Hard Drive Recovery on Mac: Recover Files from Internal or External Drives

It can be a challenge to recover data from a Mac hard drive. That’s why we have developed an easy-to-use data recovery tool called Disk Drill. Our tool is designed to quickly and efficiently retrieve lost files from all internal and external drives, even on macOS Sequoia. We also describe several other methods you can use to rescue your data or repair your hard drive.

Mac hard drive recovery
How to Recover Data from Mac Hard Drive

Depending on the extent of the damage and its nature (physical vs logical), You might find that you can see some files and folders on your hard drive, or you might encounter issues like unpartitioned, formatted, or corrupted disks. The good news is that Disk Drill can find lost partitions, rebuild HFS+ catalog files, and do other things to help you recover your lost data as long the drive in question is able to spin up and communicate with your computer (is visible in Disk Utility).

Here's a quick overview of the steps for using our Mac hard drive recovery software, Disk Drill.

!

Note: It's important to note that for macOS 10.13 and newer, enabling system extensions (called kext) is necessary to recover files from system drives, such as the main disk housing your macOS. Also, disk physical damage may substantially lower the success rate of the hard drive recovery.

Follow these Steps to Recover Deleted Files from Mac Hard Drive

1. Download and Install Disk Drill for Mac

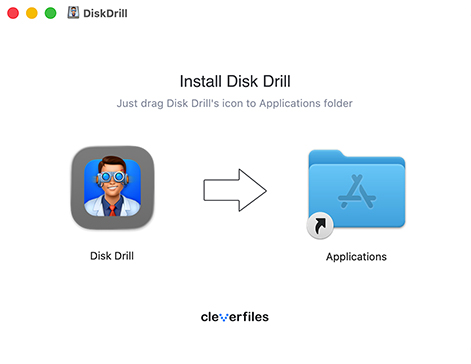
Before you download Disk Drill hard drive recovery software for Mac, ask yourself if you need to recover an external or internal hard drive. It's important to install Disk Drill on a different storage device than the one you are trying to recover from.

Why? Because it prevents overwriting any recoverable data on the affected drive. For instance, if you're recovering files from your Mac's internal hard drive, install Disk Drill on an external drive (drag the Disk Drill icon to a Finder window with a suitable location opened). Similarly, if your external drive needs recovery, make sure Disk Drill is installed on your Mac's internal storage (you can drag Disk Drill to your Applications folder) or another external device.

You can then launch the Disk Drill application and complete the initial installation process. During this process, you will be asked to let Disk Drill access your internal or external drive without any restrictions, which enables it to recover data from a Mac hard drive in the most comprehensive manner possible.

Download and install Disk Drill for Mac

2. Backup your Hard Drive

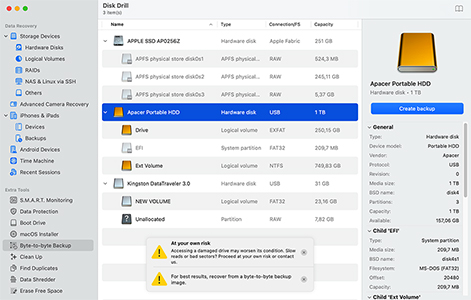
If your hard drive shows signs of physical damage or extensive corruption (like strange noises, slow read/write operations, or bad sectors), then it’s essential to back it up because the drive could fail at any moment, making data recovery impossible.

Disk Drill includes a free, convenient tool for creating a byte-to-byte backup. This tool generates a comprehensive disk backup image in DMG (or ISO) format, capturing even the sectors that are currently unoccupied but may contain recoverable data. You can select this tool from the left pane (it’s called Byte-to-byte Backup) and then simply tell it which storage device you want to back up.

After creating this backup disk image, you can initiate hard drive recovery using the image instead of the actual hardware. The latter approach is safer as it minimizes the risk of further drive failure during scanning.

Backup your Hard Drive
!

Note: Disk Drill’s byte-to-byte backup tool is not suitable for internal system drives on Macs with T1, T2, M1, M2, or M3 chips, as these are encrypted with a special chip. Such drives must be scanned directly.

3. Scan your Hard Drive

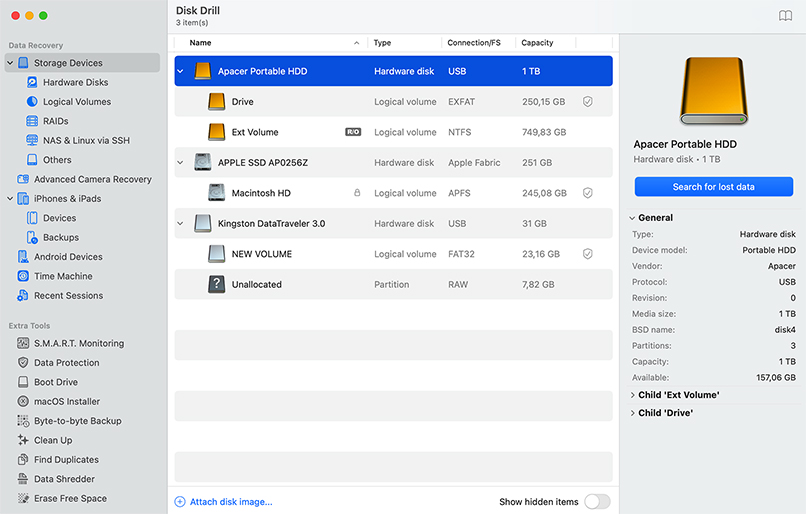
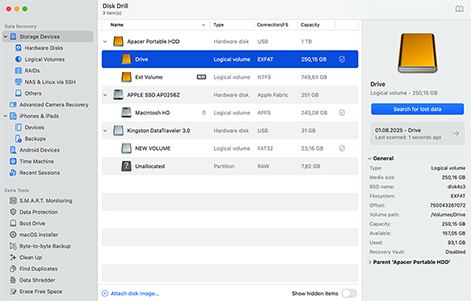
For this step, open Disk Drill and go to the Storage Devices tab. Here, you'll see a list of all available devices. Select your hard drive from this list. To achieve the best results, choose the entire storage device rather than just a single partition. Once selected, click on "Search for lost data" to start the scanning process. Disk Drill is capable of recovering data from all commonly used types of partitions (see the technical information below for more details).

When it comes to recovering a system drive, Disk Drill will require the installation of a system extension (kext). This extension grants Disk Drill low-level access to your system drive's file system. Without the kext, Disk Drill will be able to only allocate existing data, scan local Time Machine snapshots, and display non-file entries like contacts stored locally on your drive.

Scan your Hard Drive
!

If you're attempting to recover data from a TRIM-enabled SSD, be aware that this process involves additional steps. For detailed guidance on SSD data recovery, please refer to the FAQs at the end of this page.

4. Wait Until the Software Finishes Scanning

The duration of the scanning process by Disk Drill varies depending on the type and size of your hard drive. Larger drives or those with slower read/write speeds, like external hard drives, take longer to scan.

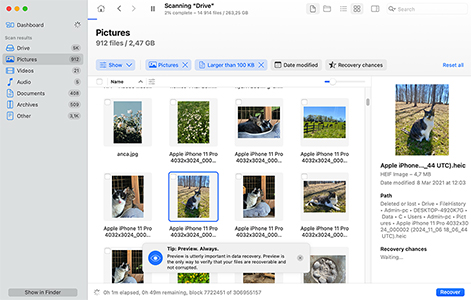
During the scan, Disk Drill continuously displays the number of files found to keep you informed of the progress. You have the option to click the "Review Found Files" button at any time to preview the results, even while scanning is still ongoing. You can also pause the scanning process and resume it later. Just know that we guarantee the best results when the scan is completed fully without interruptions.

Wait Until the Software Finishes Scanning

5. Recover From Mac Hard Drive

Once the scanning is complete, you will see the list of found files, and you can narrow them down using filters in the left pane and the top toolbar. Sometimes these files can still be corrupted. This means that another application may have overwritten a block of bits and the whole file structure is lost. Unfortunately, there's no way to prevent this. In reality, data recovery on Mac is mostly about luck! (The one exception to this is Guaranteed Recovery.) Click the "eye" icon next to each name to Preview the file to determine if the file is intact.

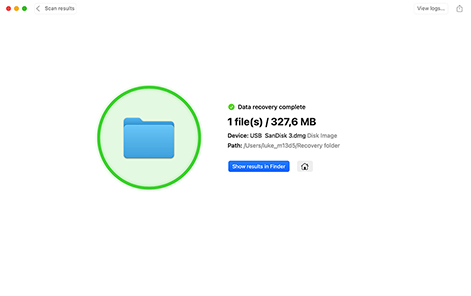
When you are ready, select the files and click the "Recover" button. At this point, you will be asked to upgrade to Disk Drill PRO if you haven’t purchased a license already. Make sure the recovery destination is outside of the hard drive you are recovering from. Wait until all the recovered files are copied to the new media.

Recover lost data from FAT, NTFS, HFS+, etc.
!

So now you know how Disk Drill can help you with Mac hard drive recovery. What are you waiting for? Download the free version of Disk Drill today.

Why You Need Hard Drive Data Recovery for Mac

Disk Drill is a reliable software tool that can help you recover lost data on your Mac. Here are some of the data loss situations that Disk Drill can resolve.

Data Deleted From a Hard Drive

Data Deleted From a Hard Drive

Disk Drill scans the hard drive and recovers lost data with a few clicks. It can even restore files that have been emptied from your Mac’s Trash Can.

Accidentally Formatted Disk

Accidentally Formatted Disk

Formatting a disk can result in the loss of a large amount of data. Recovery software can perform internal or external hard drive recovery on Mac to get back lost files and folders from formatted disks.

Faulty OS Installation or Upgrade

Faulty OS Installation or Upgrade

You can lose files from operating system installations or upgrades that don’t go well. With data recovery software, you can get those files back quickly.

Crashed Hard Drive

Crashed Hard Drive

If your operating system can recognize a corrupted hard drive, you can use data recovery software to retrieve its data. Save it to a new device when restoring.

Lost Partitions

Lost Partitions

Inadvertent formatting or a virus infection can result in the loss of a partition and its files. Recovery software is the most reliable way to recover a partition from an internal or external hard drive on Mac.

Filesystem Corruption

Filesystem Corruption

Filesystems can become corrupted for a variety of reasons, making it impossible to access their data. Disk Drill can recover these files with its hard disk recovery Mac technology.

Recover Deleted Mac Data From any Type of Hard Drive

Disk Drill can be used to recover data from any type of hard drive. It can easily restore files and folders from internal or external drives from all manufacturers.

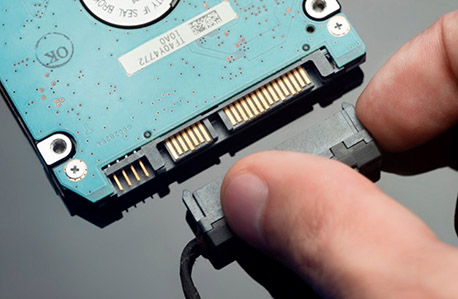
Internal Hard Drive
Internal Hard Drive

Seagate®, Western Digital®, Toshiba®, G-Technology®

External Hard Drive
External Hard Drive

Maxone®, KESU®, Silicon Power®, LaCie®, WD My Passport®

Hybrid Hard Drive
Hybrid Hard Drive

Seagate®, WD®, Fantom Drives®, Dell®

Disk Arrays
Disk Arrays

RAID0, RAID1, RAID5, RAID6, RAID10, JBOD, Windows Storage Spaces, Apple RAID

NAS
NAS

Synology®, QNAP®, WD My Cloud®, Netgear®, Asustor®, Zyxel®, Terramaster®, Buffalo® (Linux-based)

Fusion Drive
Fusion Drive

Toshiba Canvio Flex®, Seagate®, Western Digital®, Apple® HDD, OWC®

File Types Supported for Hard Drive Recovery

Disk Drill can recover over 400 different file types through its deep scanning technology. It effectively recovers just about any kind of file with a few clicks in its user-friendly interface.

Video
Video
DIR (Adobe Director Movie), M4V (iTunes video), MP4 (MPEG-4 video), MPG (MPEG video), MOV (Apple QuickTime movie), M4P (iTunes Music Store audio), SWF (Flash movie) and more
Audio
Audio
AAC (Advanced Audio Coding), AU (Audacity audio files), CAF (Core Audio File) MP3 (MPEG Audio Stream, Layer III), M4A (Apple Lossless Audio), OGG (Ogg Vorbis Compressed audio file), WAV (DTS-WAV) and more
Images
Images
BMP, JPEG, JP2, GIF, TIFF, PSP, DNG (Digital Negative), SRW (Samsung camera RAW image), VSD (Visio Drawing file). Polaroid/Sigma: X3F. Mac OS X Icon: ICNS. Adobe: AI, IDML, INDB, INDD, PSD and more
Documents
Documents
EMLX (Apple Mail Message), ICS (iCalendar), PDF (Portable Document Format), IPA (iPhone or iPod Touch Application), NUMBERS (Apple iWork Numbers), DOCX (Microsoft Word) and more
Archives
Archives
ZIP (Extended Zip File), RAR (WinRAR Compressed Archive), JAR (Java Archive), DMG (Mac OS X Disk Image), ISO (ISO-9660 CD Disc Image), 7Z (7-Zip Compressed), MBX (Apple Mail mailbox file) and more
Other Files
Other Files
ACCDB (Microsoft Database), DD (Forensic DD images), ISO (Uncompressed disk images), SQL (bundled SQL queries), OTF (OpenType Font), BIN (Generic disk images), VMDK (Virtual VMWare disks) and more

Ways to Recover Mac Data From an Internal or External Hard Drive without Softwar

If you're looking to recover files from an internal or external hard drive on your Mac without relying on data recovery software, there are various approaches you can take. The success of these methods largely depends on your computer usage habits, data protection strategies, and the degree of damage to the internal or external drive.

WAY 1

Recovering Data From Your Mac’s Trash

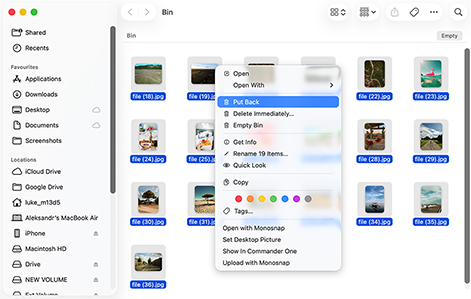
If the internal or external hard drive was connected to your Mac when the files were lost, you may be able to get them back from your Mac’s Trash Can. Just follow these steps:

  1. Click on the Trash’s icon in the Dock to open it.
  2. Locate the item you wish to restore.
  3. Right-click on the file or folder and select Put Back to recover it to its original location.
Recovering Data From Your Mac’s Trash
WAY 2

Restore a Disk Using Disk Utility on Your Mac

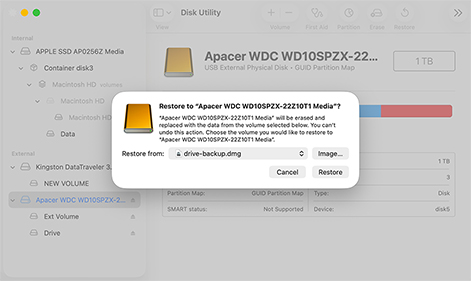
If Disk Drill was unsuccessful in recovering files from your internal or external hard drive, another option is to restore your data from a backup drive image using Disk Utility. This method is best tried after attempting recovery with Disk Drill because it involves replacing an entire volume with a copy from your backup drive. Here’s how it works:

  1. Connect the external backup drive that contains your disk copy.
  2. Launch Disk Utility on your Mac.
  3. In the sidebar of Disk Utility, choose the volume you want to restore, then select the Restore button. Within the Restore pop-up window, choose the backup image whose contents will replace the contents of the selected volume.
  4. Click Restore, and then Done.
  5. Wait for the restore to finish and then you’re all set!
Restore a Disk Using Disk Utility on Your Mac
!

Warning: This restoration method only works if you have an existing copy of your drive. Please be aware that this process will erase any data currently stored on the target volume. Proceed with caution to avoid unintentional data loss.

WAY 3

Restore from a Time Machine Backup

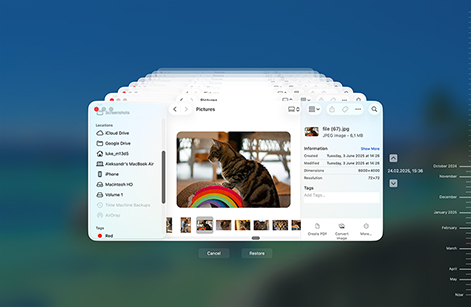
If you've previously backed up your data using Time Machine, a free incremental backup tool included with macOS, then you can easily restore lost or deleted files. Time Machine keeps a record of how your system looked on any given day, allowing you to revert to a previous state or retrieve individual files. Here’s how you can begin the restoration process:

  1. Connect the storage media with the Time Machine backup to your computer.
  2. Open a Finder window and navigate to the folder that contained the lost data.
  3. Click on the clock icon on the menu bar to open Time Machine and select the Enter Time Machine option.
  4. Find the items and specific versions of the item you want to be recovered from within Time Machine.
  5. Choose the item you want to recover. You can hit the Spacebar if you want to preview the file before recovery.
  6. Click Restore to restore your data.
Restore from a Time Machine Backup
WAY 4

Use a Mac Hard Drive Recovery Service

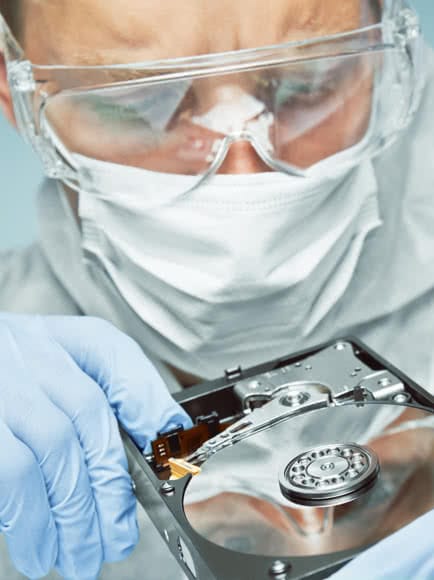
Physical damage can make it impossible for your Mac’s operating system to recognize a disk. In these cases, your best bet is to use a reliable data recovery service. These are the basic steps to follow if you need to perform this kind of recovery.

  1. Contact the recovery service to get details regarding shipping the drive to the vendor. At this time you should be able to get an estimate of the recovery cost.
  2. Ship the device to the service center. The center’s technicians will use specialized equipment in an environmentally-controlled clean room to disassemble the device and clone it to recover its data.
  3. Once recovery is complete, your data will be returned, and the original device will be destroyed. There will be no charge from a reputable recovery service if they fail to recover your data.
Use a Mac Hard Drive Recovery Service

Tips to Maximize the Chance of Successful Data Recovery

Try these tips to give you the best chance of successfully performing an external hard drive recovery on your Mac.

Stop using the device

Stop using the device

The most important action you can take when experiencing data loss is to stop using the device as soon as possible to avoid files being corrupted or overwritten.

Allow data transfers to complete

Allow data transfers to complete

Don’t disconnect an external hard drive from your computer until you are certain that any file transfers have been completed to avoid corrupting your data.

Don’t reformat the hard disk

Don’t reformat the hard disk

Avoid reformatting the hard disk until you have attempted recovery with Disk Drill. After the recovery is complete you can reformat the drive for further use.

Watch battery levels

Watch battery levels

If you are using a laptop on its battery, make sure that you have enough power to finish any file transfers before starting any processes with the internal or external drive.

Save data to a new device

Save data to a new device

Do not use the device that experienced data loss for storing data recovered with Disk Drill. Doing so increases the chance you will corrupt or overwrite your files.

Use a reliable brand of hard drive

Use a reliable brand of hard drive

Try to avoid purchasing inferior quality internal or external hard drives. The financial savings may be offset by problems with the device that lead to data loss situations.

Bonus Tips for Repairing a Damaged or Corrupted Hard Drive

After successfully recovering your data, you should try repairing the damage or corruption so that you can use your hard drive without any issues again. The following tips can help you do just that:

TIP 1

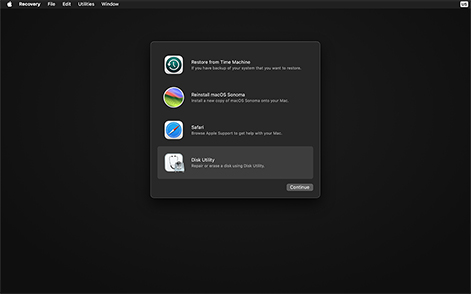
Restart your Mac in Recovery Mode

Restarting your Mac in recovery mode can help repair a corrupted system drive and restore access to the operating system:

  1. Click the Apple logo at the top left of your screen.
  2. Select Restart.
  3. Hold down the Command and R keys until the Apple logo or spinning globe appears.
  4. Select Disk Utility from the macOS Utilities screen.
  5. Choose the problematic hard drive and repair it using the First Aid tool.
Restart your Mac in Recovery Mode
TIP 2

Use the fsck utility - Files System Consistency Check

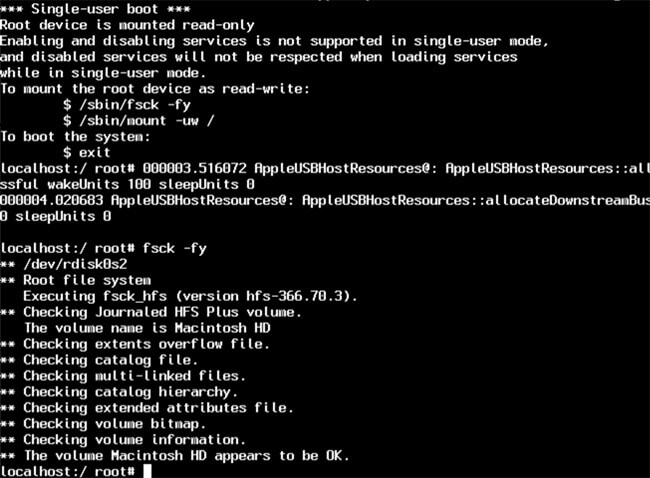
If you have an internal or external drive whose integrity has been compromised, then you can check its consistency using the fsck tool:

  1. Click the Apple logo at the top left of your screen.
  2. Select Restart.
  3. Hold down the Command and S keys until you see the command prompt.
  4. Now, use the appropriate fsck tool for the file system type. For HFS file systems, use fsck_hfs (use fsck_apfs for the APFS file system) and run it against the device identifier: fsck_hfs /dev/disk1s2
  5. Wait for the consistency check to finish.
Use the fsck utility - Files System Consistency Check
TIP 3

Use Disk Utility to Repair a Drive

Running Disk Utility's First Aid on your Mac is an effective way to diagnose and repair issues with your internal and external disks:

  1. Open Disk Utility which is in your Mac’s Utilities folder.
  2. Select the disk from the list of volumes presented.
  3. Click on First Aid.
  4. Click Run. Disk Utility will attempt to repair errors found on the disk.
Use Disk Utility to repair a drive
TIP 4

Connect the Drive to Another Computer

Connecting the drive to another computer may allow you to access the device. If so, you can use Mac utilities to repair the drive or data recovery software to restore its data.

Connect the drive to another computer
TIP 5

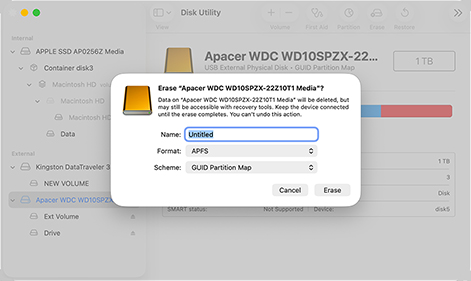
Format the drive with the APFS file system

If your corrupted drive no longer contains any important files that you haven’t successfully recovered, then you can format it to start from scratch:

  1. Open Disk Utility from your Mac’s Utilities folder.
  2. Select the drive you wish to format.
  3. Click the Erase button.
  4. Choose APFS as the file system.
Format the drive with the APFS file system

Technical Specifications for Disk Drill for Mac

OS support
OS support:

Versions of Disk Drill are available for all versions of macOS from 10.5 through the newest version macOS 14 Sonoma.

File Systems Supported:

FAT16/FAT32/exFAT, NTFS, NTFS5, HFS, HFS+, APFS, EXT2/EXT3/EXT4, BTRFS and any RAW disk

Hardware Requirements
Hardware Requirements:

Disk Space: 1GB minimum free space
CPU: 64-bit (x86-64) compatible CPU 1.0 GHz or faster
RAM: at least 4GB

Frequently Asked Questions

Updated on by Disk Drill Team

How to recover deleted files from a Mac hard drive?

To recover files from your Mac’s hard drive follow these steps:

  1. Download and install Disk Drill Data Recovery Software for Mac on a separate disk from the one you're recovering data from.
  2. Launch the app and select the drive.
  3. Click Search for lost data to start scanning the drive for files on your Mac.
  4. Review the list of recoverable files.
  5. Select the files you want and click Recover to restore them.

How to restore a disk using Disk Utility on Mac?

To restore files from a backup image of your Mac’s disk using Disk Utility, follow these steps:

  1. Open the Disk Utility application on your Mac.
  2. Choose View > Show All Devices.
  3. In the sidebar, select the disk you want to restore
  4. Click Restore, then choose the backup image you want to use for recovery purposes.
  5. Click Restore to recover your deleted files, then click Done.

How To Recover Data From a Mac SSD?

Solid-state drives (SSDs) provide higher access speeds and are used in many newer Apple Macintosh computers. Here is the procedure to use to recover deleted data from an SSD drive that has TRIM disabled. If TRIM is enabled on your MacBook Air, MacBook Pro or iMac, recovery is not possible without a backup of your data. These are the steps you need to follow:

  1. Turn off the Mac as soon as you realize you have lost some data.
  2. Use another Mac to download and install Disk Drill. This will be known as the host machine.
  3. Restart the affected Mac in Target Disk Mode and connect it to the host computer.
  4. Use Disk Drill to create a byte-level backup of the SSD drive to be used to recover its data.
  5. If you cannot create the byte-level backup, scan the affected Mac using Disk Drill from the host computer.
  6. Allow the scanning process to complete and restore the recoverable data that the application has found.

Another option is to create a bootable disk and boot your Mac from it so you bypass the SSD disk. You are trying to preserve the data on the disk, so you don’t want to use it to boot your computer.

What is the best Mac hard drive recovery software?

Here are the best Mac hard drive recovery software:

  • Disk Drill for Mac
  • PhotoRec
  • TestDisk
  • Data Rescue for Mac
  • Minitool Mac Data Recovery Personal
  • R-Studio for Mac
  • M3 Mac Data Recovery

Can you recover data from a failed hard drive?

Yes, as long as your Mac can still recognize the failed hard drive, you can recoveer data from it with Disk Drill recovery software:

  1. Download, and install Disk Drill.
  2. Launch the app and select the hard drive.
  3. Click Search for lost data to start scanning for lost data.
  4. Preview the files that can be recovered.
  5. Click Recover again to perform the recovery.

How do I recover files from an external hard drive that won't boot Mac?

To recover files from an external hard drive that won't boot on your Mac, you first need to connect the problematic external hard drive to your Mac using a hard drive enclosure or docking station. Once connected, open Disk Drill, which you should have installed on the internal hard drive of your Mac. The software will detect the external hard drive, allowing you to initiate the recovery process.

What is a hard drive recovery process?

A hard drive recovery process involves retrieving data that has been lost or deleted from a hard drive but is still physically present on it. This process typically involves the use of specialized data recovery software capable of scanning the drive to locate recoverable files, which can then be restored to a secure location.

How do I fix a corrupted external hard drive on Mac?

You can fix a corrupted hard drive using the First Aid tool in Disk Utility:

  1. Connect the external drive to your Mac.
  2. Open Disk Utility.
  3. Choose the external hard drive.
  4. Click the First Aid button.
  5. Confirm your decision to repair the drive and then wait.

Why won't my Mac recognize my external hard drive?

There are several reasons your Mac may not recognize your external hard drive. They include:

  • Malfunctioning cable or USB port;
  • Finder settings need to be updated to display external disks;
  • The drive is not mounted. You can mount it with Disk Utility.

How do I force my Mac to mount an external hard drive?

Use these steps to force your Mac to mount an external hard drive using the command line.

  1. Use the diskutil list command to find the drive you need to mount.
  2. Enter the command diskutil mount "disk name".
  3. The command will return verification that the drive has been mounted.

What is the best hard disk recovery software for Mac?

Disk Drill is the best hard drive recovery software you can obtain for your Mac. It combines powerful recovery technology with an intuitive and easy to use interface to offer a versatile tool that can be used by anyone with a Mac. Quickly recover lost or deleted files from your hard drive with just a few clicks using Disk Drill.

How to recover files from an external hard drive on Mac?

To recover lost files from an external hard drive on Mac:

  1. Download, install and launch Disk Drill Data Recovery Software for Mac.
  2. Connect the external drive to your computer.
  3. Select the external drive from the disk list.
  4. Click the Search for lost data button to look for files.
  5. Preview the files that can be restored and make your selections.
  6. Click Recover again to retrieve the selected files from your external hard drive on Mac.

How can I recover hard disk data when it is not detected?

You need to resolve the issue so macOS recognizes the drive before attempting recovery. You can try:

  1. Reconnecting the device to another port;
  2. Rebooting your Mac;
  3. Checking for a damaged cable or interface;
  4. Using a direct connection rather than a hub;
  5. Updating your Finder preferences to show external drives;
  6. Running Disk Utility and attempting to mount and verify the drive.

Can I recover files from a crashed hard drive on Mac?

To recover from a damaged or failing hard drive that can still be recognized by macOS:

  1. Use Disk Drill to create a byte-level backup of the drive and preserve it from further damage.
  2. Connect the backup media to your computer and launch Disk Drill.
  3. Attach the byte-level backup by selecting Backup -> Attach non-mountable images.
  4. Select the backup disk and click Recover.
  5. Preview and select the files to be restored.
  6. Click Recover again to perform the recovery.

How do I get data off my old hard drive on Mac?

We can use Disk Drill to scan our old hard drive and recover files from it. I will walk you through it and the process is quite simple.

  1. Download and install Disk Drill.
  2. Plug your old hard drive into your Mac.
  3. Select this storage device from within Disk Drill and then click on Search for lost data and the process will begin.
  4. Wait for the scan process to complete.
  5. Look through what Disk Drill was able to recover and then checkmark the box to then select them for recovery.
  6. Click on the blue Recovery button.

How do I get data off my old hard drive on Mac?

When dealing with older Macs, especially those running outdated operating systems not supported by modern versions of data recovery software like Disk Drill 5, you can:

  • Disassemble and connect through a docking station: For very old Macs, one effective method is to remove the hard drive from the old Mac and connect it to a newer Mac using a docking station.
  • Direct Mac-to-Mac connection: Another convenient option is to use Target Disk Mode. This allows you to connect your old Mac directly to a newer Mac and scan the old Mac’s hard drive using Disk Drill on the newer Mac without the need to physically remove the hard drive.

How do I recover data from the system drive of my Mac?

Recovering data from your Mac's system drive requires a slightly different approach to avoid data loss due to system activities. Fortunately, Disk Drill makes everything simple:

  1. Start your Mac in Recovery Mode.
  2. Once in Recovery Mode, open Terminal.
  3. In Terminal, enter the command: sh <(curl http://www.cleverfiles.com/bootmode/boot.xml). This will guide you through the necessary steps for data recovery in Recovery Mode.

For more detailed guidance, visit our Disk Drill Recovery Mode instructions. Remember, recovery chances on Macs with T1, T2, M1, M2, or M3 chips may be lower due to their advanced encryption mechanisms.

Need to run your data recovery on Windows? Recover files from Windows Hard Drive

More How To's on file recovery on Mac OS X

How do I recover lost data?

See what Disk Drill fans say

I managed to recover the data from two dead drives, both Toshibas. I used an app called 'Disk Drill". One thing that I find frustrating on Mac's: it's almost impossible to force the OS to recognize a drive. So I open Disk Drill, open mac's native disk utility, and then use terminal to try to force the matter. It seems to work.
Read more
It’s simple, well-organized, and most importantly – it works a majority of the time. I was able to see and undelete files I got rid of long ago with just a few clicks. Ant
Read more
Used by world famous companies