Hard drives are responsible for storing all of your files and folders on a Mac. Overall, they are quite reliable. But unfortunately, they aren’t flawless and have a limited lifespan. Even if you don’t physically damage the drive yourself, there are many other factors that can affect the state of your Mac’s HDD, the data stored there, and can even cause drive failure.
The good news is that data recovery is possible with damaged, corrupted, or dead Mac hard drives. It is a bit of a tricky process, but don’t worry, that’s why we’re here to help.
How a Hard Drive Becomes Dead or Damaged on a Mac
It’s impossible to overestimate the importance of a hard drive in your Mac. If it gets damaged or actually dies, you may become at risk of losing all of the data from your computer: pictures, videos, documents, etc. Knowing what can cause such issues can be incredibly helpful in preventing it from happening and recovering the lost data if it has already happened.
So, here are a few reasons why your Mac’s HDD might fail or get damaged:
- 💽 Aging: Yes, it can even be as simple as that. In general, the lifespan of a Mac’s hard drive varies somewhere between 3-5 years. It depends on many factors, but eventually, all HDDs fail.
- 🦠 Malware: Viruses and other malware rarely attack Macs, but it’s still a possibility. And if it happens, it may cause data loss or, in worst-case scenarios, hard drive failure.
- ⚙️ Hardware problems: Since Mac hard drives consist of a lot of moving parts, they might get damaged either overtime or because of basic human error.
- ⚒️ Physical damage: Excessive heat, water, or humidity can destroy the hard drive of any Mac.
- 🩹 Mishaps: If you drop your Mac on a hard surface, it can cause mechanical problems in its hard drive.
- 🔌 Power issues: Whether it’s a sudden power outage or an increase of the electrical charge in the power lines, any of the power issues may cause severe Mac hard drive damage.
How to Recover Deleted Files from Dead Hard Drive
The data recovery results might vary depending on the severity of the issue and on how quickly you act in your situation.
Method #1: Recover Deleted Files from Dead Hard Drive with Data Recovery Software
So, how to get files off a dead MacBook?
Let’s start with the quickest and most effective method, which is using a specialized data recovery tool. The process requires you to create a disk image backup of your Mac (you’ll have to do it via Recovery Mode if your Mac isn’t booting) and then scan and recover the data from that file with the application.
Our software choice for this method is Disk Drill since it’s easy to use and provides incredible results even with high volumes of data. Also, with this tool, you’ll be able to choose whether you wish to recover all of the files from your Mac’s drive or only a few specific files.
Follow these steps to recover data from a dead Mac hard drive:
- Connect the external drive to the Mac with the dead HDD.
- Boot into Recovery Mode (for Intel-based Macs, turn on your Mac by pressing the power button and holding the Command + R keys; for M1 Macs, press and hold the power button until the Startup Options window appears).
- Open Disk Utility.
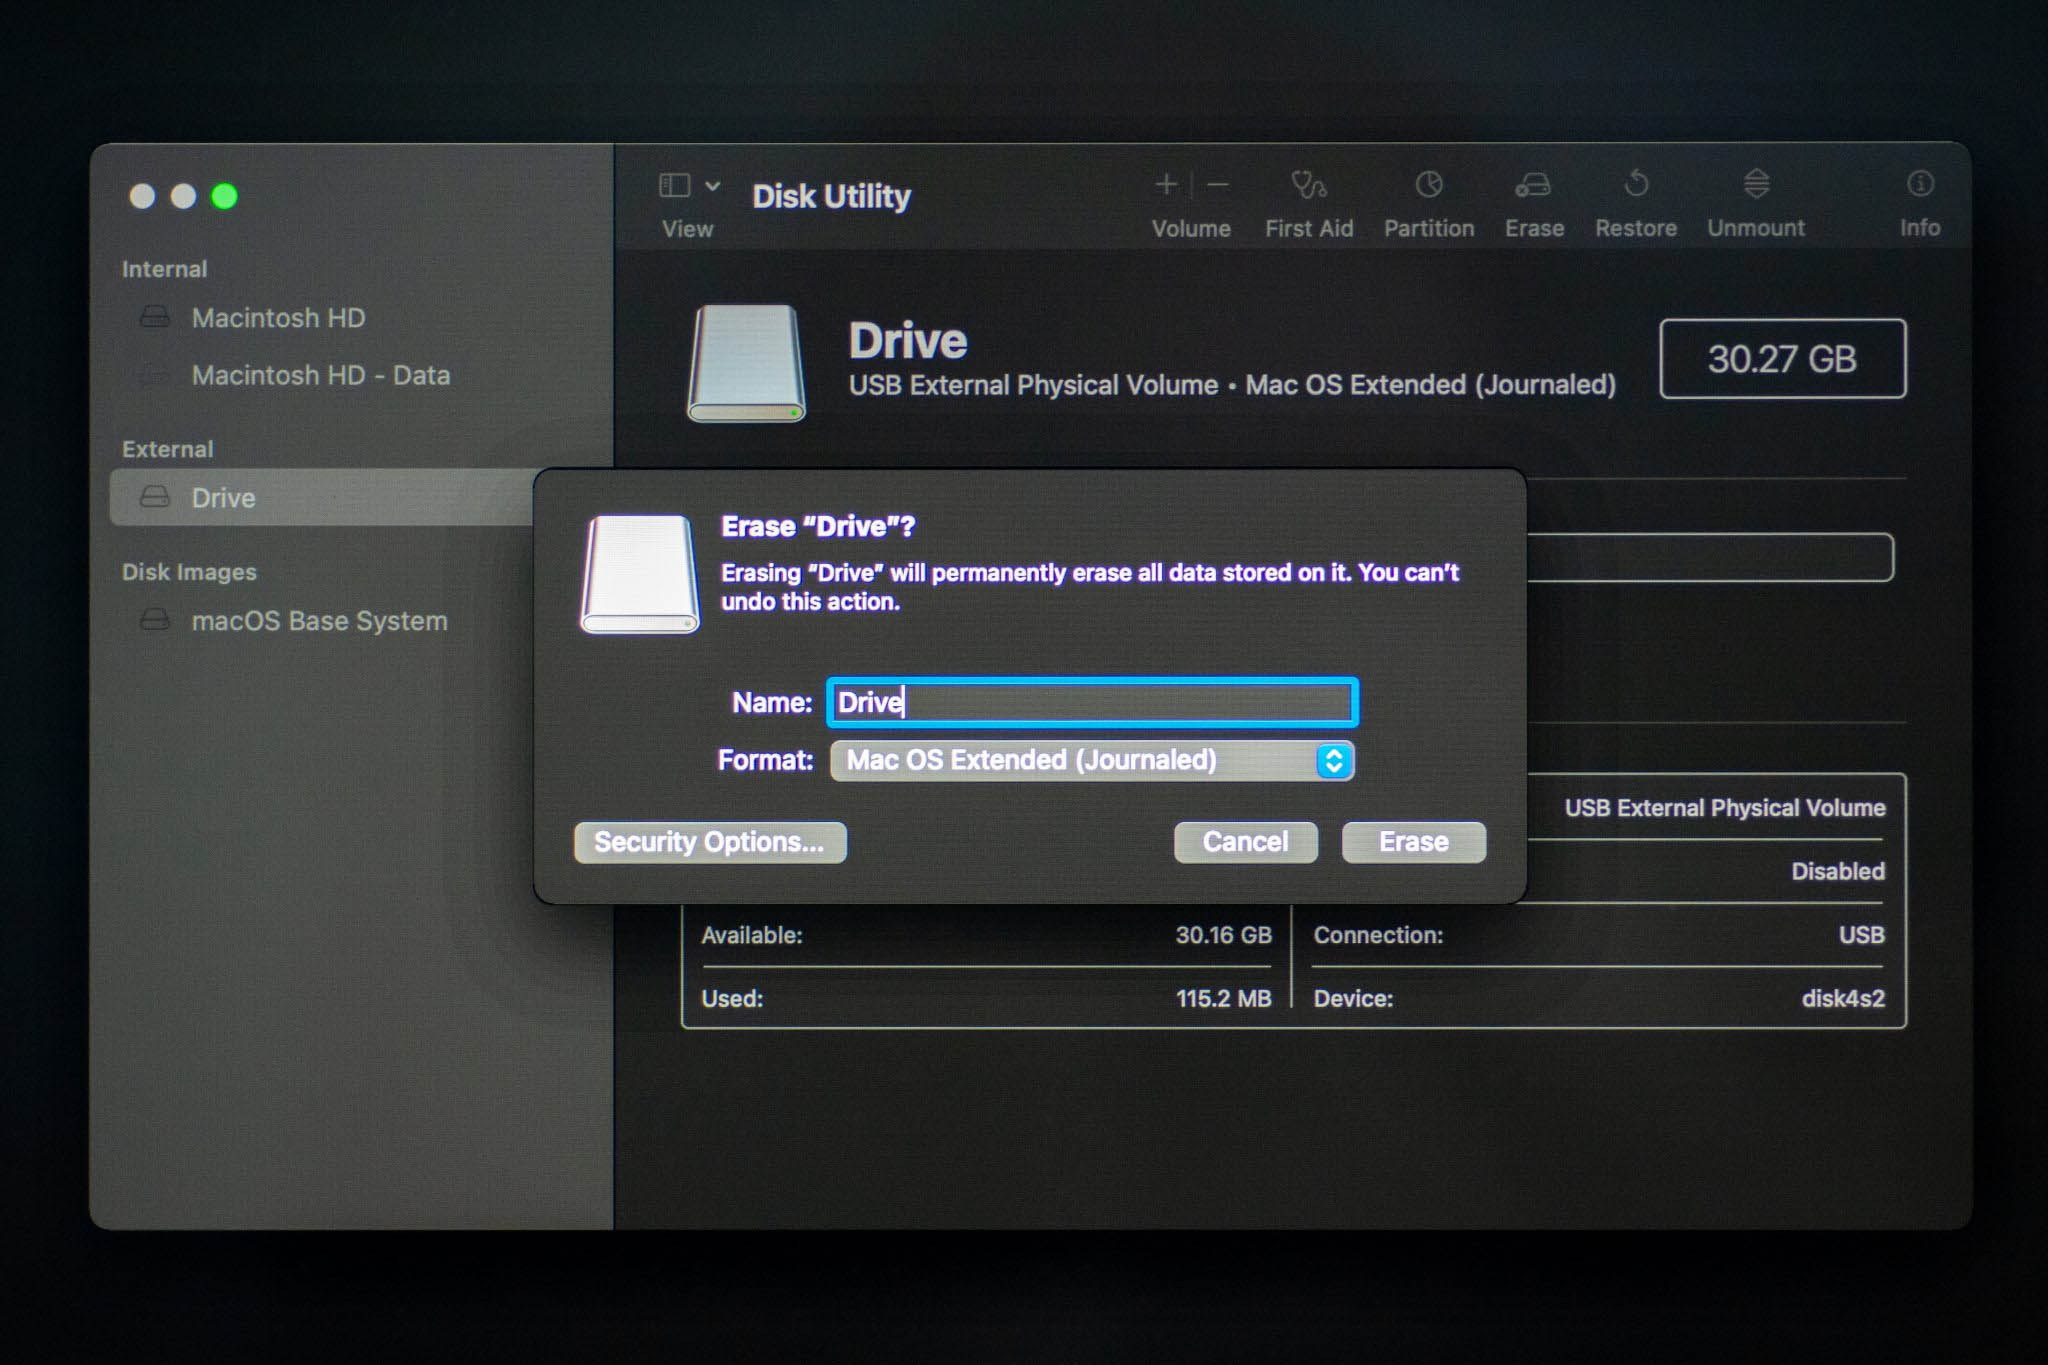
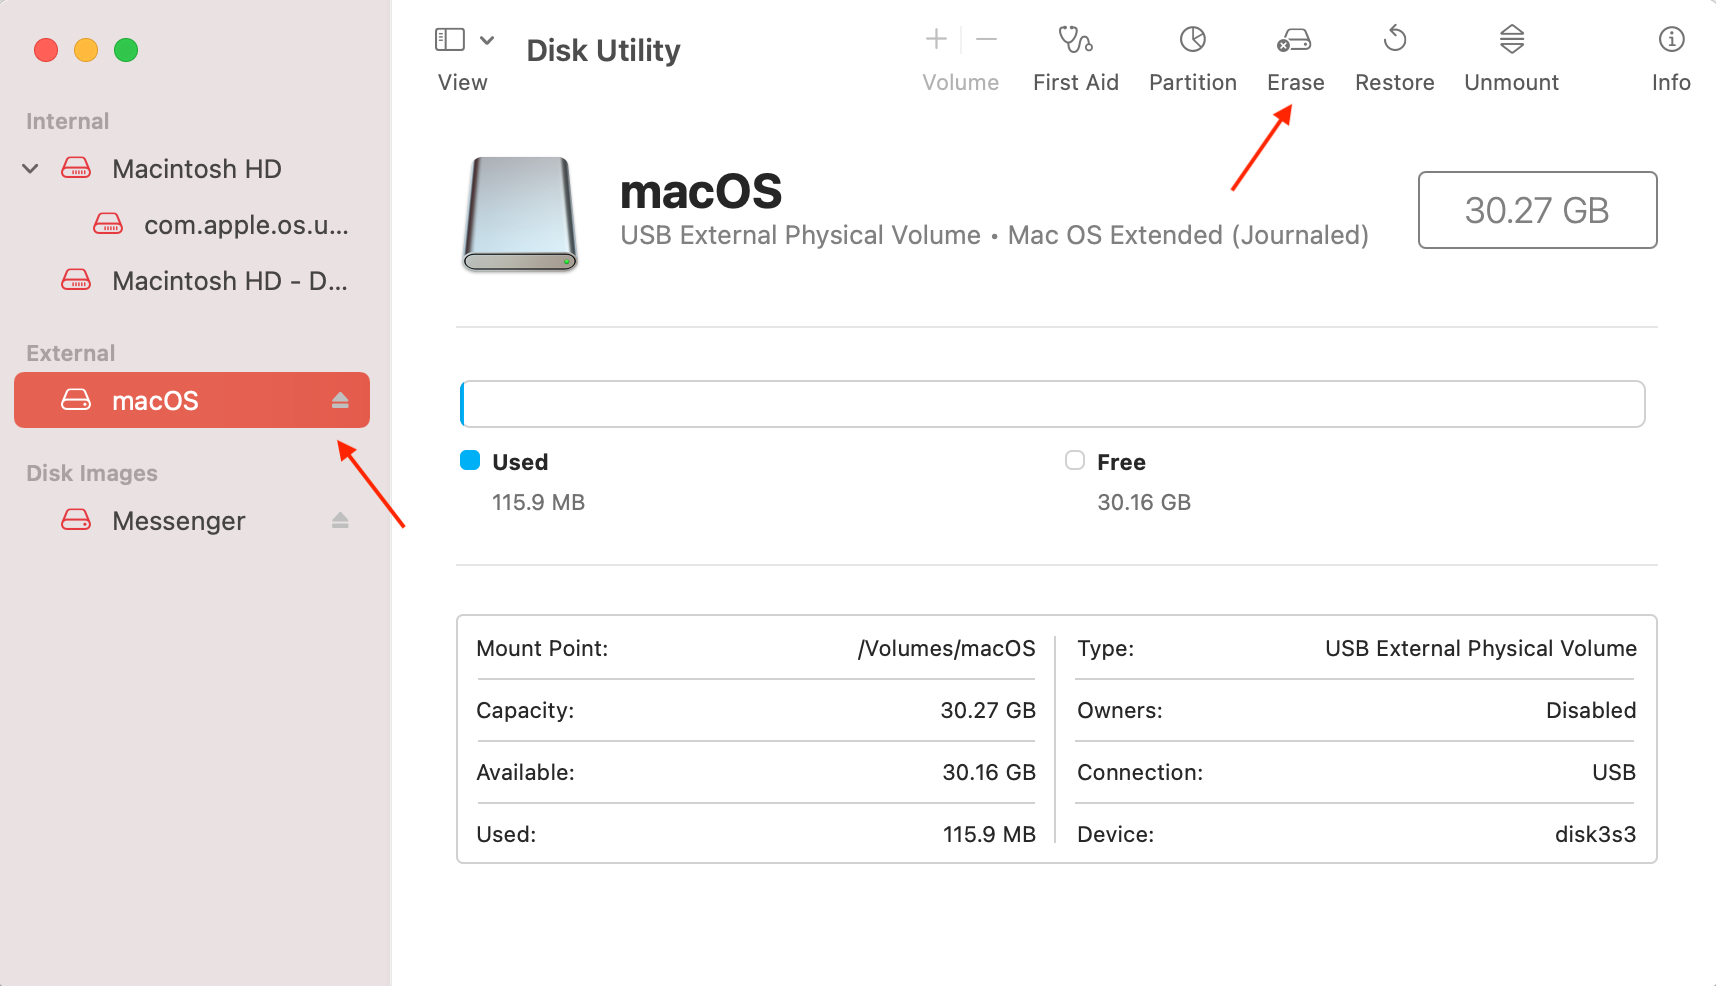
- Choose the connected external drive and click Erase. Type in a name for the drive, select the Mac OS Extended (Journaled) format and choose the GUID Partition Map scheme.
- Click Erase to confirm.
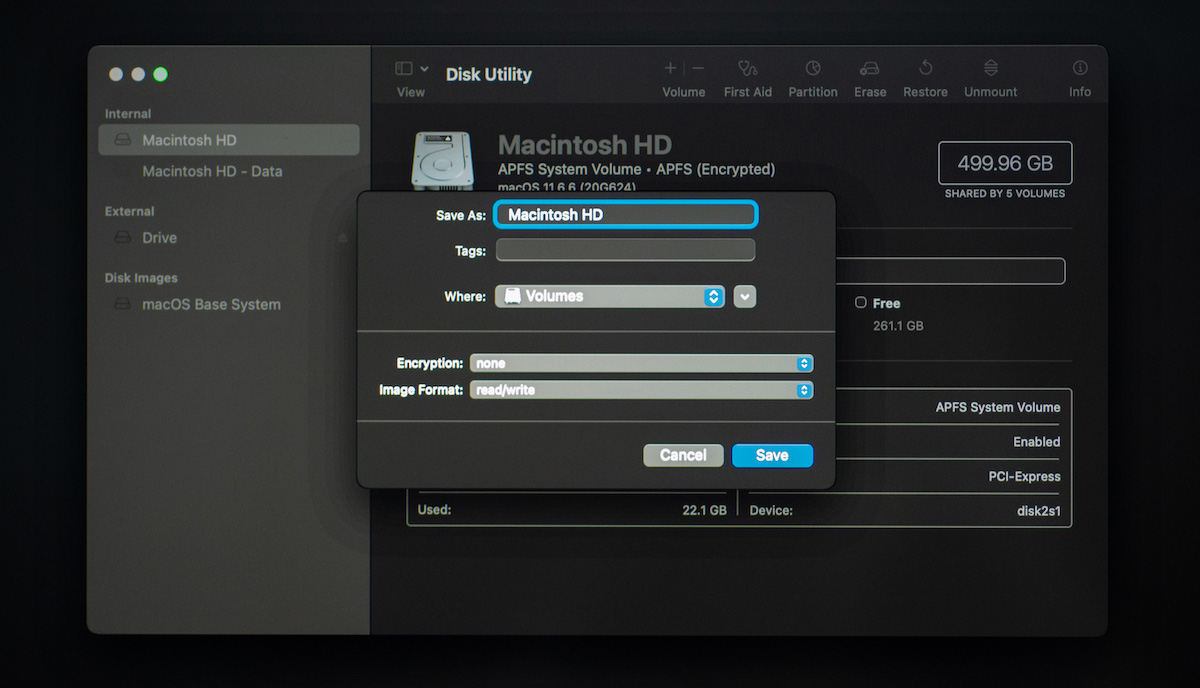
- Select your Mac’s internal drive. Then from the menu bar at the top, click File > New Image > Image from Macintosh HD.
- Type in a name for your backup, choose the external drive as the destination, and select read/write as the format. Click Save to confirm.
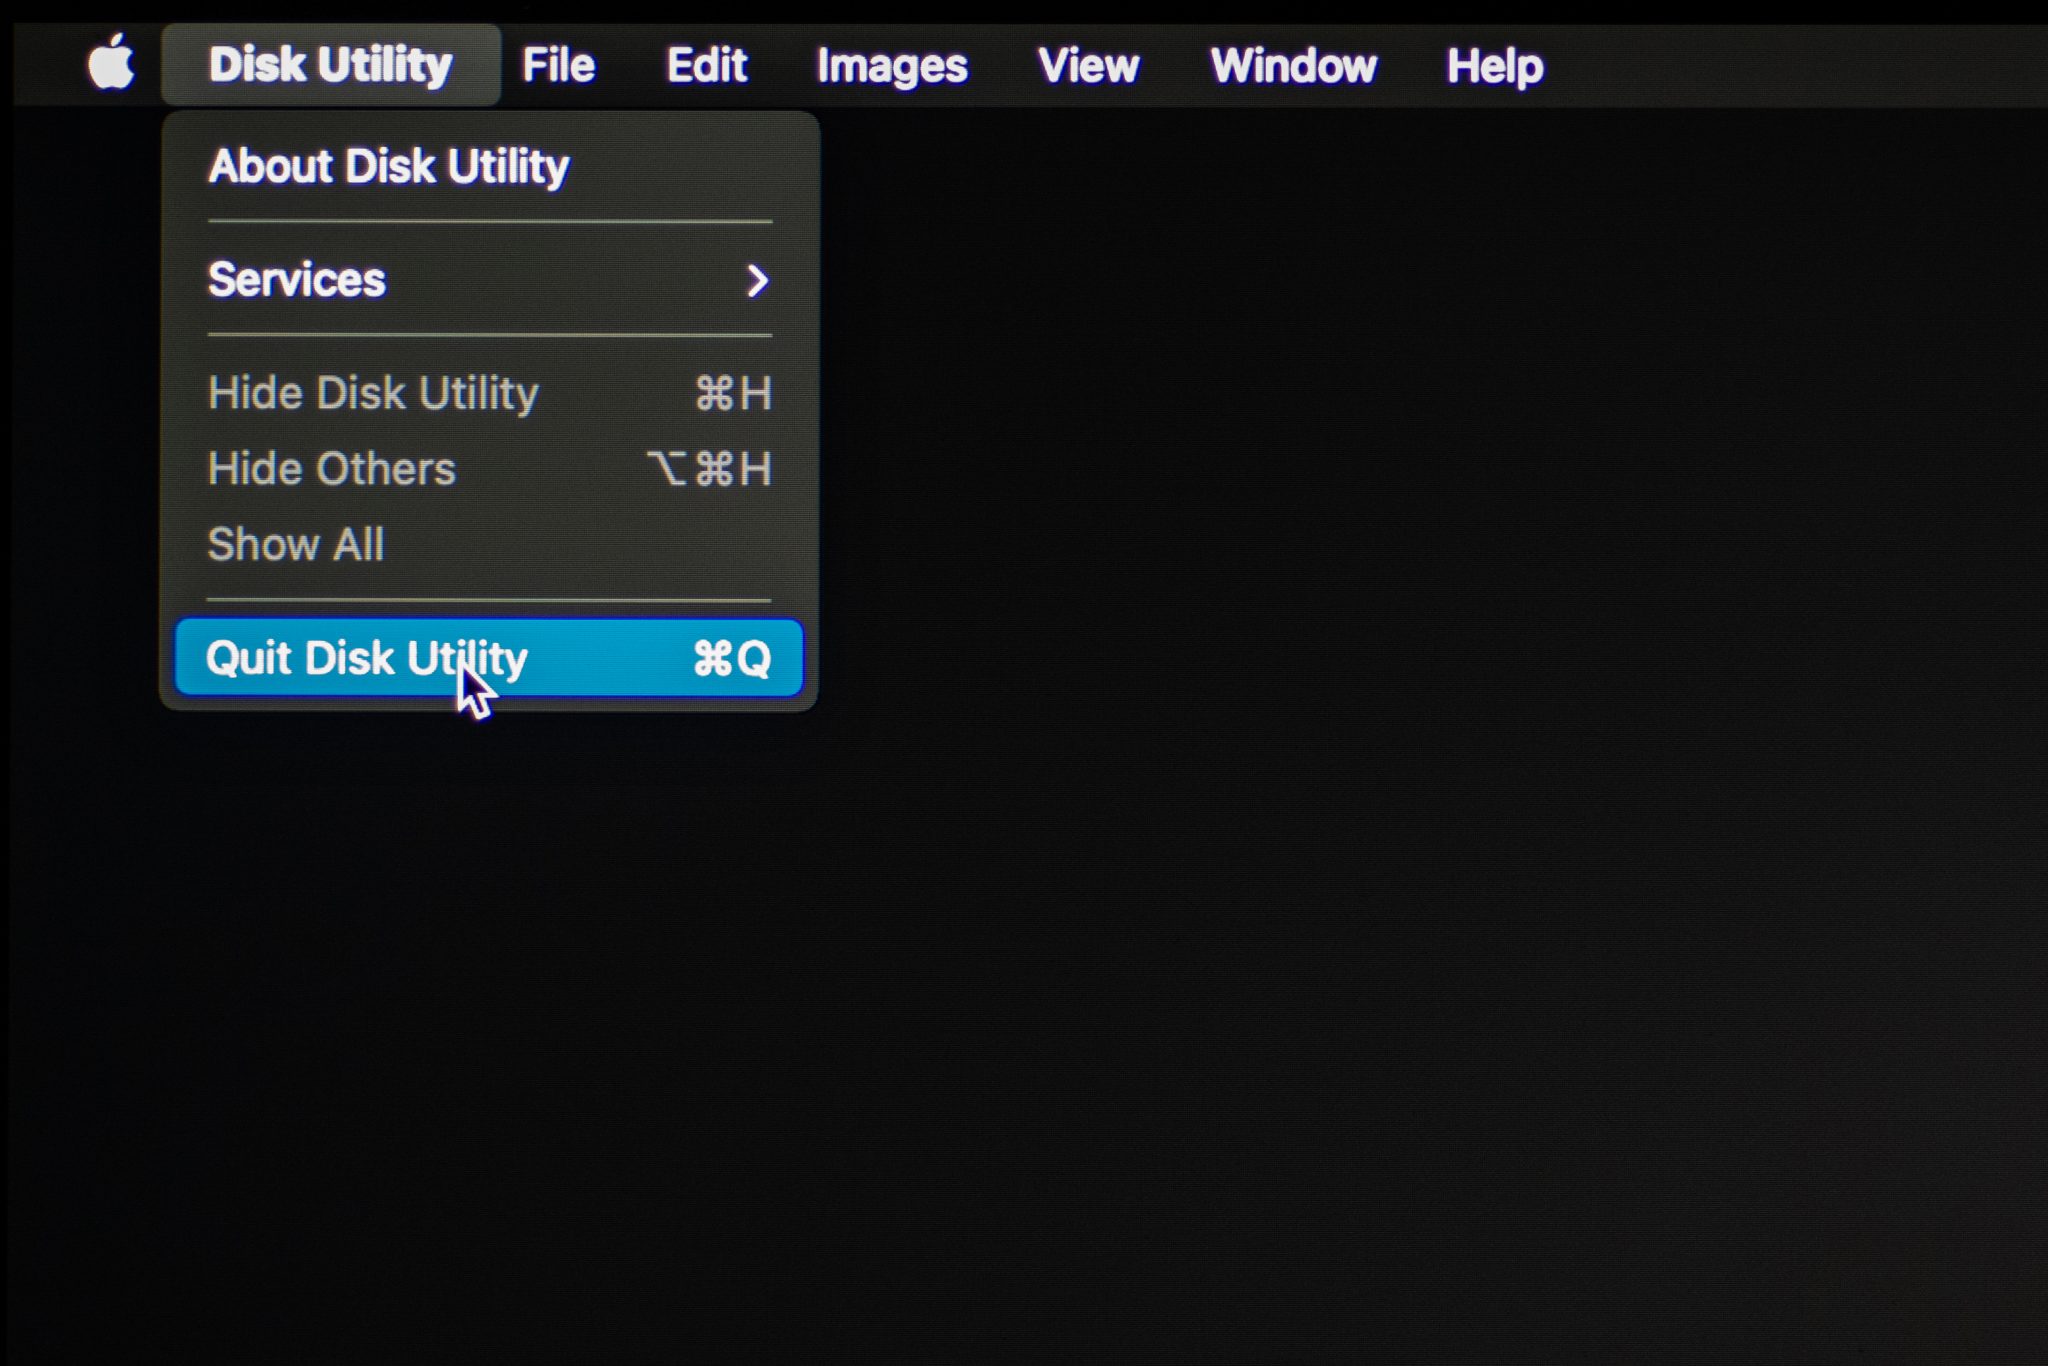
- Once the process is finished, quit Disk Utility and eject the drive.
- Plug in the external drive into your working Mac. Find the disk image file and double-click it.
- Download Disk Drill onto your Mac and follow the onscreen instructions to install it. When finished, launch the app.
- Choose the Storage devices tab on the sidebar and click the image backup file to select it.
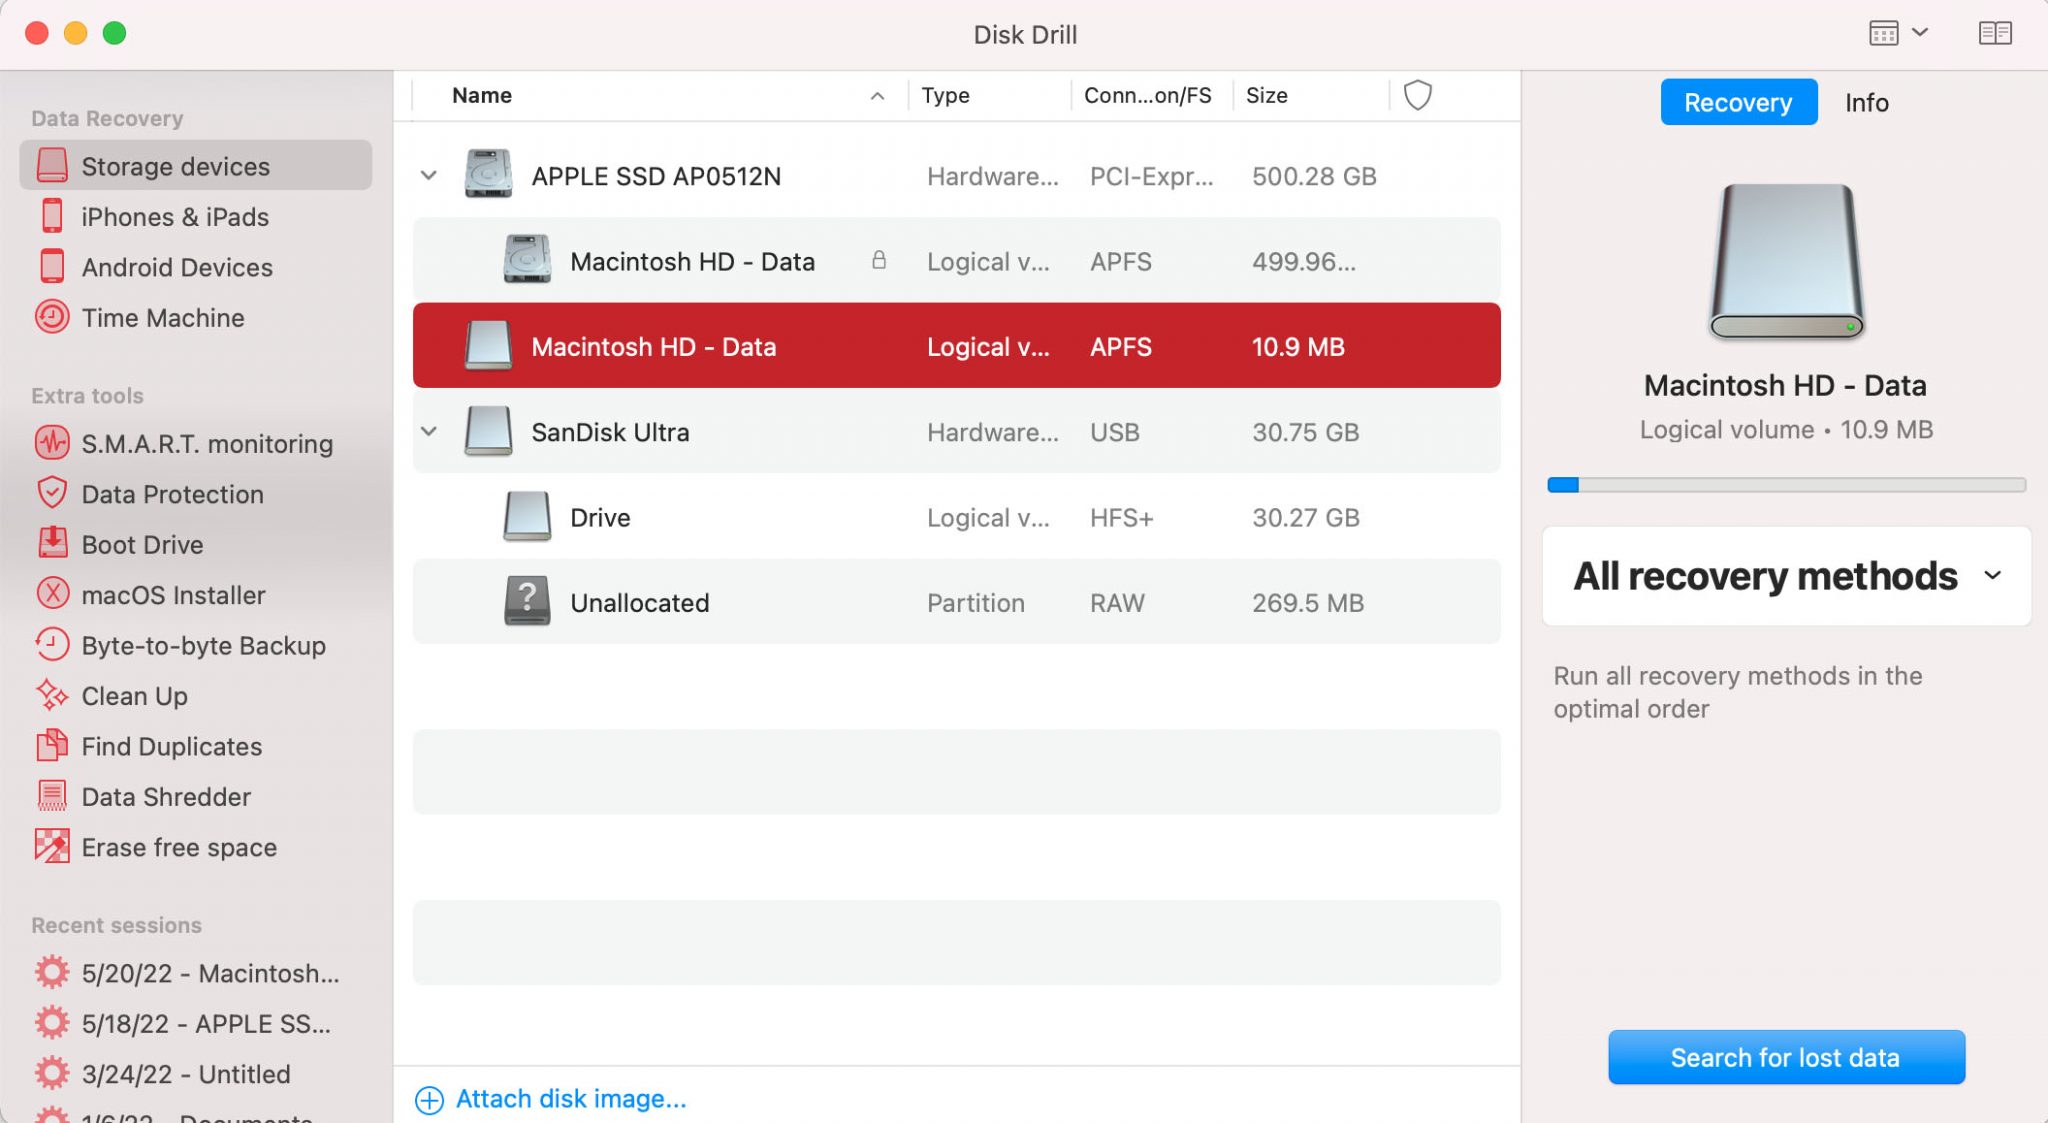
- Initiate a scan by clicking the Search for lost data button.
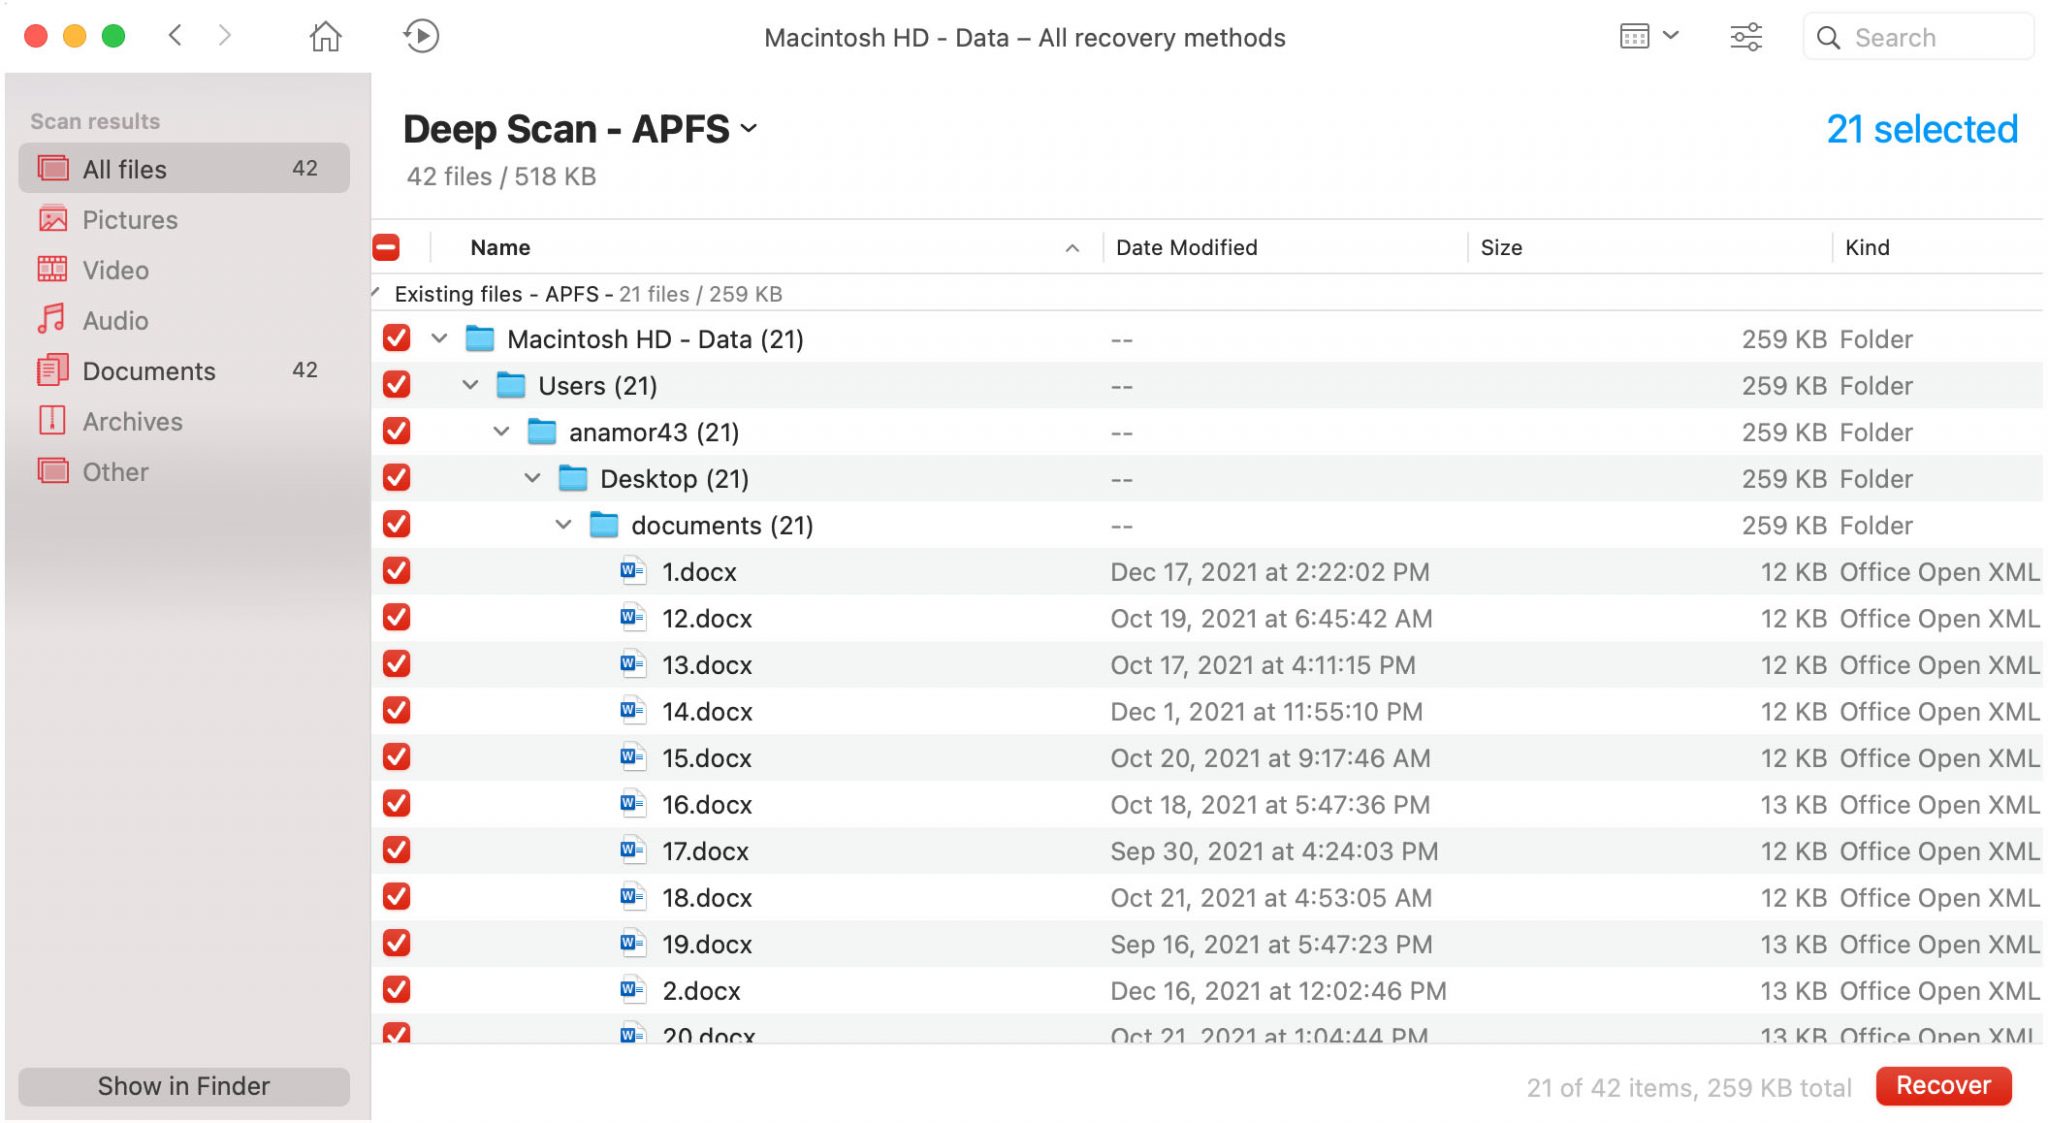
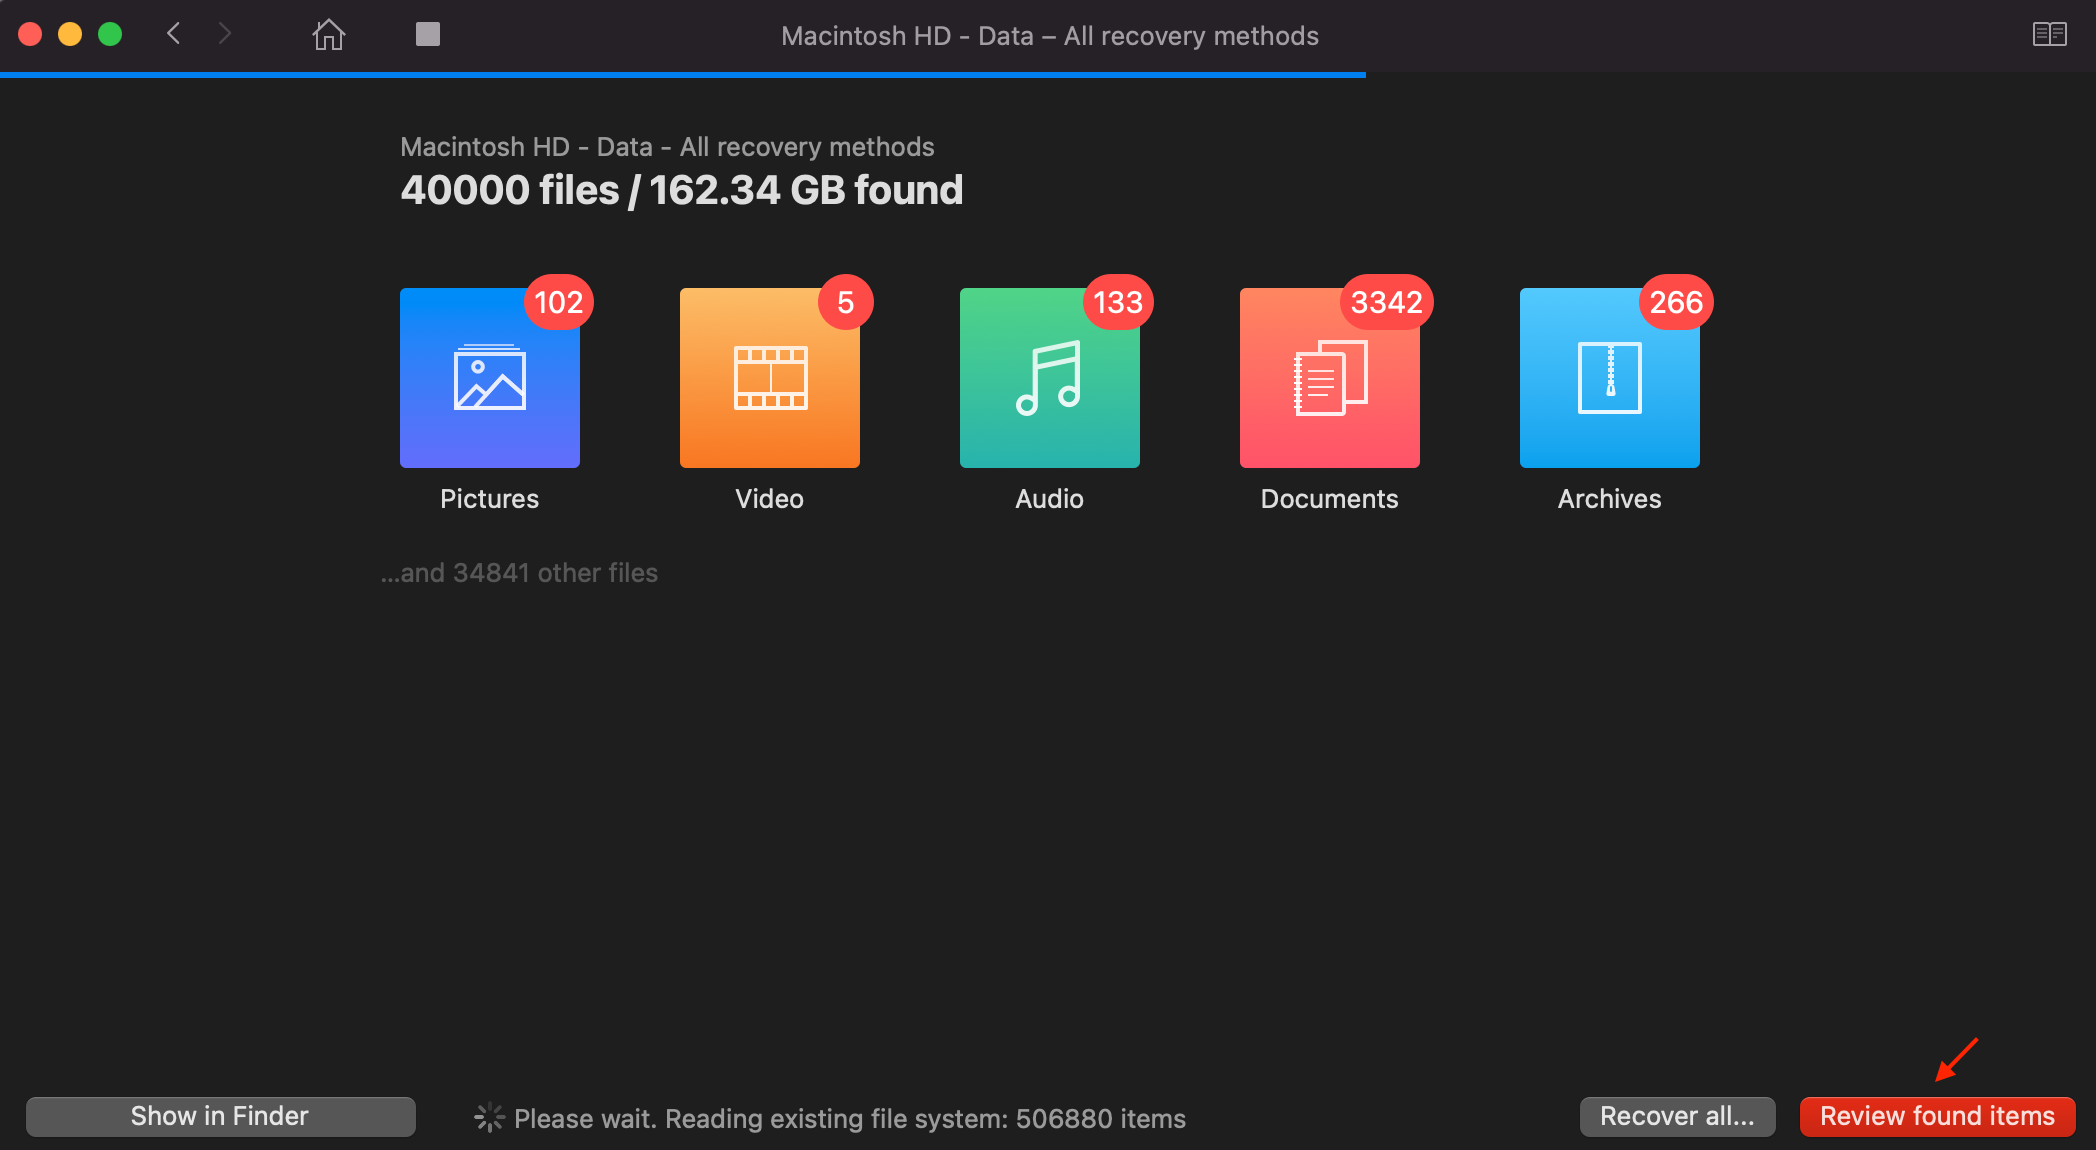
- Once the scan is finished, click Review found items.
- Select the files you wish to restore, and when ready, click Recover.
- Choose a preferred destination for the recovered data and click OK to confirm.

Method #2: Recover Mac Hard Drive Data to Another PC/Mac
The next option is to use either a PC or another MacBook to restore the data from a corrupted or dead Mac. Of course, it’s much easier to recover the files from a failing Mac hard drive to another macOS-based computer than to a PC. But it’s still possible with both types of computers.
From Mac to PC
If your Mac doesn’t boot and you want to restore all of the data from it to a Windows-based computer, you’ll have to remove the HDD from your Mac, place it in an enclosure, and connect it to your PC. Once you’ve done that, follow these steps to recover your data:
- Download Disk Drill for Windows and install it on your computer.
- Launch the application.
- From the list of storage devices, choose the connected hard drive.
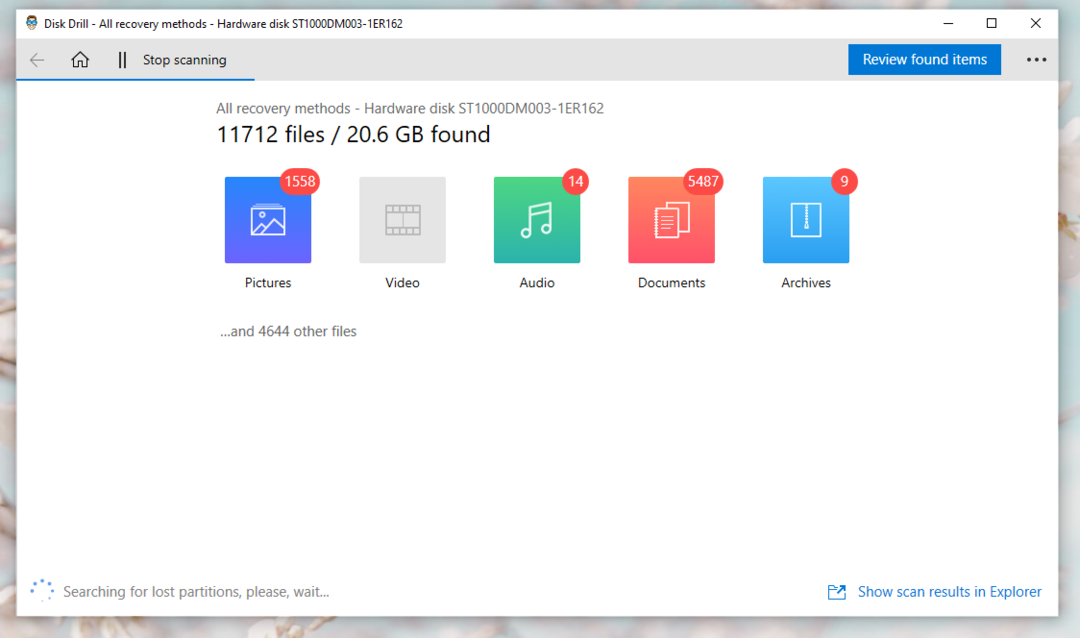
- Click the Search for lost data button to initiate a scan.
- Once the process is finished, click the Review found items button.
- Choose the files which you want to recover and click Recover.
- Select a destination folder for the recovered data and click OK to confirm.
- Click Show recovered data in Explorer to view the files.
From Mac to another Mac
The feature that allows you to connect two Macs to share data is called Target Disk Mode in Intel-based Macs and Share Disk in M1 Macs. It’s possible to use this feature to recover all of the files from a computer that won’t boot because of a dead HDD.
If your damaged Mac is Intel-based, follow these steps:
- Connect your Macs with a cable.
- Access the Target Disk Mode feature on the damaged Mac (shut down your Mac, press the power button to turn it back on, and then press and hold the T key).
- Open Finder on the working Mac and go to Locations > Network.
- Double-click your damaged Mac’s hard drive to open it, and then choose Connect As > Guest and click Connect to confirm.
- Copy-paste the needed files from the dead Mac HDD to your working Mac.
If your failing Mac is Apple Silicon-based, follow these steps:
- Connect your Macs with a cable.
- Access the Share Disk feature on the damaged Mac (shut down your Mac, press and hold the power button until the Startup Options screen appears).
- Click Options > Continue (type in your admin password, if prompted).
- Using the menu bar at the top of the screen, click Utilities > Share Disk.
- Choose system disk and click Start Sharing to confirm.
- Open Finder on your other Mac and click Network under Locations.
- Double-click your damaged Mac and drag and drop the needed files to your working Mac.
Method #3: Create a macOS Bootable USB Disk And Recover Data from Dead MacBook
Another solution that you can try is to make a bootable USB macOS installer and use it to restore data from your dead Mac hard drive. For this method, you’ll need a USB flash drive, a working Mac, and a macOS installation file.
Also, before you move forward, you’ll need to format your USB drive properly. Here’s how to do it:
- Launch Disk Utility on your working Mac.
- Choose your flash drive on the sidebar and click Erase.
- Type in a name for your flash drive, choose the Mac OS Extended (Journaled) format, and the GUID Partition Map scheme.
- Click Erase to confirm.
Now follow these steps to create a macOS bootable USB disk and recover the data from your dead MacBook:
- Connect the formatted USB drive to your working Mac.
- Download Disk Drill and follow the instructions to install it.
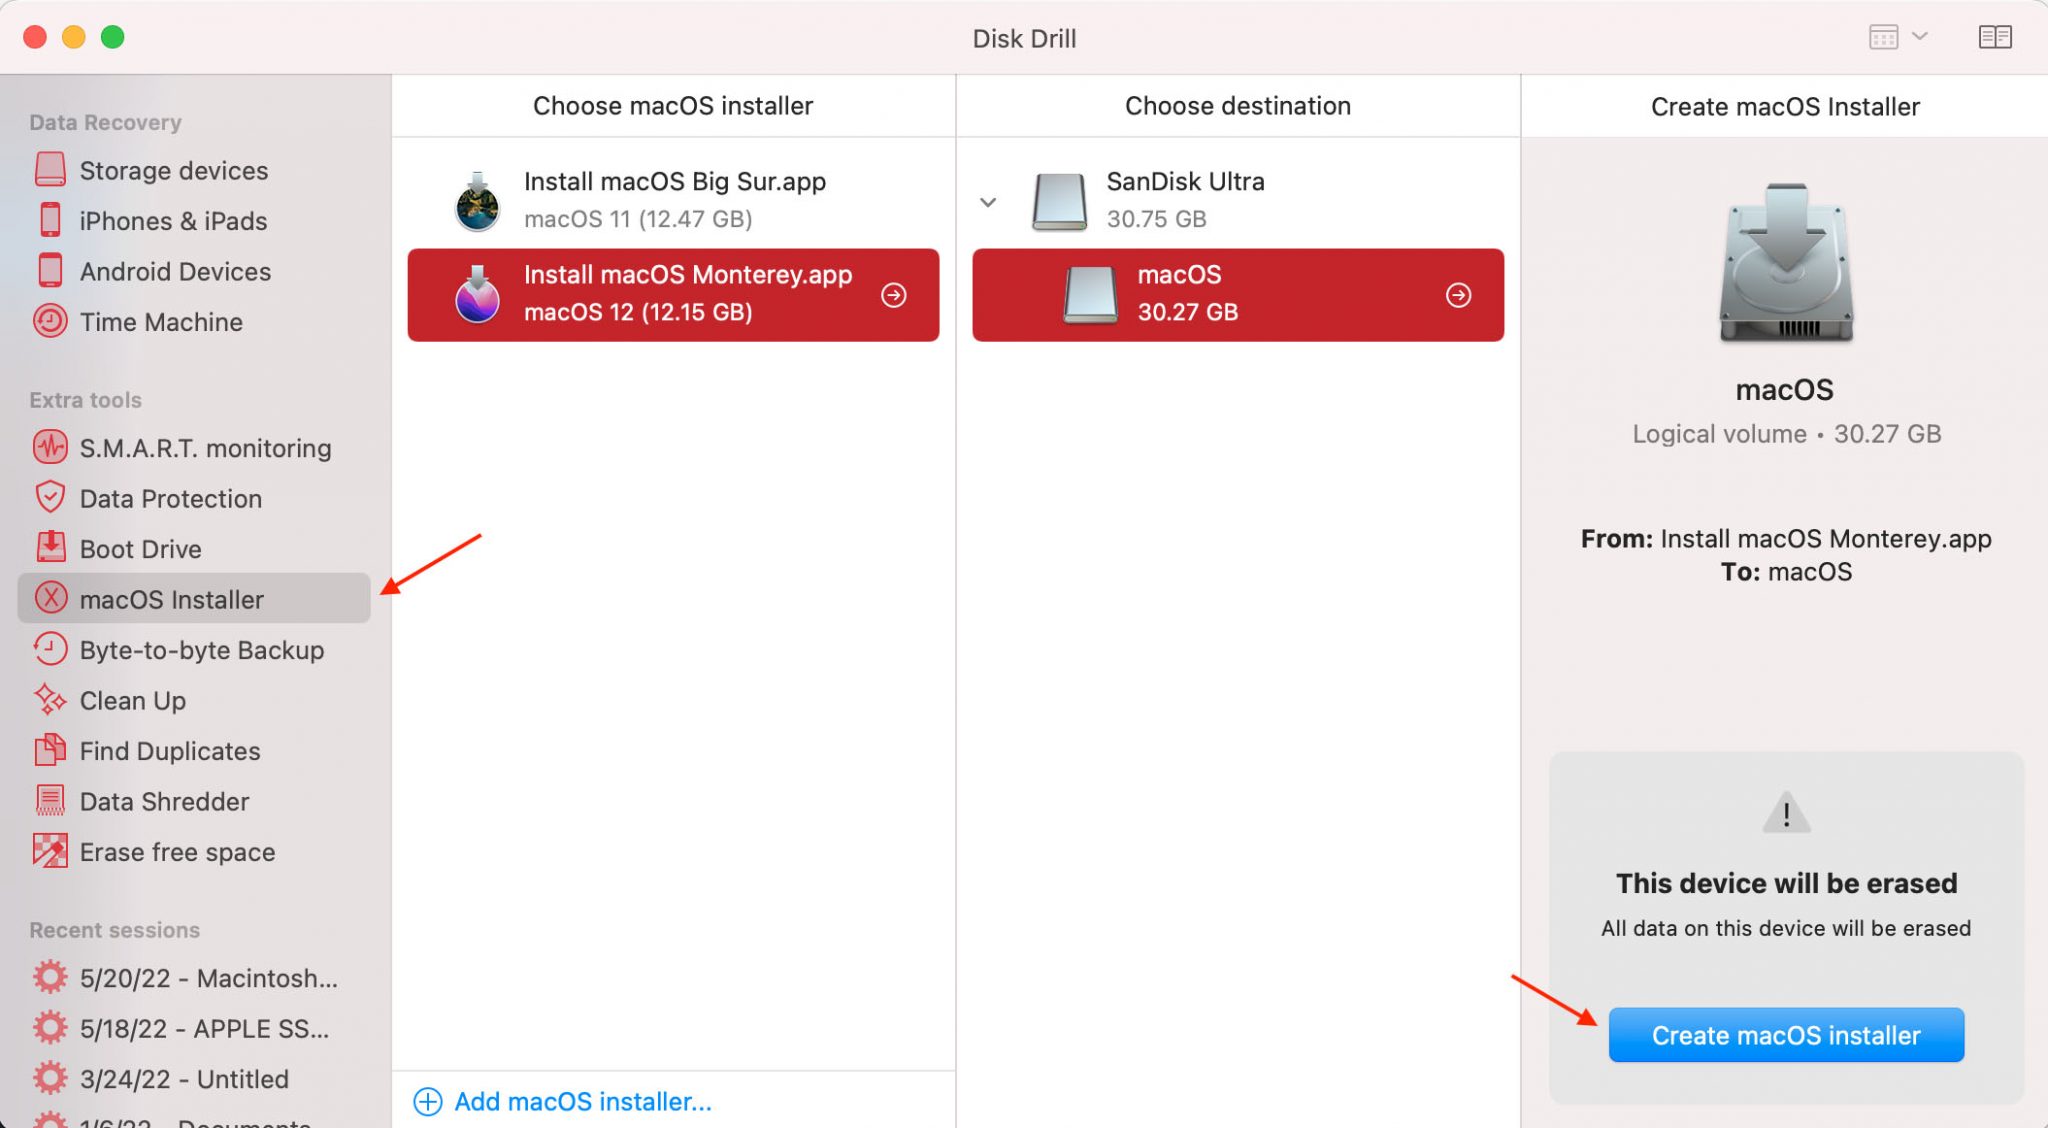
- Launch the application and choose macOS Installer from the sidebar.
- Select the needed macOS installation file, choose your USB drive as the destination, and click Create macOS Installer. Click Yes to confirm.
- Once the process is finished, click Done, and eject the flash drive.
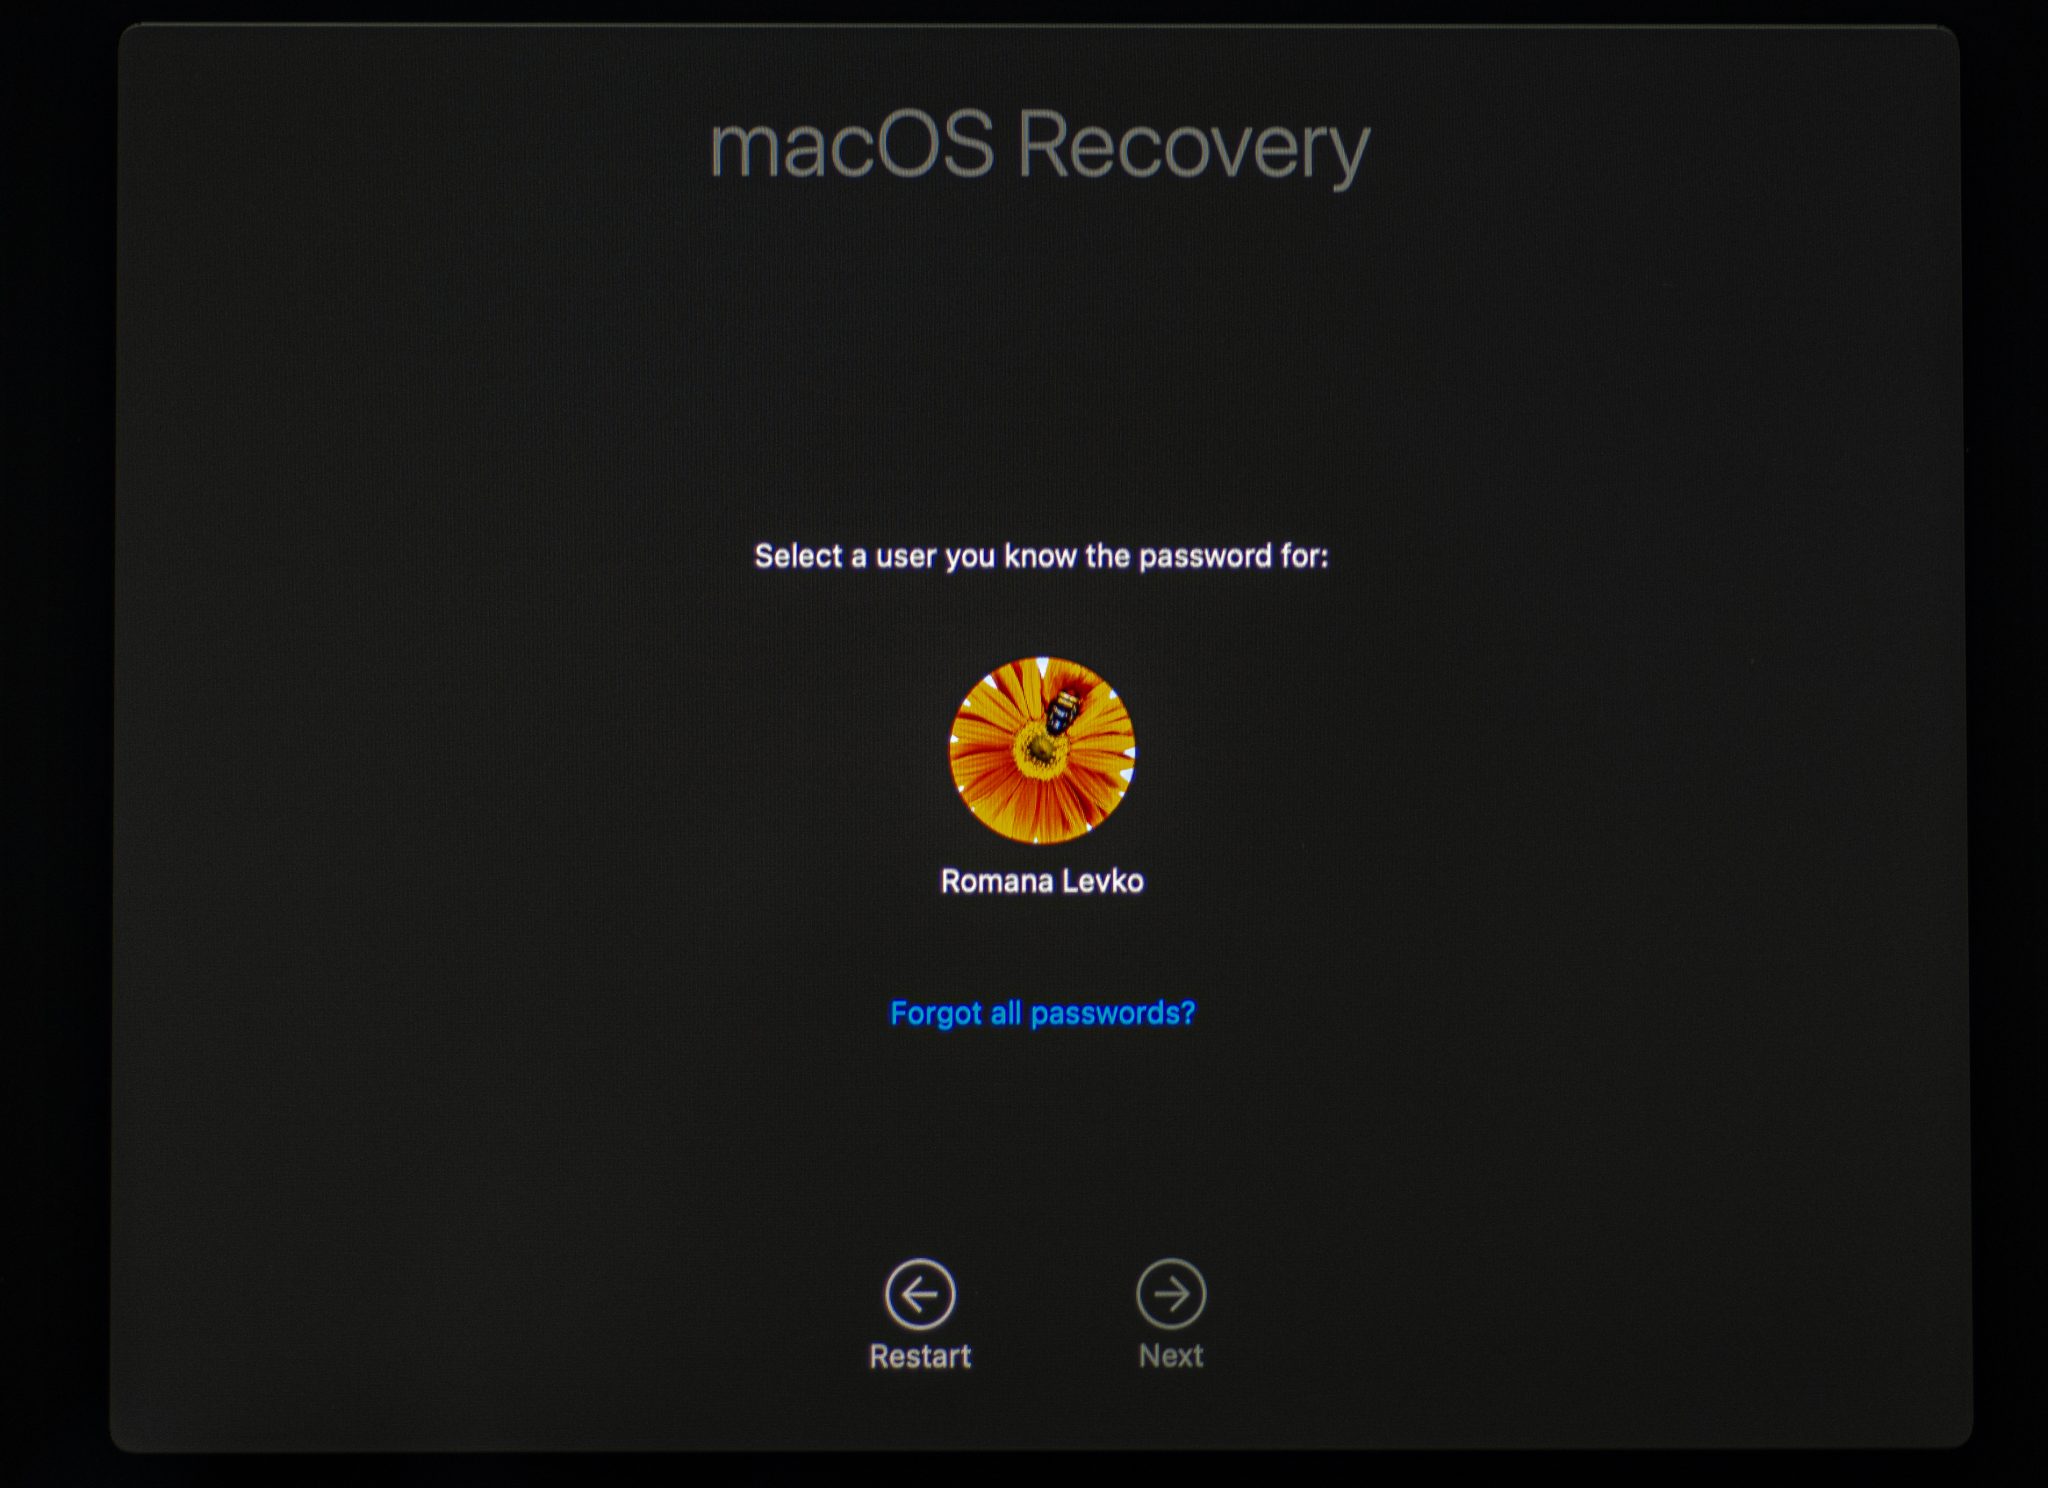
- Plug in the flash drive into your damaged Mac and boot the computer into Recovery Mode (for Intel-based Macs, turn on your Mac by pressing the power button and holding the Command + R keys; for M1 Macs, press and hold the power button until the Startup Options window appears).
- Choose the external drive as your boot source.
- Once your Mac has booted successfully, download and install Disk Drill.
- Launch the app, choose your Mac’s main drive (it’ll be listed as an external drive), and click Search for lost data.
- Click Review found items and choose the files which you want to restore.
- Click the Recover button, select a preferred destination for the files, and click OK to confirm.
Method #4: Restore Files With a Time Machine Backup
If you’ve been using Time Machine to back up your files, you can easily use the most recent backup version to restore all of your data. You can either get your Mac’s HDD fixed and then restore the files back to it or do it right away on a different Mac.
Here’s how to recover data from a dead MacBook Pro or MacBook Air using a Time Machine backup:
- Connect the drive with the Time Machine backups to your Mac.
- Boot your Mac into Recovery Mode (for Intel-based Macs, turn on your Mac by pressing the power button and holding the Command + R keys until the Apple logo appears; for M1 Macs, press and hold the power button until the Startup Options window appears).
- Click Restore from Time Machine.
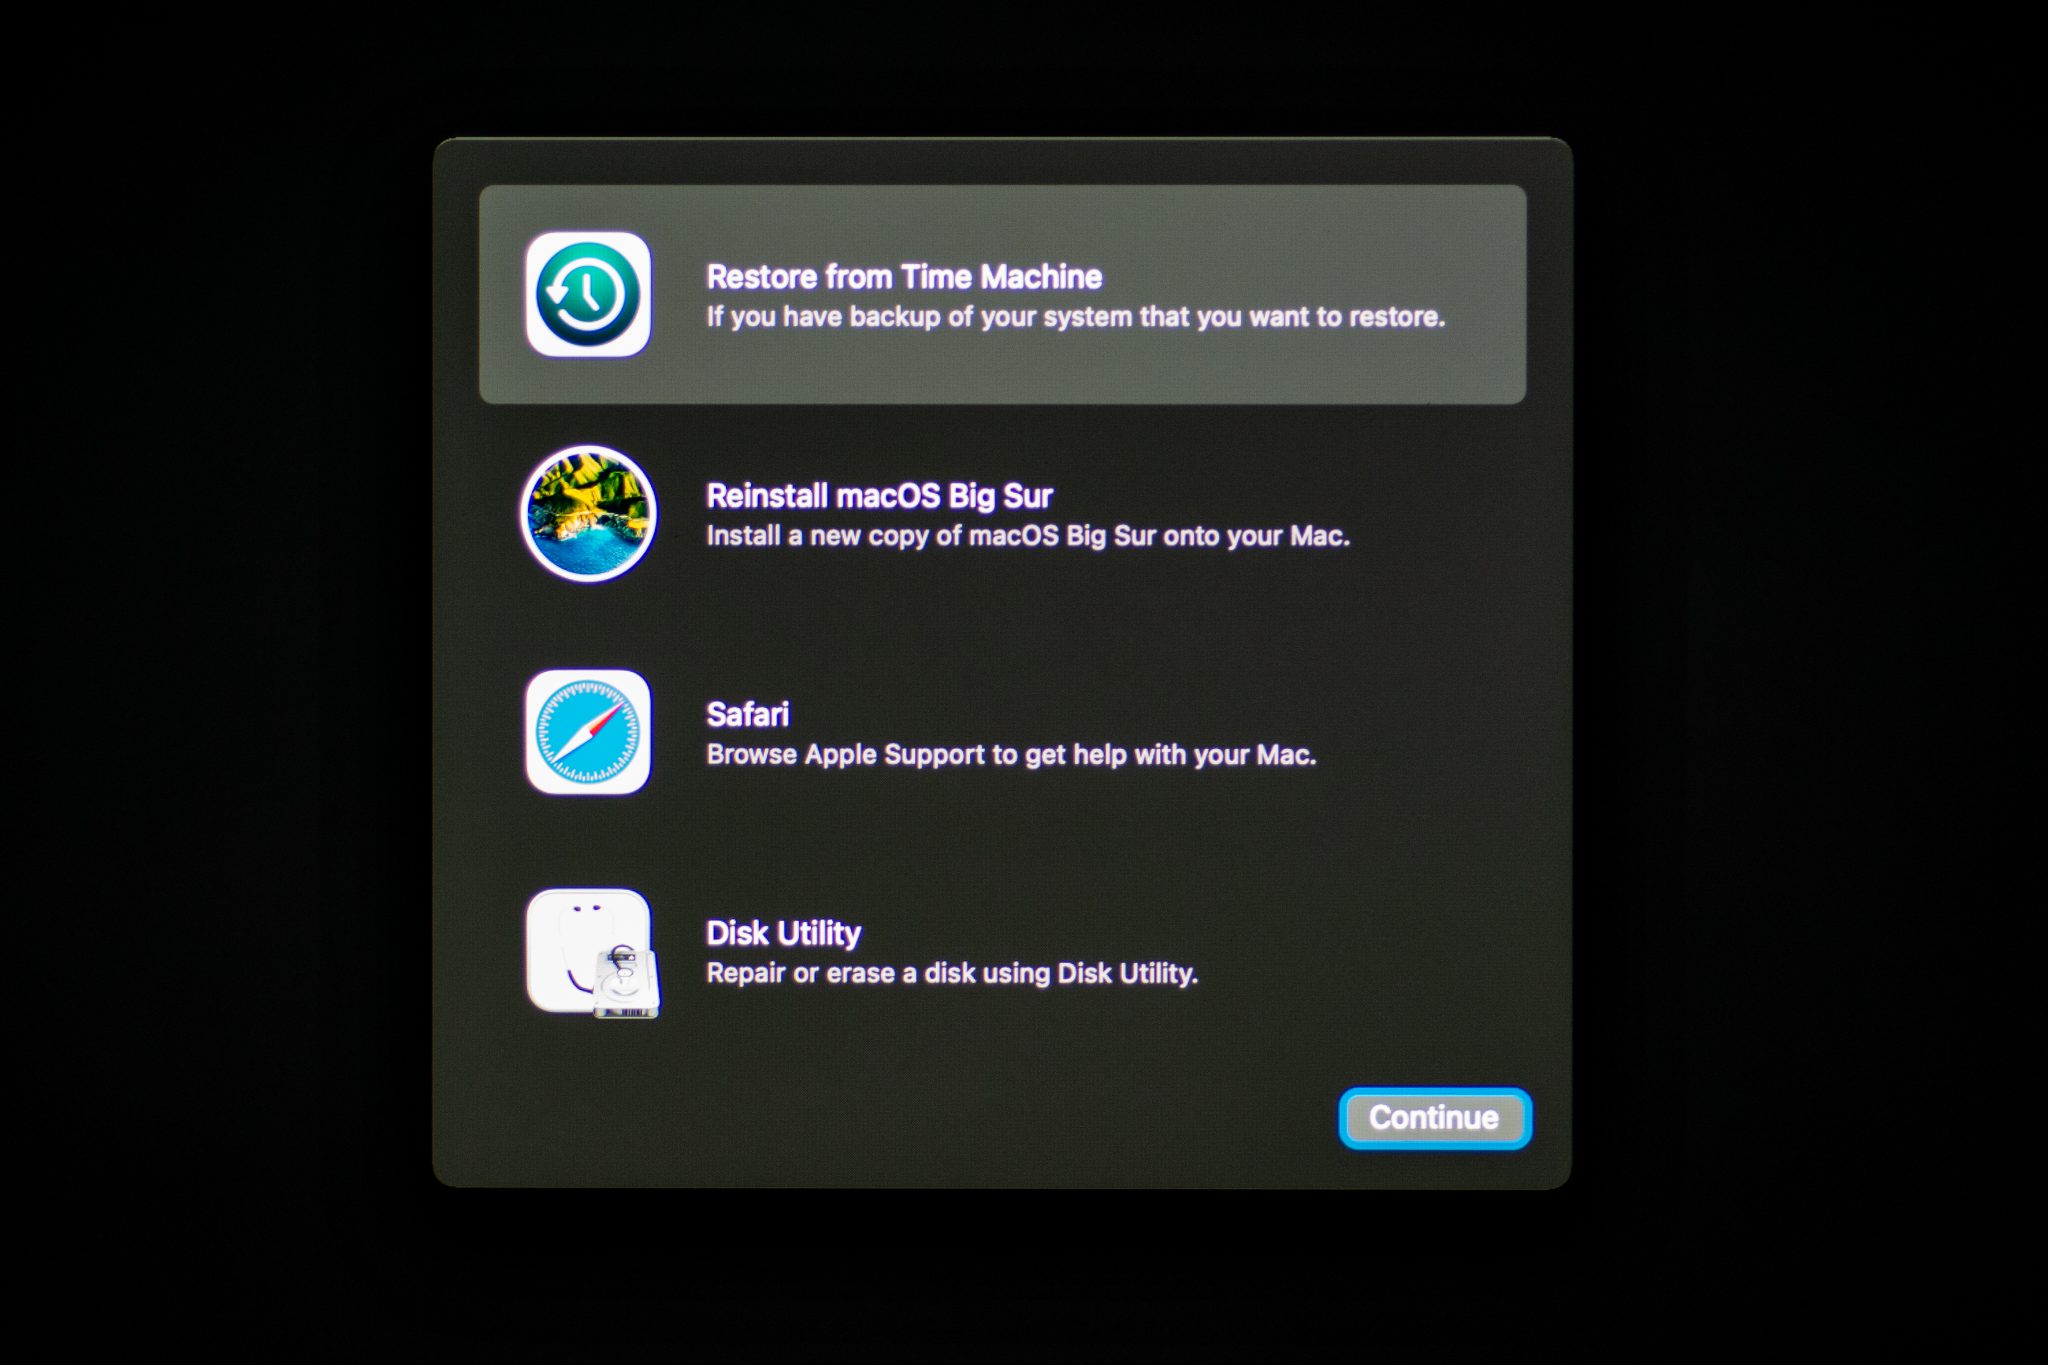
- Choose the needed backup version and select your Mac’s drive as the destination.
- Click Restore to start the process.
Method #5: Get Help From a Professional Data Recovery Service
If nothing helped to recover the data from your dead Mac’s hard drive, the last option that you have left is to contact a professional data recovery service and let experts handle the issue.
Cleverfiles data recovery service is an excellent option when it comes to restoring data from a damaged or dead Mac hard drive. Probably the biggest advantage of this service is that it has a no data – no charge policy. So if they fail to recover any files from your Mac’s HDD, you won’t have to pay any non-refundable fees.
Here’s what you should do if you decide to go with this solution:
- Contact the data recovery service and discuss your issue.
- Find out how to ship your Mac hard drive to them.
- Get a price quote.
- If you approve the recovery price, the experts will start the process immediately.
How to Repair a Corrupted, Damaged, or Dead Hard Drive on Mac
It’s almost impossible to repair a dead Mac hard drive yourself if you don’t have extensive knowledge in that field. But if your Mac’s HDD is corrupted or damaged, there are a few options to try to fix it.
Method #1: Use the First Aid Feature in Disk Utility
If your Mac’s hard drive is corrupted or damaged, it’s possible to repair it with the First Aid feature. To access that feature, you’ll have to boot your MacBook into Recovery Mode and launch Disk Utility.
Here’s how to repair your Mac’s hard drive with the First Aid feature:
- Boot your Mac into Recovery Mode (for Intel-based Macs, turn on your Mac by pressing the power button and holding the Command + R keys until the Apple logo appears; for M1 Macs, press and hold the power button until the Startup Options window appears).
- Launch Disk Utility.
- Choose your Mac’s drive from the sidebar on the left and click the First Aid button on top.
- Click Run to confirm.
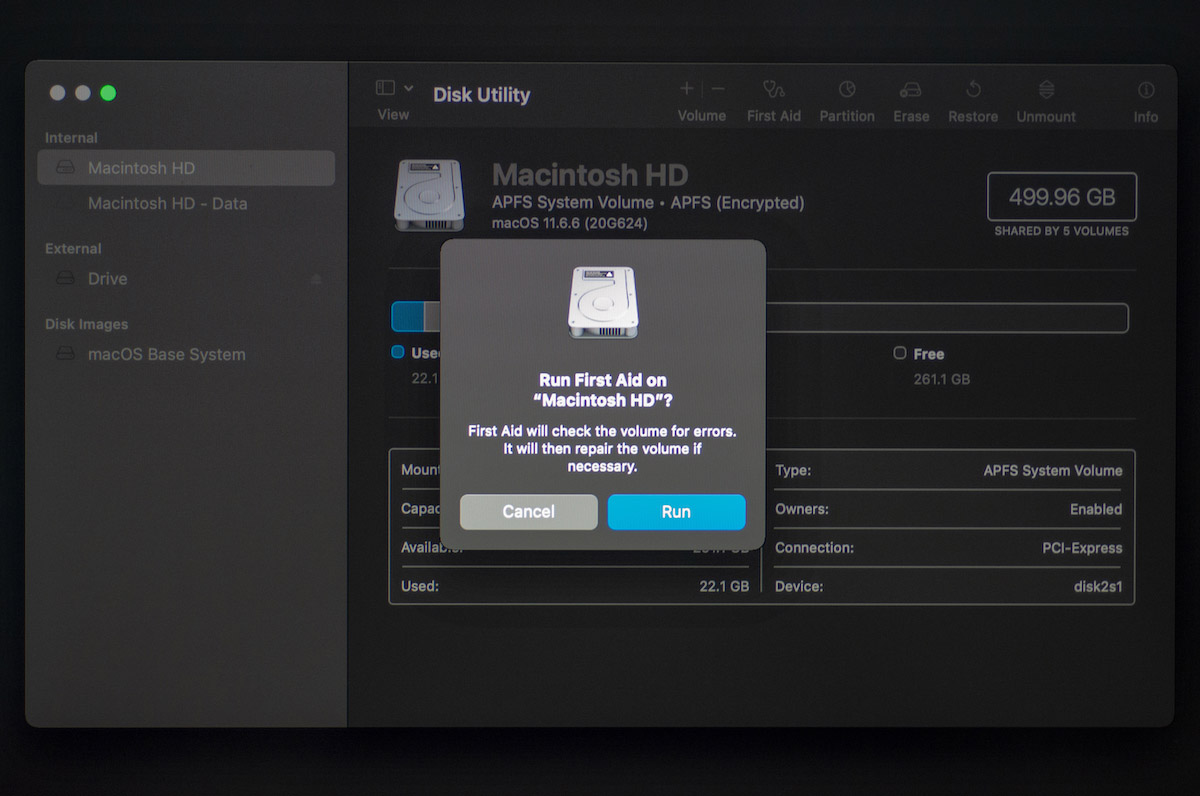
- Once the process is finished, restart your Mac.
Method #2: Use Terminal to Repair Your Mac’s Hard Drive
This method is an alternative to the previous one. In case you aren’t able to launch Disk Utility on your Mac, you can use the Terminal app to attempt to repair your Mac’s HDD.
Here’s what you should do:
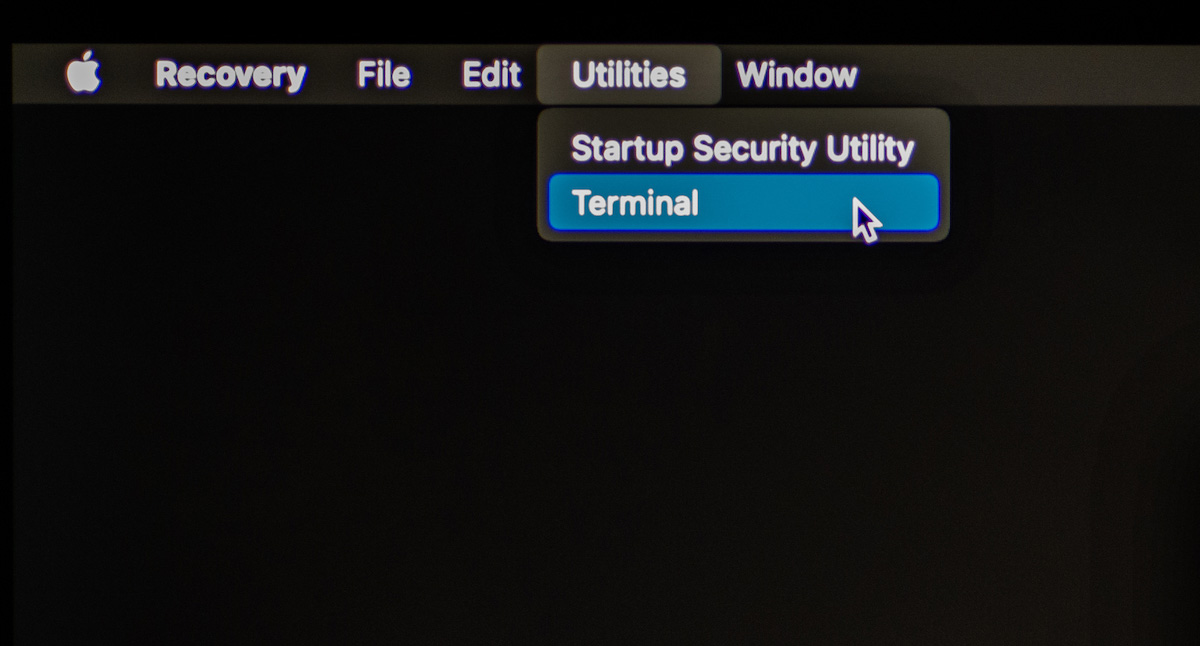
- Boot your Mac into Recovery Mode (for Intel-based Macs, turn on your Mac by pressing the power button and holding the Command + R keys until the Apple logo appears; for M1 Macs, press and hold the power button until the Startup Options window appears).
- Launch Terminal.
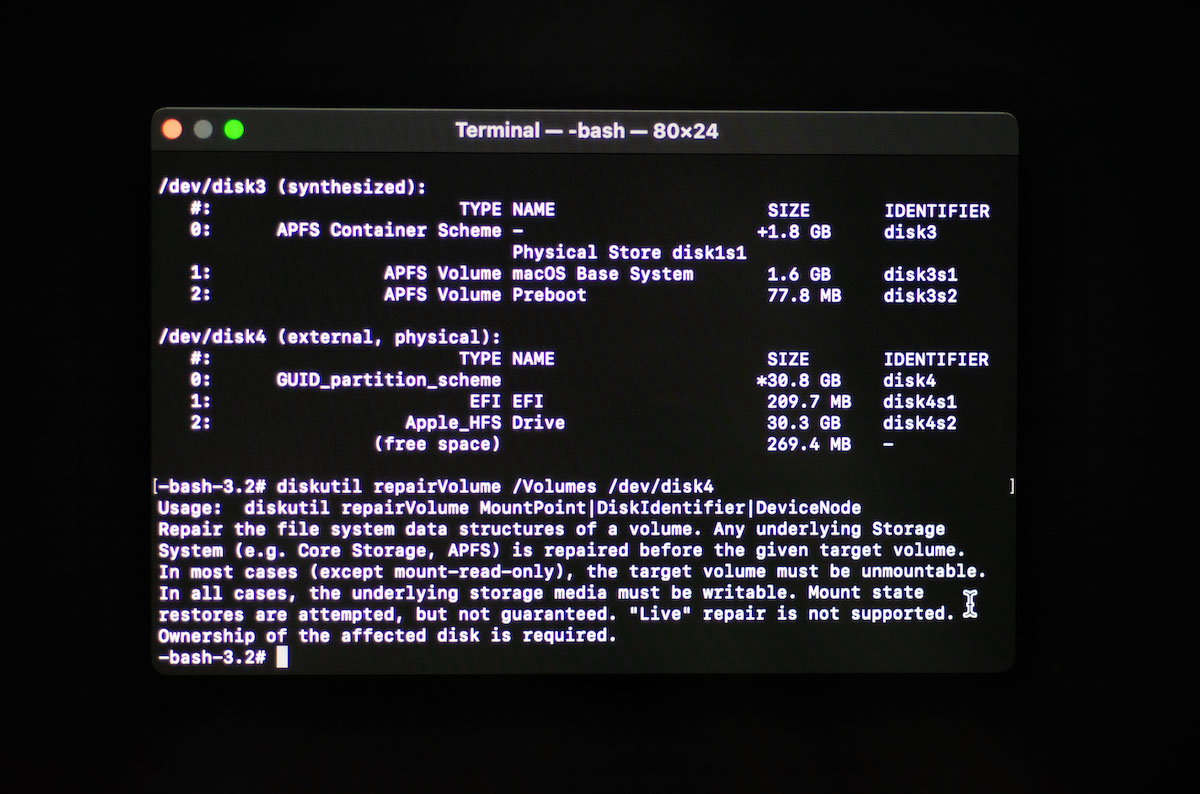
- Type in diskutil list and hit the Return key.
- Type in diskutil verifyVolume /(your drive's identifier) and hit Return to scan the hard drive for errors.
- Read the last lines of text in the Terminal window. If the application has detected an issue, type in diskutil repairVolume /Volumes/(your drive's identifier) and hit the Return key.
Method #3: Use FSCK in Single User Mode
This method works only with Intel-based Macs since the Single User Mode is still available only for these types of Macs. Follow these steps to boot your Mac into this mode and repair its HDD (if the problem is in the consistency of the file system):
- Power on your Mac while holding down Command + S.
- Enter the admin password if prompted.
- Type in this command and hit Return: /sbin/fsck -fy
- Wait for the process to finish.
- Type exit and hit the Return key to exit the Single User mode.
Conclusion
Recovering files from a dead Mac hard drive can be quite a complex and tricky process. The result of the data recovery depends on many factors and the state of the HDD. But even in the most severe cases, the methods described in this article might help you to successfully recover your lost files.


FAQ:
The quickest and easiest solution would be to use a data recovery tool like Disk Drill to restore the data from your dead Mac hard drive. You’ll need to boot your computer in Recovery Mode and create a disk image backup of your drive. Once you’ve done that, you should use the application to recover the files from the image:
- Download and install Disk Drill.
- Launch the app and choose the backup file from the list of devices.
- Click Search for lost data to initiate the scan.
- Wait for the scan to finish and click Review found items.
- Choose the files which you want to recover and click Recover.
- Select a preferred destination for the data and click OK to confirm.
Yes, it’s possible to retrieve data from a dead Mac. Depending on whether your Mac is able to boot into Recovery Mode or not, there are a few data recovery methods that you can try:
- Use specialized data recovery software.
- Connect your Mac with another computer to transfer data.
- Use a macOS bootable USB drive.
If your Mac won’t turn on and you need to retrieve the data stored there, your best option would be to either use an enclosure to connect your HDD to another computer or to get help from professionals.