In our Data Rescue 6 review, we’ll look closely at what it actually offers, how well it performs across common recovery scenarios, and whether it’s still a worthy choice in 2025, for both longtime Mac fans and anyone else who needs their files back.
📌 Here’s our brief summary:
Data Rescue 6 has been around for a while, Its promise is simple: recover your lost files without drama, whether they were deleted, lost in a crash, or stuck on a corrupted drive.
Our impression: it’s functional. The app can recover deleted files and offers disk cloning, which is very helpful in certain situations. But overall, it feels like a tool that hasn’t changed much in recent years. The interface is dated, the feature set is pretty basic by today’s standards, and the pricing model leans more commercial than consumer-friendly.
That said, there’s plenty more to unpack here.
| 👍 Strengths | 👎 Weaknesses |
|---|---|
|
|
To keep things clear and fair, we broke this review down into key parts: features, recovery performance, user feedback, and pricing. Each section gets its own score (1 to 5), and those scores come together to form our final verdict.
🔎 Why You Can Trust Us:
Every app review is the result of a hands-on, multi-step process run by team experts. Our QA specialists run recovery tests on real drives. Then, lab engineers verify the results to make sure every text is accurate. Experienced technical editors present the results in a clear, reader‑friendly format.
What Data Rescue 6 Offers
Data Rescue 6 is made by Prosoft Engineering, a California-based developer that’s been in the data recovery game since the early 2000s. They’ve long been known in the Mac community, especially back when recovery tools were harder to come by.
Data Rescue plays nice with both Windows and macOS, and the Data Rescue Mac version actually feels like the more stable of the two.
| 💻 Available platforms: | Windows, macOS |
| 💸 Price: | Starts at $19 per file, $79 for 30-day access, or $399/year for the Pro version |
| 📚 Supported file types: | 100+ out of the box (and you can teach it more using FileIQ) |
| 🗃️ Supported file systems: | FAT, FAT32, exFAT, NTFS, HFS+, APFS, ext2/3 |
| 💻 Supported devices: | Hard drives, SSDs, USB drives, memory cards, some RAID arrays |
| 🗄️ NAS/RAID support: | RAID 0 and JBOD supported – but only in “Professional Mode” |
| 💿 Disk image creation/scanning: | Yes, full cloning support + ability to scan from disk images |
| 👨💻 Customer support: | Email and live chat (limited hours); no phone support |
General Information
One nice touch right out of the gate – you only need one license to run Data Rescue 6 on both macOS and Windows. That’s not super common in this space (off the top of our heads, only Disk Drill offers something similar); it’s especially handy if you bounce between platforms (or need to help out friends/family who do).
As for system requirements, they’re pretty reasonable, but there are a few important things to flag:
- You’ll need an internet connection to activate the software and access certain features.
- You also need a second storage device – you can’t recover files to the same drive you’re scanning (which is standard practice).
- And if you’re using a Mac, you’re covered from macOS Sierra (10.12) all the way up to Ventura (13) – yes, M1 and M2 Macs are supported, though you’ll need Rosetta for full compatibility.
File Format & File System Support
Out of the box, Data Rescue 6 supports 100+ file types – your usual suspects like DOCX, XLSX, JPG, PNG, MP4, MOV, PDF, and so on. The kinds of files most people lose when things go sideways.
But here’s where it gets interesting: it comes with a feature called FileIQ. What does that mean in real life? If the file you’re trying to recover isn’t already supported, you can feed Data Rescue a working sample, and it’ll learn how to recognize that file type in future scans. Pretty slick, it’s not something you see in every recovery tool.
As for file systems, support is solid, just don’t expect miracles. Here’s how it breaks down:
- Windows build: NTFS, FAT / FAT32 / exFAT, plus read‑only access to HFS+, APFS, and ext2/3 volumes.
- macOS build: APFS, HFS+, FAT / FAT32 / exFAT, plus read‑only NTFS and ext2/3.
- Linux: ext4 is only partly supported (metadata can go missing), and there’s no ReFS, Btrfs, or ZFS.
That covers what most everyday users bump into, but it’s not a cross‑platform powerhouse.
And now for the part that trips people up: Data Rescue 6 for Mac can’t scan encrypted APFS or HFS volumes. At all. And it doesn’t even warn you. If you point it at an encrypted Mac drive, it’ll act like everything’s fine, run the scan… and give you nothing. That’s a pretty big miss, especially since encryption is standard on modern macOS systems by default.
Mac vs Windows
For the most part, Data Rescue 6 looks and works the same on both macOS and Windows – same layout, same workflow, same UI. But there are a few small differences worth knowing about.
- If you use Data Rescue 6 for Mac, you get one extra tool: the ability to create a bootable recovery drive. It’s handy if your main system drive is failing and you want to avoid booting from it altogether. There’s also deeper support for HFS+ and APFS – but remember, encrypted volumes still won’t work.
- With Data Rescue 6 for Windows, things are simpler. No bootable recovery tool here, but scanning NTFS and FAT drives works well enough. Just launch and go.
While technically you can scan a Windows-formatted NTFS drive using the macOS version, or a Mac-formatted HFS+ drive using the Windows version, it’s not where Data Rescue 6 shines. Both versions definitely perform better in their native environment – NTFS on Windows, HFS+ on Mac.
User Interface
In terms of looks, Data Rescue 6 is seriously outdated. On macOS Sequoia, it feels like a throwback to an older era of utility software – simple, flat, and not in a good way. Yes, it supports dark mode, which is nice… but that’s about as modern as it gets.
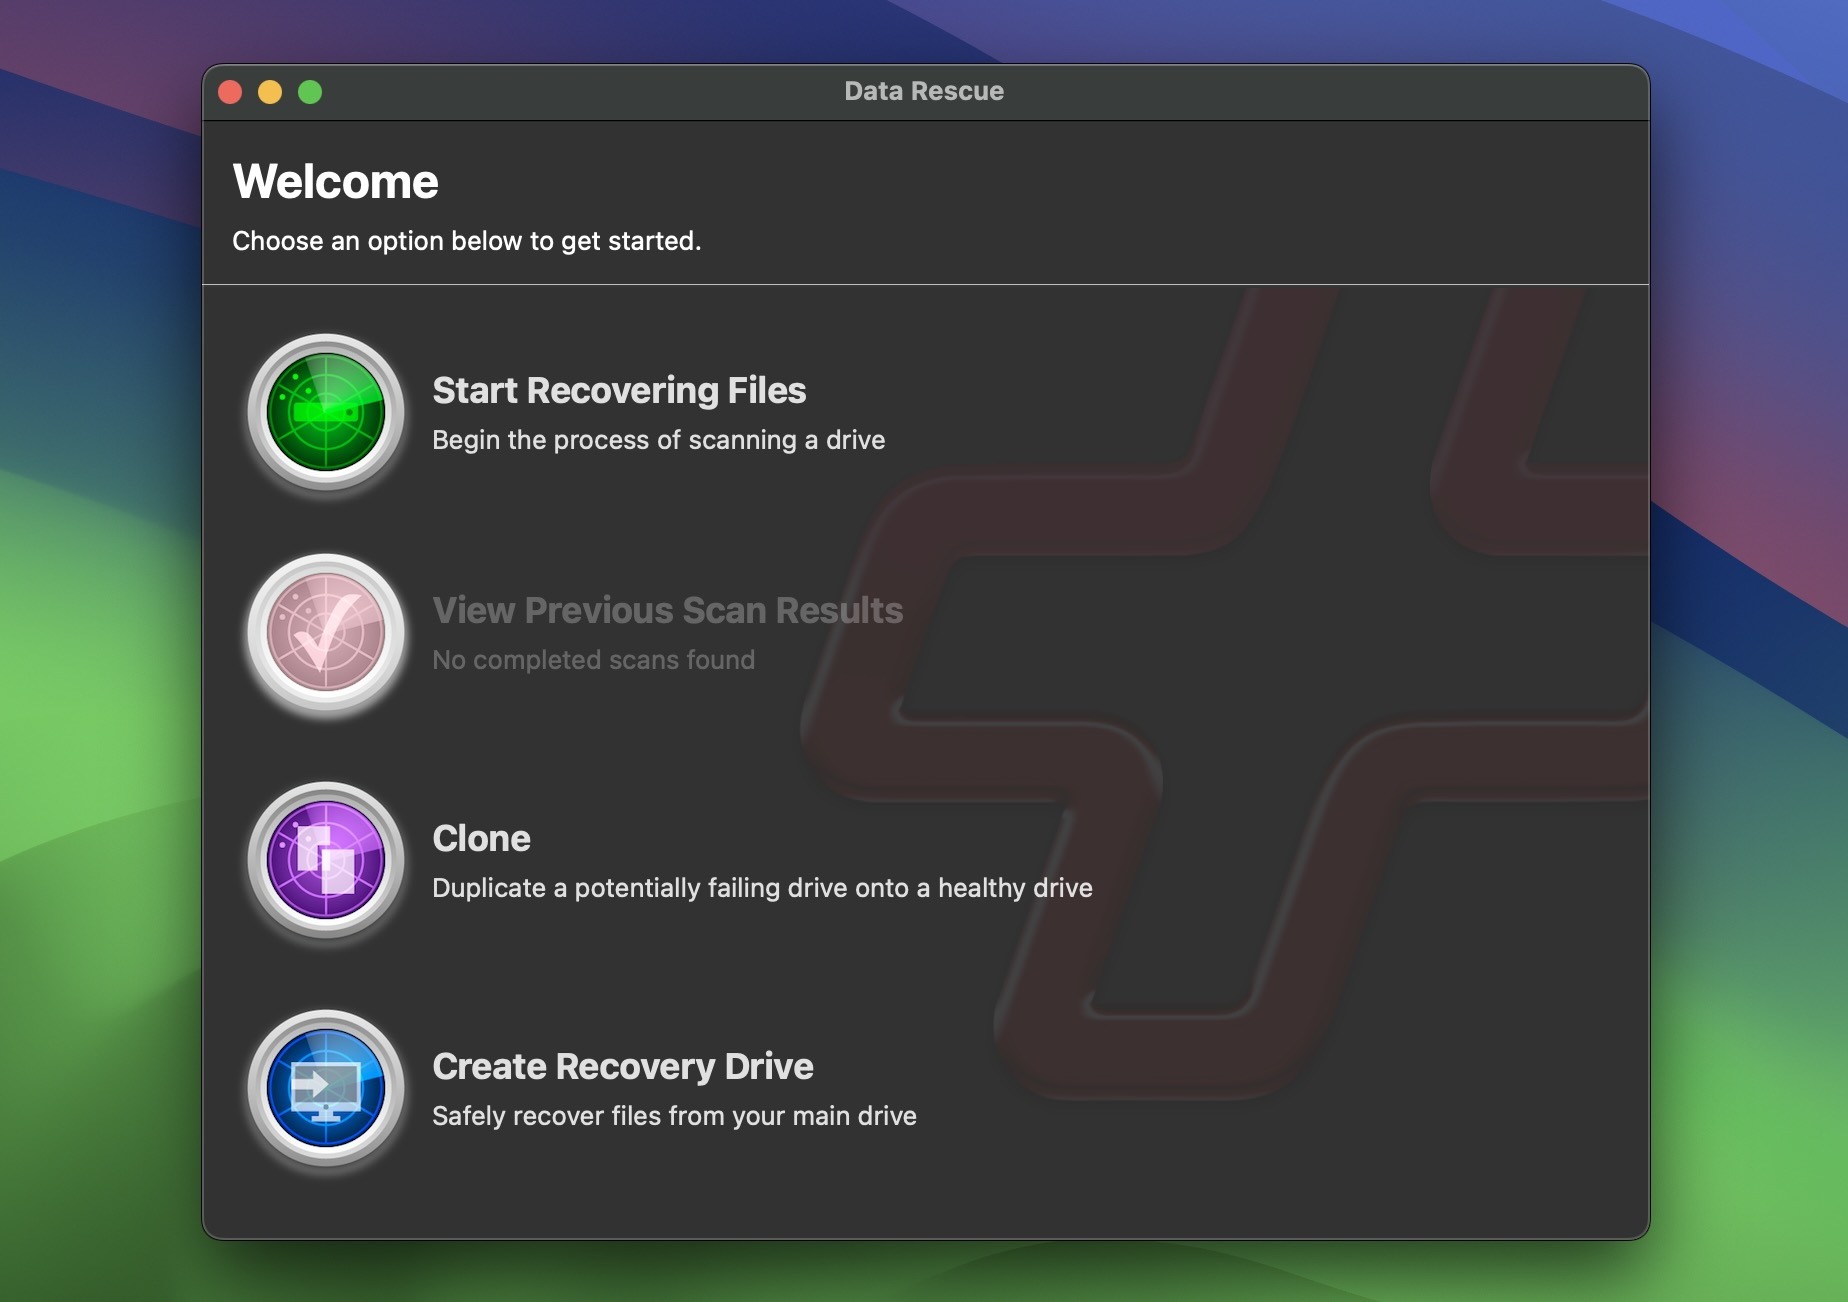
The welcome screen (as you can see above) looks clean at first glance, but it’s also incredibly basic. You get four chunky icons with minimal context. No tooltips, no customization, no guidance for first-time users.
Once you’re into the actual scan process, things don’t improve. You can’t continue interrupted scans, and there’s no way to change how recovered files are displayed – just one static tree view. That’s it. The UI, honestly, seriously needs a full overhaul.
Extra Features
In terms of extra features, the list is pretty short. You get:
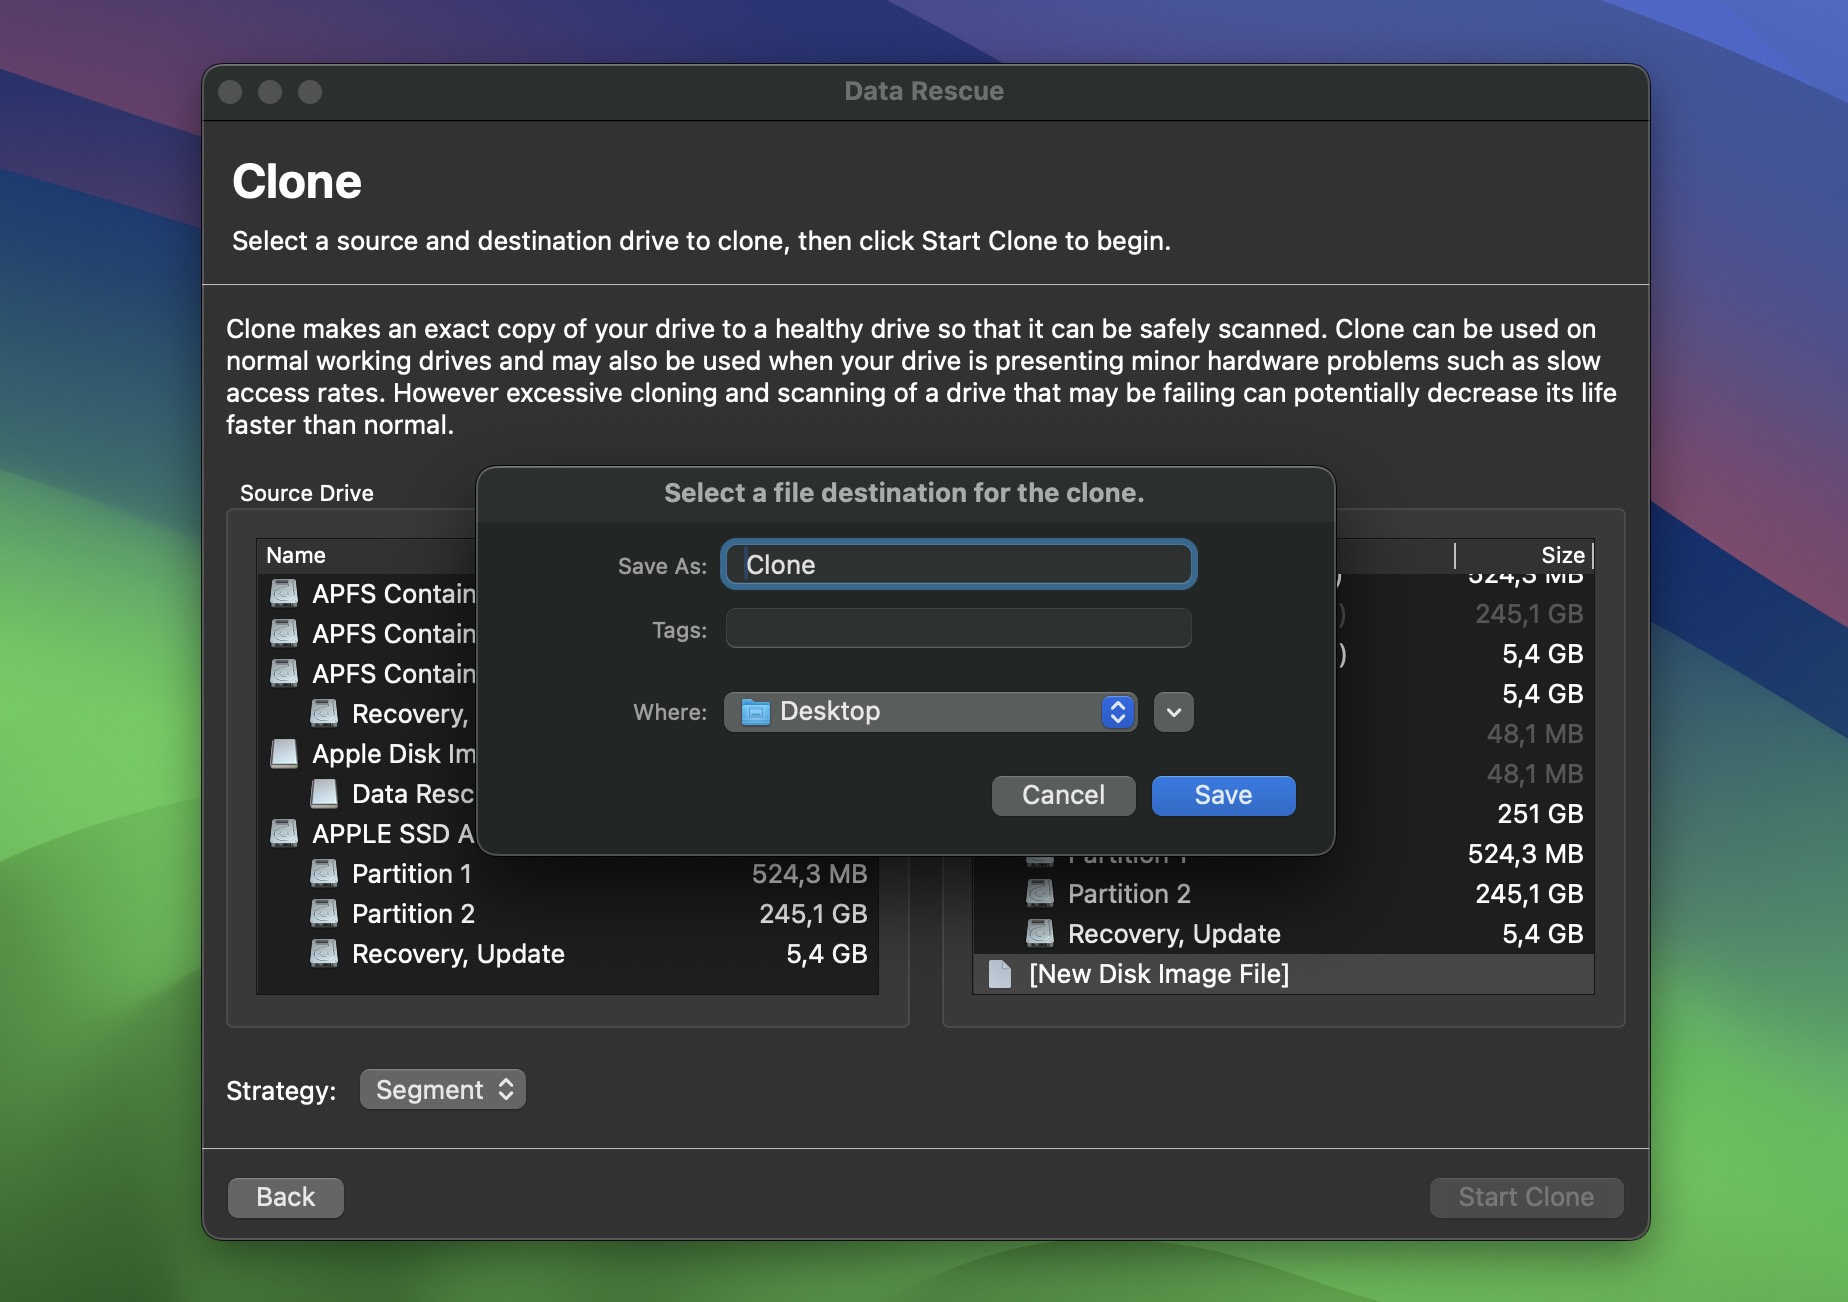
- Cloning tools – helpful if your drive is failing and you want to scan a safe copy instead. You can either clone to another drive or create a disk image (DMG/ISO).
- Bootable recovery drive creation – but this one’s Mac-only. It lets you recover files from your main startup disk without booting into macOS, which can be a lifesaver if your system won’t boot.
- FileIQ – we’ve mentioned it before, but it’s worth repeating. This feature lets you train the app to recognize new file types by feeding it a sample file.
- RAID support – but here’s the catch: it only works with RAID 0 and JBOD, and you have to switch into Professional Mode to even see the option. No support for RAID 1 or more advanced setups, and it’s easy to miss unless you already know to look for it.
That’s about it.
We’ll be generous and give it a 4.
What it does include – like cloning, FileIQ, and basic RAID support – is genuinely useful, and most works as advertised. It covers the basics for most standard recovery jobs, and the Mac-only bootable recovery drive is a nice touch.
That said… it’s far from feature-rich. You won’t find scheduling tools, smart filters, built-in file repair, disk health monitoring, or anything that pushes the envelope. No cloud recovery, nothing fancy.
So yeah – solid core features, but definitely showing its age.
How Data Rescue 6 Recovers Data
Now let’s get to the more tangible stuff.
This is where we break down how we tested the tool, how it actually works in real-world use, and what kind of results you can expect if you’re trying to recover lost data.
We’ll start with our testing process – what we used, what scenarios we simulated, and why. Then we’ll walk through how Data Rescue 6 works from install to recovery. And of course, we’ll show you what it actually managed to bring back.
Here’s a quick summary before we get into the full breakdown.
| Test Case | Deleted Files | Formatted Drive / Corrupted Drive |
| Scanning Speed | Under 1 min (Quick scan) | 11 min |
| Total Data Recovered | ~1.9 GB | ~1.8 GB |
| Documents Recovered | ~780 | ~780 |
| Photos Recovered | ~170 | ~140 |
| Videos Recovered | ~50 | ~40 |
Our Testing Process
We tested the latest version available at the time of writing – Data Rescue 6 (Mac) Version 6.0.9 – to see how it performs in real-world scenarios.
Here’s the setup we used:
- MacBook Pro (M1, 2020) running macOS Sequoia
- Test device: 16 GB USB flash drive (exFAT format)
- Test data: ~2.1 GB mix of files – documents (DOCX, XLSX, PDF), images (JPG, PNG), videos (MP4, AVI, MOV), and a few RAW media files
We ran three recovery scenarios: (1) recently deleted files; (2) a formatted drive; (3) a corrupted drive with partial file system damage.
- Accidental deletion is straightforward. We copied the test files to the USB drive, then deleted them via Finder.
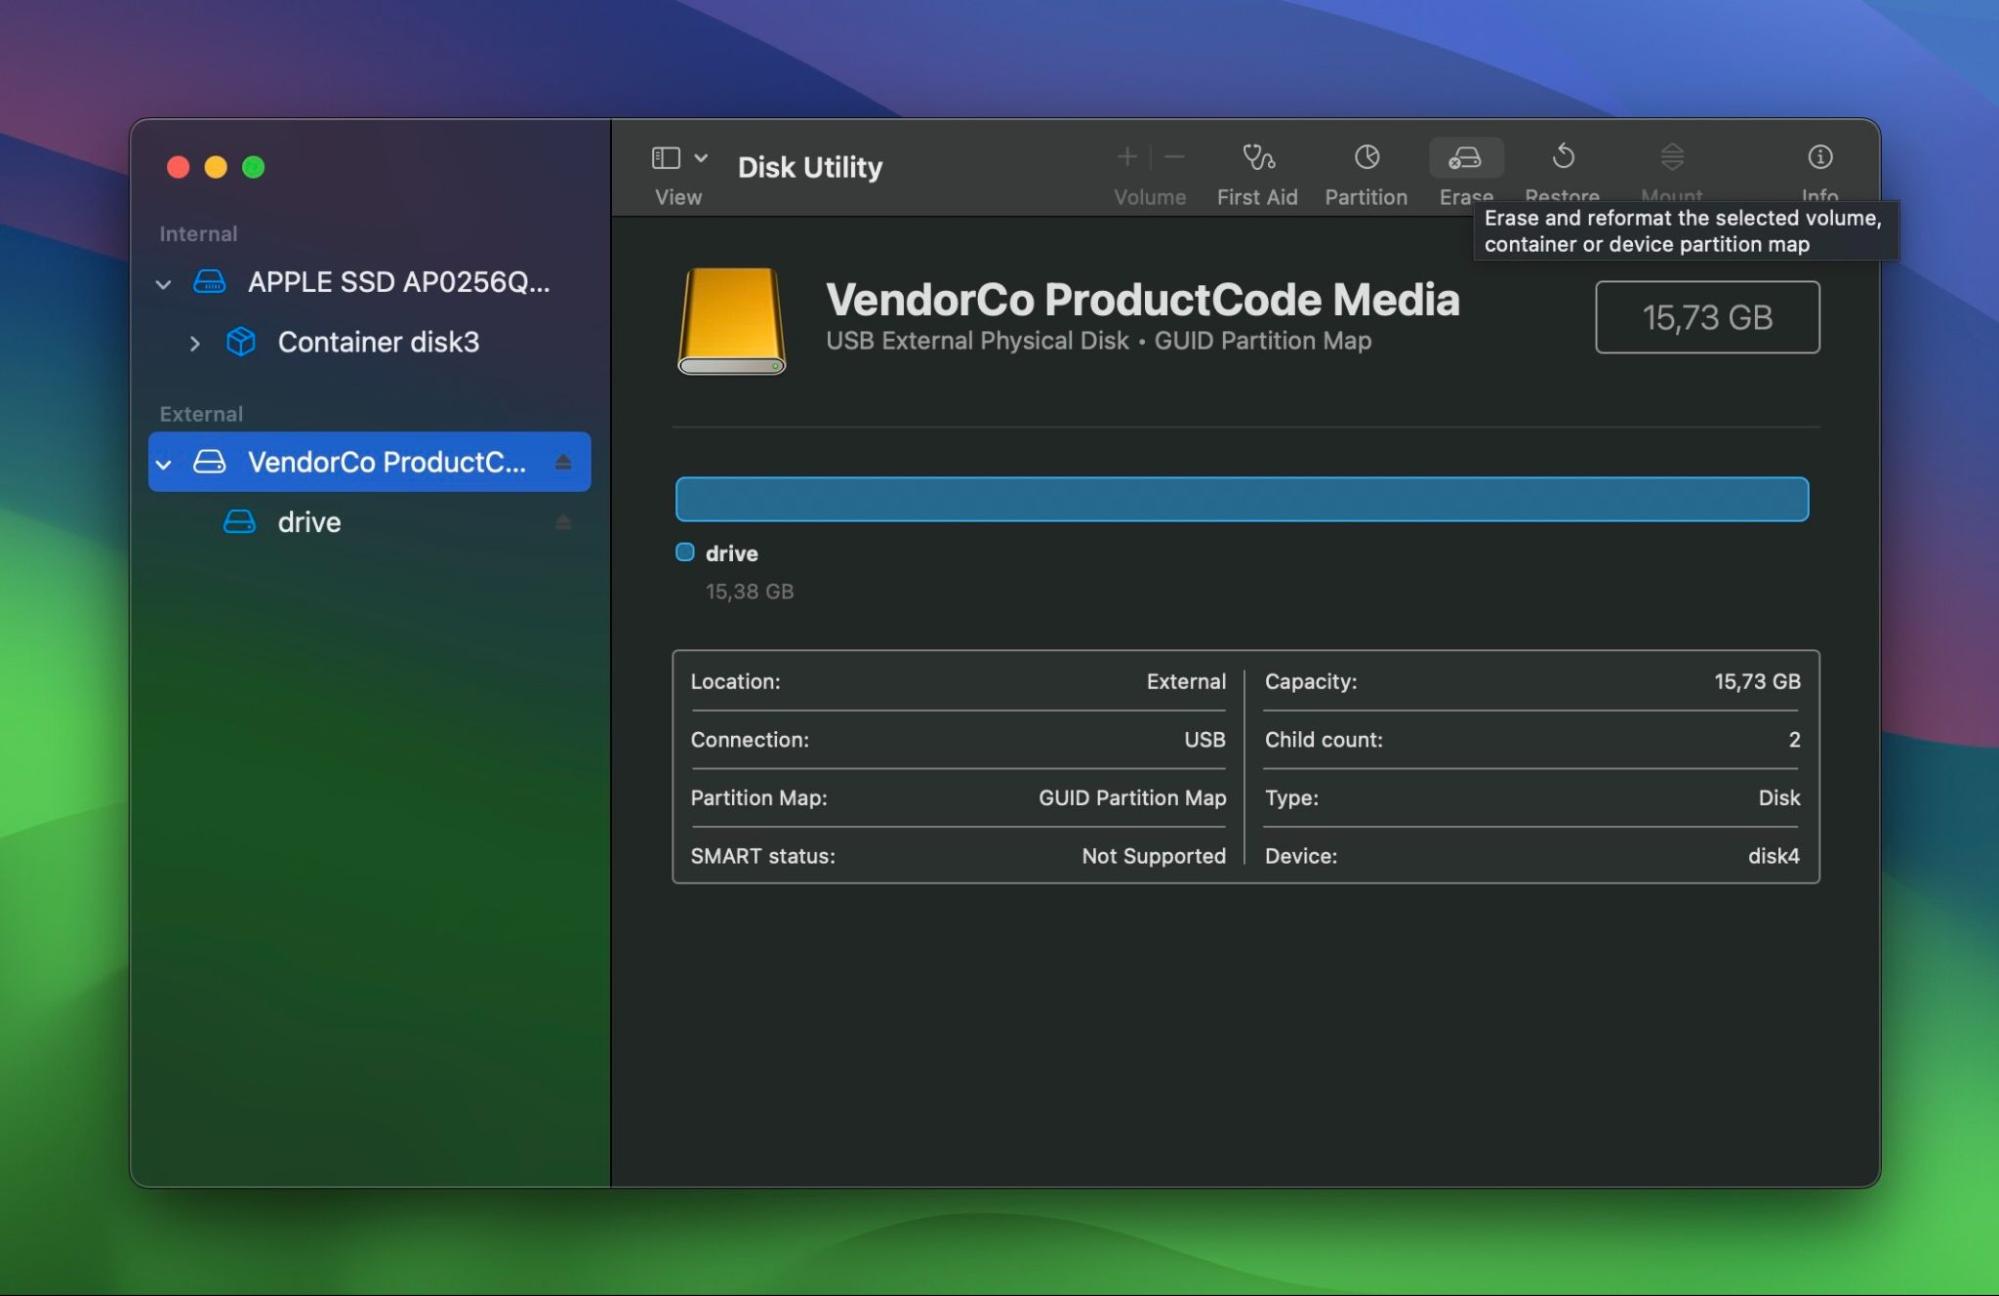
- Formatted drive. Using Disk Utility, we selected the USB drive, hit Erase, and reformatted it as a fresh exFAT volume (standard quick format).
- Corrupted drive. We deliberately damaged the file system by tampering with the partition table, which caused the drive to become unreadable/unmountable in Finder. The goal was to simulate something that might happen after a failed format, a bad USB removal, or an OS crash during write operations.
Before we reveal how it handled each data loss case, let’s take a step back and look at what the recovery process actually feels like from a user’s point of view.
Installation and Data Recovery
Whether you’re using Data Rescue 6 for Mac or Data Rescue 6 for Windows, the installation process is simple enough. You download the installer from Prosoft’s official site, follow the prompts, and you’re in.
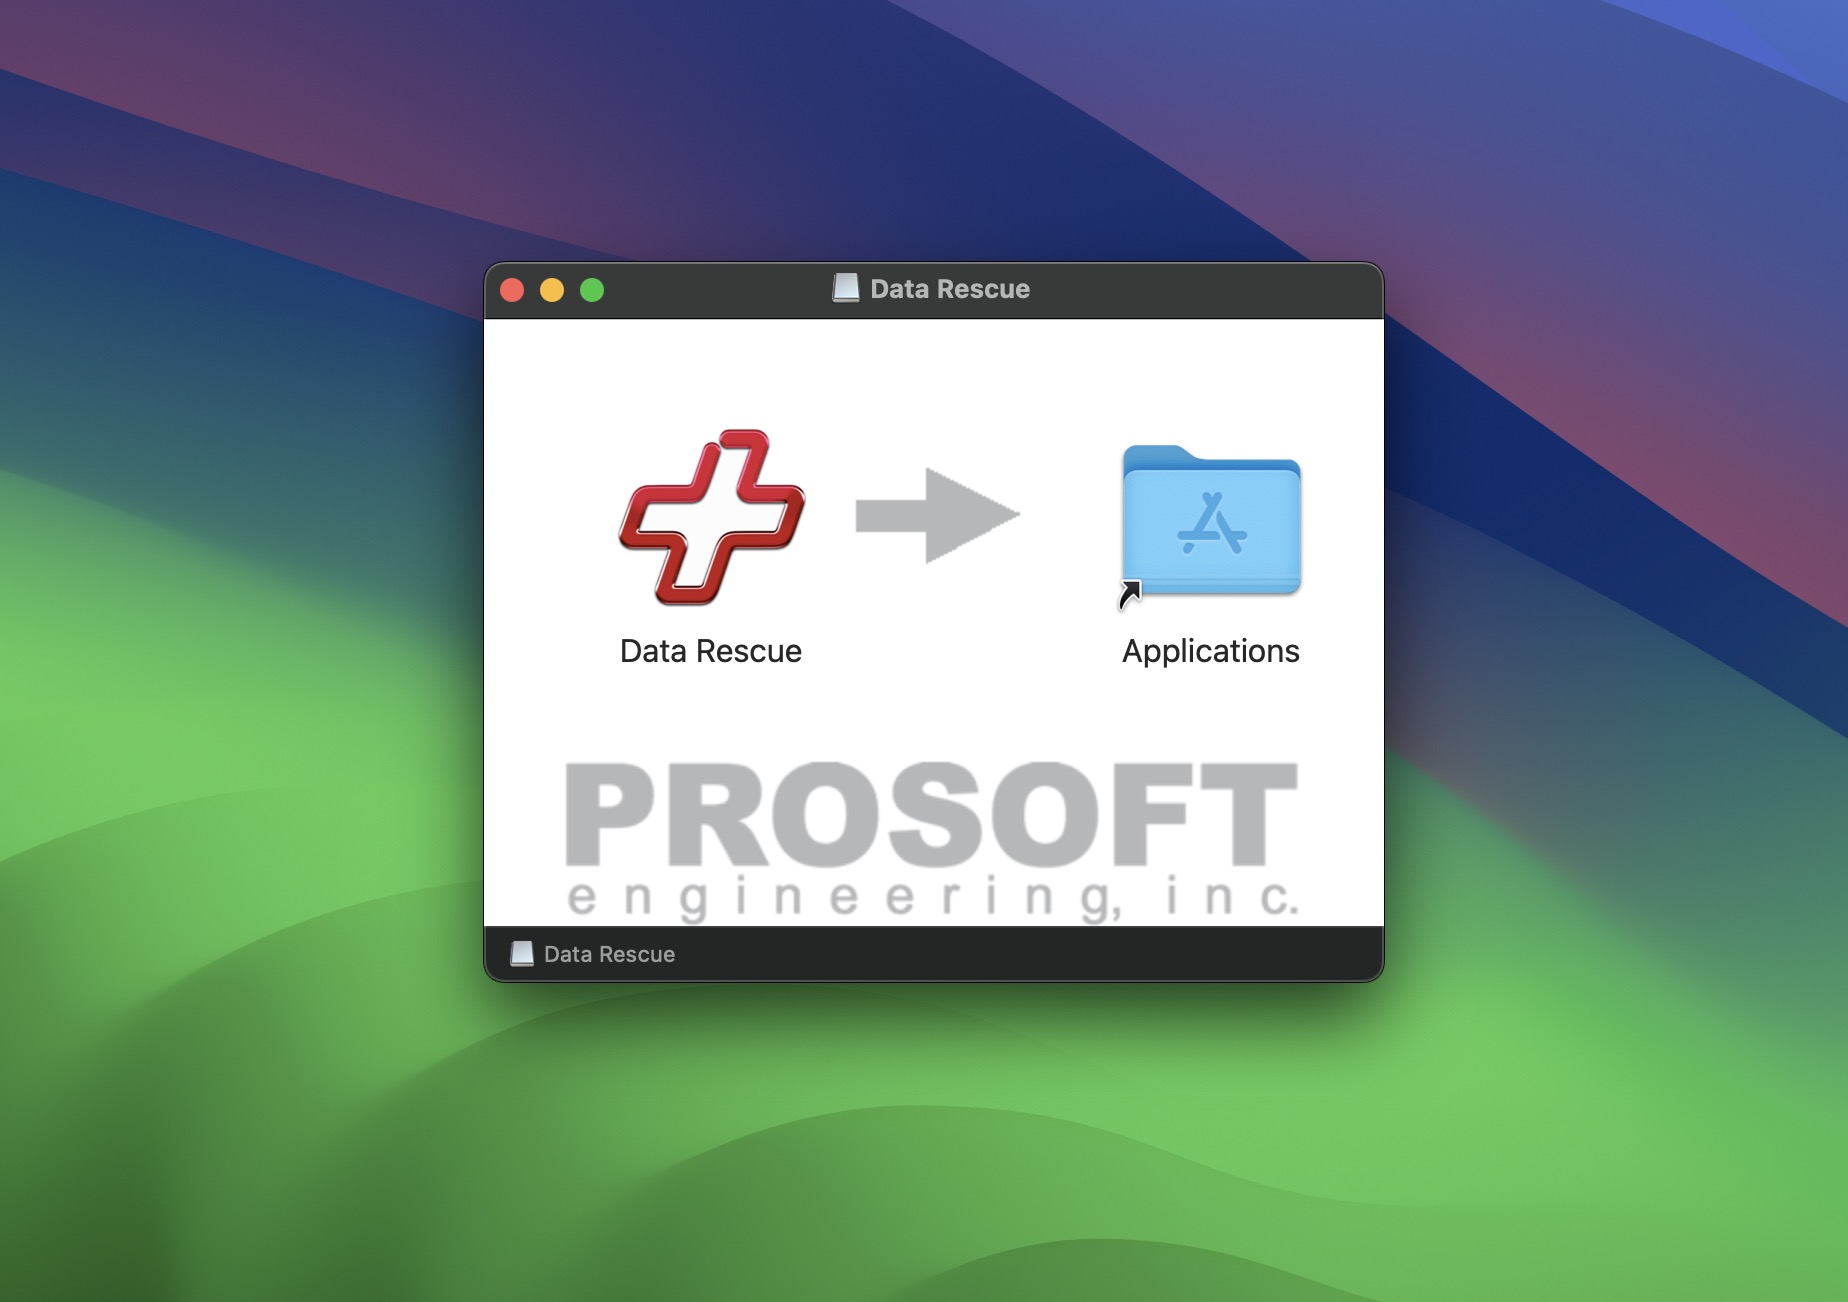
- On Mac, installation is the usual drag-and-drop process. You download the .dmg from Prosoft’s site, open it, and drag the app to your Applications folder. But – because of macOS privacy rules – you’ll also need to give it Full Disk Access in System Settings.
- On Windows, it’s even more straightforward. Just download the .exe, run the installer, and you’re good to go. No permissions dance. The app launches right into the main screen.
Once inside, the UI is the same on both platforms: you’ll see your connected drives, options to start a new scan, resume a previous one (sort of – we’ll get to that), or create a clone.

As you can see in the screenshots, on Mac, there’s one extra option – Create Recovery Drive. This lets you make a bootable USB stick to recover data from your internal drive without needing to boot into macOS. It’s absent from the Windows version. Aside from that, the layout and overall experience look and feel the same on both platforms.
Once we launched the app, here’s how things played out.
- When you open Data Rescue 6, you’re greeted with a simple welcome screen. To begin, we clicked on the obvious one – Start Recovering Files.
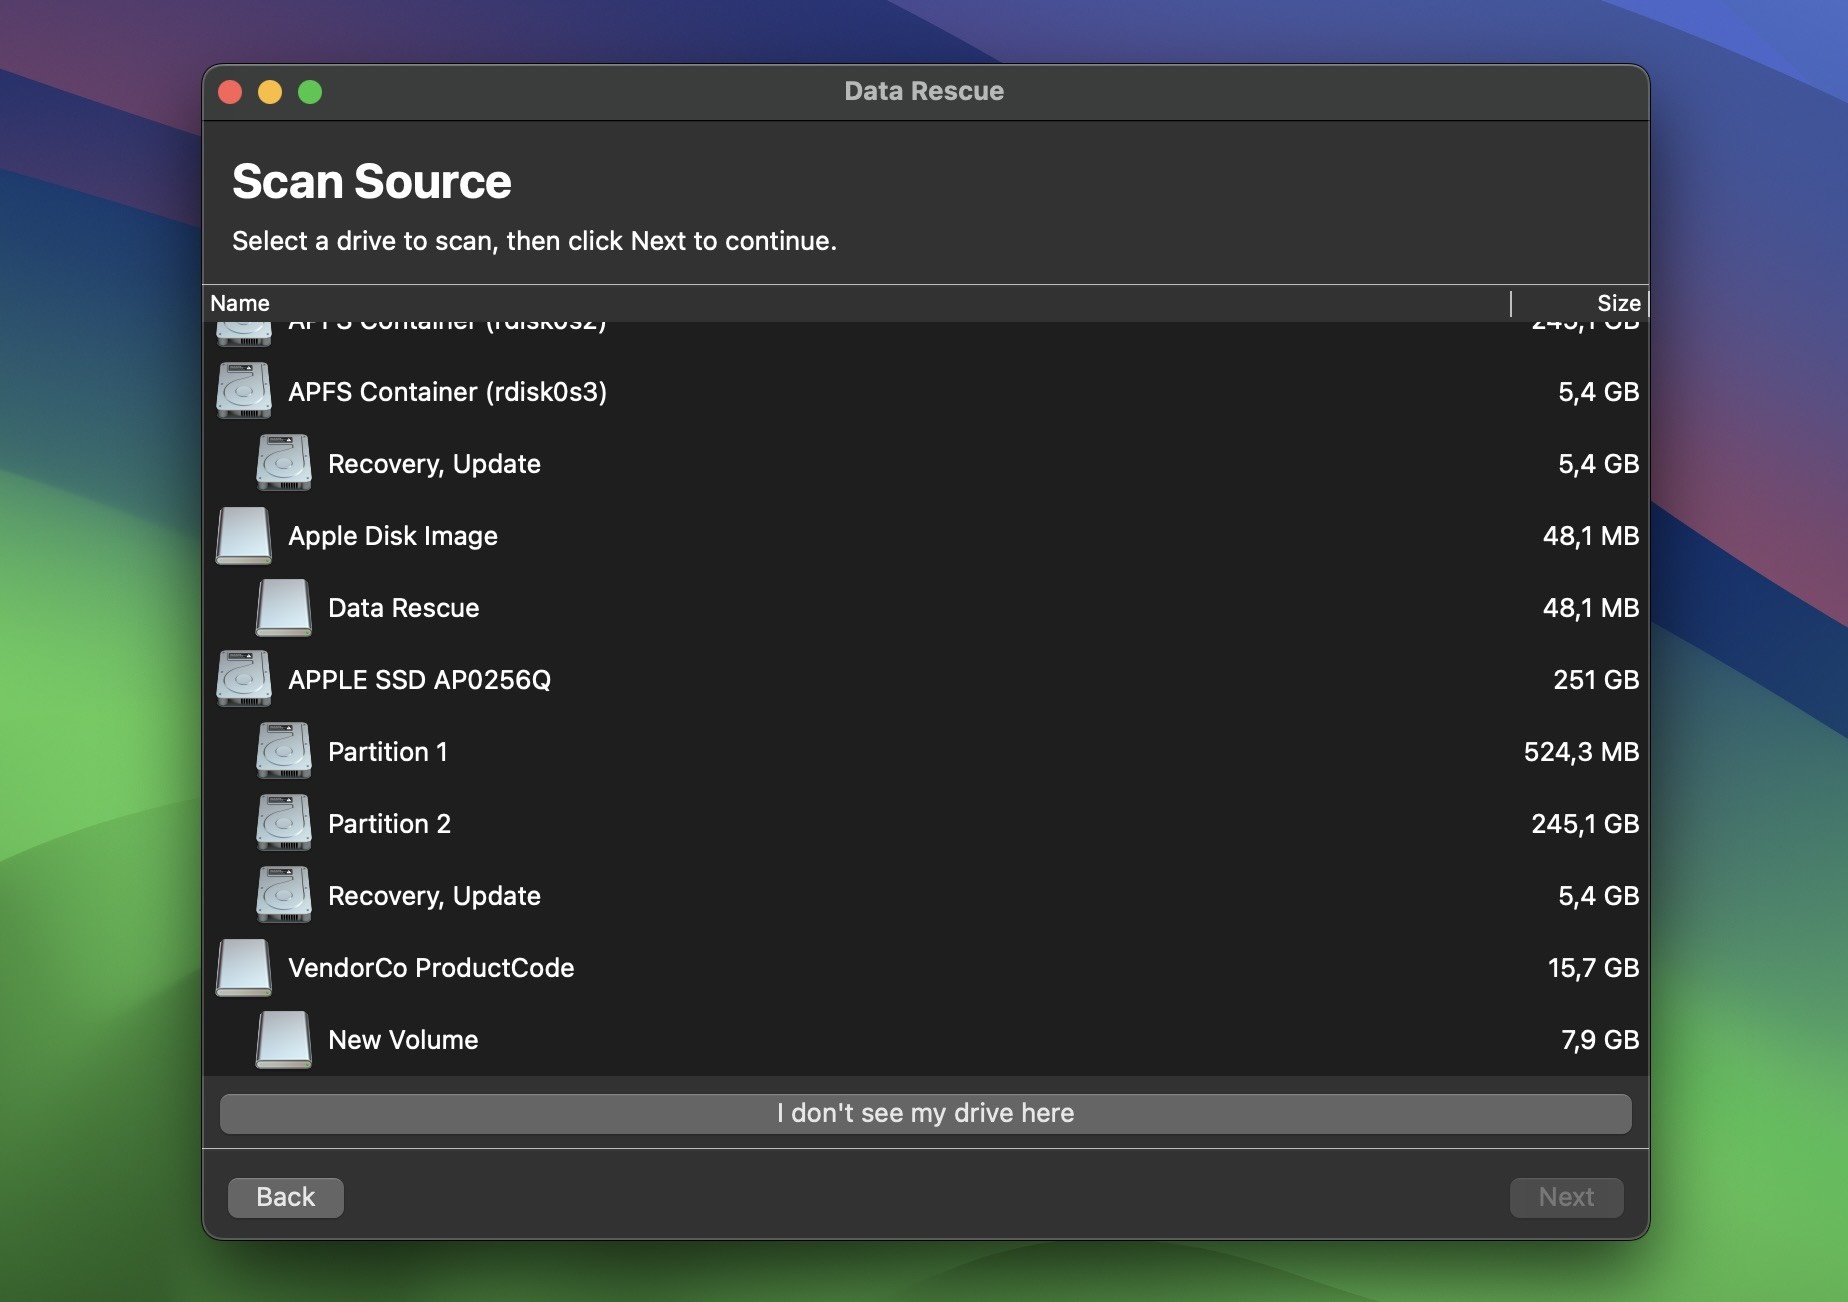
- Next up: select the drive you want to scan. This screen lists all the drives the software can see – internal disks, USB flash drives, external HDDs, even small partitions. As you can see in our screenshot, it did a good job picking everything up. If something doesn’t show, there’s a “I don’t see my drive here” button for troubleshooting.
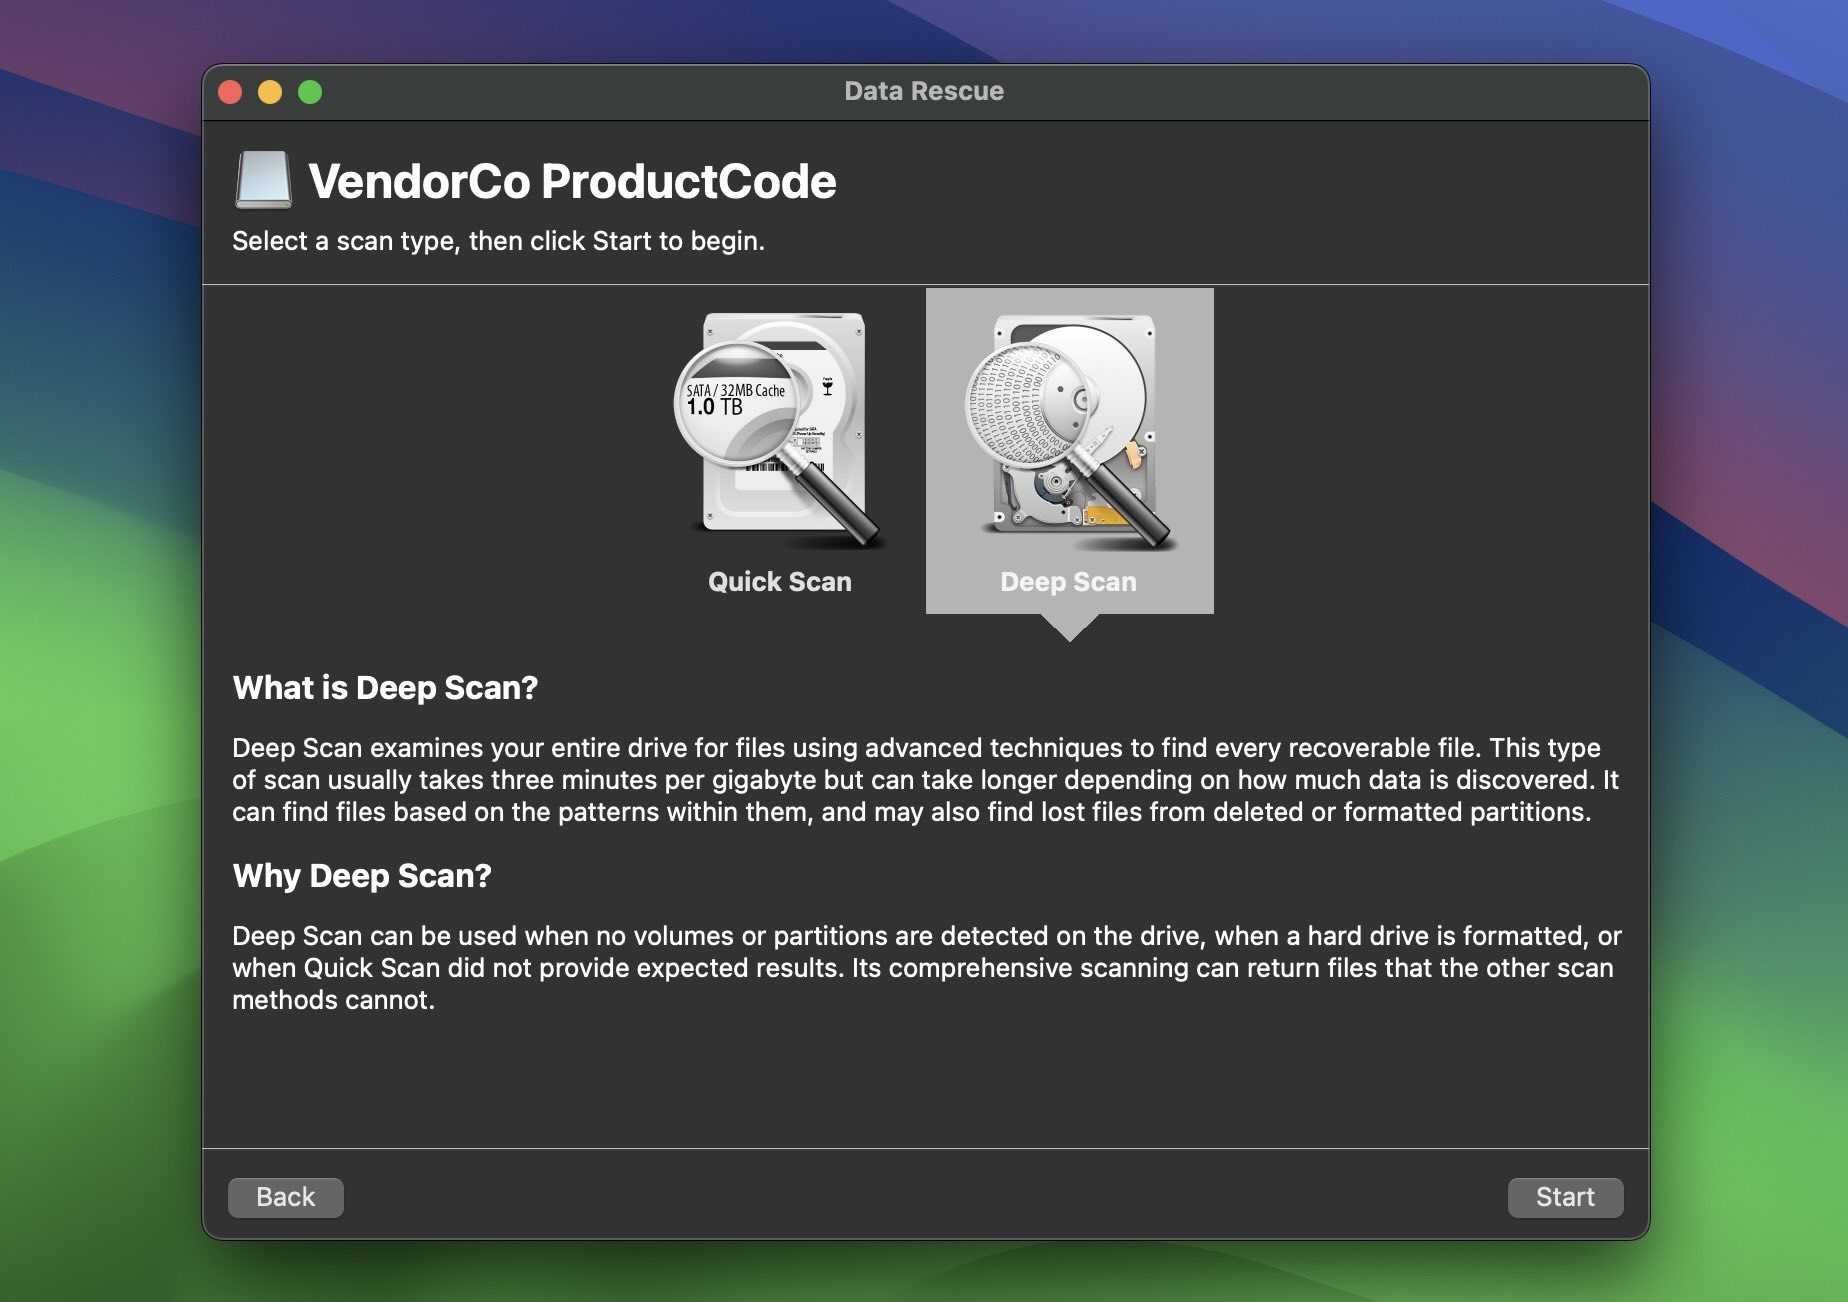
- Once you pick a drive, the app asks whether you want a Quick Scan or a Deep Scan. Quick Scan is faster and good for recently deleted files, especially if the drive still mounts properly. Deep Scan takes way longer but combs through the entire drive structure – great for formatted or corrupted volumes. We went with both during testing (more on that later), but for now, once you choose your scan type, you hit Start and let it roll.
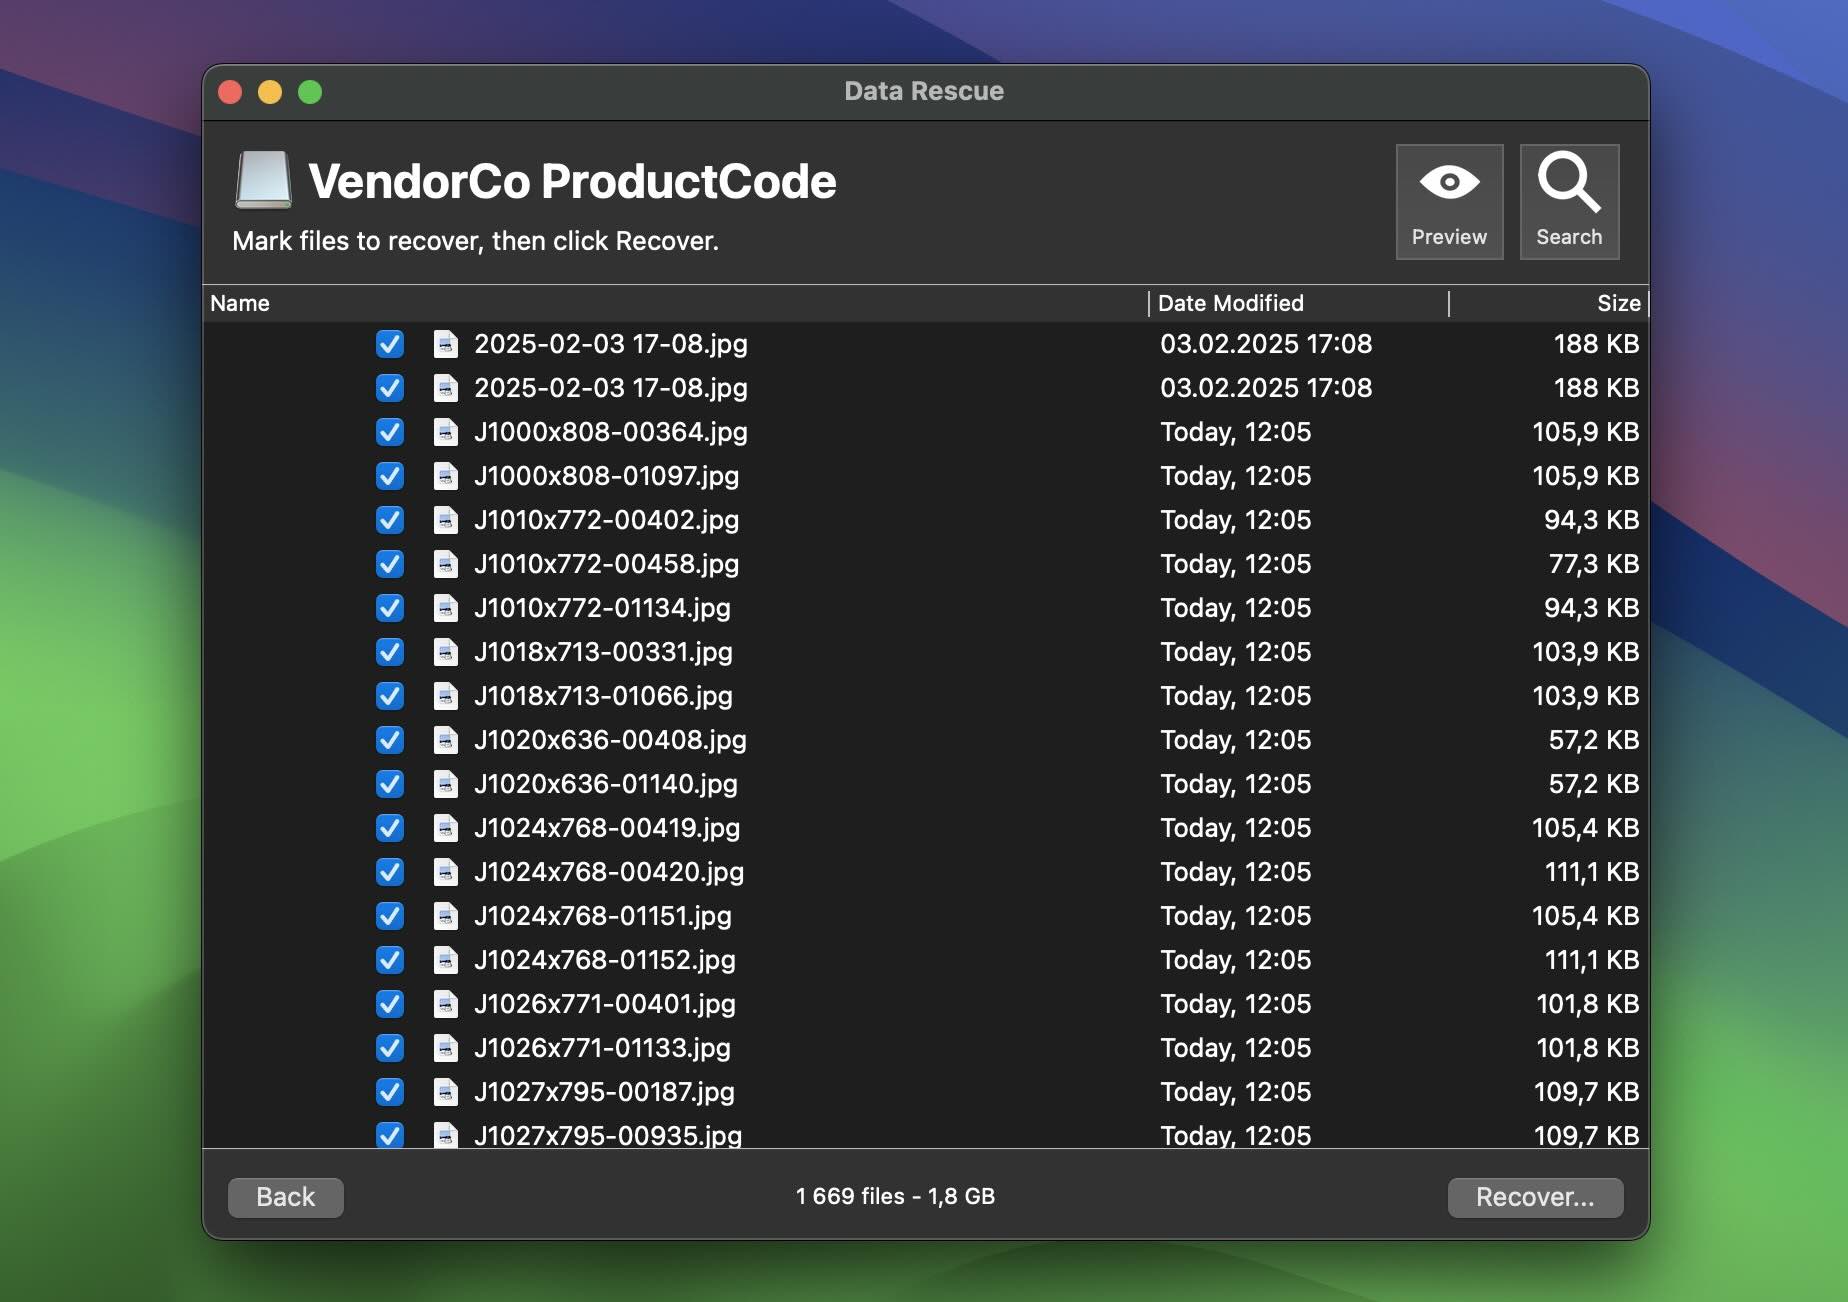
- When the scan finishes, you’ll see a file tree showing what Data Rescue found. And yeah… the interface here is bare. No thumbnails. No recovery percentage indicators. No file quality scores. Just a long list in a static view.
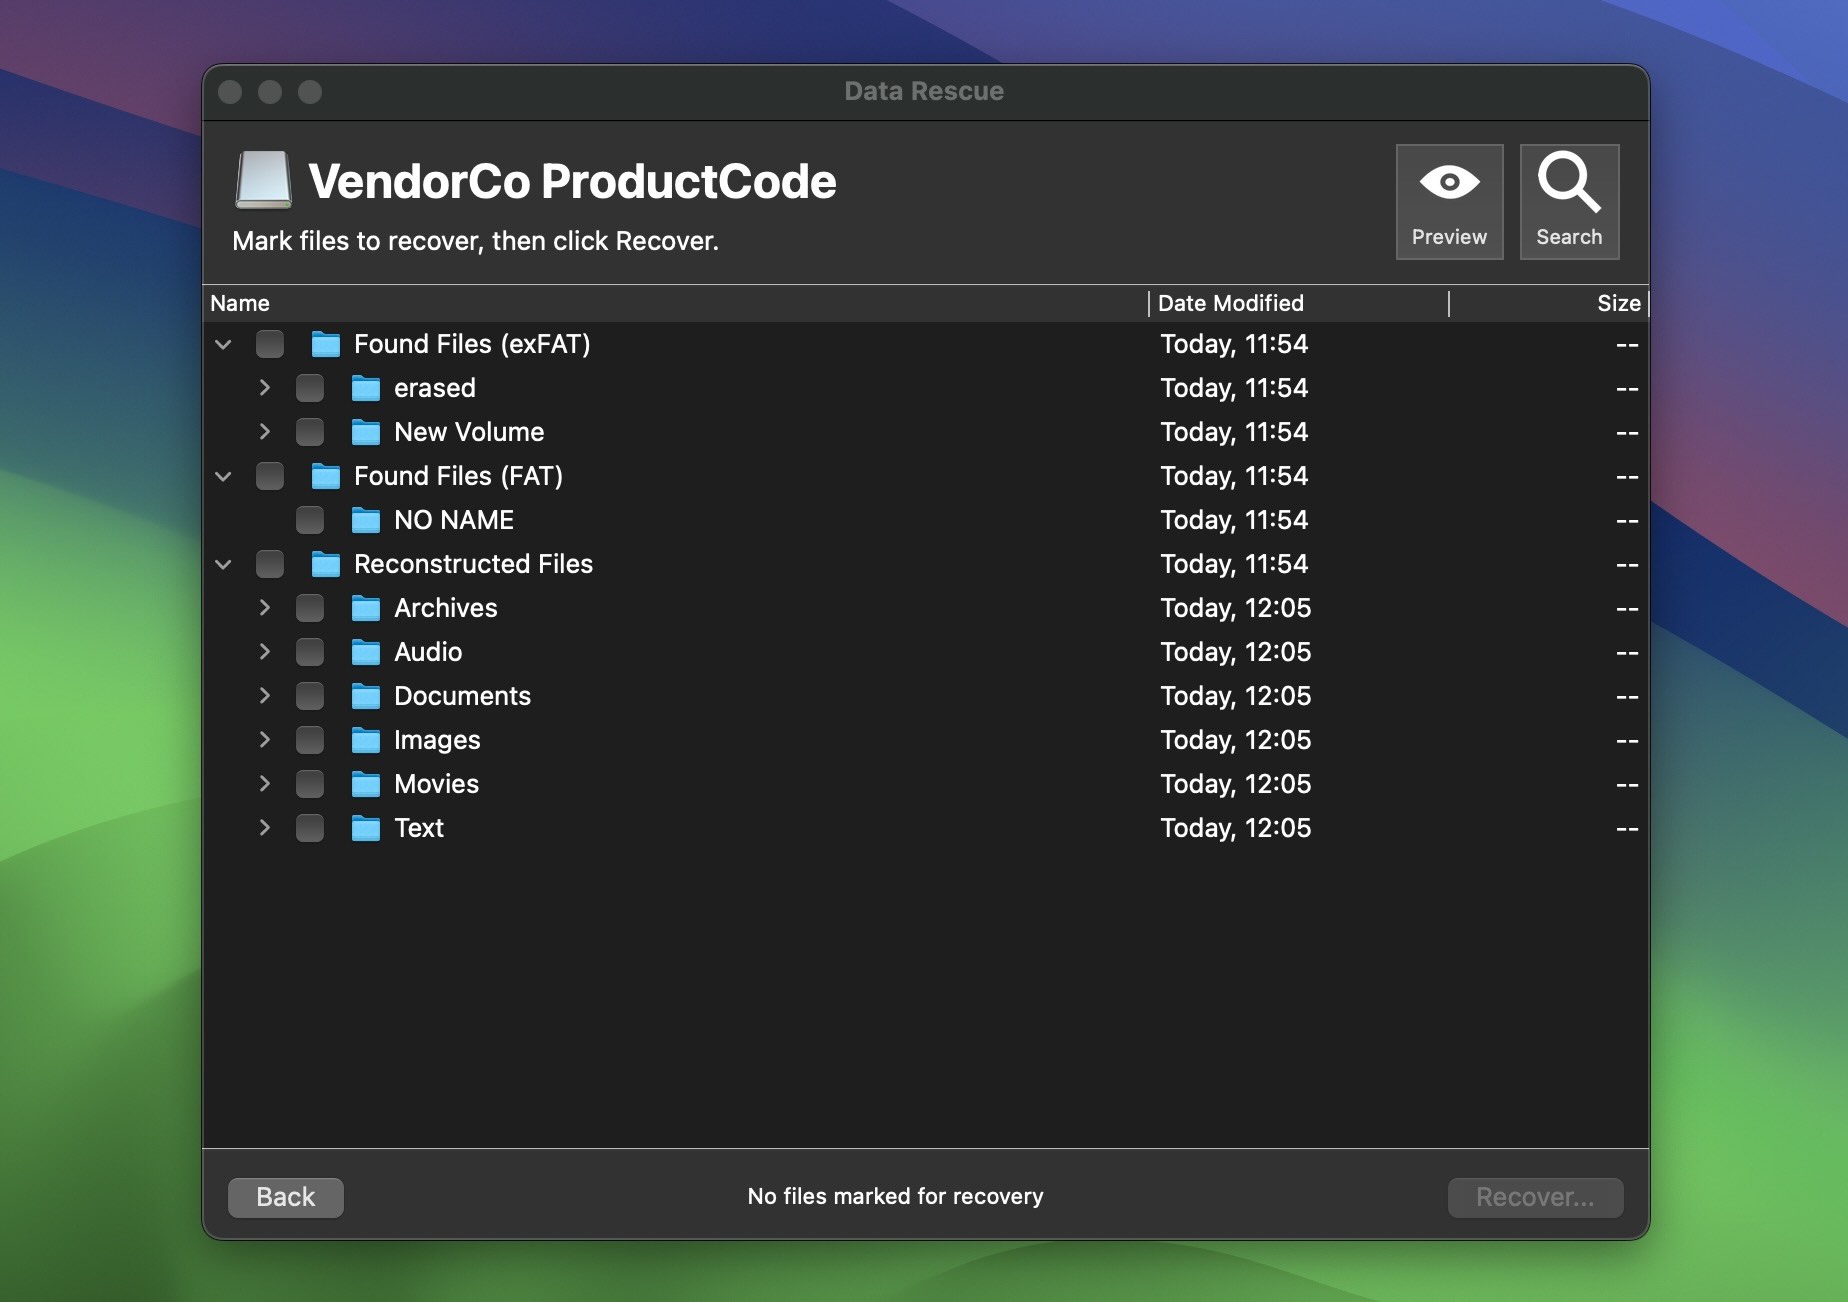 If you want to preview something, you have to click each file and hit the Preview button manually.
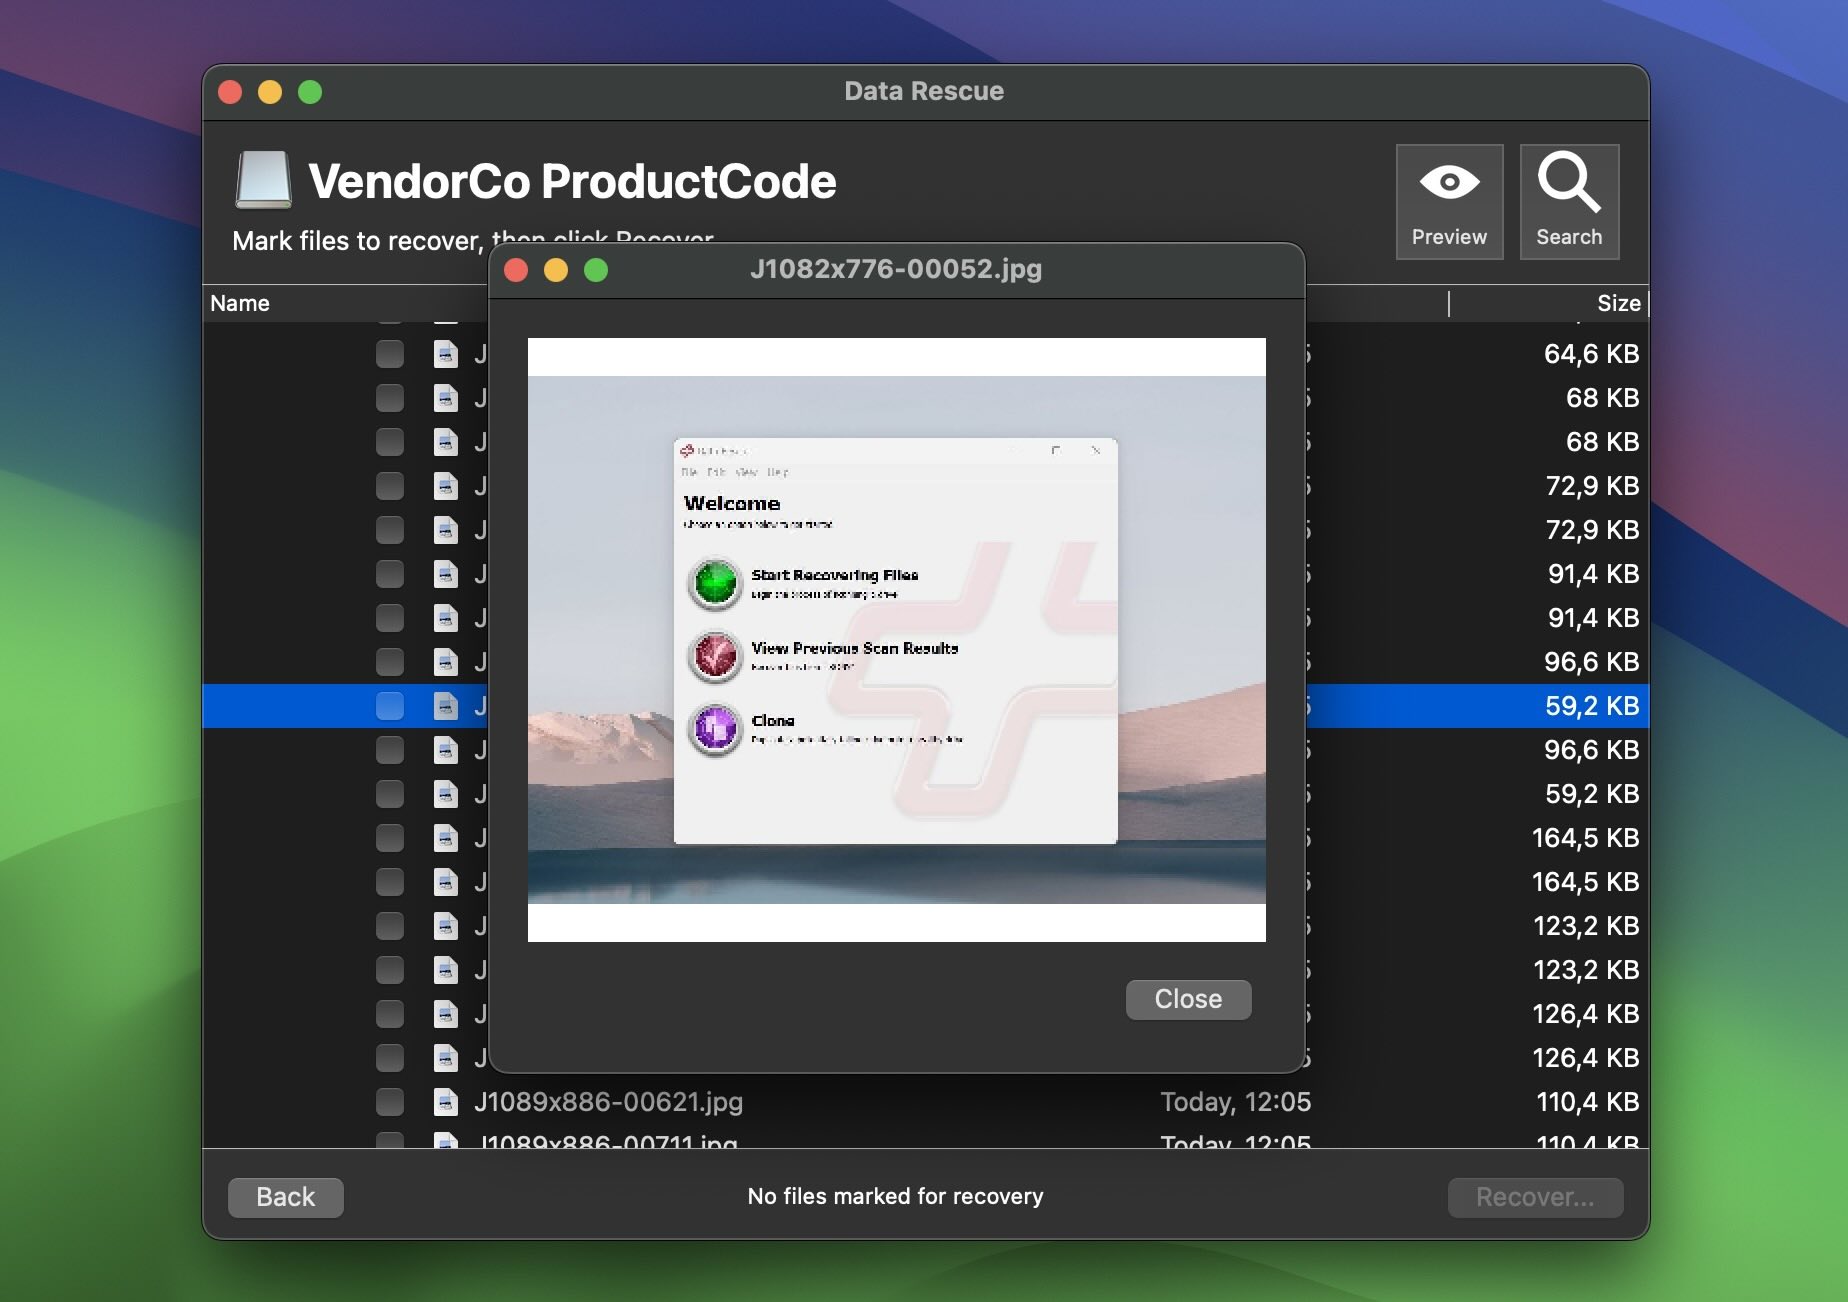 There is a Search tool (in the screenshot below), and it lets you filter by name, extension, file size, or date modified. It’s functional – especially if you know exactly what you’re trying to recover. That said, this is old-school file browsing, plain and simple, so don’t expect any smart sorting, visual previews, or one-click “find my photos” type of features.
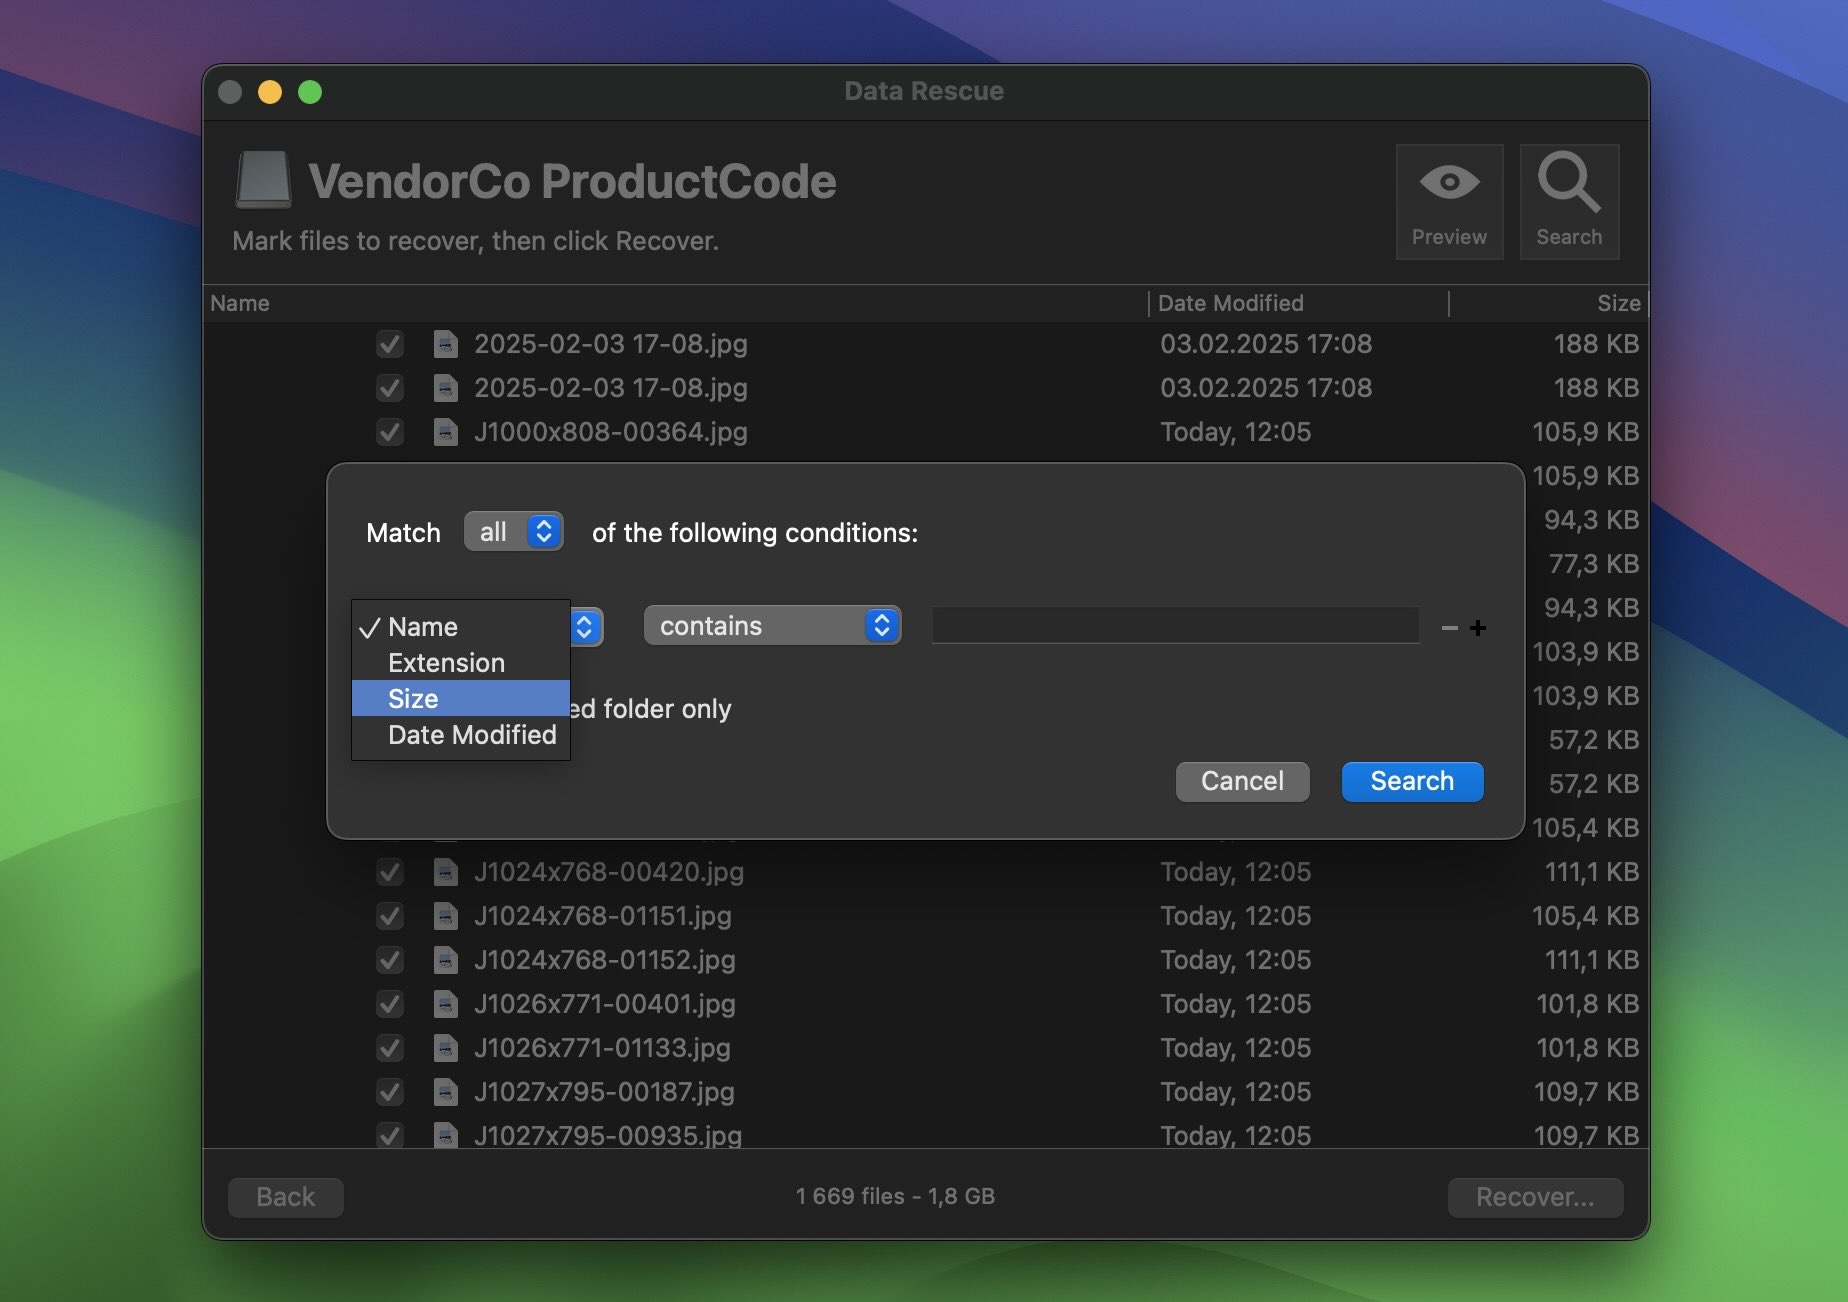
- To actually recover your files, you just select what you want and click Recover. Keep in mind, the free trial version only lets you recover up to 1 GB, and that’s for new users only. Anything more than that, and you’re looking at a paid license.
To sum up: while everything in Data Rescue 6 is pretty straightforward, don’t expect much hand-holding – or advanced control either. It’s not R-Studio, which practically drowns you in technical data and parameters. But it’s also nowhere near as polished or intuitive as tools like EaseUS or Disk Drill when it comes to guiding you through the recovery process.
In fact, while R-Studio can overwhelm you with options, Data Rescue leans too far in the other direction. It gives you barely any info about your connected drives. So if you’ve got multiple partitions or similarly named disks, it can be tough to tell which one’s which. And if you’re new to all of this? That vagueness doesn’t help. It makes the situation harder than it needs to be.
There is a session manager, but it’s oddly limited. You can only save up to 15 scan sessions, and if you hit that cap, the software won’t let you start a new one until you delete all the old ones. Worse, the saved sessions don’t include much detail – no drive names, no scan type info – so picking up where you left off isn’t always smooth.
All in all, the recovery process works… but it could use a lot more clarity, flexibility, and modern UX thinking.
Recovery Results
First, let’s talk about the scan modes we mentioned earlier – Quick Scan and Deep Scan.
For our first scenario – recently deleted files – we went with a Quick Scan, because… well, that’s what it’s designed for. The scan was lightning-fast. Two seconds. It pretty much skimmed the drive’s existing file table, spotted what was recently trashed, and wrapped up instantly.
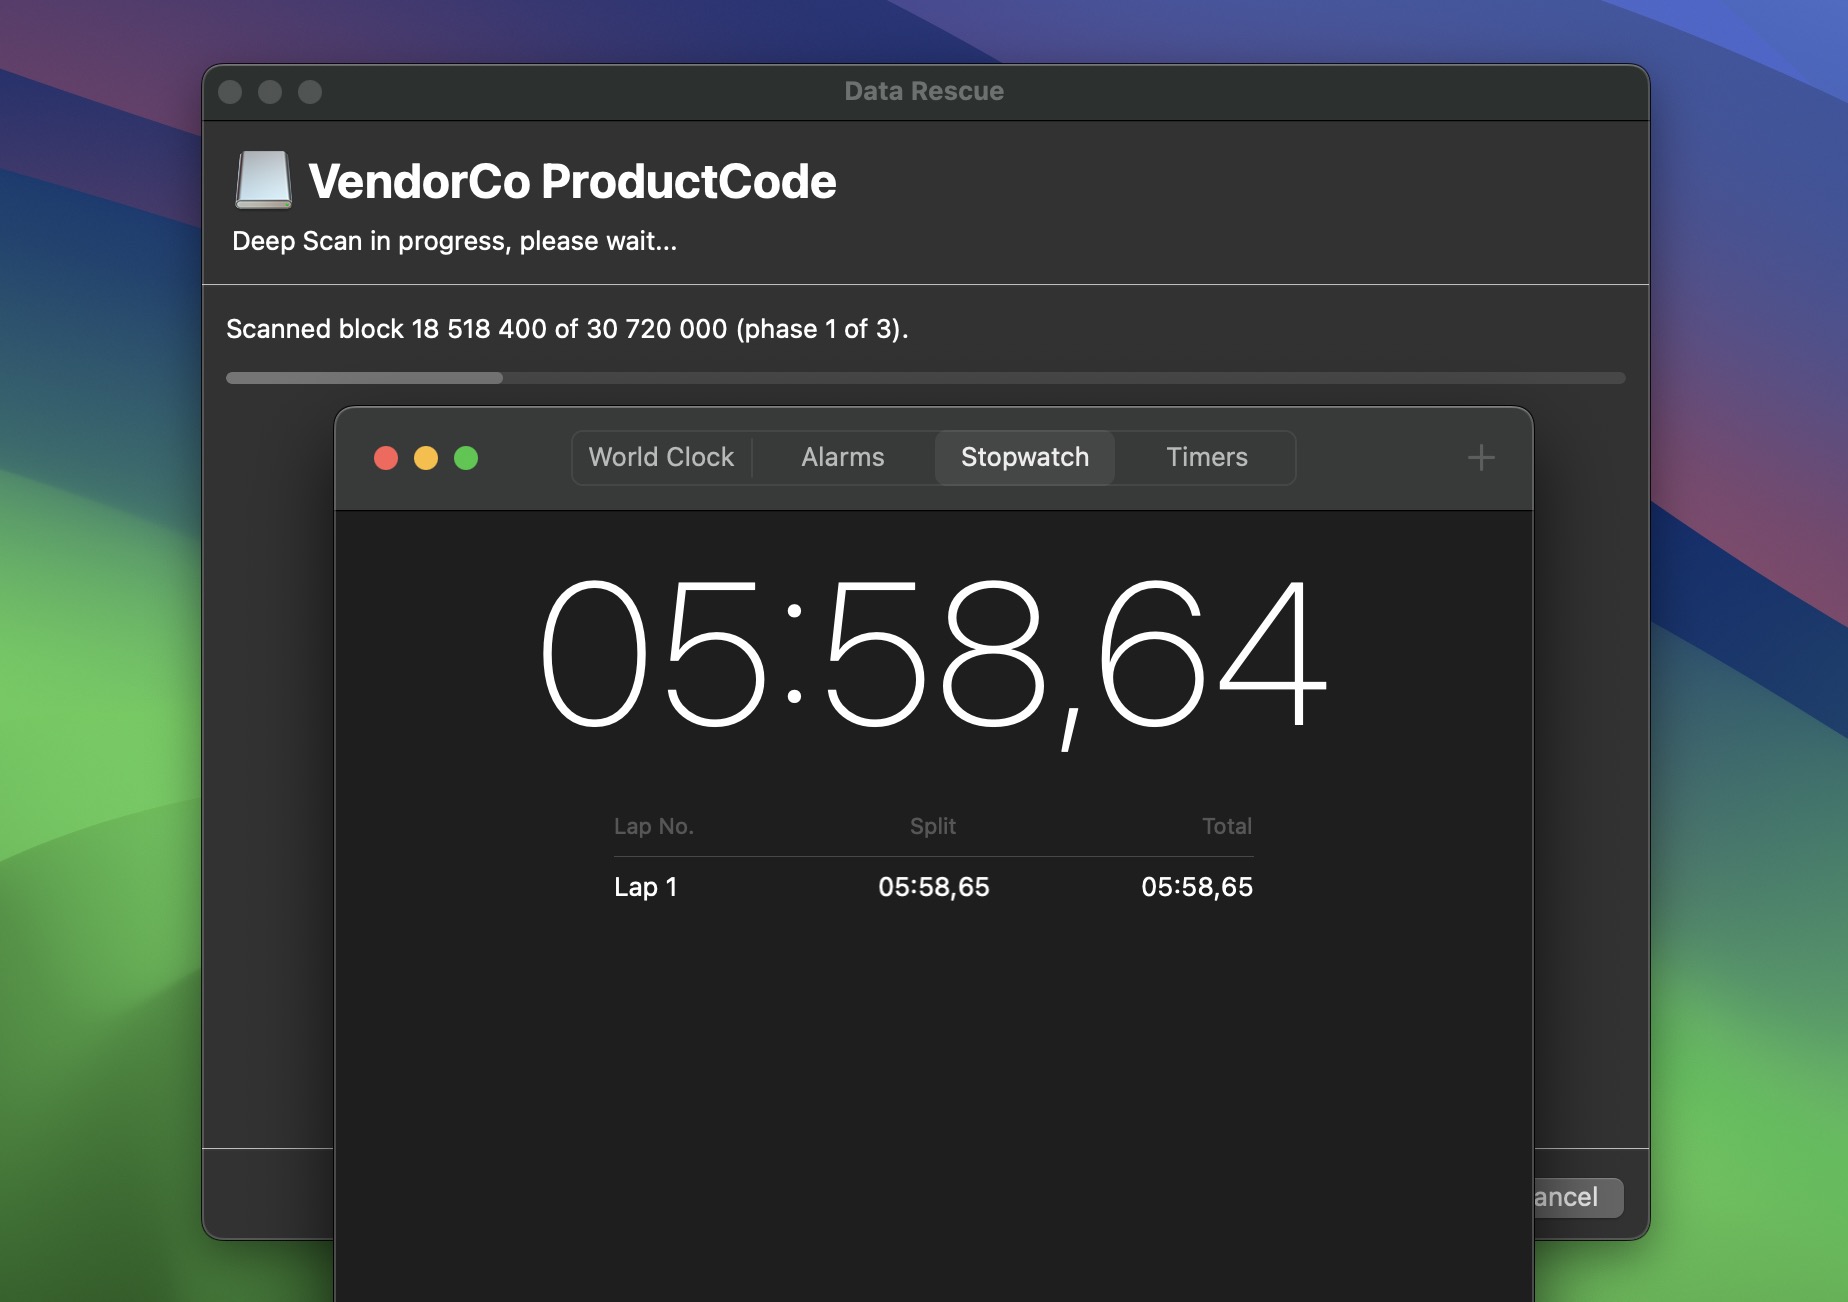
For the next two scenarios – formatted drive and corrupted partition – we switched to Deep Scan. That one took considerably longer (about 11 minutes for our 16 GB flash drive). To be clear, Data Rescue doesn’t display any kind of progress estimate. No percentage. No time remaining. Nothing. So we pulled out the classic macOS stopwatch to time it ourselves. Not exactly cutting-edge UX.
While it’s not the fastest tool we’ve tested, it’s also not the slowest. For a deep scan, it was somewhere in the middle – not painful, but not zippy either.
As for what was actually recovered, the best results came from the recently deleted files scenario. Not perfect, but close – we recovered about 1,950 out of 2,000 files. A few files were oddly missing, which was a bit unexpected given how fresh the deletion was, but overall, it was solid.
For the two more complex cases – formatted drive and corrupted partition – the results were nearly identical: 1,669 files recovered out of the same original 2,000. Not bad, but there’s clearly a limit to what the software can do when things get messy.
In terms of file types, document recovery was impressive. Formats like PAGES, NUMBERS, and KEY, XLS/XLSX, PDF, DOC/DOCX came back almost fully intact. So if you’re trying to get back important work or school files, you’re probably in good shape.
It also did well with common video formats – MP4, MOV, AVI – but not all of them. Some MOV files (the CineForm HD codec) didn’t make it, which is worth noting if you work with pro video.
Where it struggled most was RAW images. Simple formats like JPG and PNG came through without issue, but it didn’t do well with more complex RAW files like ARW, CR2, or CRW. If you’re a photographer shooting in RAW, this probably isn’t the recovery tool for you.
So yeah – good for general media and office files, not so much for pro workflows or obscure formats.
We’ll go ahead and call it 4 stars for recovery. It’s not a confident 4, but giving it a 3 feels a little too harsh considering the actual results. The process itself is desperately outdated – no scan time estimates, no recovery previews worth mentioning, and a UI that clearly needs a modern rebuild. But the results? Not too bad. And ultimately, that’s what counts most.
Data Rescue Pricing Comparison
We already mentioned that Data Rescue 6 gives you a free trial – and to be fair, it’s not the worst. You can scan your drive and recover up to 1 GB of data, as long as you’re a new user. But what happens when that limit runs out?
Let’s take a look at the actual options you get once the trial ends. There are three tiers:
- Standard License – $79. This gets you full access to the software for 30 days, with unlimited recovery during that time.
- Professional License – $399/year. This one’s built for IT pros or people constantly rescuing drives. You get unlimited recoveries, unlimited system activations, and access to all features including Professional Mode.
- Pay-per-file – starts at $19. Yep, you can unlock individual files if you only need one thing back.
As you can see, Prosoft Data Rescue relies entirely on a subscription model. Whether it’s the $79 short-term access or the full-blown $399/year pro license, there’s no lifetime option. And honestly? That doesn’t do it any favors in our book.
But before we pass any judgment, let’s quickly compare it to a few popular Data Rescue alternatives. We picked tools we’ve reviewed and tested ourselves: Disk Drill, R-Studio, and EaseUS Data Recovery Wizard.
| Software | Free Trial | One-Time License | Subscription Option | OS Support | File System Support | UI | Features |
| Data Rescue 6 | Up to 1 GB (new users only) | ❌ | ✅ $79 (30 days), $399/year (Pro) | macOS, Windows | NTFS, FAT/FAT32, exFAT, HFS+, APFS, ext2/3 | Outdated; basic file tree only | FileIQ, cloning, bootable drive (Mac), RAID 0/JBOD |
| Disk Drill | Up to 500 MB (Windows) | ✅ $89 lifetime (one-for-two licence) | ❌ | macOS, Windows | FAT32, exFAT, NTFS, APFS/HFS+, ReFS and EXT4 | Modern, clean, user-friendly | Disk health monitoring, file preview, RAID support, backup tools, cleaning tool, macOS installer (Mac version) |
| R-Studio | Lets you recover files smaller than 256 KB | ✅ Starts at $63.99 (per OS) | ❌ | macOS, Windows, Linux | NTFS, NTFS5, ReFS, FAT12/16/32, exFAT, HFS/HFS+ and APFS | Complex, data-heavy UI | RAID reconstruction, network recovery, hex editor |
| EaseUS Data Recovery Wizard | Up to 2 GB | ✅ $149.95 lifetime (per OS) | ✅ $69.95/month, $99.95/year |
macOS, Windows | FAT32, ExFAT, NTFS, NTFS5, EXT2/EXT3 HFS+ ReFS | Polished and easy to use | Emergency boot media |
If you look at the pricing options of competing data recovery tools, it’s hard not to feel like Data Rescue 6 can’t really hold its own. The $79 for 30 days might sound manageable at first – until you realize you can subscribe to EaseUS for $69.95/month instead, and get a more modern interface and better preview tools for cheaper.
Lifetime options makes the gap even more obvious. Disk Drill offers a lifetime license for $89 – only $10 more than Data Rescue’s one-month pass. And it comes with loads of extra features like disk health monitoring, duplicate cleanup tools, and a more intuitive interface. Then there’s R-Studio, which starts at $63.99 for a permanent license, and delivers way more power under the hood – advanced RAID, forensic-level scanning, capabilities that far exceeds what Data Rescue 6 provides.
So when you compare capabilities and pricing side by side, Data Rescue’s model starts to look seriously out of touch. That $399/year Pro license? It’s the kind of price you’d expect for a professional-grade toolkit… not a product that has no file repair or modern UI in sight. For home users especially, it’s a hard one to justify.
We’re giving it a 3 – and honestly, that’s as high as we can go. The pricing is simply too steep for what it offers, especially with no lifetime license and subscriptions being the only option.
Compared to what other tools deliver for less – or even as a one-time purchase – it’s hard to call this a good deal.
What Users Think About Data Rescue 6
And the final score we’ll take into account here is user feedback.
We ran through Reddit threads, review sites, and tech forums to get a feel for how regular users experience Data Rescue 6. And here’s what we saw.
💬 Some folks appreciated its free trial. One reviewer on G2 summed it up well:
“Capable, affordable option to try first. You can run the tool for a free preview of what it is able to recover, and the first 1GB of recovered data is free of charge.”
💬 Many others were frustrated by how limited the trial really feels. Seb Nachname on Trustpilot noted:
“Open source file recovery? No… you spend the time to scan your drive just to learn that you have to pay to recover them.”
💬 Another user, Konstantin, had a bigger issue with version control and licensing:
“When you buy their software and they update it to a newer version, your old one stops working and they ask you for an upgrade. Literally unheard of! I have 10 year old software that still works… their Data Rescue software just stops working.”
💬 And on Softonic, one user shared a particularly rough experience:
“Didn’t work for me, no data recovered. Couldn’t delete. Couldn’t shut down my computer. I don’t recommend this program to anyone who is looking to buy it.”
User feedback, when it comes to actual data recovery, is generally good. People who’ve used Data Rescue for years still trust it to pull back deleted files, and for basic jobs, it delivers.
We’ll call it a soft 4, mostly carried by longtime users and the fact that it still gets the core job done – especially on Mac.
But we’ve also seen a noticeable amount of negative feedback, and it leans heavily toward the pricing model, forced upgrade path, and the lack of lifetime licensing. That is understandable. When you’re already dealing with lost files, the last thing you want is to hit a wall with subscriptions, expired licenses, or paywalls right after scanning. Licensing is definitely something the developer should look to improve.
Final Verdict
OK, it’s time to put a bow on it.
Let’s look at every score we gave it throughout this review:
- ⭐ Features: 4/5. It checks off the basics, and extras like FileIQ and cloning are nice touches. But it’s missing more advanced utilities found in other tools.
- ⭐ Recovery Performance: 4/5. Solid results for deleted files and common formats. It struggled with RAW images and some pro videos, but overall recovery was better than average for standard use cases.
- ⭐ Pricing: 3/5. No lifetime license. Subscription-only. Expensive compared to more capable tools. The value just isn’t there.
- ⭐ User Feedback: 4/5. Veterans still trust it for basic recovery, especially on Mac. But complaints about pricing, forced upgrades, and limited usability are piling up.
Data Rescue 6 works – but it’s not keeping up. If you have a specific, straightforward recovery need Data Rescue PC or Mac can still get the job done. But for most users, especially in 2025, there are smarter, faster, and more affordable alternatives that offer more features, better performance, and a far better user experience.
Data Rescue 6 feels like it’s coasting on its legacy reputation. But you can’t do that forever. The time for a major update has come – and honestly, it was yesterday. In a space where recovery tools are evolving fast, sticking to the basics isn’t enough anymore. If Prosoft wants to stay relevant, it’s going to need more than minor version bumps and subscription tweaks. It needs a modern UI, smarter recovery tools, and pricing that actually fits the everyday user.