Our PhotoRec review looks at four areas that matter most in recovery software: features, recovery performance, user feedback, and overall value. We scored each category from 1 (poor) to 5 (excellent), then averaged the results for a final verdict.
📌 Here’s our brief summary:
If you’re looking for a 100% free way to recover lost files, PhotoRec is absolutely worth a look. Just be ready for the trade-offs that come with an open-source tool built around one recovery method: signature scanning.
In our tests, PhotoRec did basically what it promised. It recovered files when the file system was corrupted (or missing altogether). But it is what it is: it won’t preserve original filenames or folder structures, and its interface, even in the “graphical” QPhotoRec version, will turn away many potential users.
If you’re okay with those sacrifices, PhotoRec can be a useful tool to keep around. If not, there is a whole range of better options that offer previews, cleaner scan results, and a much smoother workflow.
| 👍 Strengths | 👎 Weaknesses |
|---|---|
|
|
🔎 Why You Can Trust Us:
Every app review is the result of a hands-on, multi-step process run by team experts. Our QA specialists run recovery tests on real drives. Then, lab engineers verify the results to make sure every text is accurate. Experienced technical editors present the results in a clear, reader‑friendly format.
What Is PhotoRec?
PhotoRec is a free and open-source file recovery tool developed by Christophe Grenier – the same developer behind TestDisk, which we reviewed separately. As we explained in that review, TestDisk focuses on partition repair and structural recovery. PhotoRec, on the other hand, covers the other side of the equation: actual file recovery.
The two tools are often mentioned together as TestDisk & PhotoRec, but while TestDisk helps you restore partition tables and boot sectors, PhotoRec can recover lost files directly – photos, videos, documents, and more.
| Key Feature | Details |
| 💻 Available Platforms | Windows (9x–11/Server), macOS, Linux, BSD, Solaris, DOS |
| 💸 Free Version | Yes, 100% free and open-source (GPL v2+) |
| 📚 Supported File Types | Over 480 file extensions across ~300 file families |
| 🧠 File System Support | Ignores file system |
| 🗄️ NAS/RAID support | No built-in support for RAID or NAS volume structures |
| 💿 Disk image creation/scanning | No disk imaging capabilities |
| 🧰 Recovery Method | Block/cluster scanning with file signature matching |
OS Compatibility
One of the great things about PhotoRec is how widely it runs. It supports:
- Windows (XP through 11, plus Windows Server versions)
- macOS (Intel and Apple Silicon)
- Linux (most distros)
- FreeBSD, NetBSD, OpenBSD
- SunOS and even DOS
Is PhotoRec free on all OSs? Absolutely. It’s an open-source project through and through. Whether you’re on Windows, macOS, or Linux, you get full access to everything it offers. And yes, that includes PhotoRec for Mac.
PhotoRec also often comes (bundled with TestDisk) on Live CDs (like GParted or SystemRescue). That means you can boot straight into a recovery environment without touching your internal drive. Super useful if your system won’t boot or you want to play it extra safe.
Ease of Use
Ease of use is where PhotoRec shows its age. This is not a modern recovery app with a dashboard, visual scan results, or a friendly “next-next-finish” workflow. It runs in a terminal-style interface, and you control everything with the keyboard: arrow keys, Enter, and basic menu prompts.
That doesn’t mean PhotoRec is impossible to use. The workflow is fairly logical once you understand it: choose the disk, select the partition (or whole device), pick the file system type, choose where recovered files should be saved, and start the scan.
But it is still intimidating for beginners. There are no previews, no visual file tree, no recovery chances, no easy way to understand what the scan is finding while it runs. PhotoRec simply recovers everything it recognizes and saves the results into folders with generic file names. You only get to sort through the files after the scan finishes.
QPhotoRec vs PhotoRec
There’s also QPhotoRec, a GUI version that Windows users can run instead of the classic terminal-based PhotoRec. It uses the same recovery engine under the hood, so the actual recovery logic is the same. The main difference is how you interact with it. PhotoRec gives you a keyboard-driven terminal menu, while QPhotoRec gives you a simple window with dropdowns, buttons, and file-type options.
You’ll find it in the same archive as the main photorec.exe file, there’s nothing extra to install or download separately.
ℹ️ What is qPhotorec? QPhotoRec should not be confused with a separate recovery app. It is merely a graphical “wrapper” for PhotoRec, which means it uses the same Photorec under the hood. Don’t expect it to find files that the main utility missed – the recovery method and results will be the same.
The difference is convenience. QPhotoRec gives Windows users a graphical window instead of keyboard-driven terminal menus. That is it.
File Format & File System Support
Unlike many PhotoRec alternatives, this data recovery tool relies entirely on signature scanning. That means it doesn’t take the file system into account at all – so listing supported file systems doesn’t really apply here. Whether your drive is formatted as FAT32, exFAT, NTFS, ext4, or something more exotic – it doesn’t matter.
What does matter is whether PhotoRec recognizes the file type you’re trying to get back. Since it’s scanning raw data for known file signatures, recovery depends on that recognition. If your file has a unique header and it’s included in PhotoRec’s library, it’s got a solid chance of coming back.
PhotoRec can recover more than 480 file extensions from 300+ file families, including office documents, archives, video, RAW camera, and audio formats. You can check out the full list of supported file types here.
Storage Devices & Data Loss Scenarios
On its official page, PhotoRec positions itself primarily as a recovery tool for photo devices and media storage. Think memory cards, USB flash drives, and camera storage – it was literally built with that use case in mind.
The developer even lists a bunch of tested devices – so if you’ve got an old Canon EOS 60D, Nikon CoolPix 950, or Olympus Stylus 300 lying around with a corrupted card, there’s a solid chance PhotoRec can help.
Keep in mind, you can use PhotoRec on more than just camera cards. It also works with hard drives, SSDs, USB flash drives, and other storage devices. Keep expectations realistic, though: PhotoRec recovers files through signature scanning, so you won’t get original filenames or folder structure back – just raw files dumped into a folder. So if you’re trying to recover hundreds or thousands of files, it can get messy fast. But when the file system is gone or totally corrupted? This kind of blind, deep scan might be exactly what you need.
Extra Features
This one’s easy to cover – because there are no extra features. PhotoRec neither performs disk imaging nor examines SMART data, and it lacks backup tools and file previews. Just you and the terminal window.
In terms of features, we can’t score it higher than 3 – and that’s generous.
PhotoRec scores points for its wide OS support – you can run it on almost anything. It also recognizes 480+ file types, which is solid.
But that’s where the list ends.
No disk imaging. No RAID support. No file previews or metadata recovery. 3 out of 5 is fair.
How to Recover Data Using PhotoRec
Now that we’ve covered what PhotoRec is and what it’s supposed to do, let’s talk about what it actually did in our hands-on test.
We divided this section into three parts: Testing Process, Installation & Scanning, and Recovery Results. If you’re short on time and just want to see how it performed, here’s a quick summary:
| Test Case | Deleted Files / Formatted Drive / Corrupted Drive |
| Scanning Speed | 14 min |
| Total Data Recovered | ~1 GB |
| Documents Recovered | 500+ |
| Photos Recovered | 450+ |
| Videos Recovered | 25+ |
Testing Process
For our tests – since this is a full-fledged data recovery tool (as much as it can be) – we used the same methodology we’ve applied to many others. That means we ran PhotoRec through three real-world scenarios:
- Deleted files
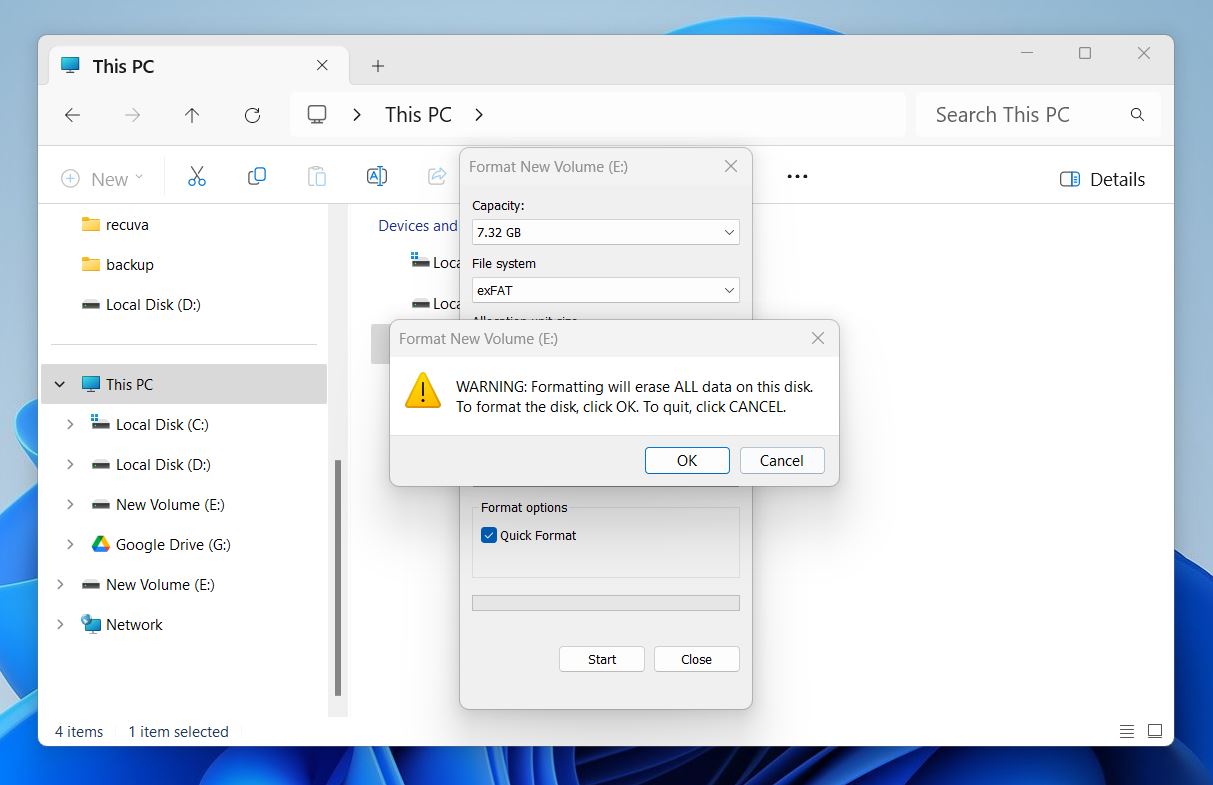
- A quick-formatted USB stick
- A corrupted partition table (RAW/unreadable drive)
We didn’t try to overcomplicate things. These are the kinds of situations real users actually face, and we wanted to see how PhotoRec handles them without any extra tweaking or ideal conditions.
- For the deleted files test, we just shift-deleted the content.
- For the formatted drive, we ran a quick format – not a full wipe.
- And for the corruption scenario, we modified the partition table slightly with HxD, rendering the drive unreadable (appeared as RAW).
Here’s our test setup:
- OS: Windows 11 Pro (latest build)
- Machine: MacBook Air M1 via Parallels (for fun)
- RAM: 16 GB
- Storage: Internal 512GB SSD
- Test Device: Kingston DataTraveler 16GB USB 3.0
- Test Files: About 1.3 GB worth of mixed formats – Office docs, PDFs, JPEGs, MP3s, MP4s, and a few RAWs (NEF, CRW, CR2, ORF, etc.)
Installation & Scanning
We ran our test on a Windows machine using QPhotoRec – the version with a graphical interface. It’s a bit more beginner-friendly than the command-line-only PhotoRec, which is why we went with it for most of our scans.
On a Mac the process is slightly different. As we explained, there’s no QPhotoRec for Mac, so install and run PhotoRec in Terminal – easiest via Homebrew. Here’s how:
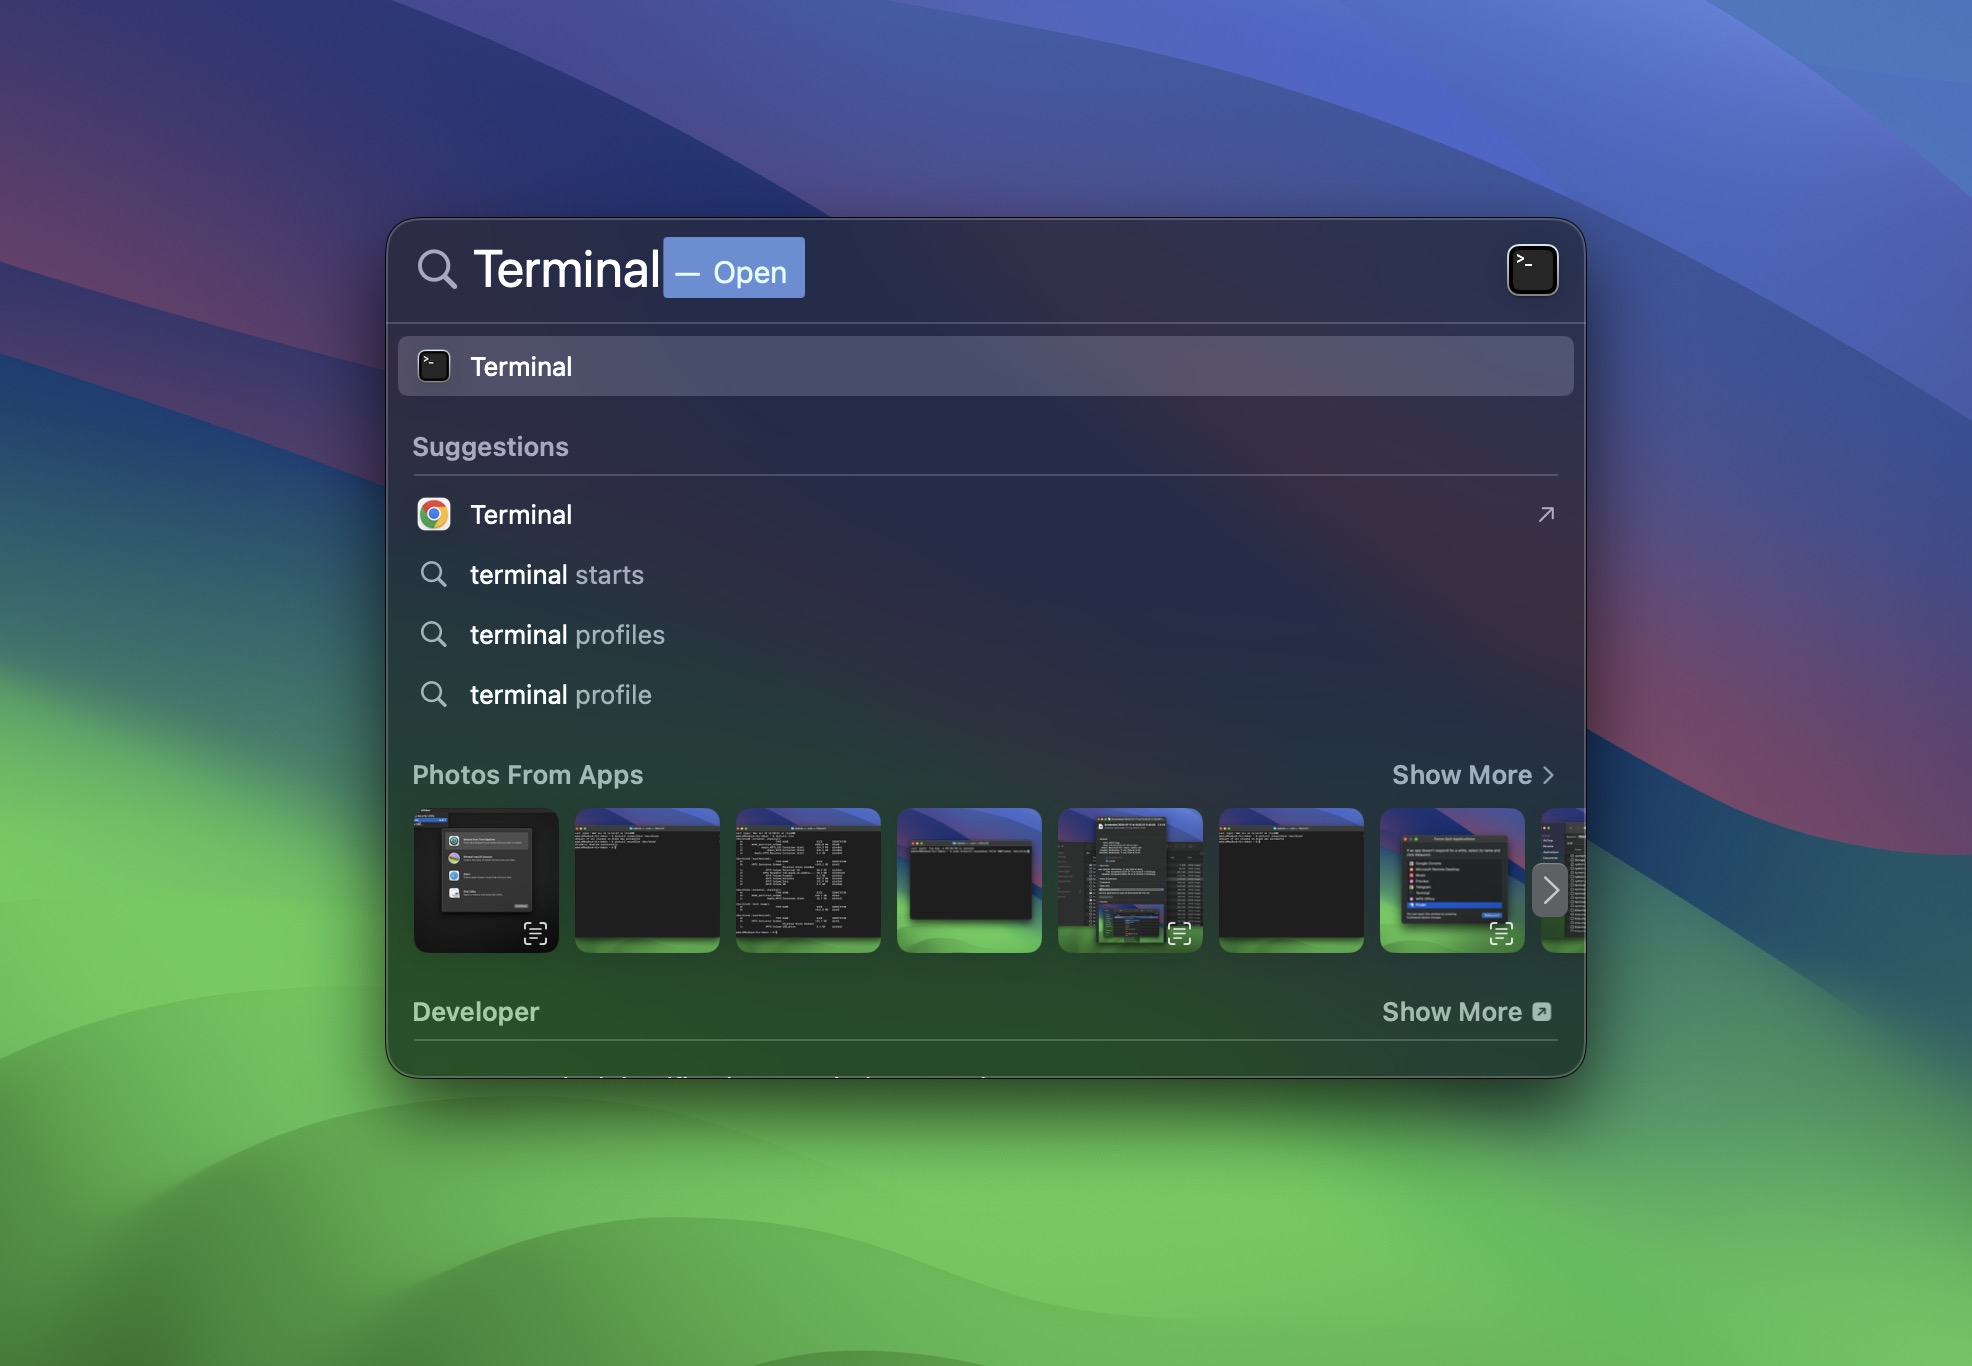
- Open Terminal. You’ll find it in Applications > Utilities, or just hit Cmd + Space, type “Terminal,” and press Enter.
- If you don’t have Homebrew installed (and you’ll know because typing brew gives you a “not found” error), paste this command and hit Enter:
/bin/bash -c "$(curl -fsSL https://raw.githubusercontent.com/Homebrew/install/HEAD/install.sh)" - Follow the prompts. It’ll take a few minutes. Once Homebrew is ready, type this to install PhotoRec (it comes bundled with TestDisk):
brew install testdisk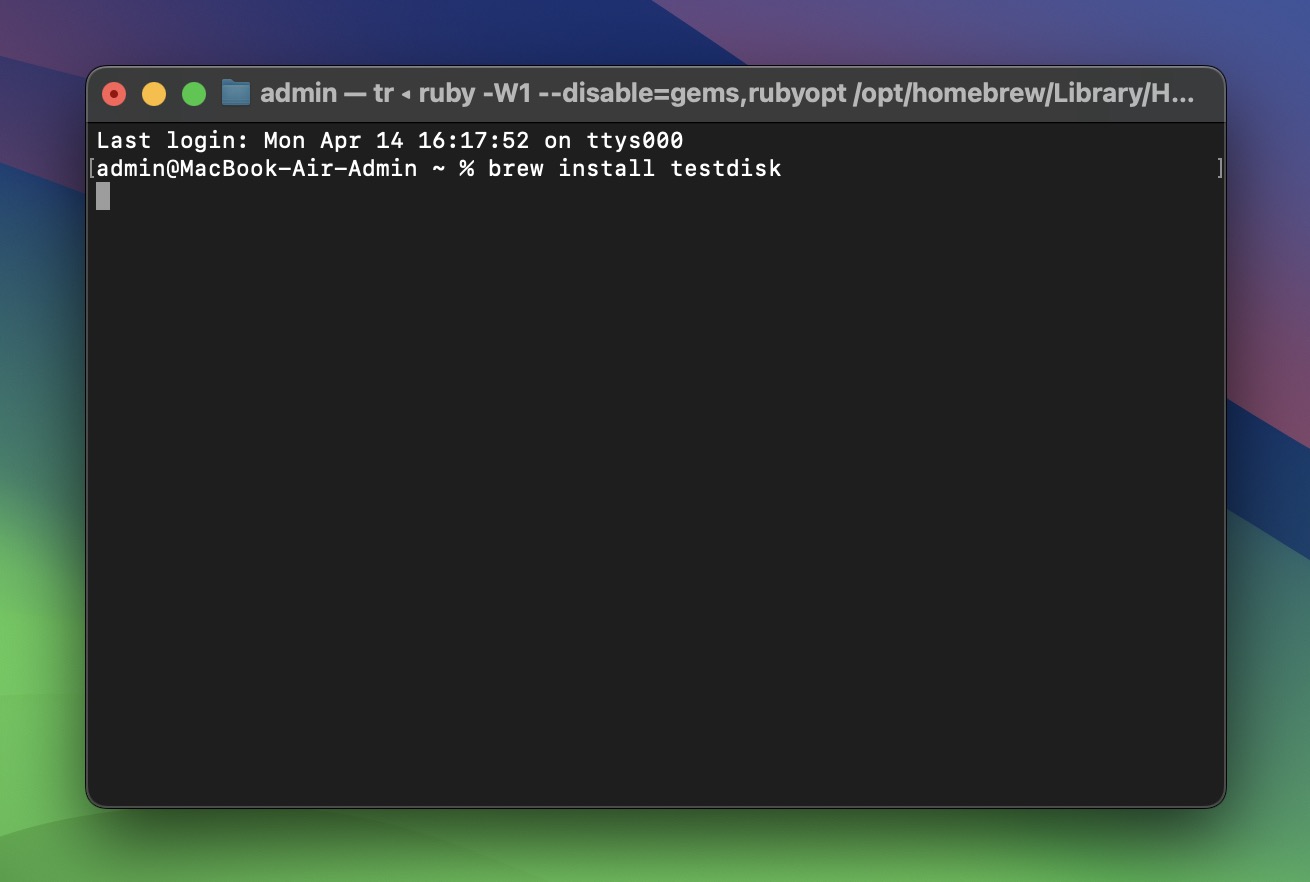
- To launch PhotoRec type:
sudo photorec - And hit Enter. You’ll be dropped into a keyboard-only recovery interface – just good old arrow keys.
Or you can just grab the latest stable version as a standalone archive – TestDisk & PhotoRec 7.2 (Feb 22 2024) – straight from the official site. That’s what we did for our Windows test. Just download, unzip it somewhere safe, and you’re good to go.
On Windows, you can run both photorec (command-line) and qphotorec (the GUI version). We used qPhotoRec for our tests and, we’ll walk you through how to use it. (If you’re on macOS, we also show how to run PhotoRec from Terminal after it.)
Here’s how the recovery process looked for us using qPhotoRec, step by step:
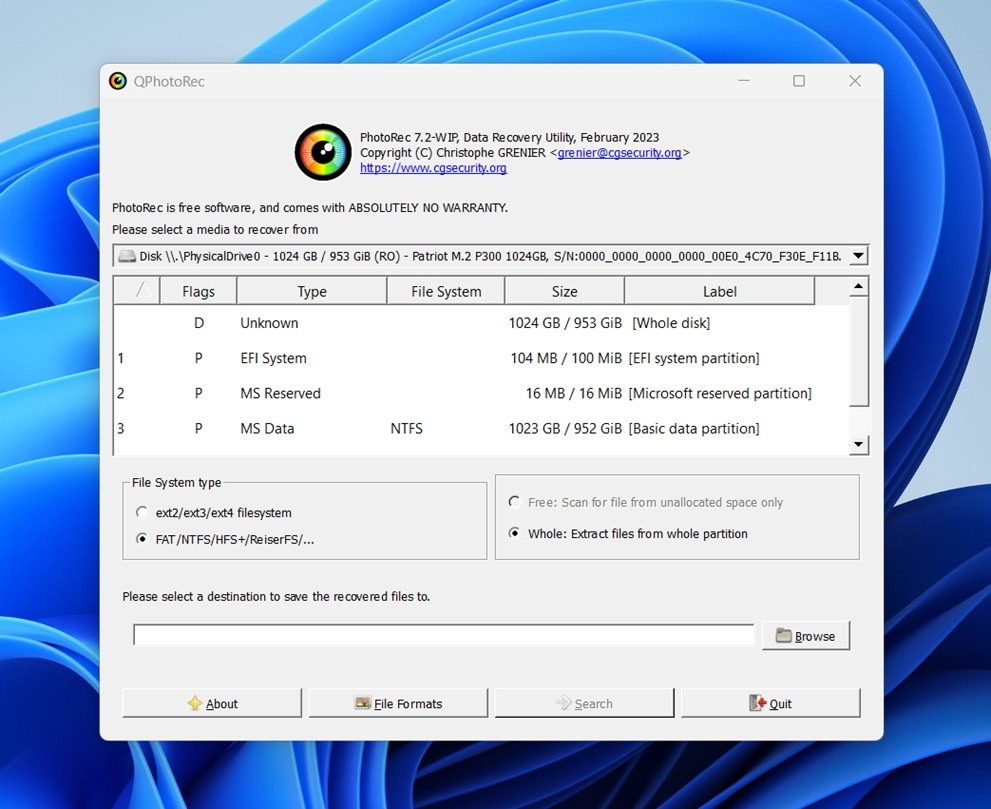
- We launched qPhotoRec and picked our test USB drive from the dropdown menu at the top.
- Next, we chose “Whole: Extract files from whole partition” instead of scanning just unallocated space. We wanted to catch everything, including any fragmented files that might still be lingering.

- Under “File system type,” we left the default setting as “FAT/NTFS/HFS+/ReiserFS…” since that matched our setup.
- Then, we hit Browse to select a folder on our main drive. Not the USB! This is standard practice: you should never save recovered files to the same drive you’re scanning. If possible, use a completely different drive. Otherwise, you risk overwriting the very files you’re trying to get back.
- Finally, we clicked Search, sat back, and watched qPhotoRec do its thing.
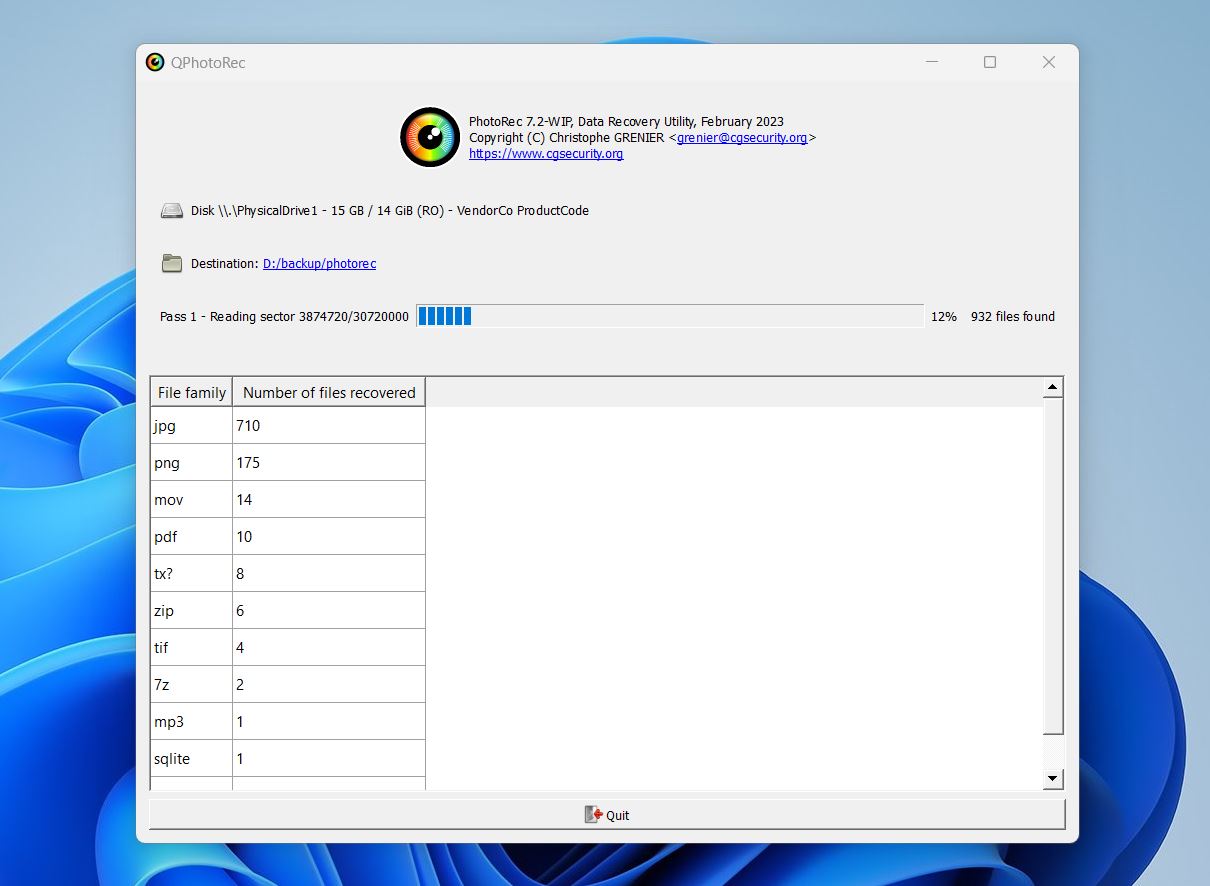
As you can see – absolutely barebones. You can basically select your drive, set a destination, click Search, and… wait. That’s it. You can’t preview files. You can’t filter by type, date, or size. The UI offers little improvement over the CLI; it mostly replaces keystrokes with buttons.
Now, speaking of the CLI version – if you’re on a Mac, this is what you’ll be working with. Let’s take a look at how it works in the terminal:
- Type
sudo photorecin Terminal, enter your password, and hit enter.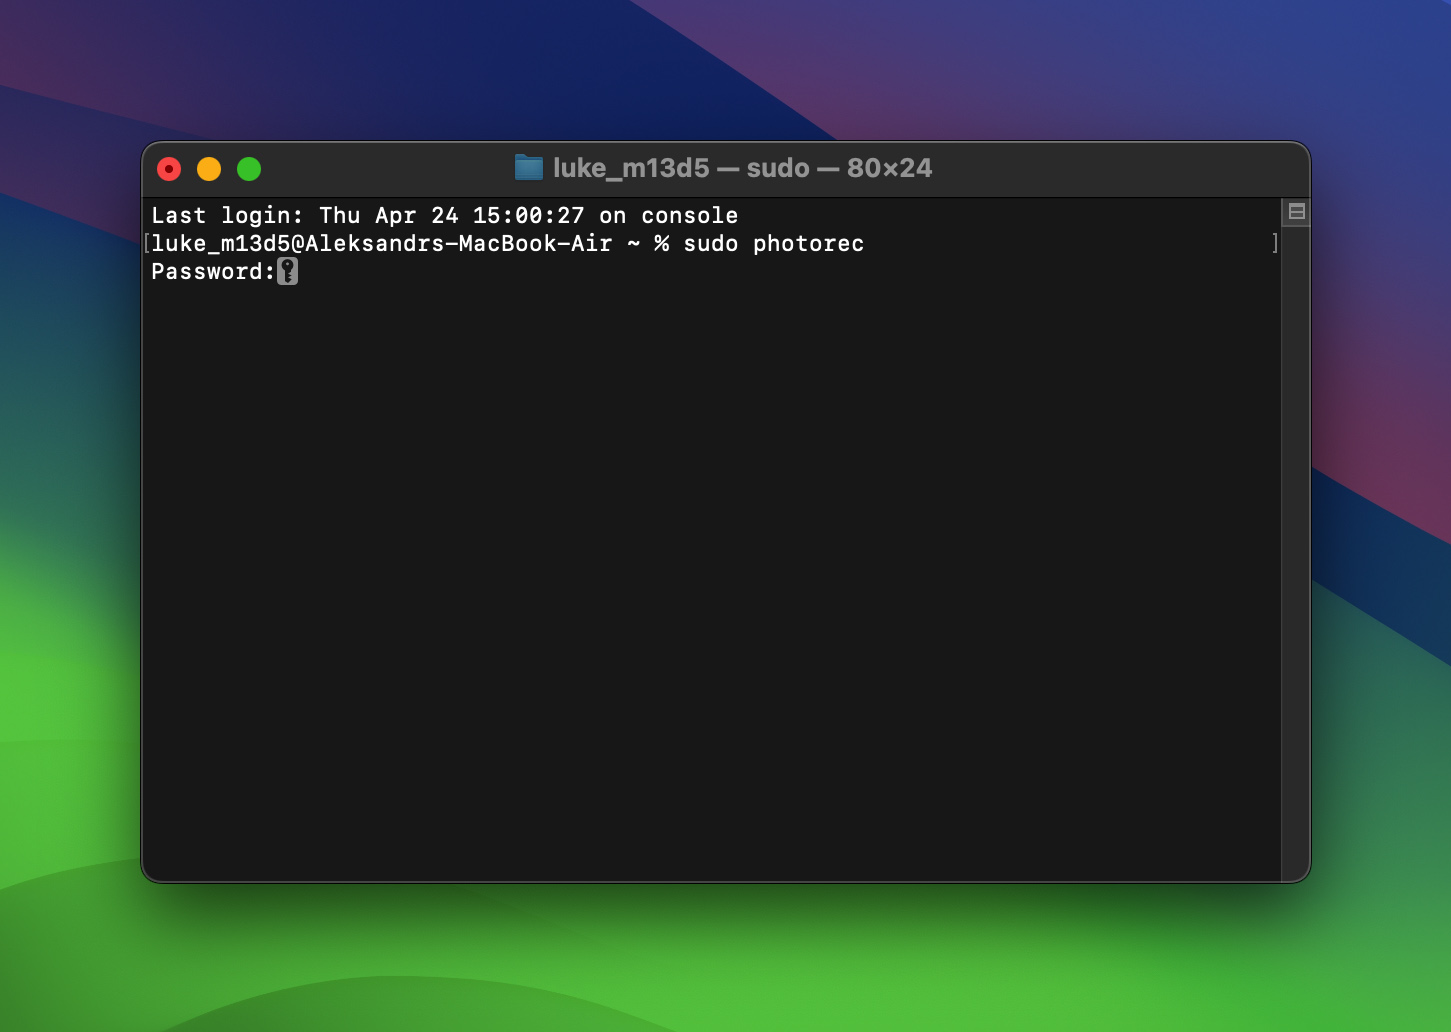
- Use arrow keys to select the disk you want to scan.
- Hit Enter to choose the filesystem type (usually detected automatically).
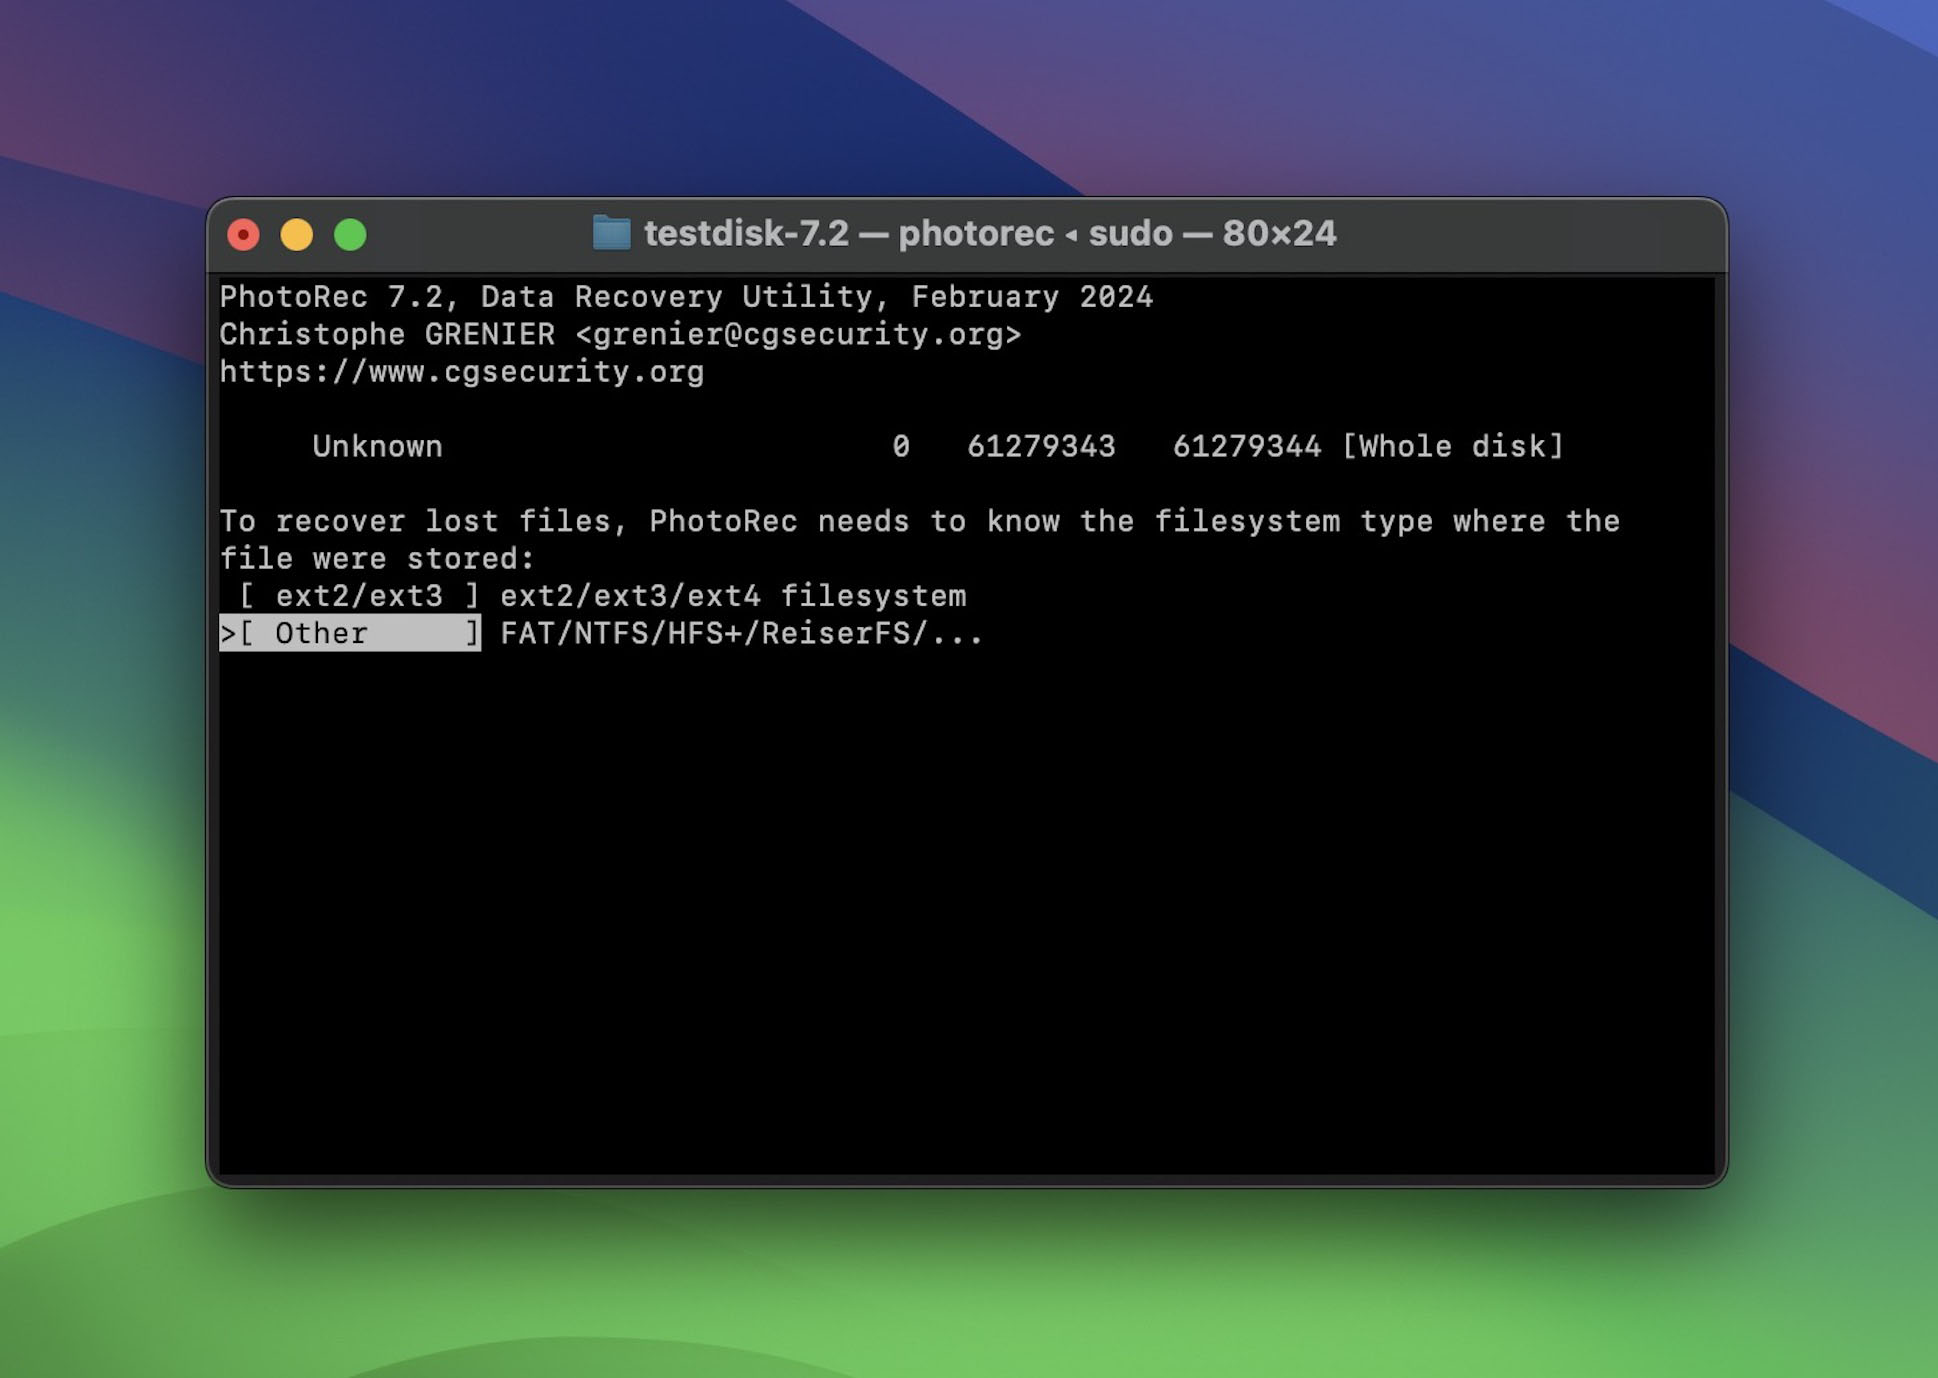
- Select [File Opt] if you want to limit file types.
- Choose a destination folder (don’t save to the same drive you’re recovering from!).
- Then hit [Search] and let it run.
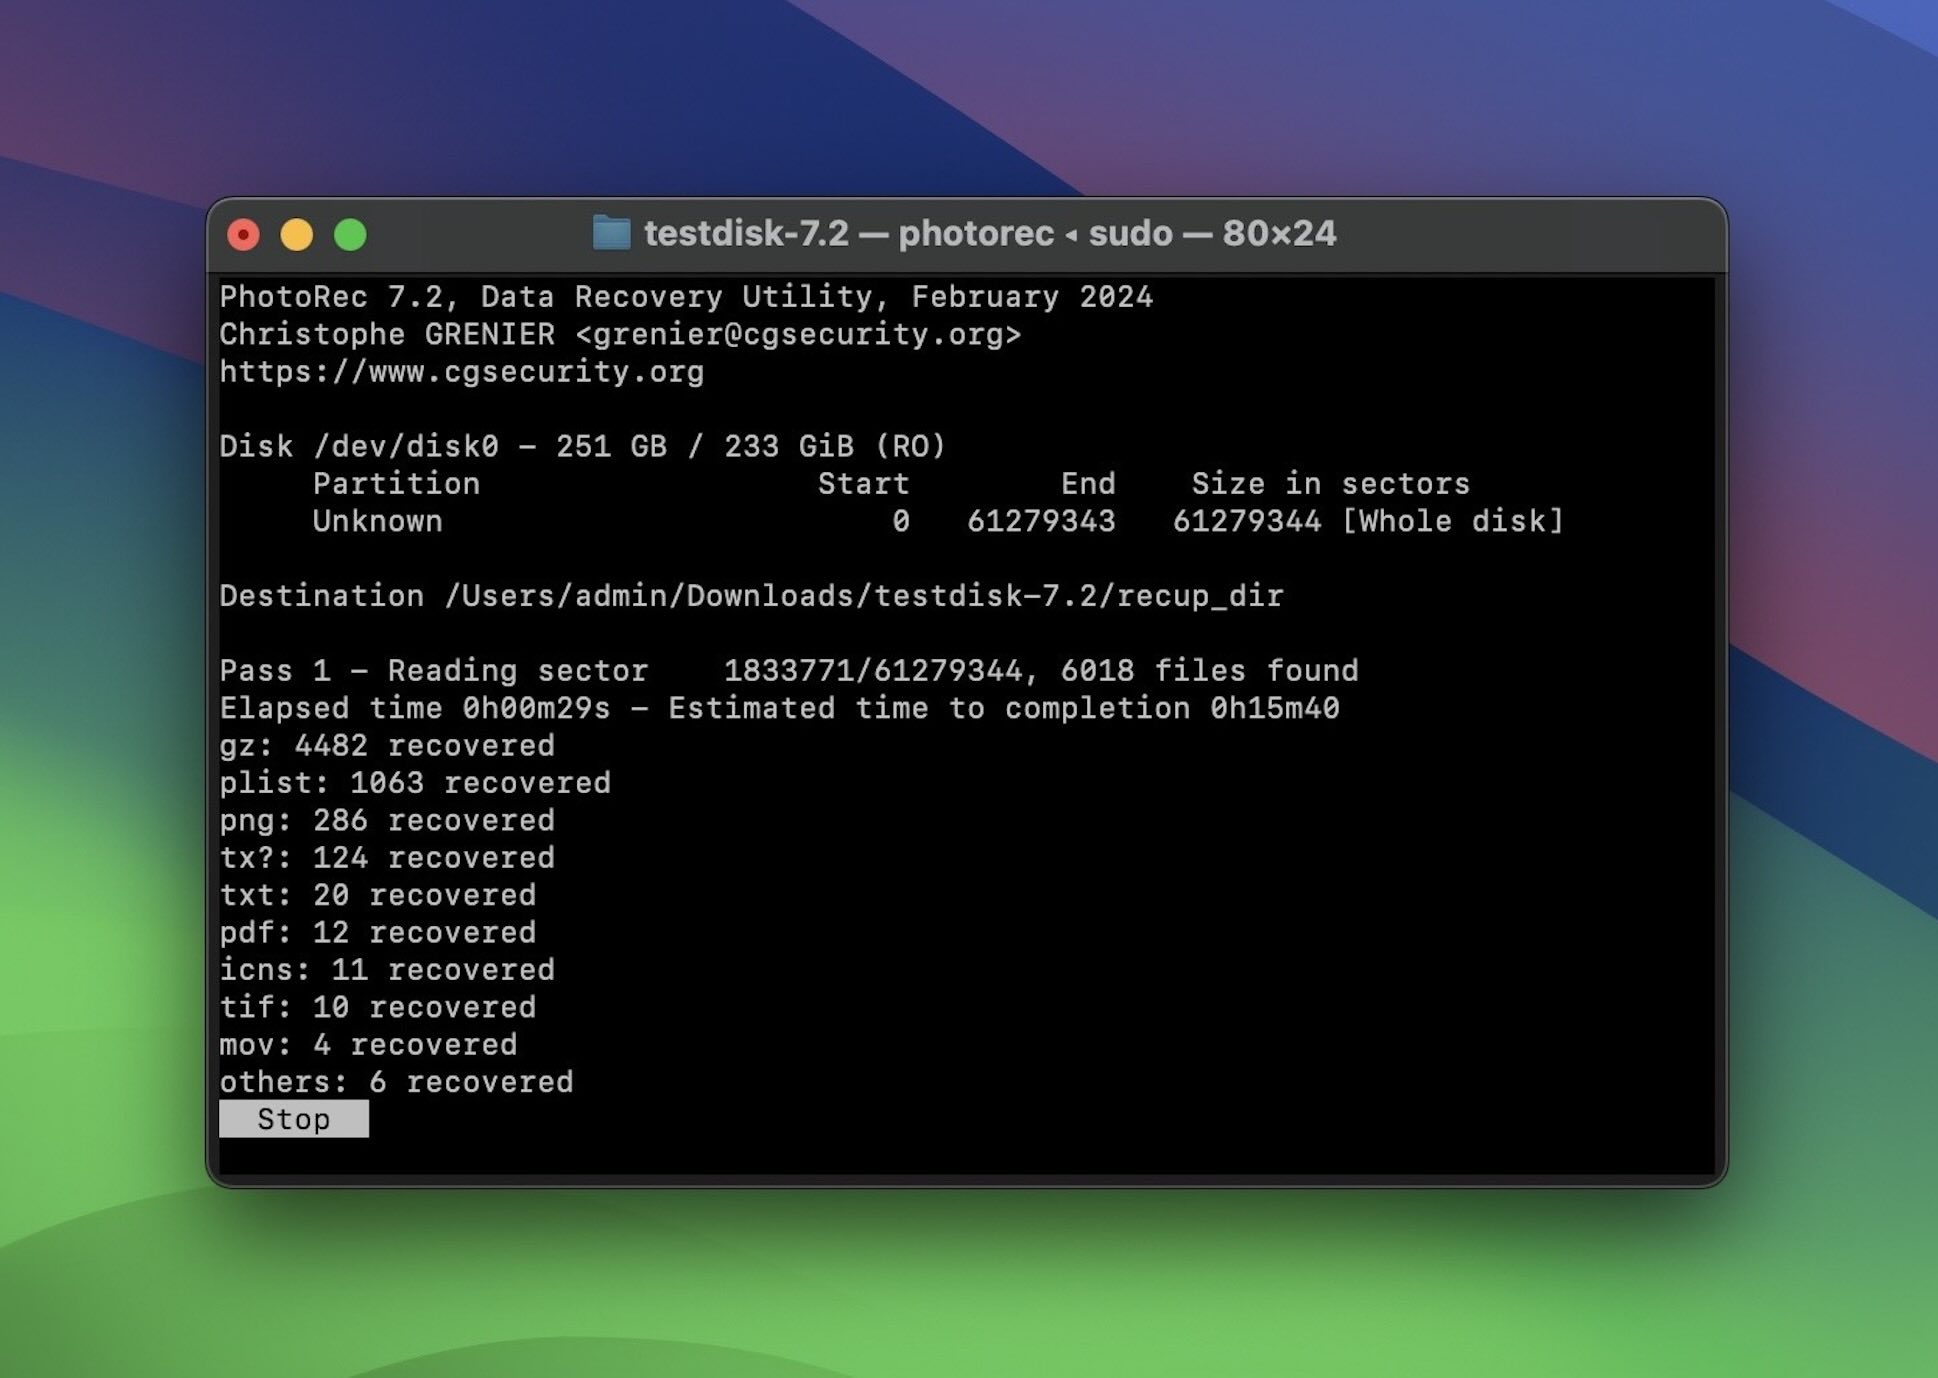
That’s it. That’s all the control and features you’ll get – just terminal prompts. Just like in QPhotoRec, you can go into File Opt to limit which file types it looks for (helpful if you’re only after photos, videos, or documents), but that’s pretty much it.
Anyway, let’s get back to our test. Next up, we’ll break down exactly what we were able to recover with PhotoRec, how long it took, and what kind of condition the files came back in.
Is PhotoRec Good? Our Recovery Results
From a recovery perspective, PhotoRec was just OK. Since it runs a single deep scan and identifies files by their signatures, we didn’t see any difference between our deleted, formatted, and corrupted drive scenarios.
We got identical results from all three. PhotoRec recovered 995 files – DOC/DOCX, PPT, TXT and PDFs – which opened without issue. But sorting through them? Brutal. With no file names or folder structure, you’re staring down a wall of generically named files in one giant folder. Making sense of it all was a nightmare.
PhotoRec also handled media files pretty well. JPG, PNG, GIF, and MP4s were mostly intact. But with RAW photo formats into the mix – the kind that really challenge recovery tools – it started to falter. NEF files came back clean. But CRW and SRF? No luck. They were completely unrecoverable.
Worth noting: we didn’t include any formats that PhotoRec doesn’t officially support. But since it already covers the vast majority of file types people use day to day, we think that’s fair enough.
Does PhotoRec work? Based on our tests, yes. Overall, solid recovery, and we’re giving it a 4 out of 5.
PhotoRec only runs one type of scan, but that scan covers a ton of ground. It recognizes a wide range of file signatures – including some newer ones – so it did well with most of the formats we threw at it.
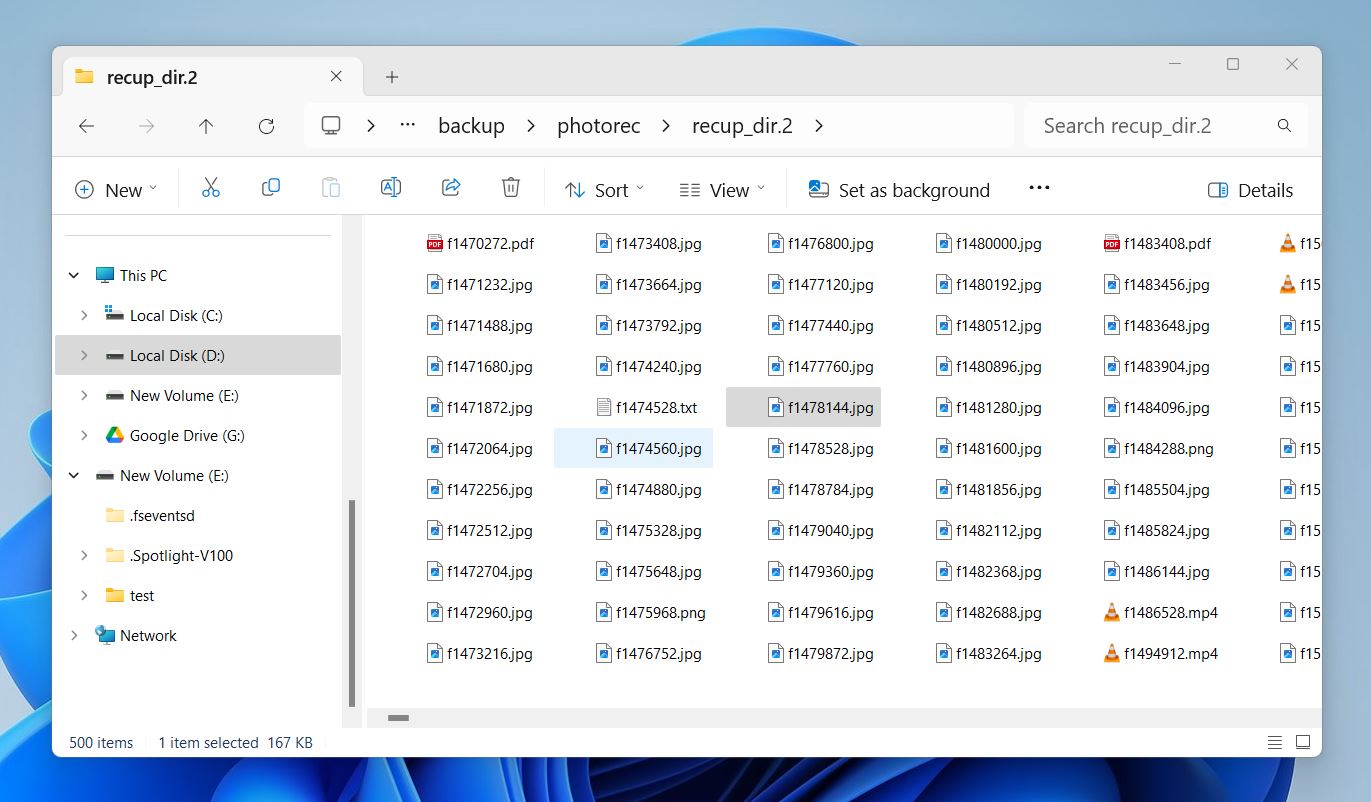
But would we recommend it if you lost thousands of files? Not really. Especially not if you care about folder names or filenames. Because you’re not getting any. Files come back as things like f1482112.pdf, recup_0003.jpg, and so on. No structure, no context. You’ll be digging through a huge dump of data trying to match things by eye.
We wouldn’t recommend it for big jobs. Not unless you’ve got a free afternoon and a lot of patience.
PhotoRec Alternatives
This review isn’t complete without a comparison. Let’s talk PhotoRec alternatives; it’s far from the only player on the field. You might prefer a simpler option.
So let’s take a look at how PhotoRec compares to some of the more popular options out there – like Recuva, Disk Drill, and EaseUS Data Recovery.
| Tool | PhotoRec | Recuva | Disk Drill | EaseUS |
| 💸 Free recovery available | Completely free | Completely free | Up to 100MB of free recovery (Windows) | Up to 2 GB of data recovery |
| 🔍 Scan mode | Signature scan only | Quick and deep scan | Quick and deep scan | Quick and deep scan |
| ⚙️ OS support | Windows, macOS, Linux, more | Windows only | Windows, macOS | Windows, macOS |
| 🖥️ UI | Only in QPhotoRec for Win | Basic, sufficient | Modern, intuitive | Modern, intuitive |
| 🗄️ NAS/RAID support | No | No | Yes | Yes |
| 💿 Disk image creation/scanning | No | No | Yes | Yes |
| 🧰 Extra features | None | Basic preview | Byte-to-byte backups, Advanced Camera Recovery module, S.M.A.R.T. monitoring, cleaning tool, data protection features | Disk imaging, file repair, ChronoSnap backup |
While truly 100% free tools like PhotoRec are rare, several alternatives offer usable free tiers so you can judge results first. Every PhotoRec alternative in our table, such as Recuva, Disk Drill, and EaseUS, lets you recover files without paying upfront, each with its own ceiling. Disk Drill offers 100 MB on Windows (with unlimited preview to validate results), EaseUS allows 2 GB with the right steps, and Recuva doesn’t cap recovery but is far more basic.
When it comes to user experience, all three blow PhotoRec out of the water. Even Recuva, which is closer in simplicity to QPhotoRec, still includes preview functionality and even estimates your recovery chances. Beyond that, though, Recuva doesn’t offer much extra – unless you count secure deletion.
Disk Drill and EaseUS, on the other hand, feel like polished apps. Disk Drill especially packs in the extras: full disk imaging, S.M.A.R.T. monitoring, data protection tools, RAID support, a real-time file previewer that works while you scan, and a dedicated Advanced Camera Recovery module that can reconstruct fragmented video footage from many cameras and storage devices.
PhotoRec simply isn’t built to compete with that kind of feature set. It’s an open-source, barebones, signature-scan-only tool, and that comes with clear limits.
So if ease of use, modern UI, file preview, and stronger recovery capabilities matter to you, there are more user-friendly PhotoRec alternatives worth checking out.
In terms of value, we’re giving PhotoRec a solid 4. Yes – it’s completely free, open-source, and cross-platform. You get everything it can do out of the box.
But, what it can do is a bit limited. No file previews. No filters. No file names or folder structure. No disk imaging. It’s not the most comfortable tool to use – and the learning curve, especially on macOS without QPhotoRec, is steep.
So while you’re getting great bang for absolutely $0, it’s not a one-size-fits-all recovery solution. The price is right. But if you’re after even basic comforts – like a halfway decent UI – there are better options out there. And yeah, some of them are also free (or at least let you test-drive enough to know if they’re worth it).
PhotoRec User Reviews
Now it’s time to talk about what others have to say. To get a better picture of where PhotoRec stands, we combed through community forums, Reddit threads, and user reviews on platforms like G2 and Trustpilot.
Here are some examples:
💬 Over on G2, a user highlighted how handy it is that TestDisk and PhotoRec come bundled together:
“TestDisk is a simple but powerful application to analyze and recover disk partitions. What I like most is that it has an integrated tool called PhotoRec that is used to recover lost files… especially optical drives.”
💬 Trustpilot has a more emotional take:
“I recovered my pics! Thanks to this web I could download PhotoRec and recover my pics from an SD storage that broke after unplugging it without expulsing it first.”
💬 Meanwhile, Reddit paints a more nuanced picture:
“I used it once back when I didn’t know better, and it works. It’s just that it’s a pretty limited tool… only useful when there’s no filesystem metadata and the files aren’t fragmented. Even then, there are better free or almost-free alternatives.”
💬 Another commenter chimed in with praise:
“PhotoRec worked brilliantly to get my NEF photos off an SD on an M1 Mac. The trick? You have to open it in Terminal for the drive to appear.”
The general feedback lines up with our own experience. Users tend to praise PhotoRec because it’s free and effective in many data loss situations when the file system is damaged or missing.
The complaints are just as consistent: no filenames, no folder structure, no GUI (in the classic version), and a workflow that can feel rough if you’re not used to recovery tools.
We’ve also seen a few people ask whether it is safe. Is PhotoRec safe? Yes, absolutely. It’s open-source, read-only by default, and has been around long enough to earn trust in the data recovery world.
In short, the general feedback warrants a 4. A solid 4.
Final Verdict
OK, it’s time to bring this PhotoRec review to a close.
First, let’s quickly recap the scores:
- ⭐ Features? 3 out of 5 – not a lot of extras, barebones.
- ⭐ Recovery performance? 4 – gets the job done, especially with common formats.
- ⭐ Value? Easy 4 – completely free and open-source.
- ⭐ User feedback? Another 4 – the praise is earned, and the complaints are fair.
Average score: (3 + 4 + 4 + 4) ÷ 4 = 3.75
We don’t do half-stars here, so we round down.
Pretty great results – especially for an open-source tool.
PhotoRec isn’t trying to be everything for everyone. It’s not here to wow you with animations or “auto-magic” scans. It’s here to get files back through raw signature recovery. If you’re okay giving up filenames, folder structure, previews, and a nice interface in exchange for a truly free recovery tool, PhotoRec might be all you need.
Just don’t expect miracles (and maybe clear your weekend if you’re trying to dig through a thousand recovered files with generic names).
If that doesn’t sound all that appealing, Disk Drill is a better choice as a complete recovery tool. Yes, it sits in a heavier weight class than PhotoRec, but that difference comes with real advantages: a clean UI, file previews, recovery from file system records and signatures, byte-to-byte backups, Advanced Camera Recovery, and more. In other words, it gives you a much more practical recovery workflow, especially when you’re dealing with a large drive, mixed file types, or files you need to identify before recovery.
But PhotoRec? It may still be worth keeping in your recovery toolkit. It’s free and capable in the right scenario. You may not want it as your main recovery tool, but when you need a no-cost utility that can carve files, it can absolutely come in handy.