If you lost important files on your LaCie external drive or it’s giving you trouble, our guide walks you through the solutions you can try on your own. We cover different LaCie data recovery solutions, the tools that make sense at home, and the fixes worth trying before you assume the drive is done for good.
Some cases take just a few clicks. And the tougher ones still give you a real chance, as long as you take the right steps early.
Is It Possible to Recover Data from a LaCie External Hard Drive?
Yes, in many cases, it is possible to recover data from a LaCie external hard drive. However, the data recovery results will greatly depend on the reason for which data loss occurred in the first place and whether you choose a suitable recovery method.
To help you get the best results possible when recovering data from a LaCie drive, we have compiled a table with the most common disk problems and their causes that users encounter most often. You can view this table below.
| Reasons | Description |
| 😧 Accidentally deleted files | If your LaCie drive hasn’t already written new data on the space that was previously occupied by the deleted files, you can easily recover those files with data recovery software. Otherwise, your only options are to use either Time Machine (for Mac) or File History (for Windows). |
| 🧹 LaCie drive formatted by mistake | By formatting your drive, you’ll instantly remove all data from it. To recover those files, try data recovery software first or restore them from a backup (if one is available). |
| 📛 Unsupported file system | If the data on your LaCie drive is still intact but inaccessible because the drive uses a file system your computer does not support, you may not need full data recovery software to recover your LaCie external hard drive. In some cases, specialized tools can read unsupported file systems and let you copy the files elsewhere, though these tools are often not free. Once your data is safe, you can format the drive into a file system your computer supports. |
| 🛑 Corrupted file system | If the data is important, the safer approach is to recover the files first and then format the drive, since trying to fix a corrupted file system usually is not worth the risk. If the data is no longer important, you can try repairing the file system instead (but creating a backup first is still the smarter move whenever possible). |
| 👾 Viruses or malware infection | If your drive is infected with virus or malware and you can’t access your data, first try to unhide the files. If that doesn’t work, you can use file recovery software to restore the files from your LaCie external hard drive. |
| 💥 Physical damage | If your LaCie hard drive is beeping or has been physically damaged (due to improper connection or ejection, unexpected power surges, or water exposure), recovering data from it might be a bit complicated. But a professional data recovery service might be able to handle restoring the lost files from it. |
How to Recover Data from a LaCie External Hard Drive
If you have experienced data loss on your LaCie external hard drive, it is critical to stop using the drive immediately. Continuing to use the drive can result in new data being written over the areas where your lost files are located, potentially making them unrecoverable.
With the right approach, however, you can often restore your precious files with the help of specialized data recovery software or backups (if you had one, which is rare).
Below are the step-by-step instructions for each method that you can follow to recover your data from the external hard drive.
Method 1: Use Data Recovery Software
Data recovery software is one of the easiest and most efficient ways of recovering files from a LaCie external hard drive. We prefer this method over the other ones since a tool like this can be helpful in many data loss situations related to accidental deletion, formatting, unexpected disappearance of files, and even file system corruption. And it doesn’t depend on whether you have a backup of your drive available or not.
Regardless of whether you’re on a Mac or Windows, we’ll show how to recover data from a LaCie hard drive with Disk Drill, which works on both platforms.
Genuinely just a massive thank you to the devs of Disk Drill (@Cleverfiles). Saved YEARS of footage from being lost forever on a dead drive. 10/10 tool pic.twitter.com/SlqdIjnr9t
— Moon (@MoonJuiceTTV) June 13, 2023
You’ll see in our screenshots that we use the macOS version of Disk Drill. Even so, the UI and the recovery steps are the same on both Mac and Windows, so you can follow the guide either way.
Here’s what you need to do:
- Connect your LaCie drive to your computer. Plug your LaCie hard drive into your computer using the appropriate USB or Thunderbolt cable.
- Download Disk Drill for Mac or Windows and follow the onscreen instructions to install it.
- Launch Disk Drill. In the Disk Drill dashboard, you will see a list of available storage devices.
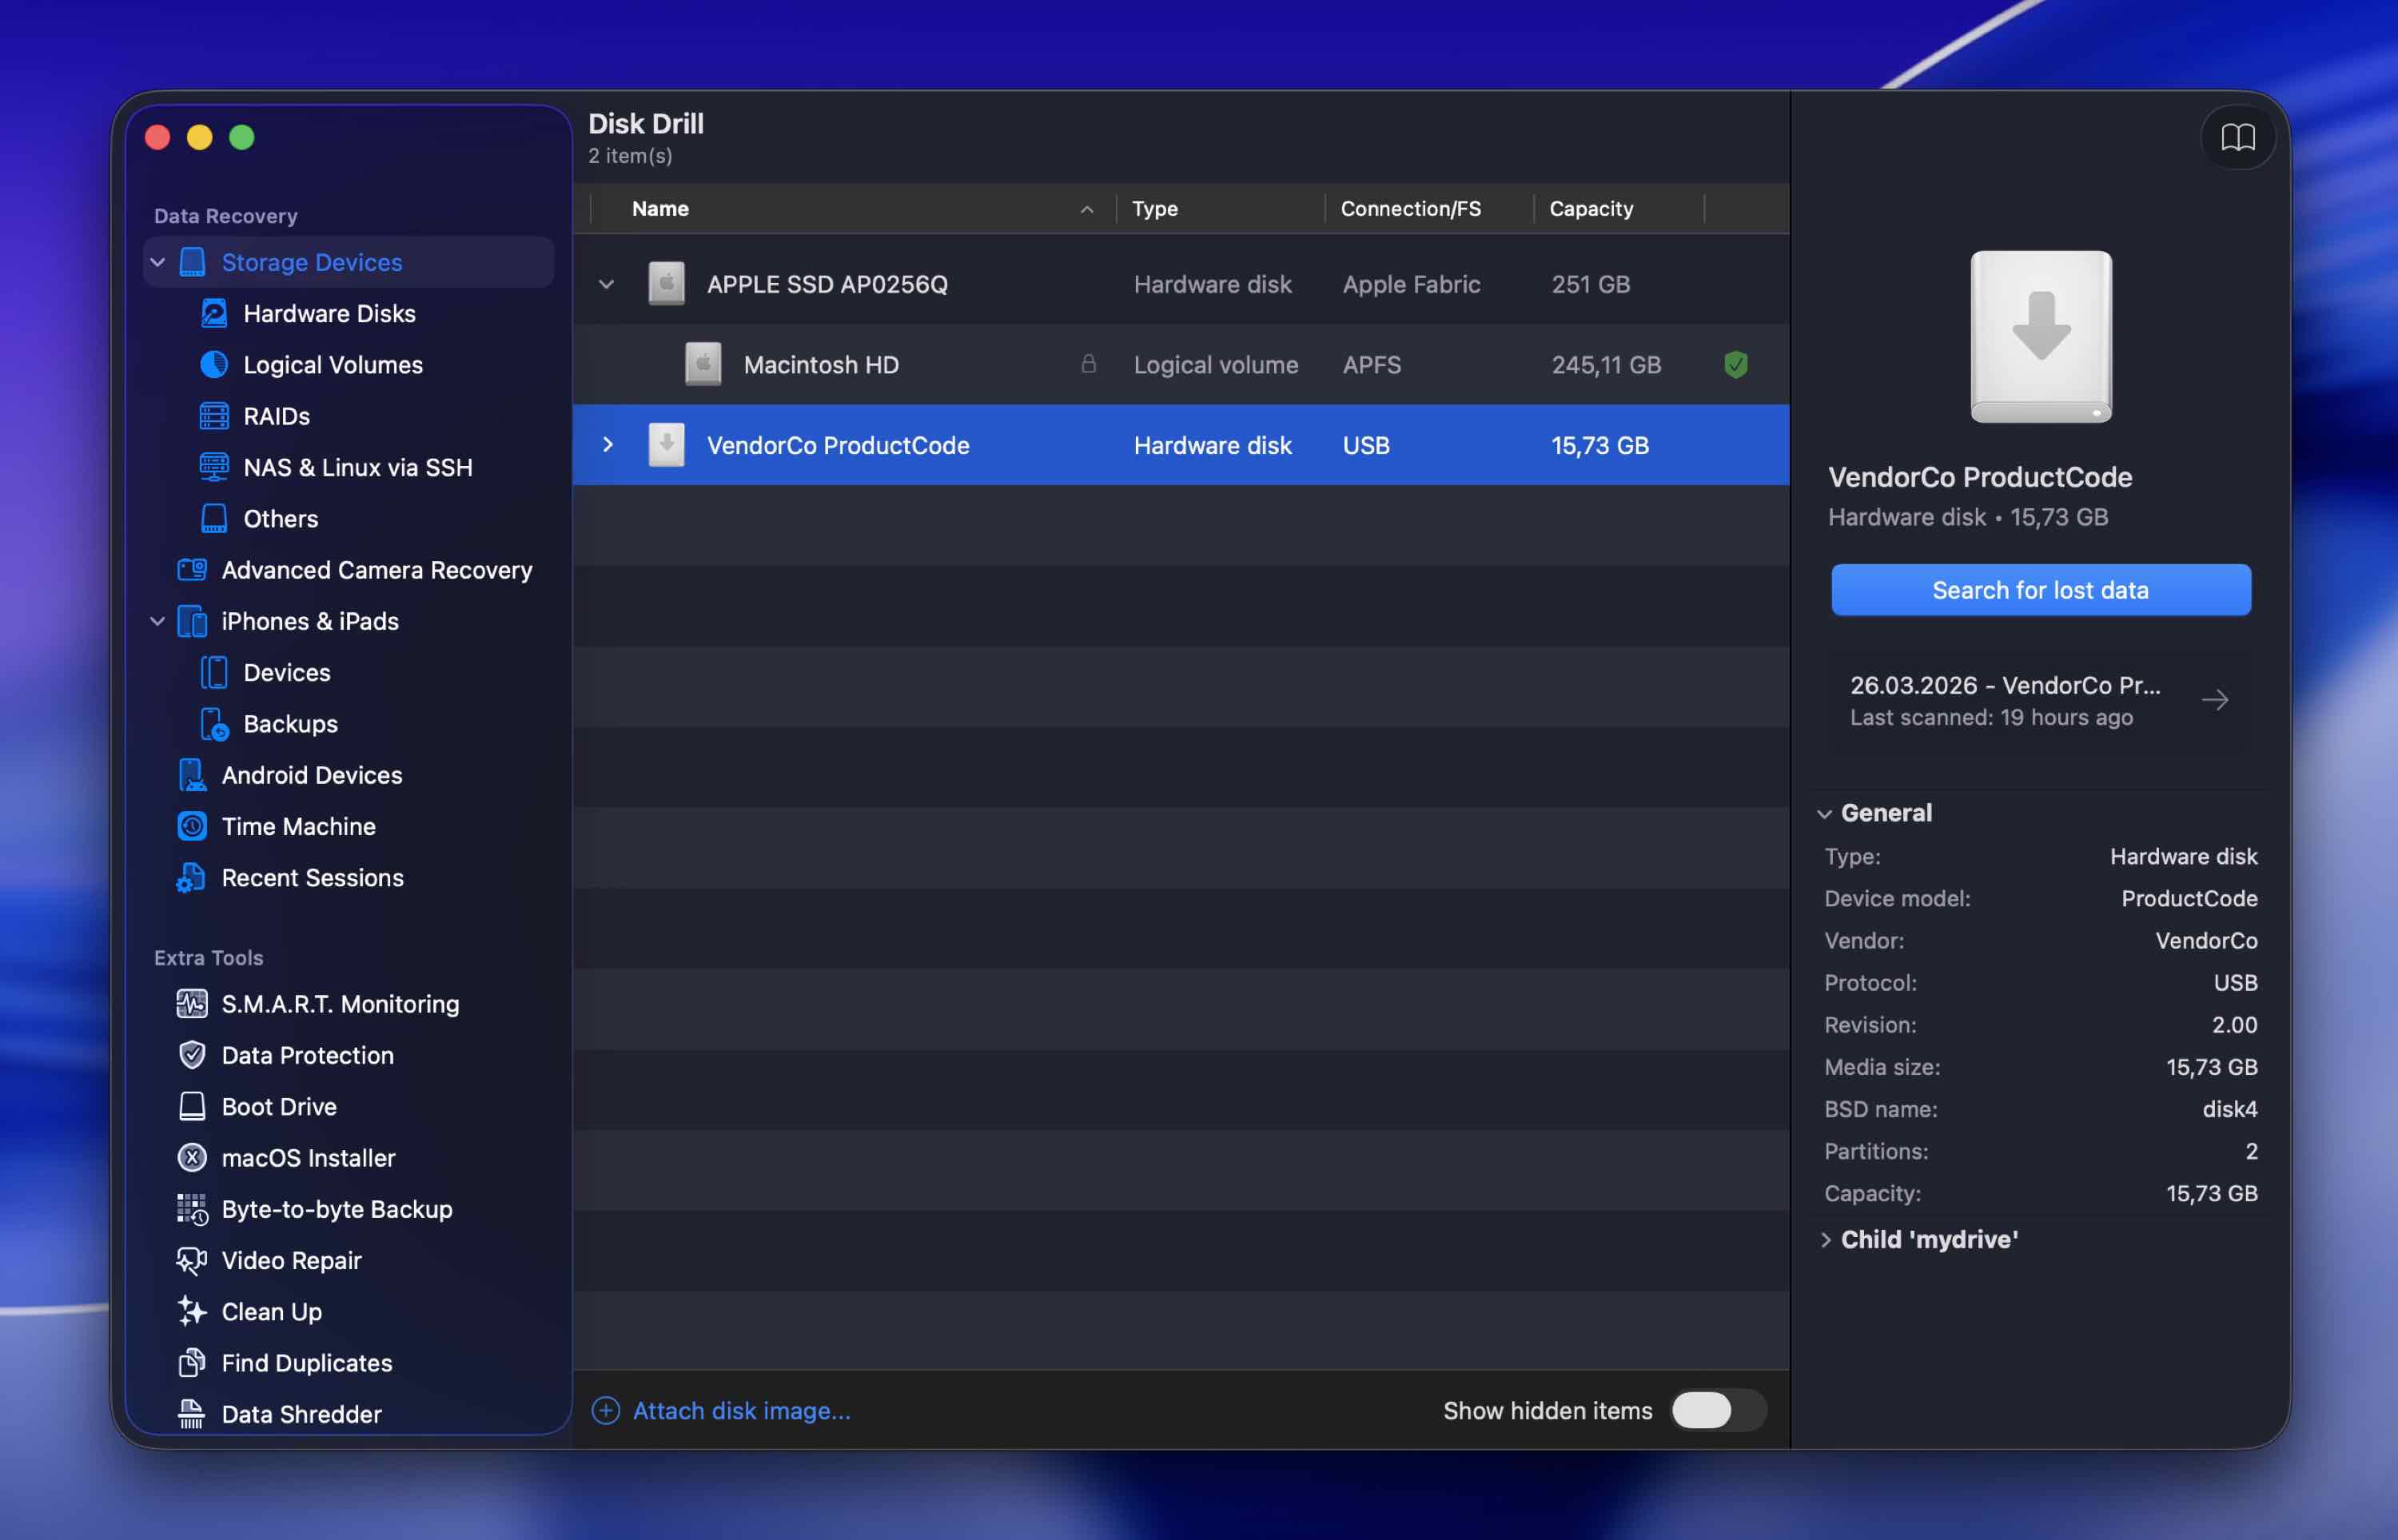
- Choose your LaCie drive from the list of available devices and click Search for lost data.
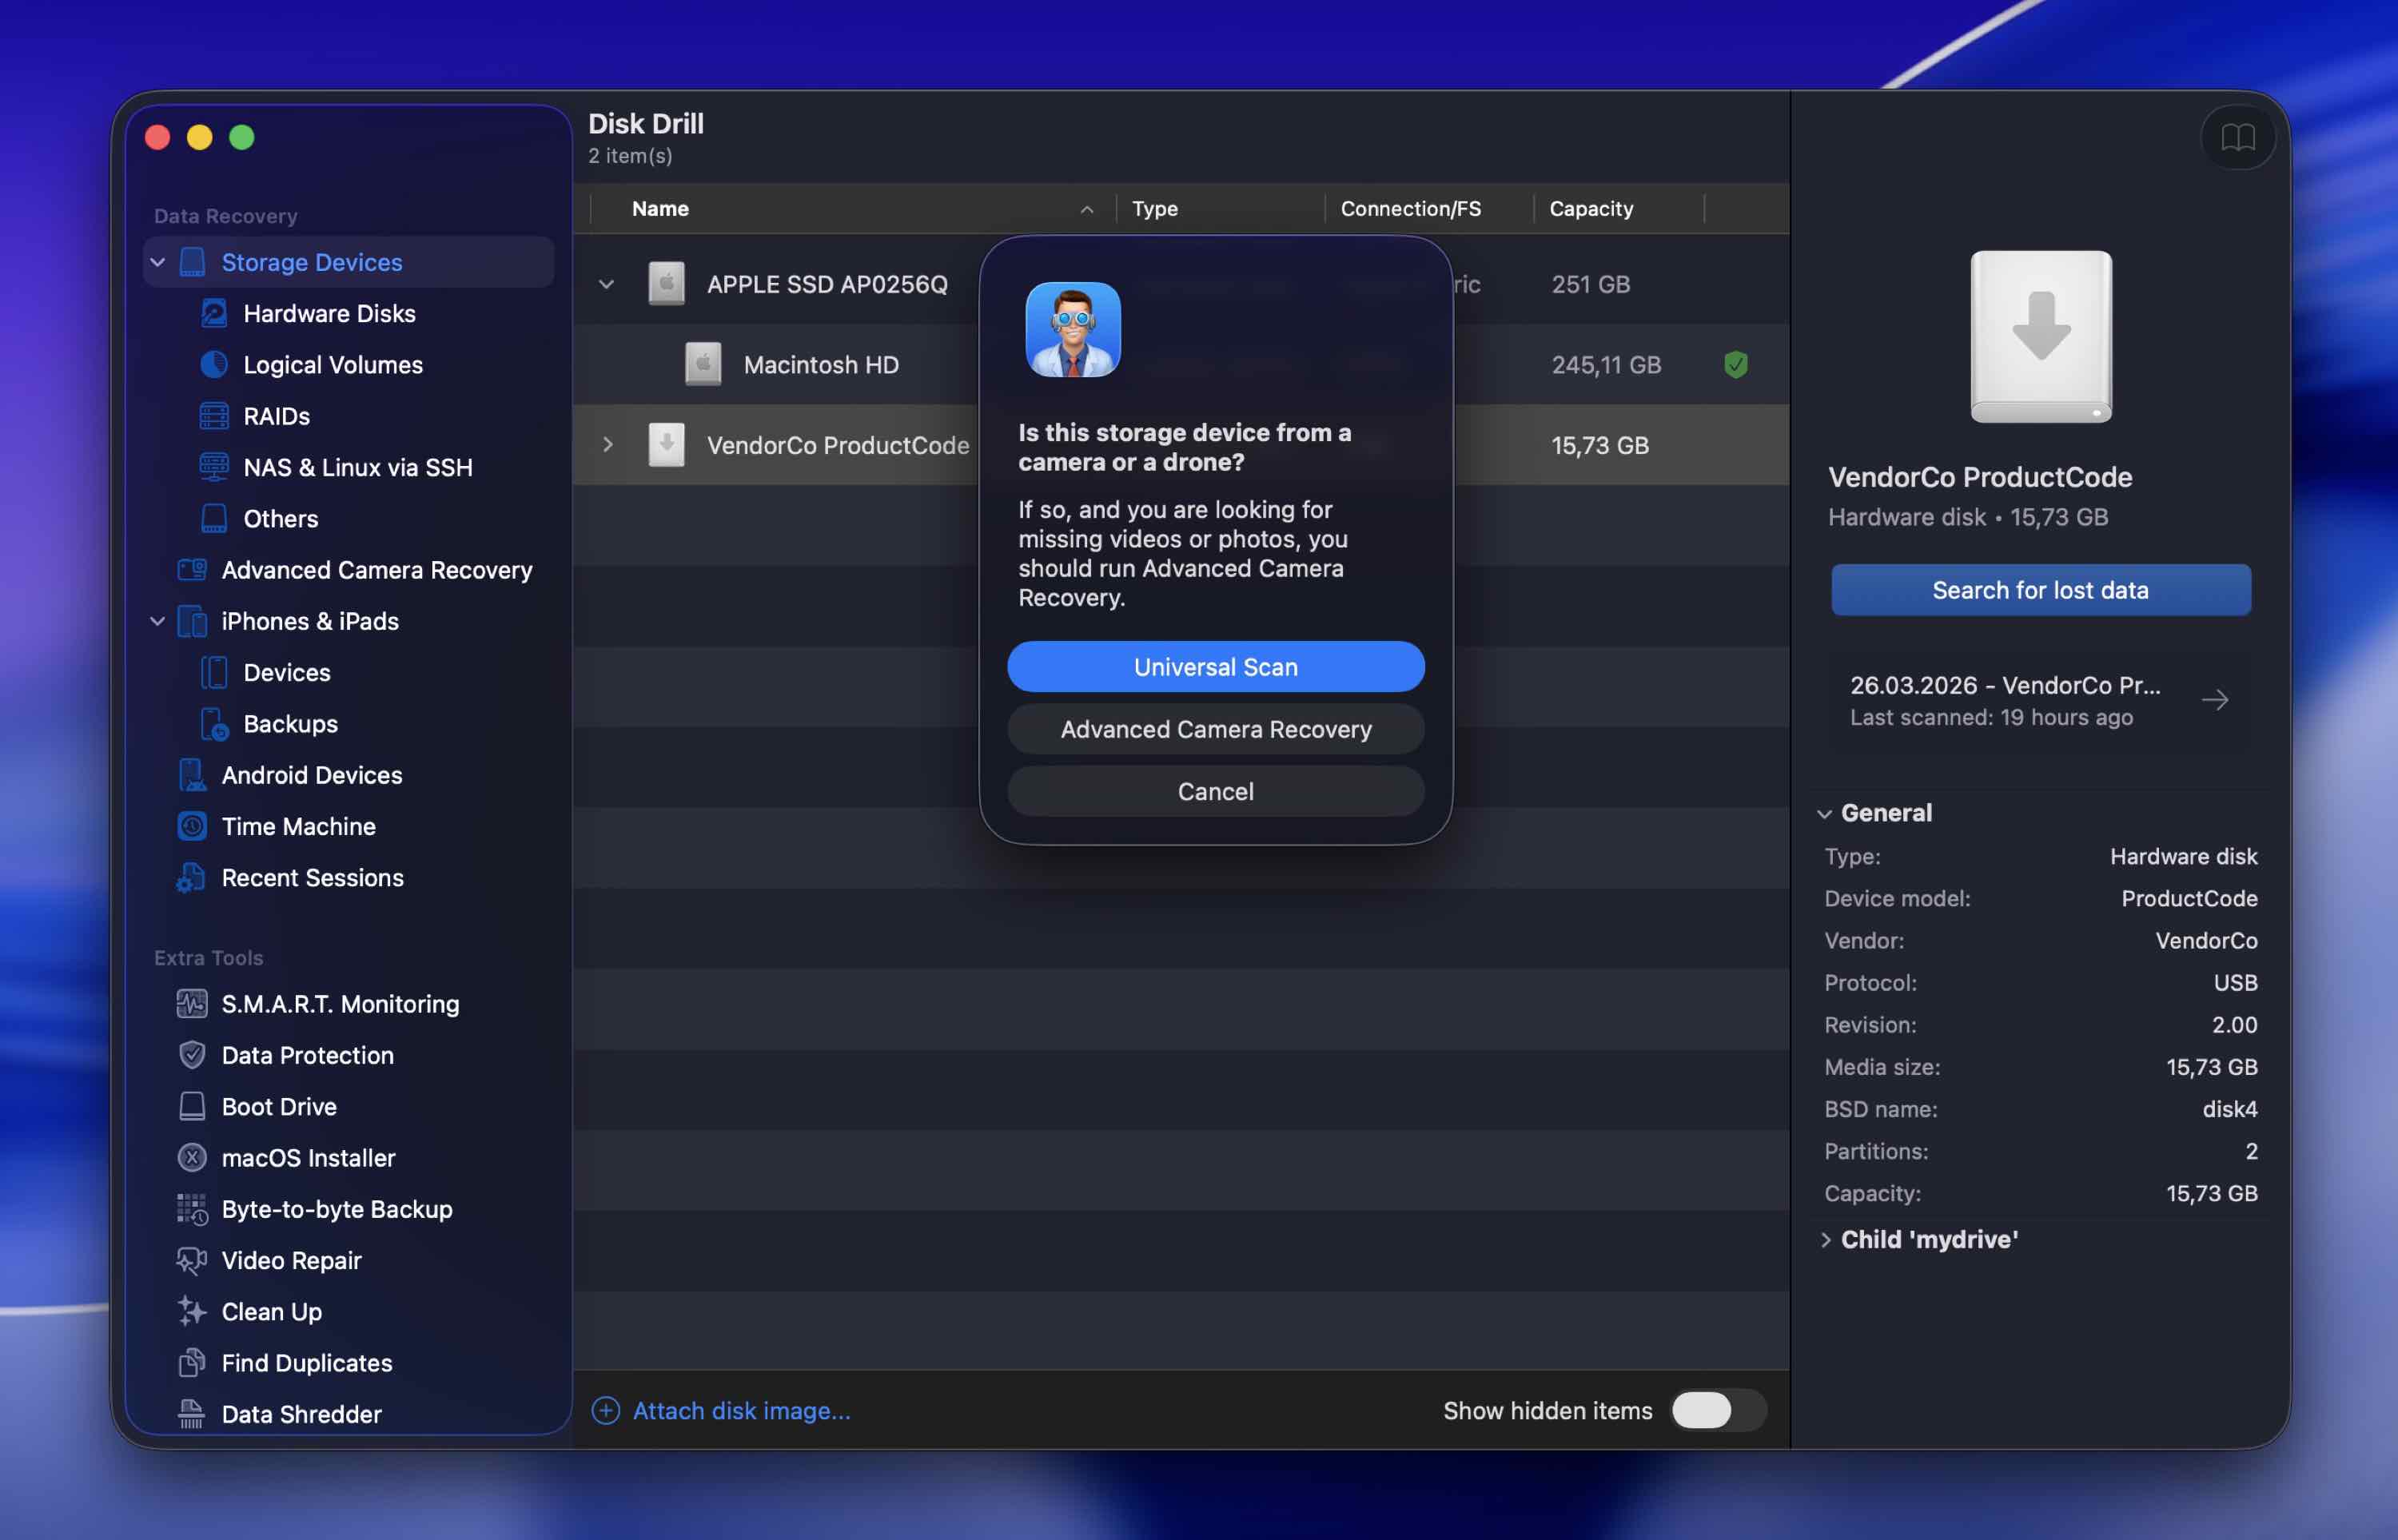
- After that, choose Universal Scan to launch a full scan of the drive.
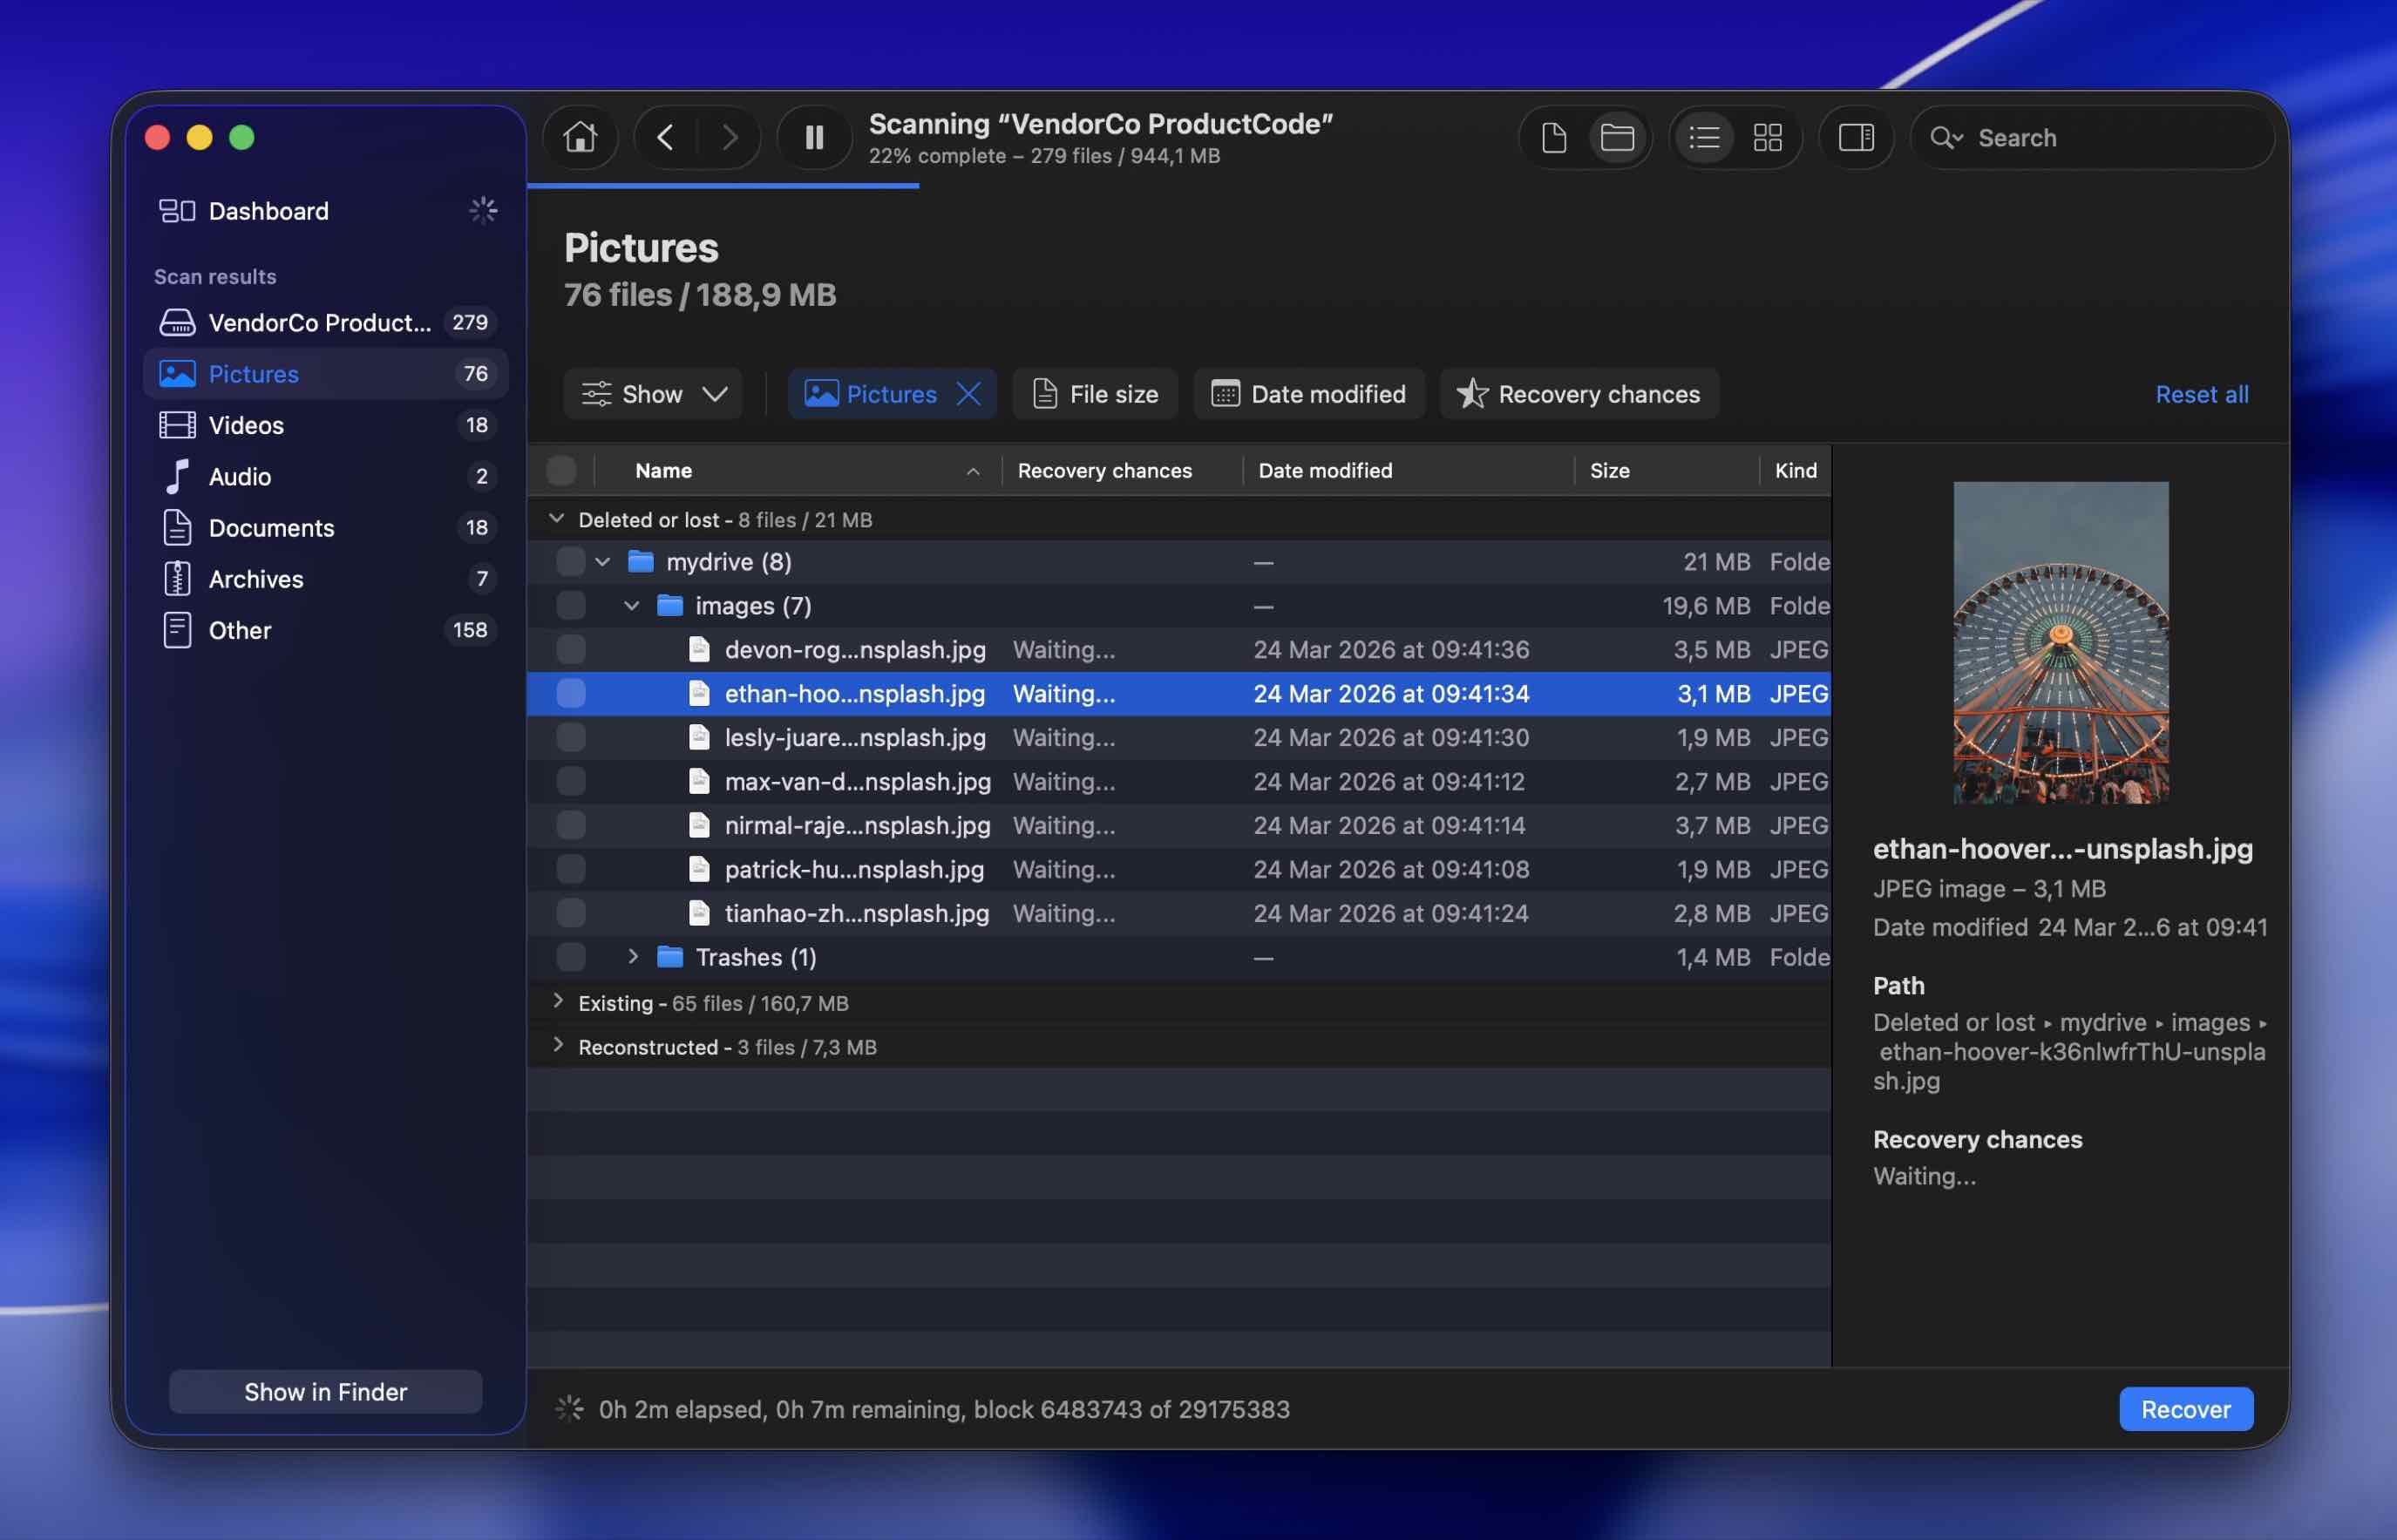
- Wait for the scan to finish or click Review found items to check the results right away.
 You can browse through the found files while the scan is still running, preview them in real time, and get an early sense of what’s recoverable. Disk Drill also lets you pause the scan and resume it later.
 - Use the sidebar on the left to narrow down your search to a specific data type (choose from Videos, Audio, Pictures, etc.).

- Click a file to preview it. If the preview opens and the file looks fine, that is one of the best signs that recovery should work properly – a clean preview means the file’s data is still there and the recovered version should open without issues. (Keep in mind, though, that some file types do not support preview in the first place, so the lack of a preview does not automatically mean the file is damaged.)
- Select the files you wish to recover and click the Recover button when ready.
- Choose a preferred location for the files (preferably not on your LaCie drive to avoid overwriting data) and click Next.
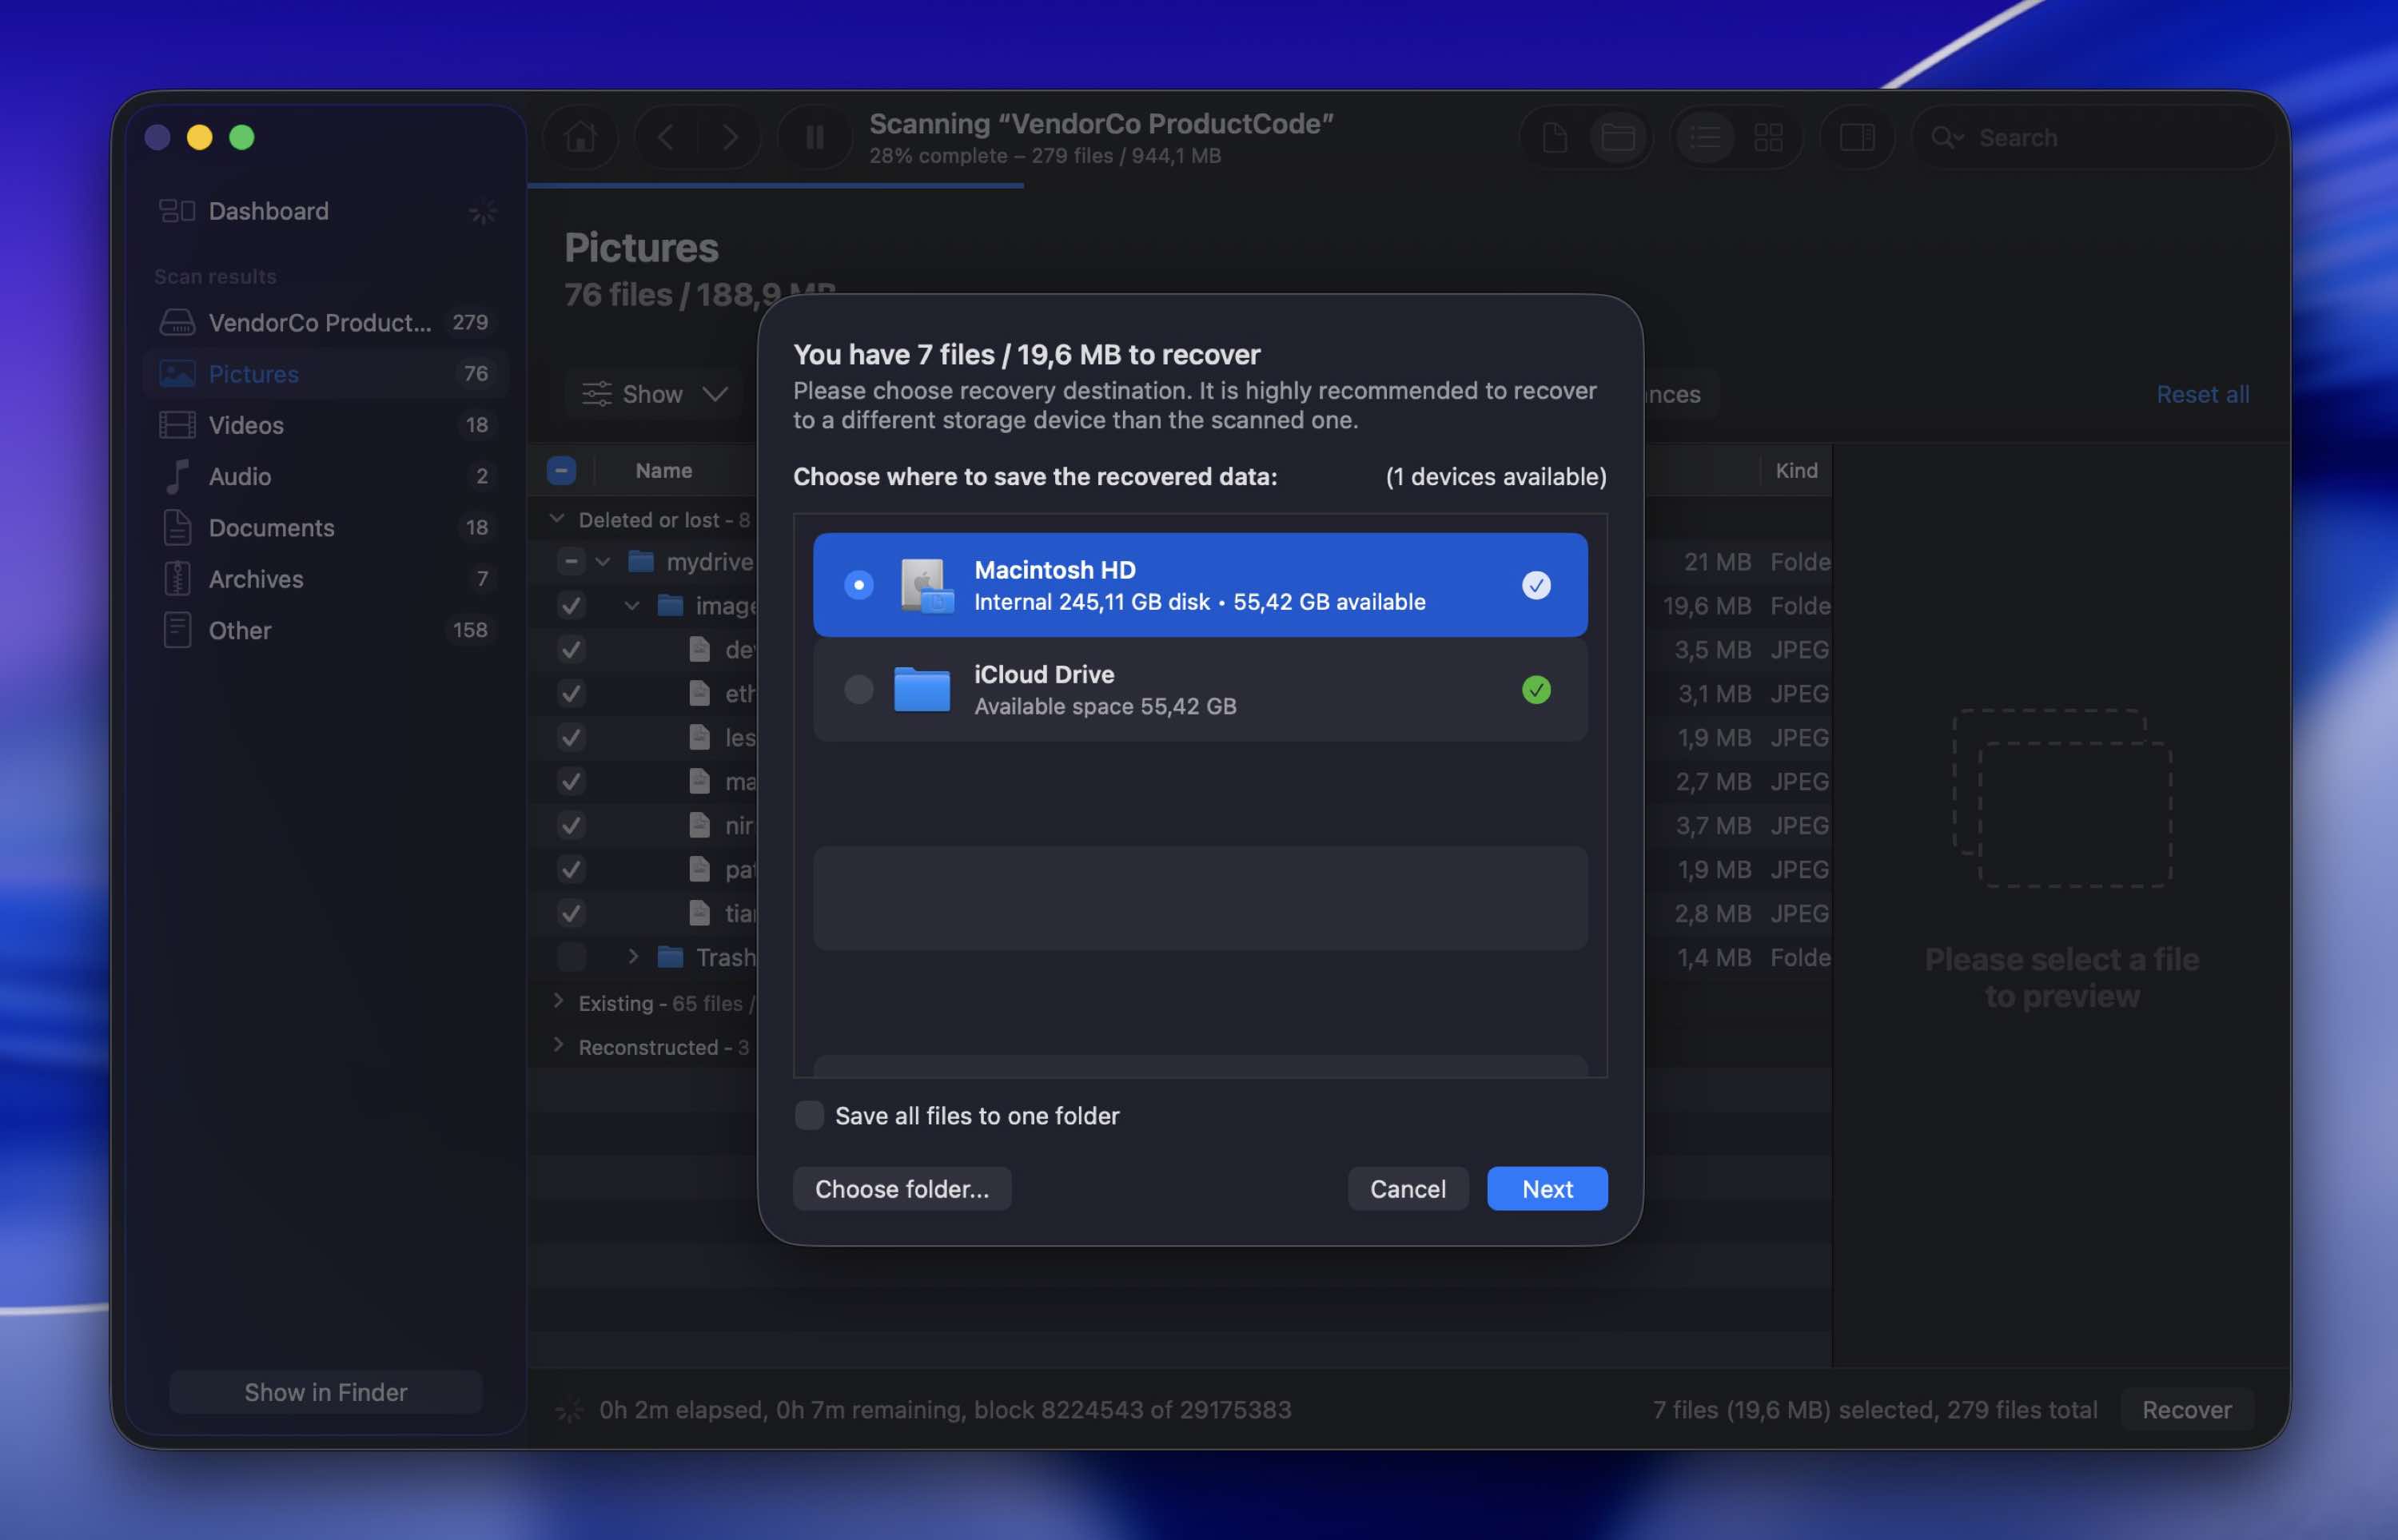 You won’t see the LaCie drive in this list, and that’s a good thing (saving recovered data back to the same drive can overwrite other lost files and cut your recovery chances). Go with your computer’s internal drive or a different external drive with enough free space.
 - When the data recovery process is complete, click the Show results in Finder button to view the retrieved files.
Disk Drill shows great results with LaCie drives because it supports most file systems you’re likely to run into (exFAT, NTFS, HFS+, FAT32, and others). It also has broad file signature support, which matters in cases where the original file system is damaged, missing, or unreadable. That gives it a better chance to find recoverable files even when the LaCie drive’s structure is a mess. Another advantage of this tool is that you’ll be able to test it for free to see whether those files can actually be recovered before having to get the paid Pro version (and even recover some data for free on Windows, too).
Method 2: Use Built-In OS Backup Features to Restore Data
Your operating system’s backup tools might be another great way of recovering lost data on your LaCie external drive.
However, this method will work only if you’ve enabled backup tools on your computer for the external device and used it with your LaCie drive before the data loss happened, which is relatively rare.
Here we’ll cover two built-in OS tools that may help: Time Machine on macOS and File History on Windows.
Follow these steps to recover data from your LaCie external hard drive using Time Machine on your Mac:
- Connect your LaCie external drive to your Mac.
- Open Finder and click your drive from the list of available devices on the left.
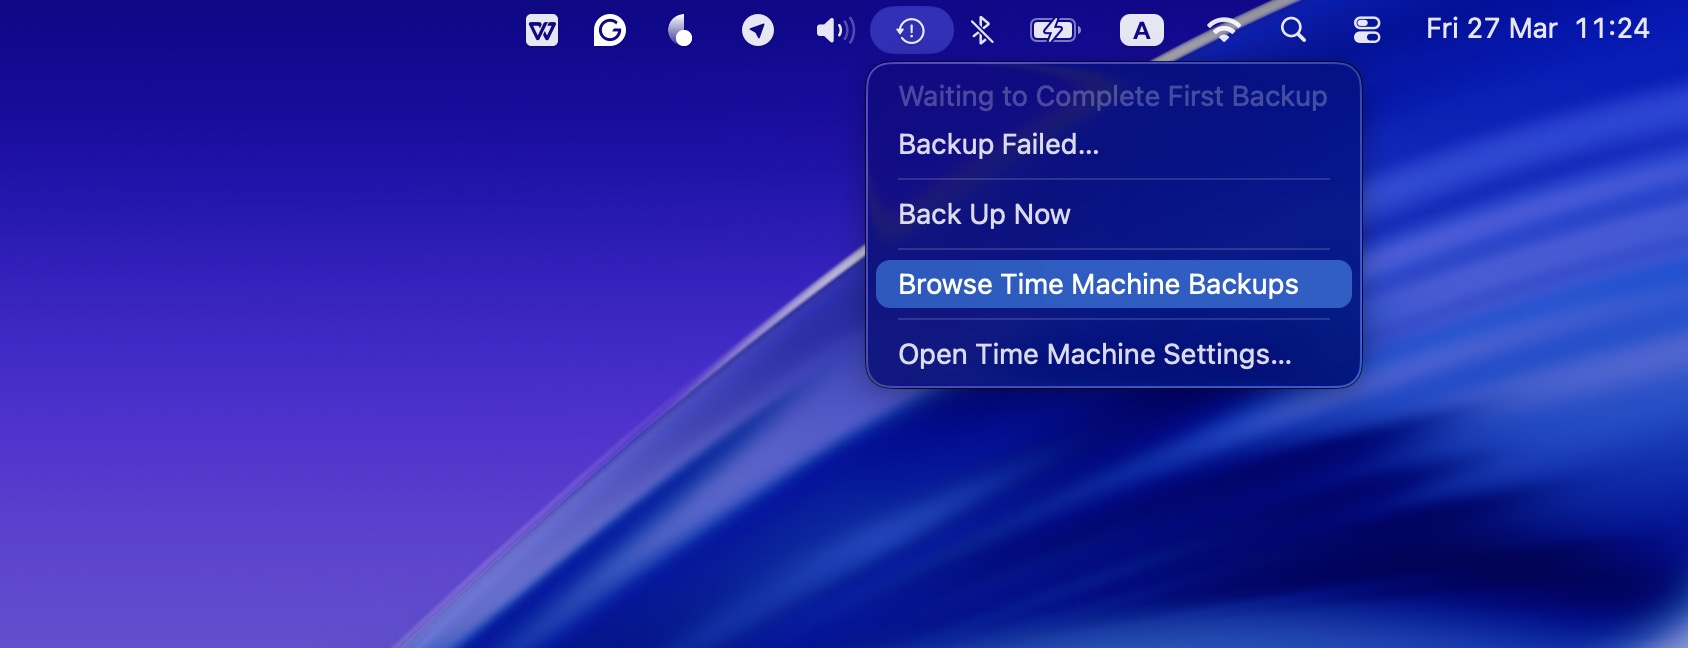
- Launch Time Machine on your computer (click the Time Machine icon on the menu at the top of your screen and choose Browse Time Machine Backups).
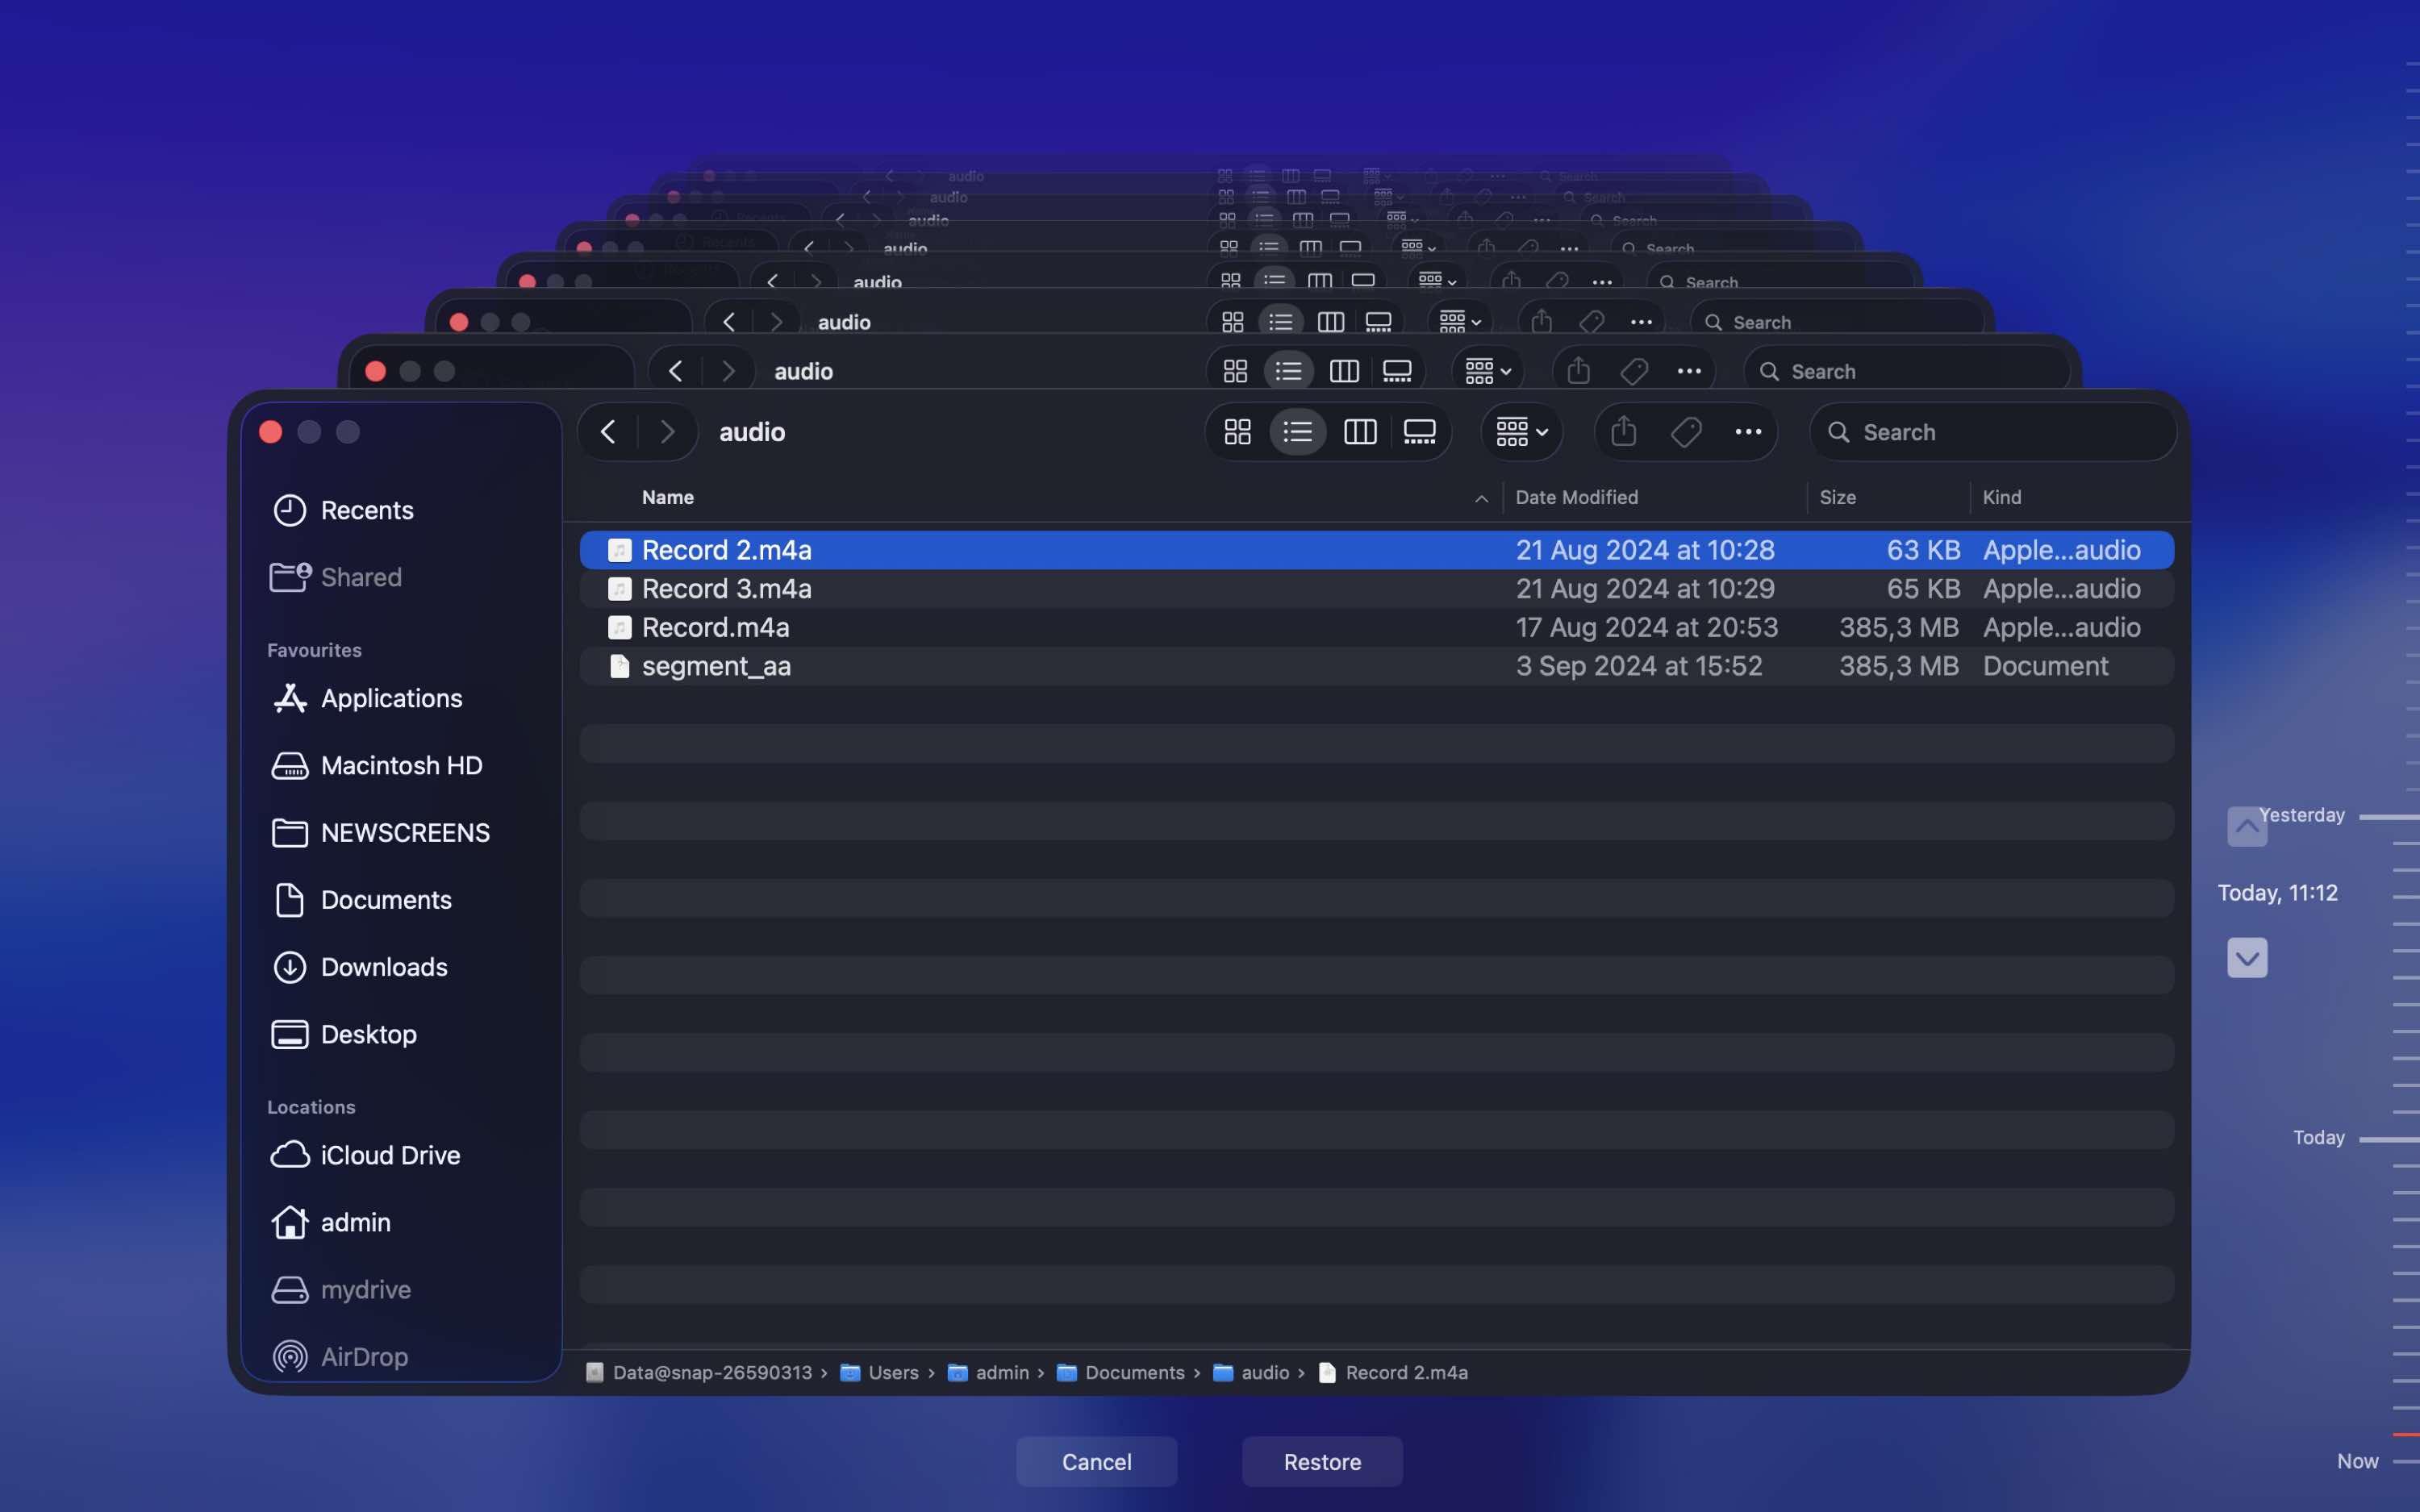
- Choose the appropriate Time Machine backup version using the timeline on the right.
- Locate and select the data you want to recover.
- Click the Restore button.
If you’re using a Windows-based PC with your LaCie external hard drive, you might be able to recover the lost data using the File History feature.
Follow these steps to recover files from your LaCie drive using File History on Windows:
- Open the folder where you think those LaCie files may have been copied before, right-click it, and choose Properties.
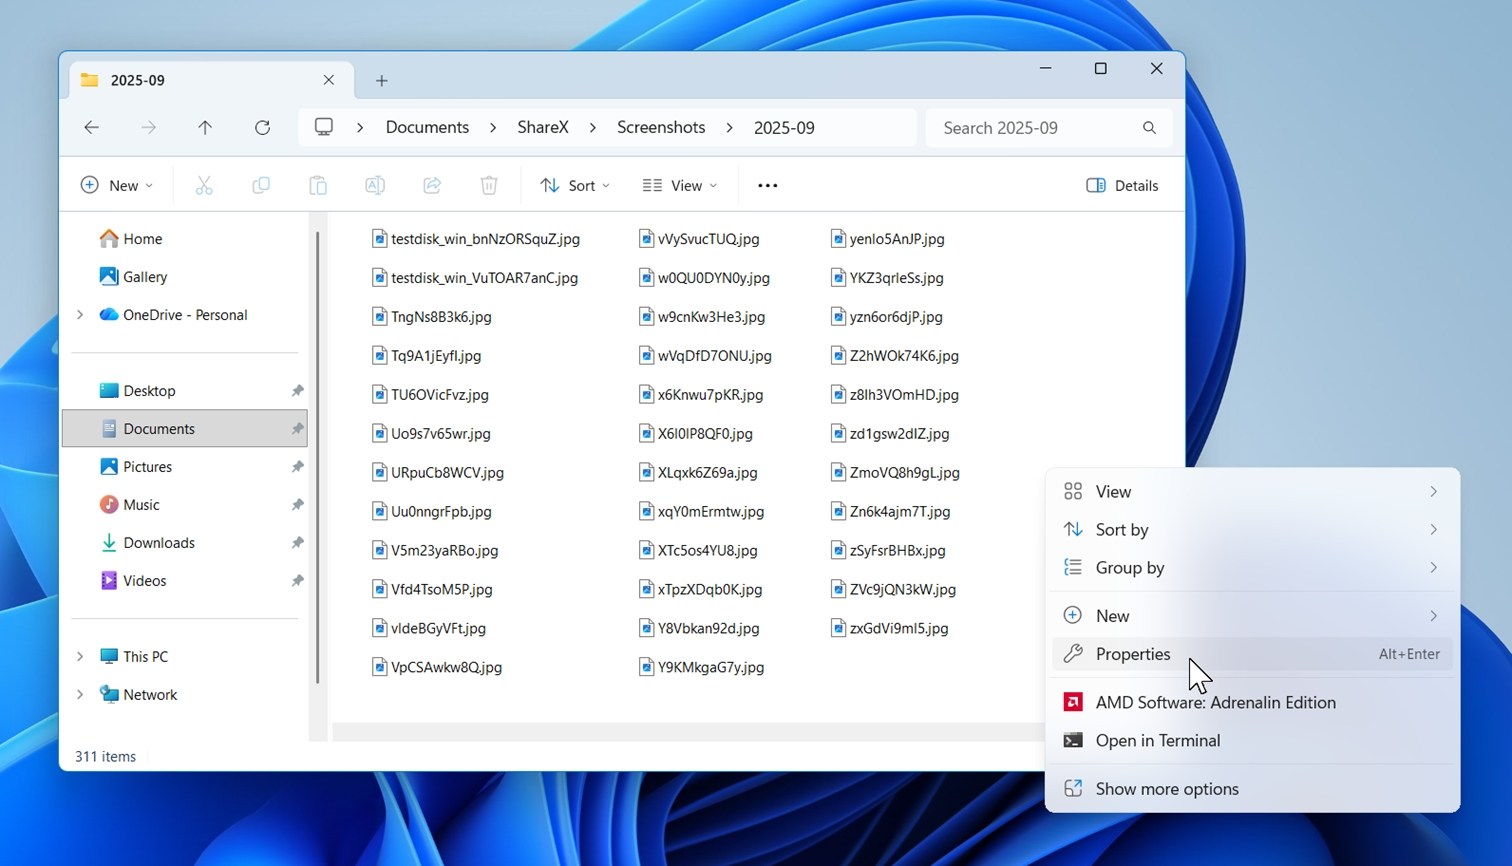
- Then open the Previous Versions tab. In our screenshot, you can see Windows listing several saved copies of the same folder, grouped by time. That’s what you want.
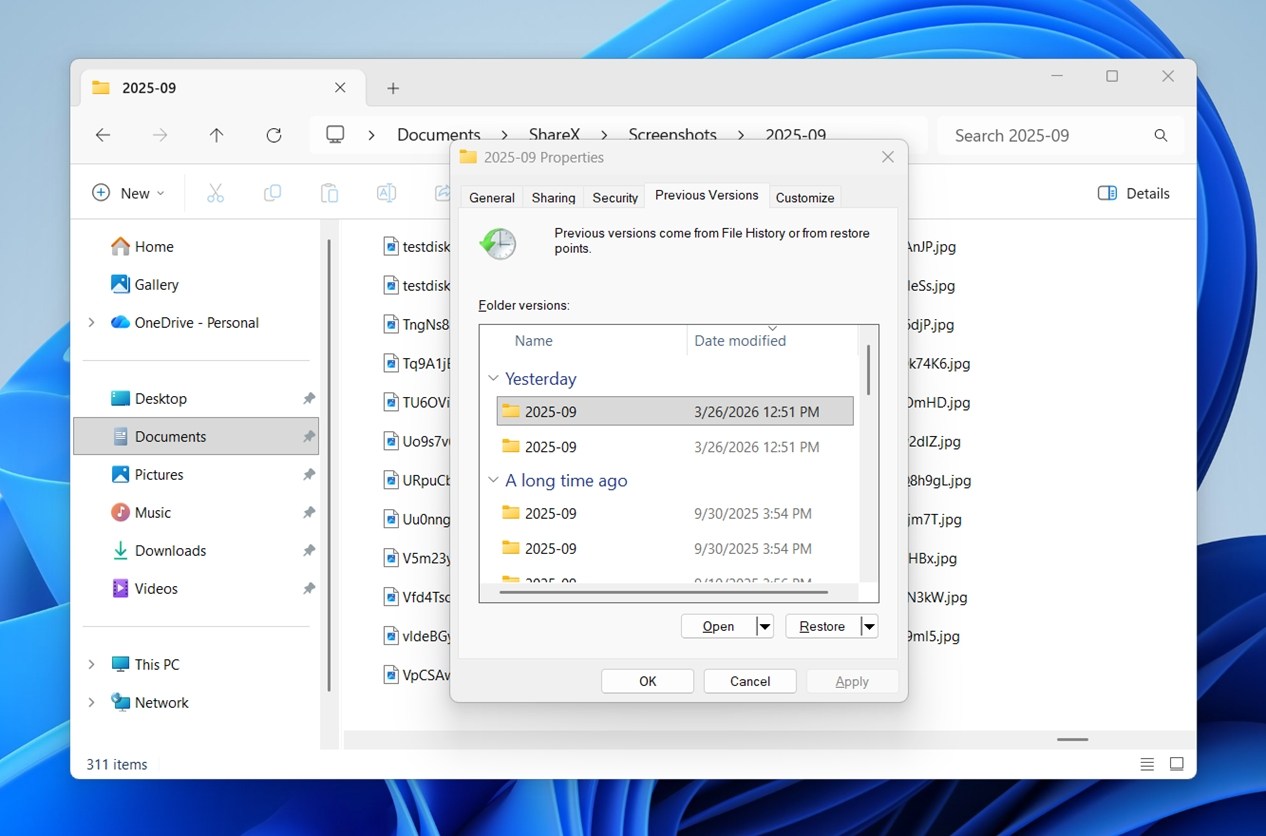
- Click Open first if you want to check the contents before restoring anything. If the missing files are there, use Restore to put that version back (or use the small arrow next to it and choose a different location). We’d go with a different folder first.
After completing these steps, the chosen files will be placed back to their original location on the drive.
How to Restore LaCie External Hard Drive Functionality
So you’ve managed to restore the lost data from your LaCie external hard drive, now what? If the reason which led to the data loss in the first place was read/write errors, file system corruption, failure to mount, or bad sectors, and you plan on continuing to use the drive, it’s a good idea to try to restore its normal operation to prevent the same issue from happening again.
If you already recovered everything important, feel free to skip ahead to Method 3. If you could not recover the data for some reason, the next methods may still help, whether you want to try fixing the drive errors (Method 2) or move on to a professional recovery service (Method 4). And if you want to repair the drive first, try to make a backup before doing that whenever possible.
Here we have selected proven LaCie hard drive recovery tips that have helped many users solve most problems.
Method 1: Check the LaCie Hard Drive Connection
The first thing that you should check if you’re having an issue with your LaCie external hard drive is the connection between it and the computer. Here’s what you should do:
- Check the connectors and cables. Make sure the USB cable is properly attached to both your computer and the external hard drive. If you can’t view your drive on the computer, try using a different cable to see if it is successful in connecting the drive to the USB port in your computer.
- Try a different USB port. It’s possible that the port you’re using to connect your drive to your computer is the issue. To rule out this issue, try using a different USB port.
- Reboot your computer. Maybe there are some issues with the drive recognition. In such a case, reboot your computer and try to connect your LaCie drive again to see whether the issue went away.
Method 2: Fix Hard Drive Errors
The next step would be to check to see whether your LaCie drive has any drive errors that are preventing the external drive from working properly. Both Mac and Windows-powered computers have built-in tools that can help detect file system issues, bad sectors, and fix some corruption problems with external drives that might be preventing you from accessing the files located on it.
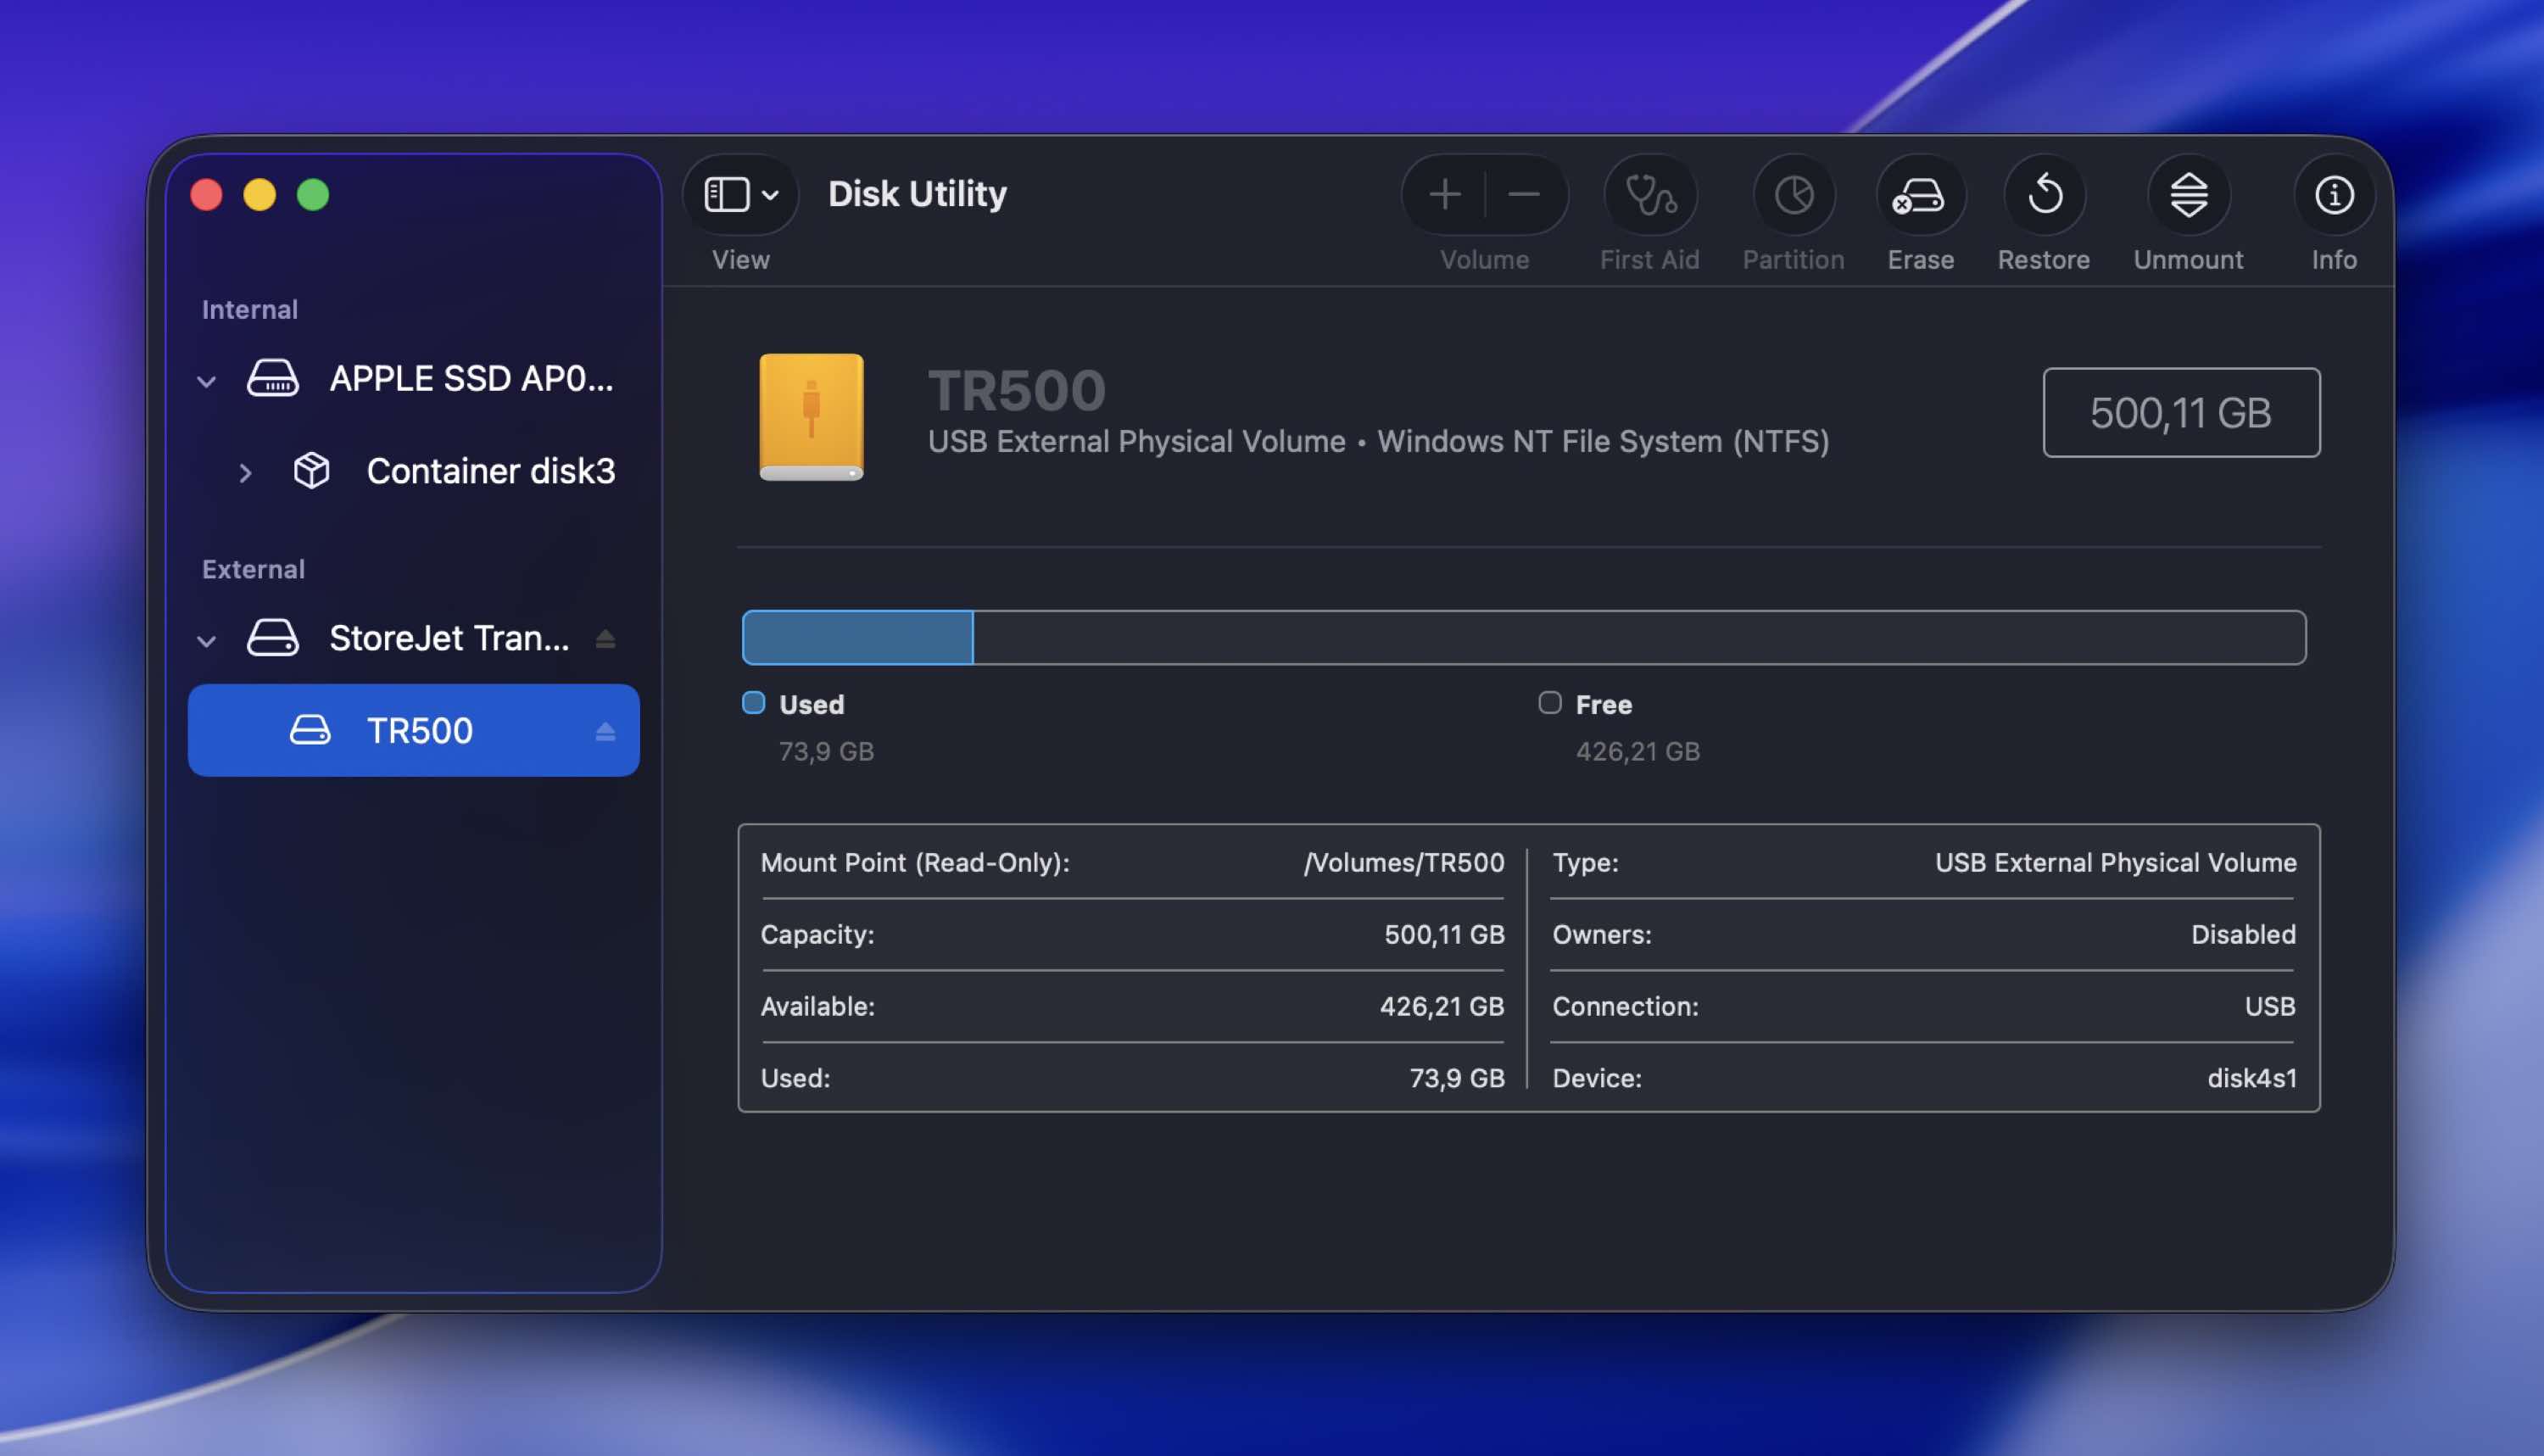
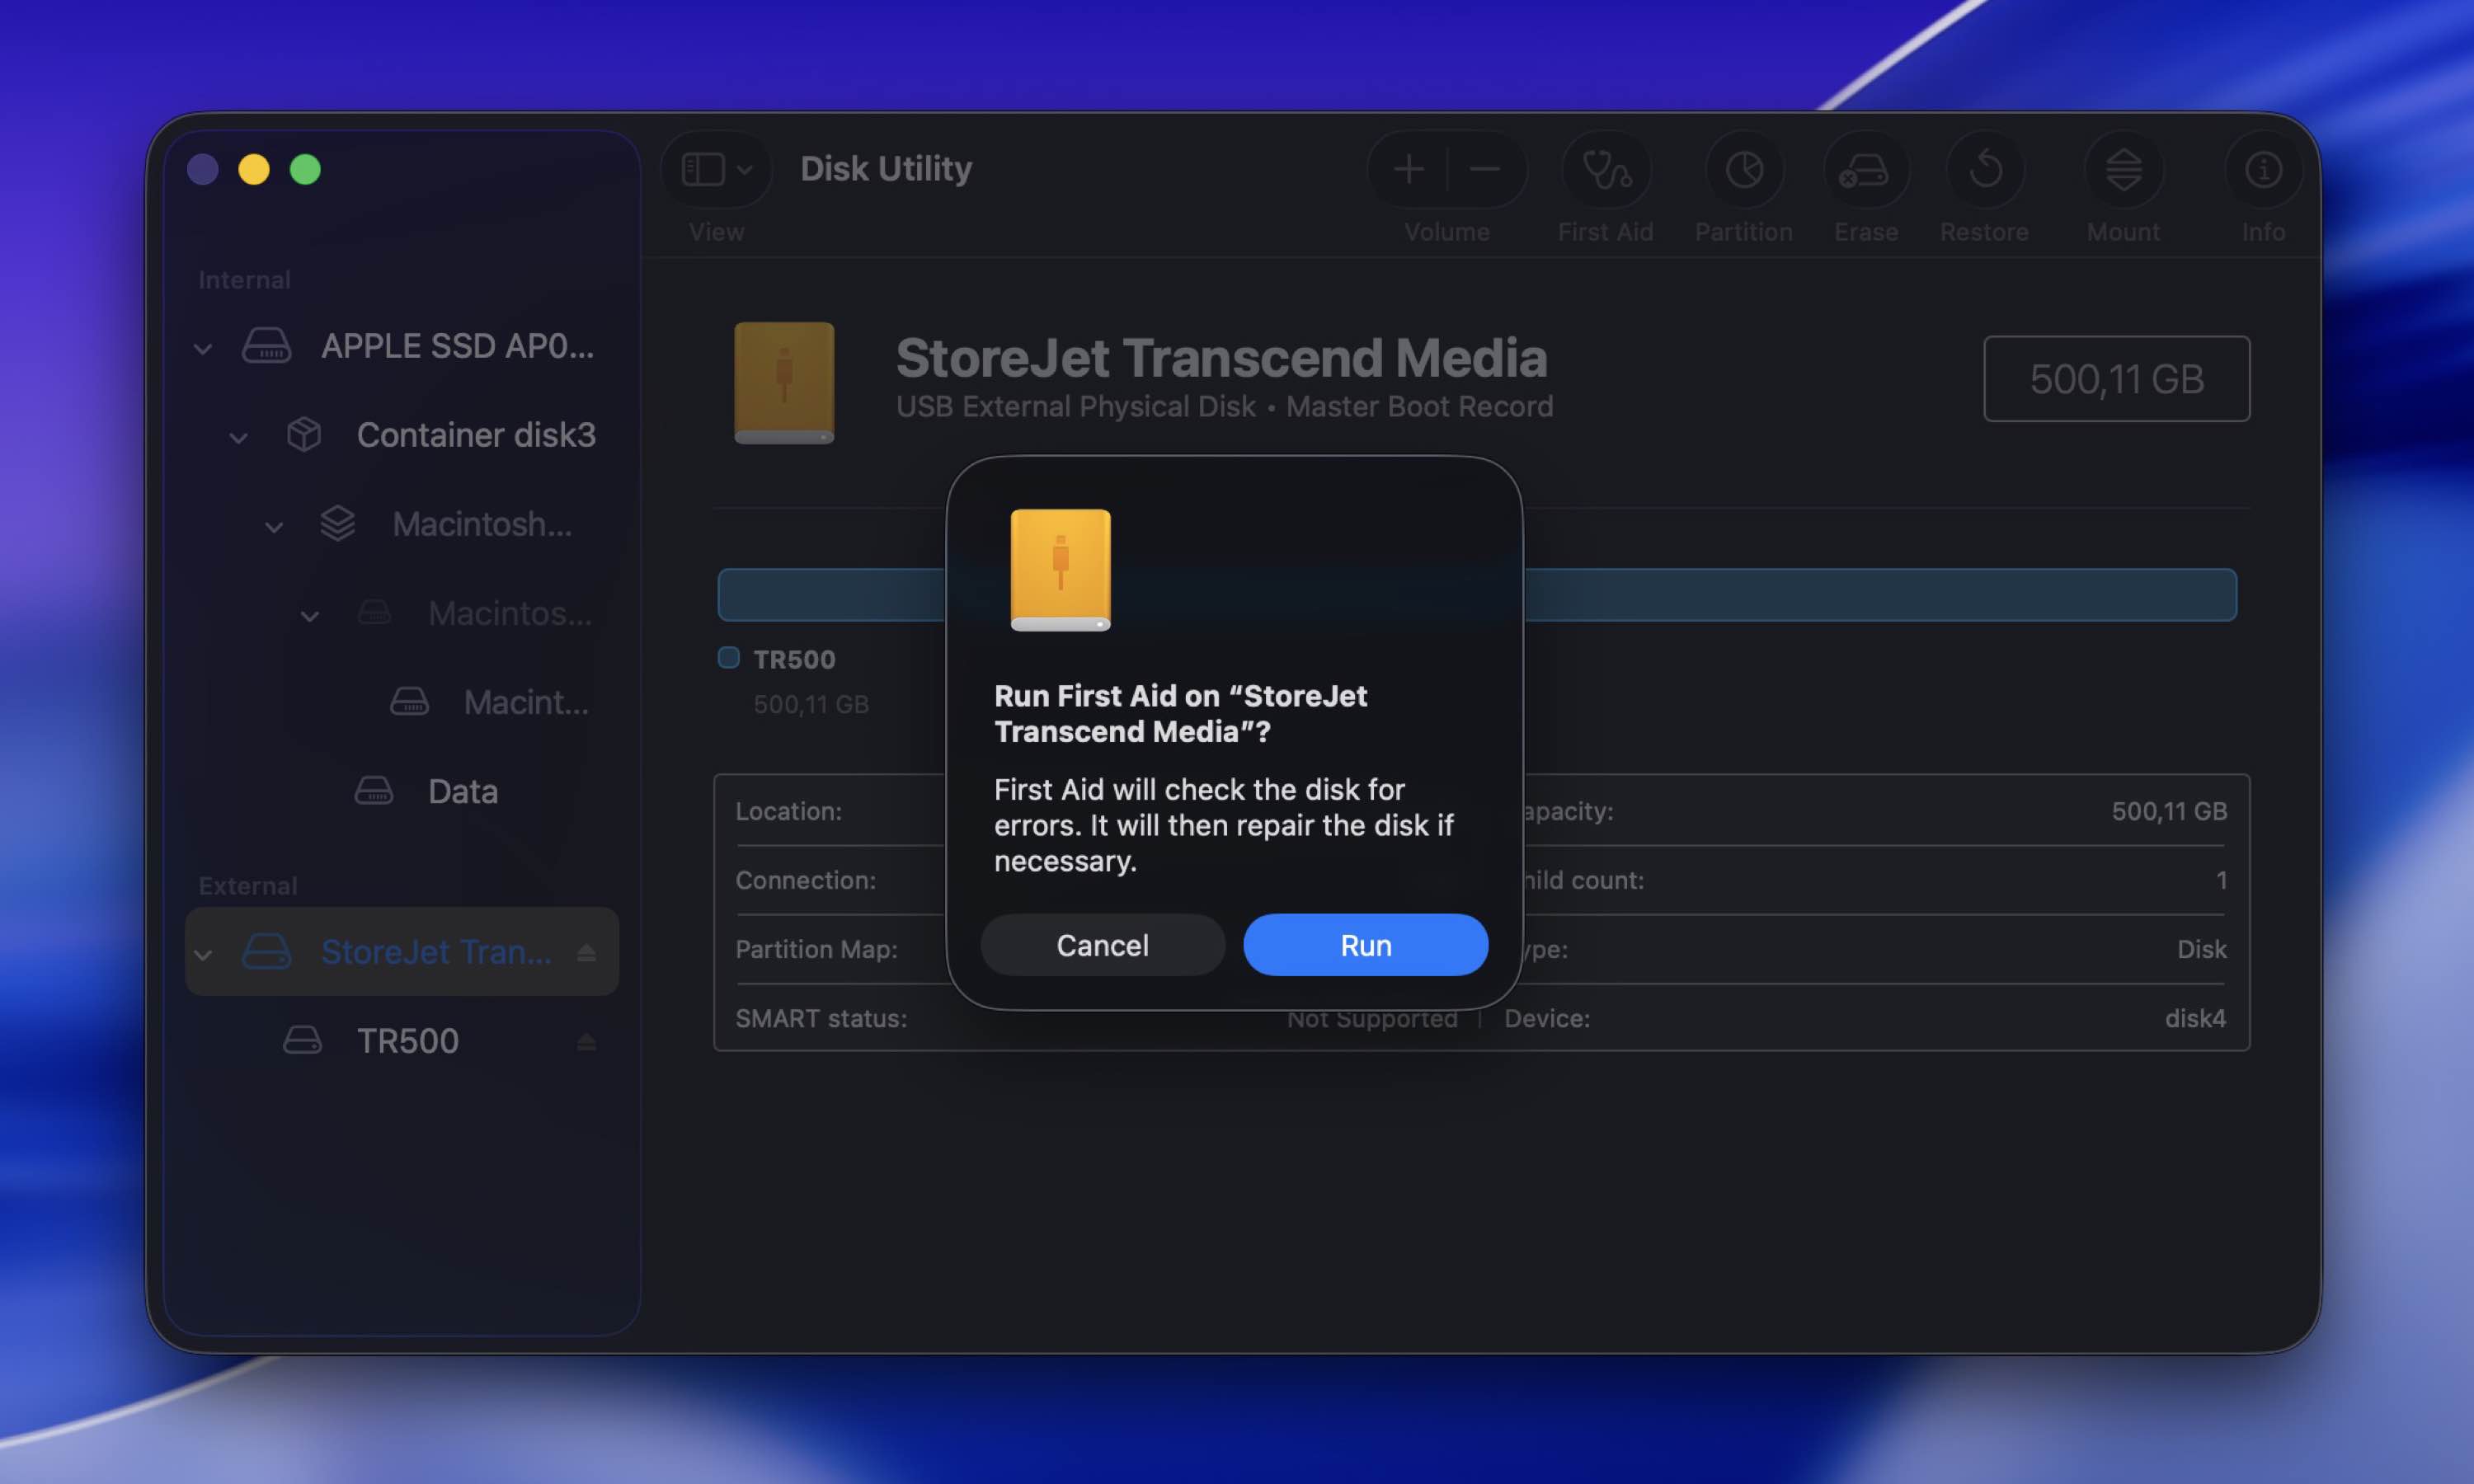
If you’re on a Mac, follow these steps to use First Aid to fix the LaCie drive:
- Connect the LaCie external hard drive to your Mac.
- Open the Disk Utility app on your MacBook (open the Launchpad and type in Disk Utility in the search field).
- Choose your drive from the list of available devices on the sidebar on the left.
- Click the First Aid button at the top.

- Click Run.
When the process is finished, reconnect your LaCie drive to your Mac to see whether the issue has been addressed.
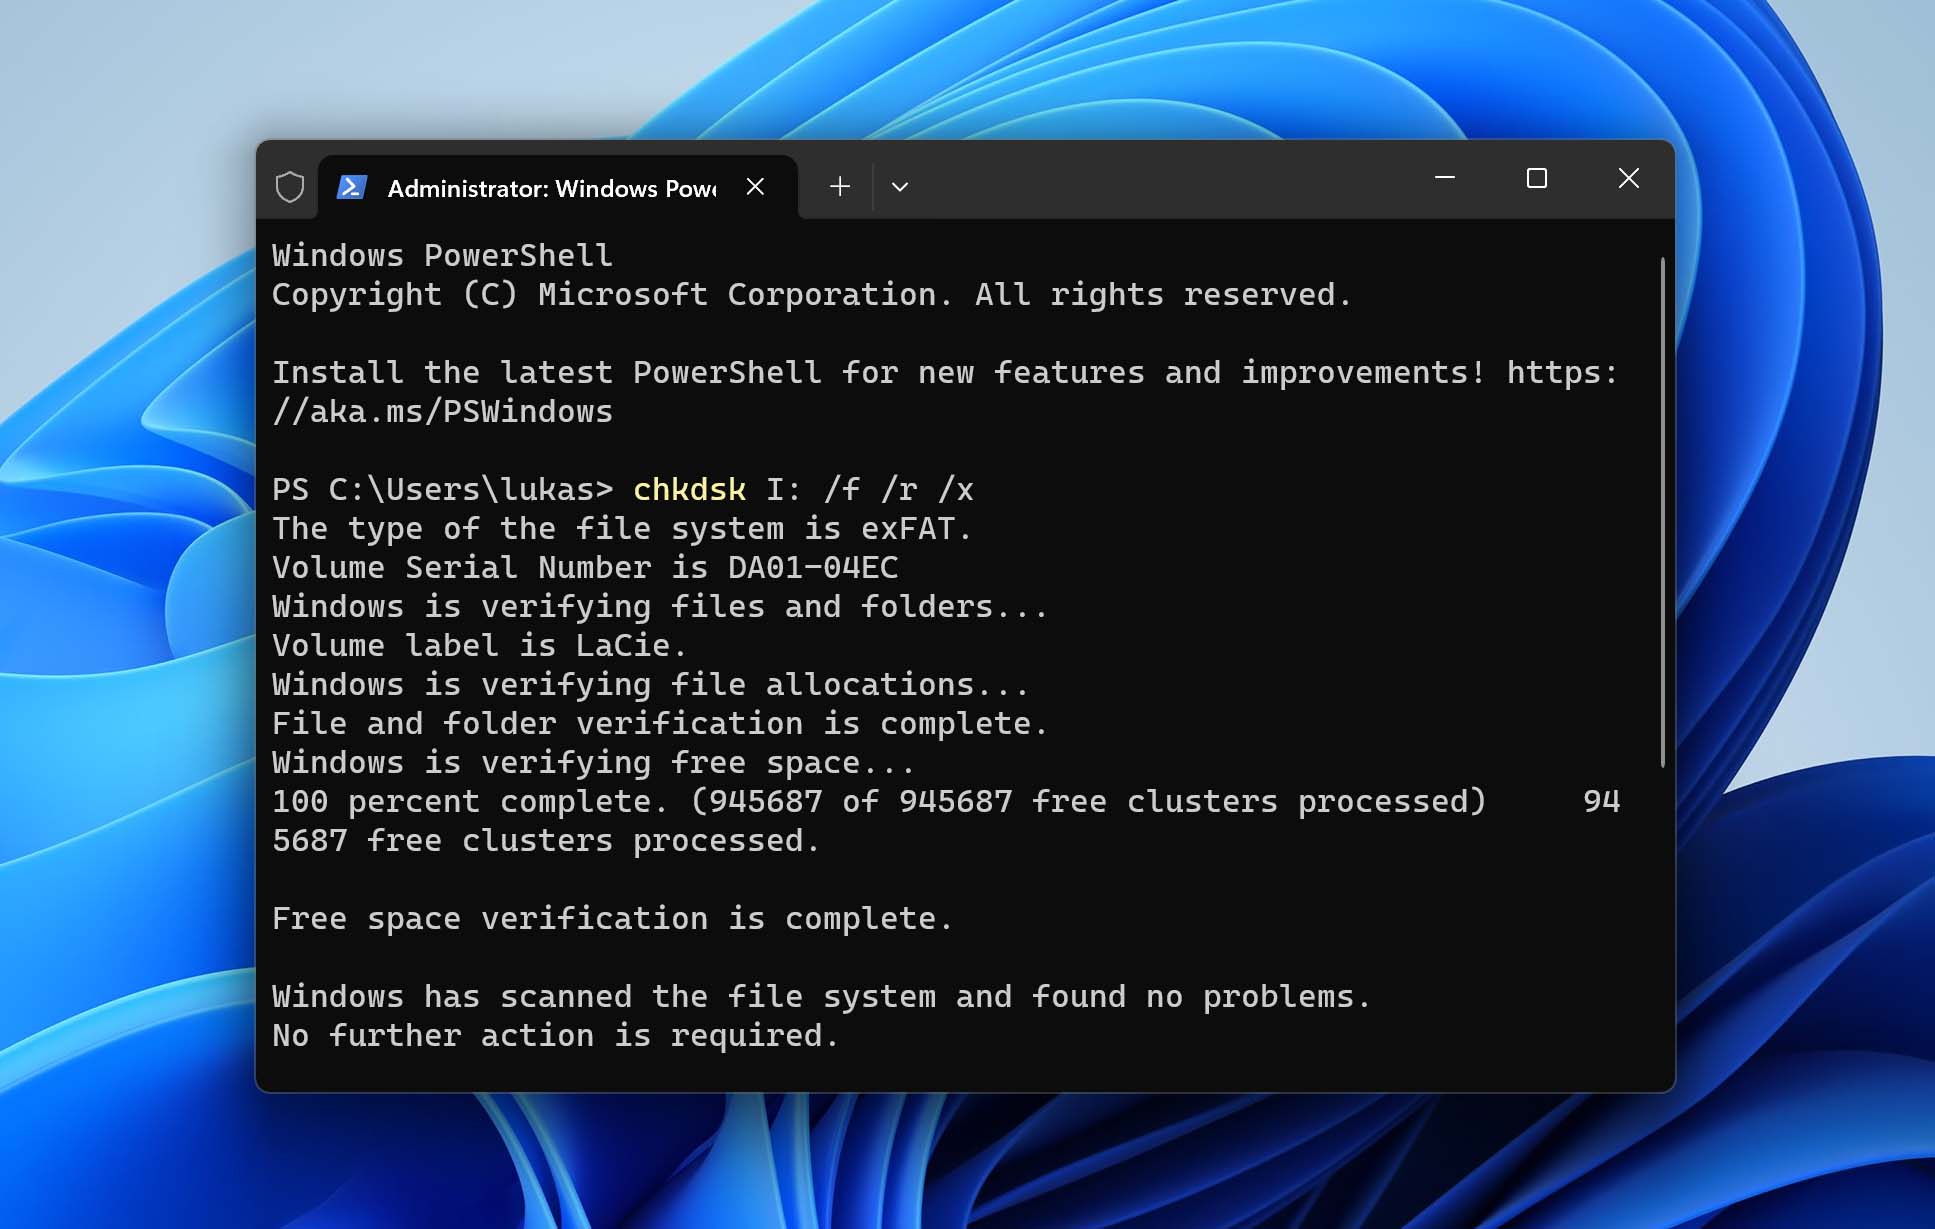
If you’re on Windows, you’ll need to use a tool called CHKDSK to recover your LaCie external hard drive:
- Connect the LaCie drive to your Windows PC.
- Hit Windows + S key combination and type in the Terminal in the search field.
- Right-click Terminal and choose Run as administrator from the available options on the right.
- Copy-paste the following command in the window (replace I with the letter corresponding to your external drive): chkdsk I: /f /r /x
- Press the Enter key and wait for the scan to finish.
Method 3: Format the LaCie External Hard Drive
Another method that you can try to remove issues on your LaCie drive in connection to file system corruption or other system-related issues is formatting it. You can do this both on a Mac and on a Windows PC.
Follow these steps to format your LaCie external drive on your Mac:
- Connect the LaCie external hard drive to your Mac.
- Launch Disk Utility (open the Launchpad and type in Disk Utility in the search field).
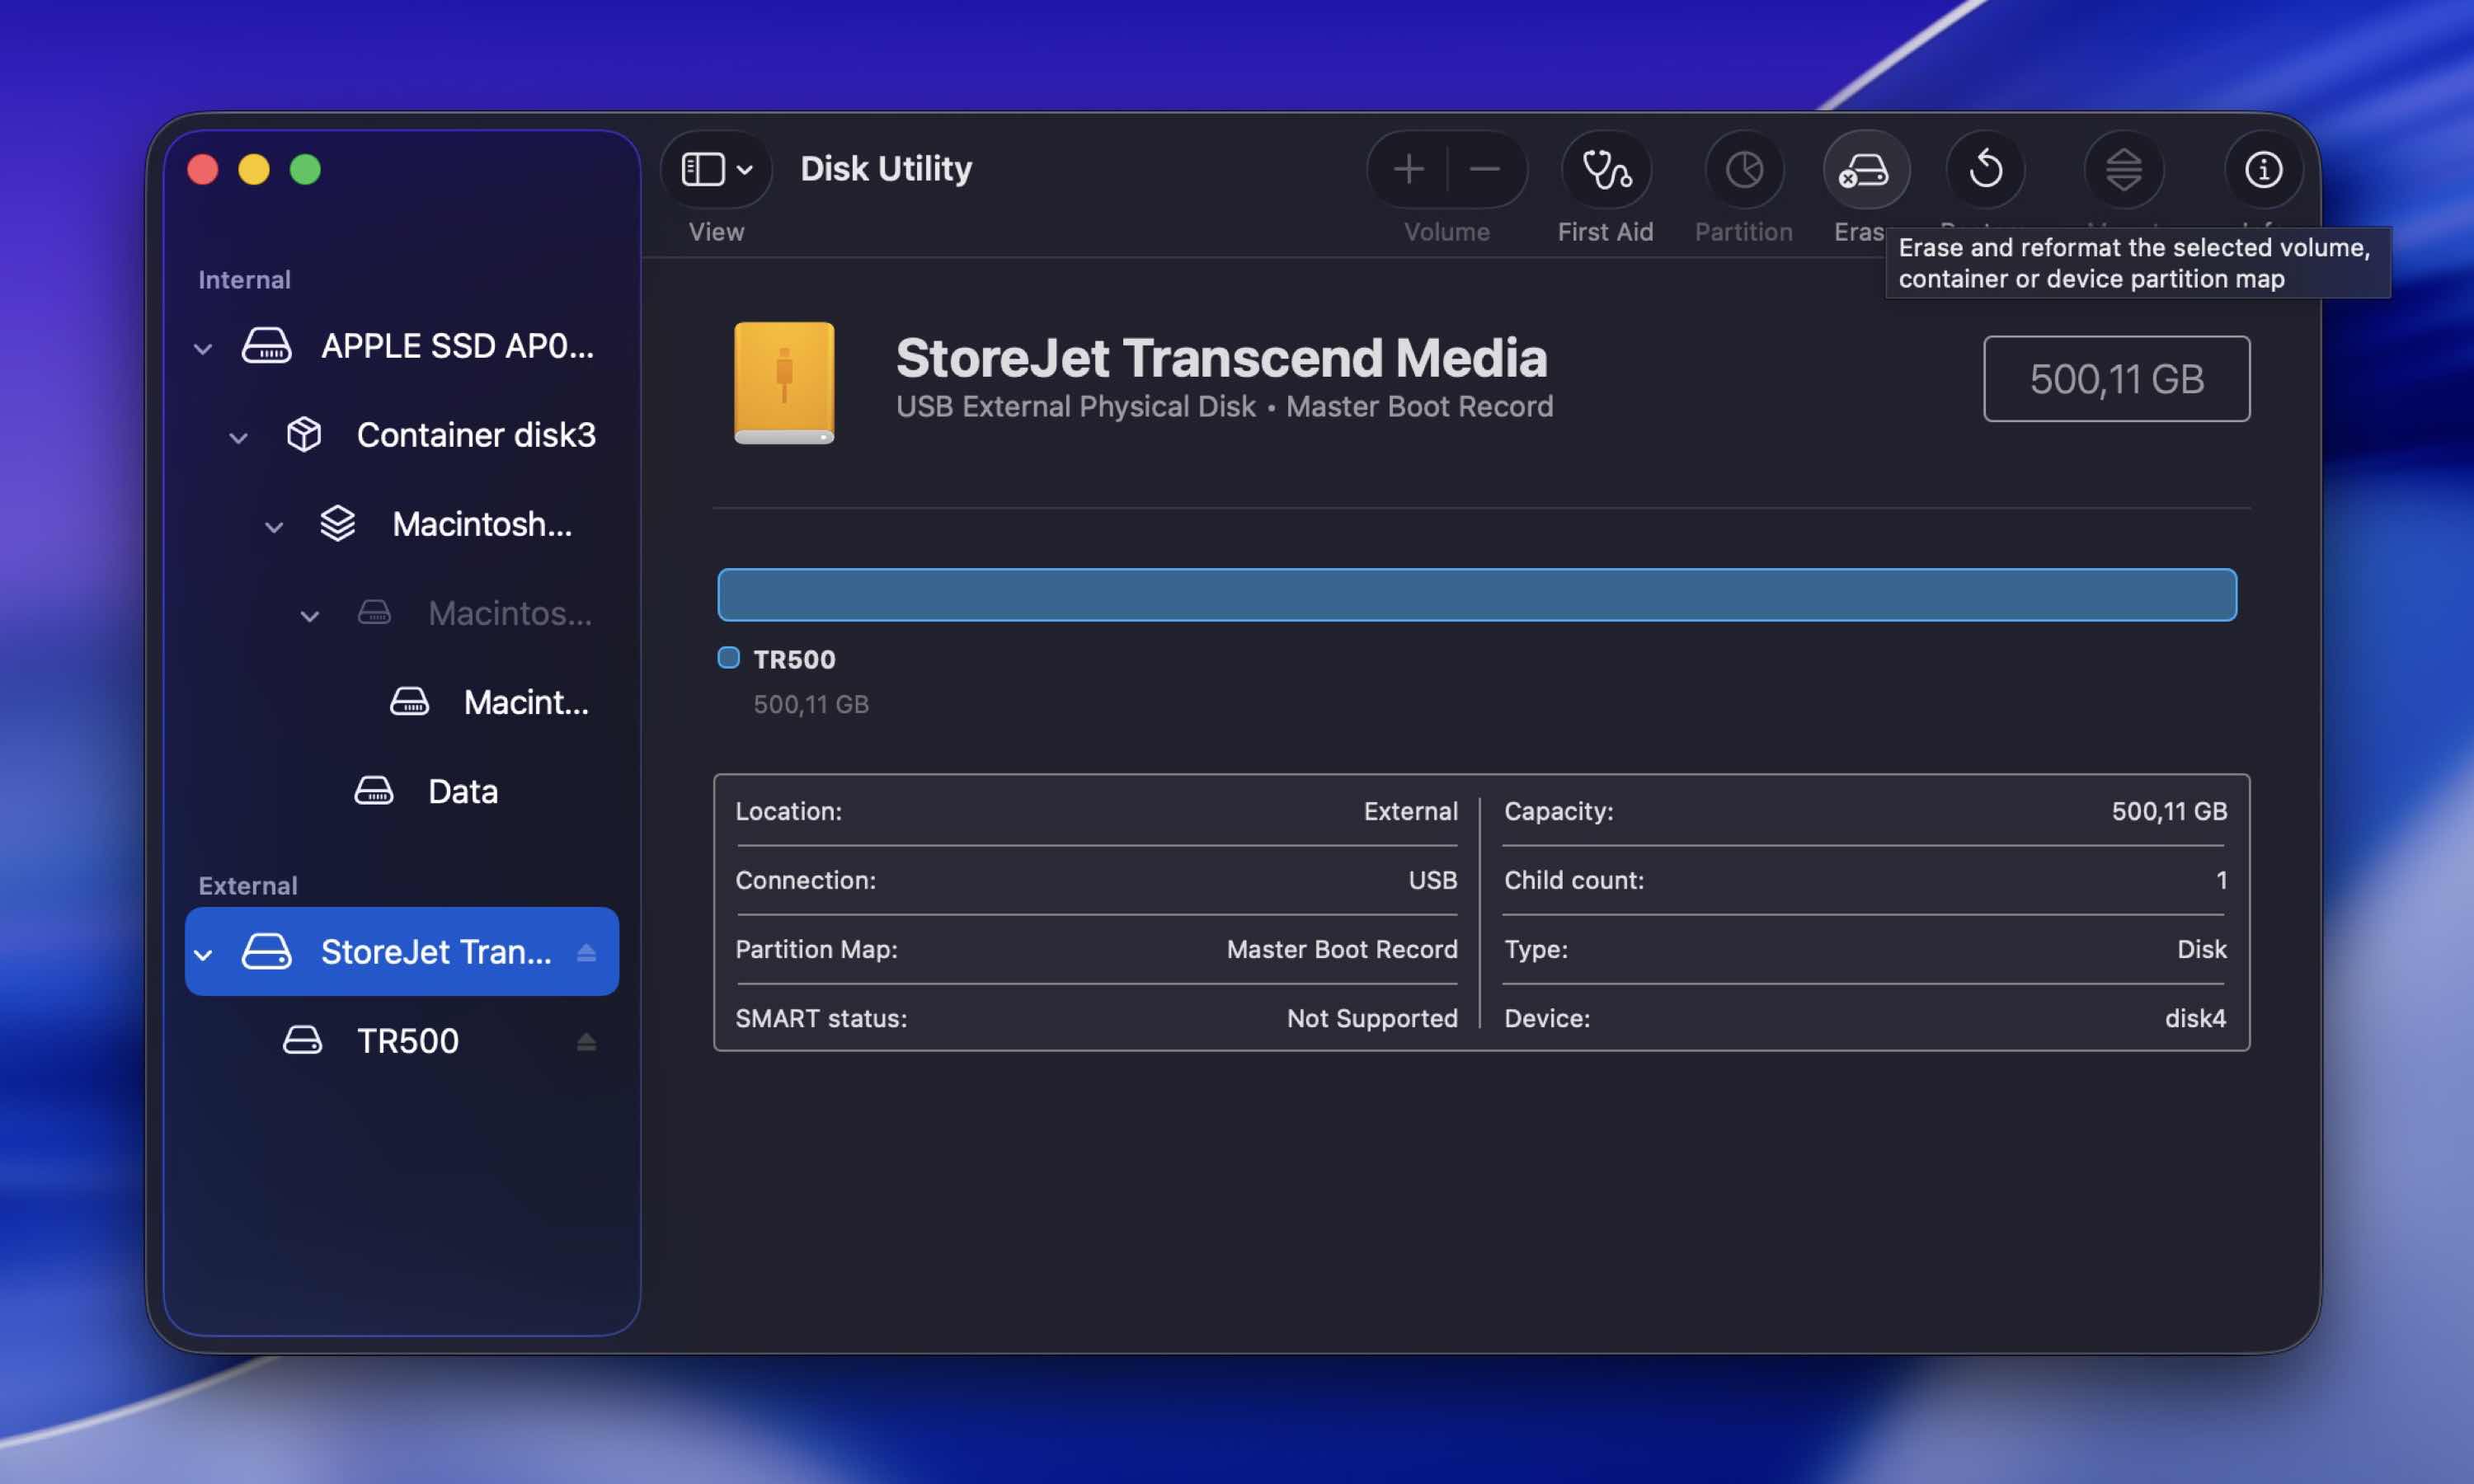
- Select the connected drive on the sidebar on the left.
- Click the Erase button at the top of the screen.
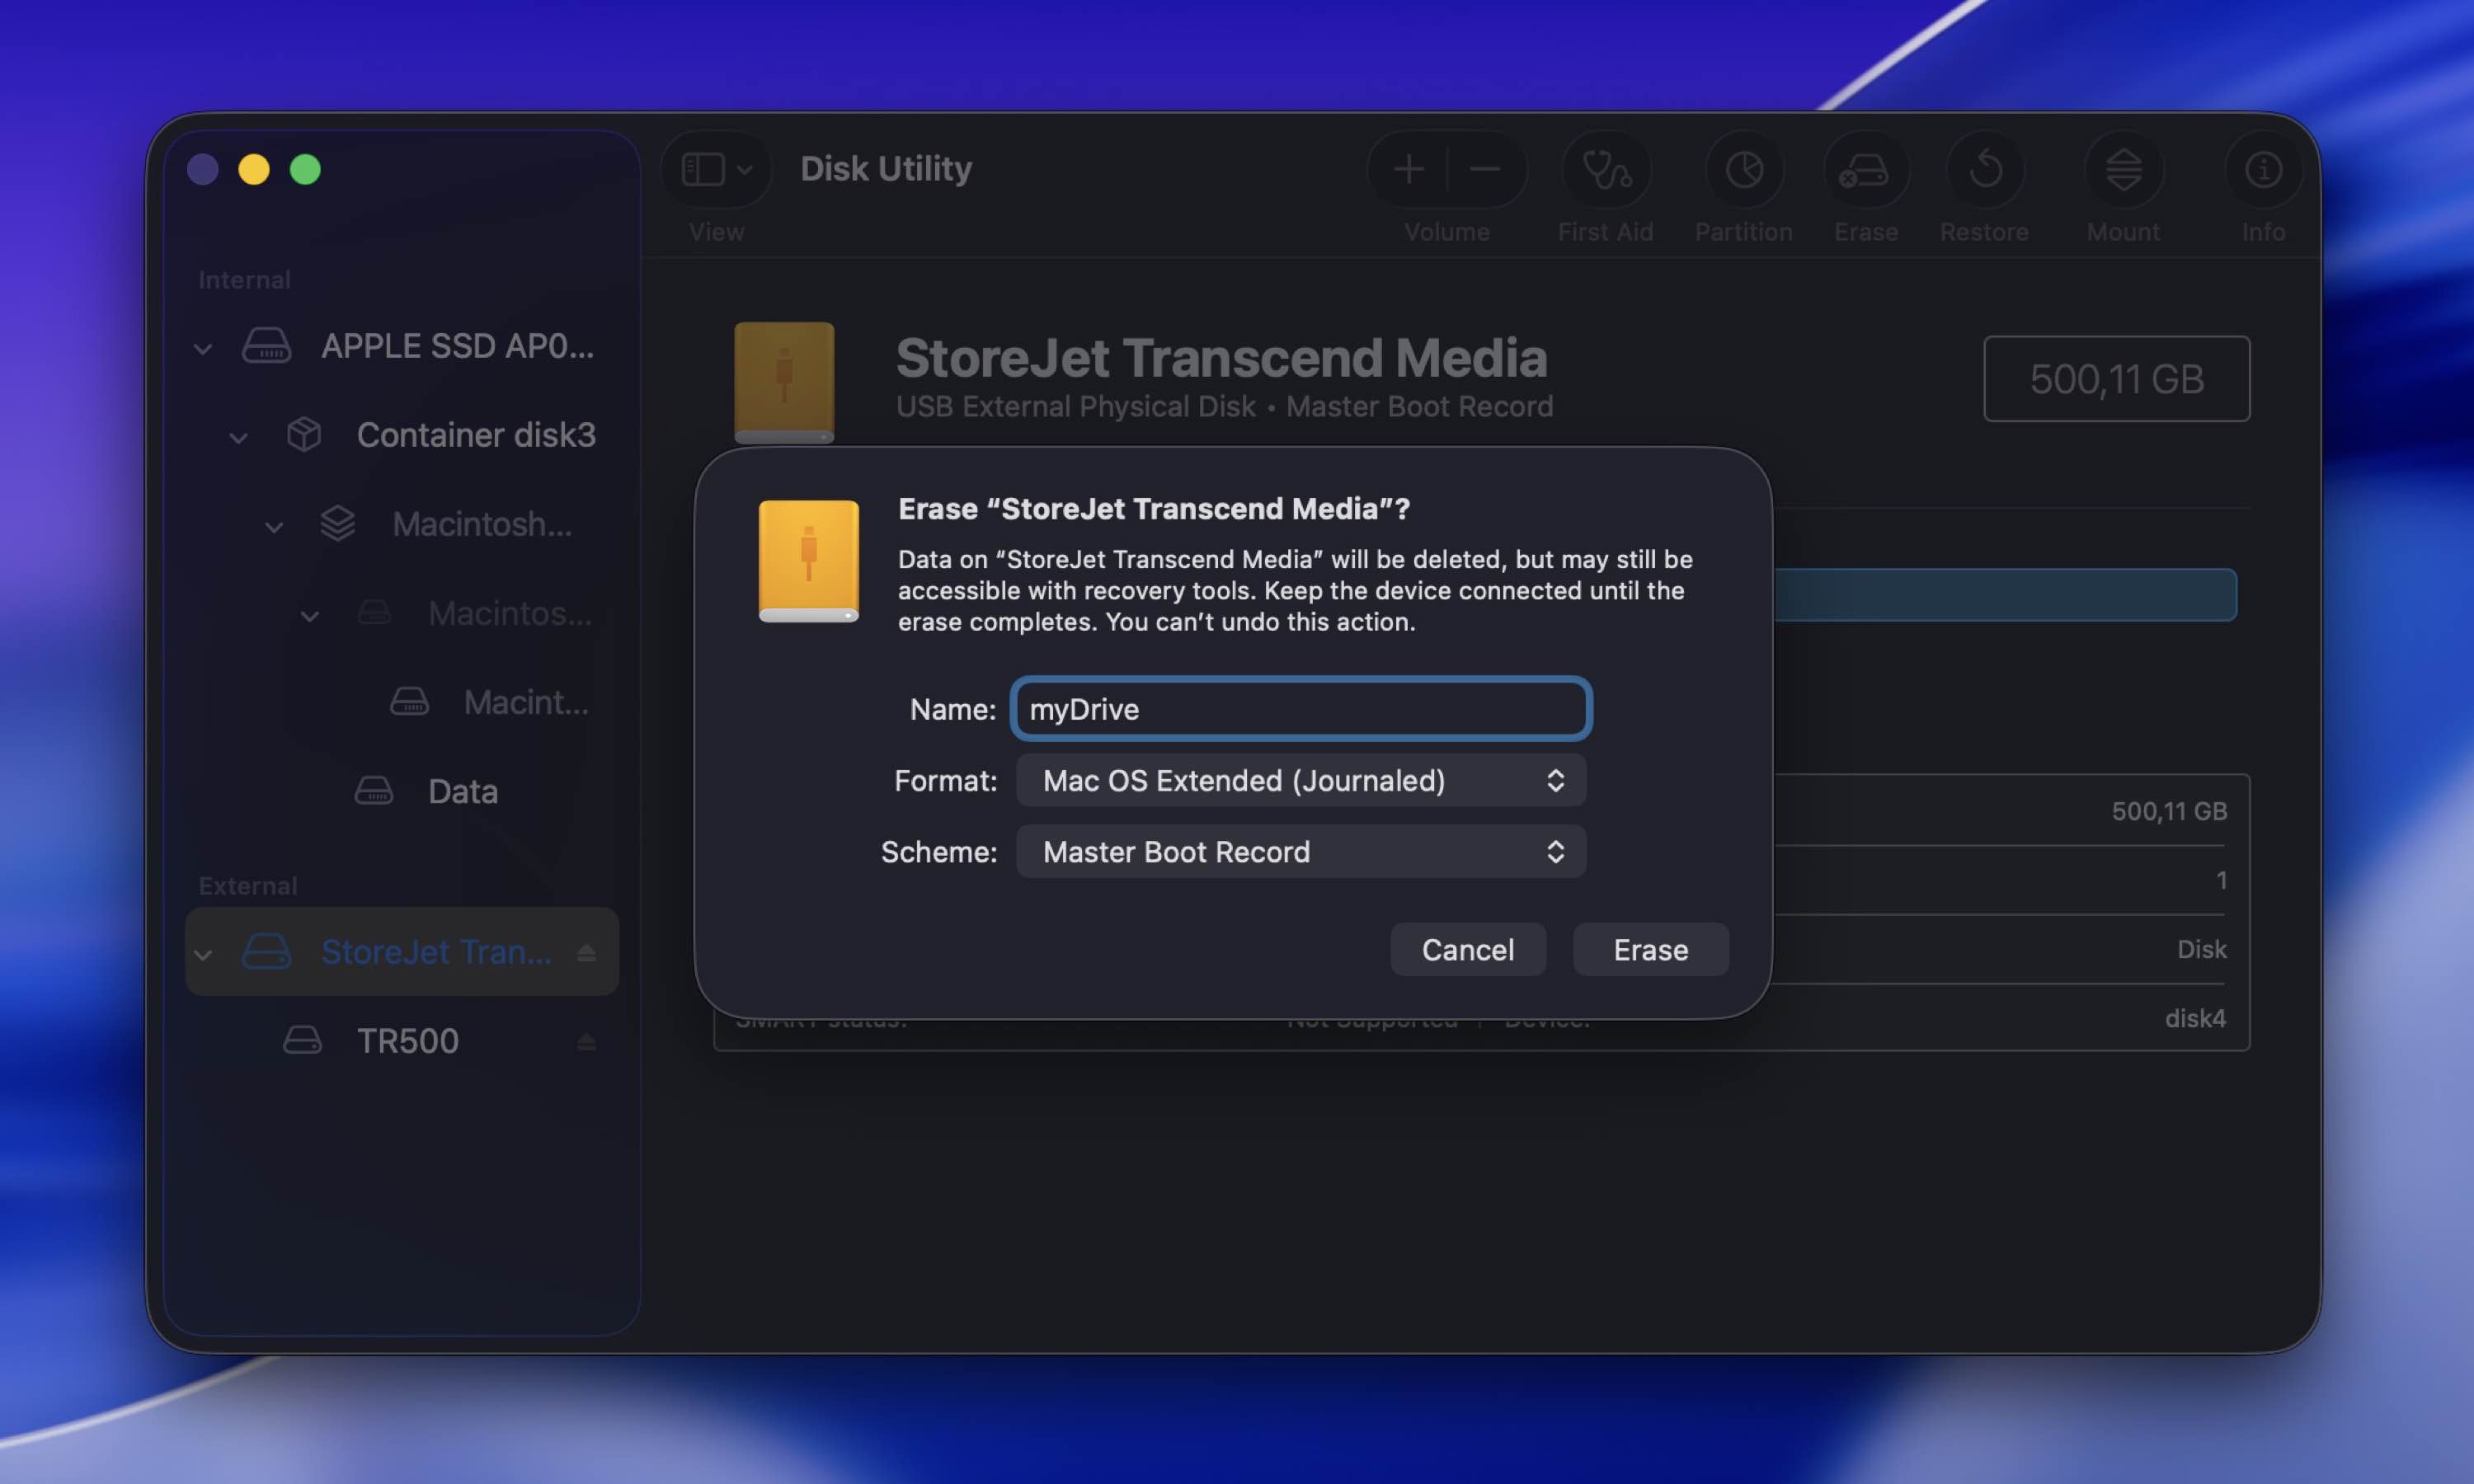
- Type in a new name for your drive and choose the needed format.
- Click Erase to format your drive.
If you’re using a Windows PC, then follow these steps to format your external HDD:
- Connect the LaCie external hard drive to your computer.
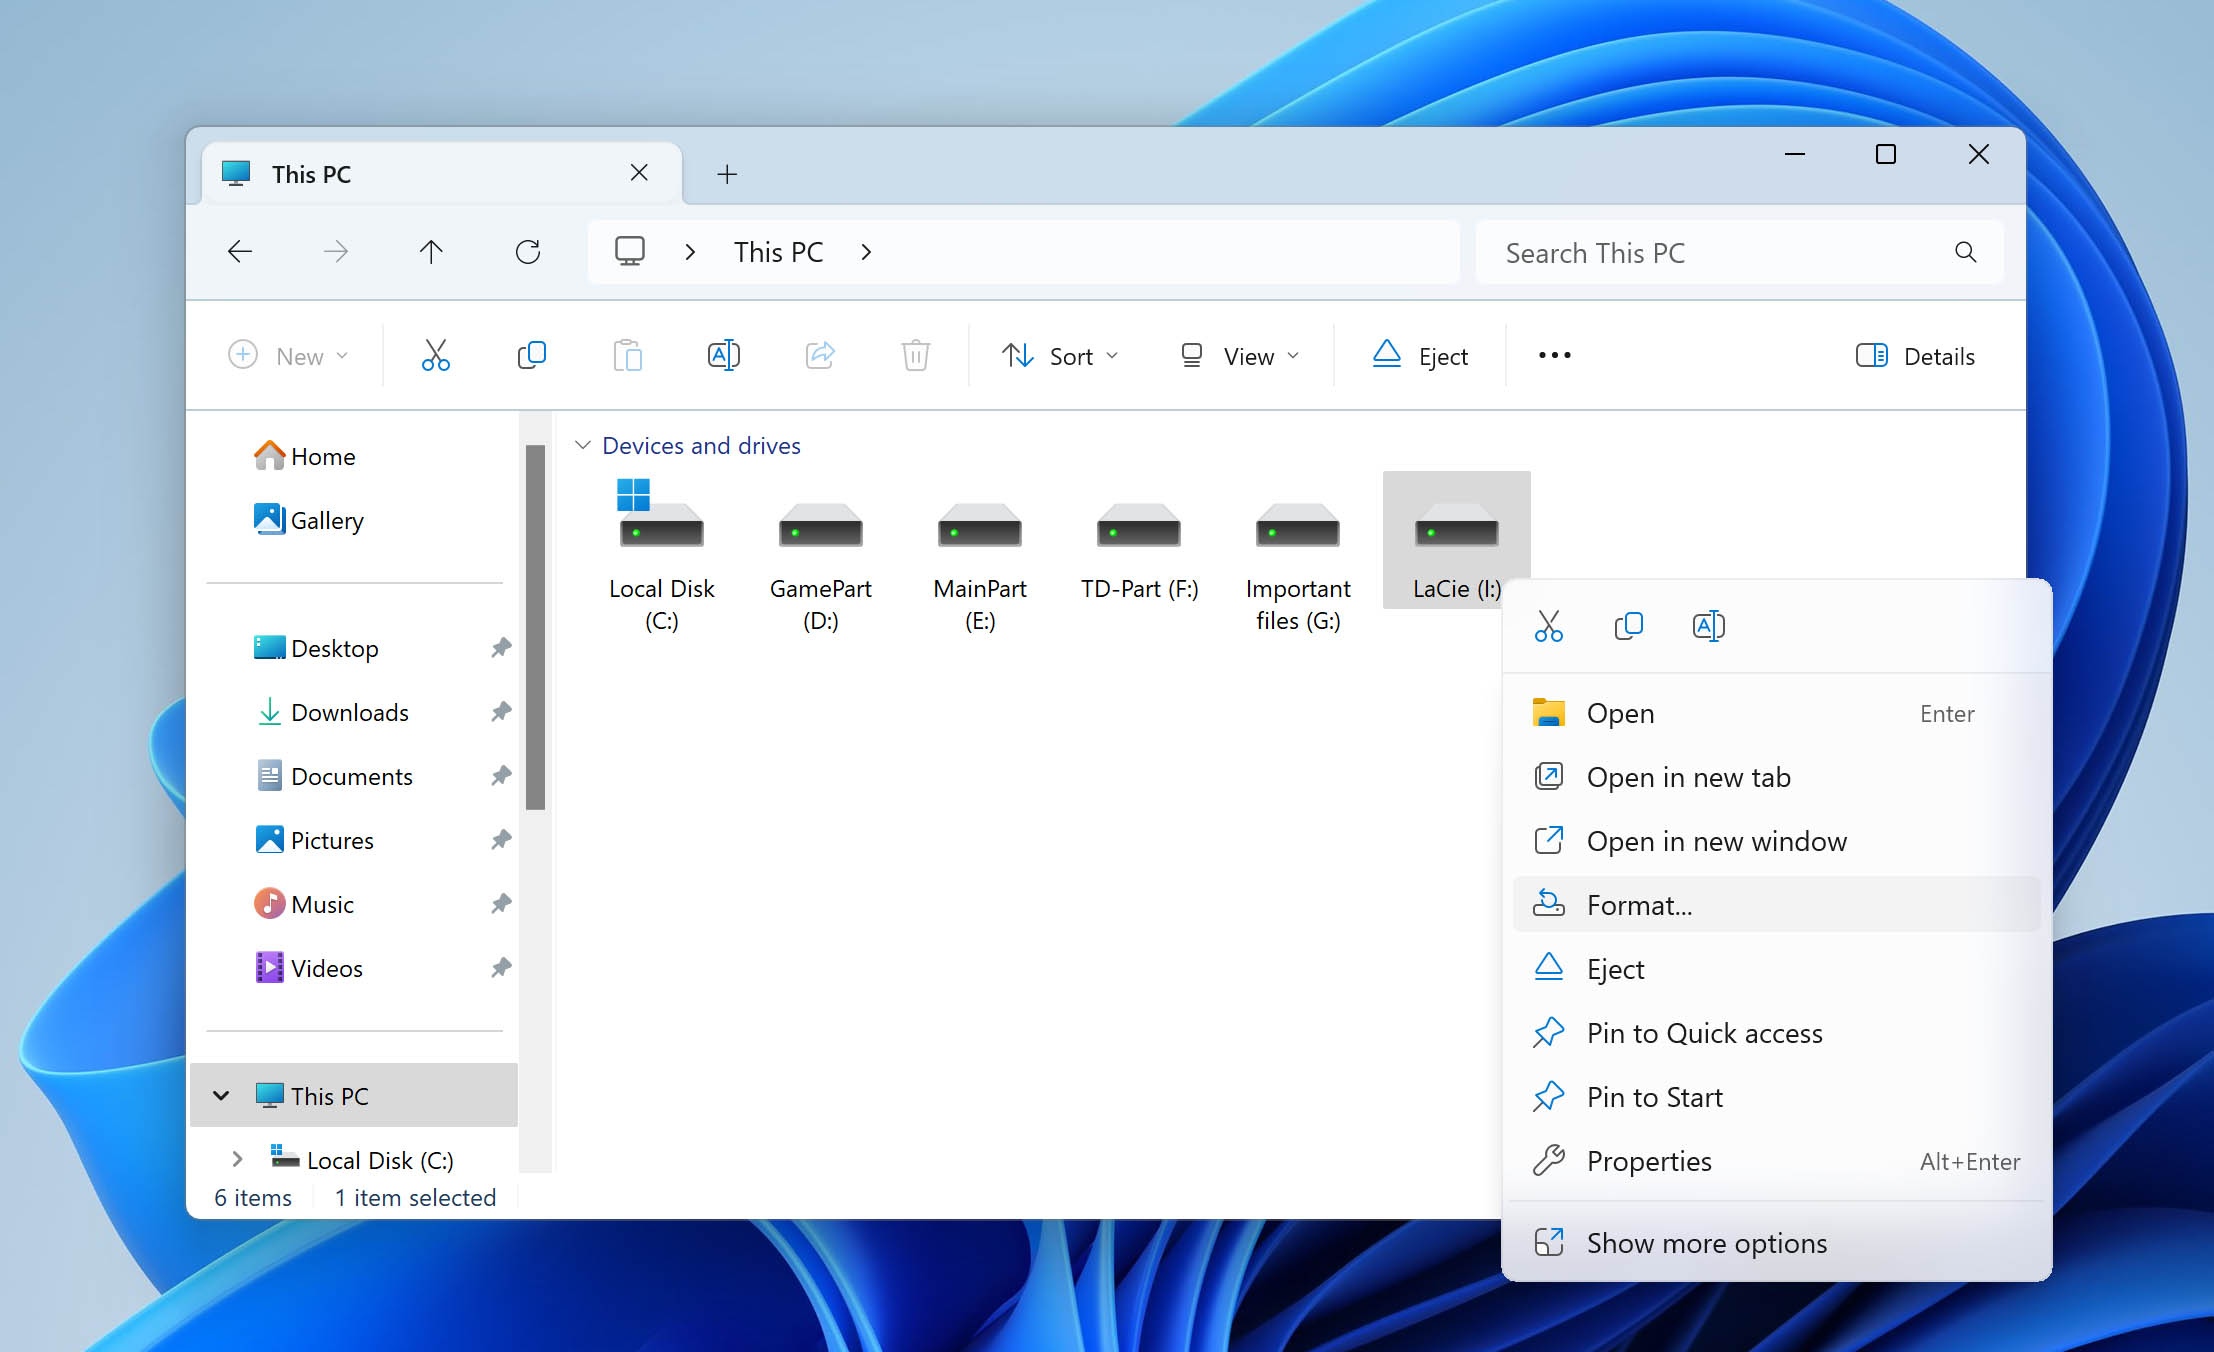
- Open File Explorer and locate the LaCie drive.
- Right-click the drive and choose Format from the drop-down menu.
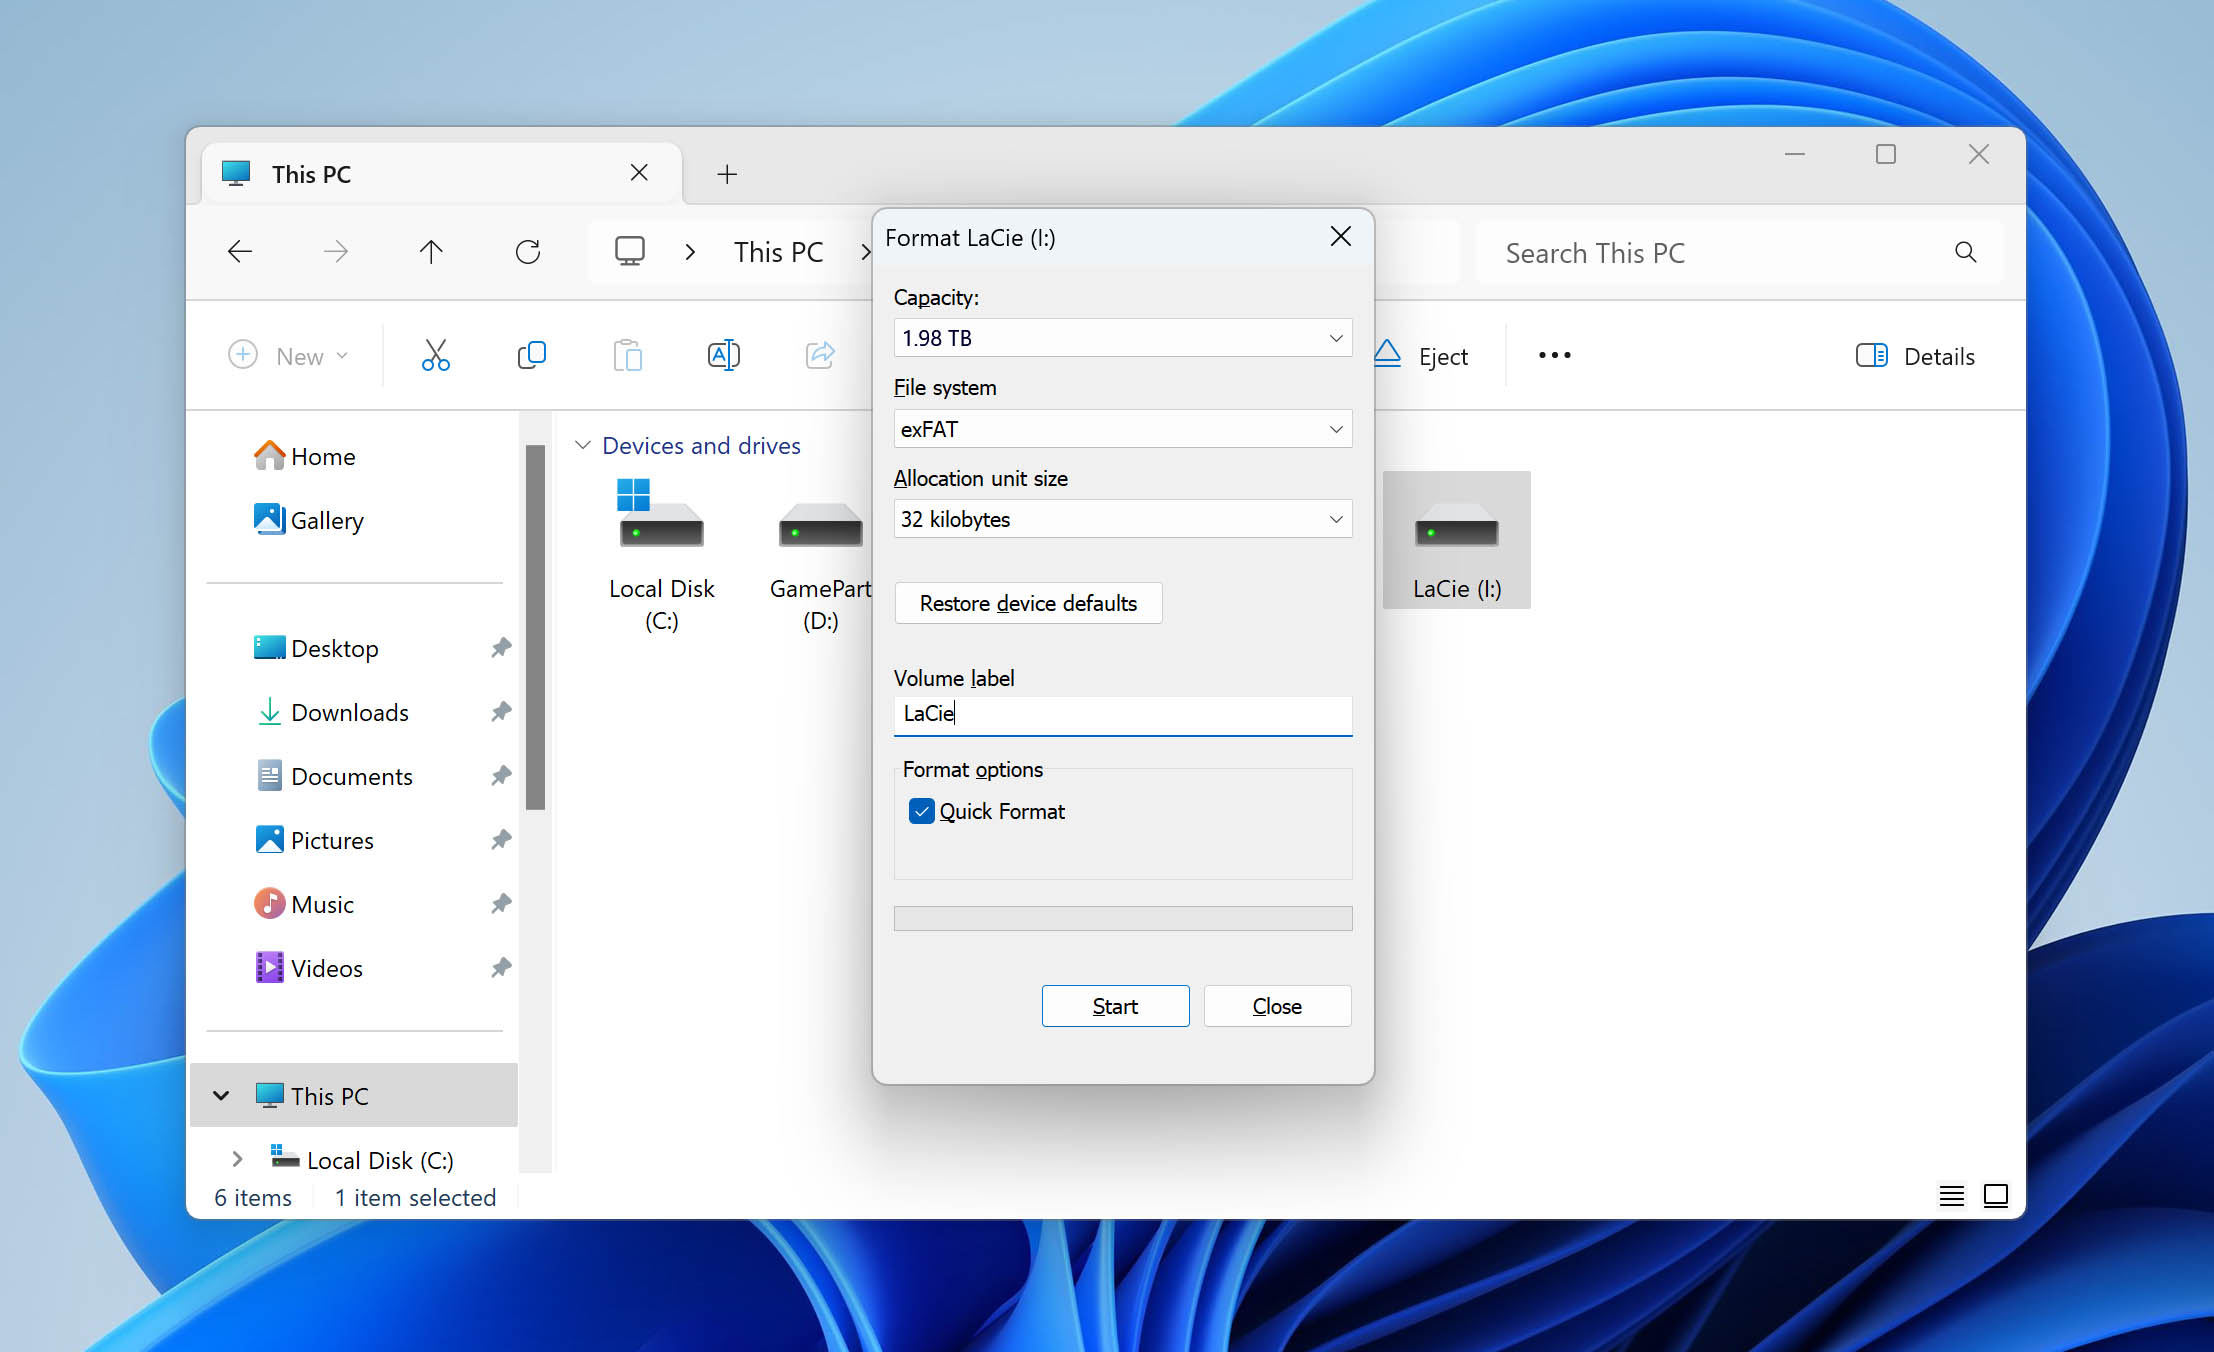
- Choose an appropriate file system format (if you plan on using your drive with both
- Windows-based computers and Macs, choose exFAT).
- Type in a suitable name for your drive and check the Quick Format box.
- Click Start to confirm and format your drive.
Once you’ve formatted your external HDD, reconnect it to your computer and check whether it’s functioning properly.
Method 4: Contact a Data Recovery Service
There’s also the option to contact a professional data recovery service. To be clear, DIY recovery software often uses the same core approach these labs use at the logical level: scan the drive, find lost data, and copy it somewhere safe. In many everyday cases, that means you can do the job yourself and spend far less money. That’s why we started this guide with DIY recovery methods first.
That said, some situations are harder to handle at home or simply too risky. A recovery service makes more sense when the LaCie drive has clear signs of physical failure: makes unusual noises, overheats, shows the wrong capacity in Disk Management or Disk Utility. It also makes sense when the data is valuable enough that you don’t want to risk trial and error.
When it comes to choosing such a service, you can start with LaCie’s official support route, since many LaCie drives are sold with Rescue Data Recovery Services included for a limited period. Coverage depends on the exact model and warranty terms, so it’s worth checking your drive first before you pay an independent lab out of pocket. If your product qualifies, that can save you a serious amount of money. If not, you can still go with a third-party recovery company.
A good alternative is the CleverFiles Data Recovery Service: it is much more affordable compared to the official LaCie service and offers a no data – no charge policy, which is quite neat.
If you’re still unsure about whether you should get help from a data recovery service or use a DIY data recovery solution, here’s a comparison chart that might help you to make up your mind.
| Data Recovery Service | Data Recovery Software | |
| 💸 Cost | Higher price range | More affordable (or even free) |
| 🏆 Success Rate | It depends on the level of expertise of the service center and the condition of the drive | Completely individual, depends on each case |
| 😬 Risk | Lower risk compared to the DIY method but still varies depending on the expertise level of the recovery specialist | Higher risk of things going sideways since you’ll be the one performing the recovery (it depends on your own knowledge level and on the safety of the chosen tool) |
| ⏱️ Time | Takes longer to receive the data back | Quicker since you’ll be the one performing recovery |
| 🦾 Required Skills | No requirements since data recovery specialists will be responsible for your data recovery | It depends on the data recovery tool, but at least some tech knowledge is needed |
FAQ
It usually makes sense to try LaCie hard drive data recovery yourself when the drive is still detected at the hardware level. For example, if you can see it in Disk Management on Windows or Disk Utility on macOS, and it shows the correct capacity, we’d say there’s a solid chance DIY recovery software can help. That usually means the computer still sees the device well enough to scan it, even if the file system is damaged, the partition is missing, or the drive won’t open normally.
But if you hear loud clicking, grinding, repeated spin-up and spin-down sounds, stop there. The same goes for a drive that shows the wrong capacity, does not appear properly in Disk Management or Disk Utility, or gets unusually hot. In those cases, DIY attempts can make things worse, so a professional service is the safer call.
LaCie does not offer official data recovery software in the usual sense. Some LaCie products may include Rescue Data Recovery Services, which is a professional recovery service rather than software you run yourself. So if we’re talking about true data recovery software that scans a drive for deleted/inaccessible files, LaCie does not really have a dedicated official tool for that – you’ll need third-party recovery software.
You can recover data from a LaCie drive using a data recovery tool like Disk Drill:
- Download and install Disk Drill for Windows or Mac.
- Connect the LaCie drive to your PC.
- Launch Disk Drill and initiate the scan.
- After completing the scan, click the Review found items button.
- Choose the files you wish to restore and click Recover button.
If your LaCie external hard drive is not turning on and is entirely unresponsive, your best option is to get help from a professional data recovery service. They should be able to repair your drive and retrieve the data from it to a separate external storage device.
The best data recovery software for a LaCie external hard drive that can be used on a Mac is Disk Drill. This tool has a user-friendly interface and amazing scanning capabilities. Disk Drill for macOS supports all major file systems (including exFAT and NTFS) and can recover data even after drive formatting or corruption.
Conclusion
Now you can be sure that with the right solution you’ll be able to successfully perform LaCie external hard drive data recovery in any scenario. In most cases, data recovery software like Disk Drill will be your best bet, since it usually gives the most reliable results and does not take much effort to try. All you need to do is download the app, scan your LaCie drive, and see what it can find.
If backups are available, you can also use those, such as Time Machine on Mac or File History on Windows, though that’s much less common with external hard drives (unless you set that up ahead of time). And if the drive shows signs of physical trouble, it’s better to avoid DIY attempts and consider a professional data recovery service instead. That’s the most serious kind of case, but it does happen.