If you accidentally quick formatted your hard drive, you’re in the right place. This guide shows you how to recover data after a quick format step by step, what to avoid, and how to give yourself the best chance of getting your files back without making the situation worse.
Is It Possible to Undo a Quick Format?
Yes, data recovery after a quick format is often possible. A quick format usually removes the file system information that tells the OS where your files are, but it does not immediately overwrite the actual data stored on the drive. That’s why recovery software can still find and restore files in many cases.
The key point here is to make sure you’re dealing with a quick format, not a full one.
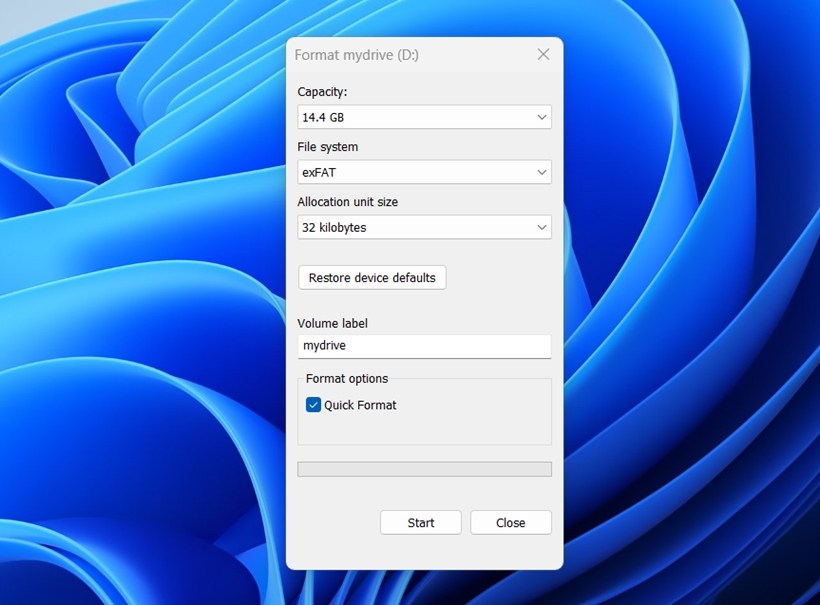
In Windows, this usually comes down to the Quick Format checkbox in the format window. If that box was checked, you performed a quick format. If it was unchecked, the system ran a full format instead. On a quick formatted drive, the partition may look empty, but the old data can still remain there until new files overwrite it.
A full format is much worse for recovery because it does more than clear file system records. It writes across the partition, which destroys the old data in the process. In practical terms, that usually means your files are gone for good.
There’s also low-level formatting, but that’s mostly outside normal day-to-day use. Most people don’t perform a true low-level format through Windows or macOS, even if they use that term casually. In most real-world cases, the choice is between a quick format and a full format, and for this guide, that difference matters the most.
If you performed a quick format, there’s still a realistic chance to recover your files from a formatted hard drive.
How to Recover Data After a Quick Format
Here are various solutions you can use to quickly recover your data following a quick format of your partition or drive.
Method 1: Recover Quick Formatted Drive Using Disk Drill
The most effective way of recovering data on your own if you don’t have a backup is data recovery software. In this case, we need a tool that can recover files after the file system has been lost/formatted and make the whole process manageable for a regular user. That’s why we recommend Disk Drill Hard Drive Recovery tool.
Disk Drill is a trusted go-to for many because it combines several scanning methods, one of which is designed to find files even when the file system has been reformatted, removed, corrupted, or otherwise lost. Just make sure you avoid installing it on the same drive you’re recovering from.
This is how you recover data from a quick formatted drive using Disk Drill:
- Download and install Disk Drill on your computer.
- Connect your quick formatted drive and select it from the list of devices.
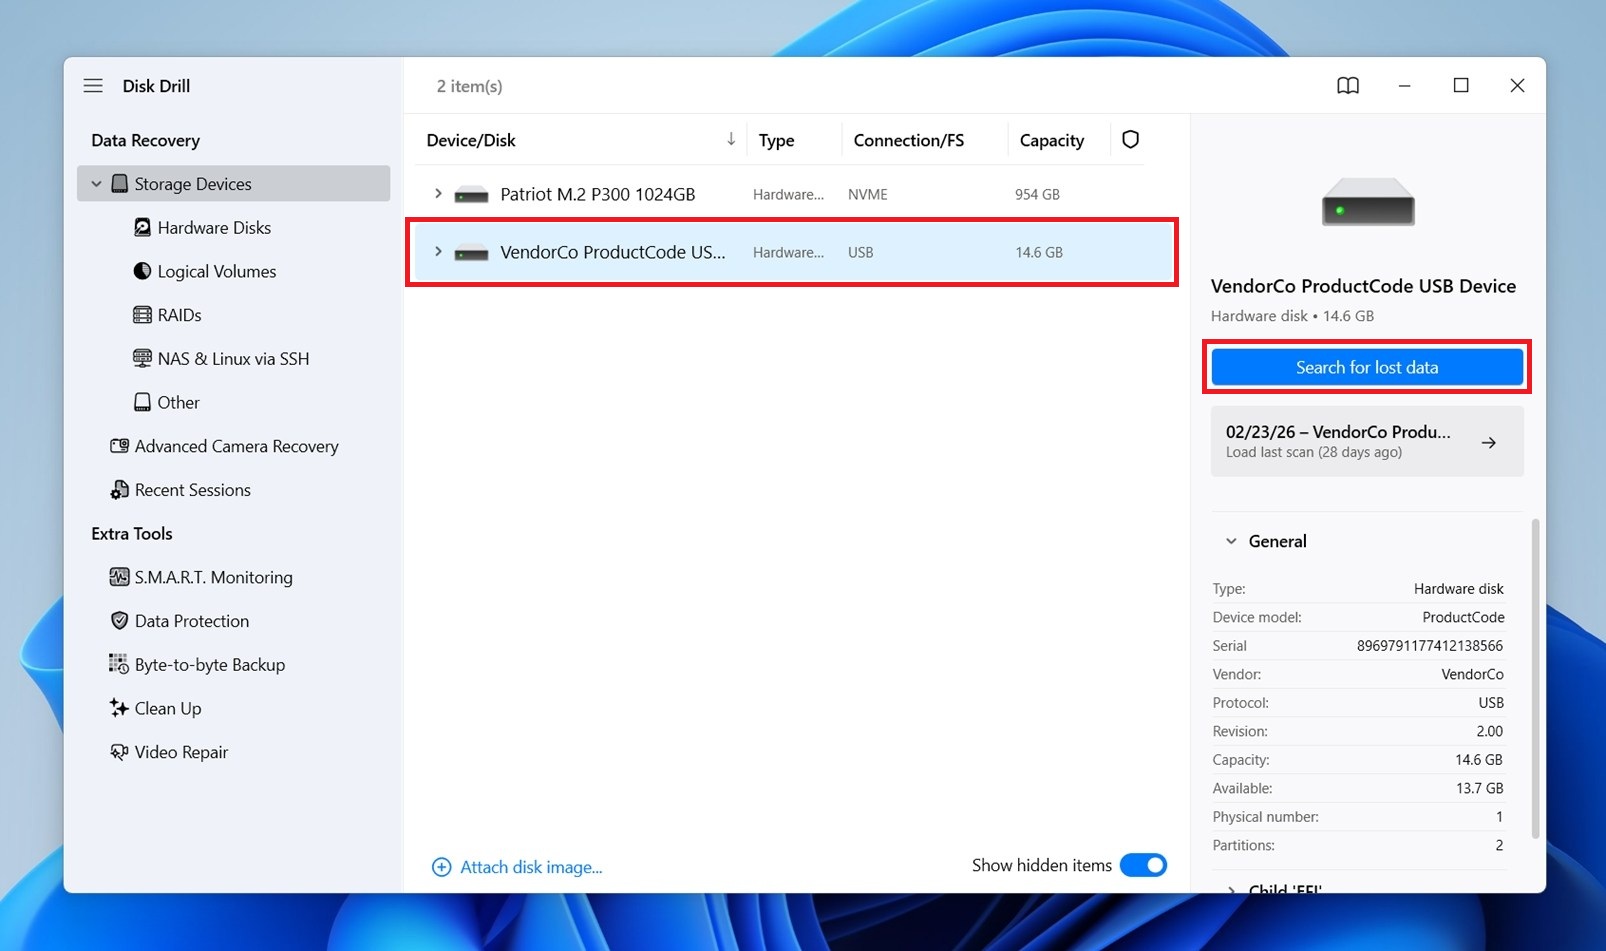
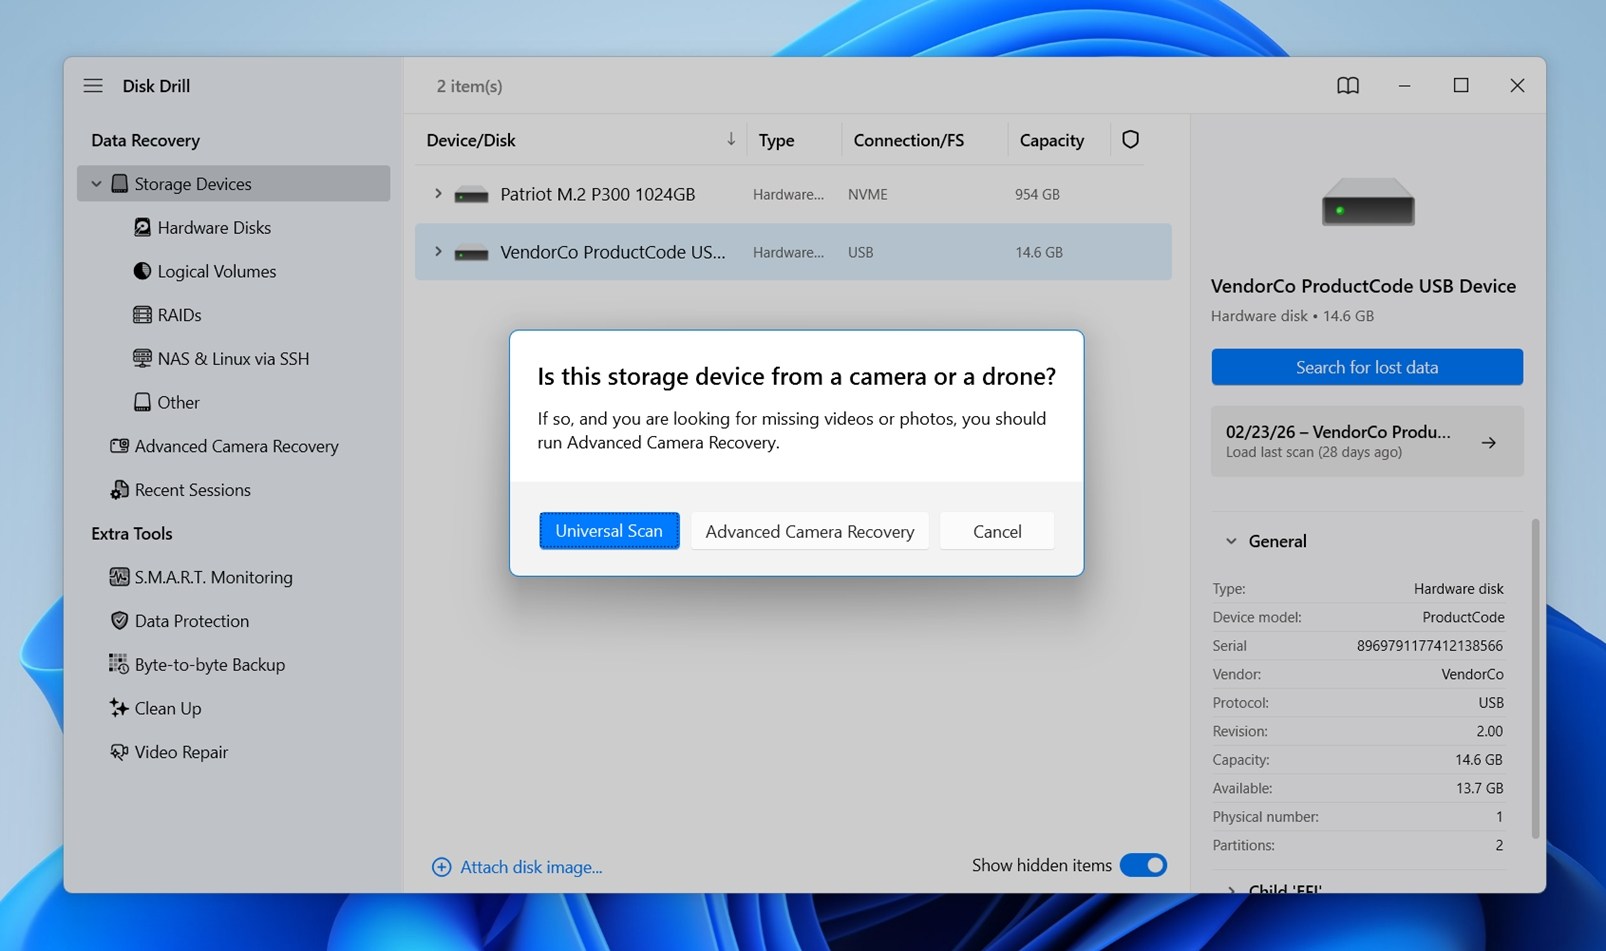
- Click Search for lost data, then choose Universal Scan. In a case like this, that scan mode usually gives the best results.
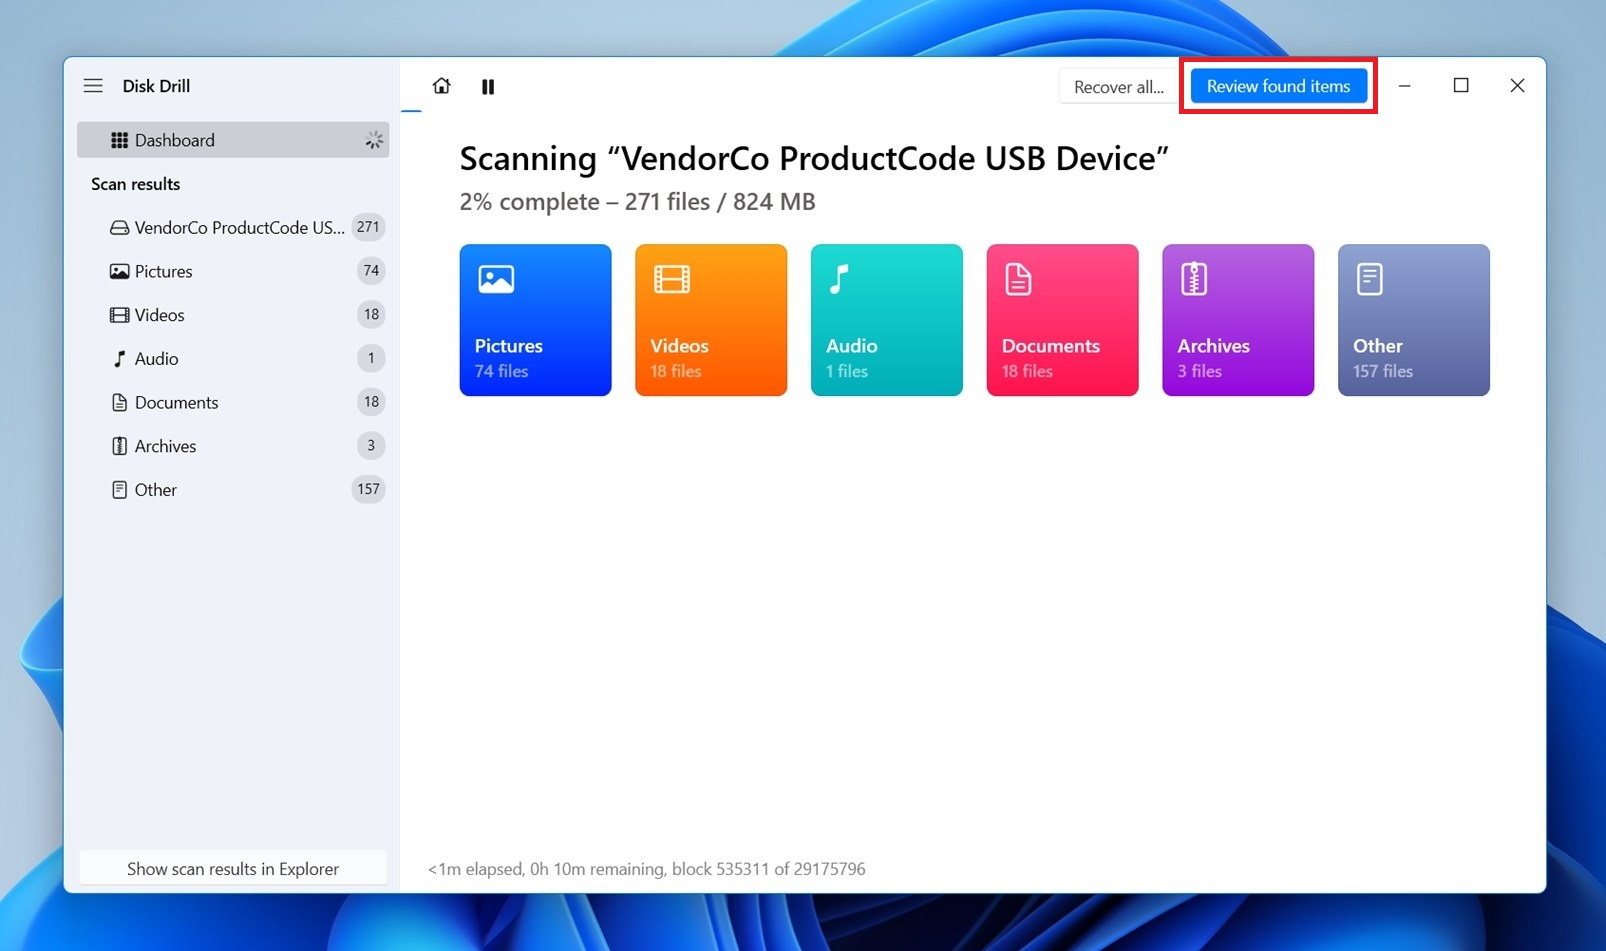
- Click Review found items, or click Recover all to recover everything at once. Alternatively, if you’re only trying to recover particular file types, click one of the colored file type icons to automatically filter the recovery results.
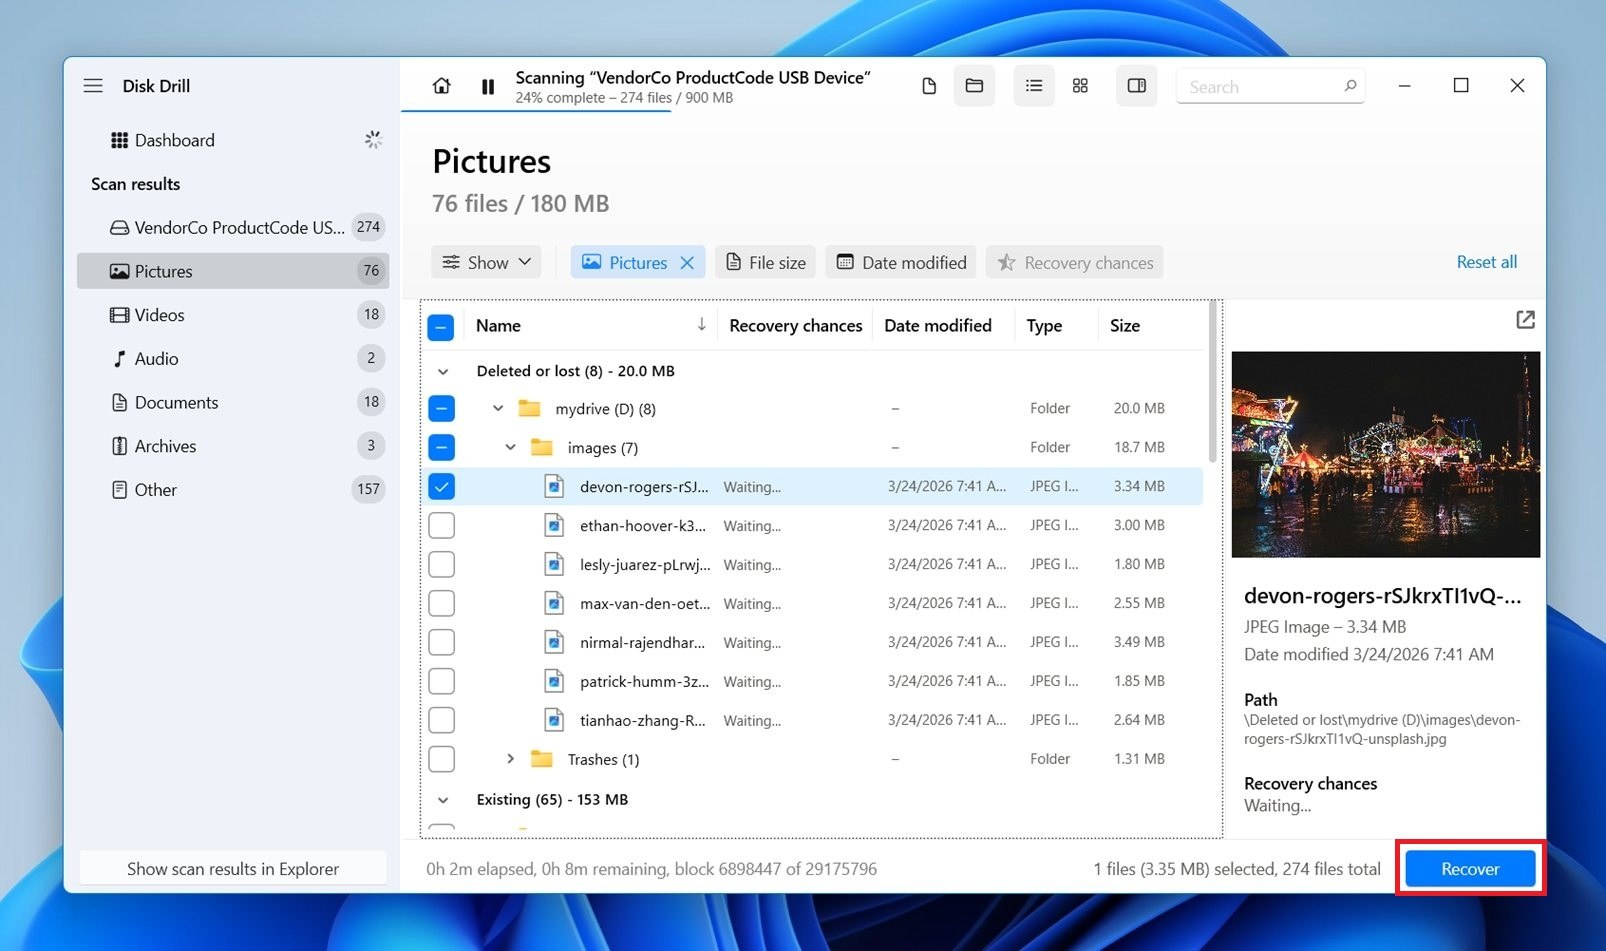
- Select the quick formatted data that was lost. You can use the recovery chances column and preview function to see what data has the best chance of being recovered. As a rule of thumb, if a file opens in preview, that means it’s intact. It’s one of the best signs you can get before recovery.
- When you’re ready, click Recover.
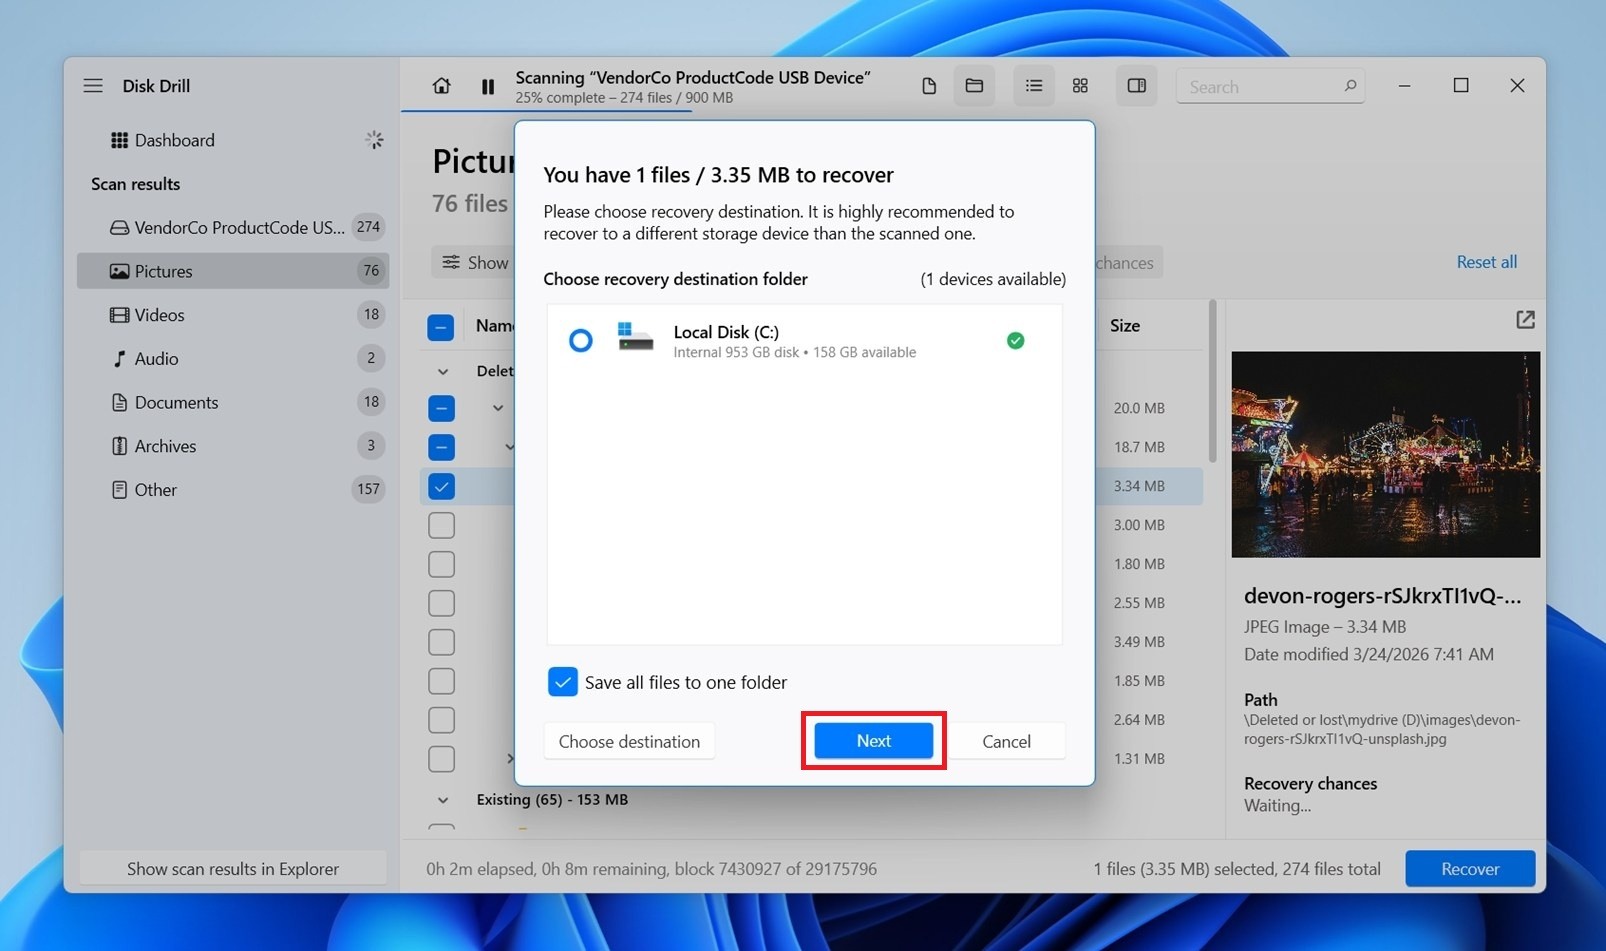
- Choose a suitable recovery location. Make sure you don’t choose somewhere on the drive you’re recovering from, as it can overwrite other lost data and reduce your chances of getting more files back. Then, to finish quick formatted hard drive data recovery, click Next.
Once the hard drive recovery software finishes its job, you should find your recovered files in the folder you selected in the last step. Go through them and make sure everything important is there. If it looks complete, you can copy the files back to the original drive. (Do that only after you’re sure you recovered what you needed.)
But in a quick format scenario, the more important feature is its signature scanner. Since formatting rewrites the file system metadata, recovery depends less on the original file system and more on the tool’s ability to find files by their known signatures. Disk Drill’s broad signature support helps a lot here.
Method 2: Retrieve Files After a Quick Format Using Windows File Recovery
A freeware alternative to Disk Drill is Windows File Recovery. It’s Microsoft’s official data recovery solution that is capable of recovering quick formatted drive data before it’s lost for good. It can be downloaded from the Microsoft Store and can be used on Windows 10 and 11 computers. Bear in mind that it is a command-line application and it doesn’t include other useful features that Disk Drill has, but it might be good enough for quick format recovery, especially if you don’t want to pay anything.
Follow these steps to recover data from your quick formatted HDD using Windows File Recovery:
- Download Windows File Recovery and open it.
- Type winfr D: C:\FileRecovery /extensive. Replace D: with the drive letter of the quick formatted drive. Replace C:\FileRecovery with the location where you want to store the recovered files. Press Enter.
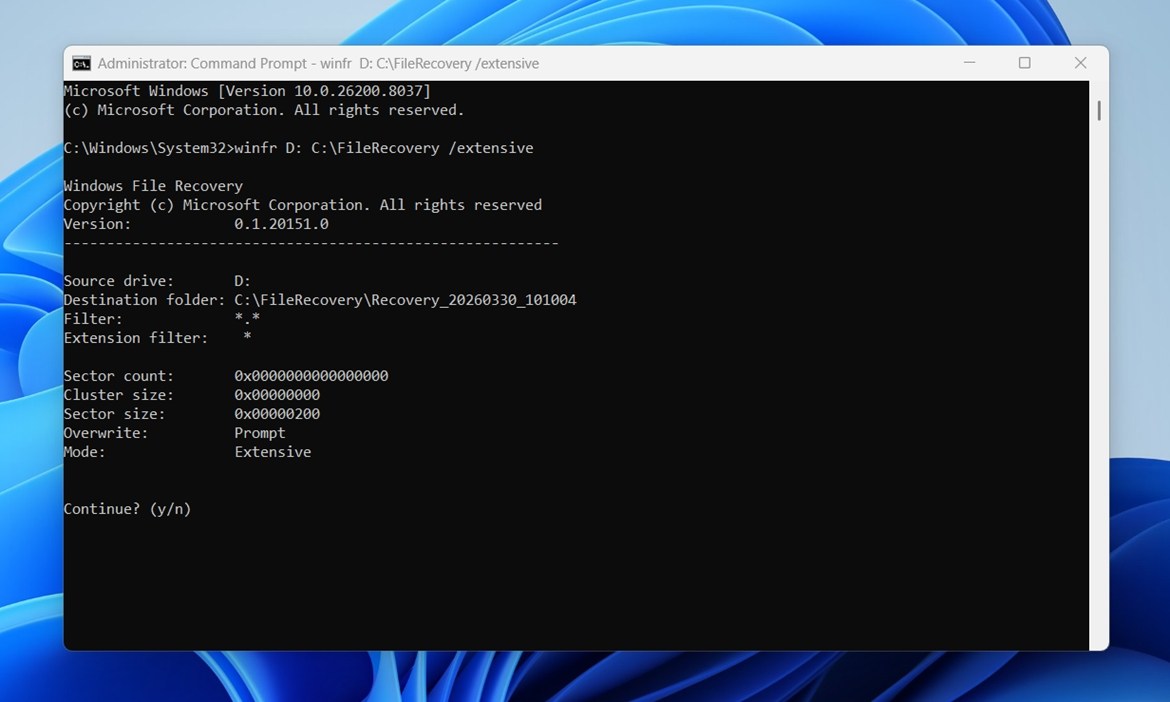
- Press Y to continue.
Windows File Recovery does not give you a visual list where you can hand-pick files before recovery, but it does support /n filters to narrow the results. It can target specific file names, paths, extensions, wildcard patterns. For example, you can search for a certain folder, recover only .docx or .jpg files, or look for filenames that contain a keyword (although after formatting, the original file names and folder structure are often lost, so that part may not work as it would after simple deletion). Microsoft covers the supported syntax and examples on its official Windows File Recovery page.
Method 3: Restore Accidentally Quick Formatted Hard Drive Using Backups
If you pride yourself on maintaining a regular backup schedule, you can recover files after a quick format by restoring them from a backup. The walkthroughs below cover the main backup utilities used by Windows.
Using File History
File History is the primary backup solution for Windows 8, 8.1, 10, and 11. It regularly keeps versioned backups of your files, which allows you to restore specific versions of your data instead of the most recent version available.
Before you go looking for your files, there’s one catch with File History. Even when it’s active, it usually backs up only the default library locations (Documents, Pictures, Videos, Music, the Desktop). So if the files you lost were sitting in some random folder outside those locations (or external storage), File History may not have copied them unless you added that folder to a library yourself.
If you’re sure that location was covered by File History (or you simply want to check), follow these instructions:
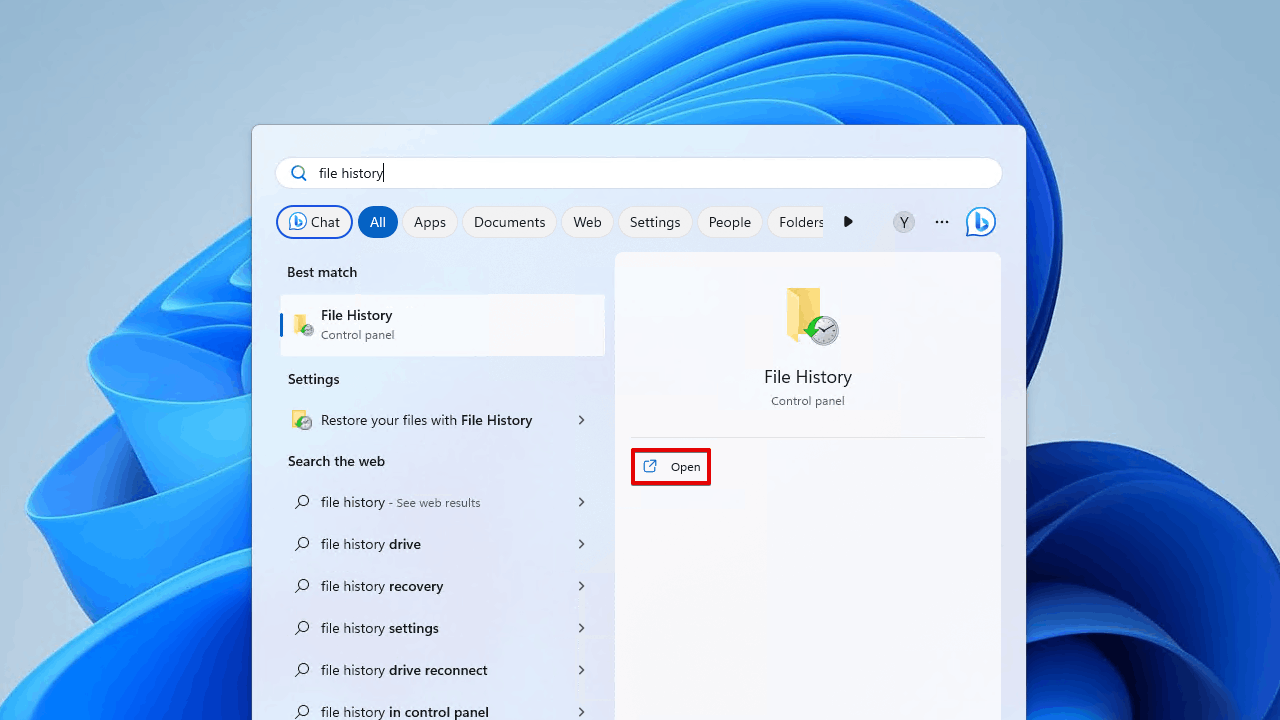
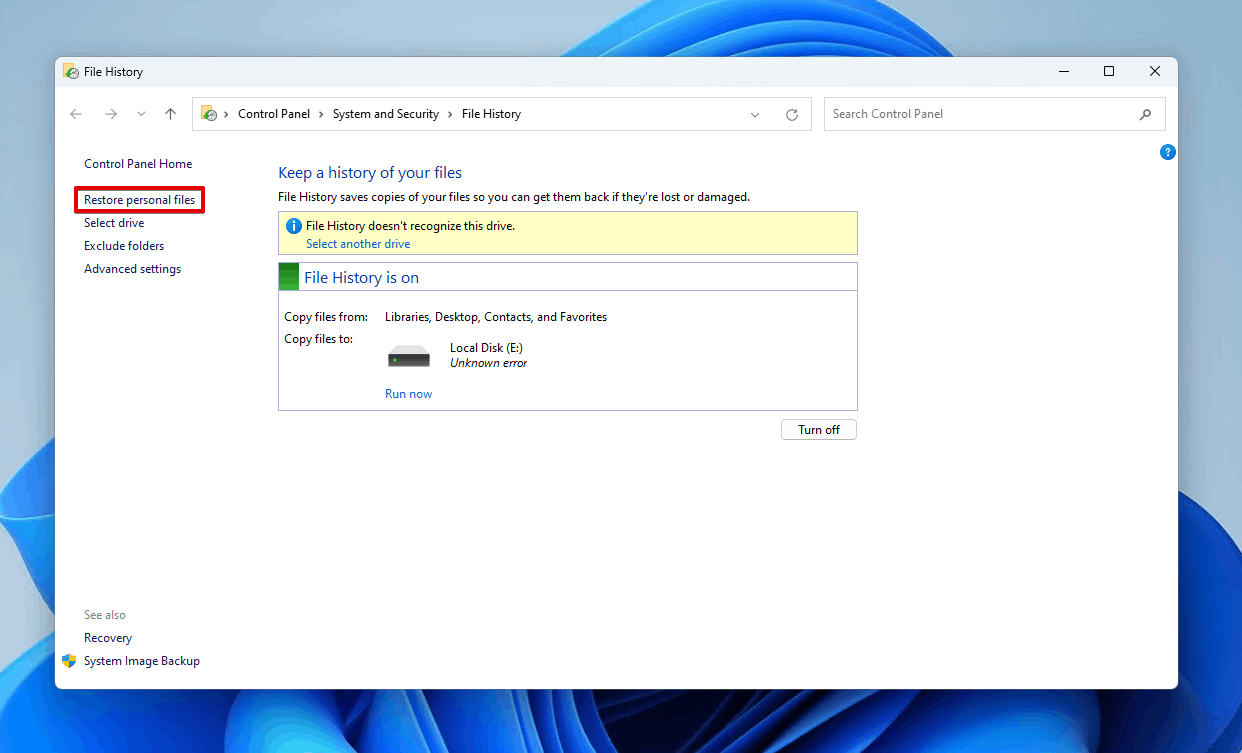
- Open Start and search ‘File History’. Open it.
- Click Restore personal files.
- Select the deleted data that you want to restore.
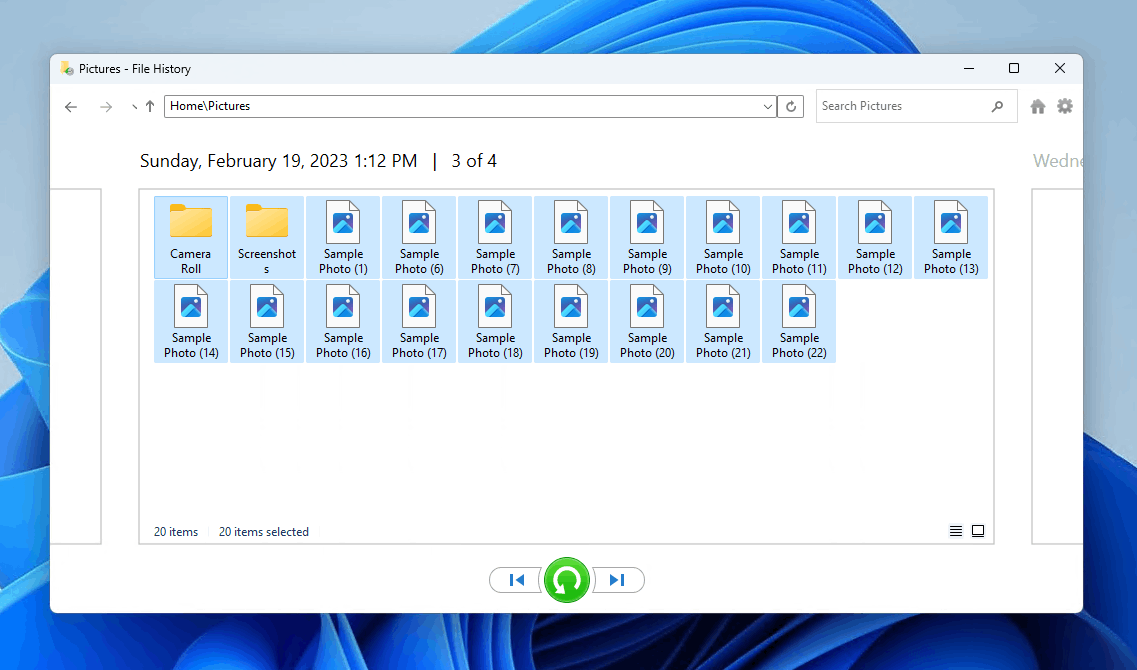
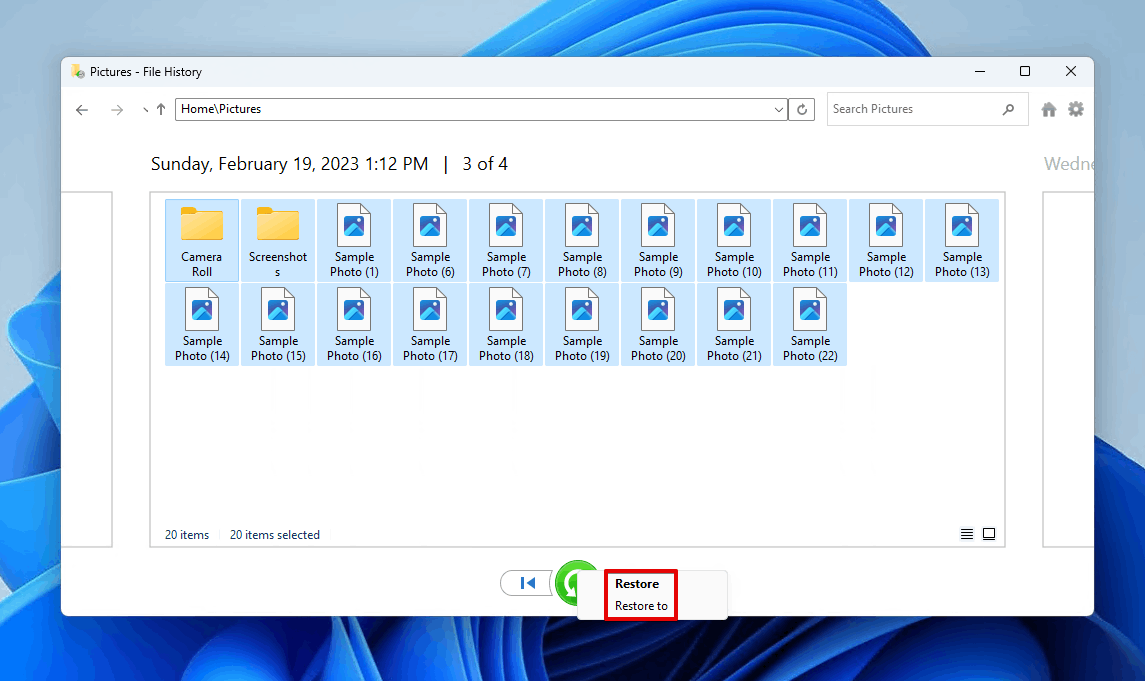
- Click the green Restore button to restore the data to its original location. Alternatively, right-click the button and click Restore to instead.
Using Backup & Restore
Backup and Restore was the primary backup utility for Windows 7 and older. Although it has since been succeeded by File History, it is still available in later versions of Windows, not only for backward compatibility but because it’s still used by many as a reliable means of backing up data.
There’s a catch with Backup and Restore too: it only helps if it was already enabled before the drive was formatted. And even then, the backup has to include the location where your files were stored.
Use these steps to restore data from your Backup and Restore backup:
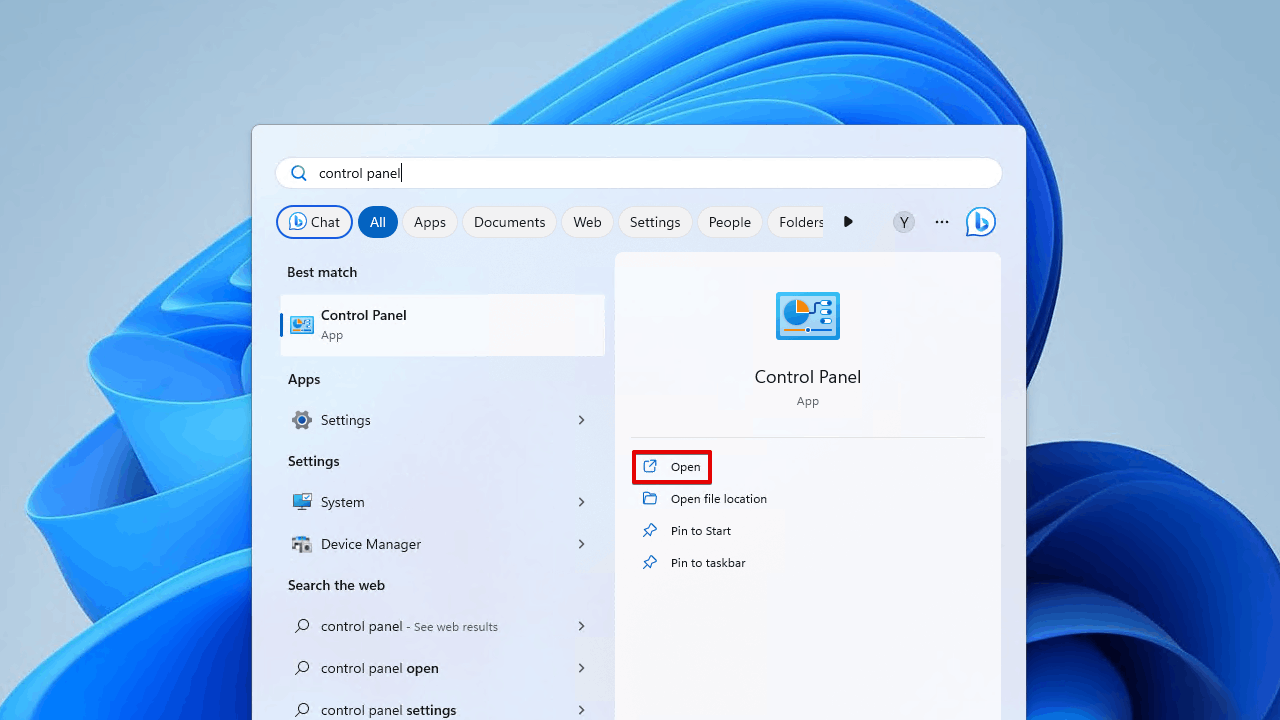
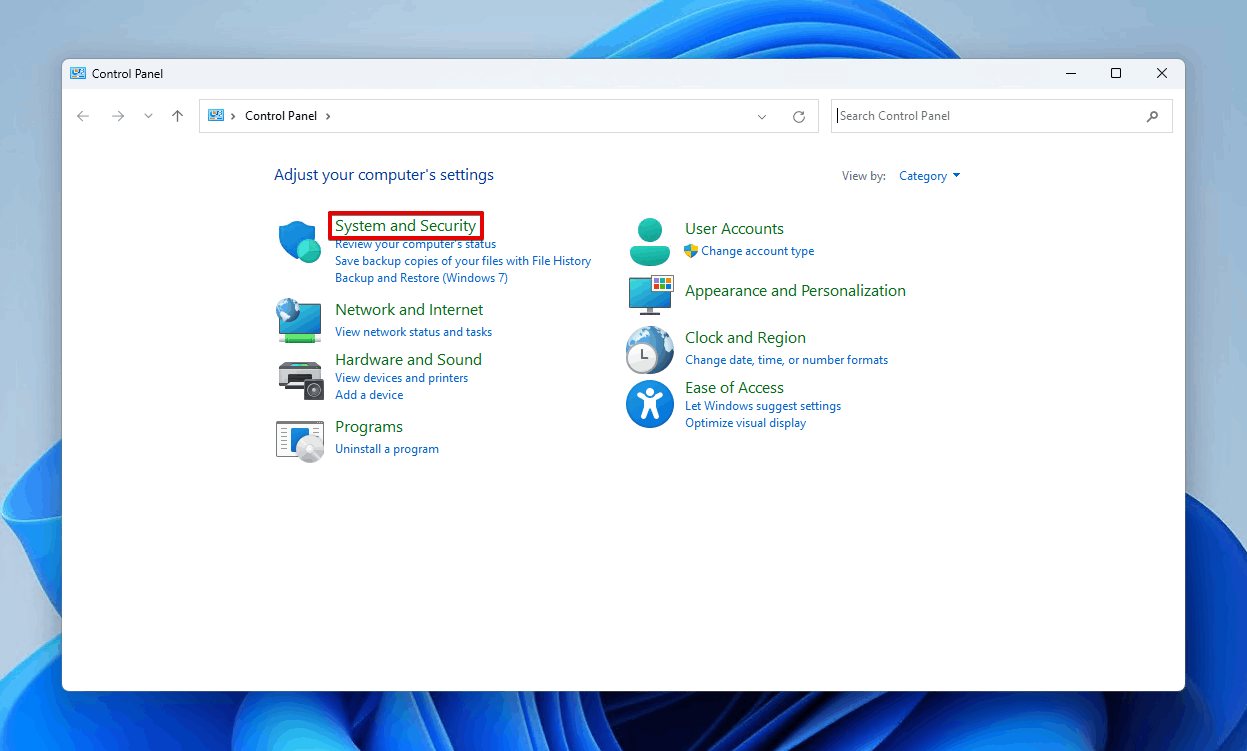
- Open Start and search ‘Control Panel’. Open it.
- Click System and Security.
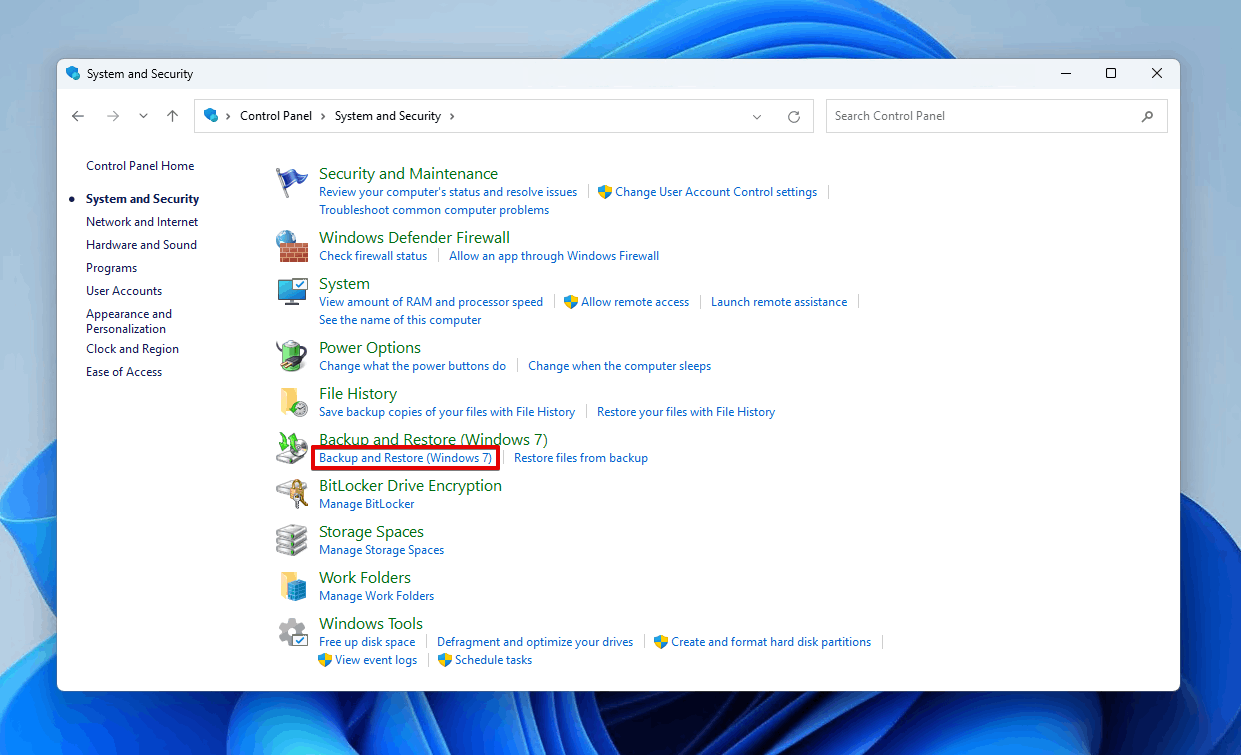
- Click Backup and Restore (Windows 7).
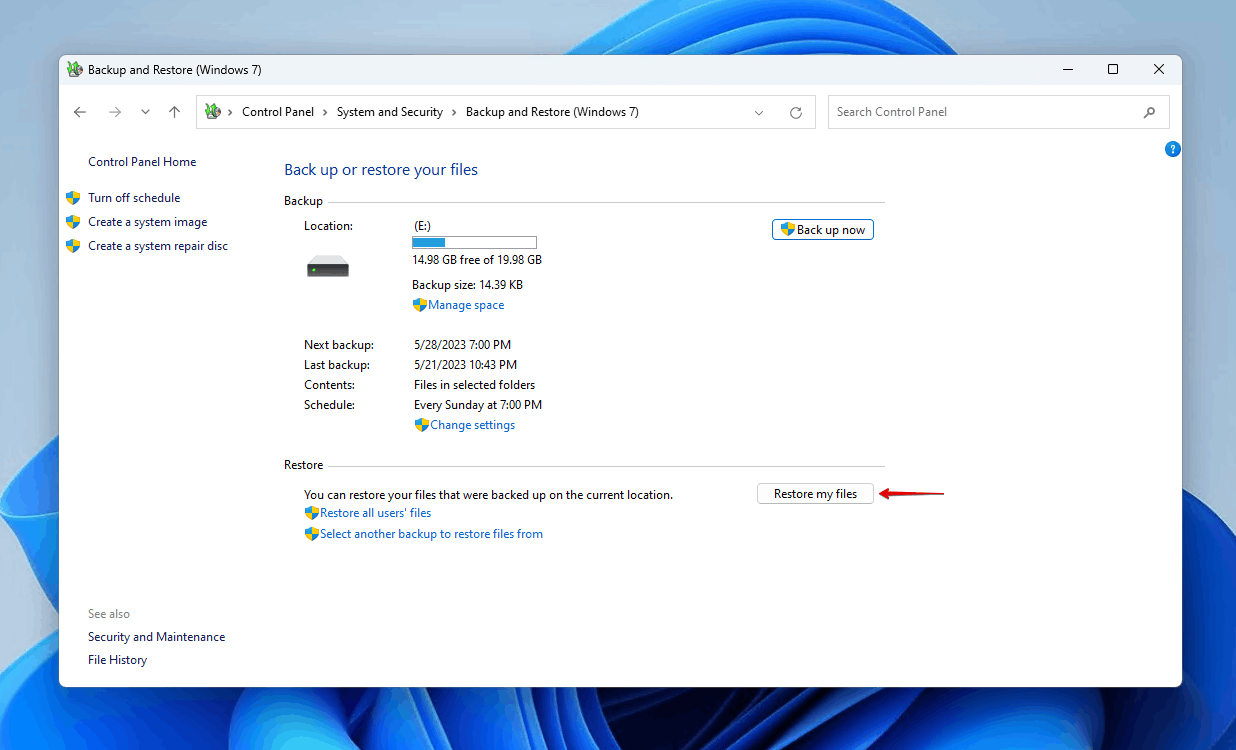
- Click Restore my files.
- Click Browse for files. Or, click Browse for folders to restore an entire folder. Select the data.
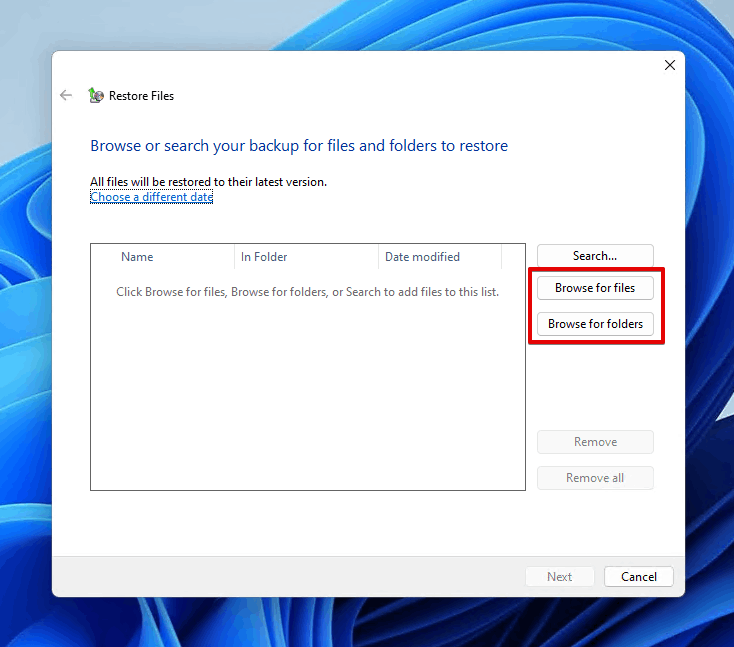
- Click Next.
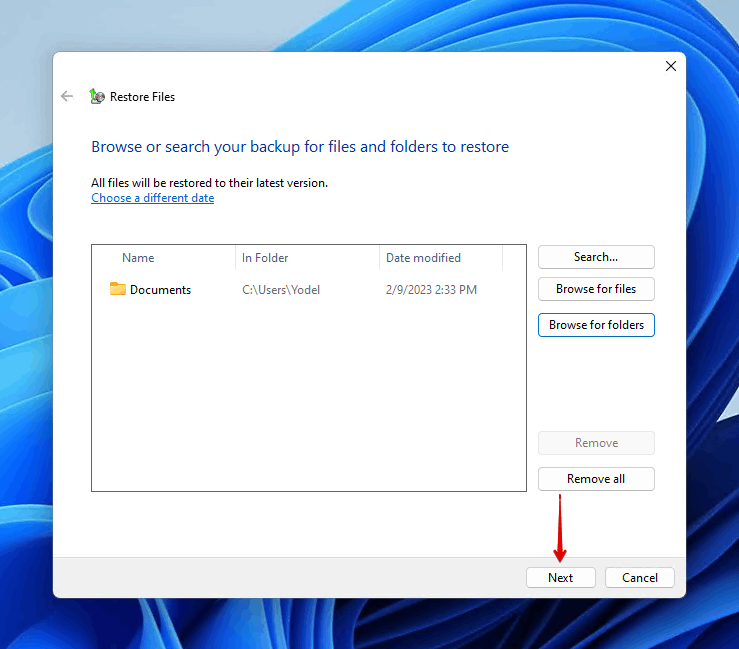
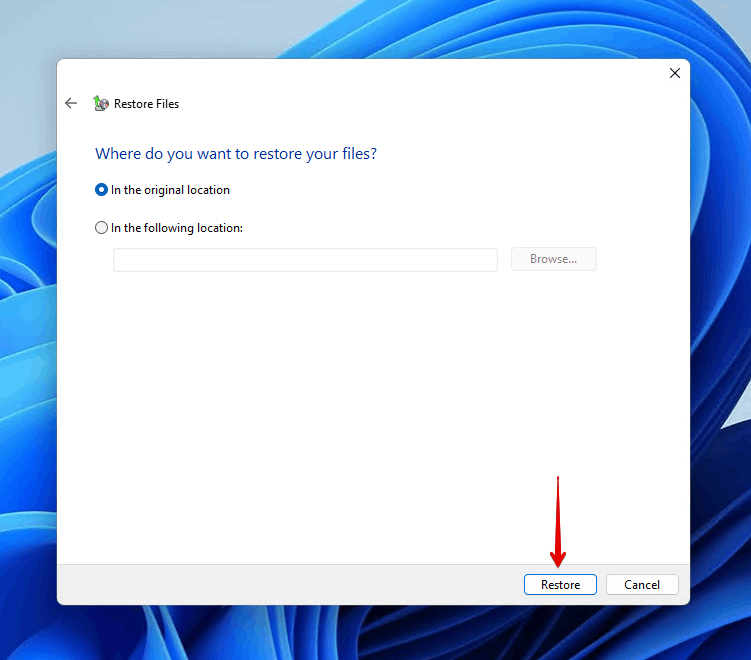
- Choose whether you want to restore the files to the original location or a new one, then click Restore.
Using Cloud Backup
Microsoft has been pushing OneDrive quite hard since its release. While the constant reminders that it exists can be annoying, it’s actually a very useful way to safely store and access your data. Not only does it allow you to store and access your data in the cloud from anywhere with an internet connection, but it can also act as a way of recovering your files if they were deleted from your local hard drive. Of course, this is only possible if OneDrive was configured already and a copy of your data is available in OneDrive.
Here’s how you can download a copy of your data from your OneDrive storage:
- Log in to your OneDrive in a browser.
- Located your data, then click the ellipsis button for more options. Click Download.
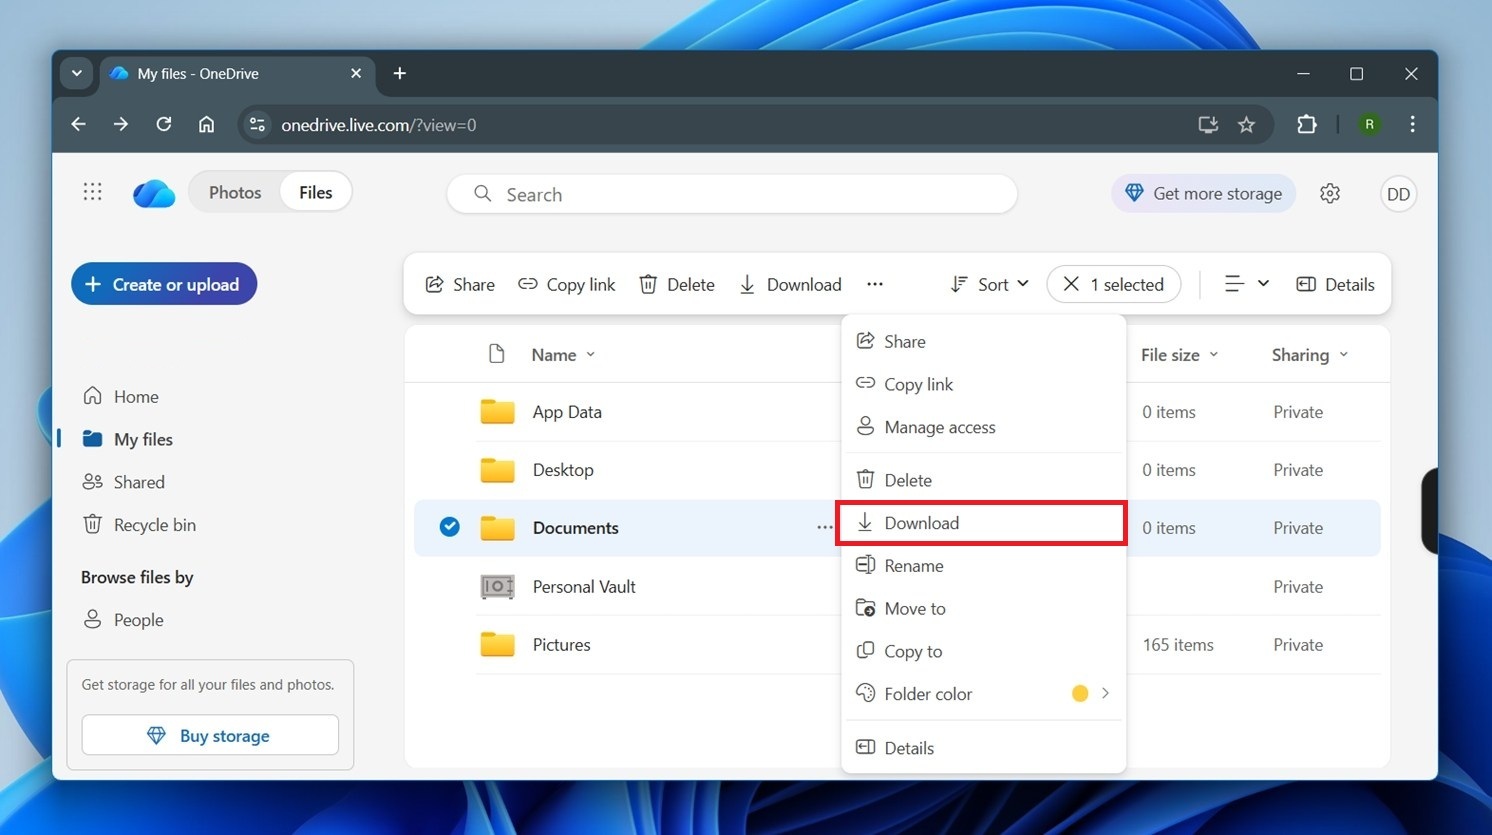
The files will then be downloaded to your local storage device where you can restore the data to its original location.
FAQ
Windows 11 does not include a built-in utility specifically made to undo a quick format with previews, file browsing, and point-and-click recovery. There is a tool called Windows File Recovery, but it’s a separate app that you need to install from the Microsoft Store, and it works through the command line.
Other built-in Windows recovery features like File History, Windows Backup, or System Image Recovery help only if you had backups set up before the format happened.
Yes, you can sometimes recover data from a quick formatted hard drive with free recovery software. Common options include Windows File Recovery, Microsoft’s own tool, and open-source projects like PhotoRec. The tradeoff is convenience.
Free tools often lack a proper UI, may not let you preview files before recovery, and can return files without their original names or folder structure. So while they can work, the process is usually less smooth and less organized.
You can recover deleted files after a quick format using data recovery software, like Disk Drill:
- Download and install Disk Drill.
- Select the quick formatted hard drive from the list.
- Click on Search for lost data and choose Universal Scan.
- Review the deleted data that was found by Disk Drill.
- Mark the files that were deleted by the quick format, then click Recover.
- Specify an appropriate recovery location.
You can’t recover data after a true low-level format. That kind of process rewrites the storage at a much deeper level than a quick format and destroys the original data in the process. In rare cases, though, partial recovery may still be possible if the process was interrupted or failed before it finished.
Also, most people never perform a real low-level format when they format a drive – they’re usually dealing with a quick format. So if you think you “low-level formatted” a drive, it’s still worth scanning it with a recovery tool before you give up.
Yes, sometimes you still can, but only as long as that old data has not been overwritten. So if you already copied new files to the drive, some of the old data may still be recoverable, while some may already be gone for good. It all depends on whether the exact physical space where those old files were stored got reused.
For example, saving a new 50 MB file could overwrite part of that old data, or it could land somewhere else and leave it untouched. There’s no way to know which files survived until you scan the drive with a recovery tool.
Conclusion
The easiest way to recover files after a quick format is still a backup. That’s the best-case scenario every time. But if you don’t have one (most people don’t), your next best option is data recovery software. A tool like Disk Drill is the next easiest and most effective way to undo quick format: it can scan your quick formatted drive for recoverable data and gives you the ability to choose what you want to restore. It’s available on Windows and even gives you 100 MB of free data recovery to try it out. It can also be used to recover data from a formatted hard drive on Mac, as you get a license for both Windows and macOS upon purchase.
You can also try the free data recovery software Windows File Recovery if you’re on a budget. It’s free, and it may work in some cases, but the experience is nowhere near as smooth as it is with a proper recovery tool that has a real interface.