Whether it happened accidentally, someone else did it, or you formatted on purpose before realizing you needed those files, you’ll need to know how to recover files from a formatted hard drive.
We put together this walkthrough with help from our tech specialists to make it easier to understand, even if you don’t spend your weekends reading about file systems. We’ll explain what formatting does, when recovery is realistic, how to do it, and what options you have (spoiler: in many cases, recovery is more than possible).
What Kind of Format Was It? Recovery Chances Explained
First, let’s talk about what type of format happened, because this has a huge impact on your recovery chances.
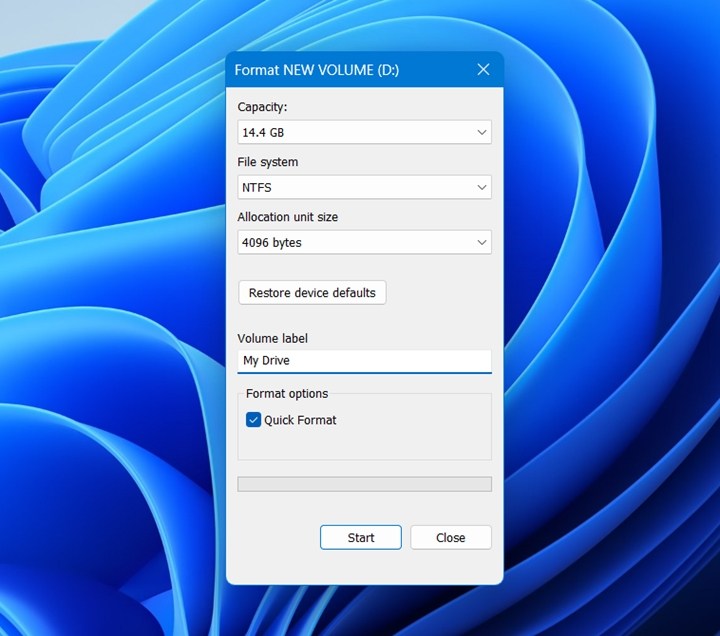
On Windows, you’ll usually deal with two main types of formatting: Quick Format and Full Format. (Technically, there’s also low-level formatting done by specialized tools, but that’s a different situation. For most cases, it’s all about one of the first two.)
- A Quick Format (the default one) is the better scenario for recovery. It writes a new file system structure over the old one and marks the drive space as available for new data. That’s why recovery is often possible: the files themselves may still be on the disk. They’re “invisible”, but hard drive data recovery software can scan the drive and restore them. So if you need to recover files from a formatted hard drive, and it was a quick format, your chances are often good.
- A Full Format is more serious. On modern OSs, a full format doesn’t only rebuild the file system. It also checks the disk and writes across the formatted area. In plain English, that means the old data gets overwritten. And once that happens, format data recovery tools won’t have much (or more like anything) to work with. (There is only one possible exception: if the full format was interrupted before it finished, partial recovery may still be possible from the areas of the drive that weren’t overwritten yet.)
The type of your drive also plays a part. SSDs are much trickier. If the formatted drive was an SSD where TRIM commands cleared the blocks, the chances drop sharply.
But we still encourage you to try a scan before you write your data off. The best way to know whether anything survived is to check for yourself with a proper recovery tool and preview the results.
Note for Mac users: macOS has its own formatting options in Disk Utility. If you used Erase with a normal file system choice like APFS, Mac OS Extended, exFAT, or MS-DOS (FAT), recovery may still be possible. This is similar to a Windows quick format in many real-world cases: the file system is rebuilt, but old file data may still exist until overwritten.
The situation gets worse if you used Security Options in Disk Utility and chose a multi-pass erase. That process intentionally overwrites the drive (similar to a Full Format on Windows), so recovery software usually won’t help. That said, this option will not appear on newer versions of macOS; starting with macOS Sequoia, Apple removed the Security Options button from Disk Utility.
How to Recover Data From a Formatted Hard Drive
Now let’s get to the practical part.
We have three recovery paths for you: first, hard drive data recovery software; then two backup-based methods. We’ll start with recovery software because the other options assume you already had some kind of backup in place. (And let’s be honest, most people searching for how to recover data from a formatted hard drive are doing it because they don’t have a clean backup ready to restore.)
The key rule is simple: do not install the recovery app or recover files back to the same formatted drive. Use another disk or external drive if possible.
Method 1: Use Data Recovery Software
Disk Drill is an excellent option when looking for an answer as to how to recover a formatted hard drive. There is a free version available to download, so you can try the tool and see what it can do for you.
Here’s how to use Disk Drill to recover files from a formatted hard drive:
- Download the free version of Disk Drill and install it.
- Attach the formatted drive you wish to recover to your computer first. Once you launch Disk Drill, it will display the drives that it can access.
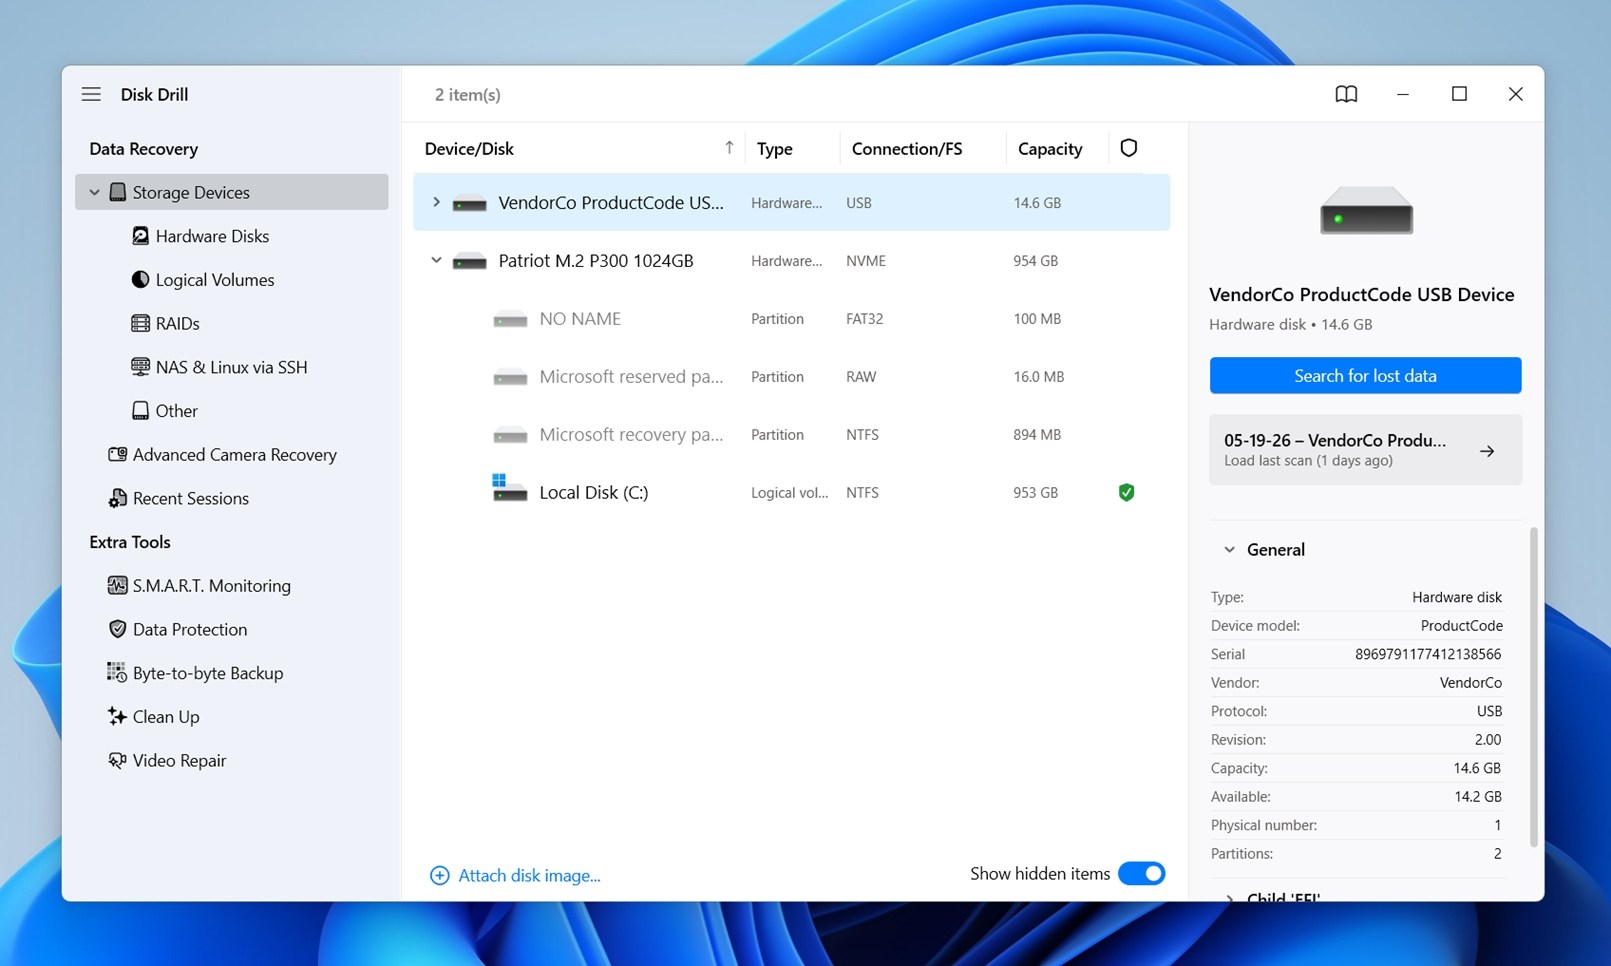
- Select the formatted hard drive and click on the Search for lost data button to scan it.
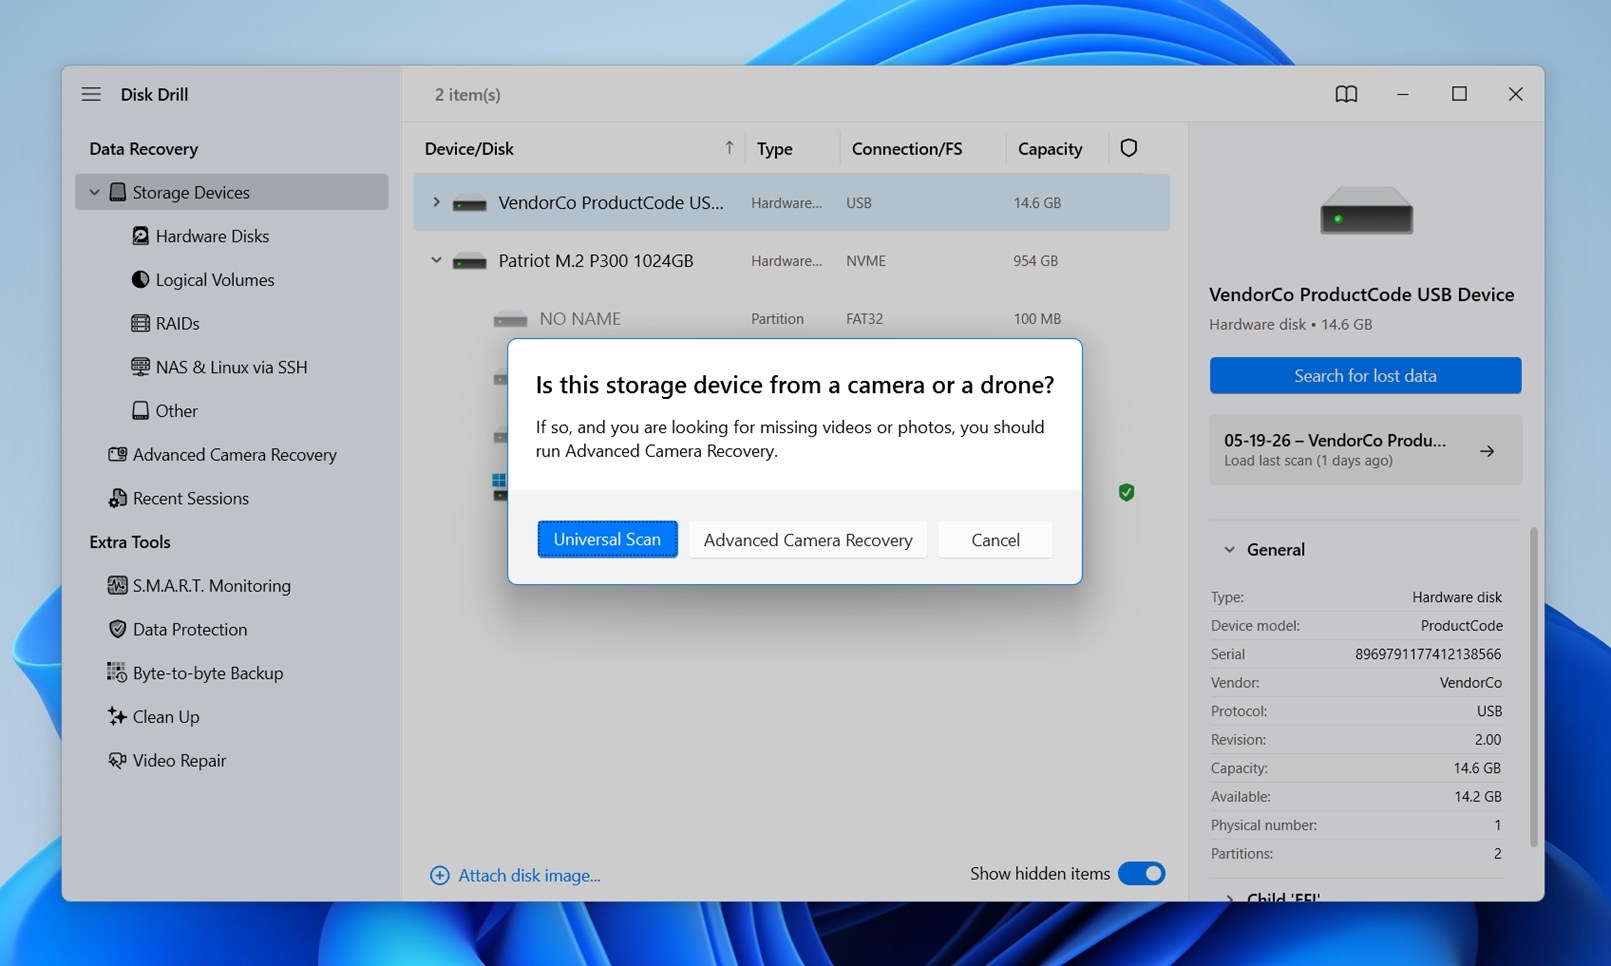
- If the app asks you to choose a scan mode, go with Universal Scan. It works well for this type of case because it checks the drive most broadly.
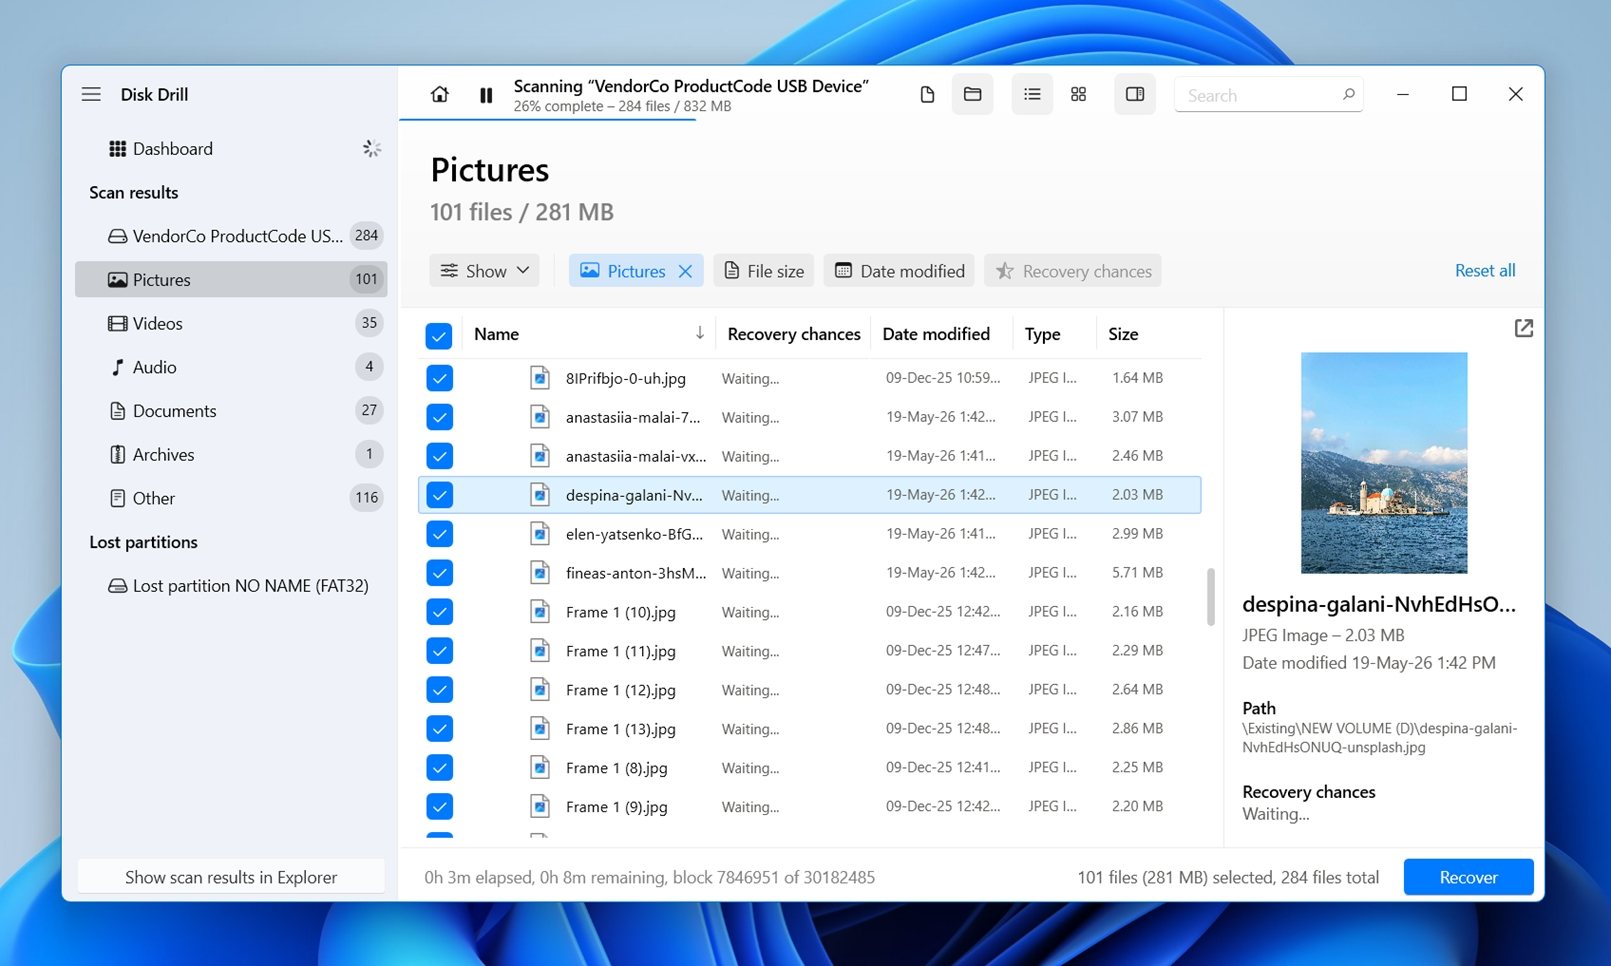
- Go through the scan results and use the filters to narrow things down. For example, you can click Pictures if you only need photos, or Documents if you’re looking for Word files or spreadsheets.
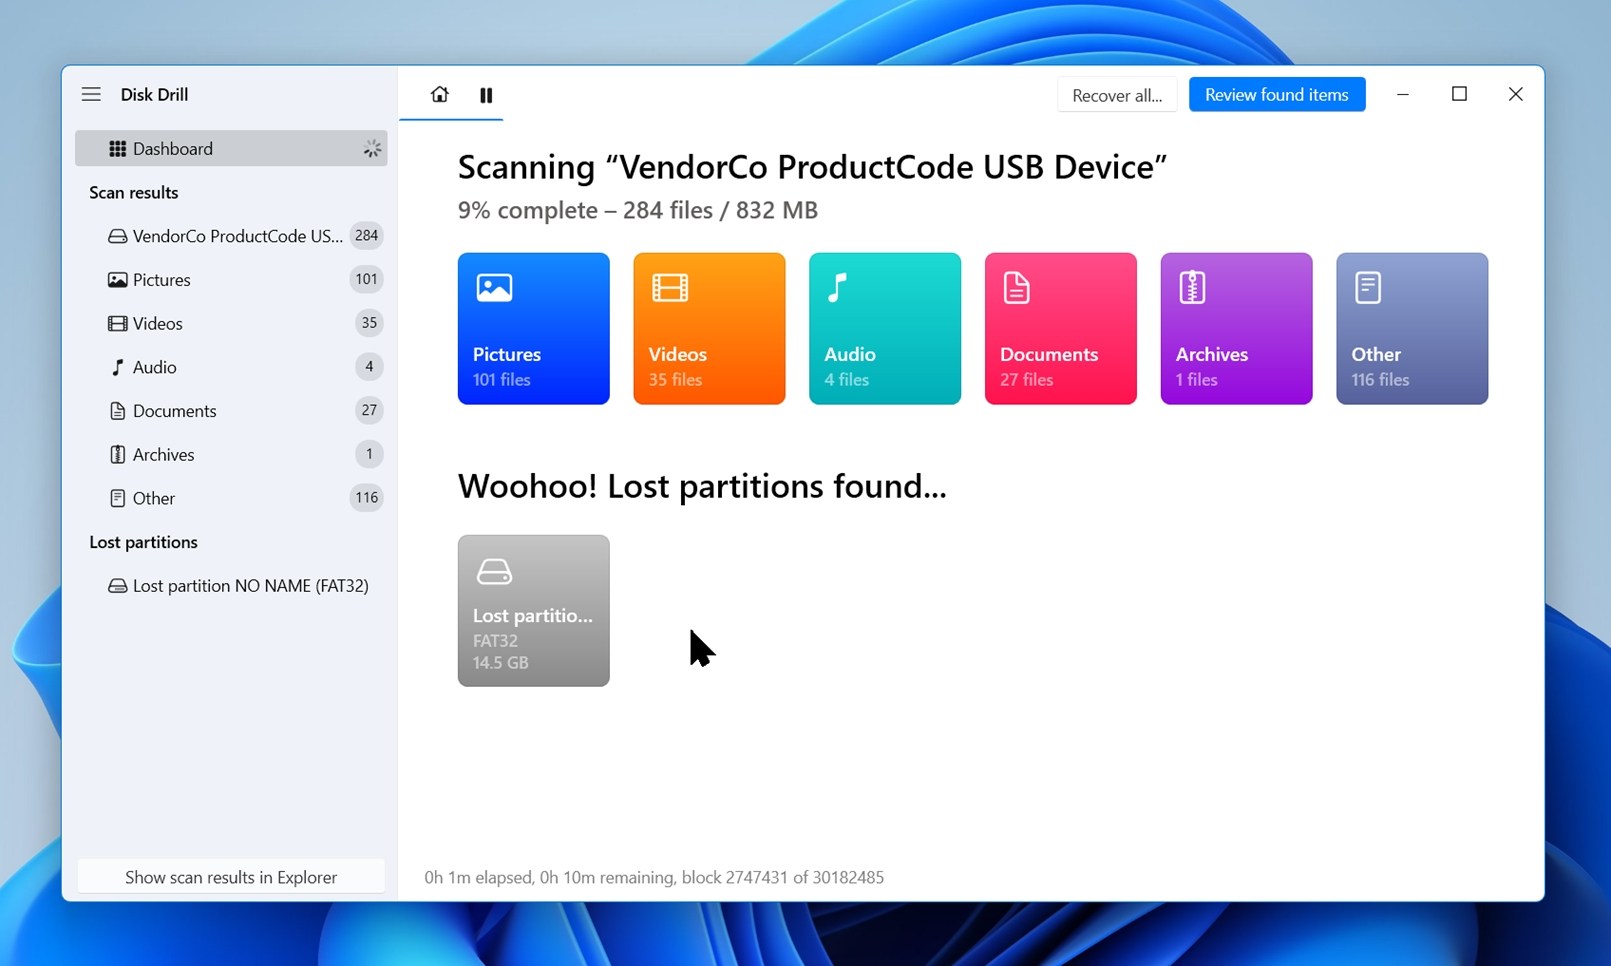
(If you want to recover everything the scan finds, let the scan finish first, then click Recover all. This is usually the easiest option when you formatted the whole drive and aren’t sure exactly what was lost.) - Click any file to open a preview before you recover it. Disk Drill can preview many file types that your OS can open natively or with the right app installed. This is useful after a format because original file names and folder paths don’t always survive. A preview is a quick way to confirm what the file actually is.
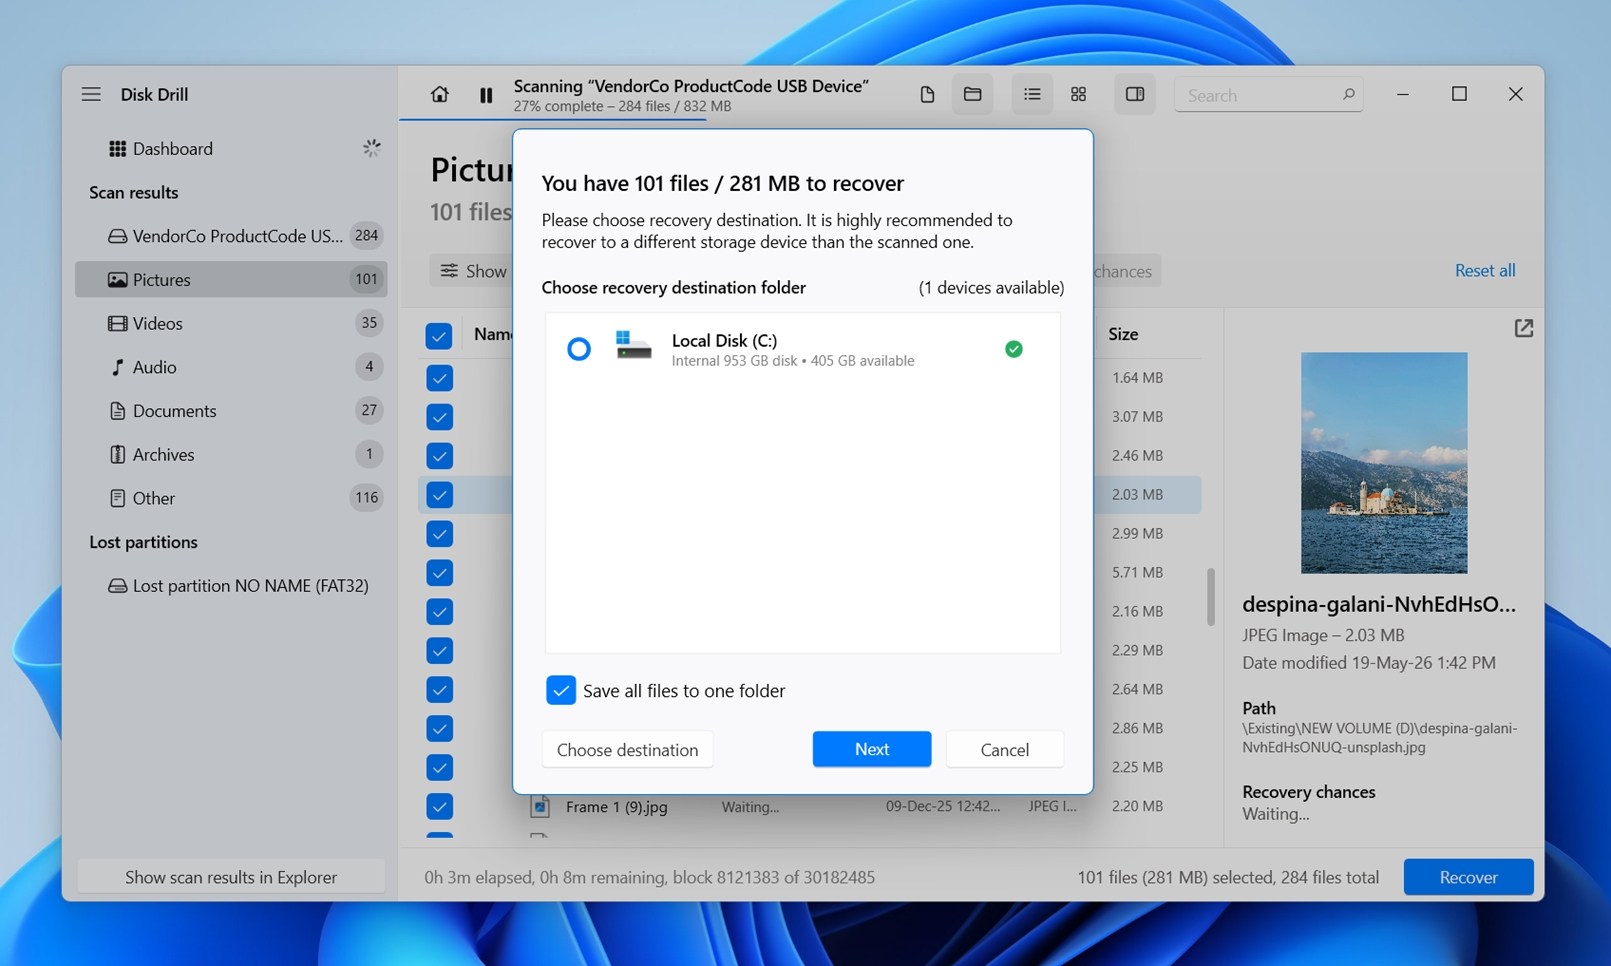
- Choose the files that you want to recover from the potentially recoverable files that are displayed by Disk Drill and click the Recover button. You will be asked to select a suitable recovery destination for the selected files (one that’s different than the formatted hard drive).
If you want to compare more software options for retrieving lost data after formatting, we also have separate rankings for Windows and Mac. Each list includes apps tested by our QA team, so you can see how different recovery tools offer before you choose one.
Method 2: Use Native OS Backups
Backups are not always helpful in formatted hard drive cases. (In fact, many people look for recovery software exactly because they don’t have a backup ready.) But if the lost files were backed up in any way before the format, then you should be able to recover data from a formatted hard drive with no problems, even if you’ve already overwritten the drive with new data.
Both Windows and Mac can back up their data in a number of different ways. Best of all, the same methods that can save you after a disastrous formatting can also protect you from future formatting mistakes if you implement them now.
Let’s take a closer look at File History.
Time Machine is the default backup solution for macOS, and it works by creating regular snapshots of your system and files. If you had Time Machine set up before the hard drive was formatted, then recovery shouldn’t be a problem.
To recover files from a formatted hard drive using File History:
- Open Windows Settings.
- This is where you can access system settings including backup and recovery options.
- Search for File History in the Settings window. This will bring up the option for Restore your files with File History. Click on this option to proceed.
- In the File History window, look for the backups of the formatted drive. You can browse through different time stamps to find the most relevant backup.
- Go through the backups and select the files or folders you wish to recover. File History allows you to choose specific items for recovery.
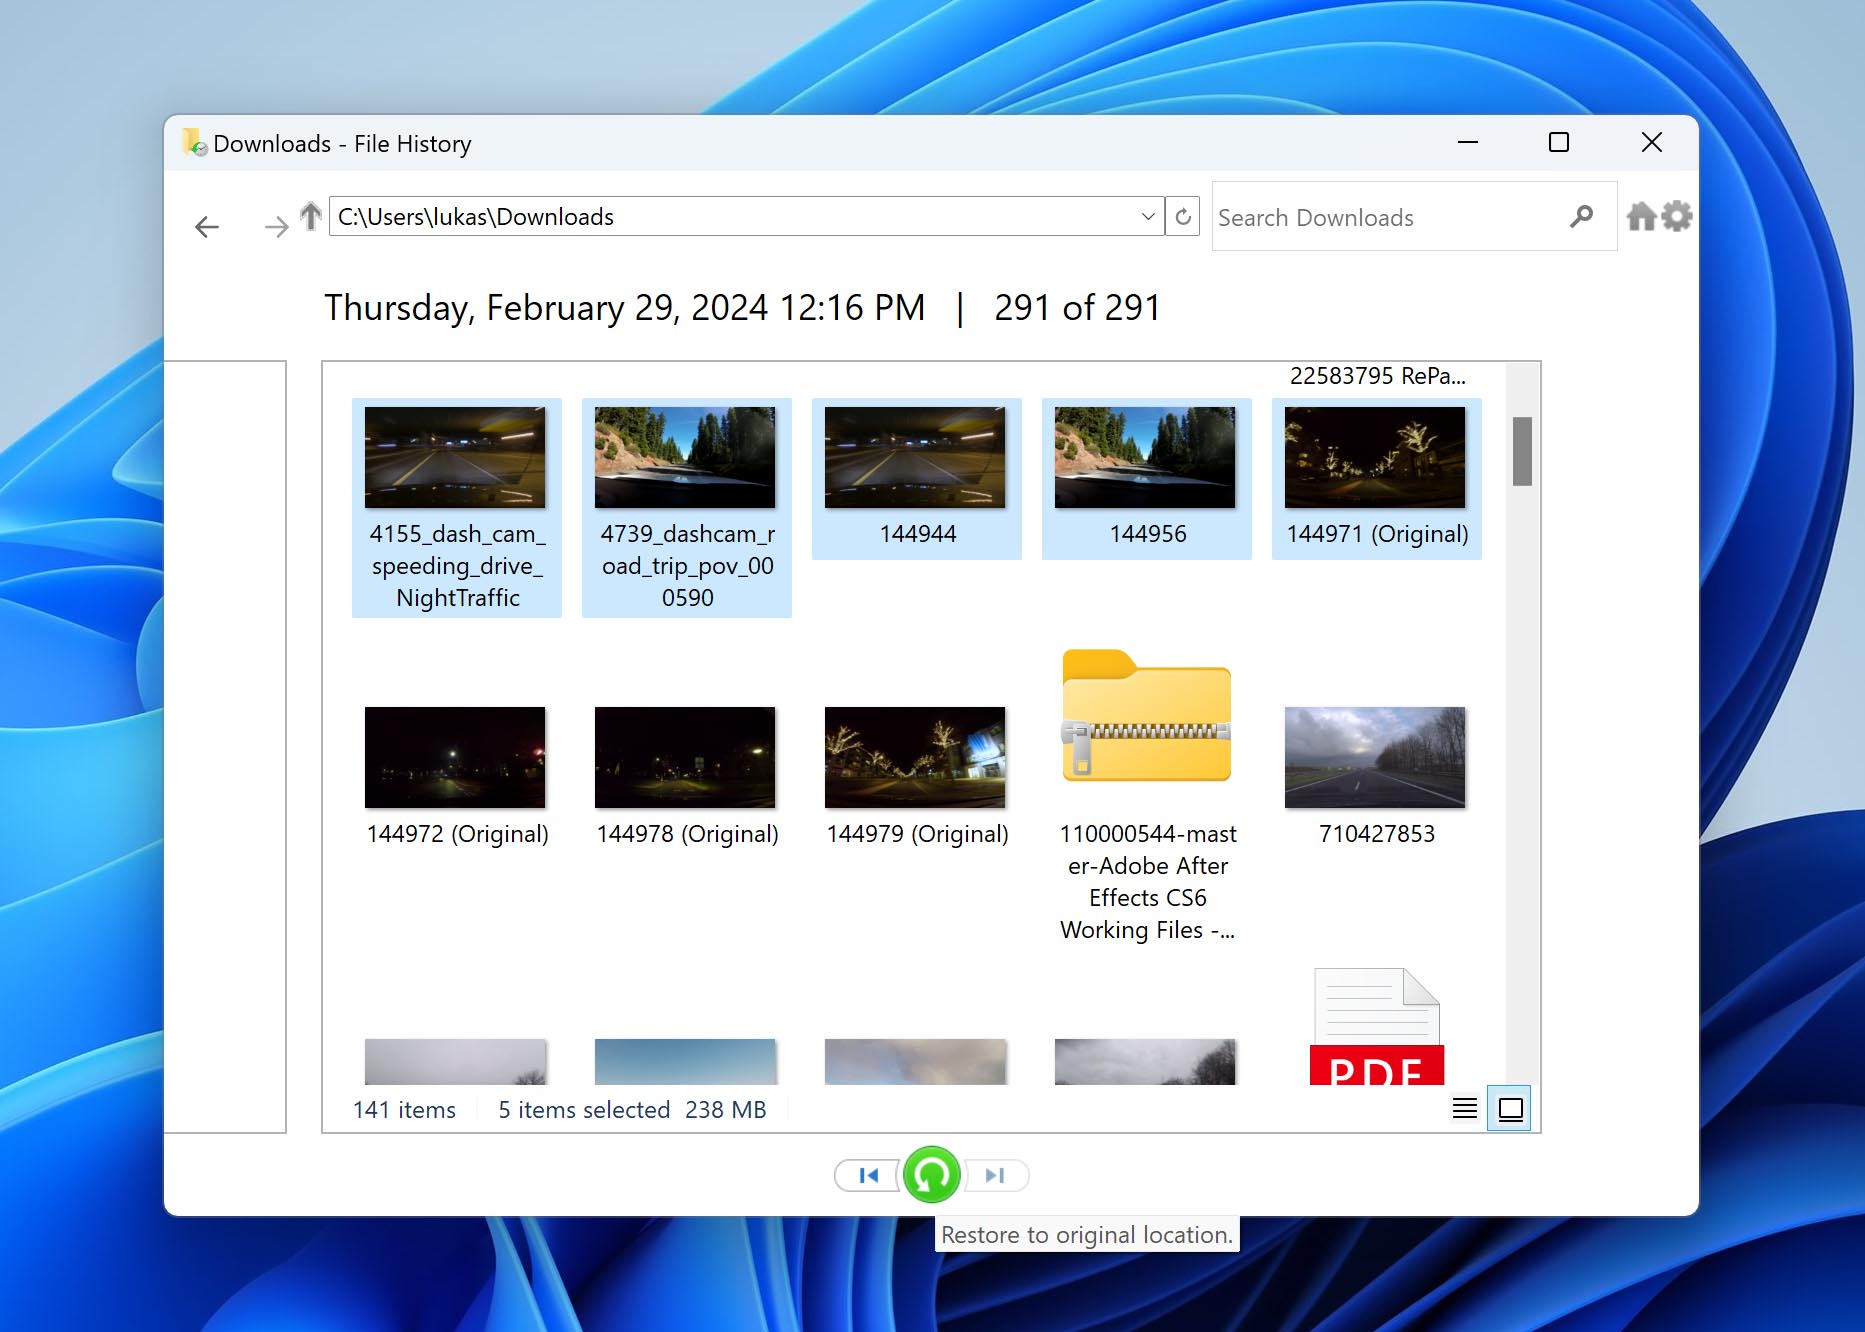
- After selecting the necessary files or folders, right-click the green button and choose Restore to. Then select a destination, such as your main internal drive or another external drive. This matters because if the formatted drive was part of a File History library or backup location, Windows will not be able to restore the files back to their original path after formatting with the regular Restore button. That original location will no longer exist in the same form.
Method 3: Check Your Cloud Backups
Another recovery path is cloud backup/sync. The logic is the same as with File History: the cloud service had to be active and syncing files before the drive was formatted. If the formatted hard drive was never synced up anywhere, OneDrive, iCloud, or any similar service won’t help.
Still, this method is worth checking. People often copy files from an external hard drive to a synced folder and forget about it. Maybe you dragged a work folder into OneDrive, or your photos were uploaded to Google Drive.
Let’s use OneDrive as the example, since it’s Microsoft’s default cloud storage service and Windows 11 comes with the OneDrive client pre-installed.
You can recover your OneDrive-backed-up files from the web:
- Visit onedrive.com in a browser and sign in with your Microsoft account.
- Browse the OneDrive interface to locate synced or uploaded files from your formatted drive.
- Select the files or folders you want to recover and click Download to save them to your computer. If the files or folders are located in the Recycle bin, then you need to Restore them instead.

Services like Google Drive and Dropbox are also common for storing files, both through manual uploads and automatic folder syncing.
The recovery process is virtually always the same, but different services offer different data retention policies and recycle bin durations.
With Google Drive, a deleted file is moved to the Trash, where it stays for 30 days before being permanently deleted. During this period, you can restore files directly from the Trash folder. After the 30-day window, the files are permanently removed from your account.
With Dropbox, deleted files are moved to the Deleted Files folder. The duration they remain recoverable depends on your plan: 30 days for Basic, Plus, and Family accounts; 180 days for Professional and Standard plans; and up to 365 days for Advanced, Enterprise, and Education plans. After this period, files are permanently deleted.
Final Words
Of course, there’s also the option to send your drive to a professional data recovery service and let someone else handle the work. That can make sense when the drive has physical damage or other signs that it’s failing. But we didn’t want to overbuild this guide around lab recovery, because formatted hard drive recovery is usually a DIY case. If the drive is healthy and the only problem is that it was formatted, a recovery service will often do the same basic thing you can do yourself: scan the drive with professional recovery software, check what survived, and copy the recoverable files to another storage device.
So, to summarize the safest approach: stop using the formatted drive, scan it with a tool like Disk Drill, review the results (preview the files), select what you need, and recover everything to a different drive. Anything that still physically exists on the disk has a chance to come back.
But your chances depend heavily on the things we covered at the beginning: what type of format it was, whether the drive is an HDD or SSD, and whether anything new was saved to the drive afterward. That’s why the best move is to scan first.


FAQ
If you’ve accidentally formatted a hard disk with important data, then you need to use a data recovery software solution like Disk Drill to scan it and retrieve the lost files. Keep in mind that your data can be recovered only until it becomes overwritten, so act quickly and don’t write any new data to the formatted hard disk.
It depends on what “DIY recovery” looked like.
If you scanned the formatted HDD with trustworthy recovery software, recovered the files to a different drive, and didn’t write anything new to the formatted disk, a lab may not find much more than you already saw. In a healthy formatted HDD case, recovery labs often go the same way: they scan it with advanced recovery tools, and check what data still exists. Where a service can help is when the drive has physical problems, connection issues, or starts failing during the scan. In that case, their equipment and cleanroom process can make a real difference.
But there’s a hard limit. If the old files were overwritten with new data, no lab can rebuild them from nothing. The same goes for many formatted SSD cases where TRIM cleared the blocks. No matter how experienced the company is, how fancy the lab looks, or how many glowing reviews it has, overwritten data is gone.
Windows doesn’t have a built-in CMD command that can recover lost files from a formatted hard drive. Commands like chkdsk, diskpart, or sfc are not data recovery tools, and using those commands can make the situation worse.
But some recovery tools do run through Command Prompt. Two common examples are PhotoRec and Windows File Recovery. PhotoRec is capable but signature-based, so it loses original file names and folder structure. Windows File Recovery is Microsoft’s free command-line tool, but it has a learning curve and serious limitations.
So, CMD-based recovery is possible with the right tool, but don’t expect much.
Recovering data from a formatted hard disk without using software is inherently challenging, your options are basically limited to backups.
Check File History, OneDrive, Google Drive, Dropbox, or any external drive where you may have copied the files earlier. If you’re on Mac, check Time Machine and iCloud Drive. These methods only work if the files were backed up or synced before the hard disk was formatted.
If no backup exists, you’ll usually need recovery software to scan the formatted drive and look for data that still physically remains on it.