This article serves as a comprehensive manual for individuals seeking to freshen up their Macs through a clean install of macOS Sonoma.
While performing a clean installation of the operating system does involve some extra steps compared to a standard update, the benefits far outweigh the initial effort. Here’s how:
- Optimal performance: A clean install eradicates accumulated system clutter, ensuring your Mac operates at its peak performance.
- Greater stability: A clean install removes any old or conflicting software that may be causing system instability. With a fresh version of macOS Sonoma, your Mac is less likely to encounter crashes or bugs.
- More free disk space: Over time, your disk may accumulate unused applications, duplicate files, or old caches. A clean install clears away this junk, freeing up precious disk space.
Step 1: Prepare for a Clean Install of macOS Sonoma
Before jumping into the clean install process, it’s vital to cover some groundwork to ensure a seamless transition to macOS Sonoma. This preliminary phase includes two crucial steps: checking your Mac’s compatibility and backing up your data.
Compatibility Check
First and foremost, ensure that your Mac is compatible with macOS Sonoma. Here’s a concise table listing the compatible models:
| Mac Model | Compatible Versions |
| MacBook Pro | 2018 – 2023 |
| MacBook Air | 2018 – 2023 |
| iMac | 21.5-inch (2019), 24-inch (M1, 2021), 27-inch (2019 – 2020) |
| iMac Pro | 2017 |
| Mac mini | 2018, 2020, 2023 |
| Mac Studio | 2022, 2023 |
| Mac Pro | 2019, 2023 |
For more detailed information, you can visit Apple’s official macOS Sonoma compatibility page.
If you’re not sure which model you have, then you can open the Apple menu and select the About This Mac option. There, click More Info and then System Report. Copy the Model Identifier from the Hardware Overview section and paste it into Google.
Data Backup
Prior to initiating the clean install, it’s essential to back up all your valuable data. That way, you’ll be able to restore your files and applications once macOS Sonoma is up and running. The main solution for creating a complete Mac backup is Time Machine
This reliable and easy-to-use backup method has been available to all Mac users since the release of Mac OS X 10.5 Leopard in October 2007. It offers the advantage of automatic backups and versioning, allowing you to restore your system to specific points in time, but it isn’t as customizable in terms of what gets backed up when compared to specialized third-party software.
Here’s how Time Machine works:
- Connect an external storage device to your Mac.
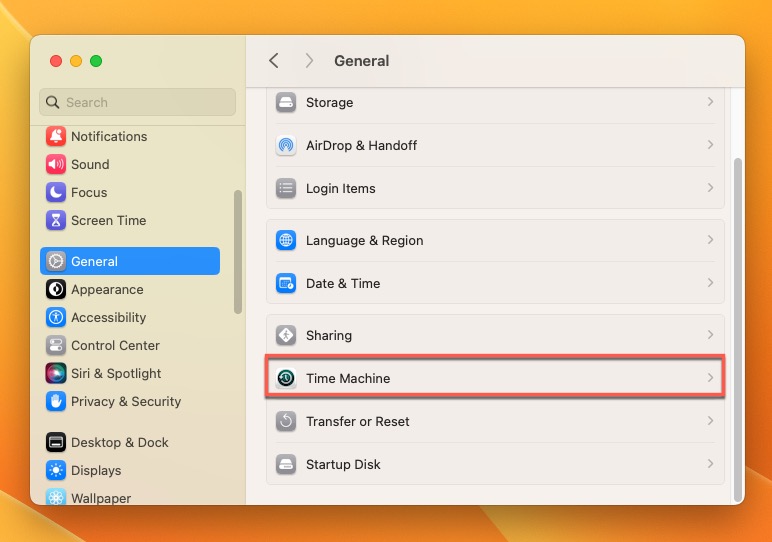
- Navigate to Apple menu > System Settings > General > Time Machine if you’re using macOS Ventura or later. If you’re using an older version, then you need to open System Preferences instead of System Settings.
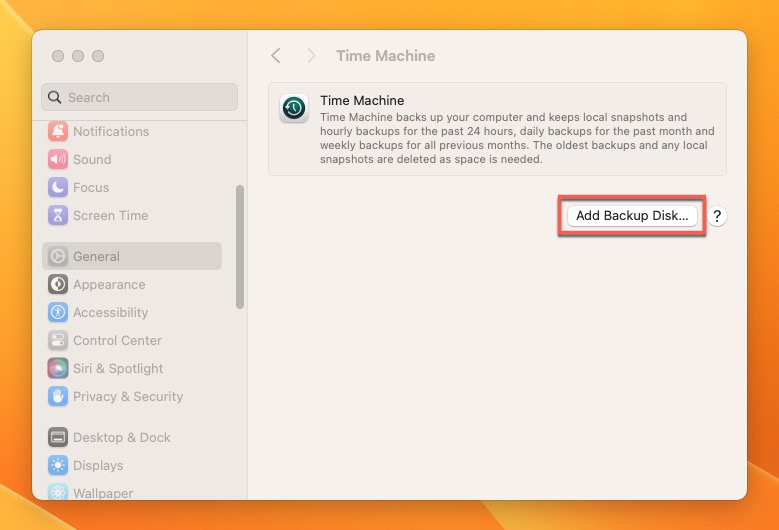
- Add the external storage device you’ve connected to your Mac in step 1 as your backup disk.
- Wait for Time Machine to completely back up your Mac.
- Disconnect the external backup storage device so that you don’t accidentally delete any files stored on it when performing the clean install of macOS Sonoma.
Step 2a: Upgrade & Erase All Content and Settings
In the past, the macOS clean install process involved creating a bootable copy of the macOS installer on a flash drive, formatting the system drive, and then installing a fresh system from the bootable macOS installer (we describe why you may still need to create a flash drive installer in the next section).
Using the Erase All Content and Settings feature, you can quickly and painlessly restore your computer to its factory settings. removing all user data, settings, and installed applications, but leaving the core macOS system intact. Essentially, you achieve the same result as the older, more cumbersome method—a fresh, clean version of macOS.
The only wrinkle in this otherwise smooth process is that the Erase All Content and Settings option needs to be invoked from the target operating system, macOS Sonoma, itself. This means you’ll first need to upgrade to macOS Sonoma using a standard system upgrade by following these steps:
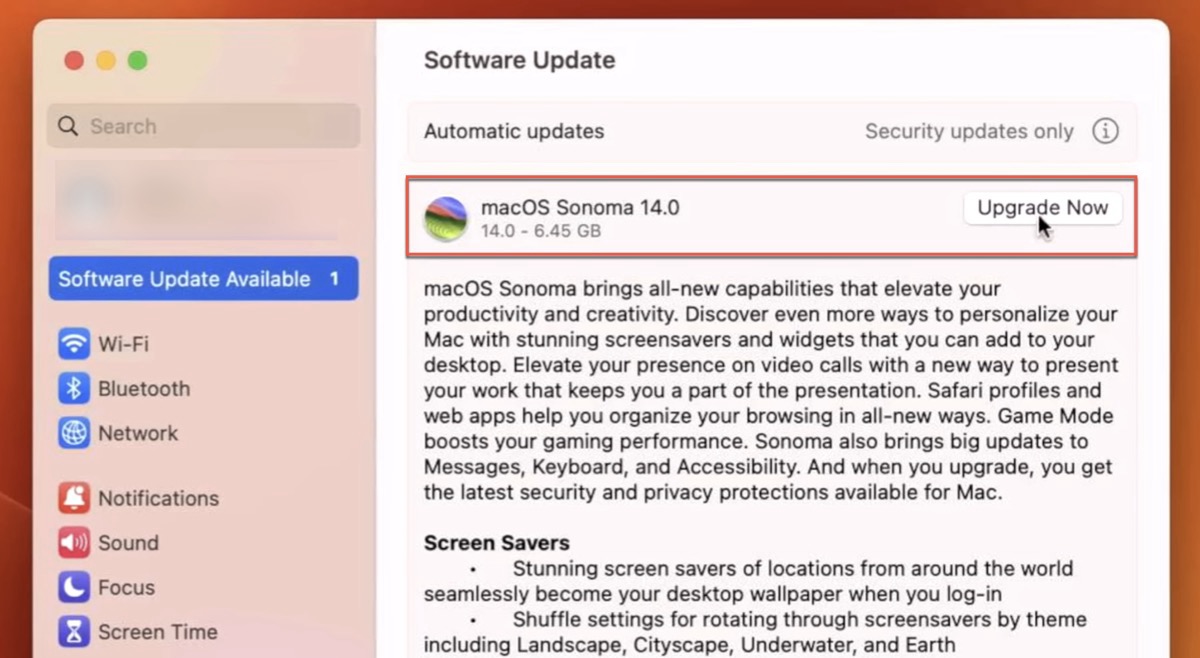
- Open System Settings (or System Preferences if you’re using an older version of macOS) and navigate to the Software Update section, located in the General tab (on new versions of macOS only).

- Click Upgrade Now to download the Sonoma installer. Wait for the installer to download and then confirm your decision to install the new version of macOS.
- Restart your Mac to finish the installation of macOS Sonoma.
Now that your Mac is upgraded to macOS Sonoma, you’re ready for the last step of the clean install process: using the Erase All Content and Settings option to wipe all data. This is what you need to do:
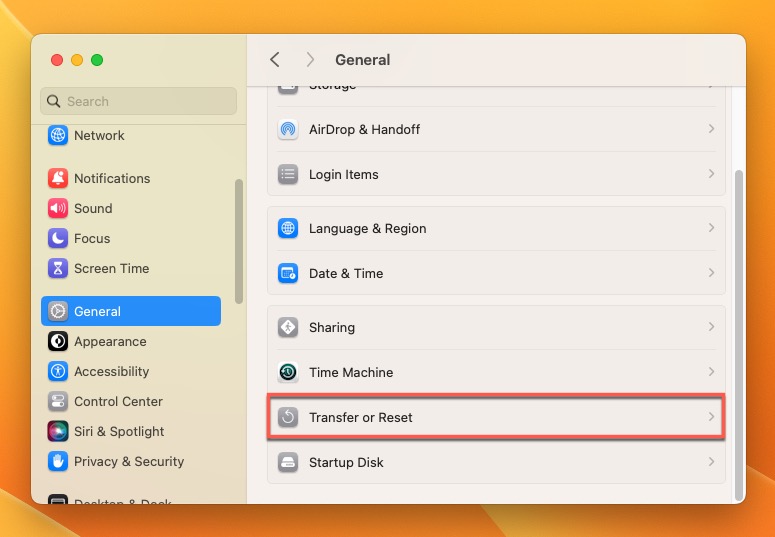
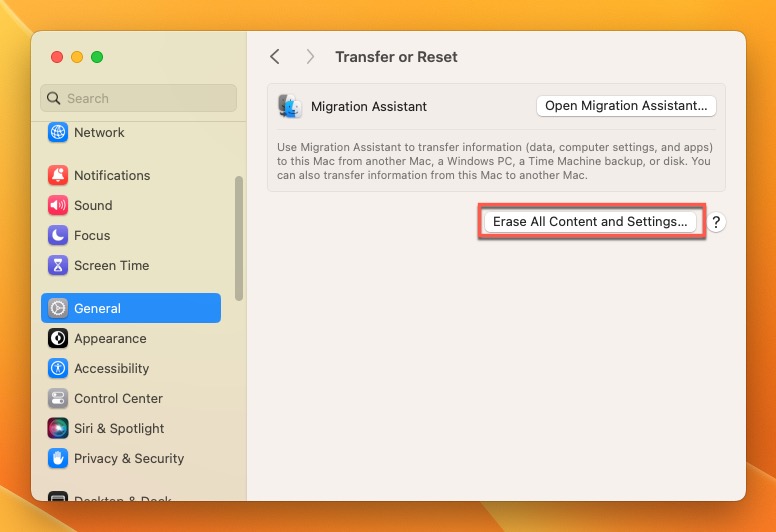
- Open System Settings, select General, and then find and click on Transfer or Reset.
- Click the Erase All Content and Settings option.
- Enter your admin password to launch the Erase All Content & Settings assistant.
- Review the settings, data, and media that will be removed and click Continue.
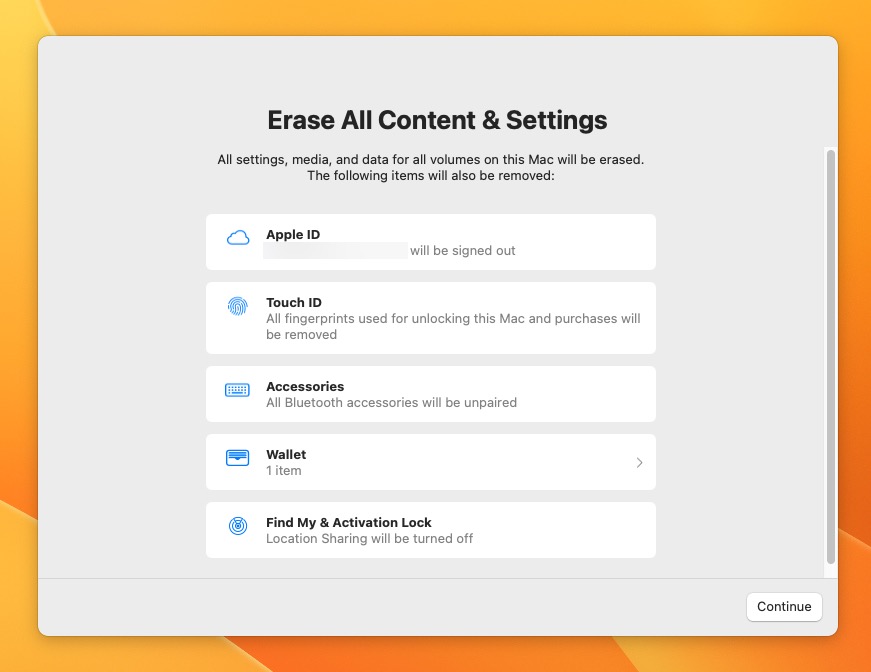
- Sign out of your Apple ID and then click Erase All Content & Settings in the next prompt to confirm your decision.
You’ve successfully clean installed macOS Sonoma on your Mac using the simplified Erase All Content and Settings option. Enjoy your fresh start with macOS Sonoma.
Step 2b: Clean Install macOS Sonoma from a USB Flash Drive
Although macOS Sonoma brings with it a convenient feature for clean installation, there are scenarios where the classic method of using a bootable USB flash drive may come to the rescue:
- Encountering issues while upgrading to Sonoma.
- Facing challenges booting into the operating system.
- Working with limited internet bandwidth or slow speeds.
- Needing to clean install macOS Sonoma on multiple Macs without redownloading the installer.
Here’s a step-by-step guide on how to clean install macOS Sonoma from a USB flash drive:
1. Download macOS Sonoma Installer
First, you need to download the macOS Sonoma installer from the App Store:
- Launch App Store.
- Select the search bar in the top-left corner and enter “macOS Sonoma.”
- Click the relevant search result.
- Click the Get button to start the download process.
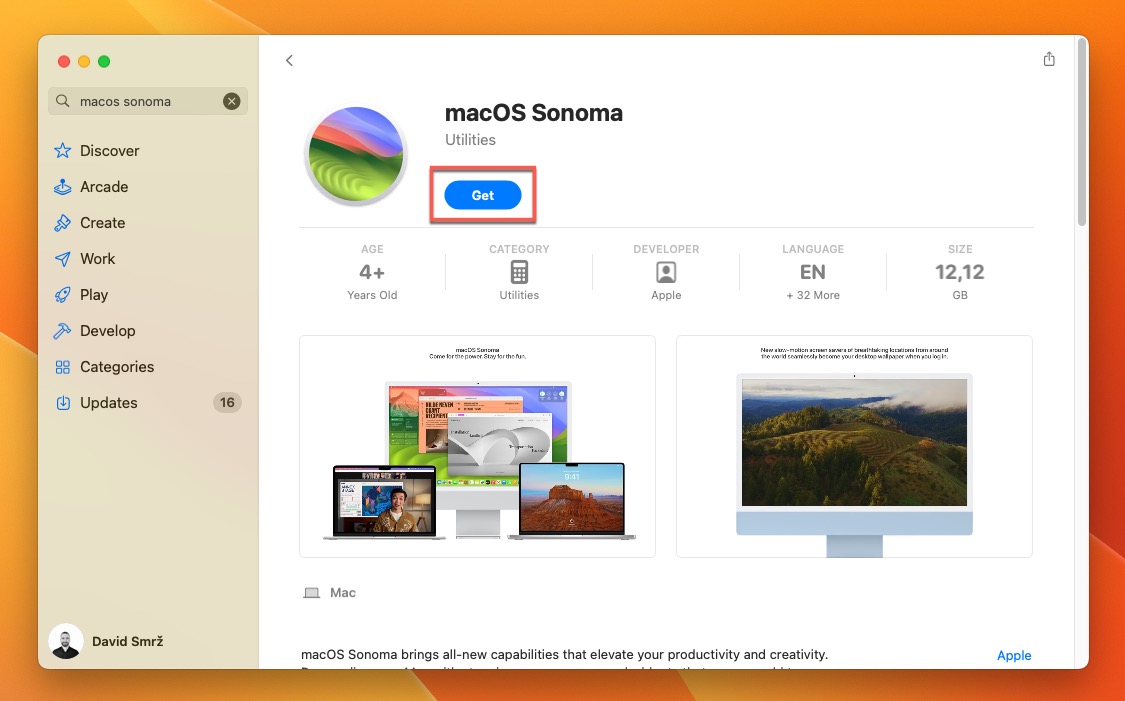
- Wait until the macOS Sonoma installer is completely downloaded.
2. Prepare Your USB Flash Drive
Now you need to prepare your USB flash drive to turn it into a bootable installer:
- Plug your USB flash drive into your Mac. Ensure it has at least 16 GB of free space.
- Launch Disk Utility from the Utilities folder or through Spotlight Search (Command + Space, then type “Disk Utility”).
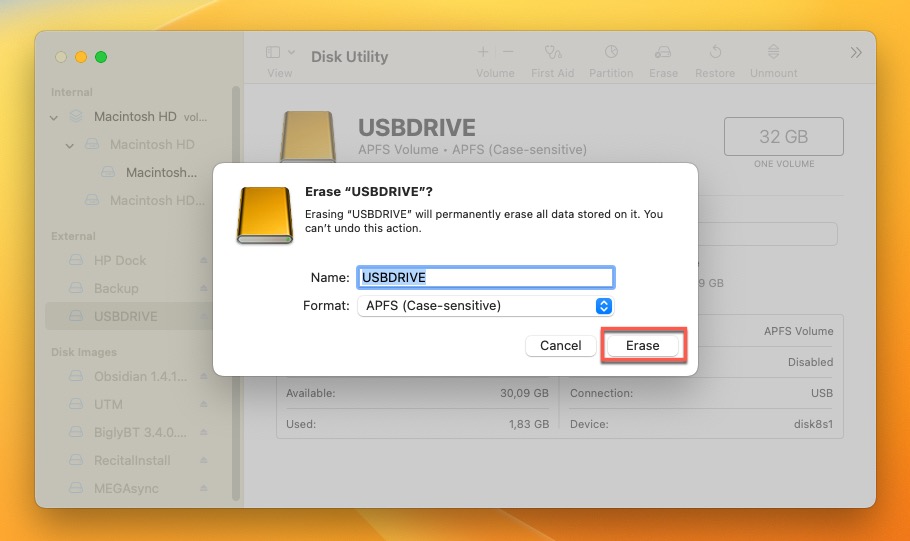
- Select your USB flash drive in the Disk Utility sidebar.
- Click Erase at the top.
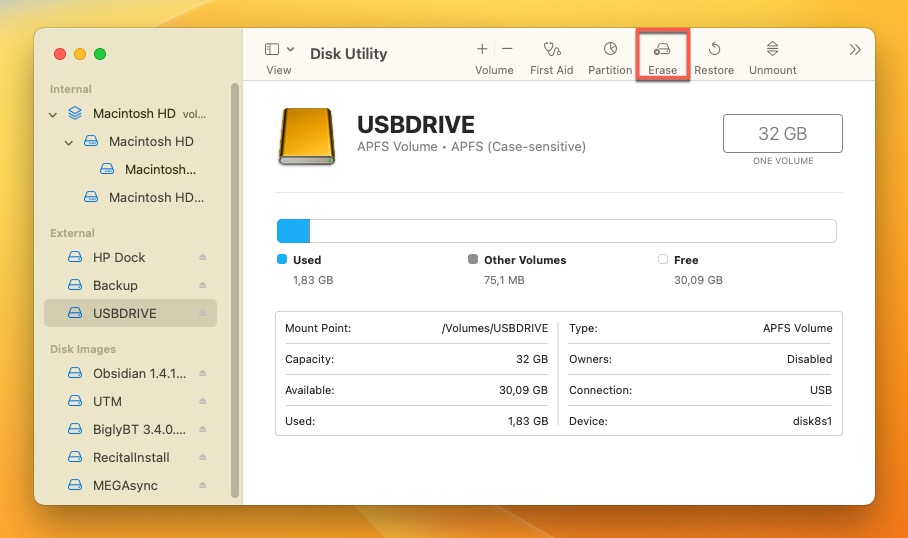
- Choose Mac OS Extended (Journaled) or APFS (Case-sensitive) from the format list.
- Click Erase again to format your drive.
3. Create a Bootable macOS Sonoma Installer
You have two options on how to create a bootable macOS Sonoma installer: the traditional way using Terminal, or the simplified way using Disk Drill.
Using Disk Drill
If the thought of tinkering with Terminal commands leaves you feeling uneasy, Disk Drill offers a user-friendly method for creating your bootable macOS Sonoma installer:
- Download Disk Drill from the official website and install it on your Mac.
- Launch Disk Drill and connect your USB flash drive.
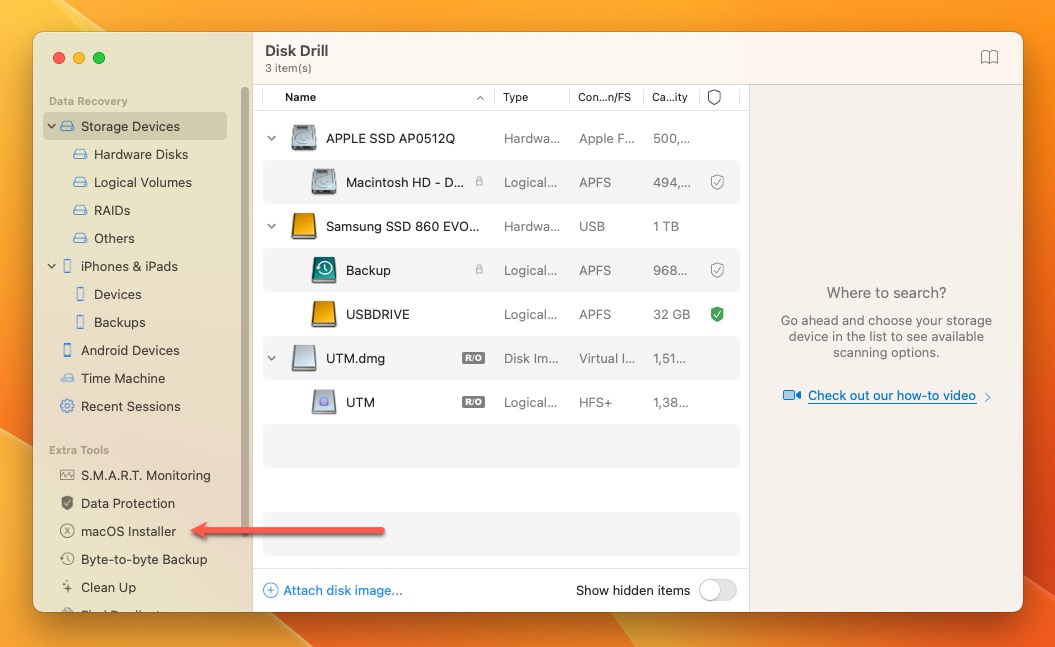
- Choose the macOS Installer extra tool in the left pane.
- Pick the macOS Sonoma installer, select your USB flash drive as the destination, and tell Disk Drill to start creating the bootable macOS Sonoma installer by clicking the Create macOS installer button.
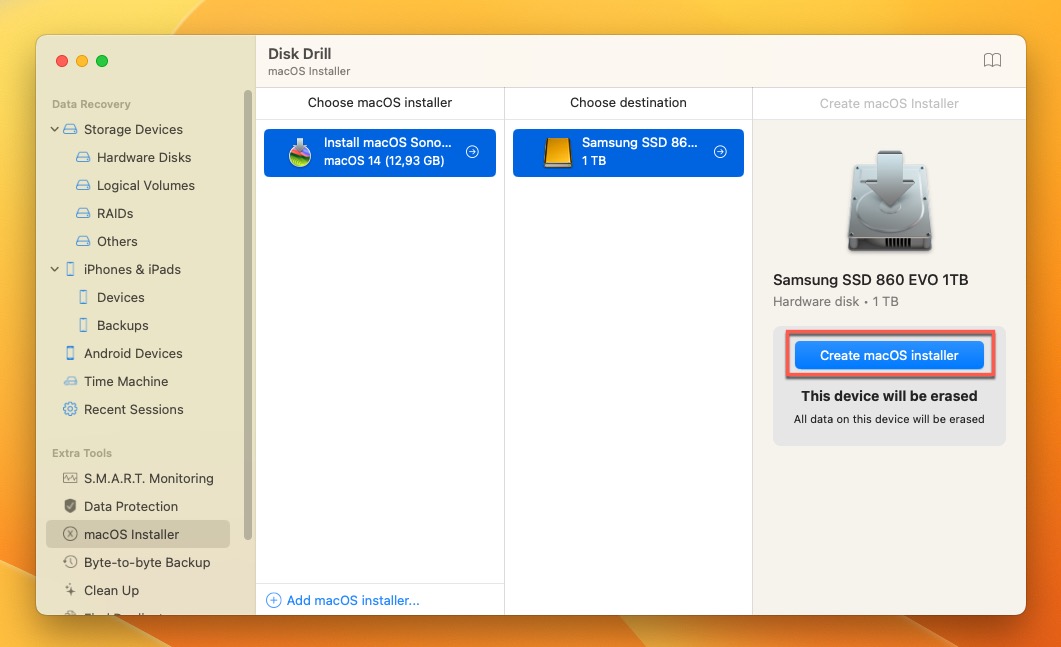
- Wait until Disk Drill informs you that the process is complete.
Using Terminal
For those who are more technically inclined, Terminal can get the job done without the need to install any additional application:
- Open Terminal from the Utilities folder or through Spotlight Search.
- Copy and paste the following command into the Terminal window (replace “Untitled” with the name of your USB drive if it’s not named “Untitled”) and press Return:
sudo /Applications/Install\ macOS\ Sonoma.app/Contents/Resources/createinstallmedia --volume /Volumes/Untitled
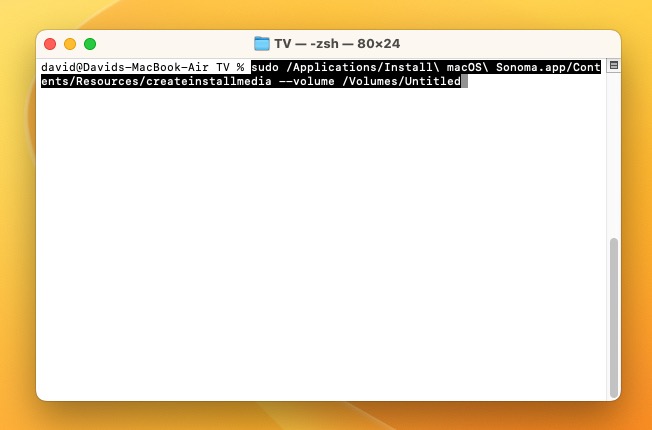
- Enter your admin password when prompted, and press Return.
- Wait for the process to complete. You’ll see a message saying “Copy complete” and “Done” when it’s finished.
4. Enter Boot Options and Erase Your System Drive
To clean install macOS Sonoma from a USB flash drive, you need to first erase your system drive:
- Shut down your Mac.
- Press the power button on your Apple Silicon Mac and hold it to enter the boot menu. If you have an Intel-based Mac, then you need to press the power button and immediately press Command + R and hold it.
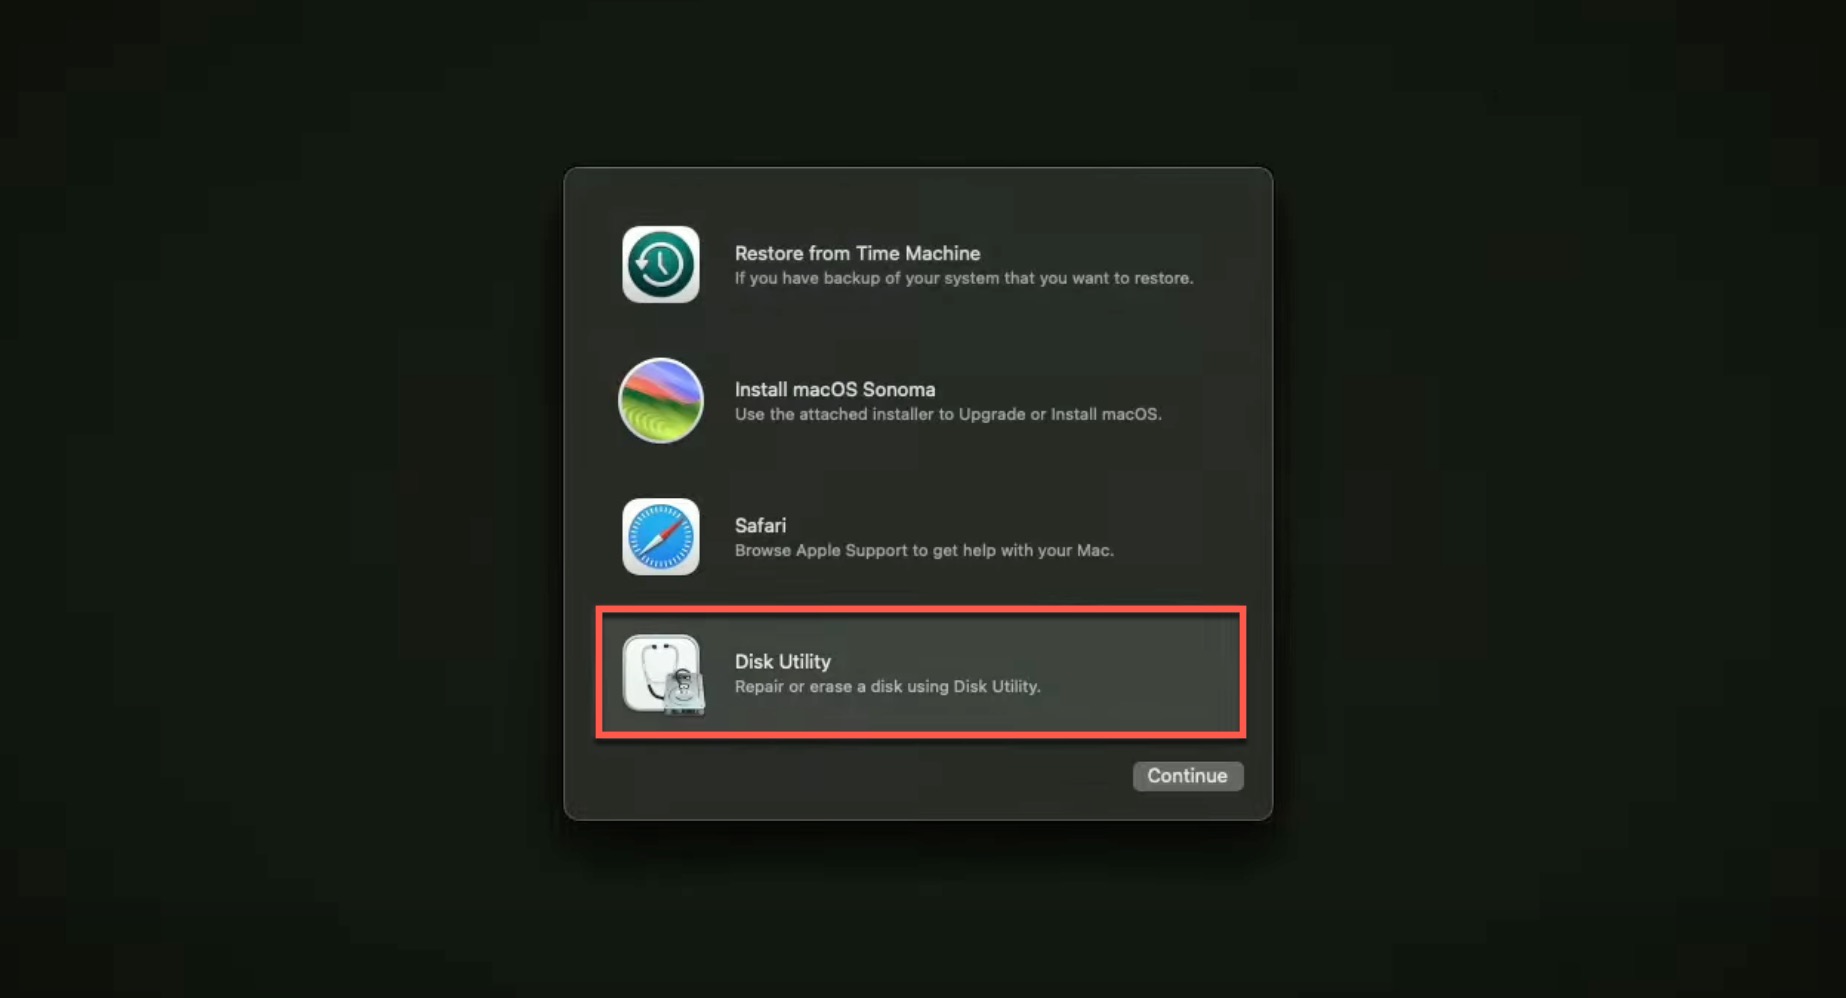
- Select Options and enter your admin password.
- Click on Disk Utility and click Continue.
- Select your system drive and click Erase.
- Select the APFS format and the GUID partition map and click Erase again.
- Shut down your Mac again.
5. Use the Bootable Installer to Install macOS Sonoma
With your system drive erased, you can finally clean install macOS Sonoma from the USB flash drive you’ve prepared:
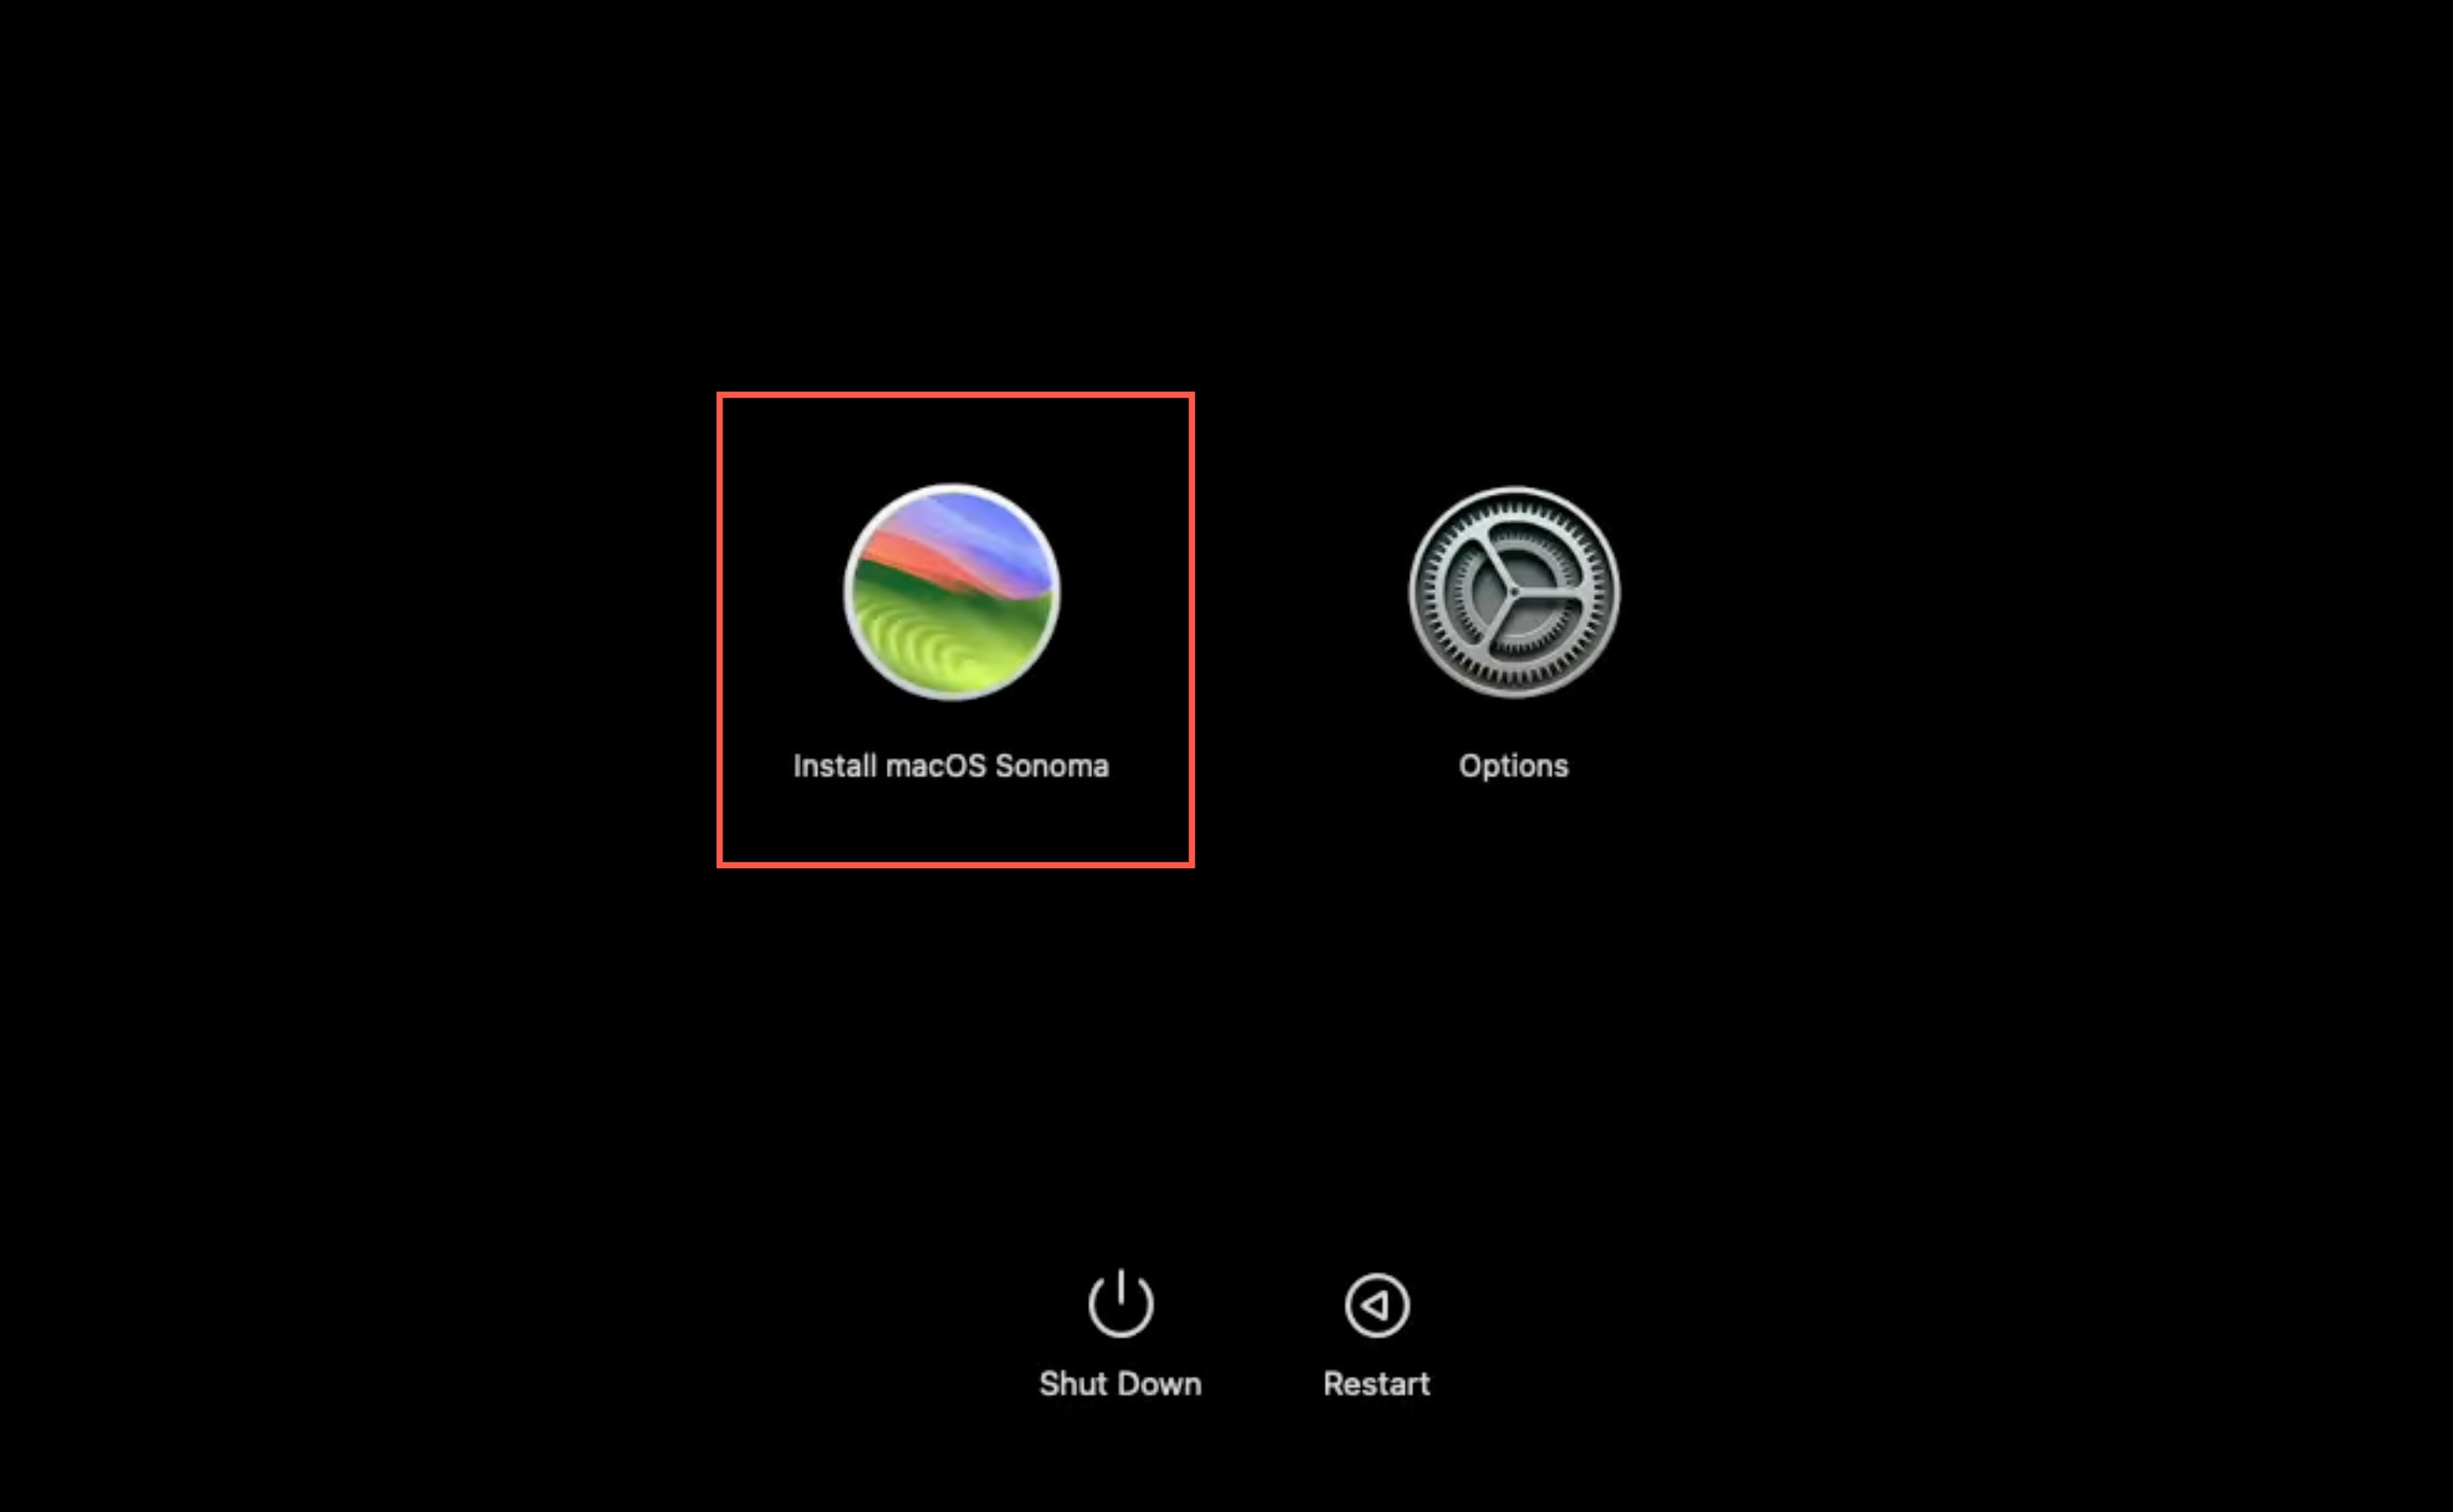
- Long-press the power button (Apple Silicon) or power button and Command + R (Intel) to enter the boot menu again.
- Select the Install macOS Sonoma option.
- Follow the on-screen instructions to complete the installation process.
With these steps, you now have the know-how to clean install macOS Sonoma using a USB flash drive. This classic method can be a lifesaver in many scenarios, but, as you can see, it’s far more complicated than the Erase All Content & Settings feature.
Step 3: Configure macOS Sonoma and Recover Your Data
Congratulations on successfully clean installing macOS Sonoma! But there are a few more things to do before you can start using your refreshed Mac.
Configure macOS Sonoma
macOS Sonoma comes with several new & exciting features that you should configure to suit your preferences. Besides them, there are various settings that have been around but are worth revisiting to optimize your Mac’s functionality:
- 🖥️ Set up desktop widgets: macOS Sonoma is the first version of Apple’s operating system with support for desktop widgets. To set them up, right-click on the desktop, choose Edit Widgets, and select your favorites.
- 👨👩👦 Create Safari profiles: Create different profiles in Safari to keep your work and personal browsing separate. Go to Safari > Settings > Profiles to set up.
- 🖼️ Change your wallpaper: The all-new macOS Sonoma brings a breath of fresh air to your desktop with its aerial wallpapers and screensavers. To change your wallpaper, right-click on the desktop, choose Change Desktop Background.
- 🧘🏼 Configure Focus Modes: Configure Focus mode to manage your notifications better. Access it via System Settings > Focus > Add Focus.
- 🦻 Explore accessibility features: macOS Sonoma provides enhanced accessibility features. Customize them under System Settings > Accessibility.
- ☁️ Customize your iCloud Settings: Manage your iCloud settings by heading to System Settings > Apple ID > iCloud. There, you can configure which apps are allowed to use iCloud, see how much storage space you have left, and even get more cloud storage space from Apple.
- 🔎 Make Finder better: Launch Finder and open the View menu to explore a variety of options that can enhance your browsing and file management experience, such as the option to display a status bar with the path to the current folder at the bottom of the Finder window.
Of course, there are far more configuration options that you can tweak to your liking, but describing them all here would be beyond the scope of this article. That’s why we encourage you to follow our blog for more macOS tips & tricks.
Recover Your Data
Don’t forget about the backup you created before clean installing macOS Sonoma. You can now use this backup to recover your files and applications. Here’s how:
- Connect an external storage device to your Mac.
- Navigate to Apple menu > System Settings > General > Time Machine.
- Add the external storage device you’ve connected to your Mac in step 1 as your backup disk.
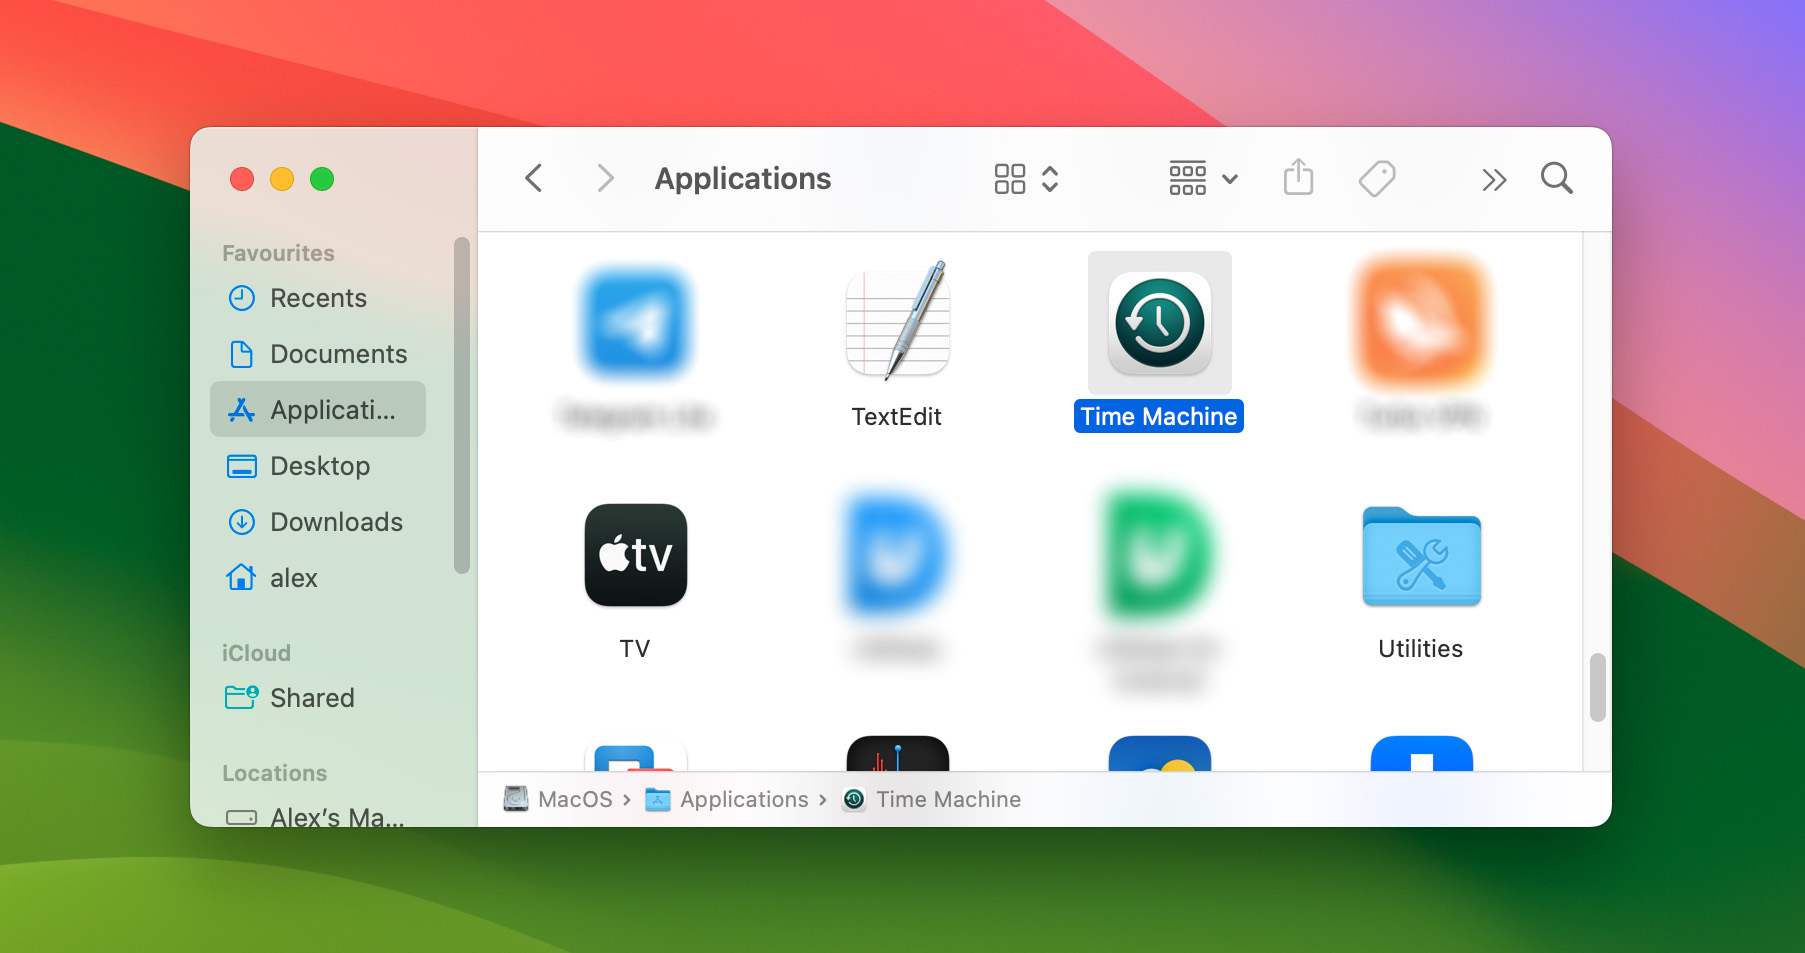
- Launch Time Machine from the Applications folder or the menu bar.
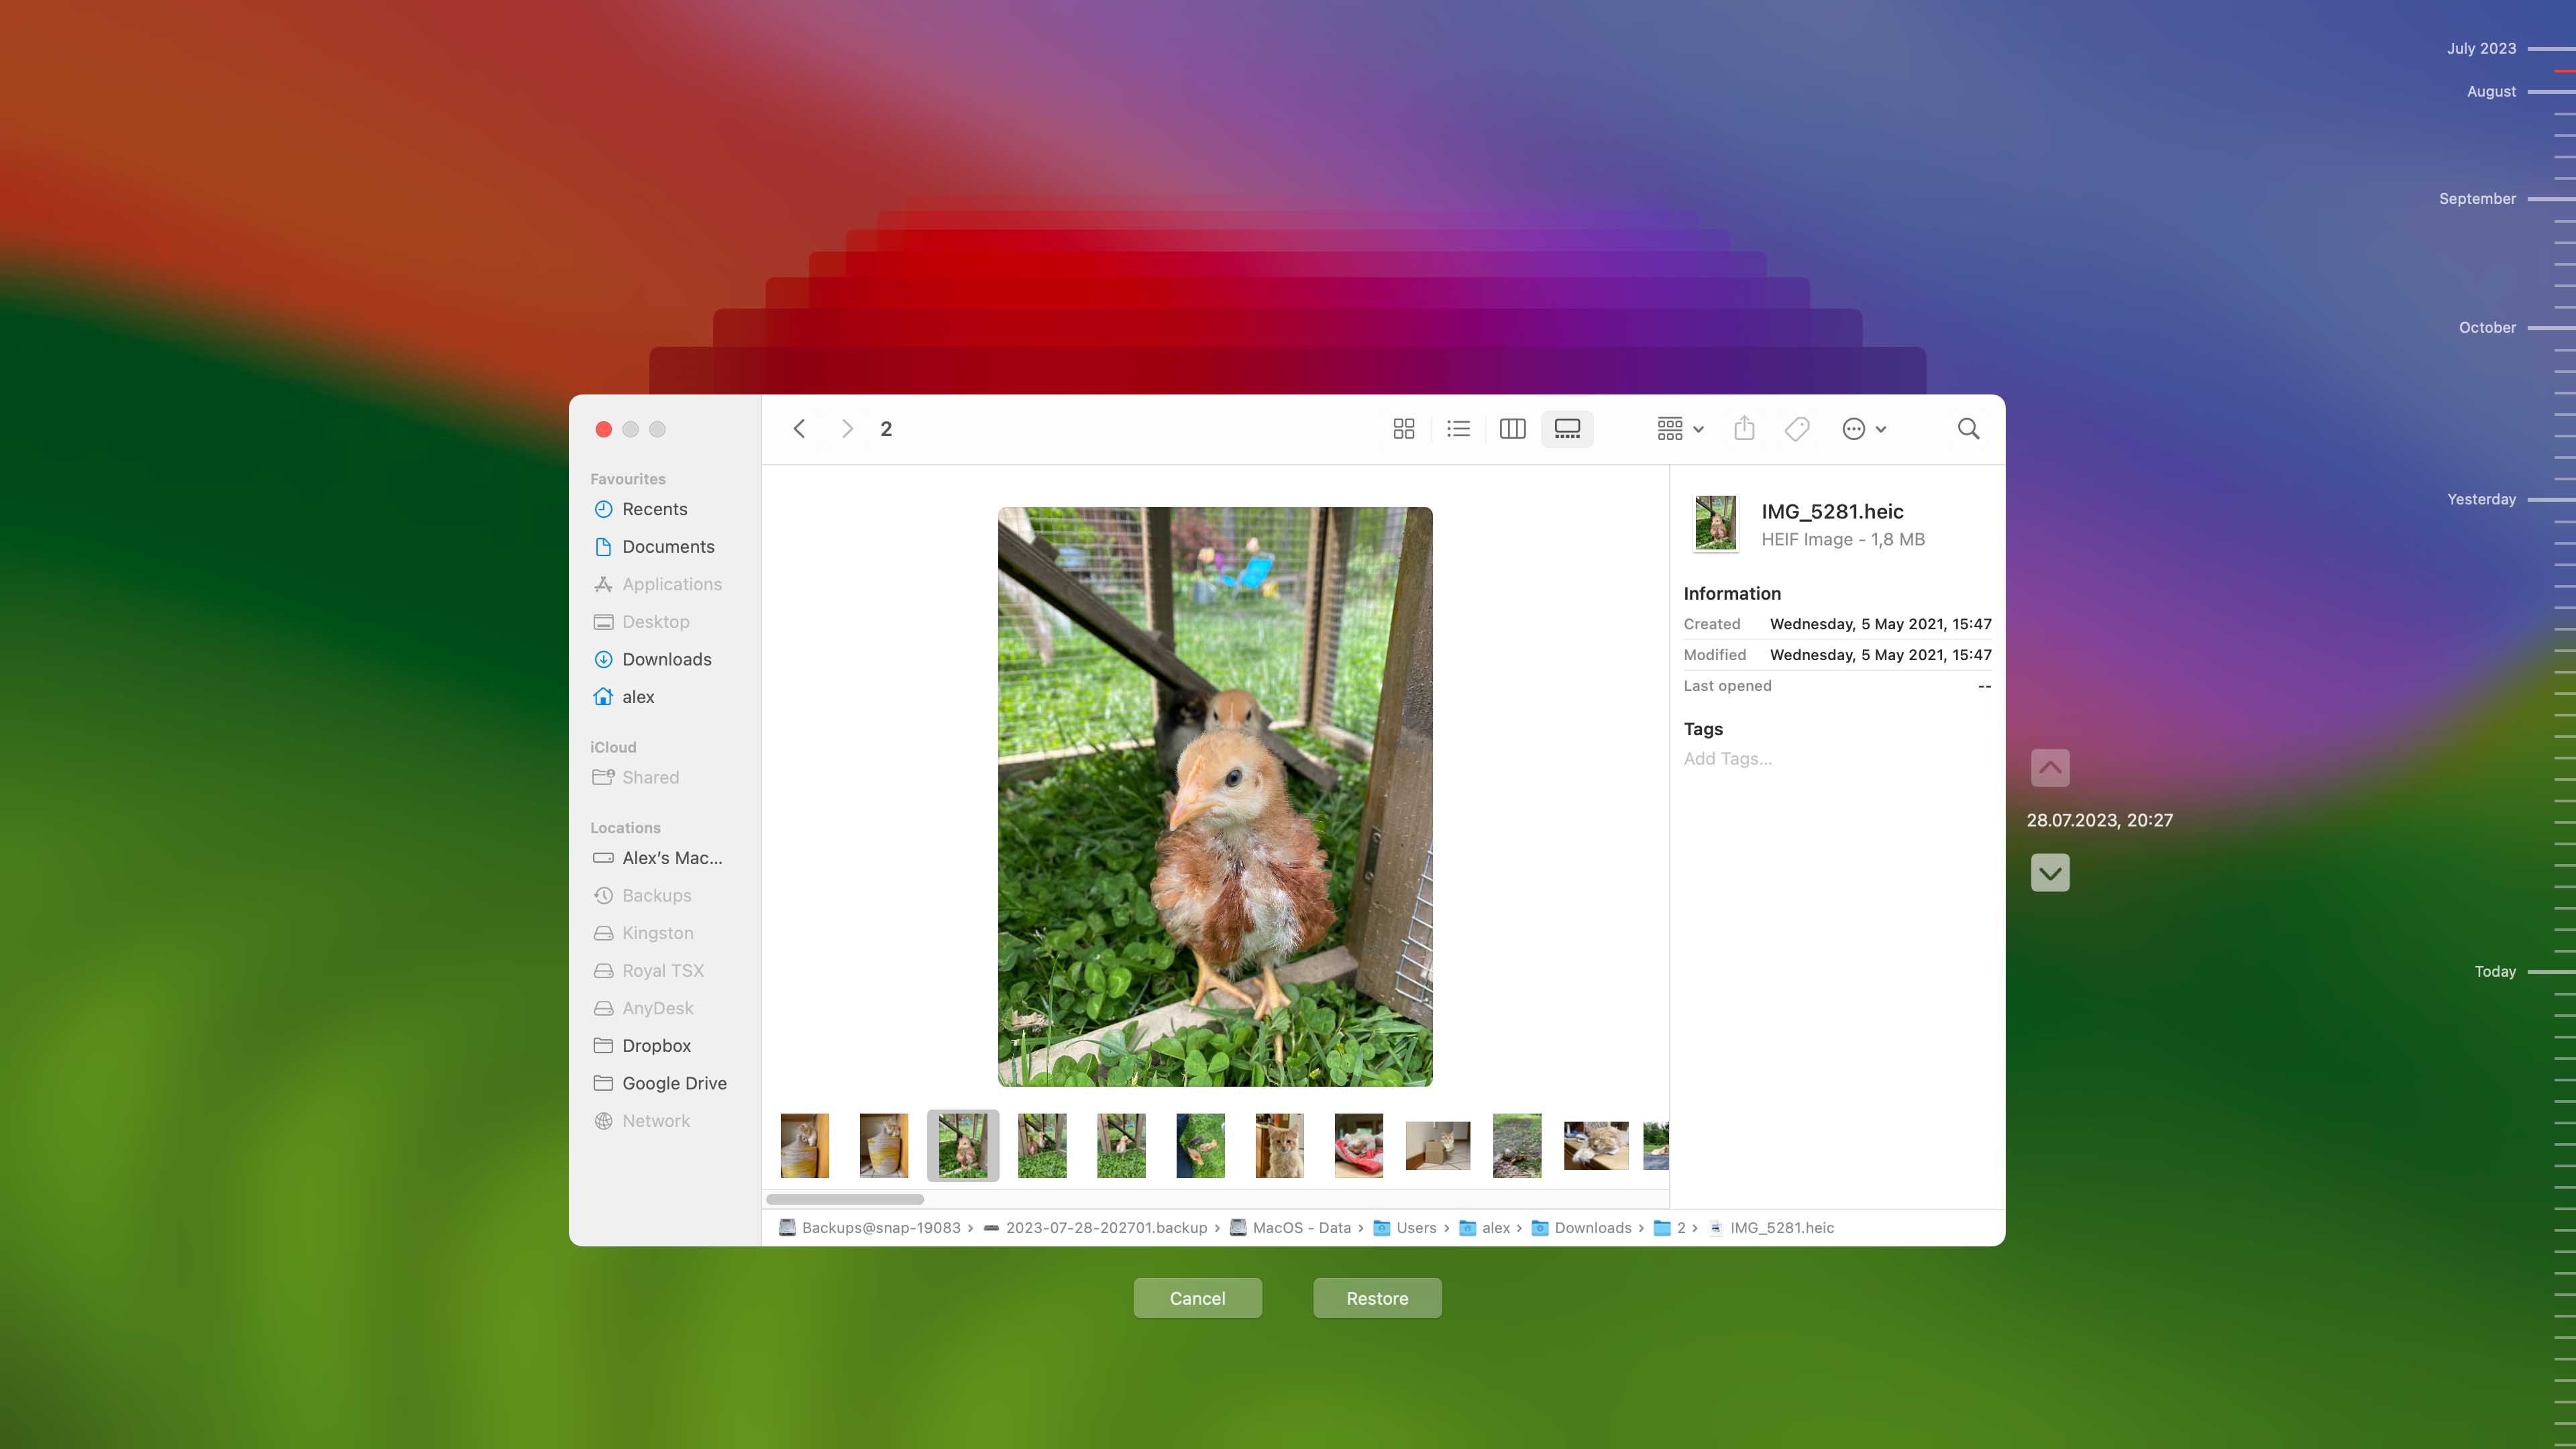
- Navigate through the timeline or browse the backups to find the items you want to restore.
- Press Restore to recover the selected items.
Now, with your data restored, you can get back to using your Mac with a fresh install of macOS Sonoma.
Conclusion
Achieving a clean install of macOS Sonoma is a surefire way to optimize your Mac’s performance and stability. Whether you’ve opted for the simplified method using the Erase All Content and Settings option or the legacy USB flash drive method, we hope that this guide has helped you navigate through the process smoothly. Enjoy your refreshed Mac!
FAQ
Performing a clean install of macOS Sonoma without a USB is a straightforward process thanks to the recently introduced Erase All Content and Settings feature. This feature allows users to erase all user data and settings while keeping the core system intact, and you can invoke it by going to System Settings > General > Transfer or Reset > Erase All Content and Settings.
There could be several reasons why your Mac is failing to install macOS Sonoma. Common issues include incompatible hardware, insufficient storage space, or a corrupted installer file. We recommend you check the compatibility of your Mac with macOS Sonoma, ensure you have enough free space for the installation, and try downloading the installer again if faced with installation failures.
It’s advisable to wait at least 24 hours if your Mac is stuck during the update, as interrupting the process can cause further issues. However, if the problem persists, attempt a forced restart by holding down the power button until your Mac shuts off, then turning it back on. If that doesn’t resolve the issue, contacting Apple Support or visiting an Apple Store for professional assistance is recommended.
Choosing between a regular update and a clean install depends on your needs. A regular update is quicker and retains all your data, settings, and applications. A clean install, on the other hand, wipes your system clean, providing a fresh start with potentially better performance and stability. If you’re facing system issues, a clean install might be the better option. Otherwise, a regular update should suffice.