What is Disk Drill?
Disk Drill is a powerful do-it-yourself app that can scan, recover and protect data on virtually any storage device, such as internal and external hard drives, cameras, iPods, USB flash drives, Mac computers, and memory cards.
Disk Drill is safe to use and yields amazing results when it comes to Mac data recovery. While Disk Drill has an array of amazing tools, this article, in particular, will focus on Recovery Mode for macOS devices.
You no longer need to create a USB boot drive to launch Disk Drill in Recovery Mode on your macOS device. Our team is making constant improvements to Disk Drill and with the new version, we managed to make Recovery Mode launch completely USB-free. Although a stable Internet connection is necessary. The following method works on macOS versions 10.11 – 15.0, Intel-based, T1/T2, and Mac with Apple silicon (M1-M4).
 💡 Read this on your phone. In the meantime, here is a convenient QR code, so you can open the article on your phone while scanning and recovering. Please make sure you have the article handy so you can follow along the process of launching Disk Drill in Recovery Mode. Pay attention to the commands you type in Terminal—they must be written correctly.
Why Should I Start Disk Drill in Recovery Mode?
The main reason to start your device in Recovery Mode is to prevent the data from being overwritten with new information if you are scanning when your Mac is operating in the usual way. The macOS system and background processes are constantly writing new files to your system drive. Thus, launching your Mac in Recovery Mode ensures that the recoverable information on its drives will be there for Disk Drill to recover and will not be erased or overwritten.
How to Launch Disk Drill in Recovery Mode on macOS: A Step-by-Step Guide
Step 1. Shut down your Mac
This step is crucial for the process as you will need to enter Recovery Mode first, which requires a certain key combination to be pressed before your operating system starts.
Step 2. Start your Mac in Recovery Mode
➜ Intel-based Mac
To start your Mac in Recovery Mode do the following: Turn on your Mac and immediately press and hold these two keys: Command (⌘) and R. Release the keys when you see Apple’s logo.
➜ Mac with Apple silicon
Follow these steps to enter macOS Recovery Mode:
- Press and hold your Mac’s power button until the startup volume slider and the “Options” icon appear.
- Click Options, then click Continue to boot into macOS Recovery Mode.
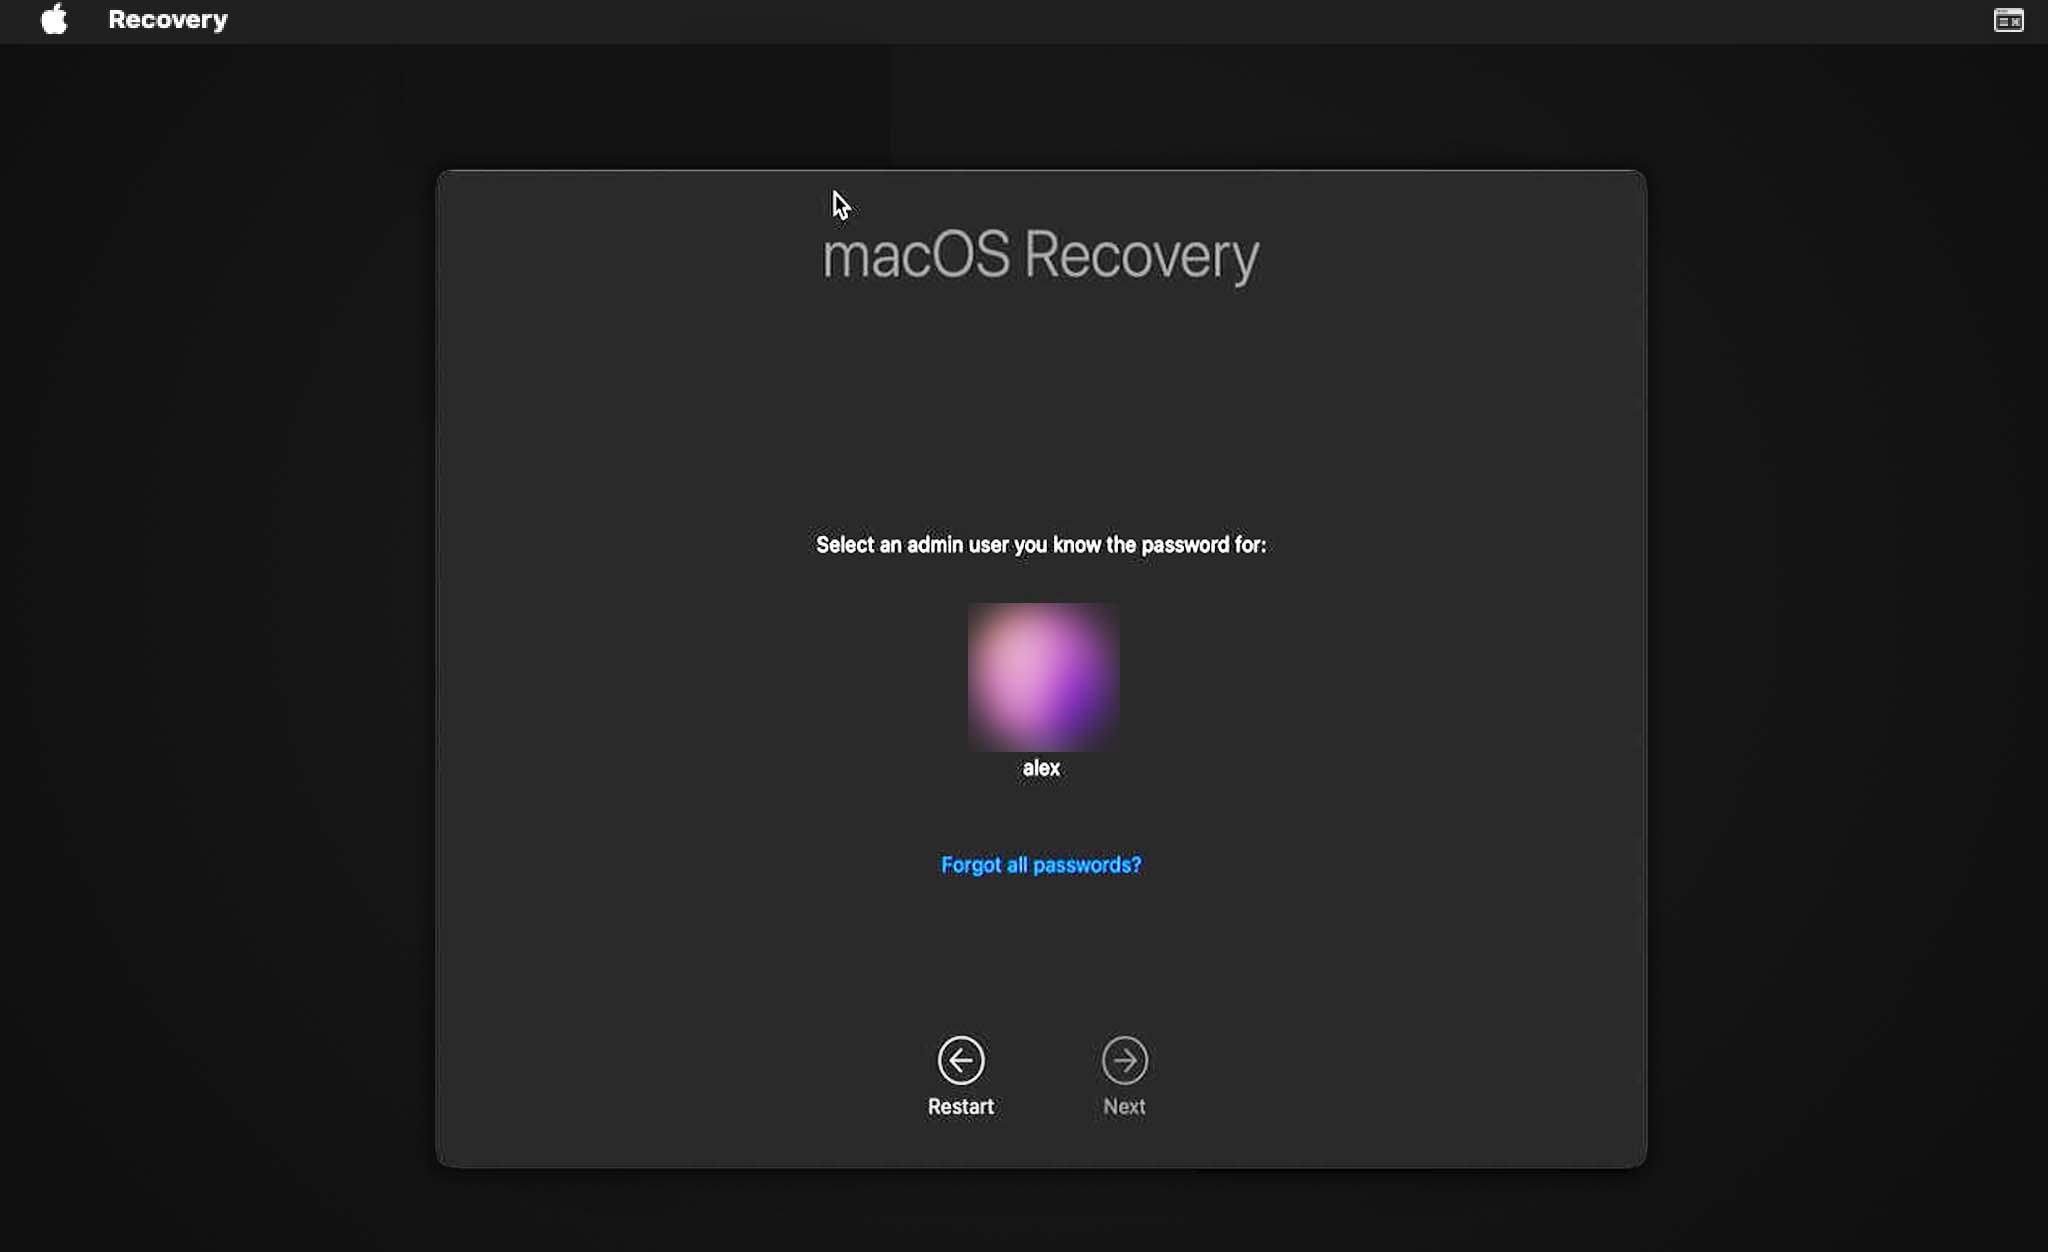
Step 3. Log in with Your Administrator Account
Select your administrator account and click Next. Enter the administrator password, then click Continue.
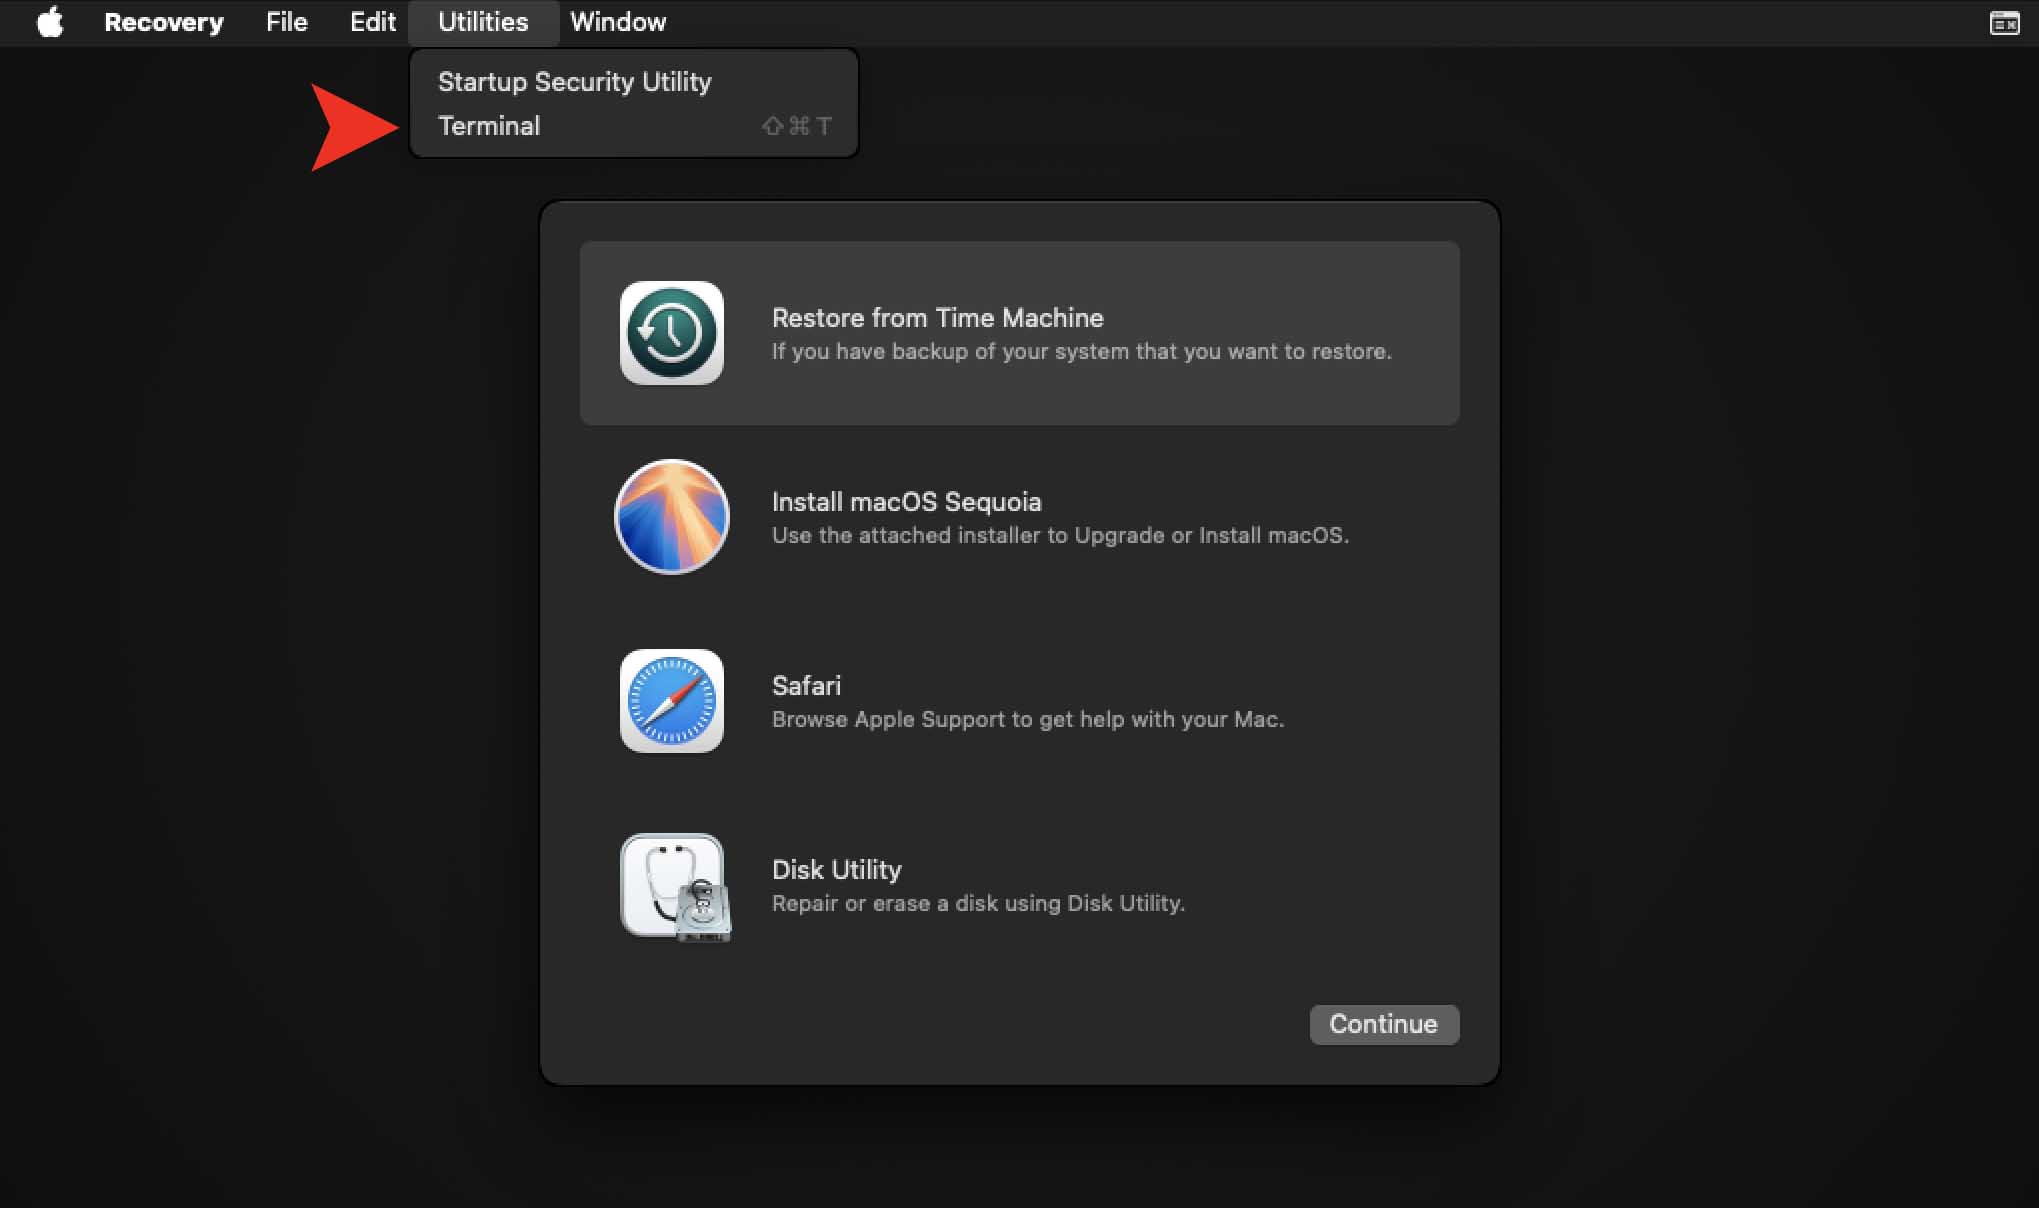
Step 4. Open the Terminal
Here is the quickest way to do it:
- At the “Recovery” screen, pull down the “Utilities” menu from the top of the screen
- Then choose “Terminal” to launch the Terminal app in Recovery Mode
Step 5. Enter the command
It should look precisely like this:
- In Terminal, type the following command and press Return:
• macOS 10.15-26.x
sh <(curl https://www.cleverfiles.com/bootmode/boot.xml)
• macOS 10.11-10.14
sh <(curl http://www.cleverfiles.com/bootmode/boot.xml)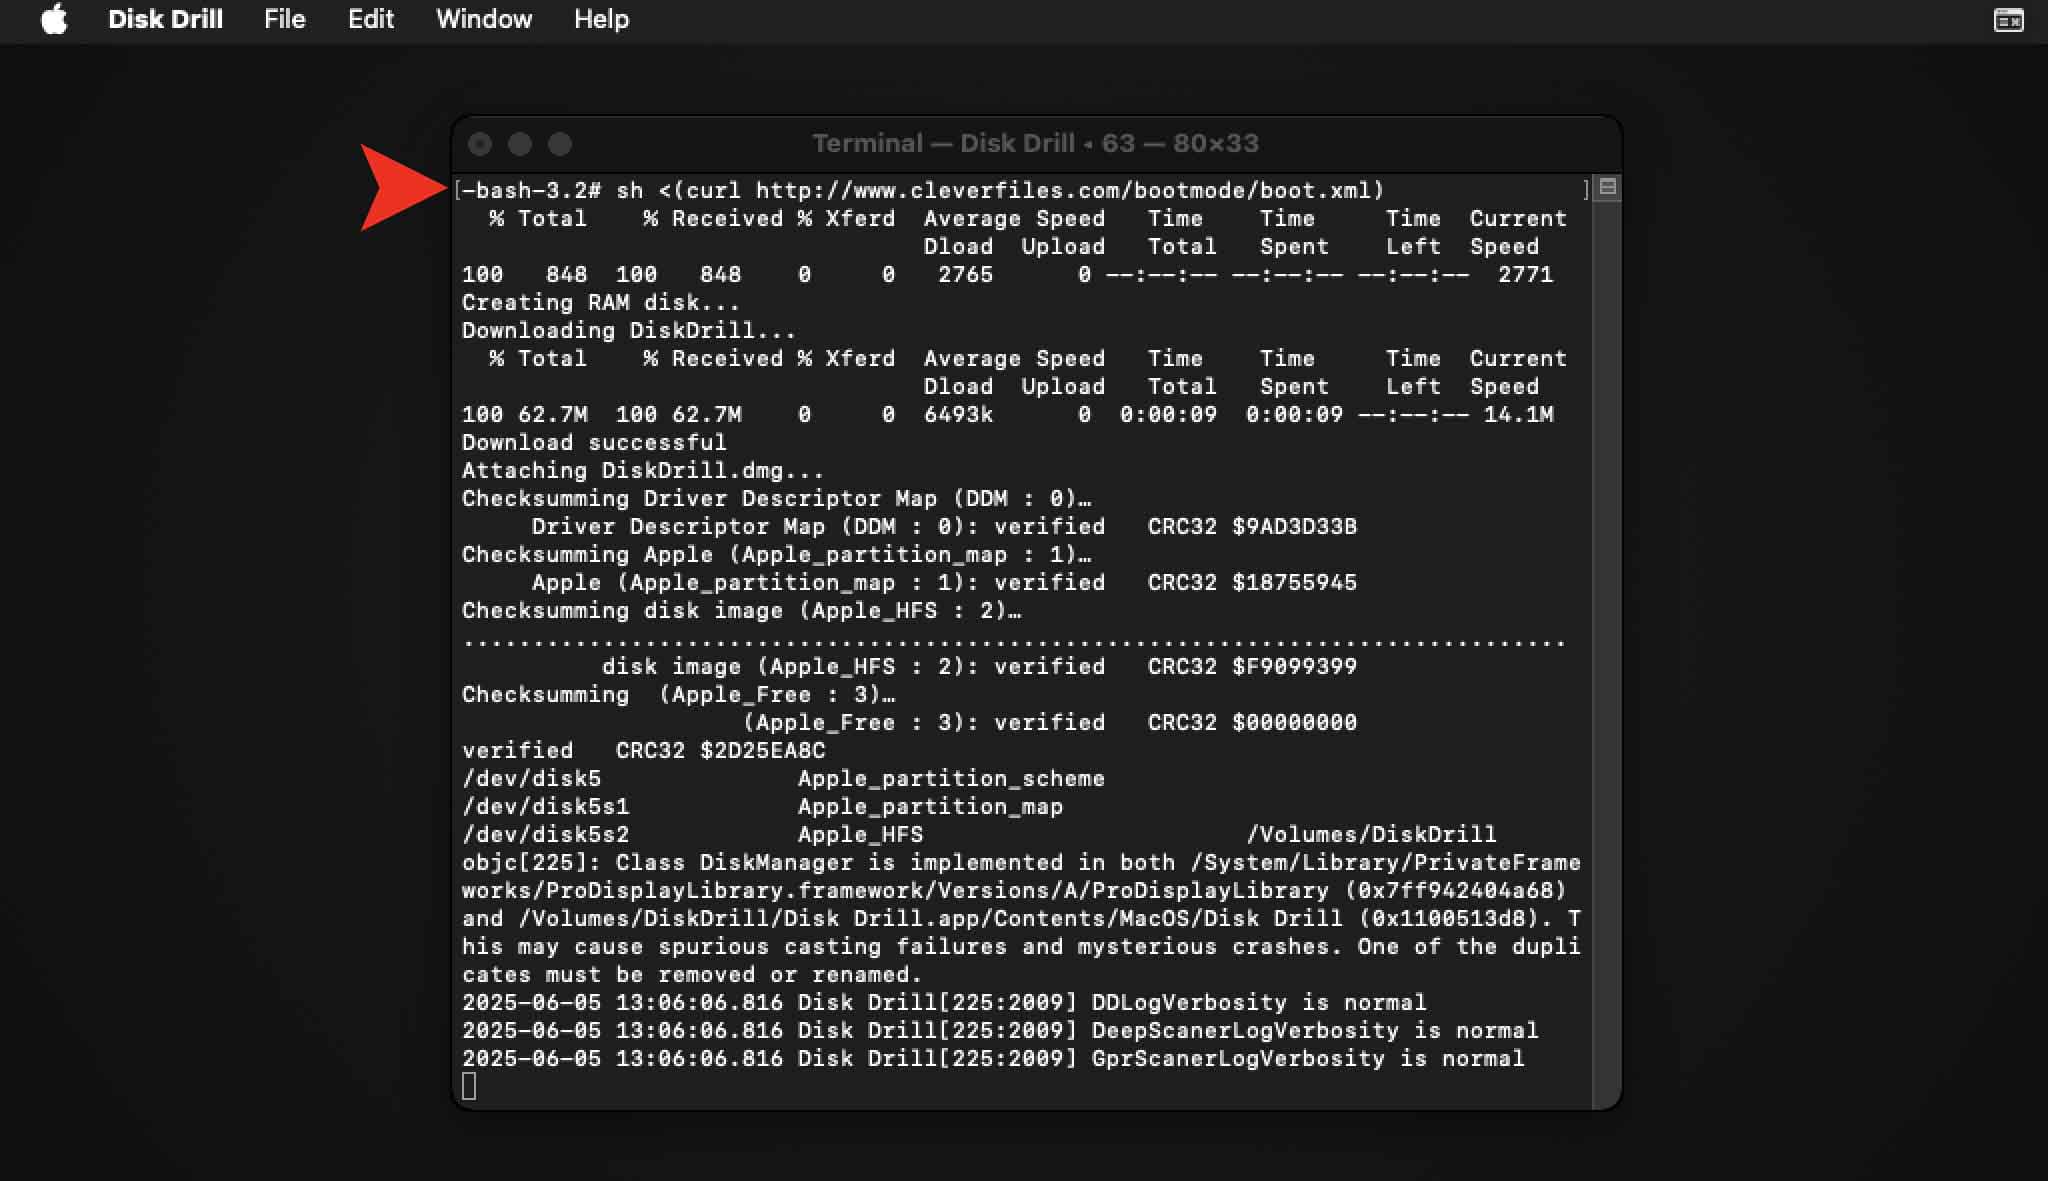
- Disk Drill will launch after it is downloaded and you will be able to start the scan in order to recover your lost files. Please make sure not to close Disk Drill or shut down your device during the scan.
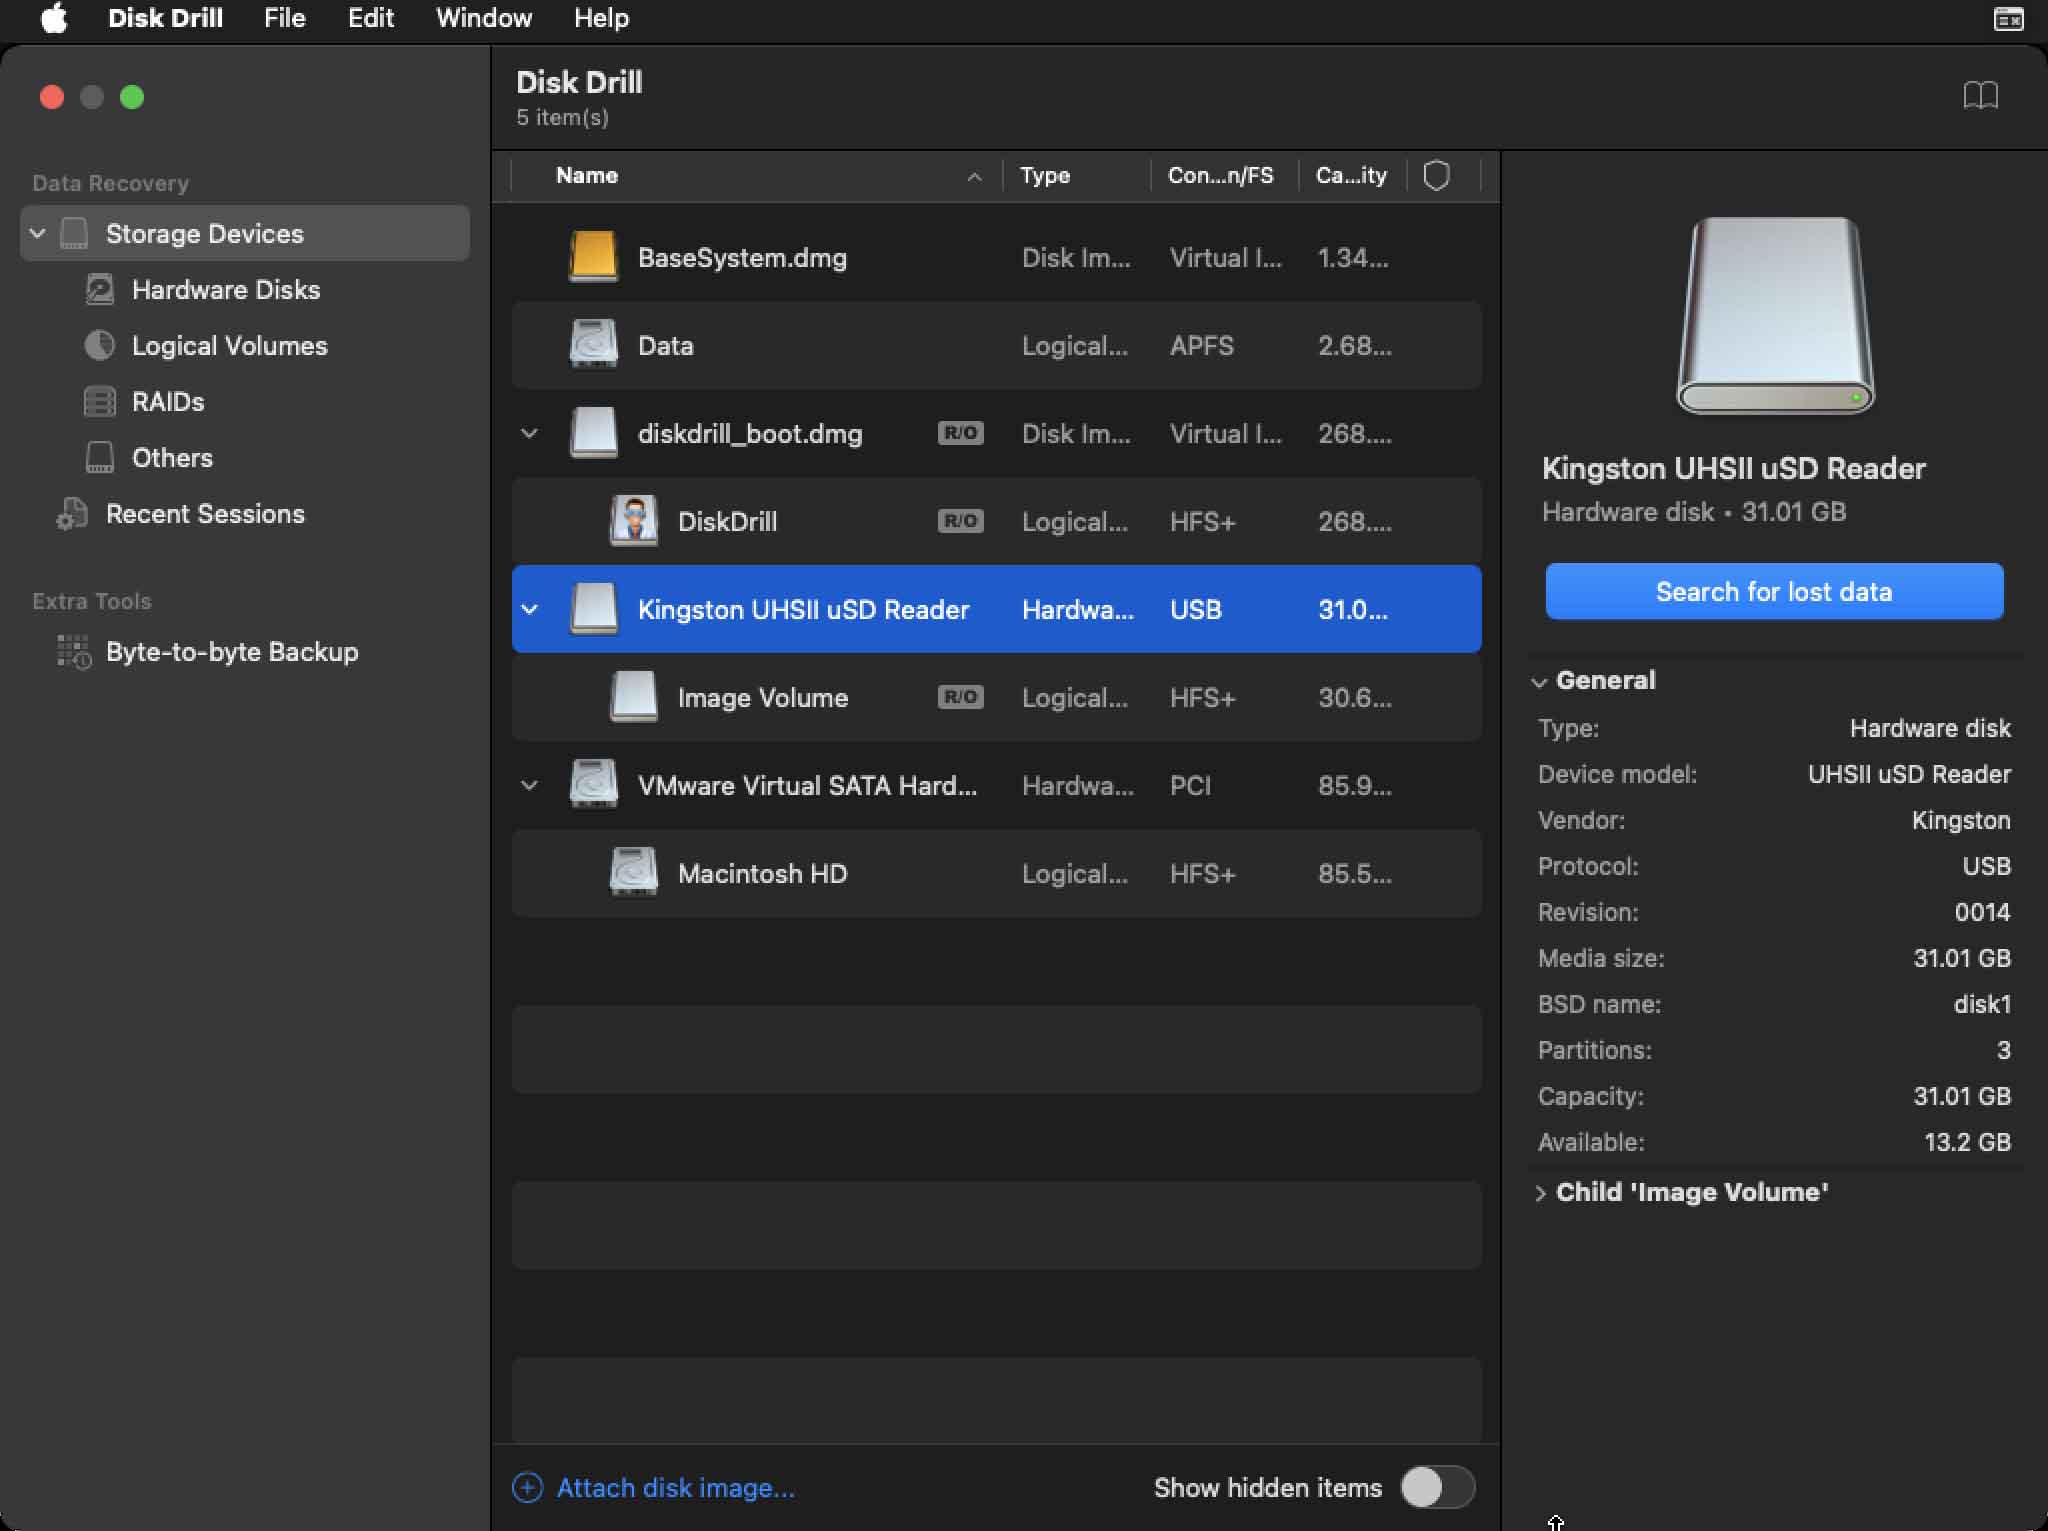
Unfortunately, when launched in macOS Recovery Mode, Disk Drill’s functionality is limited. You can scan drives and partitions to recover lost files, and only byte-to-byte backups are available under Extra Tools. The following Disk Drill features are unavailable in Recovery Mode:
- “Show in Finder” feature;
- File previews;
- Hyperlink functionality;
- Extracting Disk Drill logs;
- “Mount data as a disk” feature in “Rebuild HFS+ catalog” recovery method.
What about Disk Drill 3?
Back in Disk Drill version 3, there was a feature that allowed the creation of a bootable USB drive that could be used to launch Disk Drill from a dedicated startup USB drive. However, since macOS Big Sur (11.0) there is no known way to create a bootable USB device with Big Sur and newer on board, so starting from Disk Drill 4 we simplified this process for you and now there is no need to look for a spare USB drive to run a bootable copy of Disk Drill.
If you are looking for an article for Disk Drill 3 you can find it here. Should you have any questions, feel free to reach out.