When a file has gone through every process of deletion, there’s always the chance that we want to get it back. Think that file is gone forever? Not with a Windows backup feature or third-party recovery tools!
Common Reasons for File Deletion
Without the ability to delete files, our hard drives and other storage devices would quickly fill up to their maximum capacity and become unusable. But with the ability to delete unnecessary files comes a lot of responsibility because it’s very easy to delete the wrong files, some of which, such as pictures and videos of loved ones, may be irreplaceable.
To better understand why just about every Windows 7 user wonders how to recover deleted files at some point, let’s go over the most common reasons for file deletion:
- 🧹 Freeing up storage space: While storage space has become much more affordable over the years, hard drives and other storage devices still cost money, so it only makes sense to remove duplicate and unnecessary files from time to time.
- 🧽 Formatting: Sometimes, it’s easier to format an entire storage device than it is to manually delete individual files. In fact, formatting is sometimes necessary, such as when switching from one file system to another.
- 🧑 Human error: It doesn’t take much to accidentally delete the wrong file, which is perhaps why various human errors are the number one cause of data loss. Since being more careful doesn’t always work, it’s good to know how to get back deleted files using a variety of proven methods.
- 💥 Data corruption: Modern software is incredibly complex, and complexity breeds software bugs. In extreme cases, buggy software may even cause important data to become corrupted and unreadable. If not addressed in time, data corruption can result in permanent data loss.
- 👩💻 Malware and hackers: There are many dangerous strains of malware that are designed to delete important files or at least make them unavailable to the user. Malware protection tools, such as antivirus applications, can go a long way in keeping such threats at bay, but cybercriminals working tirelessly to be one step ahead of them.
The good news is that deleted files can, in most cases, be retrieved without much effort—even if you don’t have a backup. How? Read the next chapter of this article to find out.
Files – Rise From Your Recycle Bin!
When files take that final plunge to the digital afterlife, that realm from which a computerized Shakespeare would call that “undiscovered file folder from whose bourn no bits returns”, it can seem like they’re gone for all time. They have gone to a digital graveyard, and all we can do is mourn their passing.
When we deleted them and selected “Empty Recycle Bin”, or in File Explorer hit “Shift-Delete”, we were certain we were going to never need that file again. Until an hour, or a few days later when we go – oops. Turns out we needed those files after all.
Unlike Shakespeare’s undiscovered country, there are ways on how to restore permanently deleted files from the Recycle Bin. Unlike that unlucky prince Hamlet, we can have our happy ending. We’ll just need some help from something powerful enough to find our files when Windows tells us they’re gone.
Method 1: Recover Deleted Files on Windows 7 from Recycle Bin
When you delete files on Windows 7, the files are moved to a special folder called Recycle Bin. They then stay there until the Recycle Bin is emptied, giving you time to recover them. Here’s what you need to do:
- Open the Recycle Bin by clicking on its desktop icon.
- Select the files you want to recover.
- Click the Restore the selected items button in the toolbar.
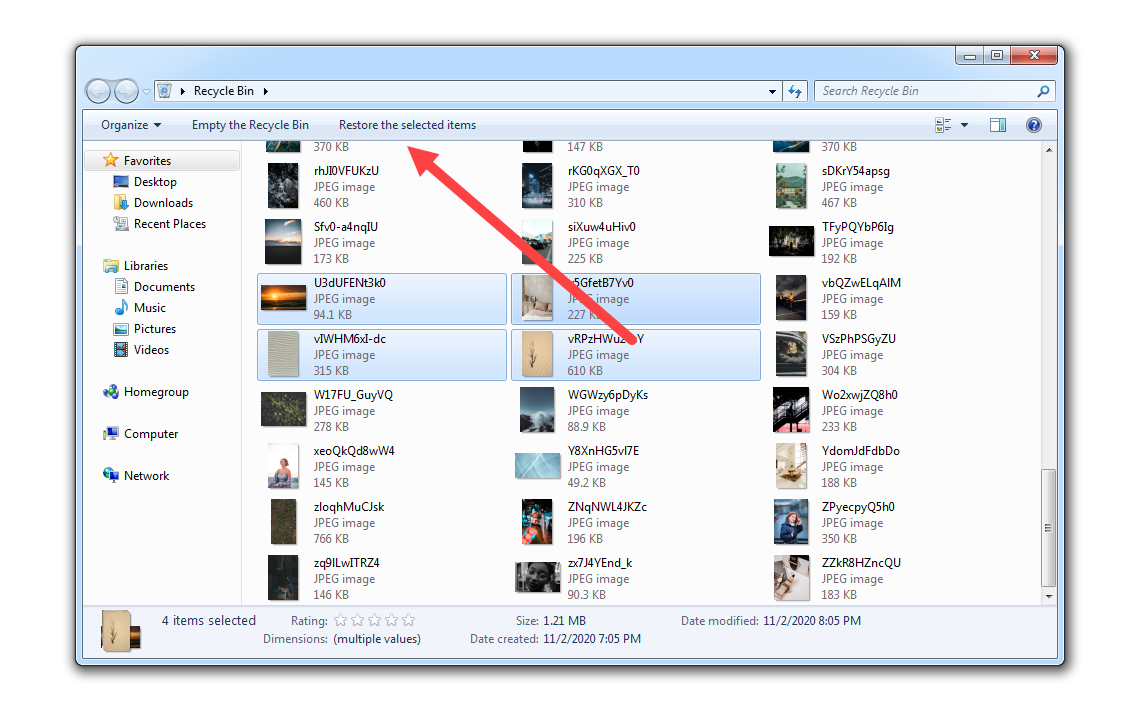
The select files will be restored back to their original locations. If you would rather move them somewhere else, you can simply drag them from the Recycle Bin into the desired folder.
Method 2: Retrieve Files from a Backup
Do you regularly back up your files? If so, then you can quickly and easily recover all lost files from a recent backup.
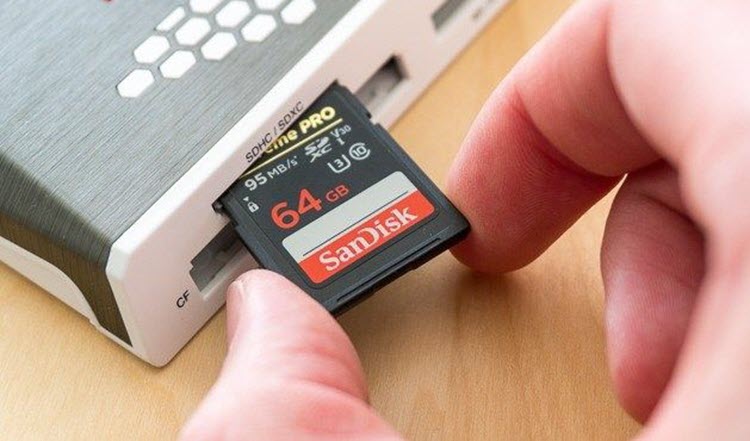
- Local backups: As the name suggests, local backups are created on physical storage devices, such as external hard drives, USB flash drives, and memory cards, which are housed on-site or somewhere nearby. Local backups are convenient because users have complete control over them, but they are vulnerable to natural disasters and other devastating events.
- Cloud backups: In recent years, there has been a boom in cloud storage, with services like Microsoft OneDrive, Google Drive, Dropbox, and others offering gigabytes of cloud storage space for free. The great thing about cloud backups is that they can be accessed from any device with an internet connection. However, their online nature is also their biggest downside, and a slow internet connection can make them extremely difficult to retrieve.
Before you retrieve deleted files from a backup, you need to make sure that the original cause of their deletion has been addressed. In other words, you don’t want to connect your backup drive to a computer that’s been infected with malware since the situation could quickly turn from bad to worse.
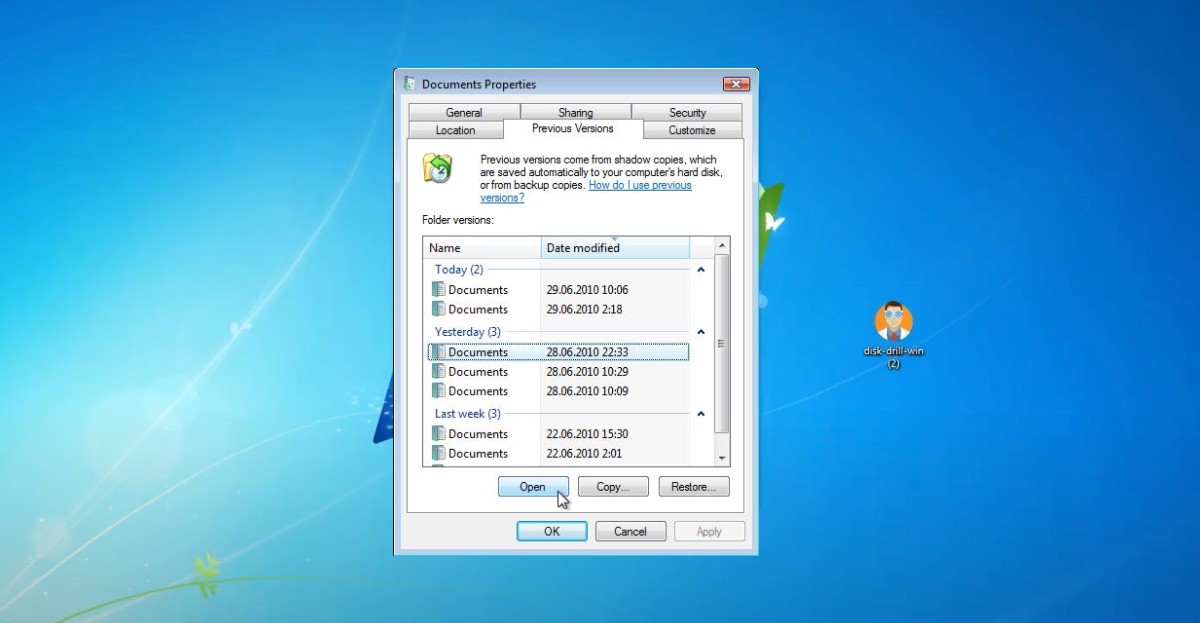
Method 3: Previous Versions in Windows Vista and 7
Windows Vista and 7 have something like files backup inbuilt. This is called Previous Versions and you can always try it for restoring your files.
Microsoft used to limit backup software in older versions of Windows – Windows XP Home has no backup program at all. This is where a file recovery tool like Disk Drill comes into action. Disk Drill is a free download with an easy to use interface that anyone can use to get back files when Windows thinks they’re removed.
Method 4: Use the System Restore Feature
The System Restore feature in Windows 7 allows you to revert your computer to a previous state and restore its system files, installed applications, Windows Registry, and system settings. Because this feature doesn’t affect personal files, such as documents, music, pictures, and videos, we recommend it only for addressing OS- or application-related data loss.
To recover a Windows 7 computer using System Restore:
- Click the Start button, type control panel in the search box, and select Control Panel from the results.
- Search Control Panel for recovery and select Recovery > Open System Restore > Next.
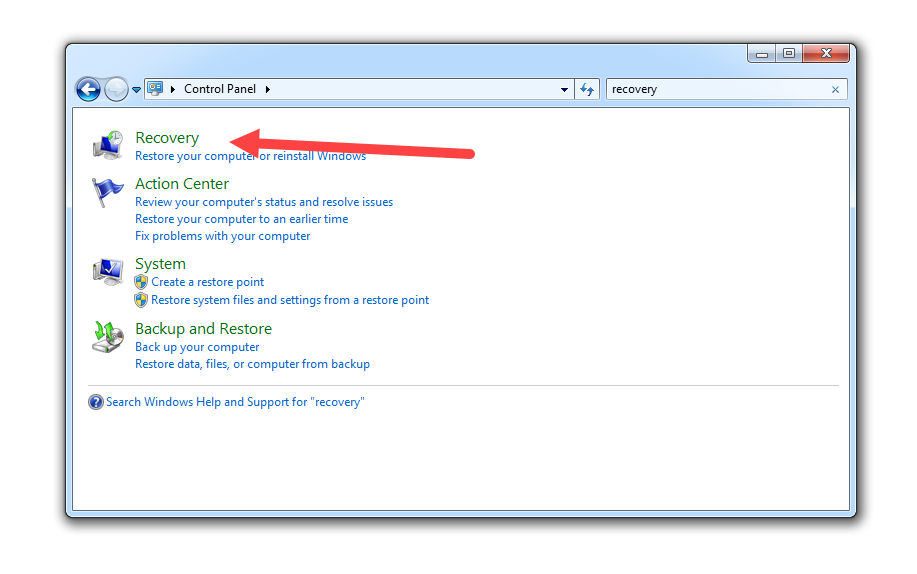
- Select a suitable restore point and click Next.

- Confirm your restore point by clicking the Finish button.
System Restore will restart your computer to apply all changes, so make sure to save your work beforehand.
Method 5: Recover Permanently Deleted Files on Windows 7, XP, Vista
When we need to know how to recover permanently deleted files in Windows 7 – or any other version of Windows from Windows XP to Windows 10, our first option should be to start with a reliable data recovery software. You can try a free version of Disk Drill, scan your drive, and verify that your files can be recovered.
- Download Disk Drill for Windows 7. Use this link to download Disk Drill for Windows XP or Vista.
- Install Disk Drill. The default installation directory is
"C:\Program Files (x86)\CleverFiles\Disk Drill\", but we can have it install anywhere we desire. It’s better to download and install Disk Drill on the external drive to prevent data from being overwritten by Windows.
- Run Disk Drill on your Windows 7, XP, or Vista. If it prompts to be allowed to make changes to your device (which in this case is the computer that you’re using), select Yes.

- Wait until Disk Drill Launches. Once it’s up, it will display a list of available drives. For this example, we deleted a file on a USB drive, so we’ll restore it from there.
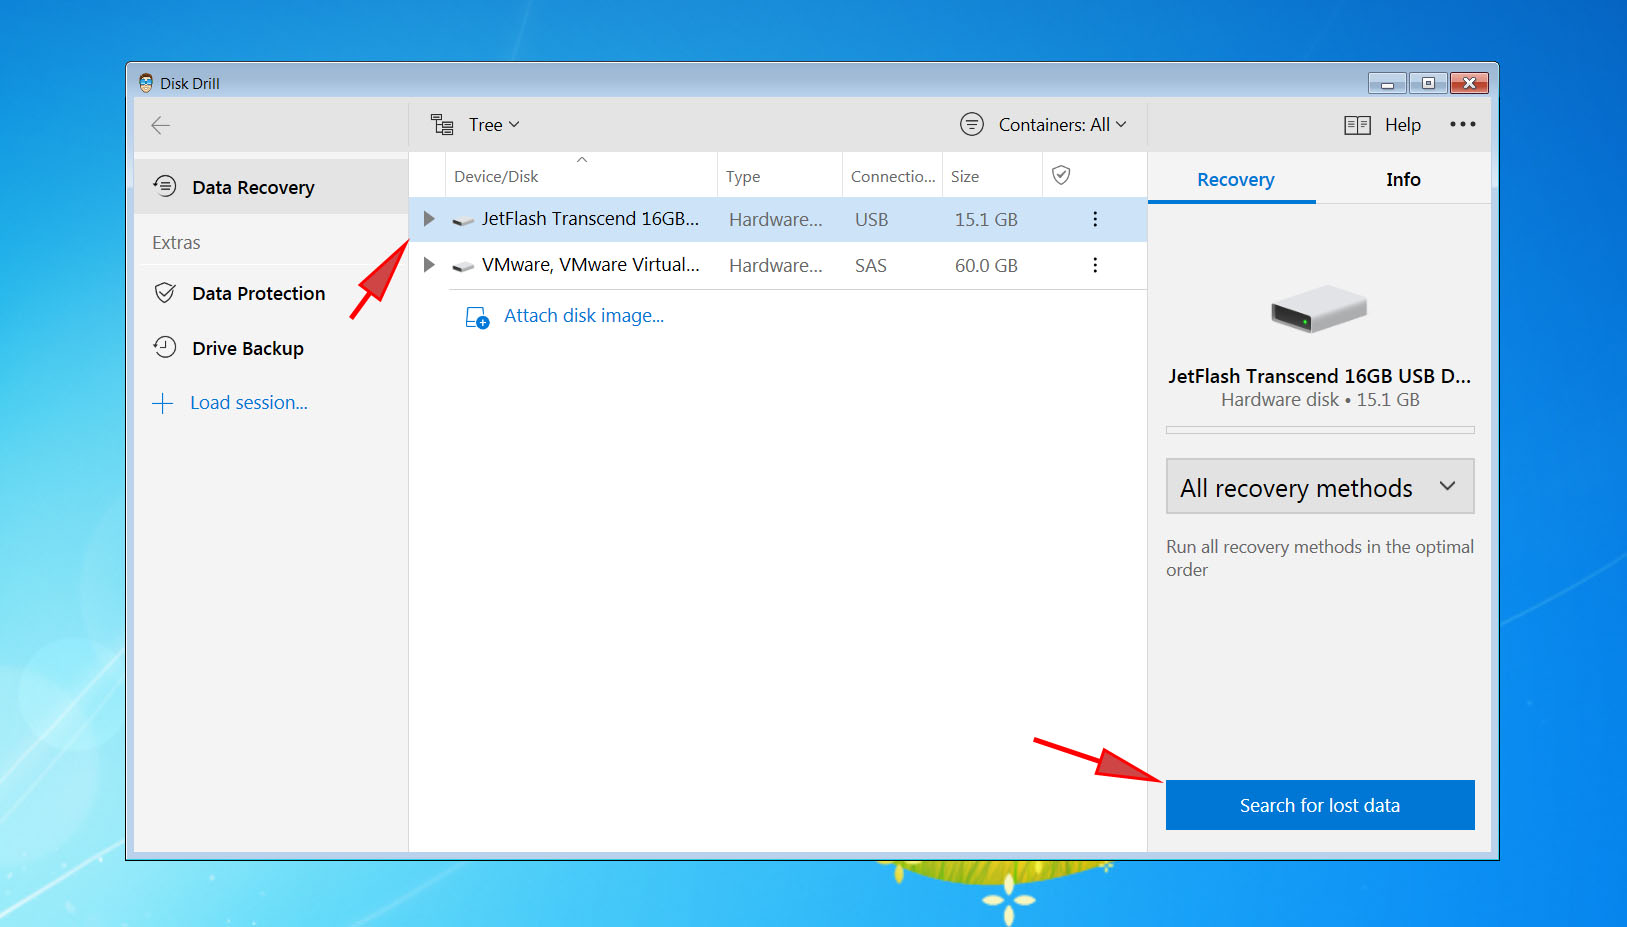
Disk Drill works with several different kinds of media – hard drives, SD cards, USB storage, and others.
- Click Search for lost data on the drive that we want to recover files from. This will launch the data recovery process, which scans the drives for lost partitions and files. Depending on the size of the drive or media we’re analyzing, this can take either a few minutes or longer. In this case, the 4GB USB drive took about 5 minutes.
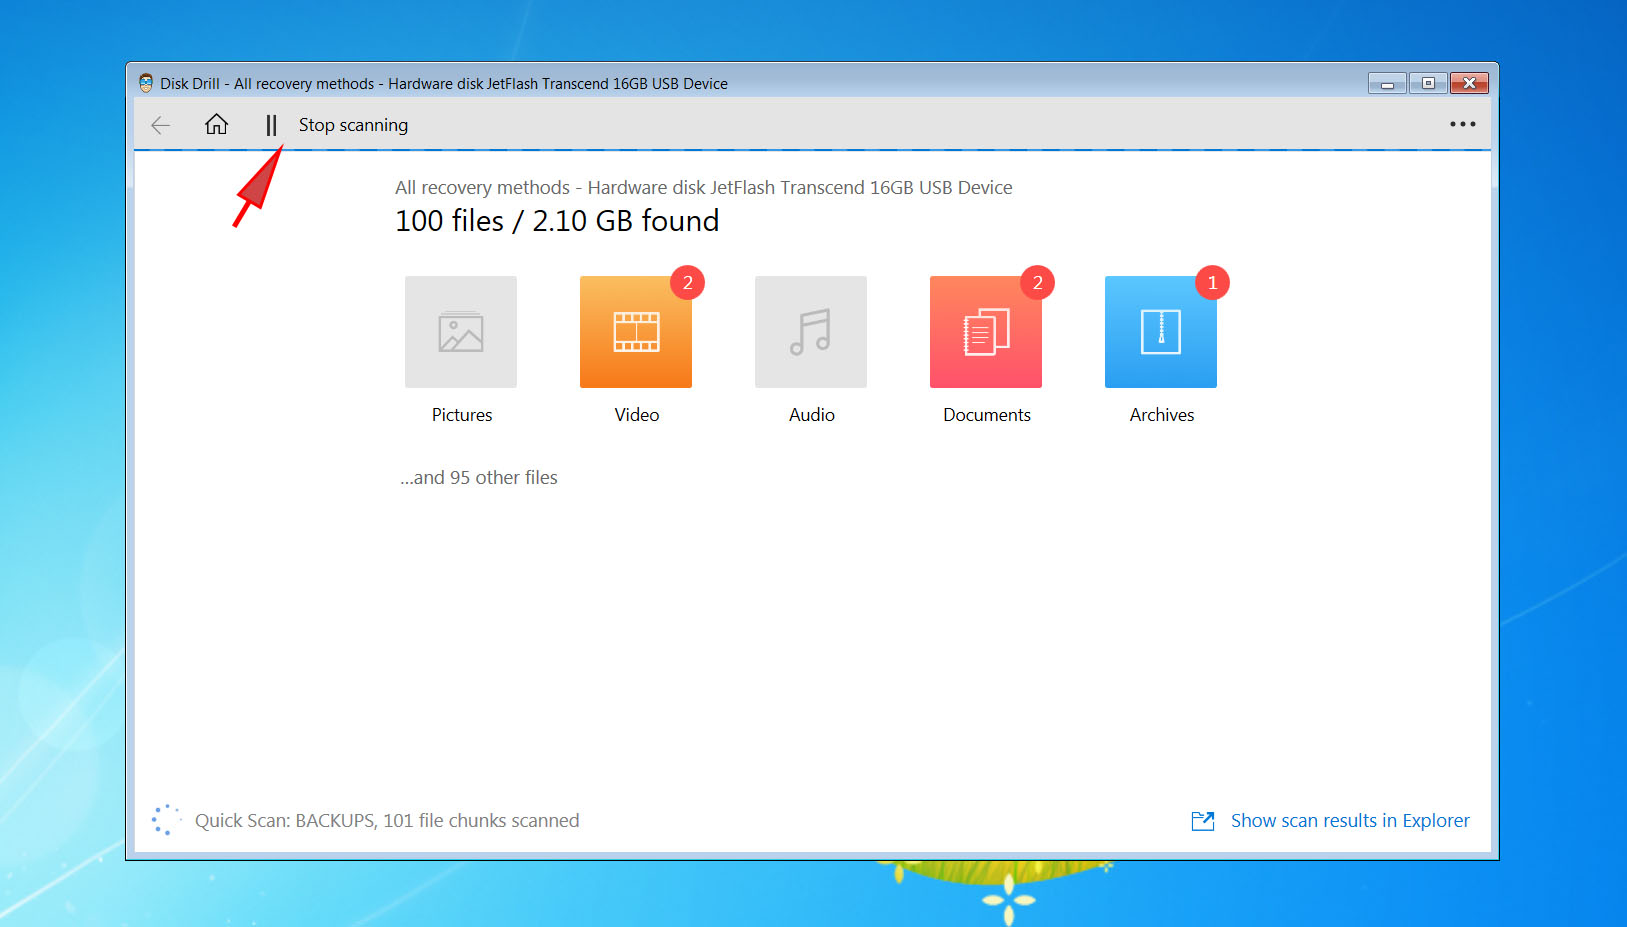
- Click Pause if during the scanning process the file or files we want to restore are found. Disk Drill allows us to save our scanning sessions, so we can stop, save, go do other things, then come back to it later. It’s best to do it all at once to maximize the odds of finding our deleted files, but if we need to stop and start again, Disk Drill allows us to do it.
- Click the checkbox next to the files or files to restore.
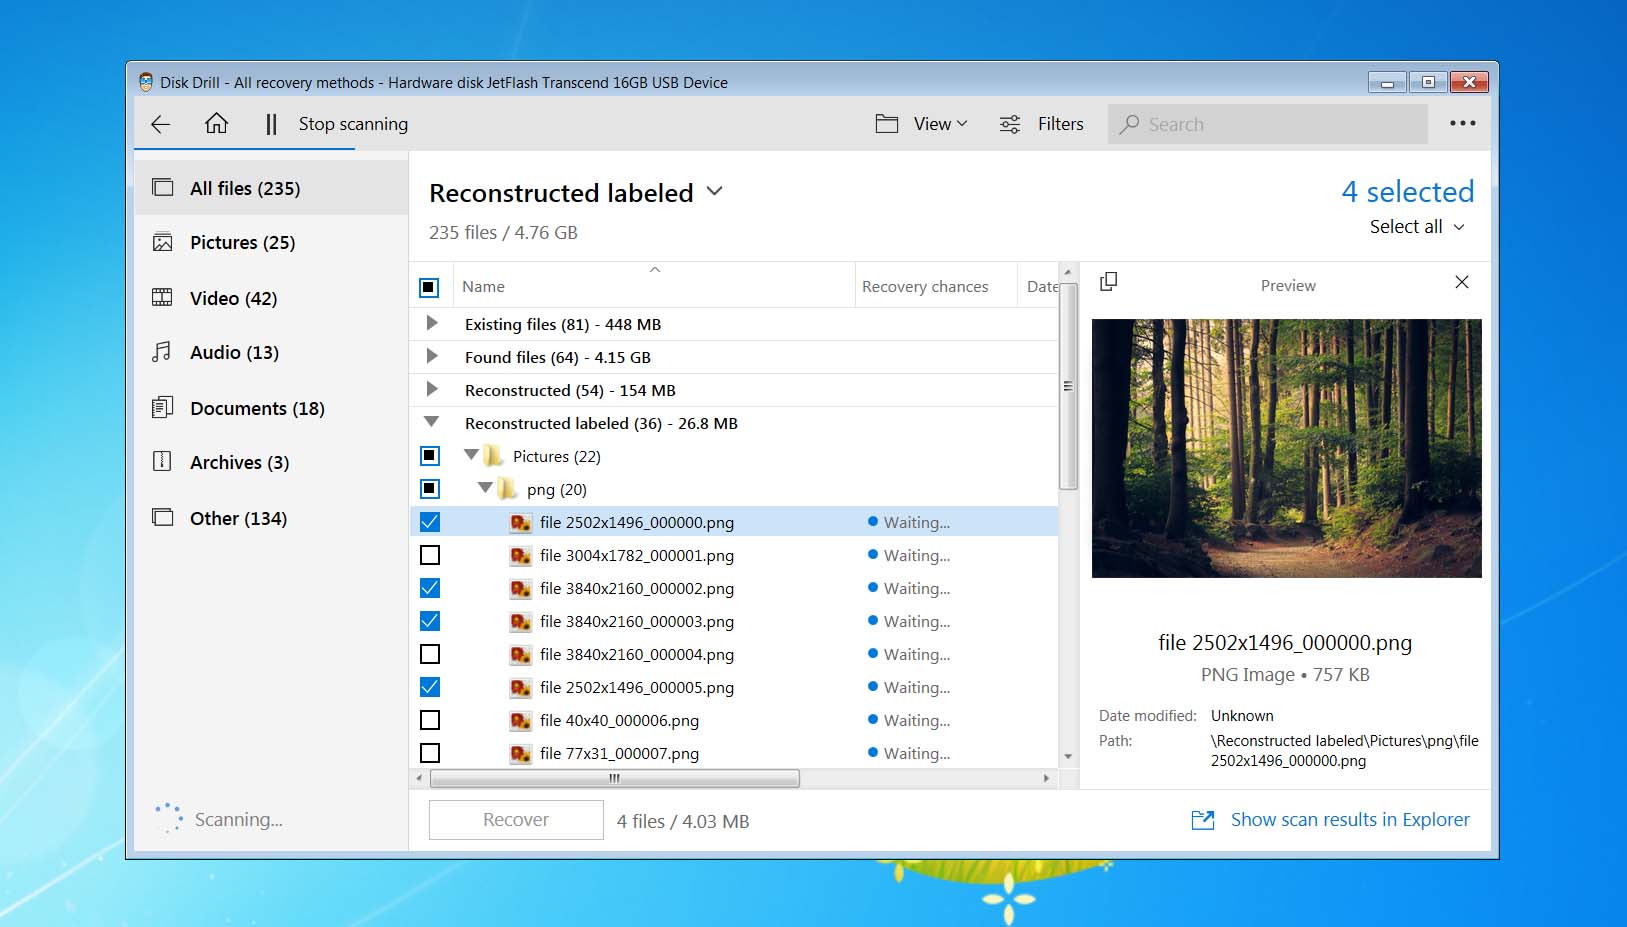
- In the text box marked Recover To, select the directory where to restore the files.
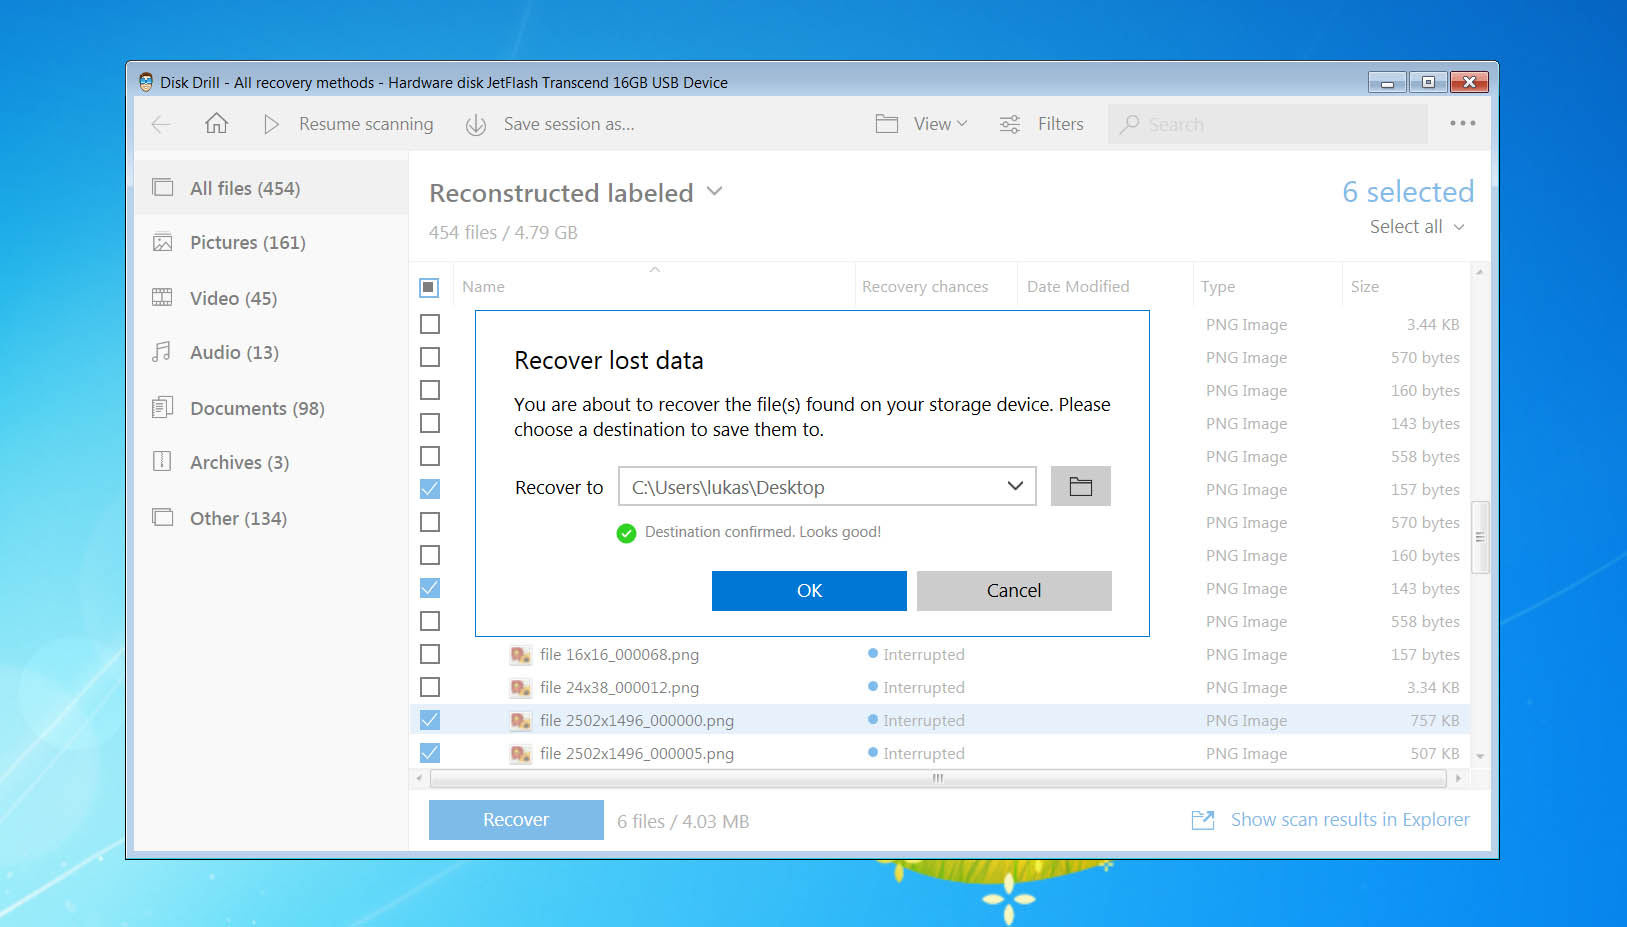
This is very important! Make sure the restore directory is on a separate drive from the files we’re restoring. In this case, we’re restoring from drive
"M:"– we would not want to restore to drive"M:", because there’s a chance we’ll be messing with the files we want to restore. If we try to restore to the same drive, there’s a chance we’ll be writing over the very information we’re trying to retrieve.Therefore, when possible restore to another drive. In this case, we’re restoring to
"C:\Users\Alex\Documents". - Click “Recover”. This starts the restoration process. Disk Drill will match the data it discovers to different file patterns, and work to reconstruct the files.
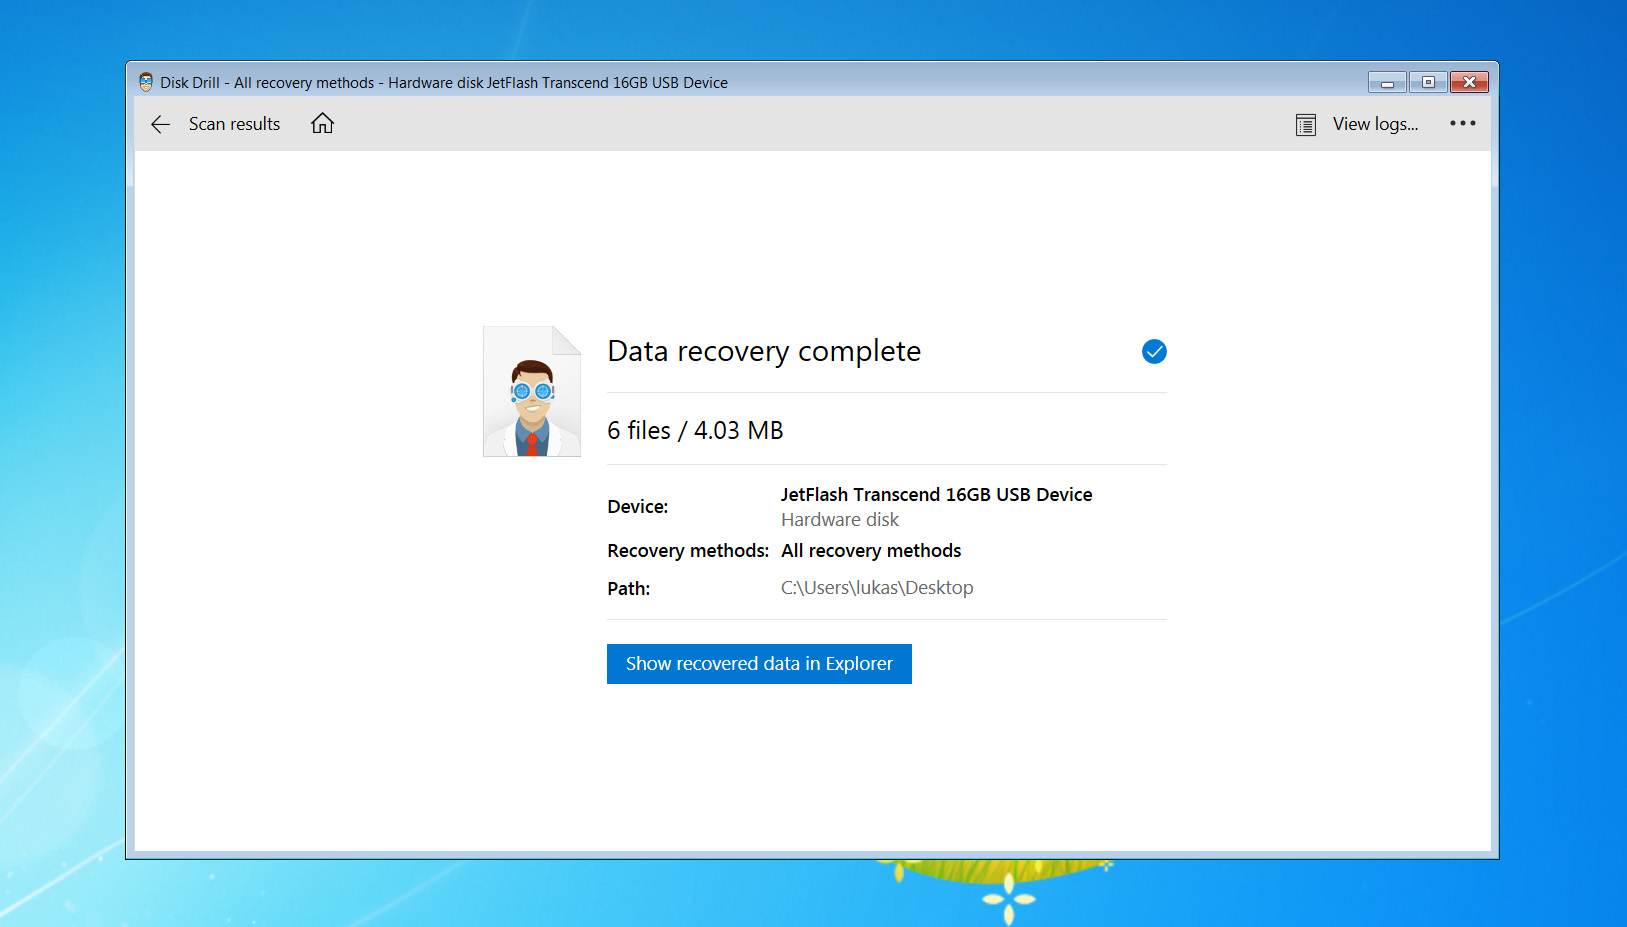
- Wait for the recovery process to finish. Disk Drill will put up an alert window when it’s done.
Method 6: Recover Files using the CMD Prompt
Another method to help recover your deleted files on Windows 7 is to use the CMD command. There are some cases when your deleted files wouldn’t show up inside the Recycle Bin, or you’ve emptied it. In such situations, the CMD prompt can be useful in retrieving your permanently deleted files.
To recover files from a Windows 7 computer using the CMD Prompt:
- Go to start and type cmd into the dialogue box.
- Right click and select Run as administrator

- Type
CHKDSK E:/fand press Enter.
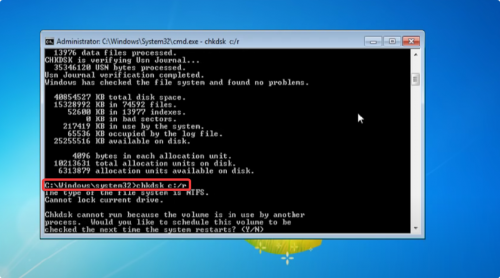
- Type in
ATTRIB -H -R -S /S /D E:*.*and press Enter to recover your deleted files using CMD.
Bonus: Pay for a Data Recovery Service
Sometimes it’s best to leave it to professionals. That’s especially true when it comes to data loss caused by physical damage.
Professional data recovery services are equipped with cutting-edge tools that allow them to extract files even from unreadable hard drives, broken USB flash drives, memory cards, and other storage devices. Data recovery professionals also have a wealth of experience in addressing all kinds of data loss scenarios, so they know which approach is likely to yield the desired results.
Contrary to popular belief, data recovery services are not ridiculously expensive—at least not all data recovery services. Companies such as Data Recovery Center by CleverFiles offer a free evaluation and charge only for recovered data, so you’ll never end up paying hundreds of dollars just to hear that your data can’t be recovered.
Exploring the Potential of Deleted Files
On a typical Windows system, file deletion really is three separate steps, depending on how we delete files:
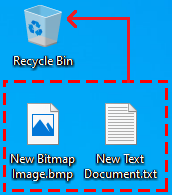 Step #1 Move files to the Recycle Bin.
During this phase, the file isn’t deleted at all. What Windows really does it moves it to a special folder and logs where the file was before it was sent off to the Recycle Bin. This way, if we want to recover the data back to the hard drive, we just open the Recycle Bin and select “Restore” to bring it back where it was before.
 Step #2 Empty the Recycle Bin.
At the moment, the file hasn’t been deleted, just moved. When we right-click on the Recycle Bin and select “Empty Recycle Bin”, even then the file isn’t really deleted. If we look at the hard drive, all of the bits that made of the file are all there.
What Windows does is just sets a flag in the hard drive that tells it “This area where the file used to be is now available for use.” It’s kind of like when someone moves out of a house, but leaves their things behind. If the new owners come in they’ll throw the old stuff out to make room for their own things, but until then, the old things are still there.
Step #3 Overwrite the file’s former location.
This is when the file can be considered “deleted”. In the course of normal Windows operations, when Windows writes new files it overwrites those sections that have been freed up by files marked as deleted. Even then, there’s a chance the file can be restored.
Files aren’t sitting in one spot on the hard drive like pages a book. They’re more like a set of encyclopedias, with volumes that are scattered across a bookshelf. If just one of the books are replaced, the rest of the encyclopedia set might still be there, and a clever file person might be able to reconstruct the missing volumes from what’s left behind.
How to Protect Your Files Against Deletion
The Windows 7 operating system lets you protect important files against deletion, and you shouldn’t hesitate to use this feature to make catastrophic data loss less likely.
Solution 1: Modify File Access Permissions
If you have administrator privileges on your Windows computer (you most likely do), then you can easily modify file access permissions to protect important files from being deleted.
- Find the file you want to protect and right-click on it. Select Properties from the context menu.
- Navigate to the Security tab, click the Edit button and select the user whose permissions you want to edit in the Group or user names section.
- In the Permissions section, check the Modify box under the Deny column.
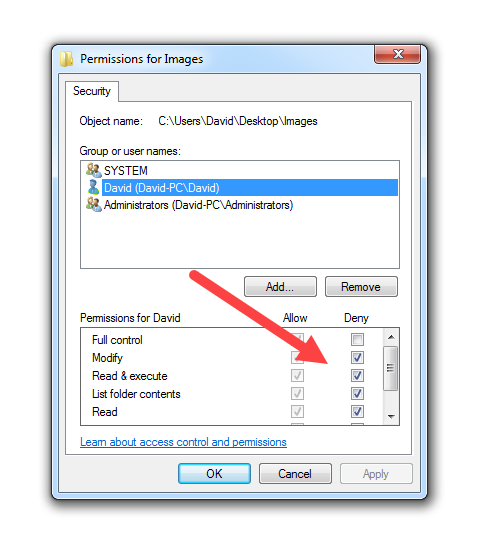
- Click Apply and confirm.
- Close the Properties window.
Solution 2: Hide Your Files
Alternatively, you can make your files invisible by changing the hidden attribute. This method isn’t as robust as the first one since some file managers display hidden files by default, but it works well for quickly hiding files from view and preventing their accidental deletion.
- Find the file you want to protect and right-click on it. Select Properties from the context menu.
- Navigate to the General tab.
- Check the Hidden option under Attributes.
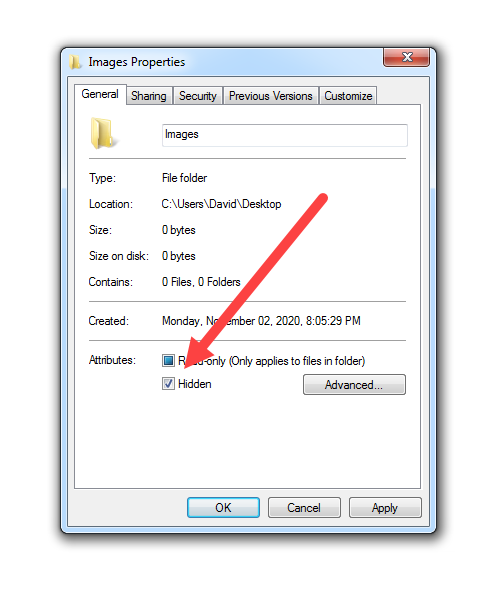
- Click Apply and close the Properties window.
If you’re using Windows Explorer to browse files, the hidden file should now be gone. To see it, you need to click the Organize button on the menu bar and go to Folder and search options. There, navigate to the View tab and select the Show hidden files, folders, and drives option.
Recovering What We Need
Disk Drill handles more than just lost files on hard drives – it also works on recovering partitions, USB drives, SD cards and other media. It’s a powerful tool that provides support for all sorts of different files, bringing them back to life when it seems like they’ve been permanently deleted. A free download is all that it will take to recover files that have been permanently deleted. Turns out – permanent might not be forever. Not with Disk Drill.
Conclusion
Losing your precious data can be pretty stressful. It can happen for various reasons, such as accidental deletion, human error, formatting, or corruption. However, this article lists all the tools and methods you can use to prevent permanent file loss.
You can always turn to the Recycle Bin or other in-built features to recover temporarily deleted files. However, professional data recovery software is perhaps the most reliable option to help get back permanently deleted files on any version of Windows.


FAQ
When you delete files on Windows 7, they automatically go to the Recycle Bin folder. It is a temporary storage folder that holds your deleted files until emptied. Here’s how you can recover deleted files using the Recycle Bin:
- Navigate to the Recycle Bin icon on your desktop and open it.
- Select the deleted files you want to recover.
- Right-click on the selected file and go to the Restore option.
- The selected files will be restored to their original location.
The only way to recover permanently deleted files in Windows 7, XP, Vista without software is to restore them from an existing backup. If you don’t have a backup of the deleted files, you need to install third-party data recovery software and hope the files haven’t been overwritten yet.
To recover permanently deleted files from Windows 7 without backup, it’s best to use professional data recovery software like Disk Drill. Here’s how you can recover deleted files in just a few steps:
- Download and Install Disk Drill for Windows 7 on your PC.
- Select the drive from the list of devices and drives. Now, click Recover to begin the recovery process.
- Once the scan is complete, search through the results to select the files you wish to recover. To do this, click the checkbox next to the files.
- Select the directory where you wish to restore the deleted file next to the Recover To text box.
- Finally, click Recover to begin the process of file retrieval.