USB drives make it easy to store and share files. But what happens when your flash drive becomes corrupted? Well, that depends on your next steps because it’s often possible to recover data from a corrupted USB drive, but you need to act quickly and use the right solution.
In this article, we explain how to recover files from corrupted flash drives and how to fix corrupted flash drives in a language that regular users can understand.
Causes of Flash Drive Corruption
USB flash drives can become corrupted for multiple different reasons, and it helps to understand them to determine the best data approach to recover data from a dead USB drive (you can’t access it at all) or one that’s merely not functioning as it should (some files are missing or impossible to open).
| Cause of corruption | Explanation | Solution |
| ❌ Bad blocks | Flash-based storage devices are divided into many small blocks. These blocks have a limited lifespan, and they can stop working correctly when they exceed it. | When dealing with a flash drive with too many bad blocks, it’s often best to salvage as much data as possible from it using data recovery software before it becomes completely inaccessible. |
| ⏏️ Improper removal | There’s a good reason why modern operating systems encourage users to safely eject their flash drives before removal: not doing so can lead to corruption as a result of read/write processes being suddenly interrupted. | A USB flash drive that has been improperly removed can sometimes be repaired using native Windows and macOS tools. |
| 🔌 Power issues | If your flash drive is not getting enough power, or if you suddenly experience an outage, then there’s a good chance that some data will become corrupted due to their transfer being interrupted. | You may be able to recover files lost due to a power issue using the File History feature. |
| 🪲 Software bugs | Application, operating system, and driver bugs can all cause flash drive corruption by preventing files from being saved correctly or damaging the integrity of the file system. | Files that have disappeared from a flash drive corrupted by software bugs can sometimes be recovered using the ATTRIB command. |
| 🔨 Physical damage | Physical damage and manufacturing defects can compromise the ability of a USB flash drive to maintain a stable connection, which can lead to corruption. | When dealing with a physically damaged flash drive containing important files, the best solution is to pay for professional data recovery services. |
How to Restore Corrupted USB Flash Drive
When faced with a corrupted USB flash drive, the key to successful data recovery lies in a methodical, step-by-step approach.
Step 1: Create a Backup Image of Your Corrupted USB Flash Drive
Before attempting any recovery or repair process on a corrupted USB flash drive, the most critical step is to create a backup image of the entire drive. Why? There are three main reasons:
- A backup image acts as a safety net. If the recovery process causes further data corruption, you can go back to the backup image and try again.
- Creating a backup image captures the exact current state of your flash drive, including potentially recoverable data that might not be initially visible.
- With a backup image, you can attempt data recovery multiple times using different methods or tools without risking the integrity of the original data.
You can effortlessly and without spending any money create a backup image of your corrupted USB flash drive with the help of USB data recovery software called Disk Drill and its byte-to-byte backup feature:
- Download the free version of Disk Drill and install it on your computer. Disk Drill is available for Windows and macOS.
- Launch Disk Drill and select the Drive Backup tool (called Byte-to-byte Backup on macOS) in the left pane.
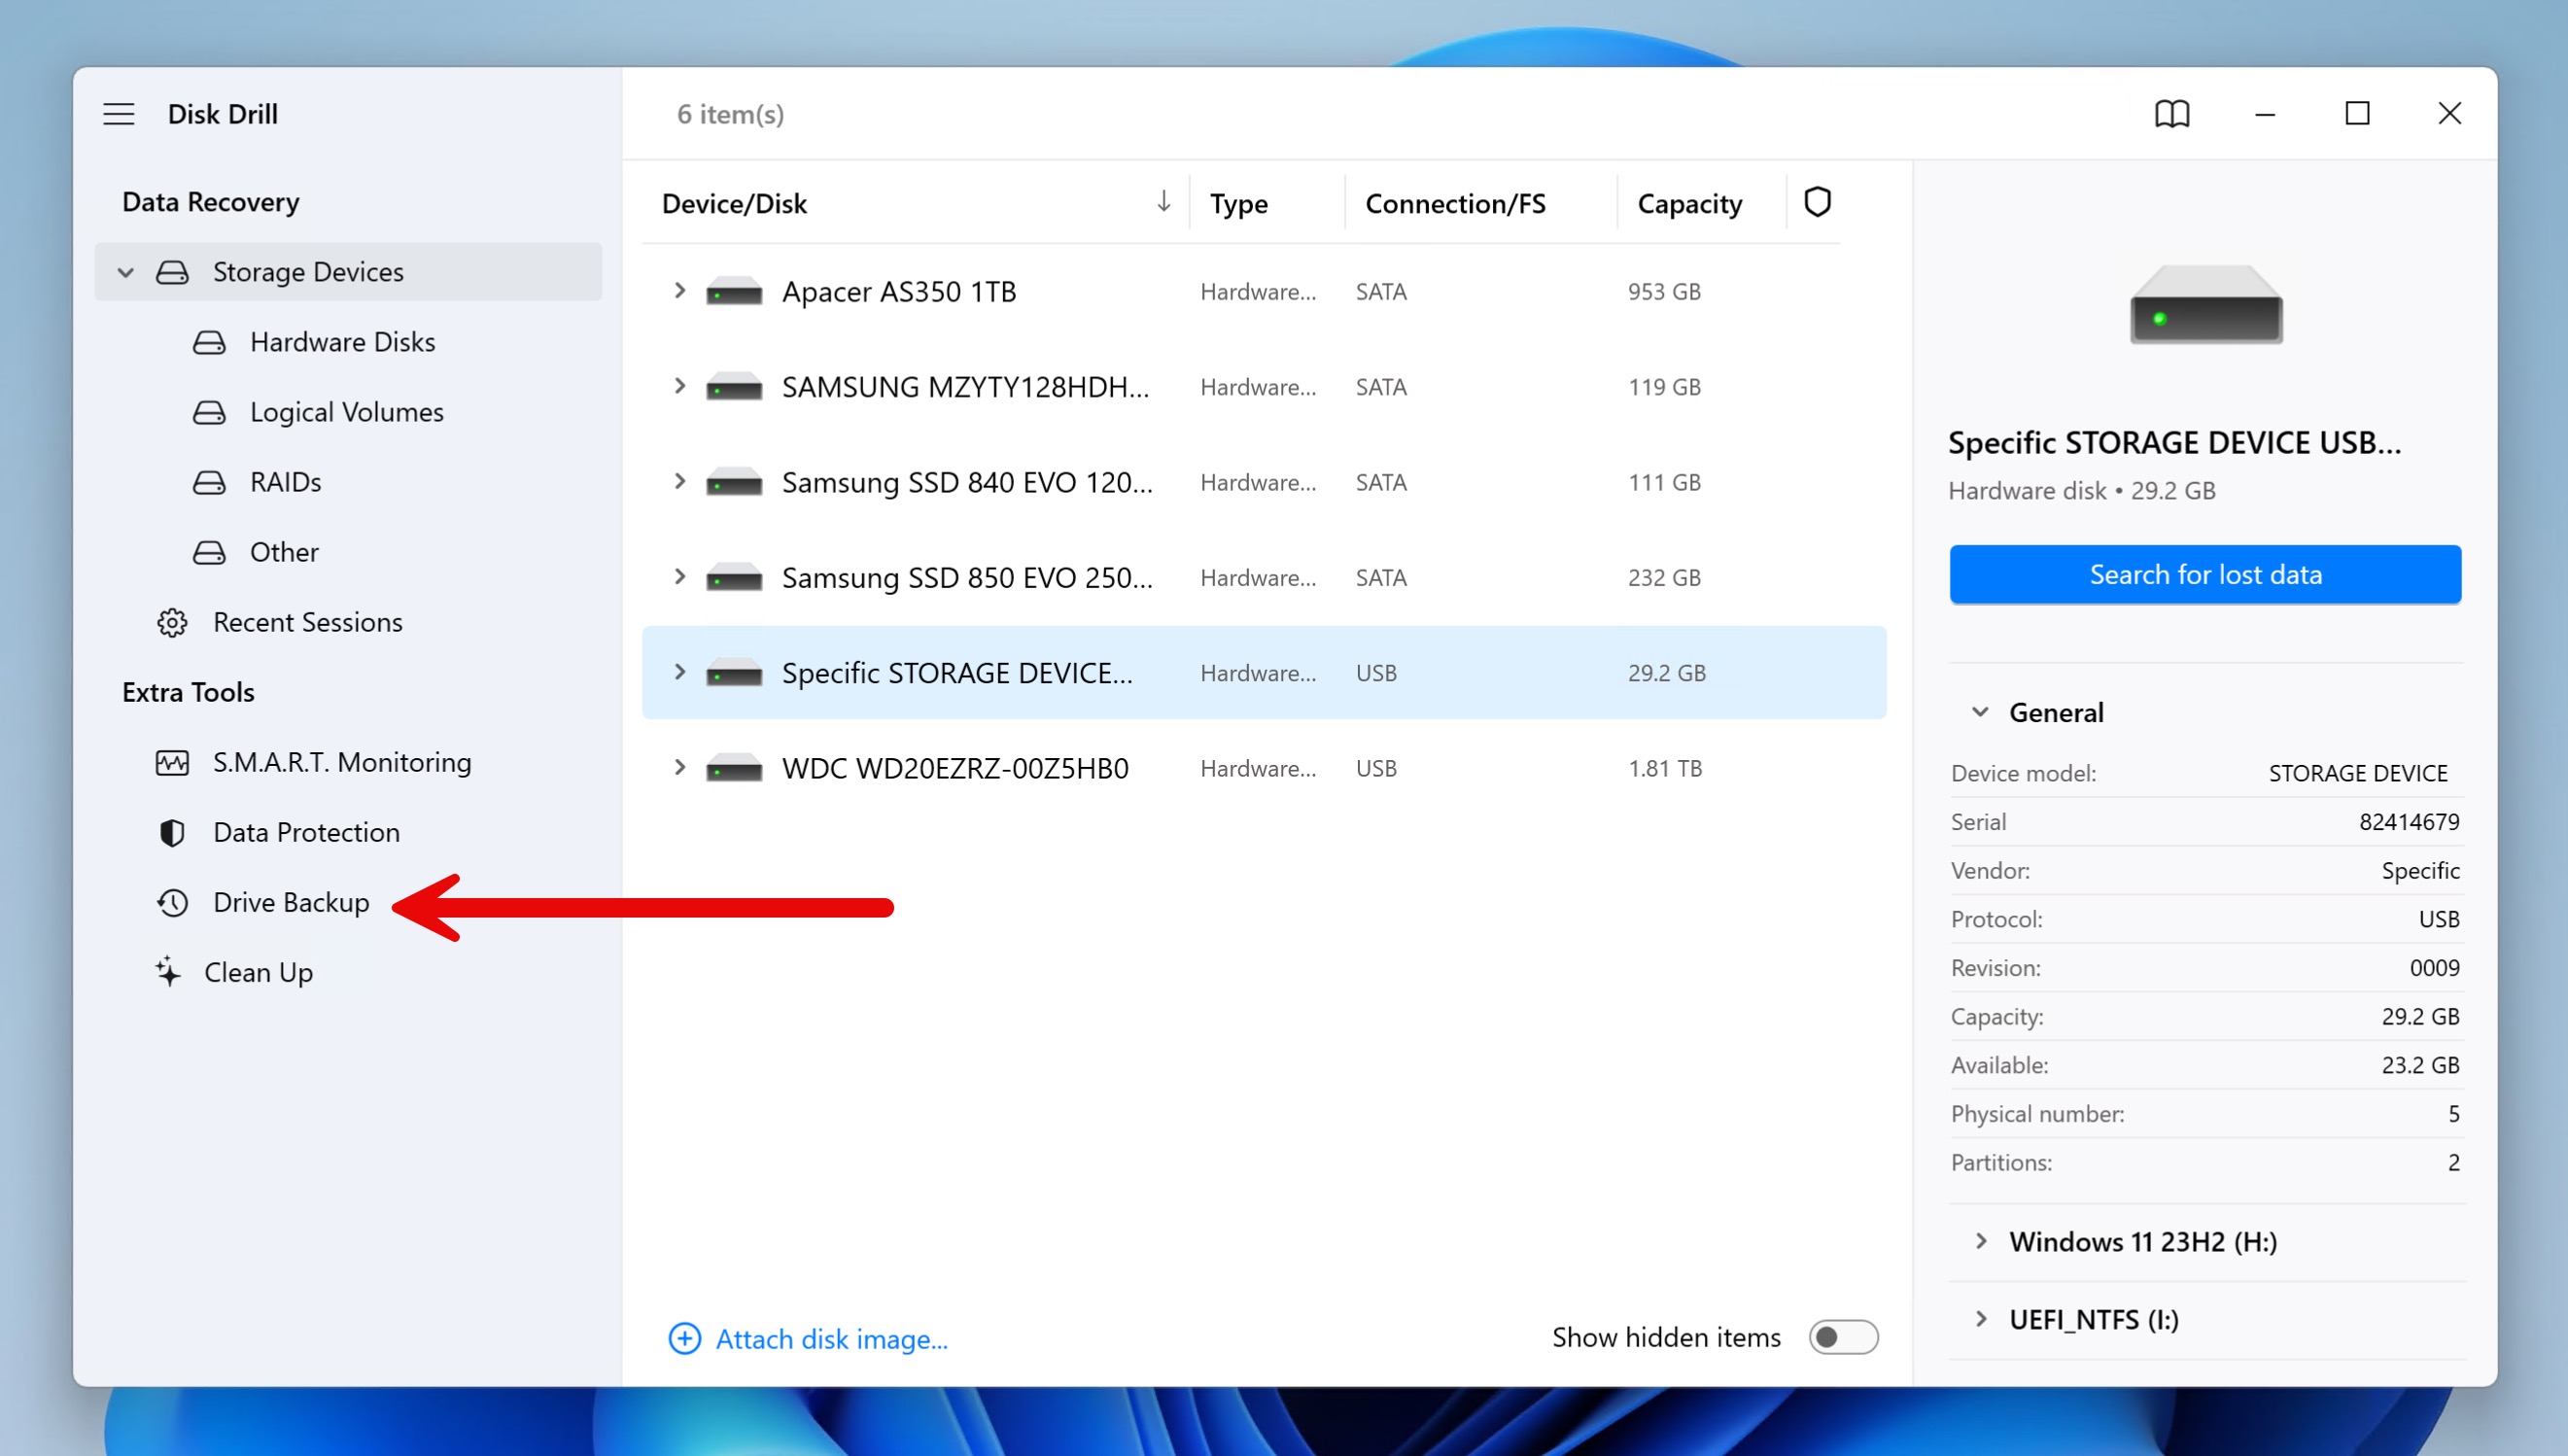
- Select your corrupted USB flash drive and click the Byte-to-byte Backup button.
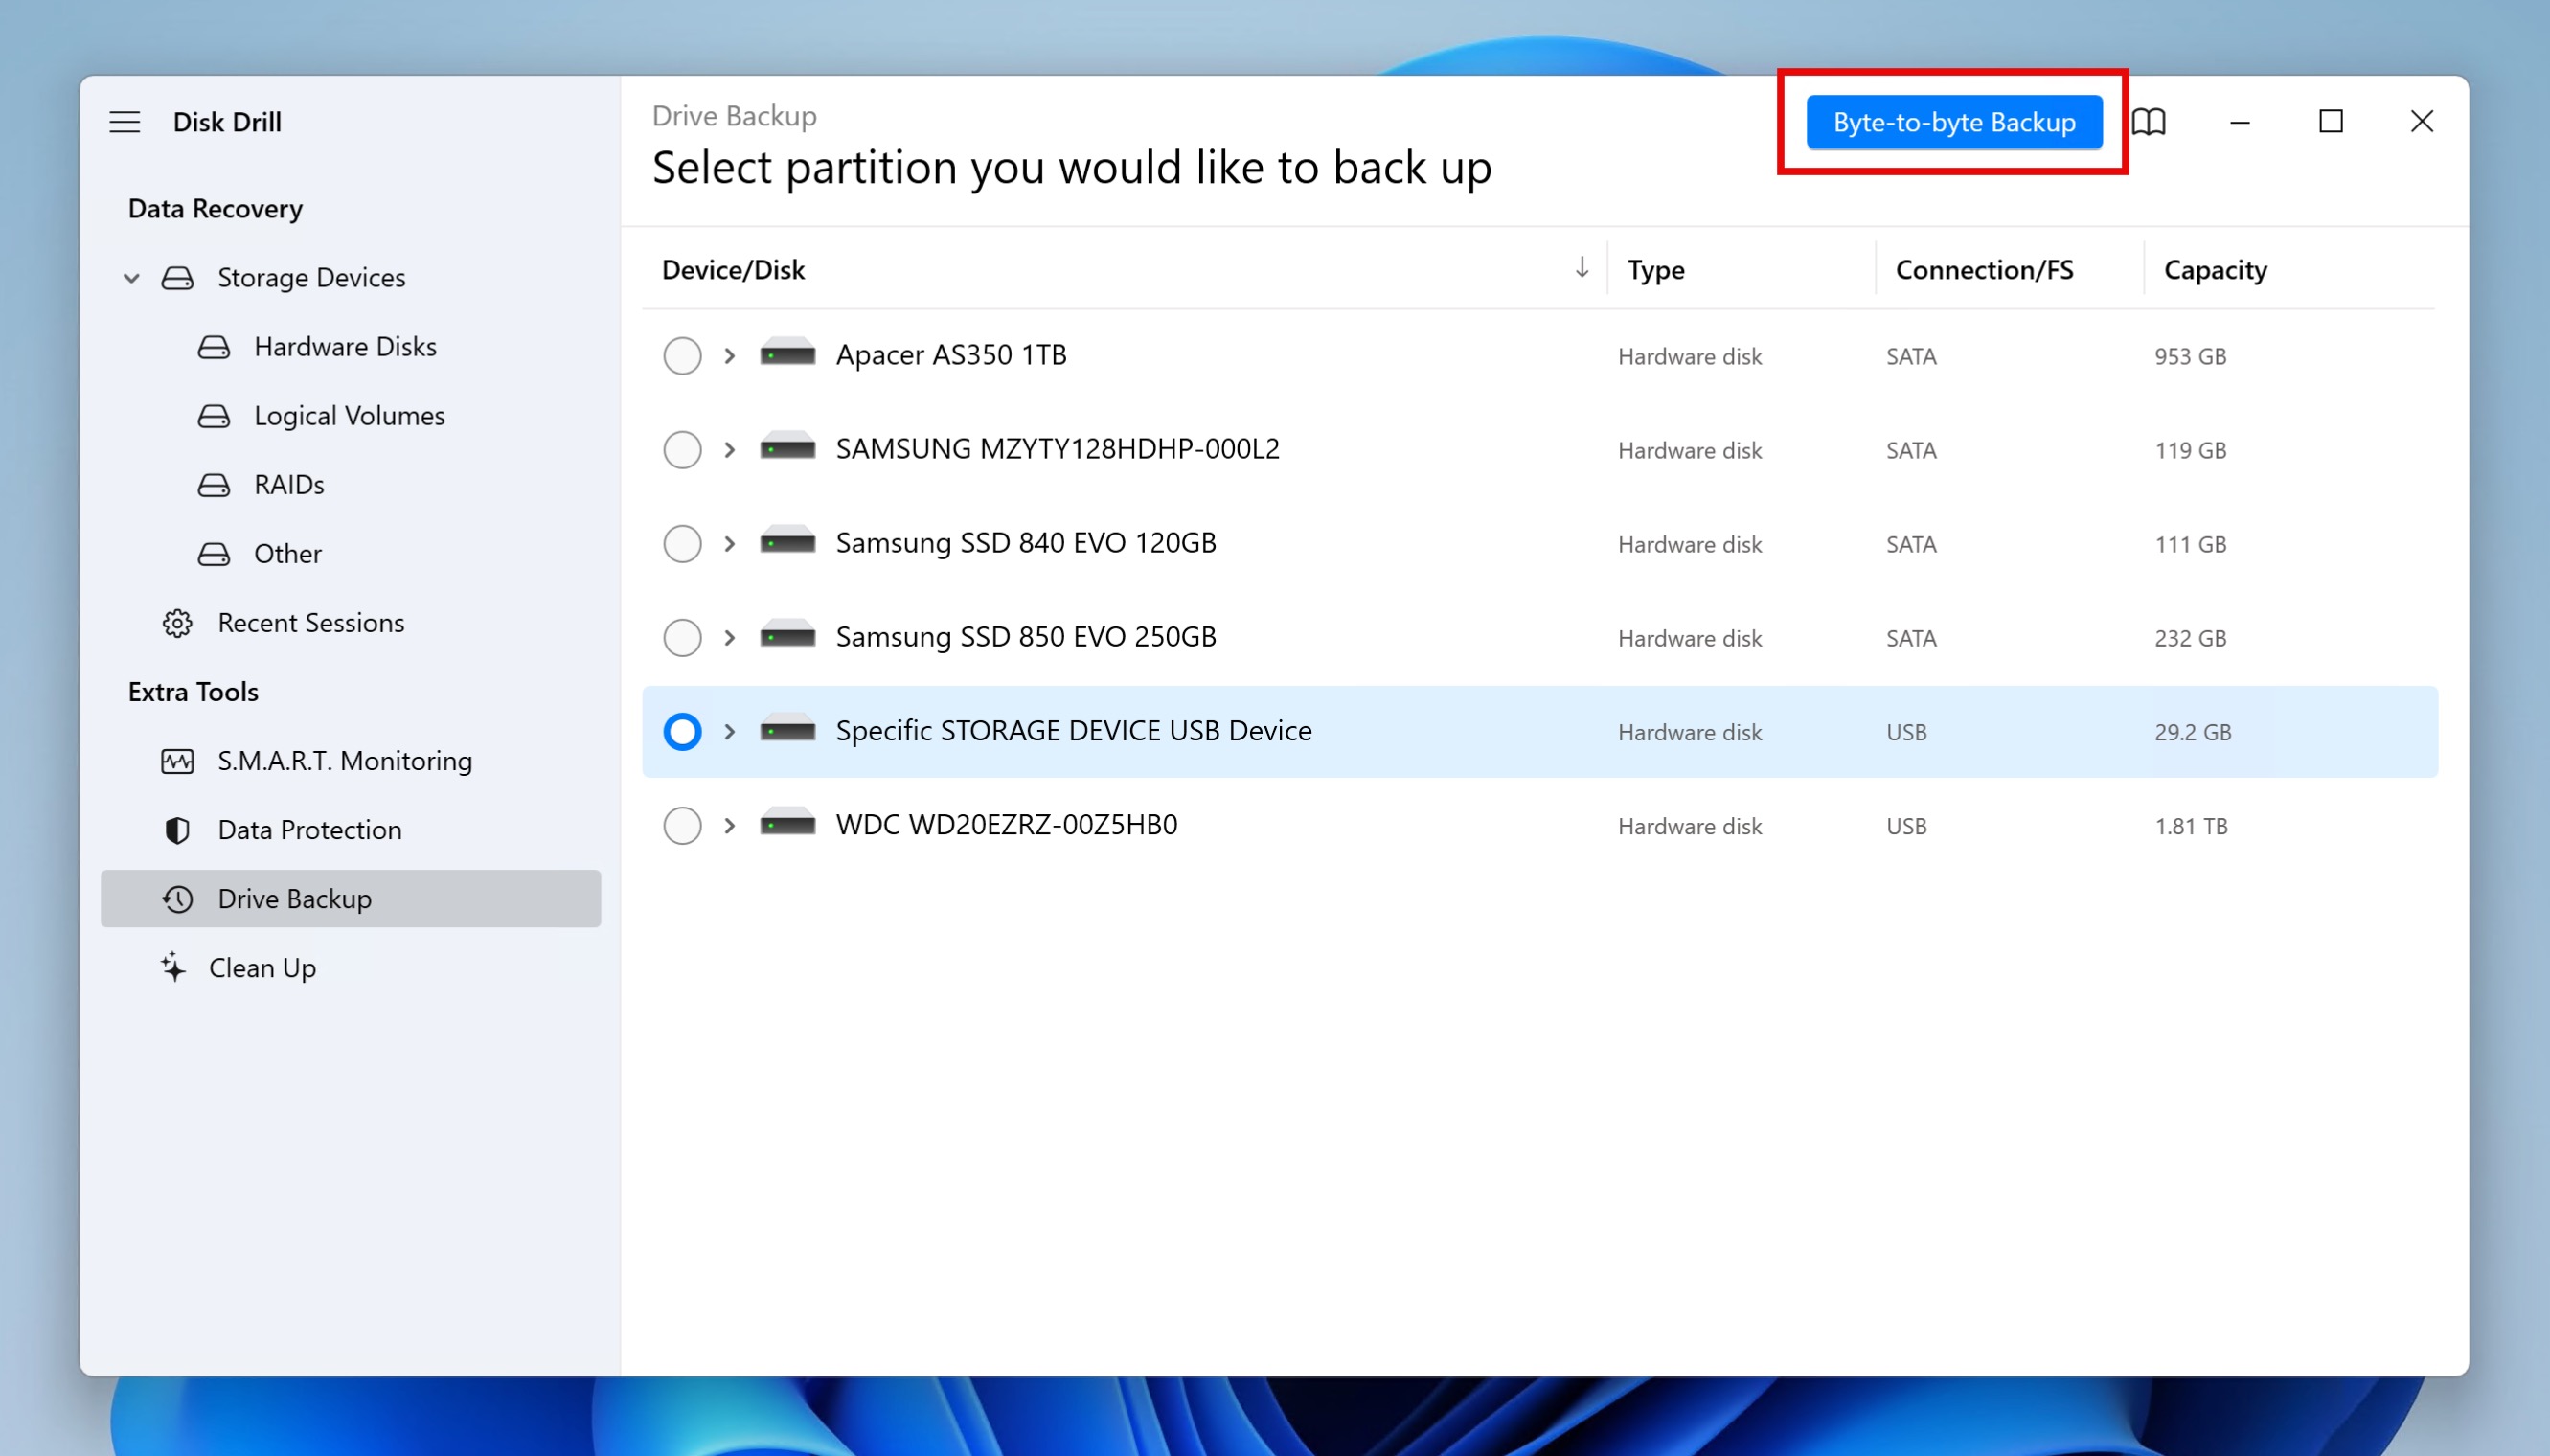
- Choose where you want to store the backup image and click OK.
- Wait until the backup image is created.
Step 2: Address the Corruption by Fixing File System Issues
With your corrupted USB flash drive backed up, you can safely proceed to address any file system issues that might be causing the corruption.
As a Windows user, you can use the CHKDSK utility that comes with your operating system to verify the file system integrity of a volume and attempt to fix logical file system errors.
CHDKS is a command-line tool, which means that it doesn’t have a graphical user interface, so it has to be invoked from Windows Terminal, PowerShell, or CMD. Here’s how:
- Make sure the corrupted flash drive is connected to your computer.
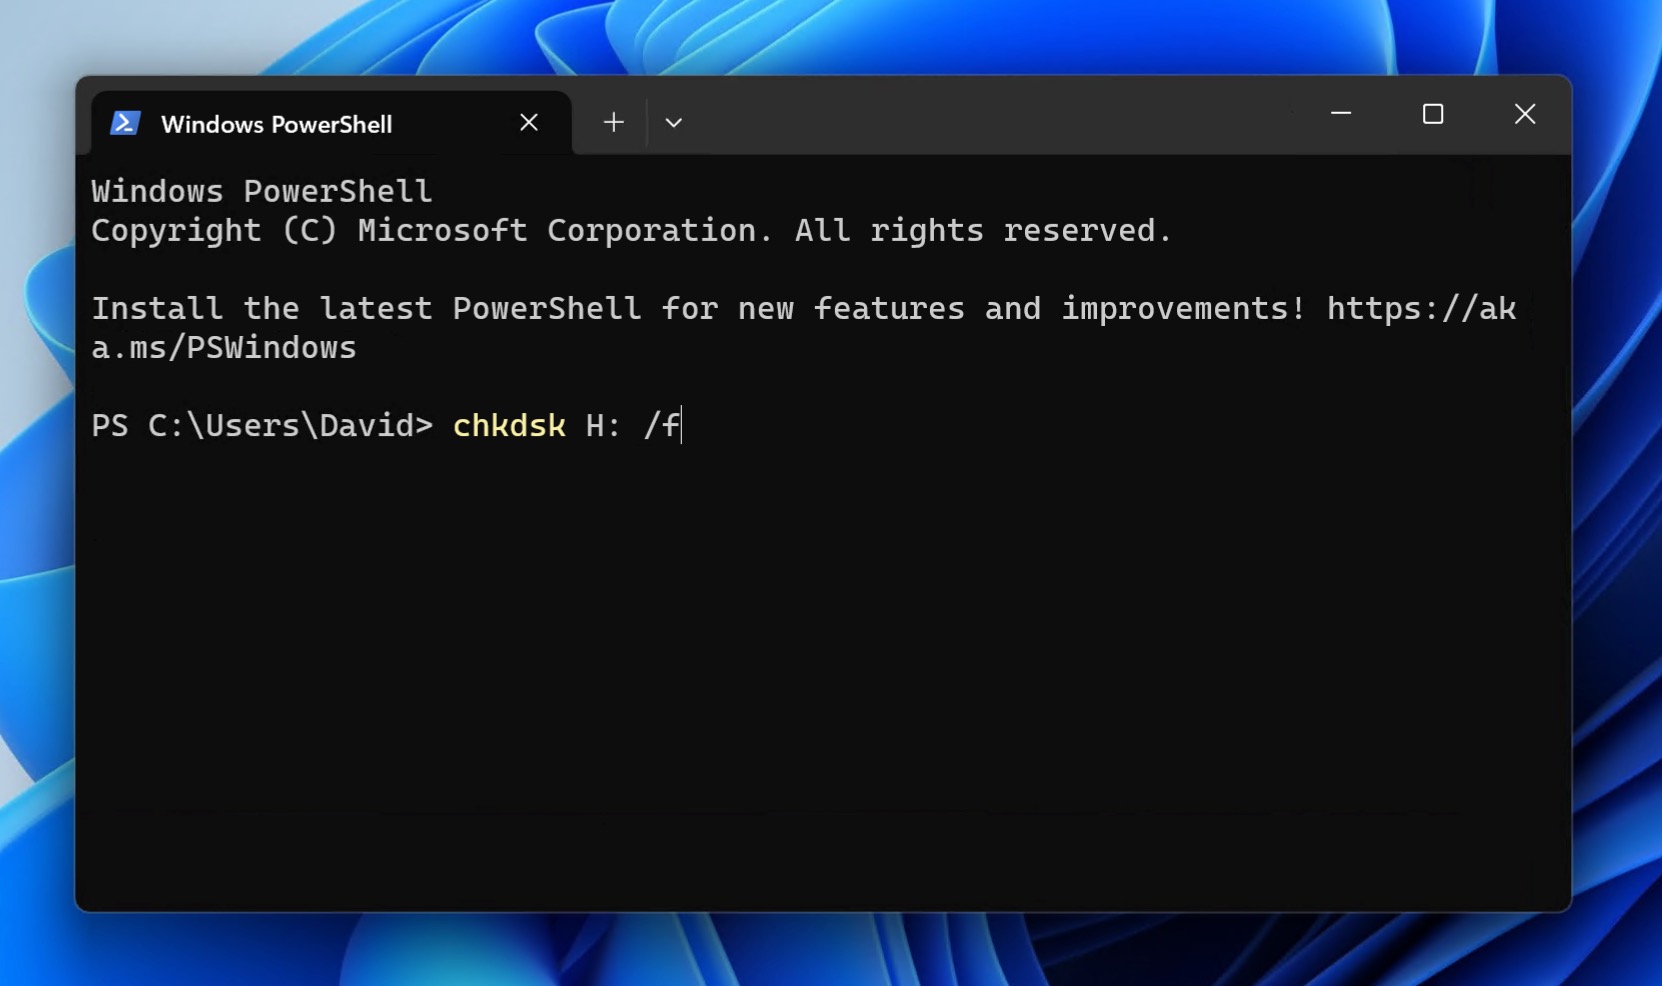
- Press Win + X on your keyboard and launch Windows Terminal, PowerShell, or CMD as administrator.
- Enter the following command and press enter: chkdsk X: /f (replace X with the letter assigned to the corrupted drive).
Follow the instructions below to discover which letter has been assigned to your flash drive:
- Launch File Explorer and click on “This PC.” We’ll be able to see all of the drives in the system. In this example, we have C:, D:, E:, and L:
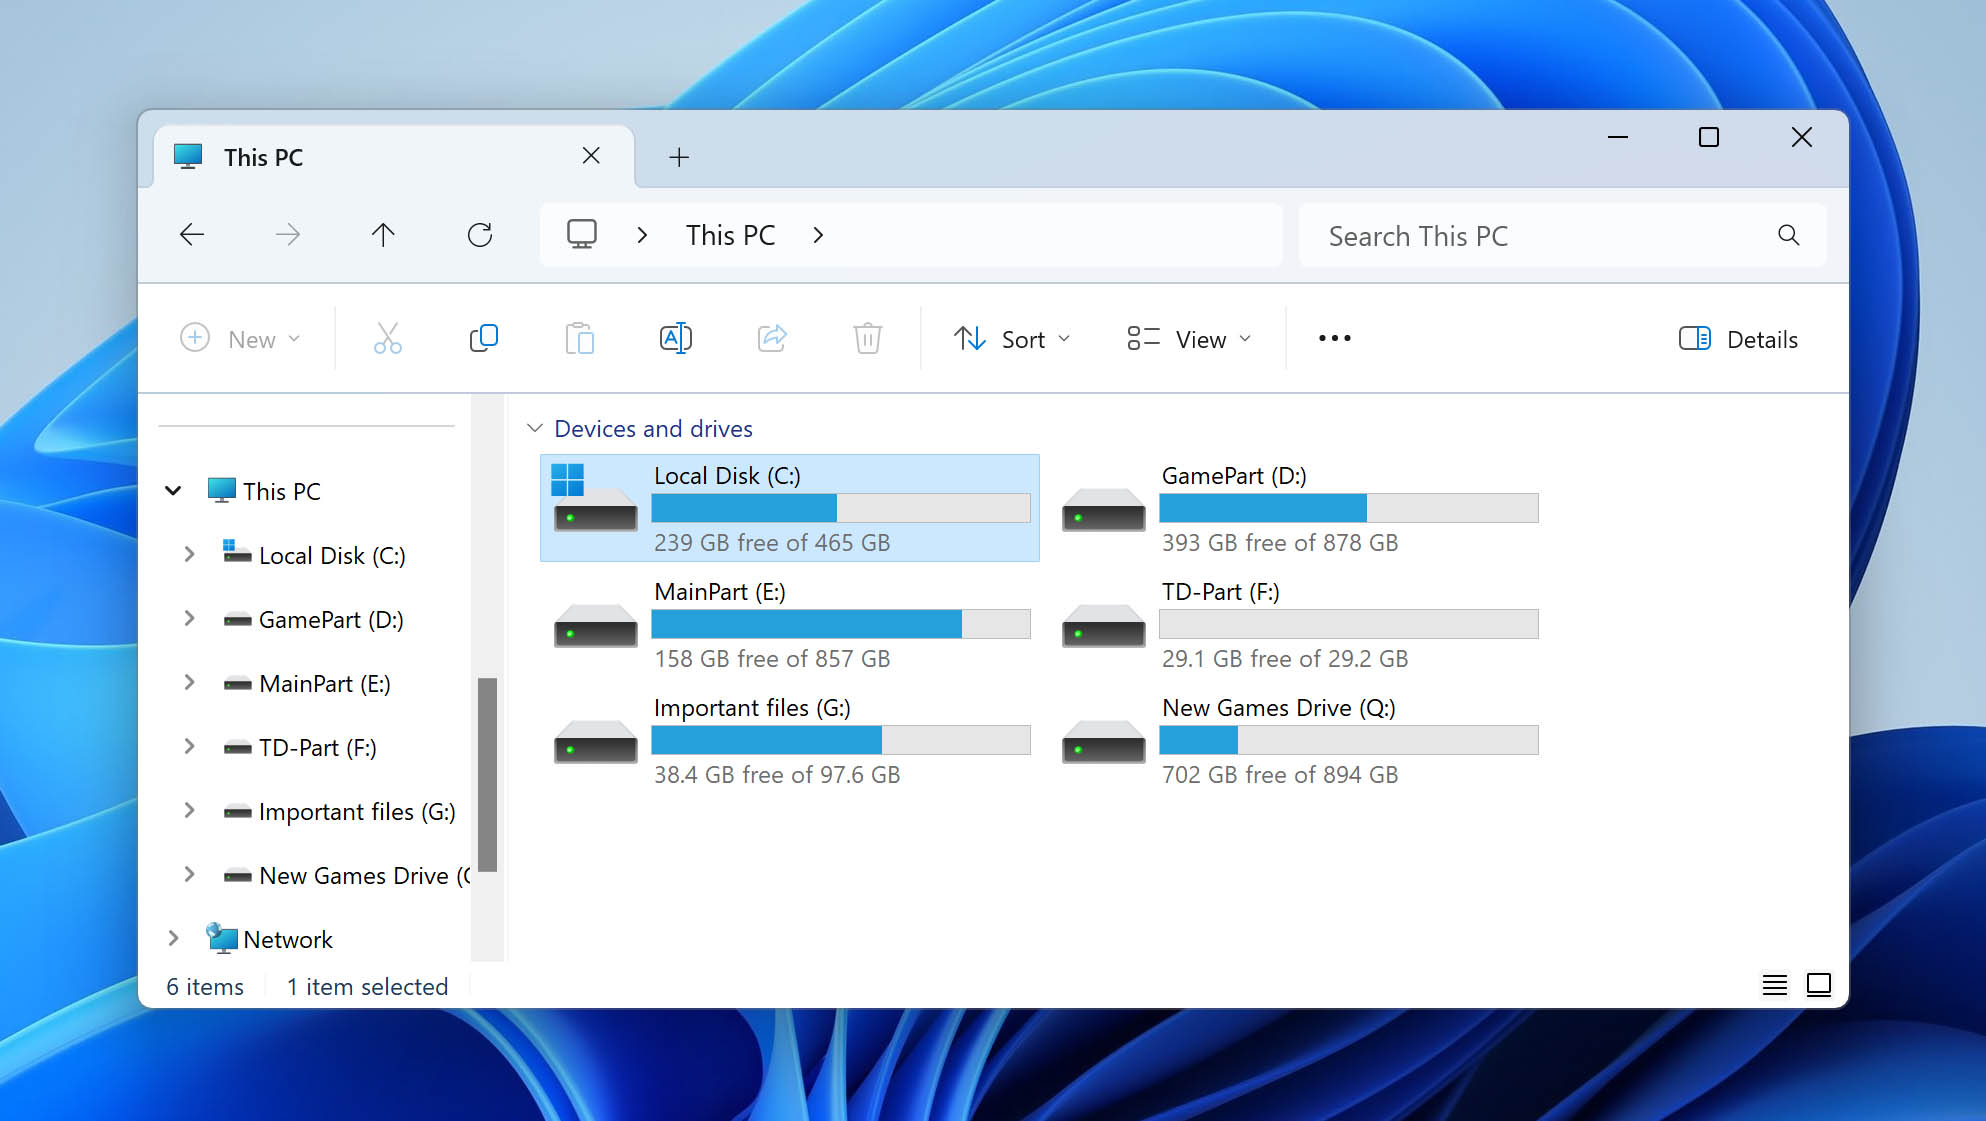
- Plug the drive into the computer. If the computer recognizes it, we’ll see the drive show up in our File Explorer.
🗨️ For this example, it registers as being drive H: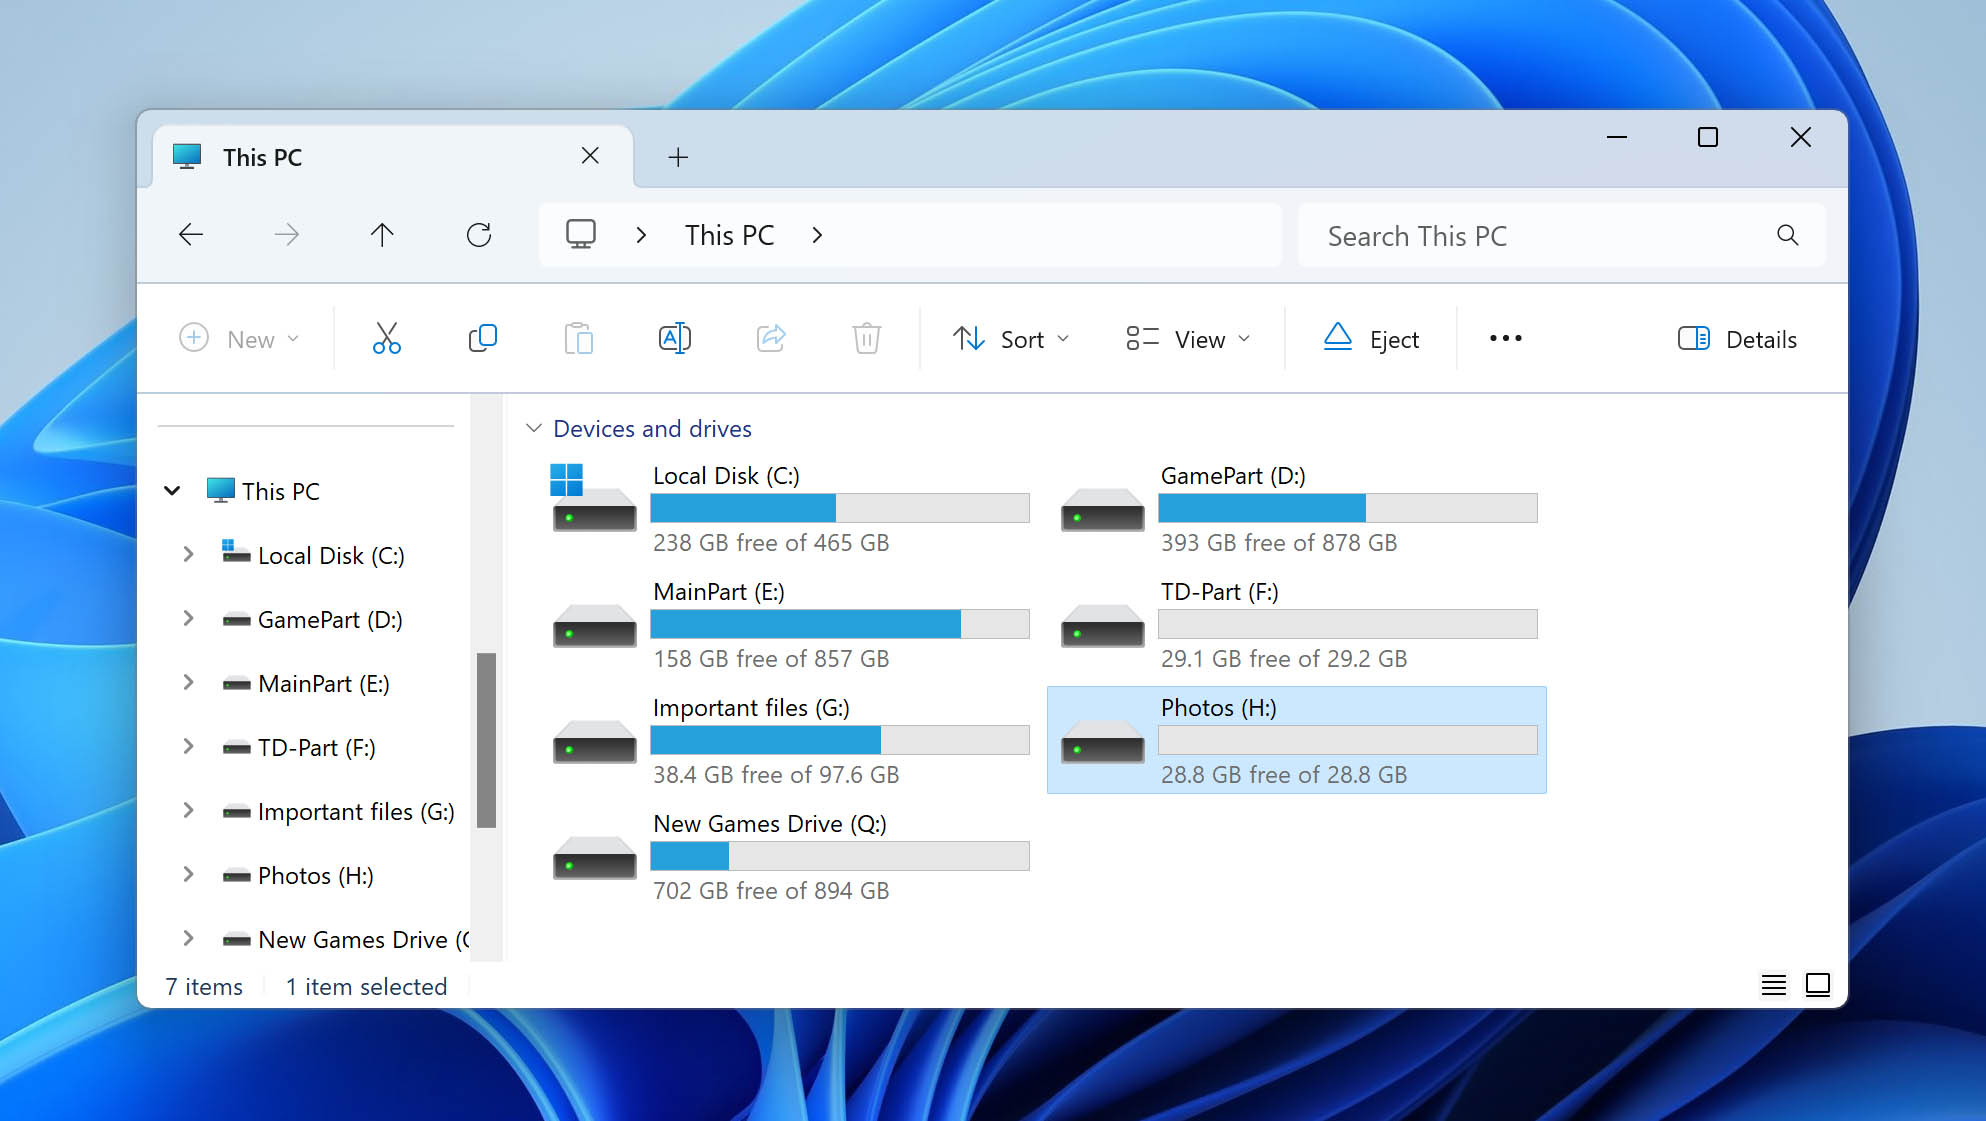
- Look at the list of drives in File Explorer. If the USB drive doesn’t display, it means that Windows doesn’t recognize the drive, or perhaps the partition map has been corrupted. One way to find out is to launch the program “Disk Management” which is built into nearly every version of Windows. It will display drive partitions even if they haven’t been assigned a drive letter. It’s one way to verify that Windows recognizes the drive:
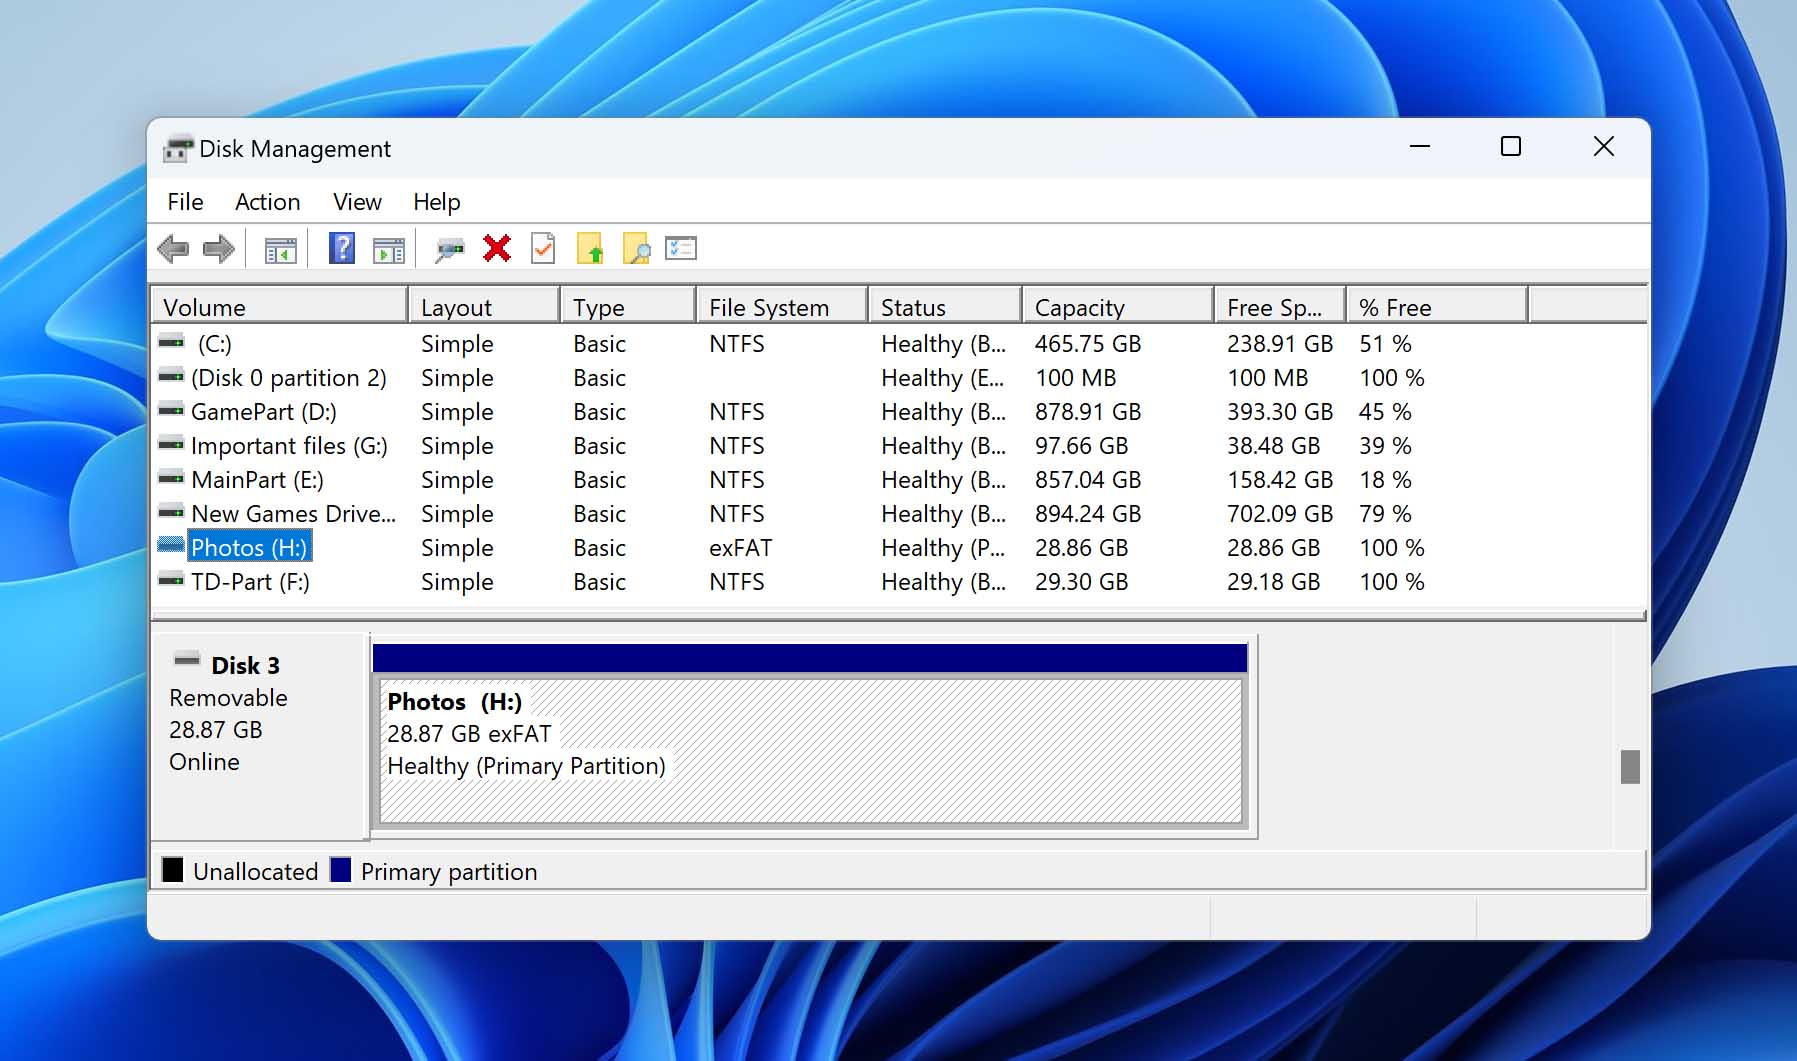 ⚠️ Note: Do not select the partition in Disk Management and attempt to reformat it – this can cause the files we are trying to restore to be lost forever.
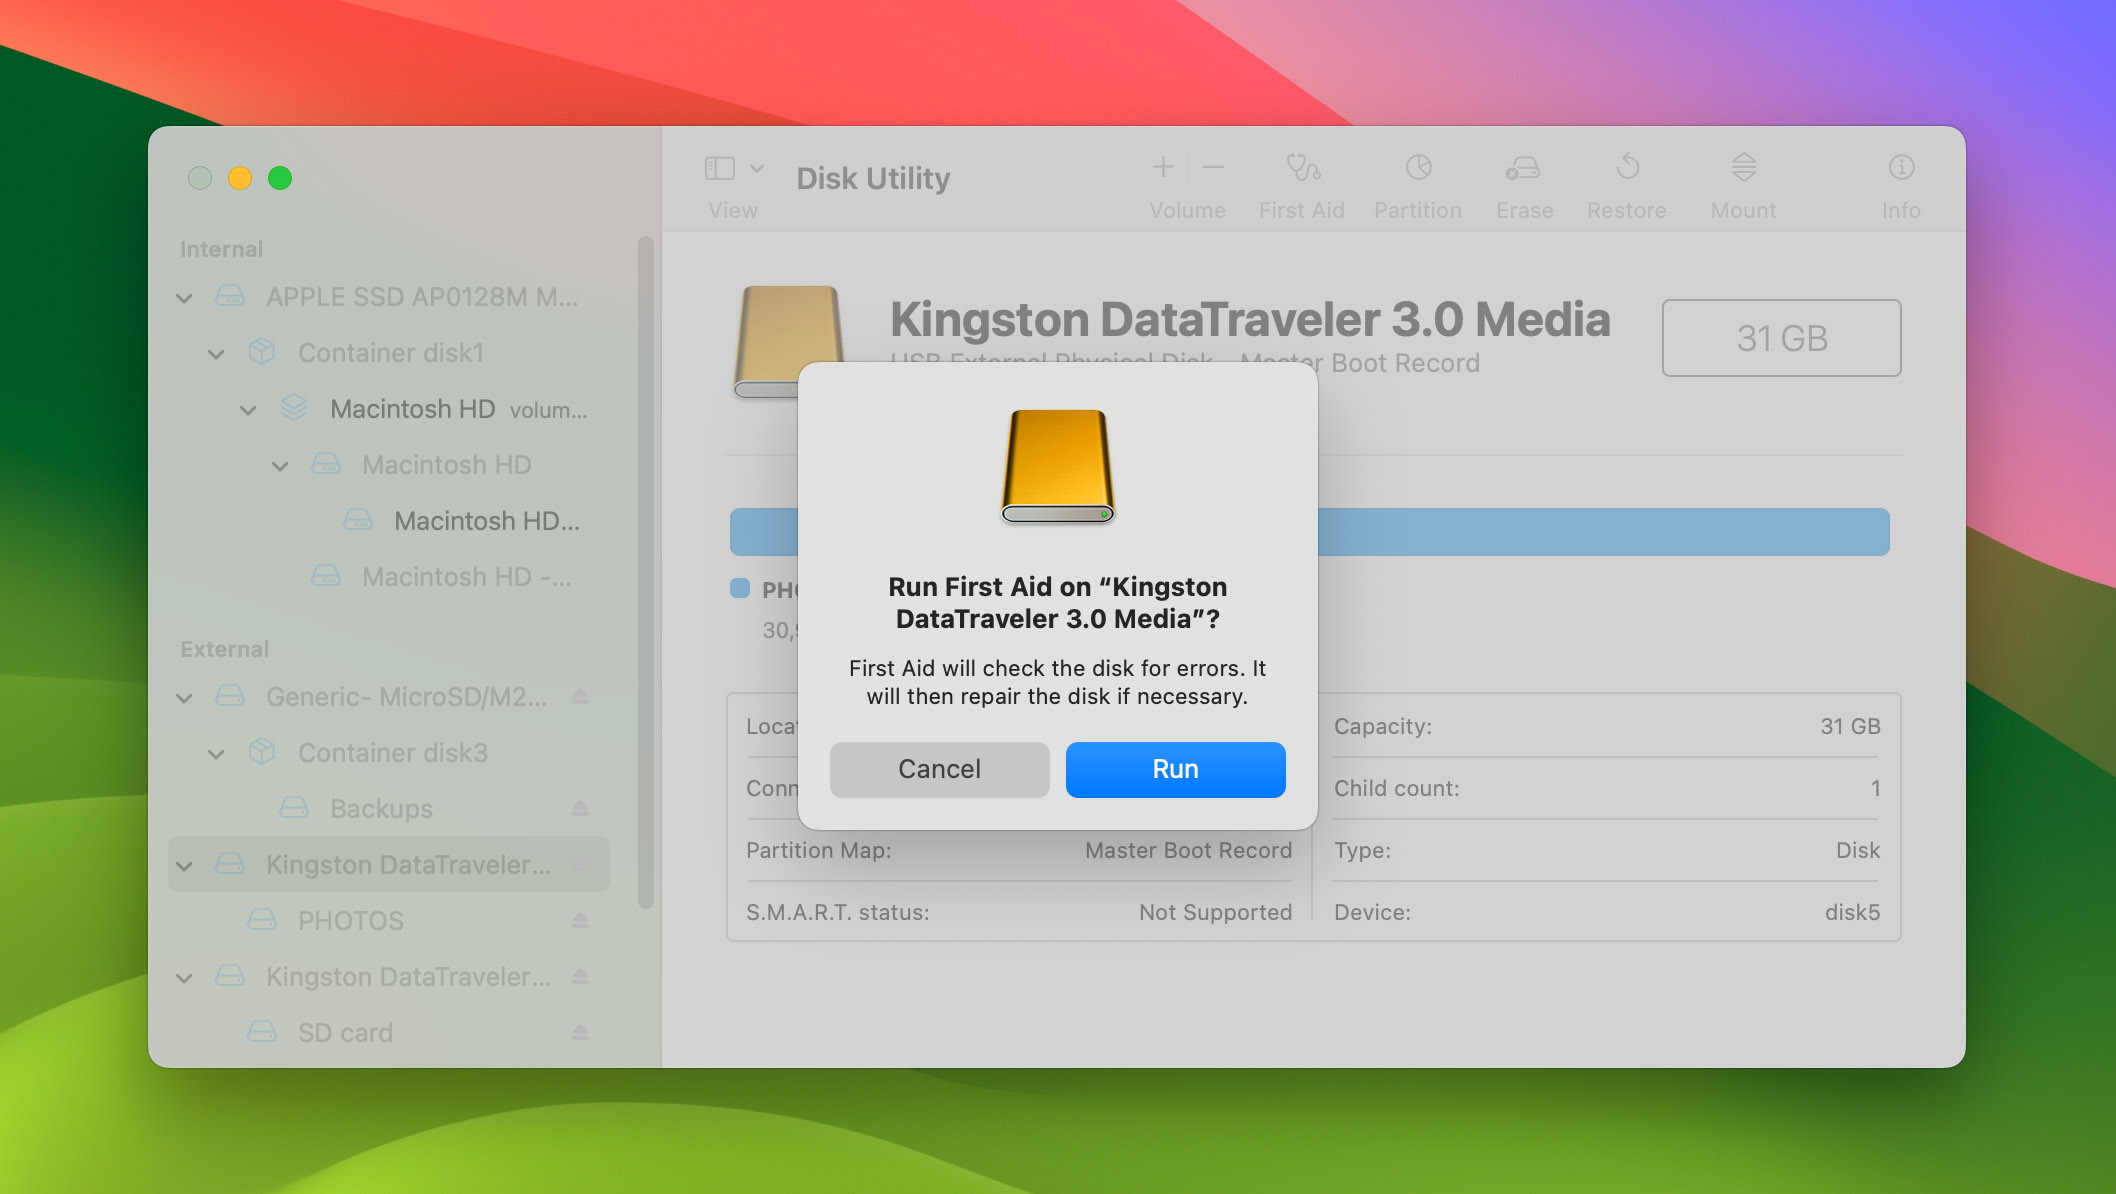
If you’re using macOS instead, then you can fix files system issues using the First Aid feature present in Disk Utility instead:
- Launch Disk Utility (you can find it in Applications -> Utilities).
- Select your corrupted USB flash drive in the left pane and then click the First Aid button in the toolbar.
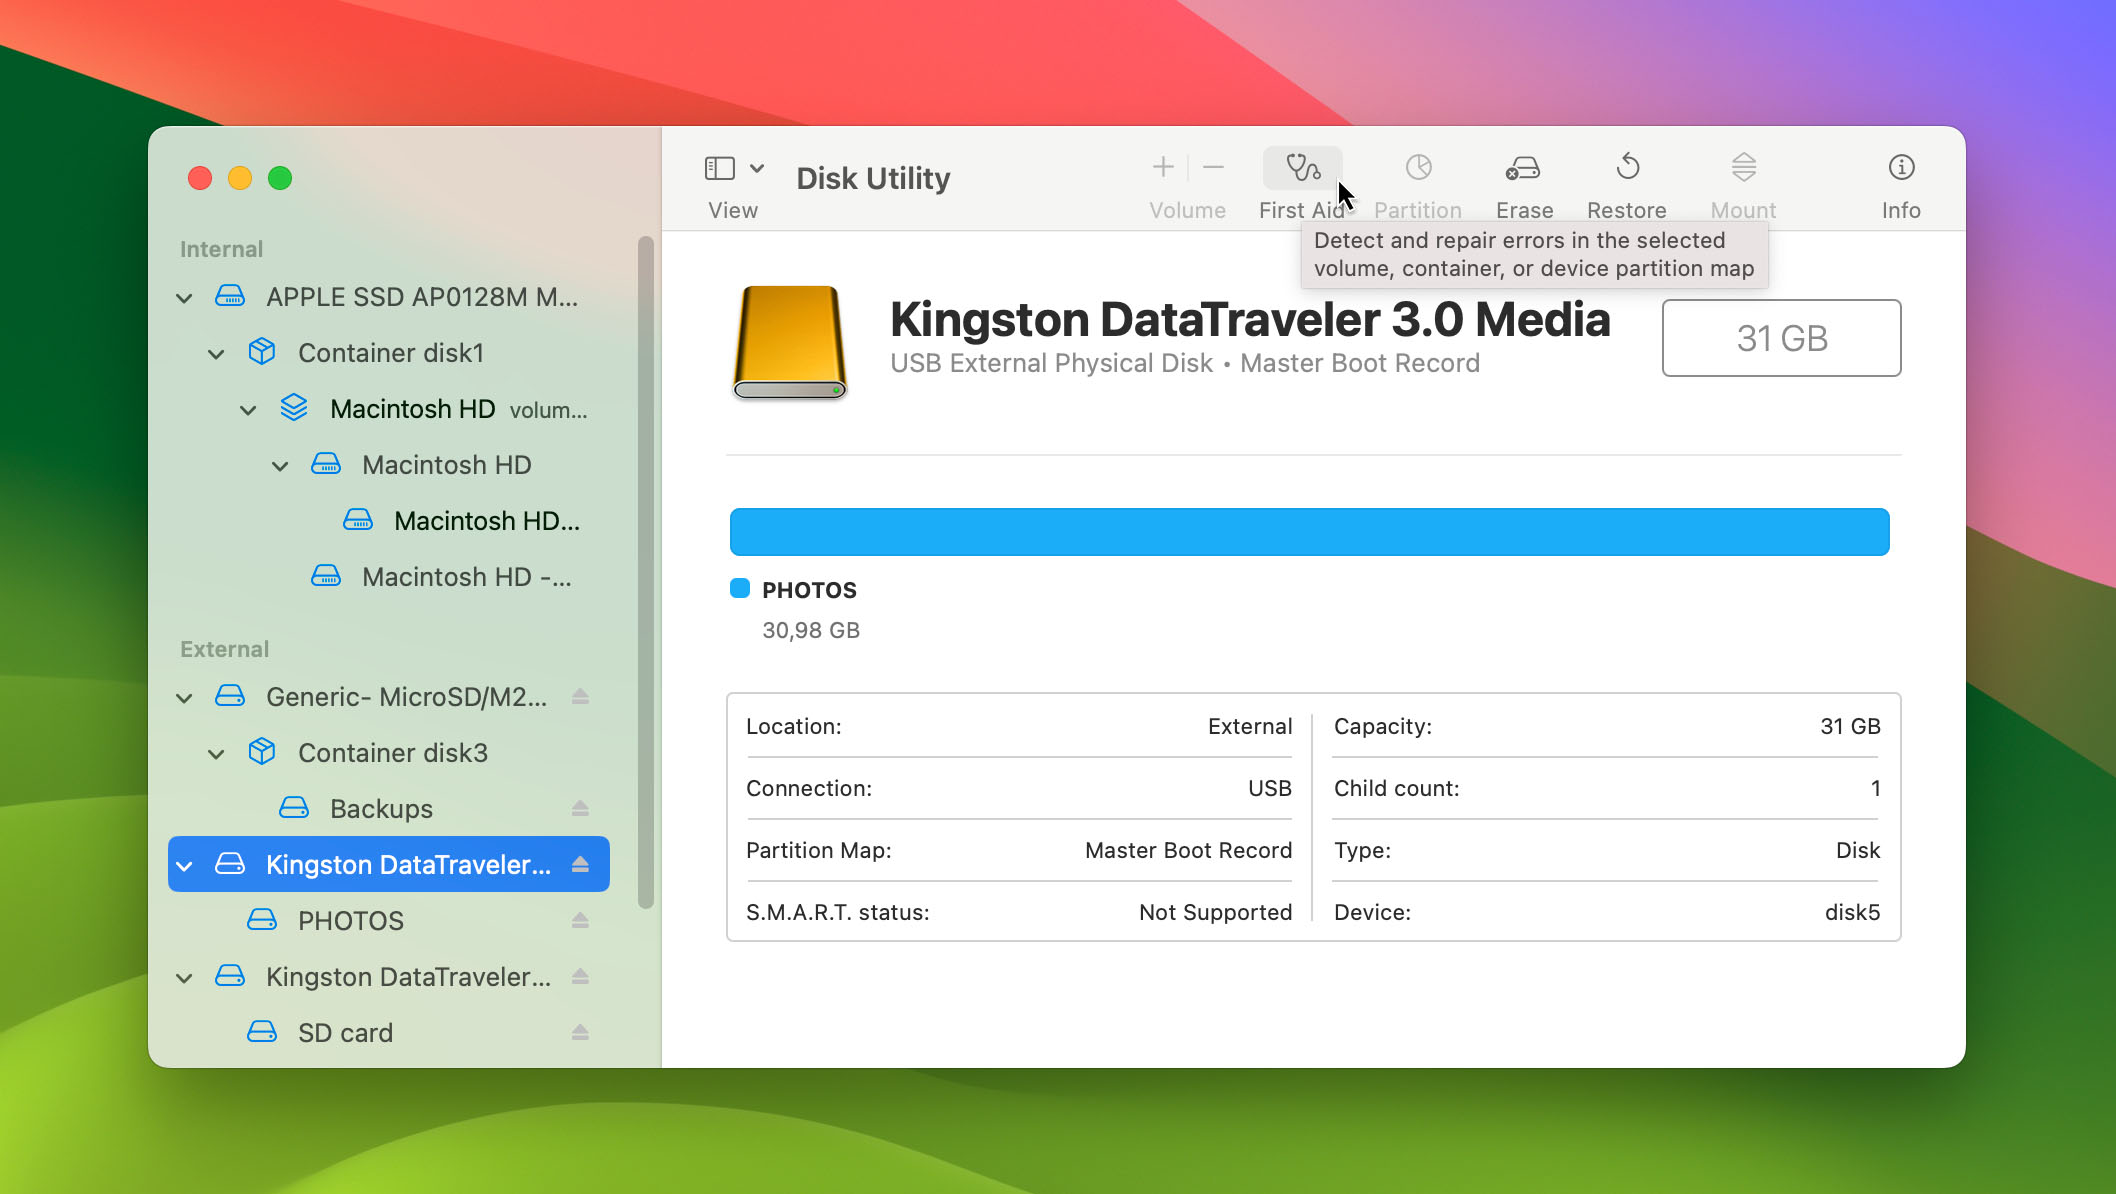
- Click the Run button and then wait for the First Aid feature to finish.
At this point, you might be able to access the contents of your USB flash drive in File Explorer or Finder and recover files from it directly. If you can’t find all of your files, then there’s still one last step: you can use USB data recovery software to find hidden, deleted, and corrupted files.
Step 3: Recover Lost Files from Your Corrupted USB Flash Drive
Now it’s time to take out the big guns: data recovery software. Once again, Disk Drill provides a straightforward and powerful solution that you can use to perform USB file recovery in no time. The software employs smart algorithms that can detect corrupted drives with unreadable sectors and handle them accordingly to deliver the best data recovery results possible.

How to recover files from a corrupted USB drive using Disk Drill:
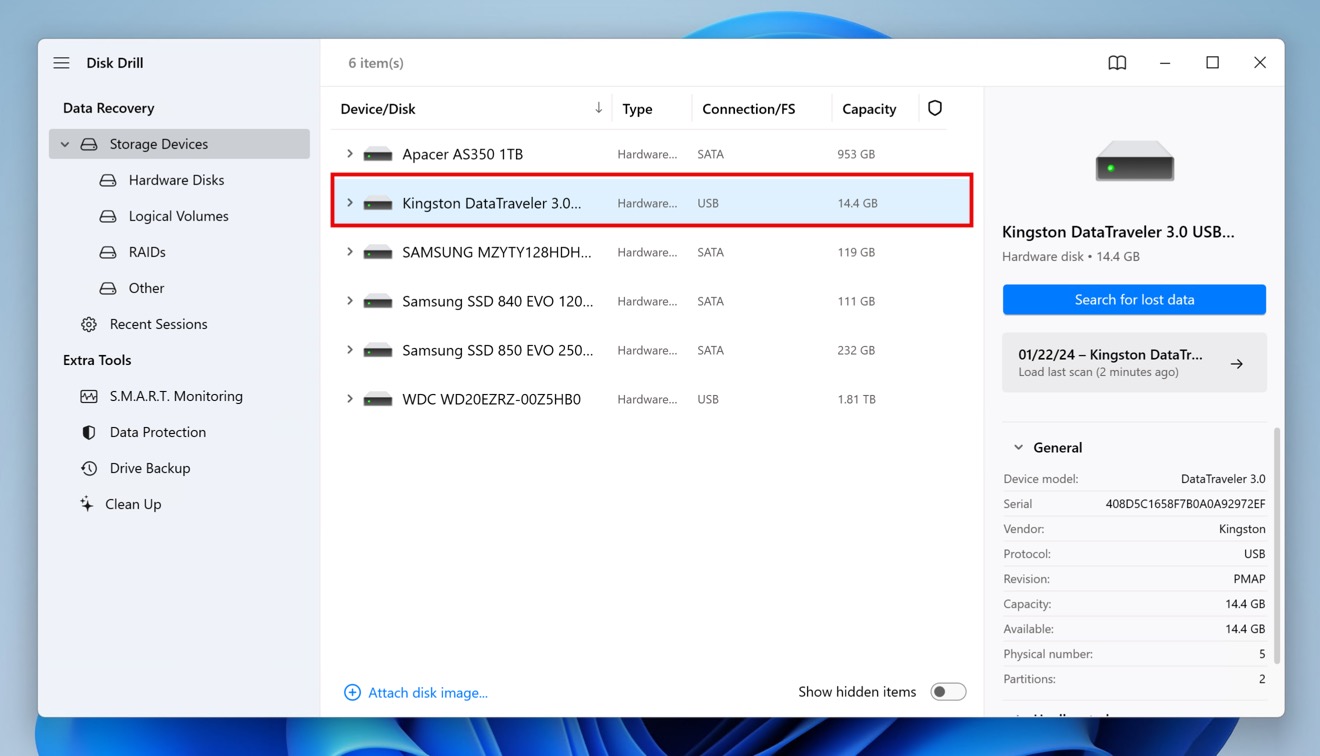
- Start Disk Drill and select the USB drive you want to recover. Alternatively, you can click the Attach disk image option below the list of connected storage devices and use it to mount and scan the backup image created in Step 1. By scanning only the backup image, you can avoid further wear and tear on your USB drive.
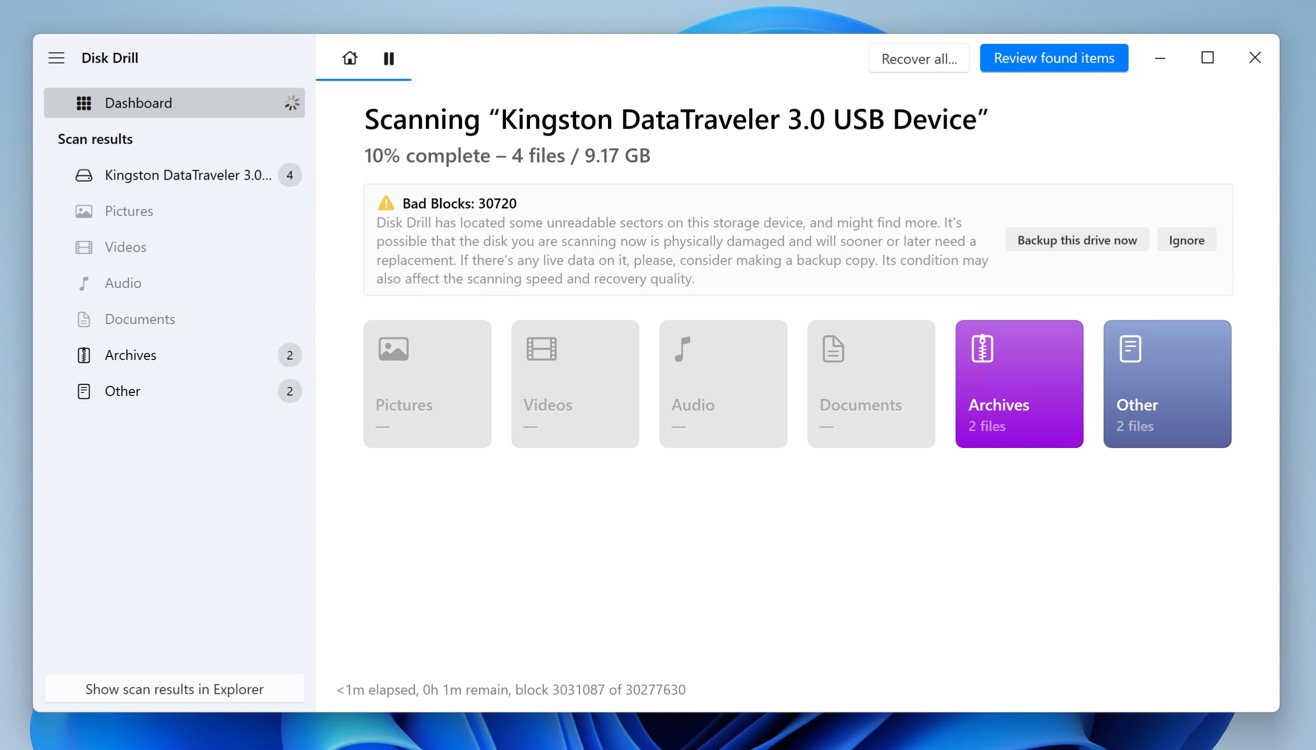
- Begin the recovery process by clicking the Search for lost data button. Wait as Disk Drill scans the corrupted pen drive. It will start to display information about recovered files as the process continues. You can click Review found items at any point to see all found files. As the screenshot below illustrates, Disk Drill will automatically alert you to the presence of any bad blocks on your USB flash drives. Take this warning seriously.
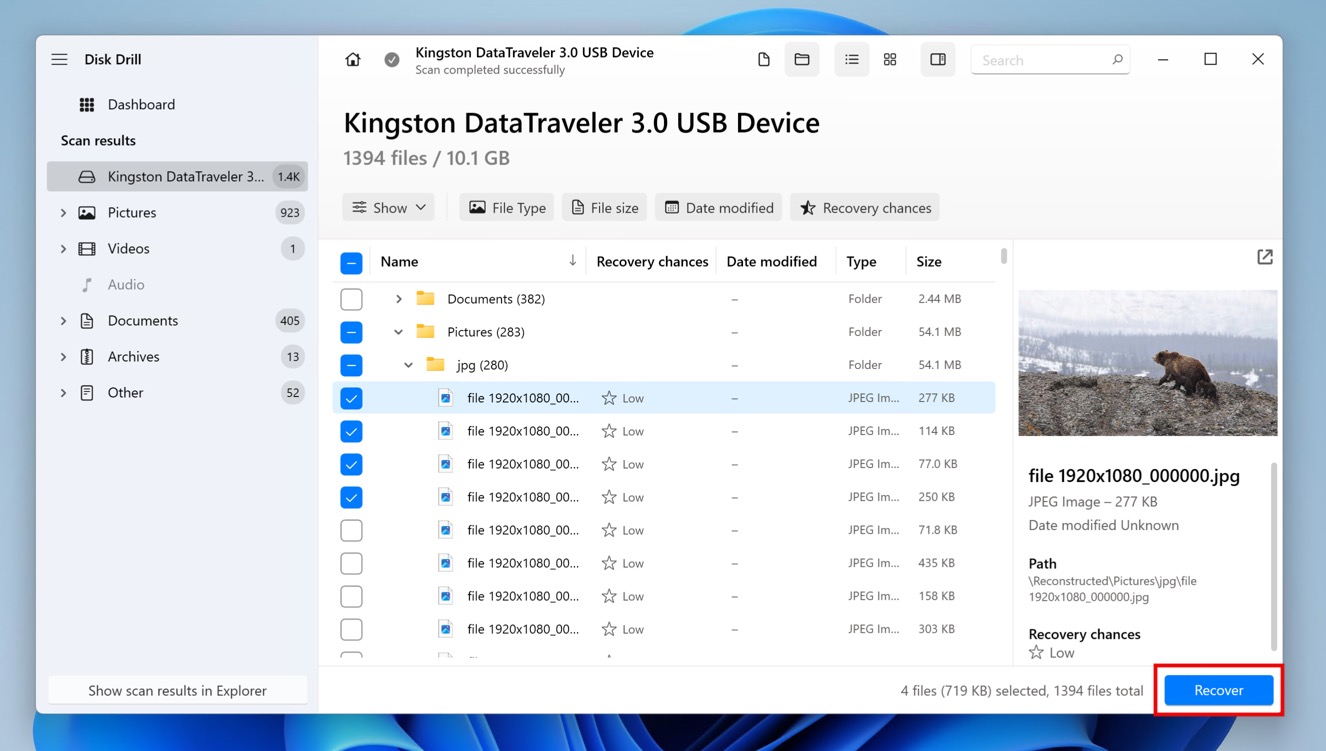
- Select lost files and click recover them. Select the files we want to recover by clicking on the checkbox to the left of the file name. You can focus on specific file types using the filters in the left pane and the toolbar above scan results. When you’ve selected all lost files, click the Recover button and choose a suitable recovery destination.
-
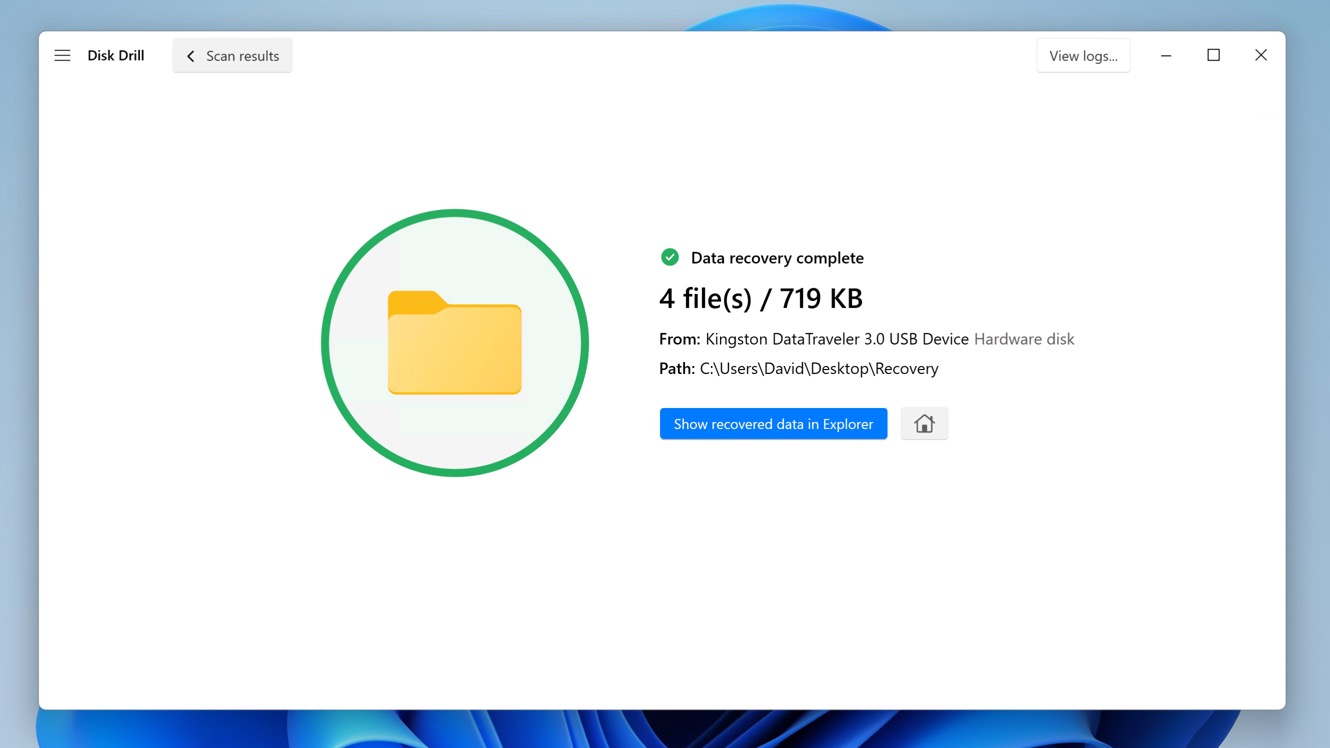
Wait for Disk Drill to display a completion message; it will look like this:
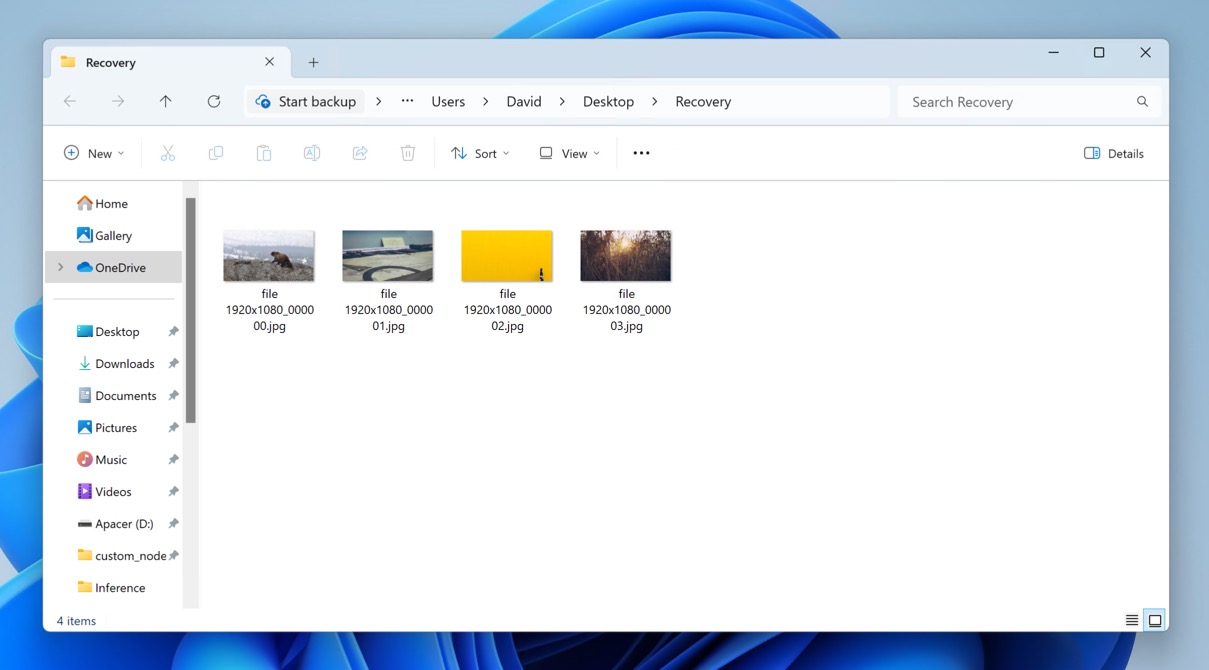
- Navigate to the recovery directory using File Explorer or Finder and look for the recovered files.
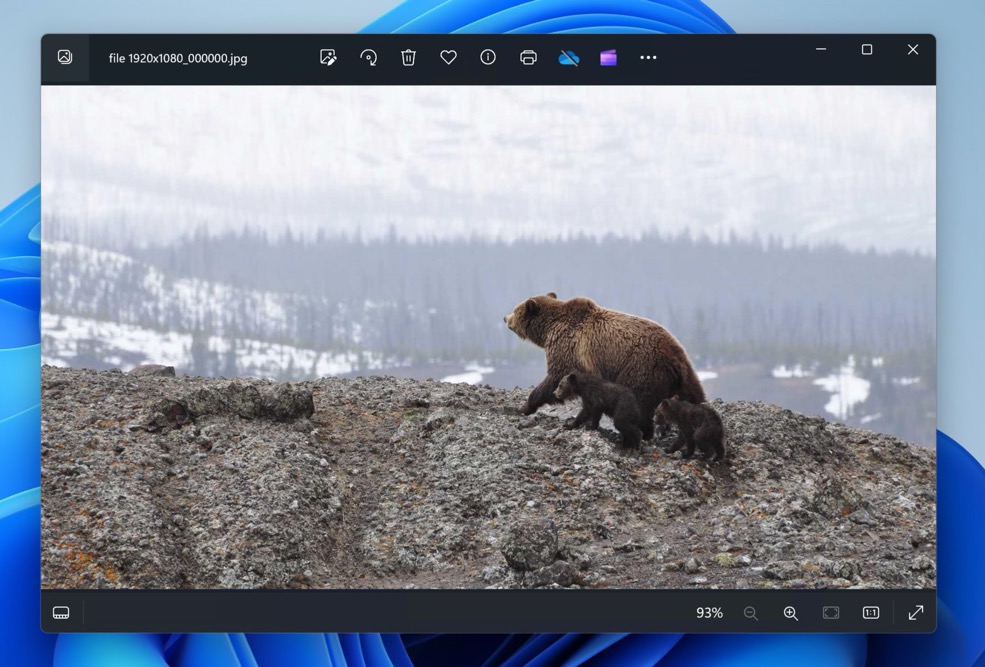
- Open a file to verify that it has been successfully restored.
The above-described steps to recover files from a USB drive on Mac with Disk Drill are the same as the steps to do the same on Windows, so you can put them to good use regardless of which operating system you use.
Other Ways to Recover Files from a Corrupted Flash Drive
Data recovery software like Disk Drill can deliver excellent results in a short amount of time, which is why we recommend you always start with it. That said, there are other ways to recover files from a corrupted flash drive. Let’s take a closer at some of them.
Method 1: Use TestDisk to Recover Partition Access
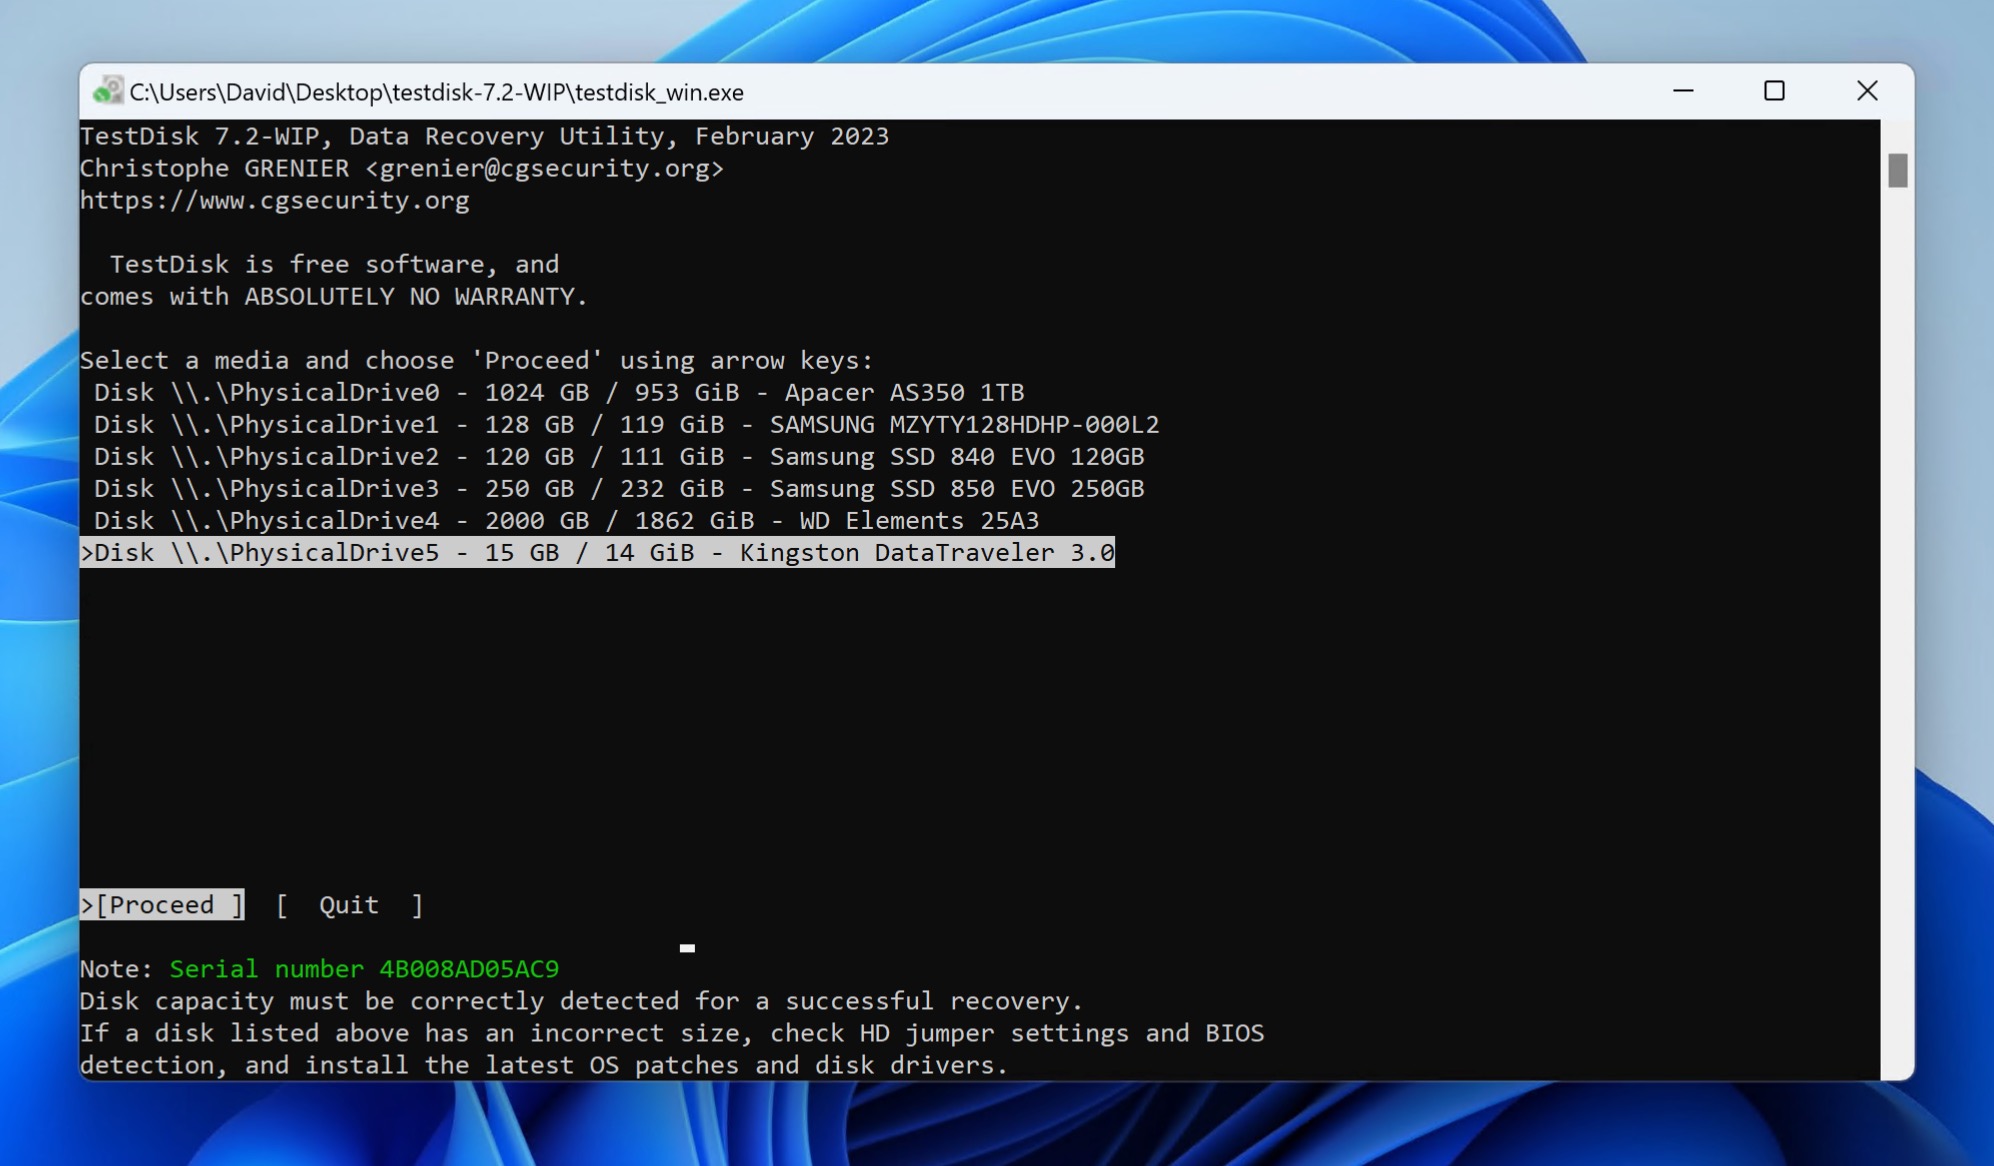
USB flash drive corruption can cause whole partitions to go missing and make it impossible to access the files they contain. That’s where TestDisk comes in. This free, open-source tool may not have a graphical user interface, but it does know how to fix broken partition tables to recover lost partitions.
To use TestDisk for recovering files from a corrupted USB flash drive, it’s recommended to follow the detailed step-by-step guide provided on their official website. This guide will walk you through the process so that you always know what to do next.
The process involves several key steps, starting with selecting the affected drive, choosing the partition table type, and then scanning for lost partitions. Once TestDisk identifies the lost partitions, you can proceed to rebuild the partition table or recover the lost partitions.
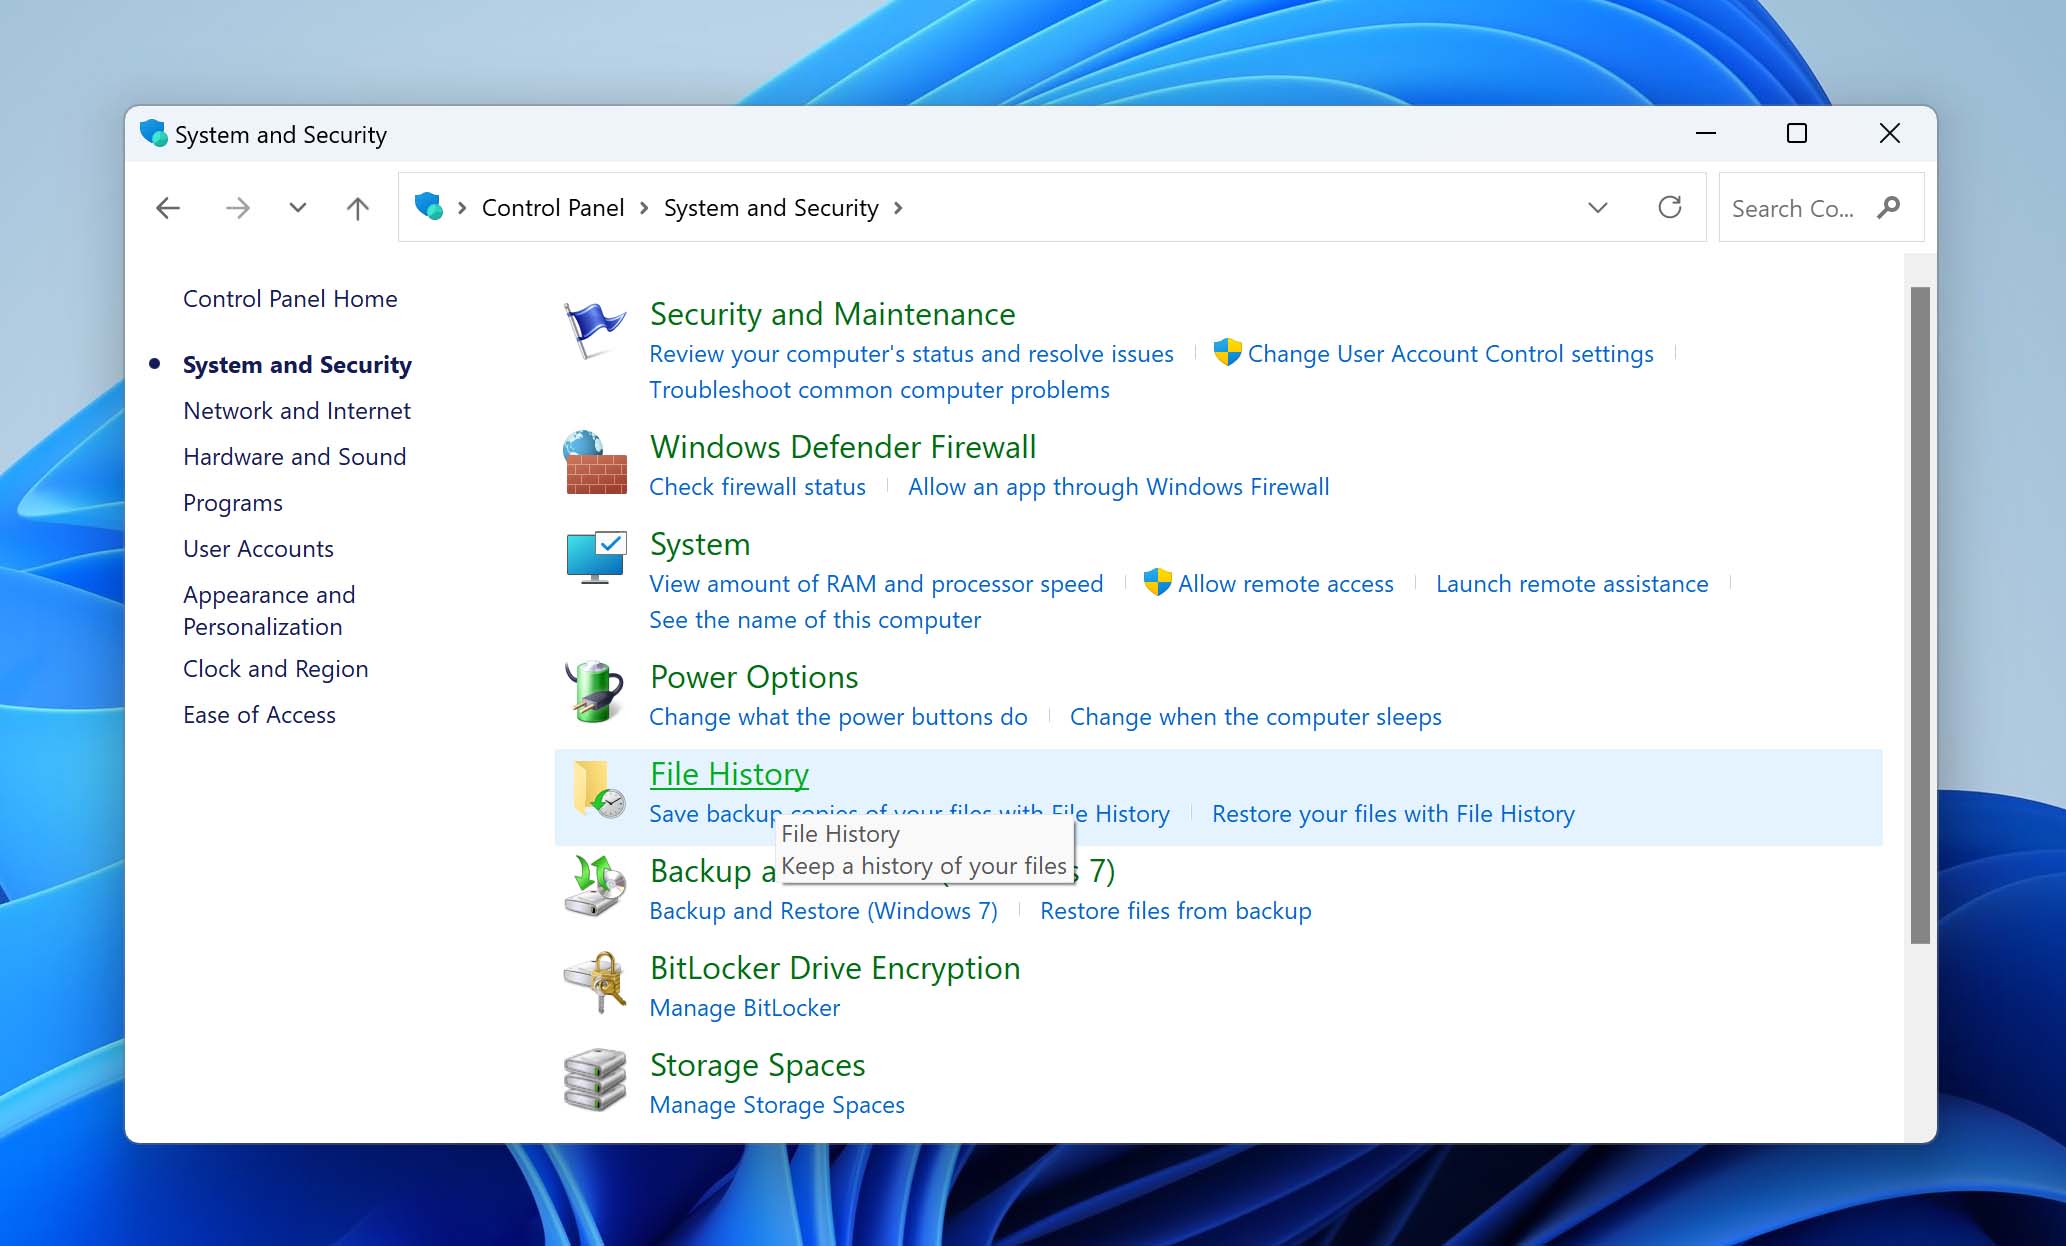
Method 2: Use the File History Feature in Windows
![]() The Windows operating system comes with a local backup tool called File History. In Windows 10 and earlier, it’s possible to tell File History to back up a custom folder, including one that’s located on a USB drive.
The Windows operating system comes with a local backup tool called File History. In Windows 10 and earlier, it’s possible to tell File History to back up a custom folder, including one that’s located on a USB drive.
If your lost files were at some point located in the locations backed up by Windows 11 File History, or if you’re a Windows 10 user and have manually added your USB drive as an additional File History backup location, then you can follow the instructions below to recover them:
- Open the classic Control Panel.
- Navigate to System and Security > File History.
- Click the Restore personal files option in the left pane.
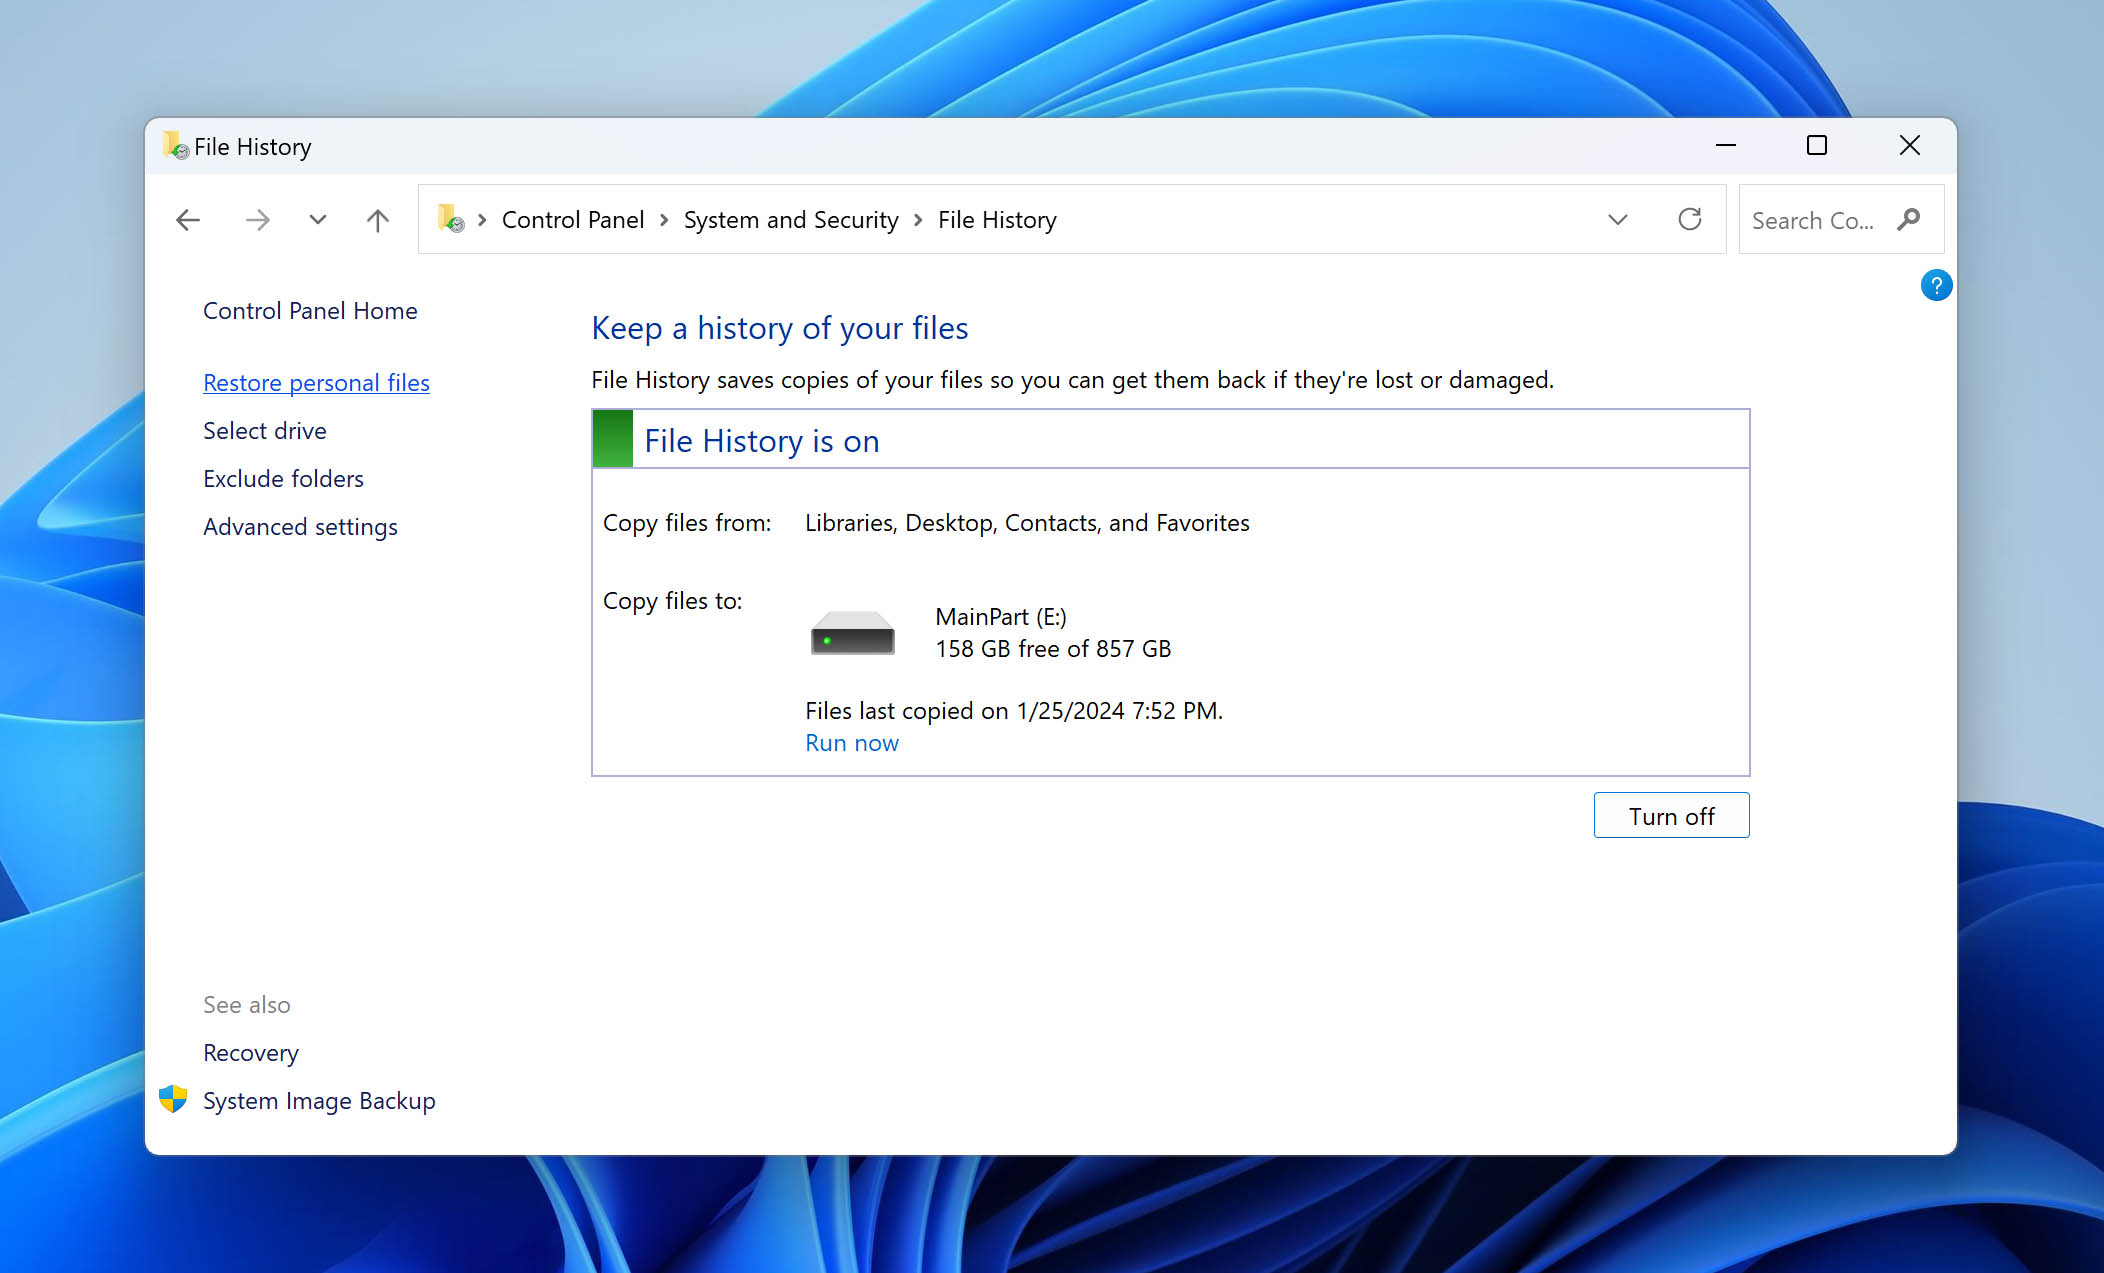
- Navigate to the location where the lost file was present and select it.
- Click the green Recover button to restore the selected file.
Method 3: Use the ATTRIB Command
Flash drive corruption can have many different forms. For example, it can cause file attributes to change, which can result in the affected files becoming invisible. The good news is that this problem is fairly easy to fix:
- Press Win + X on your keyboard.
- Launch Windows Terminal, PowerShell, or CMD as administrator.
- Enter the following command to recover hidden files: ATTRIB -H -R -S /S /D X:*.* (replace X with the letter assigned to your flash drive).
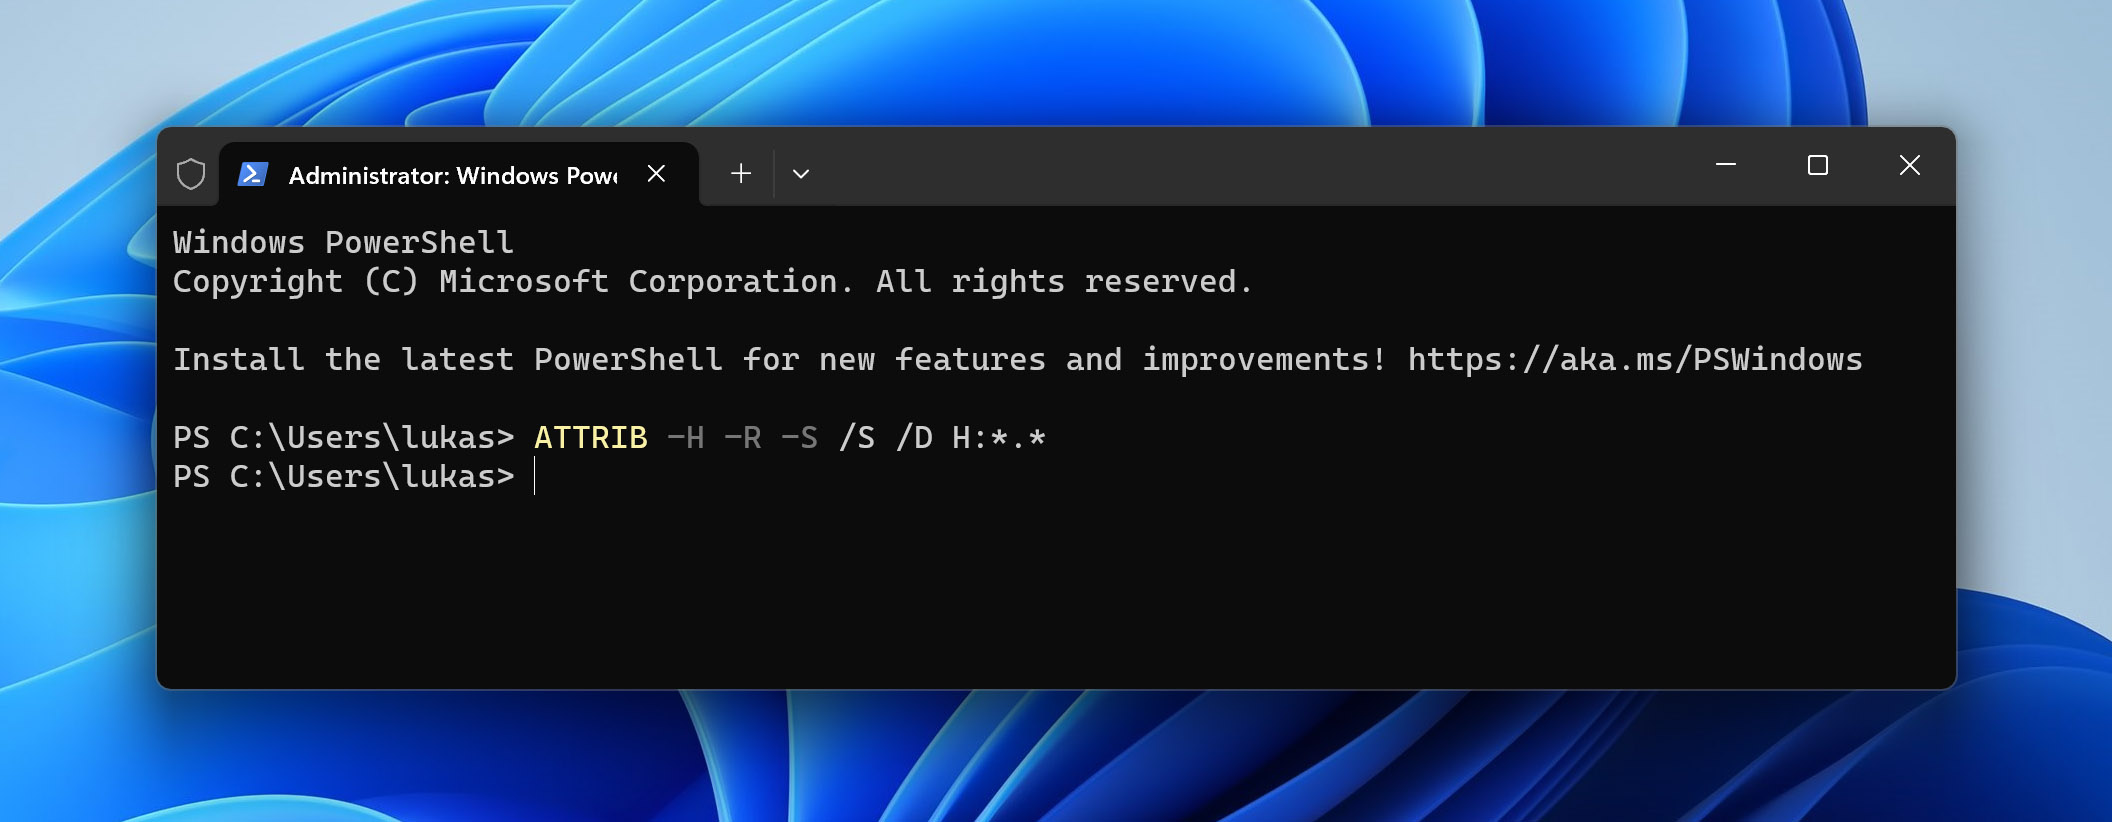
- Exit Command Prompt and open your USB drive in File Explorer.
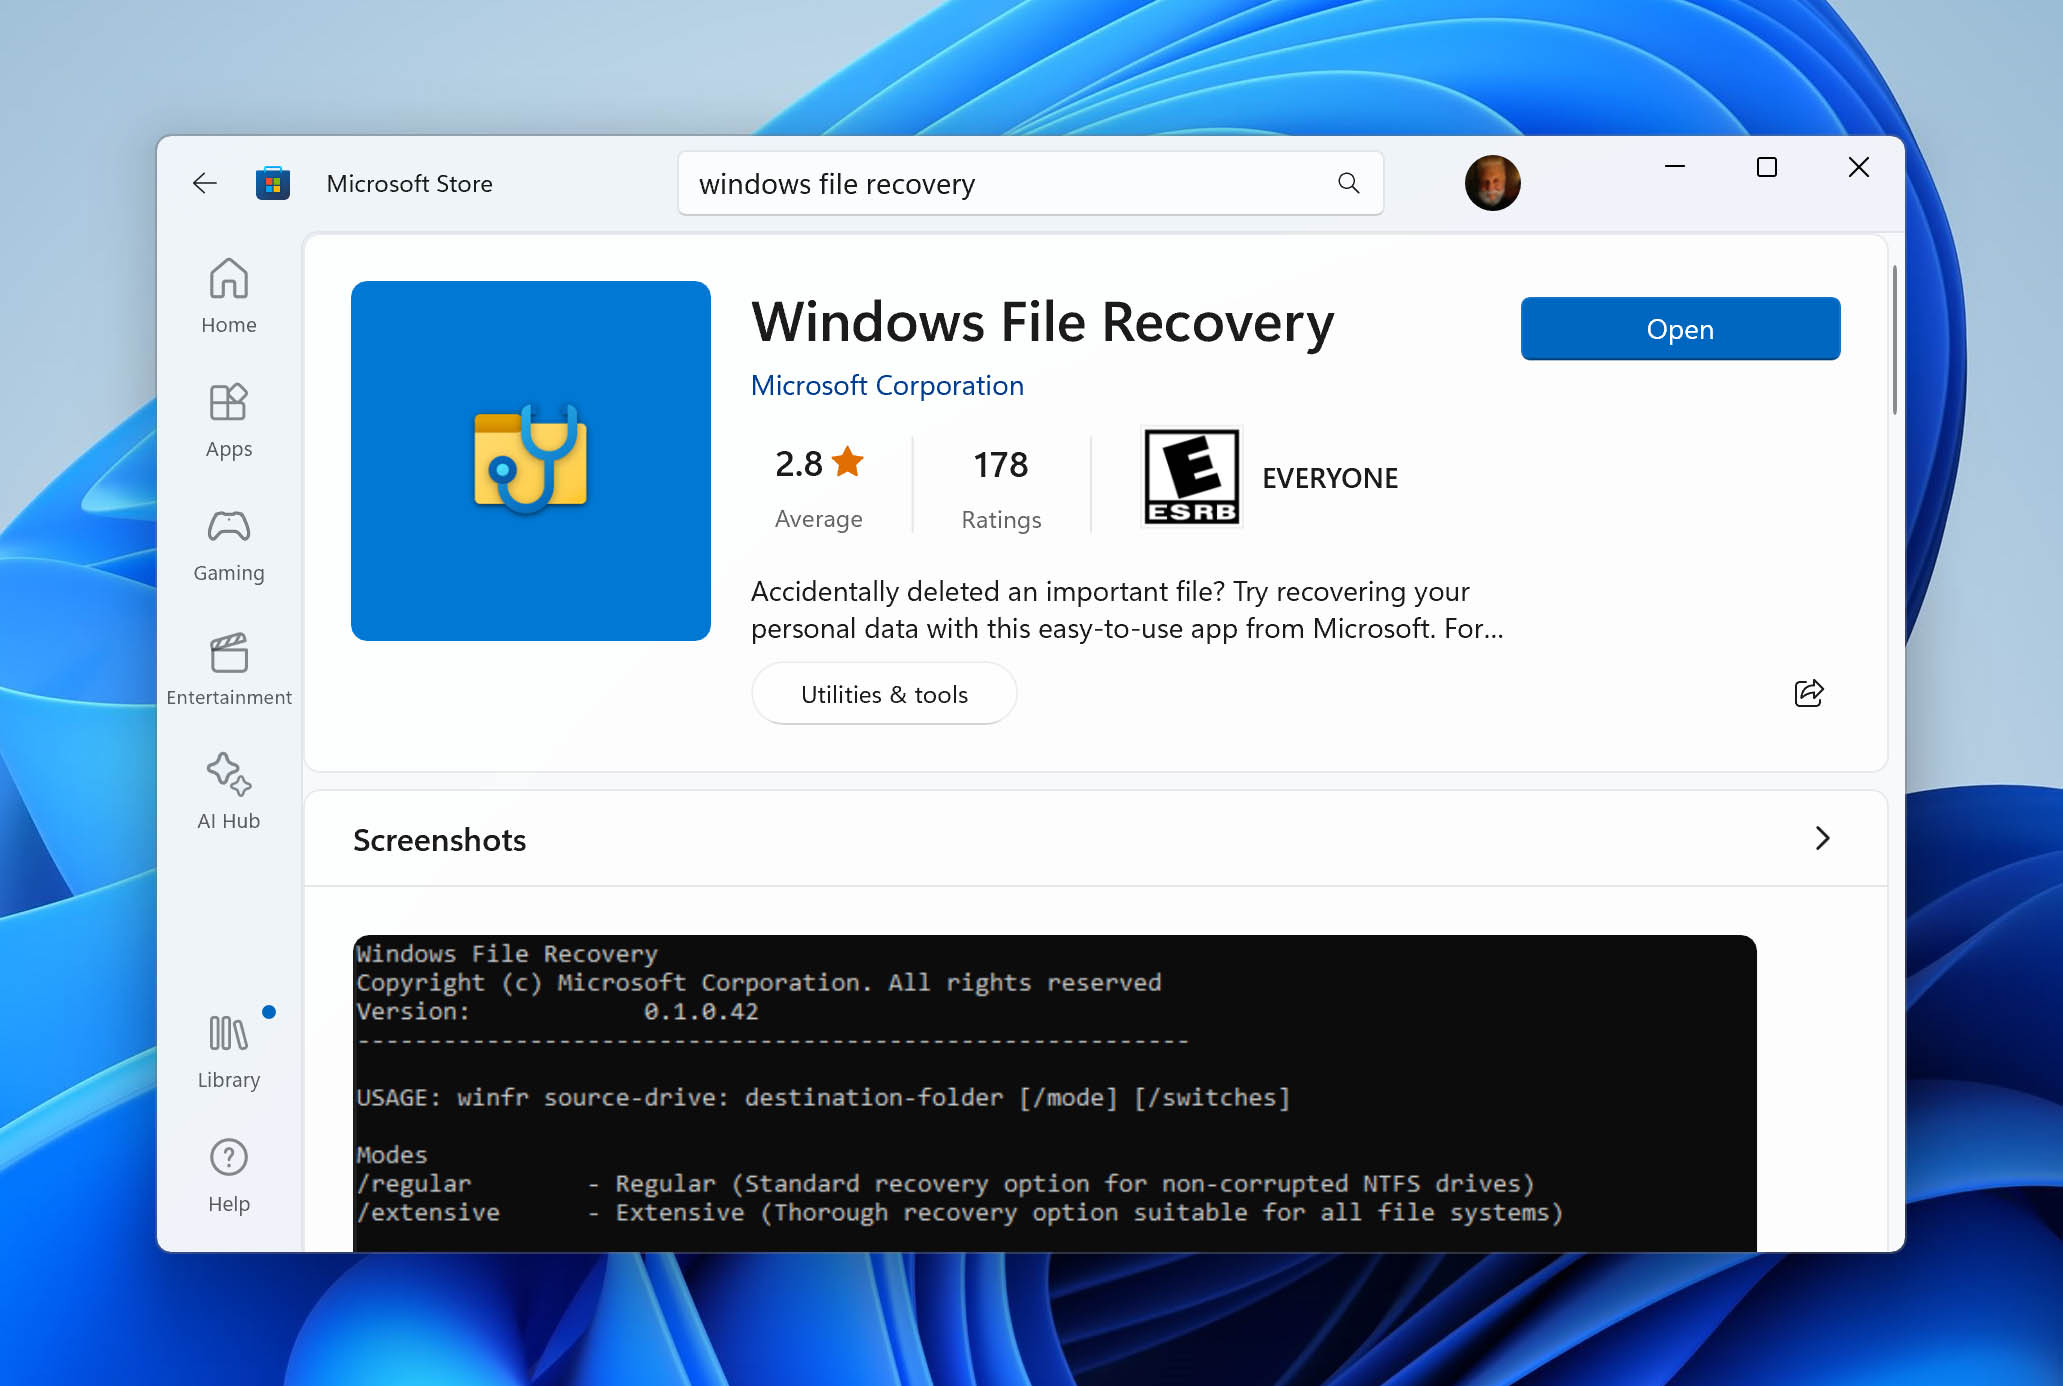
Method 4: Try Windows File Recovery
![]() Windows File Recovery is a data recovery tool developed by Microsoft, and it works on Windows 10 2004 and above.
Windows File Recovery is a data recovery tool developed by Microsoft, and it works on Windows 10 2004 and above.
Windows File Recovery is still in its early stages, which is clearly evident from the lack of a graphical user interface. The tool also doesn’t support nearly as many file signatures as leading commercial data recovery products, such as Disk Drill.
That said, Windows File Recovery is available for free directly from the Microsoft Store, and you can use it to recover an unlimited number of files, so it’s worth giving it a shot if you want to recover files from a formatted USB flash drive or get back files that have been permanently deleted.
- Download Windows File Recovery from the Microsoft Store.
- Launch Command Prompt or Windows Terminal.
- Enter the following command to recover all deleted files from drive X to the Recovered folder on drive C: winfr X: C:\Recovered /extensive
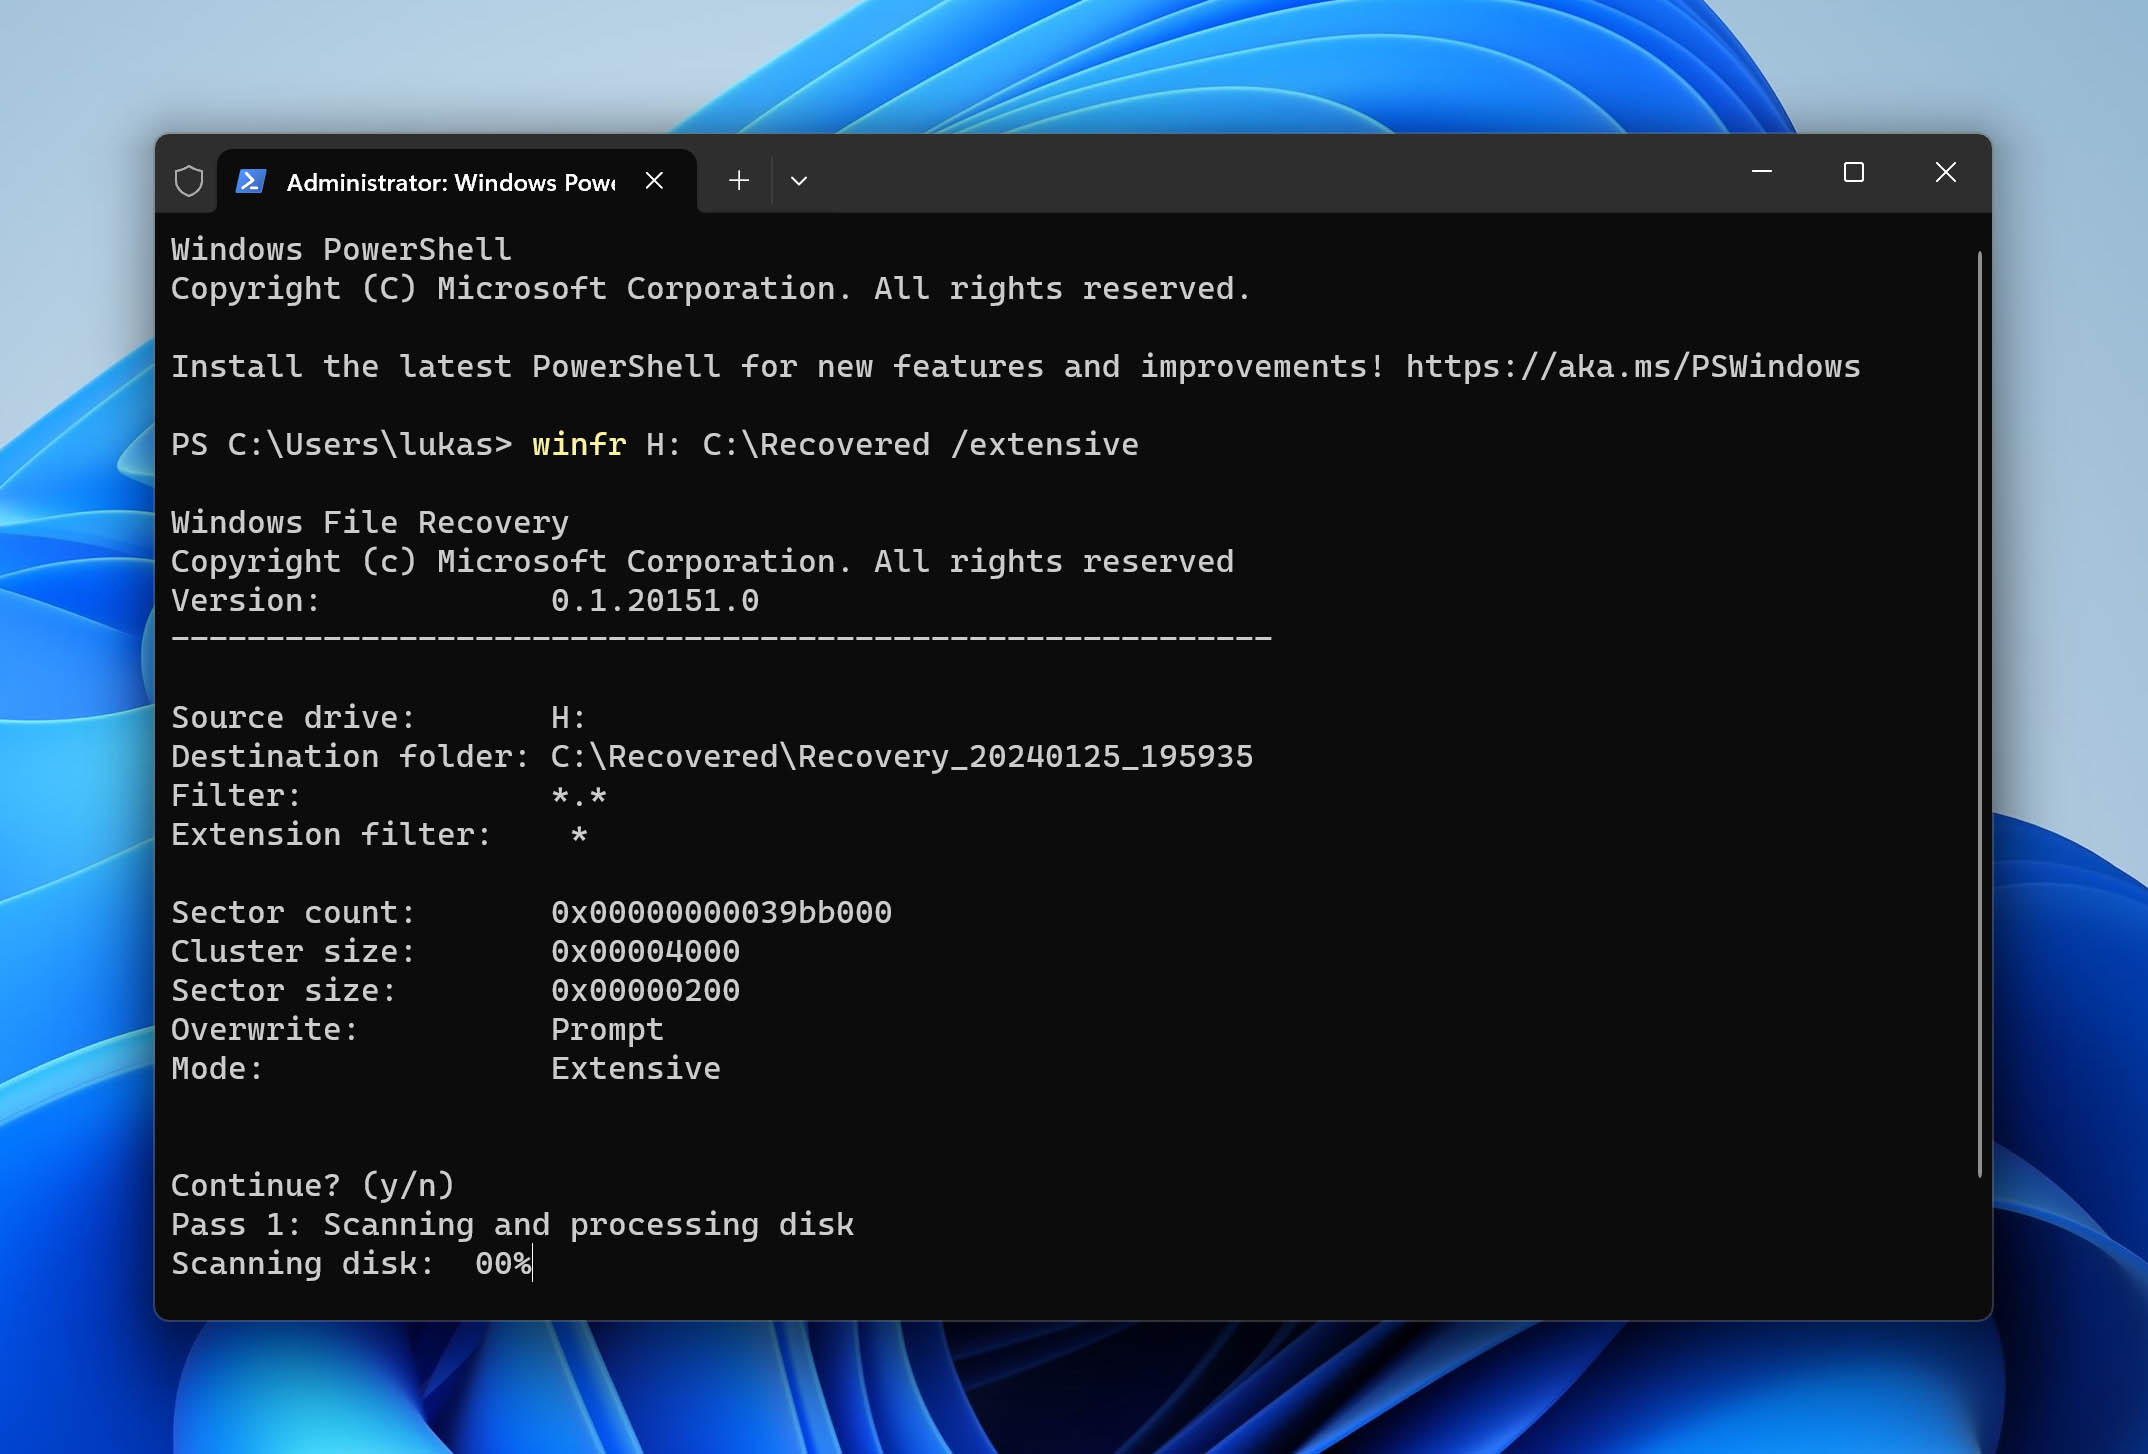
Windows File Recovery supports two main modes of operation (Regular and Extensive) as well as a number of advanced switches, and they are all explained well on its official support page.
Method 5: Pay for Professional Data Recovery
 Sometimes, the best solution is to let professionals recover your files for you. This is especially true when dealing with physical damage, which can hardly ever be successfully repaired at home without the necessary experience and equipment.
Professional data recovery services do charge quite a lot of money for what they do, but some files are so important that spending a few hundred or even a few thousand dollars beats losing them forever.
How Flash Drives Become Corrupted
Understanding how flash drives can become corrupted can help you maintain their reliability and avoid having to read data recovery tutorials in the future:
- Improper ejection is the most common cause of flash drive corruption, which is why most operating systems urge their users to “eject” a drive before removal. A failure to do so can lead to interrupted file transfers and partition errors.
- Flash drives rely on NAND flash memory chips to retain data even when disconnected from a computer. Unfortunately, NAND memory cells have a finite number of write and erase cycles they can endure before corruption occurs. That’s why it’s a good idea to not keep using the same old USB flash drive for as long as possible. Instead, we recommend you get a new flash drive once in a few years and use the old one for something unimportant.
- And the last way that a flash drive can lose its files is through simple user error. Accidentally deleting the file on a pen drive, or when selecting what drives to format picking the wrong drive. It happens to everyone at some point, but there are still ways to get those files back.
Conclusion
A corrupted USB flash drive is not the end of the world, but it can feel that way. With the guidance and tools provided, there’s a strong possibility of successfully restoring a corrupted USB drive. All of the tools here, like Disk Drill, are free to download, so give them a try. Best of luck.


FAQ
To open files on a corrupted USB drive, you can do two things:
- Fix the corruption using CHKDSK in Windows or Disk Utility in macOS.
Recover the files you want to open using USB recovery tool like Disk Drill. - Regardless of which of these two options you choose, don’t format the USB drive because that would erase all files stored on it.
Yes, it’s usually possible to fix a corrupted USB flash drive without losing any data. In fact, you don’t even need to download any special software because you already have a USB repair utility on your computer:
- Launch Command Prompt or Windows Terminal as administrator.
- Enter the following command: chkdsk X: /f (replace X with the letter assigned to the corrupted drive).
- Hit Enter and wait for the CHKDSK utility to finish scanning and, hopefully, repairing your USB drive.
If you have a flash drive that needs to be formatted, and you want to recover important data from it, you should avoid formatting and, instead, use a third-party data recovery software application like Disk Drill:
- Download and install Disk Drill.
- Launch Disk Drill and scan the flash drive that needs to be formatted with it.
- Analyze the scan results and select all lost files that you want to retrieve.
- Click Recover.
- Pick a suitable recovery destination.
Sometimes, files disappear from a flash drive because their attributes change. You can fix problematic attributes and regain access to your files by entering the following command in Command Prompt as administrator:
ATTRIB -H -R -S /S /D X:*.*
(replace X with the letter assigned to your flash drive).
To recover corrupted USB files:
- Connect the corrupted flash drive to your computer.
- Download, install, and launch Disk Drill.
- Select the drive and click Search for lost data.
- Choose the files you want to recover.
- Click the Recover button and select a safe recovery destination.