


Is Windows constantly displaying errors when you try to access your data? Or perhaps your hard drive isn’t appearing in File Explorer because it has turned RAW.
We’ll provide you with the tools and processes necessary to recover your data and restore the hard drive to working condition.
Can You Fix a Corrupted Hard Drive Yourself?
Yes. Based on our tests and the cases we reviewed, many corrupted hard drives can be fixed at home. In some cases, the “corruption” is not even caused by the drive itself.
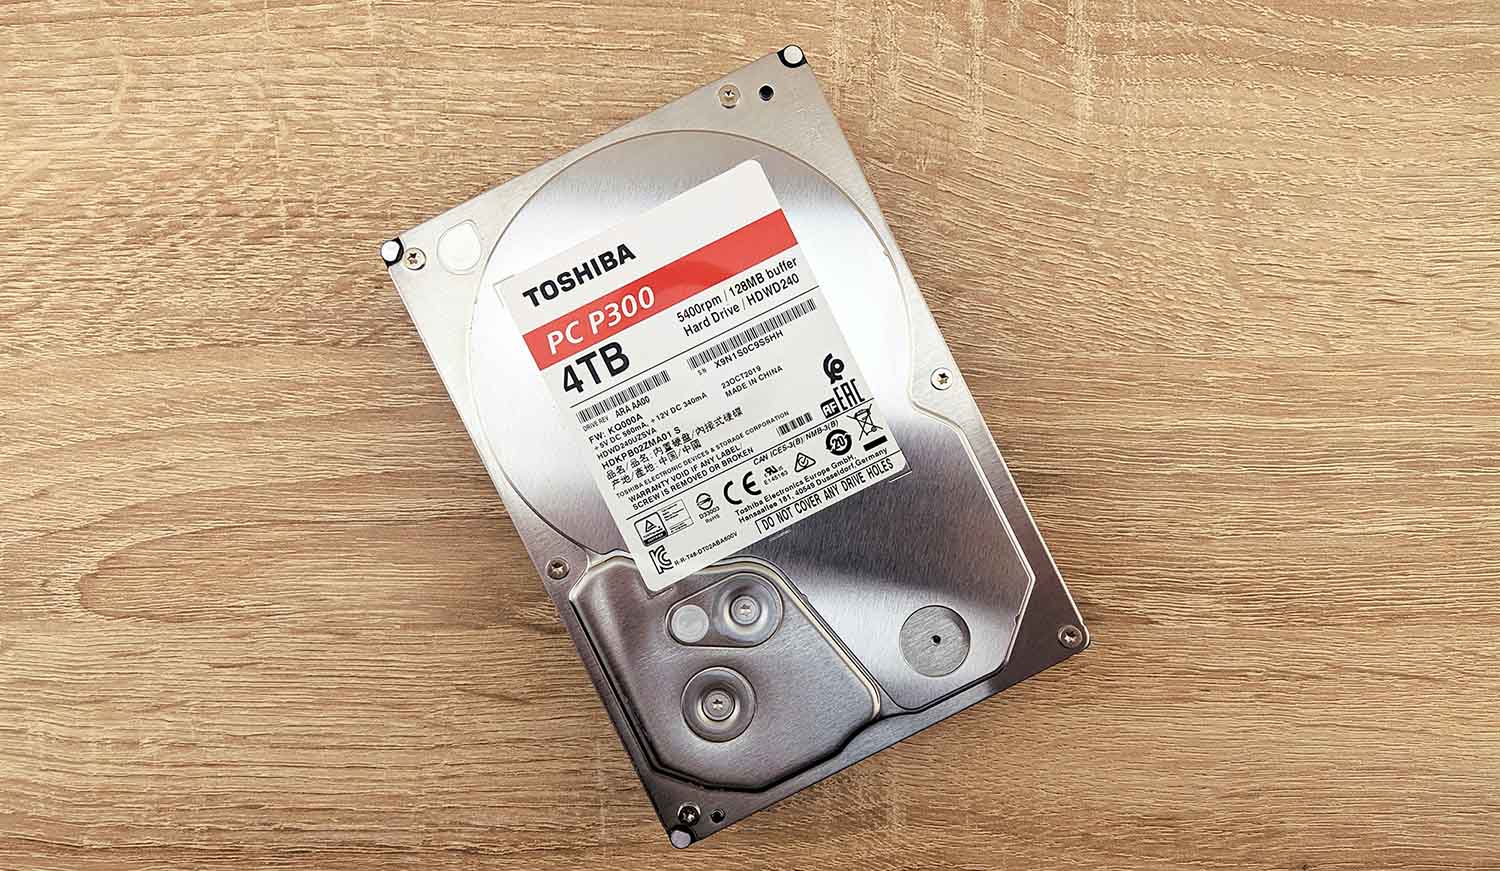
The easiest way to tell whether DIY repair is still an option is to check both Disk Management and the drive’s S.M.A.R.T. status. Right-click Start, open Disk Management, and locate the corrupted drive. If it appears there and shows the correct capacity, software-based recovery may still be possible.
But before we get to the actual fixes, we should warn you that in any instance where your drive has suffered data loss (this includes existing data that has become inaccessible), recovering your data is the first priority. Why? Because any action taken on the drive, including fixes, has a risk of making the data permanently unrecoverable. So, if you value the data on the drive, recover it first and then fix the drive.
Everything in this guide applies to Windows 11 and Windows 10. If you are dealing with a similar issue on a Mac, we have a separate guide on fixing corrupted hard drives on Macs.
❗️ Outside of connection issues, corrupted drives can fail for many different reasons. Here are some of the scenarios we see most often, along with our recommendation for what to do in each case:
- The file or directory is corrupted and unreadable. Often displayed when trying to open, copy, or move specific files or folders due to file system corruption1, and is also presented as Error 13922. Recover the data first, then run CHKDSK to repair file system errors. If the affected files are on the system drive, use SFC and DISM to repair damaged Windows files.
- The partition has converted to RAW, and Windows wants to format. Another indication of file system corruption. Windows reads it as RAW because it cannot detect a working file system. Recover the data with data recovery software, then restore the partition with TestDisk or format the drive with a new, healthy file system.
- The drive appears as “Unknown, Not Initialized” with 0 bytes in Disk Management. This means Windows cannot read the drive’s reported capacity, usually due to a hardware or connection issue. Check the cable, port, or system first. If the drive is then detected correctly but still inaccessible, it may be partition table corruption3. Recover the data with a data recovery tool capable of reconstructing the layout or file-signature carving4, then initialize the disk, choose a partition style, and then format it.
- The drive is displaying CRC errors. Cyclic Redundancy Check (CRC) errors occur when data read from a drive doesn’t match what was expected. They can be triggered by faulty SATA/USB cables, ports, or enclosures, so you should start there. If they persist, it can indicate bad sectors or physical degradation of the drive. In this case, you should create a byte-to-byte image of the disk for later recovery, or consult a data recovery service.
- The message “The parameter is incorrect.” appears. The drive may appear in File Explorer with a drive letter, but any access attempts are blocked behind “The parameter is incorrect”, and CHKDSK may mislabel the drive as RAW. This is often a hardware or connection issue, but it can also be software-related. Confirm the connection is secure, and if the problem persists, repair the partition with TestDisk, or recover the data and format the drive.
- The disk is reporting the incorrect capacity. This could be the result of partition table corruption, or worse, physically damaged sectors or hardware failure. Backing up the drive and recovering the data should be done immediately. In cases where this is obviously linked to physical damage, reach out to a data recovery service.
The next section will guide you through backing up the drive and recovering its data.
Recover Data Before You Fix a Corrupted Hard Drive
As we already said, in any instance where your data is lost or deleted, your first step is to either recover the data or back it up to prevent further loss. Any attempts at fixing the drive can result in the data being lost permanently. Hard drive recovery software can recover or back up the data even if it’s deleted or inaccessible due to errors. Even if you suspect it was a physical issue and plan to consult a professional, it’s free to download the software, scan the drive, and see what it can pull up. We’ll demonstrate what recovery looks like with Disk Drill.
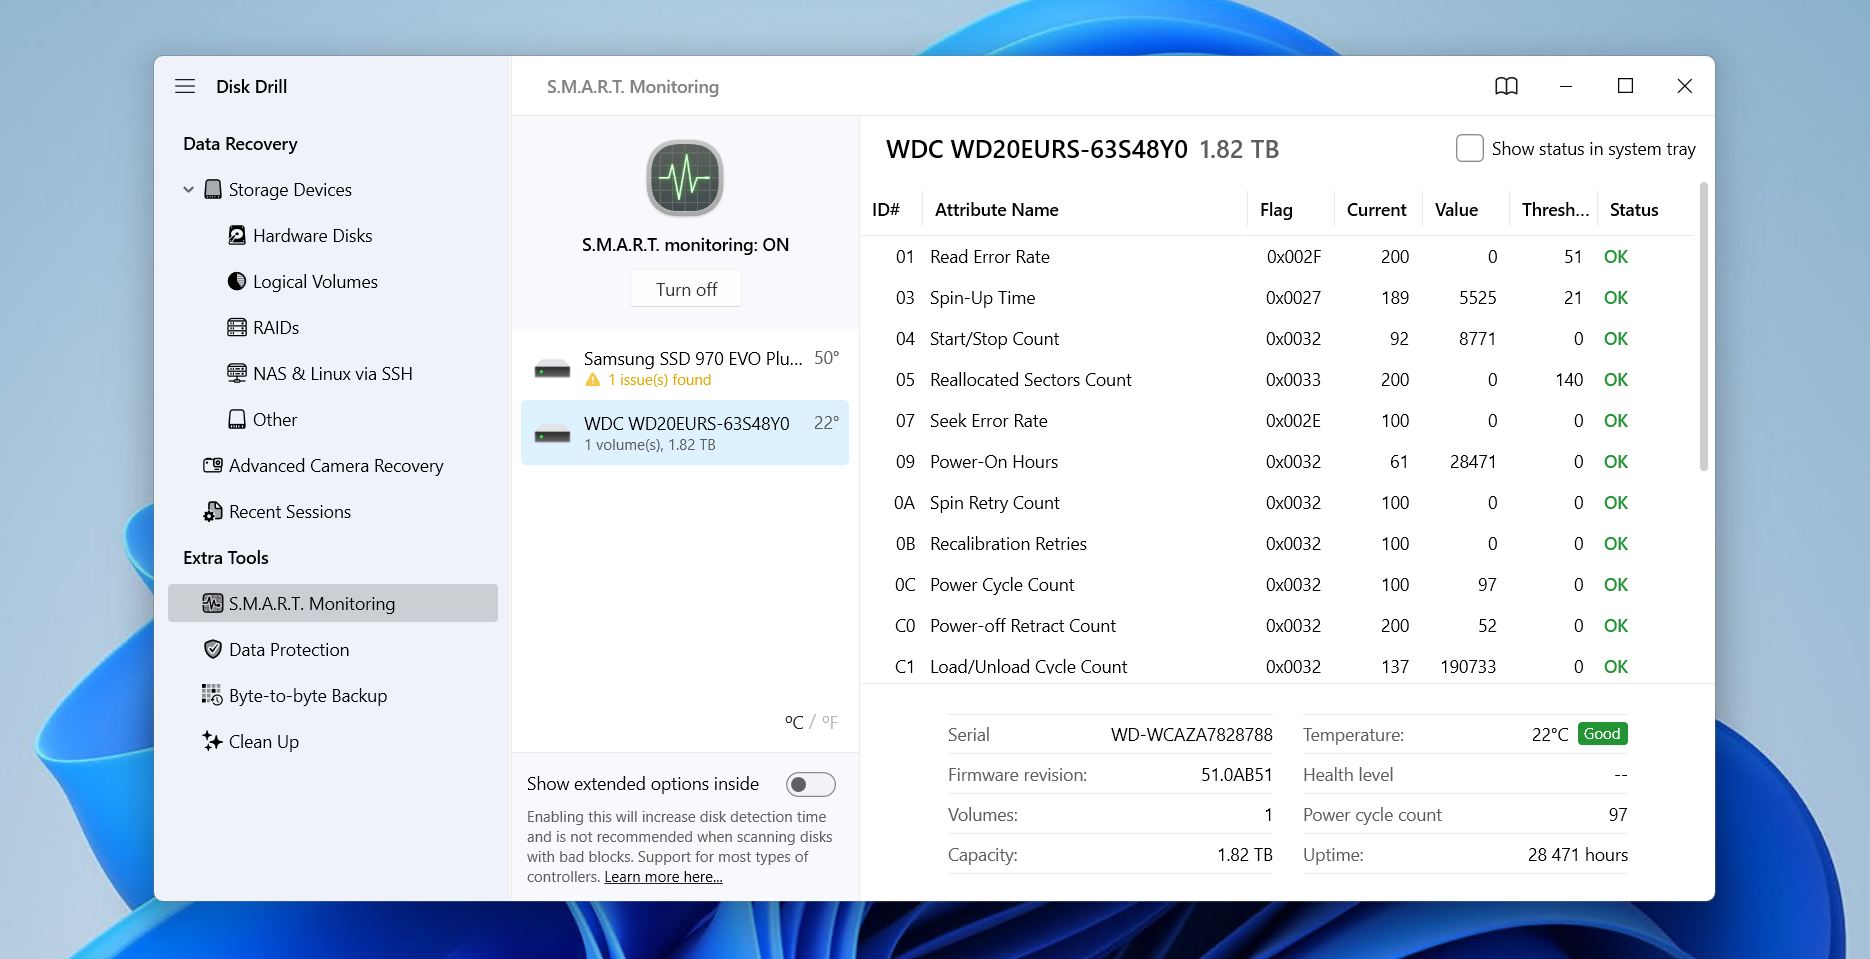
- Download, install, and open Disk Drill. If your system drive was corrupted, you’ll need to work from another PC, connecting the corrupted system drive to that system.
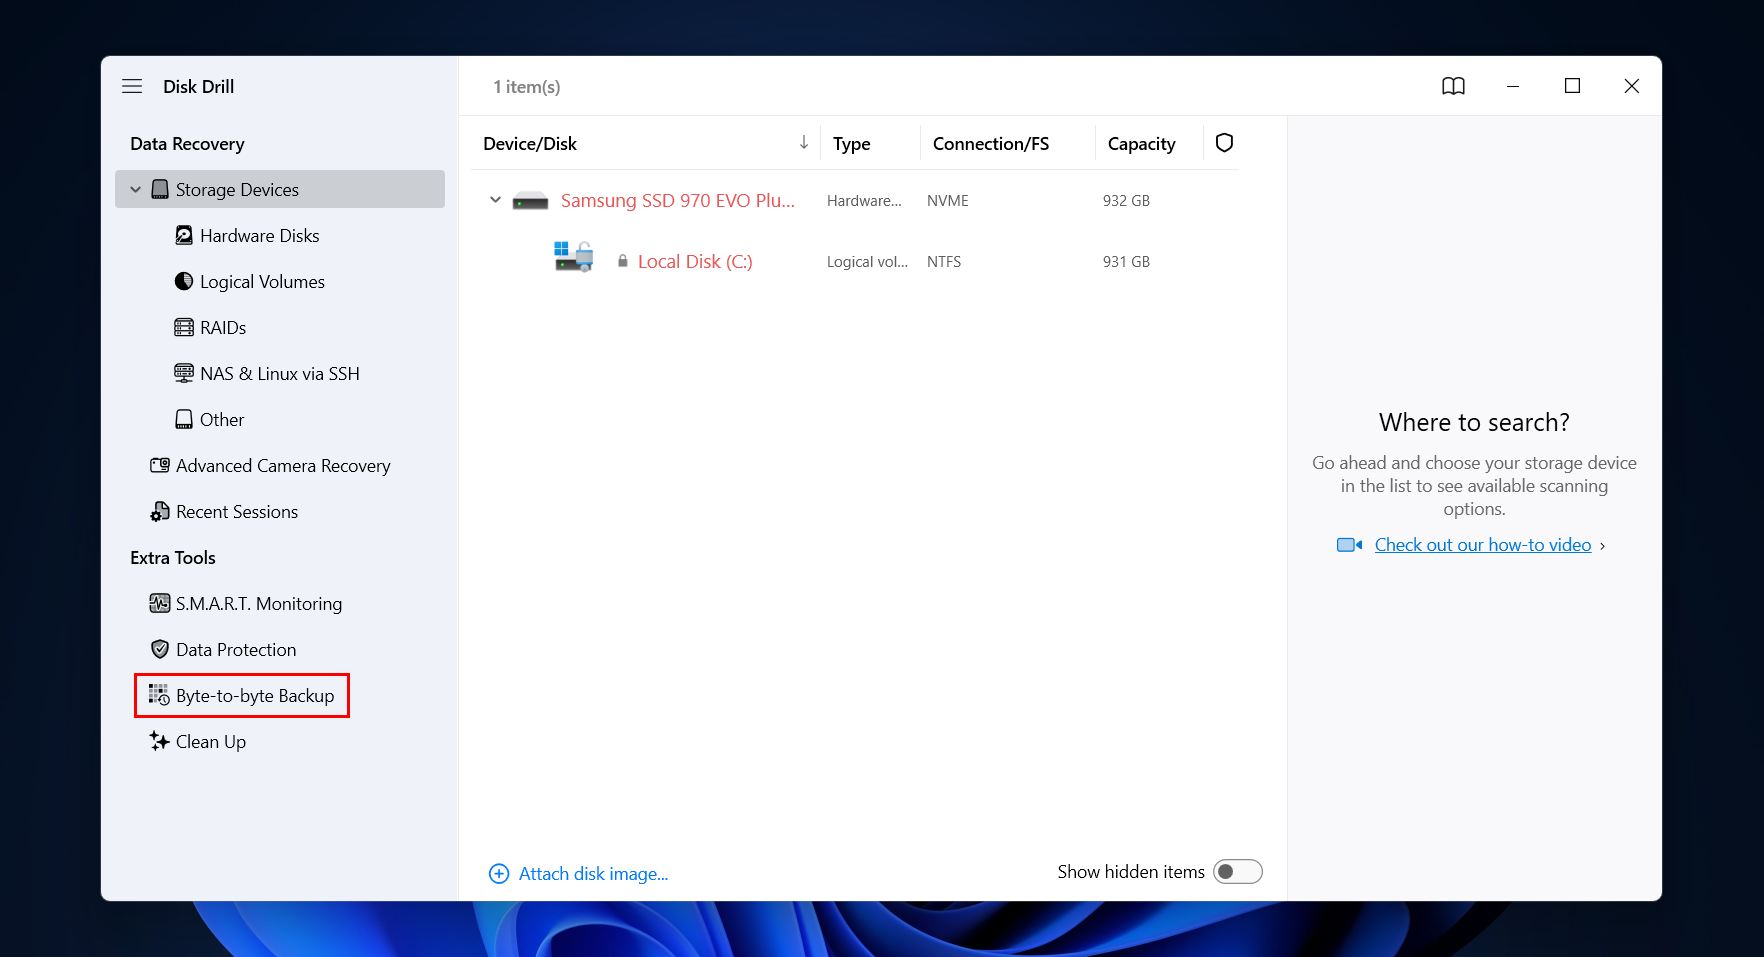
- Go to the Byte-to-byte Backup module in the left pane. Note that creating a backup is highly recommended, but not absolutely essential. It can be skipped if you do not have enough free space to create a backup image, and you can scan the disk directly instead.
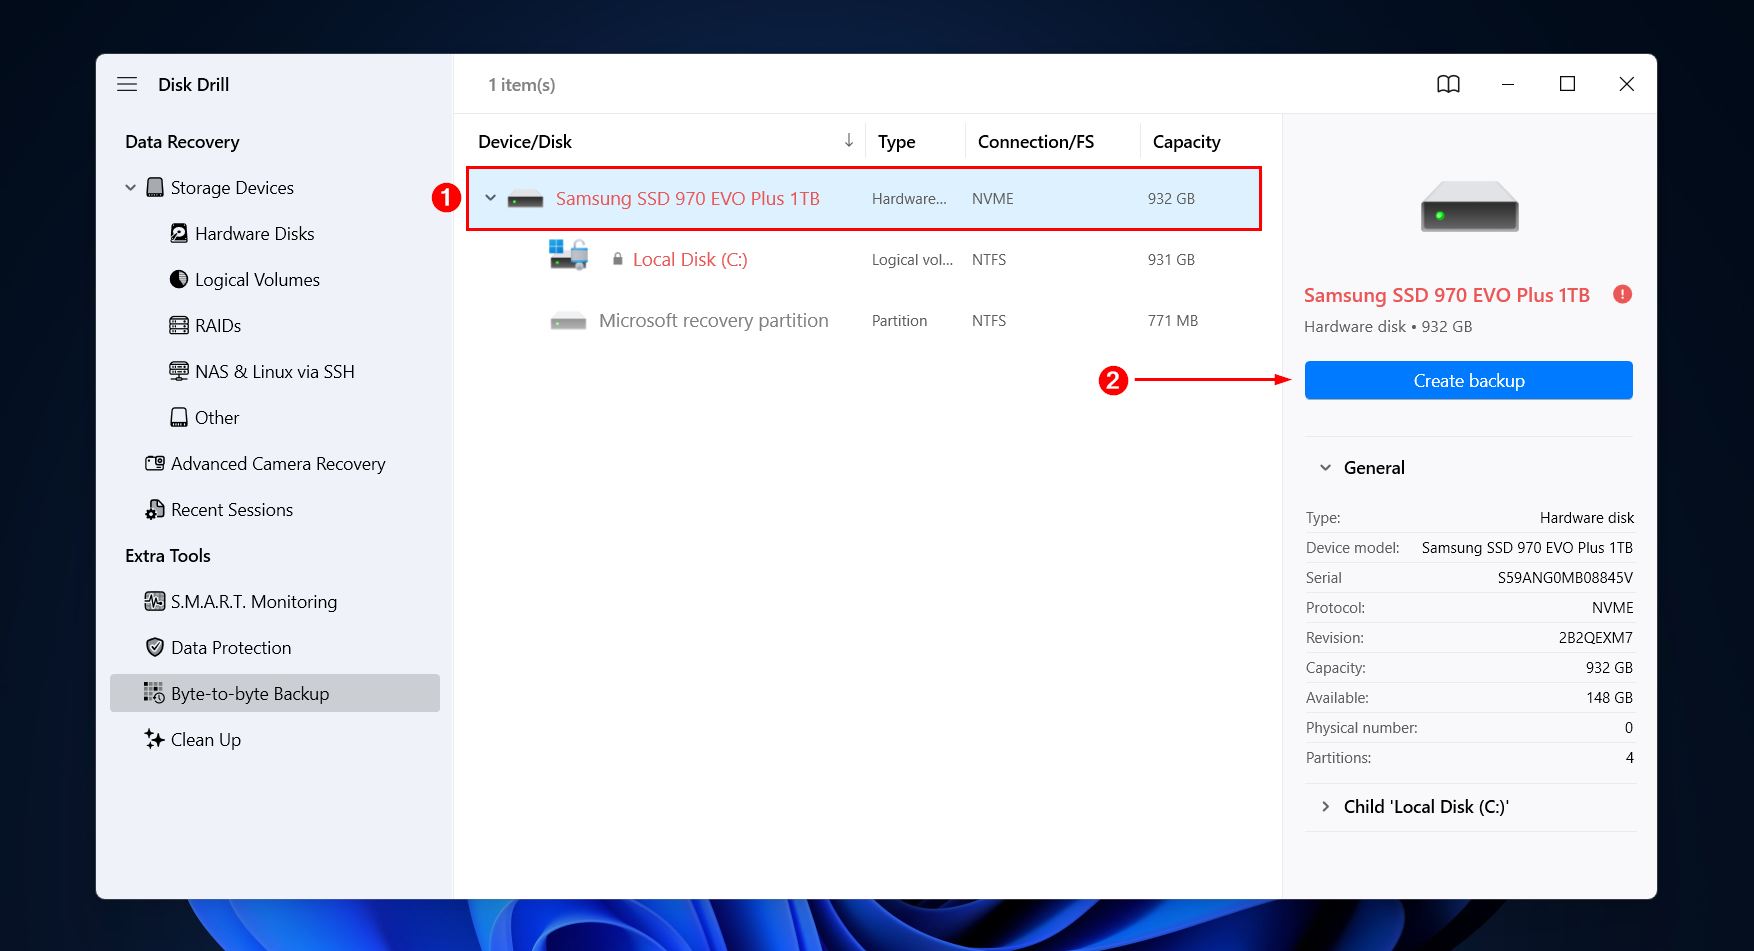
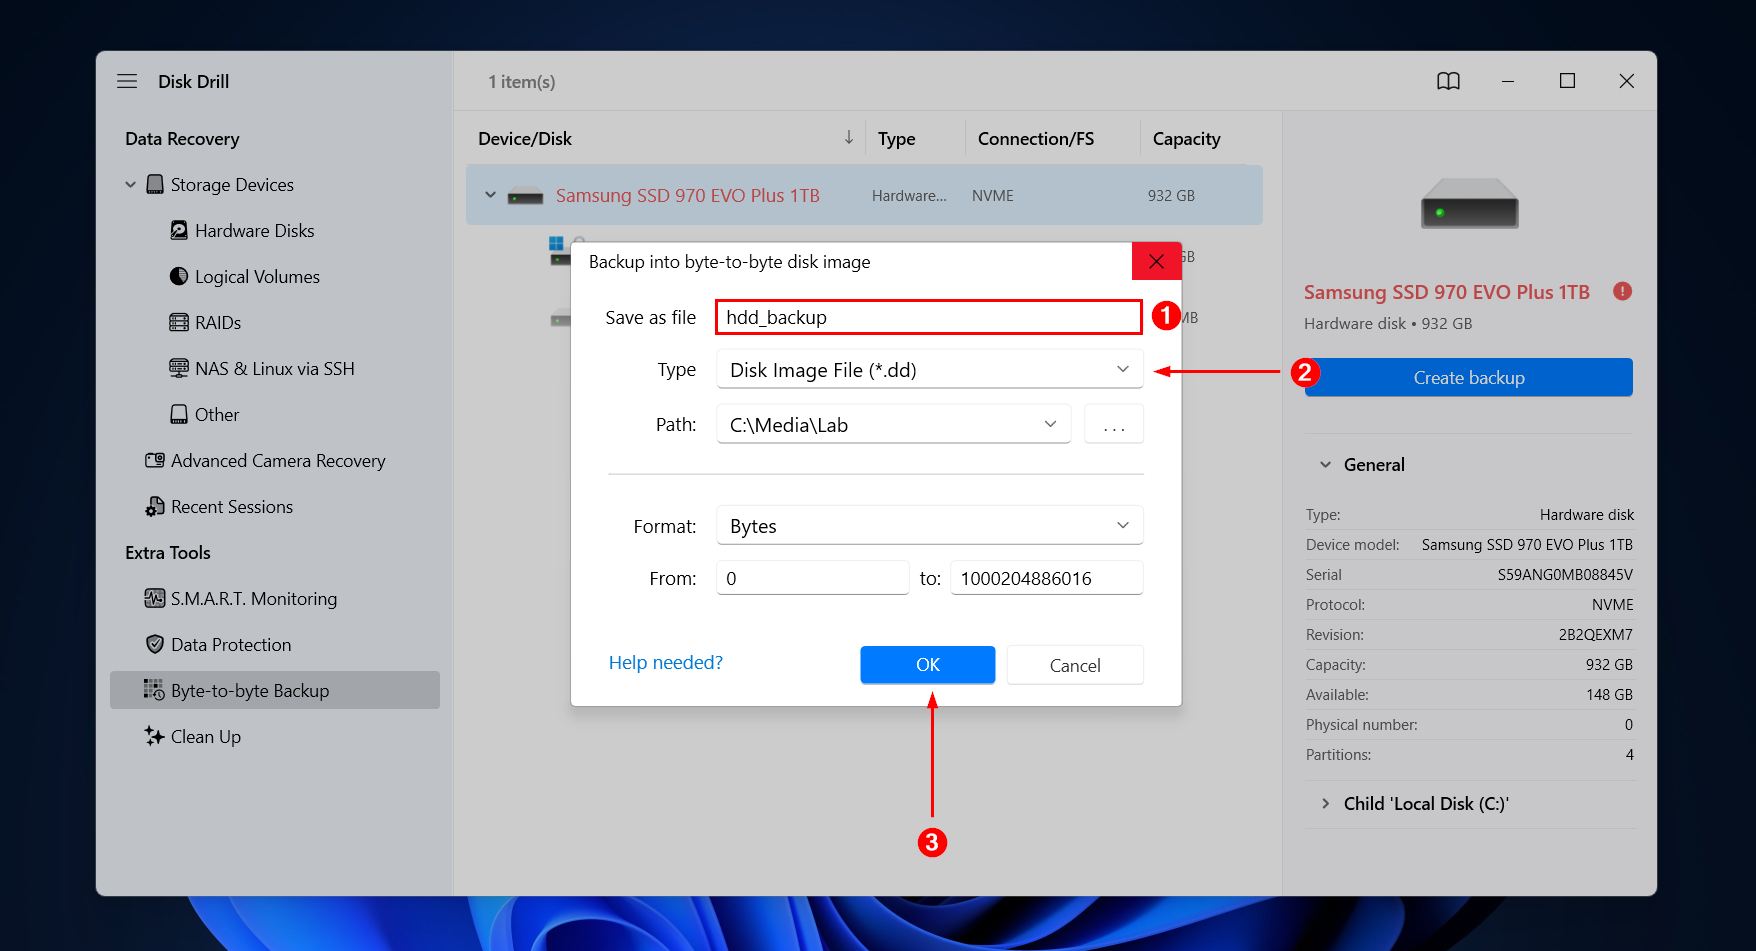
- Select the corrupted hard drive, then click Create backup.
- Give the backup a name, choose where it will be stored, then click OK.
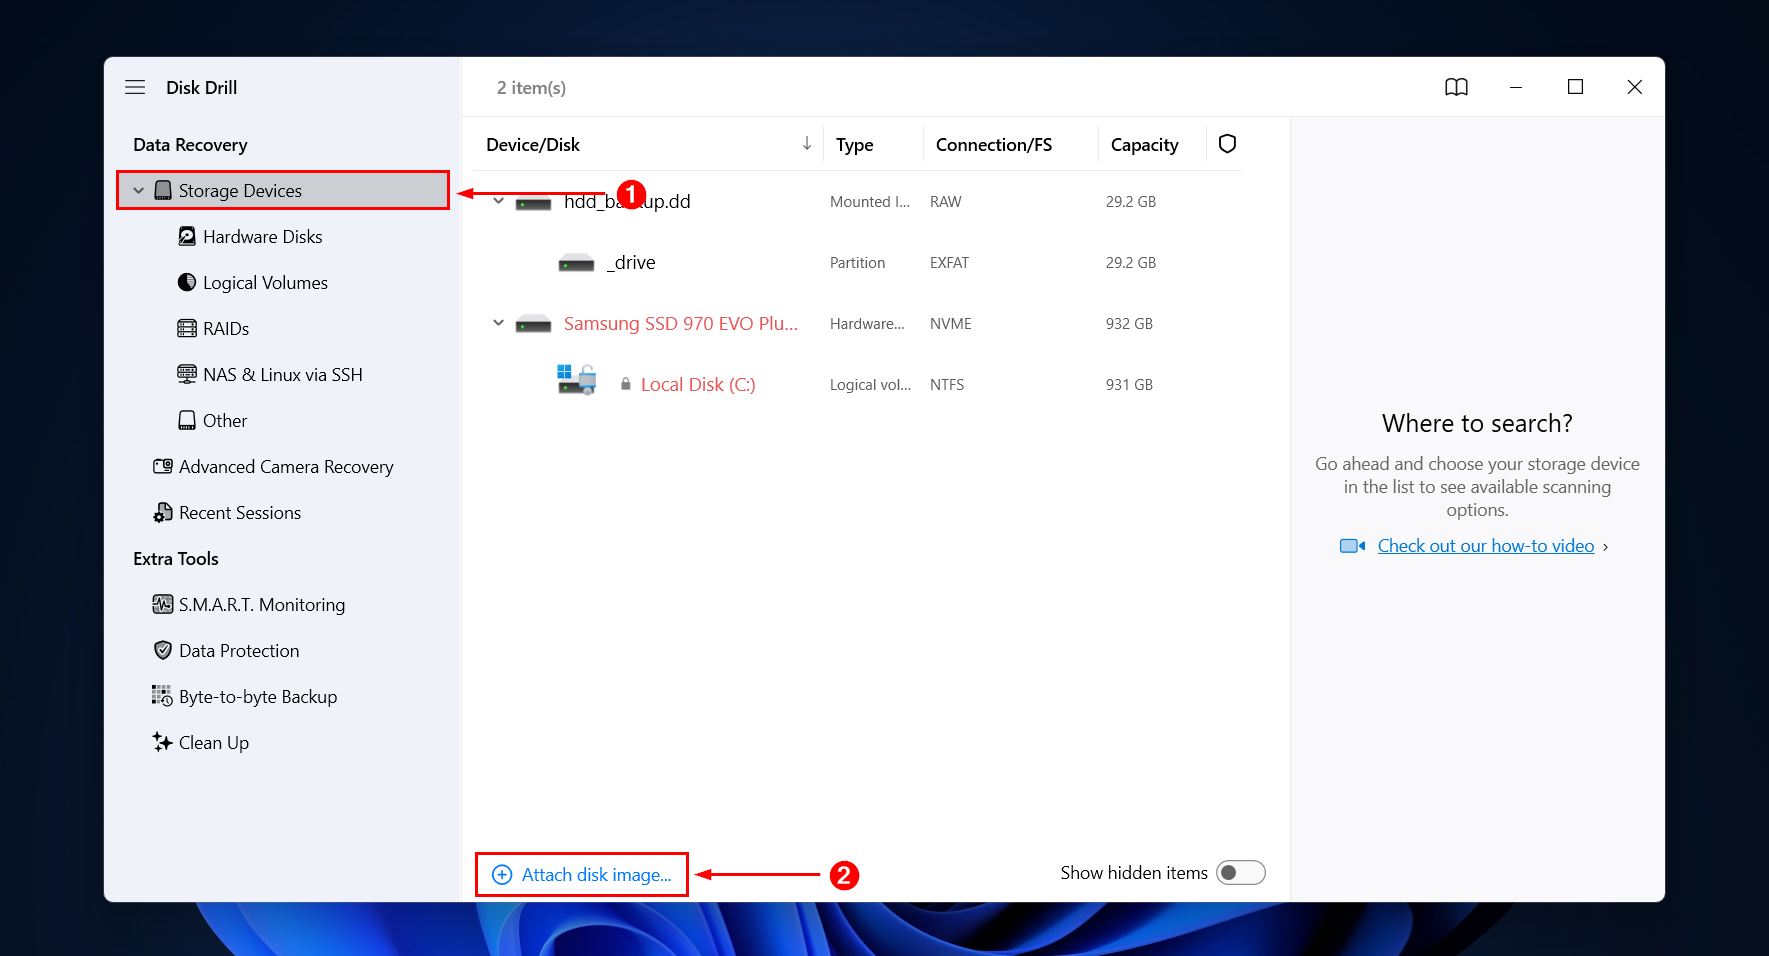
- Return to the Storage Devices and add the disk image using the Attach disk image option.
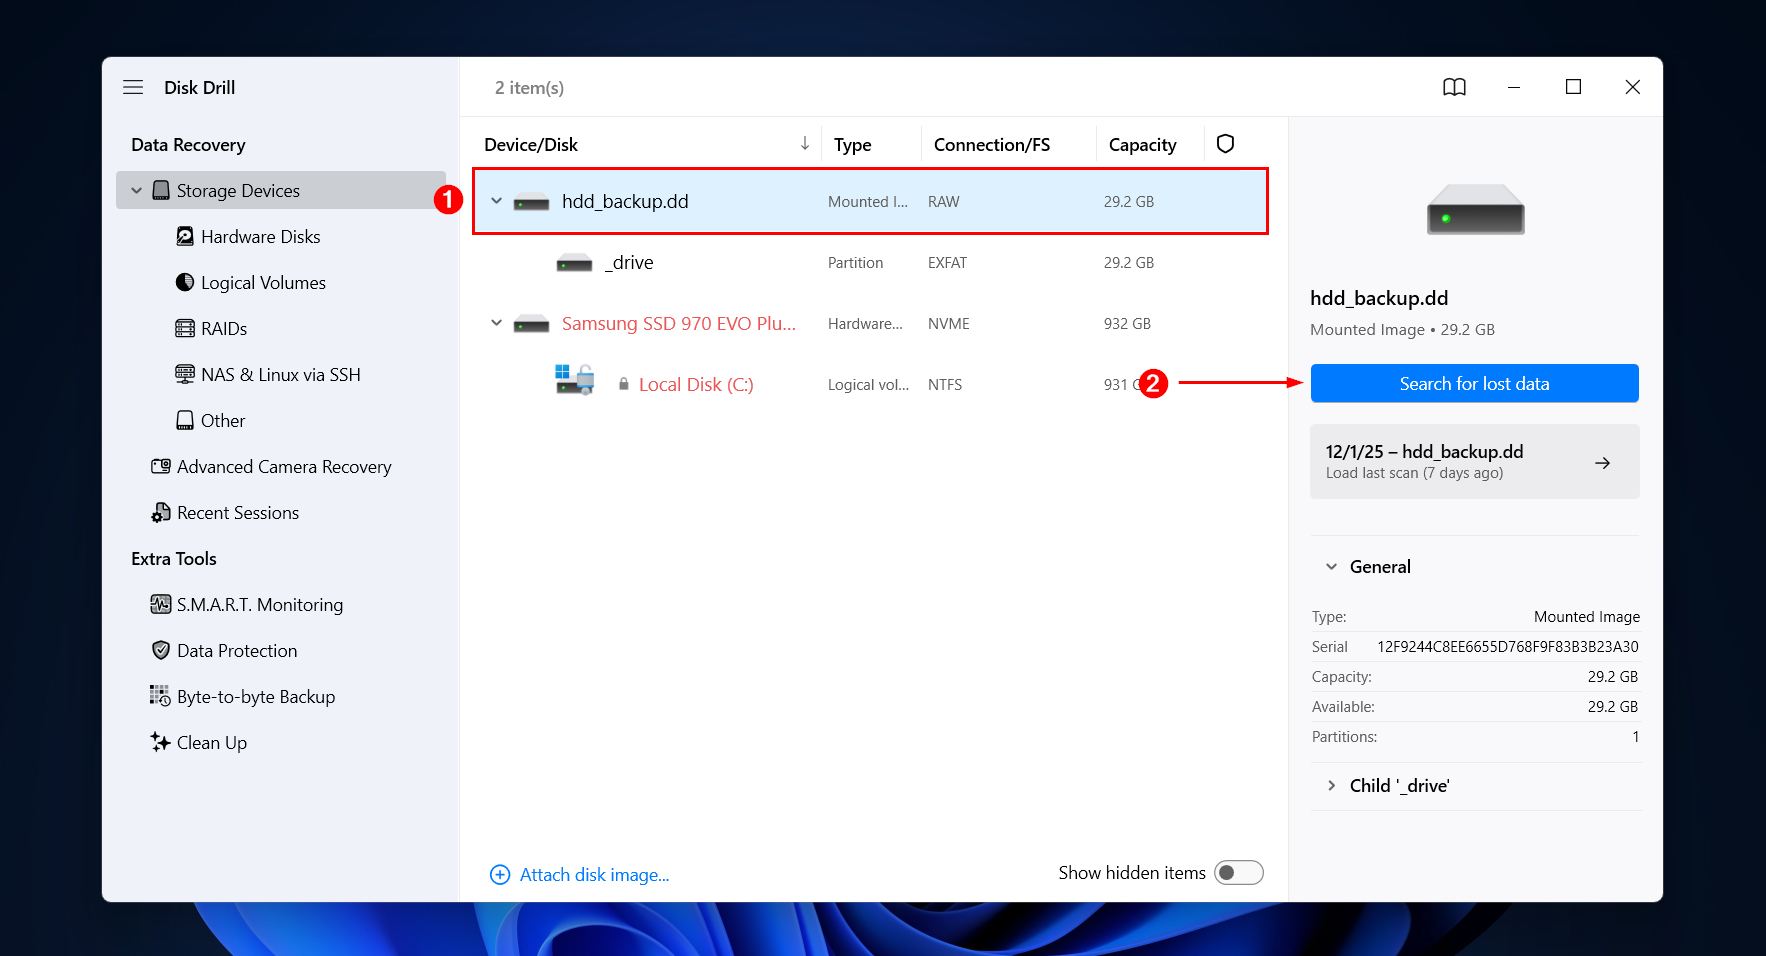
- Select the backup image (or drive, if you opted to skip the backup) and click Search for lost data.
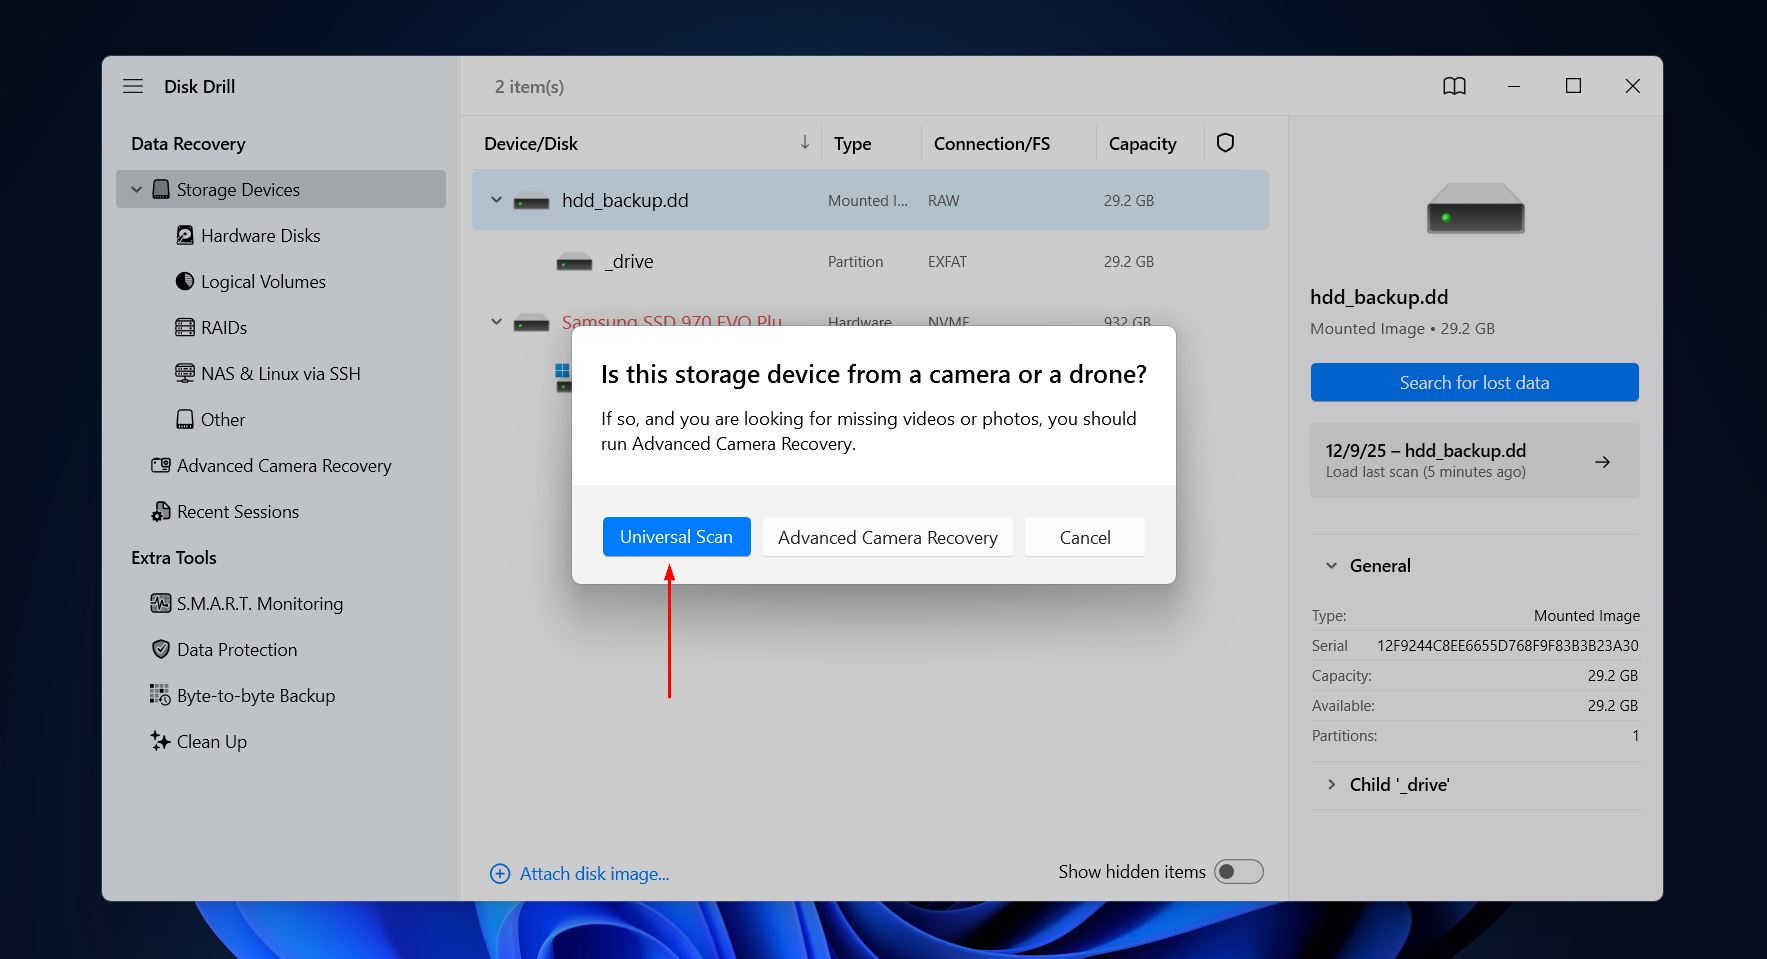
- Click Universal Scan. Advanced Camera Recovery is reserved for the recovery of fragmented videos from cameras and drones.
- Click Review found items. Alternatively, if you simply want to recover everything on the corrupted HDD, click Recover all.
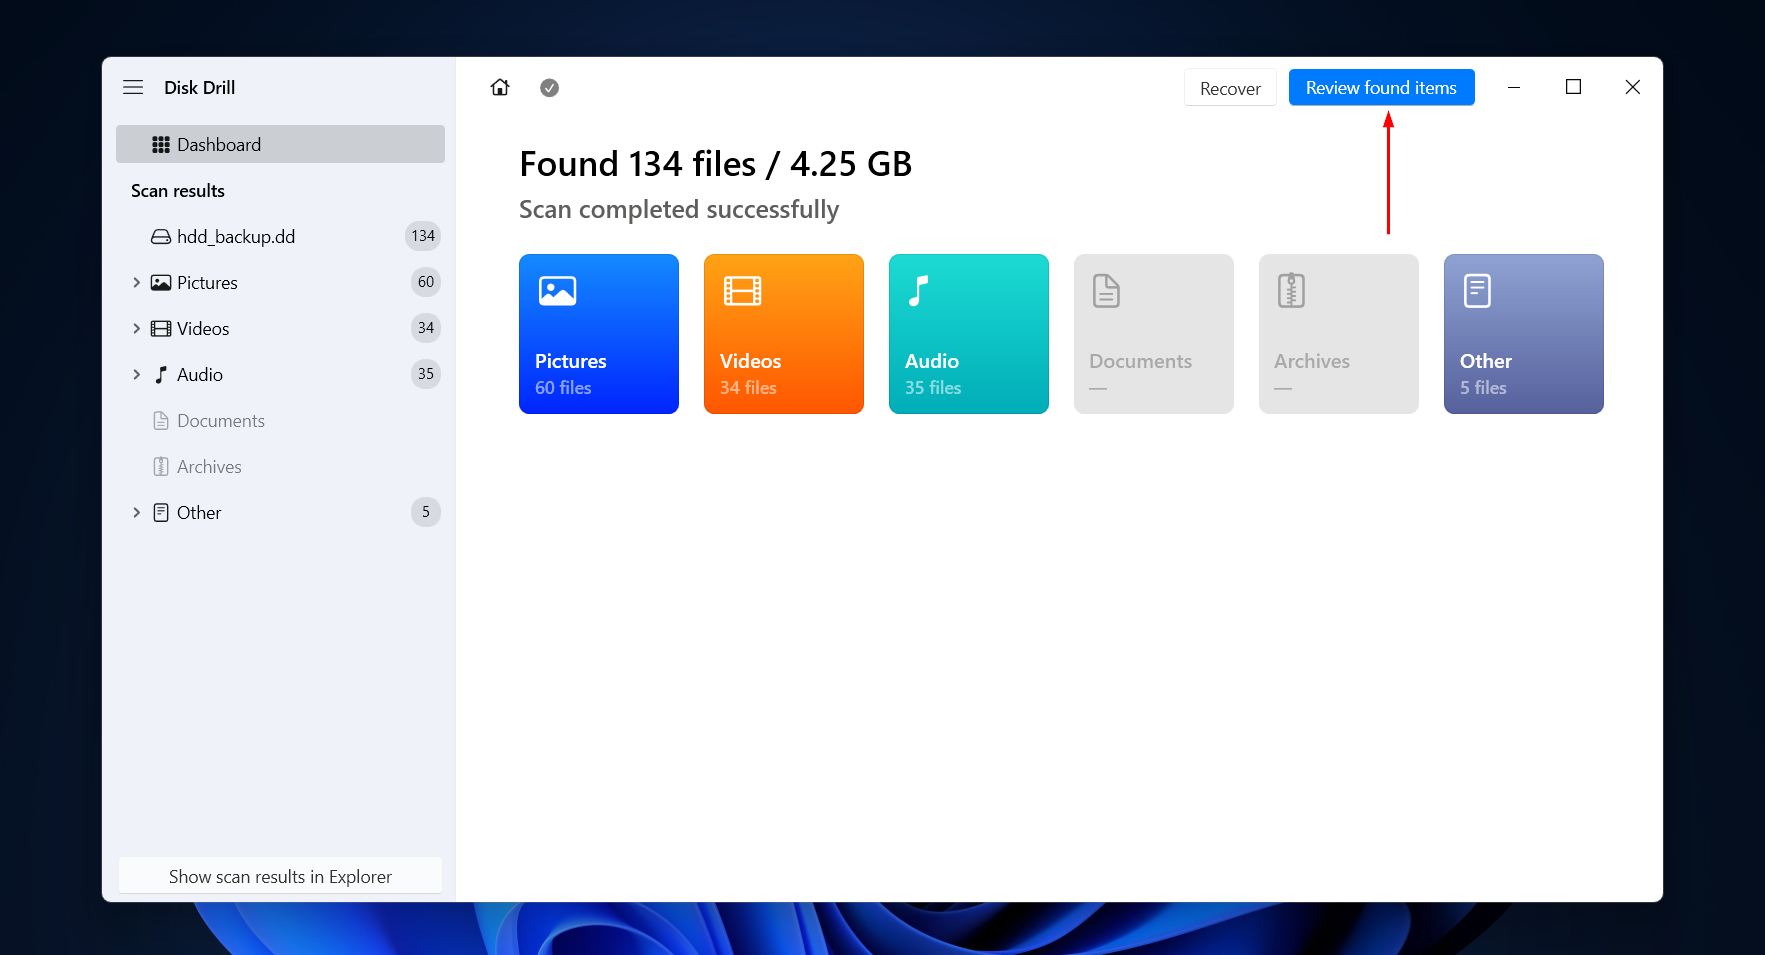
- Preview and select the data you wish to recover. Data that can be previewed can be recovered. If the results are too cumbersome to browse, refine them using the filter options. When you’re ready, click Recover.
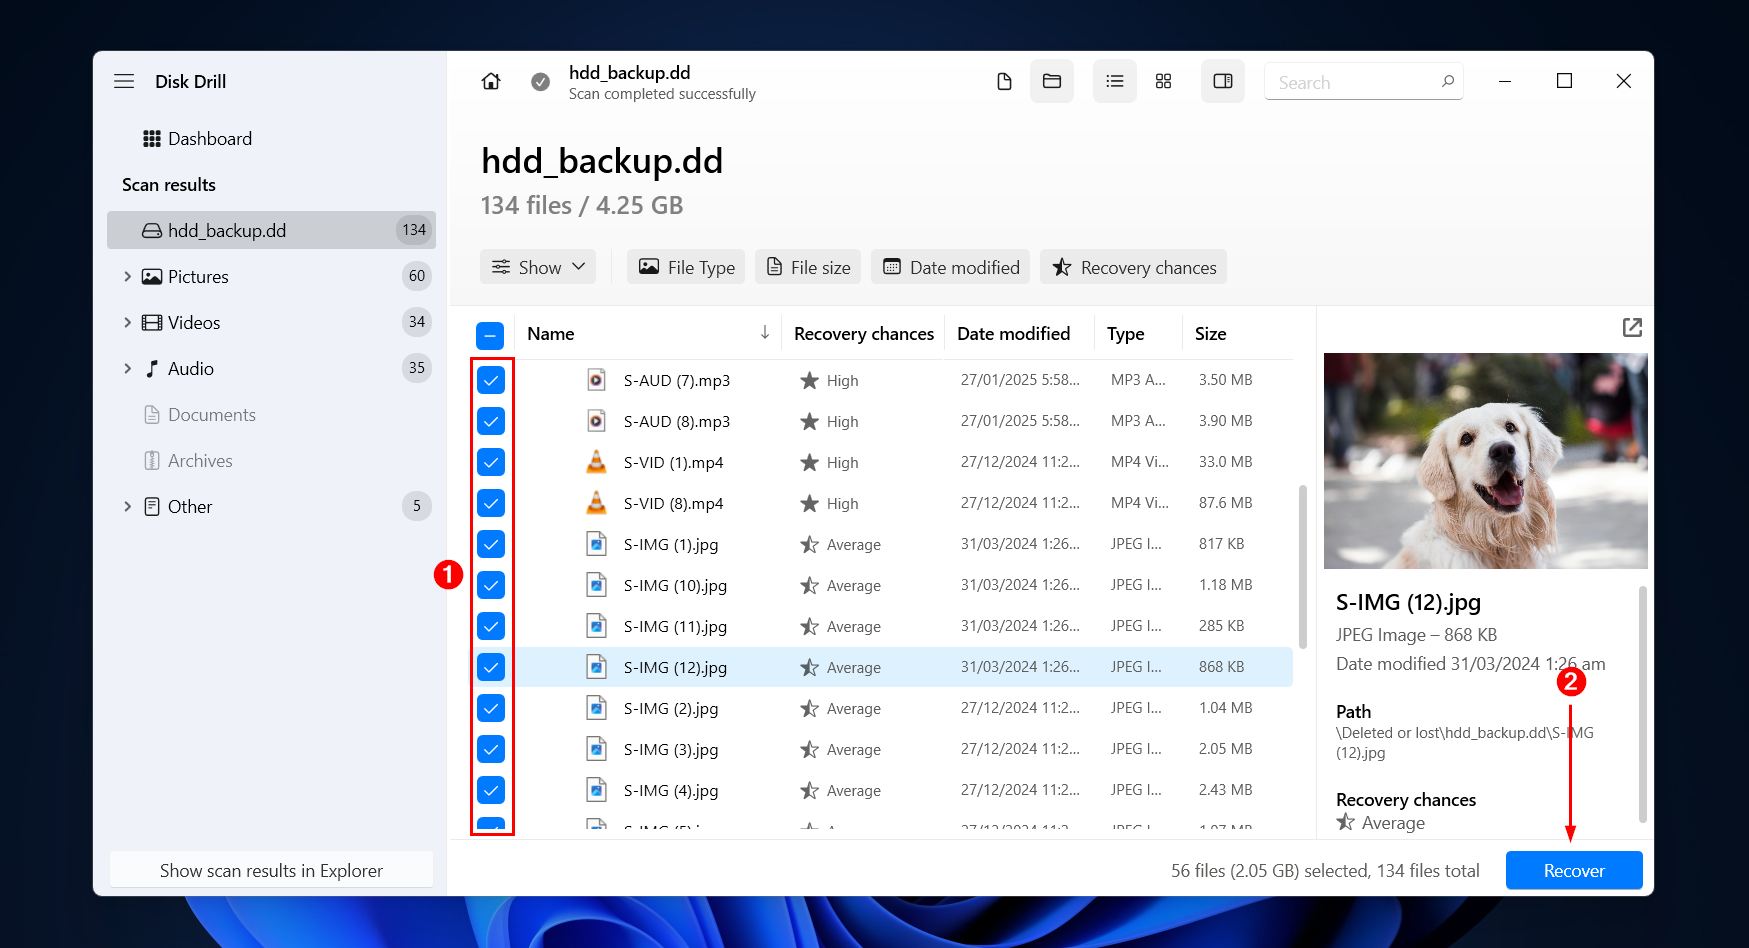
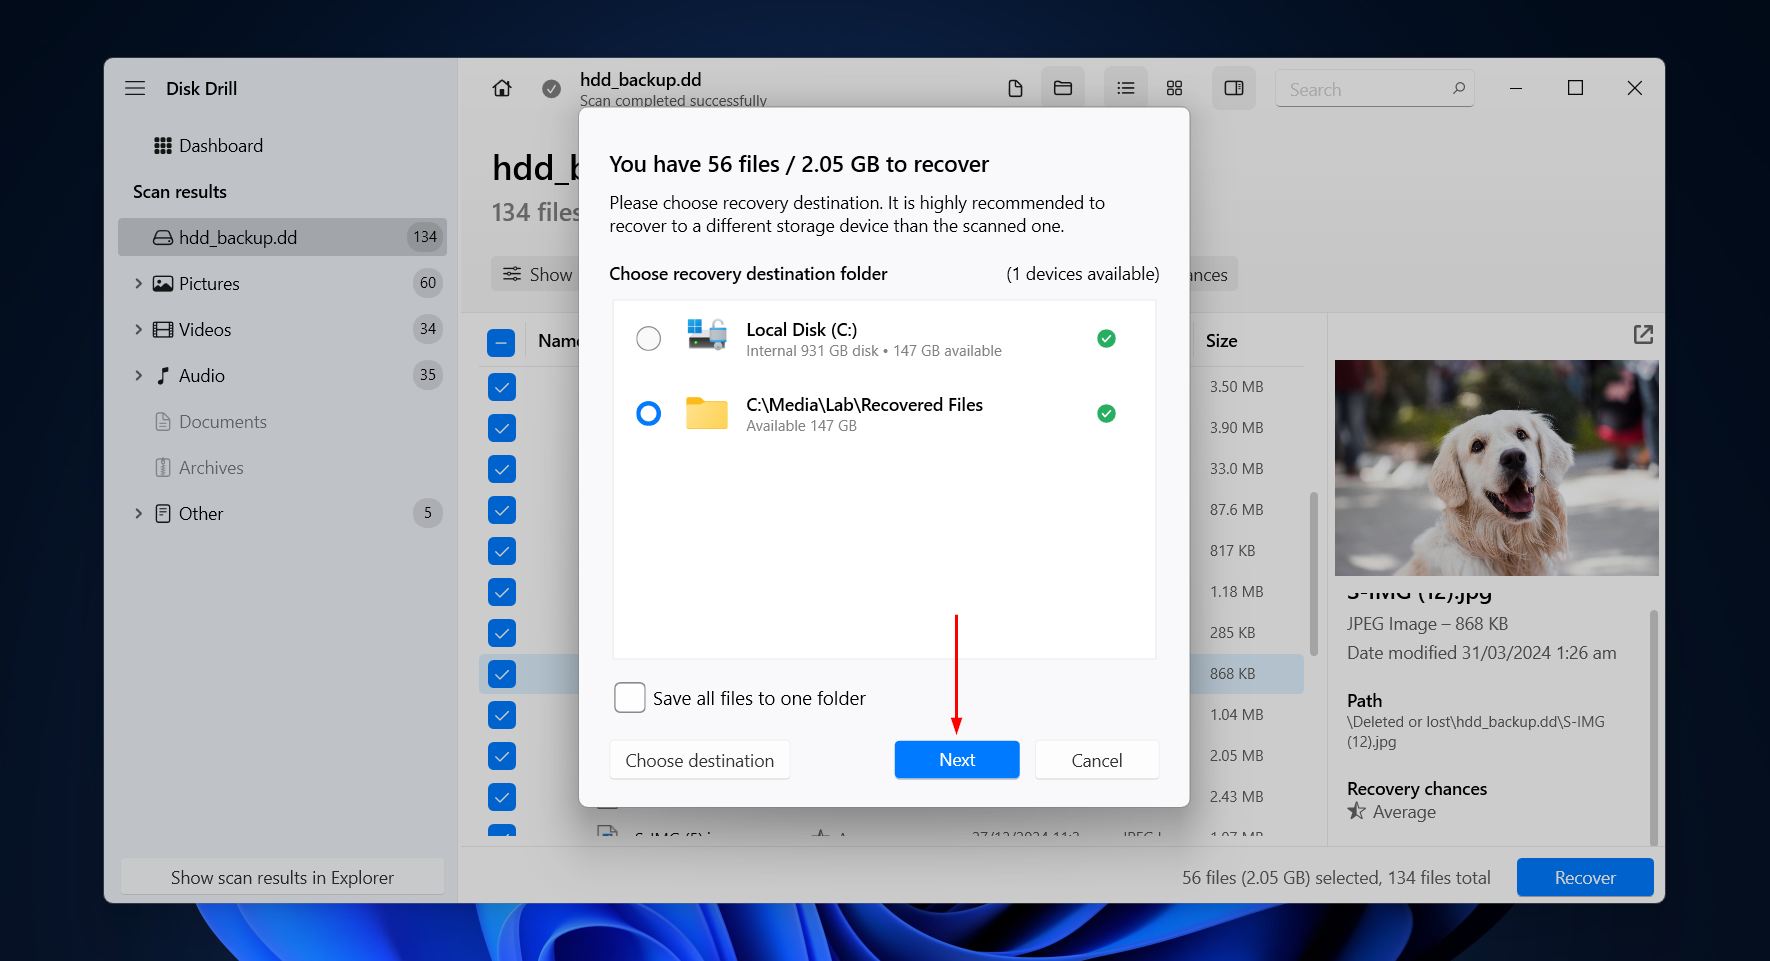
- Choose where the recovered data will be stored and click Next to recover the data. The free version of Disk Drill allows up to 100 MB of free recovery, which is usually enough for critical documents, photos, and videos. It may not be enough for an entire drive’s worth of data, but it is useful to scan and see what data is recoverable before making any investment.

There are other recovery options out there, but we prefer Disk Drill for a few reasons. One huge benefit is that you can back up the drive and recover data from it all within the app. In addition to its support for corrupted hard drives, it can also recover data from drives that are crashed, formatted, or showing as RAW. Even if you don’t want to pay for the full version, you can still run unlimited scans and backups, preview recoverable data, and utilize its disk monitoring features (some of which can warn you about future corruption) all without paying a cent. Disk Drill is also frequently featured among the top data recovery solutions in recommendations and best-tool lists across various data recovery communities.
How to Fix a Corrupted Drive (3 Proven Methods)
Once your data is recovered, or at least backed up, you can proceed to address the issue without concern for data loss. Even if you end up contacting a recovery service, having a backup image on hand is beneficial in the event of unforeseen circumstances. We’re going to start out with some simple diagnostics to exclude external factors and physical damage, and then go through some proven repair options for how to fix a corrupted hard drive on Windows 11/10.
Method 1: Use CHKDSK to Fix Errors
CHKDSK is a Windows utility that runs in CMD that’s designed to scan and repair file system corruption. With the additional /r parameter we’ll be using, CHKDSK will also check every sector of the drive to locate bad sectors. It can attempt to repair soft bad sectors and mark bad sectors so they’re not used again. Due to the nature of CHKDSK, however, it’s important you recover data before running it5.
Follow these steps to repair a corrupted hard disk with CHKDSK:
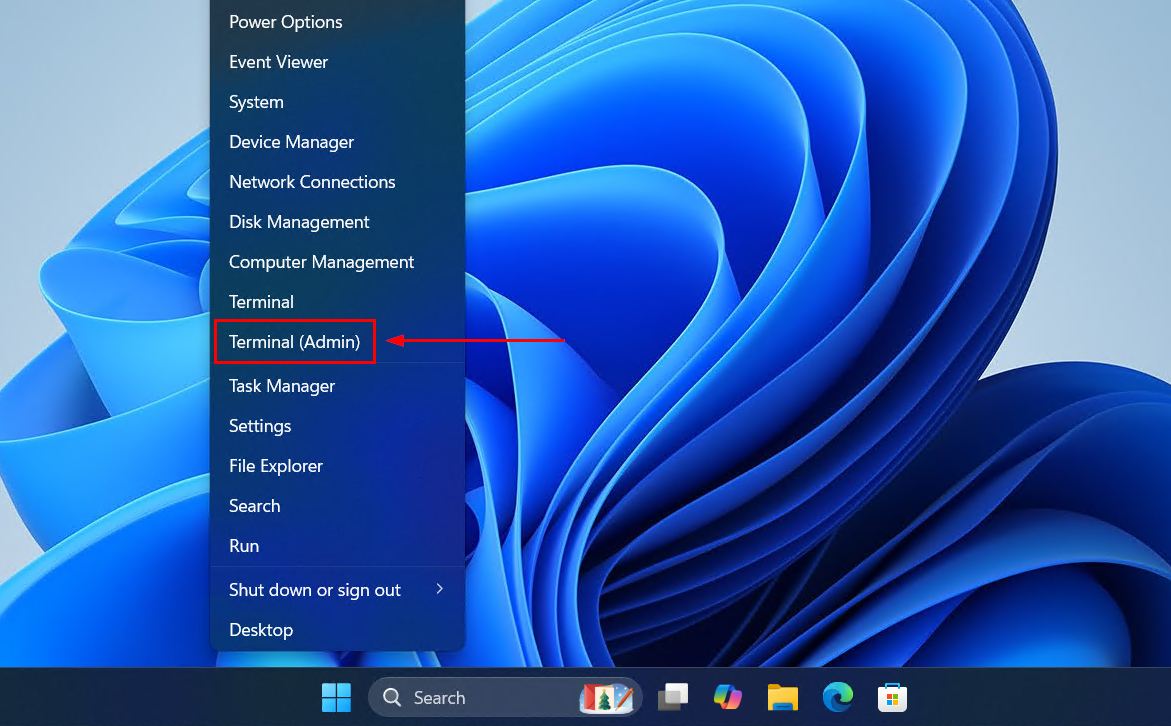
- Right-click Start and click Terminal (Admin).
- Type chkdsk *: /r. Replace * with your own drive letter. Press Enter.
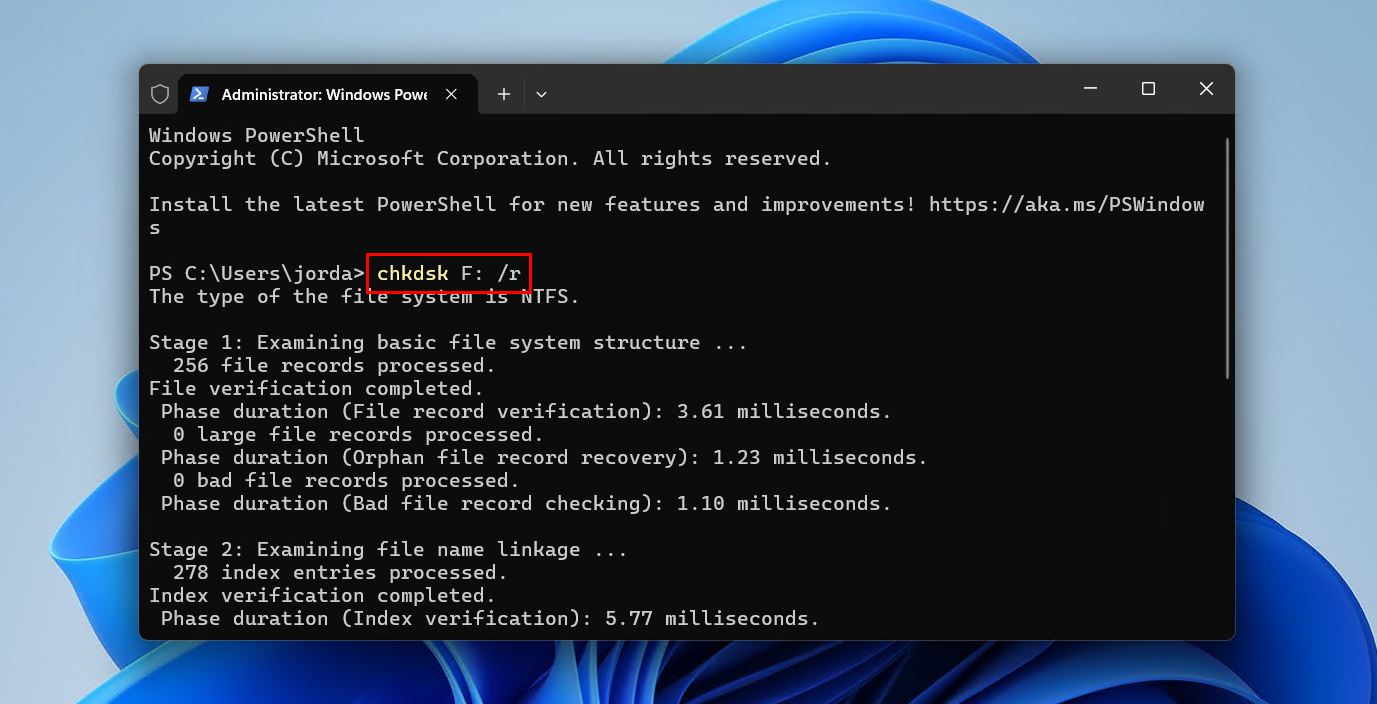
CHKDSK is good for relatively minor issues, but isn’t enough to restore the partition in place. For that, you’ll need something like TestDisk, which we look at next.
Method 2: Use TestDisk to Fix Drive Partition
TestDisk is a partition recovery tool, often considered a more effective alternative to CHKDSK – especially when the drive is showing as RAW, as CHKDSK doesn’t work on partitions without a file system. It’s able to restore the partition, data intact, by repairing the underlying damage that’s caused the partition to become lost or deleted.
Follow these steps to uncorrupt a hard drive with TestDisk:
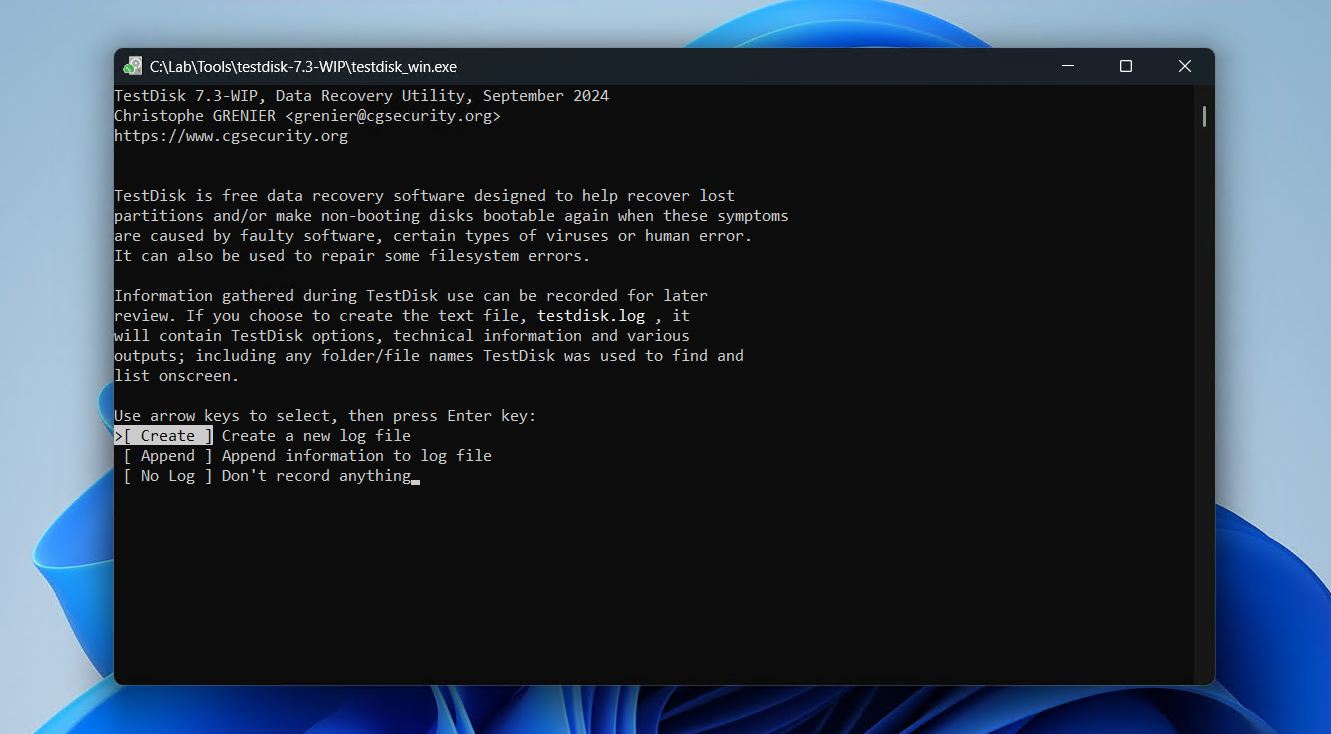
- Download and extract the contents of TestDisk. Open testdisk_win.exe.
- Press Enter to create a new log file.
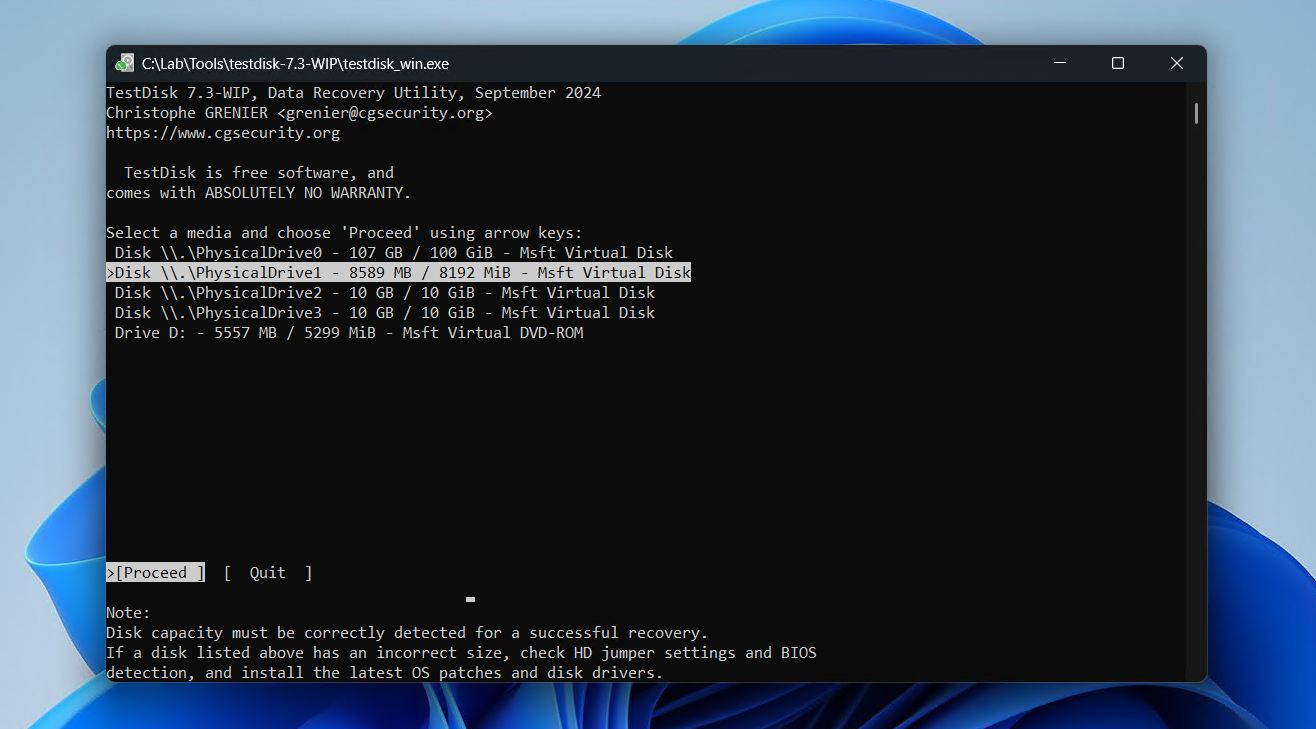
- Highlight the corrupted disk, then press Enter.
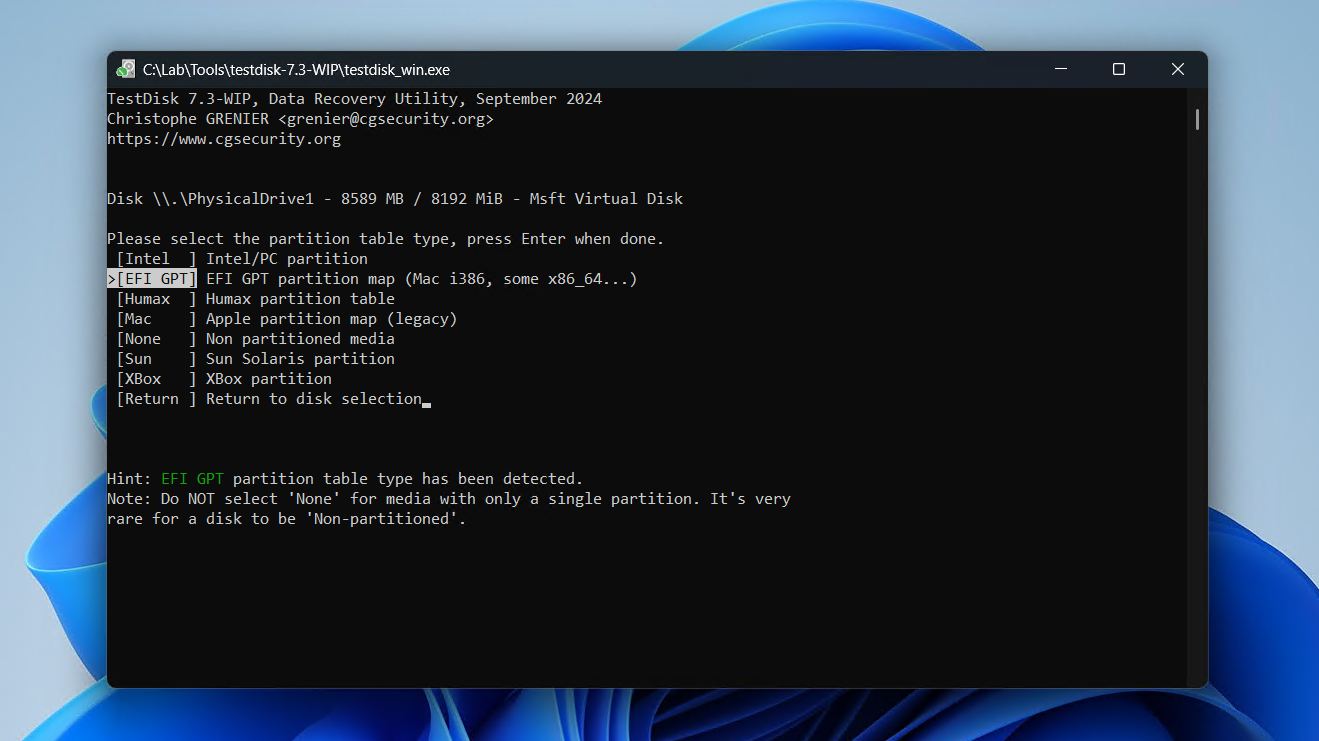
- Choose your partition table type, then press Enter.
- On the Analyse option, press Enter.
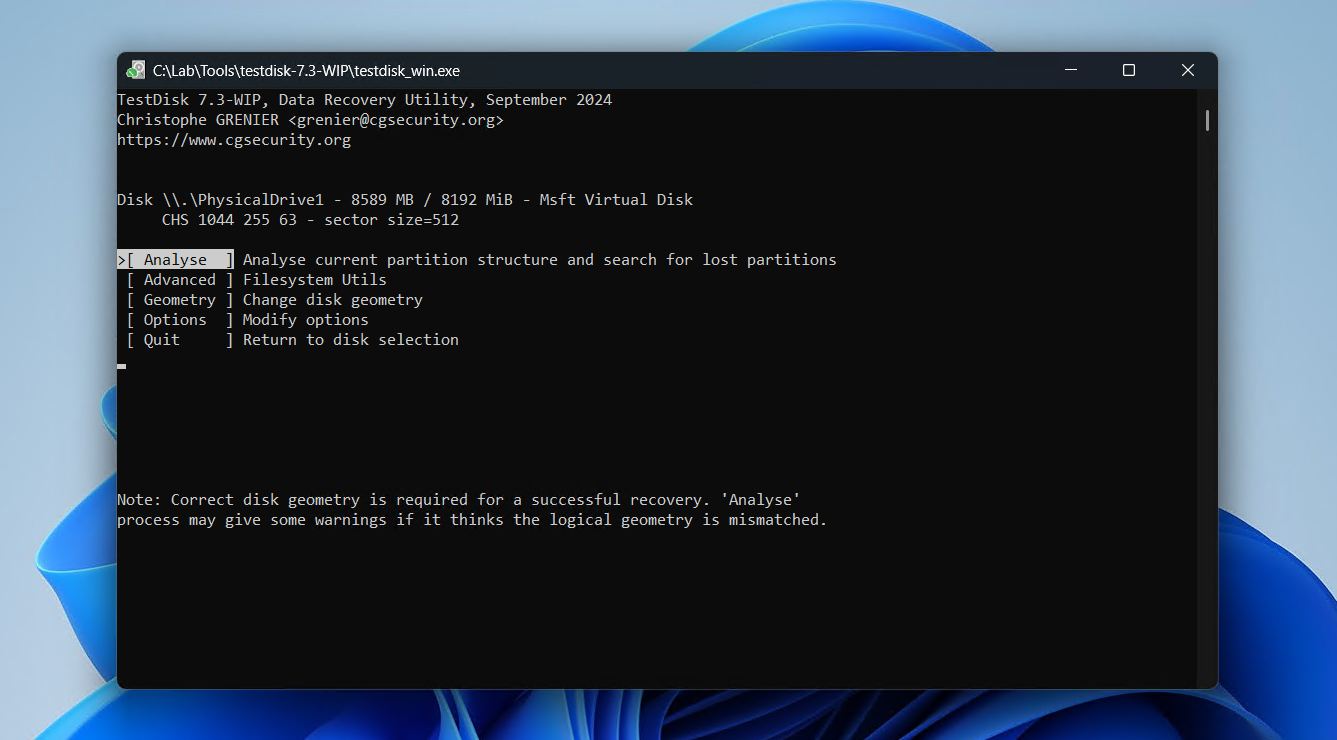
- Press Enter to begin a Quick Search.
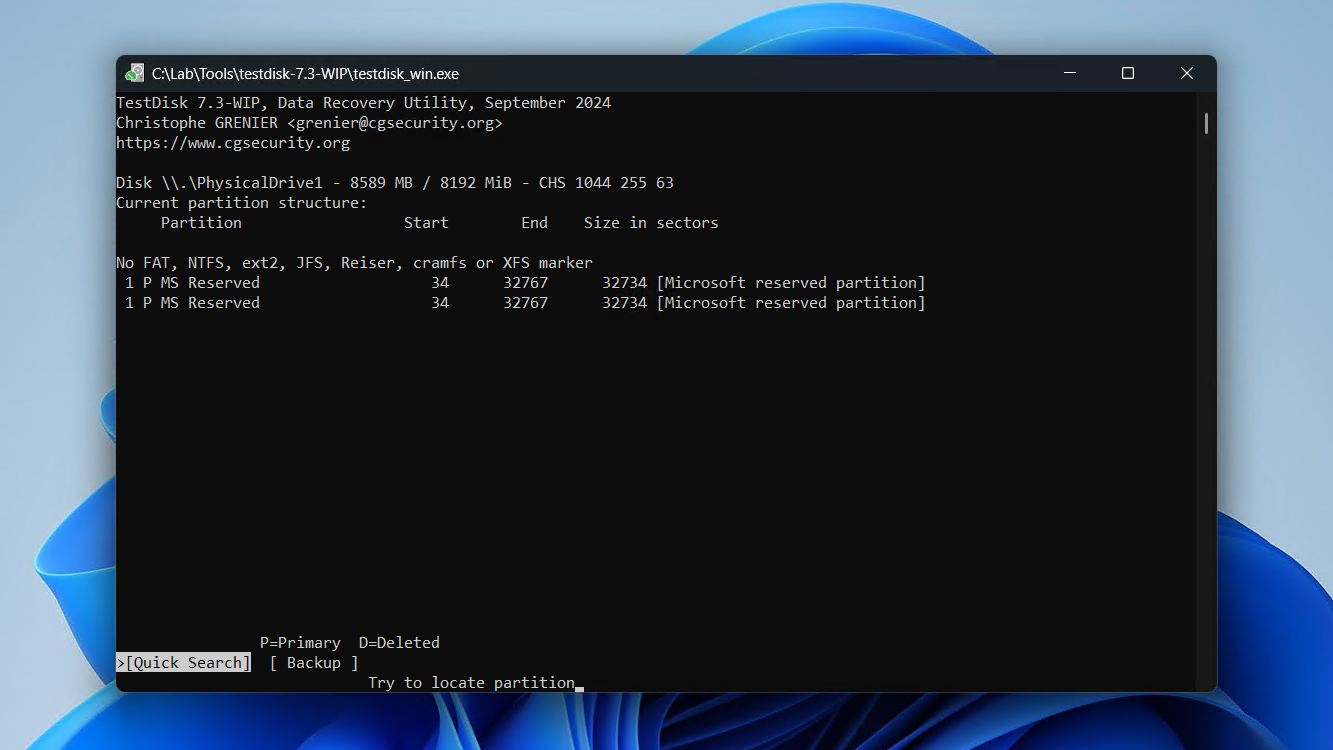
- Press Enter.
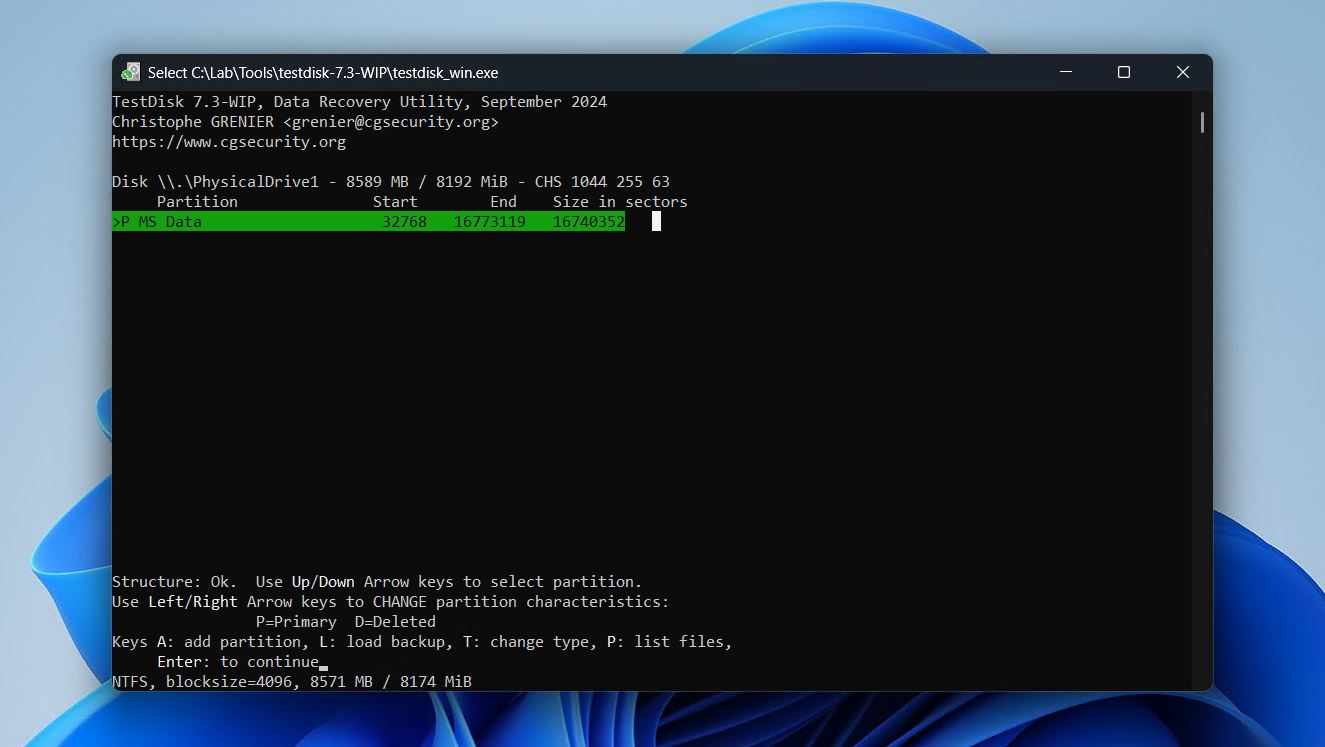
- Go over to the Write option and, if the partition was found, press Enter. If the partition wasn’t found, perform a Deeper Search instead.
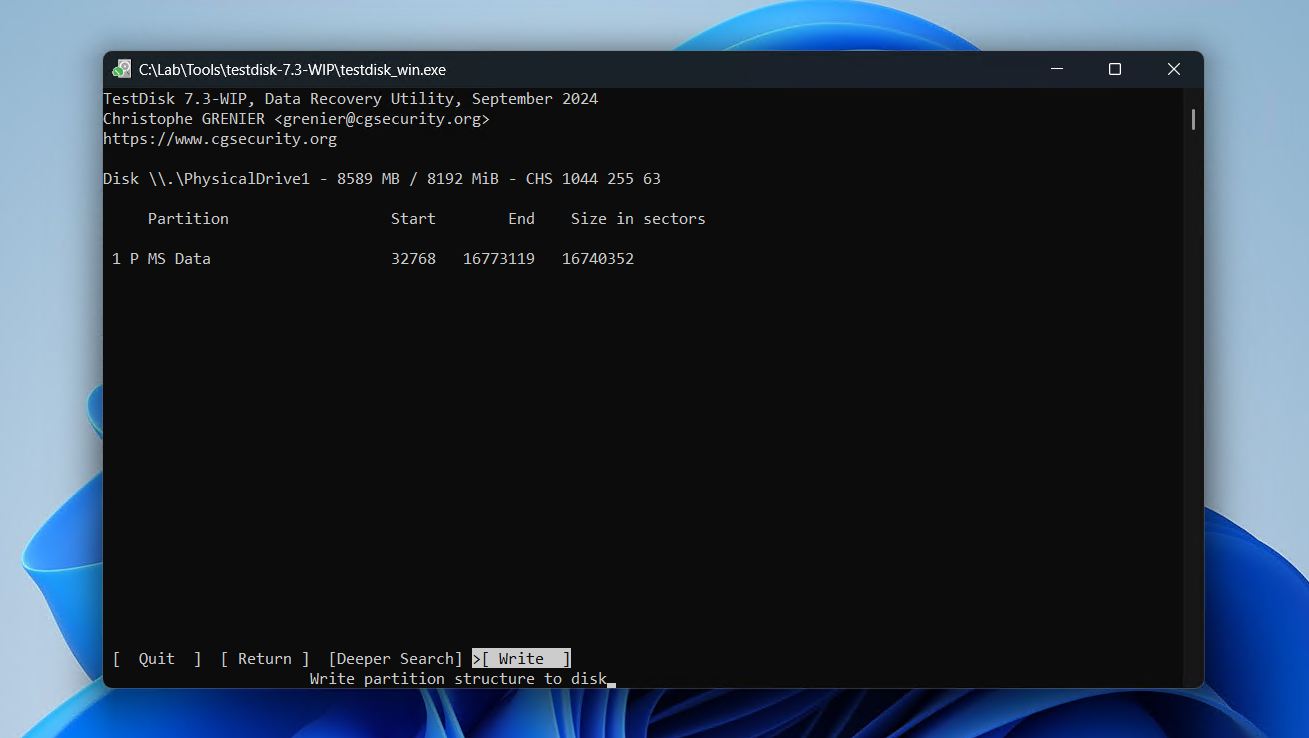
- Press Y to confirm the changes, and then restart your computer.
When it’s not a lost or deleted partition causing the issue, it may be due to a damaged or corrupted system file that Windows is unable to access. To address that, we’ll be looking at SFC and DISM next.
Method 3: Format Your Drive
The final, and most effective solution for fixing logical hard drive corruption is through formatting. This is basically a factory reset for the drive, deleting all data from the drive. There are two formats to be aware of: quick format, and full format.
- Quick format deletes all data but leaves traces of that data that can be used to recover it before it’s overwritten for good.
- Full format goes sector-by-sector and zeros each one, effectively overwriting the data and any chance of recovery. The added benefit of a full format is that it performs a surface scan, mapping out all the bad sectors that shouldn’t be used.
If the corrupted drive in question is your system disk, you will need to either (1) boot from installation media and delete the existing partition(s) before reinstalling, or (2) connect the drive to another system and format it from there.
Follow these steps to fix a corrupted HDD by formatting:
- Open File Explorer.
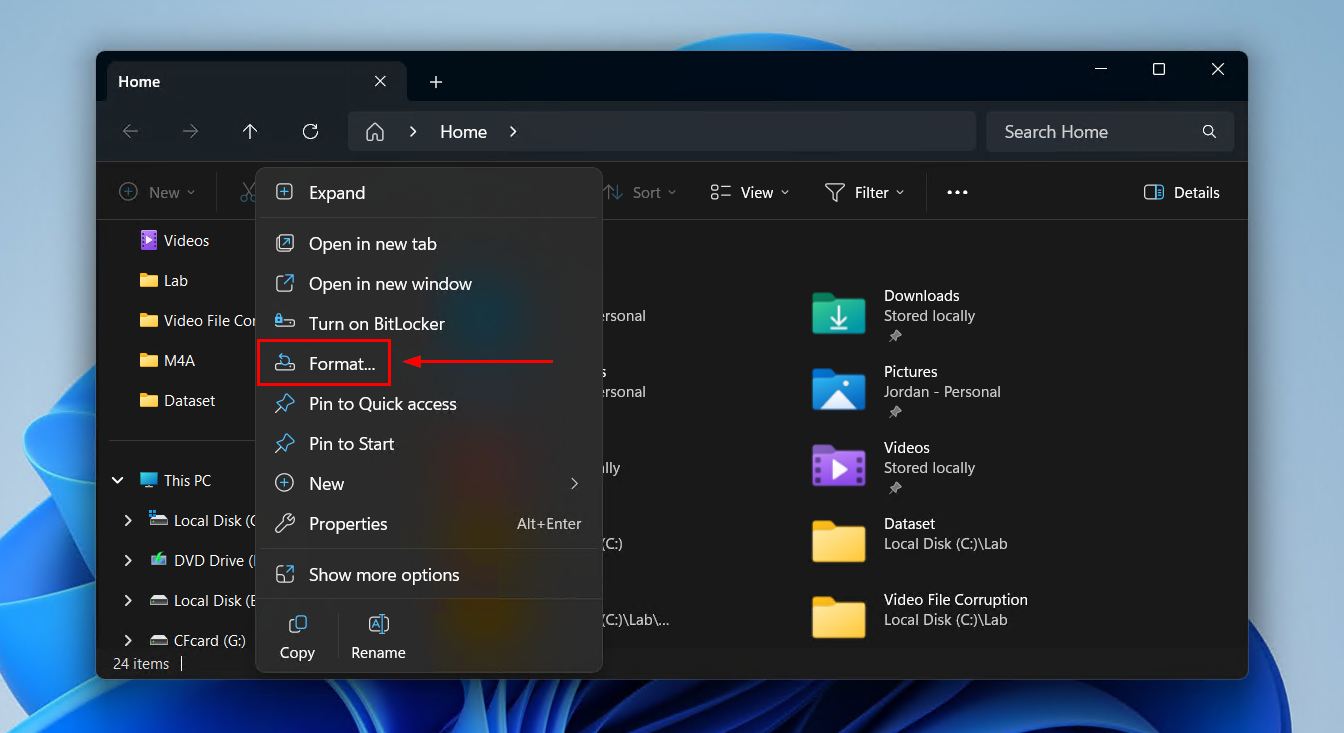
- Right-click the corrupted drive and click Format.
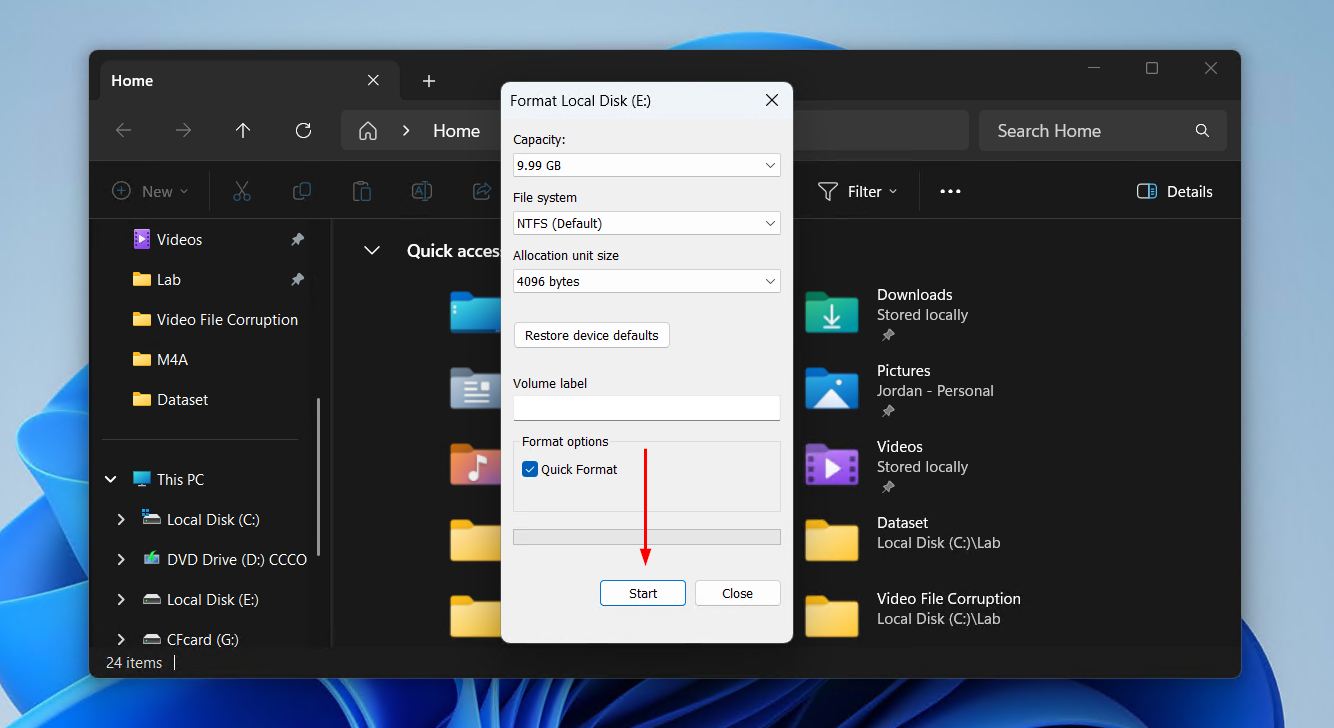
- Specify a volume label, keep Quick Format checked if you want to perform a quick format, then click Start.
- Click OK to confirm the format.
DIY Corrupted Hard Drive Recovery vs Recovery Service
As we mentioned at the beginning, most corrupted drive cases are “DIY-able” – when the drive appears in Disk Management (with the correct capacity) and does not show obvious signs of physical failure. In those cases you can recover data with data recovery software like Disk Drill, create a byte-to-byte backup, and then try repair methods like CHKDSK, TestDisk, SFC/DISM, or formatting.
But if the drive refuses to cooperate and the files on it are truly important, a professional data recovery service might be the only realistic option. Recovery labs have cleanrooms, donor parts, specialized hardware and tools for dealing with damaged heads, failed PCBs, stuck motors, and other problems most people cannot really handle at home.
Here’s the shortcut for deciding what to do:
| Situation | Best option |
| The drive appears in Disk Management with the correct size | DIY recovery |
| The drive is RAW, asks to be formatted, or shows file system errors | DIY recovery |
| Files were lost, or became inaccessible after corruption | DIY recovery first |
| The drive has minor bad sectors but still reads consistently | DIY recovery with a byte-to-byte backup first |
| The drive clicks, grinds, spins up repeatedly, or disconnects during scans | Recovery service |
| The drive does not appear in Disk Management after you checked cables, ports, and power | Recovery service |
| The drive shows 0 bytes or a clearly wrong capacity | Recovery service |
| The data is business-critical or impossible to replace | Recovery service |
One more thing: recovery services are not cheap, and the industry has its share of pitfalls, from unclear pricing to unrealistic promises. If you decide to go this route, check our rating of the best data recovery services before you send your drive anywhere.
FAQ
Before attempting to fix a damaged hard drive, you should create a byte-to-byte backup of the drive with tools like Disk Drill or Clonezilla. The drive will need to be removed from your PC and connected to another system. From there, use CHKDSK, SFC, and DISM to repair file system errors and replace damaged system files. Another option is to use TestDisk to recover the entire partition. Otherwise, the last resort is formatting the drive and reinstalling Windows.
You can use it, but we would not trust it right away. A corrupted drive that works again after CHKDSK, TestDisk, or formatting may be stable, but it may also be a drive that is starting to fail.
The best way to check is to monitor its S.M.A.R.T. status. S.M.A.R.T. data can show warning signs like reallocated sectors, pending sectors, uncorrectable sectors, read errors, or other values that point to physical deterioration. Disk Drill includes S.M.A.R.T. monitoring, and it can run in the system tray to warn you if the drive starts reporting concerning health issues.
Even if the drive looks fine, keep a fresh backup of anything important on it.
No, even if you install data recovery software on a different partition of the same corrupted drive, there is risk of your data, file system remnants, or partition table structures being overwritten and lost for good. Always install it on another disk, or work from another computer. However, until you can perform recovery, keep the drive disconnected to avoid unnecessary disk operations, or only connect it in read-only mode.
A drive that isn’t appearing in Disk Management usually indicates a deeper issue, usually (but not always) hinting at a physical issue. In this case, software-based solutions won’t work. Try checking the cables are connected correctly (and working), and see if the drive can be read by another computer. If those checks don’t resolve it, then you should stop using the drive and contact a data recovery service.
