Picture this: you’re facing some issue with your hard drive, and like any self-respecting Windows user, you run CHKDSK in hopes of repairing it. However, it doesn’t run. Instead, you’re greeted with the “CHKDSK is Not Available for RAW Drives” message. What does it mean? In simple words: Windows thinks there’s no supported file system on the drive, and CHKDSK can’t run on a drive without a recognized file system. Great, now what do I do about this?
If it’s a new or empty drive, initialize and/or format it, that’s about it. But, if the drive contains data, first recover/save that data using a data recovery program. You can then try and bring the drive to a readable state—we’ll take you through the process in the sections below. Rest assured, these methods have been tested to work on corrupted hard drives, SD cards, and USB drives by our in-house experts.
Why Does the “CHKDSK is Not Available for RAW Drives” Error Appear?
The CHKDSK not available for RAW drives error appears when Windows doesn’t recognize your drive’s file system, either because it’s corrupt, or missing entirely. Among other things, the file system tells the OS how and where data is stored on the drive. Since CHKDSK checks the file system and file system metadata, it won’t work on a drive that doesn’t have a recognizable file system in the first place. To use an oversimplified analogy—how do you repair a table when you can’t see the table?
Now, for the important question: should you be worried if you see the CHKDSK is not available for RAW drive message on your hard drive, USB drive, or SD card?
If you are one of those who fell for the “run CHKDSK to fix all issues with your drive” myth and ran CHKDSK even on a brand-new drive, then no. In this case, the error is quite normal because the drive probably hasn’t been initialized and formatted. In other words, it doesn’t have a file system yet. To fix it and assign a file system to the drive, you must initialize, partition, and format the drive using Diskpart.
Things get a little more serious if you face the CHKDSK not available for RAW drives error on a disk that contains data. It usually indicates a corrupt or deleted file system. This, too, can be resolved by directly formatting the drive, but don’t do that just yet because you have other, potentially better options:
- (Best Approach) If your data is important, and you’re willing to use software, create a backup of the drive at the very least. This ensures your files are safe in case drive repair fails and you’re left with formatting as the only choice. Ideally, recover the data right away and skip drive repair altogether. We will show how to create a backup and recover data from a backup or the drive itself below.
- If the data is unimportant, or you already have it backed up, you can attempt drive repair first. You might not even need to restore the data from backup or the device itself if drive repair is successful.
- If you’ve recovered your data already, then it’s best to skip repair and simply format the drive.
Recover Data From the Drive with “CHKDSK is Not Available for RAW Drives” Error
With the right hard drive data recovery software, it’ll take a few simple steps to get back your files from the RAW drive. The best way to approach this is to create a disk image of the affected drive and scan this disk image for recoverable files. This creates a backup of your drive while also protecting the physical drive from the additional stress of a data recovery scan. Also, since your data is saved in the disk image, you can experiment with different repair methods without the fear of losing your files. You can scan the disk directly too, but the disk image approach is safer for both the disk, and the data on it.
Our recommended data recovery and disk image creation tool is Disk Drill, thanks to its exceptional data recovery rate and ease-of-use.
Follow these steps to create a disk image and recover files from a RAW drive:
Step 1: Create a Disk Image
- Download Disk Drill and install it.
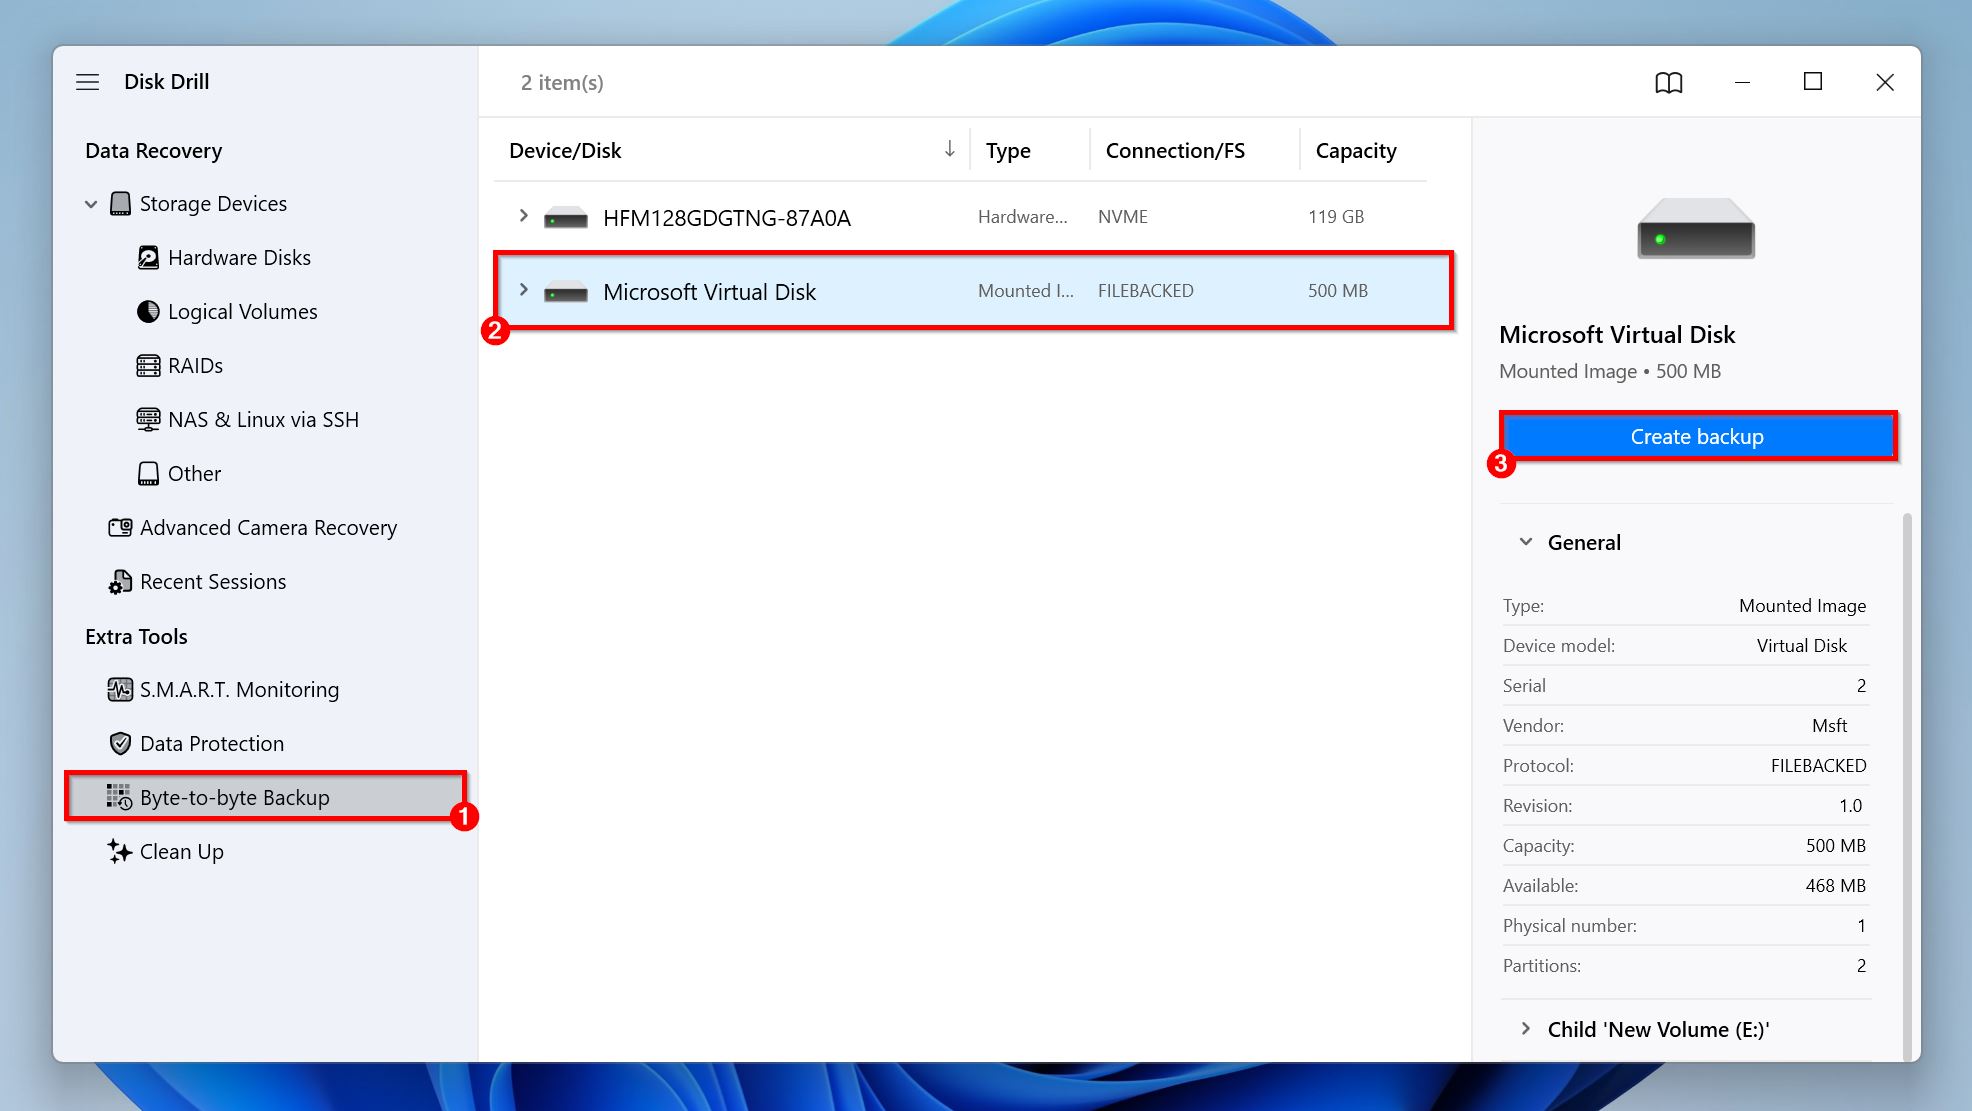
- Open Disk Drill, and click on Byte-to-byte Backup in the sidebar. Select the partition or drive you were trying to run CHKDSK on, and click Create Backup.
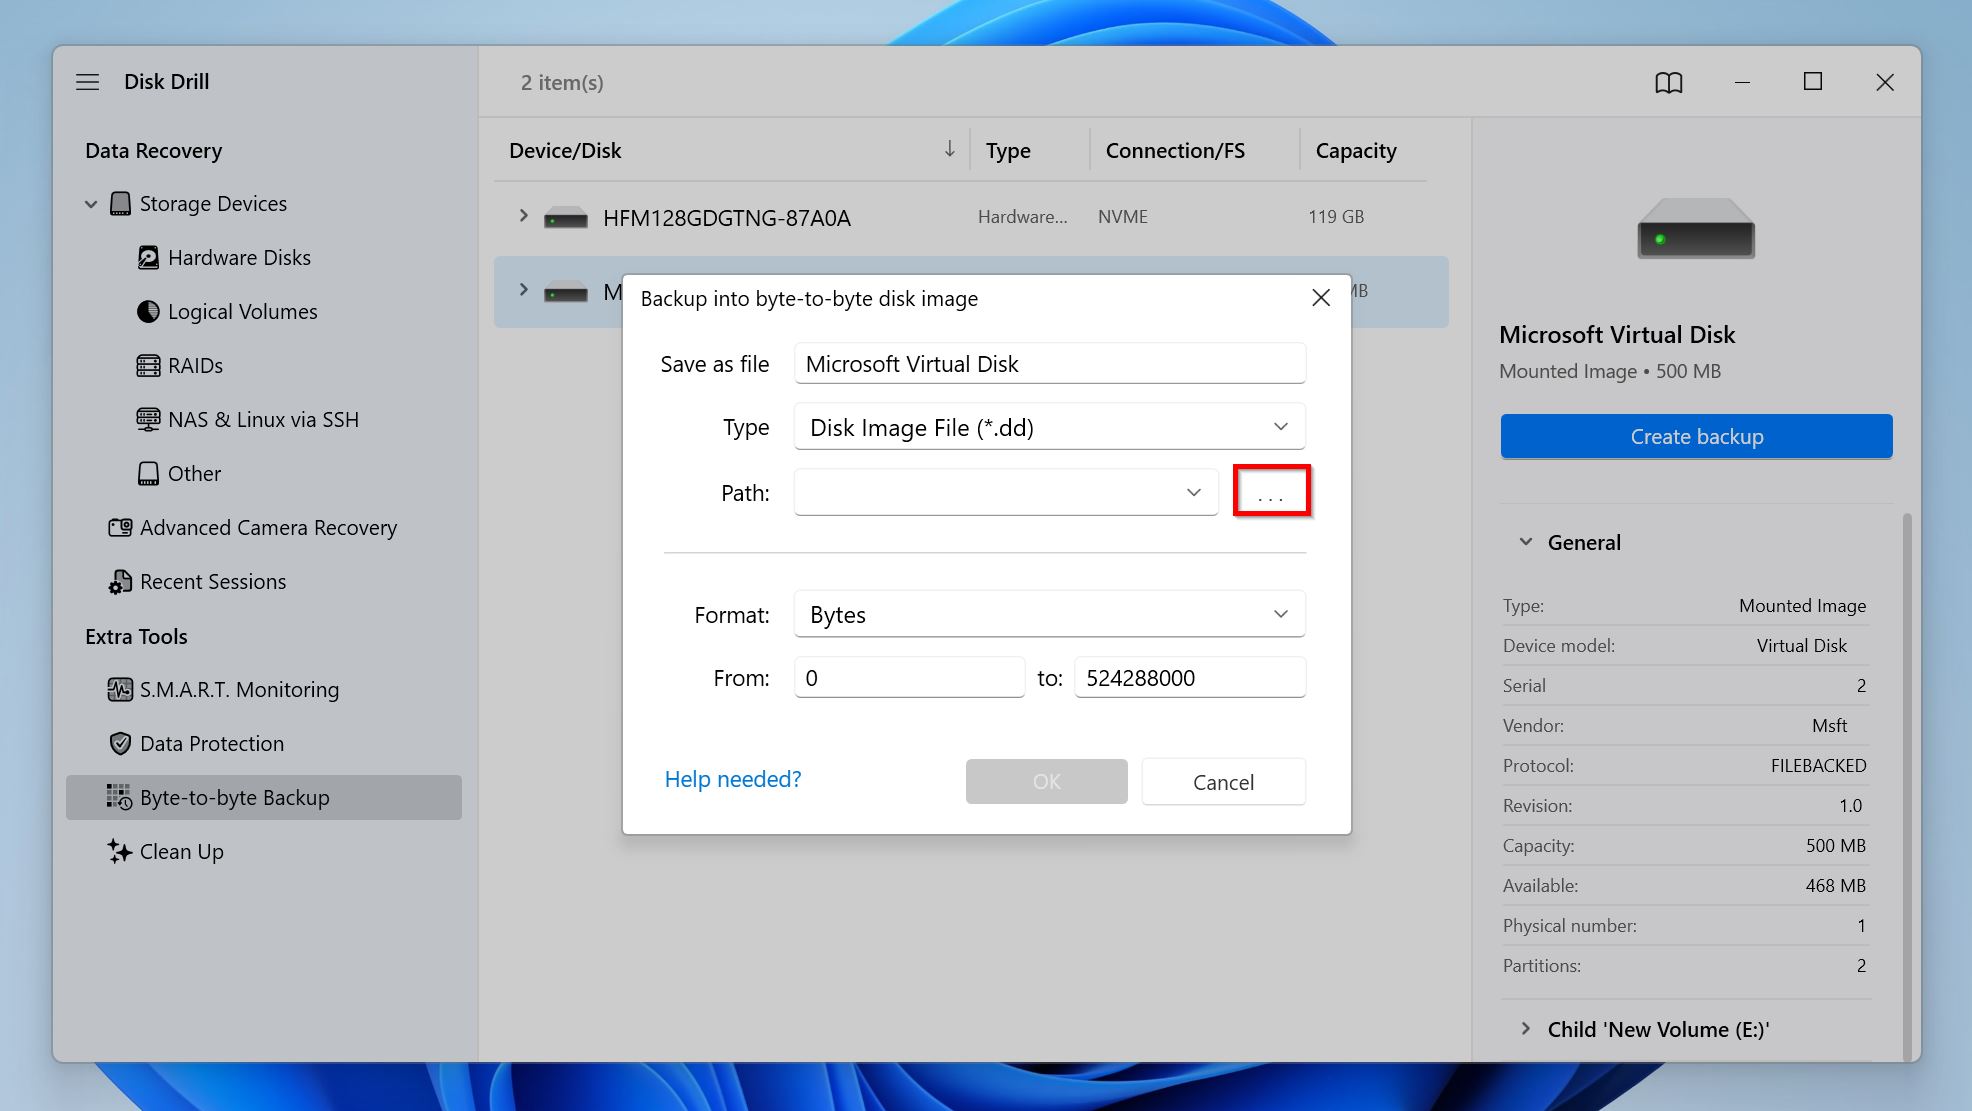
- Select the save destination for the disk image, and click OK. Make sure the destination drive has slightly more free space than the total storage capacity of the drive you’re backing up.
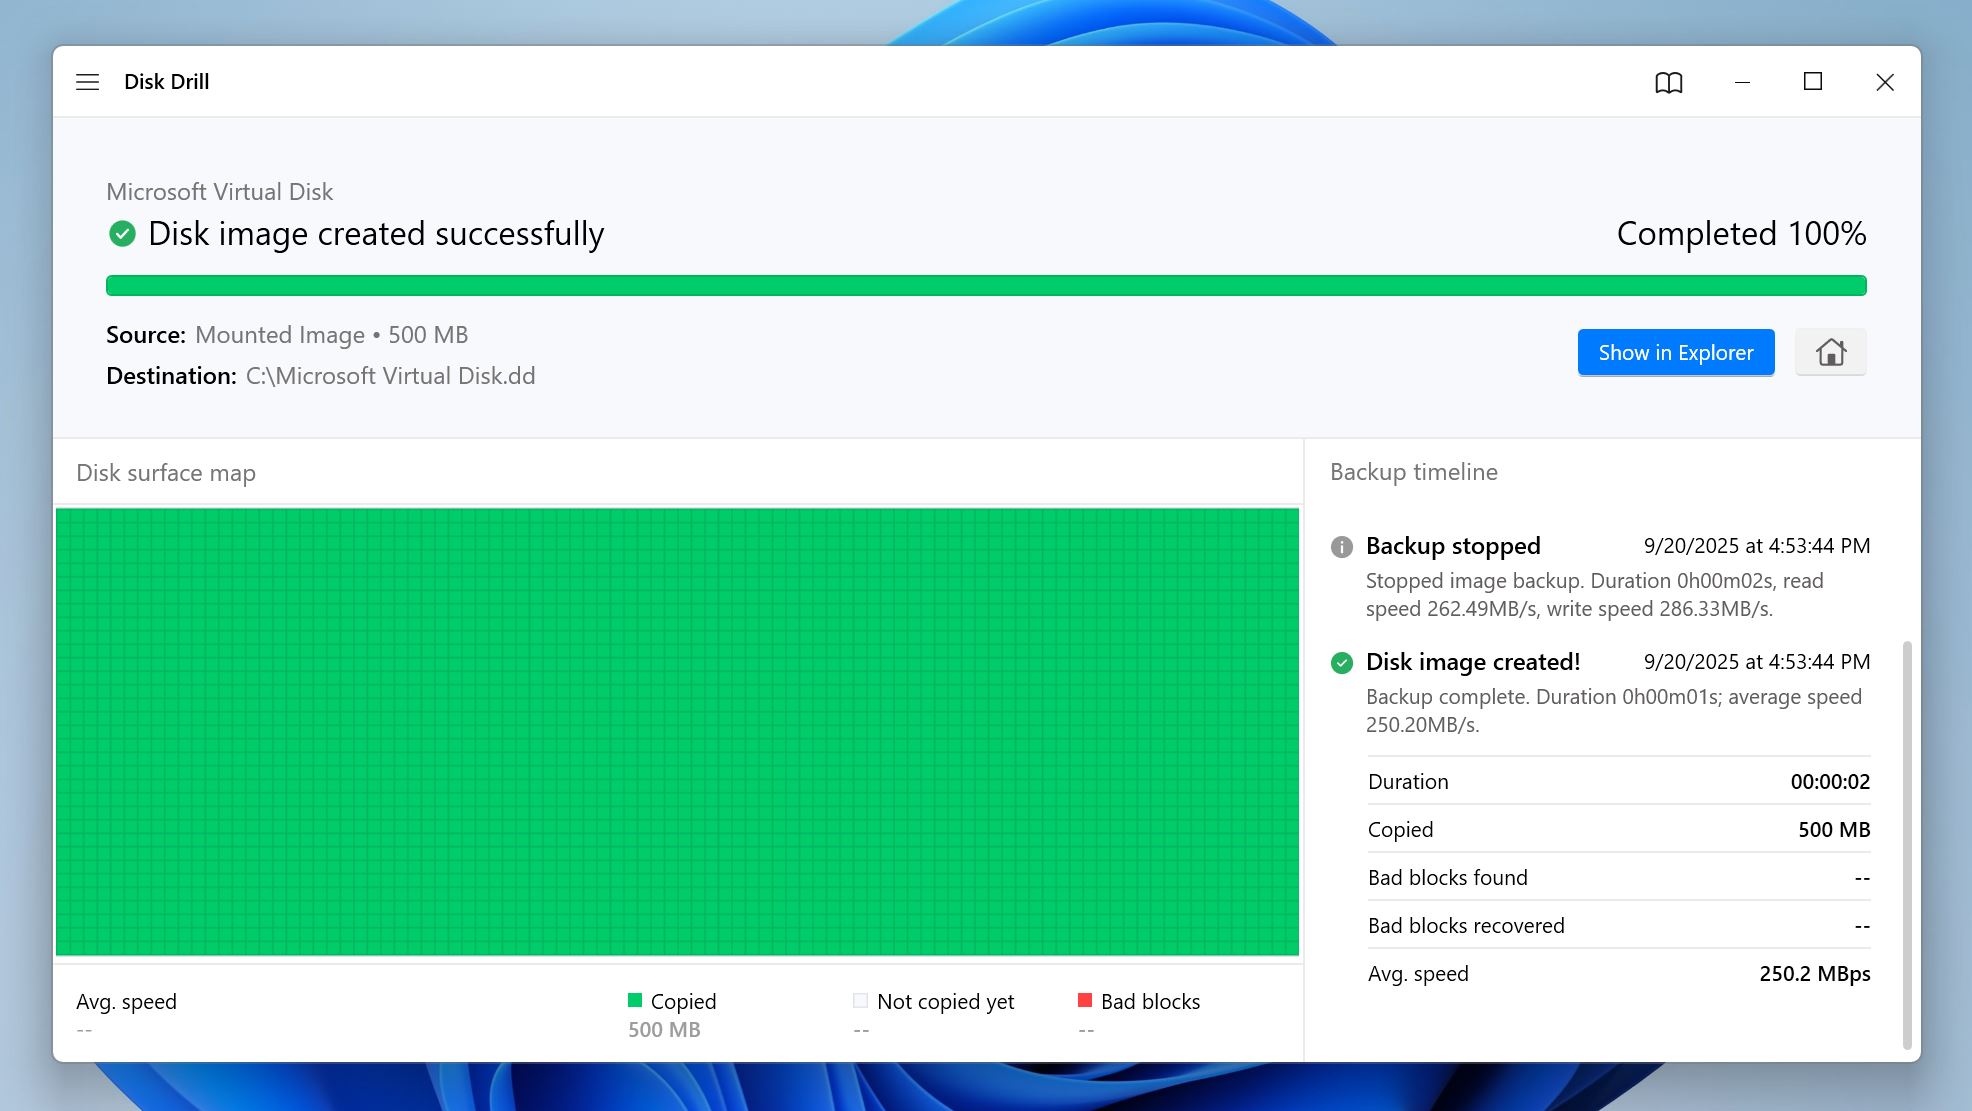
- Disk Drill will begin creating the disk image. Any bad sectors on the drive will be marked in red on the grid. If you see a lot of these, your drive may be on the verge of failure.
Creating a disk image and scanning it is the safest way to recover data. However, if you can’t back up the drive because of any reason (maybe you don’t have enough free space to store the disk image), you can directly scan the drive by selecting it in Step 3 of the section below.
Step 2: Scan the Disk Image and Recover Your Data
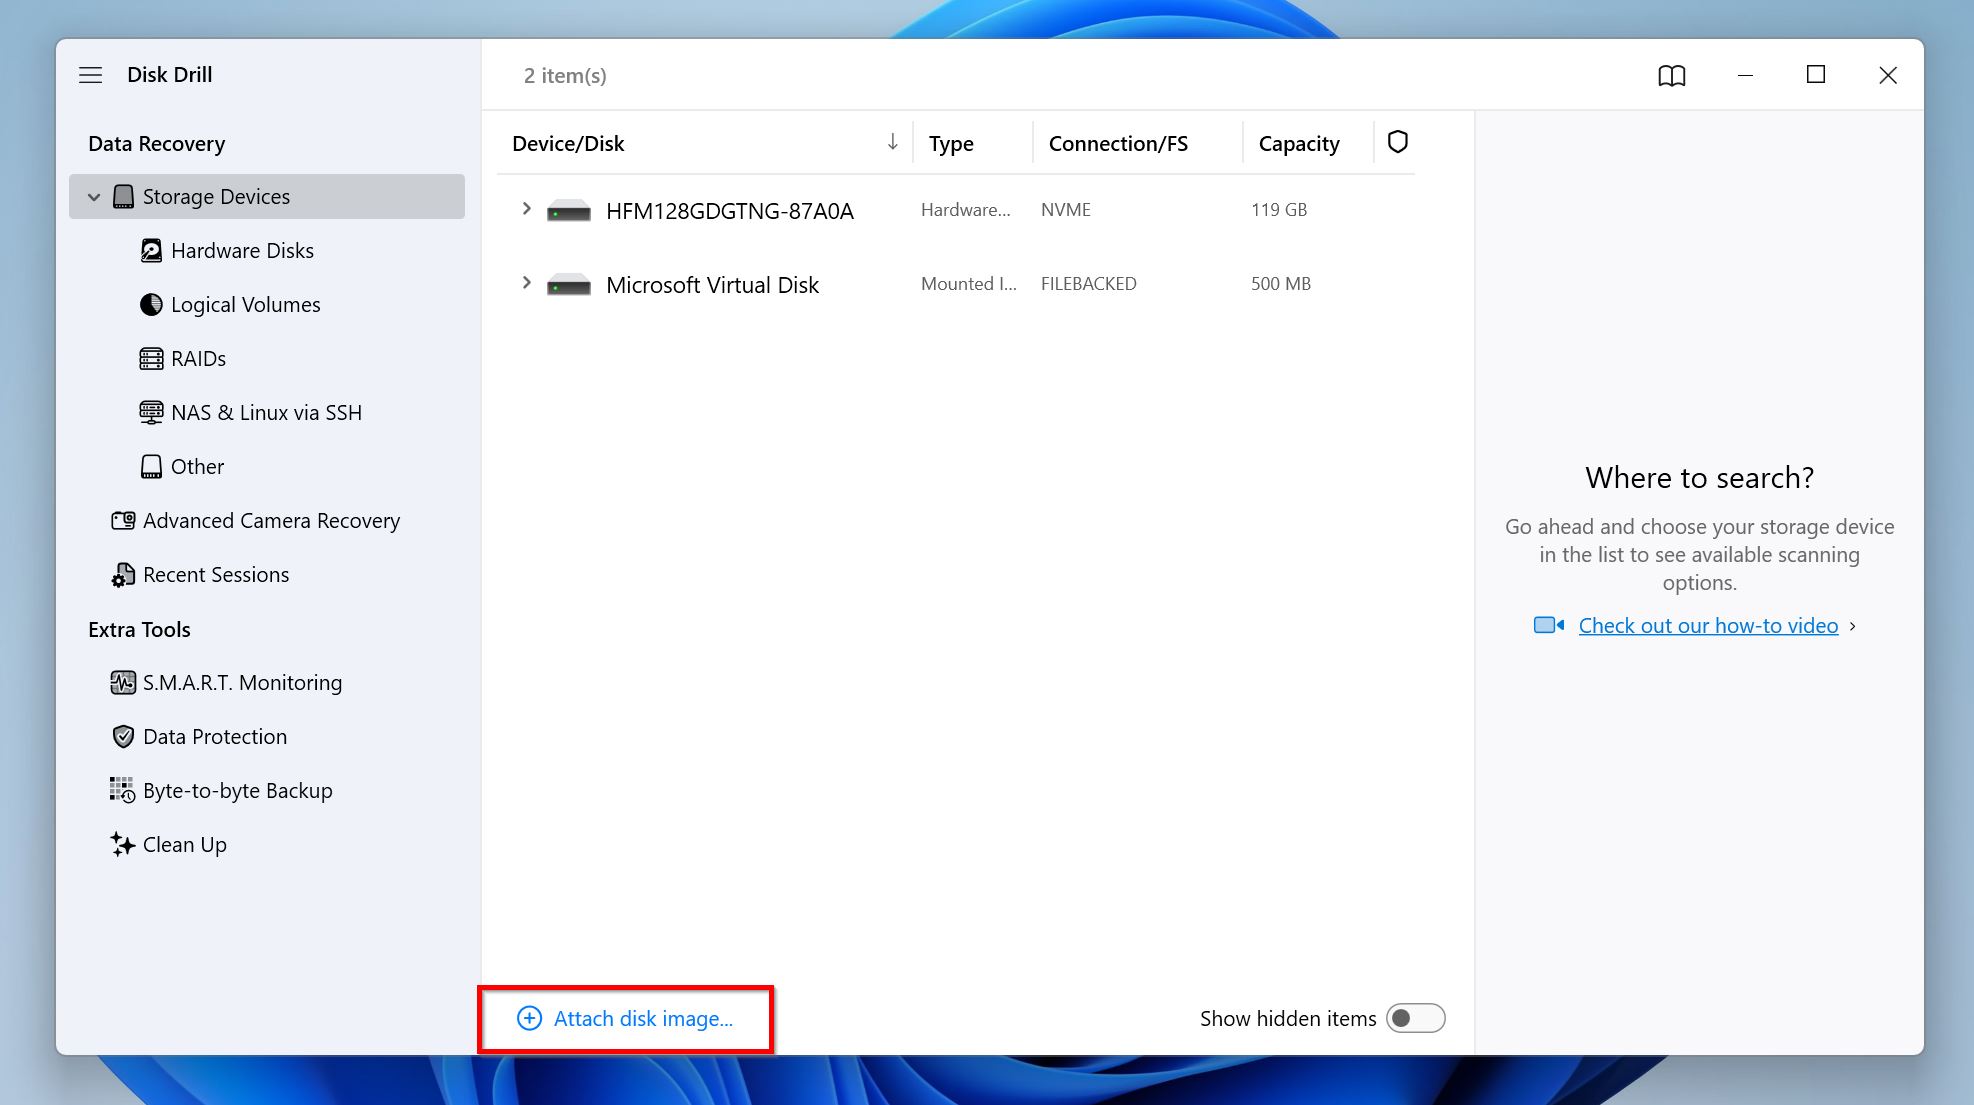
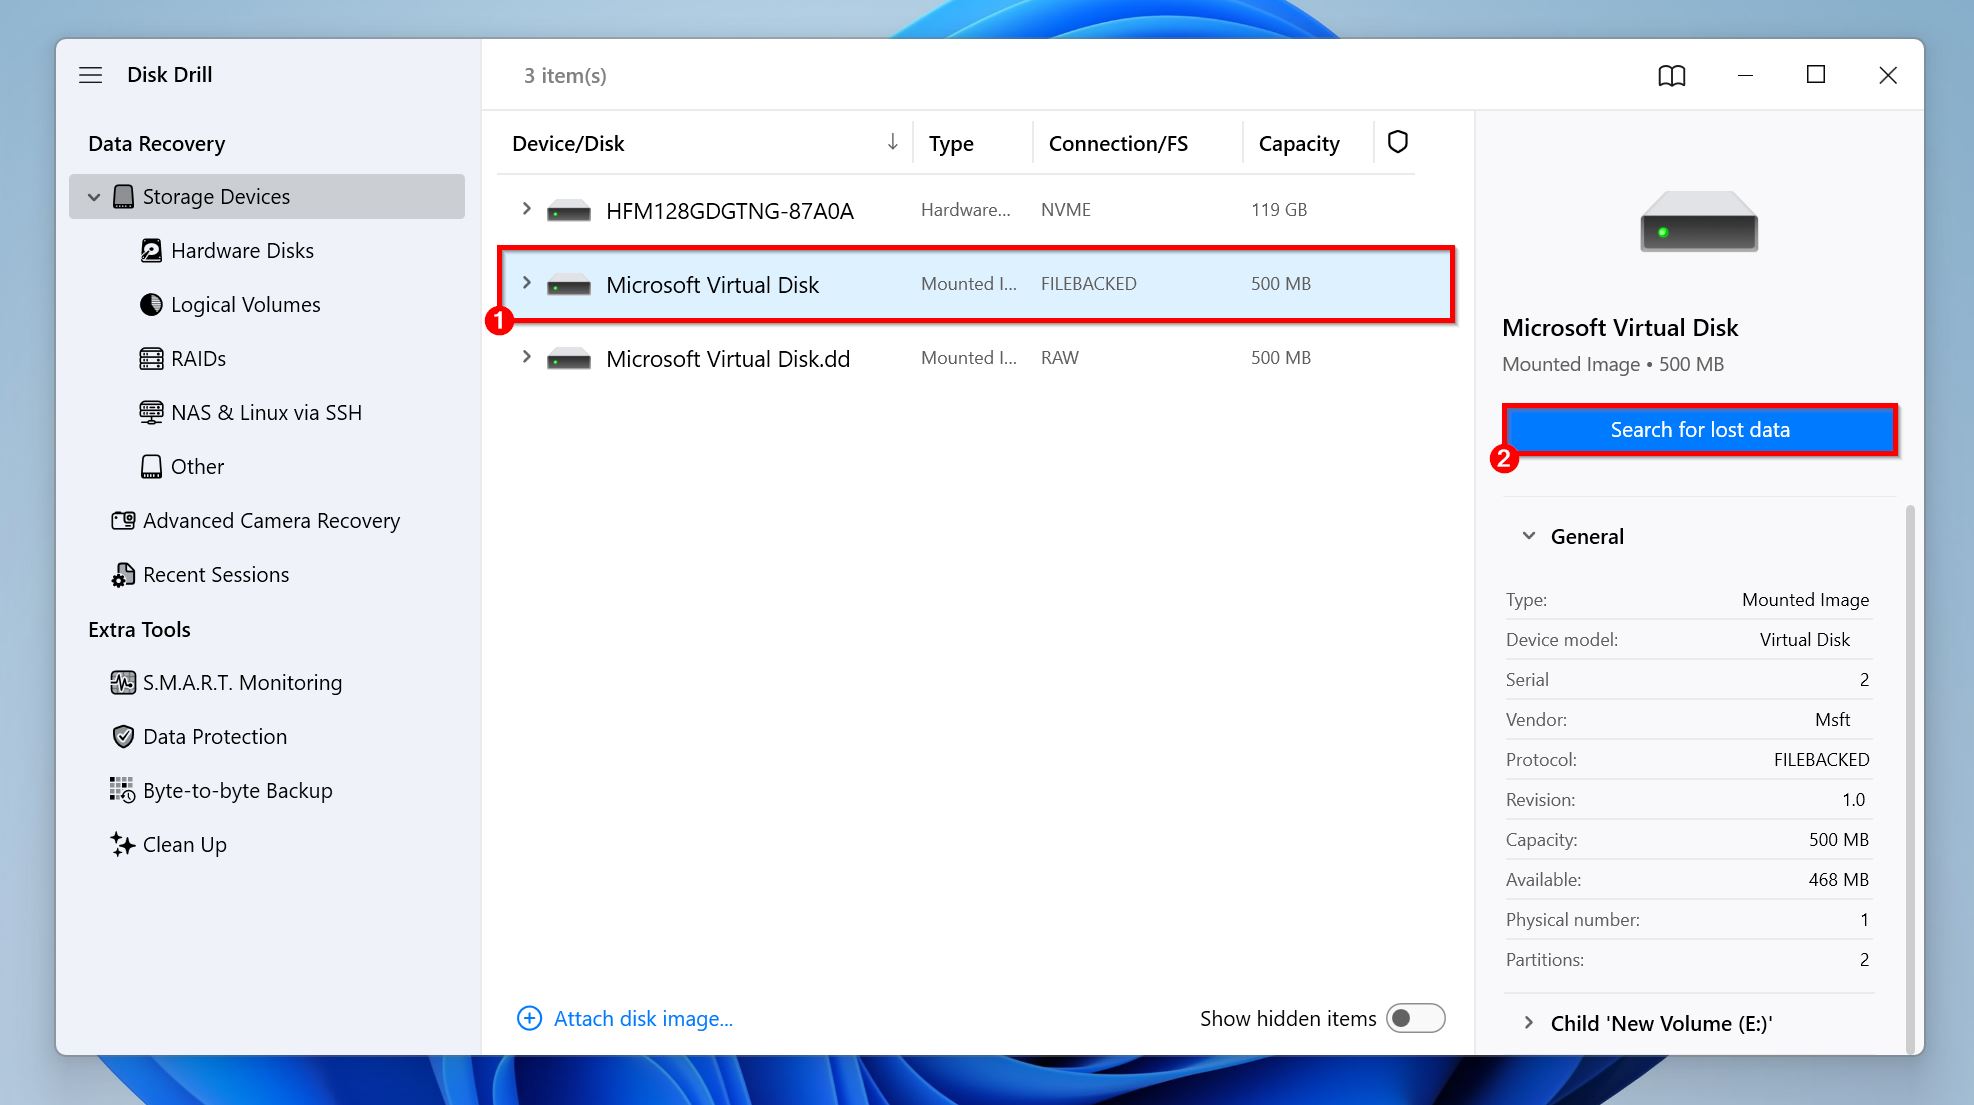
- Open Disk Drill, and click on Storage Devices in the sidebar.
- Click on Attach disk image, find the disk image you created in the previous step, and double-click it. It will appear in the list of storage drives as a Mounted Image.
- Select the disk image (or the drive itself if you skipped the imaging), and click Search for lost data to begin the data recovery scan. Disk Drill will prompt you to choose between an Advanced Camera Recovery (ACR) scan, or a Universal scan. In this case, select Universal scan.
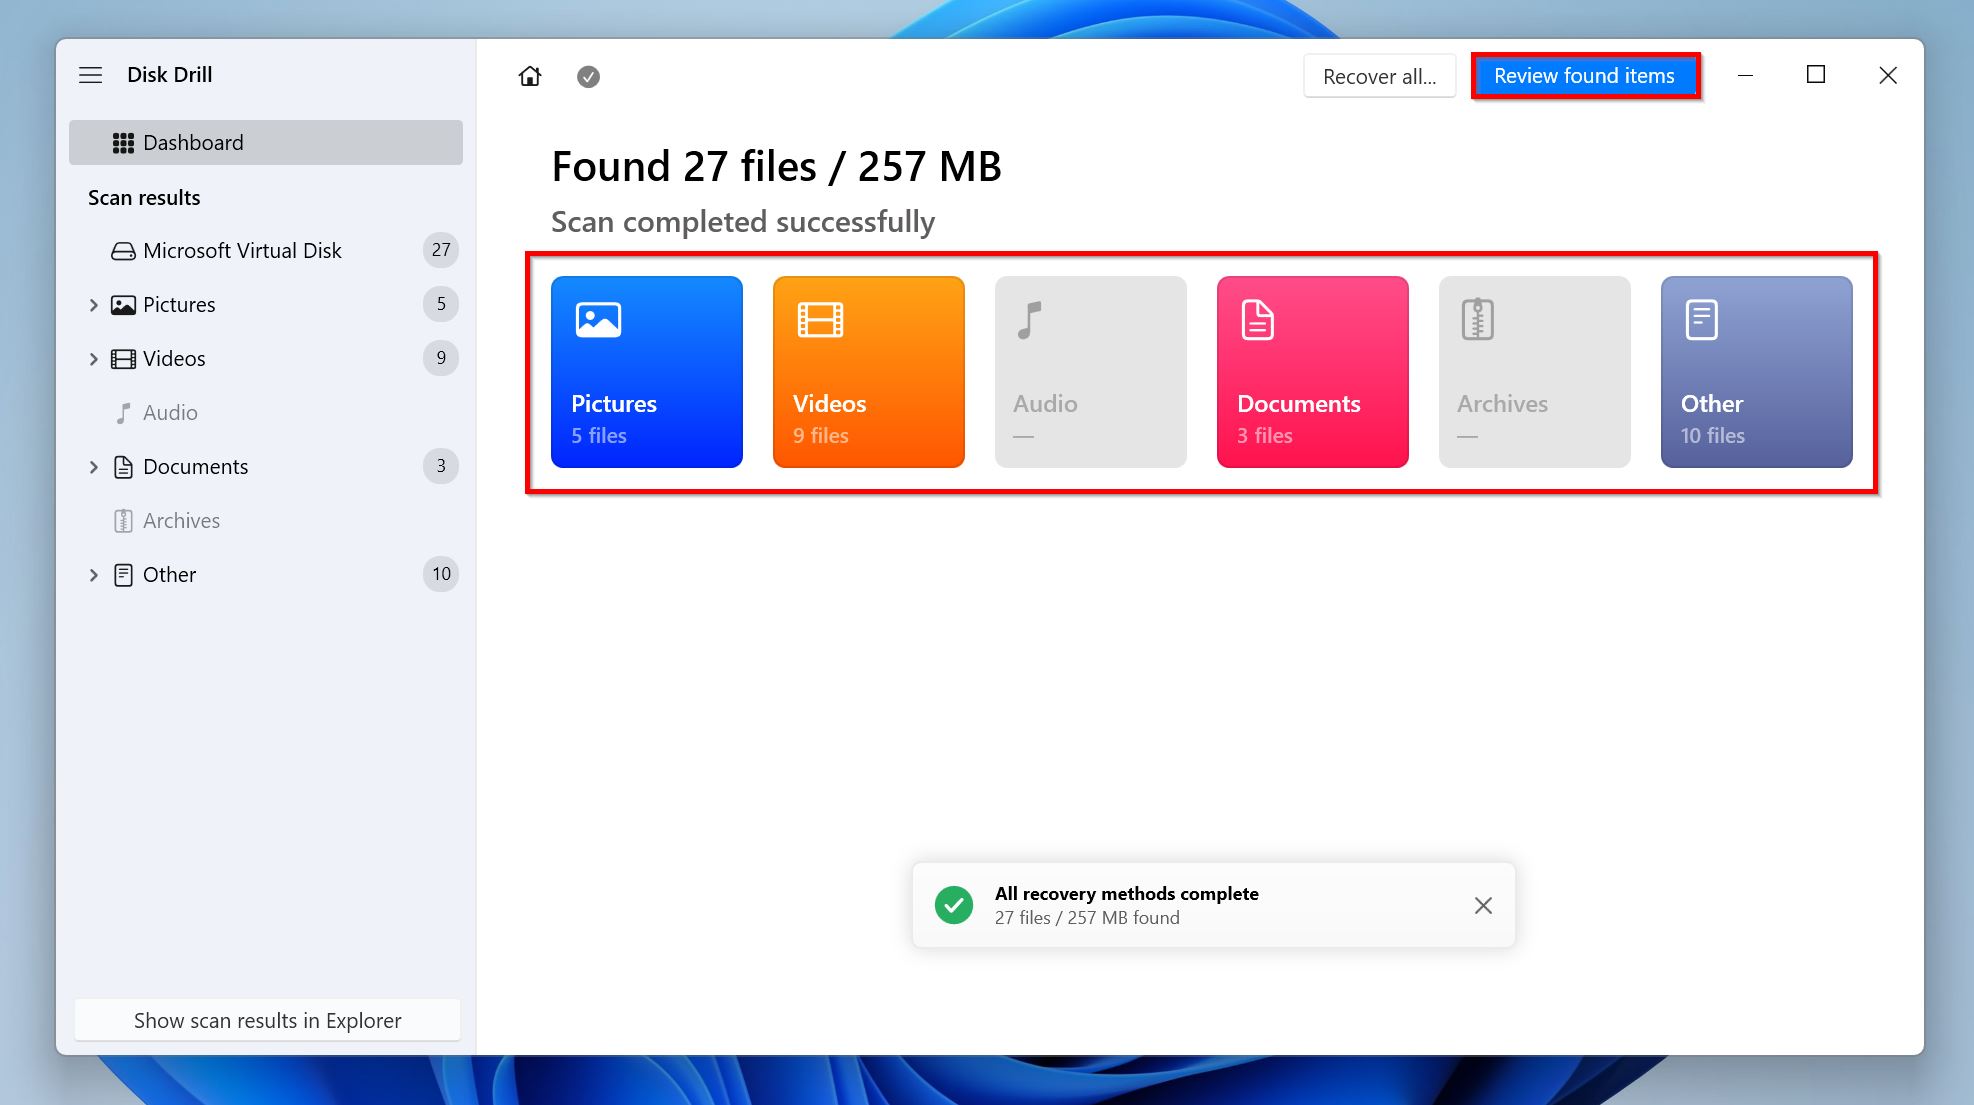
- Click on Review found items to see the recoverable files on your drive. If you wish to see only specific file types, click on the relevant file type tile instead—Pictures, Videos, Audio, Documents, Archives, and Other.
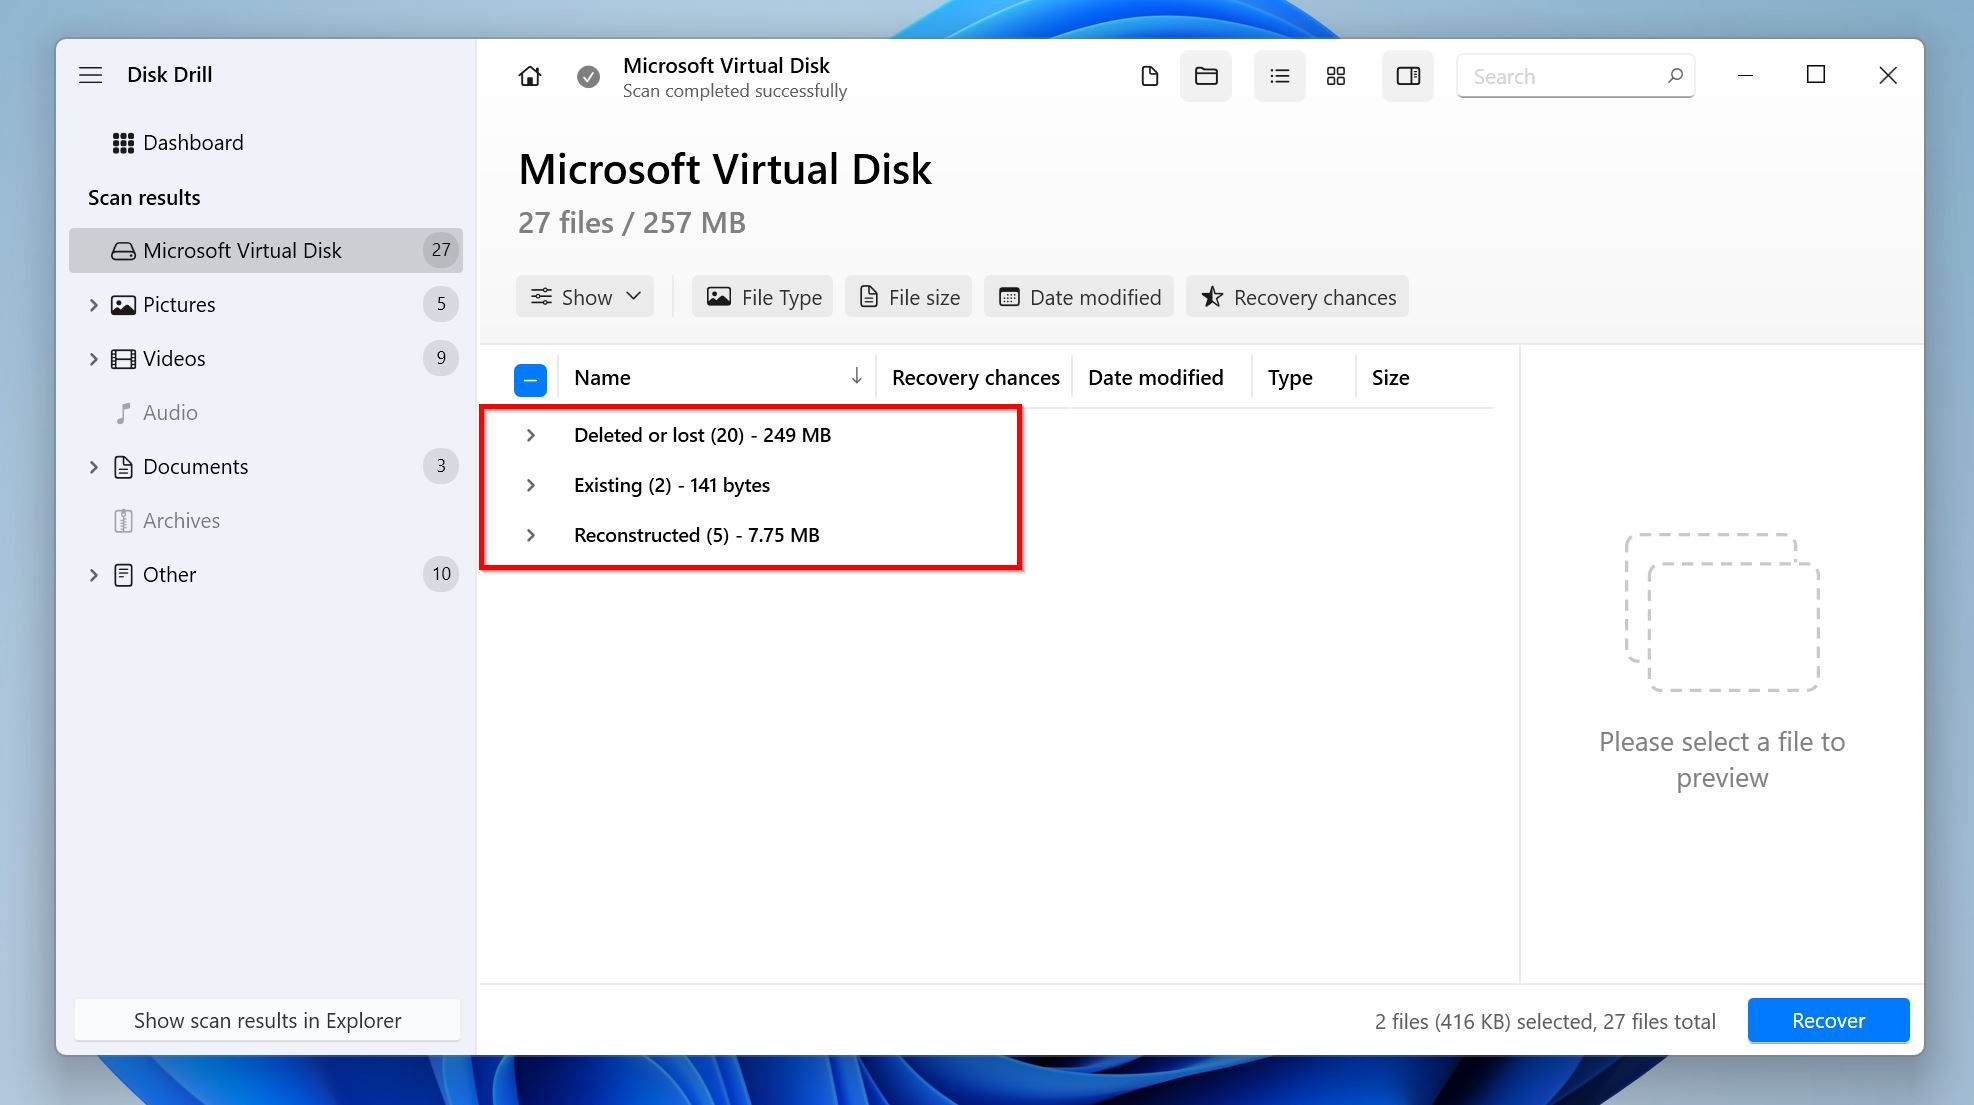
- Expand the Existing section to view the currently stored files on your drive. To view deleted files that are recoverable, expand the Deleted or lost (filenames and folder structure intact), and Reconstructed (filenames and folder structures missing) sections.
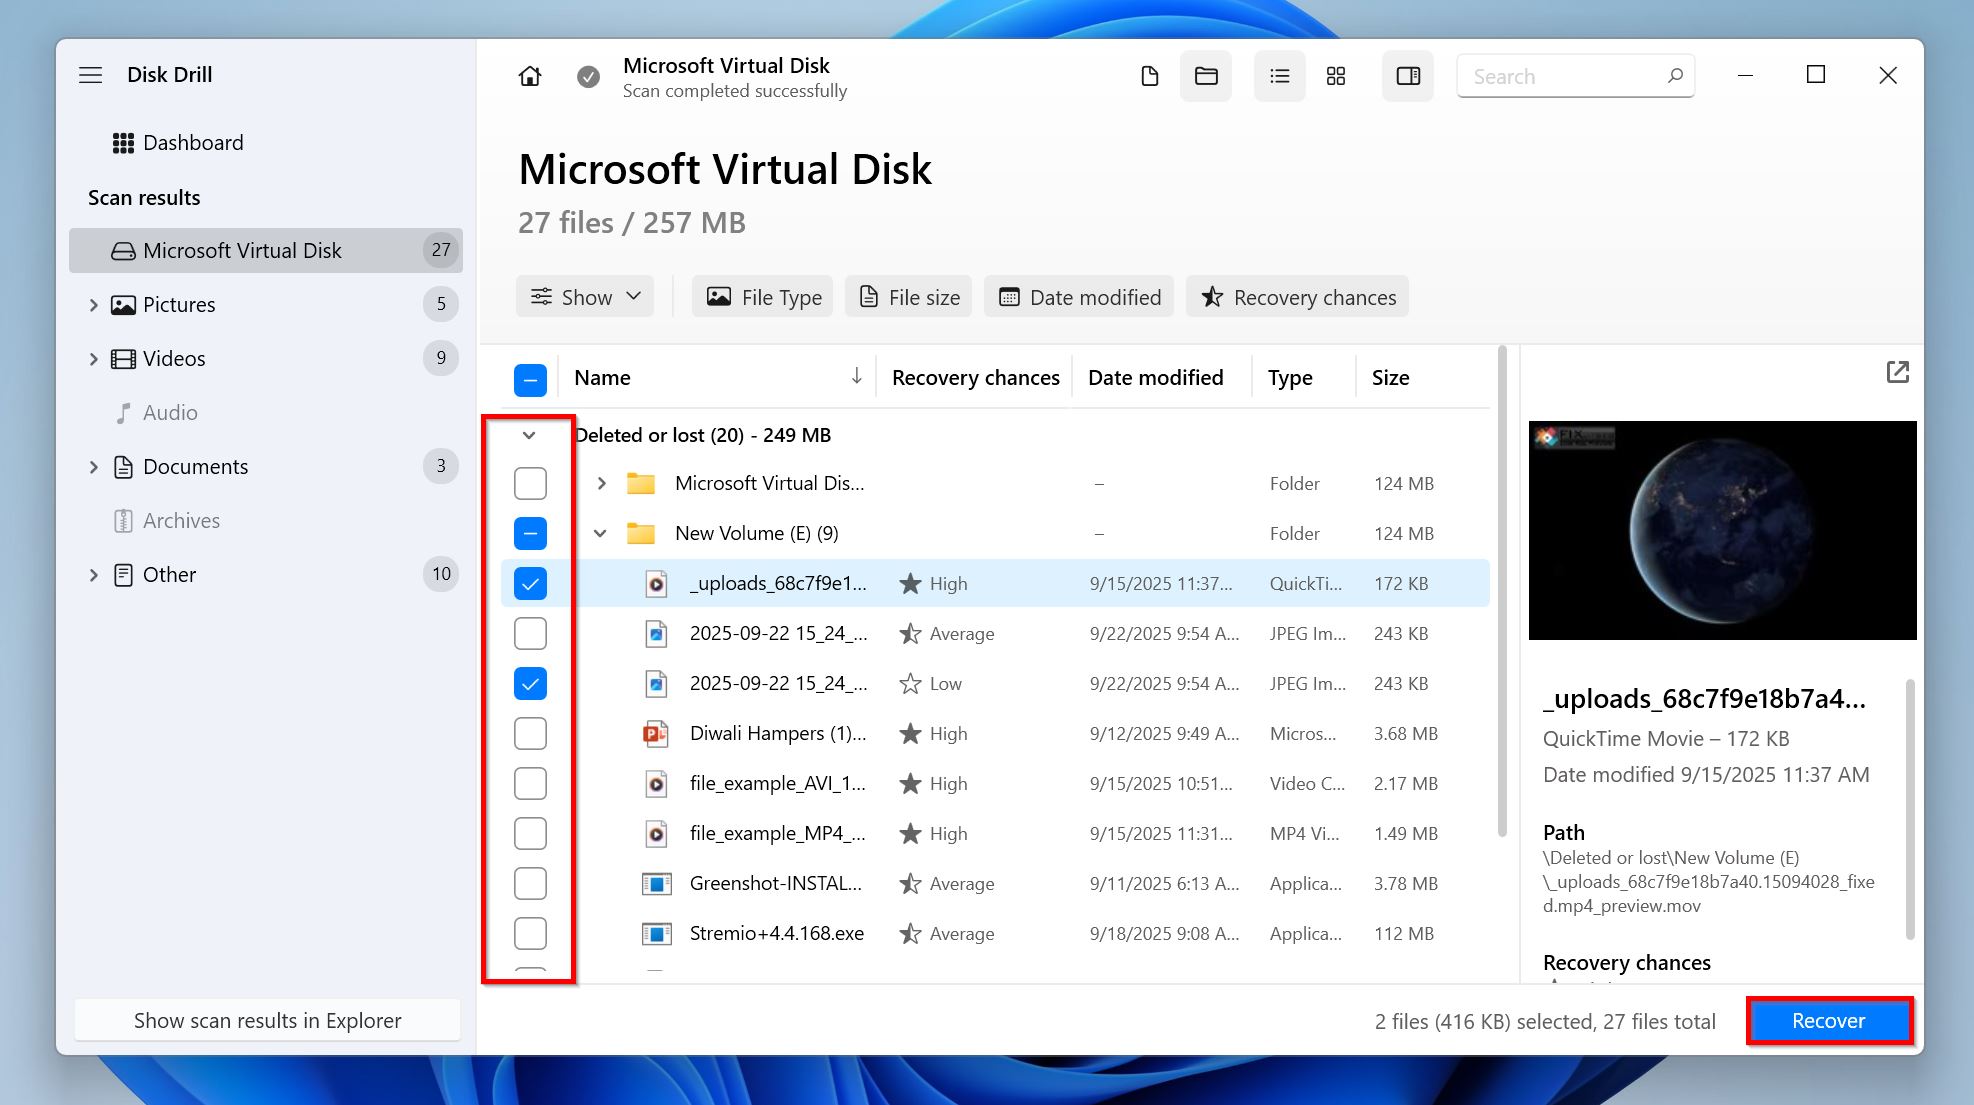
- Select the files you want to recover. The recovery chance for each file is clearly listed next to it. You can also preview the files by clicking on them—files with a high-quality preview have higher chances of data recovery. Click on Recover once you’re done selecting the files.
- Choose a recovery destination for the files. Ideally, choose a separate drive from the one you scanned. Click Next.
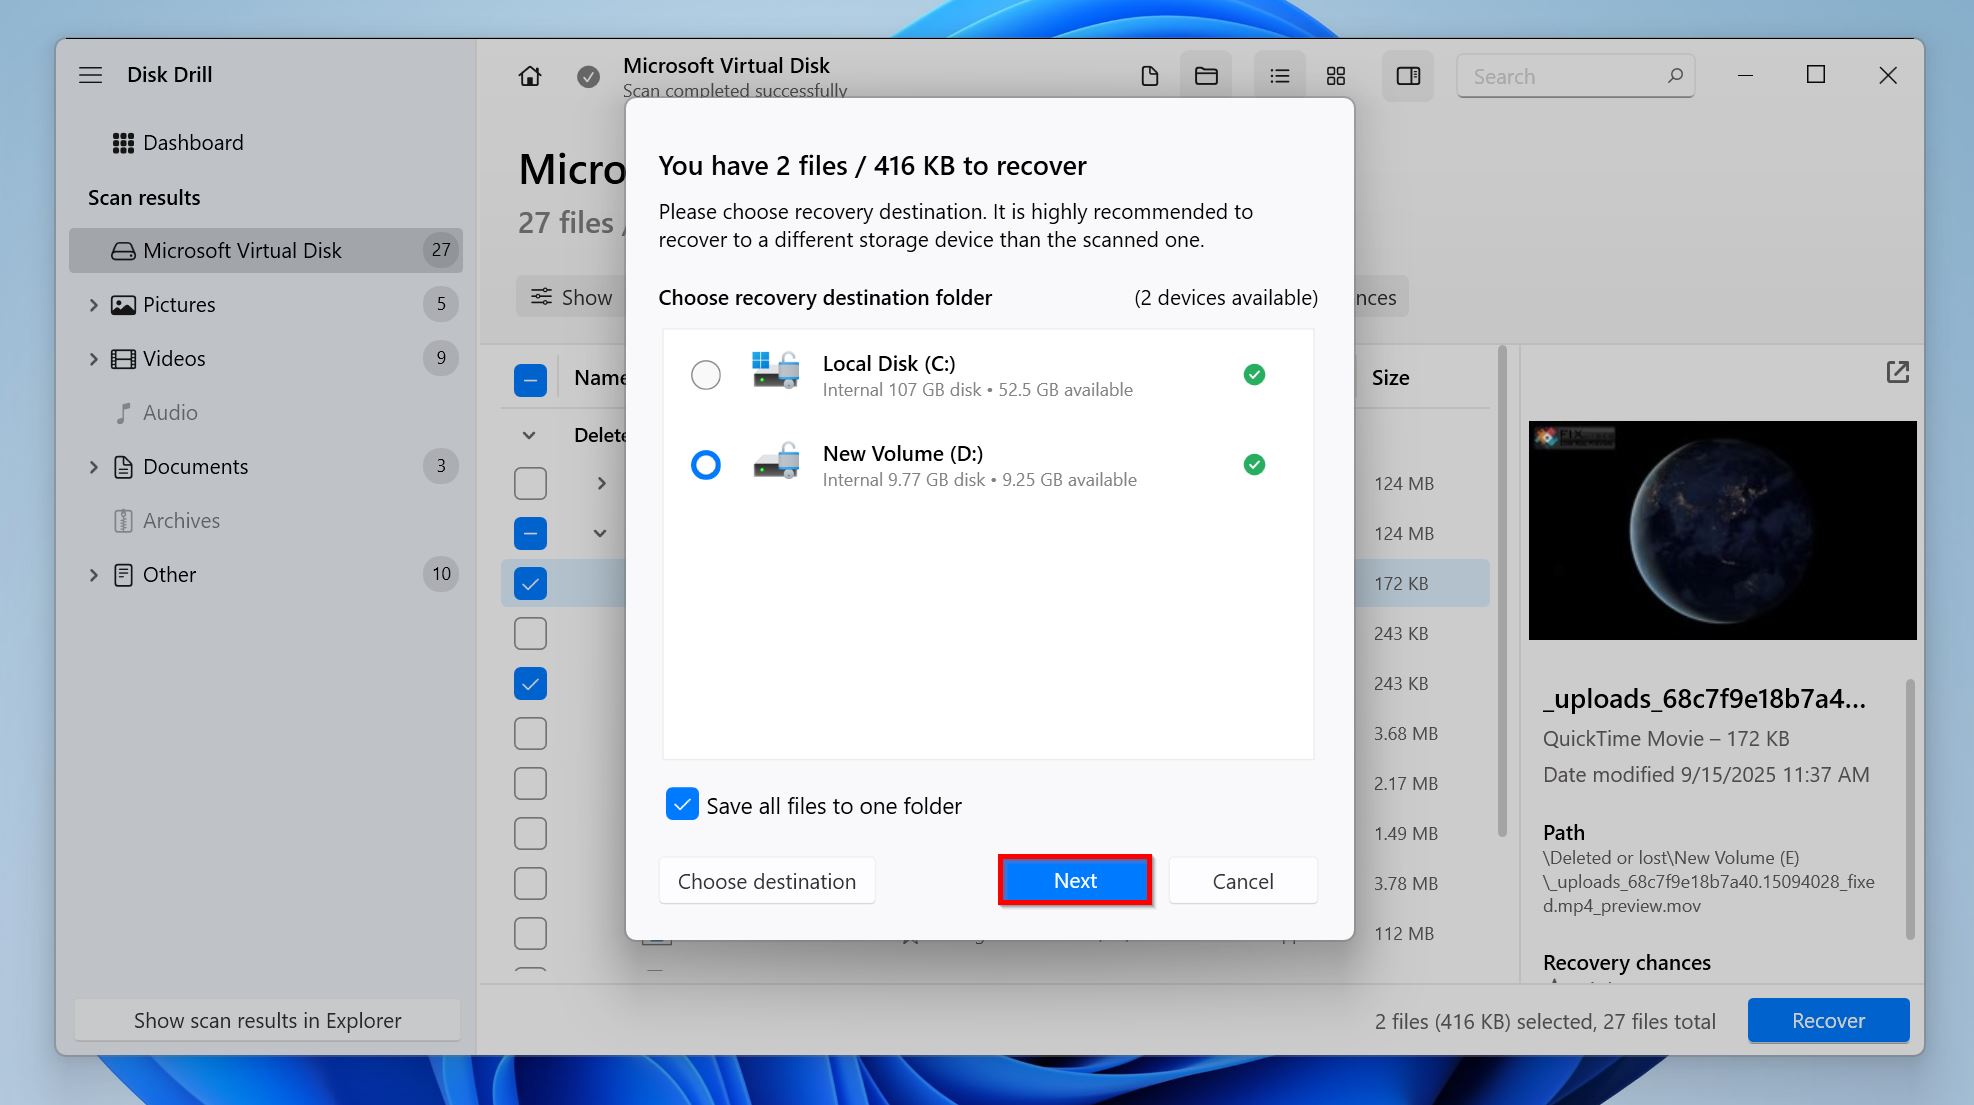
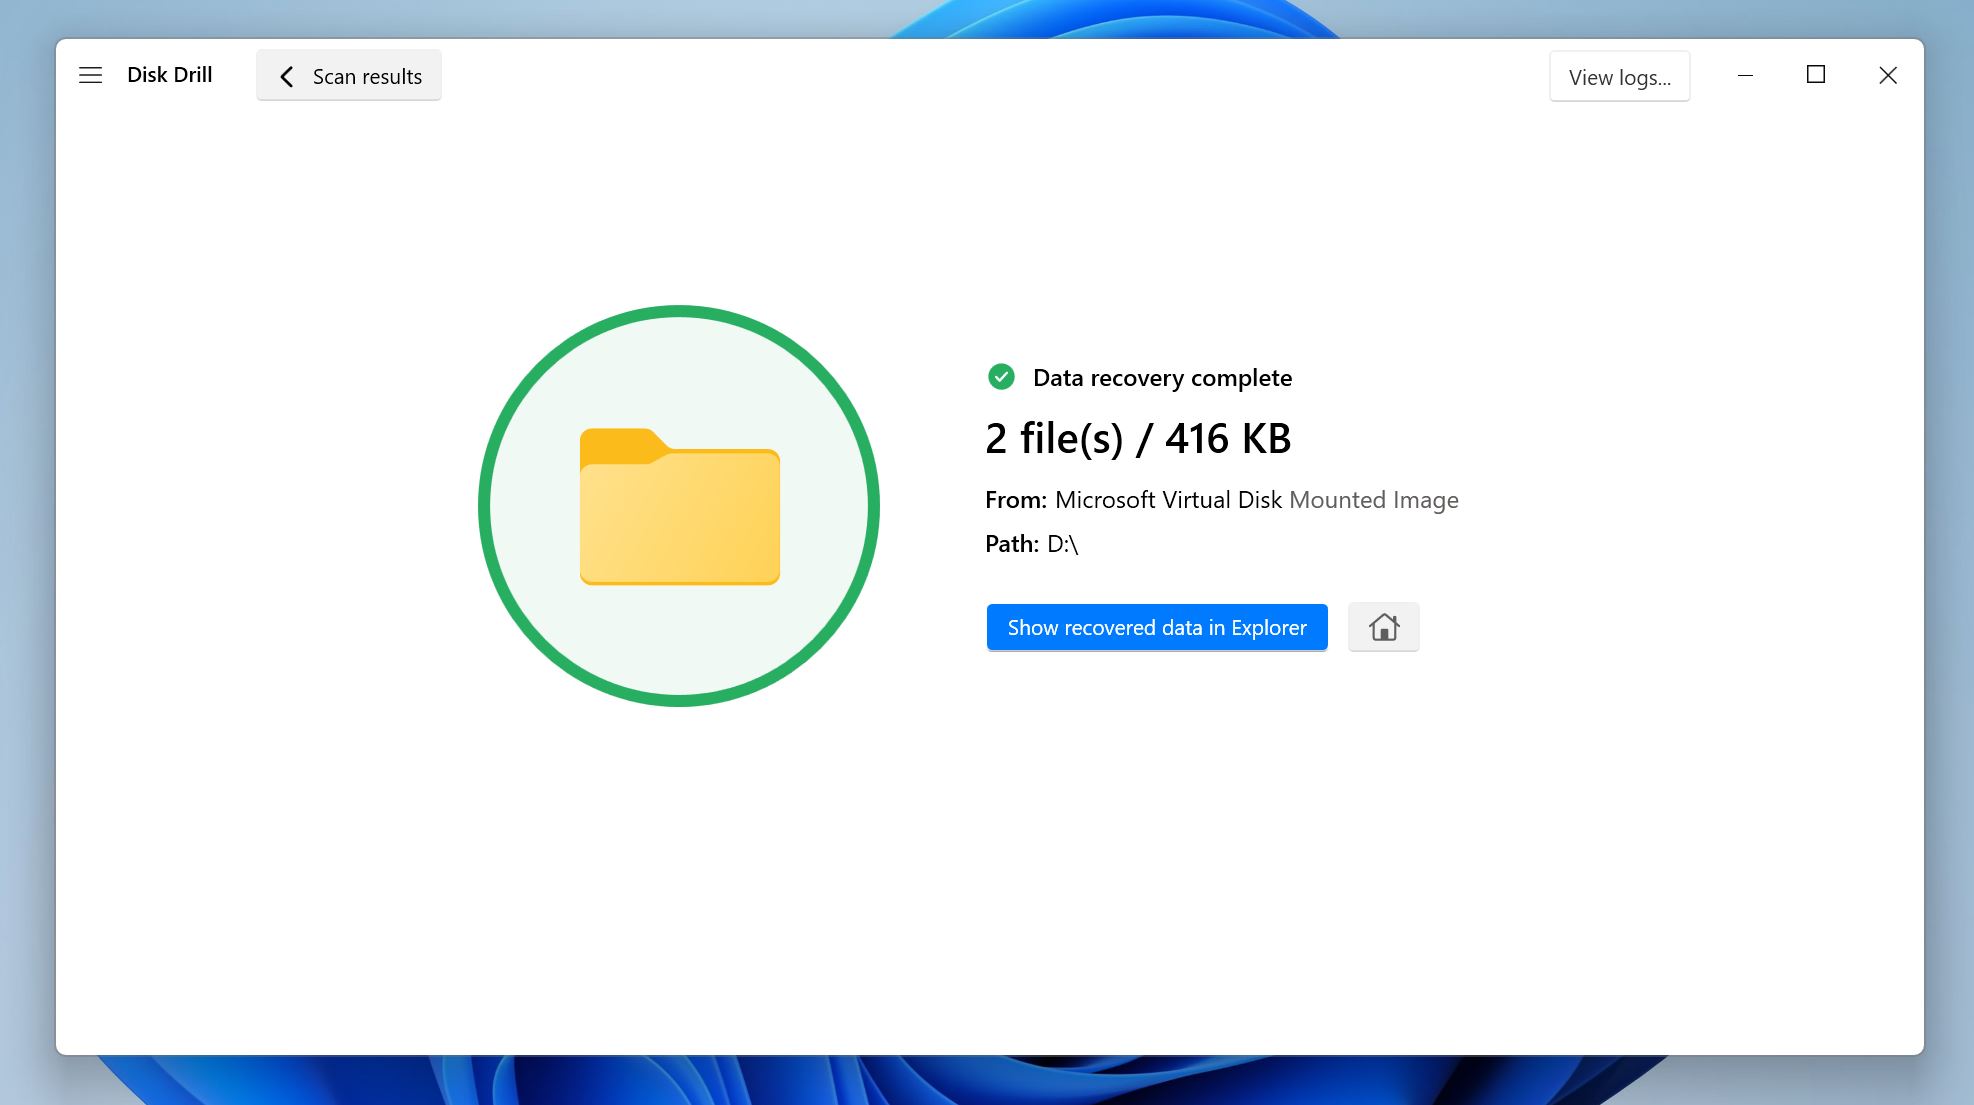
- Disk Drill will recover the selected files. Keep in mind, Disk Drill lets you recover up to 100 MB of data for free, which is enough to recover important documents, pictures, and videos. It’s also a good way to test out the app before committing.
Since Disk Drill doesn’t depend on an intact file system, it can recover data from RAW drives, corrupted SD cards, flash drives, SSDs, and more with the filenames and folder structures intact, regardless of the file type. The app’s Recovery Vault feature can even protect you in case of data loss in the future.
How to Fix CHKDSK Is Not Available for RAW Drives with the Repair Tool
We suggest using TestDisk—a free, open-source tool to fix a RAW drive without formatting it. The app can repair corrupt NTFS and FAT boot sectors, as well as restore corrupt and lost partitions. The absence of a GUI does make TestDisk slightly difficult to use, but the app’s functionality more than makes up for it
Here’s how to fix the CHKDSK is not available for RAW drives error using TestDisk:
Part 1: Repair the Corrupt/Missing Partition
- Download TestDisk and extract the archive.
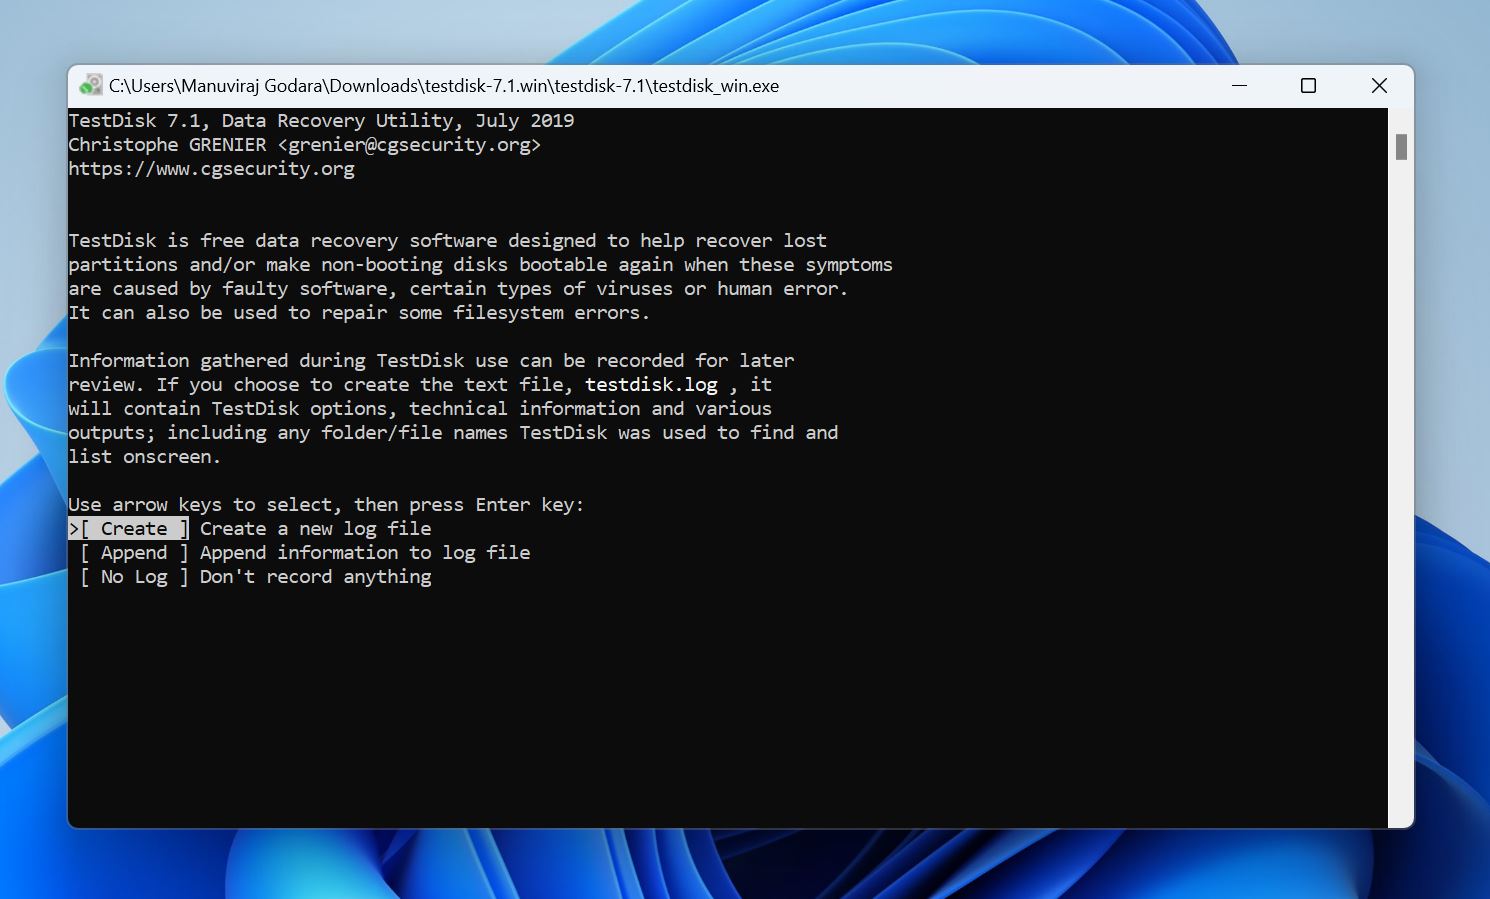
- Run the testdisk_win.exe file from the extracted folder. Since TestDisk lacks a GUI, you’ll need to navigate using the keyboard—use the Arrow keys to highlight options, and press Enter to select them.
- Choose whether you want to create a log file or not, and press Enter. This doesn’t impact the repair process.
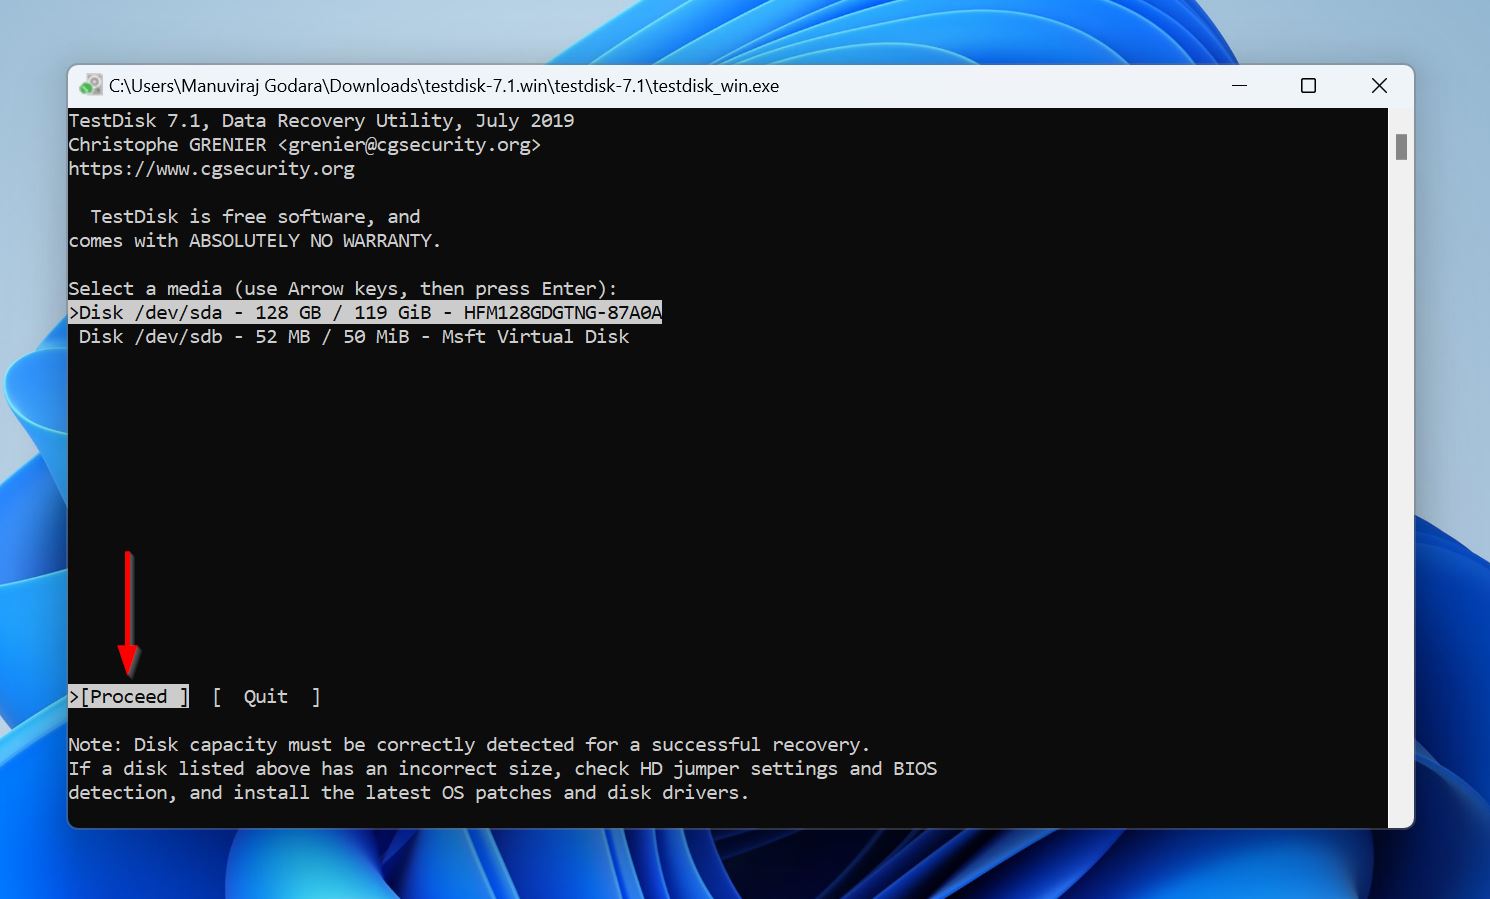
- Select the drive containing the corrupt partition, and press Enter.
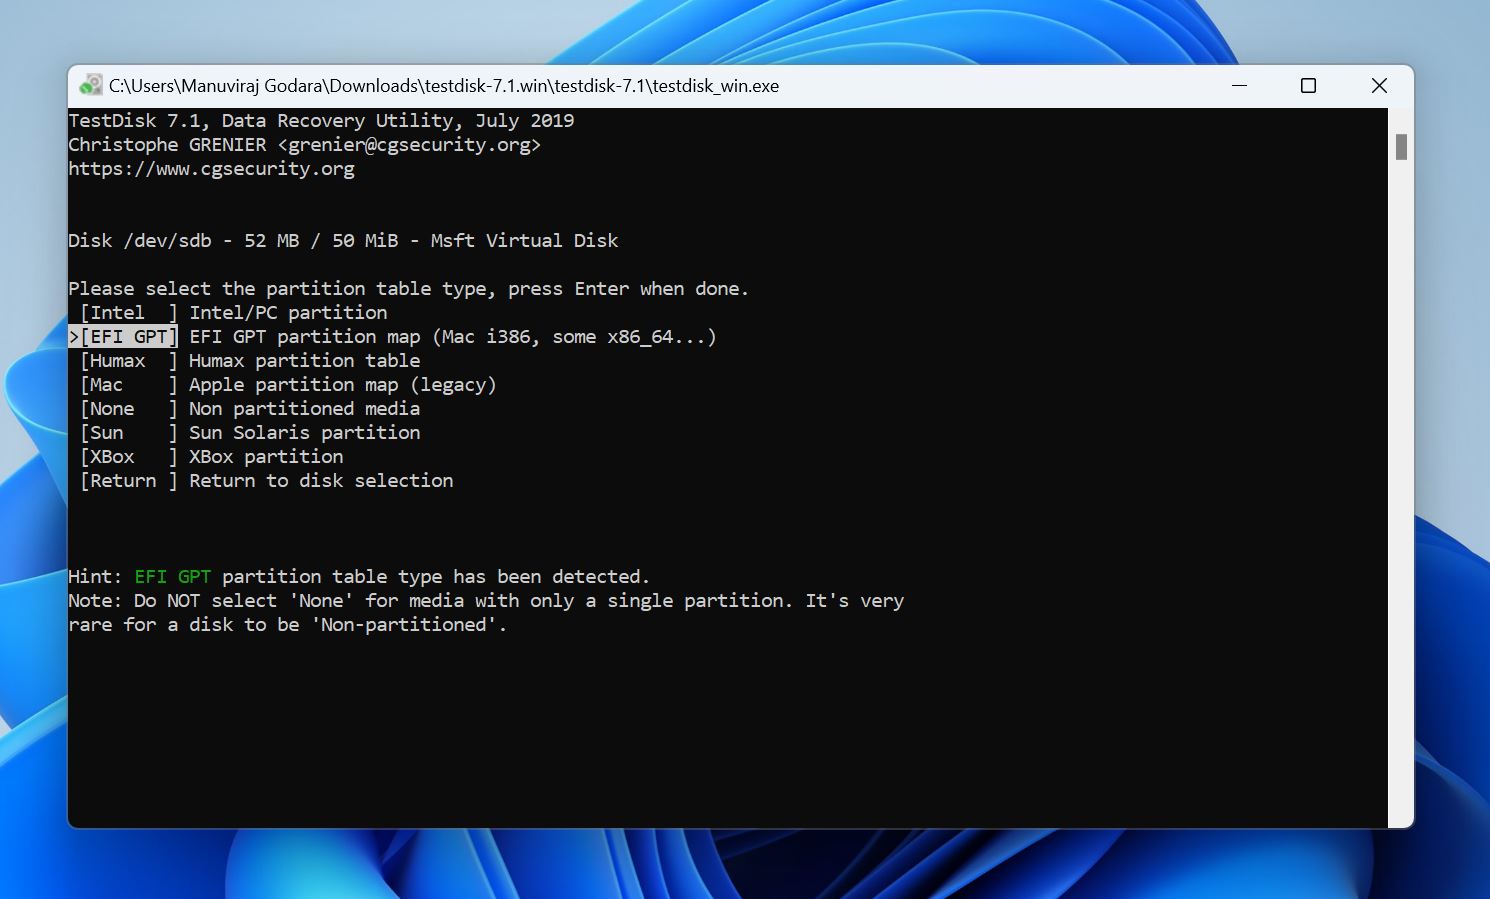
- Choose the partition table and press Enter. TestDisk auto-detects this, so it’s best to just press Enter on this screen, unless you’re sure the disk uses some other partition table than the one highlighted by TestDisk.
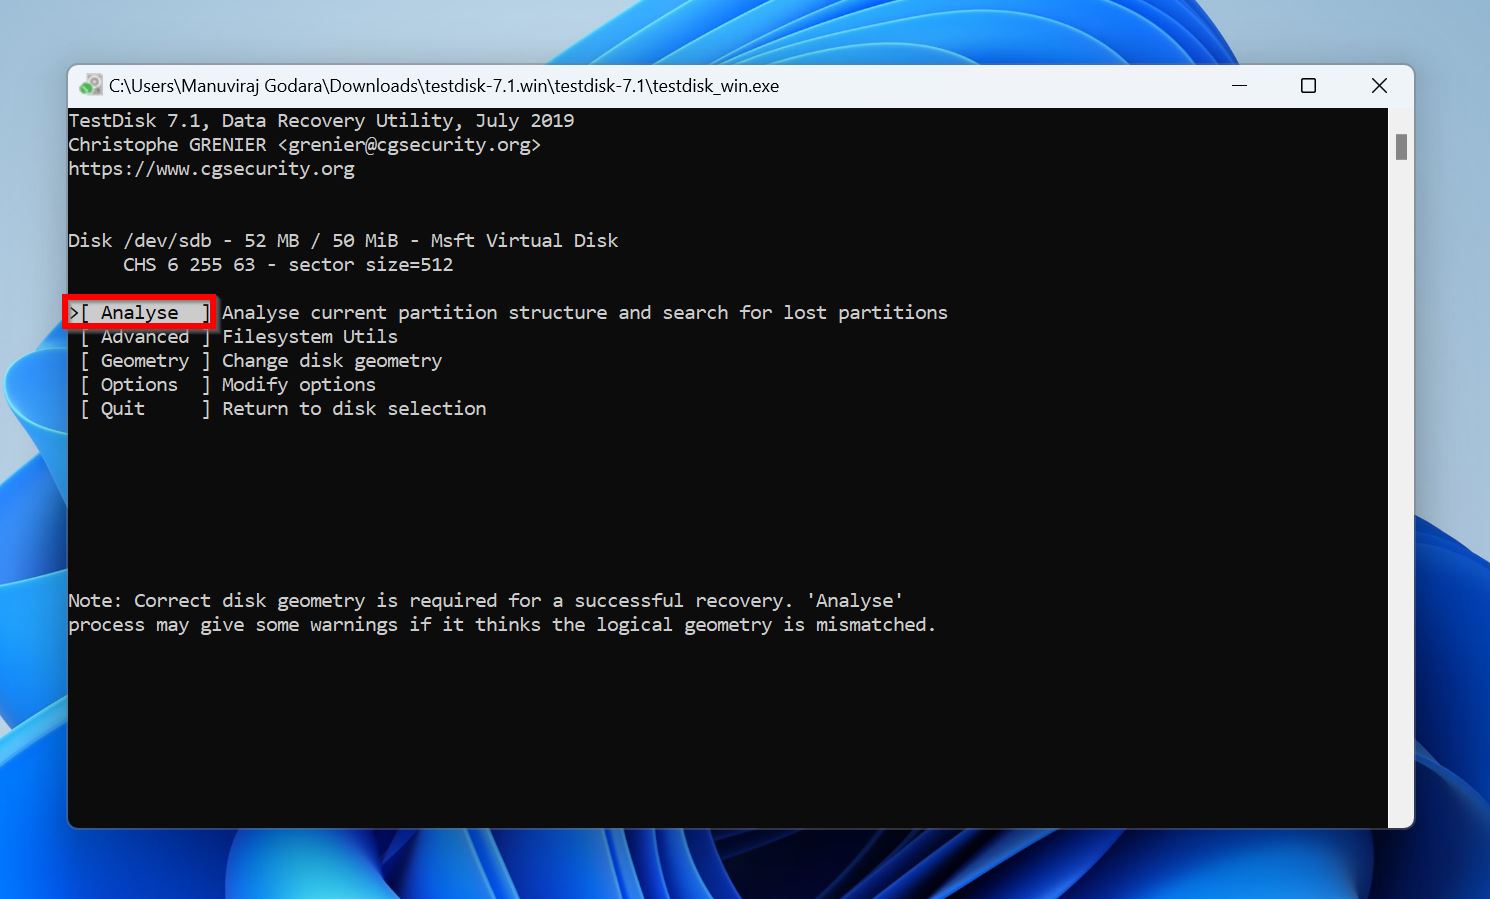
- Select Analyse and press Enter
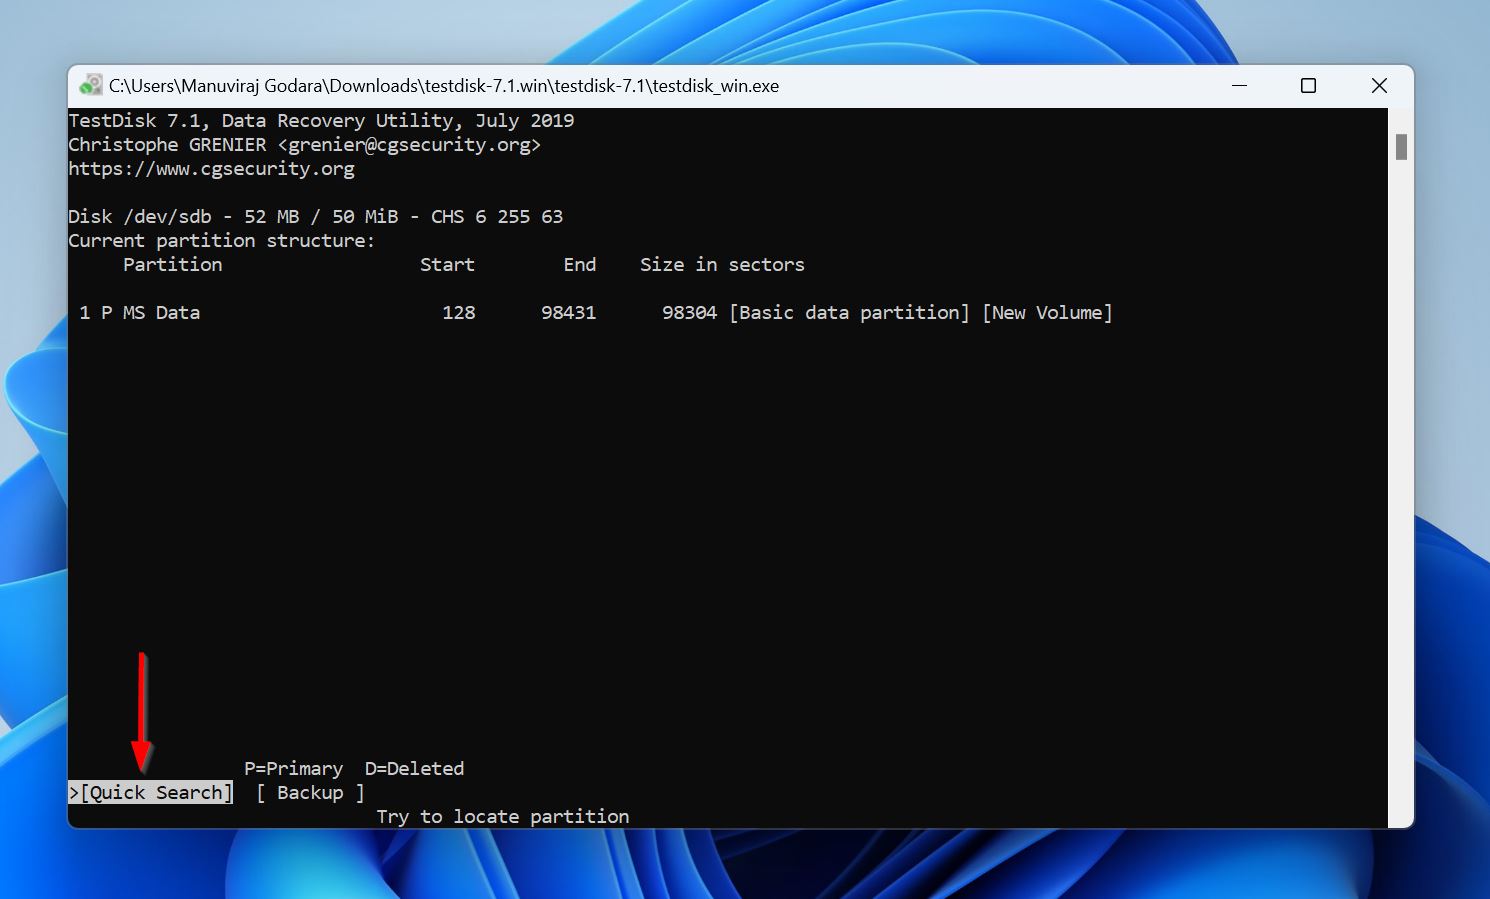
- Select Quick Search and press Enter.
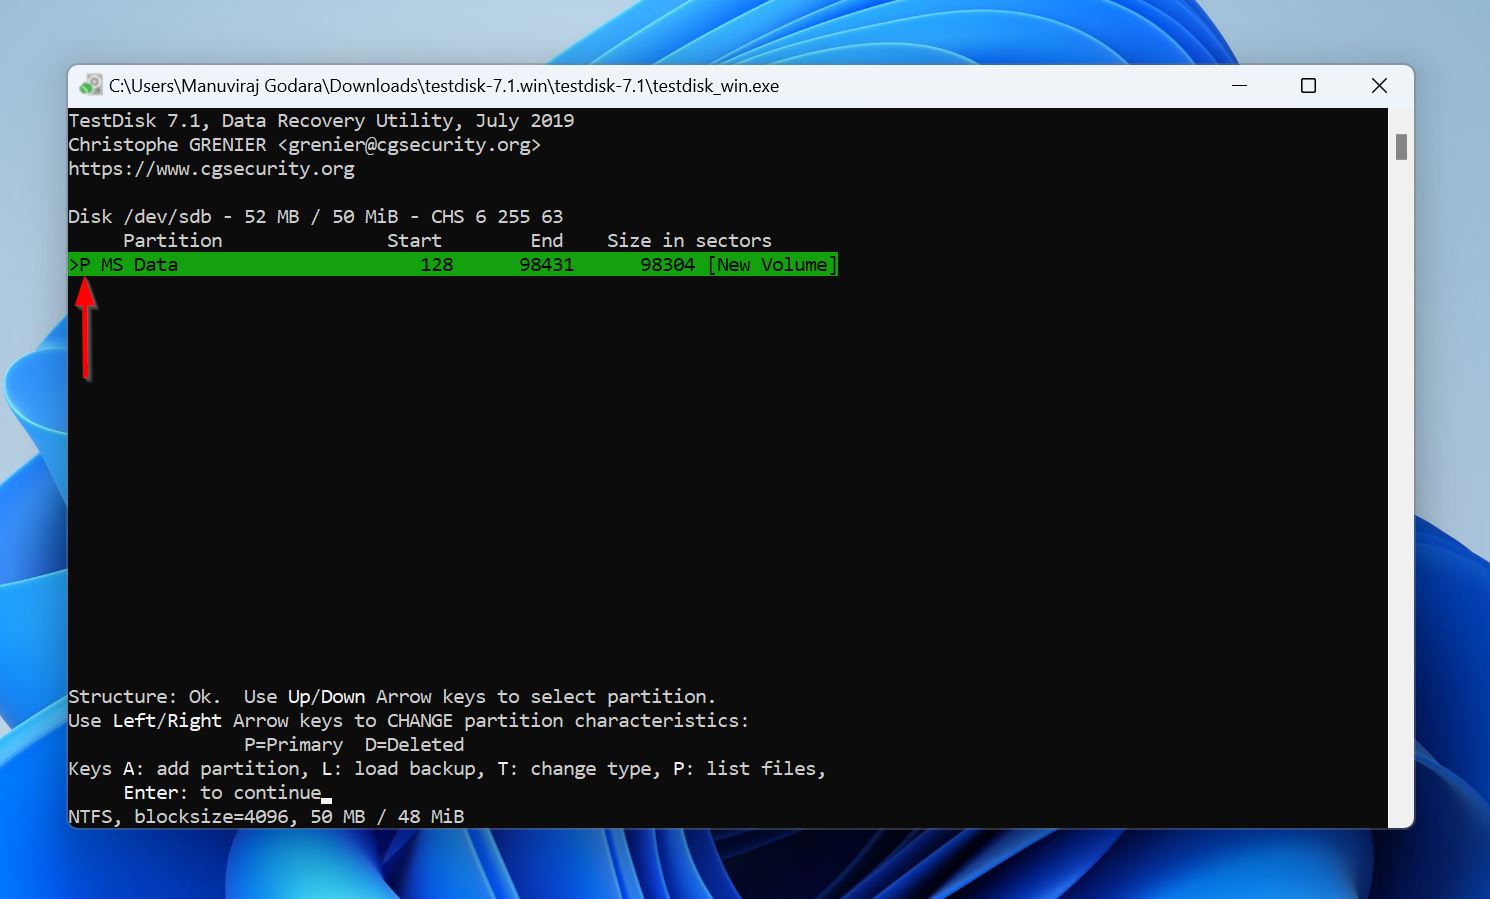
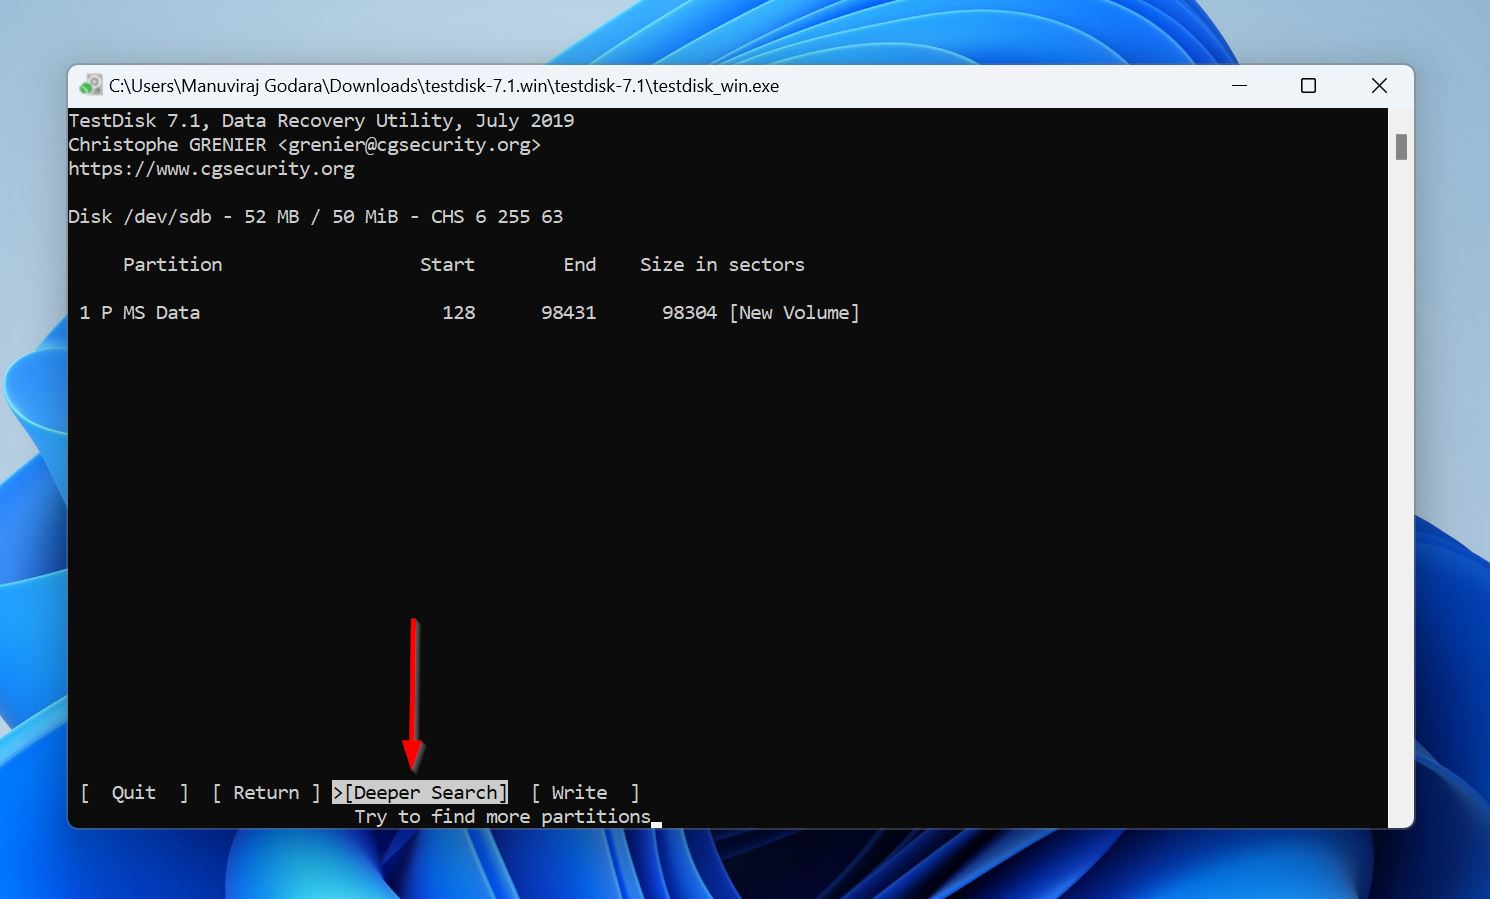
- TestDisk will display a list of partitions. Each partition will have a P (Primary), or D (Deleted) prefix before it. You can cycle through the prefixes using the Left and Right Arrow keys—make sure the partition you want to recover has a P prefix before it. Press Enter.
- (OPTIONAL) In case you didn’t find the relevant partition, select Deeper Search and follow Step 8 again.
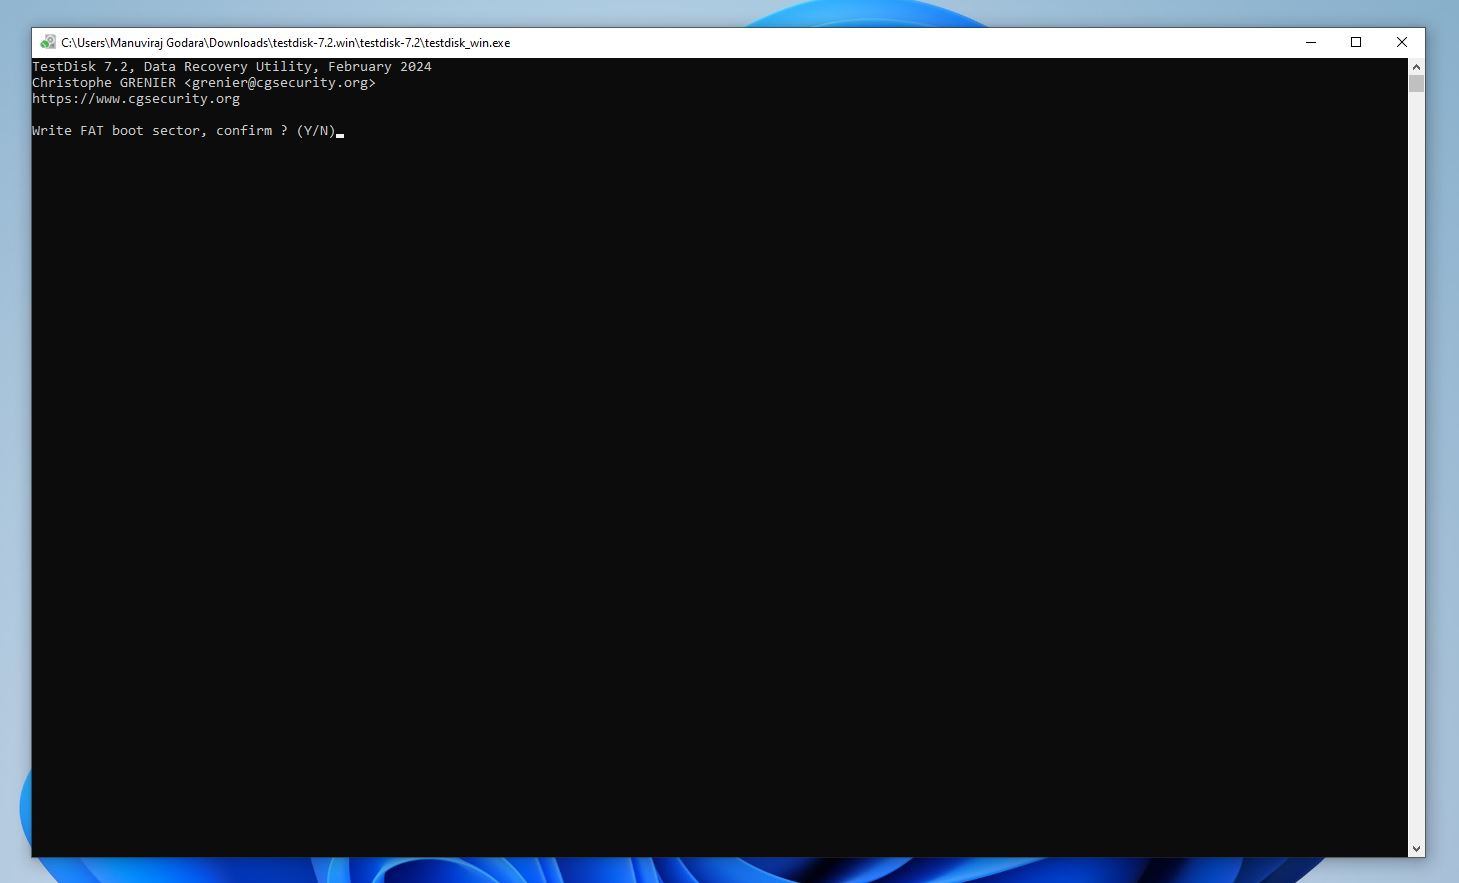
- Select Write and press Enter.
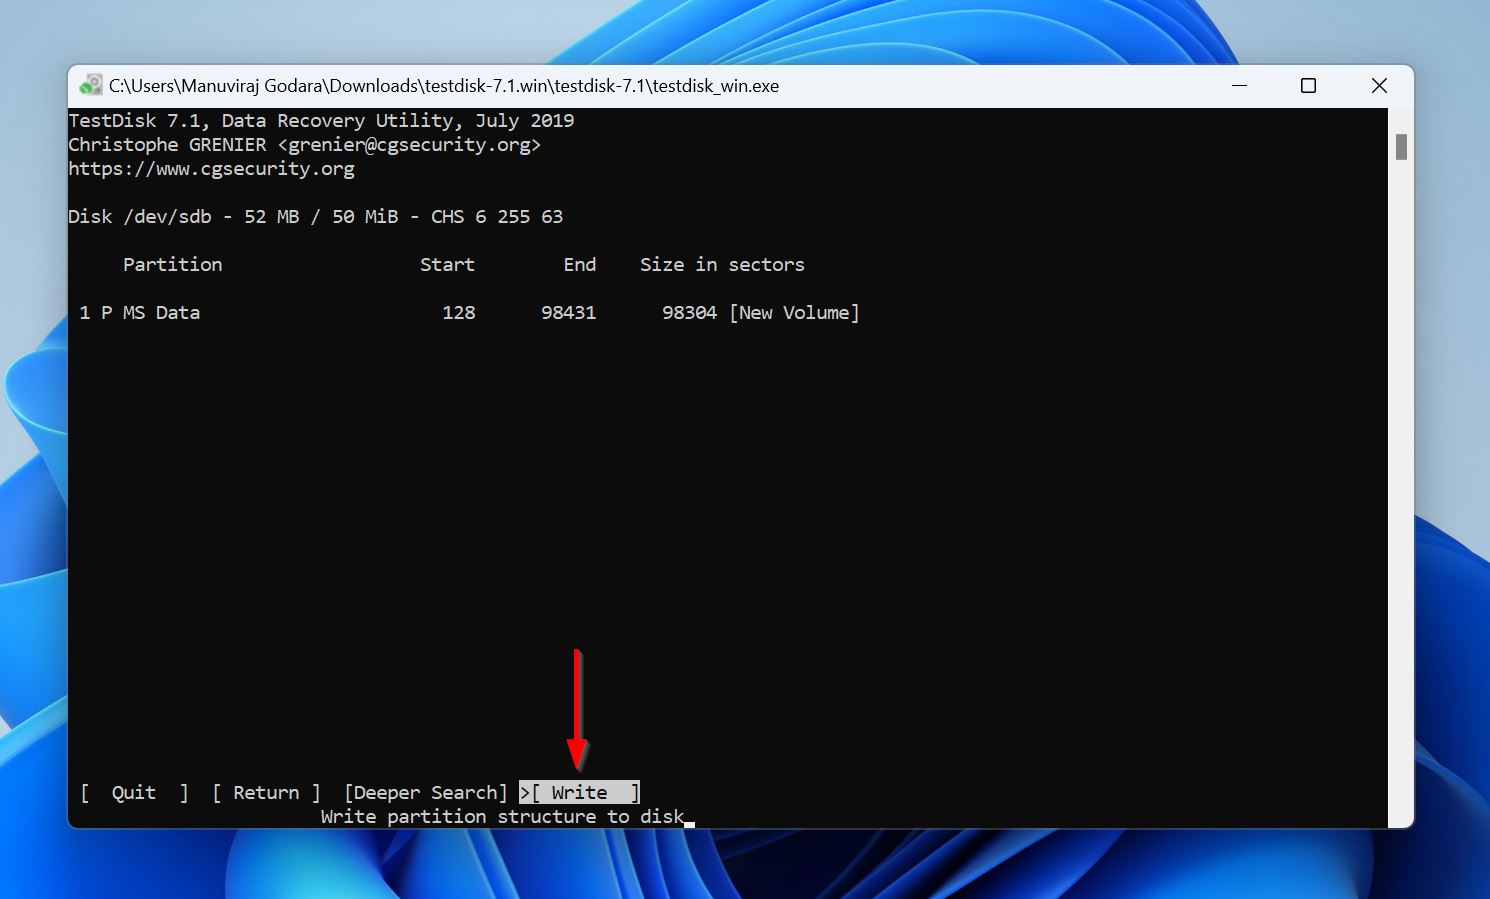
- Press Y to confirm.

- TestDisk will recover the corrupt/missing partition.
Part 2: Rebuild the Boot Sector
- Follow Steps 1 to Step 5 from Part 1 above.
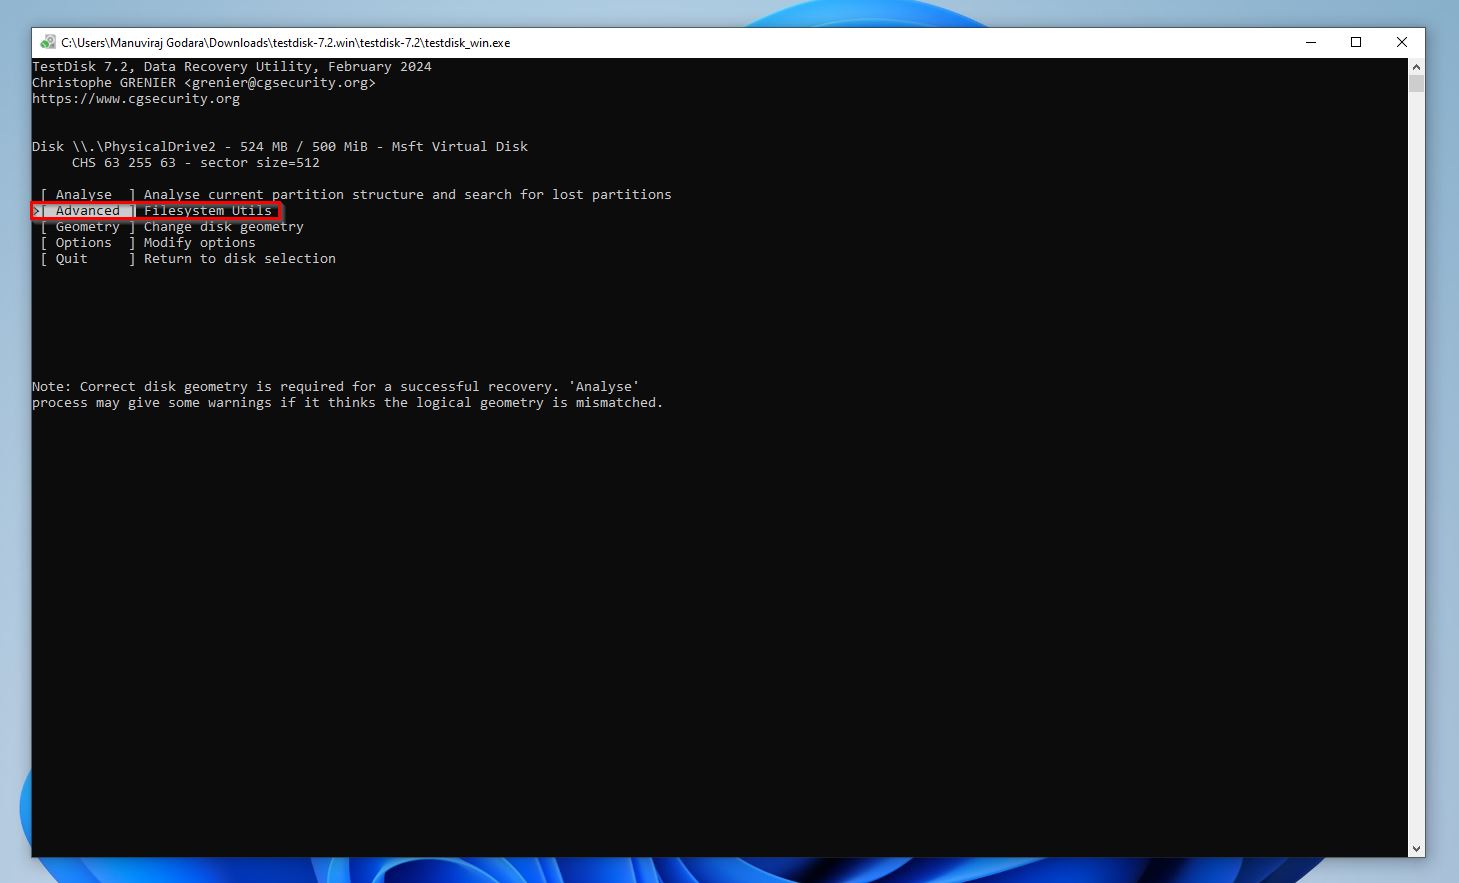
- Select Advanced and press Enter.
- Select the MS Data partition of the drive that CHKDSK wasn’t scanning. Use the Up and Down arrow keys to do this. Once the right partition is highlighted, choose Boot and press Enter. Use the Left and Right arrow keys.
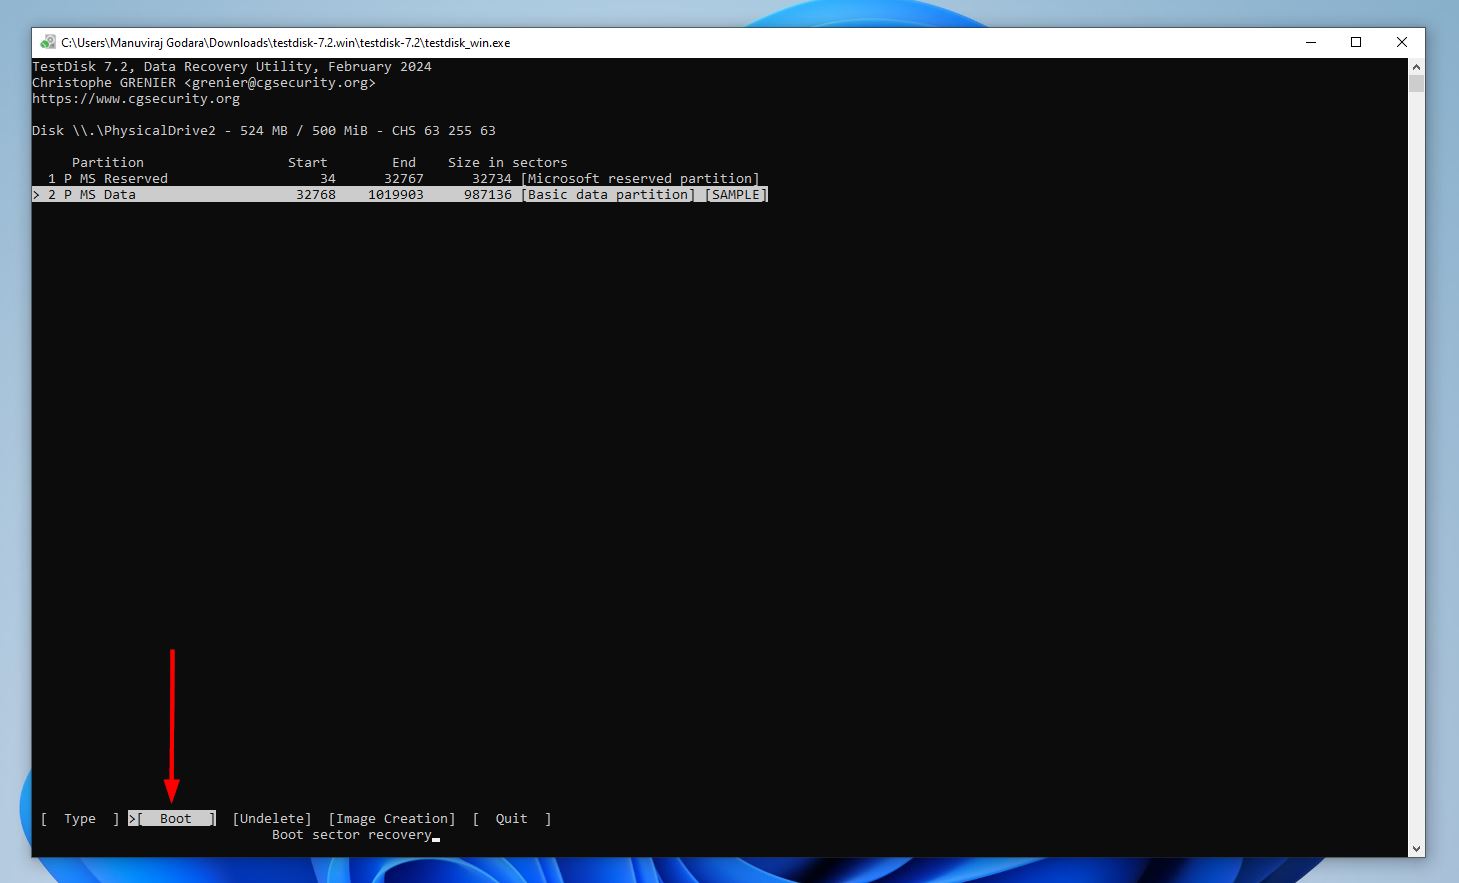
- Select Rebuild BS and press Enter.

- Select Write and press Enter.

- Press Y for confirmation.
- TestDisk will rebuild the boot sector of the partition.
Fix CHKDSK is Not Available for RAW Drives Using CMD
Once you’ve recovered your data, you can safely format the drive to remove its RAW status. However, unless you specifically want to refresh the drive’s file system—in which case, copy the drive’s contents somewhere else, format the drive, and copy them back again—there’s no real need for formatting the drive if repair was successful using the steps in the previous section.
Windows lets you format the drive using various ways, but we’ll take you through the process using Windows’ Diskpart utility. It offers much finer control over the formatting process and works even if the drive can’t be accessed or formatted using other ways like Windows Explorer.
Here’s how to fix the “CHKDSK is not available for RAW drives” error using Diskpart in CMD:
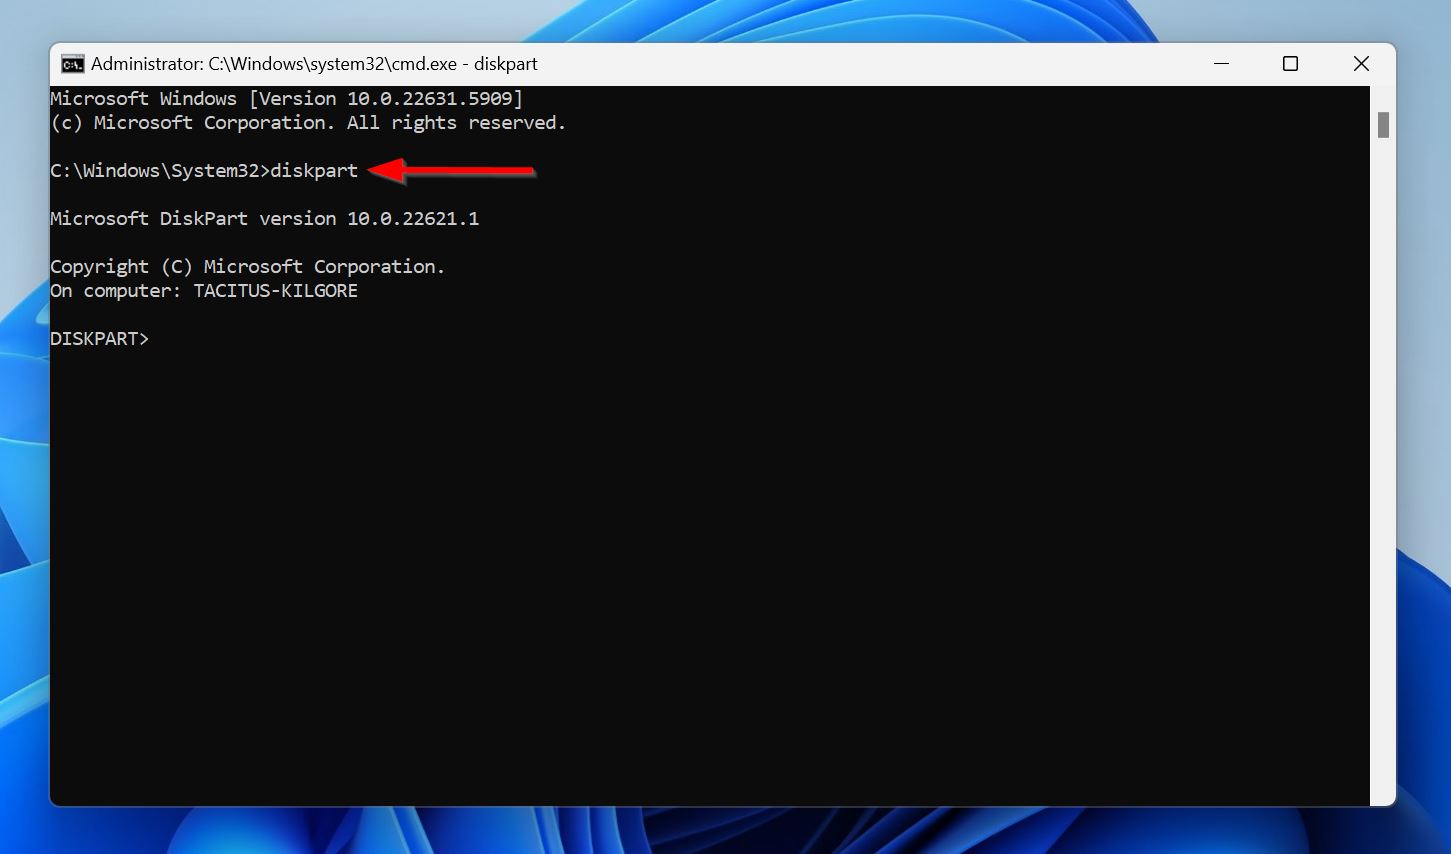
- Type “cmd” in Windows Search (Windows Key + S). Right-click on Command Prompt from the search results, and choose Run as Administrator.
- Type diskpart in the Command Prompt and press Enter.
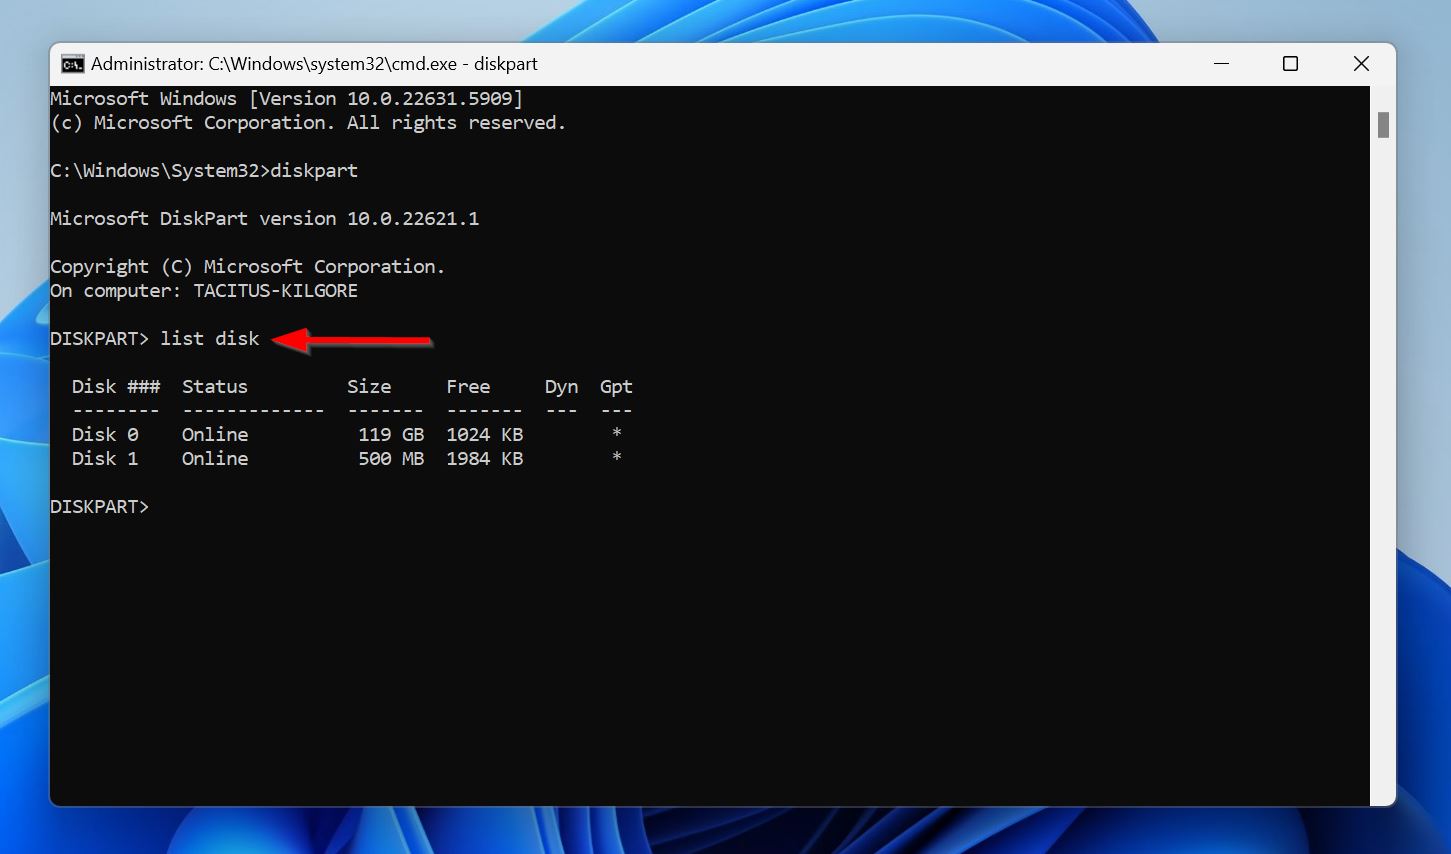
- Type list disk and press Enter. Note down the drive, or the drive containing the partition which CHKDSK said was RAW.
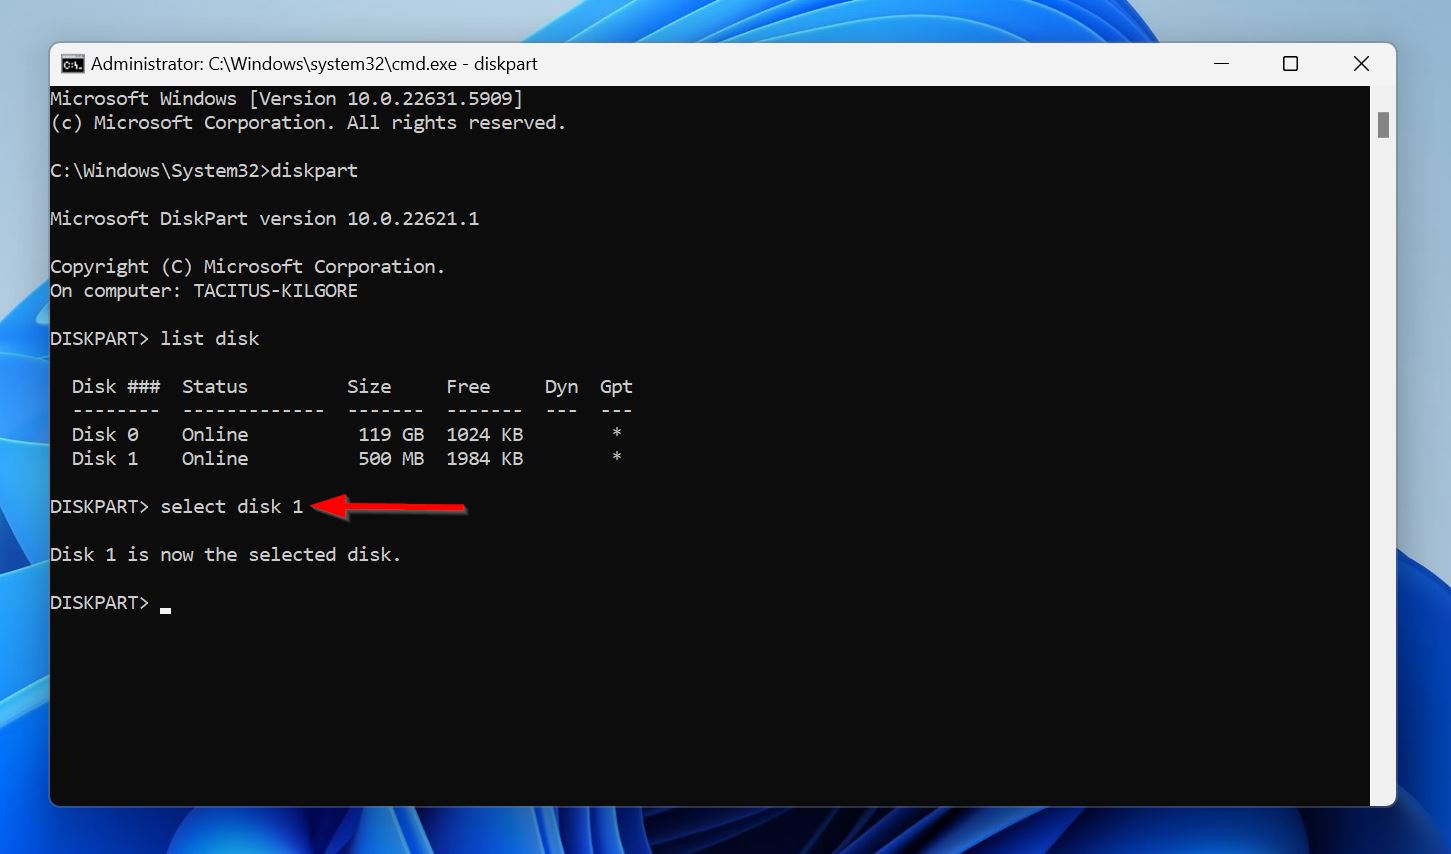
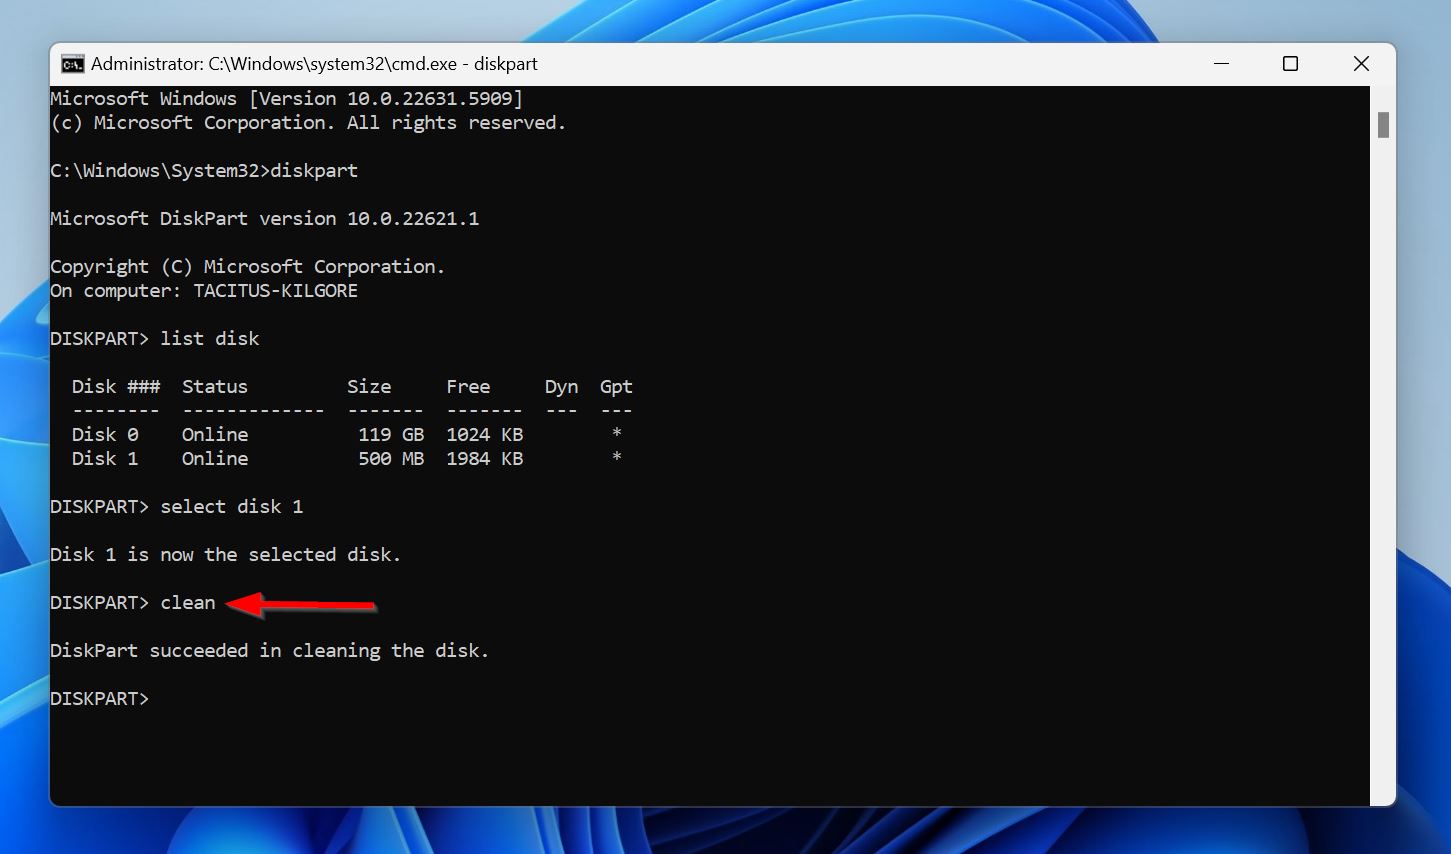
- Type select disk x and press Enter. Replace x with the drive number (0, 1, 2, etc.) of the disk which CHKDSK coudln’t scan.
- Type clean and press Enter. This wipes the partition table and related info from the drive.
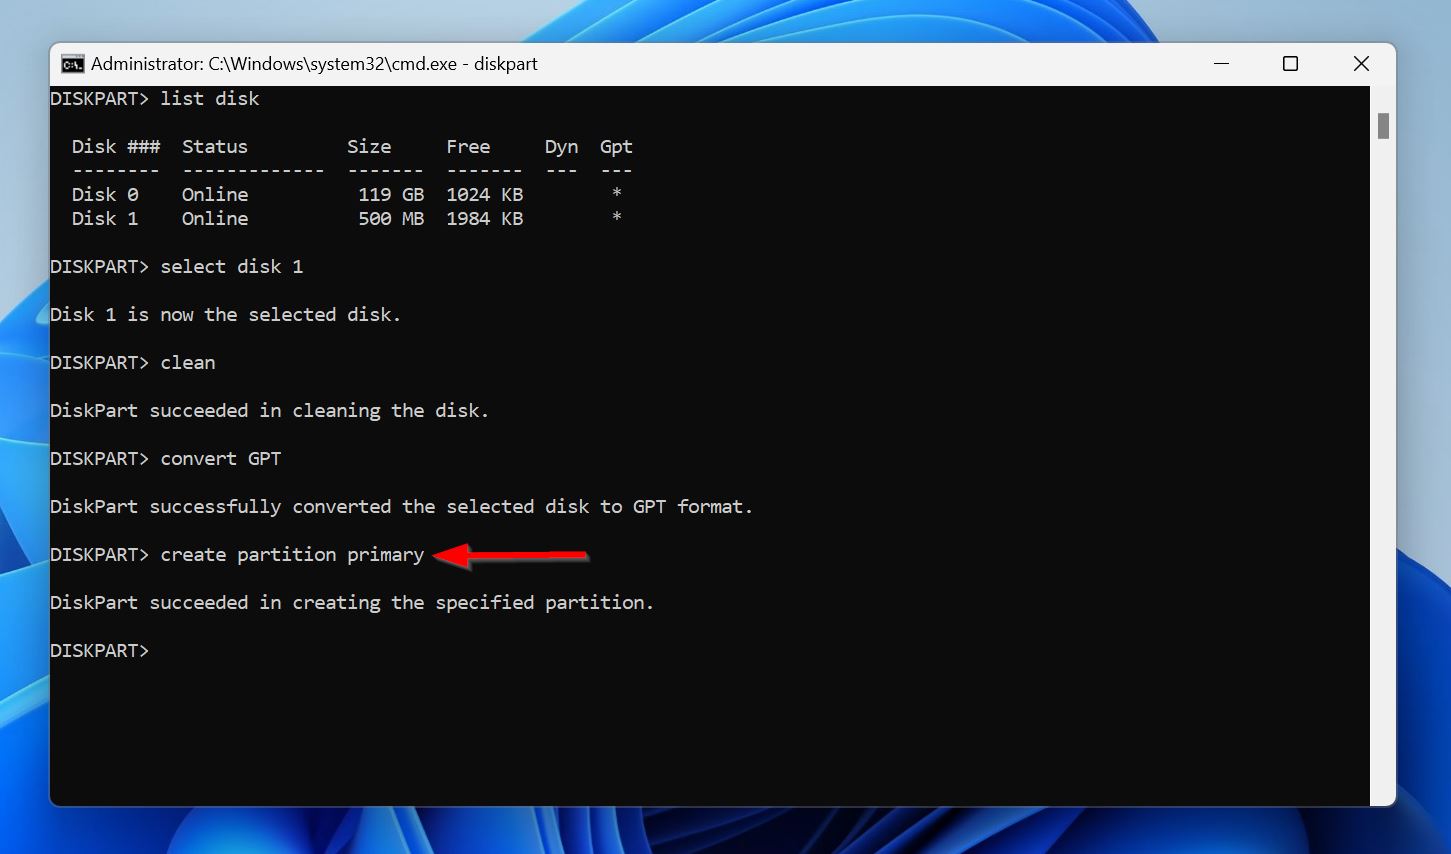
- Type create partition primary and press Enter. This creates a primary partition that is ready to be formatted. Unless you specify a size, this primary partition will use up the drive’s total storage capacity.
- Type format fs=NTFS and press Enter.
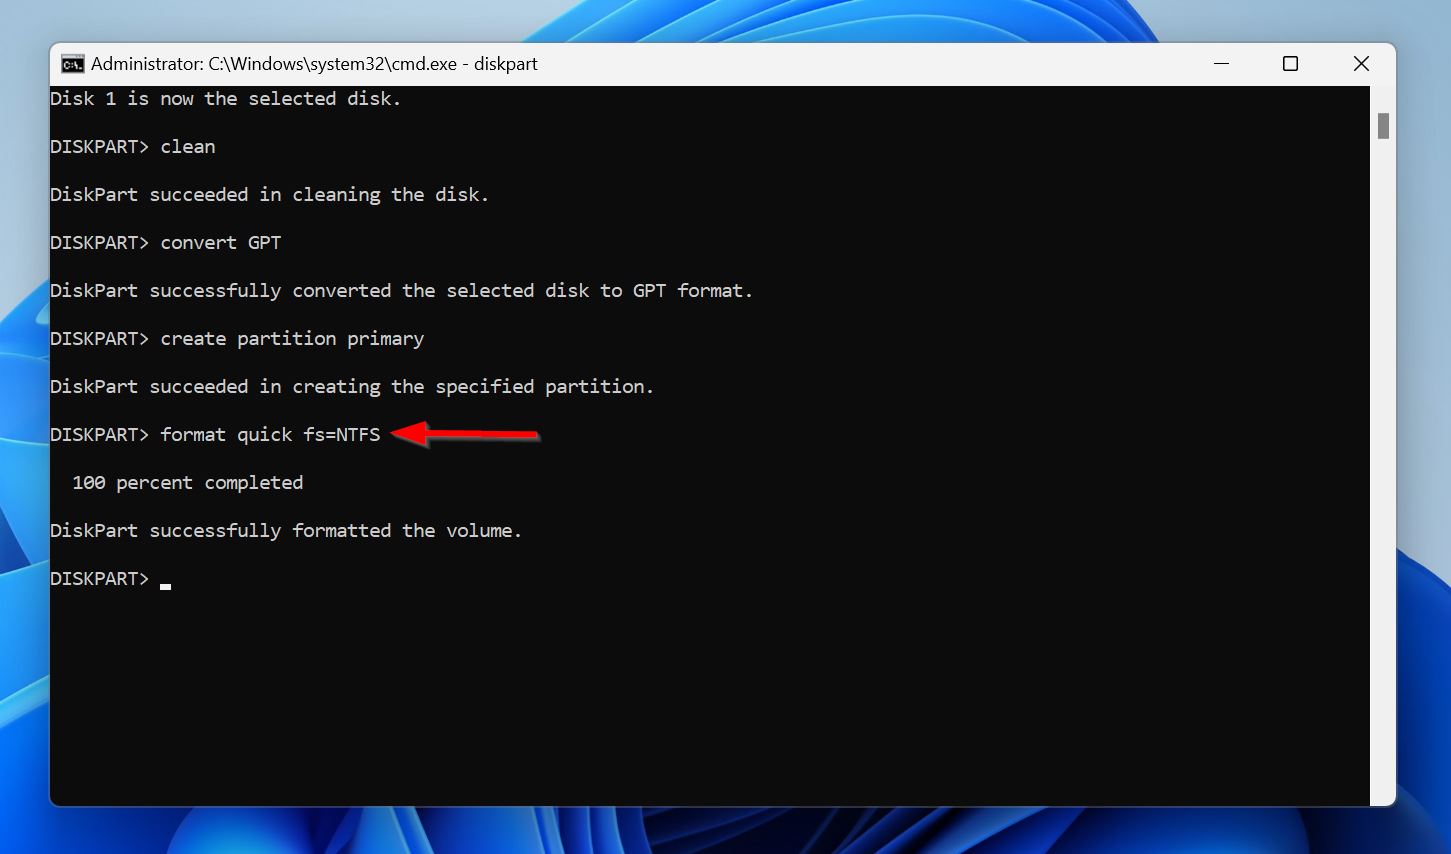
- The drive will be formatted with the NTFS file system, and will no longer show up as RAW.
FAQ
Yes, a USB enclosure, or bridge, can make a perfectly fine drive show up as RAW on Windows. This may happen because the enclosure or bridge isn’t receiving enough power, the cable is damaged, or the enclosure can’t translate SATA commands to USB properly. To confirm this, disconnect the drive from the enclosure and connect it to your PC directly.
This mismatch between Disk Management and CHKDSK usually occurs because the drive’s MBR/partition table is corrupt. CHKDSK won’t run on a drive that has a corrupt partition table, even though the file system is fine, leading to the check disk is not available for RAW drives problem.
You can’t technically “convert” a RAW drive to NTFS because a RAW status indicates that the file system is damaged or missing. Some drives may show up as RAW because of a damaged boot sector too. Tools like TestDisk can rebuild a corrupt boot sector, making the drive NTFS again. Apart from this, formatting is the only way to turn a RAW drive to NTFS: it’s best to recover your data before attempting this.