Formatted the wrong USB drive or clicked OK when Windows said “You need to format the disk” without thinking twice? Your files are most likely NOT gone because the default formatting method just makes data invisible to your operating system while leaving it physically on the drive.
But you need to stop using your USB because every write operation could potentially overwrite your recoverable data. The only thing you should do with the storage device is run recovery software following our detailed instructions on how to unformat a USB at home. We’ve personally tested and verified each method for its effectiveness, so you won’t waste your time on something that doesn’t work or makes the situation worse.
What Caused the Need to Unformat the USB Drive?
Before you can unformat a USB drive, you should understand what got you here so that you can avoid ending up in the same situation again and, most importantly, can approach the recovery of your data the right way.
Most formatting situations fall into two categories:
- 😰 Human error: Maybe you had multiple USB drives plugged in and formatted the wrong one, or you were creating a bootable drive and accidentally selected your backup USB instead of the blank one. Mix-ups like these examples happen all the time, especially when users don’t double-check before performing actions with far-reaching consequences. Fortunately, Windows uses the Quick Format method by default, which only recreates the file system while leaving the data intact (waiting to be overwritten with new date).
- ⚙️ System errors and corruption: Sometimes Windows forces your hand with error messages like “You need to format the disk before you can use it” or “The volume does not contain a recognized file system.” These pop up when your USB’s file system gets corrupted from improper ejection, power failures during transfers, or developing bad sectors. You click Format because it seems like the only way to access the drive again. Again, only the Quick Format method is used, so data isn’t immediately erased, but its recovery might be complicated by its corruption.
In either case, your priority right now should be to stop using the USB flash drive. Any new files written to it could overwrite what you’re trying to recover. The same goes for misguided data recovery attempts, such as those involving defragmentation or the CHKDSK tool.
How to Unformat USB Drive with Recovery Software
There are several USB recovery tools available, and we don’t want to overwhelm you by describing several of them. Instead, we think it’s best to focus exclusively on the tool that delivers the best results with the least amount of technical expertise required (none really), and that tool is Disk Drill.
You can use Disk Drill to scan your USB drive completely for free and see exactly what’s recoverable before committing to anything. The process is straightforward, even if you’ve never used data recovery software before, and it takes just a few minutes to complete it. Let’s walk through each step.
Step 1: Download and Install Recovery Software
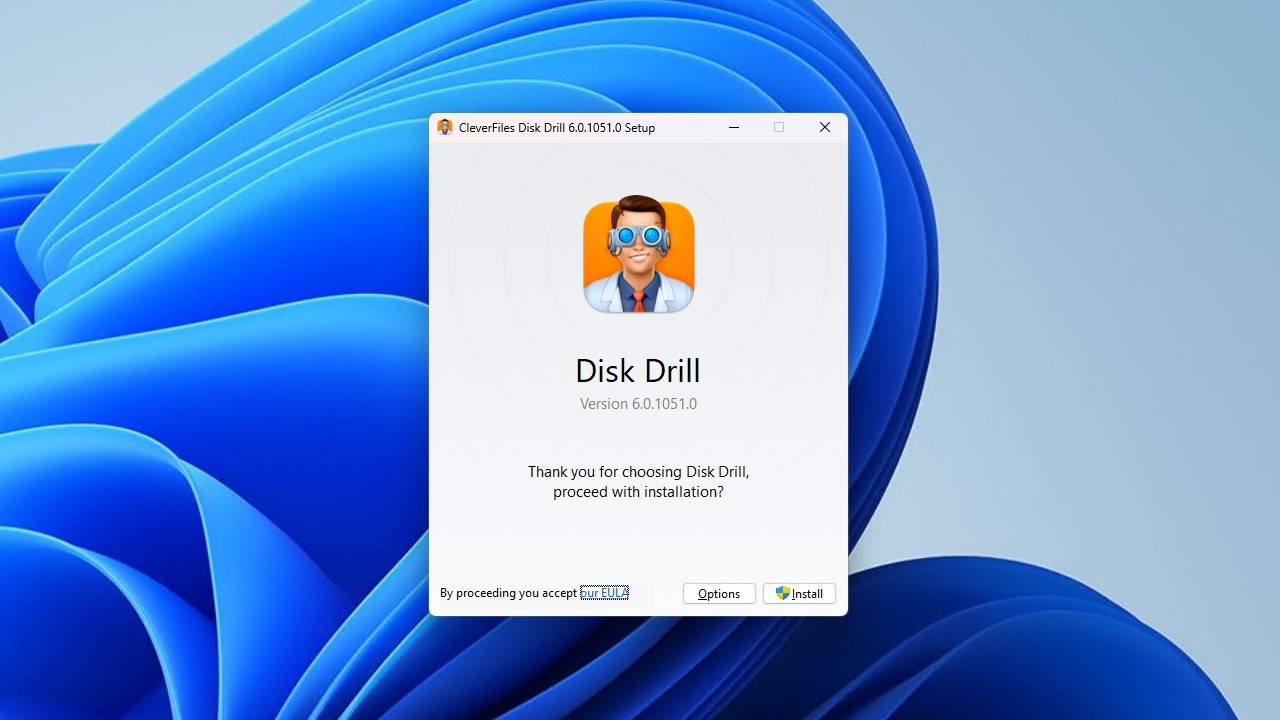
First, download Disk Drill and install it on your computer’s main drive (NOT on the USB you’re trying to recover). The free version for Windows lets you unformat up to 100 MB of data from your USB device (plenty for several pictures or documents or even a smaller video), while Mac users can preview all recoverable files to gain confidence in the software’s ability to get them back.
Step 2: Select Formatted USB Drive from the List
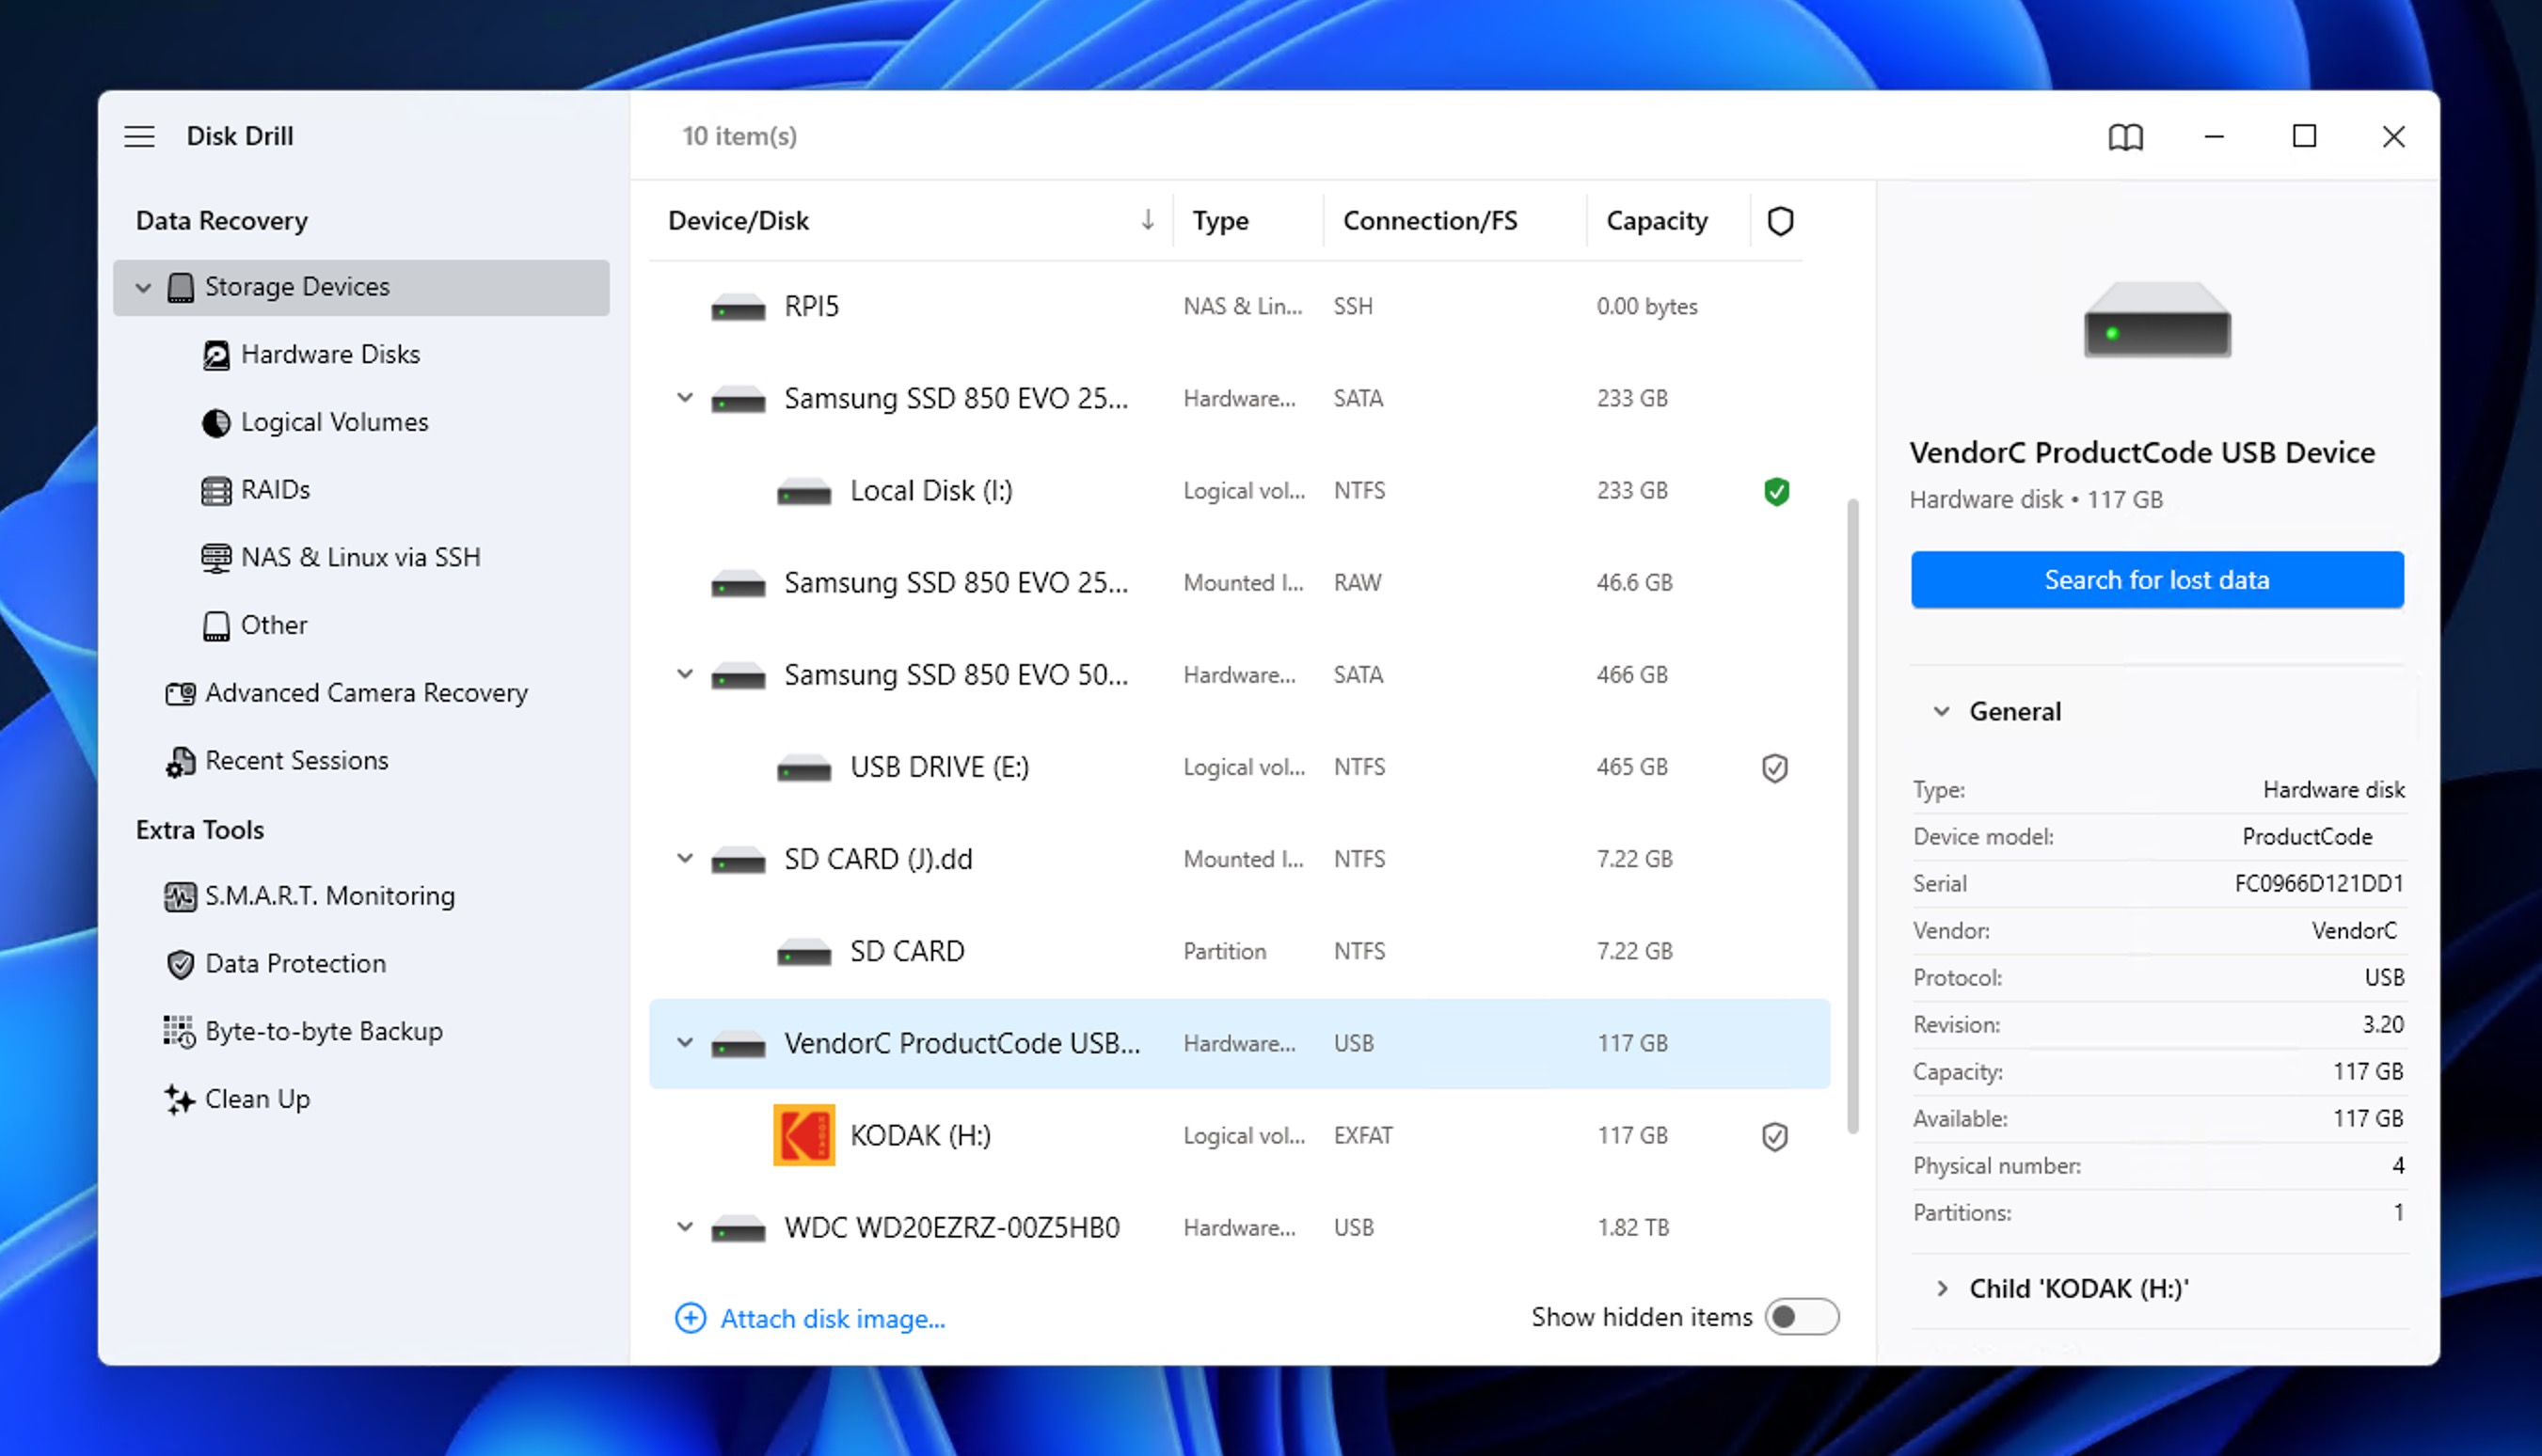
Launch Disk Drill and look for your formatted USB drive in the Storage Devices section. It should appear even if your operating system shows it as empty or unformatted. The drive might display its original label or show up as something generic like “NO NAME” or “USB Drive.” Check the storage capacity to make sure you’re selecting the right one. If you don’t see your USB listed, try a different USB port.
Step 3: Search for Lost Data
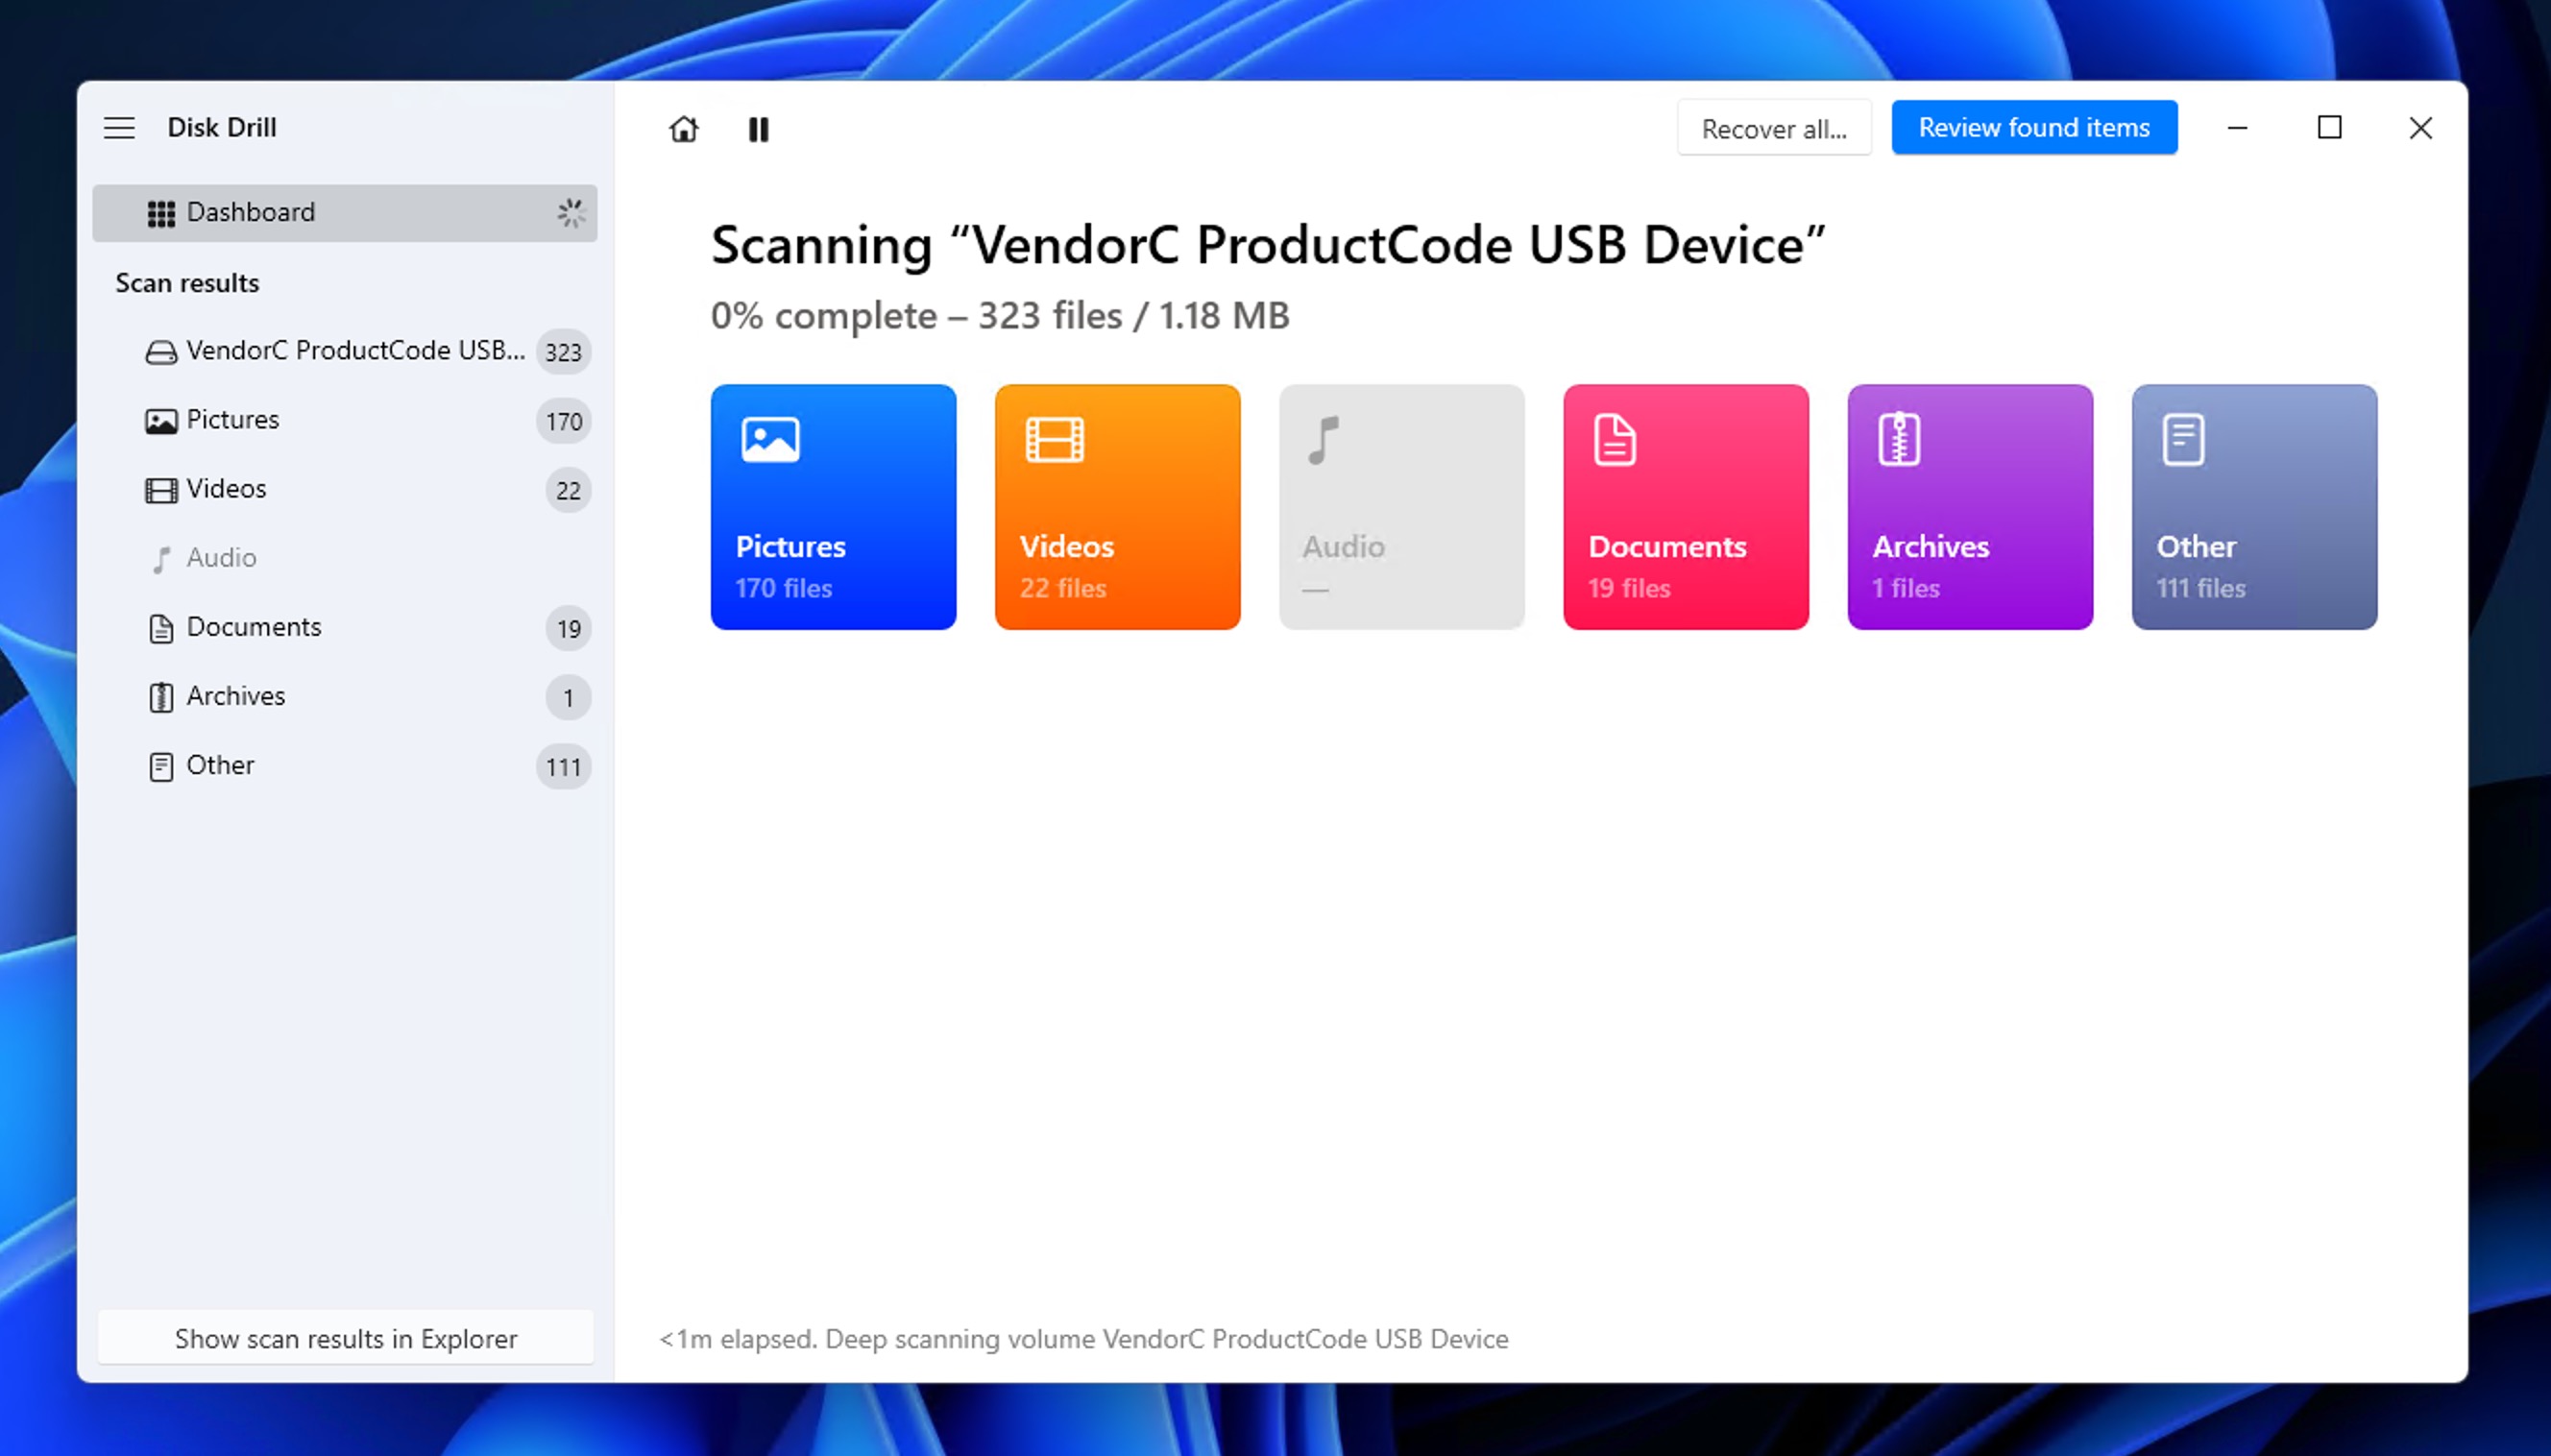
With your USB drive selected, click the Search for lost data button. Choose the Universal Scan method unless you want to recover only images and videos captured by a digital camera or drone. In such cases, you want to use the Advanced Camera Recovery method. The scanning process can take anywhere from a few minutes to an hour depending on your USB’s size and condition. You can click Review found files to see the results immediately (scanning will continue in the background).
Step 4: Review Recovery Results
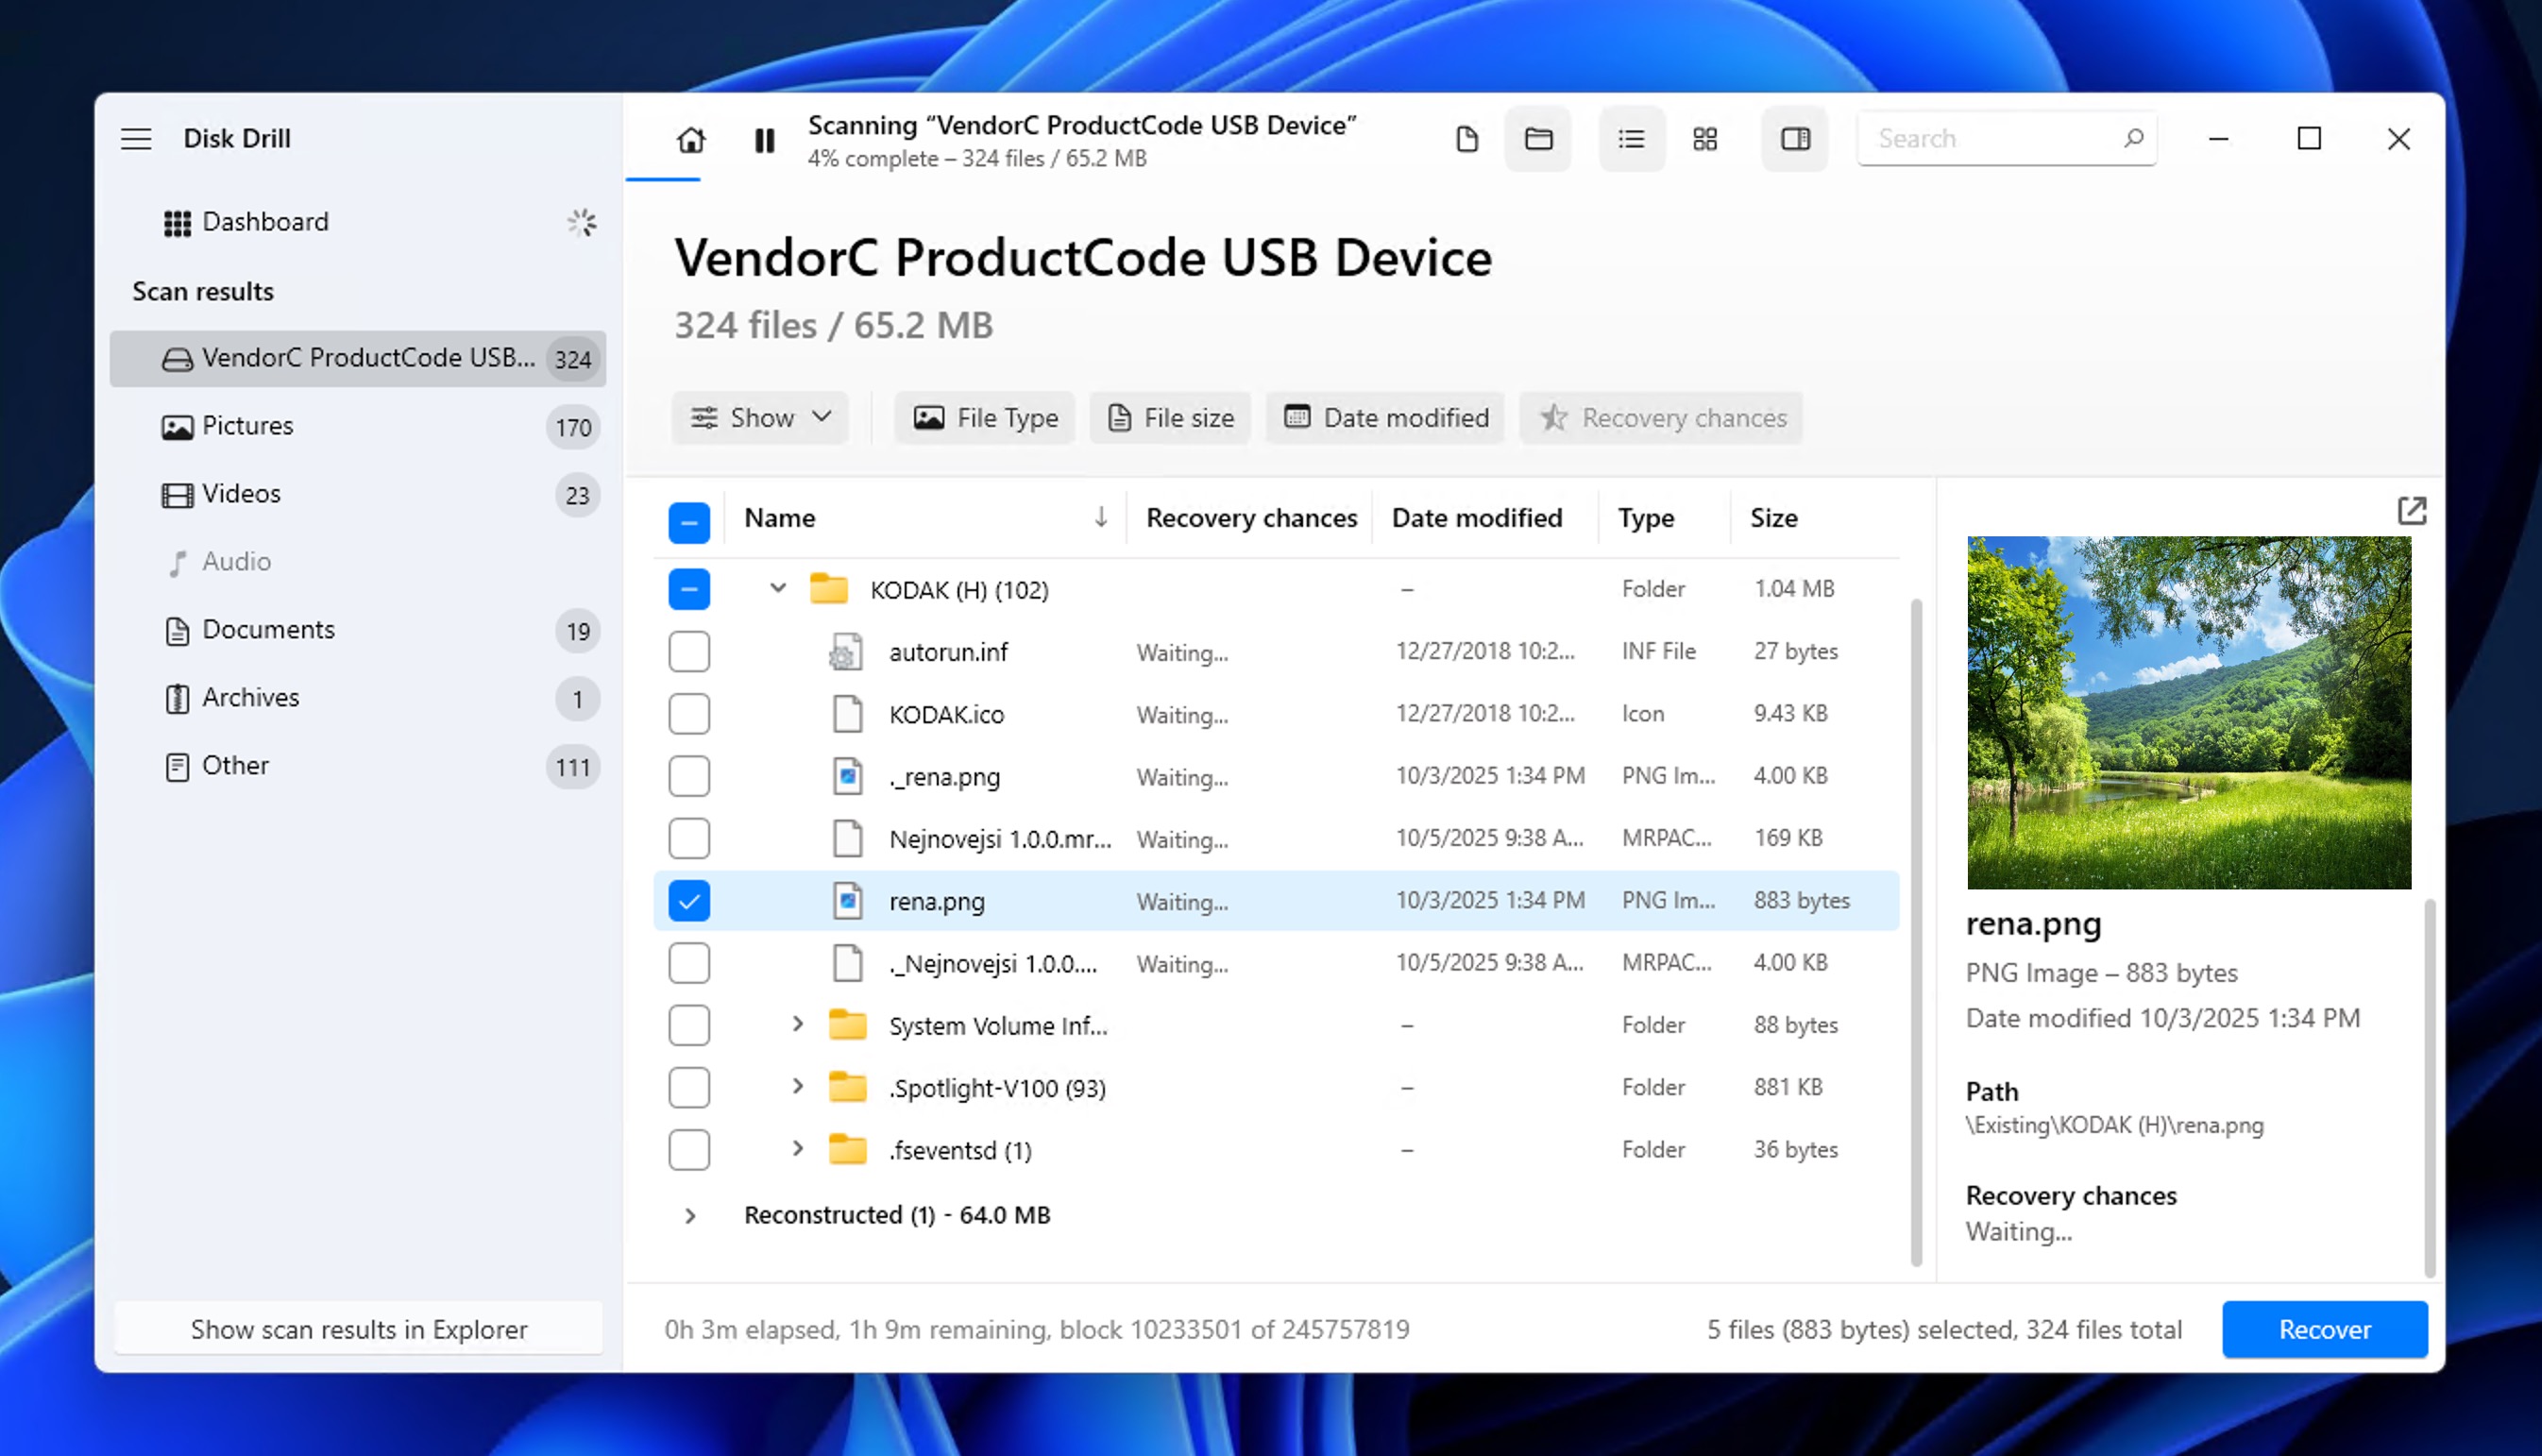
You can filter results by file type, size, or date modified to find specific files faster. Select any file you’re interested in to preview it directly in Disk Drill. If you can preview it without any issues, then it’s not corrupted and should be recoverable.
Step 5: Recover Your Files
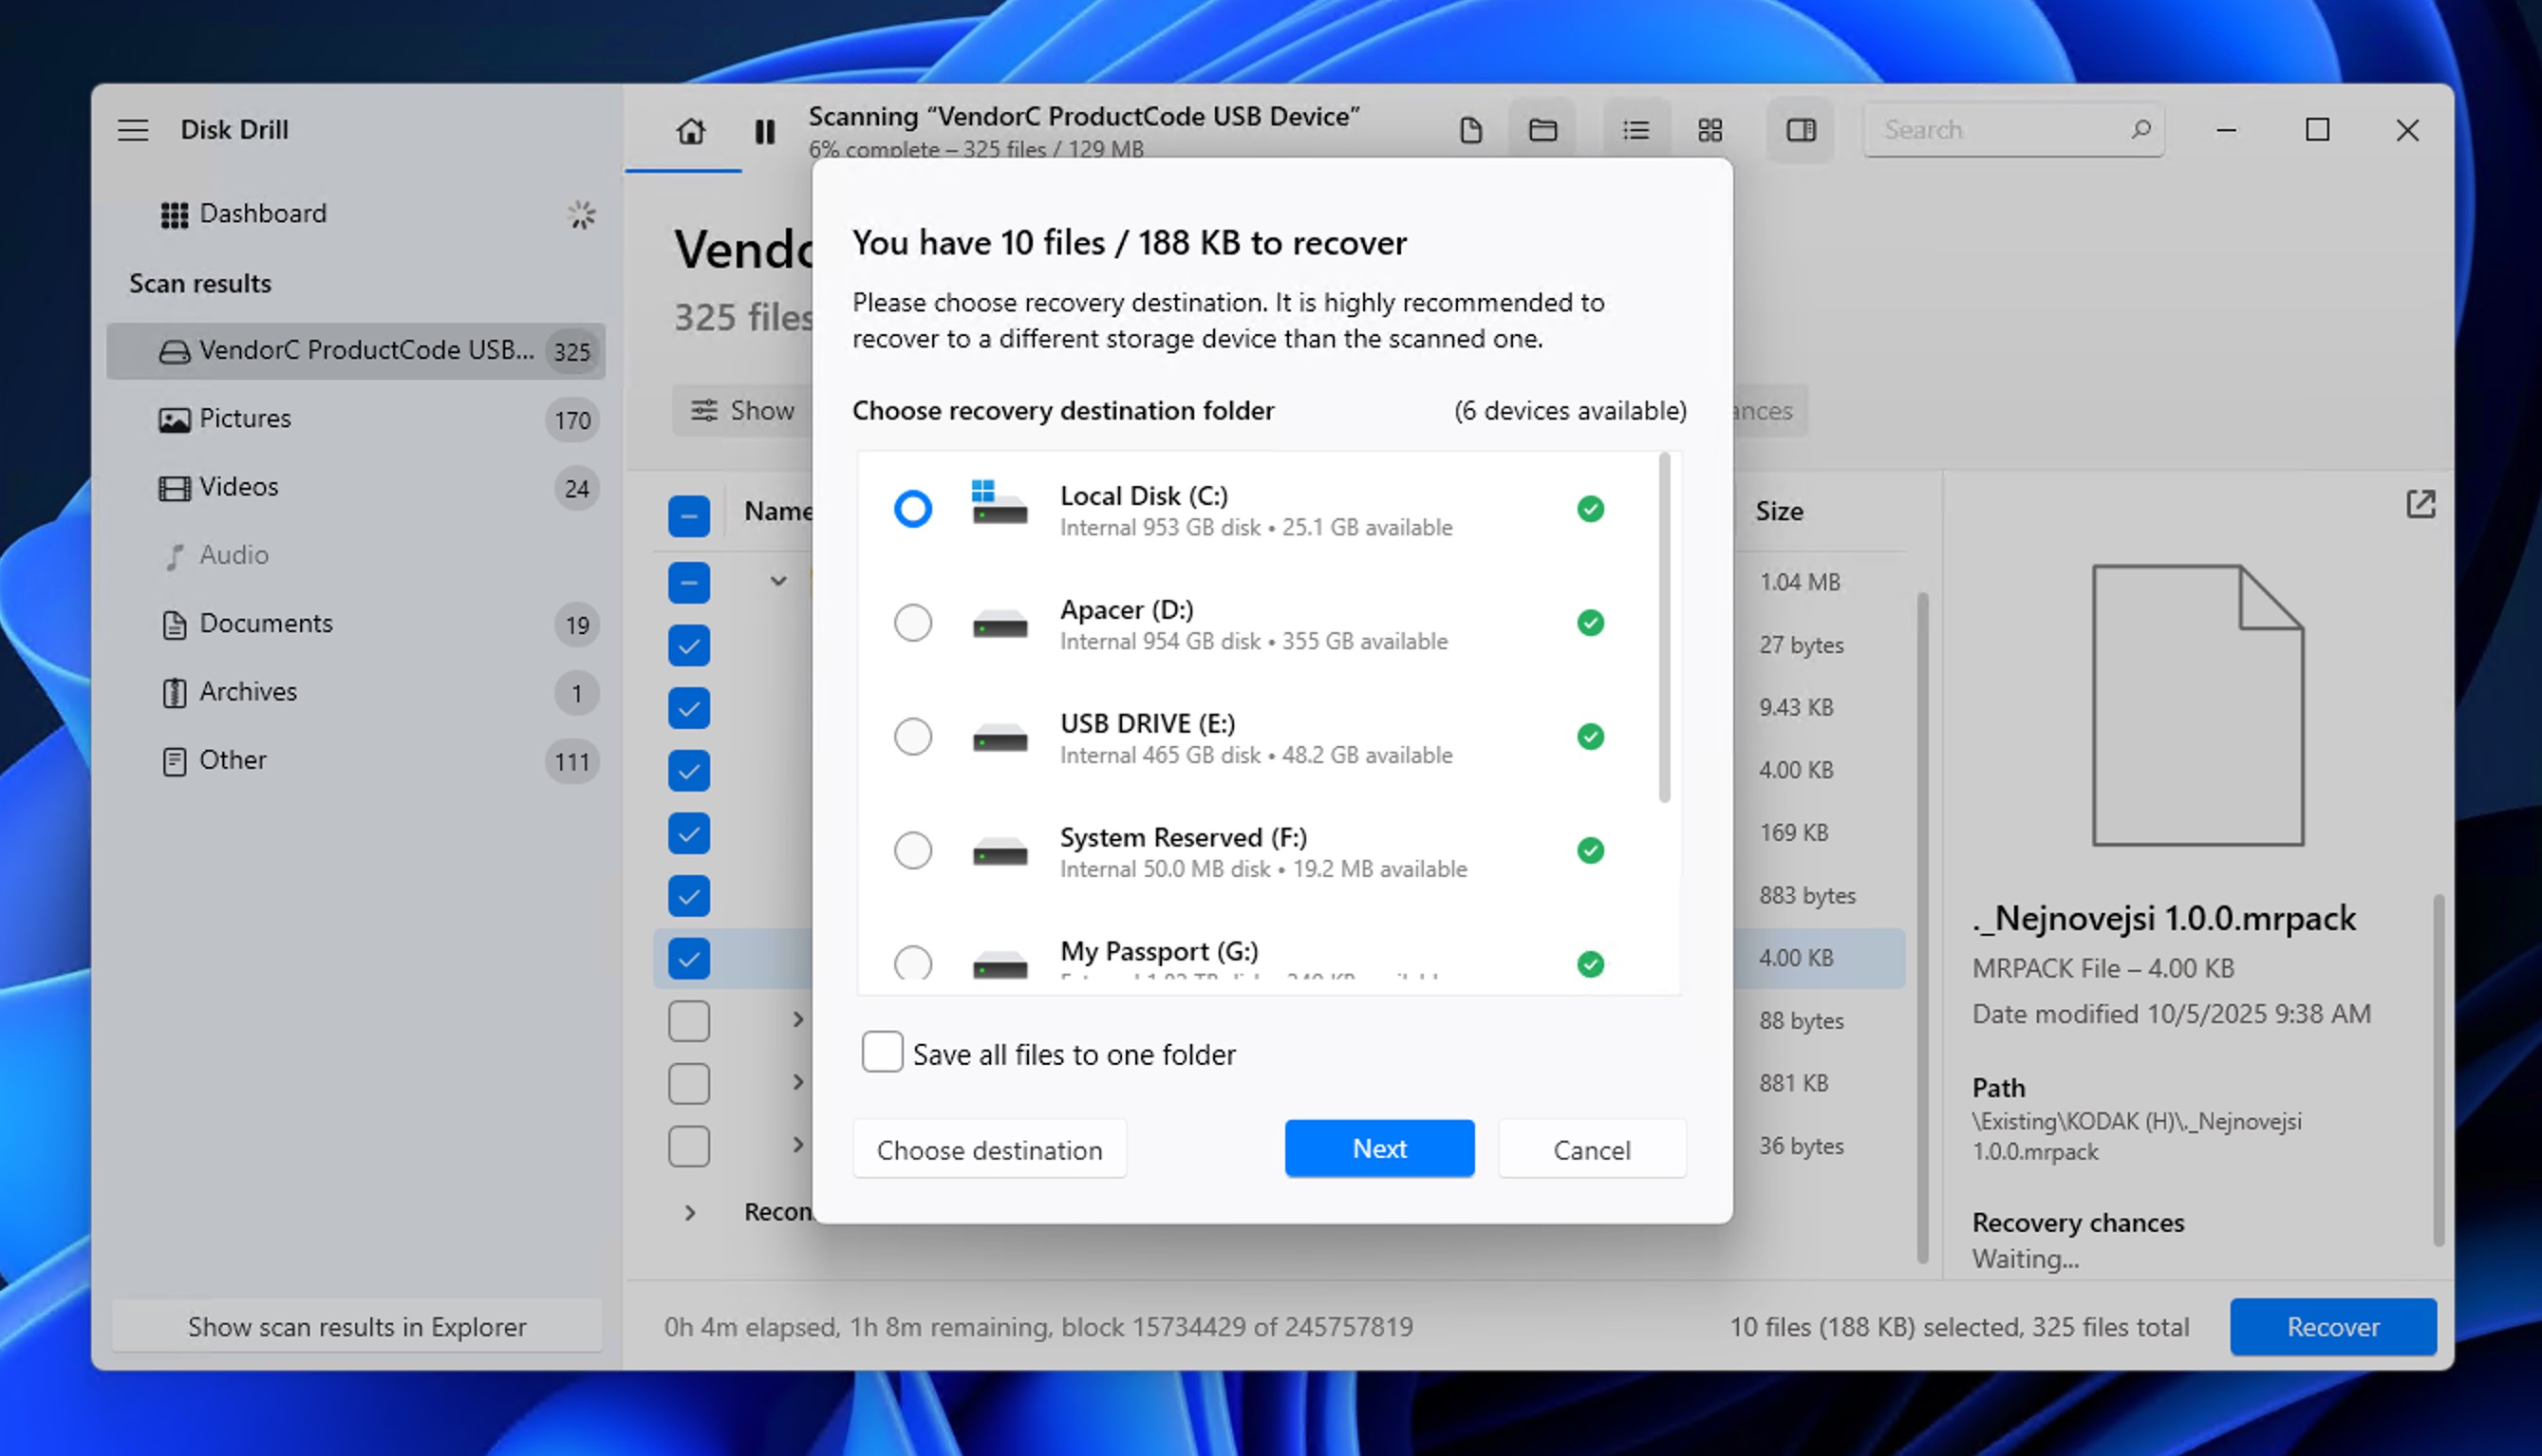
Select all the files you want to unformat (use the checkboxes next to them), and then click the Recover button. Choose a recovery destination on your computer’s hard drive or a different USB drive. Never recover files back to the same USB drive you’re recovering from, as this would overwrite data that hasn’t been recovered yet.
What Is the Difference Between Unformatting & Reformatting?
We’ve been in data recovery for a long time and have seen enough cases to know that people searching for “unformat USB” don’t always mean recovering data lost during formatting, and we can’t ignore those readers. Here are some commonly encountered situations where “unformat” actually means something else:
- You used Rufus or the Media Creation Tool to create a Windows installer, and now your 64 GB USB shows up with only 32 GB capacity.
- You formatted your drive to use with a Mac (HFS+), and now Windows can’t read it.
- You were fixing a broken USB stick, something went wrong, and now you can’t use the storage device.
If you’re dealing with these or other similar problems, you don’t need data recovery at all. You just need to reformat the drive properly using the Disk Management (or the Format tool) in Windows or Disk Utility in macOS.
The most important thing is to choose the right file system, and your choices boil down to this:
- exFAT is your best bet for most situations. It works on Windows, Mac, and Linux without any additional software, handles files larger than 4 GB (unlike FAT32), and doesn’t have the compatibility issues of NTFS on Mac.
- FAT32 works everywhere but can’t handle files larger than 4 GB. Choose this only if you’re using older devices like game consoles, TVs, or car stereos that don’t support exFAT.
- NTFS is Windows-native and supports all features like file permissions and encryption, but Macs can only read NTFS drives without special software (not write to them), so the flash drive will show up on Mac but be only half usable.
- APFS is Apple’s newest file system, optimized for SSDs and flash storage. While it offers excellent performance on Macs, Windows can’t read APFS drives without third-party software.
Unless you have a specific reason to choose otherwise, format your USB as exFAT. It’s supported by most new devices and does everything you probably expect a modern file system to do on a USB flash drive.
Bottom Line: What to Do with USB Drive Next?
If you’ve successfully unformatted your USB flash drive and had no prior issues with it, then you can keep using it. But if the drive showed problems before formatting (freezing, corruption errors, slow transfers), treat it as unreliable. You can use it for temporary files, but never store anything important on it without a backup elsewhere.
Moving forward, implement a proper backup strategy to avoid this situation again. Keep copies of important files in at least two different places, such as local storage, external drives, or another USB stick. Always double-check which drive you’re selecting before formatting, especially when multiple drives are connected.
For those wanting to learn more about data protection and recovery best practices, our help center covers everything from preventing data loss to dealing with specific recovery scenarios.
FAQ
The diskpart clean command is more destructive than a standard format because it wipes the partition table entirely. However, your actual data is still physically on the drive, so recovery is still possible using software like Disk Drill. Just make sure to act immediately and avoid writing anything new to the drive.
Yes, there’s a very good chance you can recover your files. When you click Format in response to this error message, Windows uses Quick Format by default, which only rebuilds the file system structure without actually erasing your data. You can run recovery software to get your lost files back.
Yes, you can. Your USB flash drive has been partitioned in a special way for bootable media that leaves some space inaccessible. To restore your full capacity, you need to delete all partitions and reformat the drive using Disk Management (Windows) or Disk Utility (Mac). We recommend you format it as exFAT for maximum compatibility across devices.
Unfortunately, a full format (not quick format) makes recovery impossible because it actually overwrites the data areas. This is why it’s so important to double-check before formatting and to understand which option you’re selecting.
No, there’s no reliable built-in method in Windows or Mac to unformat a drive or recover lost files after formatting. Your best option is safe recovery software like Disk Drill because it provides a user-friendly interface that automates the complex recovery algorithms, and it even lets you scan for free to see what’s recoverable before committing to the recovery process.