When Windows “breaks”, System Restore enables us to turn back the dial to a time when Microsoft’s OS was working without problems.
When you need it, though, conflicting information about it might make you wonder, “will system restore delete my files?”. Which files does System Restore affect? Will it remove your photos and videos? Will it modify your notes and documents?
In this article, we’ll see the answers to those questions, how you can use System Restore, and its most interesting alternatives.
How Does System Restore Work?
If you are wondering, “Will System Restore recover my deleted files?” the answer is negative. You can get them back from Windows File History (or similar solutions) backups or use a specialized data recovery solution, like Disk Drill.
System Restore relies on the Shadow Copy service. Shadow Copy is a technology included in Microsoft Windows that makes it possible to take backup copies or snapshots of files or volumes even when they are in use.

System Restore creates restore points at regular intervals. This allows reverting the OS to its state reflected by a past restore point. It practically works as an “undo” system for malfunctions or other problems that appeared after an OS, driver, or software update.
Does System Restore Delete Files?
System Restore only “deals with” OS-related files since its goal is to allow the user to “revert” Windows to past points in time. Because of that, it doesn’t affect the user’s files in any way: it doesn’t delete photos, documents, etc., but it also won’t recover them.
However, it’s worth noting that using System Restore can, in some cases, render some files temporarily unusable if the process affects the apps that allow access to those files. Consider the following scenario:
- An animator wants to create 3D models and renders for a project.
- They purchase and install the 3D design and rendering app Lightwave 3D. Then, use it to create and save some 3D models and 3D scenes in its custom formats, respectively as LWO and LWS files.
- After a botched Windows update, they use System Restore to “undo” the damage, “reverting” Windows to a point before Lightwave 3D was installed.
- The above will result in their LWO and LWS files being available but inaccessible because Windows will have “returned to a point in time when Lightwave hadn’t been installed yet“.
Reinstalling the apps related to particular file types Windows “has forgotten about” after a System Restore will render them usable again.
How to Recover Files Deleted After System Restore
Many don’t realize they can’t perform a System Restore to recover deleted files, and present it as a typical data recovery solution.
Did you follow such advice and used it to get back some files you lost, only to realize afterward they’re still gone? Unfortunately, that might have diminished your chances of getting those files back, especially if System Restore “wrote over” them.
Using Disk Drill to save your deleted files after System Restore “failed” to recover them is as simple as:
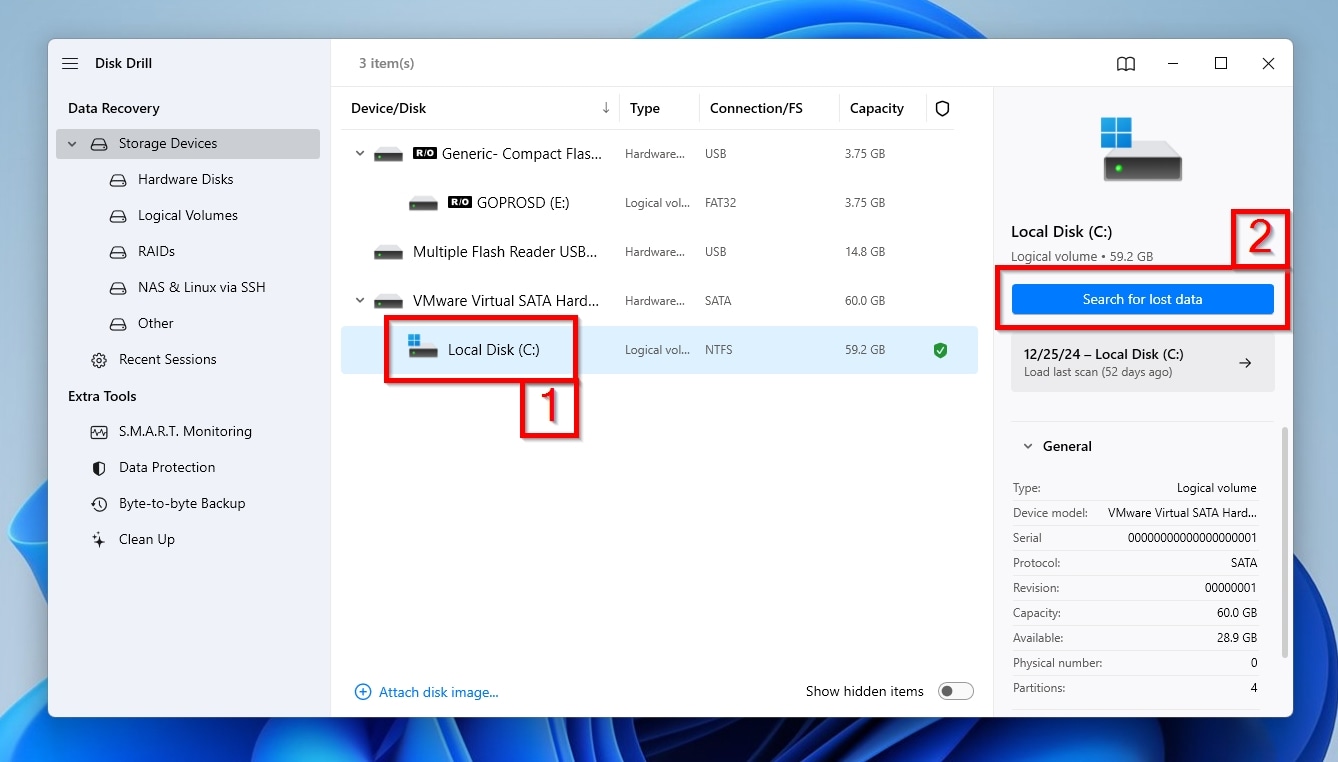
- Download and install Disk Drill on your computer.
- Launch Disk Drill and choose the device (1) from which you want to recover data from its main Device/Disk list. Then, click on Search for lost data (2) on the right of its window.
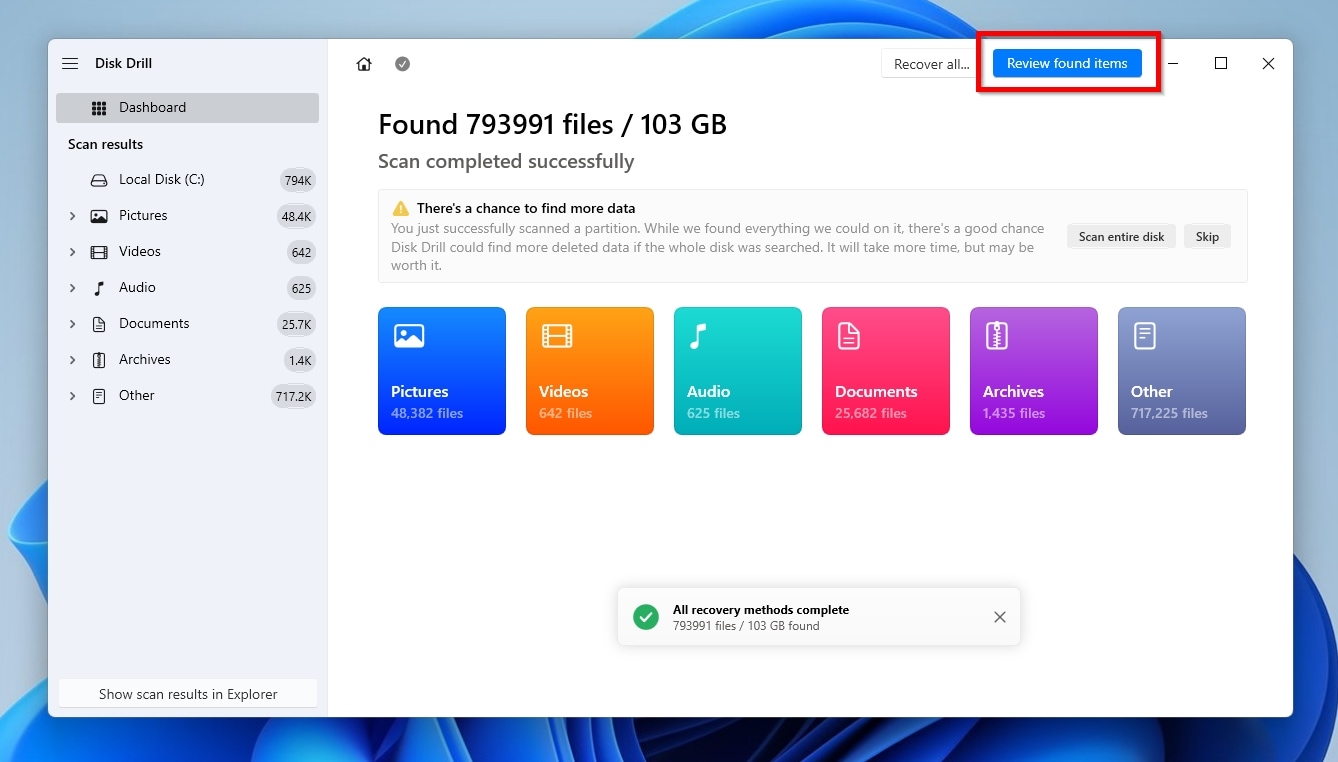
- Disk Drill will begin scanning your device. You can click on “Review found items” at any time to check what Disk Drill has found up to that moment. However, it’s better to let the scan entirely run its course. This way, Disk Drill will locate as many files as possible.

- When Disk Drill completes its scan, you can click on “Recover all” to get back all the files it located, or “Review found items” to hand-select the ones you want to recover.
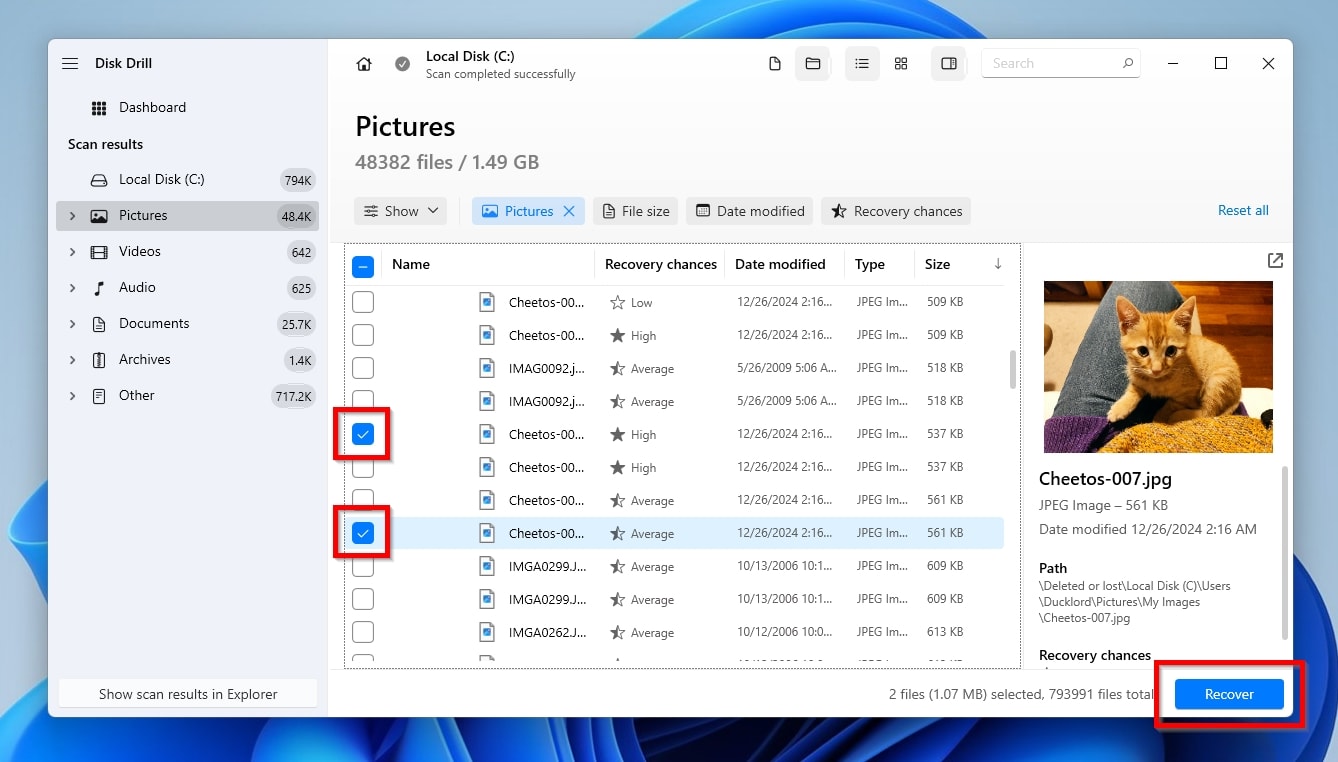
- If you choose the manual option of “Review found items”, you’ll can then select which files you want to recover individually. While checking Disk Drill’s list of found files, it’s worth noting their Recovery chances. The better a file’s Recovery chances indication, the higher the probability of getting it back unscathed.
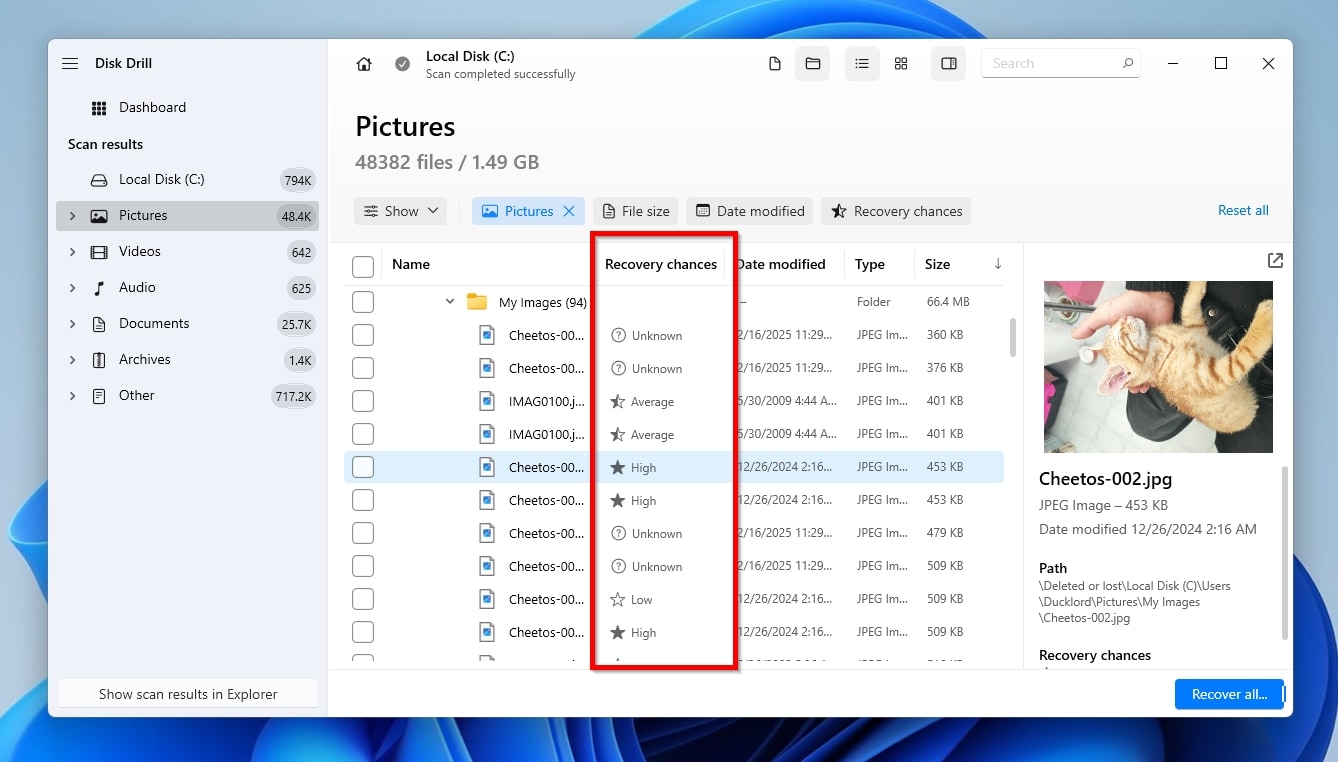
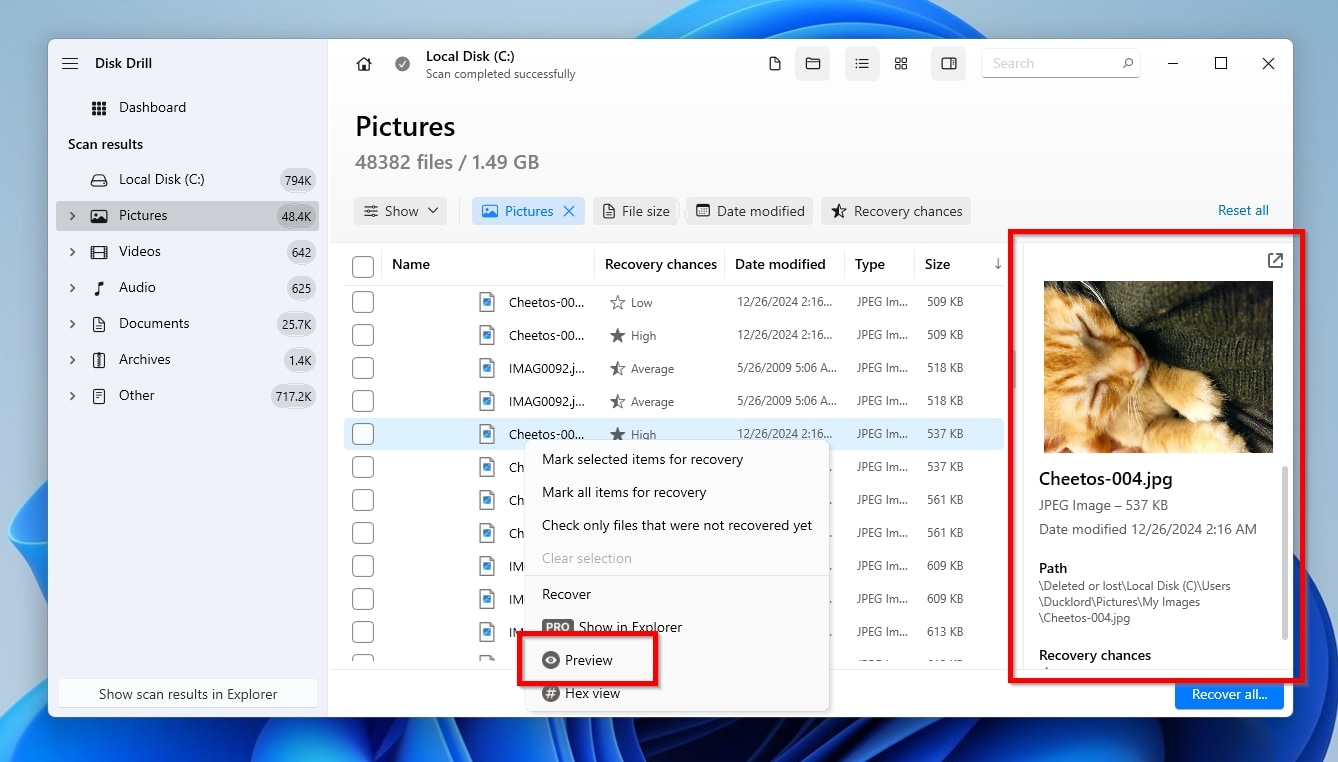
- Since filenames might not tell much about a file’s contents, Disk Drill enables you to preview some popular file types, like text documents or images. To do that, you can click on the eye icon that appears next to their filename when you hover over them. Alternatively, you can right-click on any file and choose “Preview” from the menu that pops up.
- To mark some files for recovery, place a checkmark on the little box on the left of their filename. When you’ve marked all the files you want to get back, click on the blue “Recover” button on the bottom left of Disk Drill’s window.
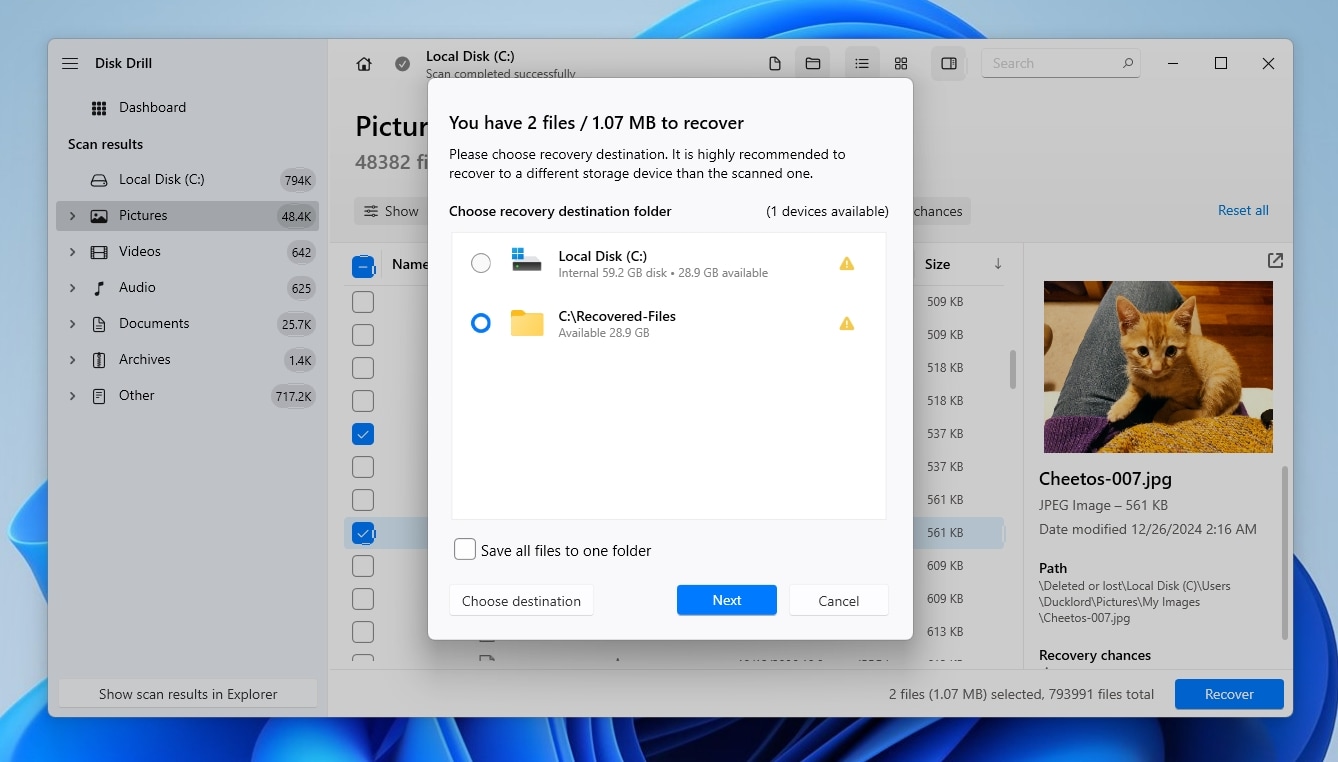
- Disk Drill will ask you where to Recover lost data. It’s best to use a folder on a secondary storage device as your destination to minimize writes on the storage media from where you’re trying to save your files.
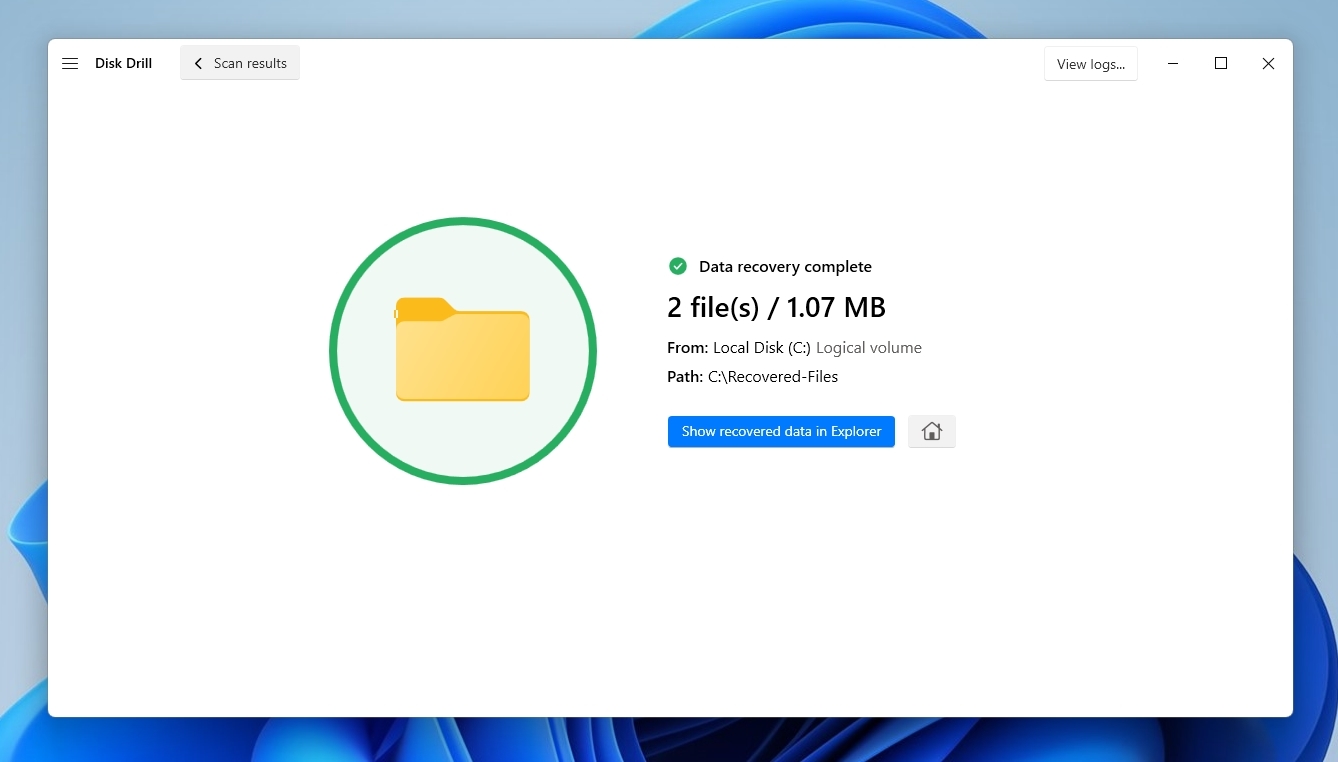
- After a while, Disk Drill will inform you that the recovery is complete. Click on “Show recovered data in Explorer” to check out the files it brought back from the brink in Windows’ File Explorer.

As you can see, recovering files with Disk Drill could hardly be any simpler, but the results are guaranteed. If you store any important data on your computer at all, it’s a good idea to have Disk Drill at hand for emergency purposes. Even though System Restore shouldn’t cause any loss of personal files, you never know when something decides to go catastrophically wrong.
Besides Windows, Disk Drill also runs on Mac computers, and you can recover up to 500 MB of data for free with Windows version. Should you need more than 500 MB, you can always upgrade to Disk Drill PRO for unlimited personal data recovery using a wide variety of accepted payment methods.
How to Make a System Restore Point
System Restore is preconfigured to automatically create new “Points” before any significant changes are applied to the OS. By default, System Restore should automatically create a new backup Point whenever any software, driver, or system update is installed. However, that’s not always the case:
- Many apps don’t have installers that would “trigger” System Restore but come in archives from which you can extract and run them.
- Nowadays, most apps have built-in updaters, and some may “fly under System Restore’s radar”.
Because of that, it’s best to manually create System Restore points relatively often. It’s easier to “return to a point in time” only two or three days ago, when your OS was relatively similar to its current state, than revert to a System Restore point taken half a year ago, “undoing” everything that “happened to the OS” since then.
To make a new System Restore point manually:
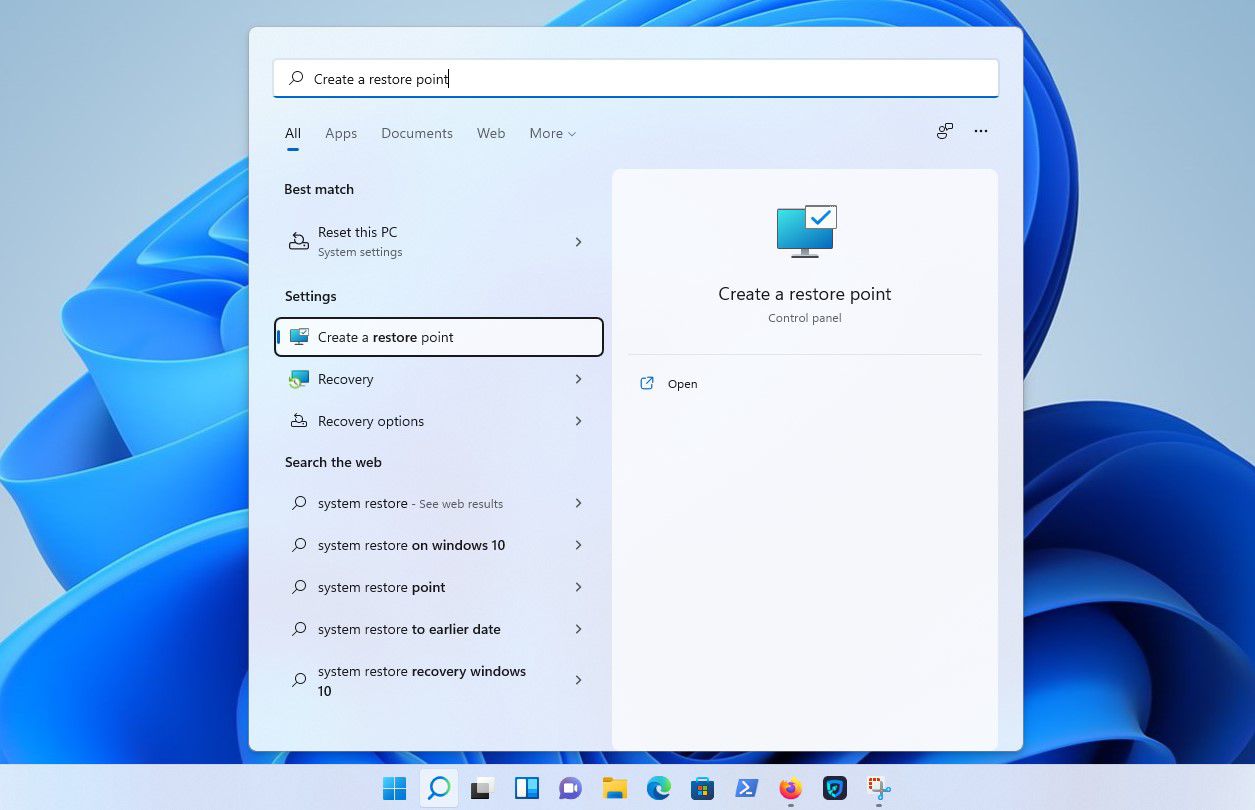
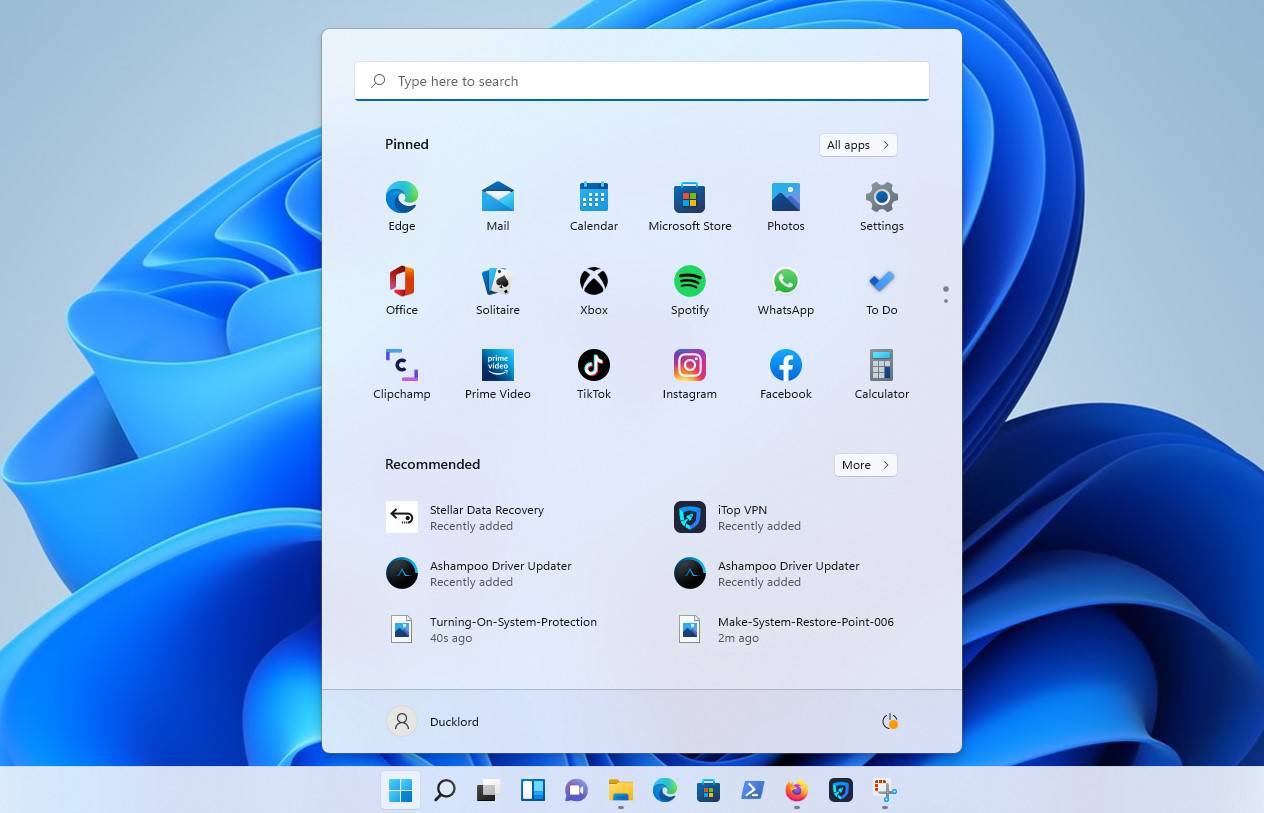
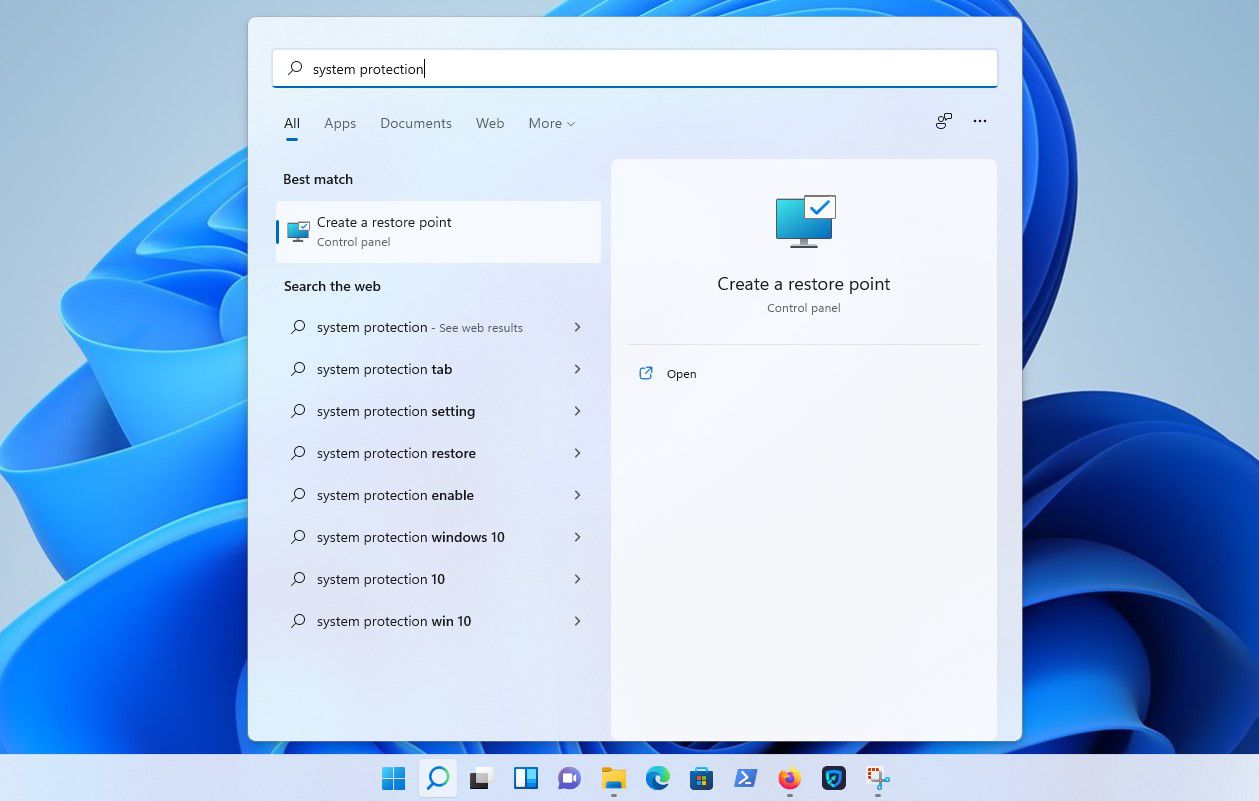
- Open the Start menu.
- Type “system restore”.

- Select “Create a restore point” from the available options.
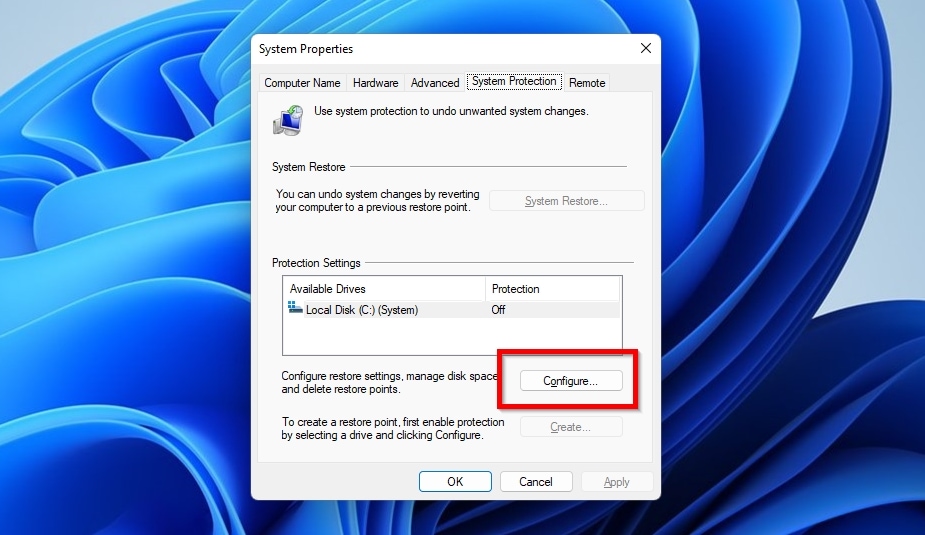
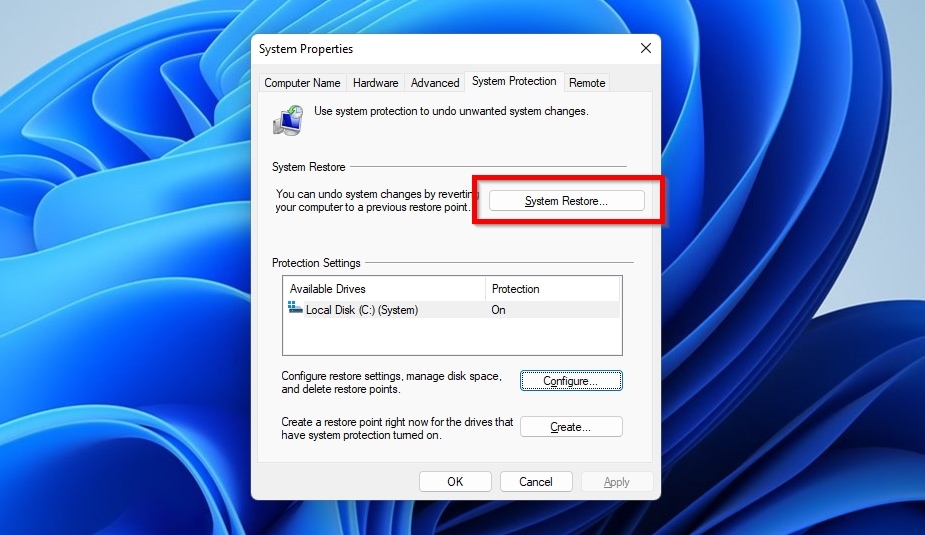
- If System Protection is turned on, skip this and the next step. If it’s off, you’ll have to enable it to use System Restore. For that, make sure the System Disk is selected on the Protection Settings list, and click Configure.
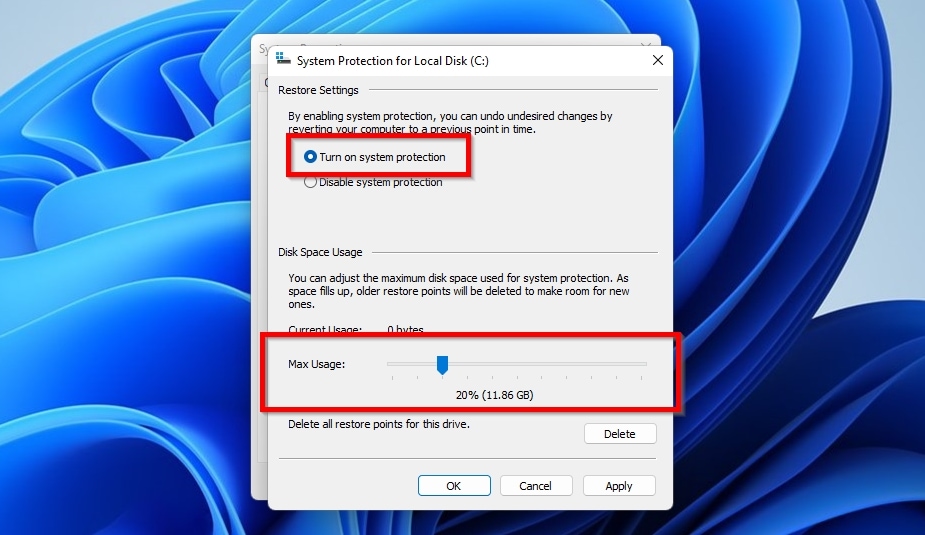
- Enable Turn on system protection and configure the amount of space you want to dedicate to it on your OS drive using the slider under Disk Space Usage.
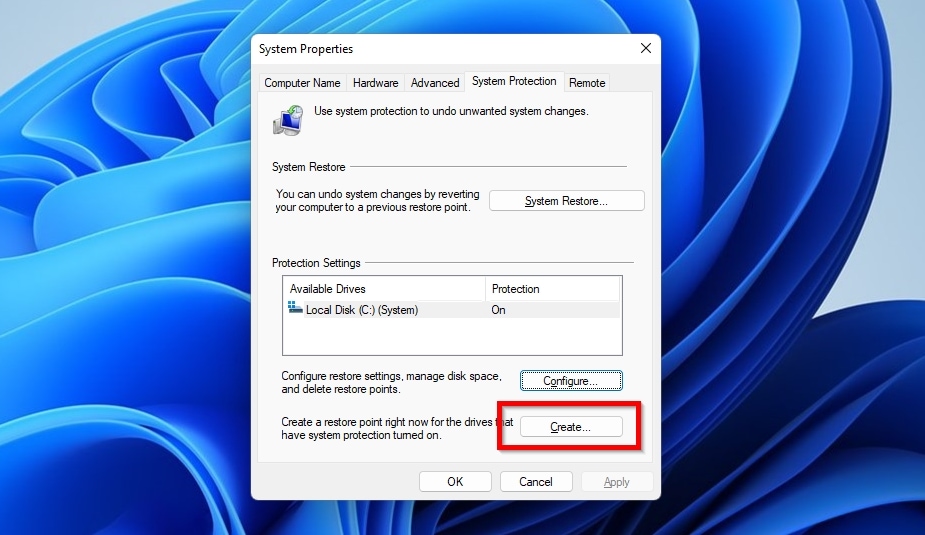
- With System Protection enabled, Click on “Create” at the bottom of the “Protection Settings” section.
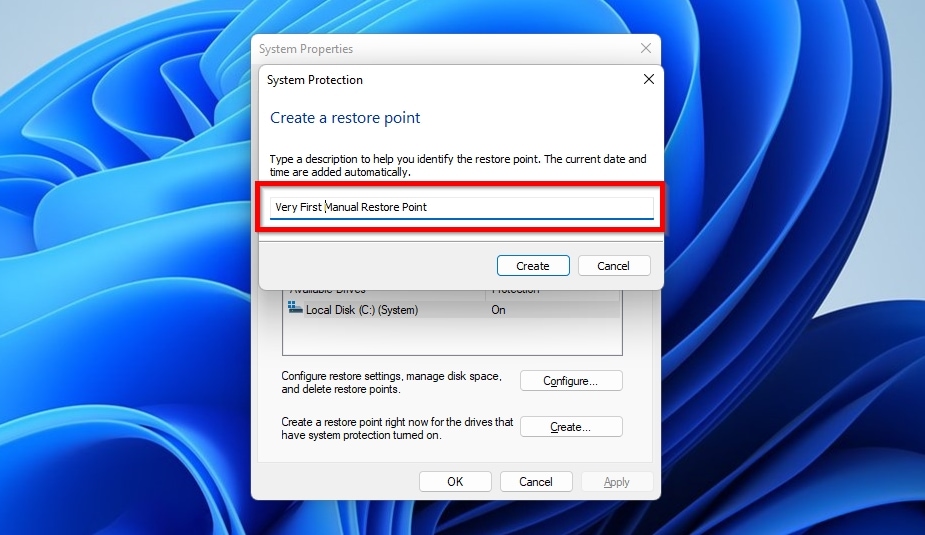
- Type a description to help you identify the restore point. The current date and time are added automatically.
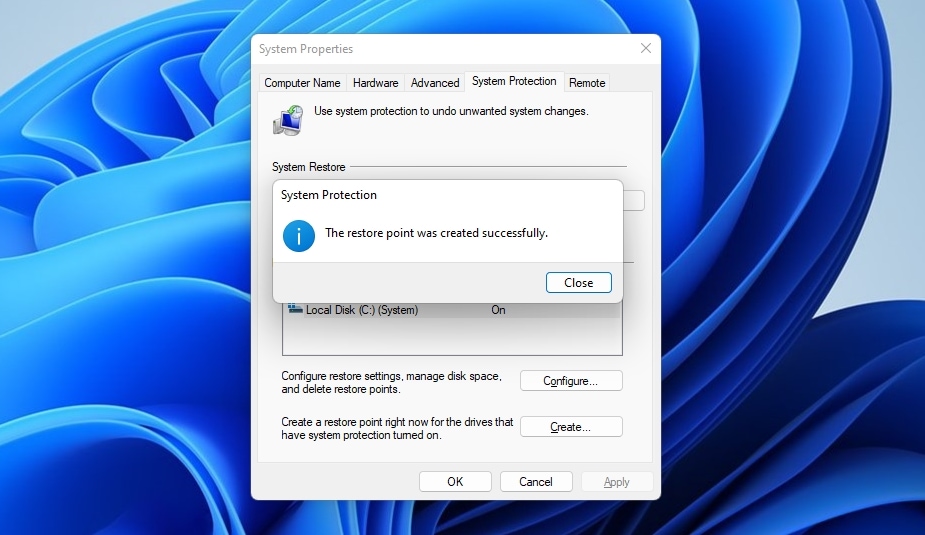
- A message will appear soon after, informing you about the successful creation of the restore point.
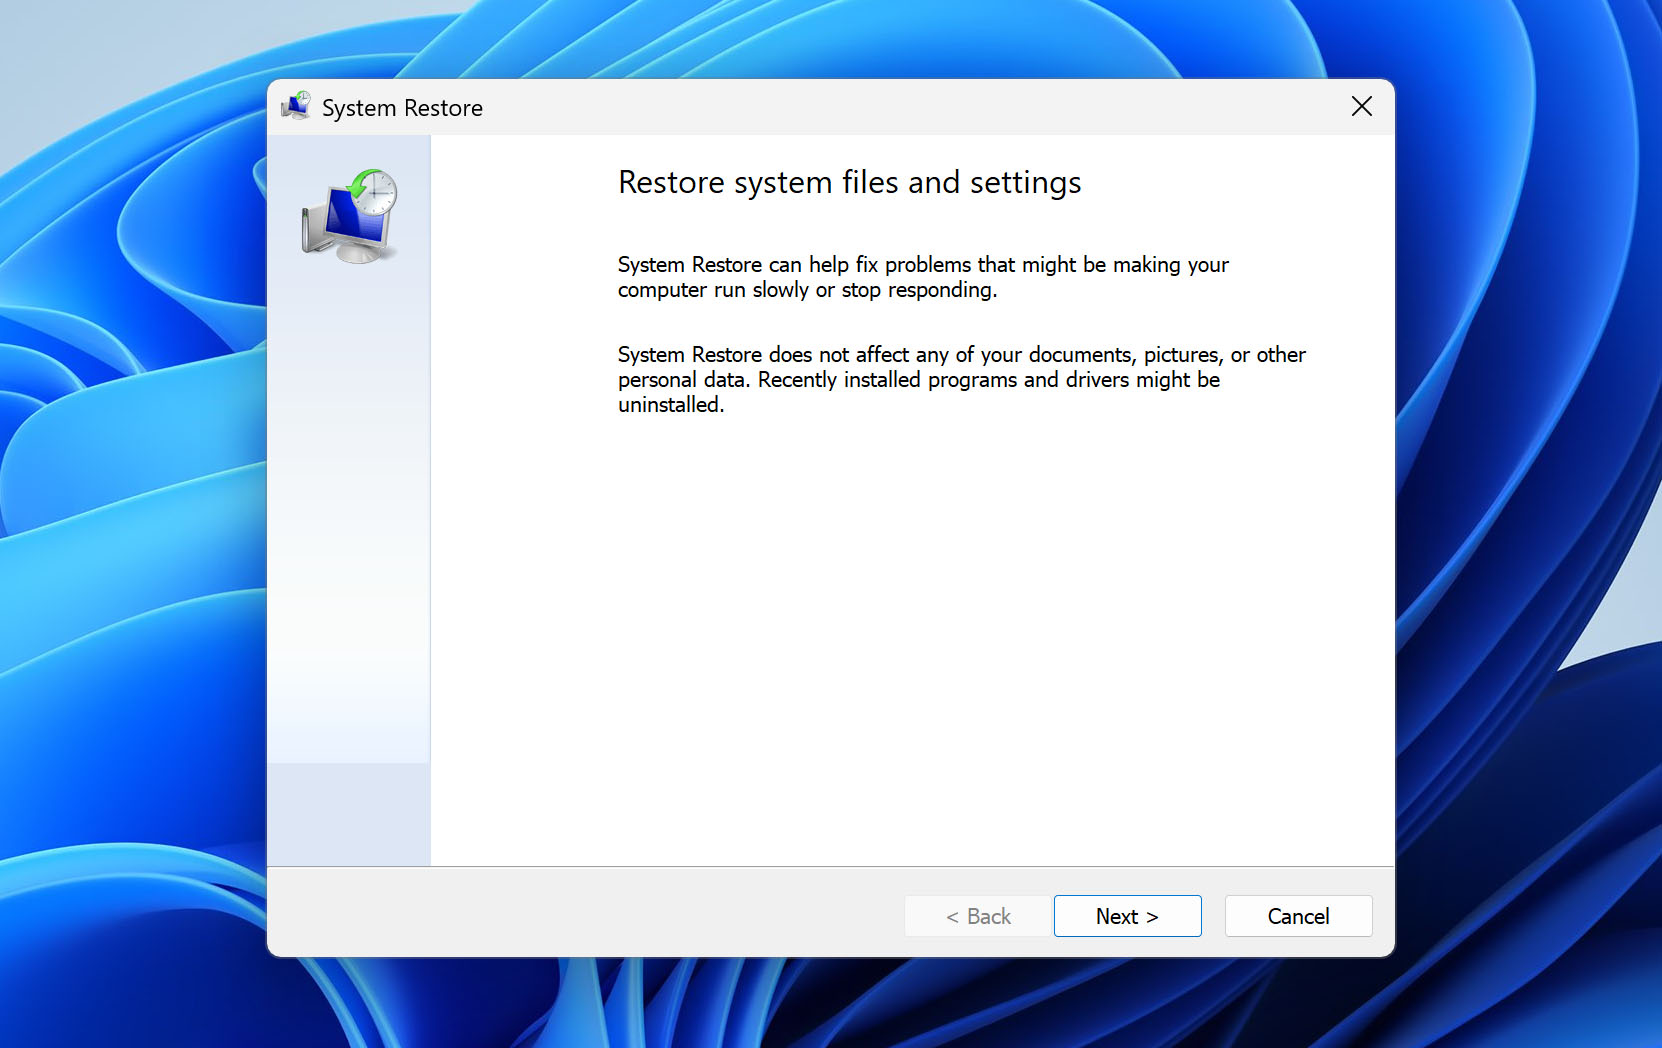
How to Perform a System Restore to Undo System Changes?
As we’ve explained earlier, System Restore can’t help you recover your personal files, but it undo damaging system changes that prevent you from using third-party data recovery applications like Disk Drill from recovering your files.
To use the System Restore feature:
- Open the Start menu.
- Type “system restore” or “system protection”. Choose “Create a restore point”.
- Select “System Restore” option.
- Select the backup which you want to restore by clicking on it once.
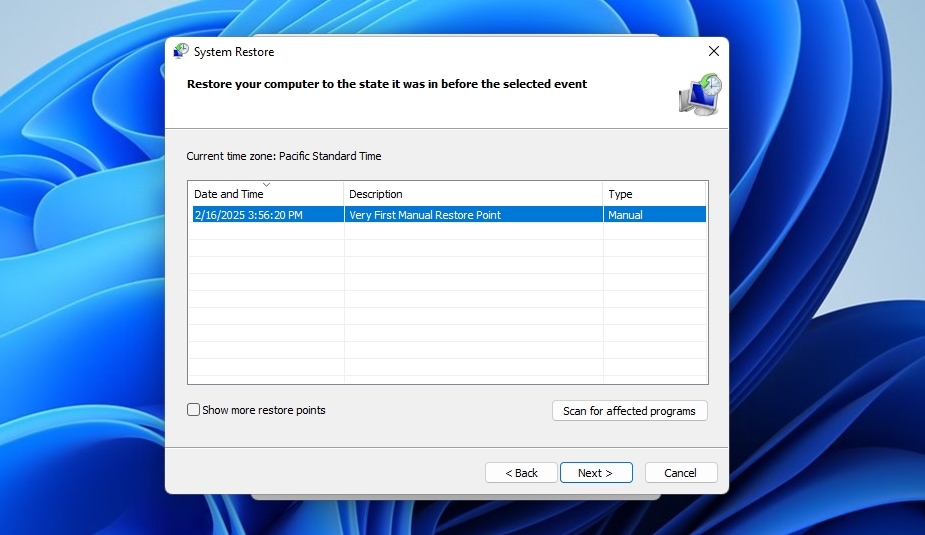
- Click “Next” and confirm that you want to revert your computer to the selected restore point.
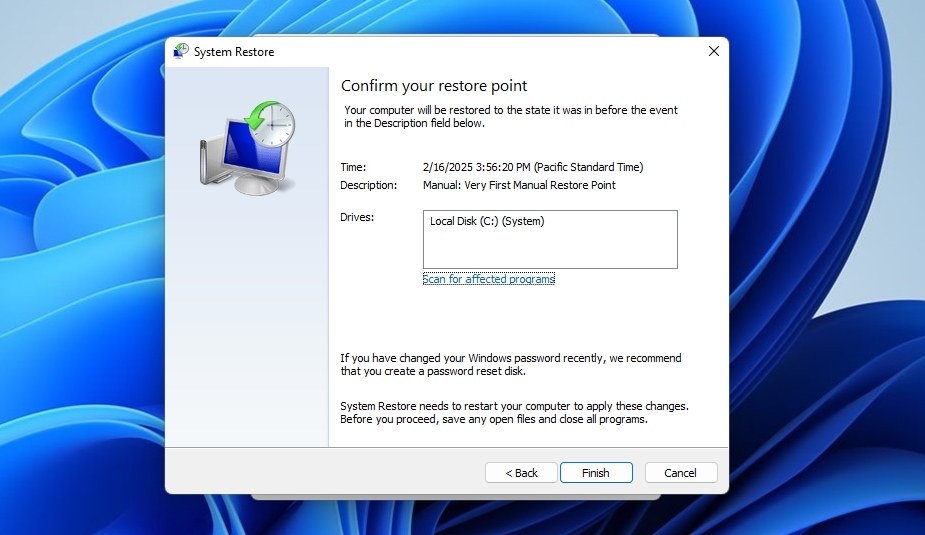
- Once a message appears saying that your computer has been successfully restored, you can click “Finish” to complete the process.
How Long Does System Restore Take?
Depending on who you ask, System Restore can take from 15 minutes up to an hour to complete its task. Strangely, all those various answers are correct.
The time needed by System Restore to revert your OS to a previous state primarily depends on three factors: your PC’s…
- Storage speed.
- CPU performance.
- RAM.
Since System Restore’s task is to replace the OS’s current files and settings with past versions, it’s similar to copying files. Such operations are affected more than anything by the speed of the storage devices in use.
Have you got your OS installed on a modern SSD that can reach speeds up to 500 Megabytes per second? A System Restore process will complete much quicker than if the OS resided on an old HDD. Mechanic HDD speeds typically hover around 100 Megabytes per second, a fraction of an SSD’s performance.
System Restore also has to check what to replace and then extract some files. The speed of both the analysis and extraction parts depends on the CPU’s performance.
Finally, System Restore doesn’t need a lot of RAM, but not having enough *can* prolong the time it takes to complete the process.
Conclusion
System Restore is a useful feature that’s part of all recent versions of the Windows operating system, from the latest Windows 11 to the still popular Windows 10 and even older. Its purpose is to restore critical system components, such as registry and system files, back to a working state. It doesn’t, however, restore your personal deleted files, which is why you also need a third-party data recovery application like Disk Drill.
With Disk Drill, you can recover everything from documents to images from music to video files and more with a few simple clicks, and Disk Drill’s user-friendly design makes it impossible to accidentally delete important files, which can’t be said about many other data recovery tools.

FAQ
You shouldn’t “lose your files” using System Restore, for it only affects OS-related files. Still, you might lose access to some files if the apps required to access them had been installed after the selected System Restore Point. Reinstalling those apps should fix the issue.
System Restore only “deals with” OS-related files, so it cannot help bring back non-OS files from the Recycle Bin or anywhere else. Still, that’s possible, as we saw in our guide on how to recover files deleted from the Recycle Bin
All apps that were available up to the creation of a System Restore Point will be available after reverting to it. Any software installed after it will be unavailable after reverting to a specific System Restore Point.
It’s impossible ” to return to where you were” after reverting Windows to a System Restore Point. Also, System Restore doesn’t work like typical backups, so you cannot “freely move between points”. That’s why it’s best also to keep complete and frequent backups.
Each System Restore Point keeps track of the operating system’s and essential software’s state. By successfully reverting to a previous System Restore Point, your PC will return to that point in time. This fixes problems introduced after software changes like system updates. However, it might also render any software installed after that point unusable.
System Restore allows returning to a time before essential OS files and settings were corrupted by replacing them with “working copies” stored in “Points”. So, although the result is the same, technically, it’s not “fixing” but “restoring files from backups”.
Returning to a System Restore Point is like traveling back in time for your PC. The apps you’d been using up to that point and all your data will still be available. In contrast, a factory reset is closer to a nuclear bomb, erasing everything to make your PC “brand new”.