If you’ve found that your pictures disappeared from your SD card, you’re not alone. Our guide is here to show you how to retrieve deleted photos from your Sony camera. And not that – if the card was formatted or became corrupted, we cover those situations too. So, grab a cup of coffee or tea, and let’s get to work.
Is It Possible to Recover Data from a Sony Camera?
If you’re a proud owner of a Sony camera like the A7R V, A7 III, A9 Mark II, A1, A7 IV, A7R Mark IVA, A7C, ZV-1, ZV-E10, A6400, A6100, or A6000 and have recently lost important photos, then we have good news for you: their recovery is not only possible, but it’s also quite achievable with the right approach and tools.
However, it’s impossible to know how long the window will remain open if you keep writing new data to the storage device where your deleted photos were located. That’s why it’s extremely important to stop using your camera and the memory card right away.
Causes of Data Loss from a Sony Camera (and What to Do Next)
When someone needs to retrieve deleted photos from a Sony camera, it’s usually because they’ve encountered one of the following common causes of data loss:
| Cases | How to Fix |
| Accidental deletion | Stop shooting. Take the card out and connect it to a computer with a card reader. This is one of the best situations to recover deleted files from Sony camera memory card, and recovery tools usually find the images without much trouble. |
| Formatting the memory card | Again, stop using the card. Try recovery software ASAP. A format does not always mean the same thing. In some cases, the camera may only rebuild the file system (the photo data can still remain on the card for a while and Sony photo recovery may still work). In other cases, Sony’s formatting behavior may issue low-level commands such as CMD 32,33,38 / SD_ERASE, which can make it basically impossible to recover deleted photos from Sony camera storage. The tricky part is that you usually can’t tell which type of format happened, and Sony’s implementation can vary by camera and card. That’s why it always makes sense to scan the card anyway. |
| Interrupted data transfer process | If photos disappeared during copying, stop using the card and check whether the files exist on either device. Then scan the memory card with recovery software. Partial transfers often do not erase the originals. |
| Improper ejection of camera or memory card | If the card was unplugged without safe removal, that may be the real issue. Reconnect it through a quality card reader and scan it first using a data recovery app before accepting any format prompt. |
| Sony camera firmware corruption | Rare, but camera firmware bugs can cause missing thumbnails, unreadable files, indexing issues. Update the camera firmware, then check the card on a computer and run recovery software if files are still missing. |
| Card corruption | Don’t format the card, even if the camera suggests it. Use recovery software to scan the card as-is. In many cases, you can still recover files from a corrupted SD card if the raw data hasn’t been overwritten. |
| Physical damage to the camera or memory card | If the card isn’t recognized at all (even in Disk Management), avoid forcing it. Seek professional assistance to recover data from a damaged SD card or camera. |
How to Restore Deleted Photos using Sony Photo Recovery Software
With the right photo recovery software, you can easily recover your photos. But how do you choose the right software when there are so many options available? That’s what the next section is all about.
Factors to Consider When Choosing Data Recovery Software
When choosing the best data recovery software for our guide, we focused on the following factors:
- 💁♂️ Ease-of-use. We looked for software that’s user-friendly and easy to navigate even for complete beginners who have never recovered any lost data before.
- ⚙️ System compatibility. We made sure the data recovery software supports the most commonly used operating systems, file systems, and storage devices (SD cards, CFexpress cards, etc.) used by Sony camera owners.
- 🖼️ Compatibility. We checked whether the software supports all necessary file formats, including JPEG, HEIF, RAW, and Sony ARW, to guarantee the successful recovery of your lost photos.
- 💰 Affordable price. We sought out software that offers effective recovery features at a reasonable price, doing our best to find the right balance between cost and performance.
If you decide to do your own research for the best software to recover deleted pictures from a Sony camera, then we recommend you consider the same factors as we did.
How to Recover Deleted Pictures from a Sony Camera
After thorough research and considering the factors mentioned above, we’ve found that Disk Drill is an ideal solution to recover deleted photos from your Sony camera. Here’s why:
- Disk Drill supports a wide range of image formats, including JPEG, HEIF, and Sony ARW. It can also perform RAW storage device recovery.
- The application is compatible with various memory card types (SD, CFexpress, and so on) that you may encounter during a Sony camera data recovery. That’s also why we recommend Disk Drill as an SD card recovery tool.
- It also includes an Advanced Camera Recovery module, which can help in more difficult situations (formatted cards, fragmented photo or video data). That matters because standard scans do not always catch everything.
- There is no other solution that’s as easy-to-use and capable of delivering such great results as Disk Drill.
Now it’s time for us to provide a step-by-step guide on how to use it to recover deleted pictures from your Sony camera:
- Download the latest version of Disk Drill and install it on your computer. The free Windows version lets you preview an unlimited number of files to verify recoverability and recover up to 100 MB of photos, which, in our case, will be a batch of JPEG/HEIF shots or a few ARW frames. You can decide after, if you are willing to upgrade to Pro.
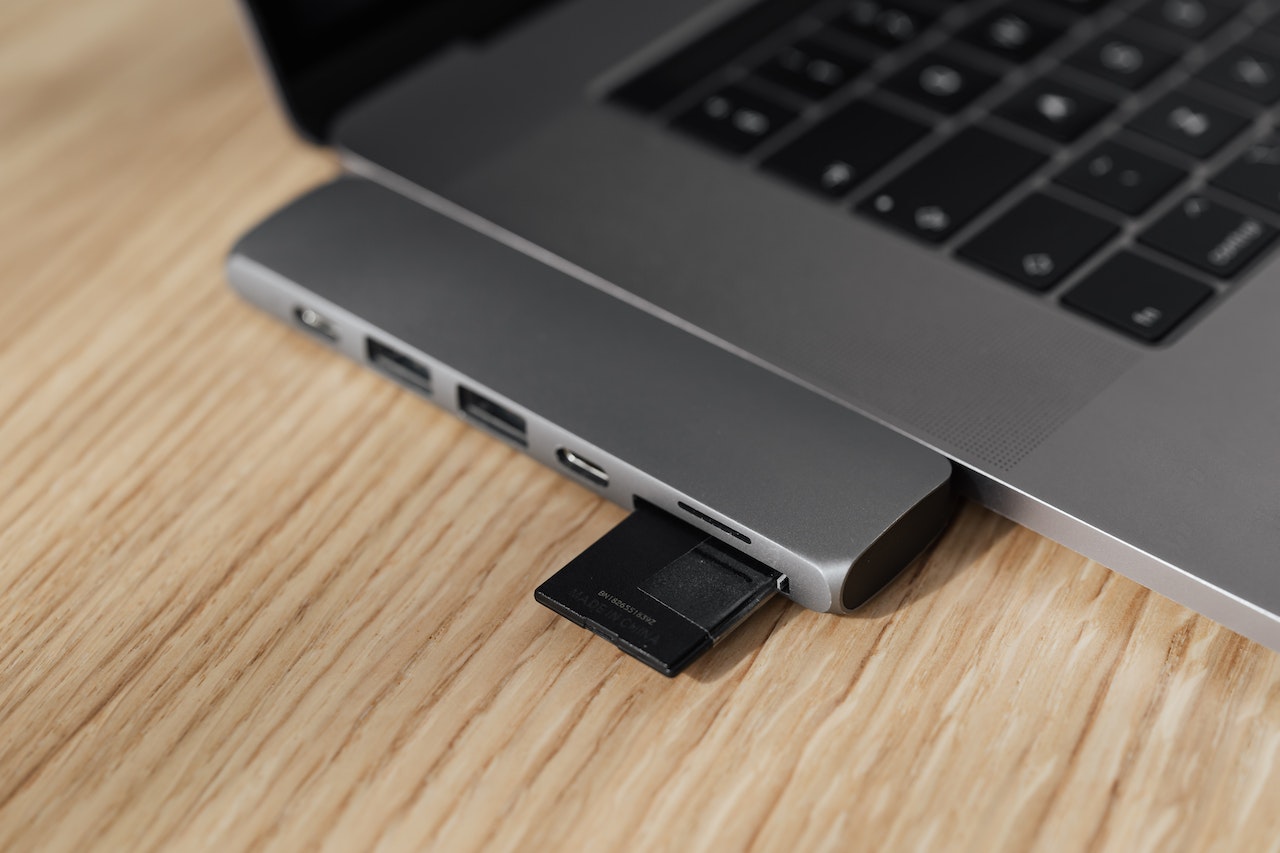
- Connect your Sony memory card to your computer. Don’t try to connect the camera itself, because Sony cameras use USB transfer modes like MTP that only expose normal accessible files, not the low-level card access recovery software needs. Remove the SD or CFexpress card, place it in a compatible card reader, and connect that reader to your computer.
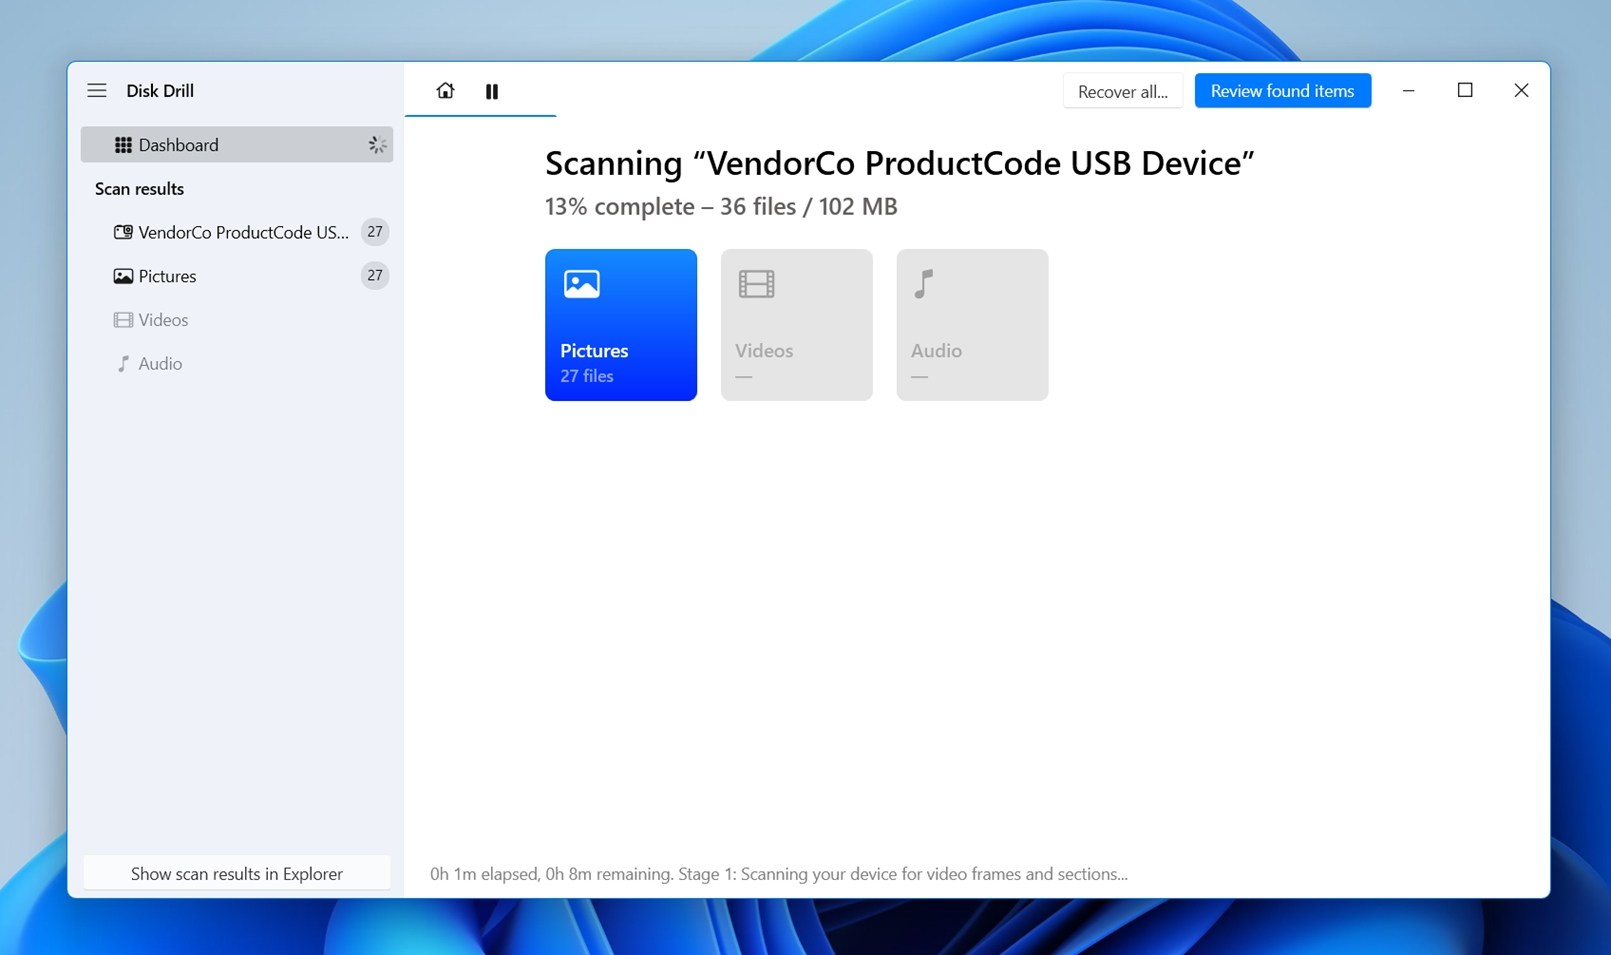
- Launch Disk Drill, and you should see your Sony camera or memory card displayed in the list of available drives. Select it.
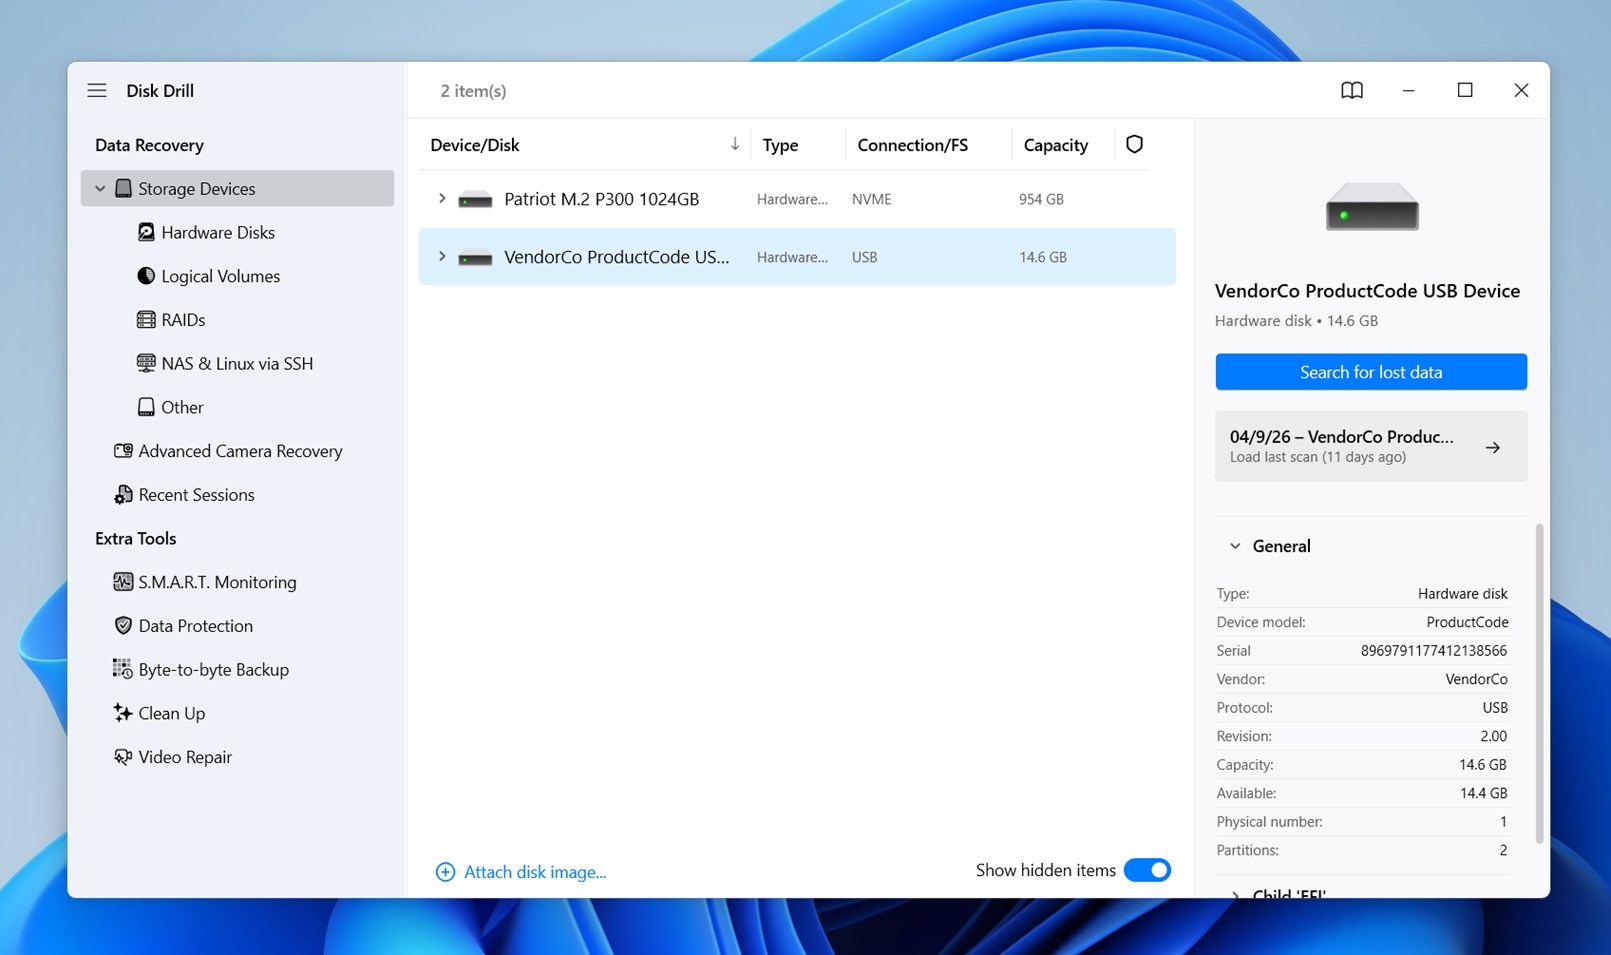
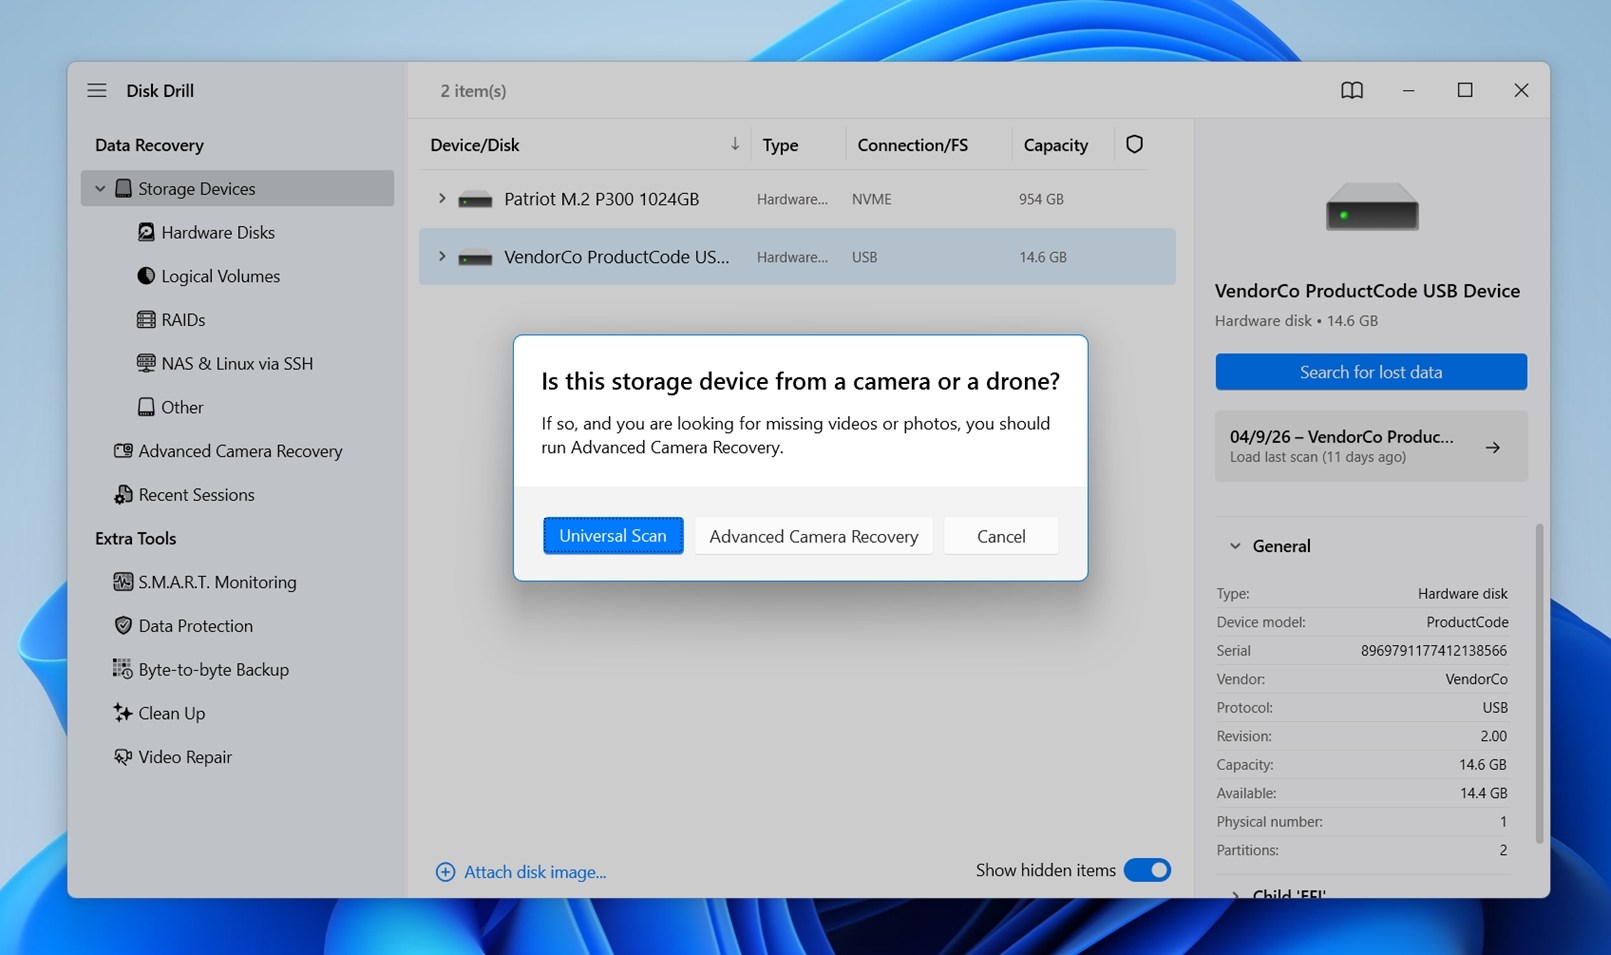
- Click Search for Lost Data and let Disk Drill run its Universal Scan – that’s the best place to start. If you’re trying to recover videos, or if the first scan misses files you expected to see, then try Advanced Camera Recovery next. That mode is designed for camera media, and it can help reconstruct fragmented video files in the correct cluster order. It’s useful in tougher cases.
- Now click the Pictures category since we’re after photos. You’ll then see a list of all images Disk Drill found on the card.
- Select any file and a preview should appear on the right, which is one of the quickest ways to check whether the photo is still intact before recovery (if you see it, if it’s intact).
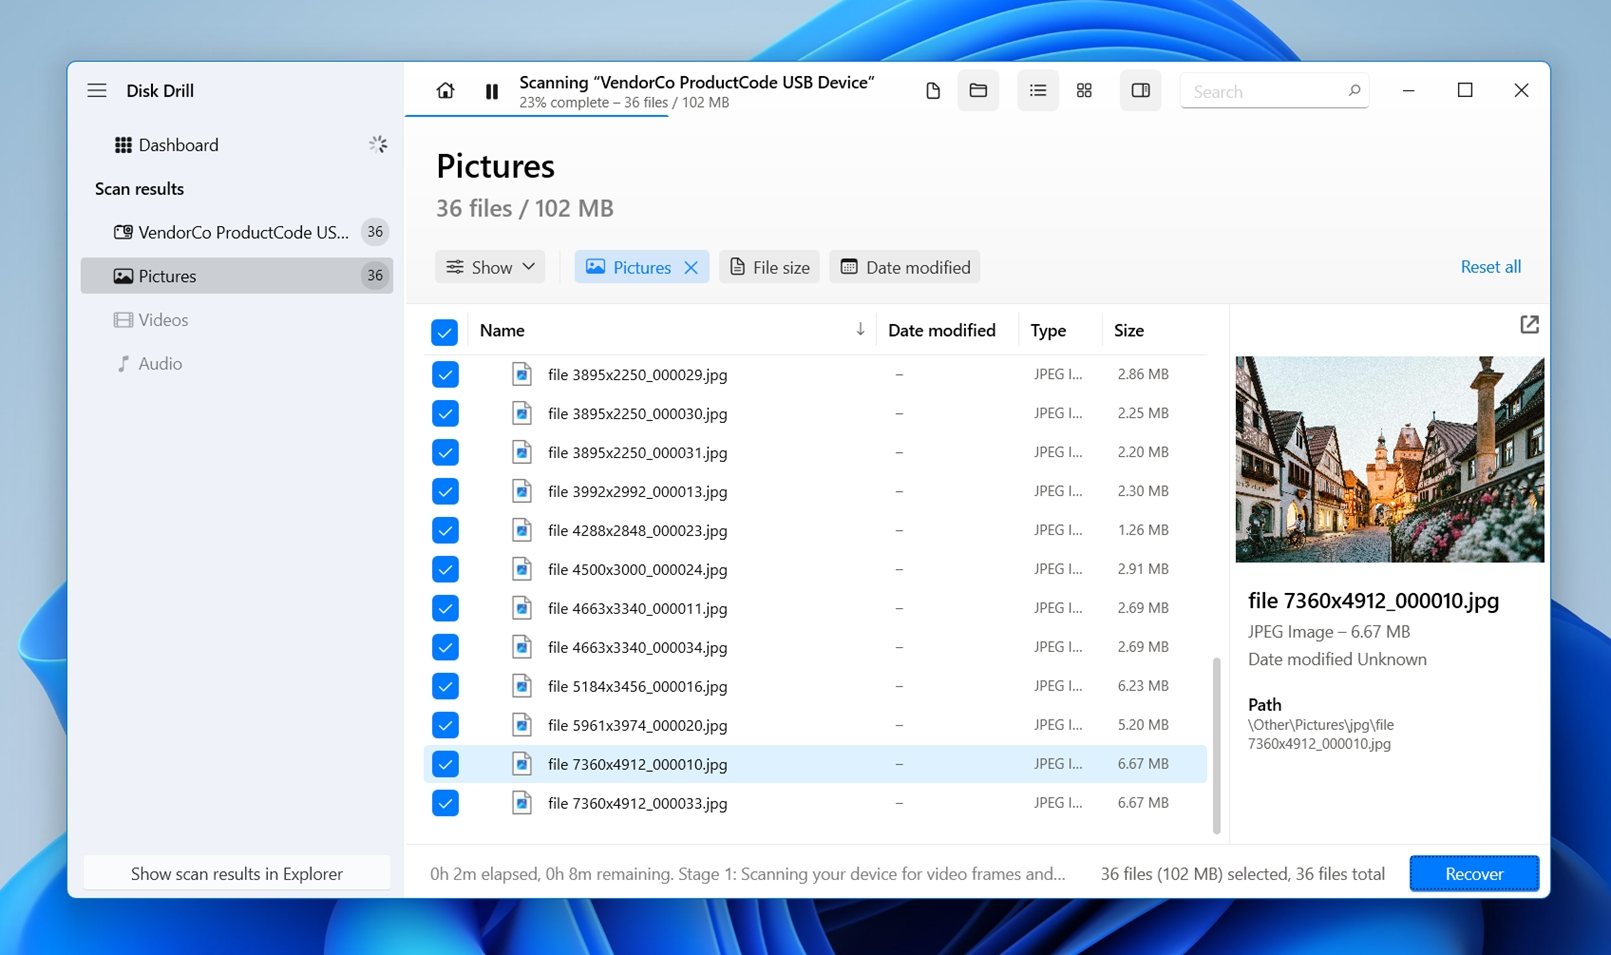
If you don’t see a preview, click the eye icon 👁️🗨️ next to the file name to enable preview mode. - Use the checkmarks next to each file to select one photo, a handful of favorites, or every image the scan found.
- Finally, click on the Recover button, and tell Disk Drill where it should place the recovered photos.
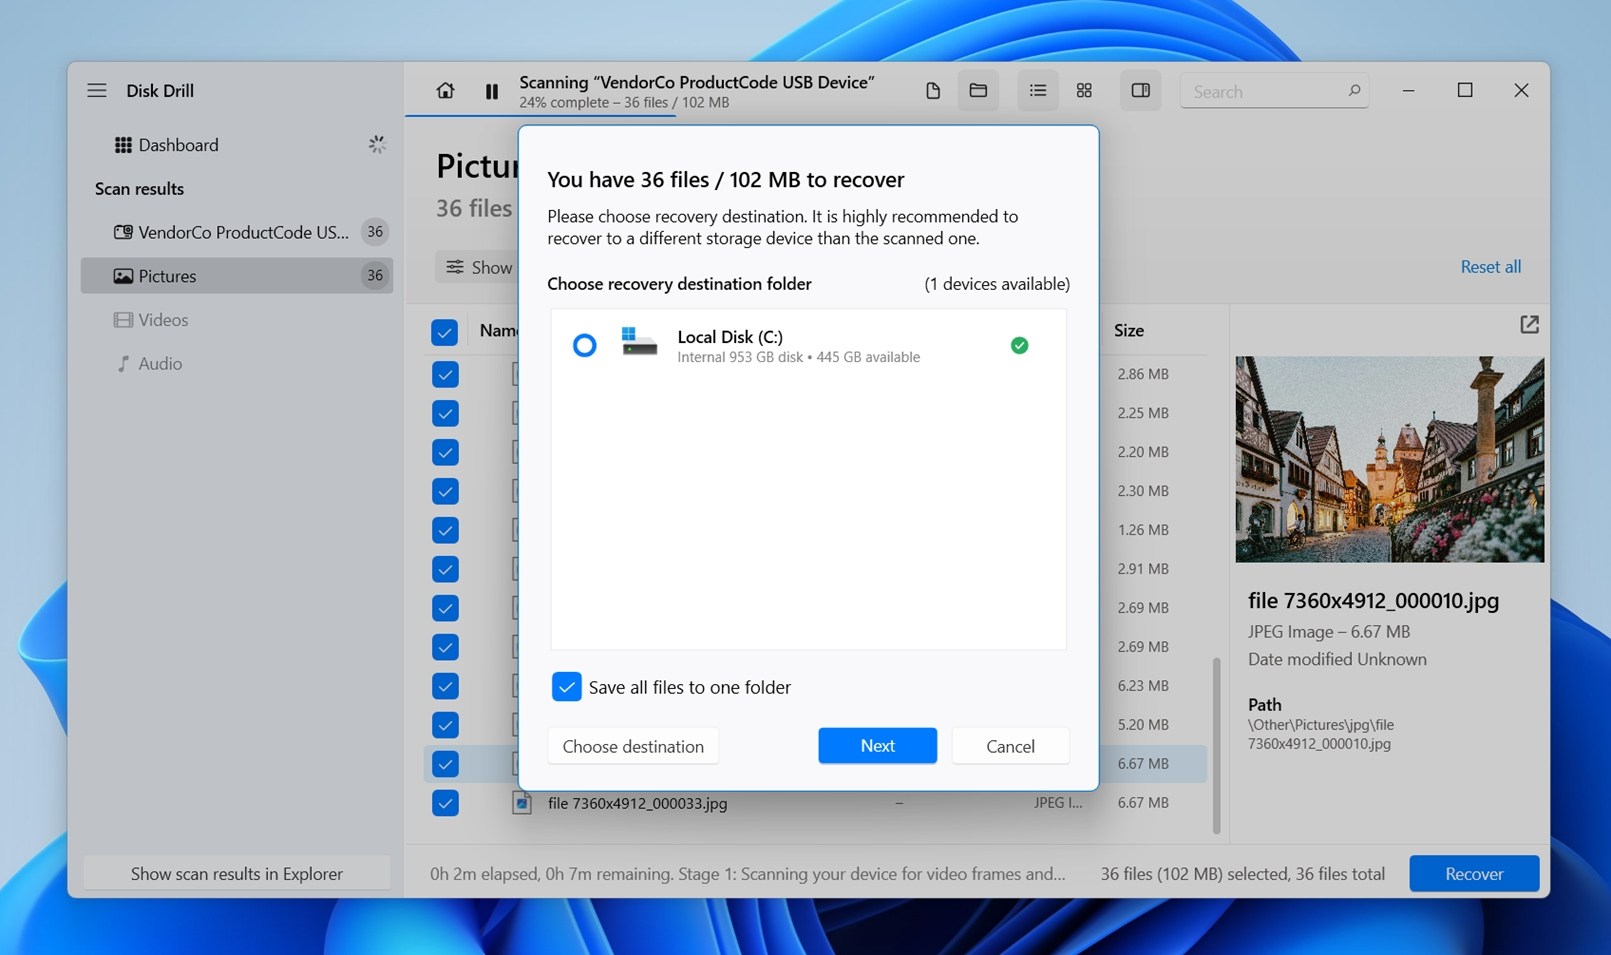 You won’t be able to select your Sony memory card as the destination – that’s intentional (saving recovered files back to the same card could overwrite other deleted photos that are still recoverable). Pick your computer’s internal drive or another storage device with enough free space.
That’s all it takes to perform a Sony photo recovery using Disk Drill for Windows!
DIY Sony Camera Photo Recovery vs Recovery Lab
As an alternative, you always have the option to hand your Sony camera memory card to a professional recovery lab. That route can make sense, and if you want to compare providers, you can read our guide to some of the best data recovery services. But, in most everyday Sony camera loss cases, a lab is not the automatic best answer.
If the memory card is physically fine, still recognized by a computer (if the card appears in Disk Management with the correct capacity, the card is recognized), the truth is that a good lab often starts with the same first step you can do at home: run recovery software. In those situations, they may not recover more than what you can recover yourself with a strong Sony photo recovery tool.
Where labs earn their price is hardware trouble. Cracked cards, broken controllers, burned components, cards that disconnect constantly, water damage, bent pins, or media that no longer appears in Disk Management. That’s where clean handling, donor parts, chip-off work, and specialist tools matter.
So our advice usually leans toward DIY first. If the card still reads normally, start at home. If the card has physical symptoms or contains irreplaceable once-in-a-lifetime photos and you don’t want to risk mistakes, go straight to a lab.
| Situation | DIY Recovery at Home | Professional Lab |
| Accidental deletion | Usually the best first choice | Often unnecessary |
| Quick format | Strong chance with capable tools | Often unnecessary |
| File system corruption | Often recoverable at home | Helpful for physical corruption |
| Card recognized normally by PC | Strong candidate for DIY | May not add much |
| Sony ARW / JPEG photo recovery | Good tools handle this well | Good, but often similar results |
| Video recovery from fragmented media | Use advanced camera-aware tools | Often similar results |
| Card not detected anywhere | Low odds at home | Best option |
| Physical damage (cracked, wet, bent, burnt) | Avoid DIY attempts | Best option |
| Urgent turnaround for paid job/photoshoot | Possible same day at home | Depends on lab queue |
| Cost | Lowest | Highest |
Common Mistakes We Often See in Sony Camera Photo Recovery
If you follow our guide to a T, your chances of success should be high. Most photo loss cases from Sony cameras are recoverable when the card is handled the right way and scanned early. Still, we keep seeing the same mistakes turn a fixable situation into a much harder one. Some of them happen in the first five minutes.
- The biggest mistake is continuing to use the camera after deletion. Someone notices missing photos, shrugs, then keeps shooting the rest of the day. That’s the fastest way to destroy recoverable data. As we already explained, deleted files often remain on the card until new photos or videos reuse that space. Every shot, clip, any extra image can replace something you wanted back.
- Another common one: formatting the card because the camera or computer prompts you to. Sony cameras and Windows both may suggest formatting when a card looks corrupted / unreadable. Many people click OK. Sometimes recovery is still possible after a format, but it becomes much harder. Scan first. Repair later.
- We also see people give up too soon after trying one basic tool. A costly assumption. Not all recovery software handles file systems equally well. Some tools are stronger with FAT32 or exFAT, others struggle with damaged partitions, and many cheap or outdated apps have weak support for Sony file types like ARW RAW images. Video raises the stakes even more. Camera video files can be fragmented across the card, and most basic tools fail badly there. If you shot clips on a Sony camera, a tool with proper camera-media support can make a huge difference.
- Another myth: “It’s been too long, so recovery is impossible.” Time by itself usually is not the deciding factor. You can recover photos after a week, a month, even years later. The real question is whether the card was used after the files were deleted. A memory card sitting in a drawer untouched for twelve months may offer better recovery odds than a card deleted yesterday and then used for 100 new photos.
- We also see people recover files back onto the same memory card they’re trying to rescue. That can overwrite other deleted photos still waiting to be recovered. Always save recovered files to your computer, external SSD, or another drive.
The takeaway is simple – most failed recovery attempts are not caused by the original deletion. They’re caused by what happens next.
FAQ
If you need to recover Sony RSV files, then data recovery software with support for this file format, such as Disk Drill, can help you.
To recover deleted pictures on a Sony CyberShot camera, follow these steps:
- Download and install Disk Drill on your computer.
- Connect your Sony CyberShot camera’s memory card to your computer.
- Launch Disk Drill and select the memory card.
- Click Search for Lost Data, then choose Advanced Camera Recovery.
- Locate and select your missing pictures.
- Click the Recover button and choose a safe recovery destination.
You need two things to recover data from a Sony SxS card: a memory card reader with support for this flash memory standard and capable data recovery software. From there, you just need to connect your SxS card to your computer using the memory card reader and scan it with your data recovery software of choice.
No, there are no built-in data recovery utilities included with standard Windows tools in either Windows 10 or Windows 11 that are specifically designed to recover deleted photos from a Sony Cyber-shot camera (or any other). Windows itself does not come with a click-and-scan recovery app hidden in Settings or File Explorer.
Microsoft does offer a separate tool called Windows File Recovery, which you can download from the Microsoft Store. It is free, but it’s extremely basic (as we noted in our review). It runs through the command line, has no friendly UI, and no preview system.
So if you want the best chance to recover deleted photos from Sony Cybershot camera for free, third-party recovery tools are usually the better route.
Conclusion
You can often restore deleted photos from your Sony camera quickly with the right tool and the right first steps. In many cases, the photos are still on the card and waiting to be recovered. Disk Drill is exceptionally good for jobs like this because it’s easy to use, supports common Sony photo formats, and handles camera memory cards well. All you usually need to do is connect the storage from the camera to your computer with a card reader, open the recovery app, select the card, and start a scan. That same approach works not only for accidental deletions, but also for many formatting, corruption, and missing-file cases involving Sony cameras.
Yes, you can also pay a professional recovery service to handle it for you. That option has its place, with physically damaged cards or priceless one-time photos. But in the absolute majority of normal memory card cases, DIY recovery will be faster, more convenient, and definitely cheaper.