We’ve been capturing videos on our iPad for a long time and for good reason too. They sync with iCloud and over time the cameras have improved allowing their video capabilities to improve.

The issue is that sometimes we may lose the videos that we’ve taken on our iPad or delete them and then realize that we didn’t want to. In this article, we’re going to take a look at how to recover deleted videos from our iPad.
How to Recover Deleted Videos Using the Recently Deleted Folder
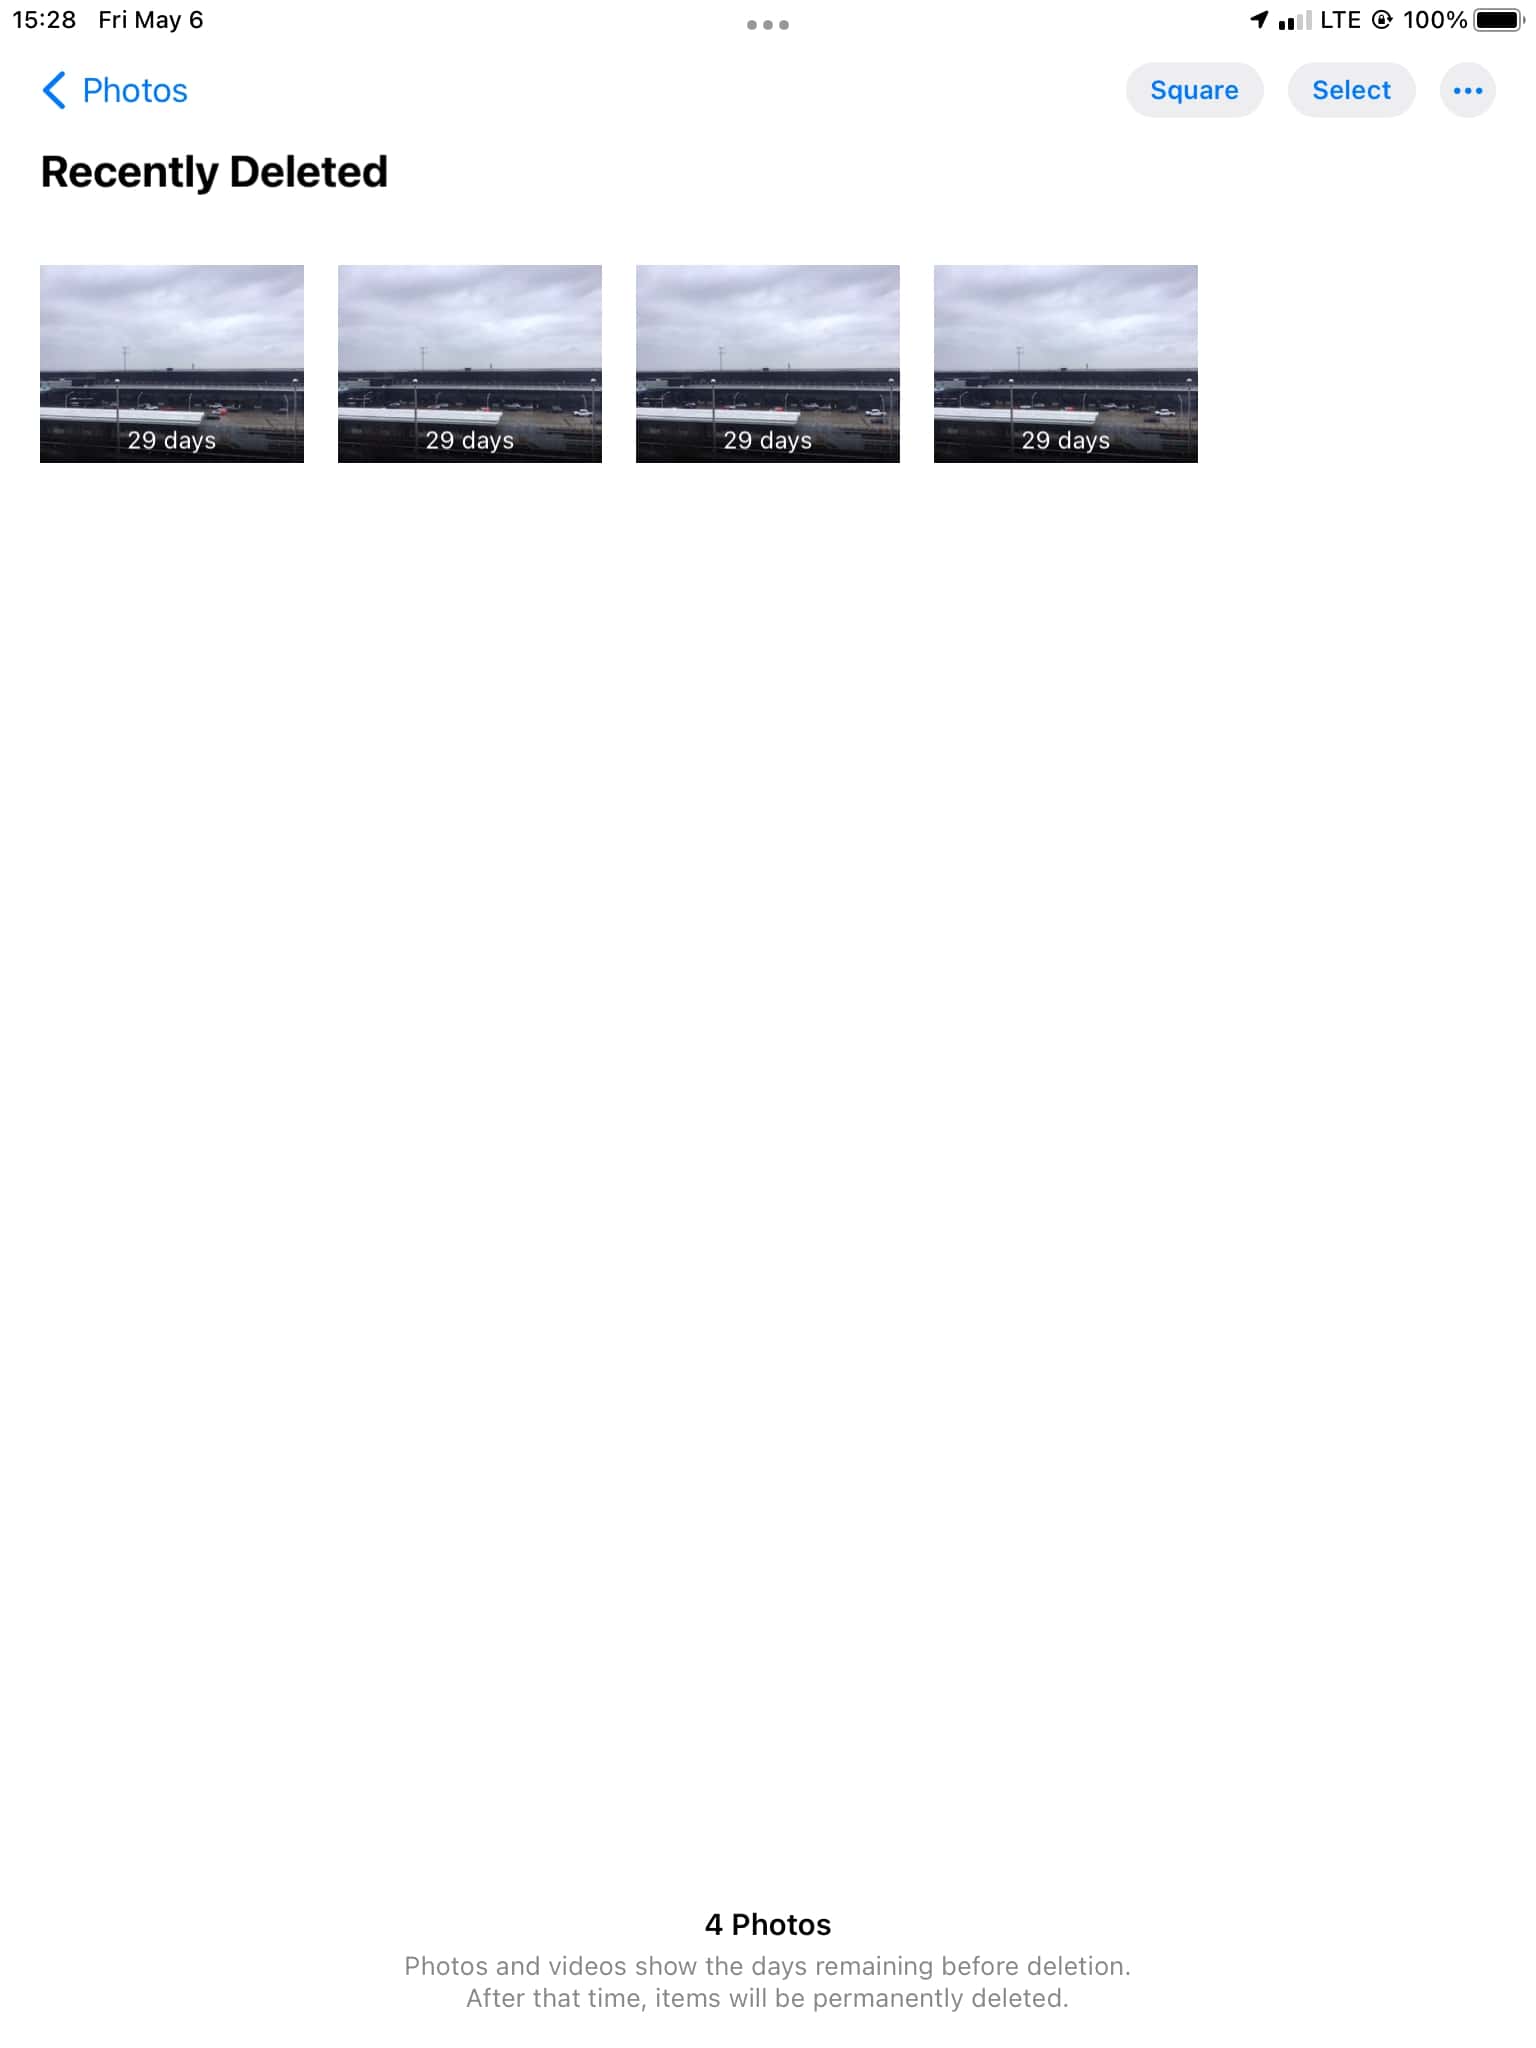
When you delete a video off of your iPad, it will then go into the Recently Deleted folder where it will sit for around 30 days, and then it will be permanently deleted.
If you deleted a video and then realize that you didn’t want to, you can go into the Recently Deleted folder and restore it. This is actually quite easy to do and we will walk through this in the steps below.
- Launch the Photos app on your iPad.
- Within the Photos app, go under Utilities and click on Recently Deleted.
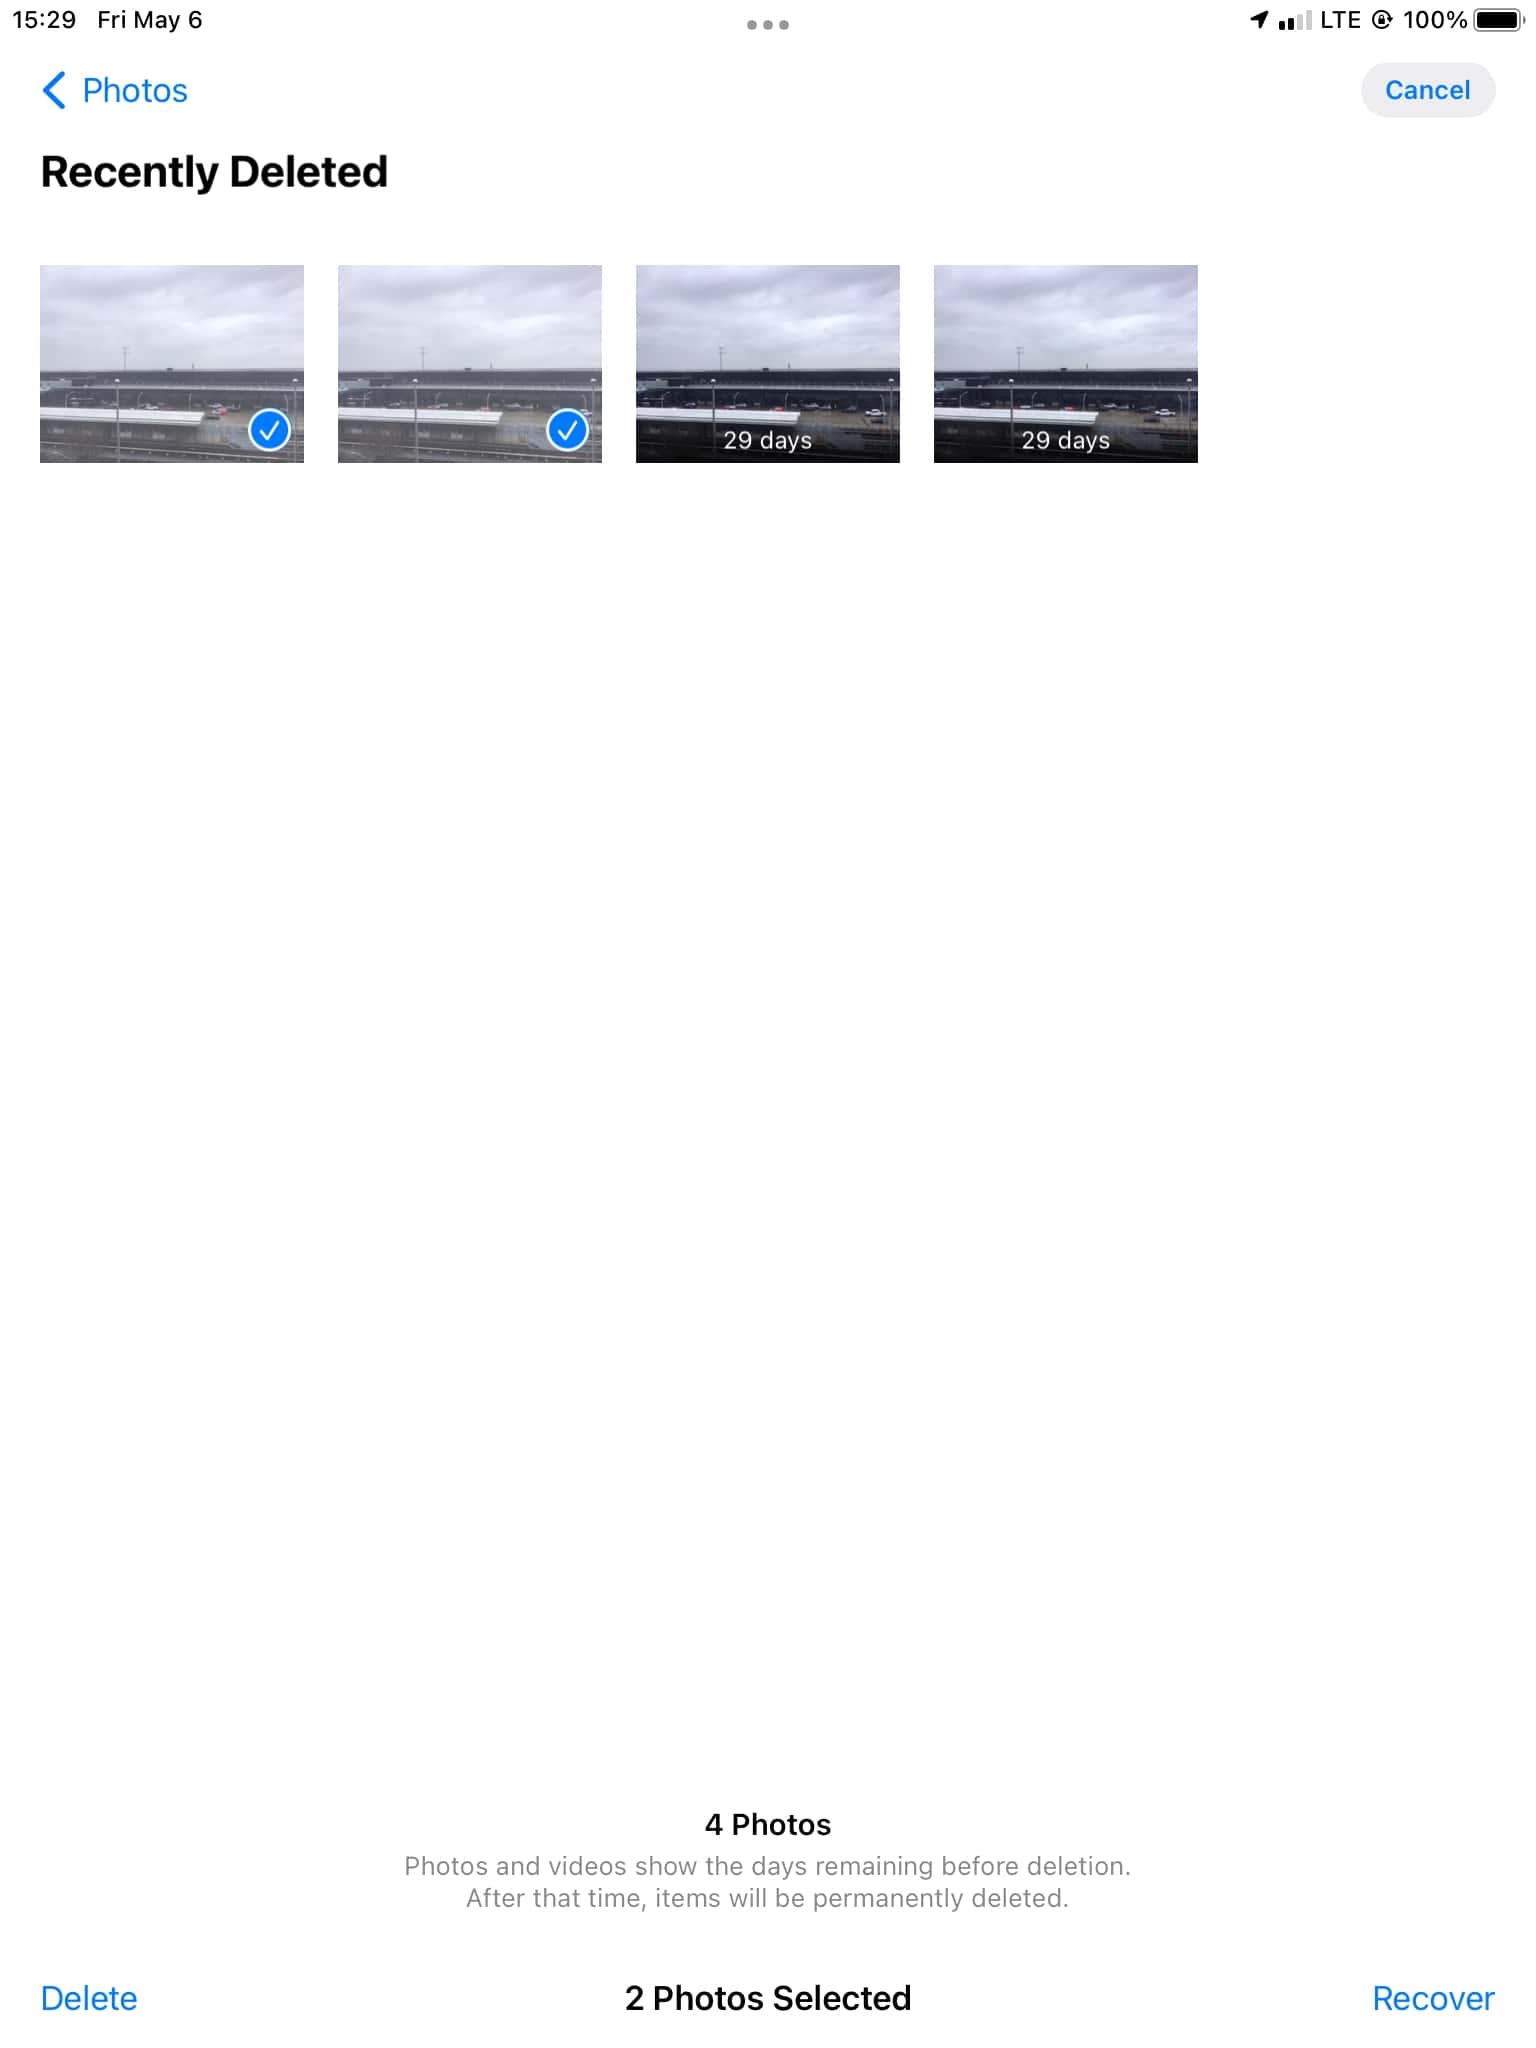
- Then, click on Select and tap on the videos that you would like to recover and put back into your main photo library.
- Once you’ve selected the videos that you want to recover, click on Recover and the videos will go back into your Library.
If the video was deleted more than 30 days ago or maybe you already deleted the videos in your Recently Deleted folder, do not worry. There are more options than we can try to find and recover the deleted videos.
Using Disk Drill to Recover the Deleted Videos From Your iPad
Disk Drill allows us to recover deleted videos from our iPad even if they’ve been deleted and the Recently Deleted folder has also been emptied.
It does this because the data isn’t actually deleted off of our iPad yet, it’s marked as free space for new data to be saved to, so most of the time we can still recover the deleted videos if a ton of time hasn’t passed or if we simply haven’t saved new data to our iPad.
In the steps below, we will walk through how to recover deleted videos off of our iPad and get them back.
- Download and install Disk Drill onto your Mac.
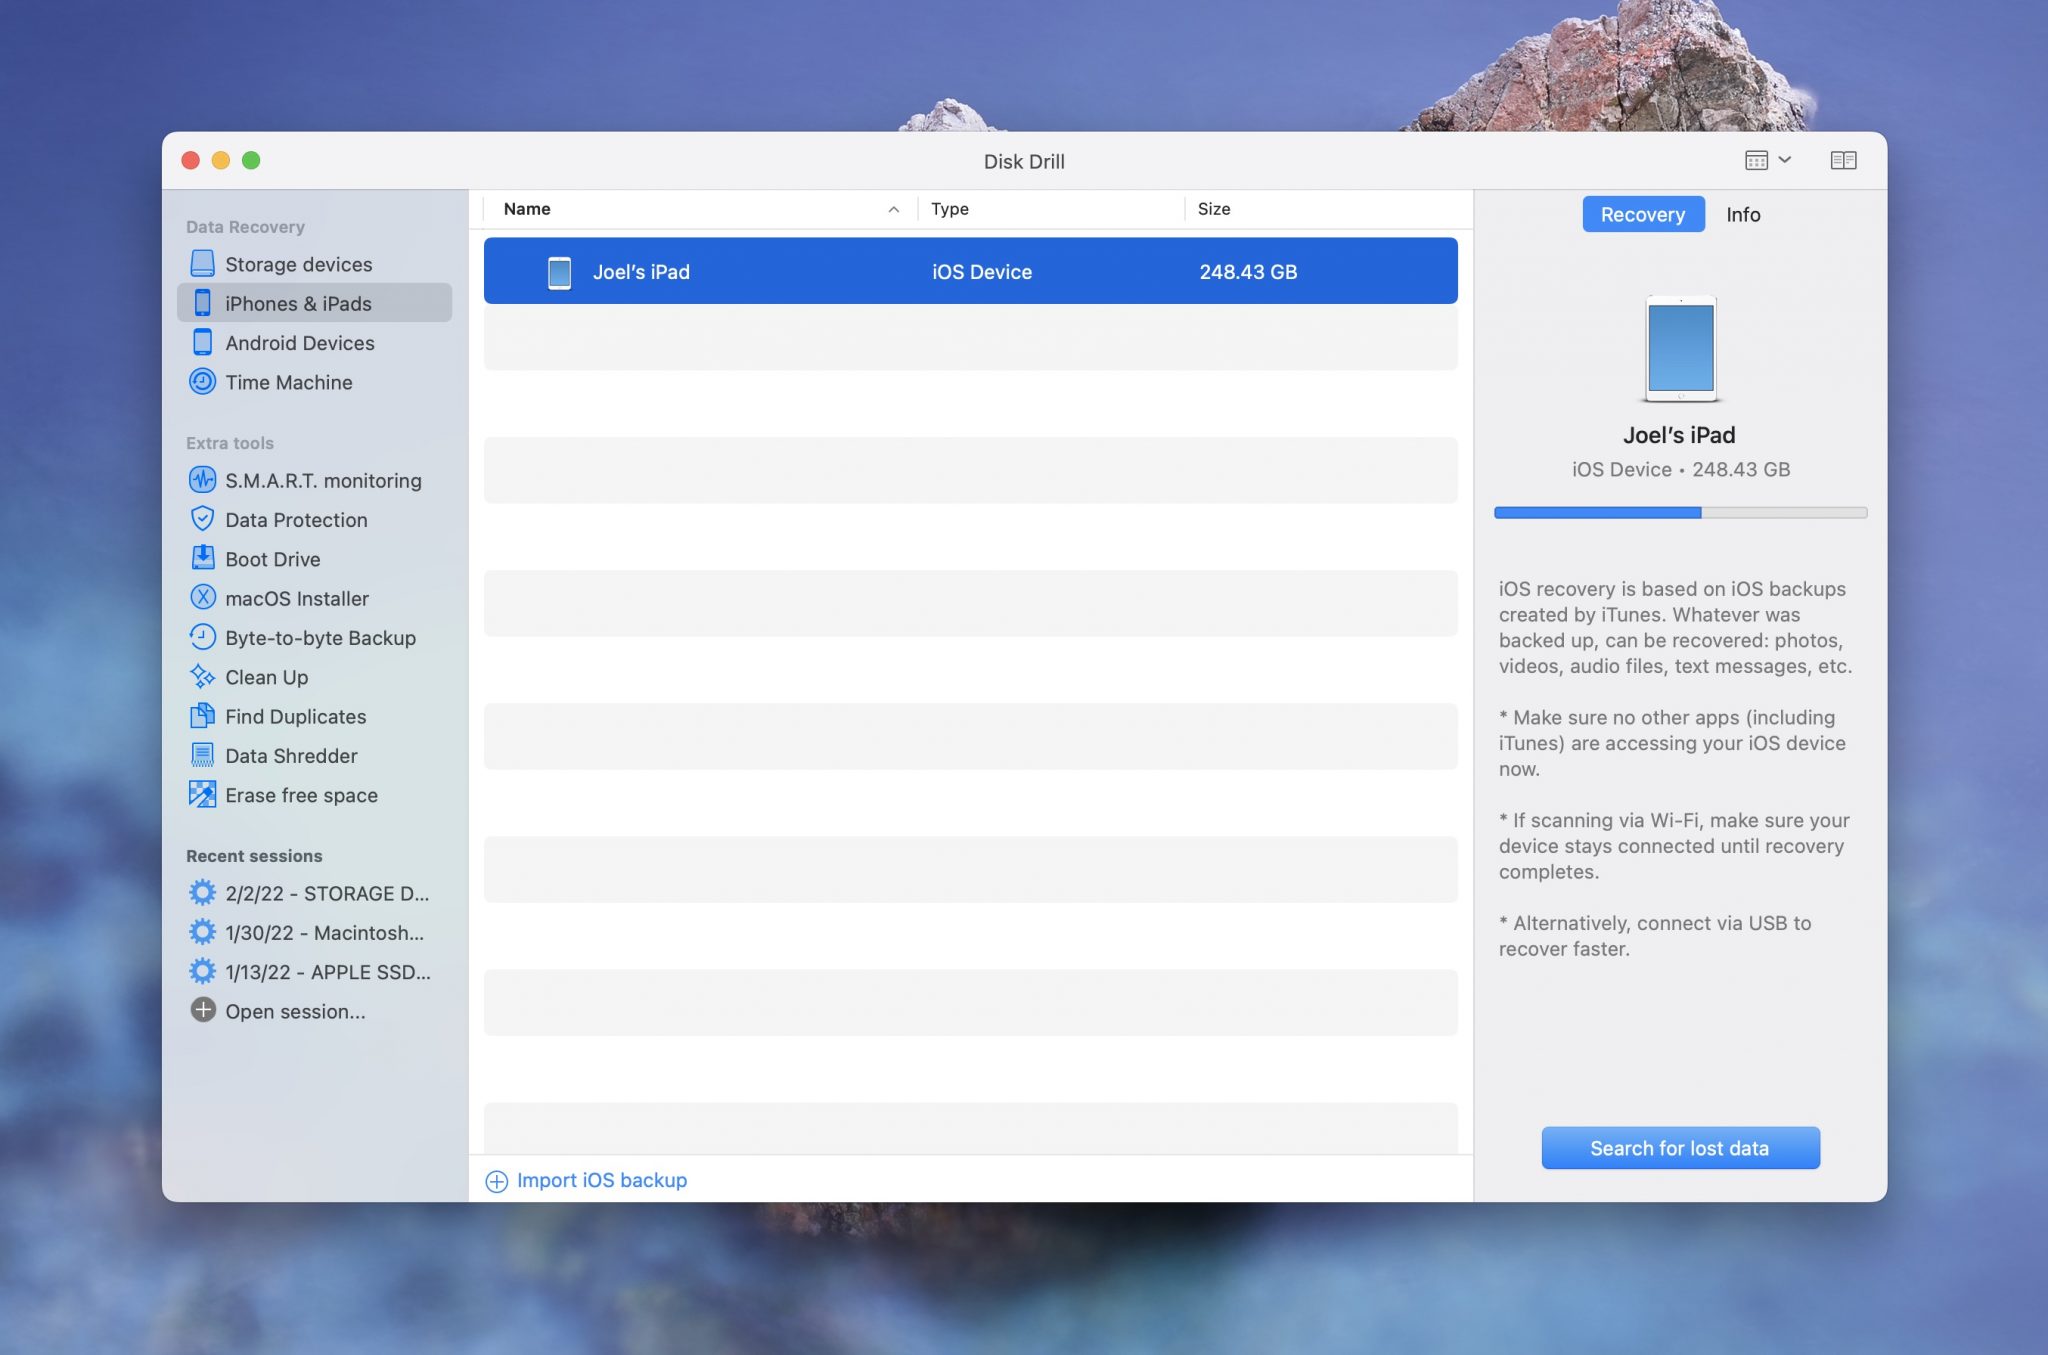
- Plug your iPad into your Mac and then launch Disk Drill. We then want to go to iPhone & iPads and select our iPad from the list. Click on Search for lost data.
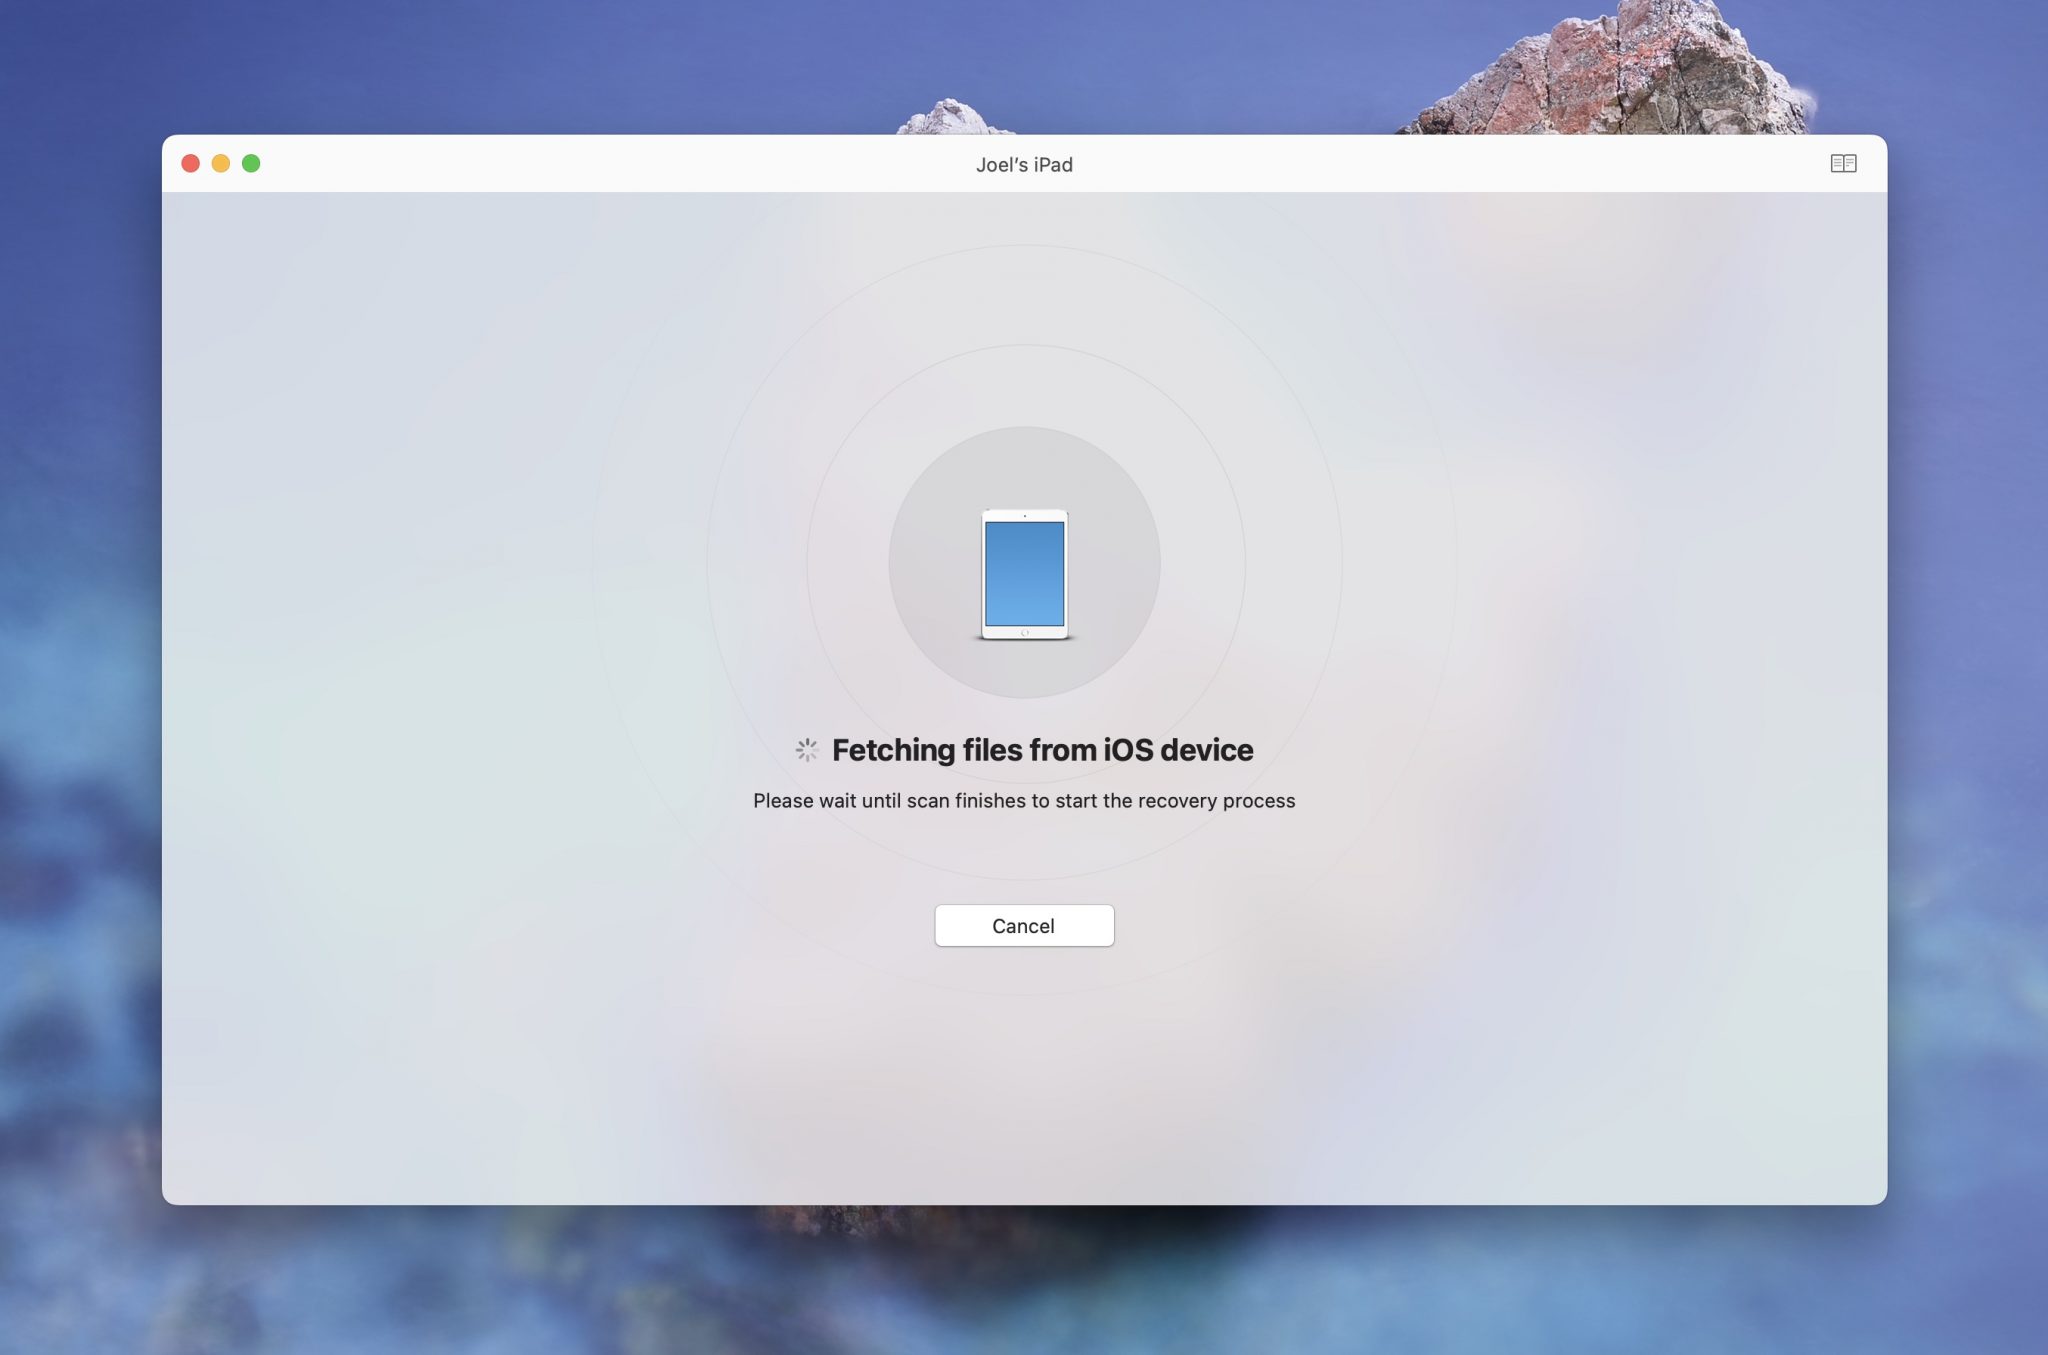
- Wait for the scan process to complete. This can take some time depending on how much data there is on your iPad.
- Once the scan has been completed, review the videos that Disk Drill was able to find for you and choose which ones you would like to recover.

How to Recover Photos From an iCloud Backup
When you first set up your iPad, you most likely set up iCloud and hopefully, it has been backing up the entire time. Your iPad will back up even without you doing anything as it does this every time that it is charging, connected to Wi-Fi, and the screen is locked.

Restoring from a backup is pretty easy to do. However, do note that your iPad will go back to looking exactly as it did on the day that you restore it to so any work that you’ve done since then will not be saved. This might be worth it though if the videos that you lost are priceless to you.
- Create a new current backup of your iPad before starting to restore to an older backup. This will ensure that if something doesn’t go right during the backup process, we can restore our iPad back to how it was before we tried to recover the deleted videos.
- Factory reset your iPad. To initiate the reset, go to Settings > General > Reset > Erase All Content and Settings. Your iPad will then reset and you will be greeted by the setup screen once the process has finished.
- Now we can go through the setup process and start the restore. You will be greeted by a screen that asks if you want to restore data, and you want to choose Restore from an iCloud backup. Your iPad will need to stay on and connected to Wi-Fi for this entire process. Please make sure that it’s plugged in and charging as well.
- To recover your videos from iCloud, look for a backup that was around the date that you last remember having them on your device.
- Allow the restore to complete, and then look and see if the videos that were deleted have been restored.
Recovering Videos Using a Data Recovery Service
Sometimes no matter what we do we can’t recover data from our iPad. If this is the case, then it might be best to reach out to a third-party data recovery center as they can attempt to recover the data.
CleverFiles offers a data recovery center that you can reach out to and send them your iPad and then they can try to recover the deleted videos that are on our device. They do this by actually taking the iPad apart and looking at the data on the hard drive.
While this can become expensive, if the data on the device is very important to you and there is no price on it, then this option works well and is worth considering.
Let’s talk about what we can do to protect the data on our device.
How to Protect Your iPad Videos
It’s important to protect the videos on your iPad in the first place so that if something does happen to them you’re prepared and able to get them back easily.
Below are the best ways that you can ensure that your videos on iPad are backed up and saved.
☁️ Set Up and Use iCloud on Your iPad
iCloud is built right into your iPad and it comes as part of iPadOS. You can use it for free and it’s very easy to set up. Every time that your iPad is plugged into the charge, is on Wi-Fi, and the screen is locked, it will back up to the cloud and save all of the data on your iPad.
It does this automatically and you don’t even have to remember to do this. This service is free and if you back up a lot of data, you will have to purchase a larger storage option but it’s worth it and they’re not expensive.
💾 Use iCloud to Store Your Videos
Turning on iCloud Photo Library allows you to store all of your videos in the cloud. This ensures that if something were to happen to your iPad, all of your videos would still be saved in the cloud and you would be able to purchase a new iPad and then the videos would appear back on the device.
It’s also super convenient to use when you have more than one Apple device as all of your videos will appear on your other devices as well so when you pick up another Apple device you can access all of your videos which makes for a great experience.
👩🏼💻 Use Disk Drill to Back Up Your Videos
You can also use Disk Drill to back up your videos which is a free service and allows you to choose per file which ones that you would like to back up.
Disk Drill comes with a feature called byte-to-byte backup and you can select an external device and backup your videos to it.
- Download and install Disk Drill to use the Byte-to-byte Backup feature.
- Once you’ve downloaded and installed Disk Drill, launch the app and connect an external hard drive or any other storage device that you want to back up to.
- Navigate to the Byte-to-byte backup section of Disk Drill. You can find this halfway down the left-hand side column.
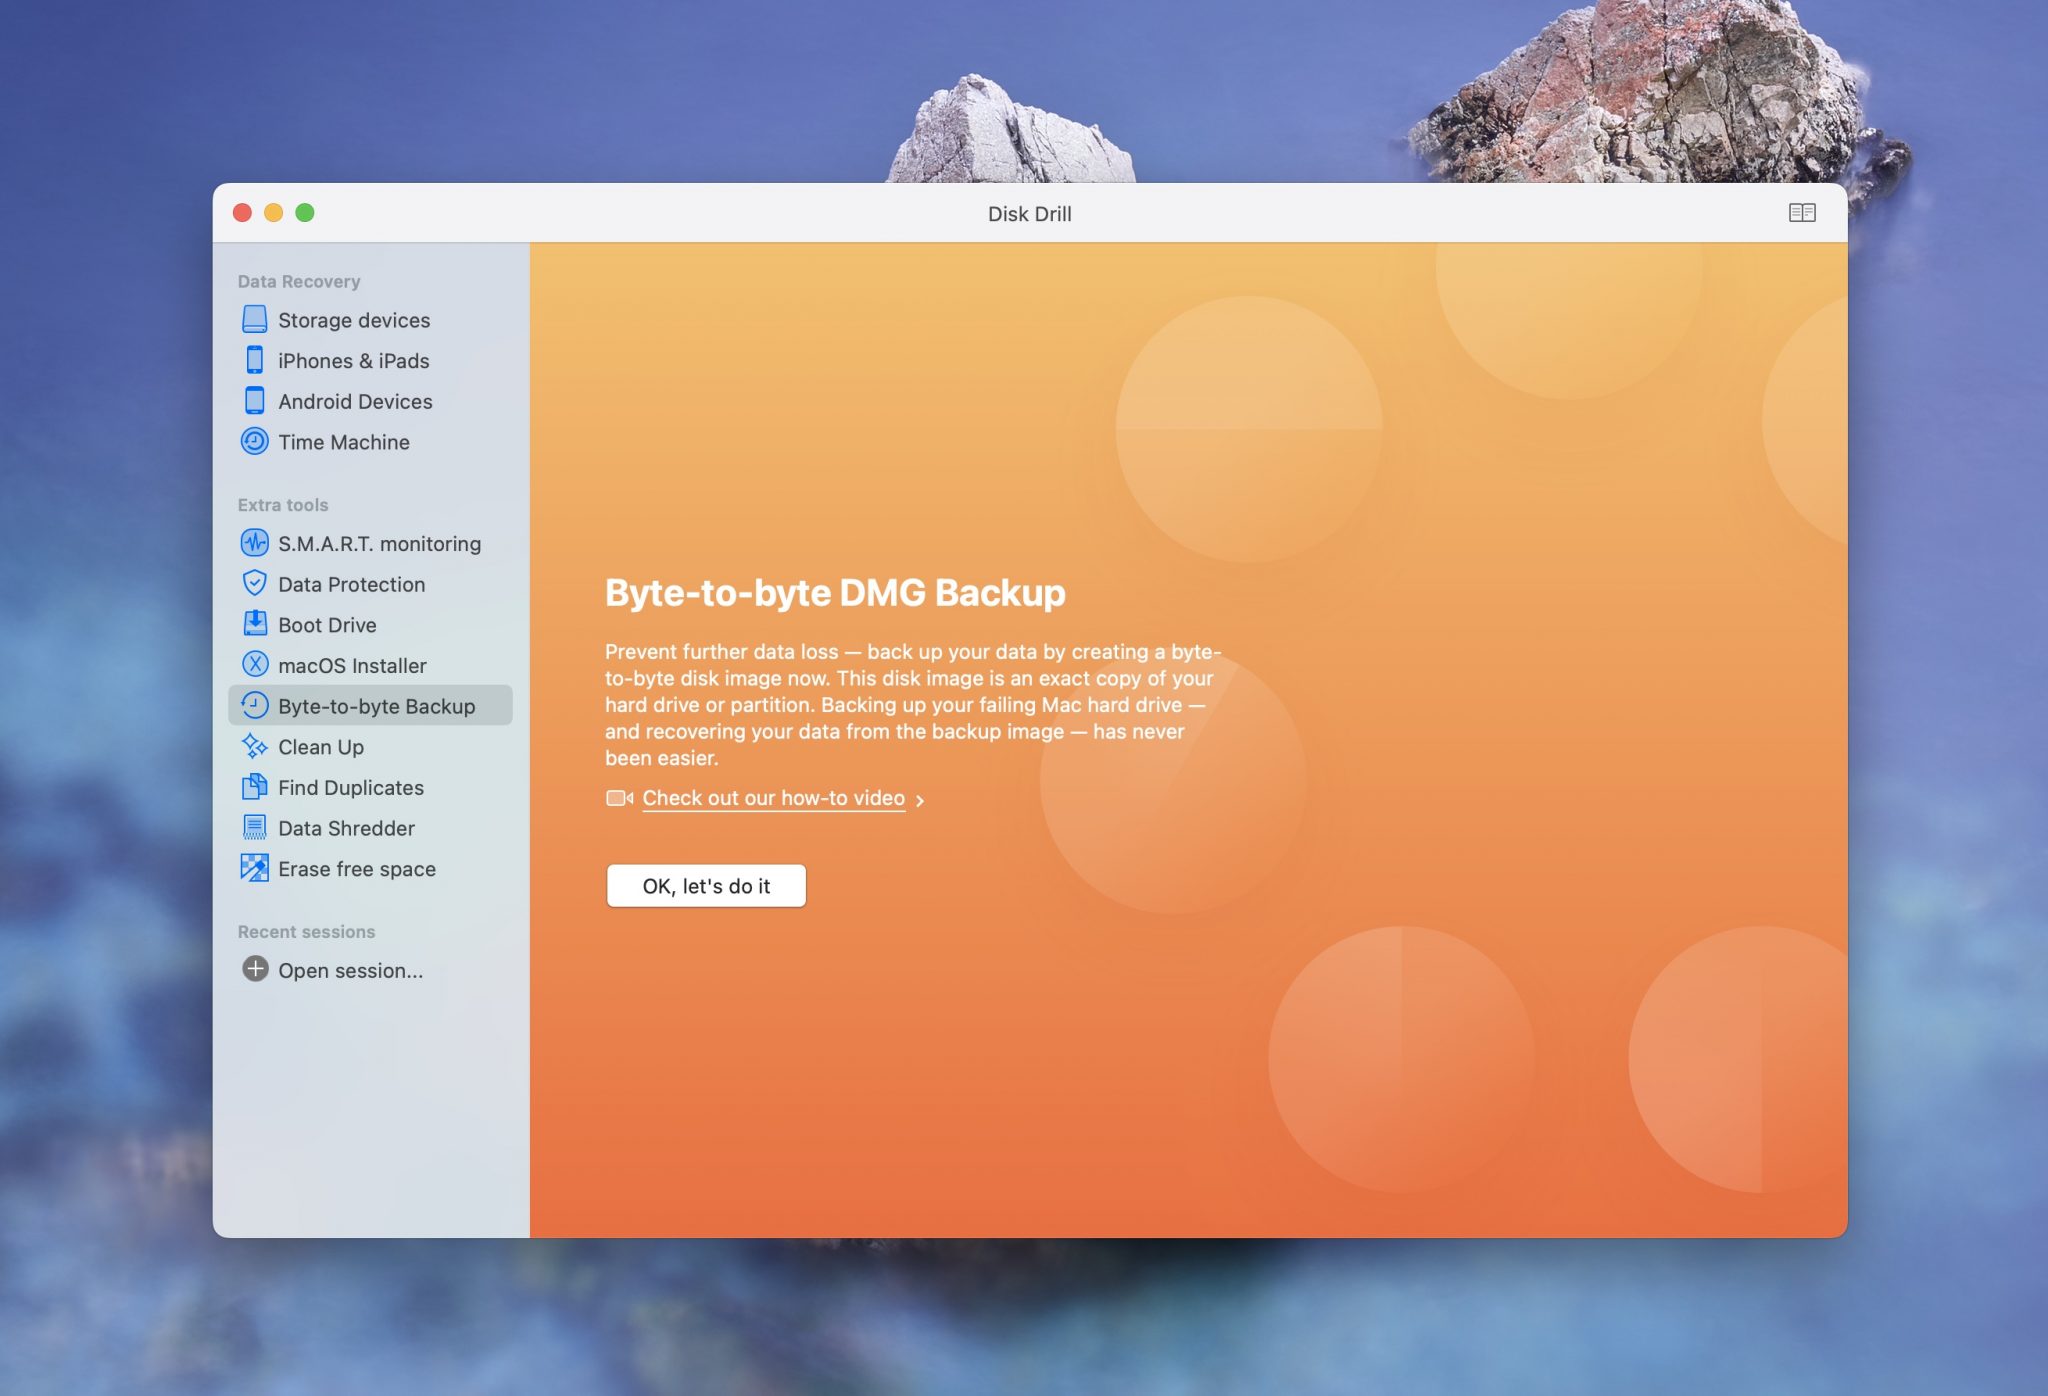
- Now, select the storage device that you want to back up to.
- Choose the name of the backup and where you want to save the backup to. I just let Disk Drill choose the default name for the backup but you can change it to something custom if you would like to.
- Wait for the backup to complete. This can take some time depending on the amount of storage that you’re backing up. For me, it took about 3 hours even though the time below is saying just over an hour. Keep in mind though, that I have a slow mechanical hard drive. If I had an SSD, this process would have gone a lot faster.
Once the backup progress is complete, you will receive a Disk image-created message. You now have all of your data backed up and on your external hard drive! Super easy 🙂
Conclusion
Being able to understand and recover data from your Mac not only saves you money, but it allows you to be a better computer user.
Some data, you just can’t put a price on and knowing how to get it back should something happen to it, is a very powerful skill to have.


FAQ
If you don’t have a backup, there are still ways to recover your deleted videos from your iPad.
First, you should head to your Photos app and check the Recently Deleted Folder as any videos that you’ve deleted will stay here for 30 days before they’re erased from your iPad.
If you don’t see the deleted videos there, then the next best thing would be to download and install Disk Drill and scan your iPad for the deleted videos.
- Download and install Disk Drill onto your Mac.
- Launch the app and go to iPhone & iPads and select your iPad.
- Wait for the scan process to complete.
- Review your iPad for the deleted videos and select the ones that you would like to recover.
Lastly, if none of these options work you can contact the CleverFiles Data Recovery Center and send your iPad to them and have them recover the deleted videos.
If the videos on your iPad have already been emptied from the Recently Deleted Folder, then the next step would be to either use a third-party data recovery app like Disk Drill or restore from an iCloud Backup.
Using Disk Drill would be easier so I would recommend that you try this step first.
- Download and install Disk Drill.
- Launch the app and go to iPhone & iPads and select your iPad.
- Wait for the scan process to complete.
- Review your iPad for the deleted videos and select the ones that you would like to recover.
If using Disk Drill did not work, then the next best thing would be to restore from an iCloud backup.
- Back up your iPad currently so that you have a spare backup just in case.
- Factory reset your iPad. To initiate the reset, go to Settings > General > Reset > Erase All Content and Settings.
- Go through the setup process and look for a backup to restore from that will have the videos that you’re wanting to recover. Keep in mind that your iPad will go back to exactly how it looked on this day, so any work that you’ve completed since that day will no longer be on the iPad.
- Wait for the restore to complete and then check your Photos app for the deleted videos.
Yes, you can! If you notice that an iMovie project that you were working on is no longer on your iPad then there are ways to try and recover it.
First, check the Recently Deleted Folder in the Photos app to see if it is in there. Any videos that you’ve deleted will be in this folder for 30 days. If you find them there, simply select them and click on Restore and they will go back into your Photos app where you can then put them back into iMovie and continue editing.
If the videos aren’t located there, then you will want to use Disk Drill to try and recover the iMovie videos that you were working on.
- Download and install Disk Drill.
- Launch the app and go to iPhone & iPads and select your iPad.
- Wait for the scan process to complete.
- Review your iPad for the deleted videos and select the ones that you would like to recover.