Have your downloaded files–or even entire Downloads folder–gone missing? As long as you act quickly, you have a small window of opportunity to restore any lost files and folders using built-in software or third-party solutions.
Our team has reviewed dozens of user stories related to losing their downloads, and based on those experiences, we tested different methods of getting them back. This guide is a collection of the best ways to restore downloads on both Windows and Mac platforms, as well as an explainer for why they disappear in the first place.
How Downloads Get Lost and Why Recovery Isn’t Always Simple
Data loss can be unusually common with downloaded files for some users, due to unique settings that help you prevent downloads from accumulating (and taking up too much storage space), as well as manage potential threats attached to them (such as malware).
Fortunately, recovering lost downloads is possible–it can even be pretty easy, sometimes. But there are several factors that can affect your success rate.
Part 1: Why Downloads Are Gone
For any platform, the primary cause of data loss (in general) is human error; it’s common for users to accidentally delete downloads or move them to unexpected or forgotten locations. On Windows, several system features add to the confusion: (1) Storage Sense, a built-in Windows 10/11 tool that automatically deletes files from the Downloads folder based on your settings, (2) cleaning up Temporary files without excluding Downloads, and (3) Microsoft Defender or SmartScreen blocking or quarantining downloaded files.
Macs have a simpler problem, mostly revolving around iCloud. If iCloud Sync is enabled for your downloads, and you have activated the Optimize Storage feature, it’s possible that your downloads were offloaded from local storage to clear up space. However, they should be safely stored in iCloud’s servers.
Part 2: Why Recovery Isn’t Always Straightforward
In any case, the most obvious way to get your downloads back is from their original source–for example, download a file again from the same website. But what if the link expires or the original source files are gone? What if your access gets revoked?
The next best solution is data recovery. This is the act of extracting data fragments directly from your computer’s hard drive and restoring them as working files. The problem–for both PC and Mac–is the type of drive. If your computer uses a solid-state drive (SSD), it very likely has the TRIM feature installed and activated, which makes data recovery significantly harder.
How to Recover Permanently Deleted Downloads with Data Recovery Software
When you’ve got no backups and no way to redownload your files, the next most reliable method of recovering deleted files on Windows 11 is by using data recovery software. This is a type of program that can scan your drives for the data fragments of your downloads, then restore them to working files or folders. The tool we’ll be using for this guide also lets you simply extract existing files that you lost or misplaced.
There are several recovery apps that you can choose from online, but we’ll be featuring Disk Drill for this section. It’s highly-rated Windows data recovery software and Mac recovery software, compatible with most major file systems (including ExFAT, FAT32, NTFS, HFS+, and APFS) and nearly 400 file signatures across documents, videos, photos, and more. It performs similarly well on both operating systems and lets you scan your drive and preview files for free–Windows users can even recover up to 100 MB worth of data without any cost.
Here’s how to recover deleted files in the Downloads folder (or an accidentally deleted Downloads folder) using Disk Drill:
- Download and install Disk Drill on your computer.
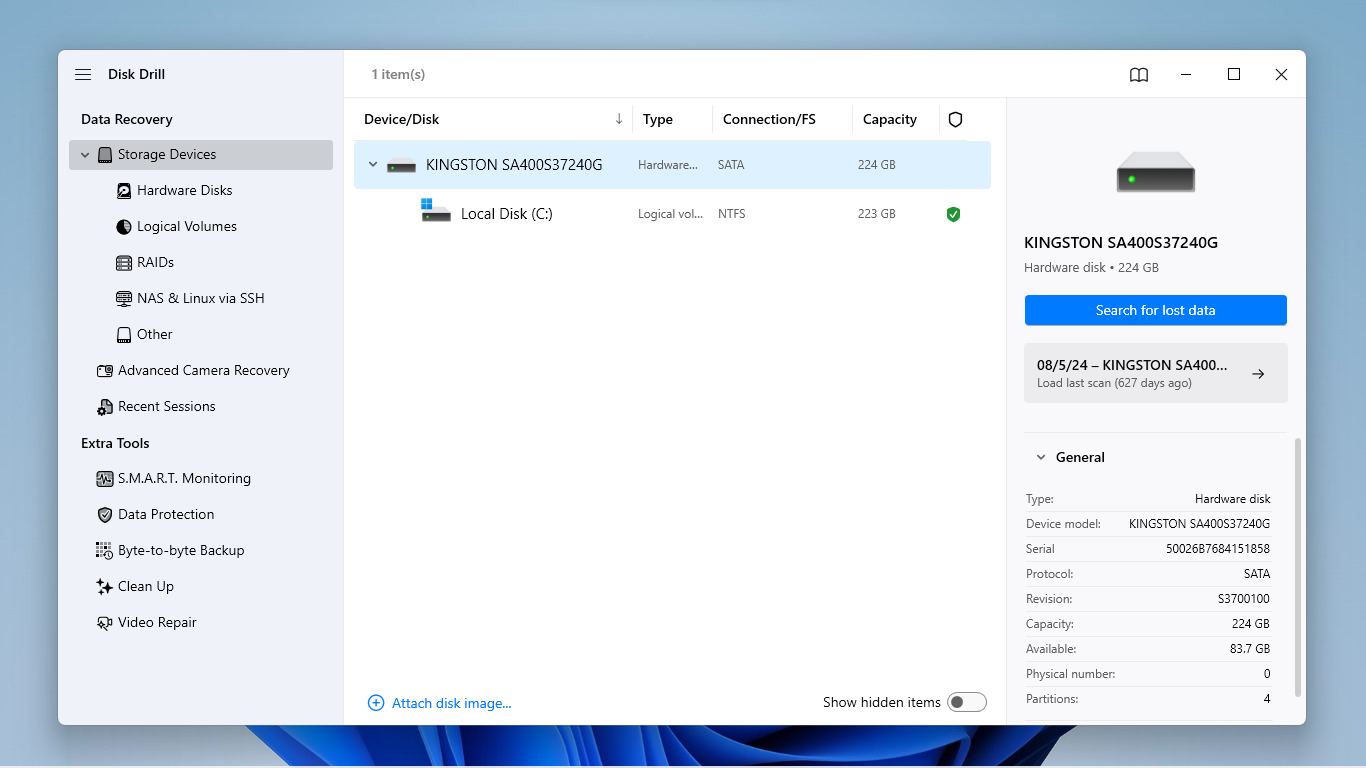
- Open Disk Drill and identify the appropriate drive or volume; unless you change their default settings, browsers download files to your local disk (commonly referred to as Local Disk (C:)). You can select the Local Disk volume or the drive it’s stored on. Then, click Search for lost data.
- A dialog box may appear, which prompts you to choose between Universal scan and Advanced Camera Recovery. Run a Universal scan first, and only choose ACR during a rescan if any recovered videos end up unplayable.
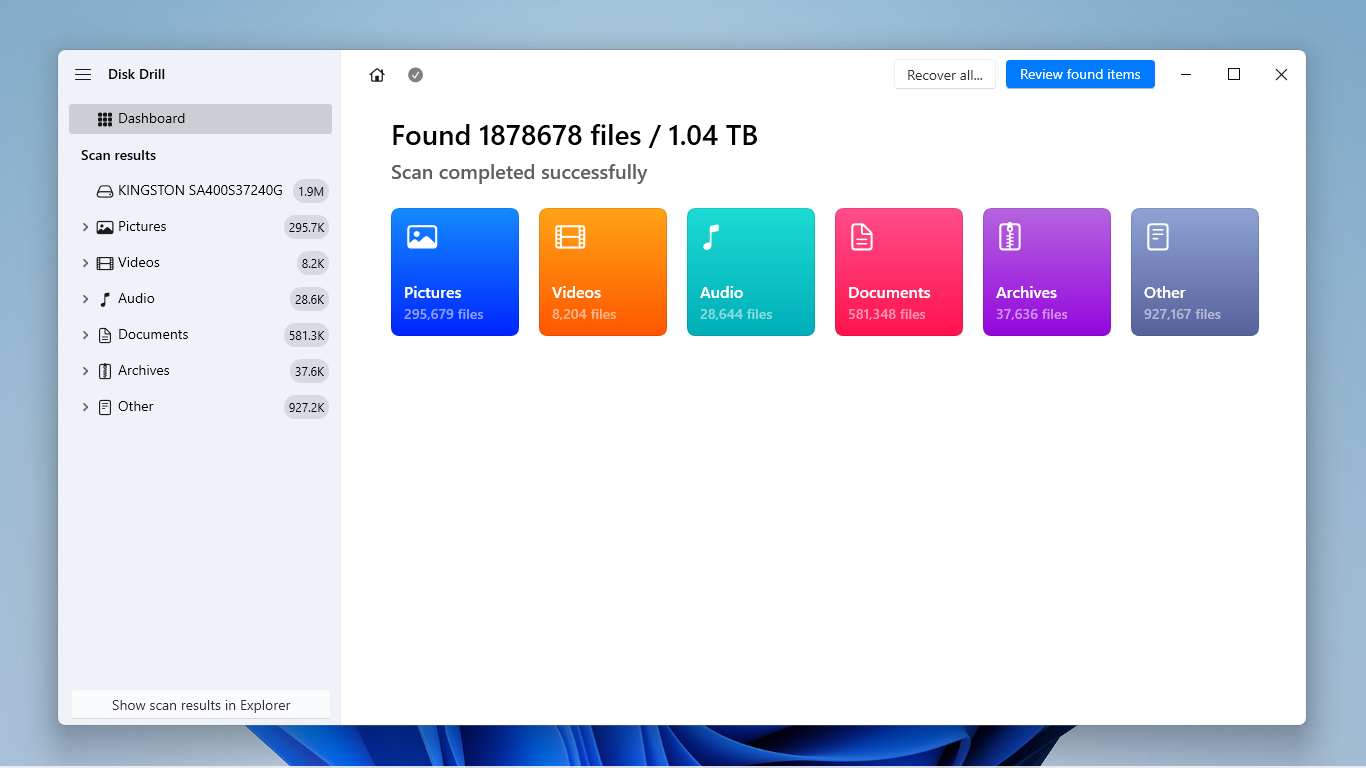
- Wait for Disk Drill to finish scanning your drive. Then, click Review found items.
- Expand the Existing section if you’re looking for files that were simply misplaced, or expand the Deleted or lost and Reconstructed sections for deleted items. You can use the filters in the left sidebar, as well as the search bar in the top right corner, to narrow down scan results to specific file types or names (or even folder names).
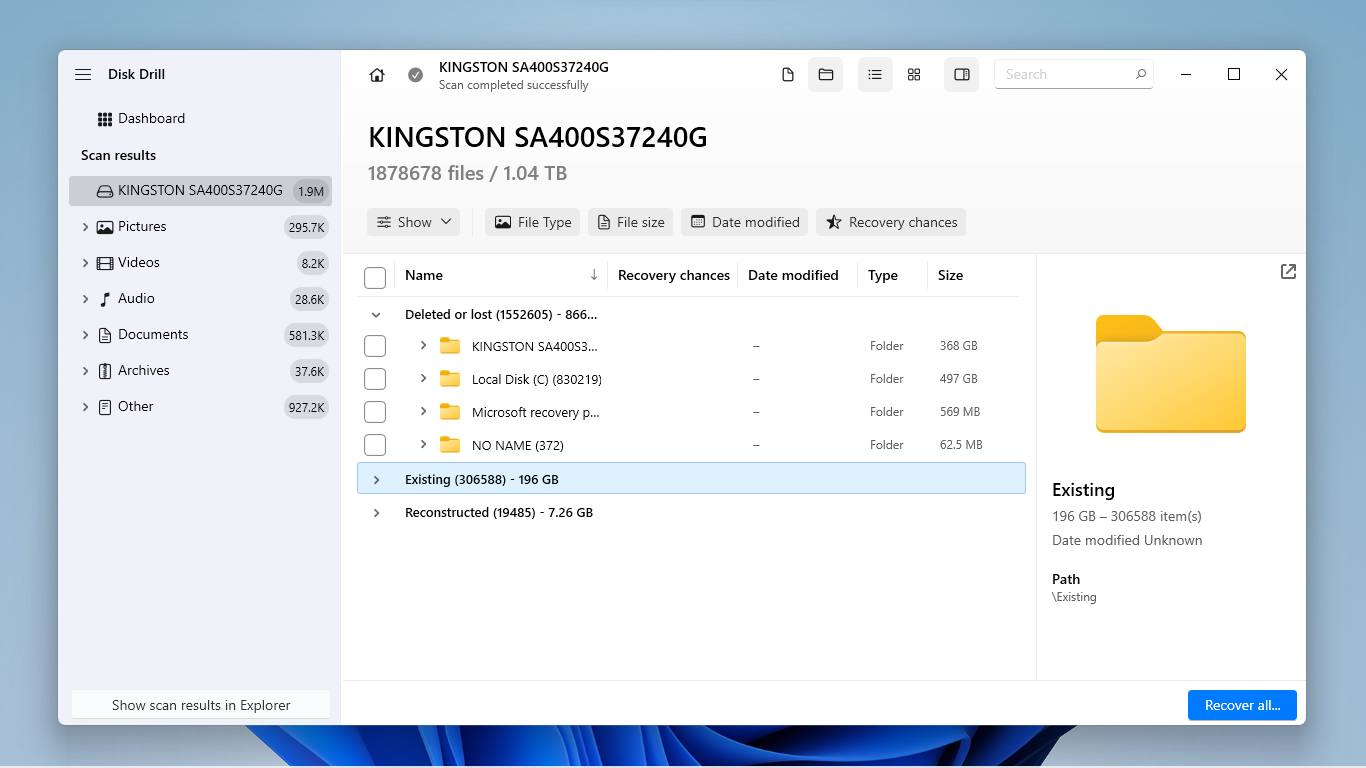
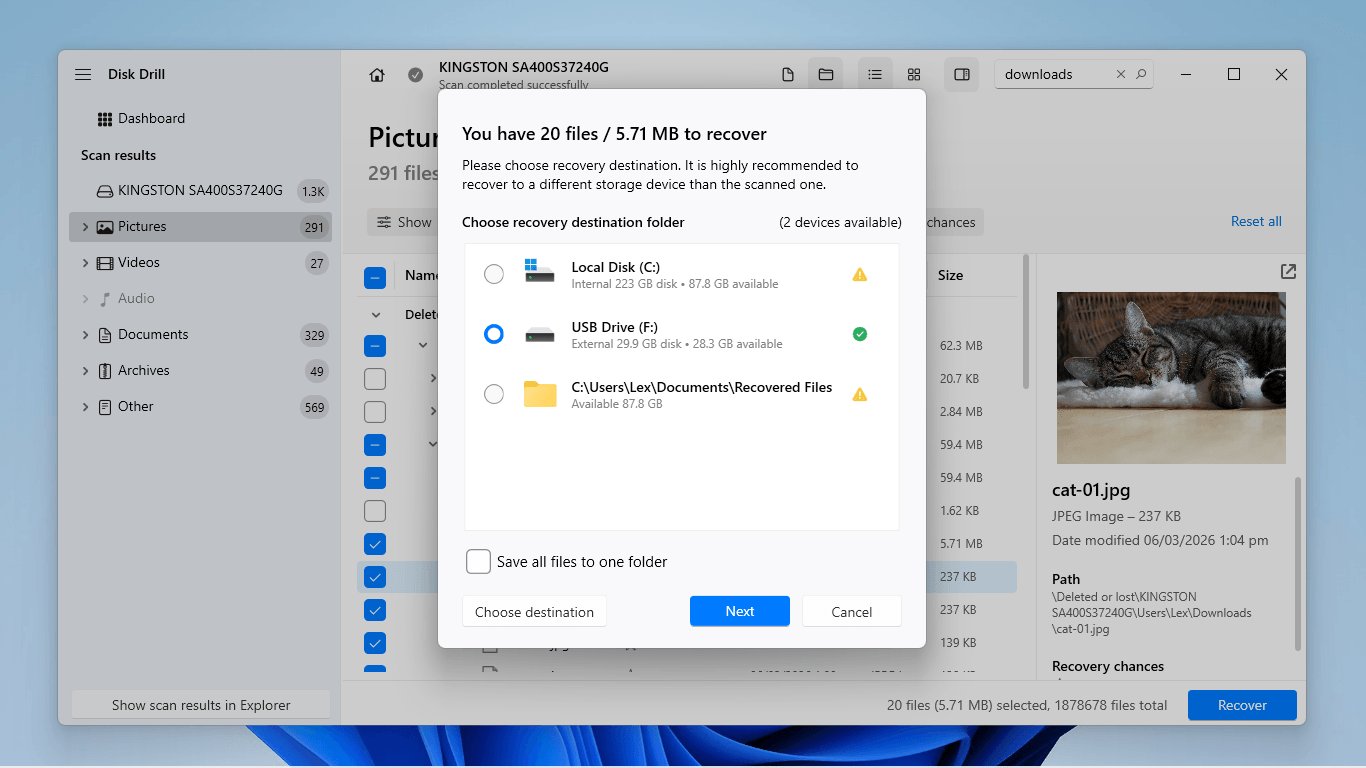
- Make sure to click each file once to display its preview in the right sidebar. Then, use the boxes in the leftmost column to select the files and folders you want to restore. Click Recover.

- In the new dialog window, select a location where you want Disk Drill to save your restored downloads. Make sure to select a location other than the drive you’re recovering the data from (e.g., if you’re recovering data from your PC drive, save the files to an external USB). Finally, click the Next button to proceed.
Aside from the features showcased in the guide, Disk Drill has other useful (completely free) tools that can help with missing downloads. Byte-to-byte backup is a disk imaging feature that can create a complete copy of your drive. S.M.A.R.T. Monitoring warns you of any potential problems with your drive that may cause data loss. Recovery Vault is a pre-emptive solution that creates copies of your files’ metadata to make recovery far easier, if you ever need it.
How to Recover Deleted Download Files on Windows PC
Beyond using third-party data recovery software, Windows provides multiple native solutions that can help you restore your deleted downloads. Whatever ends up most successful for you depends on your individual scenario. With that in mind, we started with the simplest solutions first, so you can start with Method 1 and work your way down (if you don’t know where to start).
Method 1: Check the Recycle Bin
When your downloads were deleted from your computer, Windows didn’t immediately erase them. First, your files got sent to the Recycle Bin, where you can either move them back to their original location or delete them permanently. Here’s a quick guide on how to find missing files on your PC and restore them from the Recycle Bin.
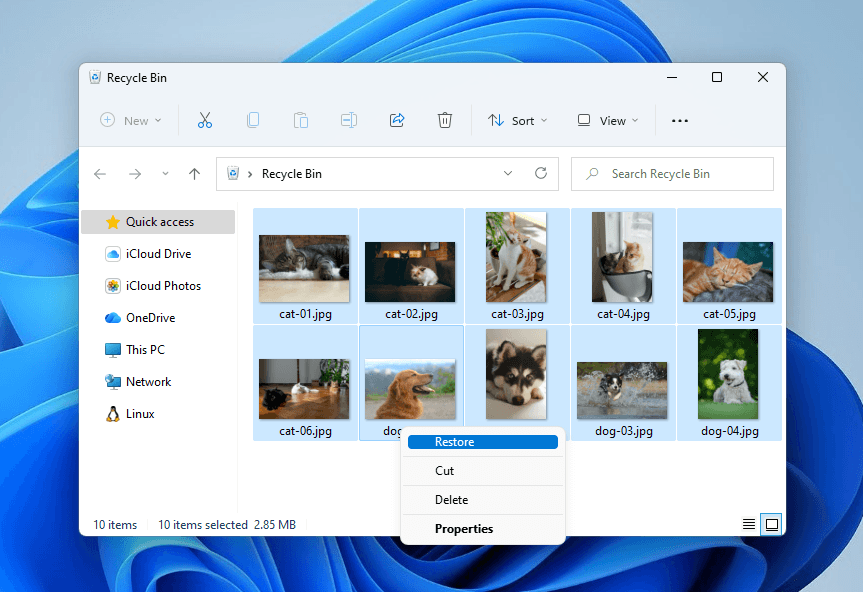
- Open the Recycle Bin by double-clicking its icon on your PC’s Desktop.

- Click the deleted file or folder you want to restore (or click-drag to select multiple items). Then, right-click your selection and click Restore.
If your files are already gone, the only way to recover files from an emptied Recycle Bin is by using data recovery software (see the recovery guide section). However, backups can make this attempt unnecessary–see the next section.
Method 2: Use Backups
Aside from the Recycle Bin, Windows has other built-in “safety nets” in the form of backups. File History handles local backups, while OneDrive manages cloud backups and data synchronization. We prepared guides for both solutions below.
File History
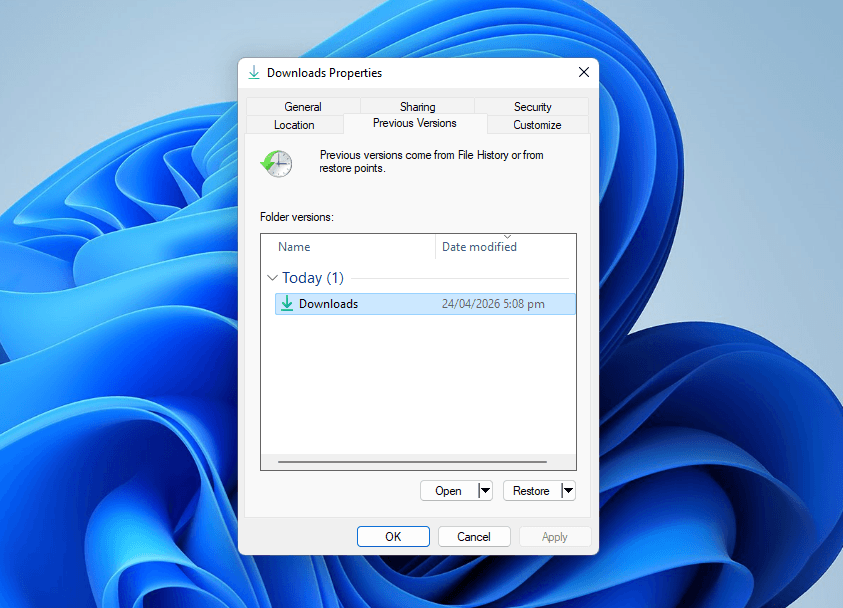
File History is a built-in backup utility on Windows PCs that allows you to restore previous versions of your files and folders. If your downloads were part of File History’s inclusions, and you created a backup before they were deleted, this method can help you get them back.
- Open File Explorer.
- Navigate to the folder where your deleted downloads were last stored. Right-click that folder and select Show more options.
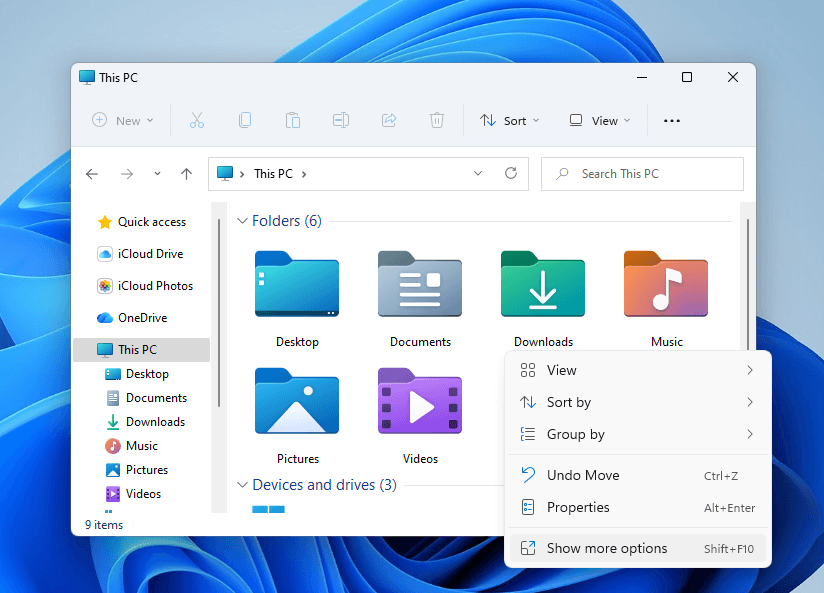
- Choose Restore previous versions from the context menu.
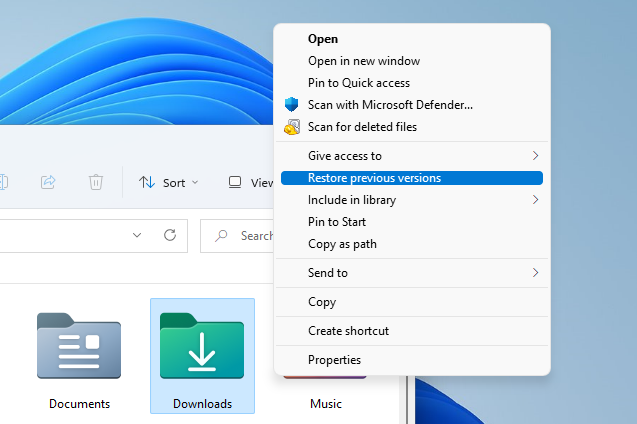
- In the new window that appears, select a version of the folder dated before your downloads were deleted. Then, click the Restore button.
OneDrive
OneDrive is Microsoft’s cloud storage and synchronization service that stores copies of any files and folders you choose to include in the sync list. It also provides two safety nets for deleted files: the Recycle Bin and Version History features. If your downloads were synced to OneDrive before they were deleted, one of these tools could bring them back. We’ll feature them both in one step-by-step guide:
- Open a browser on your PC, then log in to Microsoft OneDrive.
- On the left sidebar, click the Recycle Bin button (🗑️). Then, select the files you want to recover and click Restore. If your files aren’t in OneDrive’s Recycle Bin, proceed to step 3.
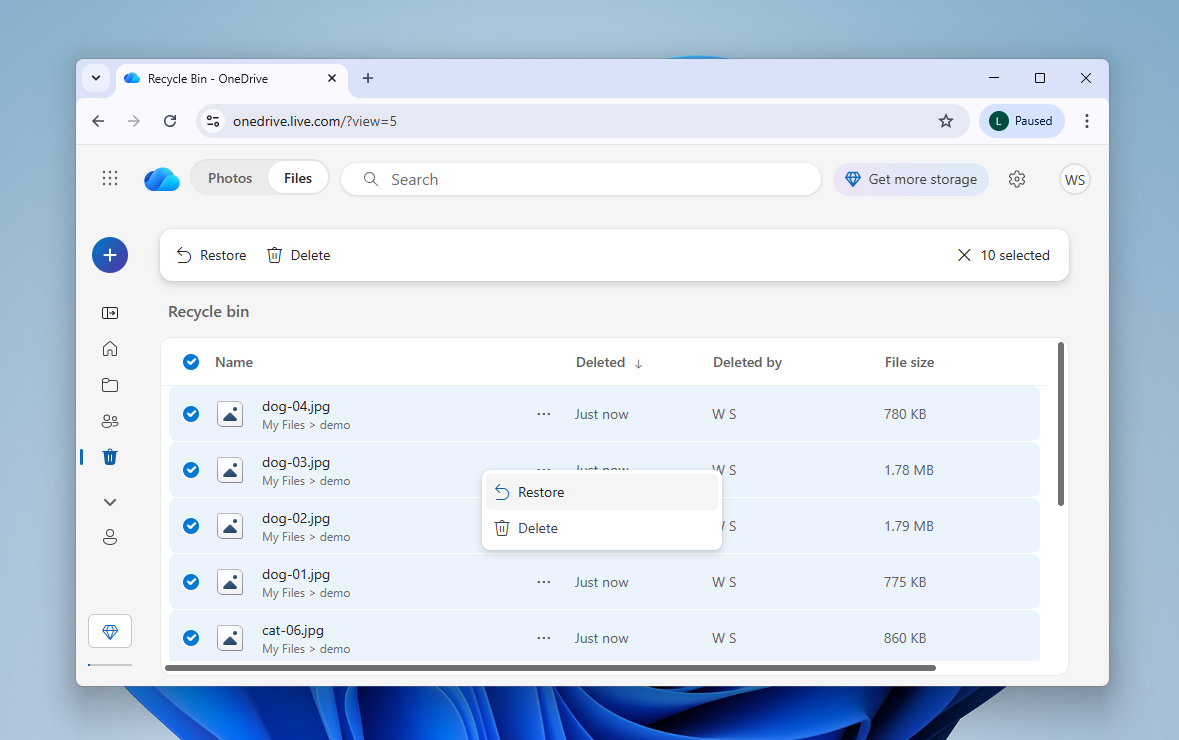
- Use OneDrive’s web explorer to navigate to the directory that contained your downloads before they were deleted. Then, right-click the folder and select Version history from the context menu.
- In the Version History window, you’ll see a list of modifications applied to that folder or its contents. Right-click the version you want to restore, then select Restore from the context menu.
Method 3: Make Sure Files are Not in Quarantine
While rare, it’s possible for downloaded files to get flagged by Windows Security (or other antivirus programs on your computer). Most of the time, flagged files aren’t deleted–they simply get quarantined. They are removed from File Explorer and can only be access through the antivirus program itself.
Here’s to break out any flagged downloads from Windows Security:
- Open Windows Security via the Start menu.
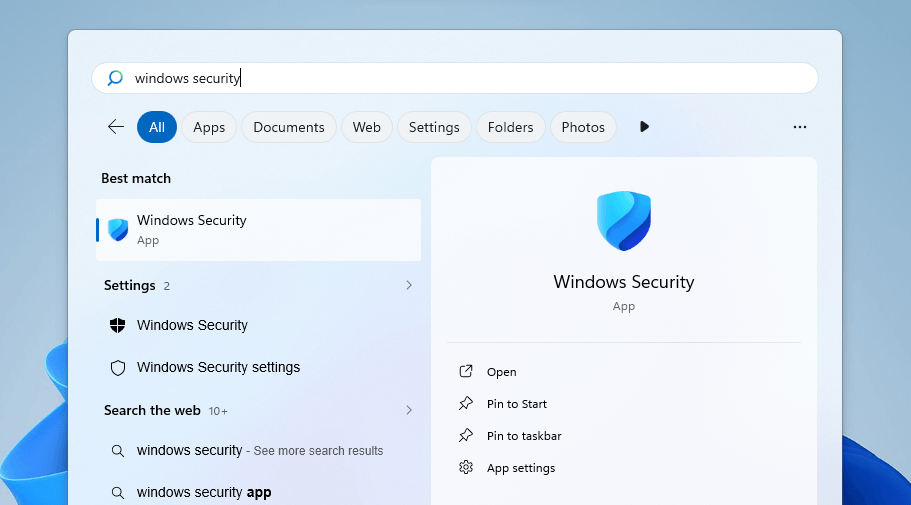
- In the main dashboard, select Protection history.
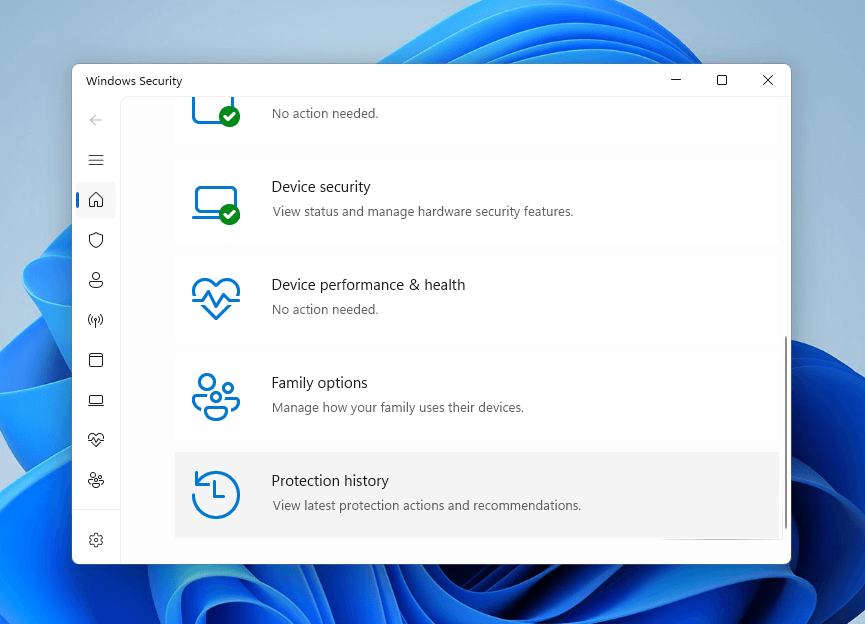
- Locate your downloaded file. Then, click the file and click the Allow button from the Actions menu.
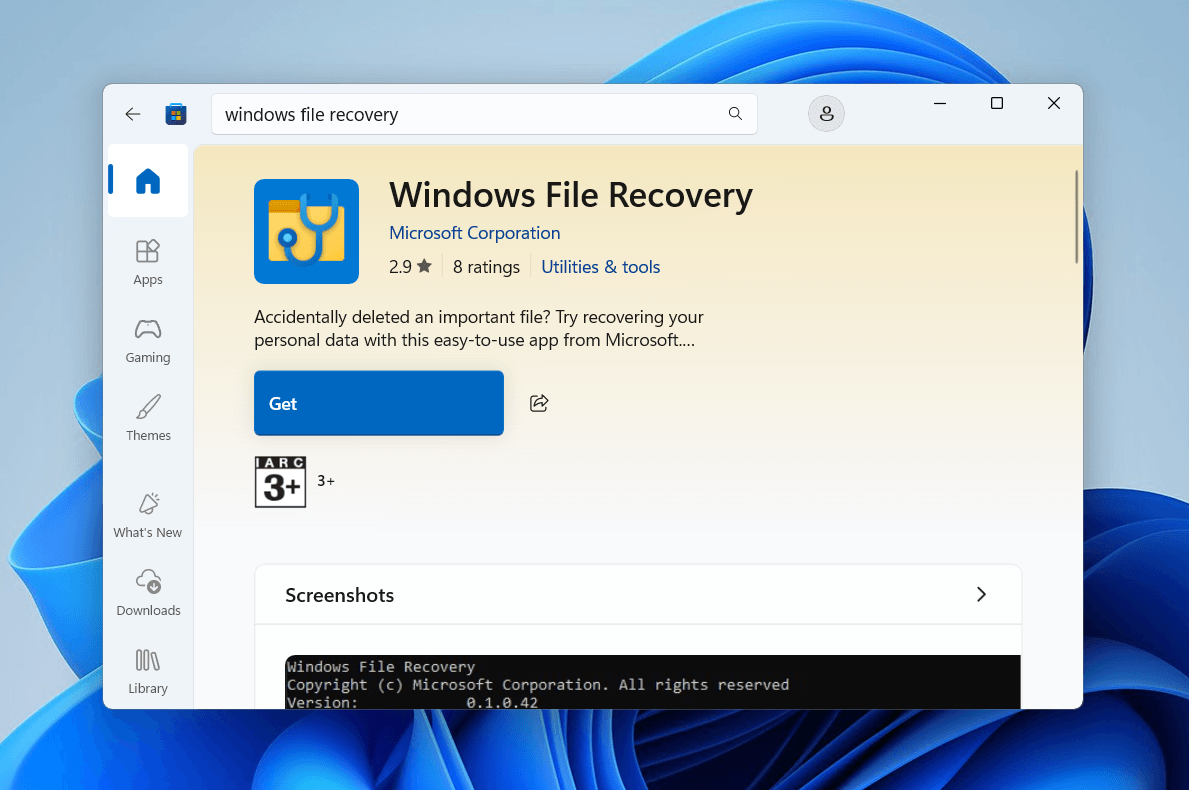
Method 4: Try Windows File Recovery Tool
The Windows File Recovery tool is a data recovery software program developed by Microsoft that you can download for free from the Microsoft Store. It supports a wide variety of file types, ranging from documents and zip archives to video and audio files.
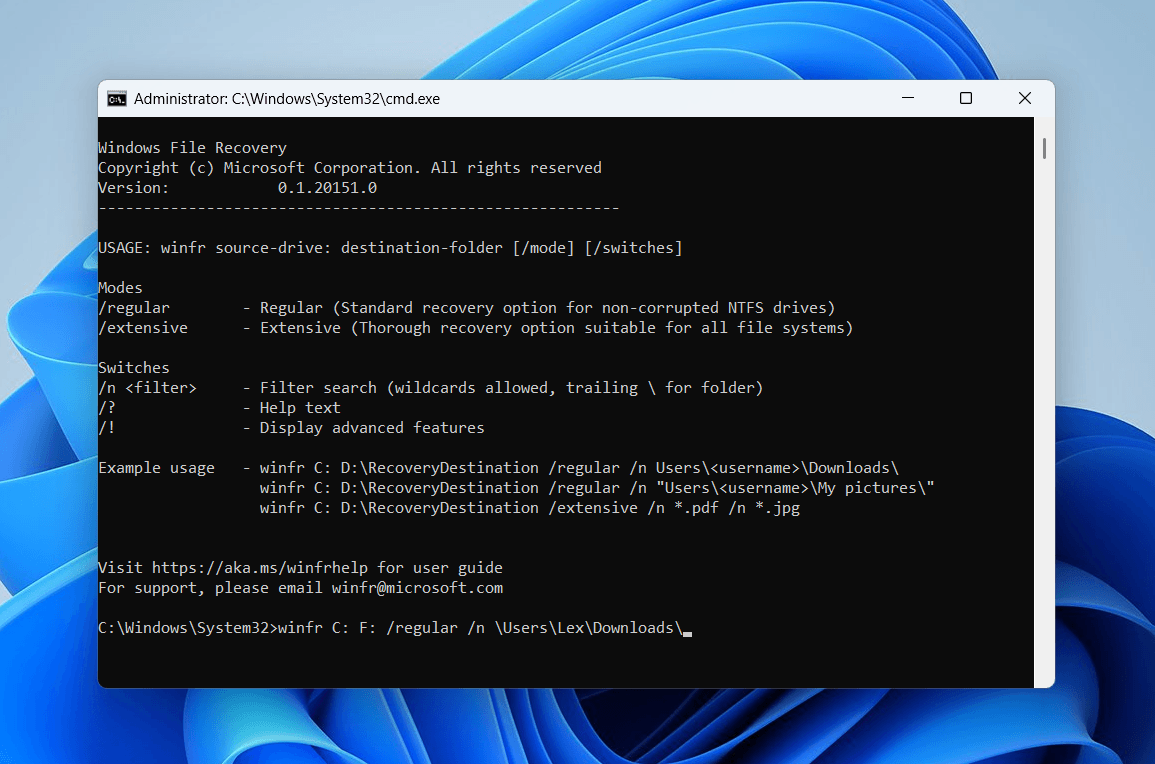
The only problem with this app is that it doesn’t have a GUI (graphical user interface), which you commonly see with third-party tools. Instead, it uses Command Prompt’s interface, and you can only utilize it through (simple) commands.
- Download and install the Windows File Recovery Tool from the Microsoft Store. Then, open the app.
- Command Prompt will appear on your screen. Use one of the following commands, depending on your needs:
Recover your Downloads folder from your PC drive to a USB (F:):winfr C: F: /regular /n \Users\Lex\Downloads\
Recover a specific file (e.g., sample.pdf) to a USB (E:):winfr C: F: /regular /n \Users\Lex\Downloads\sample.png
Recover all files with the same extension (e.g., .png) to a USB (E:):winfr C: F: /regular /n \Users\Lex\Downloads\*.png
How to Recover Downloads on a Mac
Without using third-party data recovery software, restoring your missing downloads on a Mac relies mostly on the Trash folder and various built-in local and cloud backup tools. Below, we prepared simple step-by-step guides for each of these tools and how to recover deleted download files.
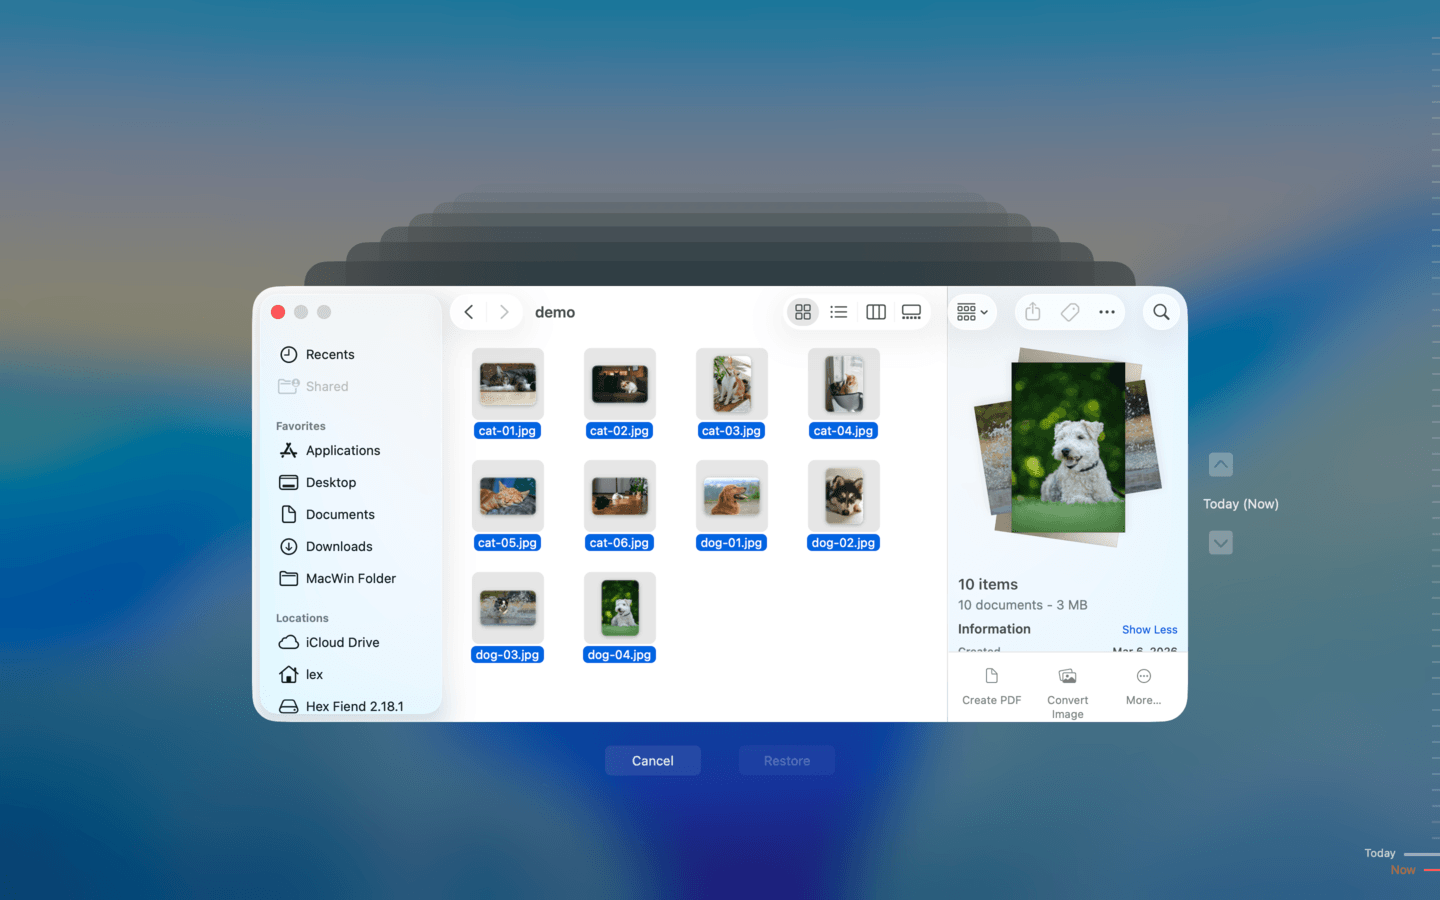
Method 1: Look in the Trash
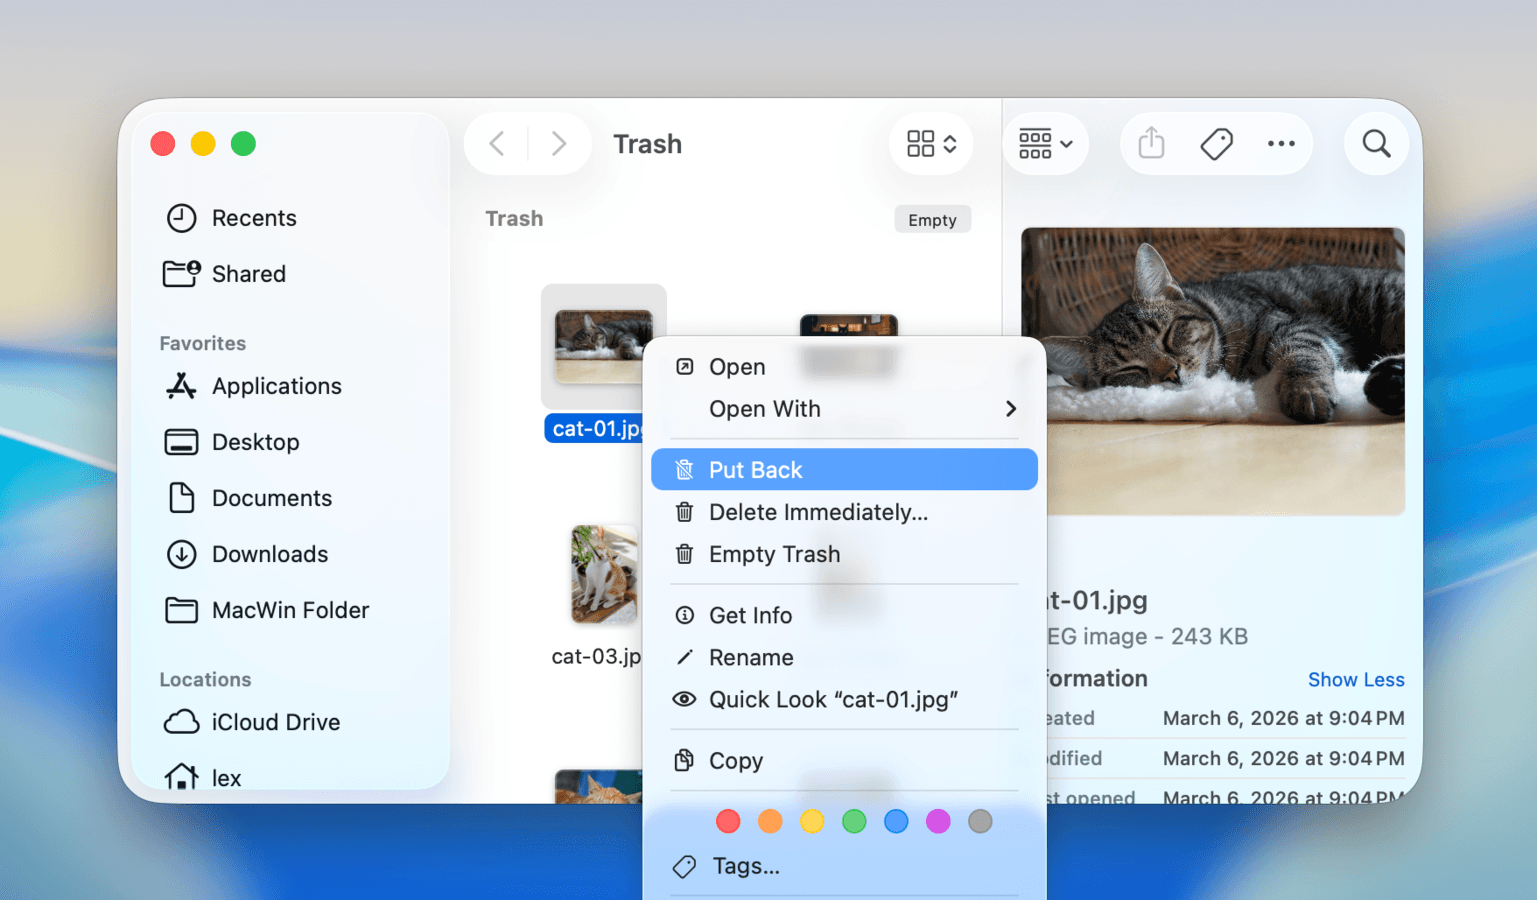
Similar to Windows’ Recycle Bin, Mac has a special folder called Trash that stores all deleted files until you restore them to their original location or delete them permanently. If your deleted downloads aren’t in their original location, this is the first place you should look.
- Click on the Trash icon on your Dock.

- Select the files you want to restore. Then, right-click your selection and choose Put Back from the context menu.
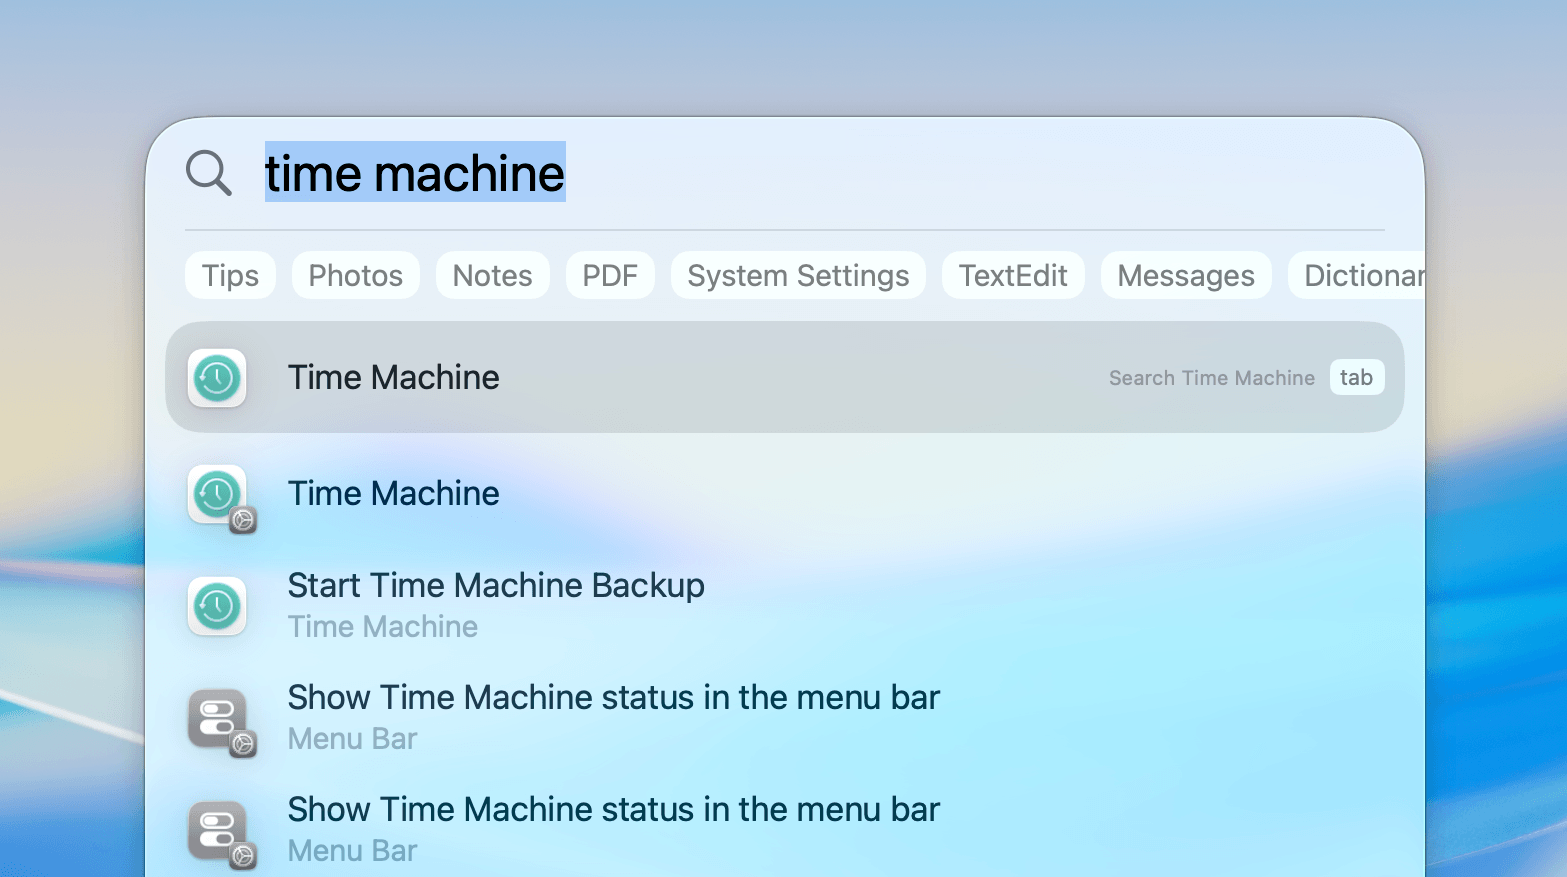
Method 2: Utilize Time Machine
Time Machine is your Mac’s built-in backup tool. When you activate it for the first time, it saves a full copy of selected Mac user data; as long as you created a Time Machine backup before your downloads were deleted, and the folder (containing your downloads) is included in the backup list, you can restore its contents.
- If you have it, connect your Time Machine backup drive to your Mac.
- Open Spotlight using the CMD + Space keys. Then, type “time machine” and select the Time Machine app (which is usually the first option).
- Use the Finder window to navigate to your Downloads folder. Then, use the arrow buttons on the right to view different snapshots of the directory. Once your missing files appear, select them and click the Restore button.
Recovering your files and folders with Time Machine restores them to their original locations. Make sure those locations don’t have existing files with the same names as the files you’re restoring.
Method 3: Consider Cloud Backups
Do you have iCloud enabled on your Mac? If so, check if the folder that contained your downloads is synchronized with iCloud. If iCloud is enabled but the sync process hasn’t completed yet, you might have enough time to download the copies saved to iCloud’s servers.
- Open any browser on your Mac and login to iCloud.com.
- Click the Drive section to expand it.
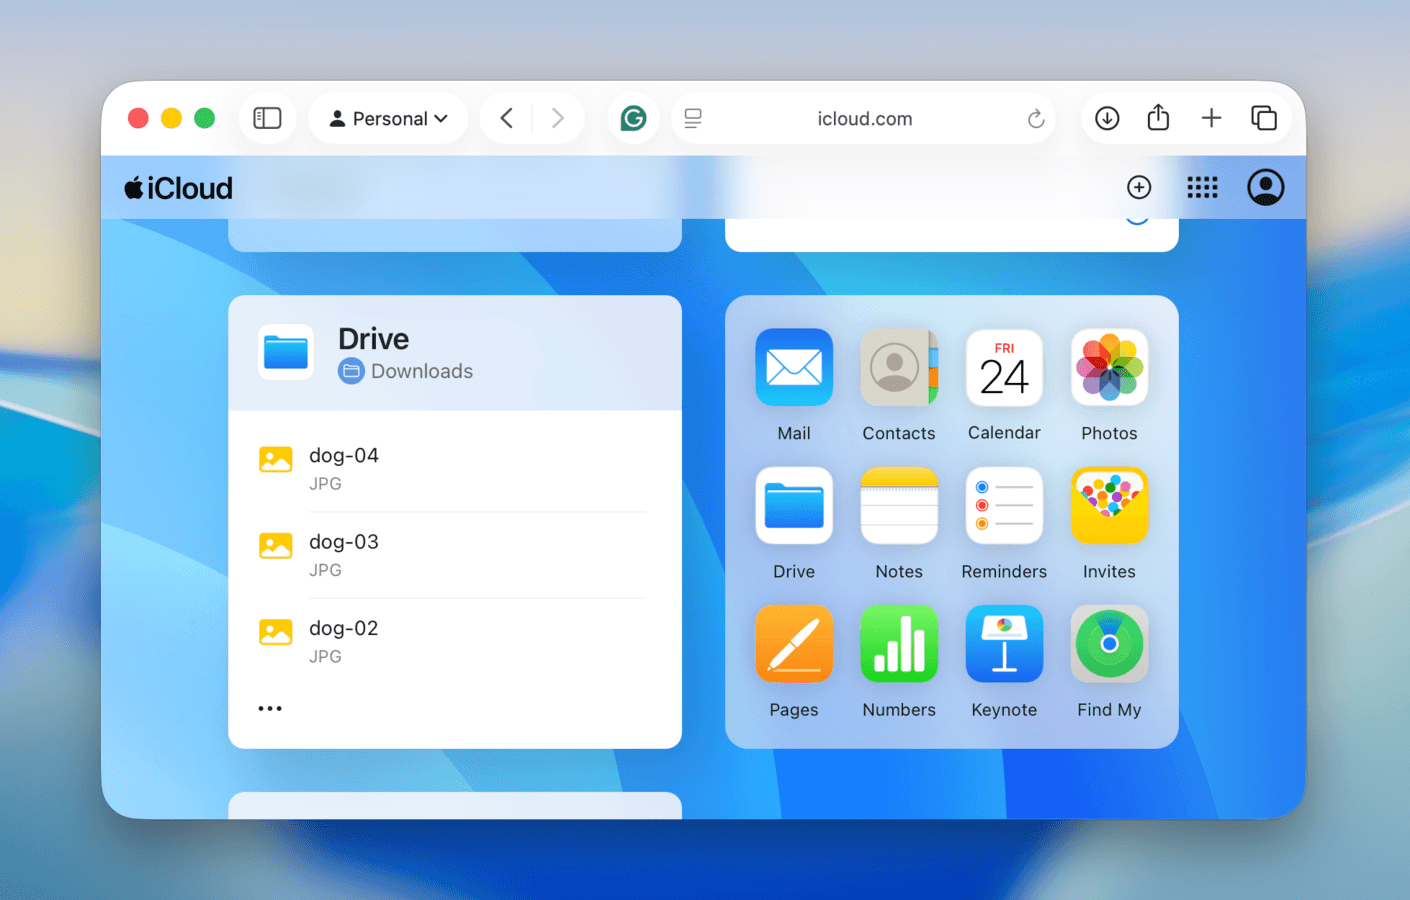
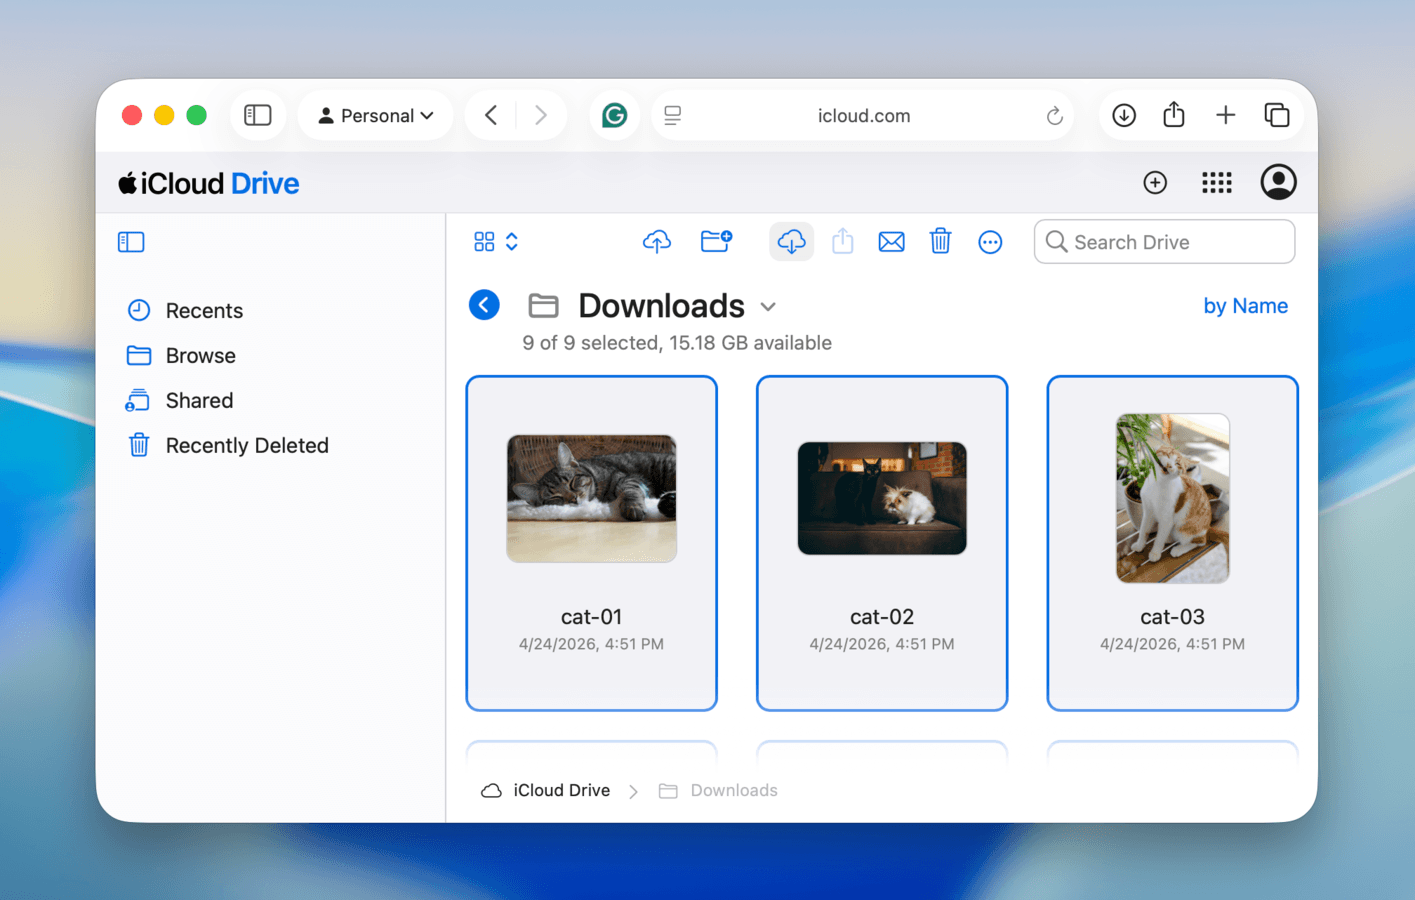
- Navigate to your Downloads folder.
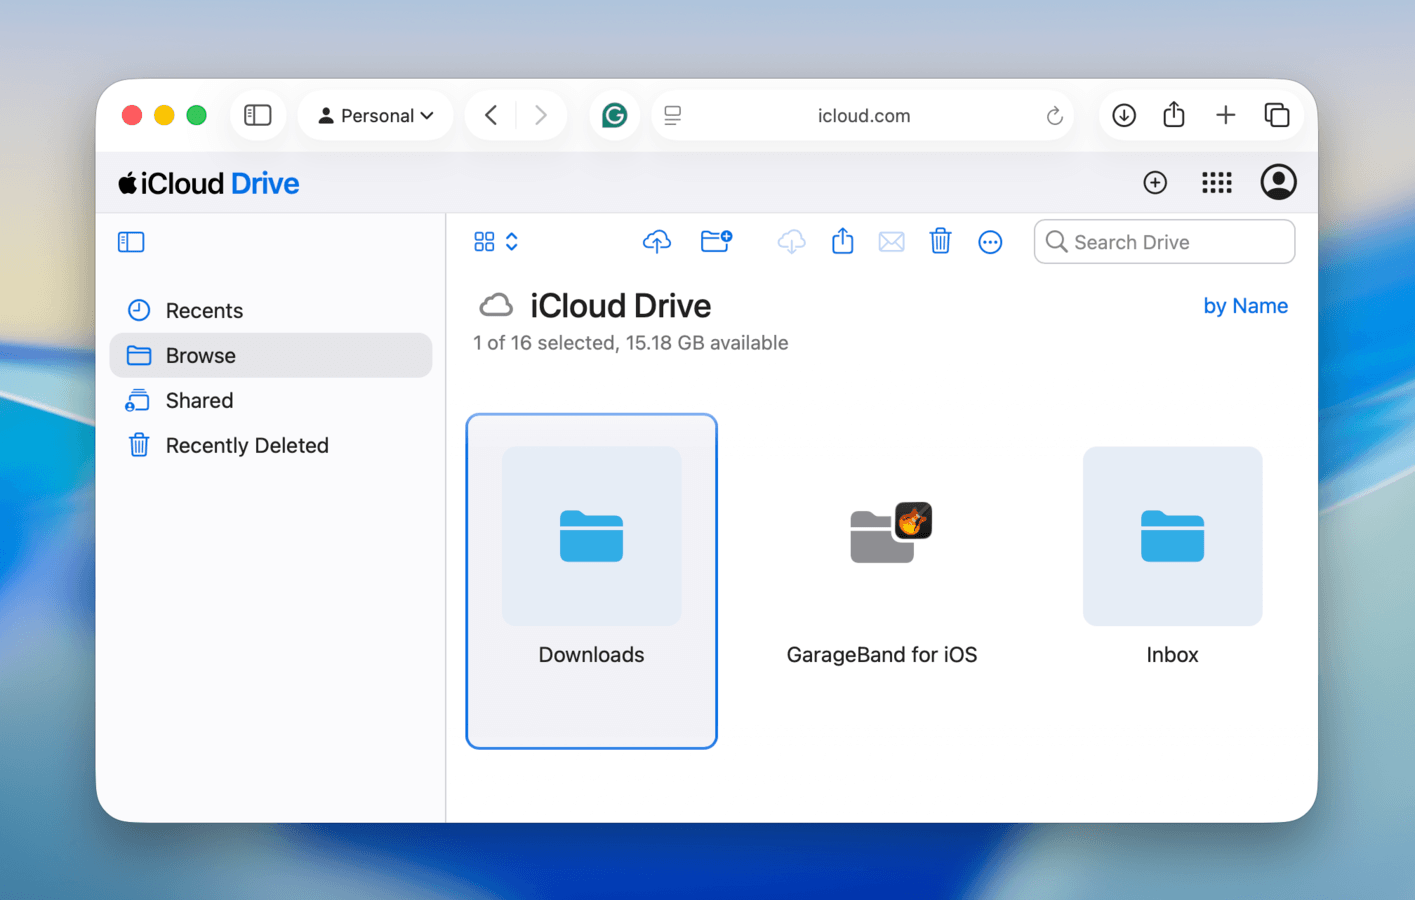
- Select the files you want to download. Then, click the download button (a cloud with an arrow pointing down) in the top right corner of the screen.
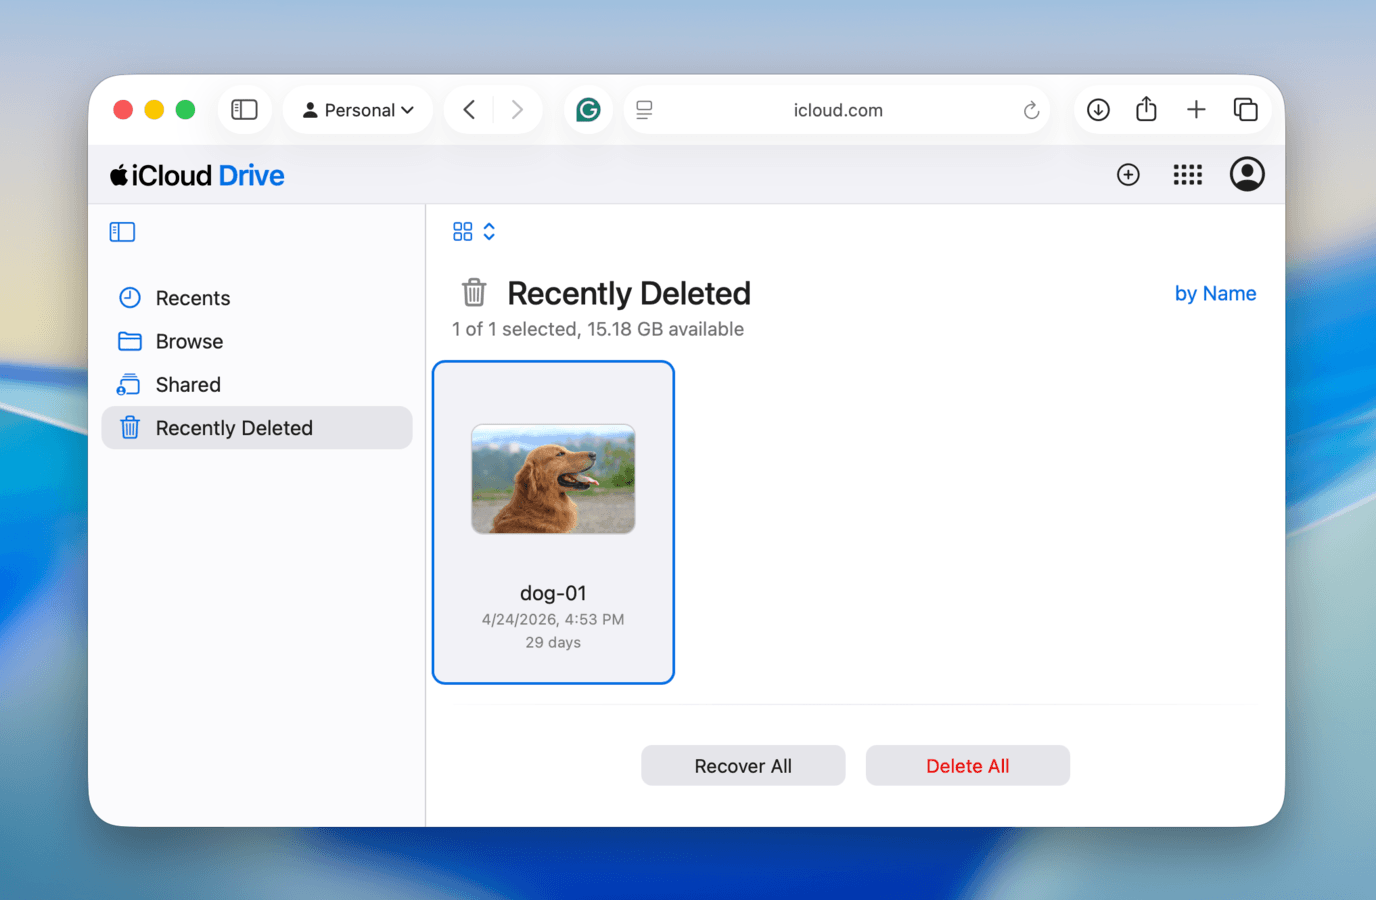
- If your files aren’t in their original cloud folders, select Recently Deleted from the sidebar. Then, select the files you want to restore, and click Recover. This action returns your files to their original cloud folders, where you can download them to your Mac (step 3).
Bottom Line
For a top-view reference of everything you need to do, so you don’t keep having to scroll through the entire guide each time, here’s a quickfire outline of the exact steps you need to take–in order–to troubleshoot your missing downloads:
- Try re-downloading the file.
- If the file isn’t available from its original source, check your Recycle Bin or Trash folder.
- Make sure the file isn’t quarantined by your antivirus.
- Check for backups, whether from local apps like File History and Time Machine, or cloud services like OneDrive and iCloud.
- Stop using the drive containing your missing downloads, then use a data recovery software program like Disk Drill to restore them.
- Once your downloads are secured, keep track of any auto-cleaning or protection settings, like Storage Sense, SmartScreen/Safe Browsing, antivirus white lists, etc.
FAQ
Restoring your Downloads folder to its default location depends on whether it was simply misplaced or it was actually deleted. Here are the appropriate solutions for both cases:
- I moved my Downloads folder: Open File Explorer and type shell:Downloads in the address bar. Then, right-click your Downloads folder > Properties > Location > Restore Default. Right-click the folder again > Pin to Quick access (so it appears in the sidebar).
- I accidentally deleted my Downloads folder: Open File Explorer and navigate to C:\Users\YourUsername. Then, create a new folder, rename it to Downloads, and restart your PC.
Files not appearing in File Explorer, but appearing in your browser’s downloads list, is a common issue with many possible causes. Here’s a quick troubleshooting guide that covers most of them:
- The file may have been moved elsewhere after being downloaded; locate it using the search tool in the Taskbar or with the Win + S or Win + E keys.
- Refresh File Explorer manually (F5 key or Refresh button) in case of refresh lag.
- The download may be incomplete or frozen; try hitting the Pause and Resume buttons on your browser, or restart the download.
- Check your Antivirus program’s Quarantine history, as your files may have been blocked.
- Your browser might be saving downloads to a different folder, which you can check/modify in your browser’s settings (e.g., Chrome: Settings > Downloads).
There are several possible reasons why your downloads go missing on completion, and they determine what course of action you should take. Here are the 3 most common ones:
- SmartScreen/Safe Browsing: Several mainstream browsers have an optional setting that automatically deletes suspicious files. On Edge, it’s SmartScreen; on Chrome, it’s Safe Browsing. In both browsers, you can access this setting via Privacy and security > Security.
- Antivirus software: Your antivirus software may have suspected that your downloaded files are dangerous. Open its quarantine/protection history to unblock your files.
- Windows 11 Storage Sense: Windows 11’s Storage Sense is an auto-cleaning feature with an optional configuration to clean up the contents of your Downloads folder. Modify it via Settings > System > Storage > Storage Sense.
To add your Downloads folder back to your Finder sidebar:
- Open Finder.
- Click Finder (on the menu bar) > Settings.
- Navigate to the Sidebar tab, then make sure Downloads is checked under the Favorites section.
Alternatively, you can drag any folder in Finder’s file browser to the Favorites section in your sidebar.