


Need to recover data after reinstalling Windows? There are so many different ways to update, reinstall, and refresh Windows systems, and it can be confusing to figure out what happened to your old data. Worse, if they actually were deleted, the clock starts ticking down on their recoverability.
To test the best solutions and next steps for every single one of these scenarios, we reinstalled Windows on our own team’s devices and analyzed dozens of other user stories. As a result, we came up with the definitive guide on how to recover files after a Windows reinstall, no matter what method you used.
Can I Recover Files After Reinstalling Windows?
There are several different ways to “reinstall Windows”, and the recoverability of your data largely depends on which method you used for your PC.
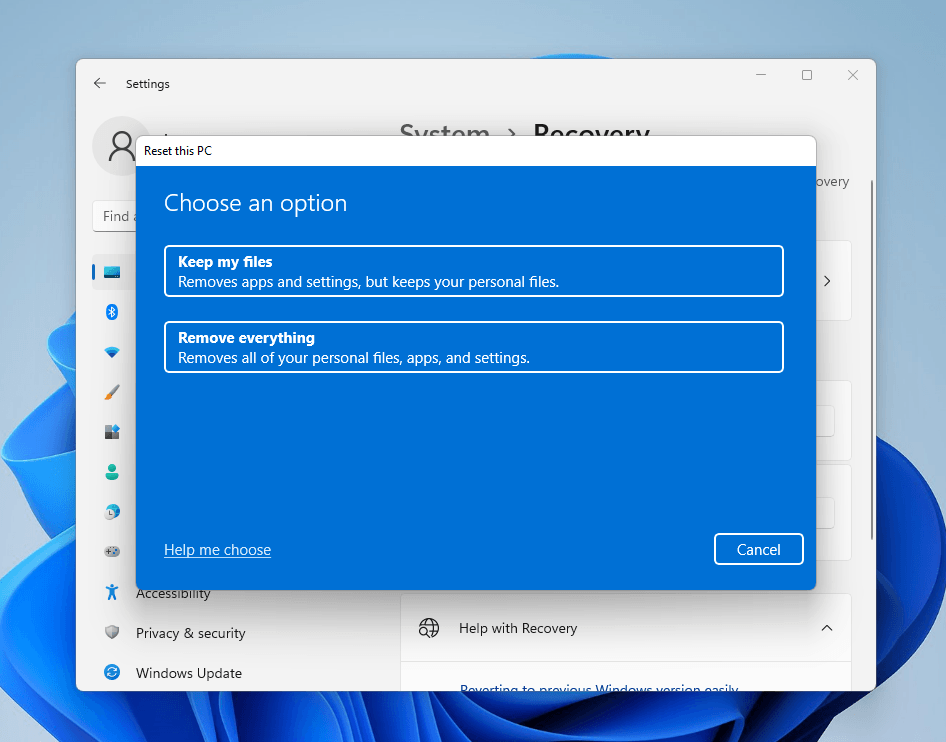
To help you figure out what you need to do to recover your deleted files, we prepared a menu of the different ways users can reinstall Windows, how they affect your data, and what you should do next.
| Reinstall scenario | What you can potentially recover and how |
| Reset this PC → Keep my files option is selected | Files from your main user directories should have been retained. Check your Desktop, Documents, and Downloads folders. |
| Reset this PC → Remove everything option is selected | This option deletes all user files; use data recovery software to scan your drive directly (chances are lower on SSDs). Alternatively, check your local backups or cloud backups if you have them. |
| Reset this PC → Remove everything option is selected → Clean data setting is enabled | Recovery is unlikely in this case, as this setting is designed to make data harder to recover. |
| You reinstalled Windows without formatting the partition (using a Windows installer) | Your user and system files are possibly saved in the Windows.old folder, which was automatically created during the installation process. |
| You performed a clean install (you deleted your system’s disk partition and created a new one) | You can use data recovery software to scan your drive, but note that recovery chances are lower on SSDs due to the TRIM feature. For Windows 11 users, BitLocker is also enabled by default–another complication we discuss in the recovery section. Alternatively, you can restore data from local backups or cloud backups if you have them. |
| You performed a Windows update reinstall operation to “repair components and system files” | The Windows update repair tool doesn’t delete anything. Make sure you’re logged in with the correct user account, and use the Windows search tool to make sure your files aren’t just misplaced. |
How to Recover Files After a Reinstall or Reset
In this section, we’ll cover 4 different methods to recover lost files after reinstalling or resetting Windows on your PC. We’re going to start with the method that applies to most readers, as it doesn’t require any backups. If you do have local or online (OneDrive) backups that you’re absolutely sure contain your data, you can skip Method 1.
Method 1: Use Data Recovery Software
Most users trying to solve data loss after reinstalling Windows or performing a reset don’t have backups to rely on. In this case, using data recovery software is the best possible way to get your files back. Data recovery software can scan your system drive directly for any leftover data, and restore it to a safe location.
For this guide, we’ll be using an app called Disk Drill. One of its core abilities is recovering files that were recently deleted by scanning the exact sectors that hold those files’ physical data. It can also scan drives encrypted with BitLocker, which is activated by default when you install Windows 11.
It’s compatible with all modern Windows file system formats, including FAT32, ExFAT, and NTFS, and it has a very strong preview feature that lets you view the contents of any file (including full-length videos). You can use this feature for free, along with unlimited scans and 100 MB worth of data recovery for no cost, which should be enough for most users to decide if the app works.
- If you don’t have a non-system internal drive, connect an external drive to your PC (or to another PC if you have one).
- Download Disk Drill to the external drive or a non-system internal drive (by changing your browser’s Downloads settings).
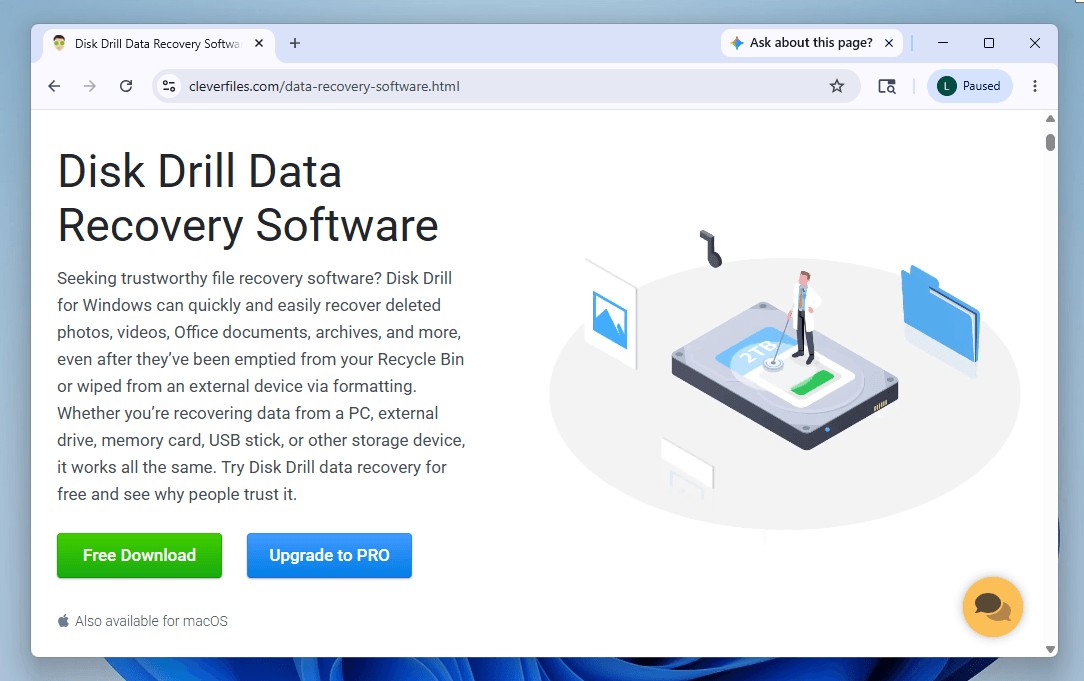
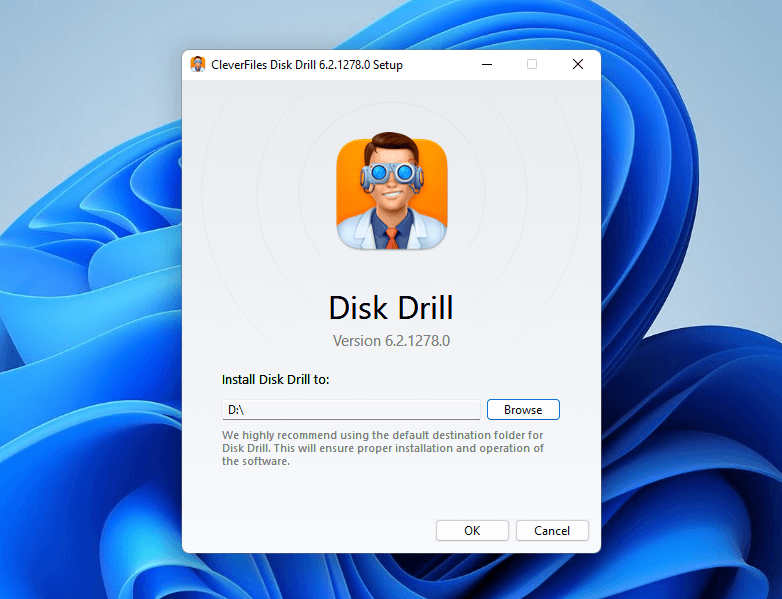
- Run Disk Drill’s installer and click Options to get to the installation settings page. Then, set the installation path to the non-system drive.
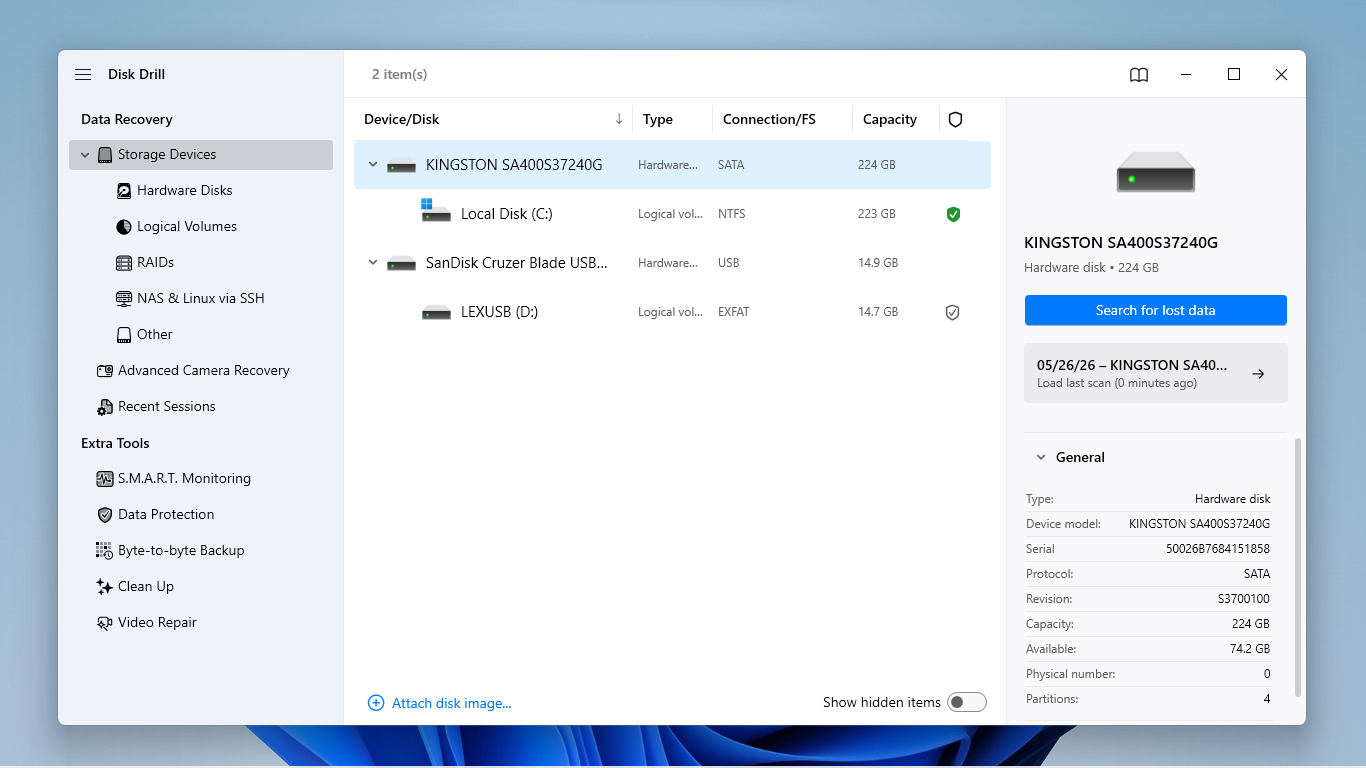
- If you need to, connect the “Disk Drill drive” to the affected PC. Then, run Disk Drill from the non-system drive (by clicking the app icon). In Disk Drill’s main menu, select your PC’s system drive and click Search for lost data.
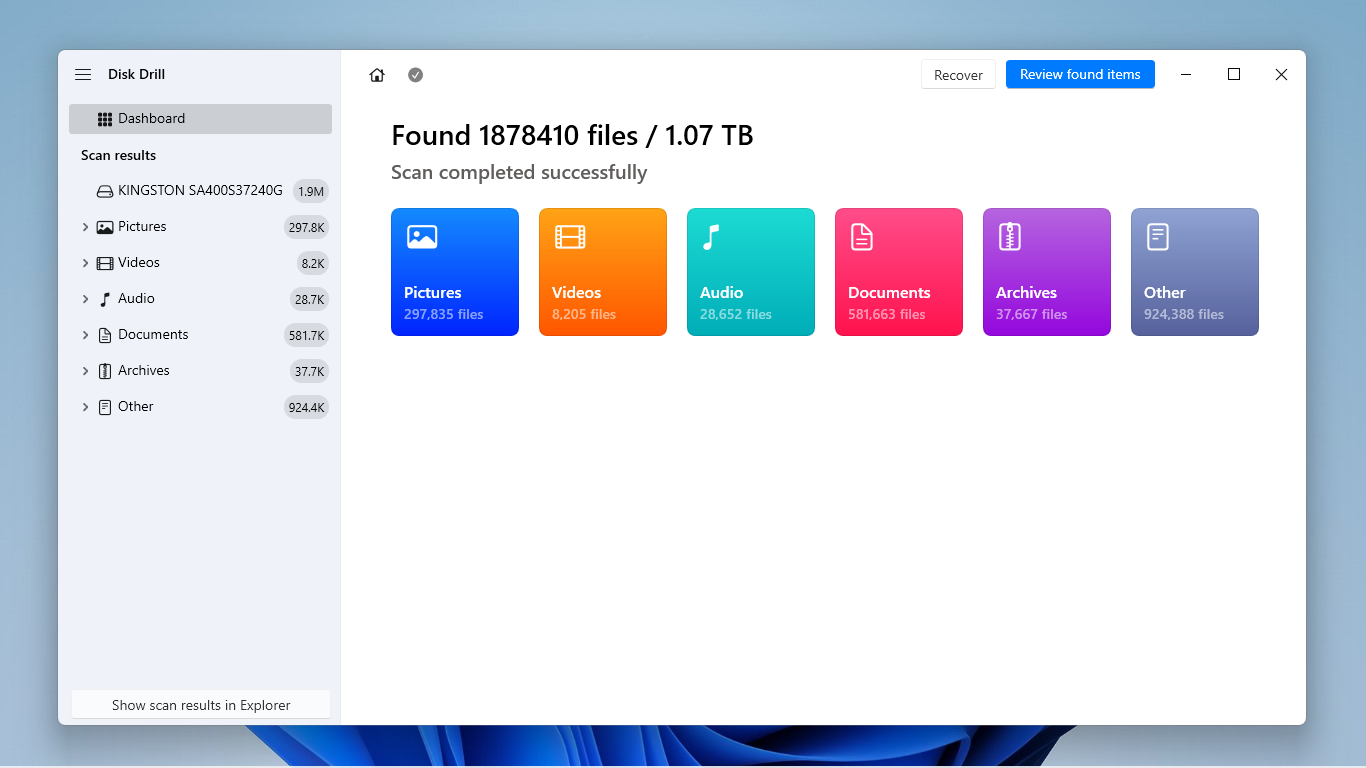
- Wait for Disk Drill to finish scanning your drive. If you want to restore all the files Disk Drill found, click Recover from this menu and proceed to step 7 (just make sure you have enough space on the external drive). If you only want to restore selected files or folders, click Review found items.
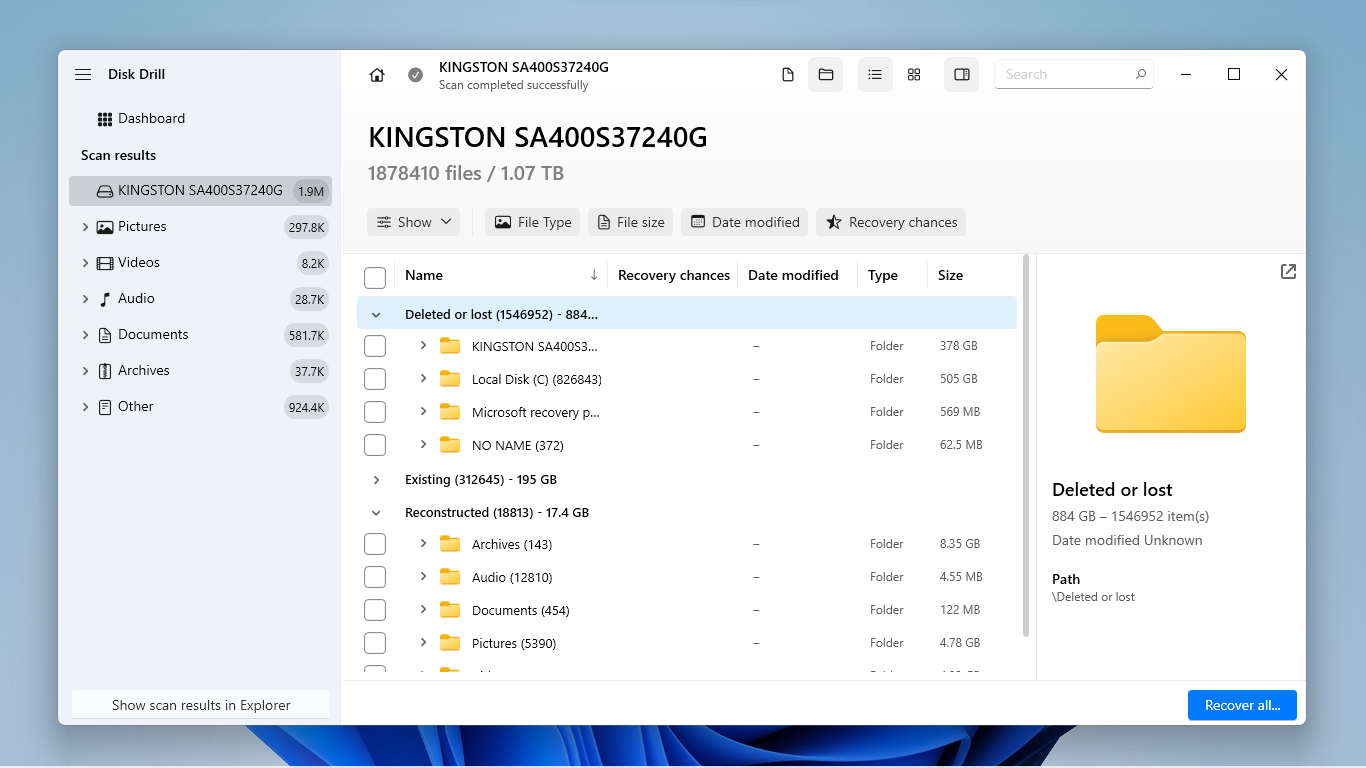
- First, expand the Deleted or lost tab to locate your files, as it retains the drive’s original folder structure and file names. If your files aren’t there, expand the Reconstructed section instead. You can use the filters in the left sidebar, as well as the search tool in the top right corner, to find your data faster.
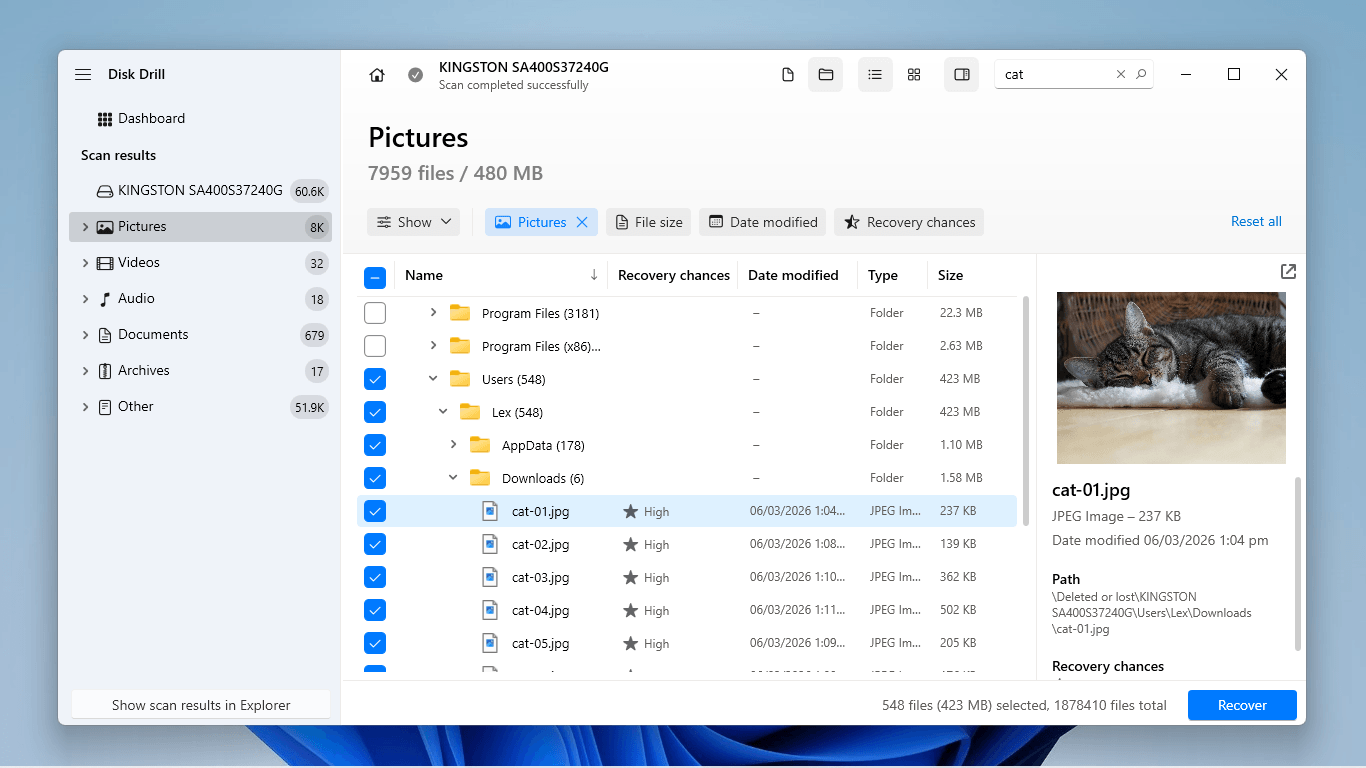
- Once you locate the files and folders you want to restore, click each one to display their preview and confirm they work and are recoverable. Then, click the boxes to their left to select them. Then, click the Recover button.
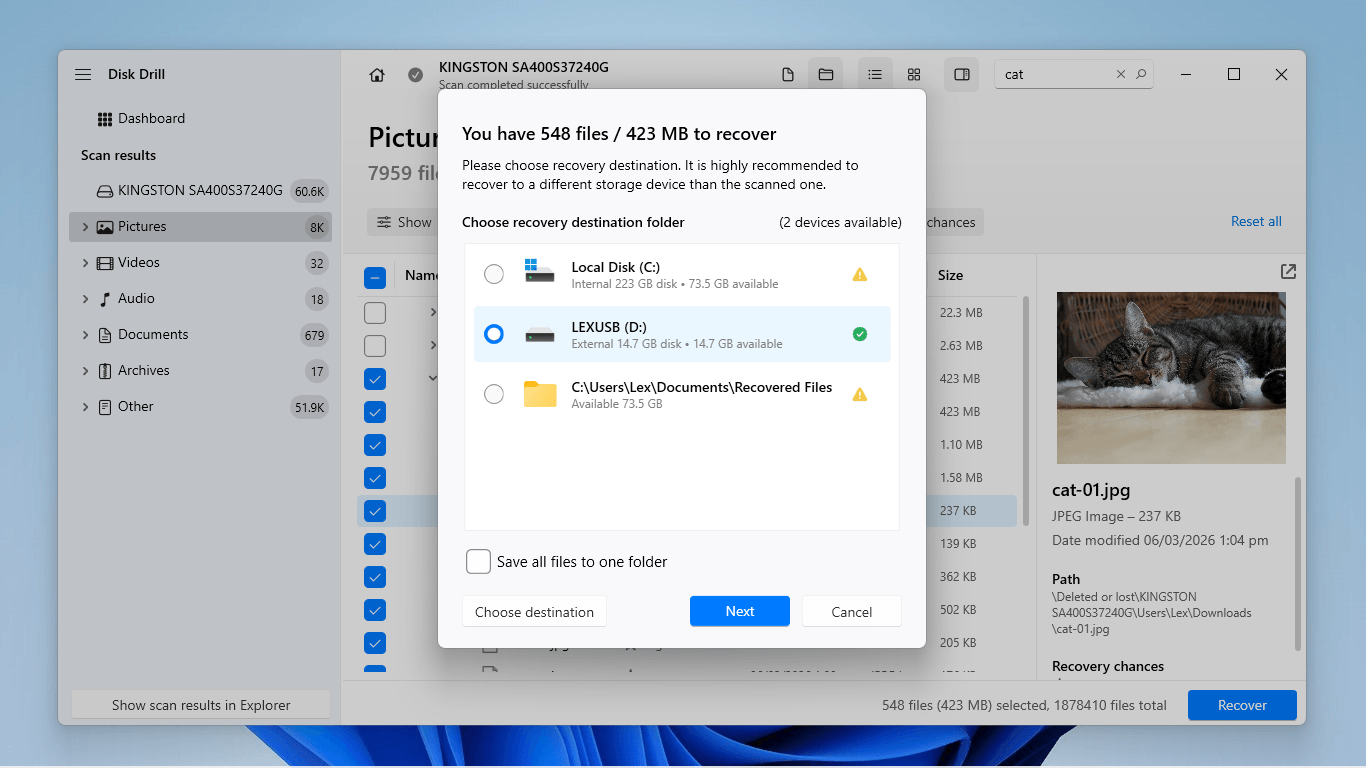
- In the dialog window, select your external storage device as the save location for the restored files. Finally, click Next to proceed.
Method 2: Restore from OneDrive
Did you activate OneDrive on your PC before deleting your files? In that case, it’s possible that a copy of your data is still saved to the cloud. As long as your files were originally saved in folders included in OneDrive’s sync feature, you might be able to download them from OneDrive web or find them in the online Recycle bin.
- Open any browser, then log in to onedrive.live.com.
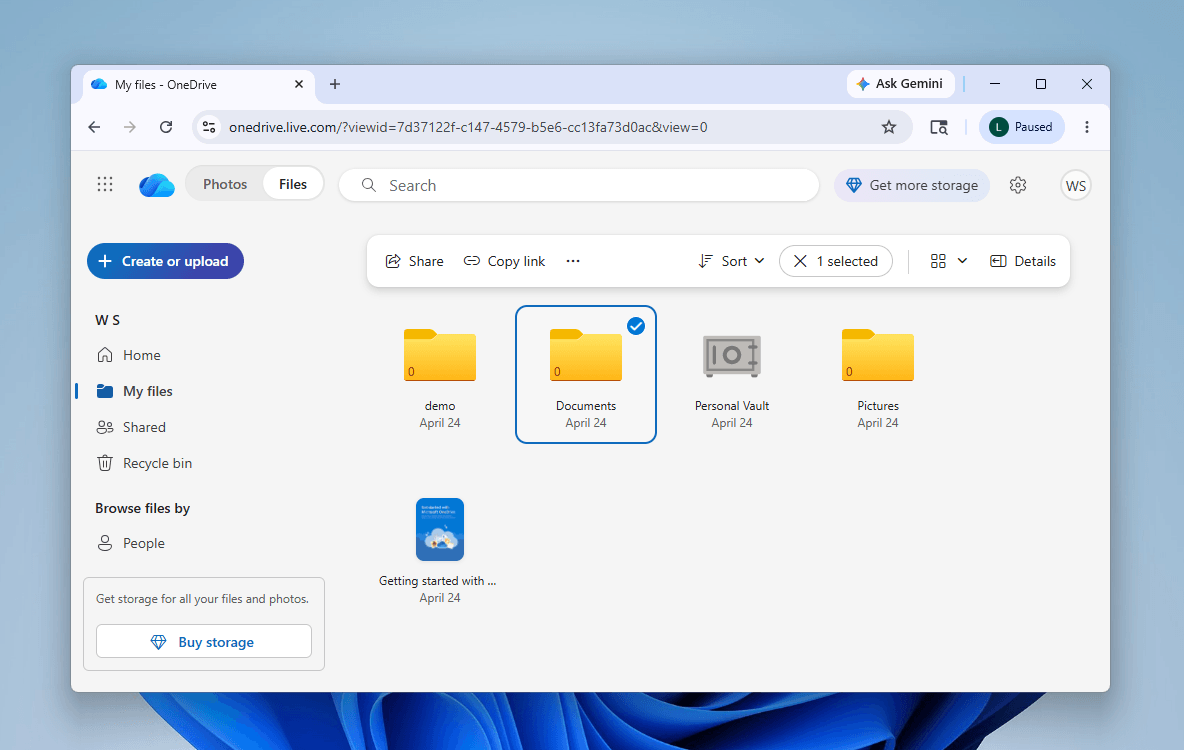
- Use the left sidebar to navigate to the Home, My Files, and Pictures pages to locate your files. You can use the search bar at the top of the page to find them faster. When you locate the files and folders you want to recover, hover your mouse pointer over each item and click the selection button that appears.
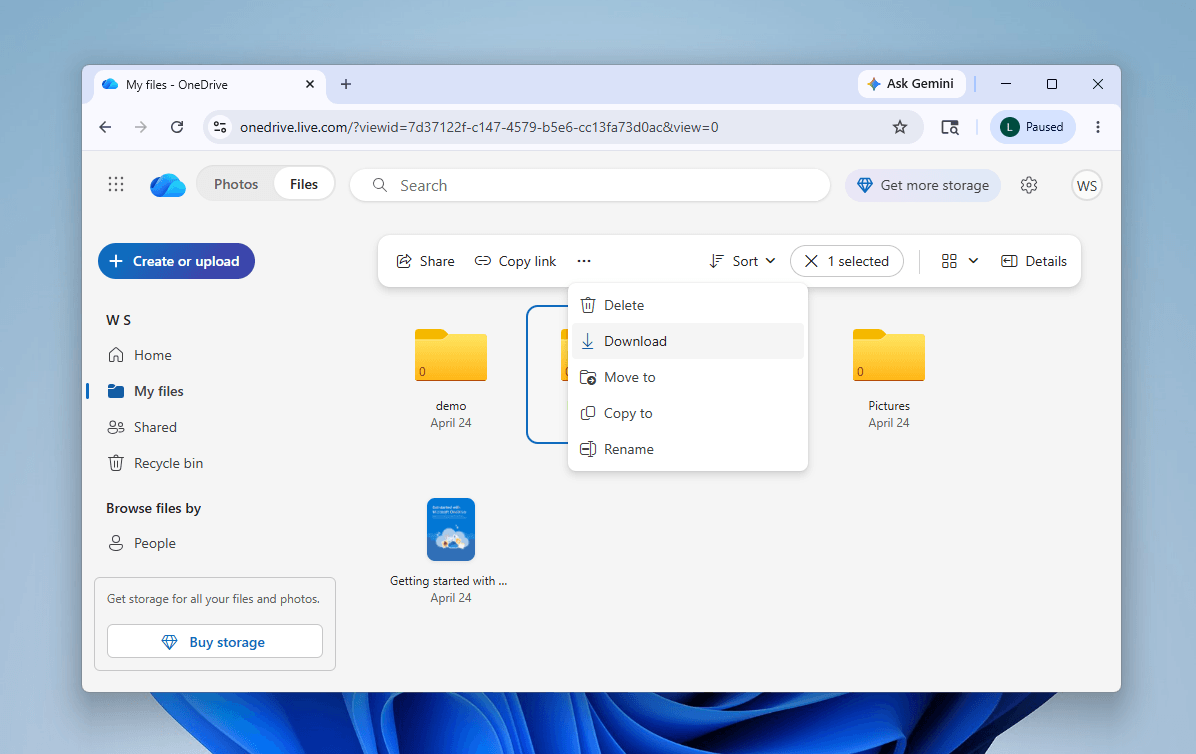
- Click the meatball menu button and select Download.
Method 3: Restore from File History or Backup and Restore
Aside from OneDrive, Windows also has local backup solutions called File History and Backup and Restore that may contain the files you need. But similarly, however, these solutions only work if you created the backup before your data was deleted.
File History
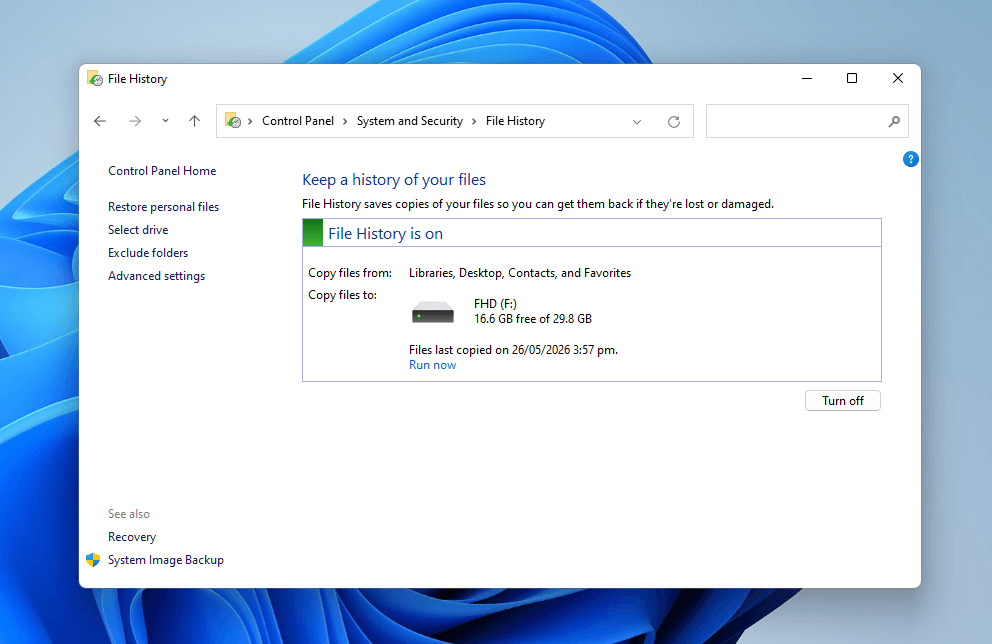
File History is newer than Back and Restore, and it strictly backs up your personal files–usually those in the main user directories, like Desktop, Documents, Pictures, Videos, and Music. If the files you need are in one of these folders, you can access previous versions of the folders, from before the deletion occurred.
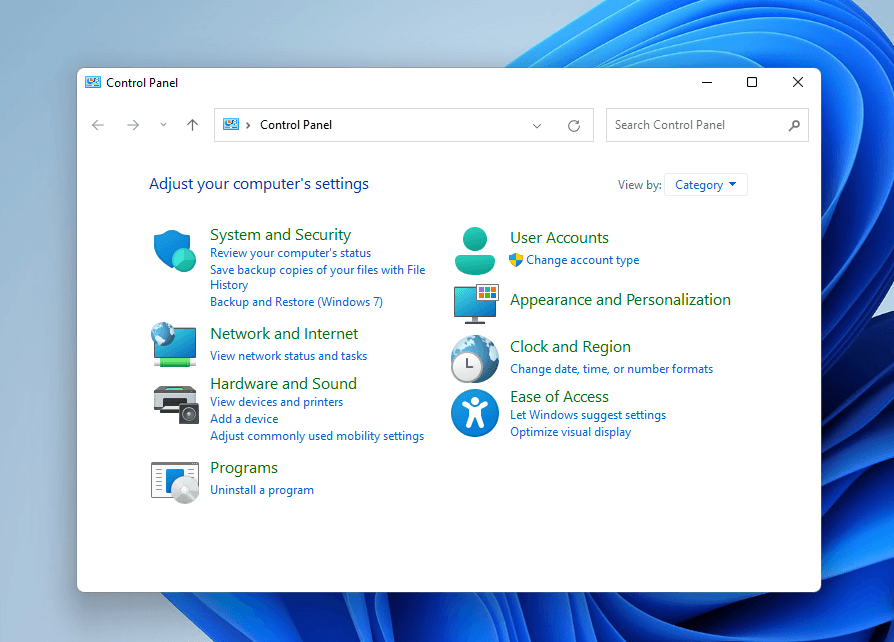
- Open Control Panel and select System and Security.
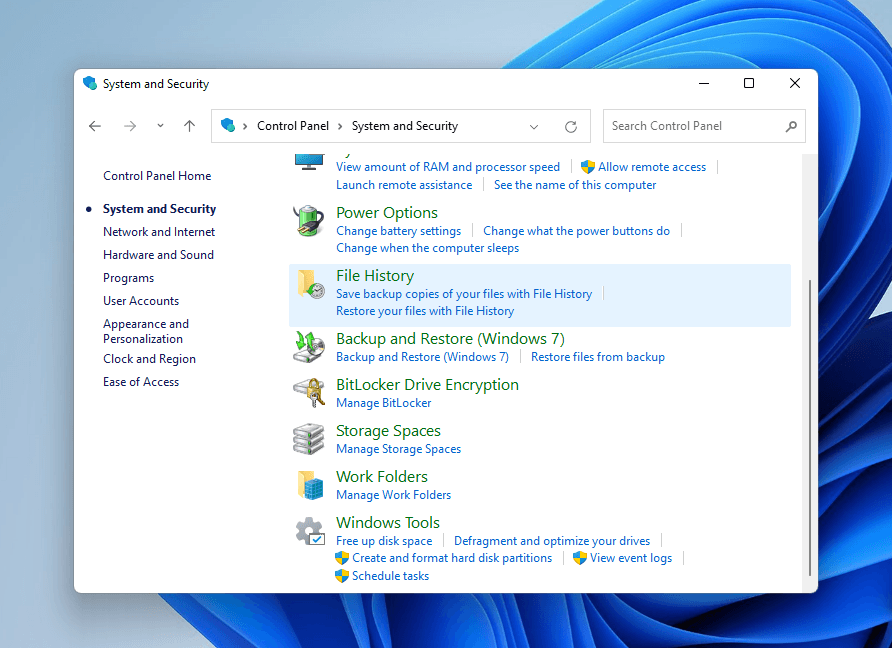
- Click File History.
- Select Restore personal files from the left sidebar.
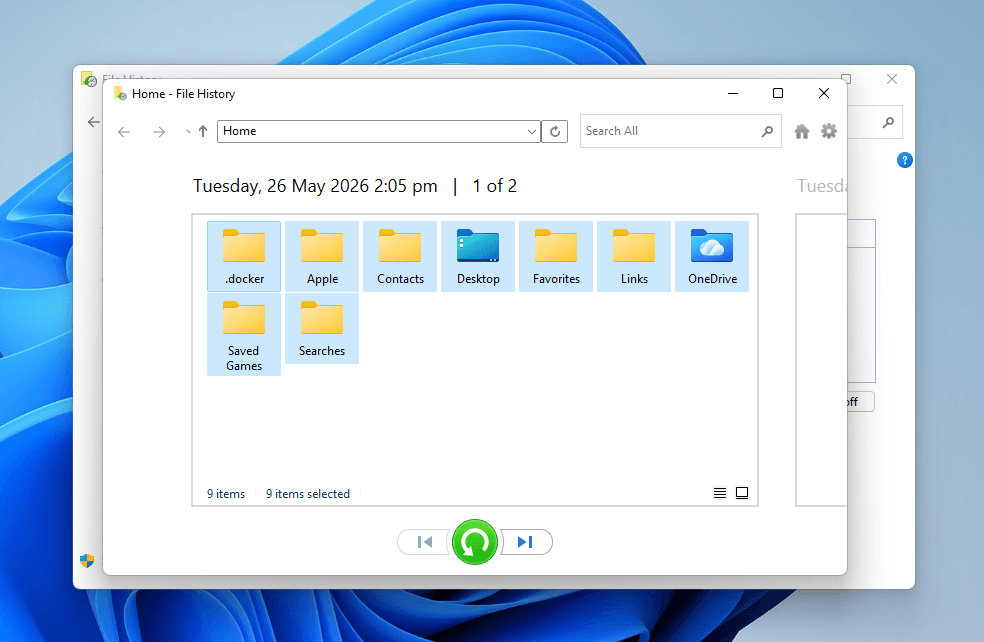
- Use the arrow buttons at the bottom of the page to navigate through past versions of your files and folders. Then, select the items you want to recover and click the green restore button.
Backup and Restore
Unlike File History, Backup and Restore generates a complete System Image. This is a total copy of your system drive in its original state when the backup was created, including its system files, application data, and everything else stored on it at that time. In other words, as long as the files you want to restore existed on your drive (and weren’t deleted) when you created this backup, you can get them back.
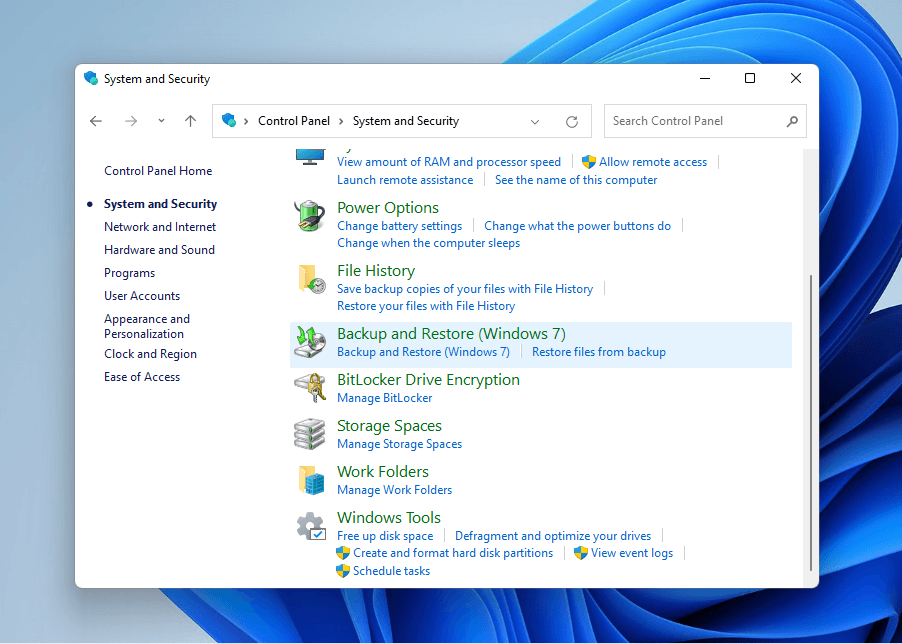
- Open Control Panel and select System and Security.
- Select Backup and Restore (Windows 7).
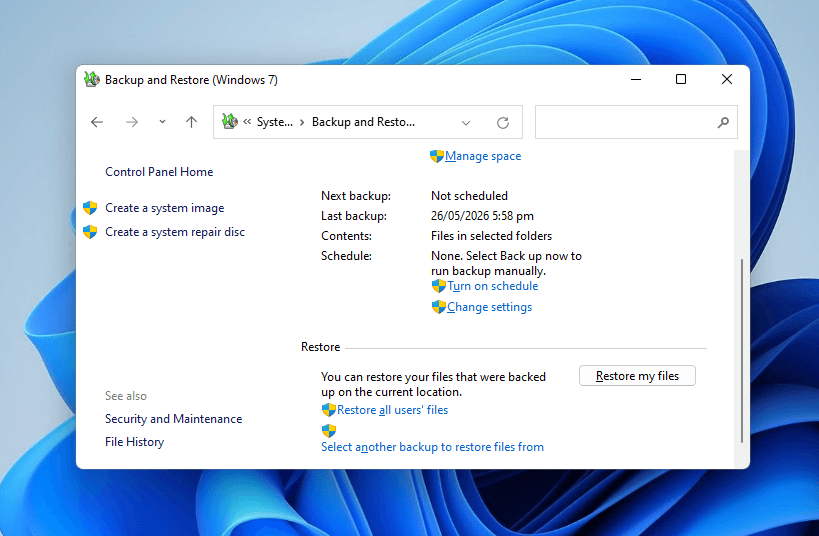
- Scroll down to the Restore section and click Restore my files.
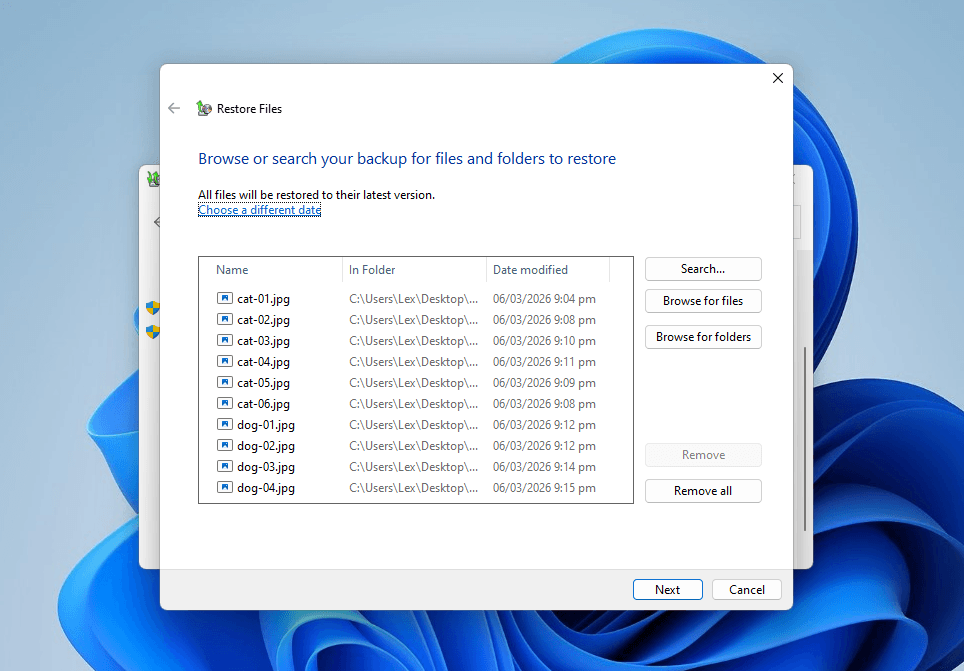
- Click Browse for files or Browse for folders to add your data to the recovery list. Then, click Next.
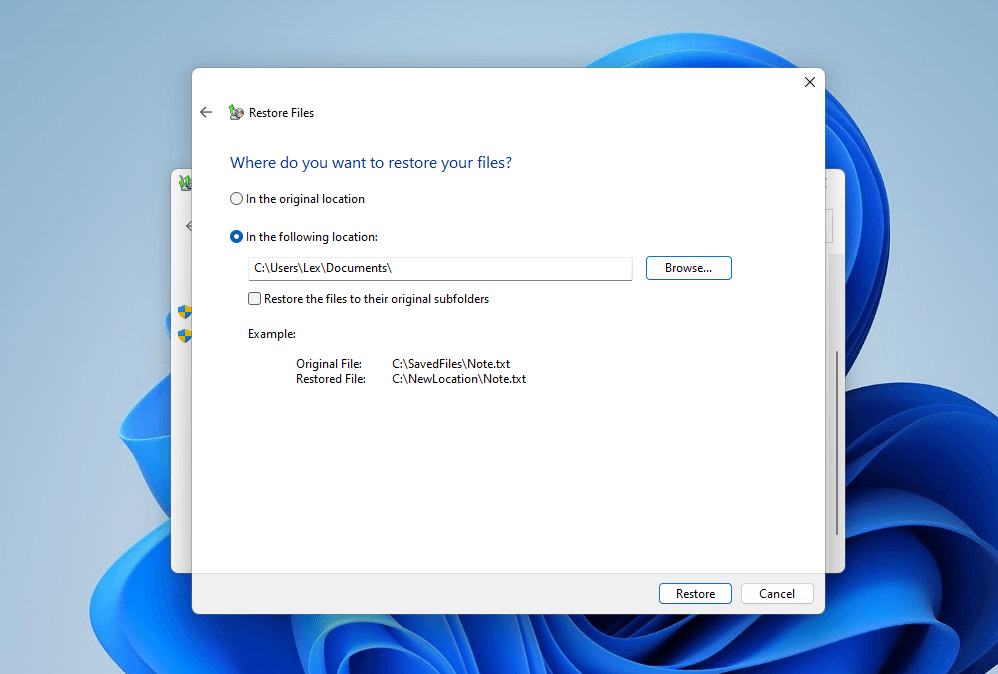
- Select In the following location: and click the Browse… button to choose where you want Windows to save your recovered files. Then, click Restore.
Method 4: Check the Windows.old Folder
If you installed Windows using a bootable installer, and you opted not to format your system drive, Windows automatically saves old files to a special folder in your computer’s root directory. This folder is called Windows.old, and you can access it directly through File Explorer.
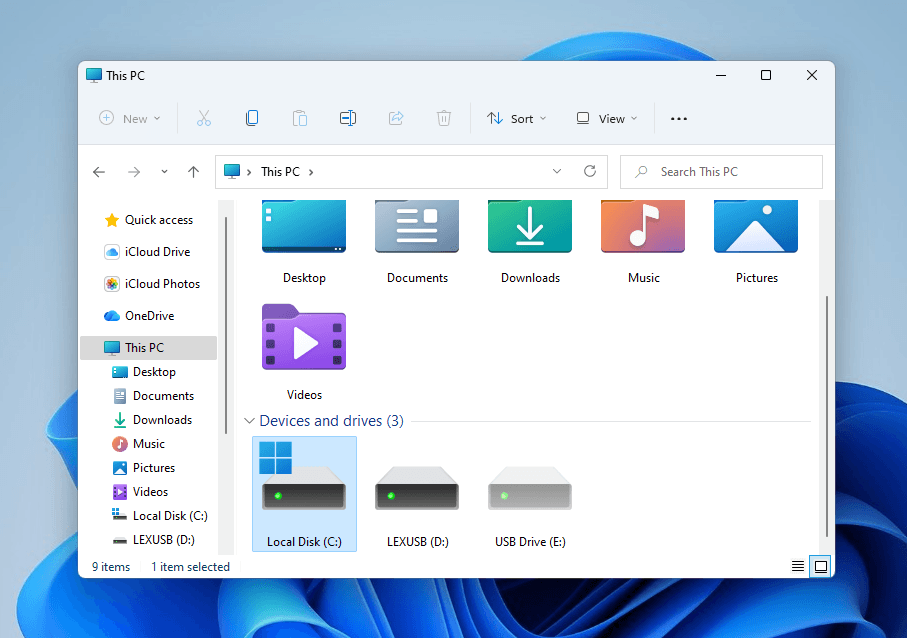
- Open File Explorer and navigate to This PC. Then, open your primary system drive (usually C:).
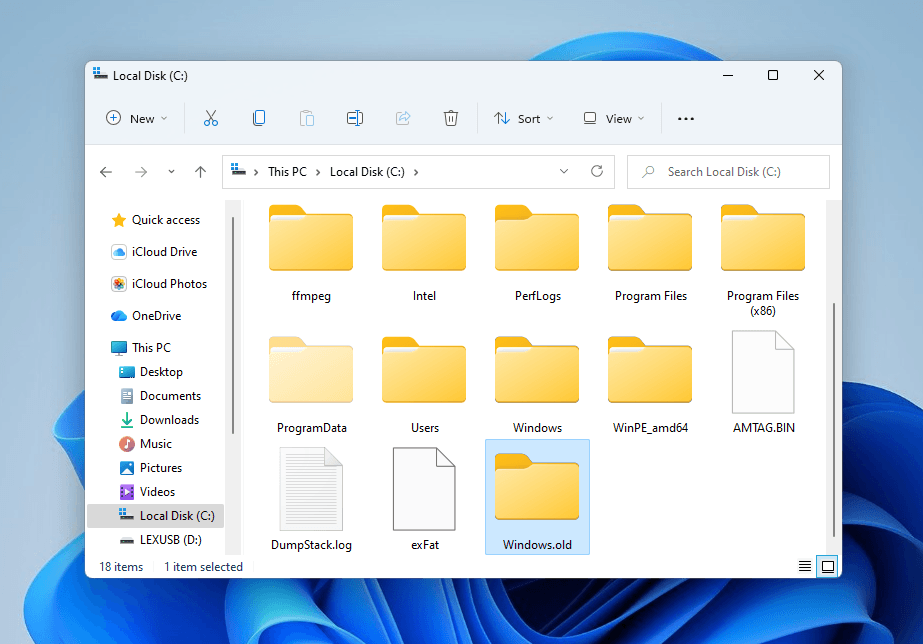
- Sort the files by Name and locate a folder called Windows.old. Open the folder and manually extract (copy and paste) the files you want to save.
Once you’ve secured the files and folders you want to keep, you can safely delete the Windows.old folder to free up storage space.
Conclusion
In summary, even after a Windows reinstall or reset, or even a clean install, your missing files may still physically exist on your drive. However, your window of opportunity to get your files back closes fast, so Disk Drill is the best way to recover data after reinstalling Windows because it doesn’t require any backups, you can run it from an external drive, and it can quickly scan for recently deleted data.
It may still be worth checking backups like OneDrive, File History, and Backup and Restore, but backups need to be created before deletion for this method to work. Finally, you can also check for the Windows.old folder in your system drive’s root directory, in case you opted not to delete the old Windows installation.
FAQ
Reinstalling Windows deletes everything to ensure a clean setup for the new operating system files, which rely on strict folder structures and complete system files to operate properly. It also ensures system stability by wiping out any potential malware, corrupted files, driver conflicts, and other software issues that may have piled up over time..
If you can’t find the Windows.old folder on your computer, there are 3 possibilities:
- You performed a clean installation of Windows and formatted primary system drive.
- You used the Reset this PC tool and chose the Remove Everything setting.
- While very unlikely, the folder could be hidden due to certain settings. You can un-hide files and folders in File Explorer by clicking the View tab > enable Hidden items.
If Windows.old isn’t hidden, the only way you can get your old files back is to restore a backup or use data recovery software to extract data directly from your drive.
Resetting Windows uses a built-in tool in the Windows Settings app to return your system to a fresh state. You can choose to keep all your files in their original locations, and it only affects your system partition. Reinstalling Windows uses a bootable installer and affects the entire disk; you can technically opt to keep your files by not formatting the drive, but they’ll be saved in a special folder called Windows.old in your system’s root directory.
It won’t always work, but there are common scenarios that allow you to possibly restore specific app data after reinstalling Windows:
- If the app uses cloud storage to save data (e.g., Adobe Cloud products), reinstalling the app and logging in with the same account should restore all your files.
- If you reinstalled Windows without formatting your drive, your files might be in the AppData folder in Windows.old, which you can find in the root directory of your system drive (usually C:).
- In your app does not save files to the cloud and you performed a clean reinstallation of Windows, you can try using data recovery software to scan your drive directly. Disk Drill excels at retaining original folder structure, which makes it easier to find the data you need.
Yes, it’s possible to recover data after upgrading from Windows 10 to Windows 11. You have several options to choose from:
- Local backups like File History and Windows Backup and Restore is the best way to get all of your data back, but they require you to create the backup before your files are deleted.
- If you activated OneDrive before deleting your files, backup copies might have been saved to the cloud. Log in to OneDrive web with your Microsoft Account to check.
- No backups? Your only solution is to use data recovery software to extract data directly from your drive. Apps like Disk Drill are beginner-friendly and offer 100 MB free data recovery.
