You deleted the wrong file or folder by mistake, opened your Recycle Bin, but the data is nowhere to be found, nor is there any hint at how to return it. It’s even worse when everything had been fine before, and your deleted files could be found in the bin like normal.
There is a solution for this. With the right tools and correct approach that we’ll cover next, you can not only get your files back but also protect them against similar data loss in the future.
Why Deleted Files Aren’t In the Recycle Bin?
So, where does a deleted file go, if not the Recycle Bin? There are plenty of reasons that could be behind why your files aren’t in the Recycle Bin. Most of the time, when you’re left trying to figure out why I can’t find my deleted files in the Recycle Bin, it’s because the file disappeared from or bypassed the Recycle Bin entirely, including in cases like:
- ⌨️ Permanent delete actions. When a file is deleted using the keyboard combination Shift+Delete, it skips the Recycle Bin entirely. This is also true for app-level deletions when using uninstallers.
- ⚙️ Recycle Bin settings. Files beyond a certain size will skip the Recycle Bin and automatically be permanently deleted. The Recycle Bin may also be configured to prevent deleted data from being stored there.
- 📍 Location of deleted files. Files deleted from USB drives, memory cards, or shared network drives are not sent to the Recycle Bin and are instead permanently deleted. Files deleted from external hard drives, however, will appear in the Recycle Bin when connected to the PC, as each drive has a hidden Recycle Bin.
- 🧹 Automatic cleanup settings. If Storage Sense is enabled, it will empty the Recycle Bin automatically, either during low free disk space or at certain intervals. Once emptied, the files are permanently deleted.
Despite the heavy emphasis on ‘permanent’ deletion, most of the time, the data is very easily recovered. So, where do deleted files go if not in the Recycle Bin? In most cases, the file system just marks the space as available for reuse, meaning the data still exists on the drive until it’s overwritten. Therefore, you can maximize your chances of recovery with two simple steps:
- Stop using the drive immediately. Don’t install, download, or save anything to the drive that contains the deleted data you’re trying to recover.
- Start data recovery ASAP. Recover the data using data recovery software before it’s overwritten and lost for good.
How to Recover Deleted Files Not in the Recycle Bin
Now you know what causes these deleted files to go missing, and the importance of recovering them quickly. Below are the most reliable methods for retrieving permanently deleted or lost files based on our team’s research and testing.
Method 1. Recover with Data Recovery Software
Data recovery software is our first recommendation to recover deleted files not in the Recycle Bin because, in many cases, backups simply aren’t available. This is especially true for external drives, which are often not backed up regularly due to the extra setup and hassle required. Using Recycle Bin recovery software is an easy and accessible solution that doesn’t require special skills. And, you can scan and locate your files for free.
Here’s the simplest way to check whether data missing in the Recycle Bin can be found and recovered:- Download, install, and open Disk Drill. Don’t install it to the same drive that contains the data you’re trying to recover.
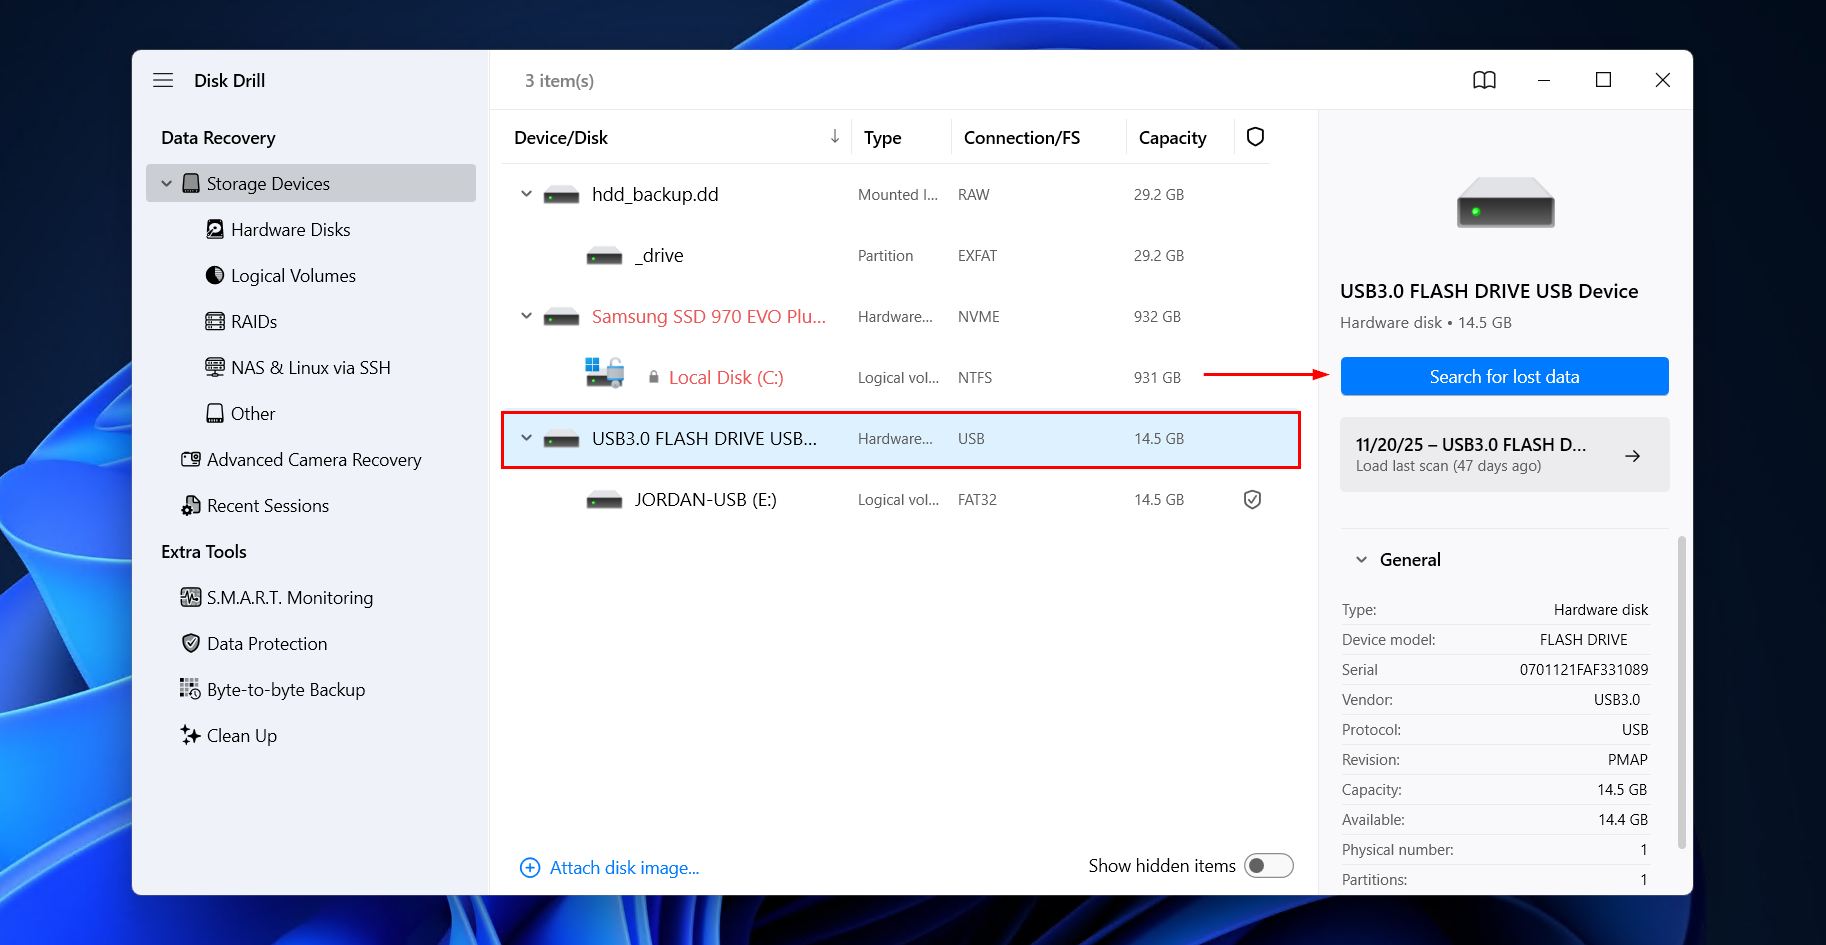
- Select the drive where the files were located before moving to the Recycle Bin, then click Search for lost data.
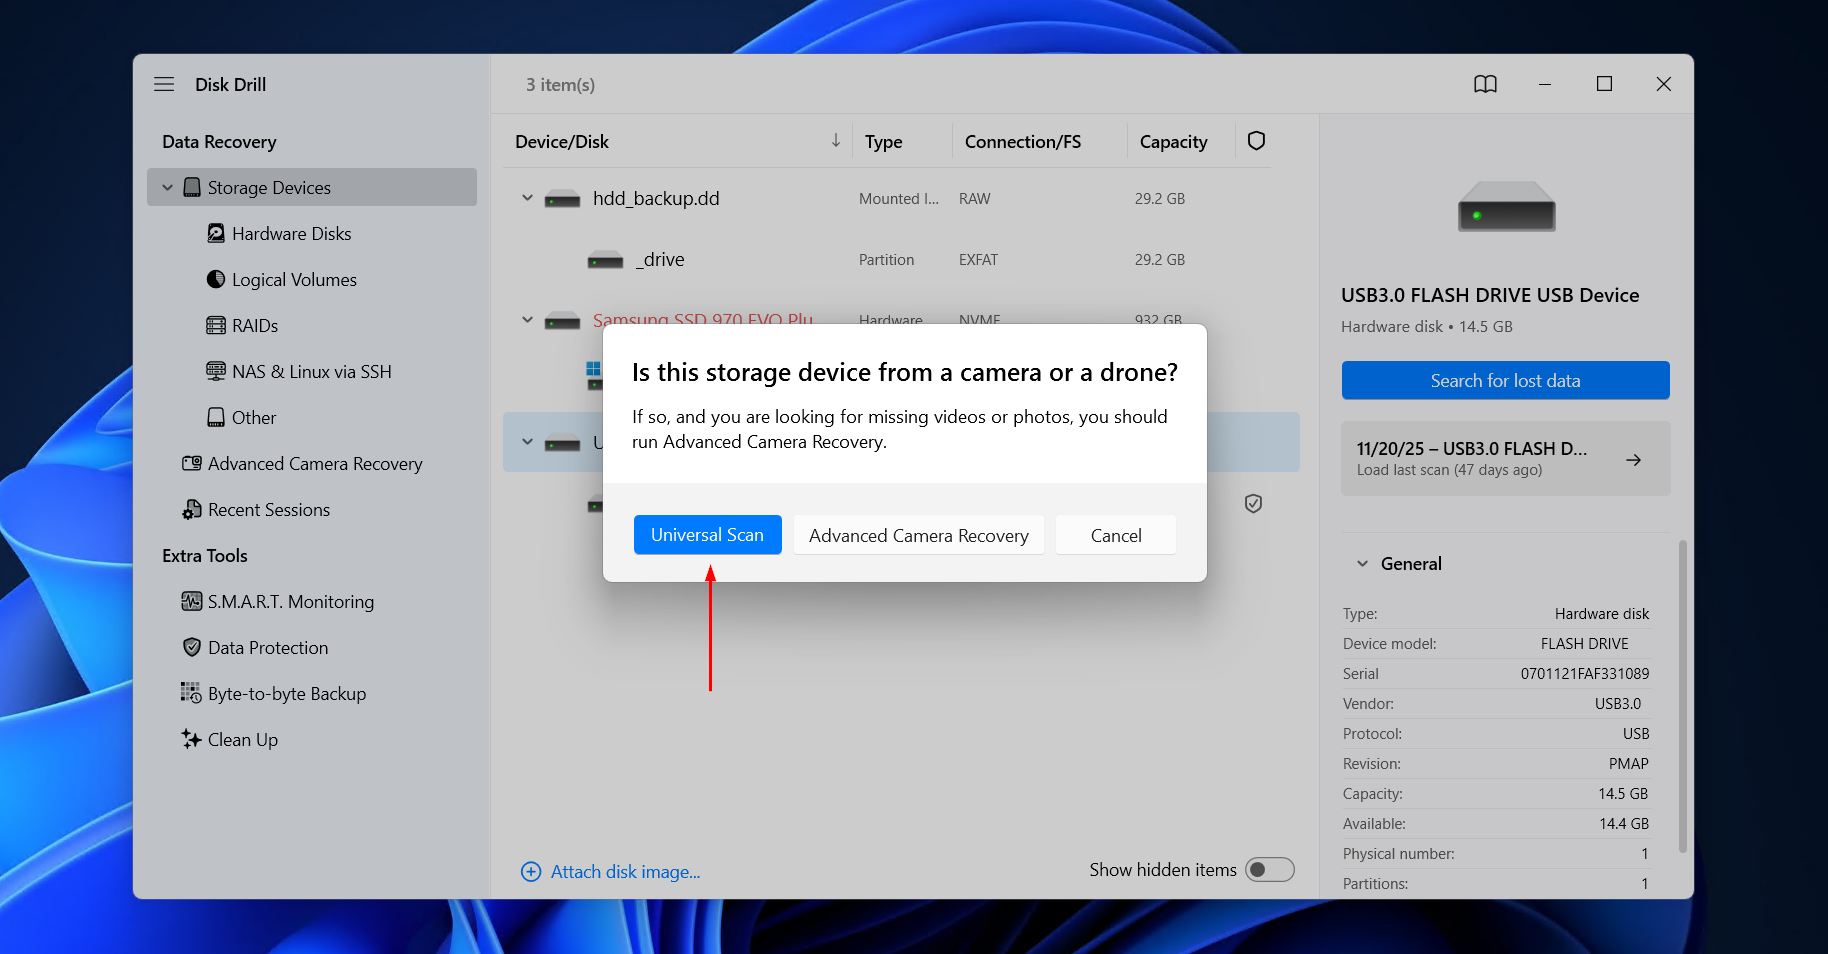
- Click Universal Scan to begin a search for all discoverable data, if prompted.
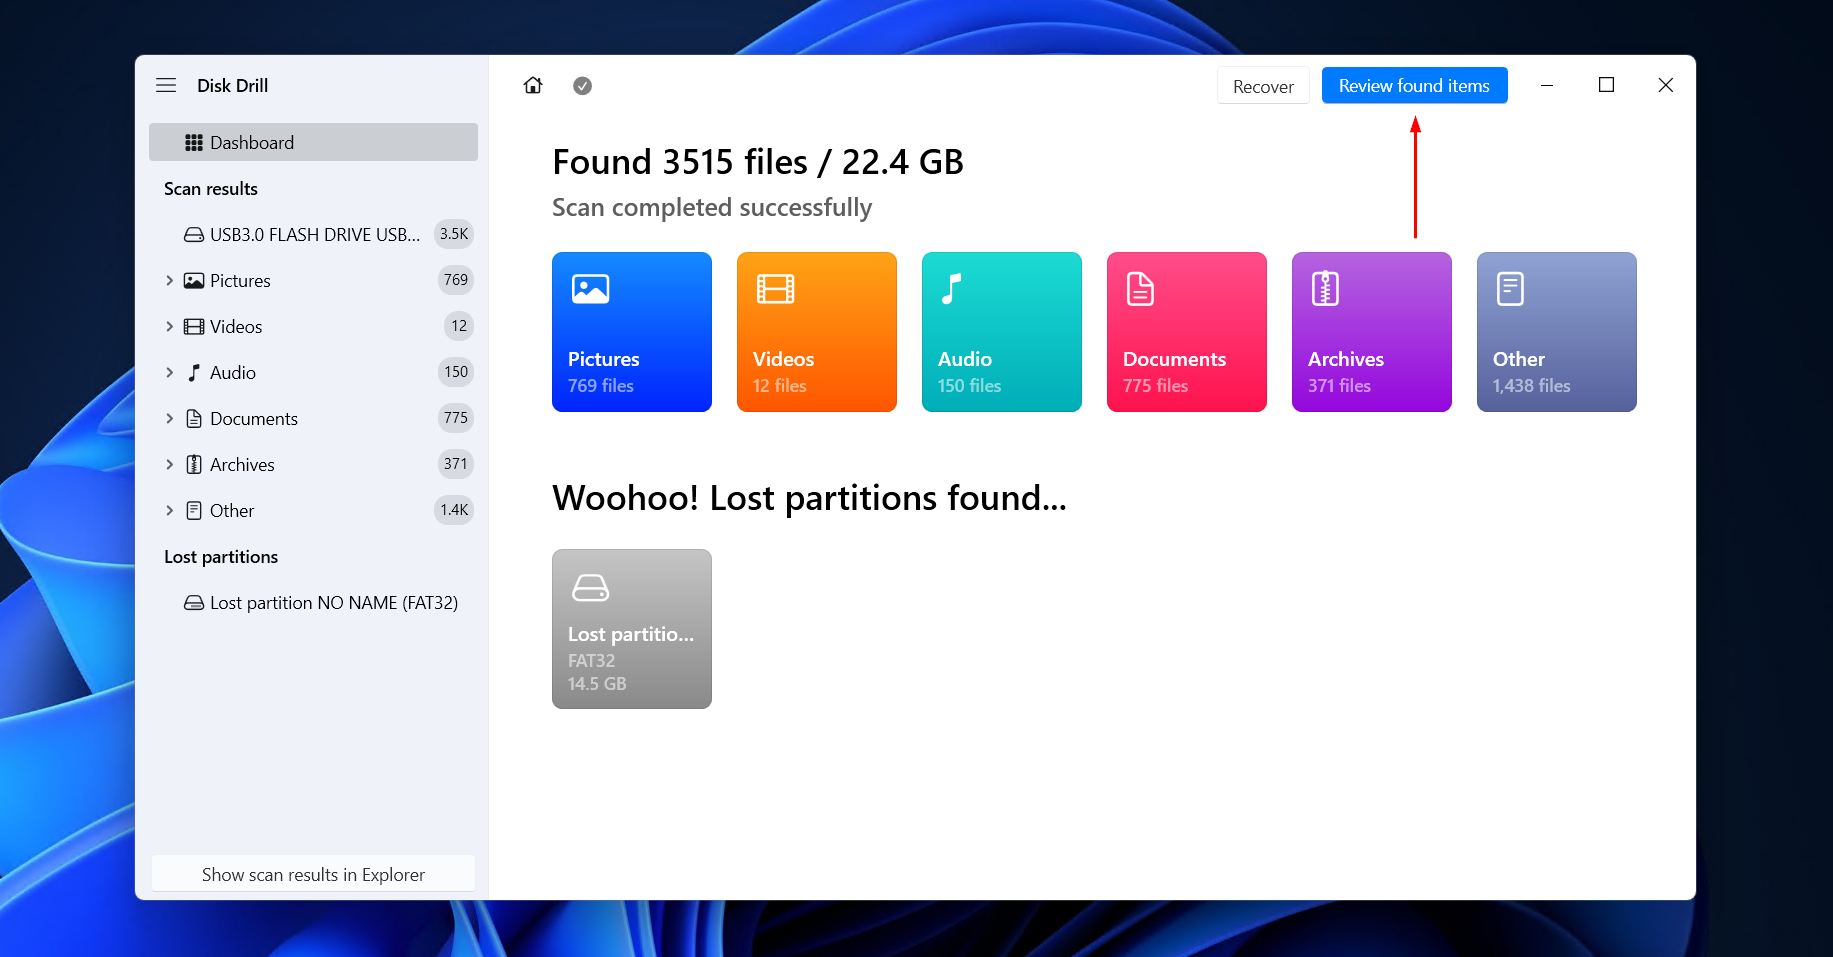
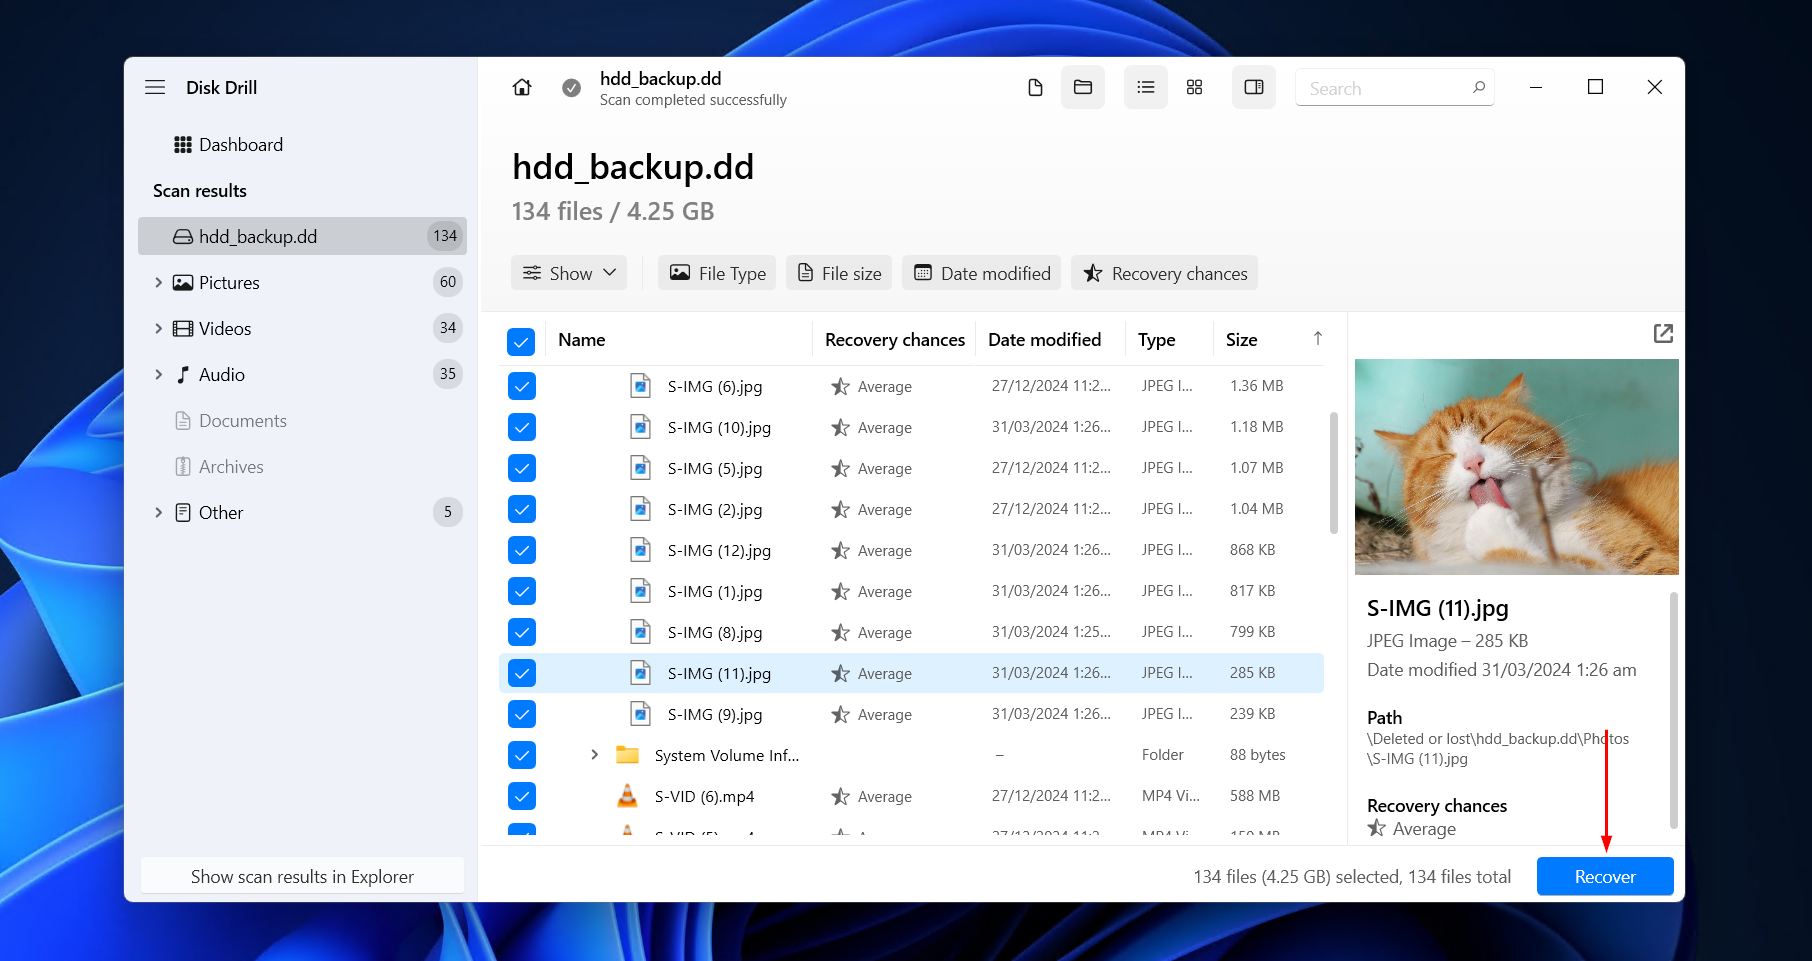
- Click Review found items to explore what was found. Alternatively, click one of the colored icons to filter the results by that file type.
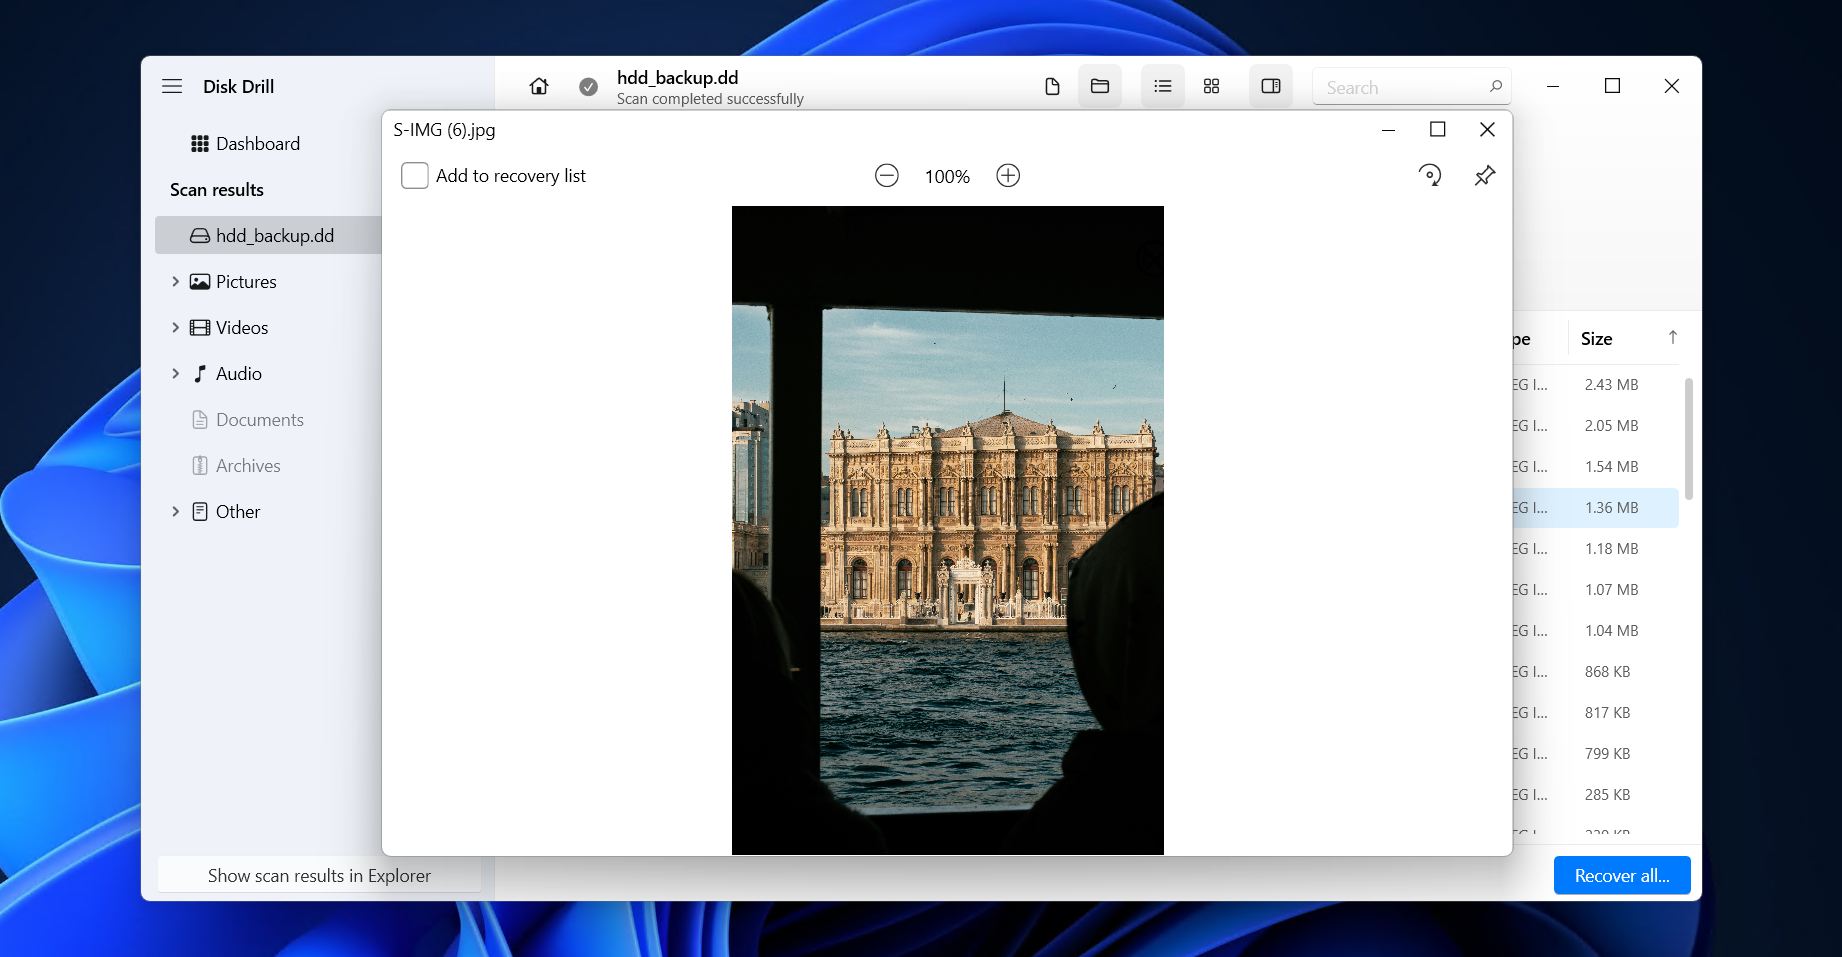
- Preview the data you want to recover. Your data will be separated into three groups. Existing includes intact or temporarily inaccessible files, so you’re much more likely to find the files you need under Deleted or lost, or Reconstructed. It can be refined using the built-in filter options.
- Select the files you want to recover by ticking their respective checkboxes, then click Recover. Disk Drill lets you recover up to 100 MB of data for free, which is enough for a large number of documents or photos, several clips, or just to make sure the program works and the files can be recovered.
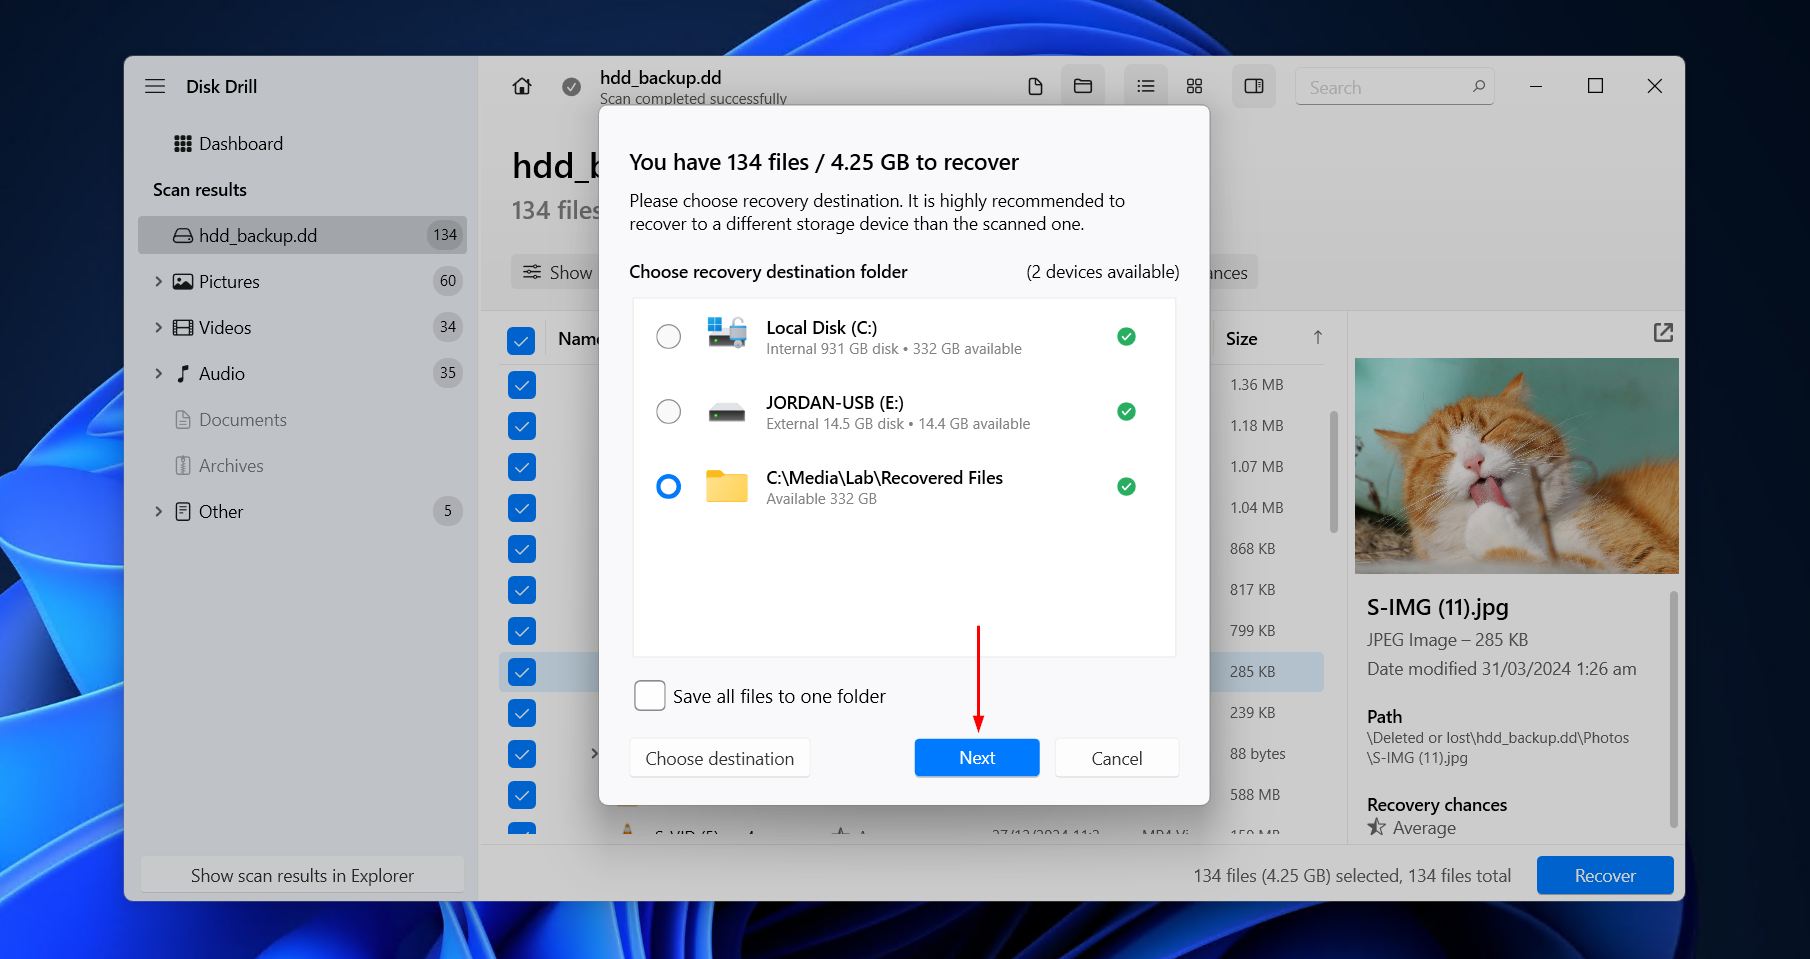
- Choose where you want to store the recovered files. Don’t choose anywhere on the same drive, as it risks corrupting the data during recovery. Click Next to finish recovery.

We choose Disk Drill for a few reasons when we need to recover deleted files not in the Recycle Bin, as well as those deleted after it’s emptied. Under the hood, it uses several scanning algorithms to locate as much recoverable data as possible, including signature recovery for when there’s no file system metadata to go off. One of its best features, though, is its ease of use, as recovery just takes a few clicks. All this makes it a quick but powerful option for recovering your data with relatively little effort.
Method 2. Restore with File History
Restoring from a backup is the most effective way of recovering deleted items not in Recycle Bin. File History is the native backup method for Windows 11, and when enabled, it lets you recover a safe copy of data that has been backed up. The added benefit of File History over the older (but still reliable and widely used) Backup and Restore is that it lets you restore folders and files to specific versions made at different points in time.
This is how you restore files from a File History backup:
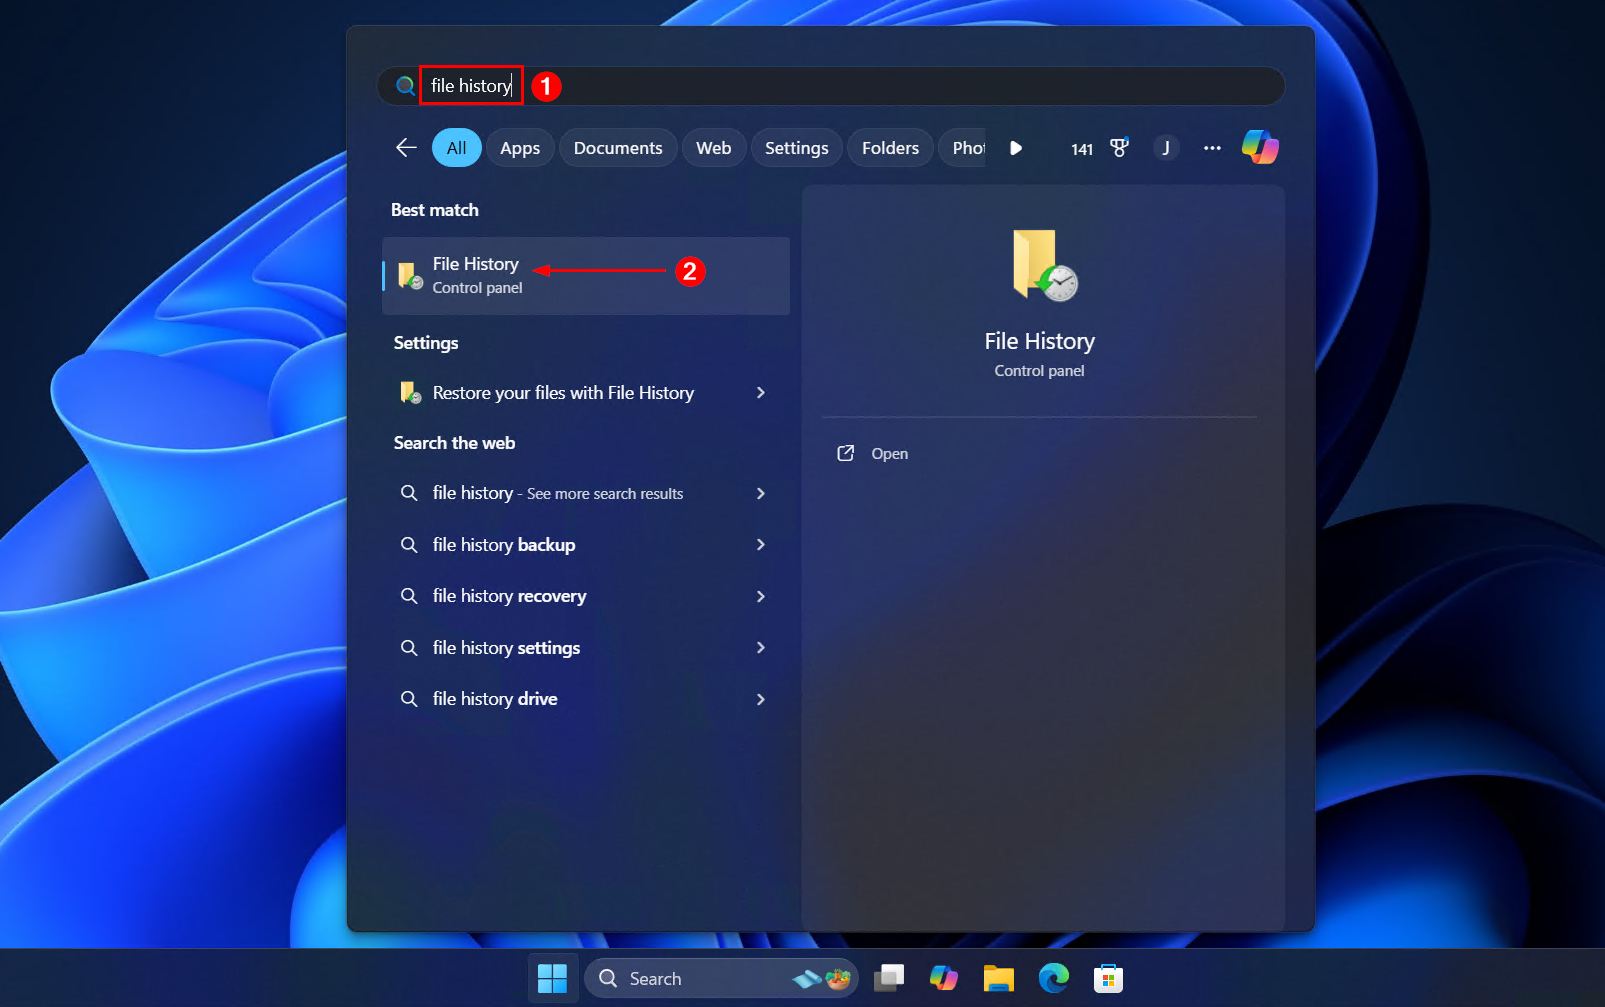
- Open Start. Search for and open File History.
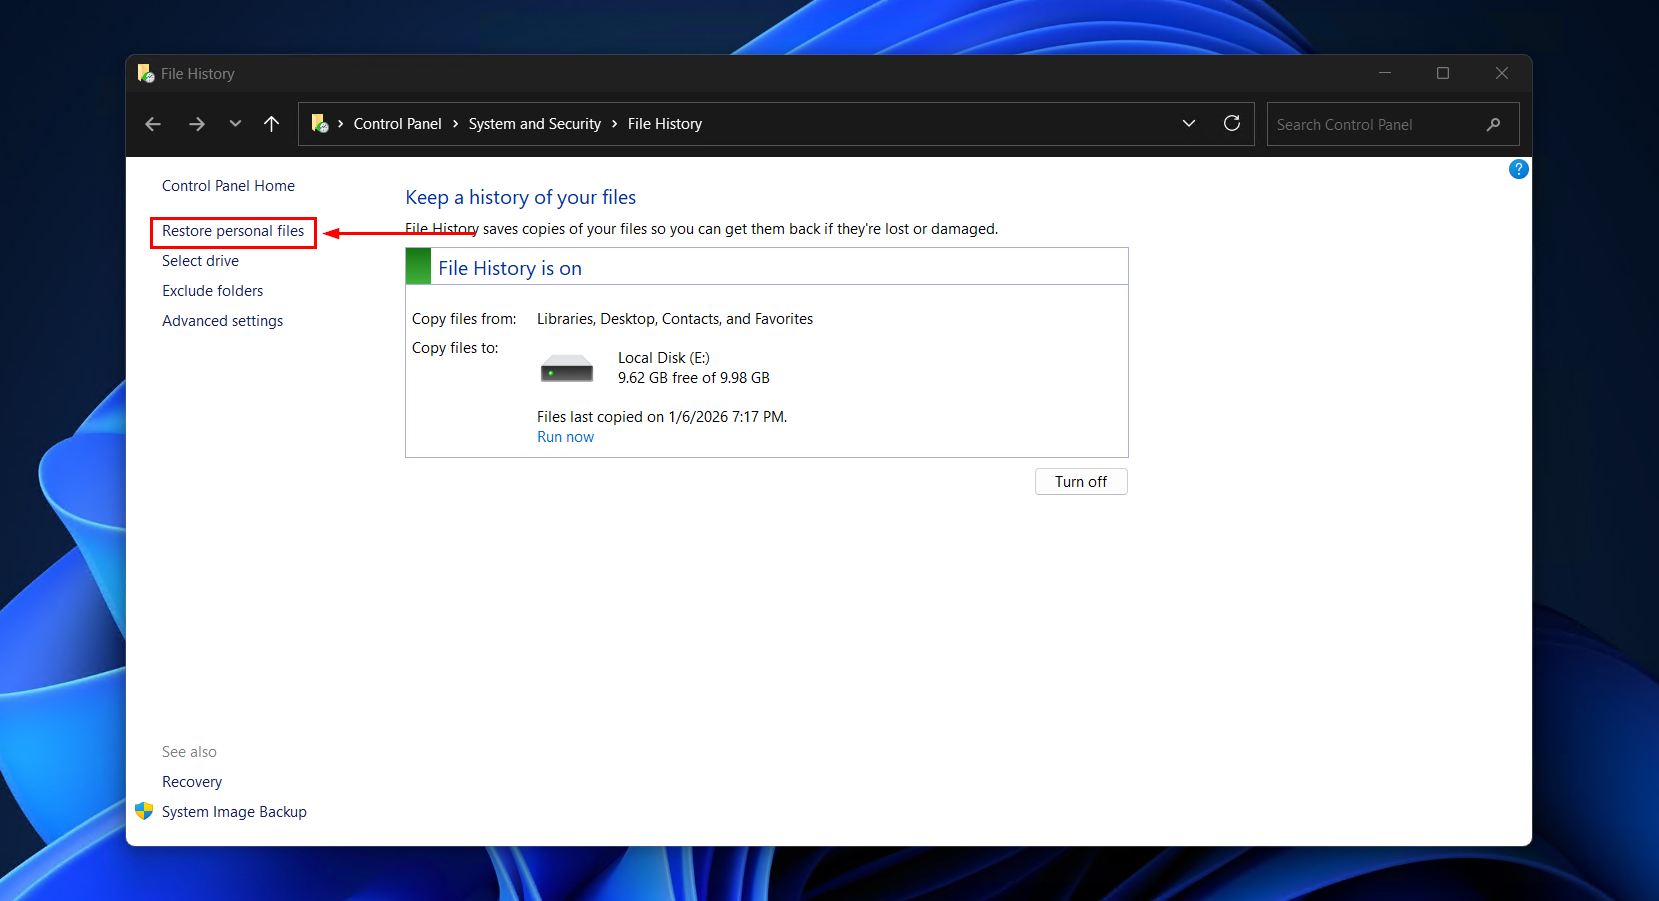
- Click Restore personal files.
- Locate and select the files you want to restore.
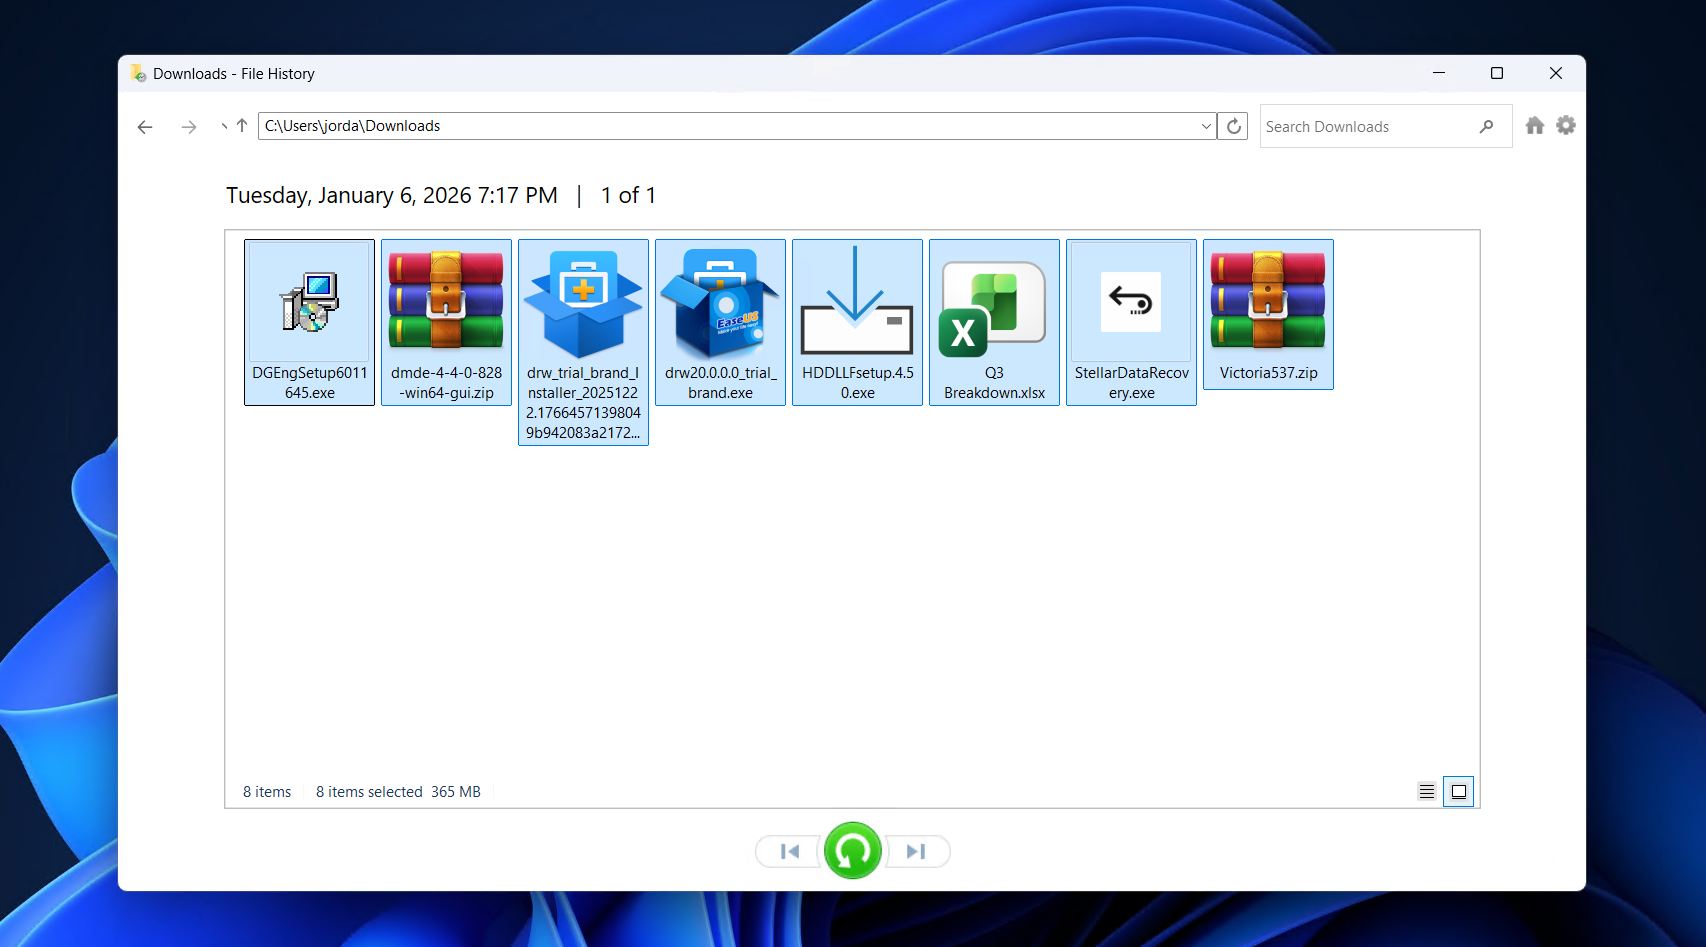
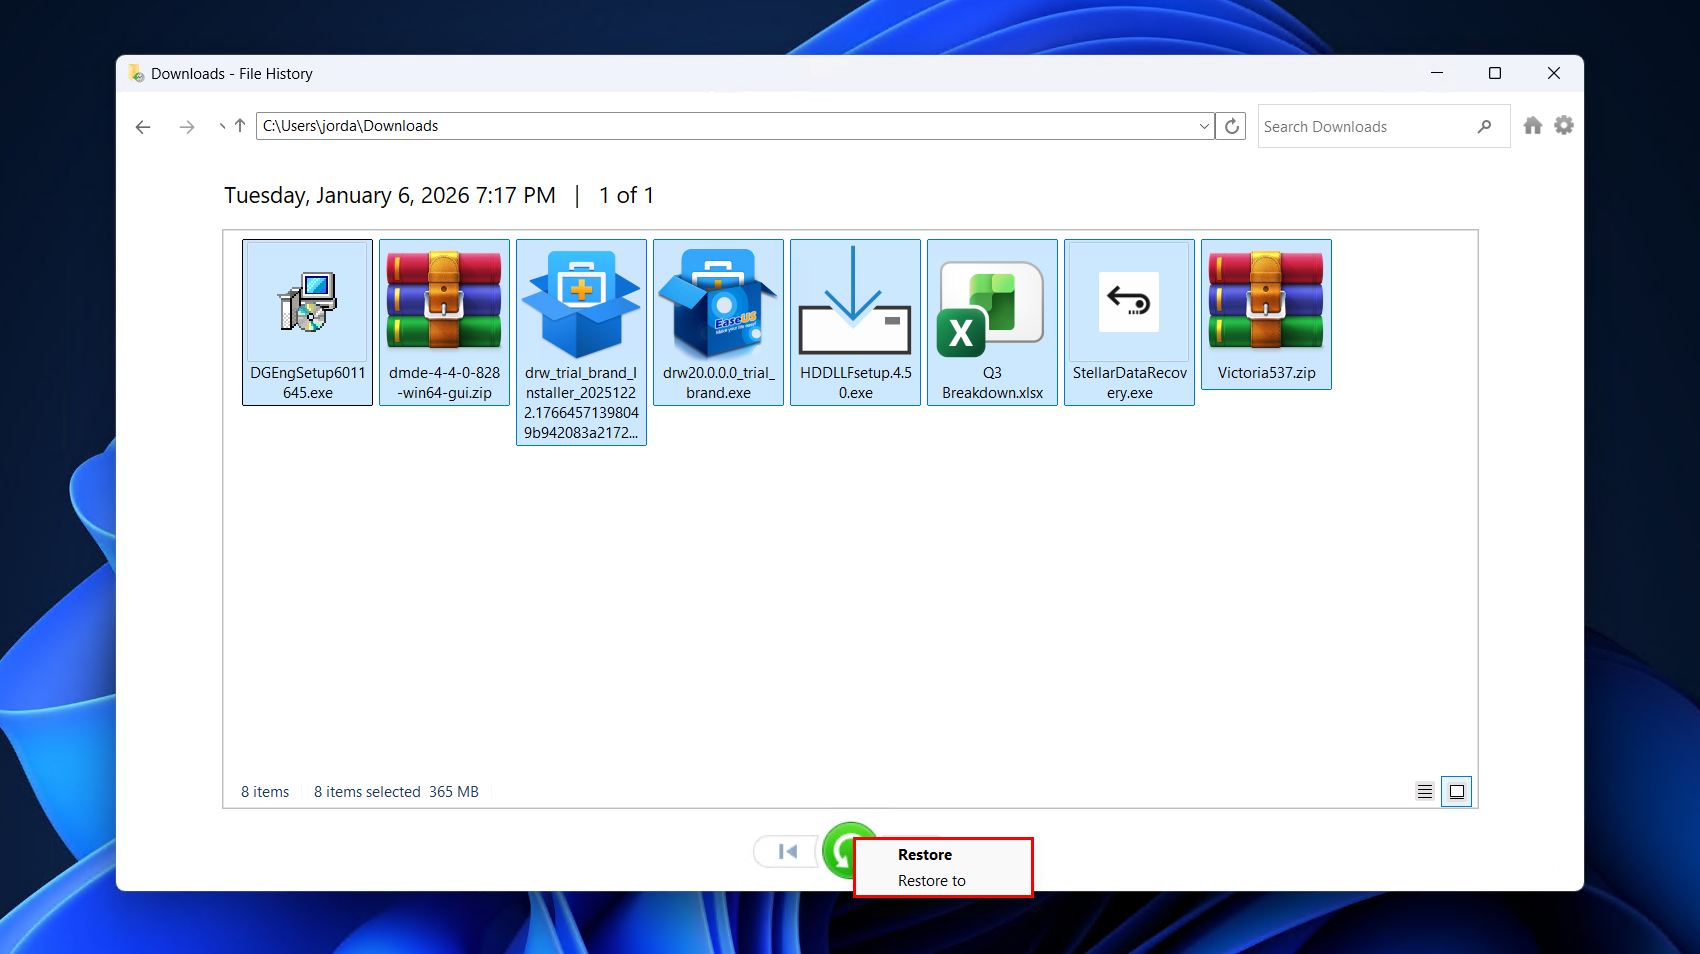
- Right-click the green restore button, then click Restore if you want the files restored to their original location, or Restore to if you want to choose a new location.
Method 3. Restore from Cloud Backups
Restoring from a cloud backup is another reliable option. Cloud services like OneDrive, Google Drive, and Dropbox host uploaded data and let you download it if a local copy is lost. OneDrive in particular is very commonly used, seeing as it comes preinstalled with Windows 11. When enabled, it also backs up your Documents, Pictures, and Desktop folders by default. As such, we’ll use it as an example.
Follow these steps to see if the data is backed up in OneDrive:
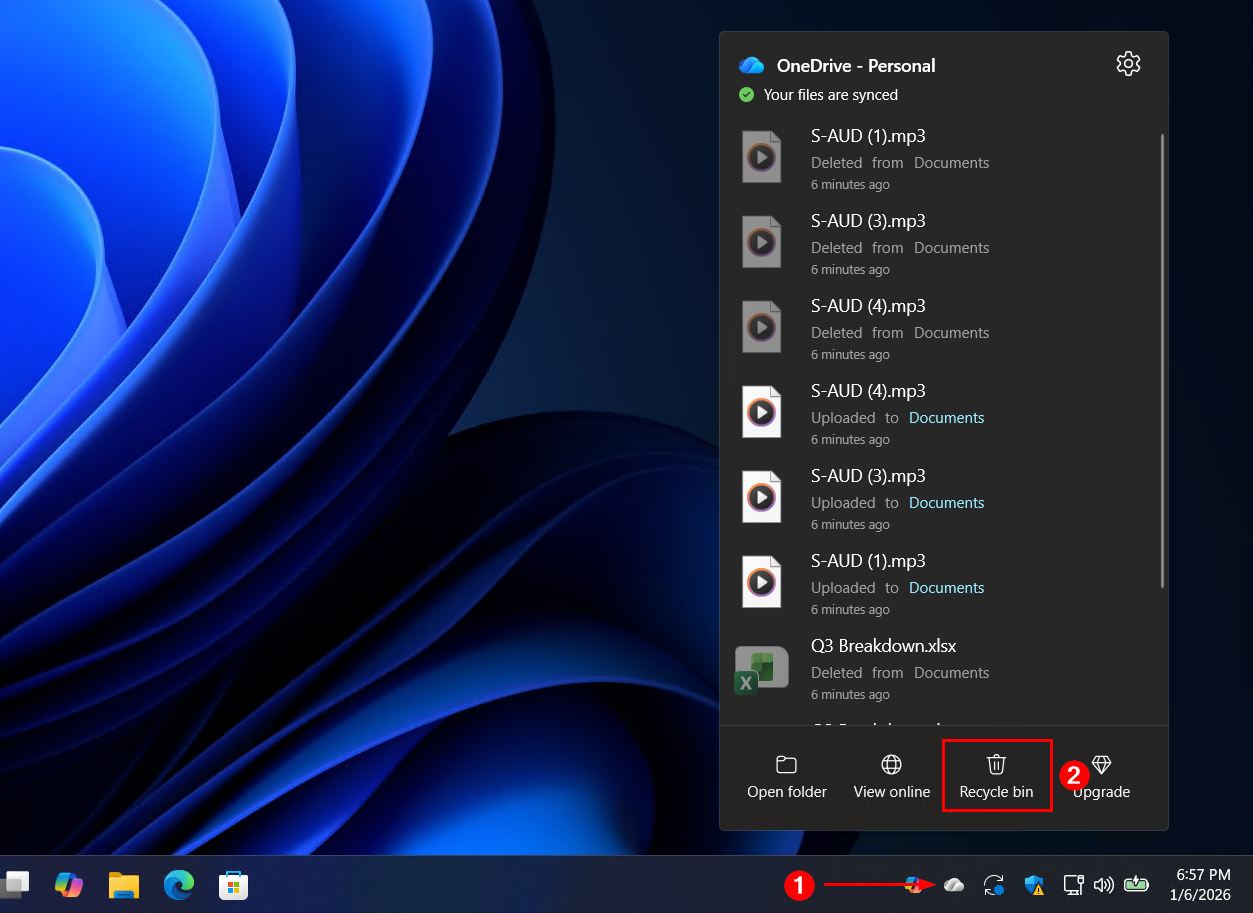
- Click the OneDrive icon in the taskbar, then click Recycle bin.
- Select the files you want to recover by ticking their respective checkbox.
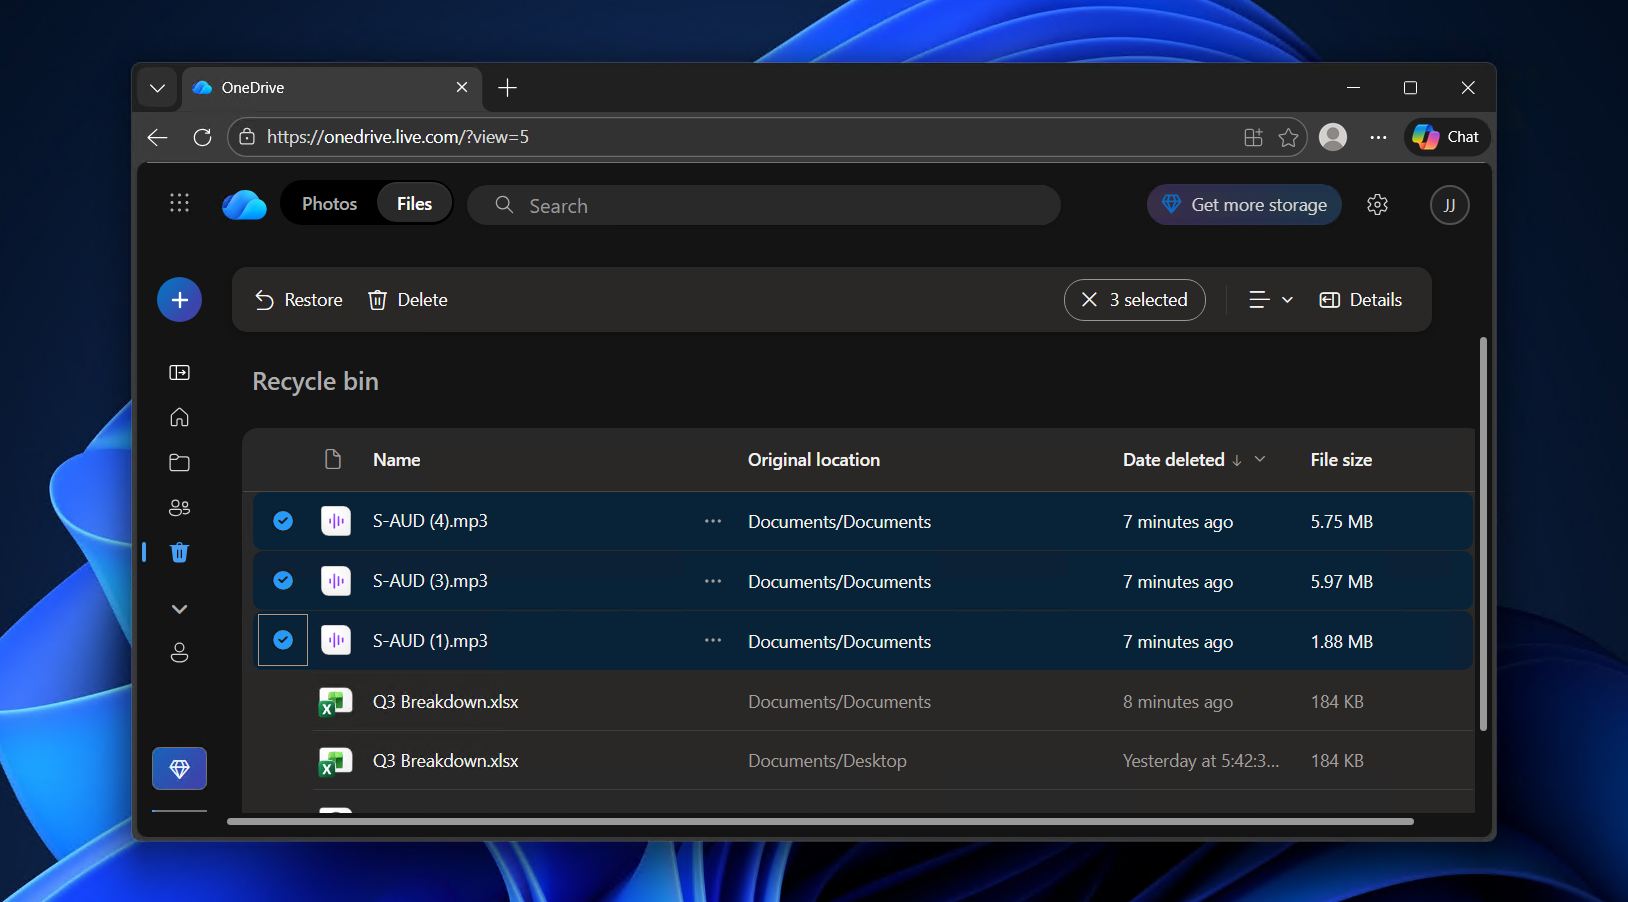
- Click the Restore button.
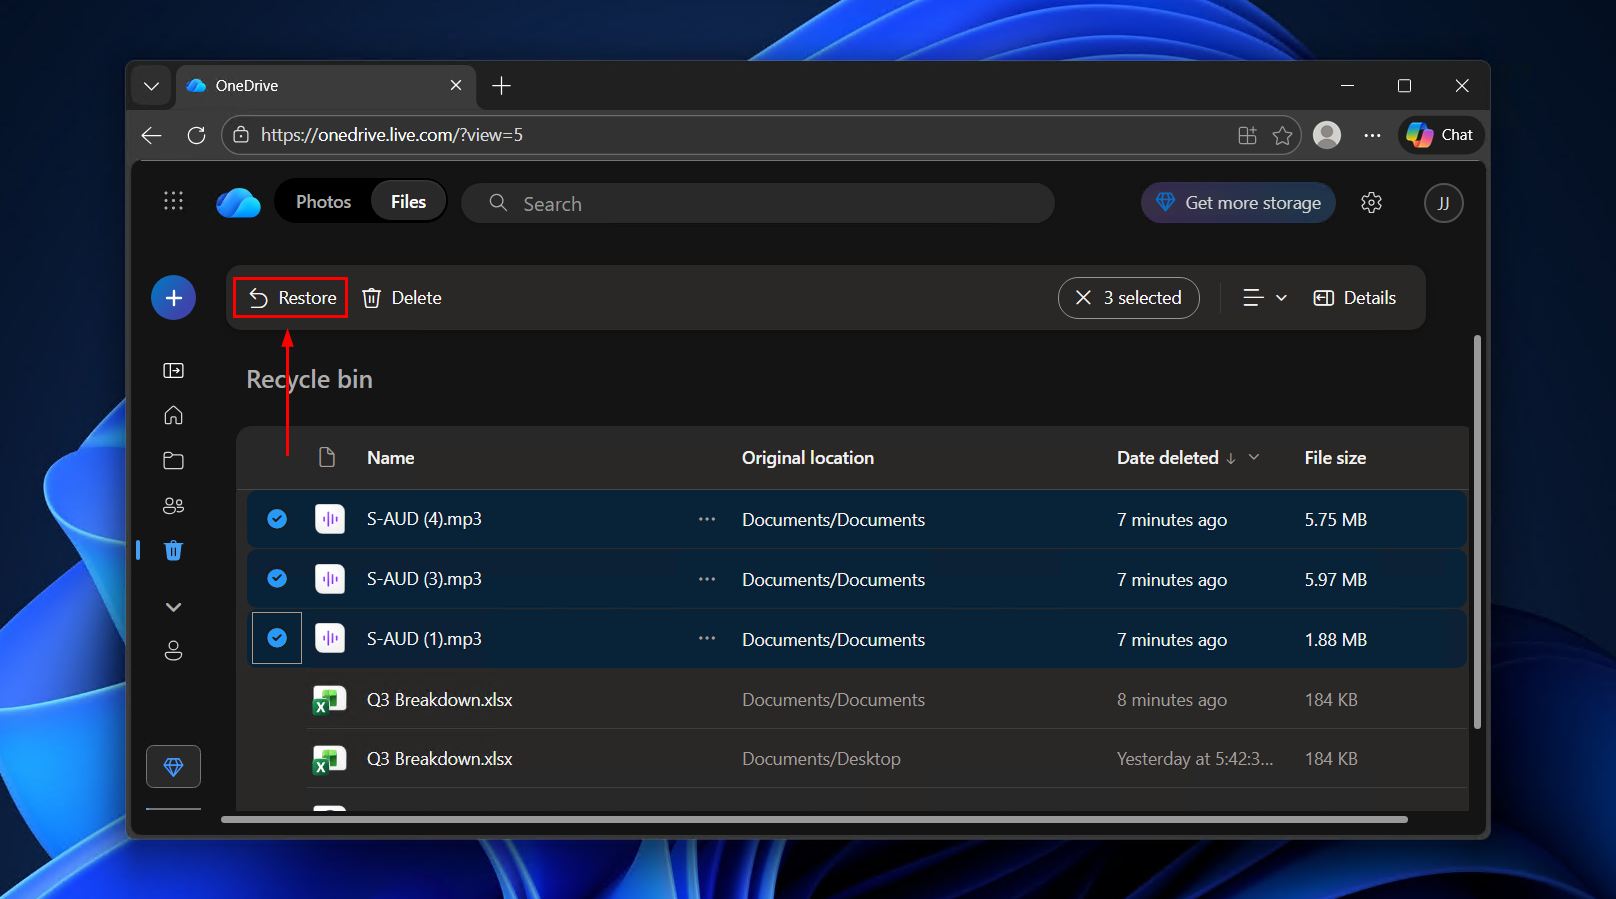
Files will be restored to their original location. Note that even though the restored data is visible on your system, it will be marked Available when online. Be sure to right-click the data and select Always keep on this device so a local copy is kept.
Does Windows Have a Native Undelete Tool to Recover Files Not in the Bin?
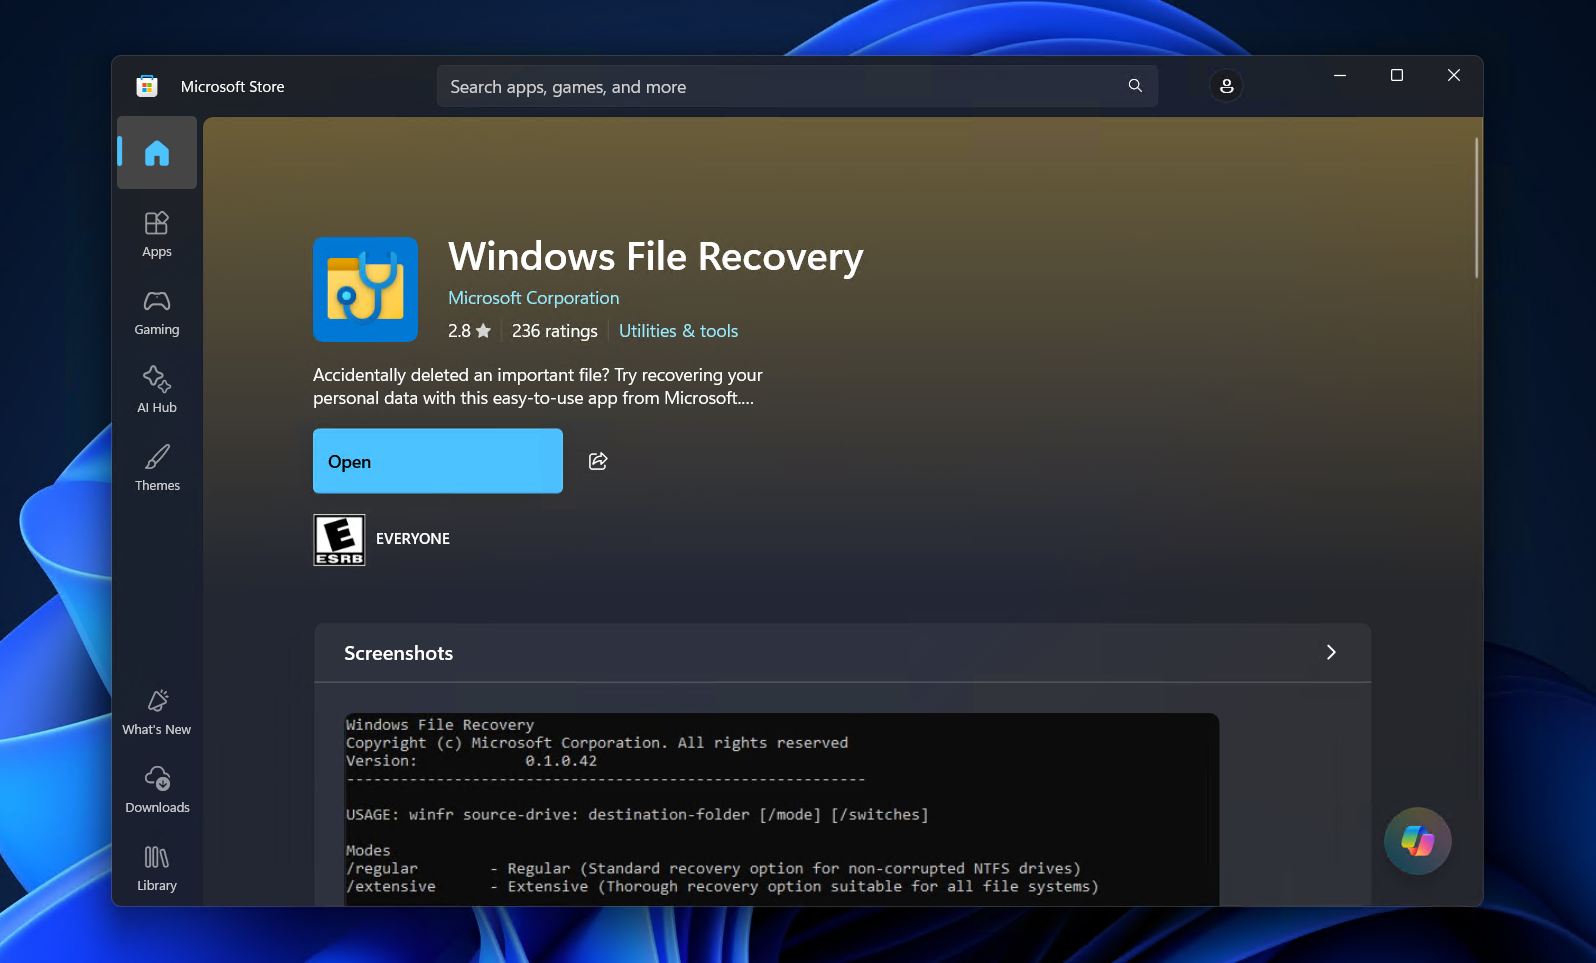
So far, we’ve covered Disk Drill and the native recovery options available in Windows. There is one more solution worth mentioning, though. Windows has its own recovery utility on the Microsoft Store called Windows File Recovery, a command-line tool that can potentially help you recover deleted files in Windows 10 and 11 that aren’t in the Recycle Bin. If you’re recovering data that was deleted from an internal NTFS drive, it has a reasonably good chance of recovering your data – just not as high as your chances would be with a premium-grade tool like Disk Drill.
Follow these steps to recover deleted files using Windows File Recovery:
- Get Windows File Recovery from the Microsoft Store.
- Run the below command, replacing C: with the drive letter of the drive that lost the data, and E:\RecoveredFiles with where you want to store the recovered files.
winfr C: E:\RecoveredFiles /regular
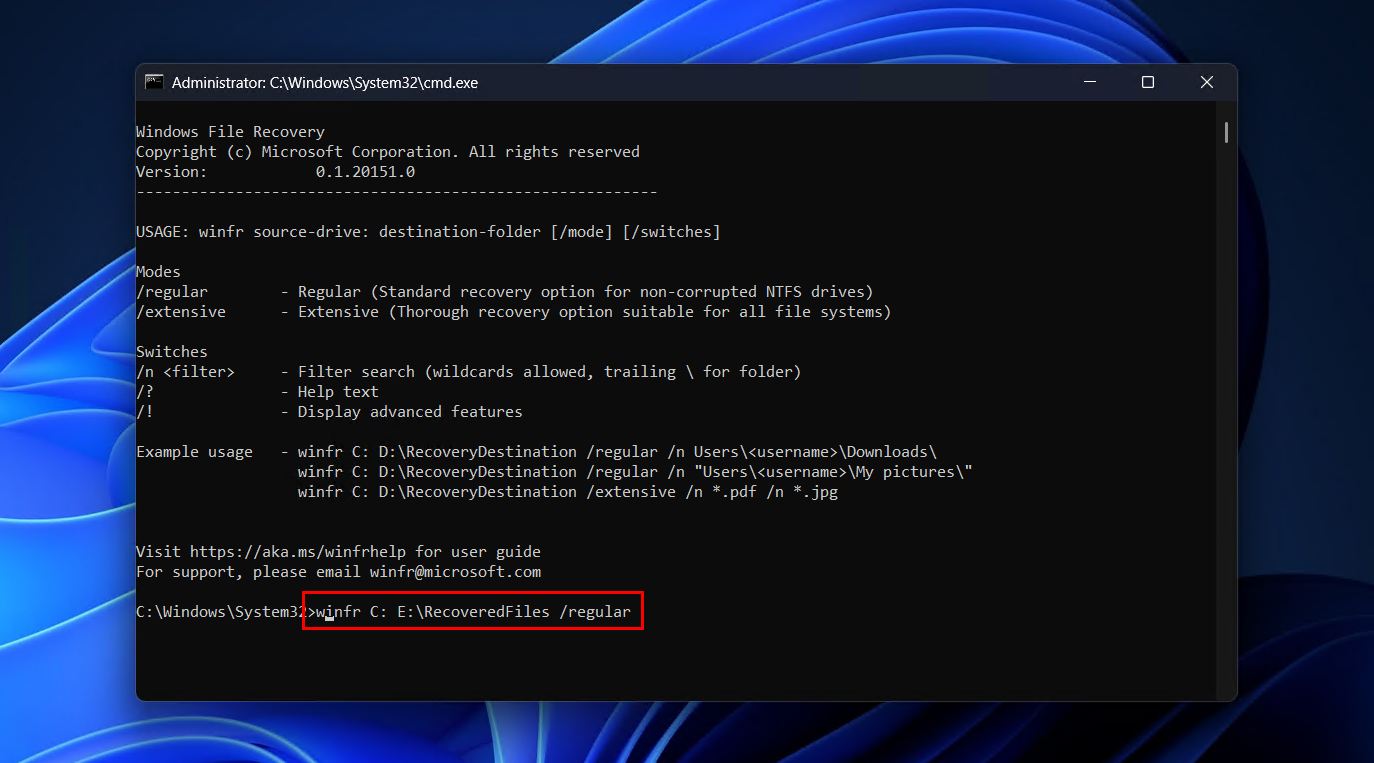
- Press Y to confirm.
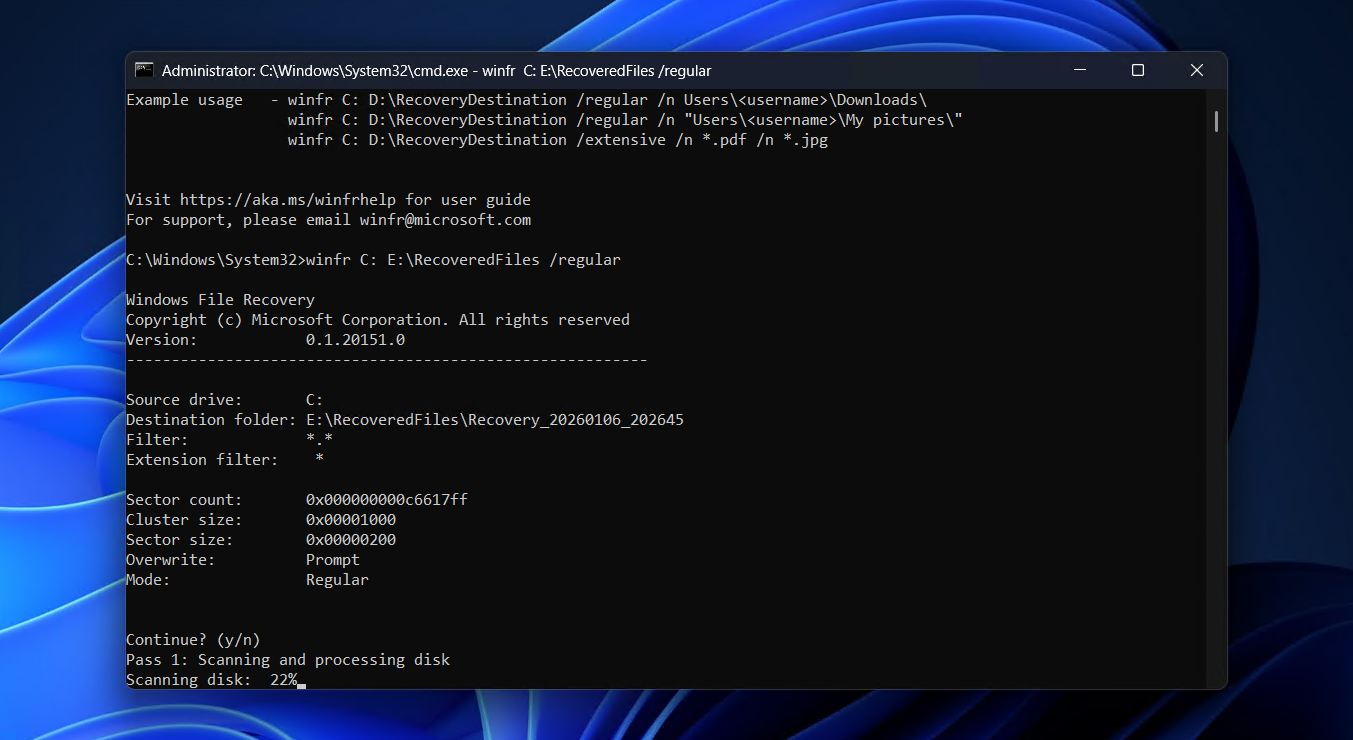
It’s possible to do a deeper search using the Extensive scan. To do so, simply replace /regular with /extensive in the final step.
What Settings to Configure to Avoid Deleted Files Not Showing in the Recycle Bin?
Once your data is recovered, it’s a good idea to update the Recycle Bin’s settings so deleted files don’t skip it due to size limitations or setting misconfiguration.
1. Keep the Recycle Bin Large Enough
You can access the Recycle Bin settings through its Properties window, where we’ll show you how to increase the maximum file size threshold to accommodate larger files and actually make sure the Recycle Bin is prepared to receive deleted files.
This is how you update the Recycle Bin settings:
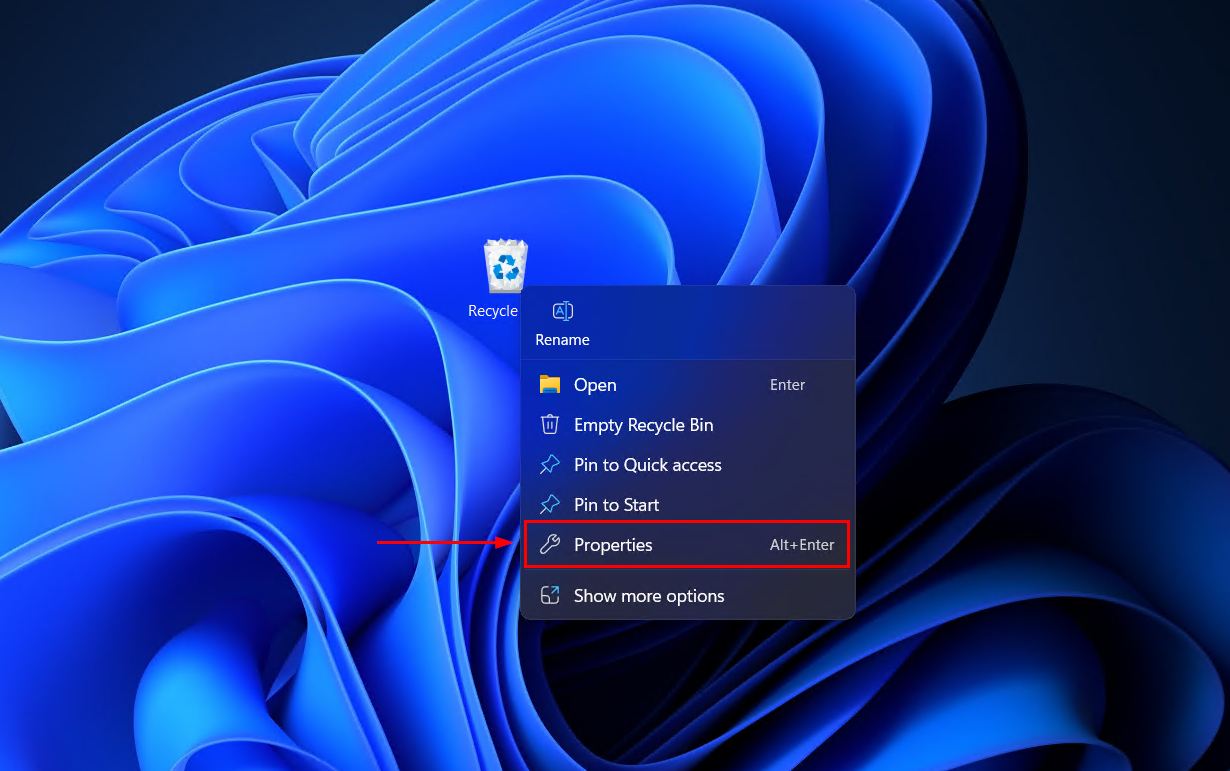
- Right-click the Recycle Bin and click Properties.
- Make sure Custom size is the enabled option.
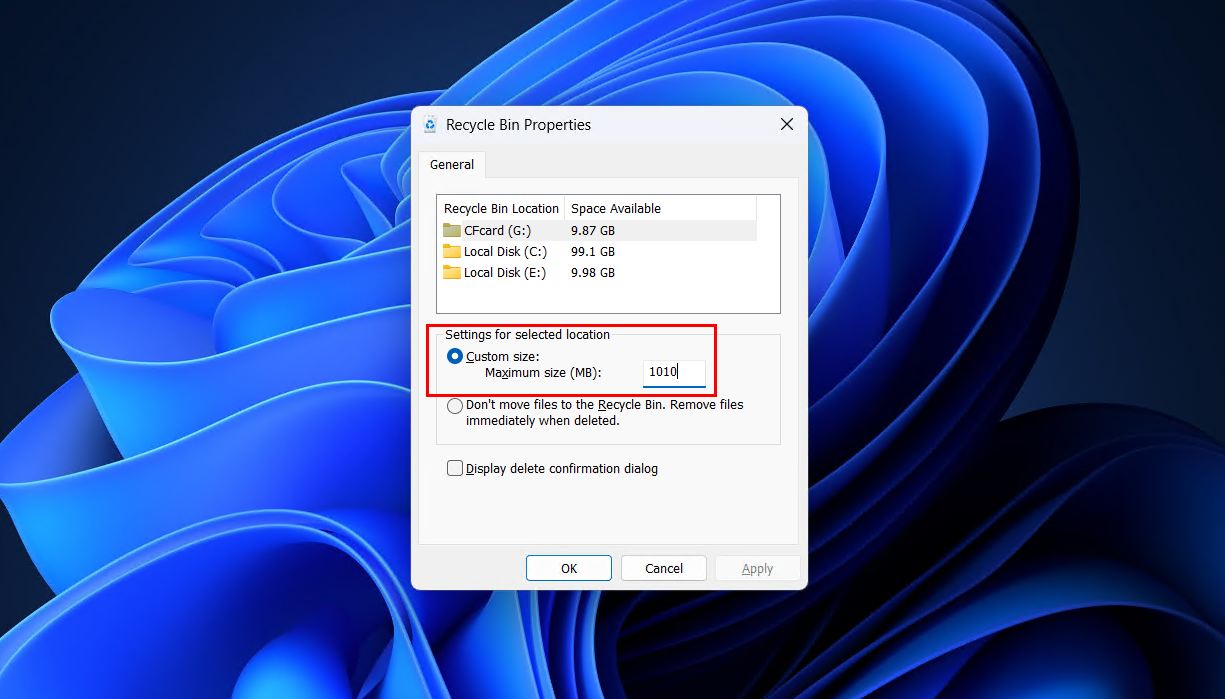
- Increase your maximum size (in MB) if you want larger files to be stored in the Recycle Bin.
2. Set Up the Recycle Bin on External Storage
External devices like USB drives and memory cards that are formatted with FAT32 or exFAT don’t have native support for the Recycle Bin. Instead, you need to manually add a Recycle Bin to them by modifying the registry.
Follow these steps to enable the Recycle Bin for external storage using the registry:
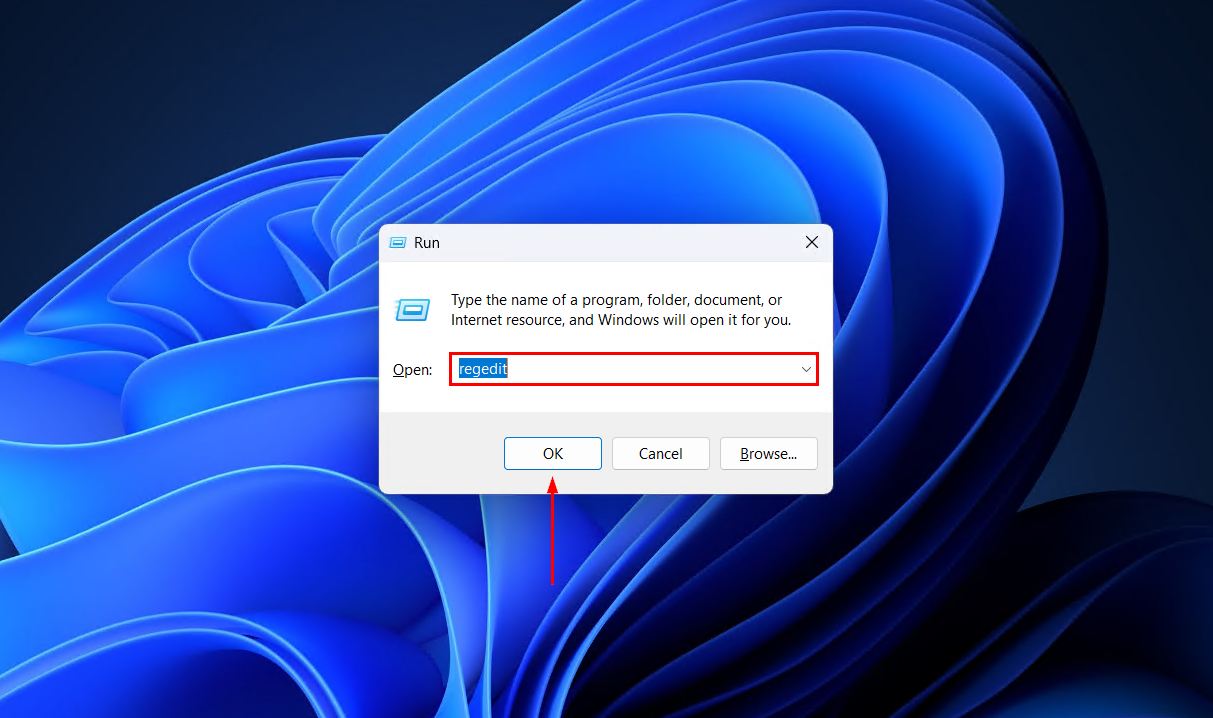
- Press Win + R and type “regedit”. Press Enter.
- Navigate to:
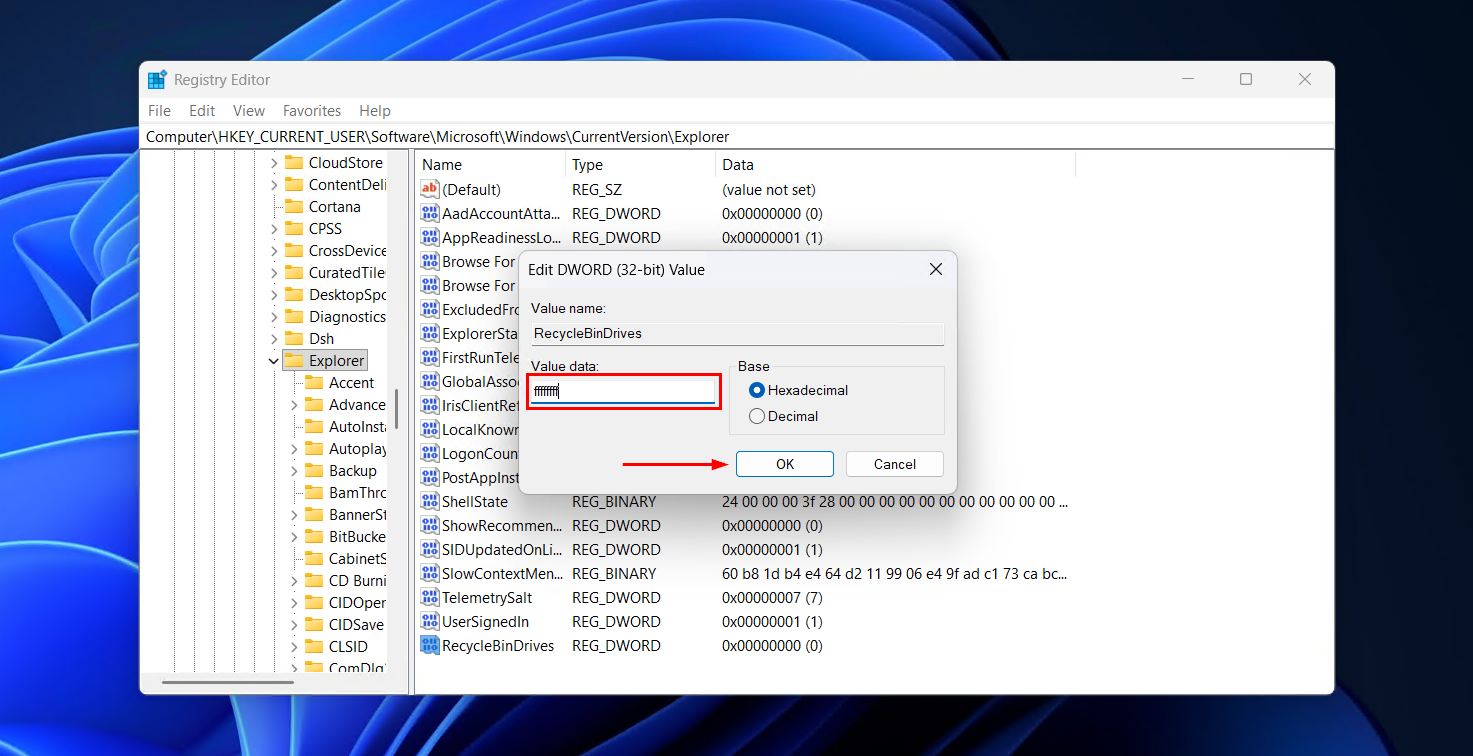
HKEY_CURRENT_USER\Software\Microsoft\Windows\CurrentVersion\Explorer
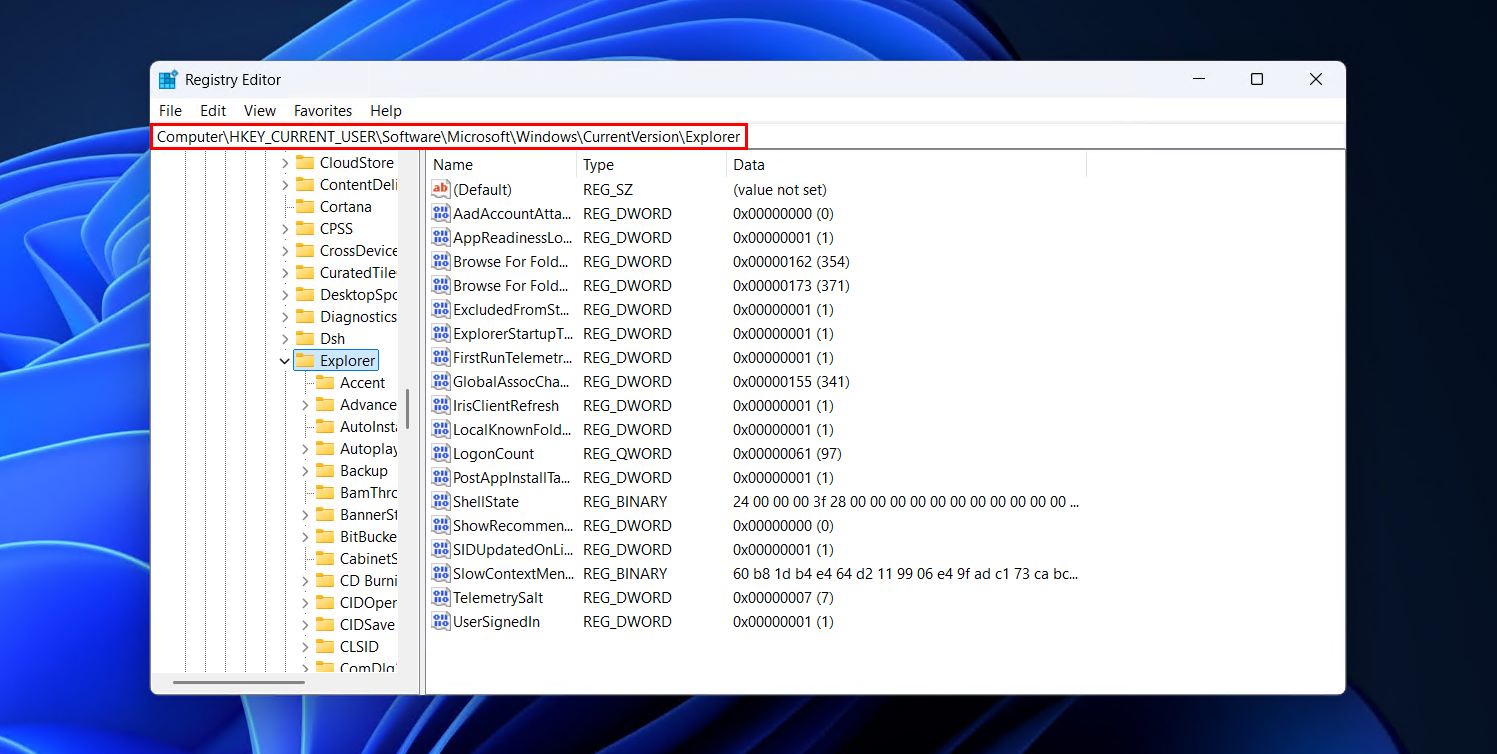
- Right-click Explorer, then hover over New and click DWORD (32-bit) Value. Name it RecycleBinDrives.

- Open the DWORD we just created and change the Value data field to ffffffff and click OK.
- Navigate to:
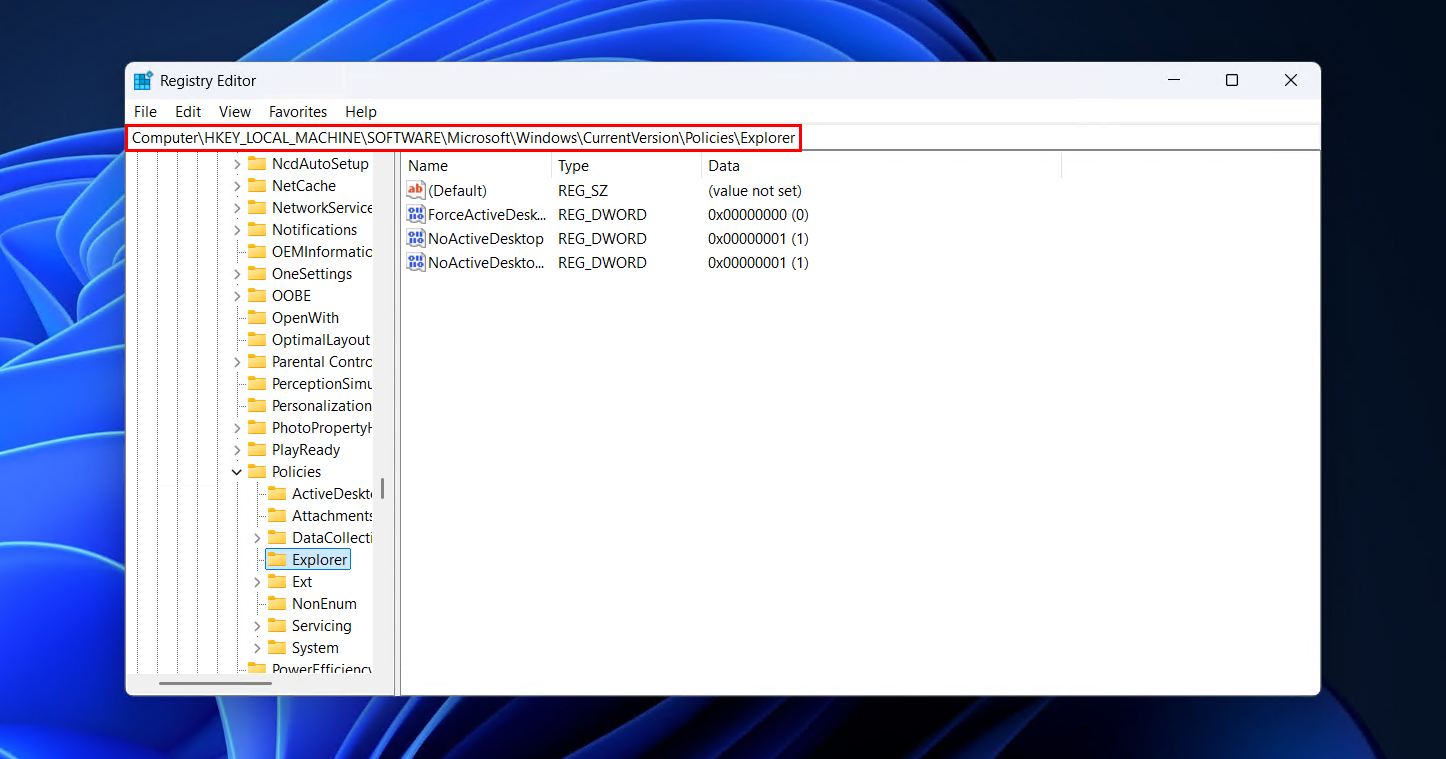
HKEY_LOCAL_MACHINE\SOFTWARE\Microsoft\Windows\CurrentVersion\Policies\Explorer
- Again, right-click Explorer, hover over New, and click DWORD (32-bit) Value. Name is RecycleBinDrives.
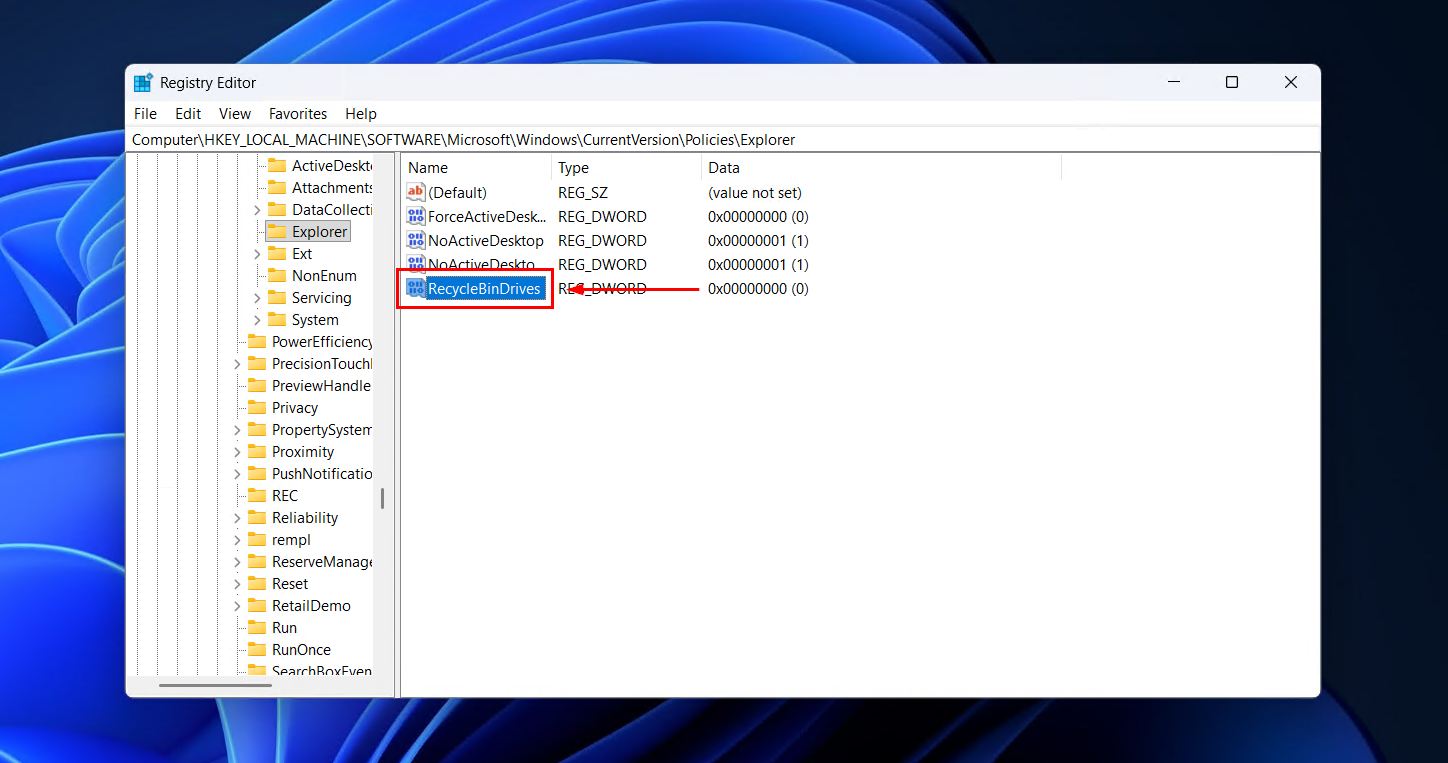
- Open the DWORD and update the Value data field to ffffffff.

- Sign out and back in or restart your PC to deploy the changes.
3. Unhide the Recycle Bin
The aforementioned method showed you how to enable the Recycle Bin on removable devices, but the Recycle Bin will be hidden by default. Even showing hidden files isn’t enough for it to appear, as it’s considered a protected folder.
Here’s how you unhide the Recycle Bin so it can be accessed on removable drives:
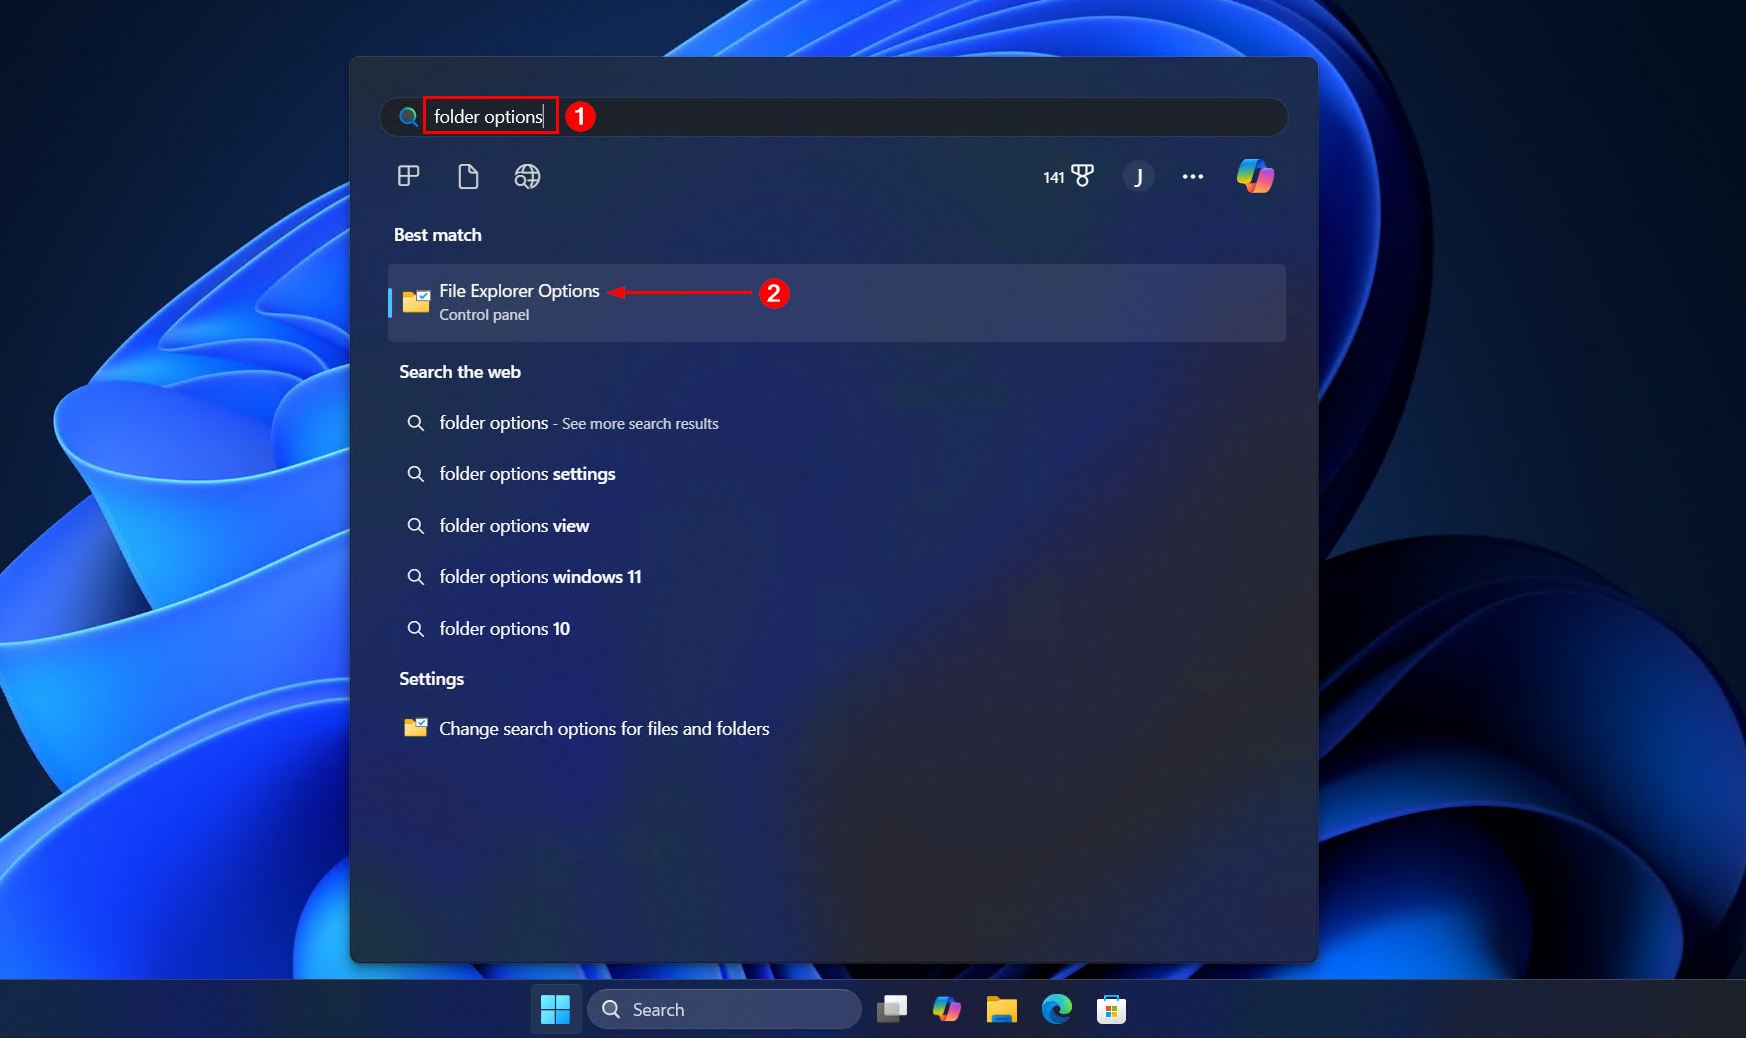
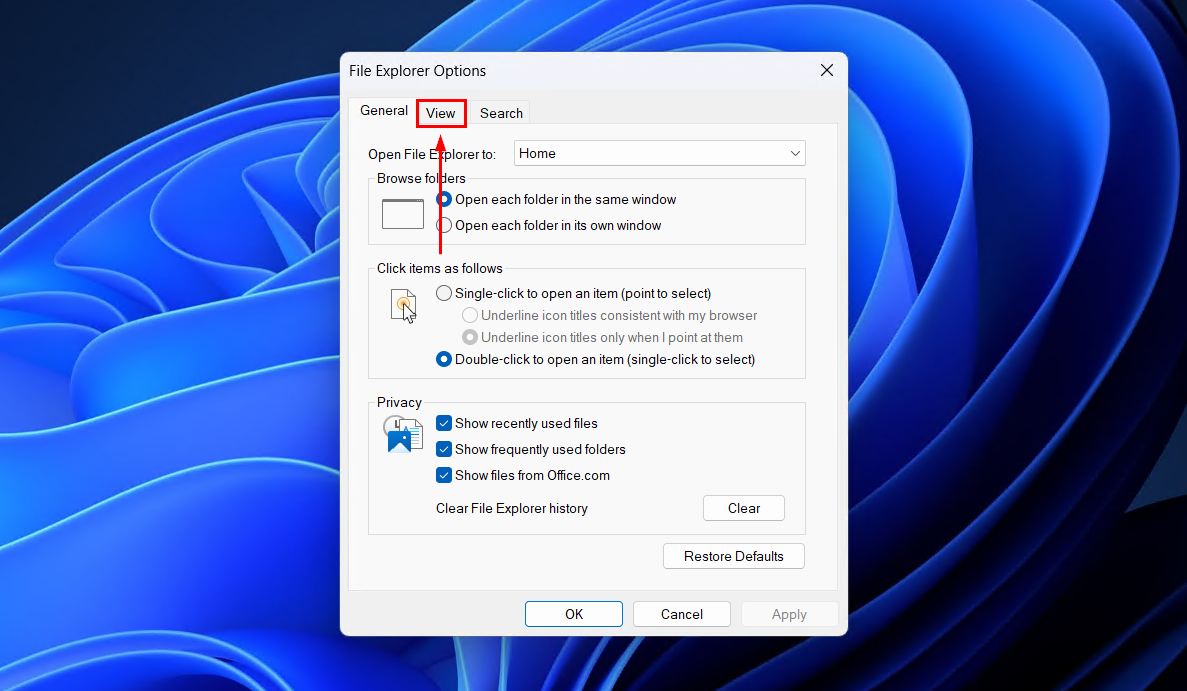
- Open Start. Search for and open “File Explorer Options”.
- Click View.
- Select Show hidden files, folders, or drives, and deselect Hide protected operating system files (Recommended). If prompted to confirm, click Yes.
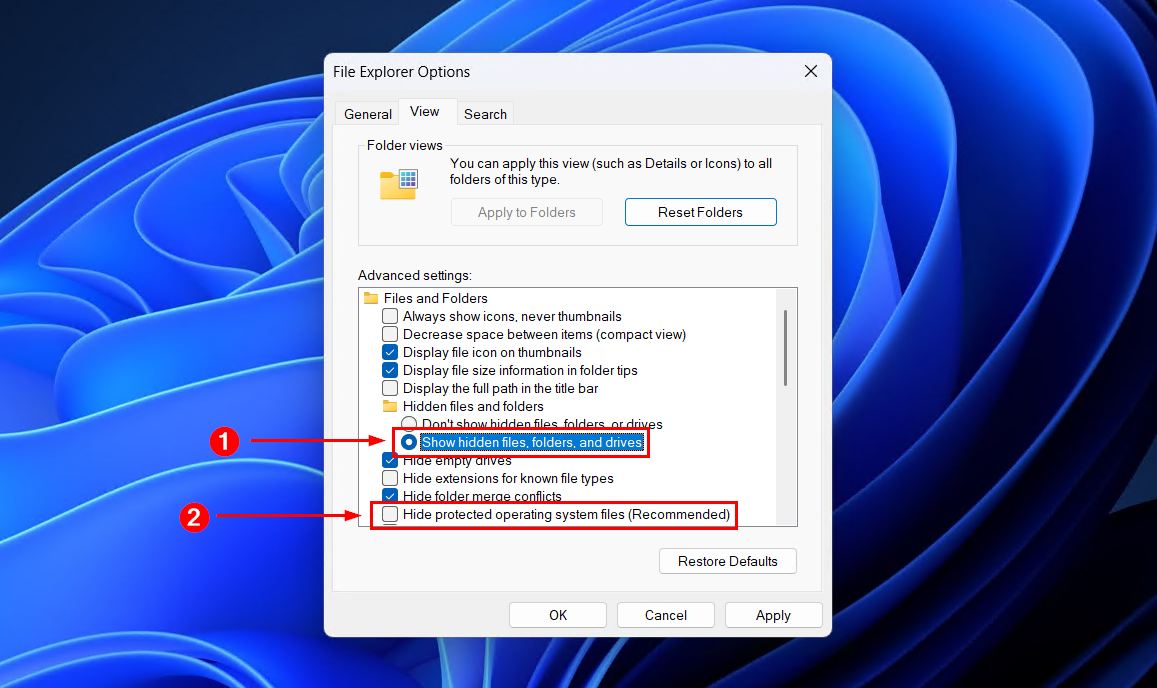
- Click Apply, then OK to finish up.
Check your storage device, and the $RECYCLE.BIN folder should now be visible.
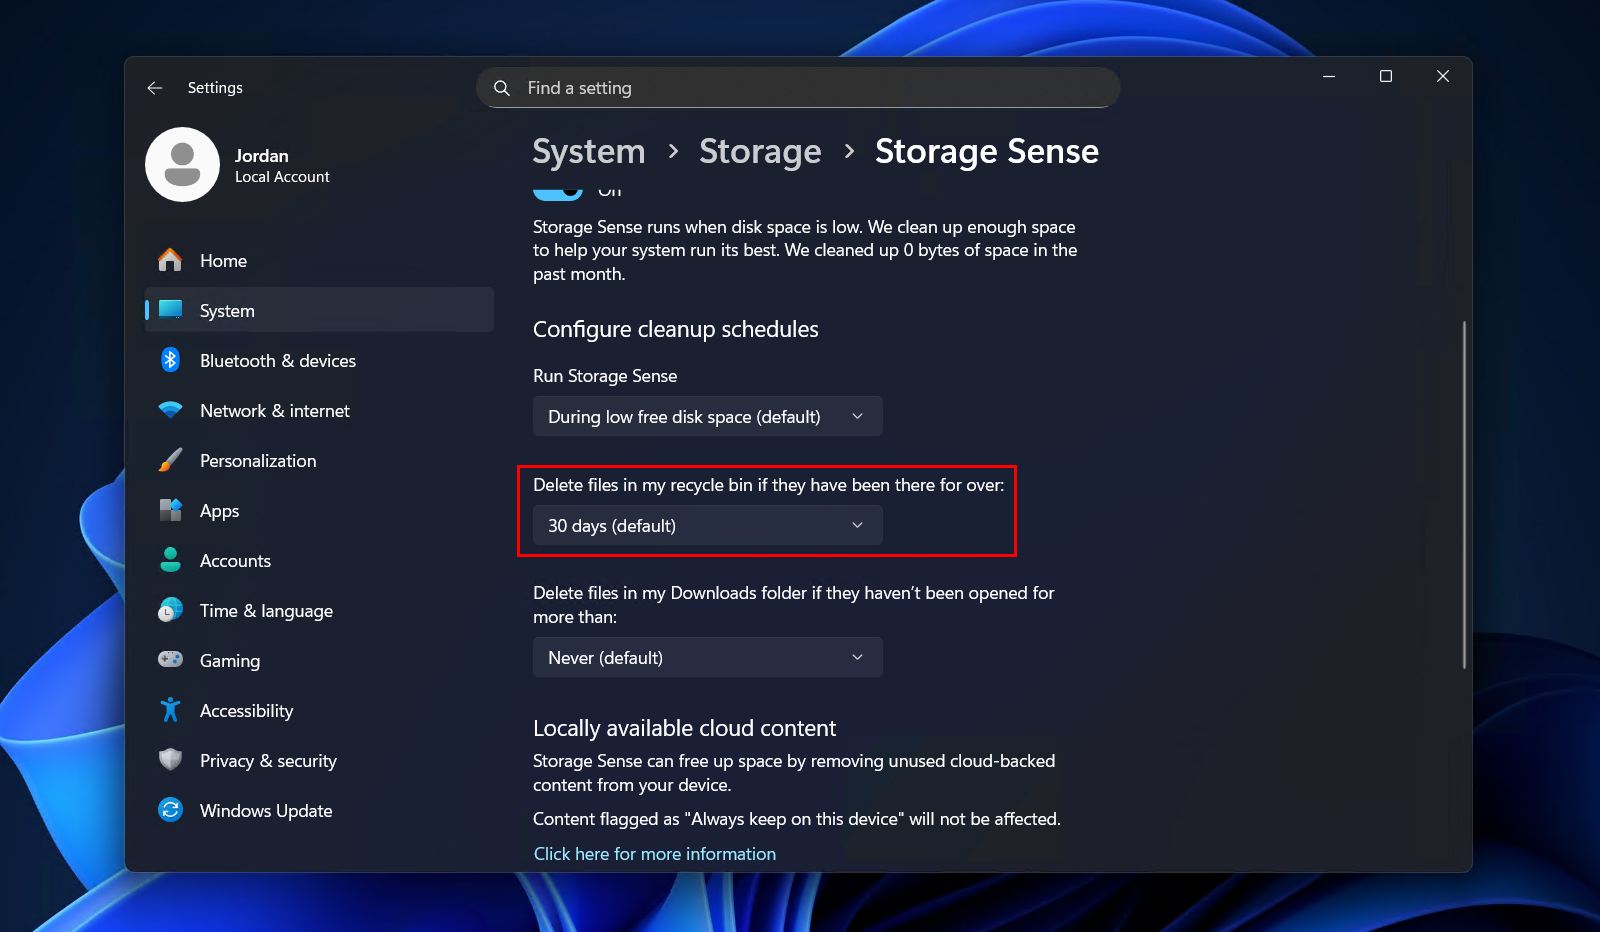
4. Tune Storage Sense
Windows 11 comes with Storage Sense, a storage optimization utility that helps keep Windows running smoothly by clearing up unnecessary data when the disk space is low. This includes Recycle Bin files. Storage Sense does serve a purpose, so disabling it entirely may not be what you want to do. Instead, we’ll show you how to change the frequency at which your Recycle Bin is emptied.
Here’s how to update your Storage Sense settings:
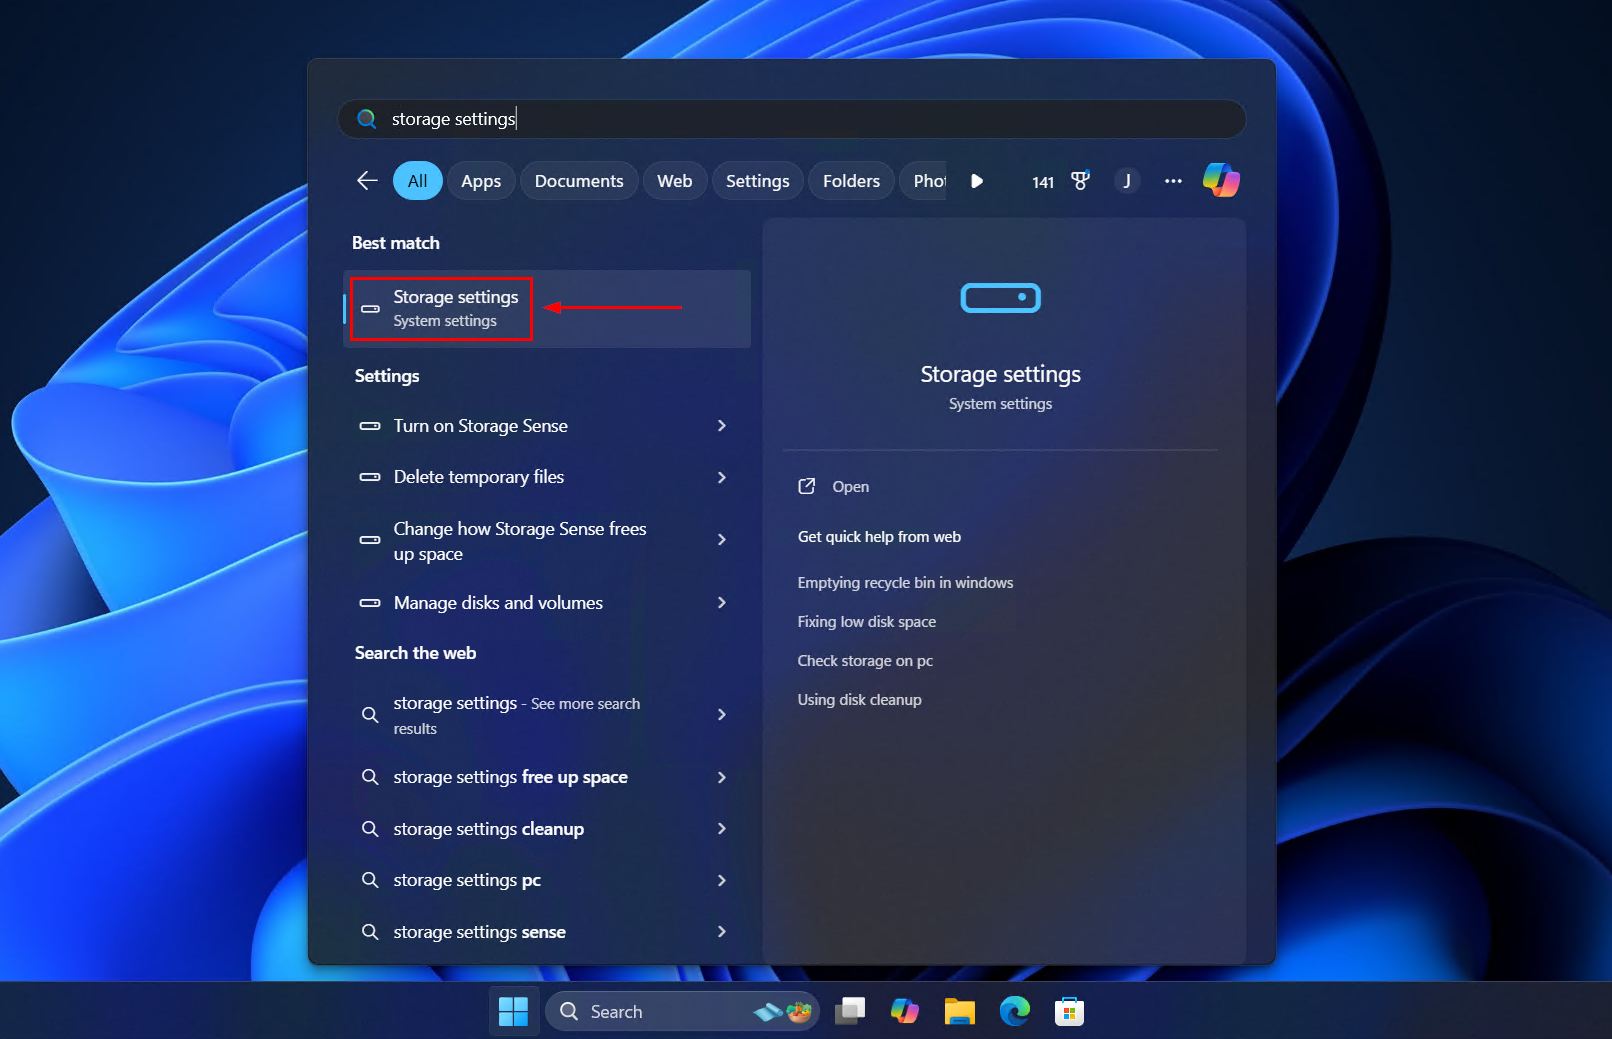
- Open Start. Search for and open “Storage settings”.
- Click Storage Sense.
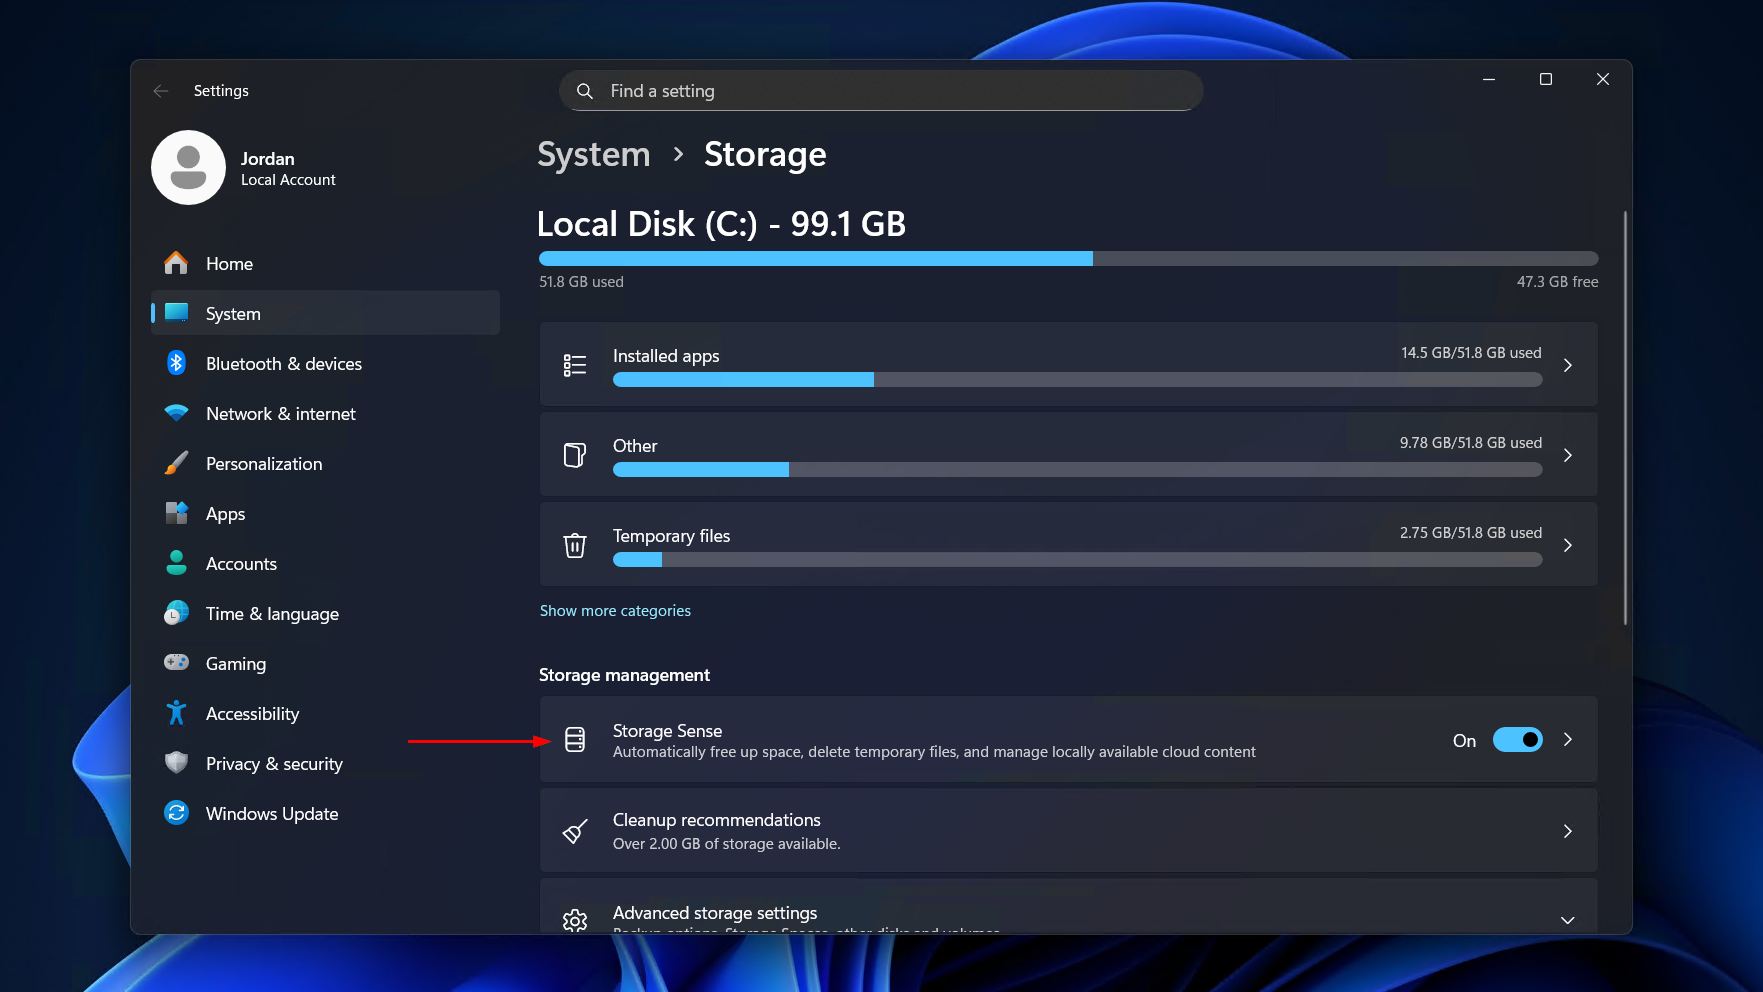
- Change the Delete files in my recycle bin if they have been there for over dropdown to your desired timeframe. E.g. If you don’t want Storage Sense to touch the Recycle Bin at all, change it to Never.
Of course, while this is all well and good for files that you’re deleting with intention, you should also account for instances of unexpected data loss. So, in addition to the above changes, consider implementing a reliable backup strategy (like the 3-2-1 rule) to safeguard the data against both intentional and unintentional data loss in the future.
FAQ
Yes. You can recover a deleted folder using data recovery software, as long as the data hasn’t been overwritten. As soon as you notice the folder is deleted, scan the drive immediately to maximize your recovery chances. If File History or a cloud backup was enabled, restoring the folder this way has a better chance of retaining the original folder structure.
A cut-and-paste operation interrupted by a system crash or disconnected drive will cause the data to get lost. Unless you have a backup to restore the file from, you should stop using the source drive straight away and use data recovery software to find the cut file, just as you would when a deleted file is not in the Recycle Bin. In future, always opt for copy-and-paste, as you can always delete the original file once you’ve pasted it elsewhere.
Since the file was hosted in OneDrive, there’s a good chance you’ll find it in the OneDrive Recycle Bin instead. Right-click the OneDrive icon in the system tray, then click Recycle Bin. Here, you will find your recently deleted files, even those that bypassed the Windows Recycle Bin. However, these will only remain for 30 days, after which they’re gone for good.
Yes, if you act quickly enough. For security reasons, most antivirus programs delete or quarantine files without using the Recycle Bin. Files can be restored from quarantine or recovered using data recovery software. For example, you can recover files deleted by Avast Antivirus by restoring them from its Virus Chest, or if the file was deleted, recover them with Disk Drill (granted it hasn’t been securely wiped by your antivirus).