If you lost files from a FAT (FAT32) partition, lost access to it, or accidentally deleted important data, you’re in the right place. In many cases, FAT file recovery is still possible – all you need is the right tool and the right steps. And here we will show you just that: how to approach FAT32 recovery, what affects your chances of success, and which methods can help safely.
Why FAT/FAT32 Recovery Often Works
One reason FAT/FAT32 file recovery often works well is that deleting a file usually does not erase its actual contents right away – the file system only marks the file’s directory entry as deleted and marks its clusters as free to use again. Until new data overwrites those clusters, a recovery tool may still be able to restore the file.
If you continue to copy files, install apps, or record new videos, the system may reuse the exact space where the deleted FAT32 files still sit. Once that happens, recovery becomes impossible. (That said, you cannot know in advance exactly which space has been reused, so it still makes sense to scan the affected storage device and see what can be recovered.)
Fragmentation can make things trickier too. If a file was stored in many separate clusters across the drive instead of one continuous block, a FAT recovery tool has to reconstruct that chain correctly. (That is one reason fragmented videos are often harder to recover cleanly than small contiguous files.)
Another common problem is damage to the FAT itself or to directory entries. In those cases, the raw file data may still exist on the device, but the file system information that ties it to its original name, folder, size, or cluster chain may be incomplete or gone. That’s why some FAT recovery cases still return files, but without their original names or folder structure.
Main Differences Between FAT12, FAT16, and FAT32
In the context of data recovery, the main difference between FAT12, FAT16, and FAT32 is not just how much storage they support, but the kinds of devices they usually appear on and the recovery situations they tend to involve:
- FAT12 usually appears on very old or very small media. For most people, it only matters in niche recovery cases involving legacy devices, floppy disk images, or embedded systems. In those situations, the recovery challenge is often simply getting the device connected to a modern PC in a way that lets recovery software scan it.
- FAT16 is more common on small partitions and legacy removable storage. Recovery is often fairly straightforward if the deletion was recent and the device is still readable (but in practice, file system damage may come bundled with aging hardware issues).
- FAT32 is the version most people will care about. It is still widely used on USB flash drives, memory cards, cameras, different removable devices because it works across many operating systems. Its 4 GB maximum file size also matters in recovery cases, since long videos are often split into chunks, and if you don’t know that, it’s easy to mistake that normal behavior for corruption or missing footage.
How to Recover Data from FAT16/FAT32/exFAT Hard Drive:
As we already said, deleting a file in the FAT file system simply means removing it from the FAT table. The data remains untouched until the clusters are overwritten by another file. As a result, deleted data can be recovered with some FAT recovery software before the storage space is used again.
Recover Using Disk Drill Data Recovery
Disk Drill is available for Windows and Mac computers. The Basic version is available for free download. The full version is commercial. Both versions can be used to retrieve lost files from a storage device using the FAT file system. Disk Drill tends to show strong results across FAT12, FAT16, FAT32 (and more) volumes, and it works in many different recovery scenarios, whether you only deleted a few files or lost an entire partition because it was formatted, corrupted, deleted, or otherwise became inaccessible. A big reason for that is its multiple scan methods, plus extra features we’ll touch on later.
Follow these steps to recover data from a FAT drive using Disk Drill:
- Download and install Disk Drill.
- Open the app and select the FAT drive or partition.
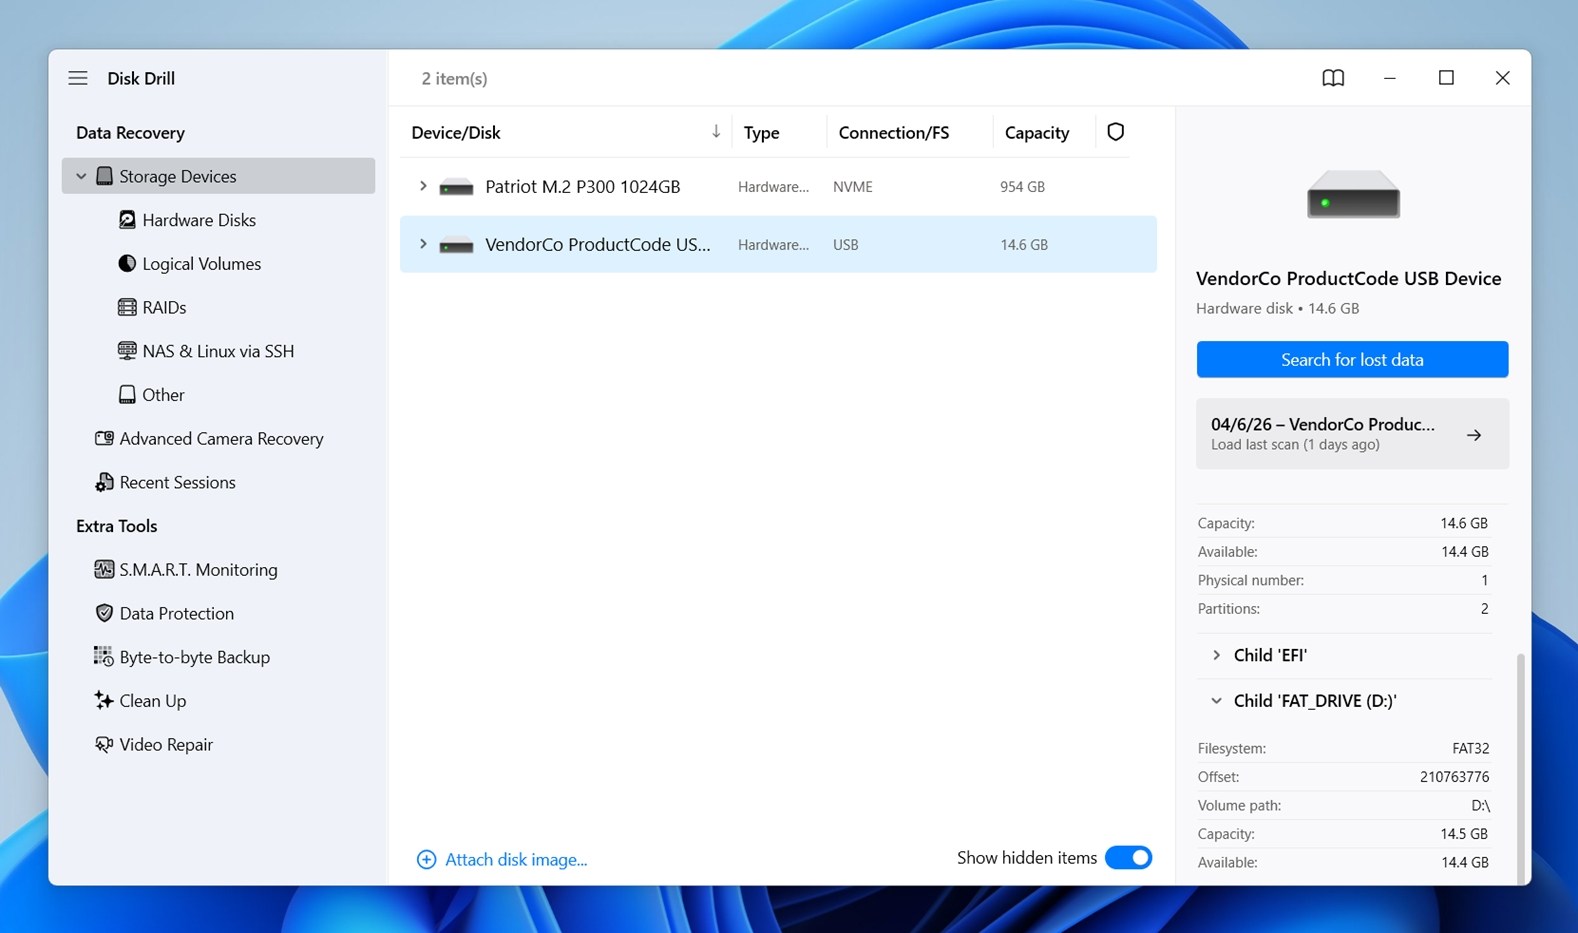 (We recommend selecting the entire physical drive instead of just the partition, since this gives the tool a better chance to find deleted data or lost partition information.)
 - Once selected, click Search for lost data. If Disk Drill asks which scan mode to use, go with Universal Scan.
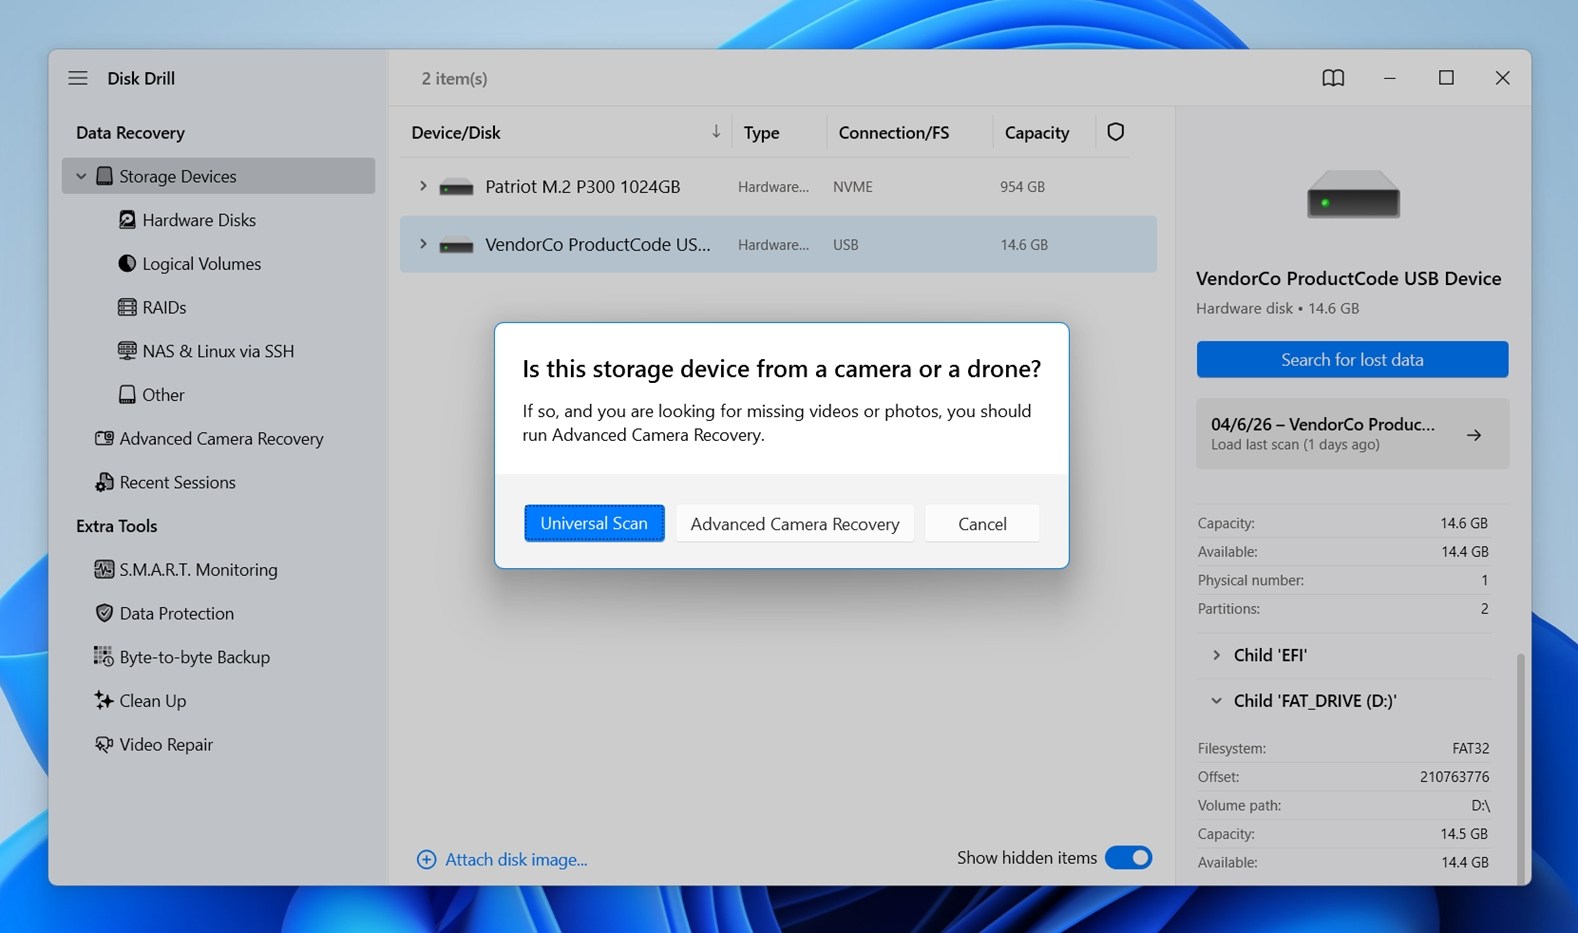 In most FAT/FAT32 recovery cases, this is the best starting point because it combines several recovery methods (Quick and Deep scan) and gives you the broadest search right away.
 - Click Review found items to check what Disk Drill found in its scan.
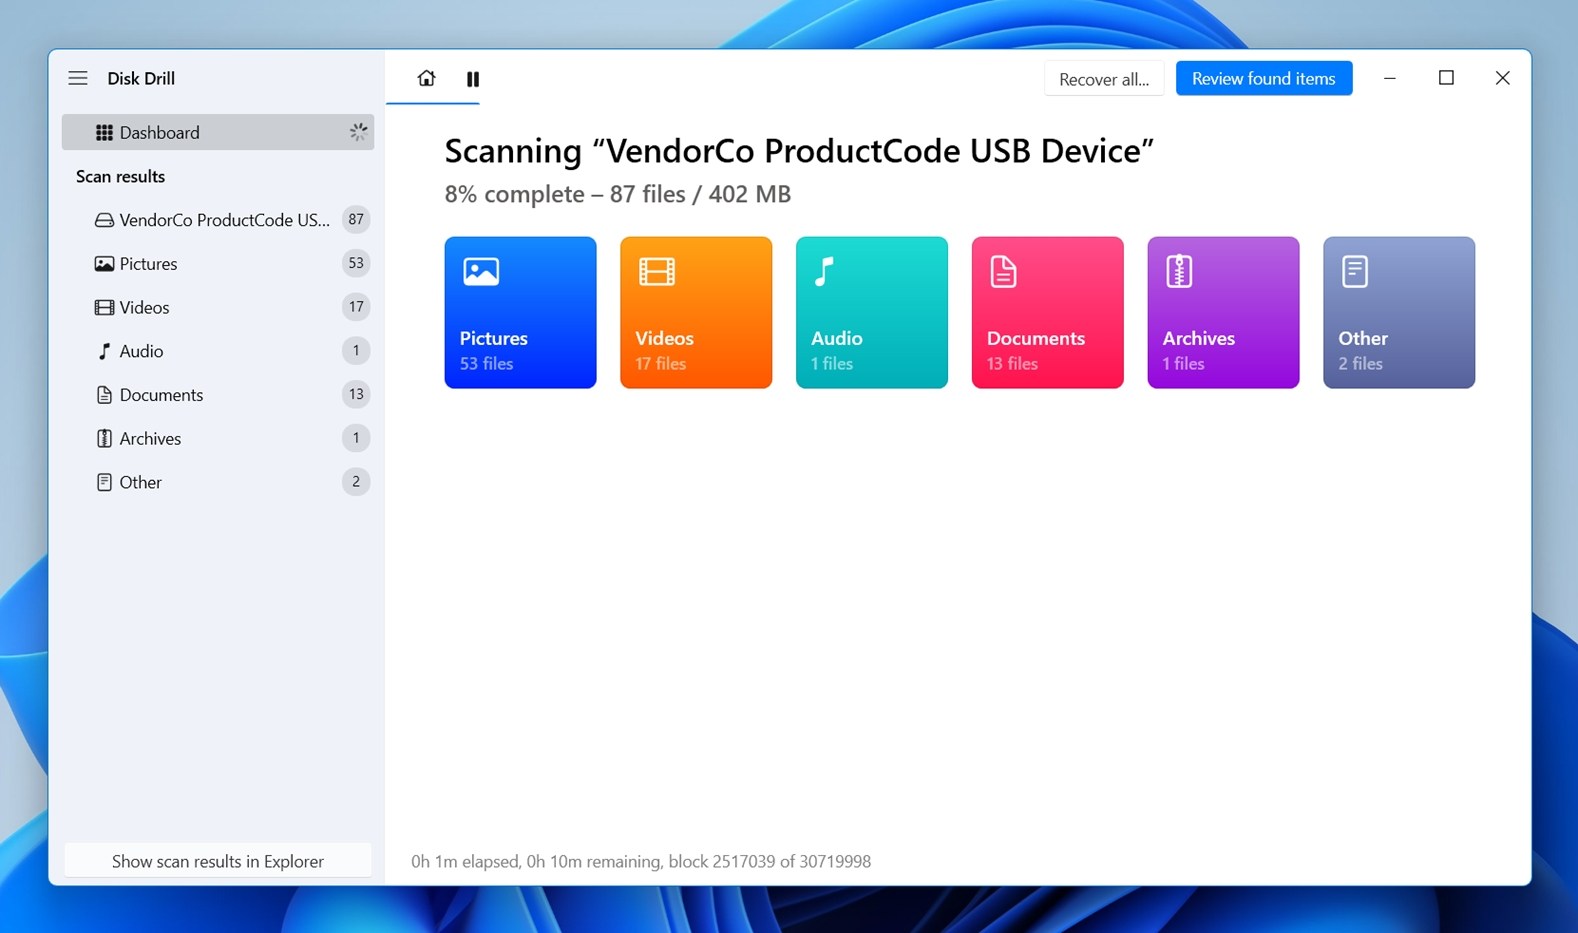 You can wait for the scan to reach 100% for the complete results, but you don’t have to. (Disk Drill starts showing found files during the scan, so you can begin reviewing them earlier if needed.)
You can also pause & resume the scan, and the app lets you save the session so you can return to it later without starting over. - Mark the files you want to recover.
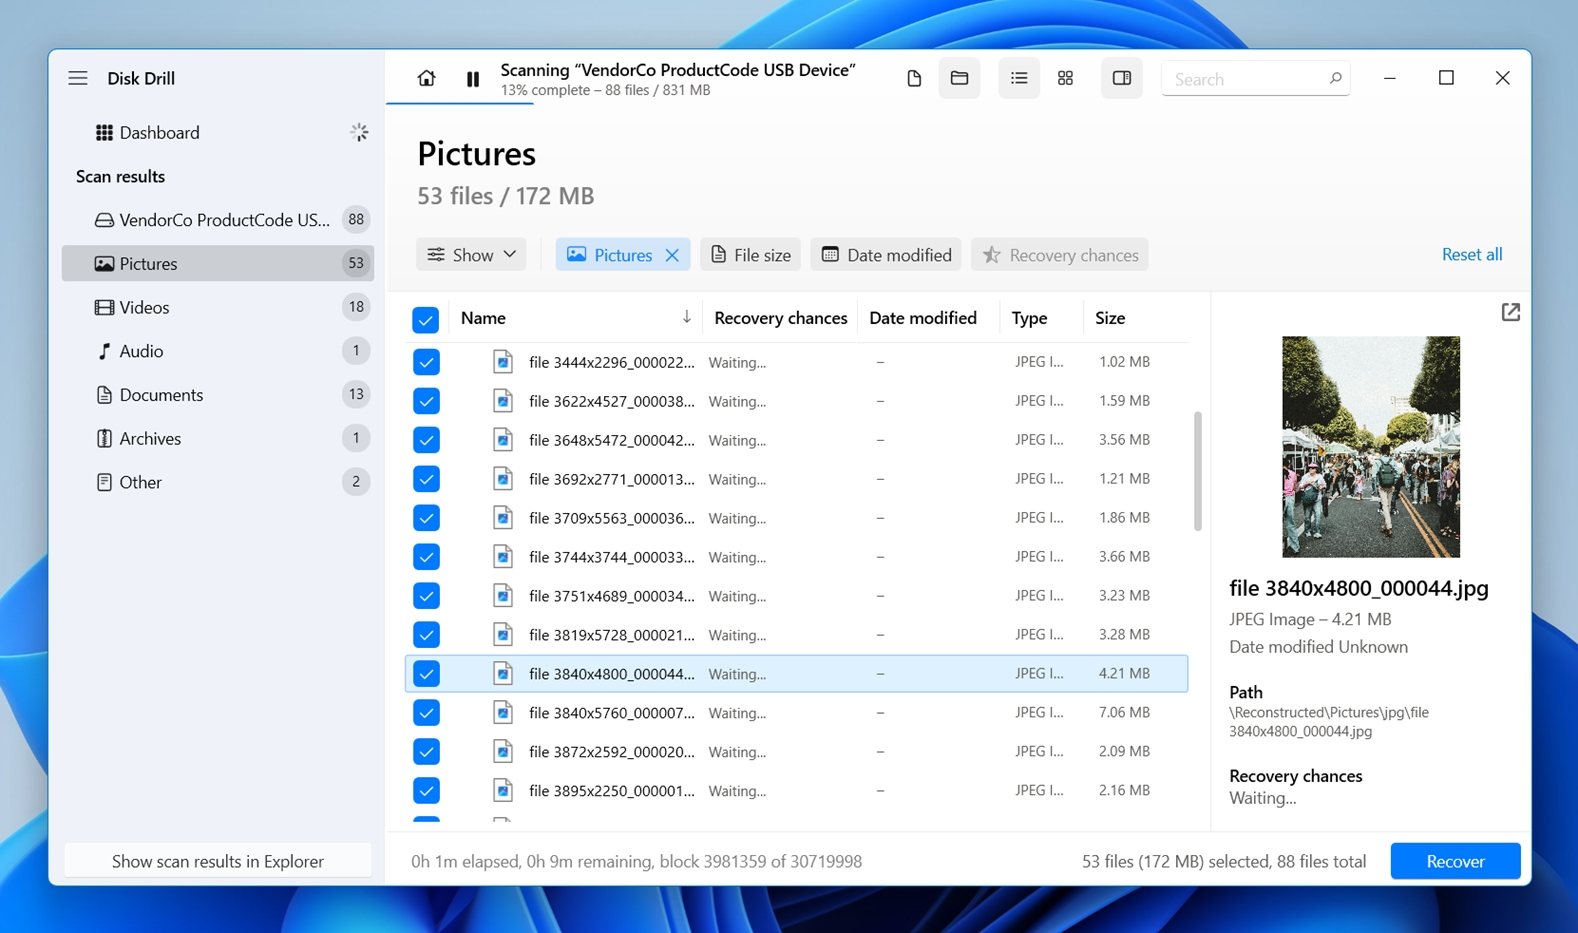 You can narrow your search using the search bar or by choosing the file type you want to view on the left. Disk Drill groups results into broad categories like Pictures, Video, Audio, Documents, and so on, and it may also break them down into more specific subcategories to make browsing easier. This can save a lot of time when you only need to recover deleted FAT32 files of a certain type.
 - When you’re ready, click Recover.
- Choose where you want to store the recovered files.
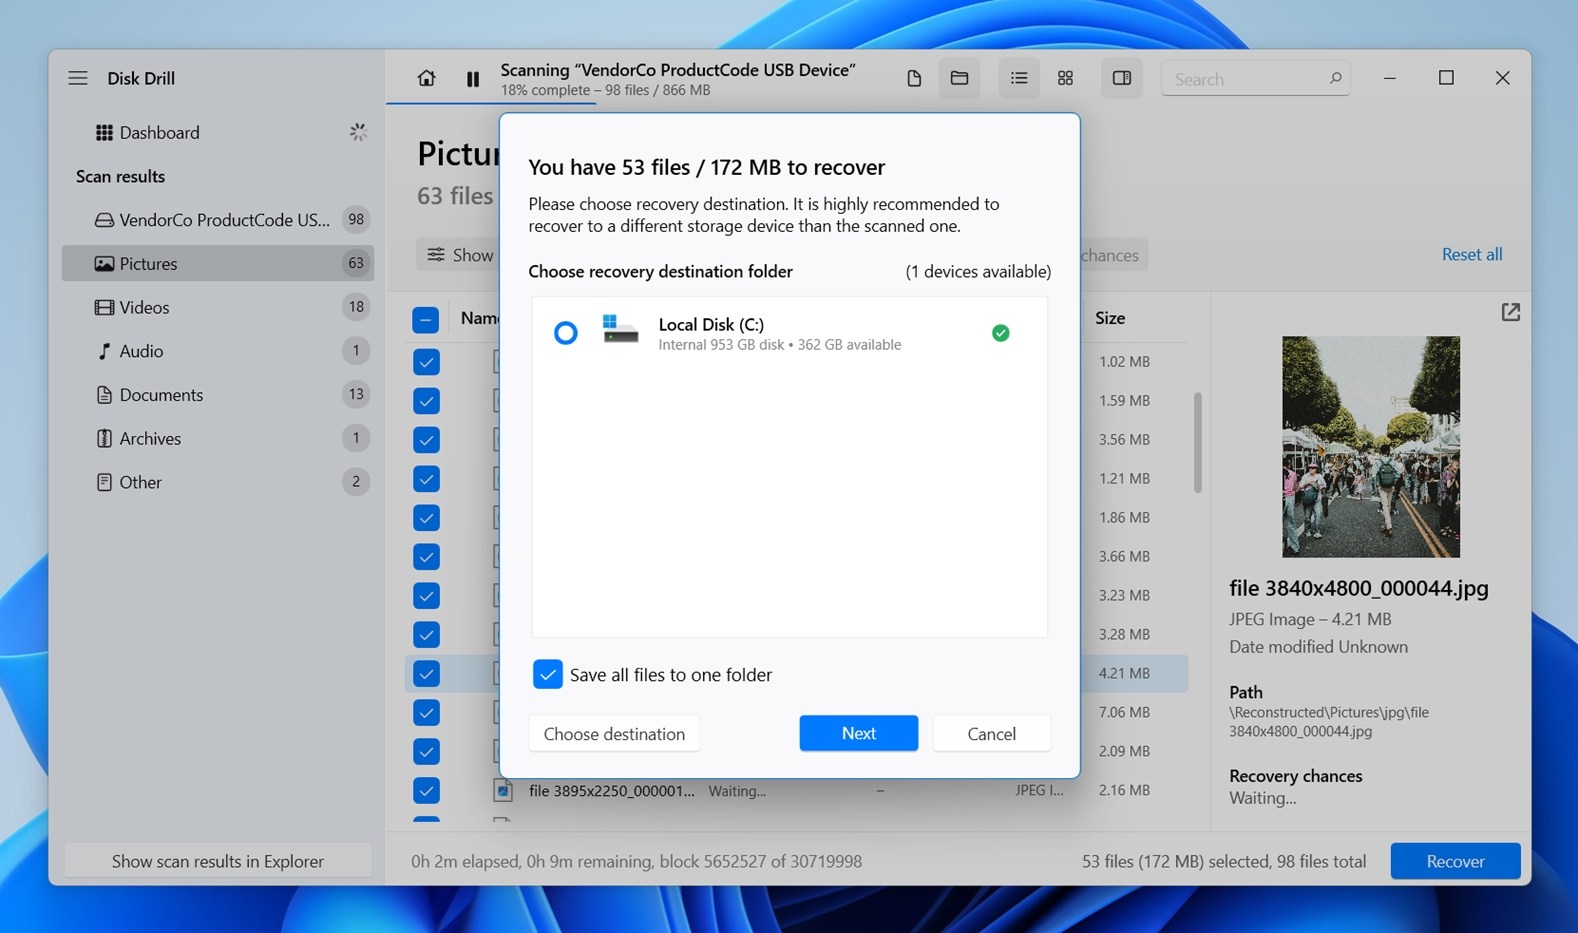 Make sure you’re not recovering to the same drive you’re recovering from. Click Next.

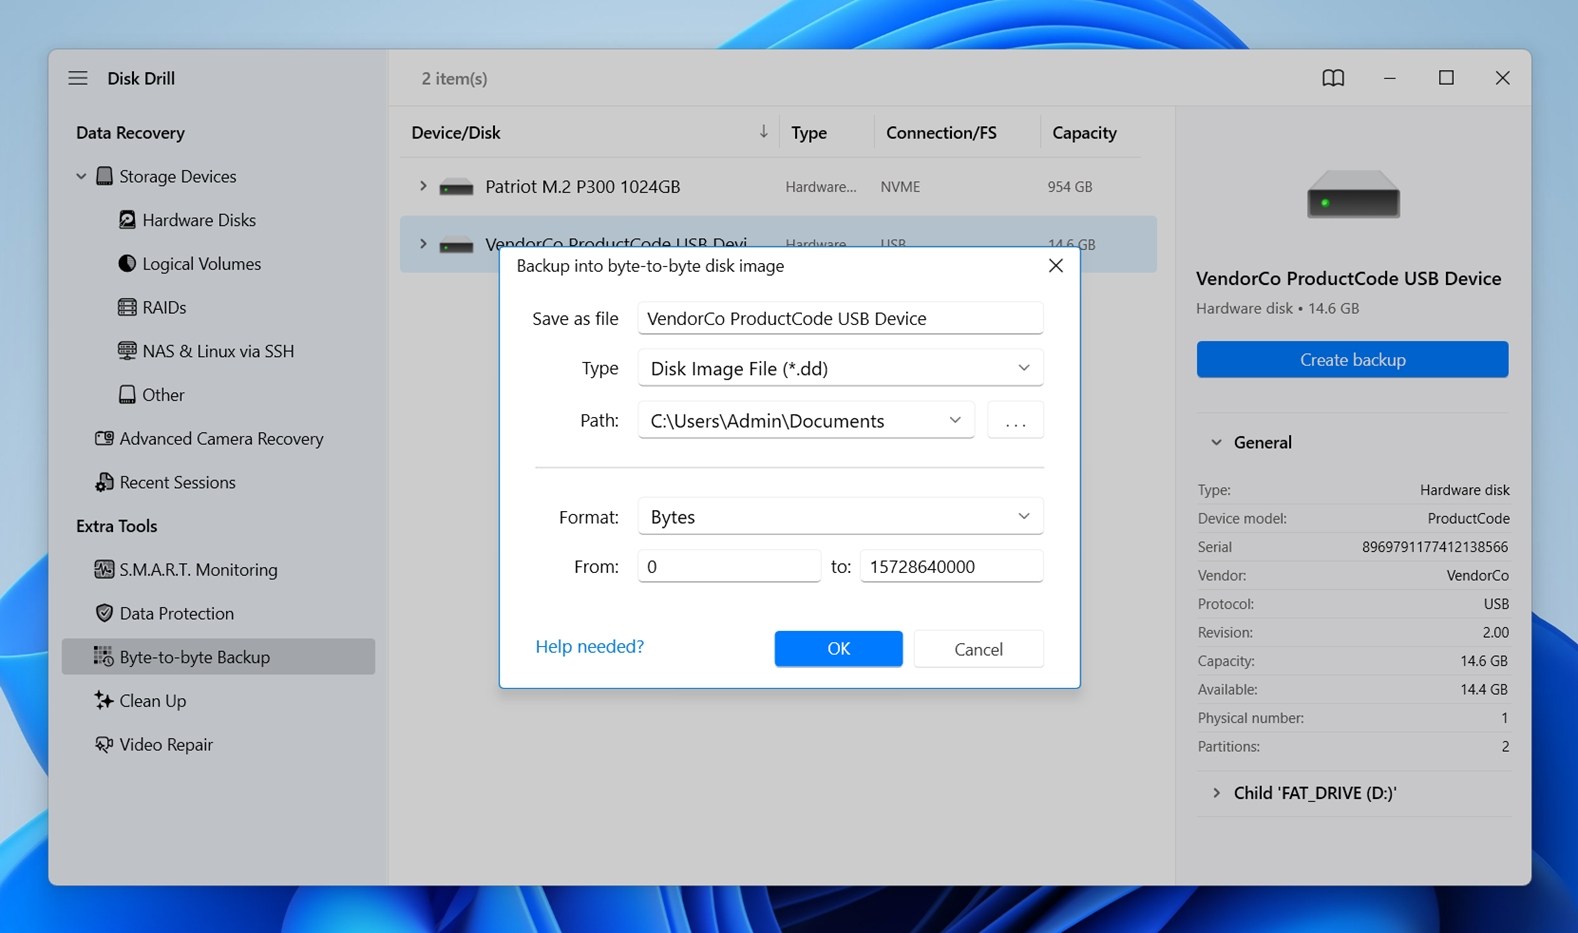 In Disk Drill, connect the problem device, open the Byte-to-byte Backup in the menu, choose the affected drive, and save the image to a different healthy disk (you’ll need at least as much free space on it as the full capacity of the source device; a little extra is even better). After that, click on Attach the image in Disk Drill and scan it like a regular drive.
Recover Using TestDisk
TestDisk is a completely free data recovery tool. Unlike its partner tool PhotoRec which specializes in the recovery of individual data, TestDisk is able to recover entire partitions. It’s a popular go-to. It supports several file systems, including FAT. That said, it helps in different cases than the previous tool. TestDisk is most useful when a FAT or FAT32 partition was deleted, became unreadable, lost its partition entry, or no longer mounts (even though the data may still be there).
It is not the best pick when you just want a capable undelete FAT32 tool with previews and an easy UI (although it does include basic undelete FAT capabilities). So it makes more sense to see it as a specialized software for partition recovery and structural repair.
As it’s a command-line tool, it can be difficult for some users. However, by following the steps below, you can recover data from your FAT drive using TestDisk:
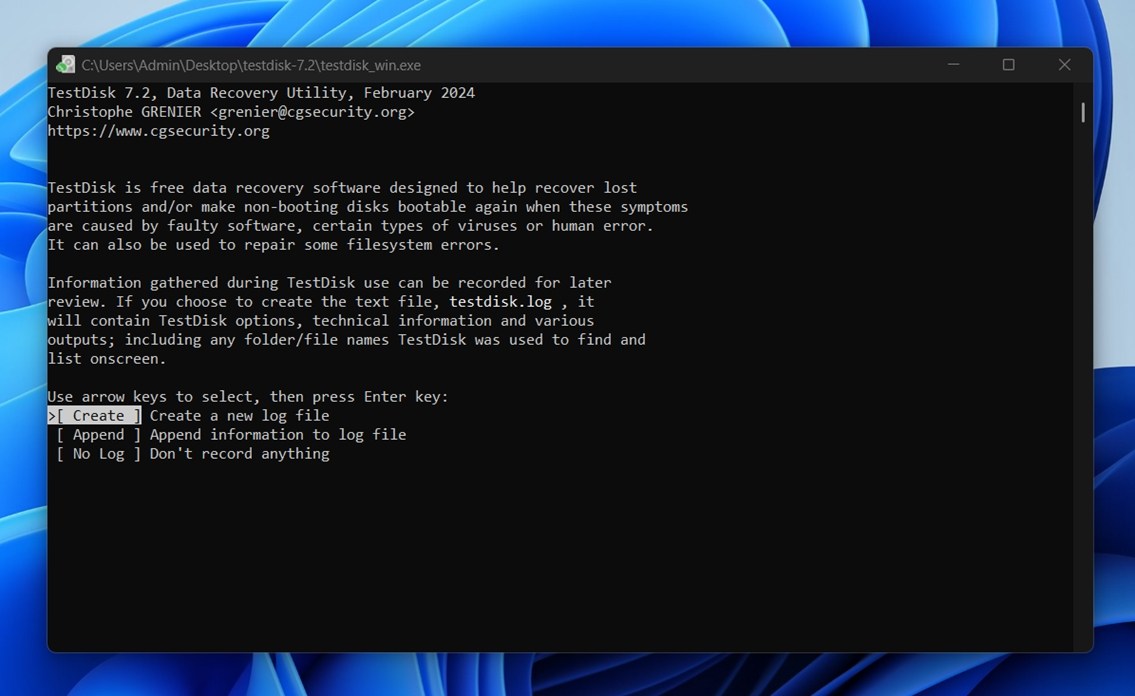
- Download and unzip the TestDisk files. Open testdisk_win.
- Press Enter on the Create option.
- Select the drive that contains the FAT partition, then press Enter.
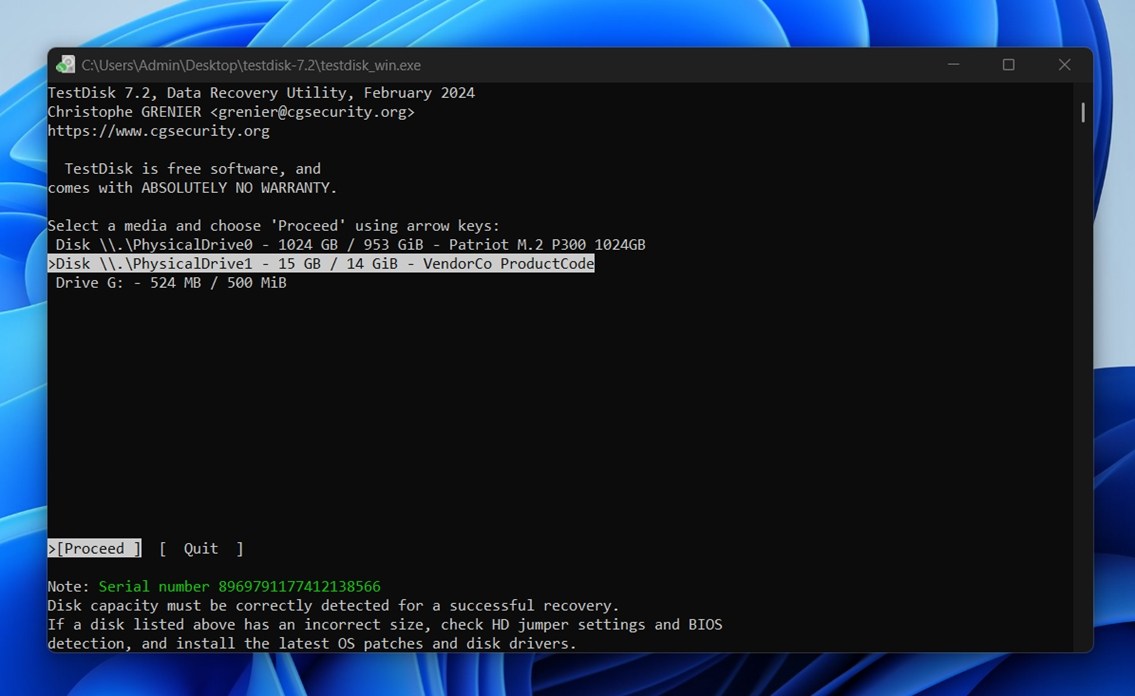
- Select your partition table type. TestDisk generally auto-detects this if you’re unsure.
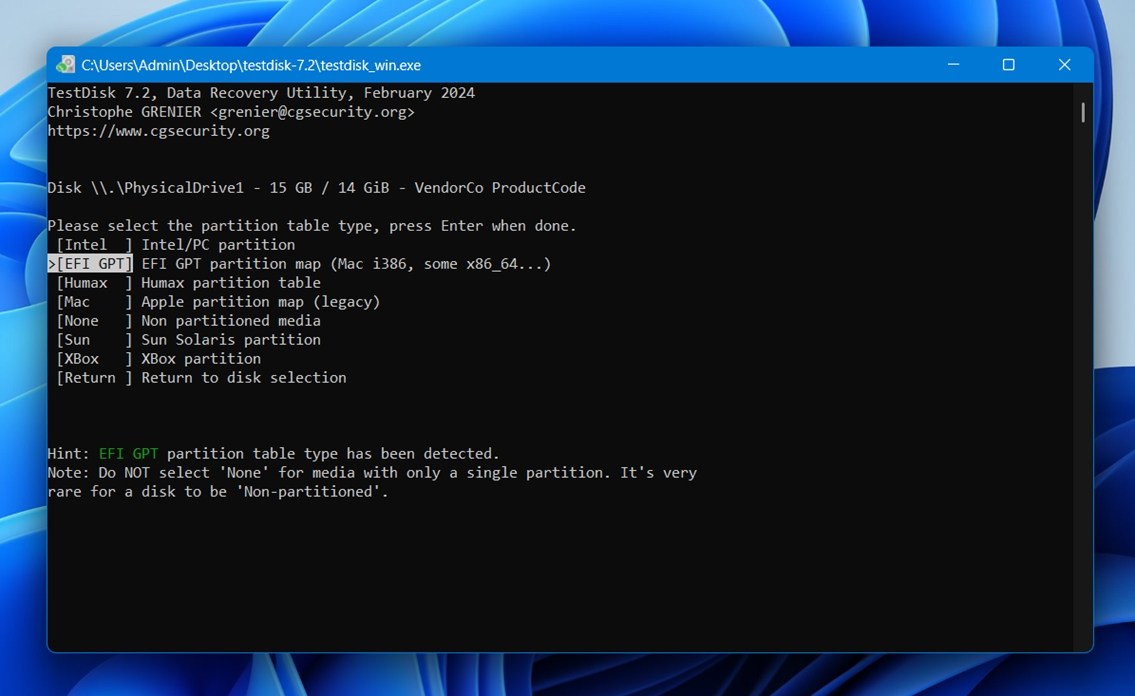 Press Enter.
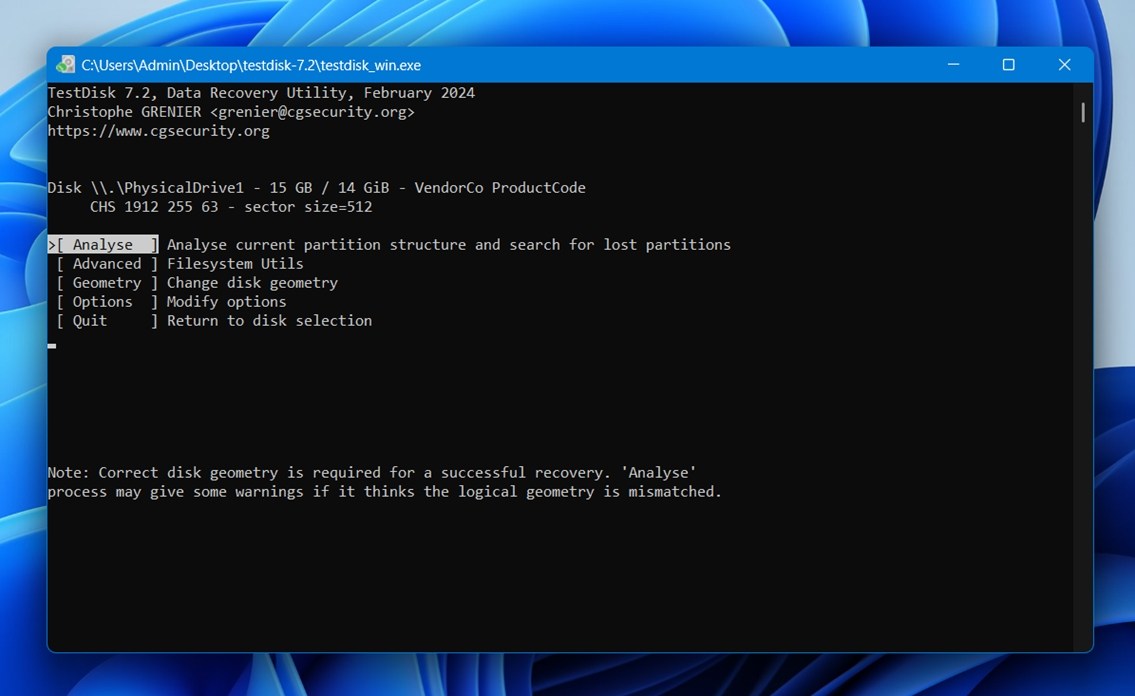
 - Press Enter on the Analyse option.
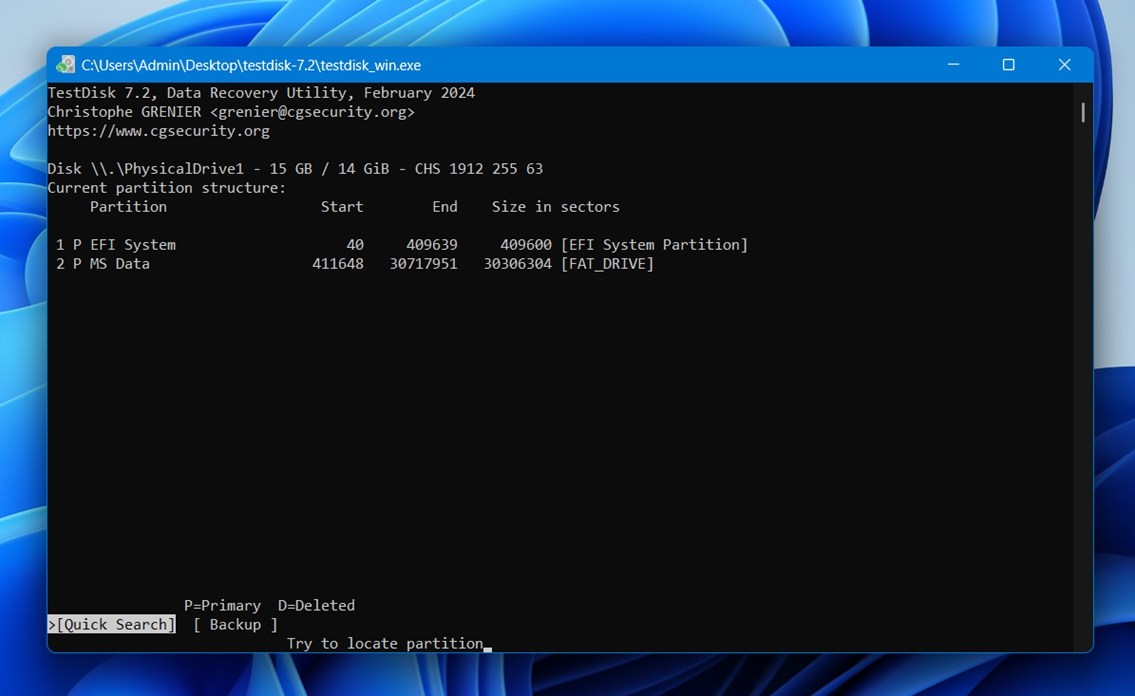
- Press Enter again to start a Quick Search.
- Press Enter on the found partition.
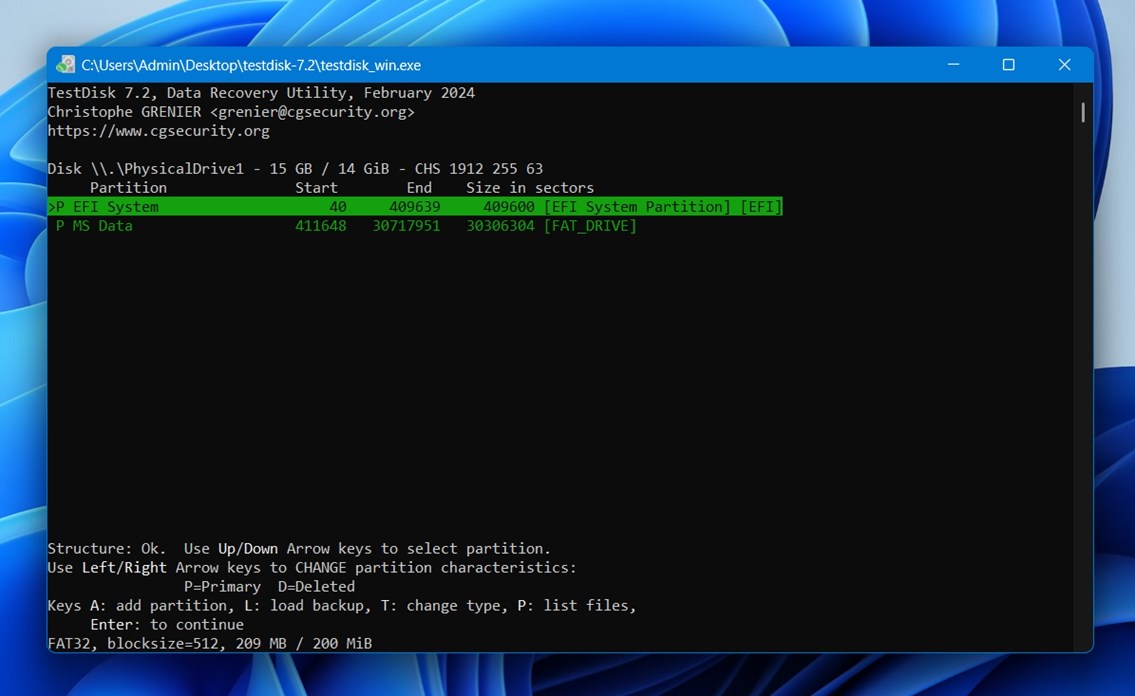
- Move to the Write option, then press Enter. If nothing was found, you can perform a Deeper Search instead.
- Press Y to confirm the action. Restart your computer to confirm the changes.
Recover Using a Data Recovery Service
In many FAT/FAT32 cases, data recovery software is more than enough, which is why we usually recommend trying DIY FAT file recovery first. If the problem is logical (accidental deletion, quick formatting, file system corruption, or a lost partition), there is often little a recovery lab can do that you cannot at least attempt yourself at home with the right tool.
That said, software recovery is not always enough. In more serious cases (if the drive has hardware damage, severe unstable behavior, or the device itself is failing), a professional data recovery service becomes the next step. It is not usually the first choice because it costs much more than software, but it can offer the best chance in cases that go beyond “normal” (logical) data loss. Professional services use specialized hardware, controlled environments, and advanced imaging and repair techniques to work with damaged devices more safely.
So while we often recommend DIY FAT32 data recovery, a lab makes sense when the data is valuable, or the device shows signs of physical trouble. But before you choose a service, keep a few things in mind:
- Check the company’s reputation (look for strong reviews, a real track record, and clear information about how they handle things).
- Prefer a no-recovery, no-fee policy (many labs offer this – it lowers the risk if your data cannot be recovered).
- A good service should explain how they inspect the device, what they charge for diagnosis, and how they report the results.
- Stop using the device before sending it in.
- Avoid repeated DIY attempts if the device seems unstable.
How to Create a Low-Level Backup of FAT File System
Before FAT file recovery, it can be smart to create a low-level backup of the device first, especially if the drive is unstable. Since FAT and FAT32 are mostly common on USB flash drives, memory cards, and other external storage, the easiest way to do this is with a built-in imaging feature in a recovery app like Disk Drill, which we mentioned earlier. But if you want a manual alternative, or you cannot create the backup from within Windows or macOS, you can also make a sector-by-sector image with a bootable Ubuntu USB.
To perform a low-level backup, you will need to create a bootable USB containing Ubuntu Linux first. Once your USB is prepared, follow these steps:
- Insert the USB to the computer while it’s powered down.
- Boot from USB into the Linux environment.
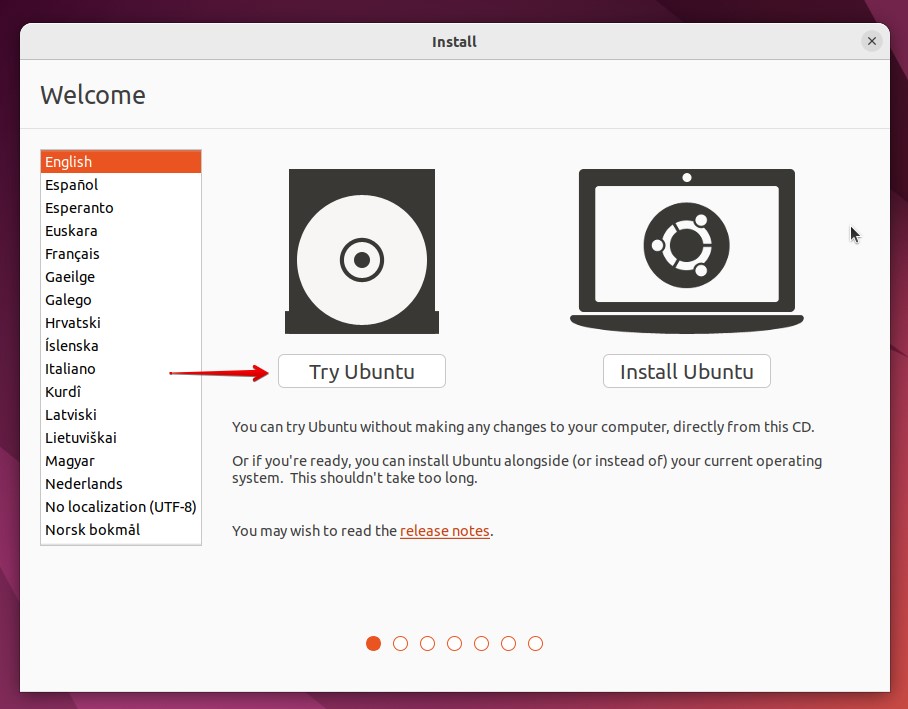
- Press Enter on Try or Install Ubuntu.

- Click Try Ubuntu.
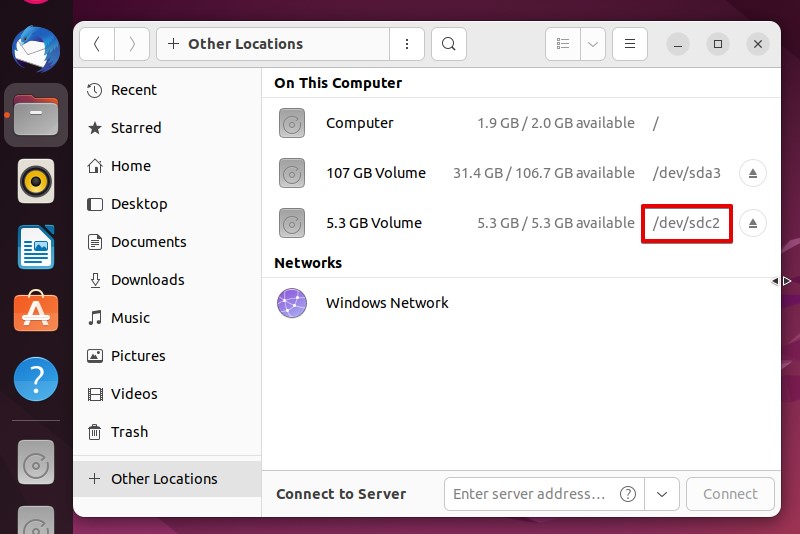
- Click Files, then Other Locations. Make note of the identifier for your FAT partition.
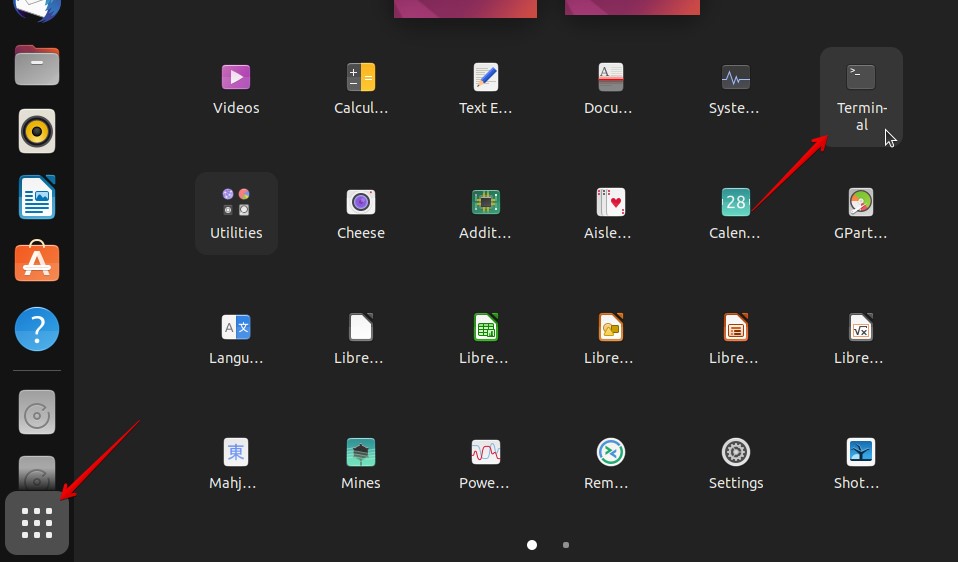
- Click the Show Applications to view all the apps included with Ubuntu, then open Terminal.
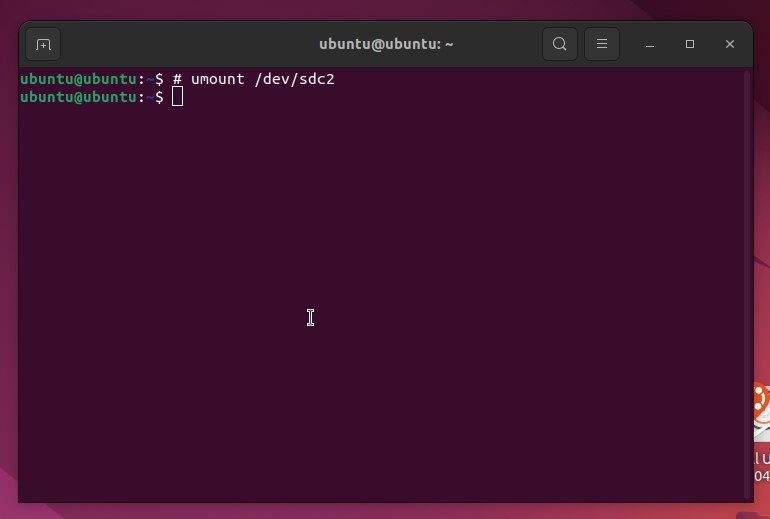
- Type sudo umount /dev/sdc2. Replace /dev/sdc2 with your own disk’s identifier. Press Enter. This will unmount the disk.
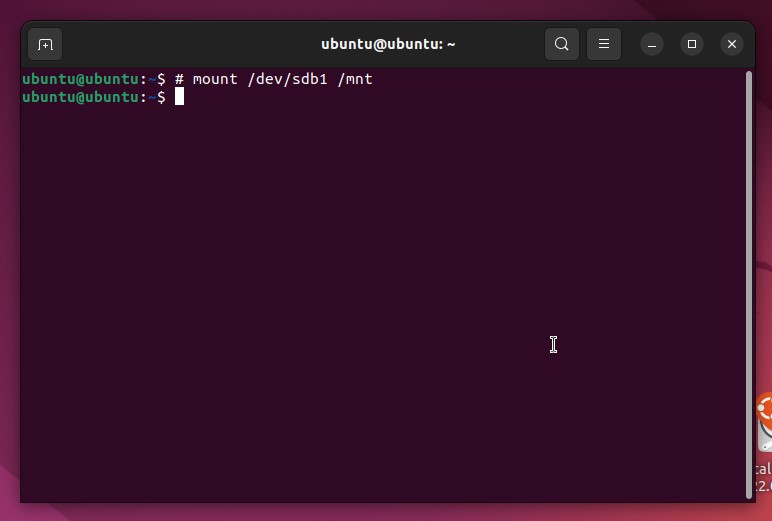
- If necessary, mount the disk you want to store the backup on. Type sudo mount /dev/sdb1 /mnt. Replace /dev/sdb1 with the path of the disk you’re using for output. Press Enter.
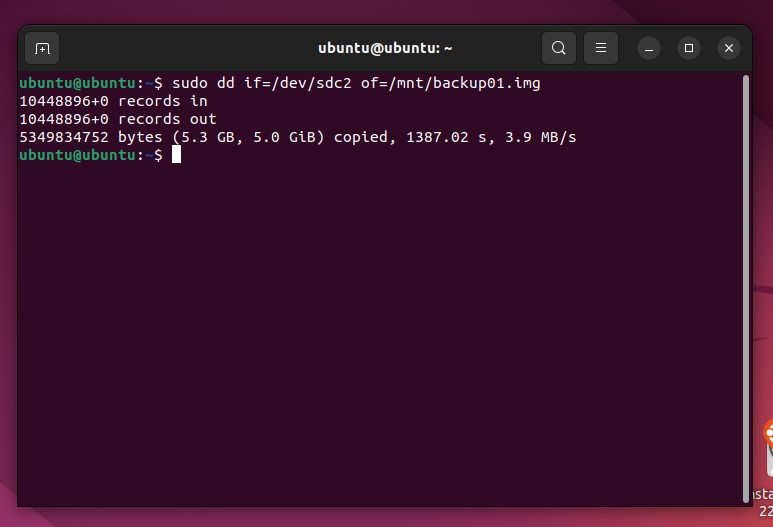
- Type sudo dd if=/dev/sdc2 of=/mnt/backup01.img. Replace /mnt/backup01.img with your own output path and file name.
How Do I Prevent Data Loss on FAT File System
If you use FAT or FAT32 storage often, the best protection is not special recovery trick. It’s habits. Most FAT data loss cases we’ve seen come from the same few things:
- The first rule is simple – keep backups of anything you care about. FAT32 is still common on all kinds of portable devices, but it is not the kind of file system you should trust as the only copy of important data. If the files matter, keep a second copy somewhere else.
- The next big one is always eject the device properly. A FAT volume can get corrupted from something as simple as unplugging it during a write operation. This matters even more with flash drives and memory cards, where people often copy files quickly and pull the device out right away.
- It also helps to watch for early warning signs. If a FAT32 drive suddenly becomes slow, asks to be formatted, disappears and reconnects, throws copy errors, or shows missing files, stop using it until you check what’s going on. A lot of people make the problem worse here. They keep trying to open files, recopy data, rerun transfers, or “test” the device. That extra activity can turn a recoverable problem into a much harder one.
- Another good habit is to avoid filling FAT32 devices to the edge (especially when you use them for cameras or other devices that write large files continuously). Storage that runs nearly full tends to behave less predictably, and FAT32 already has its own limitations, including the well-known 4 GB maximum file size.
- You should also be selective about the devices you trust. Cheap no-name flash media causes a huge amount of avoidable data loss. Counterfeit cards, failing USB sticks, worn-out memory cards are common troublemakers. If a device stores anything important, buy from a reputable brand and replace it when it starts acting strange instead of trying to squeeze more life out of it.
- Finally, if the device is important and you use it often, it makes sense to create an image backup before problems get worse. A byte-to-byte image gives you a full copy of the device’s contents in its current state, which can save you a lot of trouble later.
Conclusion
The bottom line from our guide is this: in most data loss cases, a FAT32 recovery tool like Disk Drill is the best way to go about it. If you need to recover deleted FAT32 files, or handle a quick-format situation, modern recovery software gives you the safest (and most practical) first step. The key is to stop using the device ASAP, avoid overwriting the lost data, and choose the scan mode that fits the problem. If you’re more tech-savvy, TestDisk can also help, but it’s a much “narrower” tool we’d mainly recommend for FAT partition repair and more structural FAT recovery work rather than convenient day-to-day file recovery.
And if the drive shows signs of physical failure, that’s when a professional recovery service makes more sense.
FAQ
You can recover a FAT file using Disk Drill. Follow these steps to complete FAT recovery:
- Download and install Disk Drill.
- Select the FAT drive or partition. Click Search for lost data.
- If the app prompts you to choose a scan mode, select Universal Scan.
- Click Review found items.
- Mark the files you want to recover. Click Recover.
- Choose where you want to store the recovered files. Click Next.
When a file is deleted on a FAT volume, the first byte of its directory entry is replaced with a special marker, and its clusters are marked as available for reuse in the FAT. The actual file data remains in place until new data overwrites it, which is why FAT file recovery is often possible. Recovery tools can sometimes use the remaining directory information and the still-present file data to restore deleted files, though success depends on fragmentation and whether any of the original clusters have already been reused.
You can undelete FAT32 files with several kinds of tools.
For most people, the best option is a file recovery tool like Disk Drill, Recuva, R-Studio, or UFS Explorer. These are built to scan FAT32 volumes for deleted files and try to restore them before the data gets overwritten.
You can also use TestDisk, which includes some basic undelete FAT32 file recovery features, but that is not really its main role. TestDisk is better known for structural recovery. Its bundled companion PhotoRec can recover files too, but it never preserves original file names or folder structure.