Everyone loves the convenience of taking and sharing digital photos. You can store thousands of pictures on your Mac from where you can easily send them to friends and family. Unfortunately, it is really easy to accidentally lose or delete some of these precious memories. In the time it takes to press a key, a whole lot of irreplaceable pictures can be lost.
![]()
In this article, we will show you how to recover deleted photos on Mac using multiple different techniques. Hopefully, one of these methods will help you get your valuable images back.
Photo Loss Scenarios & Recovery Solutions
There are many ways photos can be lost from your Mac. The following table describes common photo loss scenarios and directs you to the best method of attempting recovery.
| Photo loss scenario | Recovery technique |
| I accidentally deleted an important picture from the Photo app. | Use the app’s Recently Deleted Folder. |
| I deleted a folder of photos from the Finder app. | Try recovering from the Mac Trash Bin. |
| I lost some photos and have emptied my Trash bin. | Data recovery software is the best choice for this situation. |
| I just formatted a partition that contained all of my photos. | Data recovery software can get them back. |
| My photos are gone, but I did back up my machine last week with Time Machine. | Use the Time Machine backup to restore your photos. |
| I deleted photos on a mobile device and now they are gone from my computer too! | You should be able to recover the photos from iCloud using the recently deleted album. |
| I discovered a virus that has deleted some of my photos. | Data recovery software or a backup may be able to get your images back. |
Now we will demonstrate how to recover deleted photos on Mac using five different methods. One of these should be able to get your valuable pictures back.
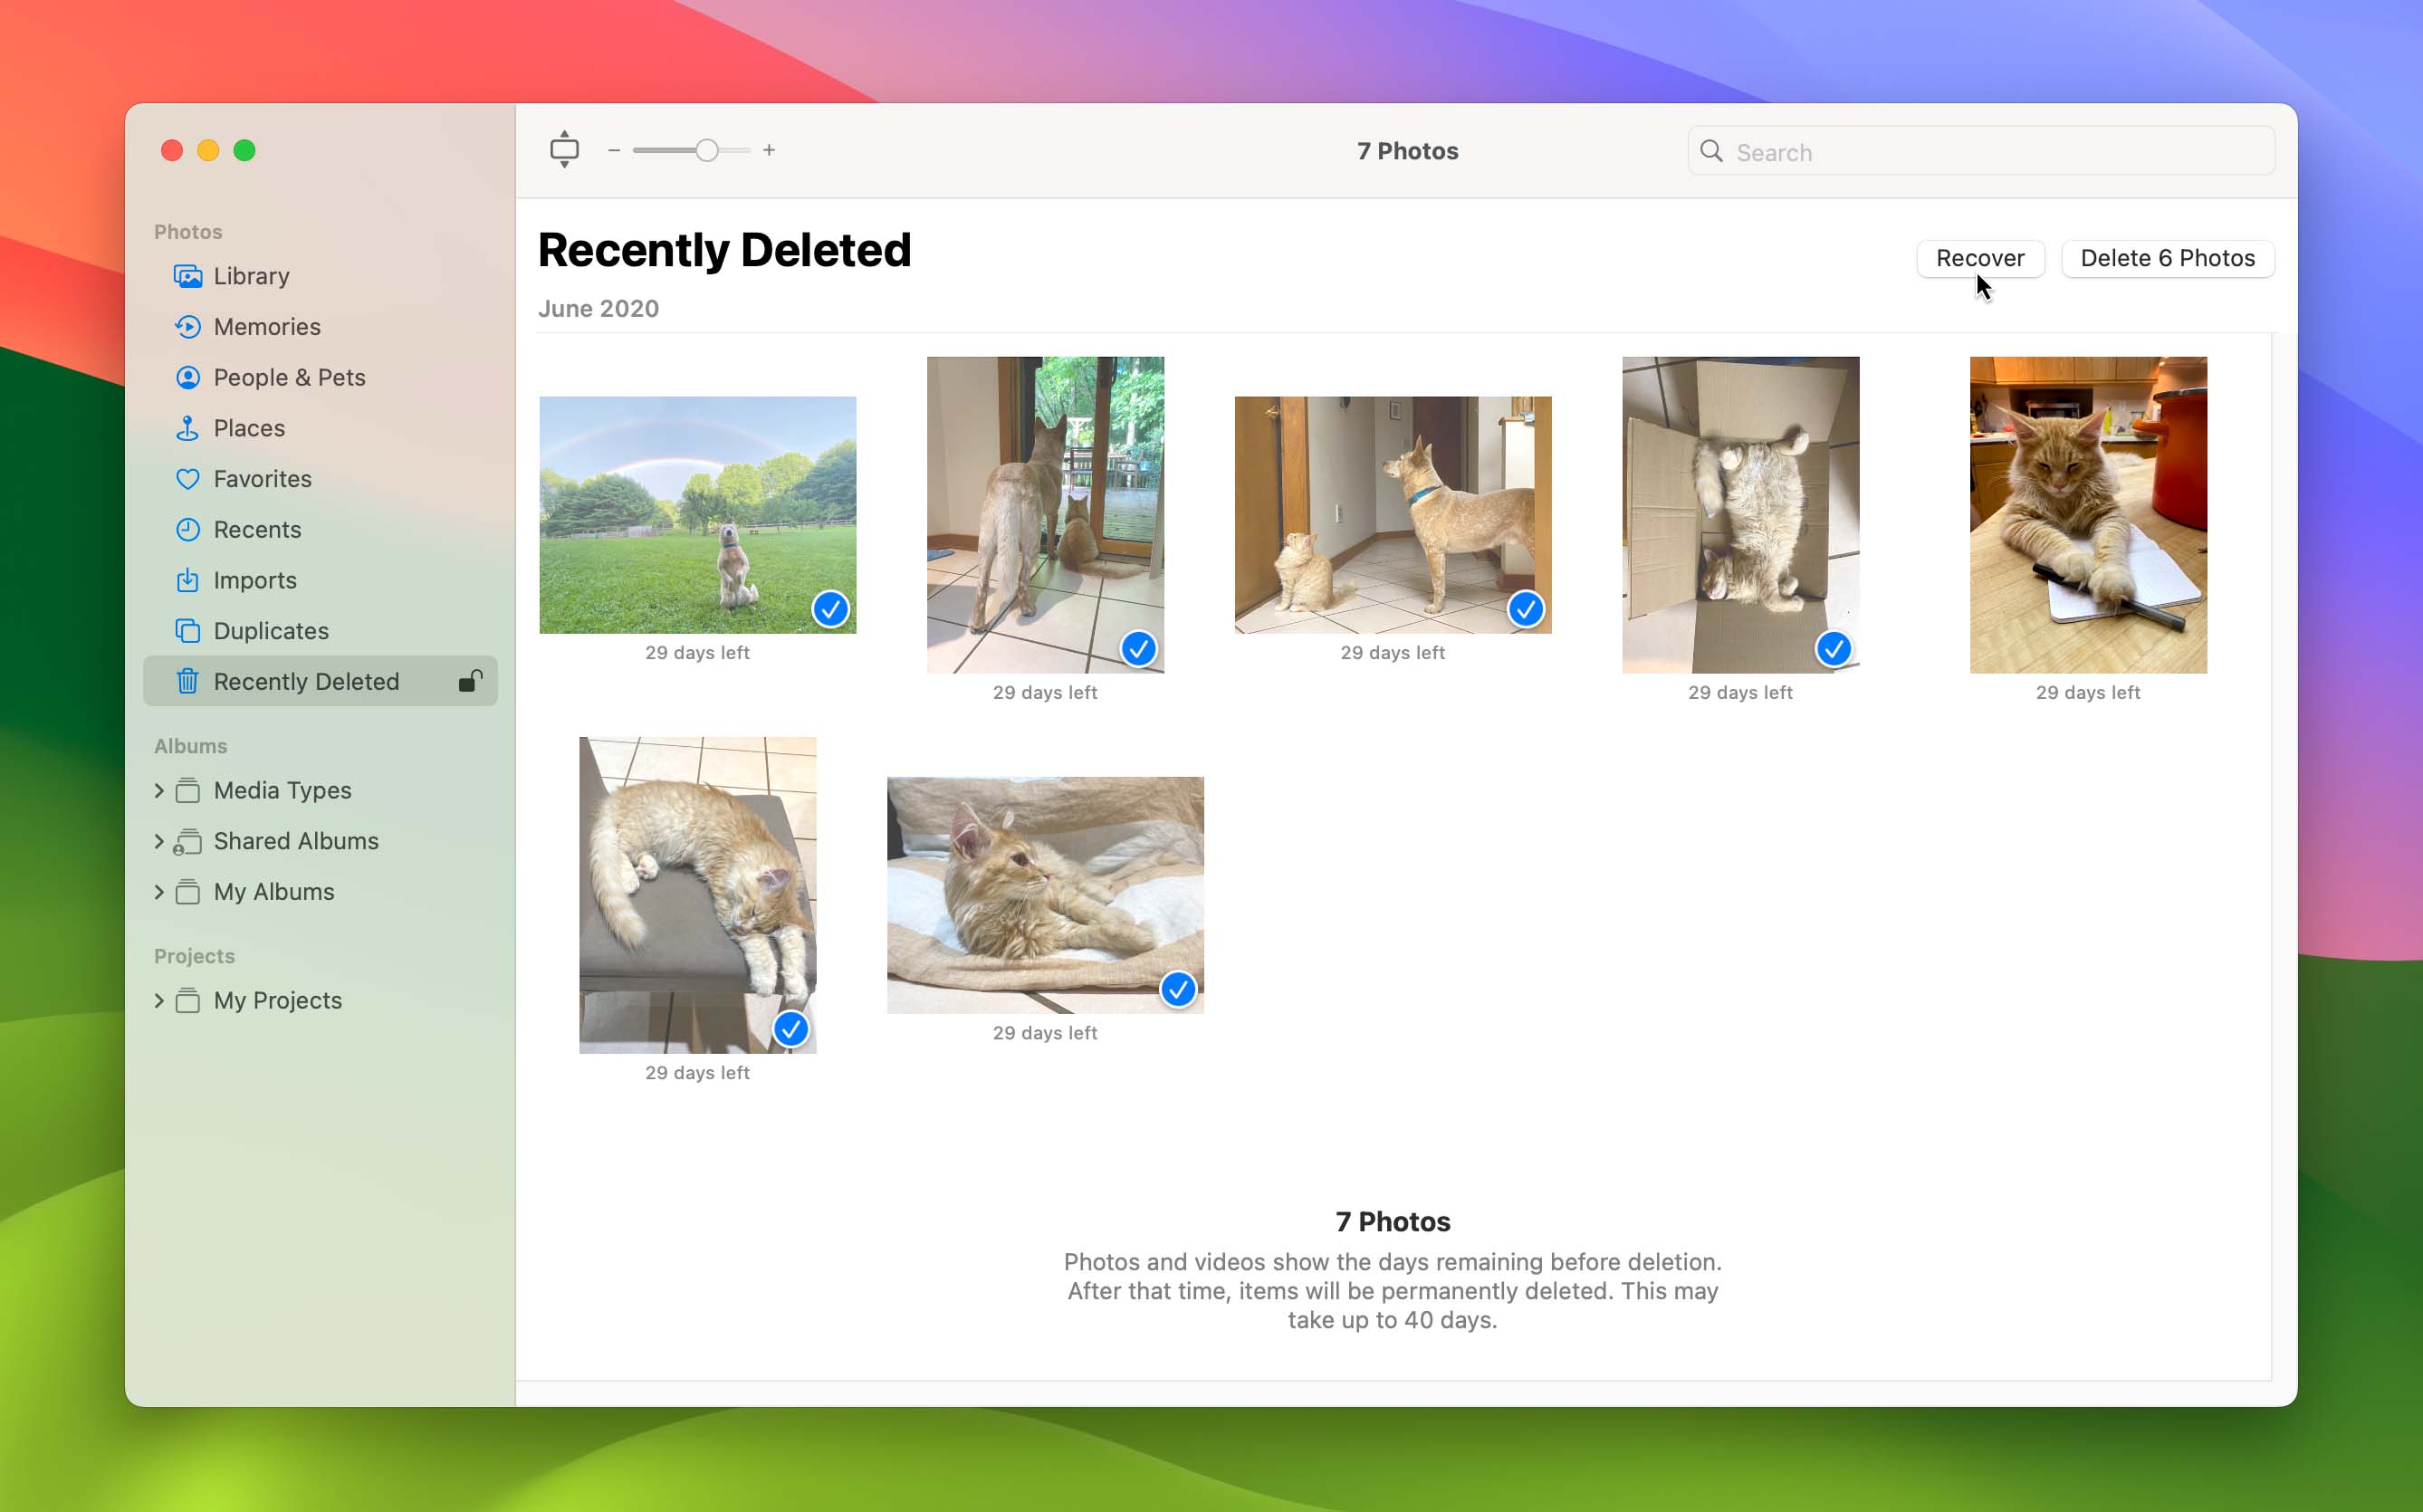
Method 1. Recover Deleted Photos using the Recently Deleted Folder
If you were working in iPhoto or the Apple Photo app when you deleted the photos, they may be in the Recently Deleted Folder. Deleted photos and videos will remain in this folder for 30 days after deletion, and can easily be restored using the following simple steps.
- Open the Photo app.
- Click on Recently Deleted in the left-hand window.
- Select the photos you want to retrieve.
- Click the Recover button to restore the deleted photos.
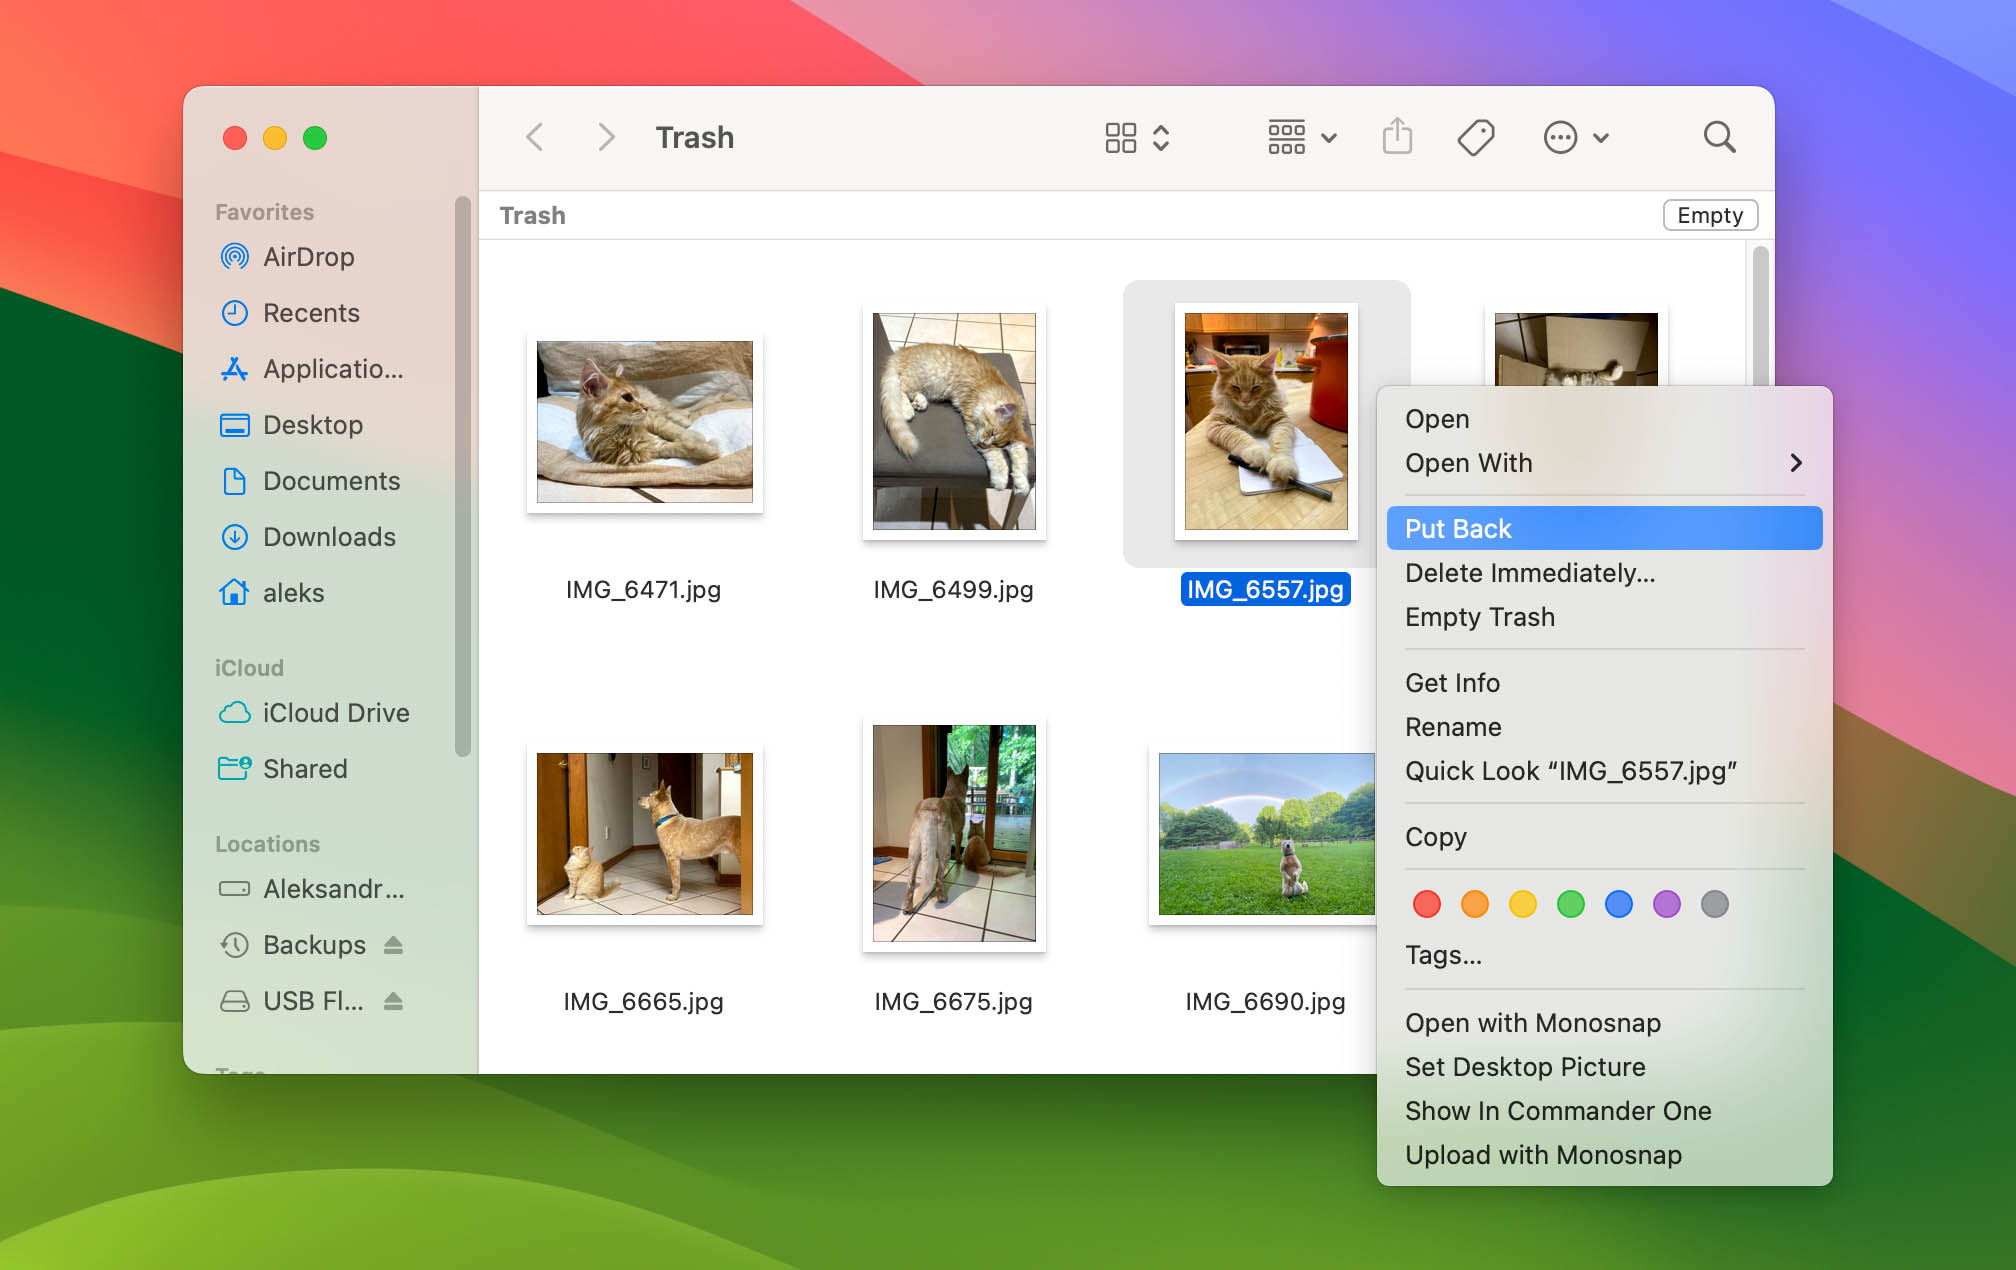
Method 2. Recover Deleted Pictures from Mac Trash
If the photos were deleted from another app, or are not in the Recently Deleted folder, the next place to look is in the Mac Trash Bin. The Trash Bin is a special folder that stores recently deleted files and folders for 30 days or until the bin is manually emptied.
The following procedure can be used to restore deleted photos or any other files that are in the Trash Bin.
- Open the Trash by clicking on its icon.
- Locate the item you want to recover.
- Right-click on the file and select Put Back to recover it to its original location.
Method 3. Recover Deleted Photos from a Mac Local Backup
You should be backing up the data on your computer, and that includes your photos. Your Mac comes with a nice backup and restore tool called Time Machine. Restoring photos from Time Machine is easy if you have backed the photos up using the tool. Use the following steps to get your photos back from a Time Machine backup.
- Connect the USB drive or other storage device that contains the Time Machine backup to your computer.
- Open a Finder window displaying the storage location where the lost data was last stored.
- Open Time Machine by clicking the Time Machine icon on the menu bar.

- Use Time Machine’s arrows and timeline to navigate through the local snapshots and backups until you find the photos you want to restore.
- Make your selections and click the Restore button. The photos will be recovered to their original locations.

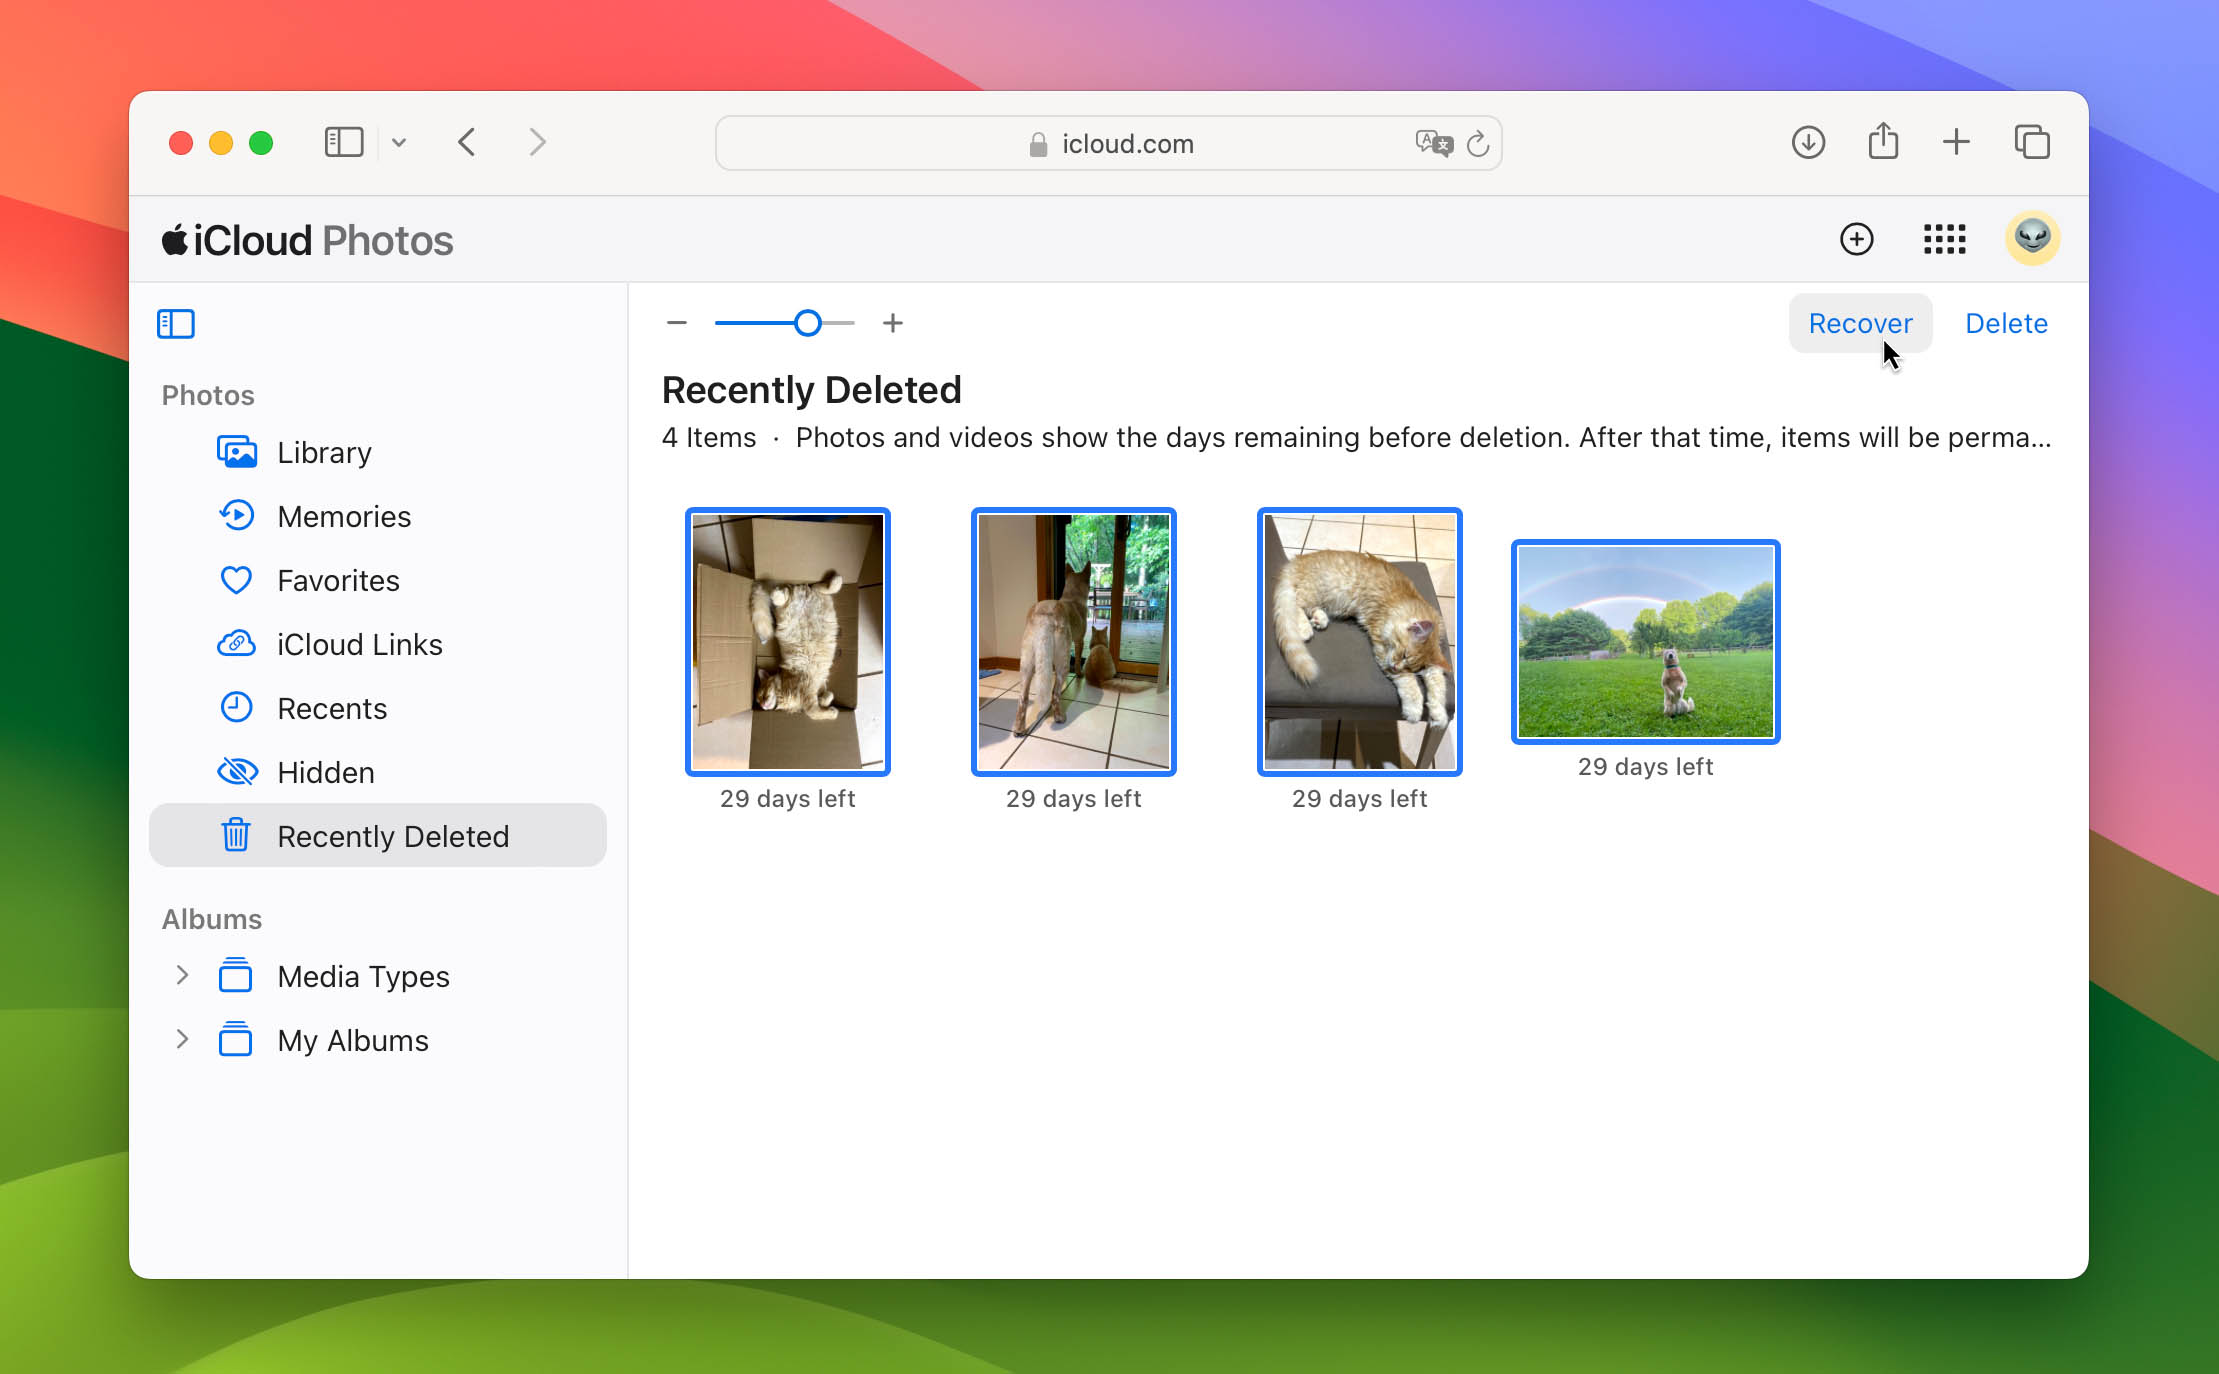
Method 4. Restore Lost Photos from iCloud
If you store your photos in iCloud, they can be recovered for up to 30 days after you delete them. The following procedure should be used to recover deleted photos from iCloud.
- Go to iCloud.com and login with your Apple ID.
- Go to Photos in iCloud.
- Click on the Recently Deleted album in the sidebar.
- Select the photos you want to retrieve.
- Click the Recover button.
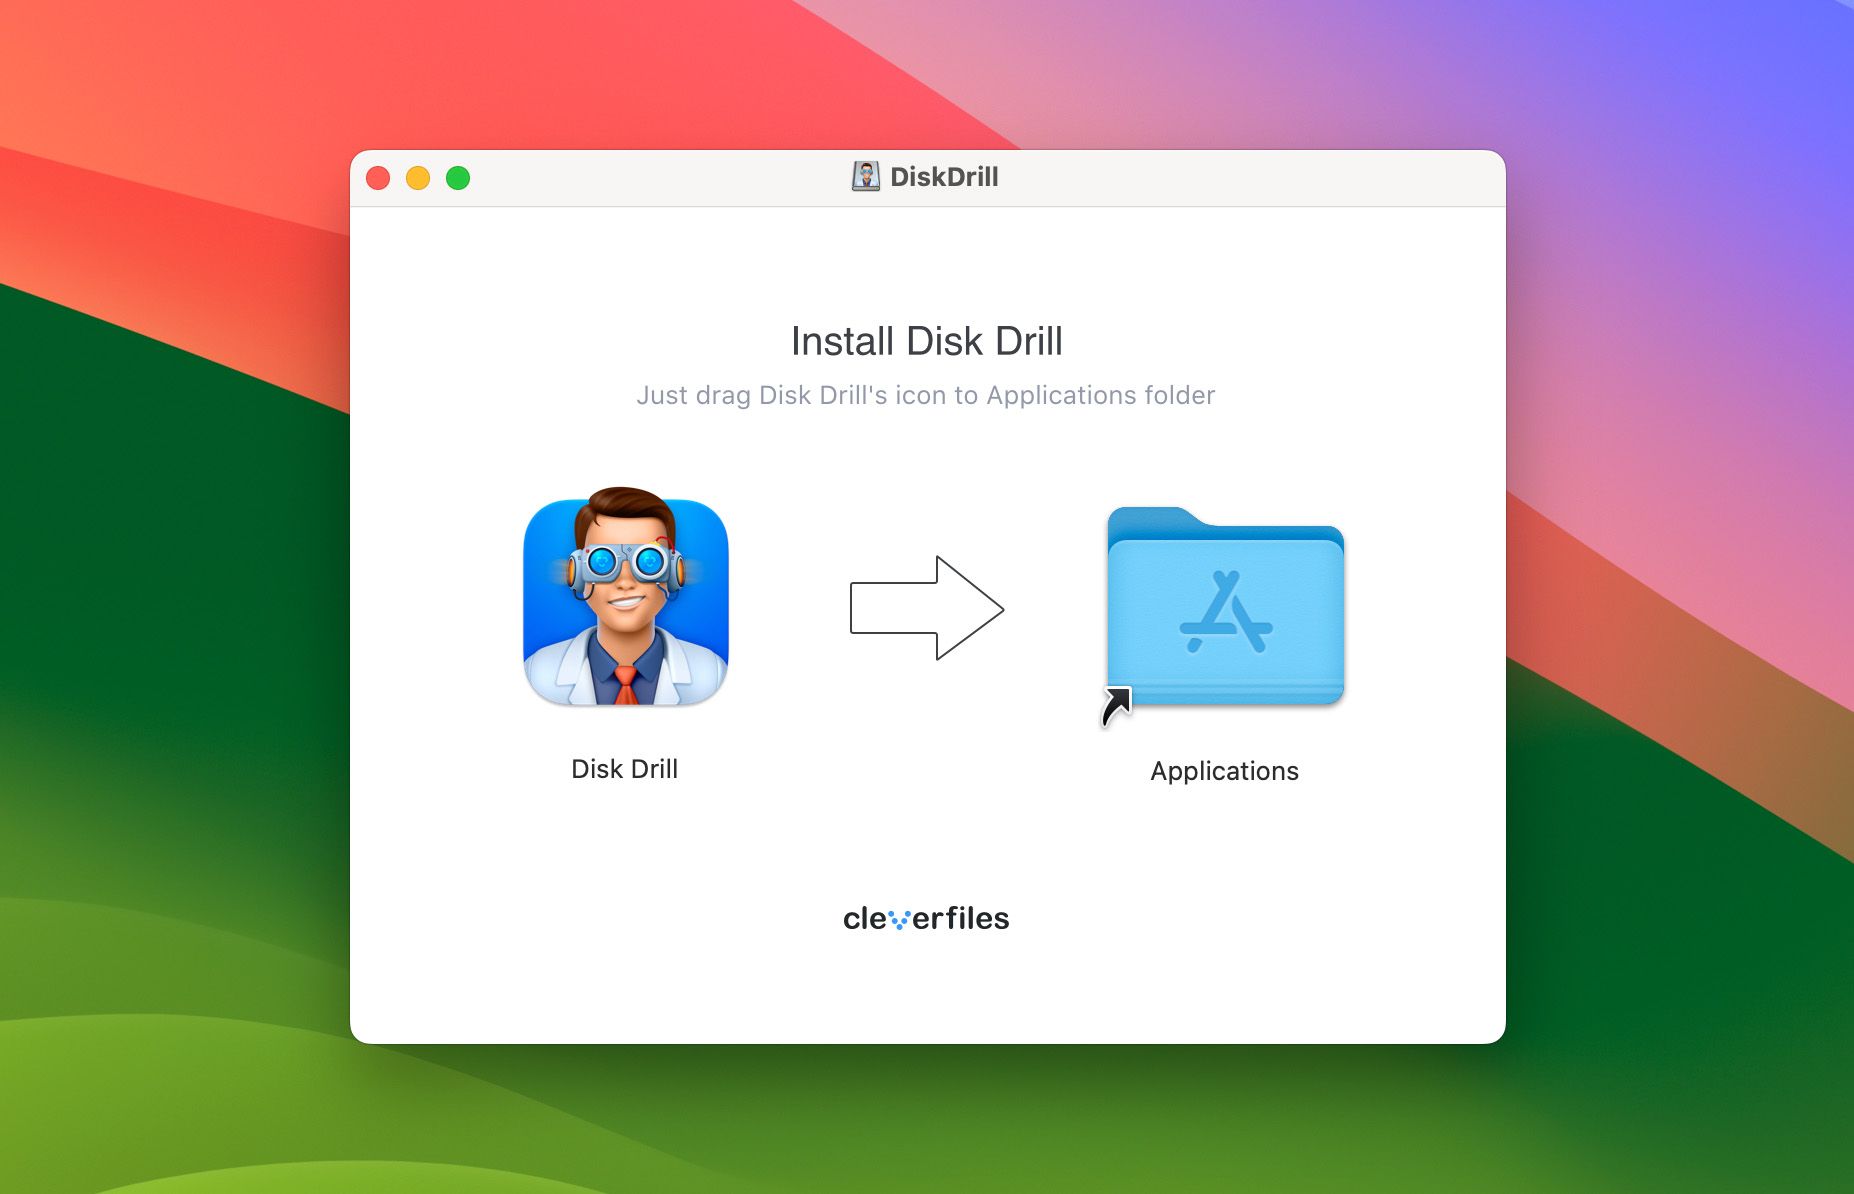
Method 5. Recover Permanently Deleted Photos with Data Recovery Software
Data recovery software for Mac, such as Disk Drill, can help recover lost photos from your Mac’s internal storage and also from external storage devices like SD cards and USB drives. If you’ve lost photos and don’t have a backup, or if you’ve emptied the Trash Bin, this type of software can be a crucial tool, as long as you act quickly.
Data recovery software works by repairing the deleted links to files. It can only do this if the files have not yet been overwritten by new data. For this reason, you need to stop using the device as soon as possible to minimize the chances of the photos you want to recover being overwritten or corrupted.
The following steps show you how to restore deleted photos on your Mac using Disk Drill photo recovery software for Mac.
- Download and install Disk Drill on your Mac computer. If your photos were stored on your main disk drive, don’t use it for the download and installation. Use a USB drive instead to avoid overwriting your data.
- Start Disk Drill and select the disk that contained the lost photos from the disk list. If your lost photos were on an SD card, insert the card into your Mac’s SD card slot or use an external card reader. Once the external device is connected, it should appear in Disk Drill’s list of available disks.
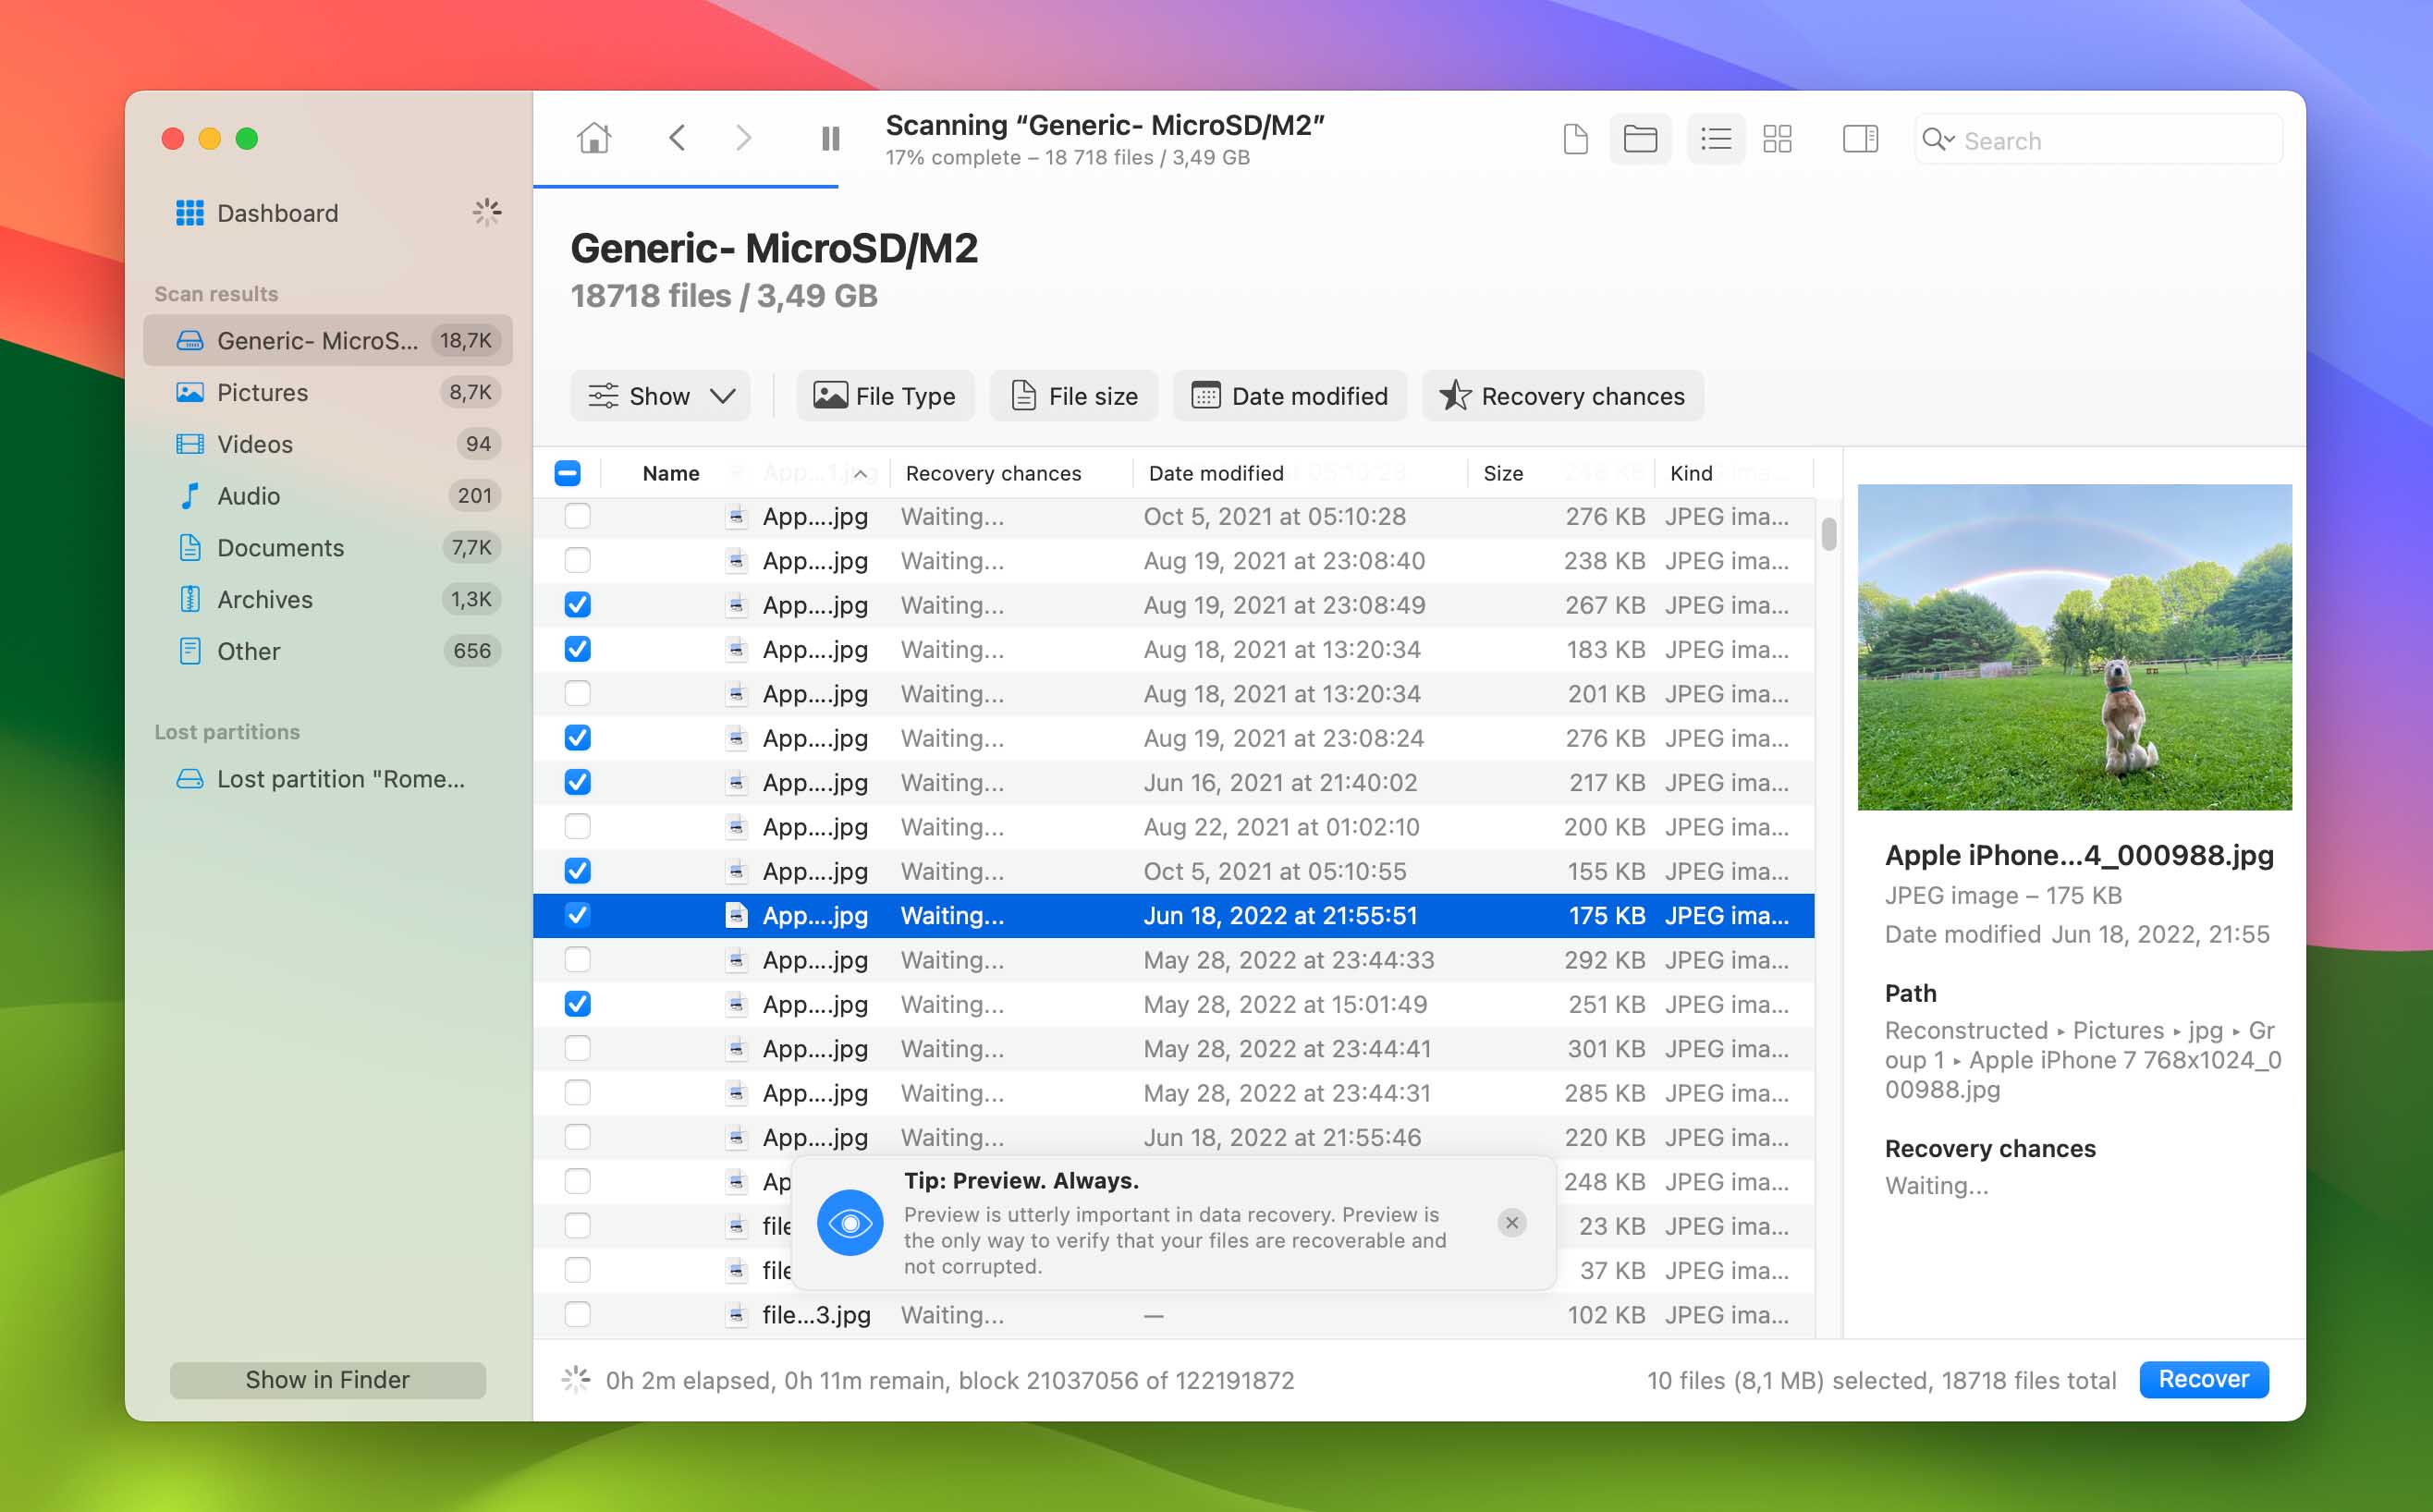
- Click the Search for lost data button to start scanning for deleted photos.

- Preview the found photos and select the ones you want to retrieve.
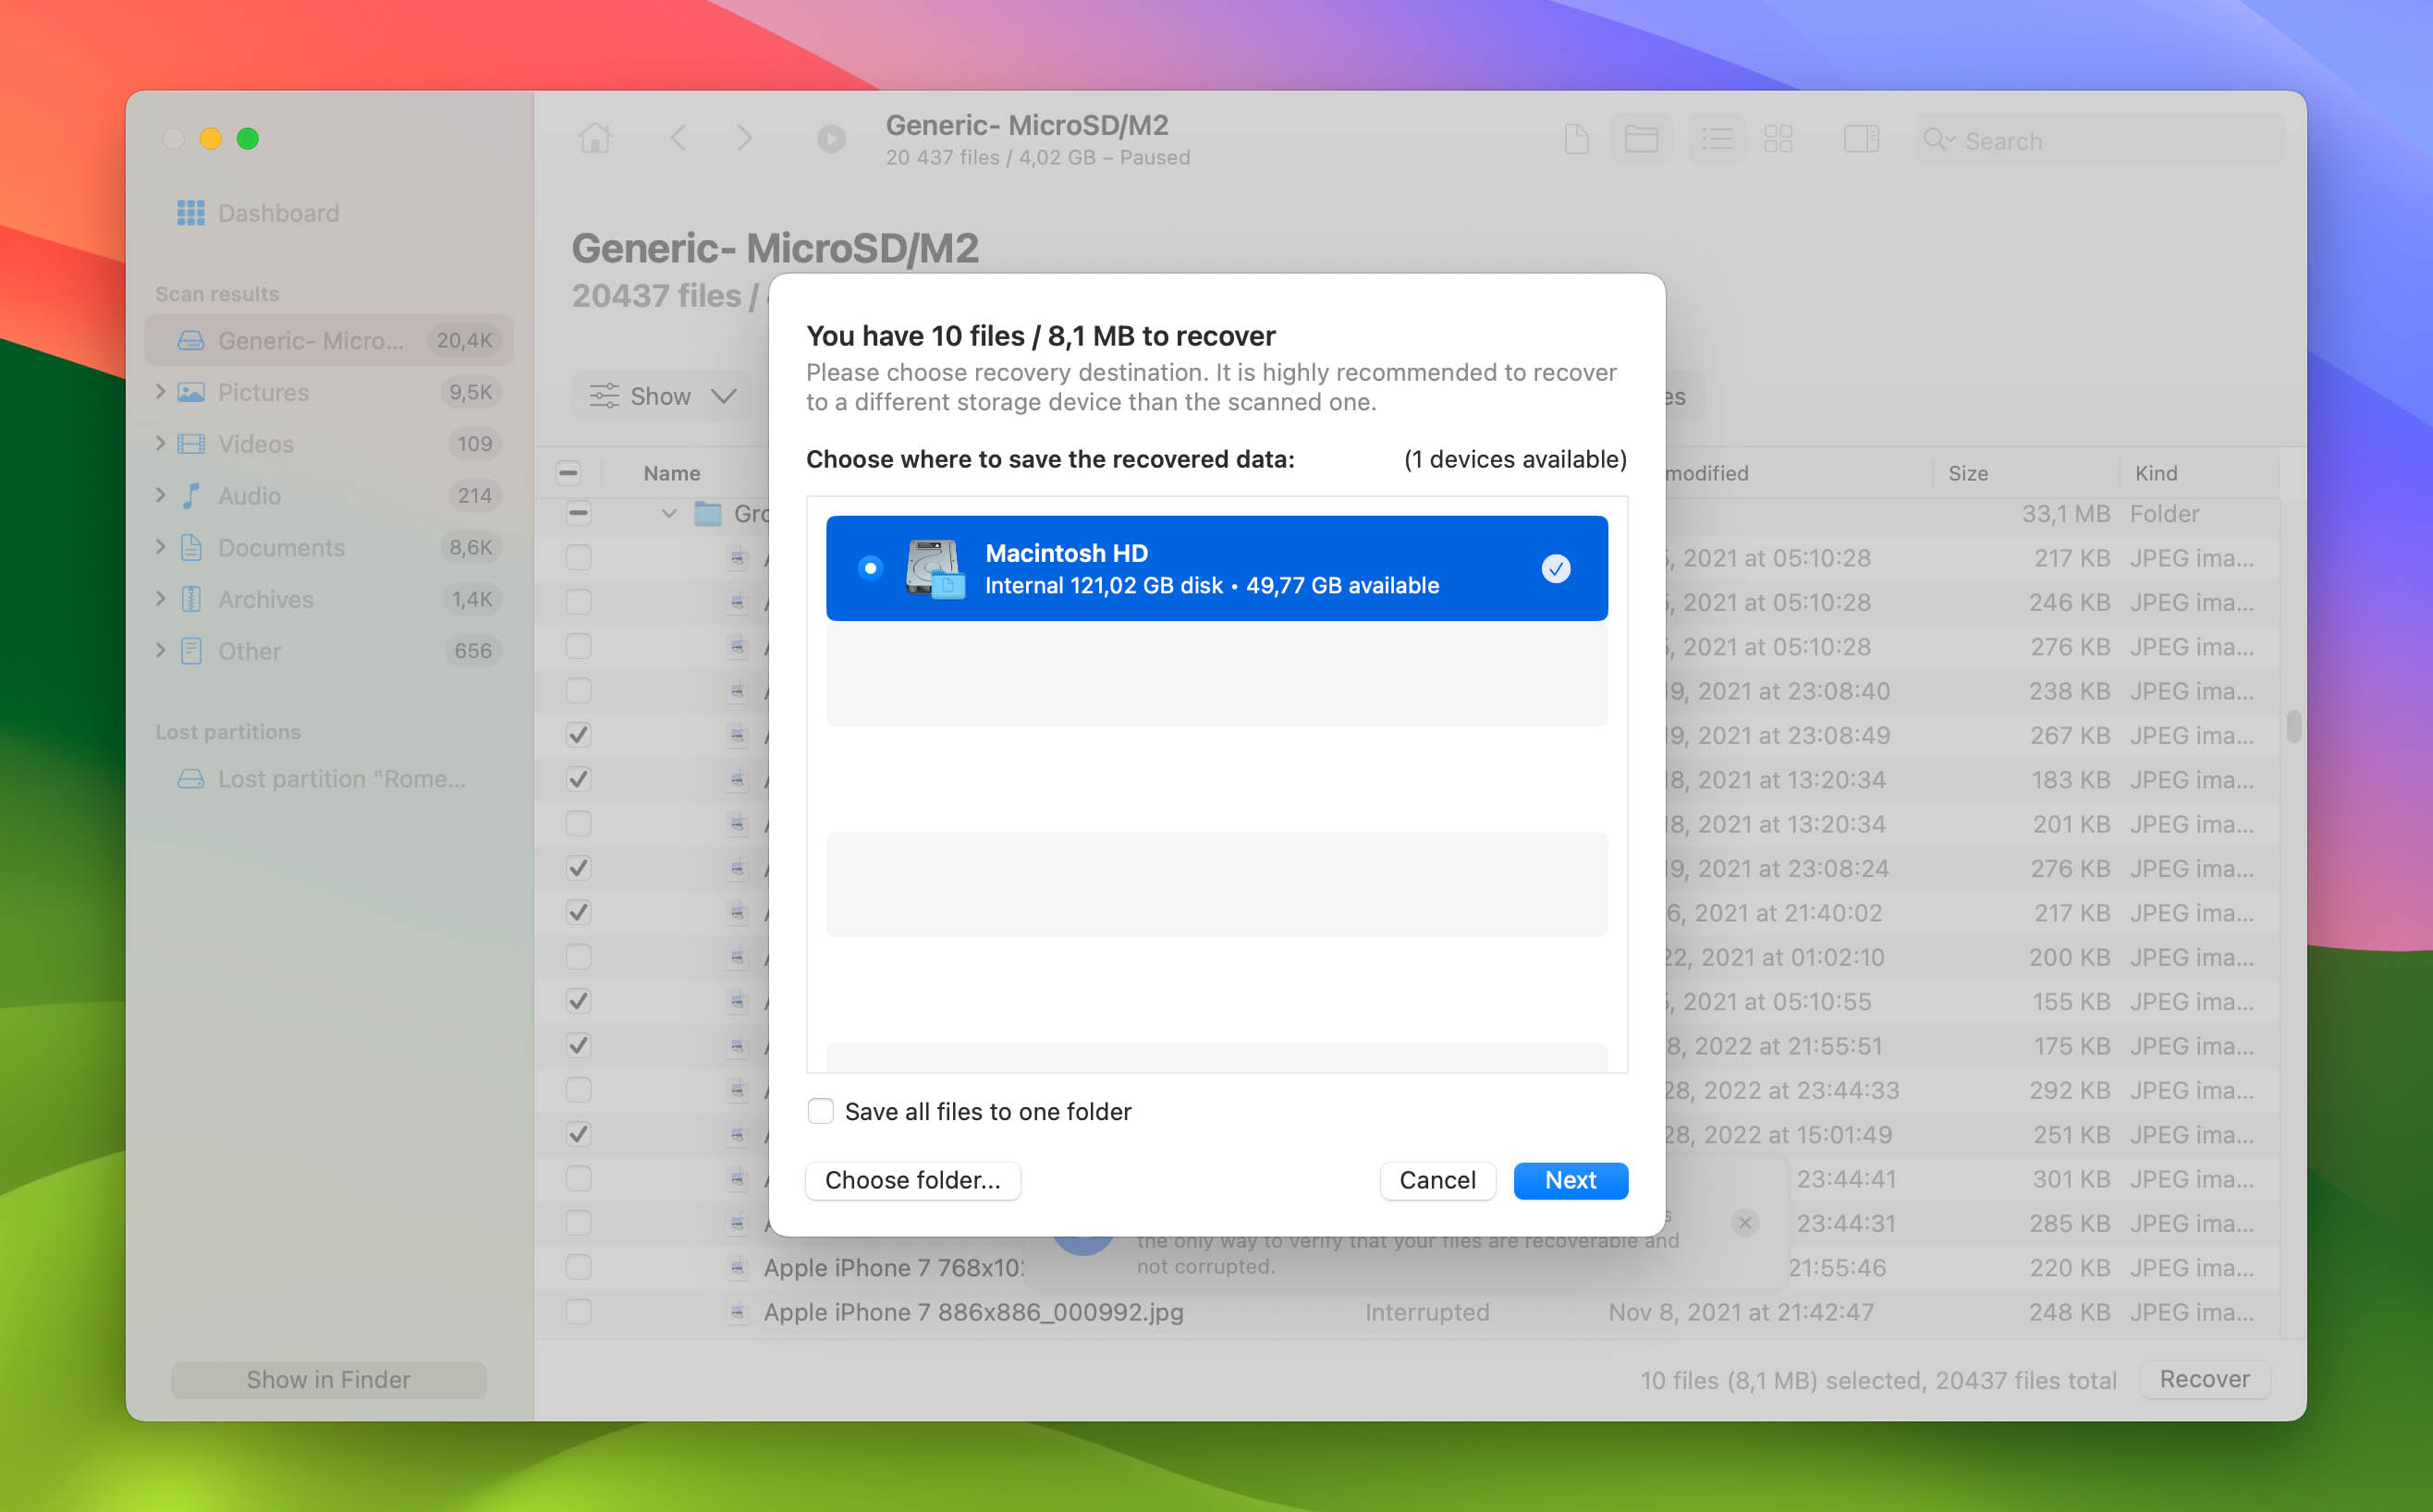
- Click the Recover button and choose a safe location other than the affected disk to save your photos.

How to Avoid Photo Loss on Mac
There are some precautions you can take to avoid or minimize the chances of losing photos on your Mac. We suggest that if you value your photos, you start to follow some of these practices.
- 💽 Backups are critically important! If you are not currently backing up your Mac regularly, what’s your excuse? Time Machine is there and ready to use on your Mac. All you need is an external disk drive to store the backups. If you value your photos and other data, start backing up your Mac today! You can also back up your Mac using a third-party backup tool.
- ⚠️ Take care when formatting partitions or disk drives. It’s the kind of activity that should only be done after careful consideration and needs to include double and triple-checking to ensure the right target is being formatted. Taking a few extra seconds now can save you a lot of time later.
- 👾 Try to stay away from computer viruses and malware. Infection with malware can lead to all kinds of trouble, including the loss of important photos. Use an antivirus program on your Mac and avoid connecting external devices to unknown machines that may contain malware.
If you follow these suggestions, your chance of losing photos will diminish. Pay attention to what you are doing, and start taking backups of all your valuable data.
Conclusion
It may seem like a disaster when you realize you have lost or deleted some of your valuable photo memories. If you act quickly, chances are good that you can get them back safely. If the photos have not been backed up and are no longer in your Trash, data recovery software can restore them for you.
We like Disk Drill for its user-friendly interface and excellent recovery results. You can download the app for free to see what it can recover before committing to a paid version of the tool. It’s the most reliable method of recovering deleted photos on your Mac.


FAQ
Disk Drill can recover permanently deleted photos from your Mac using the following steps.
- Install Disk Drill.
- Launch the app and select the disk with lost data.
- Click the Search for lost data button to scan the disk.
- Preview the recoverable files and make your selections.
- Click the Recover button to complete the recovery.
Yes, you can recover permanently deleted photos from an Apple computer using data recovery software or local backups.
Recently deleted photos go to the Photo app’s Recently Deleted folder if they were removed using the app. If they were deleted using any other method, they should be found in your Mac’s Trash Bin.
Here is our list of the best Mac photo recovery software.
- Disk Drill
- EaseUS
- PhotoRec
- R-Studio
- Data Rescue 5 for Mac
- Lazesoft Mac Data Recovery
- Stellar Data Recovery
- Softtote Mac Data Recovery
- M3 Mac Data Recovery
- Minitool Power Data Recovery
Yes! If you’ve recently deleted photos from your Mac, you can restore them right away, either from the Trash or from the Recently Deleted folder in Photos. And even if the photos are no longer located there, you’ll still be able to recover them: either from a backup or by using data recovery software.
Unfortunately, the photos will disappear from your iCloud account in 30 days after deletion. In such a case, you’ll need to use a different method to recover the permanently deleted photos. An effective and quick solution will be to use a data recovery tool to recover the files (Disk Drill, for instance).
Follow these steps to restore deleted photos via Disk Drill:
- Download Disk Drill on your Mac and follow the onscreen instructions to install it.
- Launch Disk Drill and choose the disk where the deleted photos used to be located.
- Click the Search for lost data button.
- Choose the photos you wish to restore, click Recover, and select the location to save them.
No, they are still physically present on the hard drive until your Mac overwrites them with other data. So if you want to recover deleted photos on your Mac, you should do it as quickly as possible before they actually do permanently disappear.
Follow these steps to restore deleted photos from iCloud on your Mac:
- Head to iCloud.com and log into your account.
- Click Photos.
- On the sidebar, click the Recently Deleted album.
- Choose the photos that you wish to restore and click Recover.