It’s always a problem when you delete important data from an XQD card, it’s an even bigger issue if your XQD card asks to be formatted, won’t show up on your computer, or shows files as corrupted, but it can be a real disaster if the card stores a large quantity of images or hours of video footage. We’ve encountered this exact data loss scenario so many times that we decided to put together a complete guide to XQD card recovery with tried-and-tested solutions for accidental deletion, formatting, and corruption.
Is it Possible to Restore Deleted/Lost Files from an XQD Card?
Yes. Whether your files were accidentally deleted, the card was formatted, or you’re getting errors that block access to your data, recovery is usually possible because the actual file data often remains on the card even when it’s no longer visible in your file browser.
That said, the data isn’t guaranteed to remain on the card long enough for you to recover it unless you take certain precautions:
- Stop using the card immediately. Don’t save any new photos or videos to it.
- Don’t format the card, even if your computer or camera prompts you to.
- Remove the card from your device until you’re ready to start the recovery process.
The precautions above are so important because any new data written to the card can overwrite the files you’re trying to recover.
Common Reasons Behind XQD Card Data Loss
XQD card data loss typically happens for the following reasons:
| Reason | Description | Recommended Recovery Methods |
| 😫 Accidental Deletion | Accidentally deleting photos or videos from the camera or while browsing the card on your computer. | |
| ⚠️ Accidental Formatting | Formatting the card by mistake, or agreeing to format when your camera or computer prompts you to. | |
| ⏏️ Improper Ejection | Removing the card while files are still being written, such as pulling it out mid-transfer or while the camera is still saving. | |
| 🔌 Sudden Power Loss | Sudden power loss during recording or file transfer, like your camera battery dying mid-shoot. | |
| 💾 File System Errors | File system errors that cause your computer to display messages like “You need to format the disk before you can use it” or “The disk structure is corrupted and unreadable.” | |
| 🔧 Physical Damage | Damage to the card’s pins, contacts, or internal components. Signs include the card not being detected at all, or your system showing “Please insert a disk” even when the card is connected. |
How does knowing this help you? In most of the cases described above, if the memory card is not physically damaged to the extent that it cannot be recognized by the computer, the data can still be recovered.
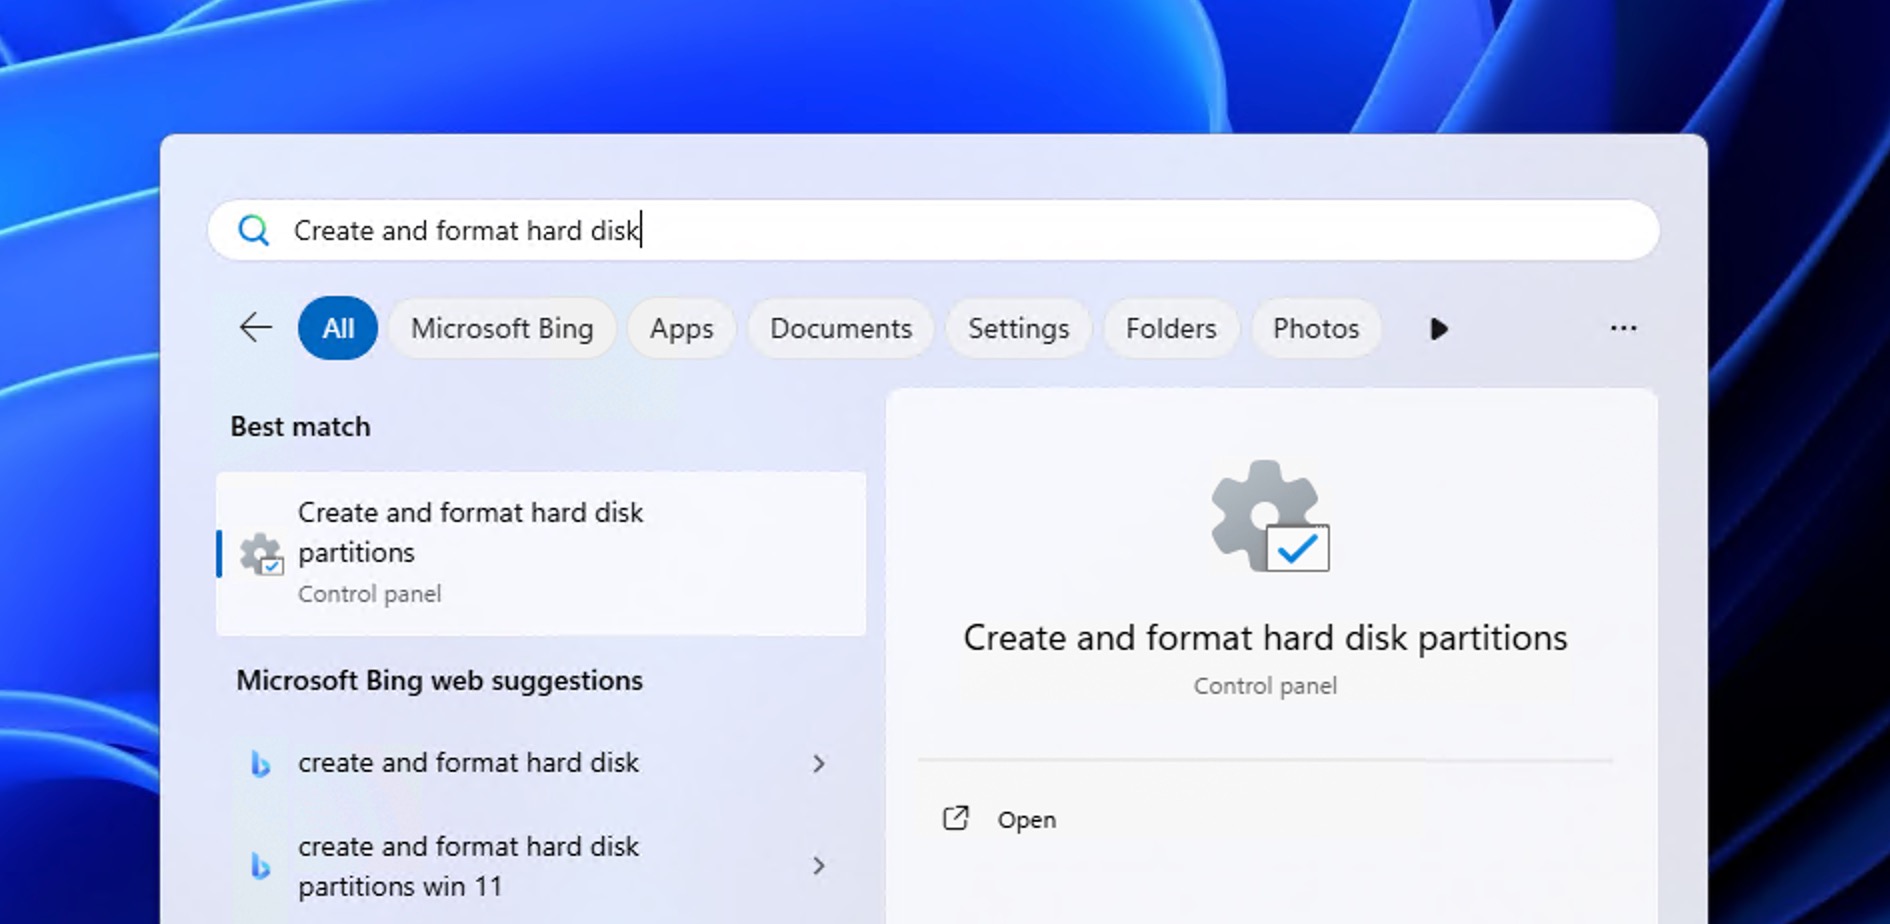
To check if your XQD card is recognized by your system, open Disk Management in Windows (search for “Create and format hard disk partitions” and press Enter). Look for your card in the list of drives. If it appears with its correct capacity, the recovery and repair methods in this article should work. If it doesn’t show up at all or displays the wrong size, start by checking your connections as outlined in our first fix method: try a different card reader, swap USB cables, and test on another computer. If none of that helps, you’re likely dealing with physical damage and it’s time to contact a professional recovery service.
How to Recover Data from an XQD Card
There are a few ways to recover lost or deleted files from an XQD card, depending on your situation. Below, we’ll cover data recovery software, checking your Recycle Bin or Trash (for cases when files from your XQD card can end up there and specialized software isn’t needed), and when it makes sense to contact a professional recovery service.
Method 1: Using Data Recovery Software
Data recovery software can scan storage devices to find files that are no longer visible in your file browser. For XQD cards specifically, you want something that handles the FAT family of file systems (especially FAT32 and exFAT) and recognizes RAW photo and video formats since that’s what you’re most likely to encounter when using an XQD card in a digital camera.
Disk Drill is our top recommendation for XQD card recovery because it works on both Windows and Mac, and you can scan your card and preview recoverable files completely free.

Here’s how to recover data from your XQD card with Disk Drill:
- Download, install, and launch Disk Drill.
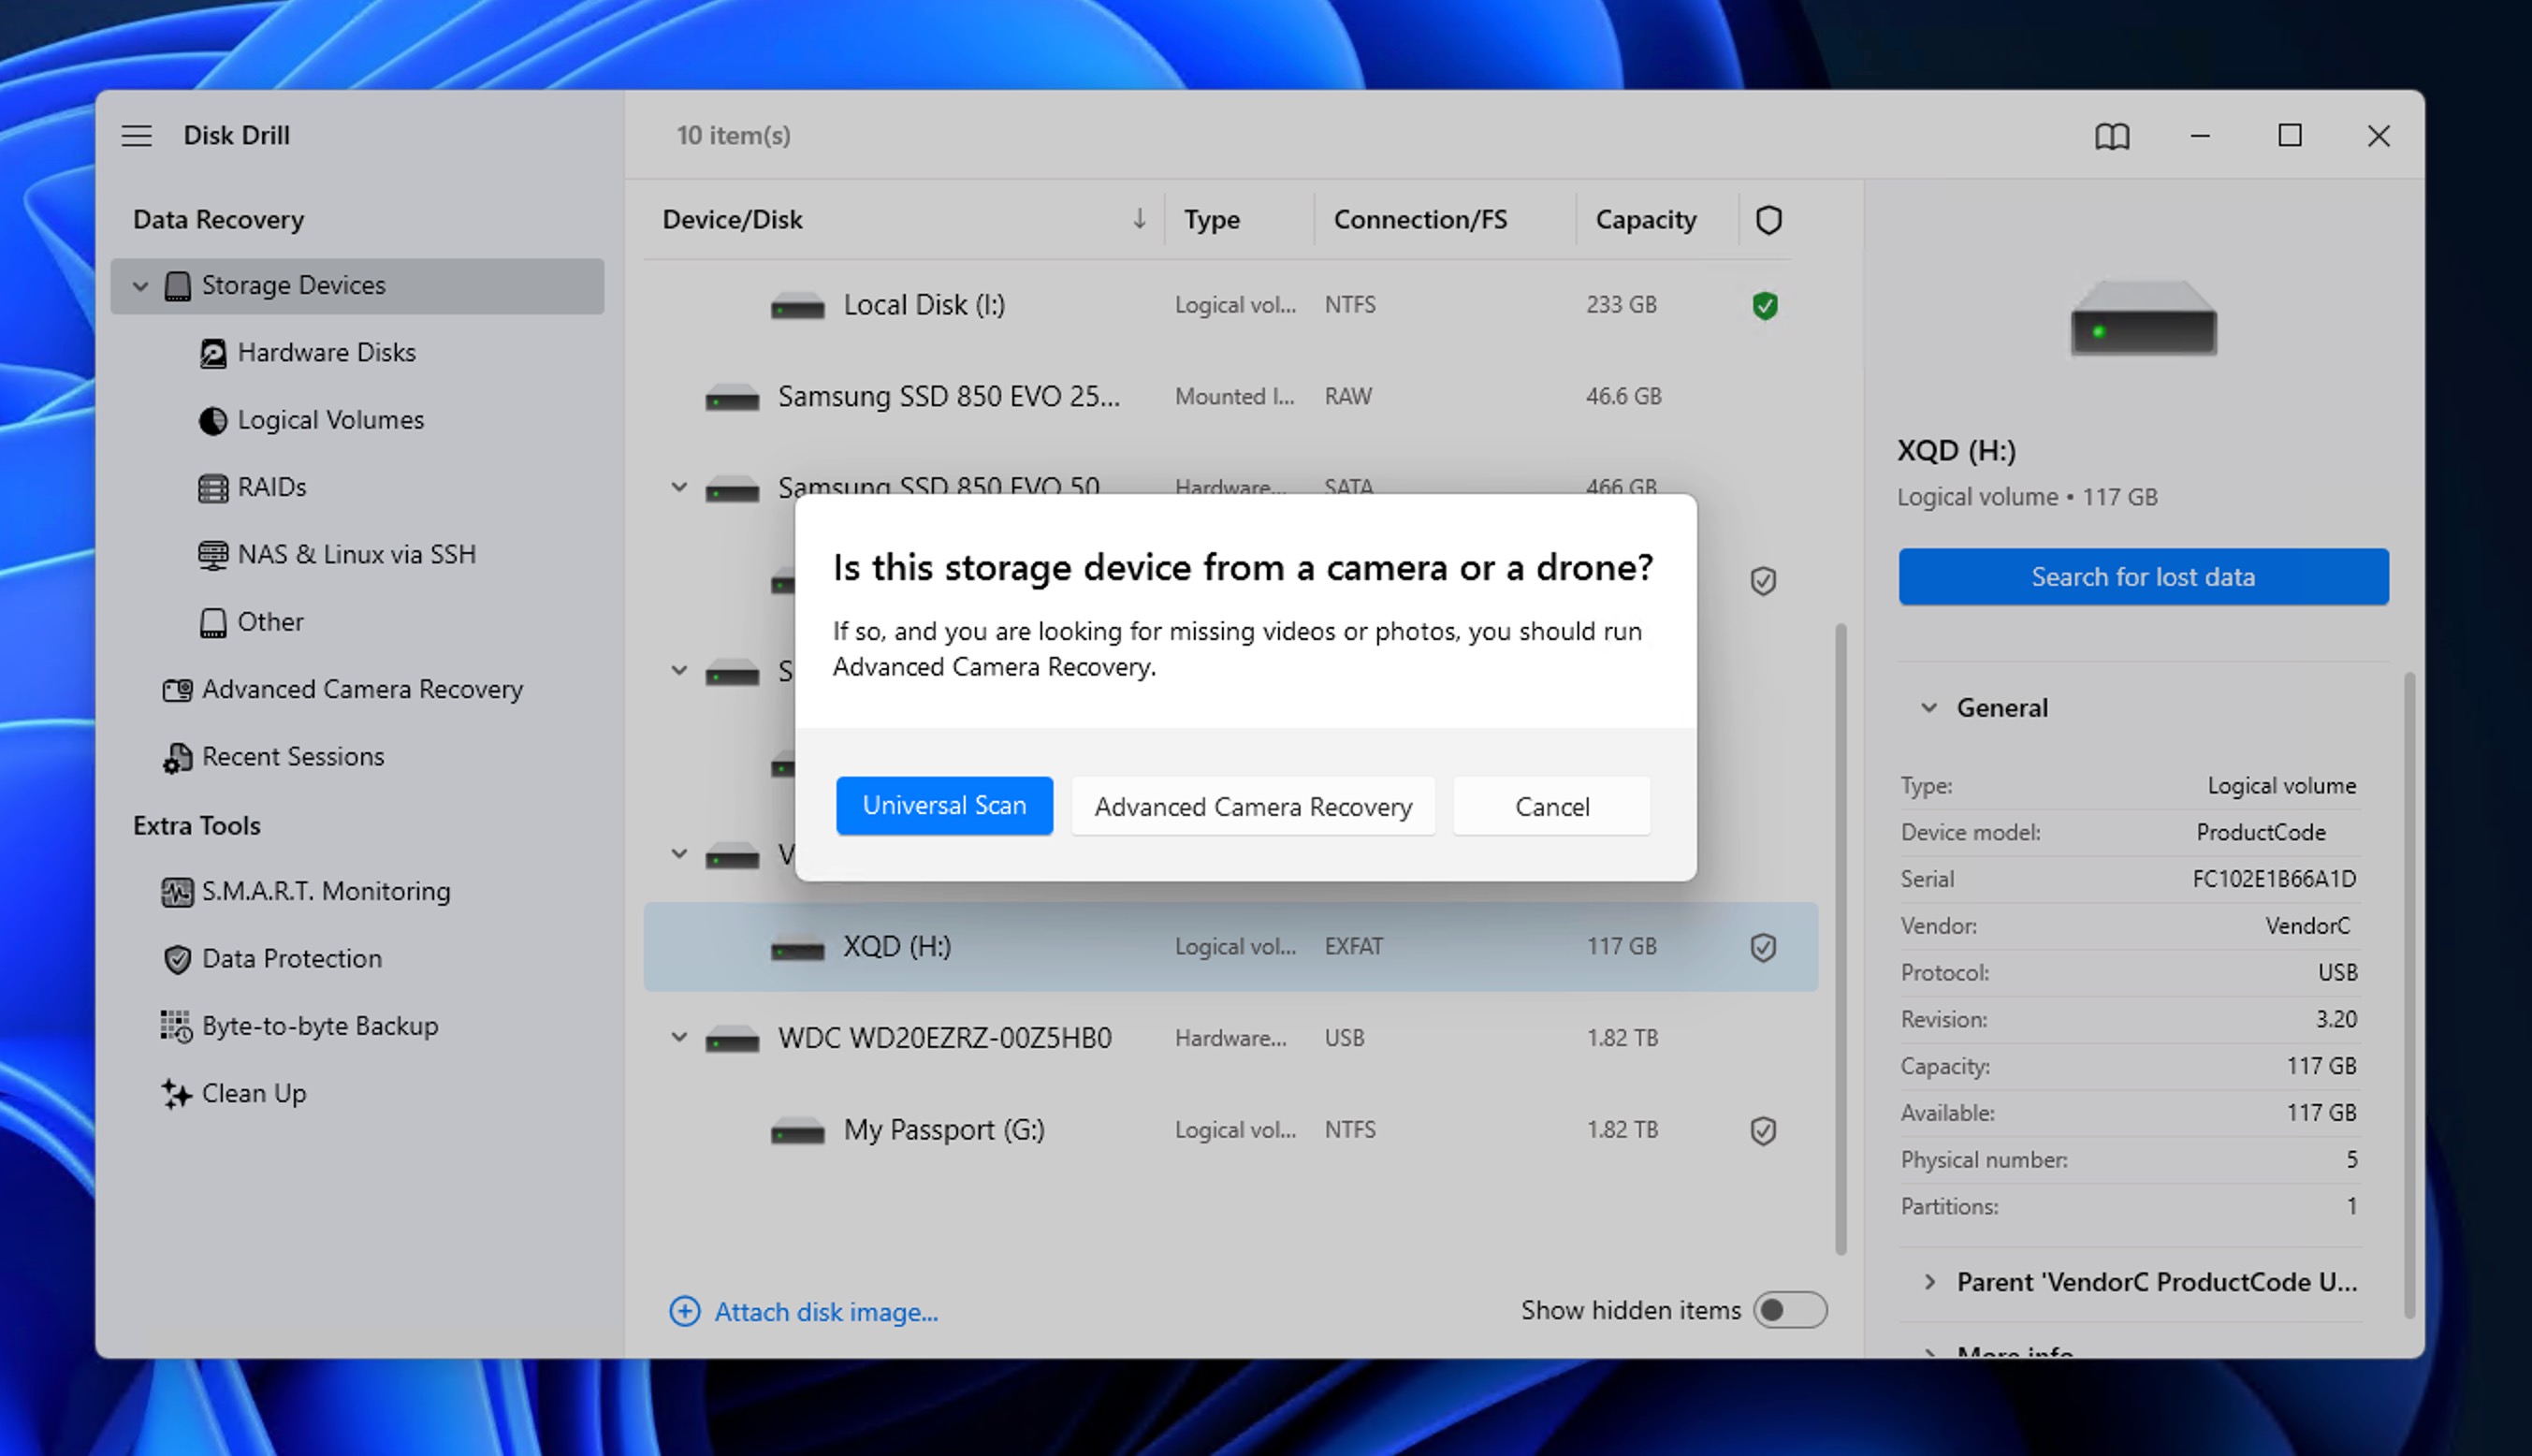
- Select your XQD card from the list of drives.
- Click Search for Lost Data to start the scan. For best results with camera footage, select Advanced Camera Recovery (ACR) from the scanning options. This algorithm is specifically designed to reconstruct fragmented video files that standard scans might miss.
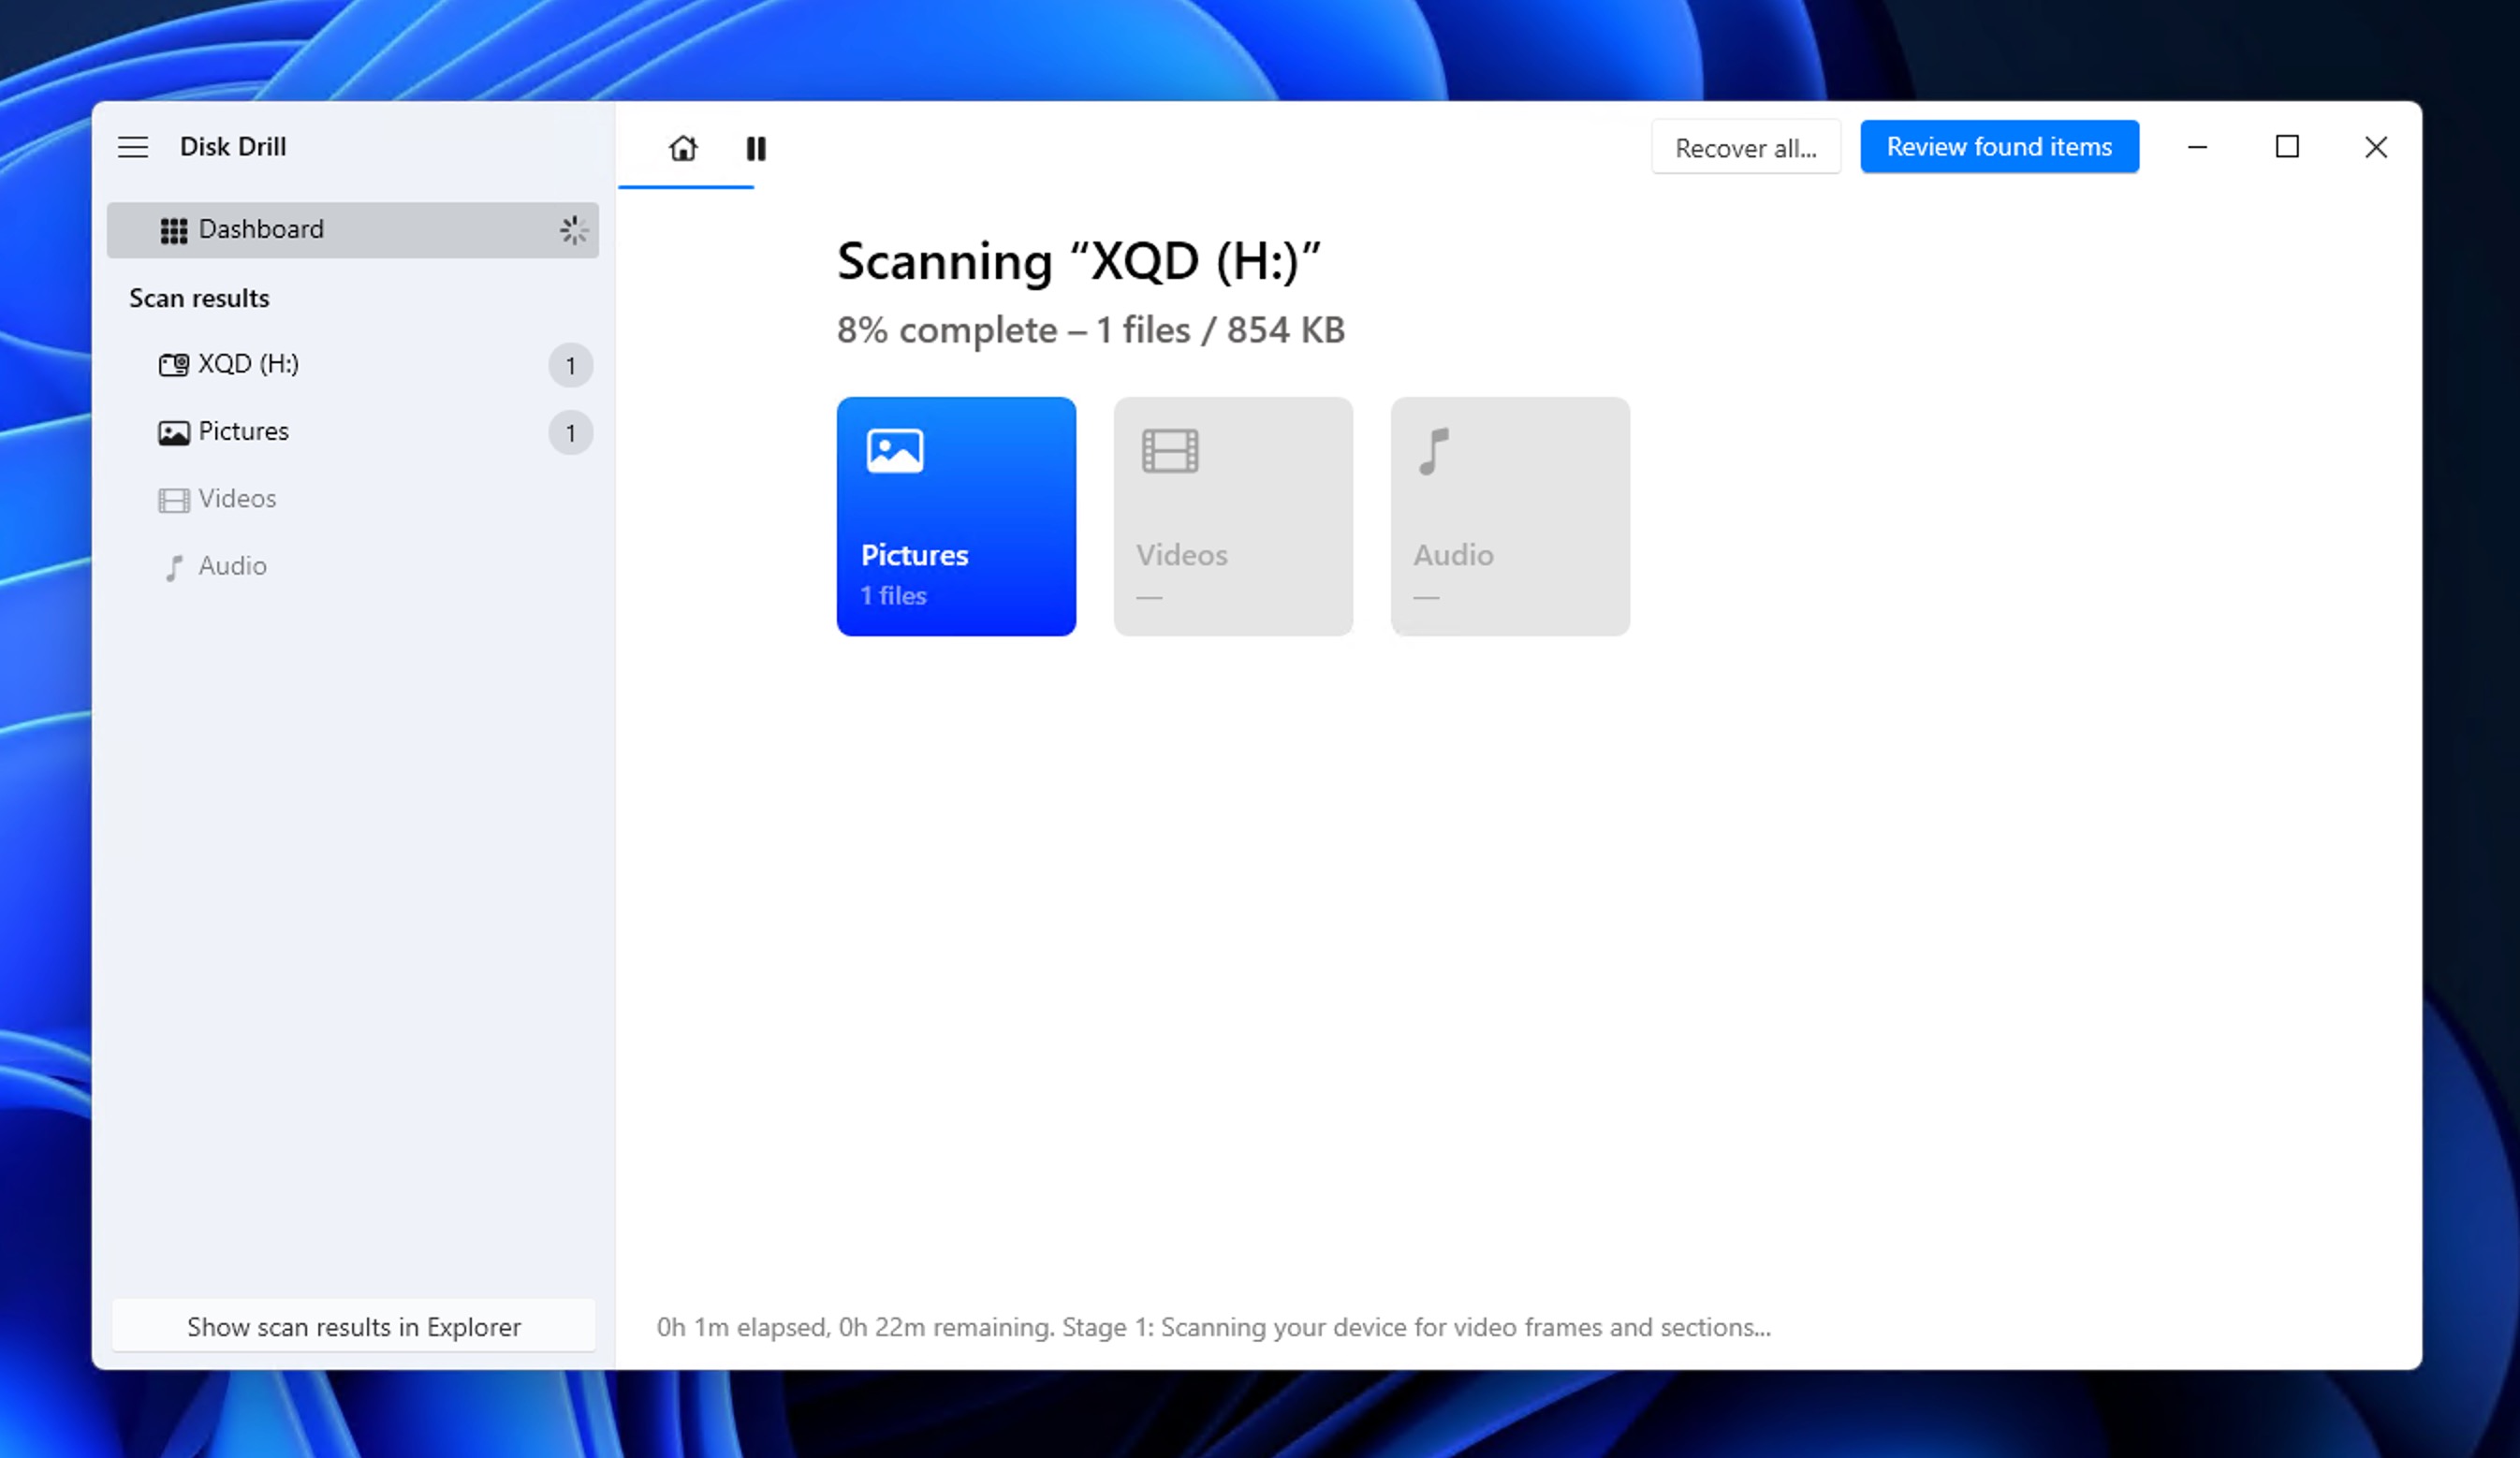
- Wait for the scan to complete or click Review Found Items to browse the results instantly (scanning will keep going in the background).
- Preview your files before recovering them. If a photo or video previews correctly, it can be recovered. You can use the scan result filters and the search bar to find what you’re looking for more easily.
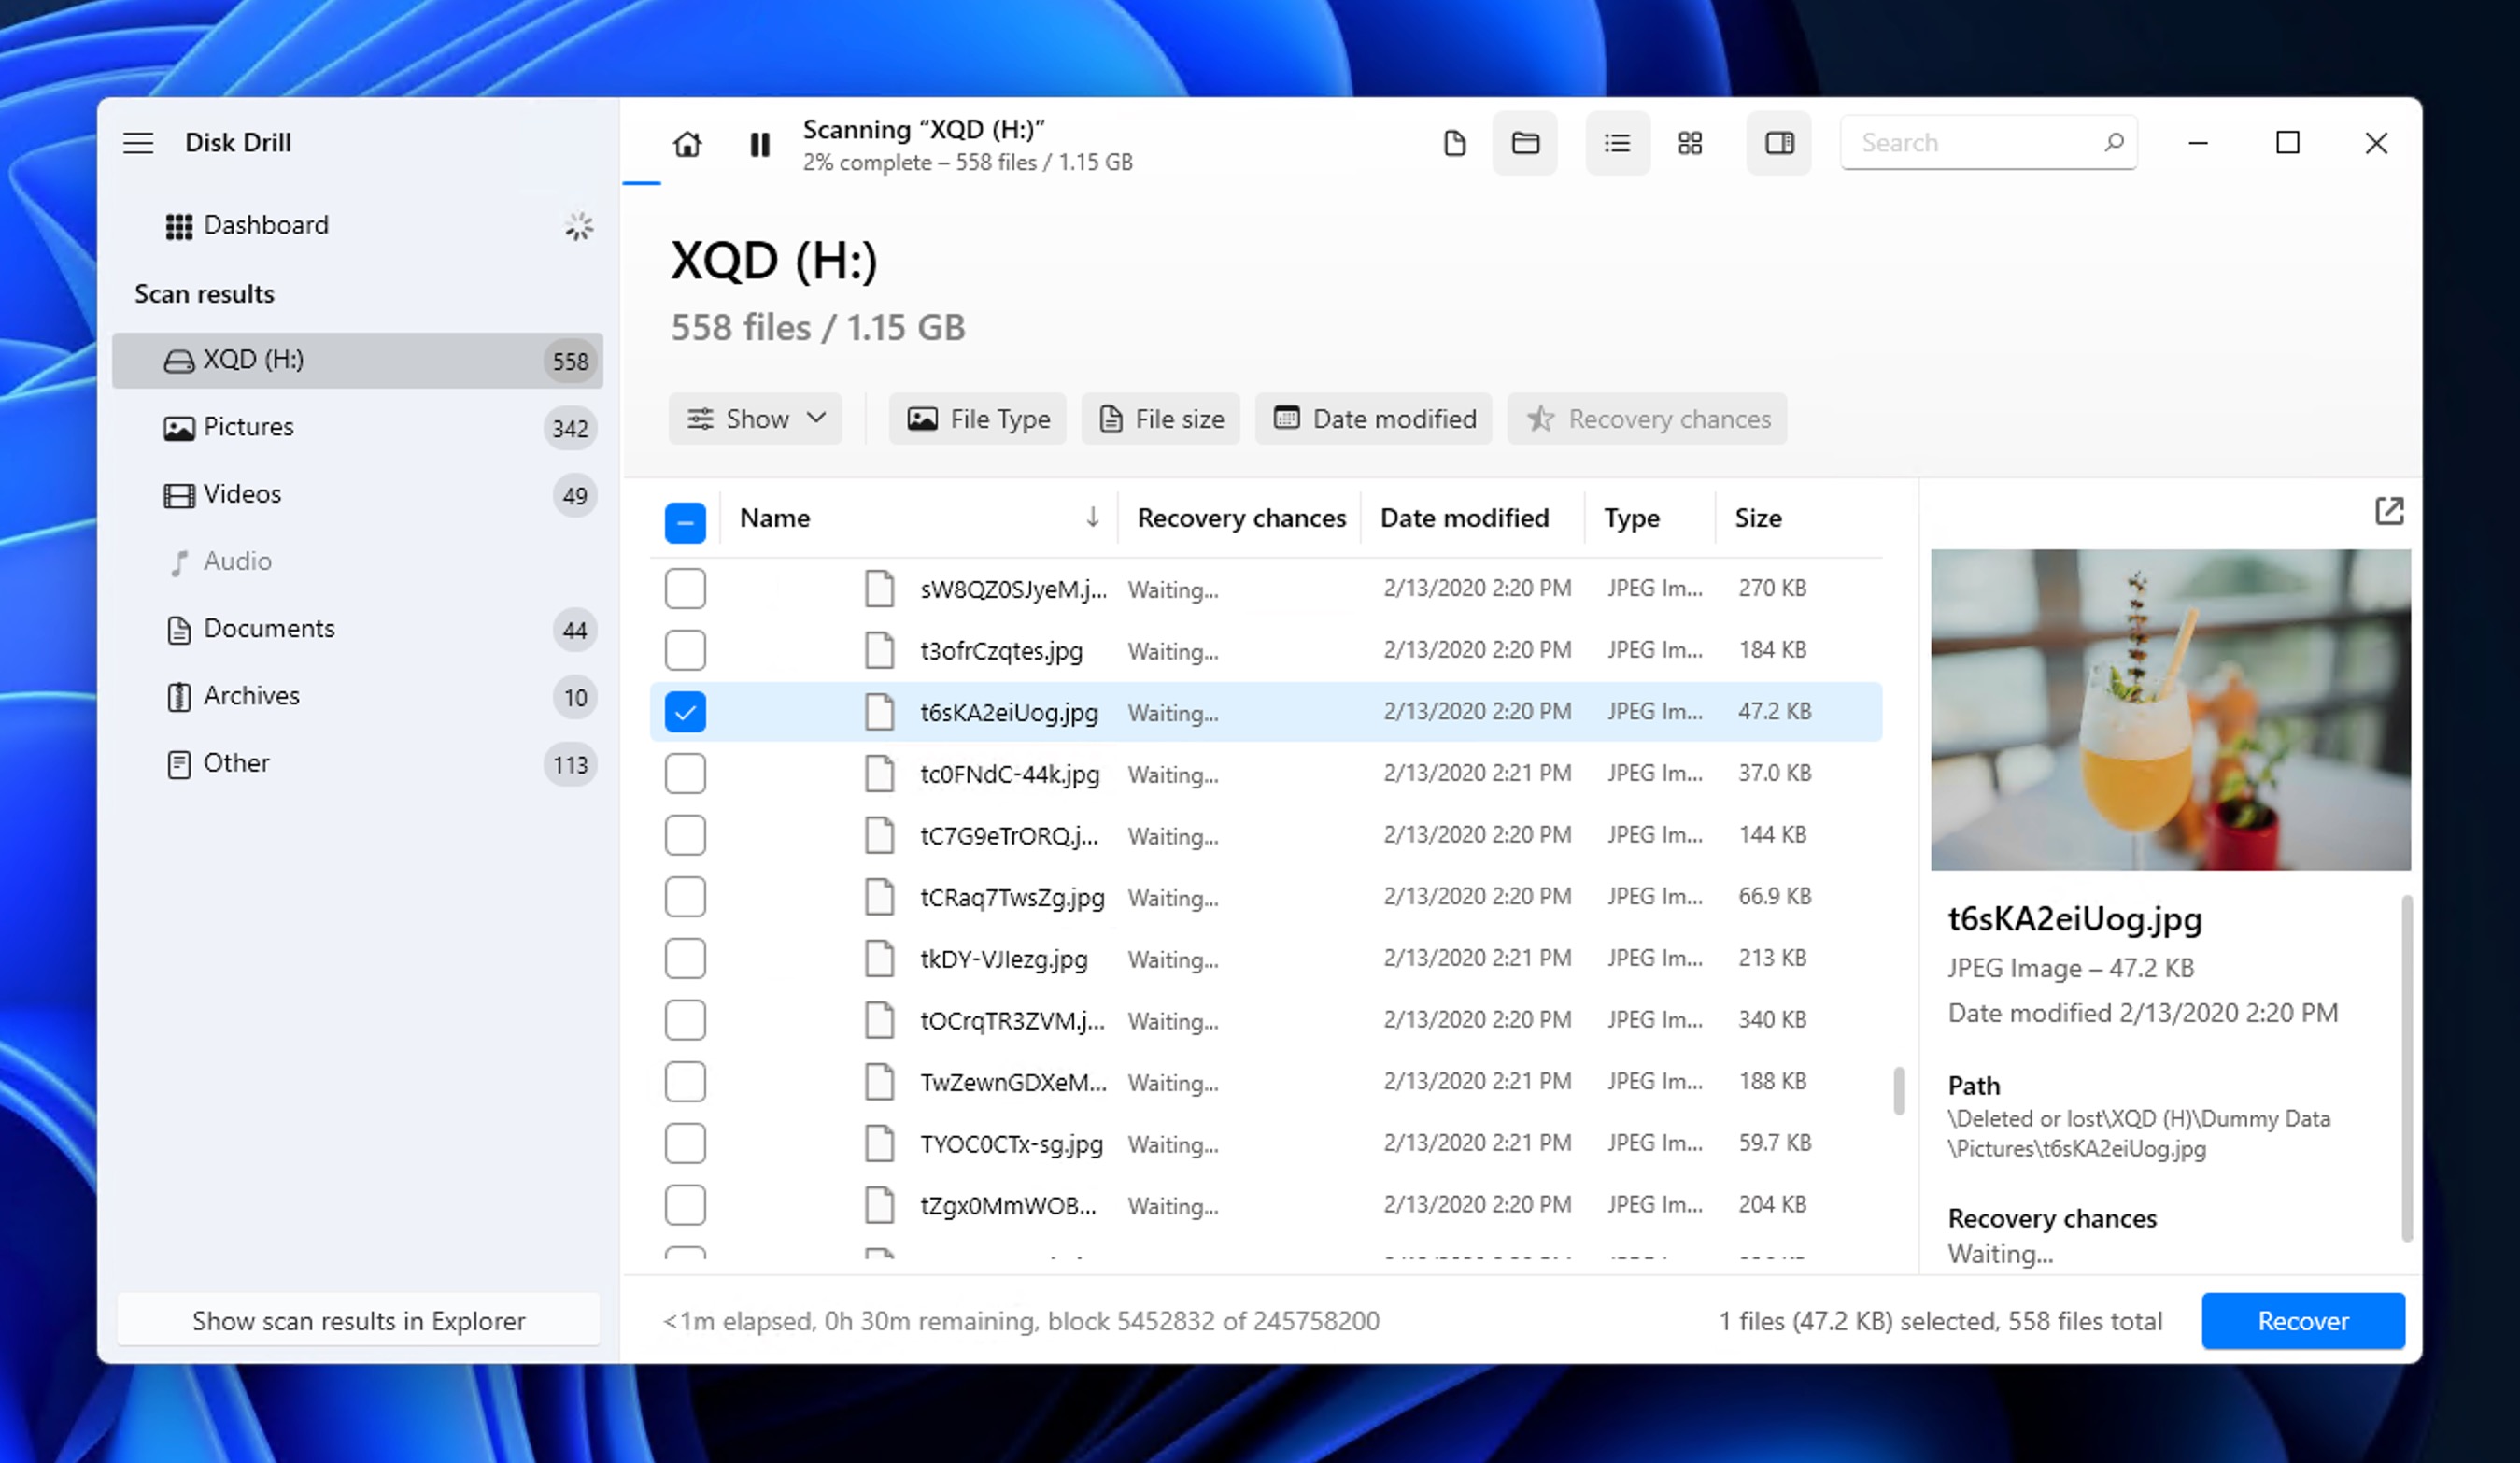
- Select the files you want to recover and click Recover.
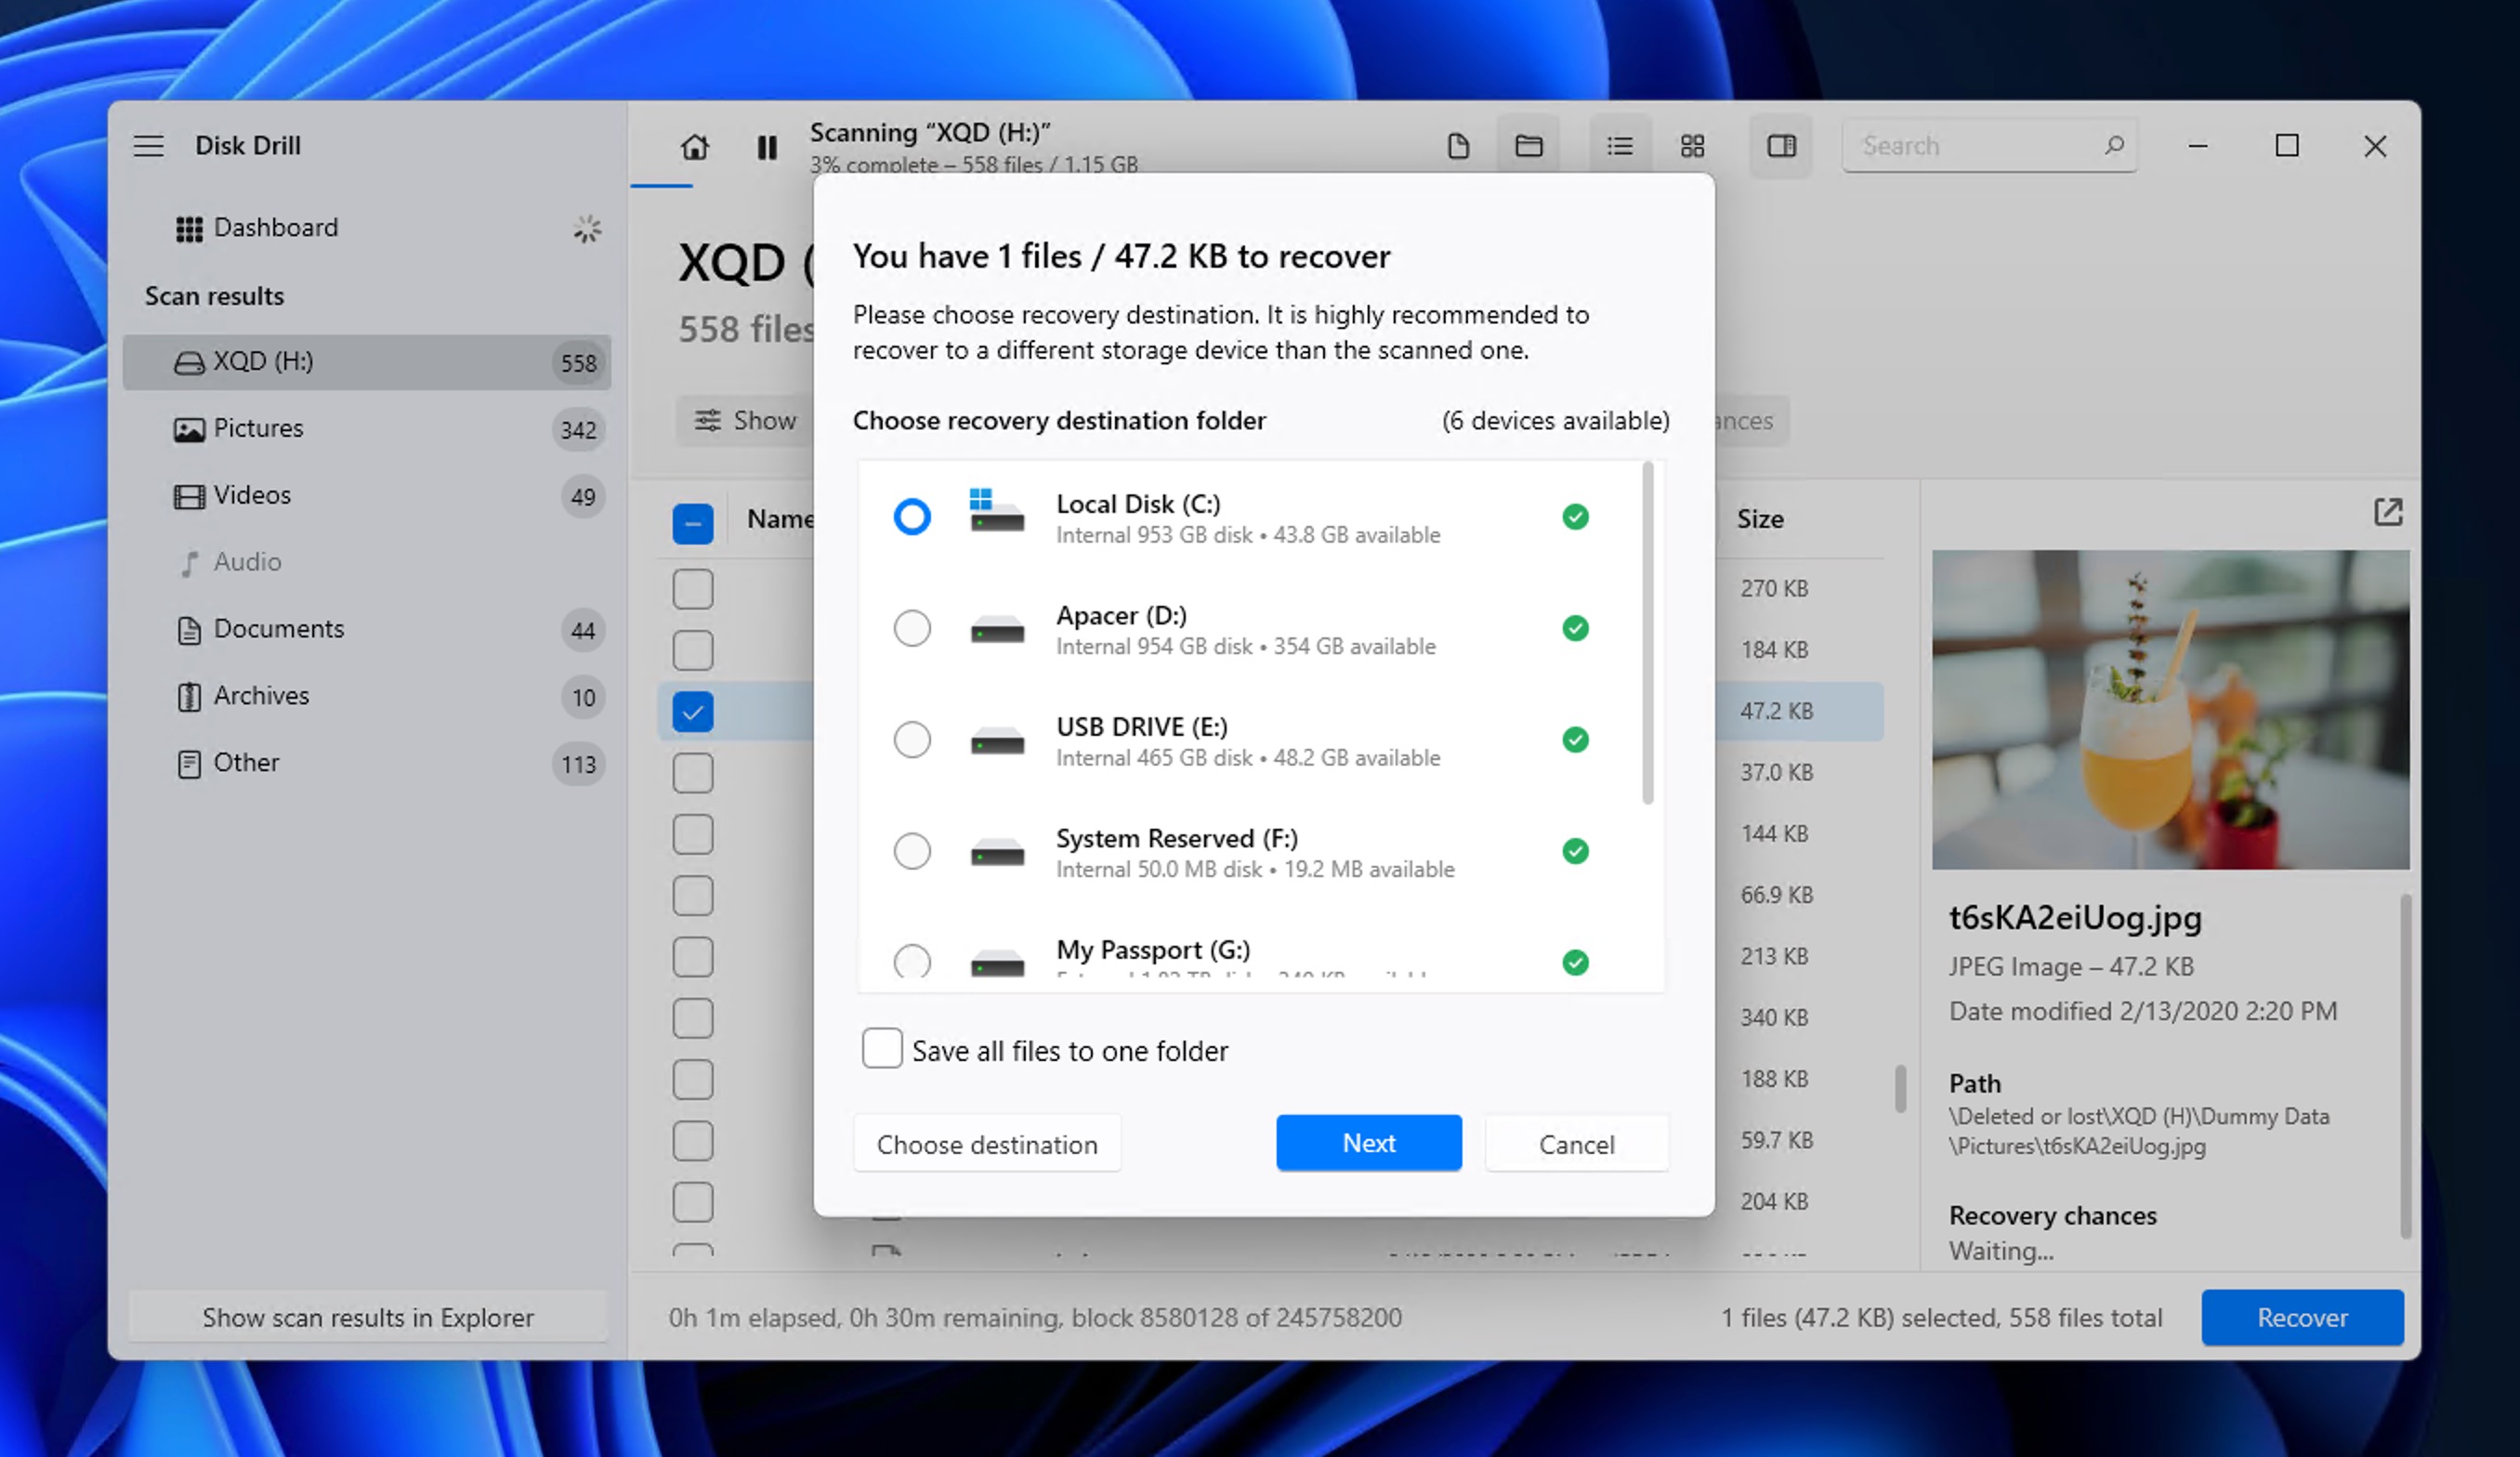
- Choose a destination folder on a different drive (not the XQD card) and confirm.
You can scan your card and preview recoverable files completely free on both Windows and Mac. Windows users can also recover up to 100 MB at no cost, which is enough to get back a handful of photos or test the software before committing to a license. Mac users can preview everything for free, but actual recovery requires a paid license.
Method 2: Restoring Data from the Recycle Bin or Trash
Unfortunately, the Recycle Bin and Trash aren’t nearly as useful for recovering XQD card content as they are for files deleted from your computer’s internal drive, which is why we don’t recommend it as the first method you try.
When you delete photos or videos from a memory card directly on your camera, they’re gone immediately. Cameras don’t have a recycle bin. And Windows typically bypasses the Recycle Bin for external flash drives, so files deleted while your XQD card is connected to a PC won’t show up when you check it by following these steps:
- Double-click the Recycle Bin icon on your Desktop.
- Search or browse for your deleted photos and videos.
- If you find them, select the files and right-click.
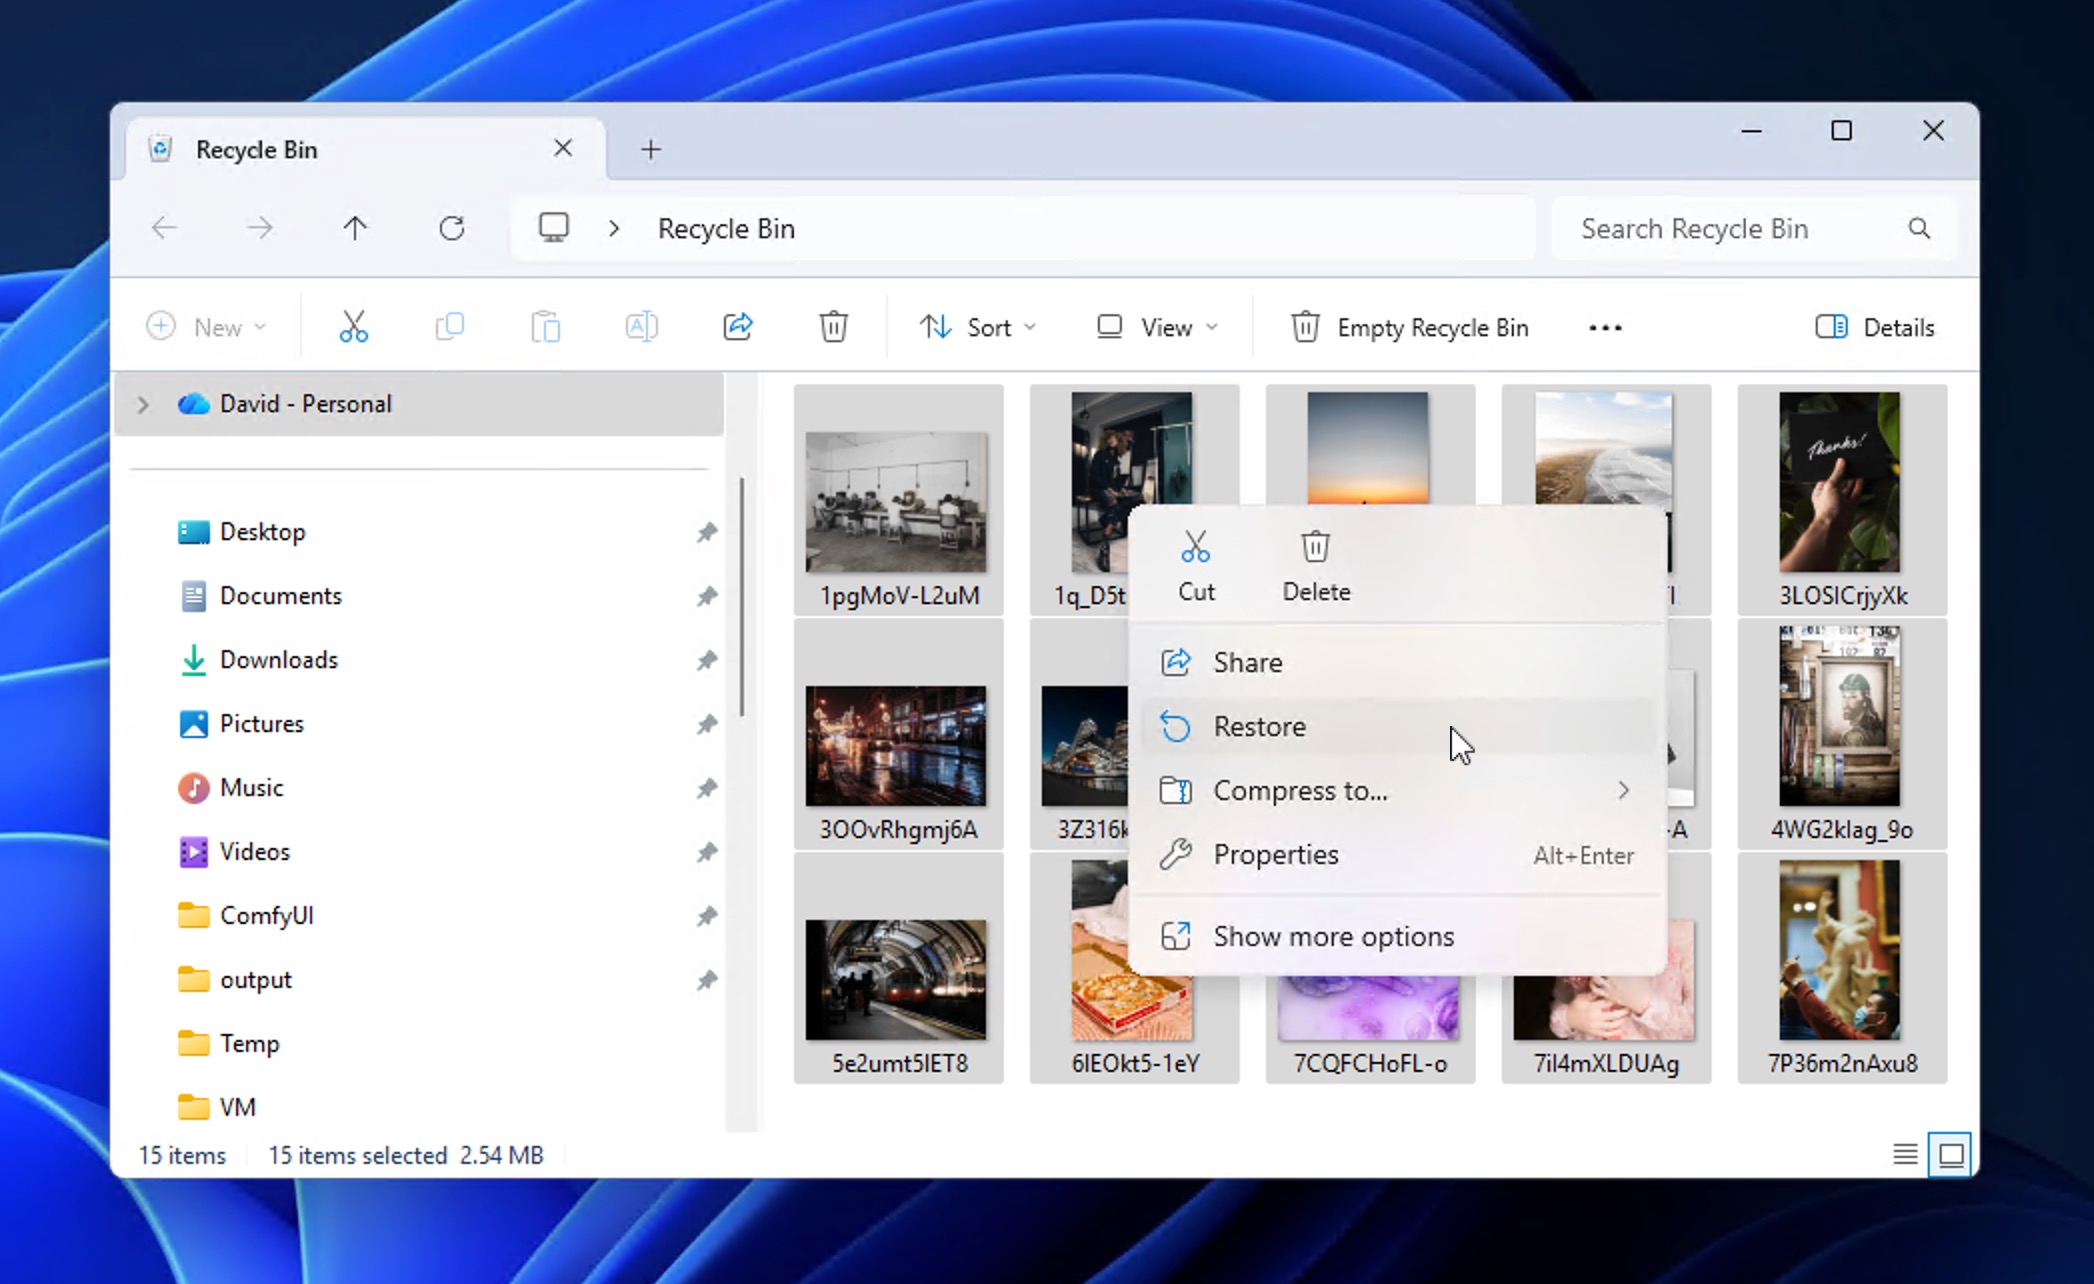
- Choose Restore to send them back to their original location.
The only exception is macOS. When you delete files from an external drive on a Mac, they’re moved to a hidden .Trashes folder on the card itself. As long as the card is still connected, you can restore them from Trash.
To check if your files are still there:
- Connect your XQD card to your Mac.
- Open Trash from the Dock.
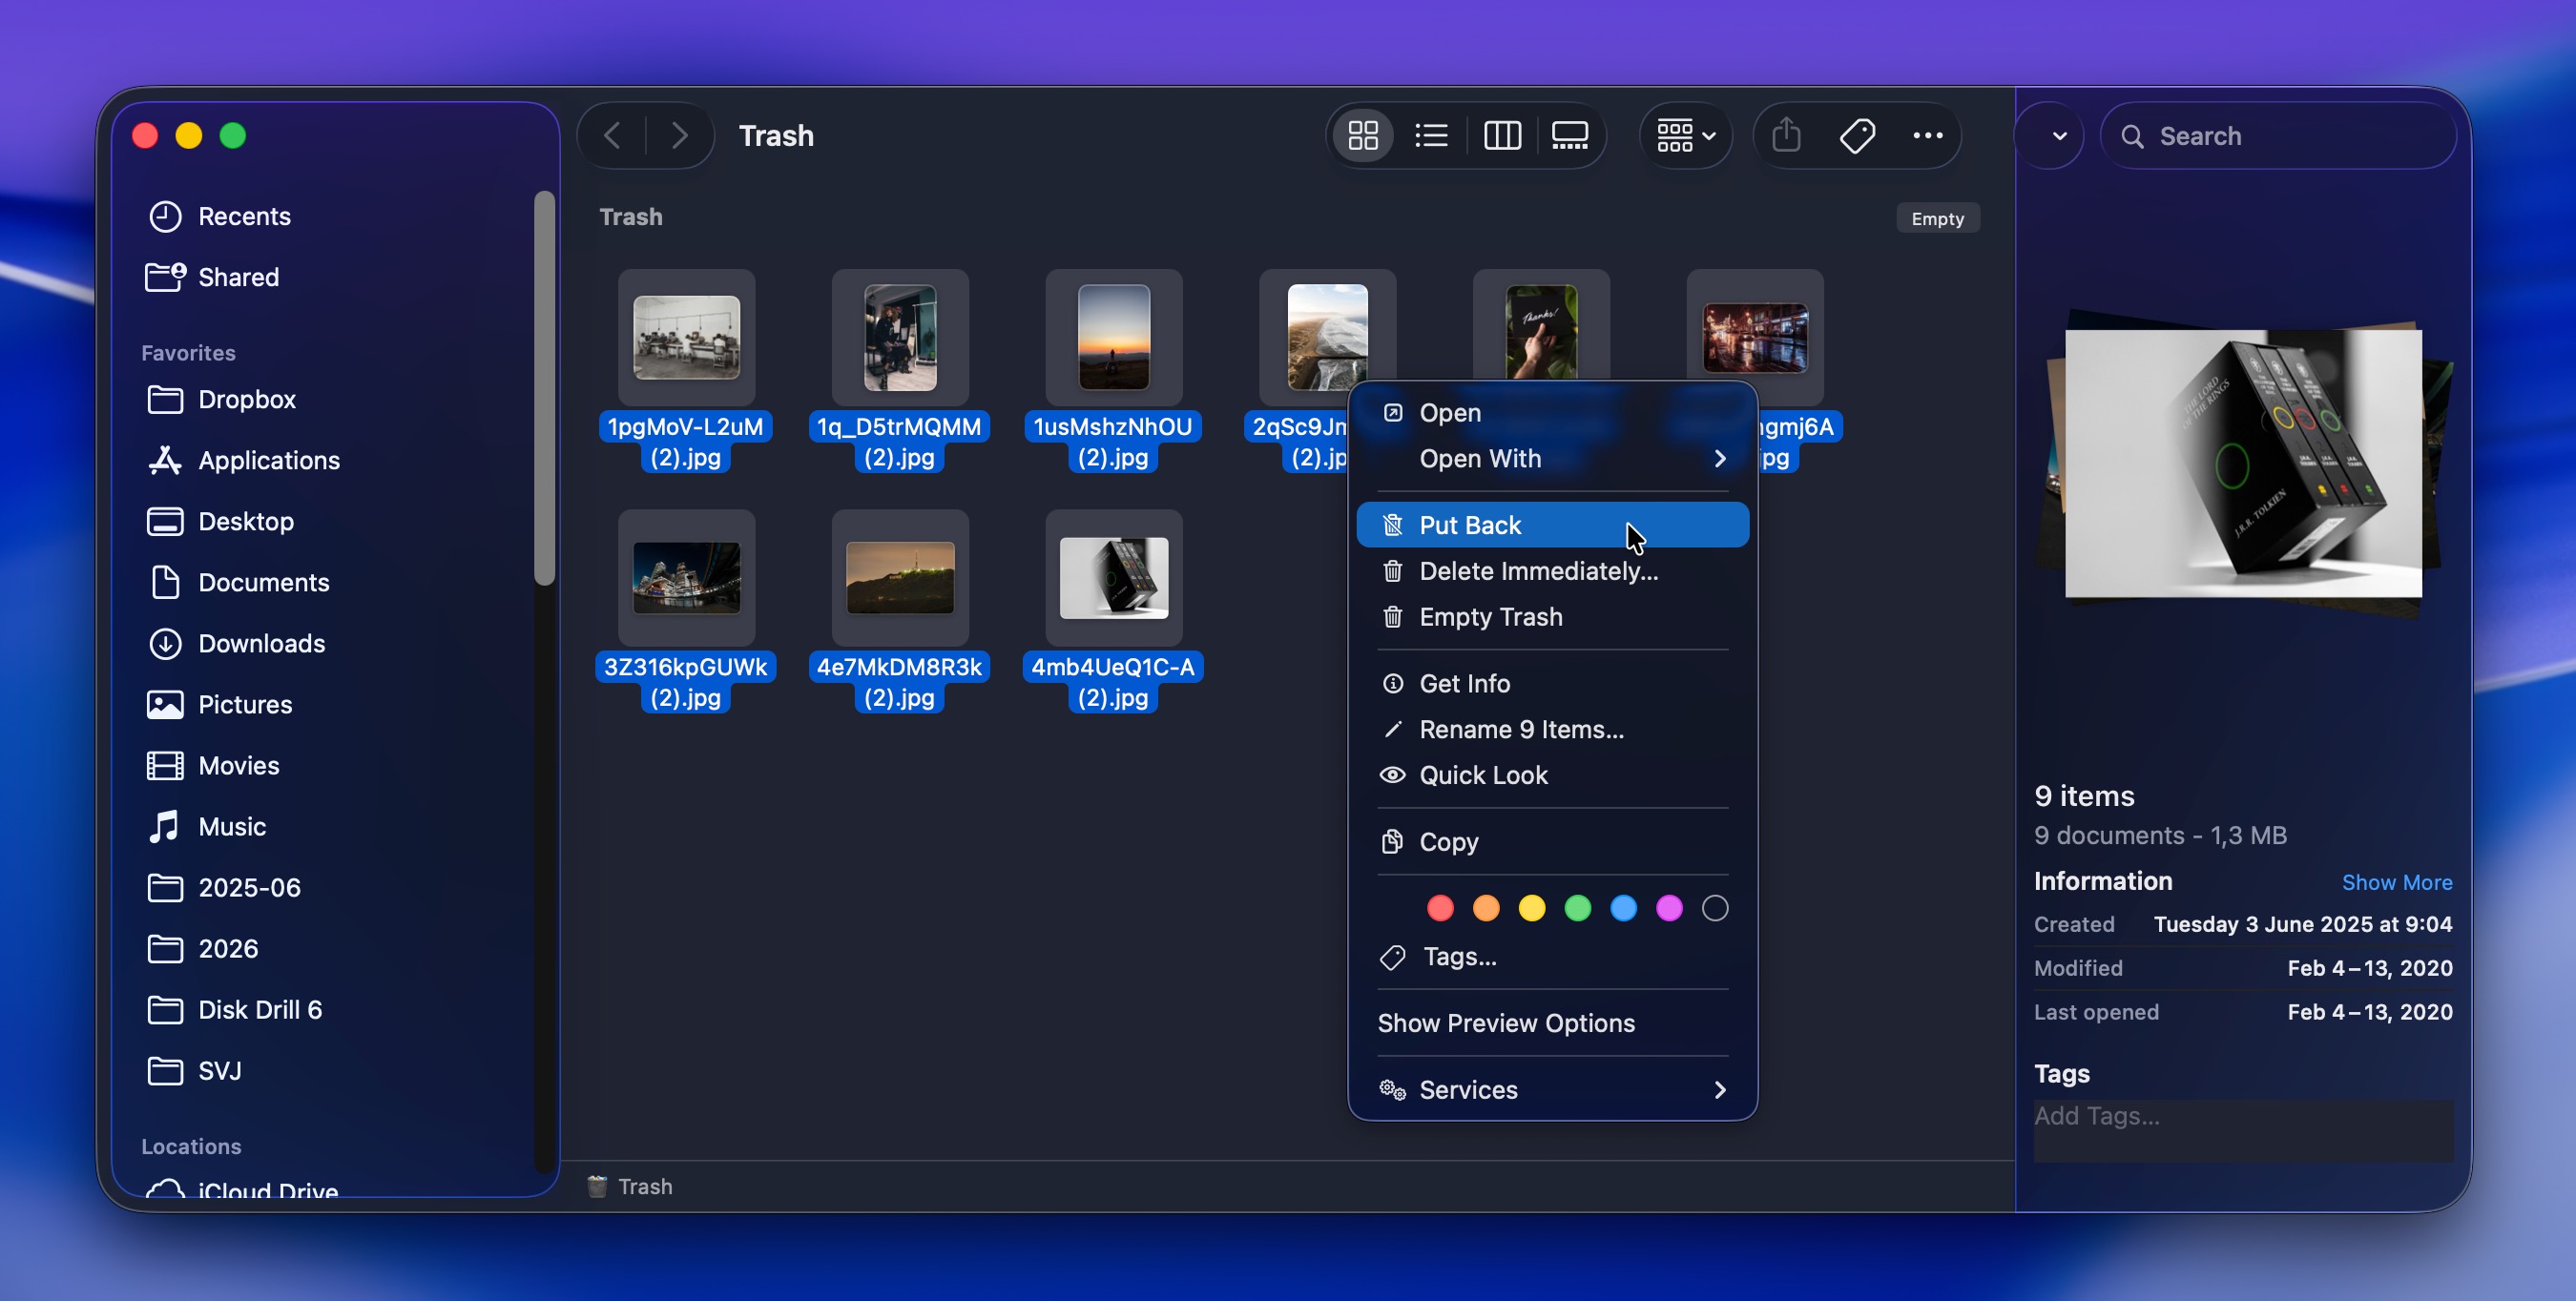
- Look for your deleted files and select them.
- Right-click and choose Put Back to restore them to their original location.
If your files aren’t in the Trash/Recycle Bin, and you’ve already tried recovery software, then there’s one more option that might be worth exploring, but only in certain situations.
Method 3: Consult a Data Recovery Service

A professional data recovery service is worth considering only in specific situations where DIY methods and recovery software cannot help, such as:
- Your XQD memory card is physically damaged (bent pins or cracked casing are the two main examples)
- The memory card is not detected at all by your computer, so you can’t scan it using data recovery software.
- You experience intermittent connection failures when you try to read the XQD memory card and can’t finish data recovery as a result.
In such cases, renowned data recovery services can often save the day by extracting the missing data directly from the memory chip.
In less serious situations, you can usually achieve the same results at home because professional labs typically rely on the same recovery algorithms and tools available in consumer software.
How to Fix a Corrupted XQD Card
The fixes below are meant for cases where your data has already been recovered or isn’t important, and you simply want to make the XQD card usable again by addressing issues like:
- Camera errors or a blank screen
- Connection-related error messages
- Empty folders when viewed on a computer
- The card is not appearing in your file browser
- Very slow access or transfer speeds
Method 1: Rule Out Hardware and Connection Issues
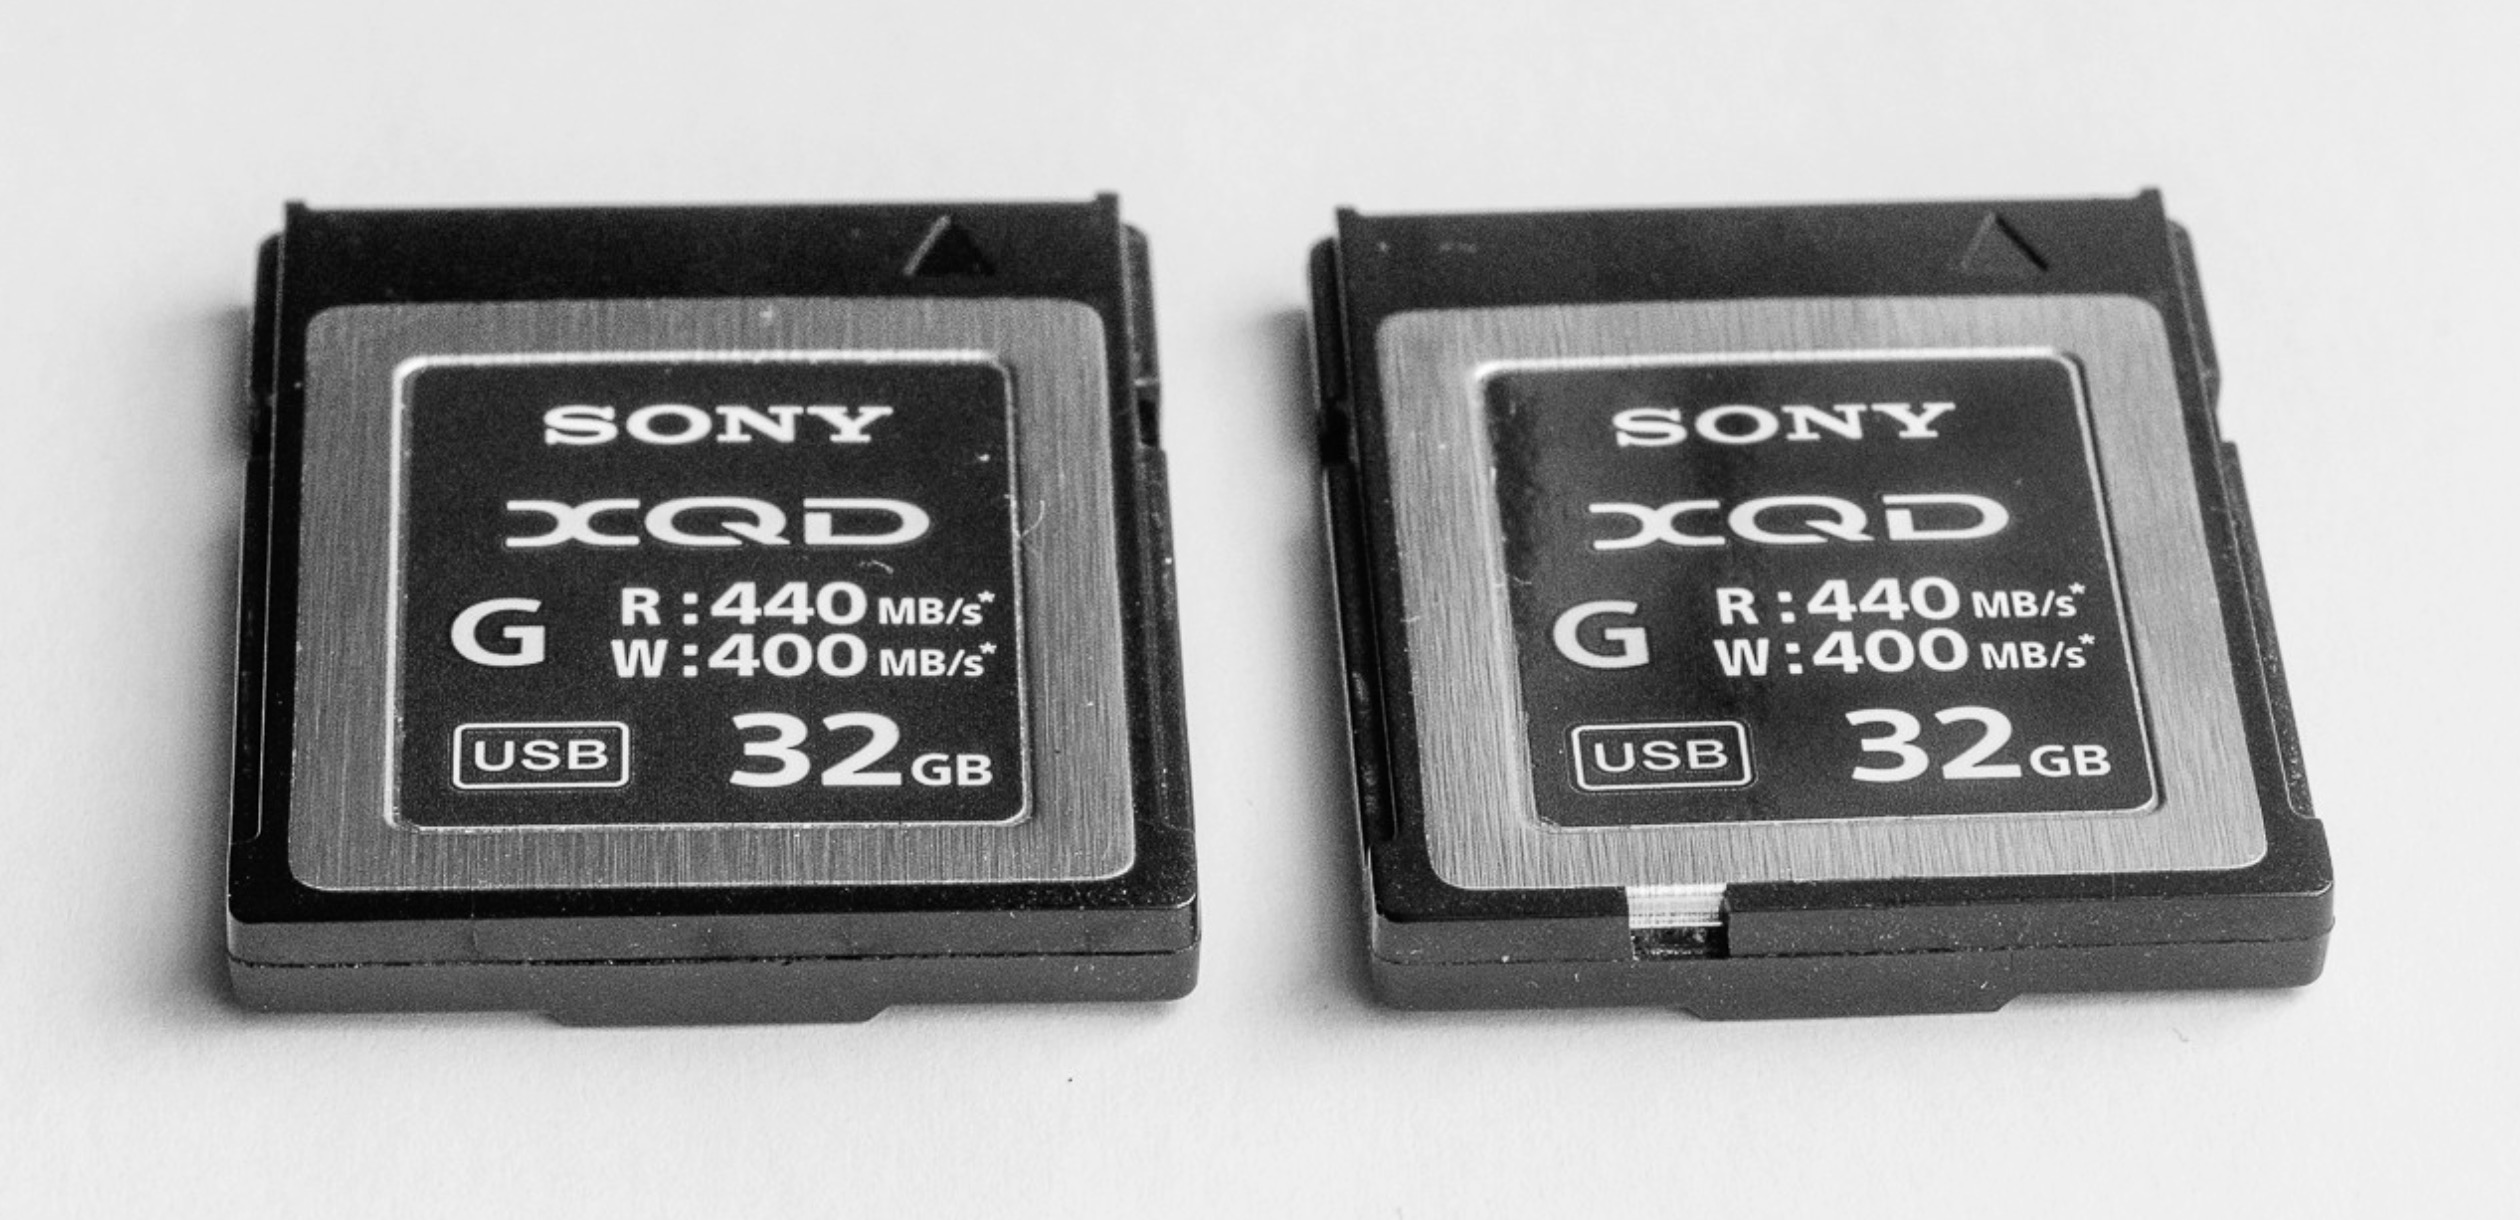
Source: https://www.nikoncafe.com/threads/defective-sony-xqd-card.327434/
Before assuming the worst, it’s worth checking whether the problem is actually with your XQD card or something else in the chain. A faulty card reader, bad cable, or damaged port can all make a perfectly healthy card appear corrupted or unreadable.
Start with a visual inspection. Look at the gold contacts on your XQD card for any signs of dirt, corrosion, or physical damage. Check the pins in your card reader as well. Bent or broken pins are a common culprit when a memory card isn’t showing up on your computer.
Next, try swapping out the hardware:
- Use a different XQD card reader if you have one available.
- Try a different USB cable if your reader uses one.
- Connect to a different USB port, preferably directly on your computer rather than through a hub.
- Test the card on another computer entirely.
If the card works fine with different hardware, you’ve found your problem. If it still won’t read, the issue is likely with the card itself, and you can move on to the software-based fixes below.
Method 2: Run CHKDSK Command Featuring CMD
CMD on Windows has a utility called CHKDSK that helps fix corrupted memory cards and XQD card errors. Here’s what you need to do:
- Search for CMD and click on Run as Administrator. Key in the following command and hit Enter:
chkdsk X: /f
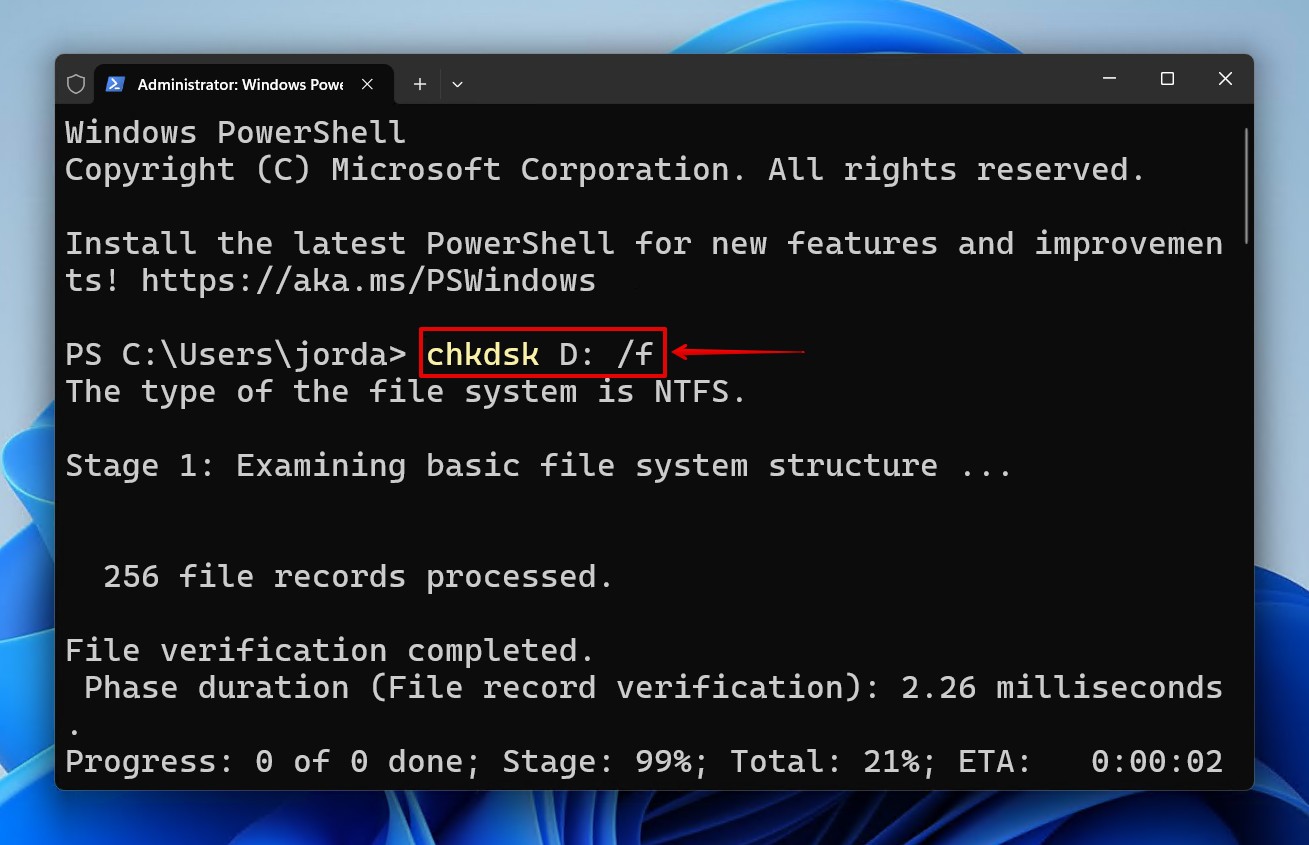
- Wait for the process to terminate. This could take multiple hours, depending on your XQD card size.
Method 3: Assign a New Drive Letter
Sometimes your XQD card won’t show up in File Explorer even though it’s being recognized by your system. You can confirm this by checking Disk Management or running a scan with data recovery software.
If the card appears there but not in File Explorer, the issue is usually a missing or conflicting drive letter. Assigning a new one takes about 30 seconds and often fixes the problem.
Here’s a quick guide to assigning a new drive letter:
- Search for Create and format hard disk partitions and hit Enter.
- Right-click on your XQD card and select Change Drive Letter and Paths…
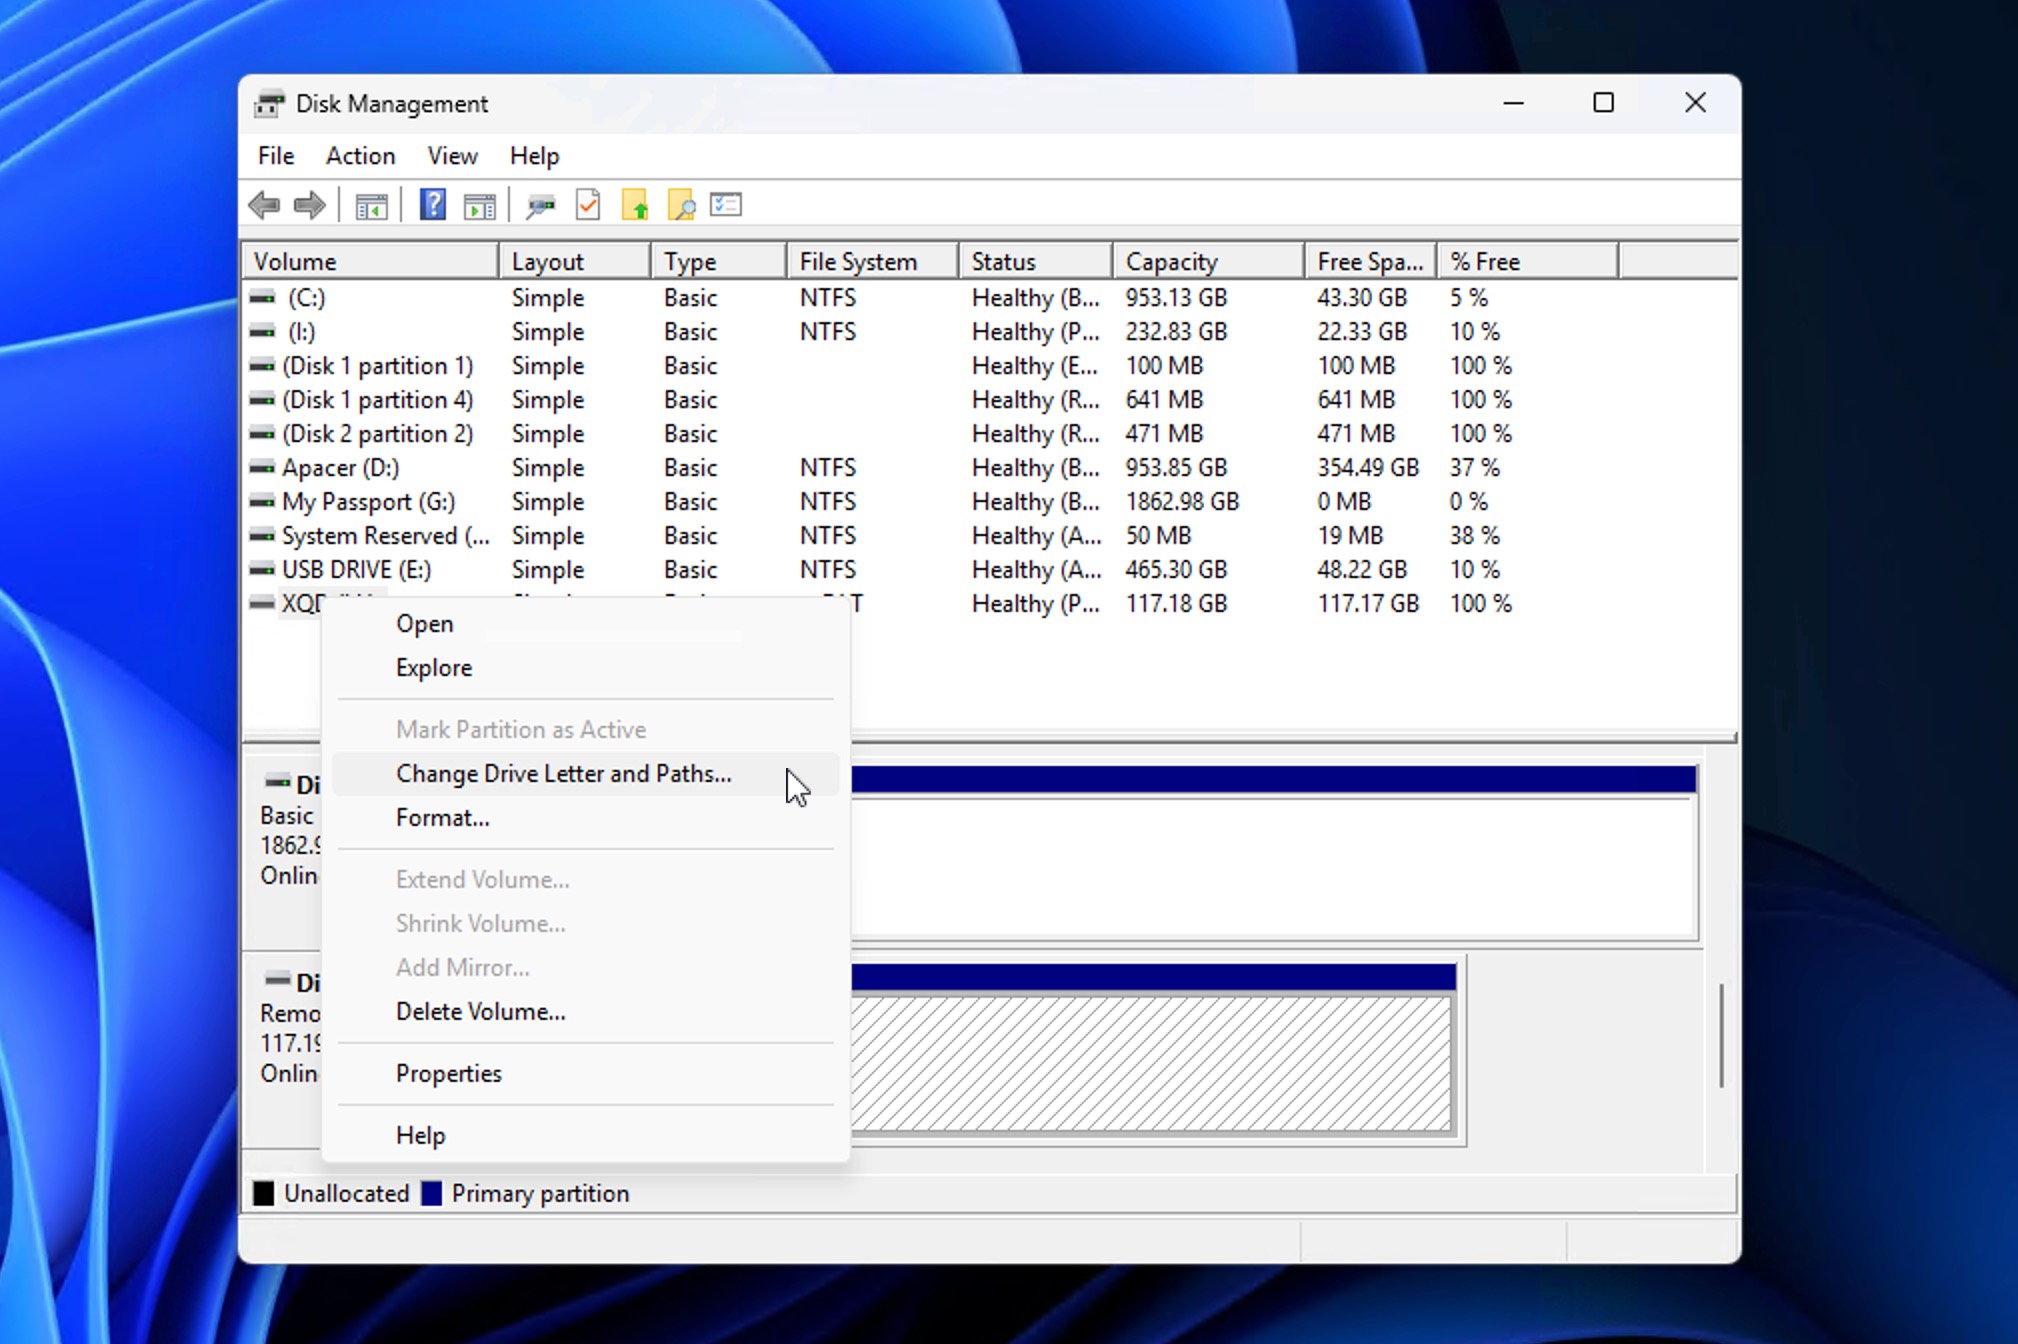
- Select Change…
- Click on the dropdown and choose a new drive letter and click OK.
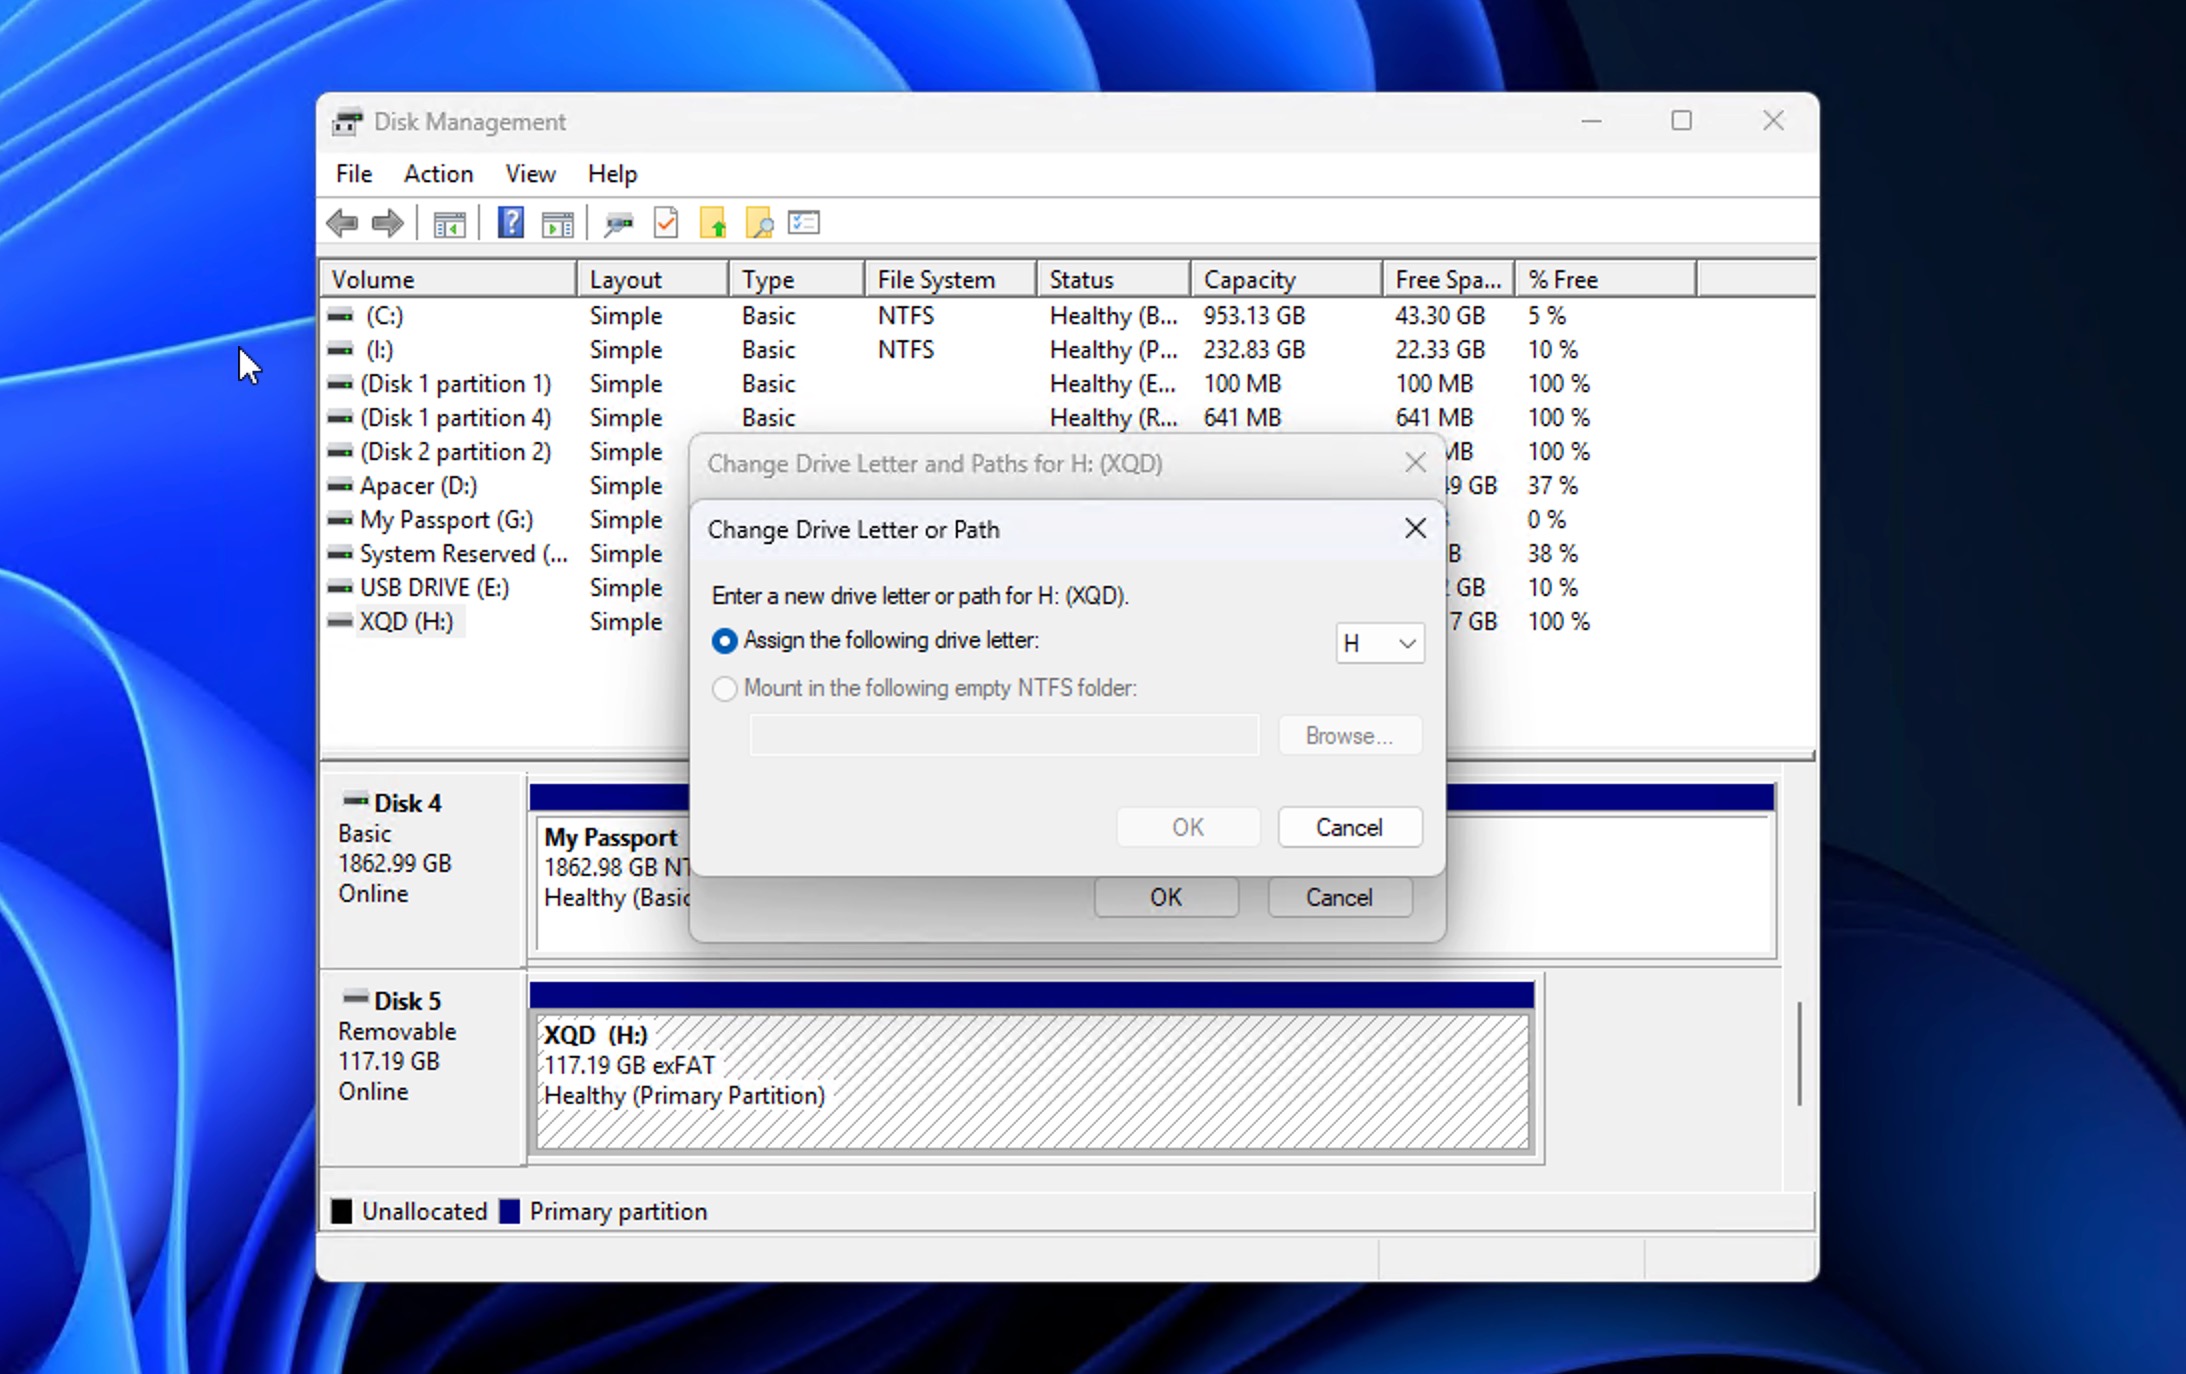
- Hit OK again.
Method 4: Using Windows Native Repair Tool
Windows has a built-in error-checking tool that can scan your XQD card for file system errors and attempt to fix them. It uses the same repair algorithms as the CHKDSK command (covered above), but wrapped in a simple interface.
If you want a quick fix without typing commands, this is the easier option. CHKDSK gives you more control over the repair process, but for most corrupted memory card situations, the GUI tool works just as well, and it takes just a few steps to use it:
- Open File Explorer.
- Navigate to your XQD card and right-click on it.
- Select Properties > Tools > Check.
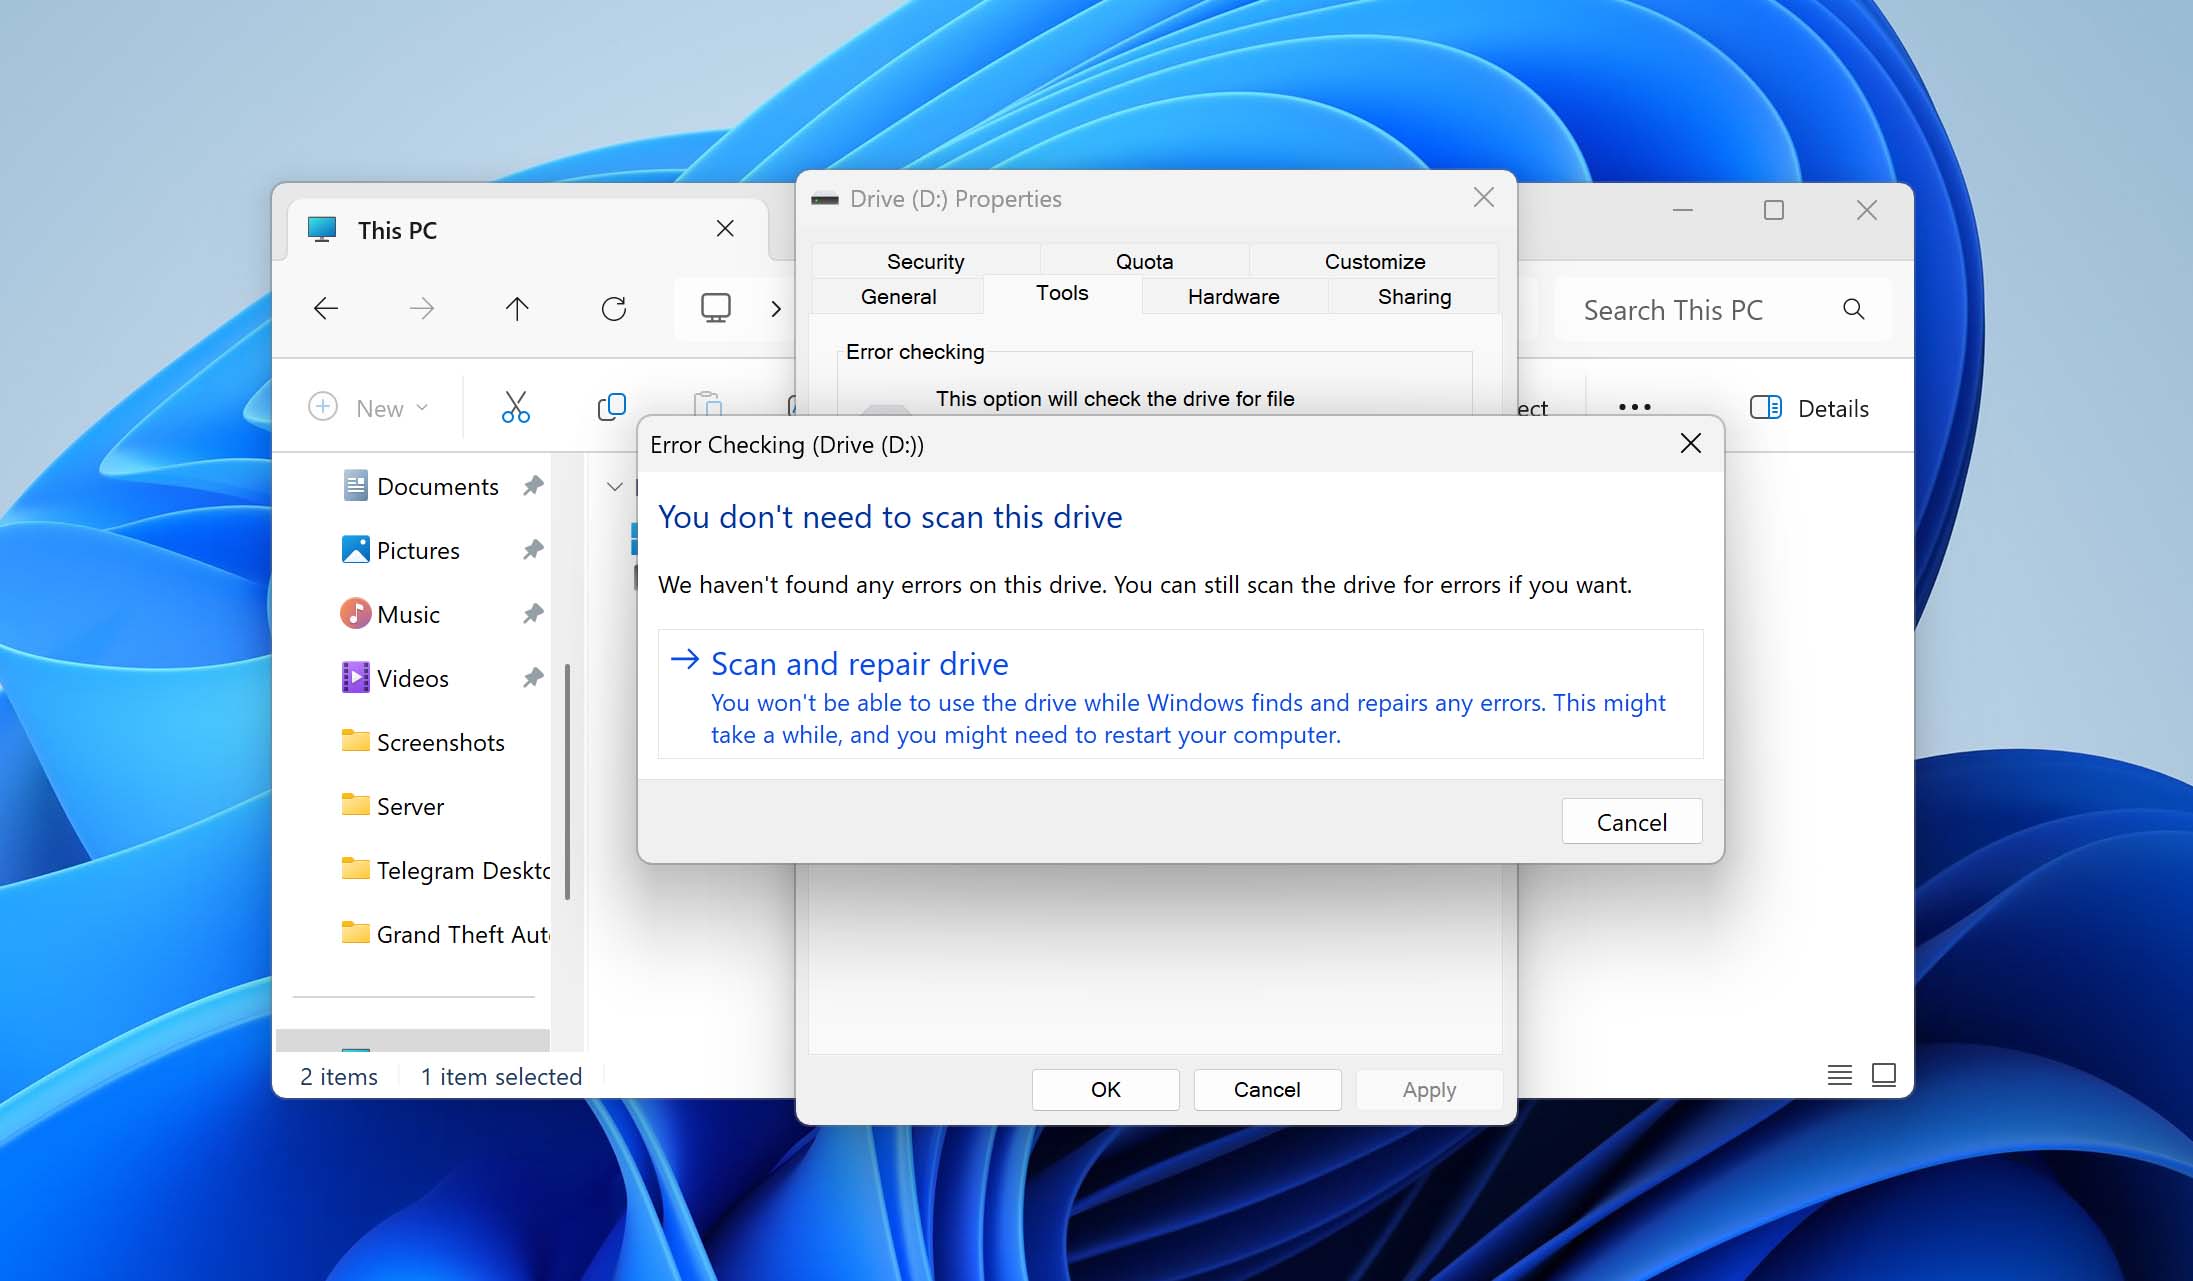
- Click on the Scan and repair drive option.
Method 5: Fix XQD Card by Formatting
Formatting can fix a wide range of XQD card issues, from file system corruption and RAW memory card errors to persistent read/write problems as it essentially wipes the card clean and rebuilds the file system from scratch.
However, formatting erases all data on the card, so if you haven’t recovered your files yet, do that first, and then you’ll be able to format a memory card without losing data. Once you’ve confirmed your files are safe (or you’ve accepted they’re gone), you can apply the simplest way to format your XQD card on Windows:
- Connect the XQD card to your PC.
- Open File Explorer and right-click on the XQD card.
- Select Format.
- Choose exFAT as the file system. This is the standard for high-capacity memory cards and works with most cameras.

- Click Start and wait for the process to complete.
If File Explorer doesn’t show your card, you can format it through Disk Management instead. Search for “Create and format hard disk partitions,” right-click your XQD card, and select Format.
Method 6: Reinstall Your Drivers
Your XQD card is another storage device with associated drivers for smooth functioning. If these drivers are outdated, chances are your PC can’t perform operations on the memory card.
Here’s an easy guide to reinstalling your driver:
- Insert your XQD card into a PC.
- Search for Device Manager.
- Navigate to your XQD card and right-click on it.
- Select the Uninstall device option.
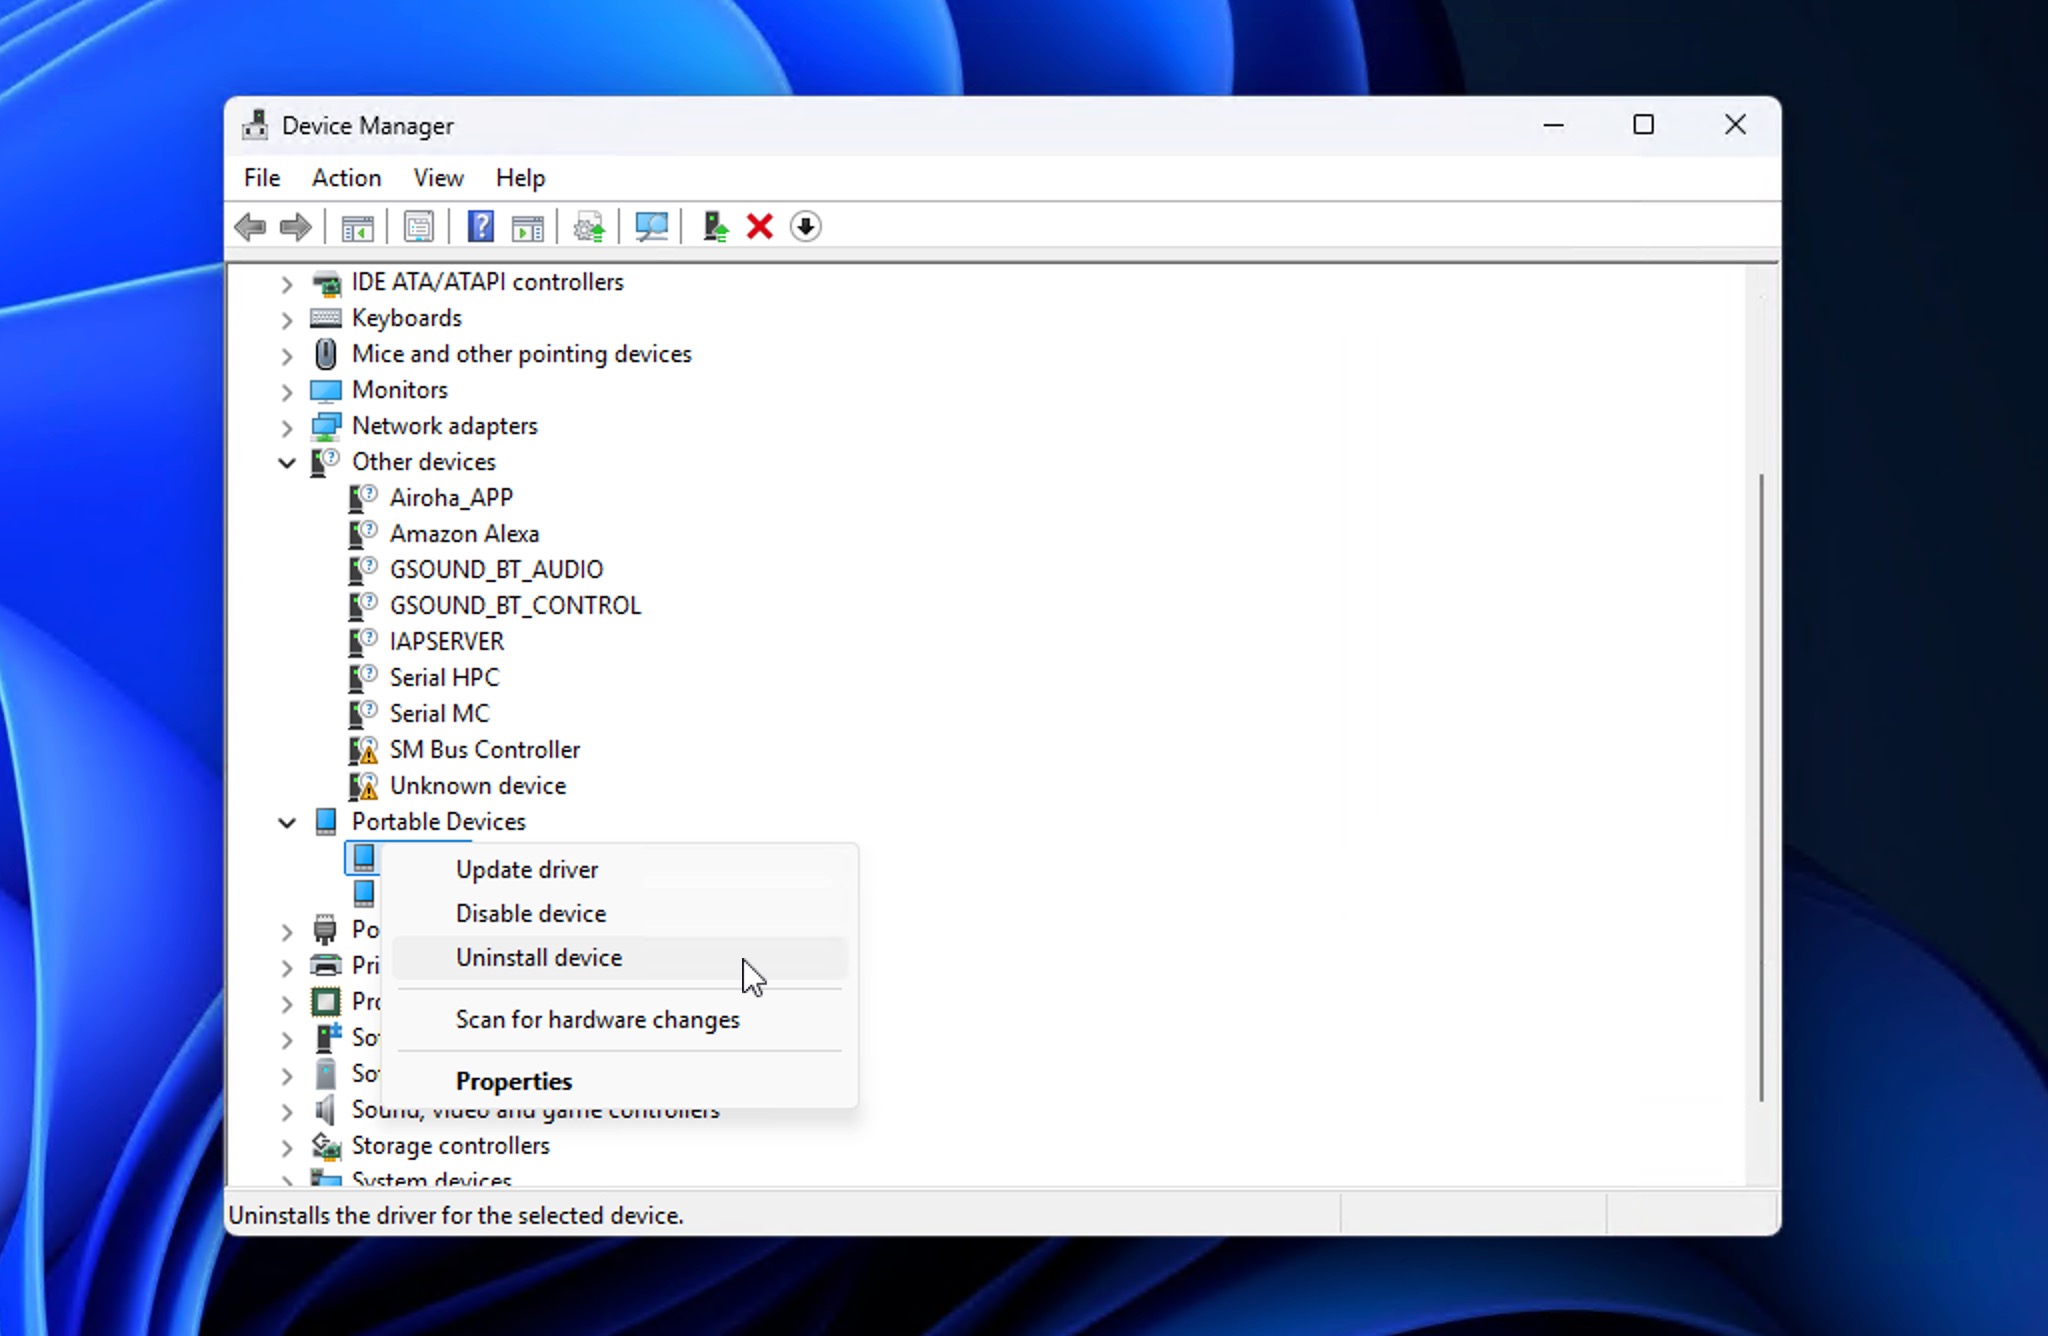
- Reconnect the XQD card to prompt a fresh driver installation.
How to Protect and Future-Proof Your XQD Cards
XQD cards are built tough, but they’re not invincible. A few simple habits can prevent most data loss scenarios and keep your cards running reliably for years:
- 📷 Format in-camera, not on your computer. Nikon recommends formatting in-camera to avoid compatibility issues that can make cards unreadable later. It’s a good idea to format your XQD card proactively from time to time, such as before an important shoot, so that your file system is always in top shape.
- 💾 Back up properly and verify your copies. Follow the 3-2-1 rule: three copies of your files, on two different types of media, with one stored off-site. Don’t delete files from the card until you’ve confirmed the backup is complete.
- 🔌 Use a dedicated XQD card reader. Avoid deleting files directly on your camera, and leave 10 – 15% of the card’s capacity free. A quality reader also reduces the chance of transfer errors that can corrupt your memory card.
- 🔄 Keep your firmware current. Check for camera and card reader updates periodically. Some cameras, like the Nikon Z6 and Z7, gained CFexpress support through firmware updates. If yours did, CFexpress cards offer faster transfers and may be worth the upgrade.
- ⚠️ Retire cards that act up. If a card intermittently disconnects, slows down noticeably, or throws file system errors, stop using it for critical work. Even after switching to CFexpress, keep a few trusted XQD cards as backups.
Following the above proactive steps can help secure your data and prolong the lifespan of your XQD card.
Conclusion
Most XQD card data loss situations are recoverable if you act quickly and avoid writing new data to the card. For accidental deletion and formatting, data recovery software is your best bet, and we recommend Disk Drill as the best XQD card recovery software specifically because of its Advanced Camera Recovery module.
For corruption and read errors, you may need to combine recovery with the repair methods we covered. If recovery software can’t detect your card at all, that usually points to physical damage. Check the card’s contacts and try a different reader first, but if it’s still invisible to your system, a professional data recovery service is likely your only option. The same applies if you notice bent pins, cracks, or other visible damage.
FAQ
Using a data recovery tool is your best bet for data recovery:
- Connect your XQD card
- Download, install & launch Disk Drill
- Select your XQD card and click on Search for Lost Data
- Select your files
- Click Recover
- Specify the destination and click OK
Absolutely! You can recover XQD card data in the following ways:
- Using a third-party data recovery tool like Disk Drill
- Restoring Data from a Recycle Bin
- Consulting a Data Recovery Service Center for professional assistance
You can use TestDisk, a free and open-source tool designed to recover lost partitions and repair file systems:
- Connect the XQD card to your PC.
- Download and run TestDisk.
- Select Create to start a new log file.
- Choose your XQD card from the list of drives.
- Select the partition table type (usually Intel for memory cards).
- Choose Analyse to scan for partition issues.
- If TestDisk finds problems, follow the prompts to repair the partition structure.
If TestDisk cannot fix the corruption, your best option is to recover your files using data recovery software like Disk Drill before formatting the card.
In many cases, yes. An in-camera format usually removes the file system structure but doesn’t immediately erase the underlying data. The key is to stop using the card right away and scan it using XQD recovery software before any new data overwrites the original files.
Corrupted video files are often still repairable, especially if the file data is intact but the video header or index was damaged during transfer. In such cases, data recovery software can extract the files, and specialized video repair tools like Clever Online Video Repair can help rebuild corrupted footage so it becomes playable again.
If your camera can still read the XQD card but your computer can’t, this usually points to a file system or compatibility issue rather than physical damage. A proven solution is to extract data from the card using XQD recovery software like Disk Drill and then format it to recreate the file system.