


The footage you need has disappeared. Maybe someone cleared the drive, or the clip you need for an insurance claim or a police report is simply missing from the playback list. In many cases you can still recover deleted CCTV footage, because deleting a video does not physically wipe it from the storage device. This guide walks you through the safest and most effective ways to get the footage back, from scanning the recorder’s hard drive to finding a copy the system saved elsewhere. Our team has been helping people and businesses recover lost footage for years, and we apply the same logic and workflows here.
Can Deleted CCTV Footage Be Recovered?
Yes, deleted security footage can be recovered when the original storage device is still readable and the missing recordings have not been overwritten by newer footage. Recovery software can scan that storage directly and rebuild the video files, even when the recorder itself thinks the footage is gone.
Deleted CCTV footage recovery is not guaranteed, though, and it is worth being honest about why. Almost every CCTV system records in a continuous loop. When the drive or reserved disk quota reaches full capacity, the recorder overwrites the oldest video to make room for the newest. That means the clock is working against you. That’s why it’s important to keep everything off until recovery, as once footage has been overwritten, nothing can bring it back.
How hard the job will be depends almost entirely on how your cameras record and where the video is kept. Find your setup in the table below.
| CCTV recording setup | Where footage is stored | Recovery outlook and challenges |
| DVR with an internal HDD | A hard drive installed inside the recorder | Often great for DIY recovery if the drive can be removed, connected to a computer, and detected with the correct capacity. Expect proprietary file systems, recordings split into fragments, and continuous overwriting. See scanning the drive with software. |
| NVR with one or more HDDs | Surveillance drives connected to a network video recorder | Recovery is realistic from a single drive. Systems using RAID, encryption, or several linked disks are much more complex. Pulling drives in the wrong order or letting the system rebuild the array can make things worse. |
| DVR, NVR, or recording PC with an SSD | An internal or external solid-state drive used for CCTV recording | Deleted footage is harder to recover from an SSD, because SSDs use a command called TRIM that can clear deleted data within minutes. Continuous recording also reuses the same space quickly. Recovery is still possible if TRIM was not supported/enabled, the footage disappeared due to corruption, or a proprietary storage system was used. |
| IP camera with an SD or microSD card | A memory card inside the camera itself | Usually the easiest case. The card connects straight to a computer and the steps match recovering deleted video from an SD card. Cards are often reformatted or overwritten, though, and recovered clips can come back in fragments. |
| CCTV system recording to a NAS or computer | A NAS volume, network share, or local drive used by VMS software | Easier when the footage is saved as ordinary video files you can browse. Harder when the NAS uses RAID, snapshots, a proprietary database, or splits recordings across several disks. |
| Cloud-based security camera | The camera provider’s servers | Recovery software cannot scan a provider’s cloud storage. Your route is the cloud library, any clips already downloaded, and the provider’s support team. See checking the cloud account. |
| Hybrid or redundant setup | Two or more places at once, such as an NVR plus camera SD cards or cloud storage | The best possible position to be in. Even when the main recorder has lost the footage, an intact copy may still be sitting on the camera, the NAS, the cloud account, or a second recorder. |
How to Retrieve CCTV Footage With Software
In most real cases, there is no backup, no cloud copy, and no clips anyone exported earlier. The DVR, NVR, camera card, or recording drive is the only place the video ever existed, which makes scanning that storage device the most practical option you have.
Disk Drill is the tool we recommend here. It reads the storage device directly at a low level rather than going through the recorder or operating system, which matters enormously for CCTV work. It runs on both Windows and Mac and it can scan every type of storage a surveillance system uses: internal and external hard drives, SSDs, SD and microSD cards, USB drives, RAID 0/1/5/6/10 JBOD arrays, NAS devices, and disk images made from recorder storage.
Surveillance systems sometimes use file systems you would recognize, such as FAT32, exFAT, NTFS, or EXT2/3/4. Plenty of others do not, just like DHFS (Dahua File System). Disk Drill can read the data directly, and also has the unique ability to piece together long, fragmented video files with its Advanced Camera Recovery tool, which works best on standard camera formats like MP4 and MOV.
Follow these CCTV data recovery steps for Disk Drill:
- Download Disk Drill, install it, then open the application.
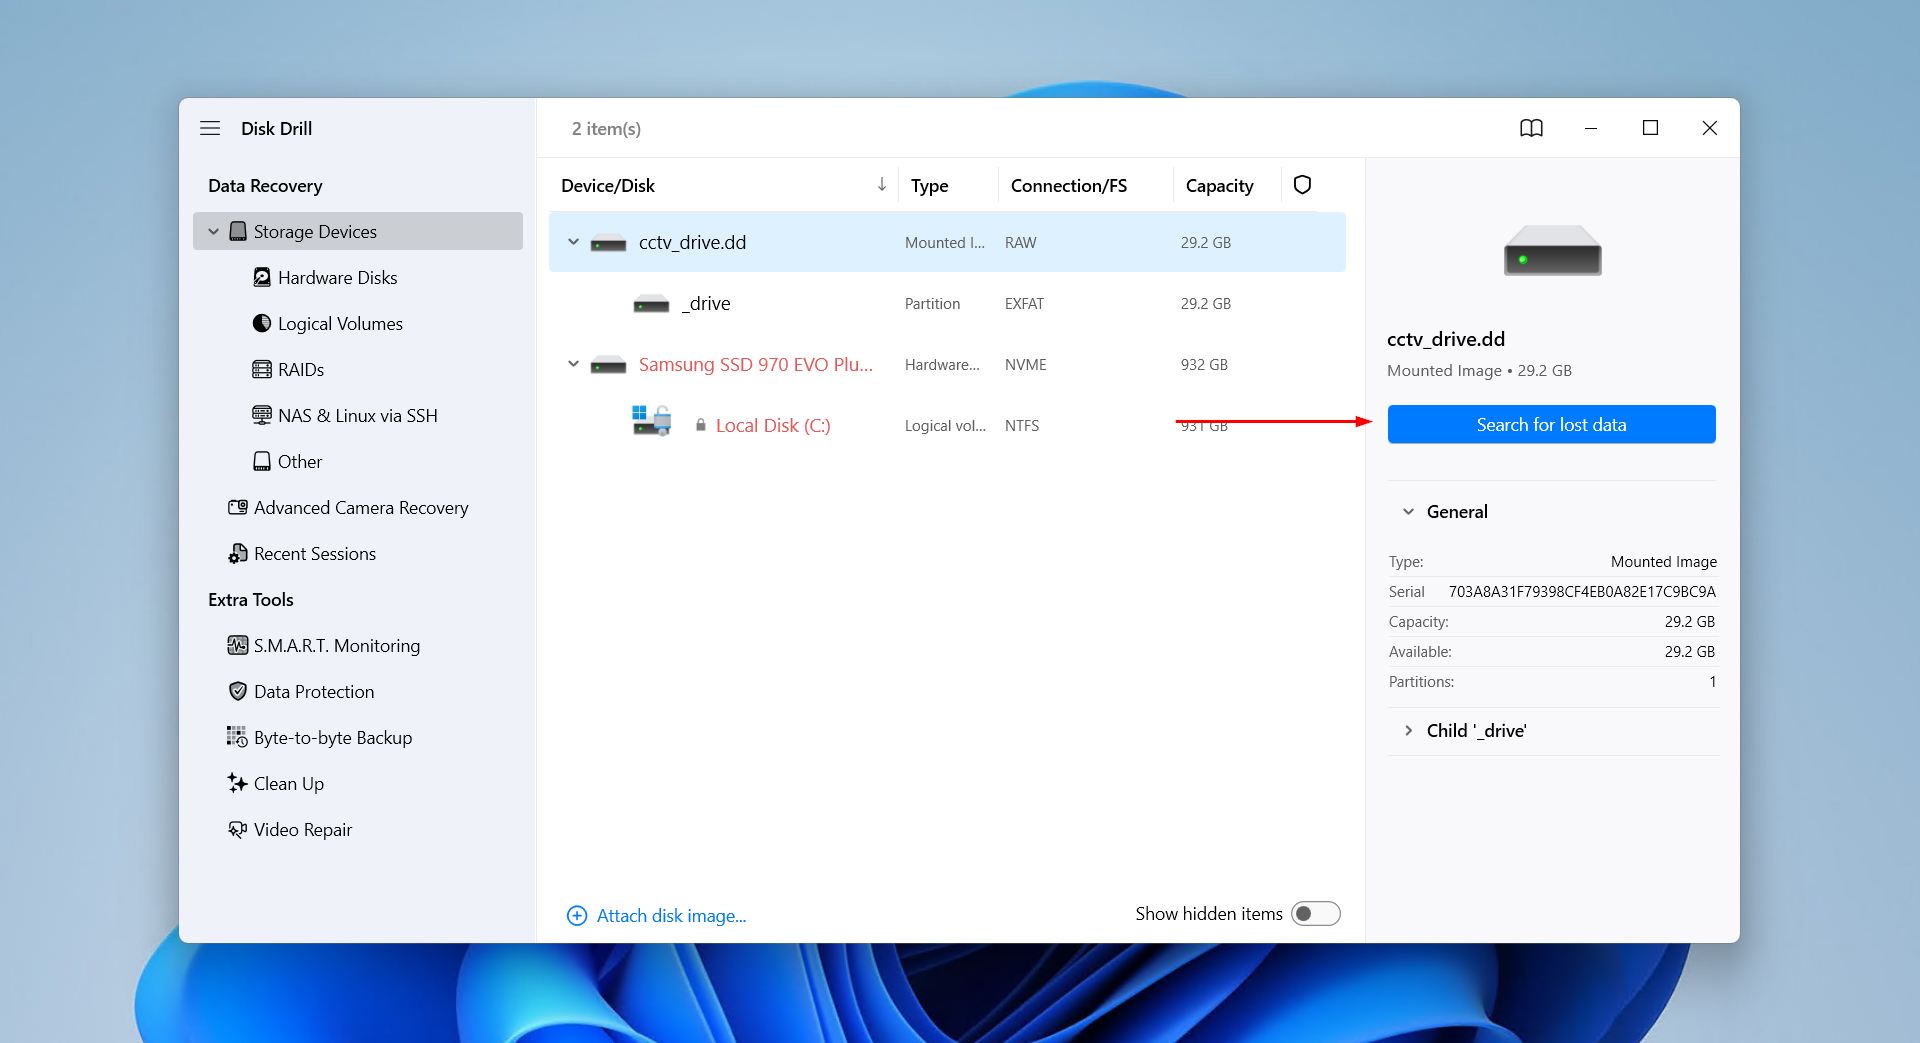
- Select the storage device with the CCTV footage, then click Search for lost data.
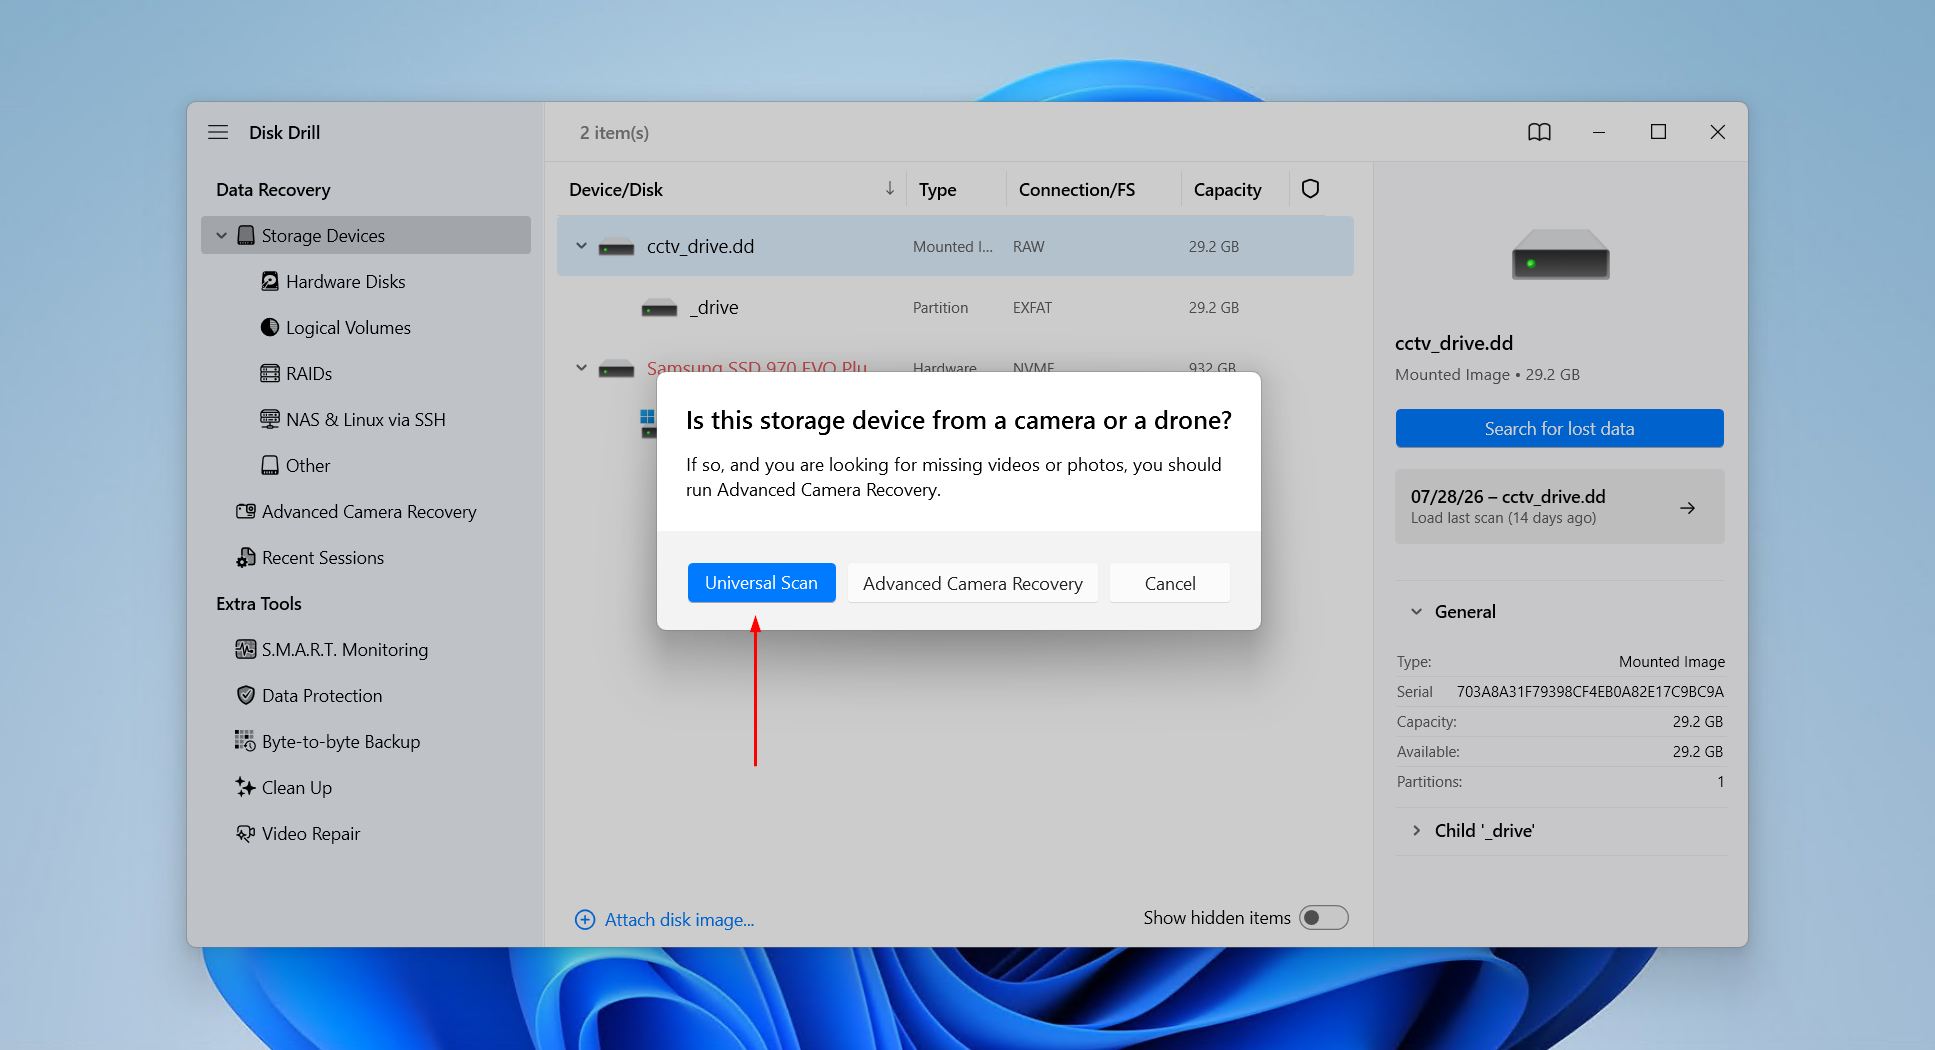
- Click Universal Scan to find the deleted files. If the videos are corrupted, or the footage was lost due to formatting, try a Advanced Camera Recovery (ACR) as well.
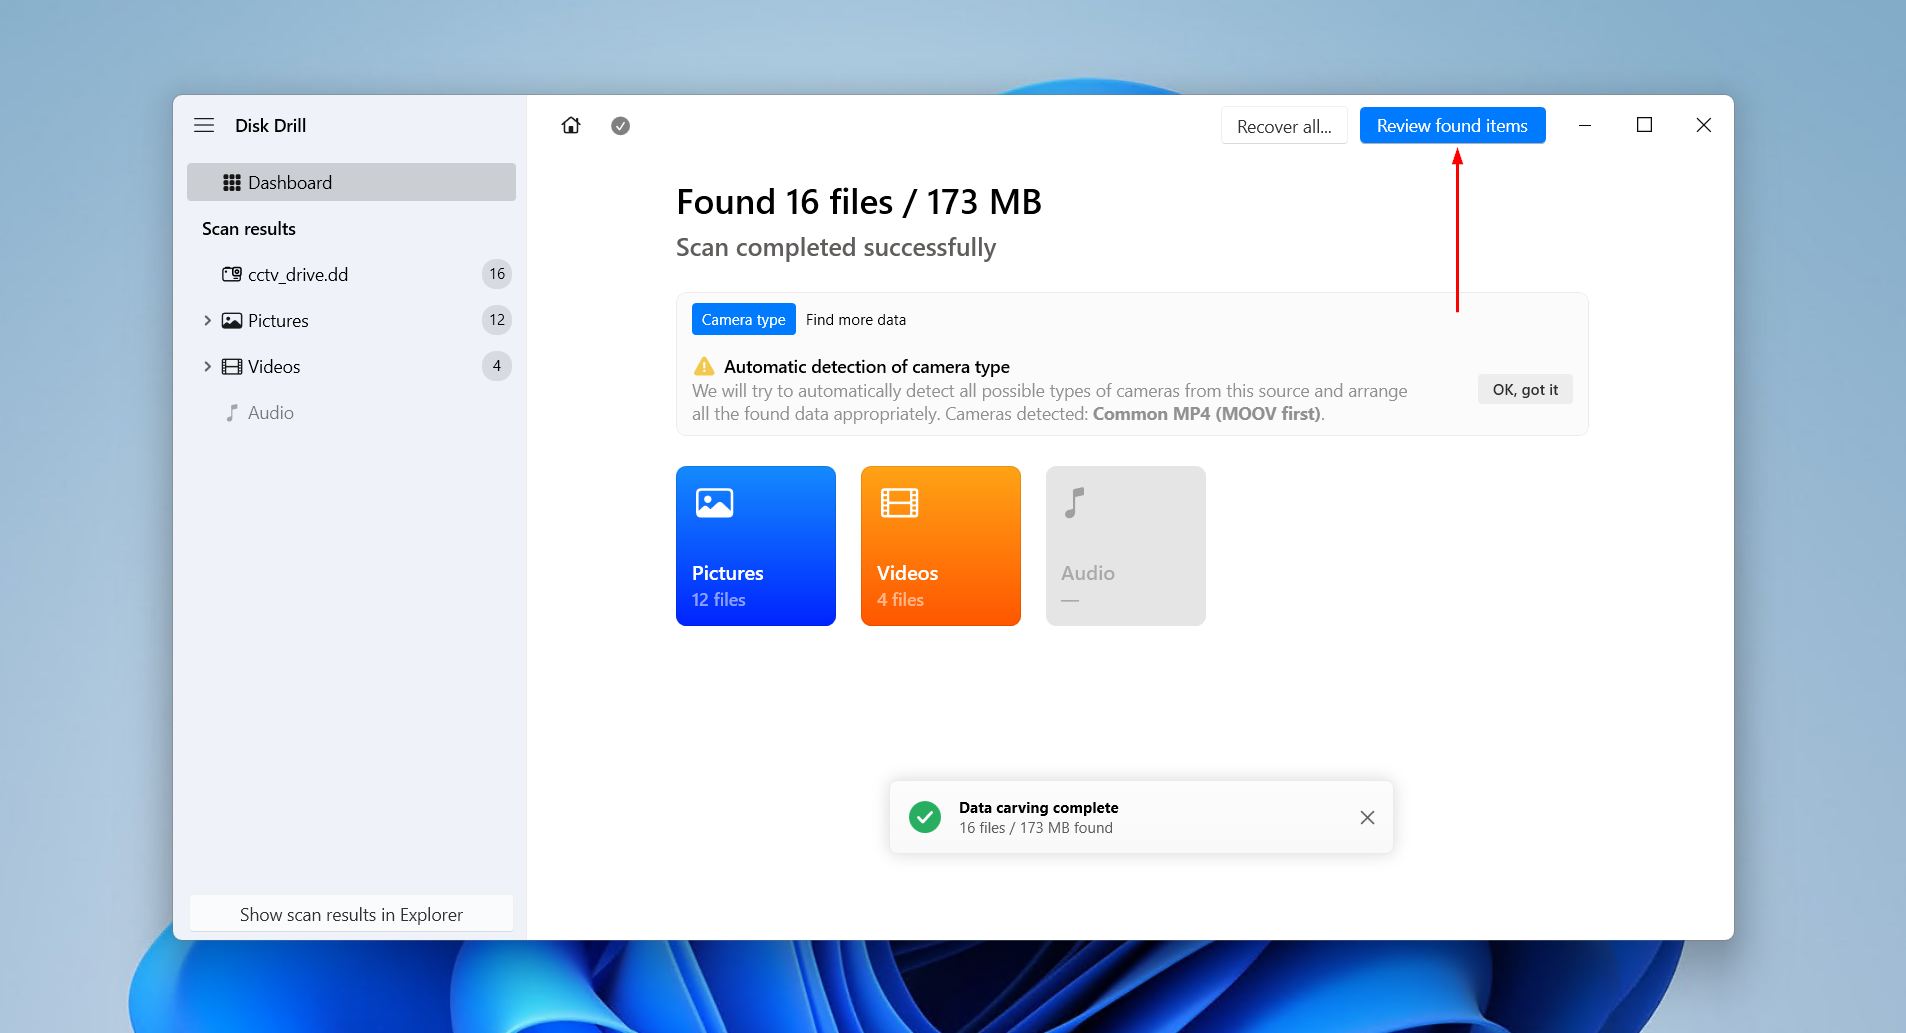
- Click Review found items to explore what footage was found.
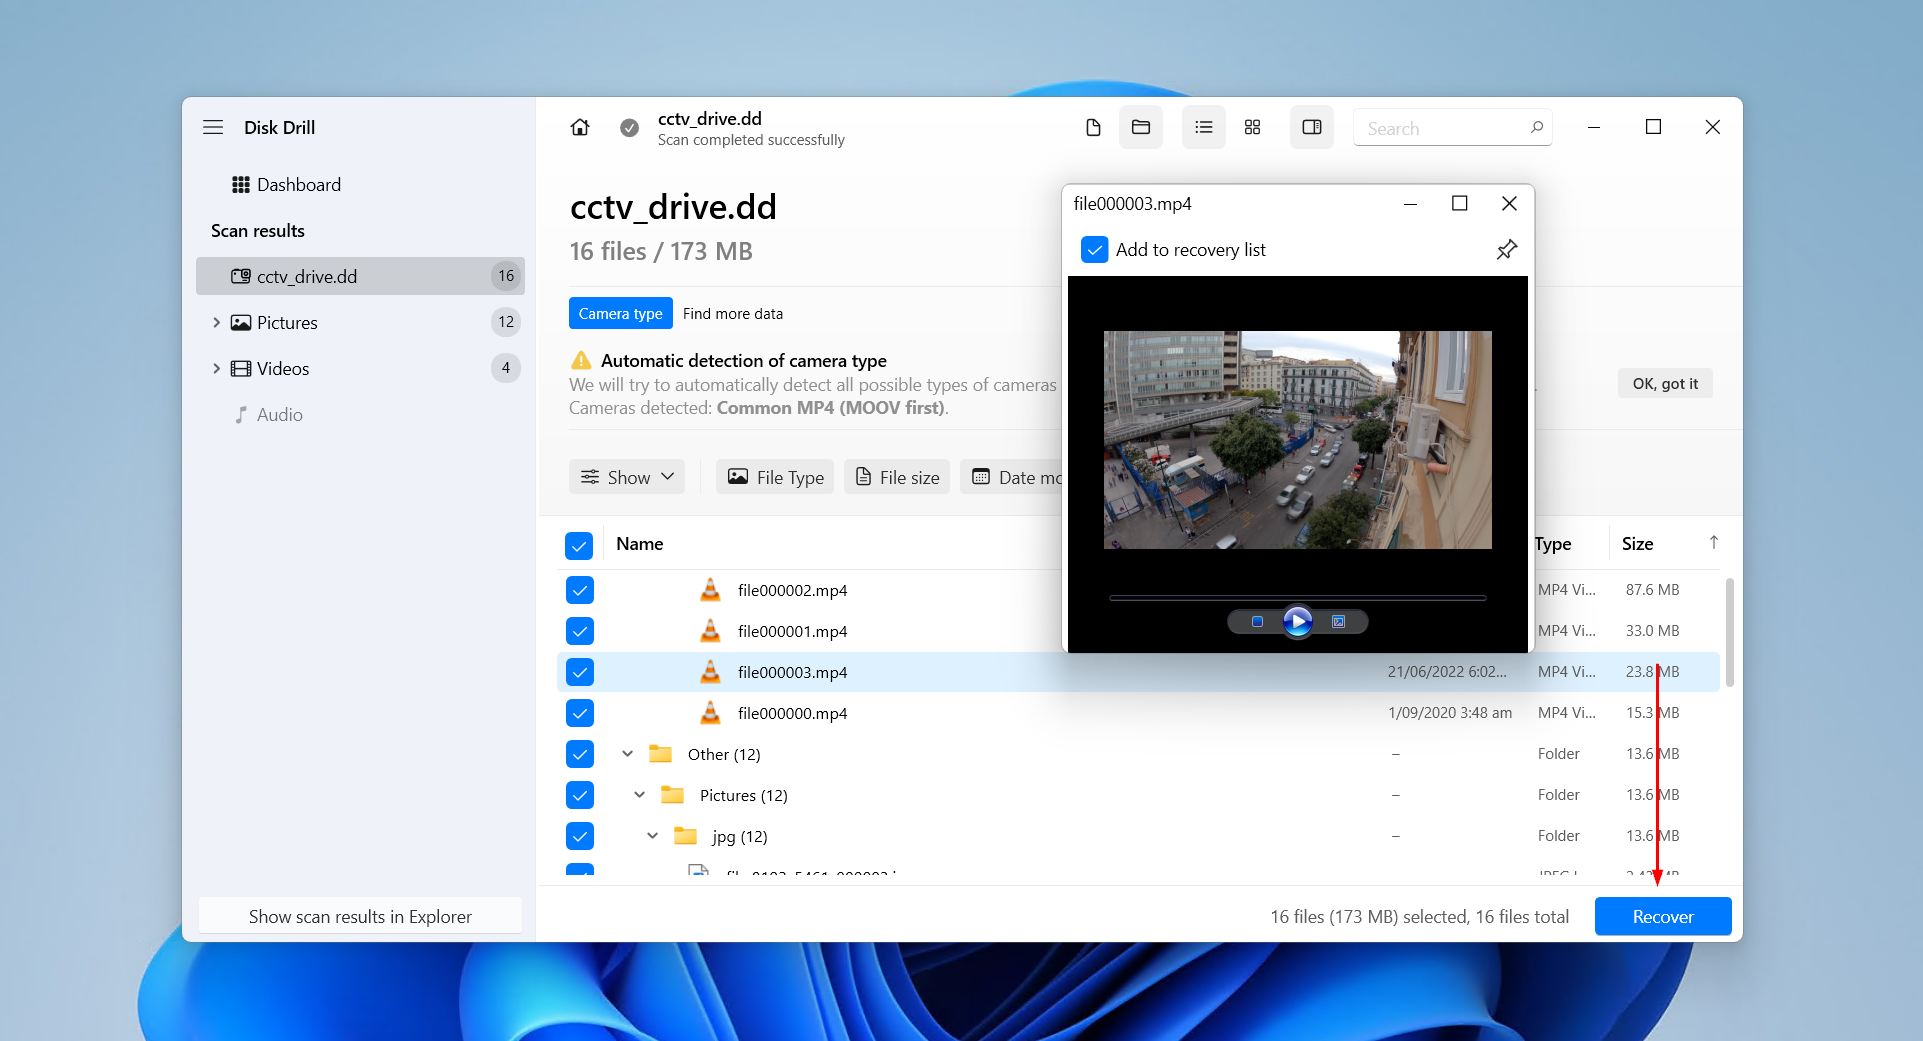
- Preview and select the footage you want to restore. If a video file can be previewed, it can be recovered. Use the filter options to refine results by file type, size, and date modified. When you’re ready, click Recover.
- Choose a recovery location on a separate physical storage device (you never recover back to the same drive the files are coming from). Disk Drill lets you recover up to 100 MB for free, enough to confirm the software finds your footage before you buy. Click Next to finish recovery.
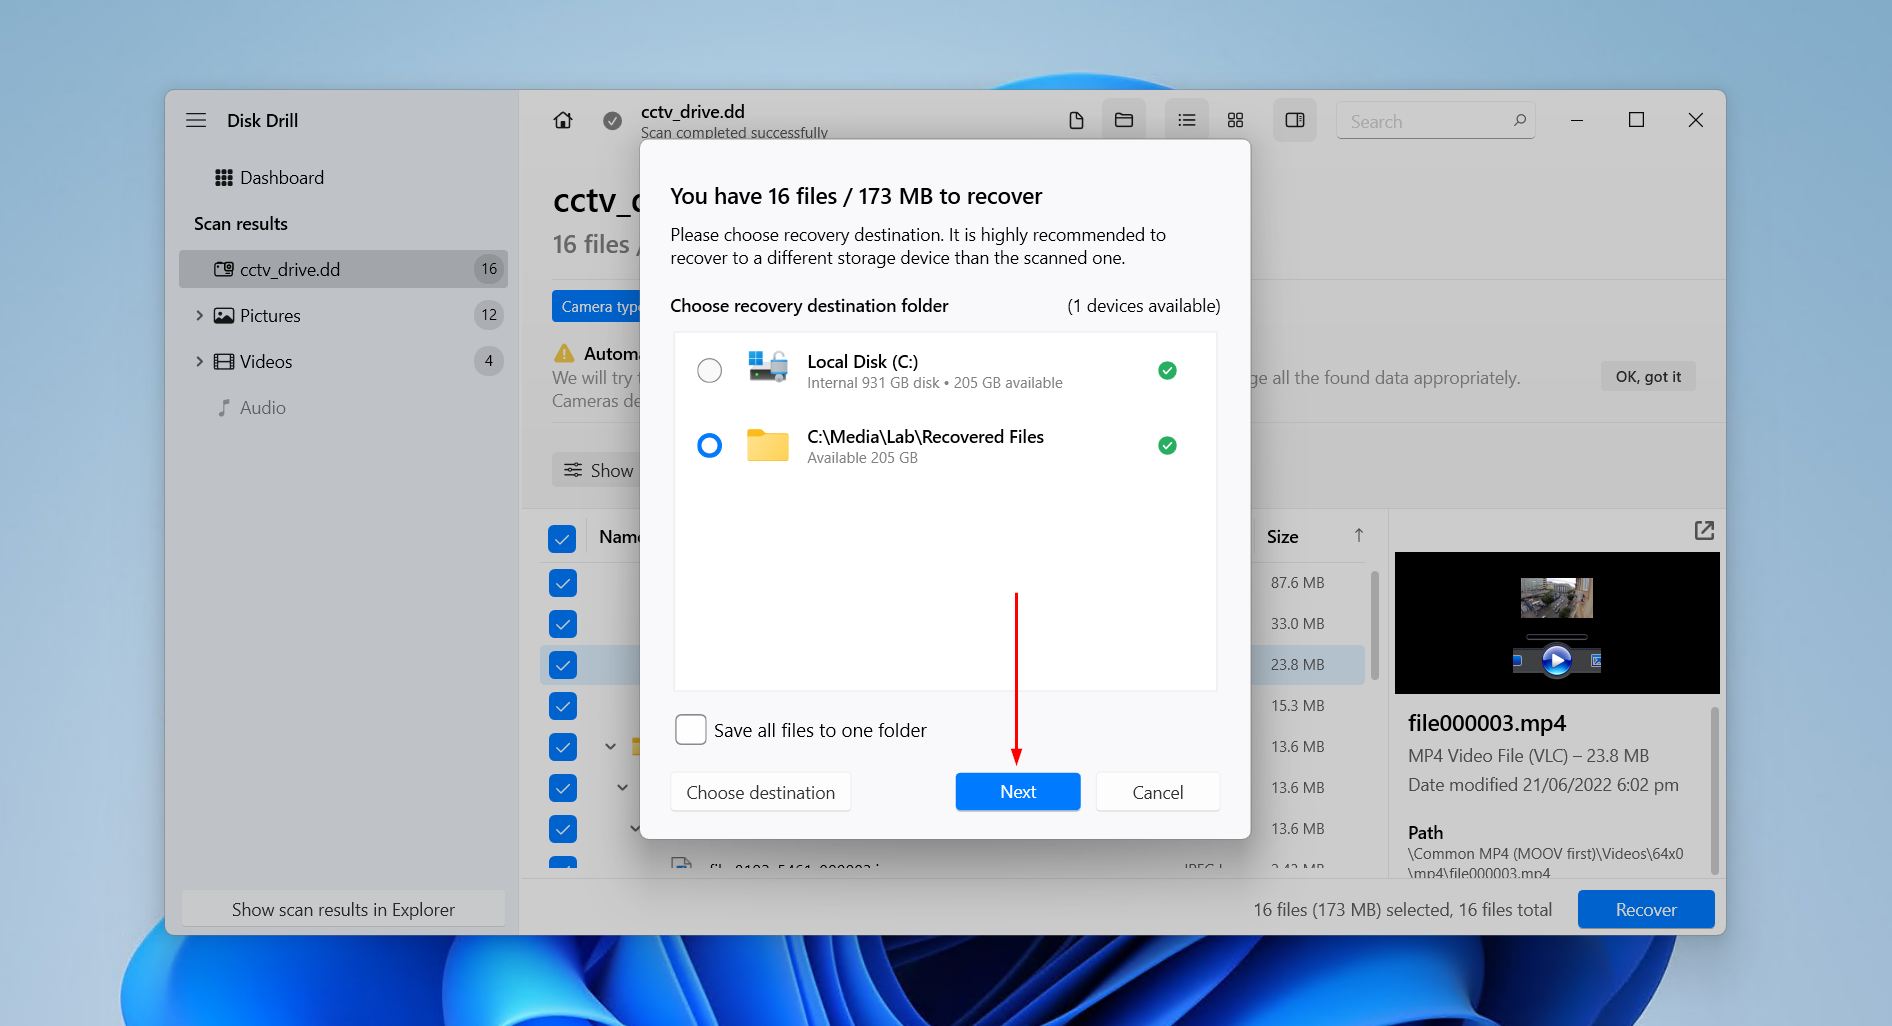
Other Ways to Restore CCTV Footage
Sometimes the footage never really left. In a lot of setups, a second, intact copy is sitting somewhere outside the original DVR, NVR, hard drive, SSD, or memory card, waiting for someone to look for it.
Method 1. Restore the Footage From a Local Backup
A local backup means one of two things. It might be an automatic copy your CCTV system was configured to create, or it might be footage that someone exported by hand at some point, perhaps for a previous incident. Either way, it could be sitting on a device nobody thinks of as part of the security system.
Check the most likely places first:
- USB drives and external hard drives that have been connected to the DVR or NVR
- The Downloads, Videos, Desktop, and Documents folders on the computer used to review the cameras
- Export or backup folders created by the CCTV software itself
- Shared folders on a local server or an office computer
- Wherever footage was saved for a previous incident, insurance claim, or police report
The fastest way to search a Windows computer is File Explorer. Open it, select the drive or folder you want to check, and use the search box in the top right. On a Mac, the same search works through Finder. However, you shouldn’t just search for ordinary video files, since some CCTV systems use a proprietary format. In addition to file types, try also searching by file name, and keep an eye out for a folder that has the footage inside alongside an included player that will open it.
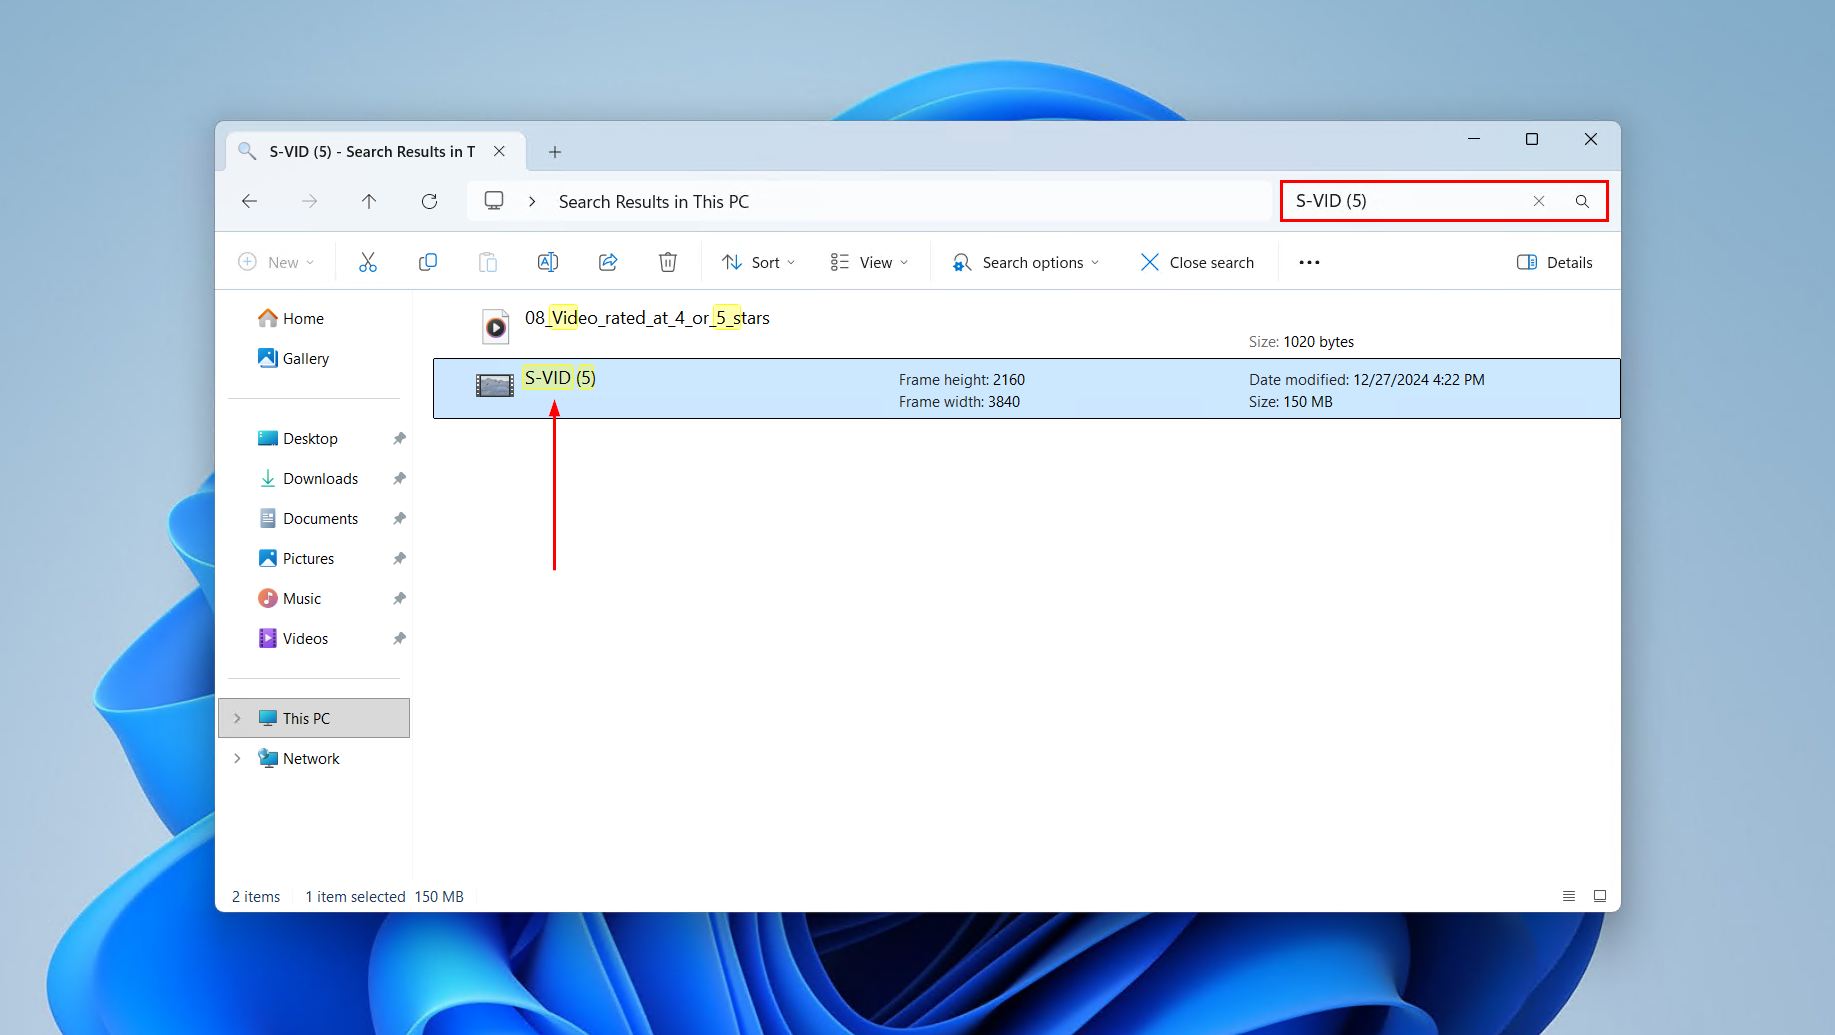
Method 2. Check the CCTV Cloud Account
Many modern security cameras upload recordings to the manufacturer’s cloud service, either alongside local storage or instead of it. If yours is one of them, an intact clip may still be waiting in the provider’s app or web portal even though the DVR, NVR, or camera card has lost it.
This only works if cloud recording was already switched on before the footage disappeared. This is worth checking carefully rather than assuming, because a camera being paired to a phone app does not mean anything was ever uploaded. Cloud recording is almost always a paid subscription feature, and a camera can be fully connected, sending live view and notifications, while storing nothing in the cloud at all.
The below screenshots will show you how to get to the cloud storage of Xiaomi security cameras through the Xiaomi Home app:
- Open the Xiaomi Home app on your device.
- Go to Storage management.
- Go to the Cloud tab.
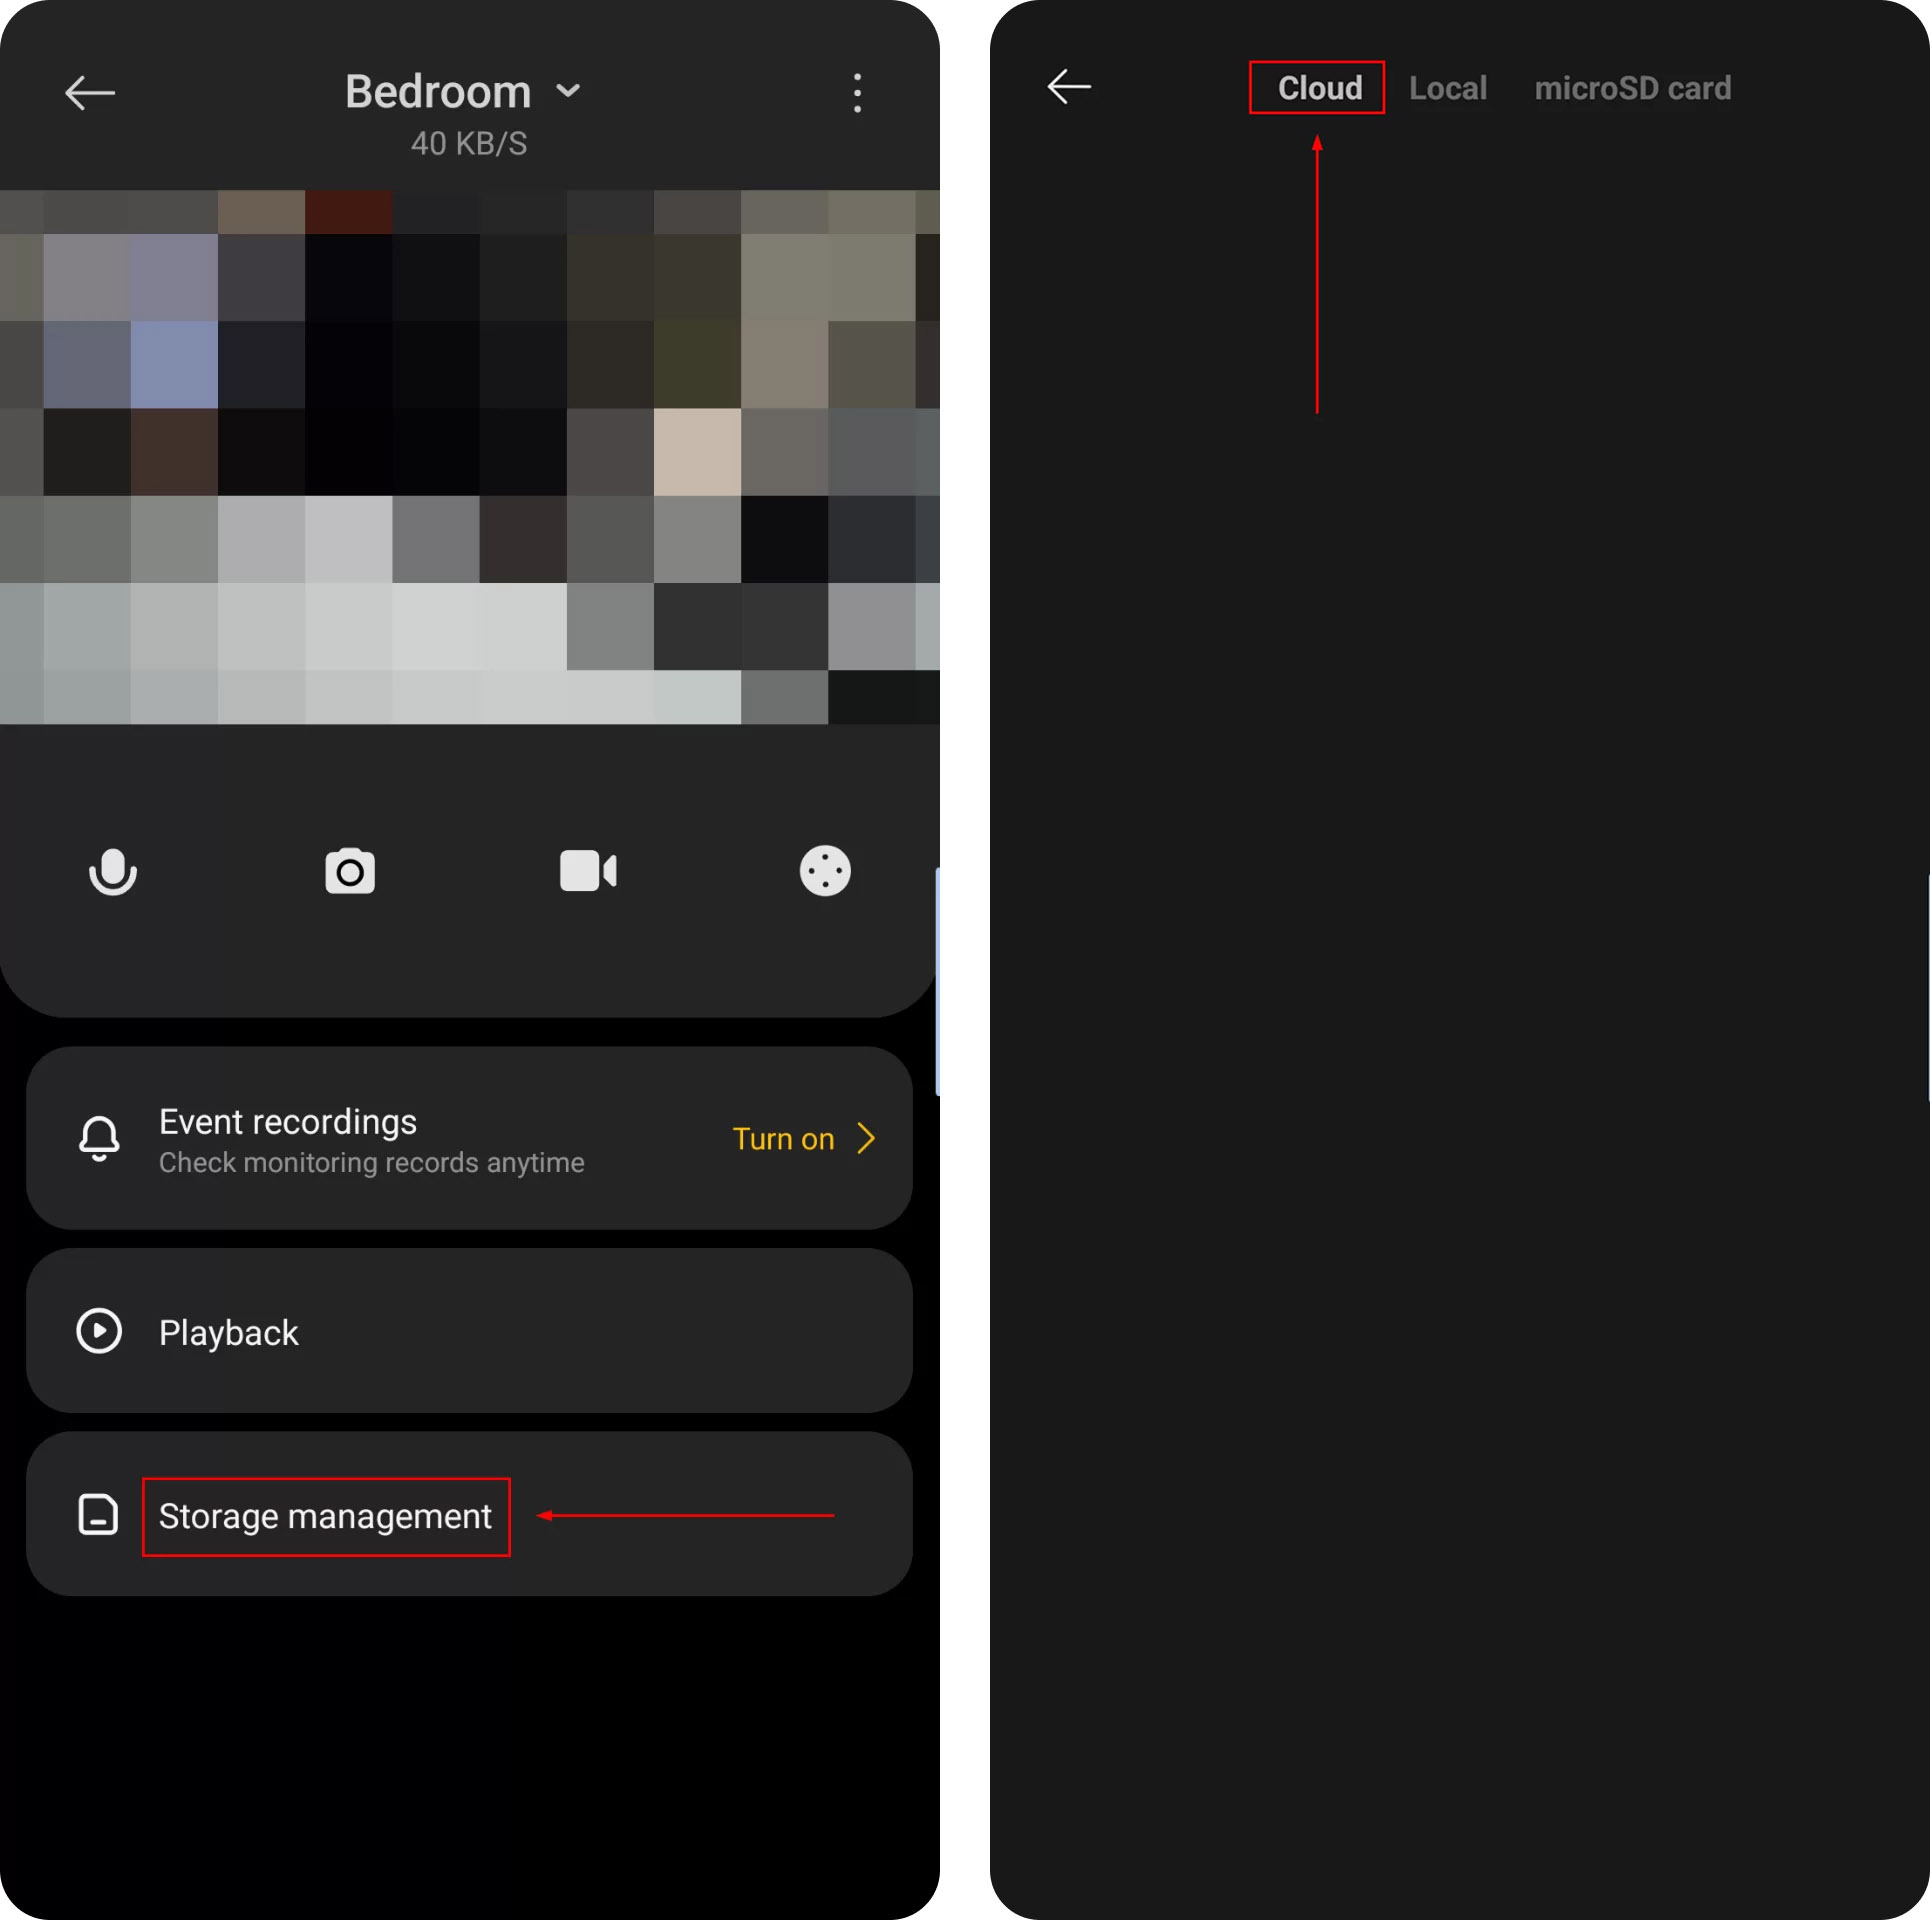
- Select and download your footage.
Method 3. Check the Camera’s Secondary Recording Location
Plenty of CCTV systems record to more than one place at once, and yours might be one of them. The main recorder may have lost the footage while a second copy sits untouched somewhere else on the network.
Work through whichever of these apply to your setup:
- An SD or microSD card inside the camera itself, which many IP cameras use as local backup
- A NAS or shared network folder the system writes to
- A computer running CCTV or VMS software
- An FTP or SFTP server the cameras upload to
- A second DVR, NVR, or recording server
- Failover or edge storage, which some systems use automatically whenever the main recorder goes offline
That last one is worth a closer look if your recorder was down, disconnected, or being serviced when the footage went missing. Edge recording exists precisely for that situation. The camera keeps recording to its own card while the recorder is unavailable, which means the gap in your recorder may be perfectly filled on the camera.
To demonstrate, we’ll show you how to find footage from an SD card used inside a camera:
- Power down the recorder and pop out the SD card.
- Put it in an internal or external card reader on your PC.
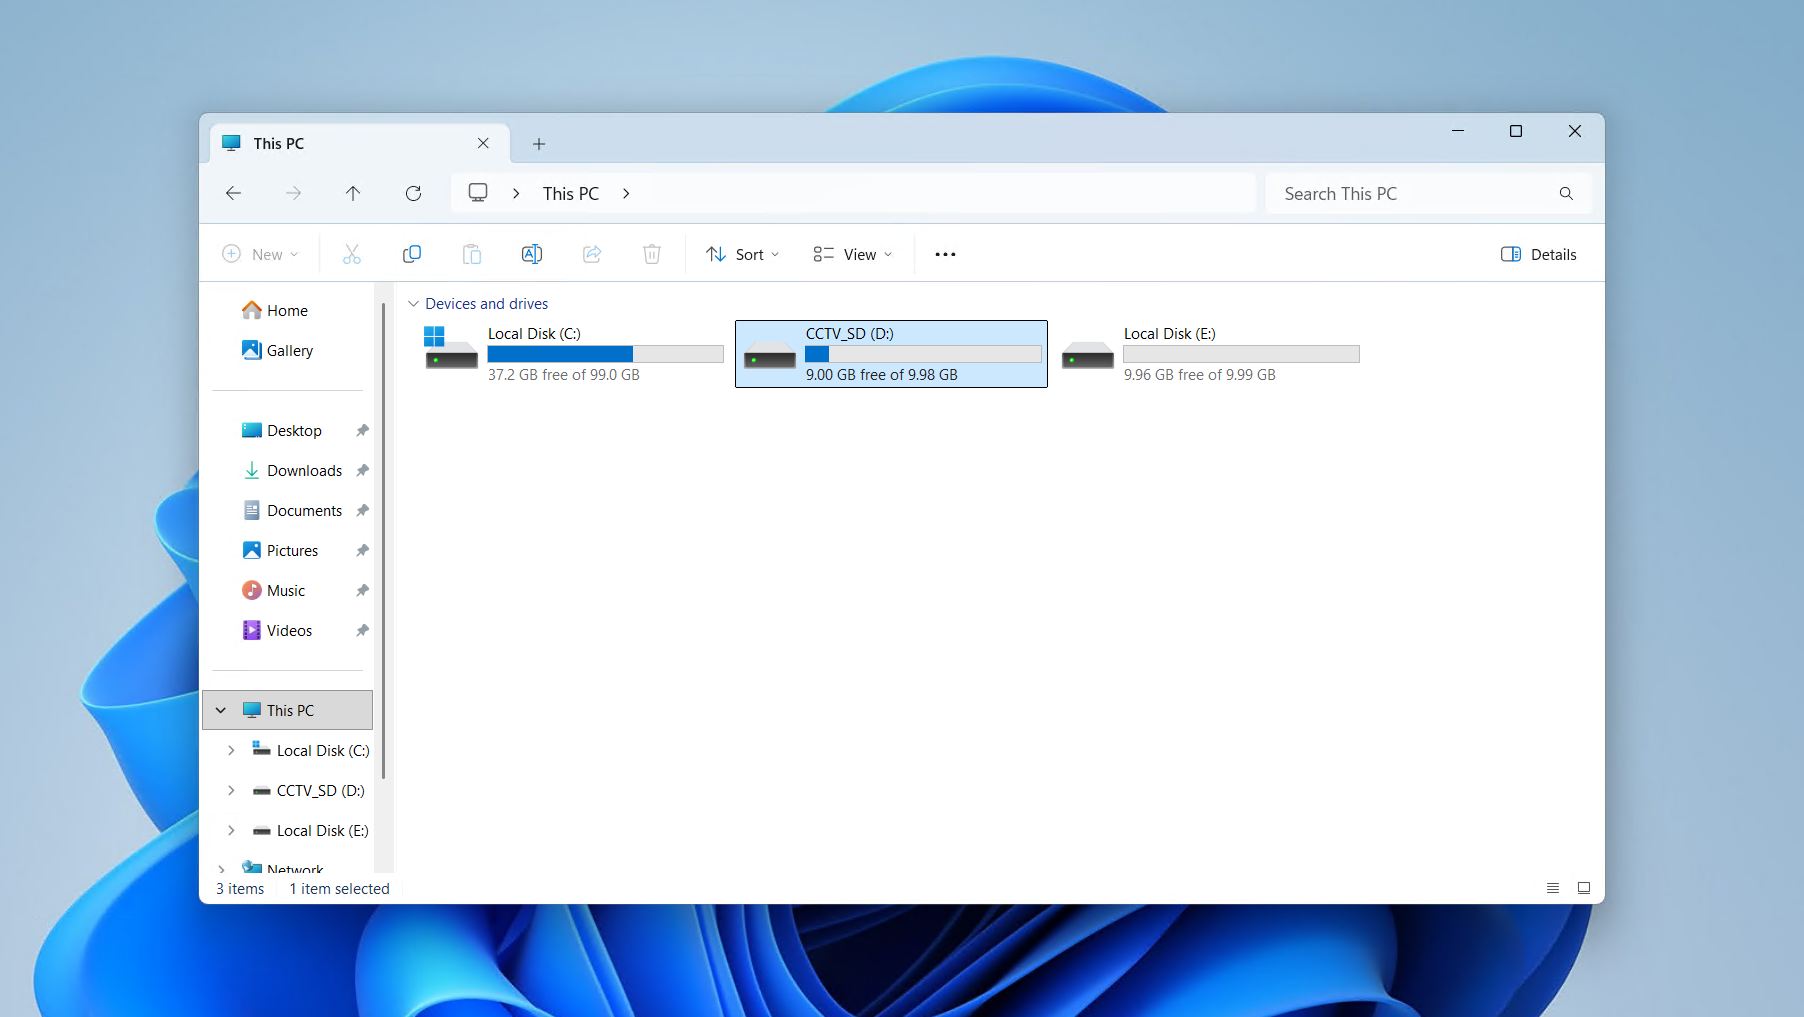
- Open the SD card in File Explorer, then find your footage.
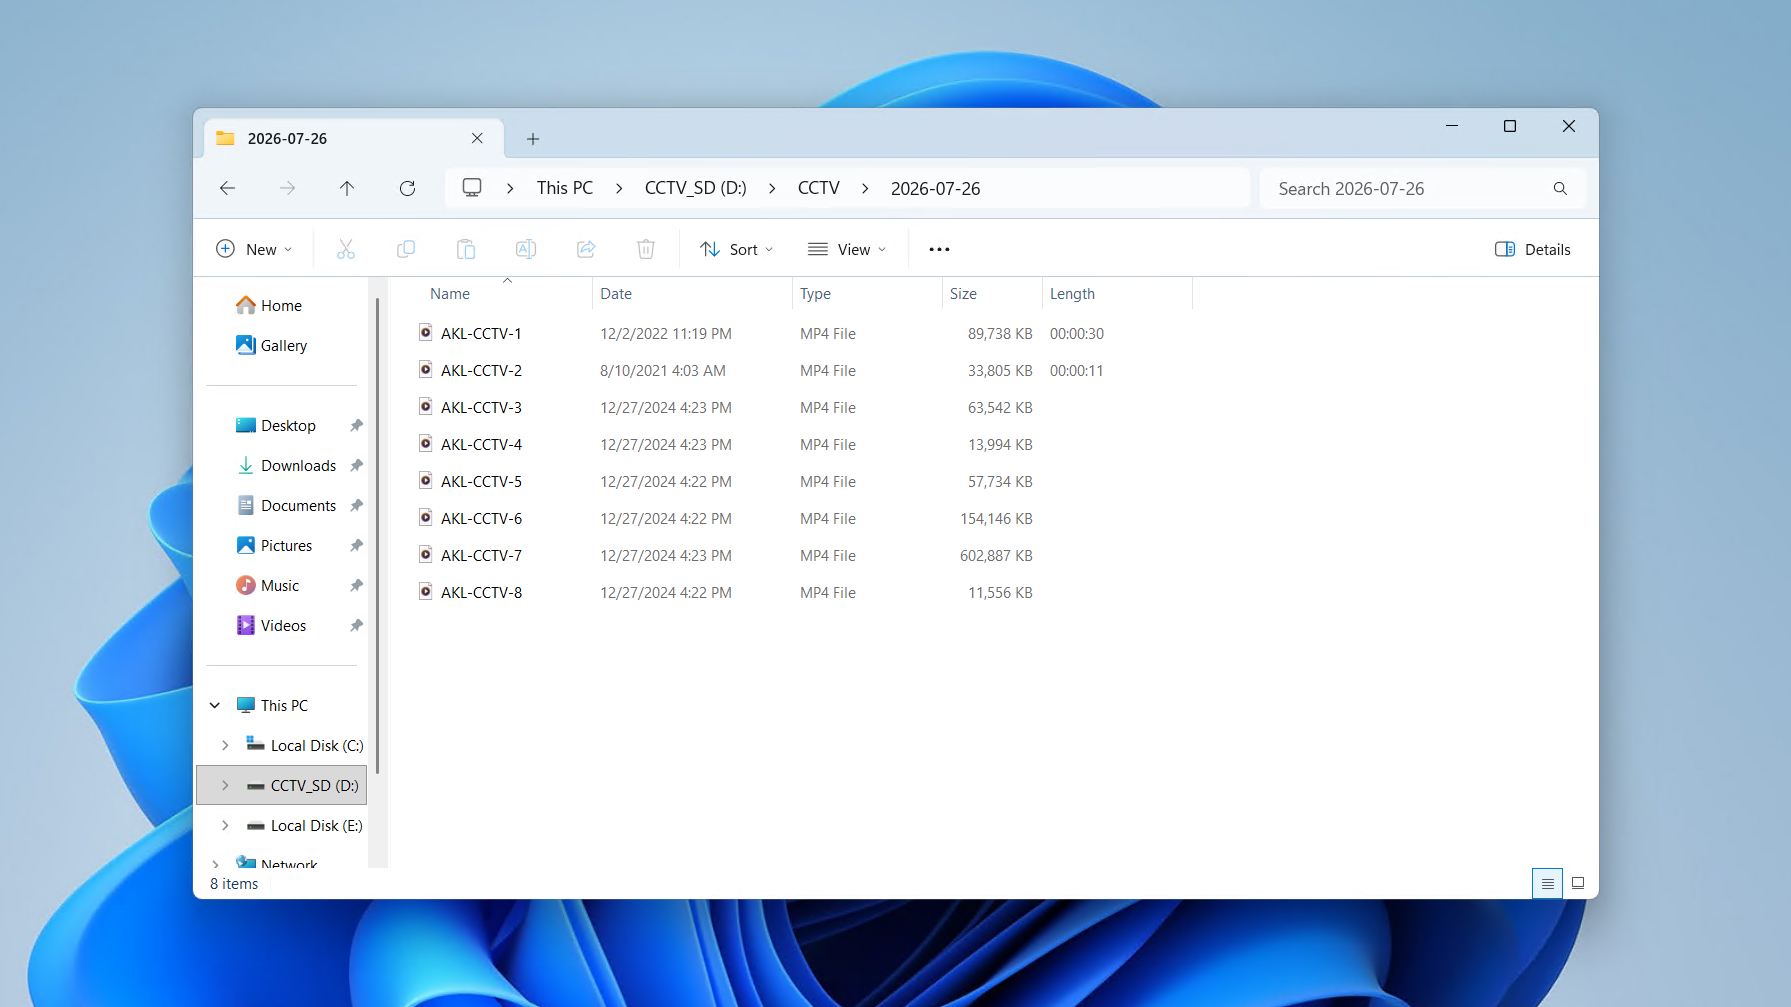
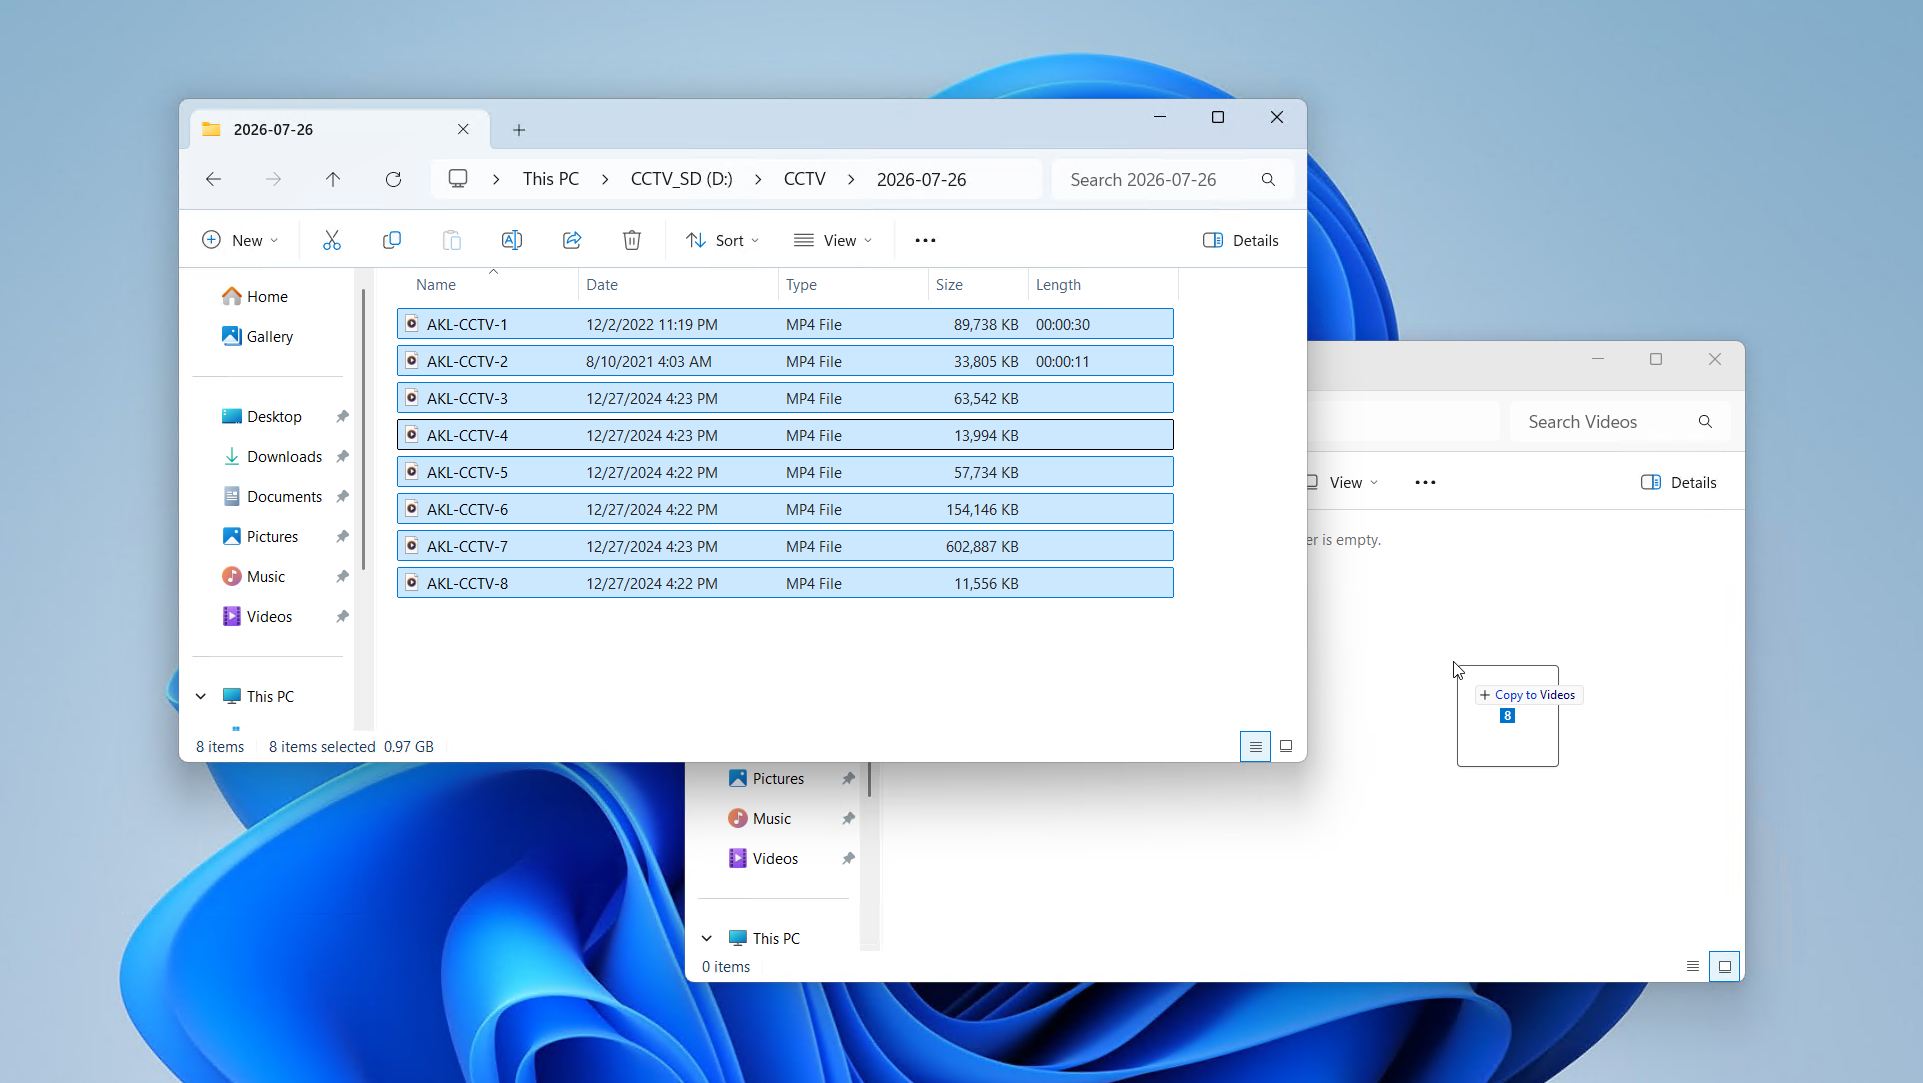
- Copy the footage to a local drive.
Why Videos Found During CCTV Footage Recovery May Not Play
You recovered the file, double-clicked it, and nothing happened. This is common and it is not always the disaster it looks like. Very often the file is perfectly intact and your media player simply doesn’t understand the format it’s in.
This is especially true of surveillance video. A .dav file from a Dahua recorder, or a raw .264 stream, wraps standard H.264 or H.265 video in a container that Windows Media Player and QuickTime were never built to read. The video inside is fine.
Try these two things first, in this order:
- Open the file in VLC Media Player. VLC is a free media player available for Windows, macOS, and Linux, and supports far more formats than the default player used by your operating system.
- Try the manufacturer’s own player. If the footage came from a native export, check the folder it arrived in, because these exports usually ship with a small player built for exactly that format. Otherwise, the original recorder software will play it.
If neither works, the file may be damaged, in which case you need repairs, not CCTV video recovery. The header that tells a player how to read the file may be missing or corrupted. The index that maps out where each frame sits may be gone, part of the file may have been overwritten, or the recording may have been corrupted before it was ever deleted.
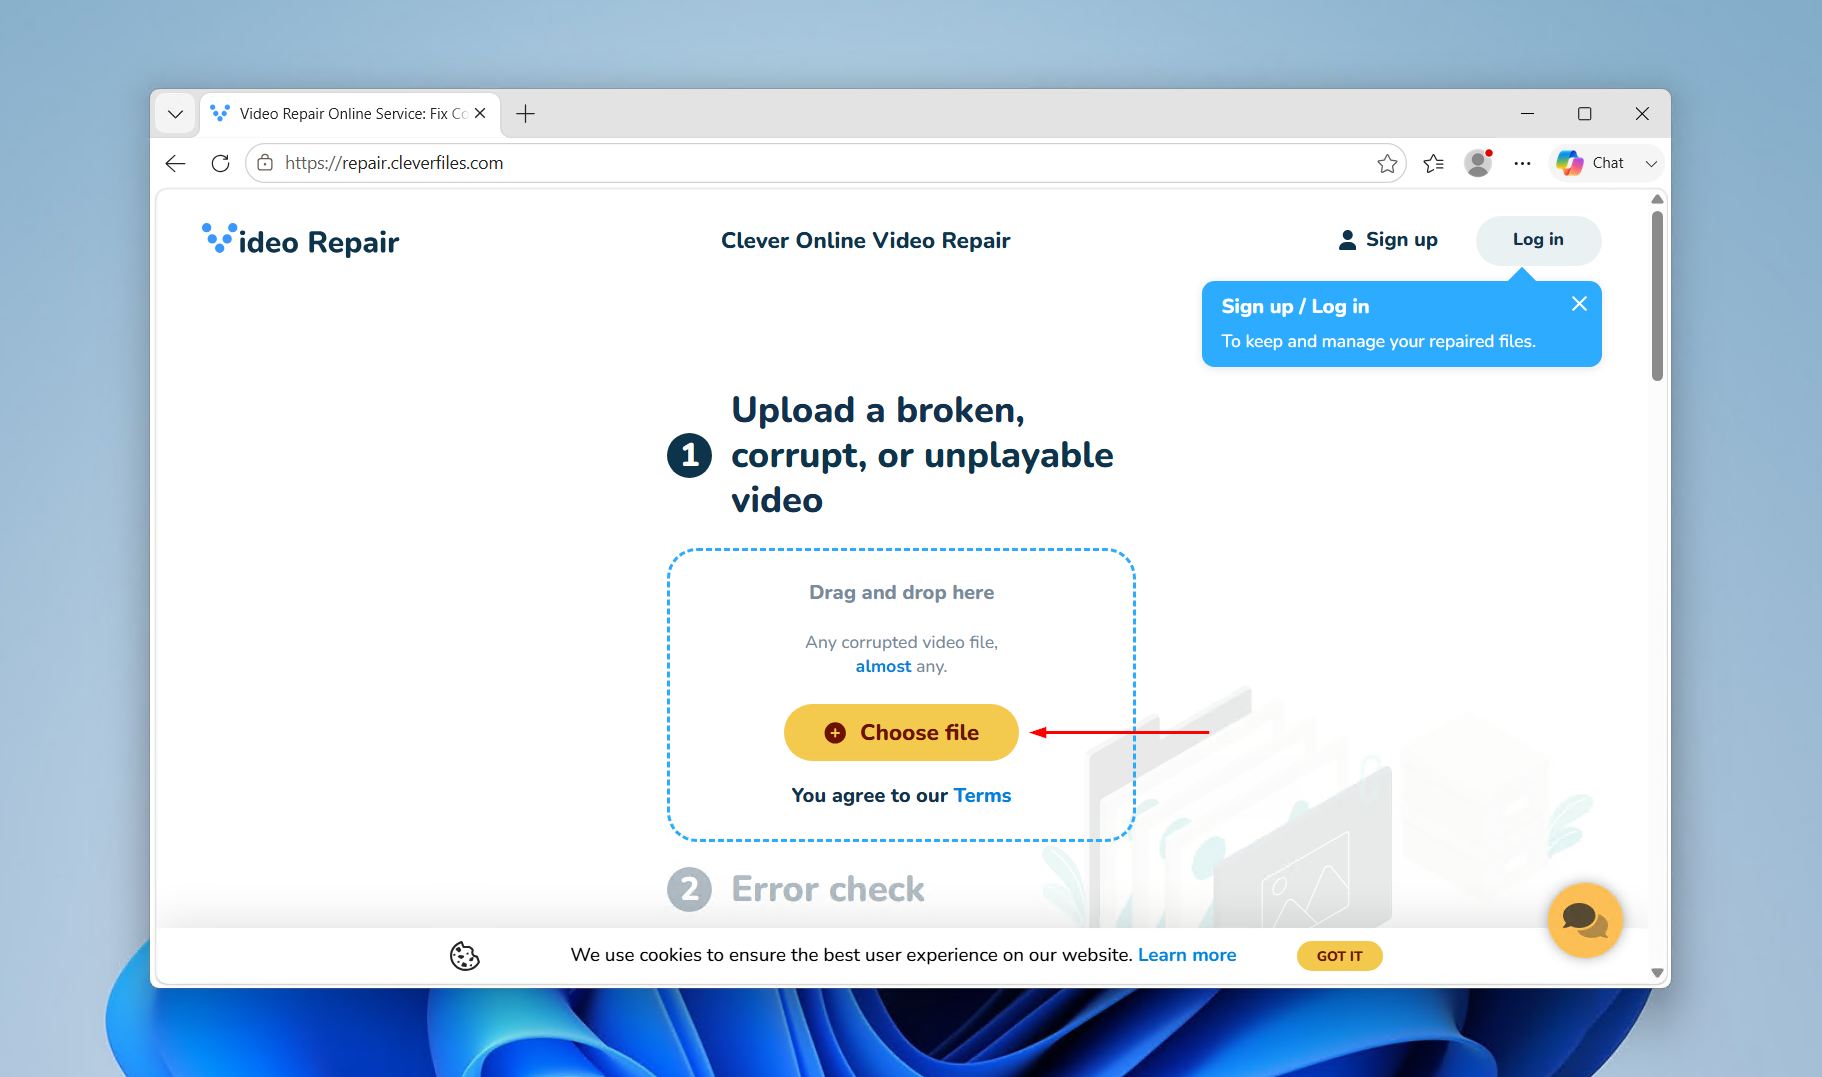
Clever Online Video Repair is the simplest option for most people, and video repairs are free if you have a Disk Drill license. It’s a browser-based repair tool that can repair the file without re-encoding, which retains its original quality. It works great with MP4, MOV, 3GP, 3G2, M4V, and QT files using H.264 or H.265 video. Most of the time it will detect the necessary parameters of the file automatically, but a matching sample helps too. Here’s how:
- Go to Clever Online Video Repair using the link above or via Extra Tools > Video Repair in Disk Drill, and add your CCTV footage by clicking Choose file. It can support clips up to 20 GB.
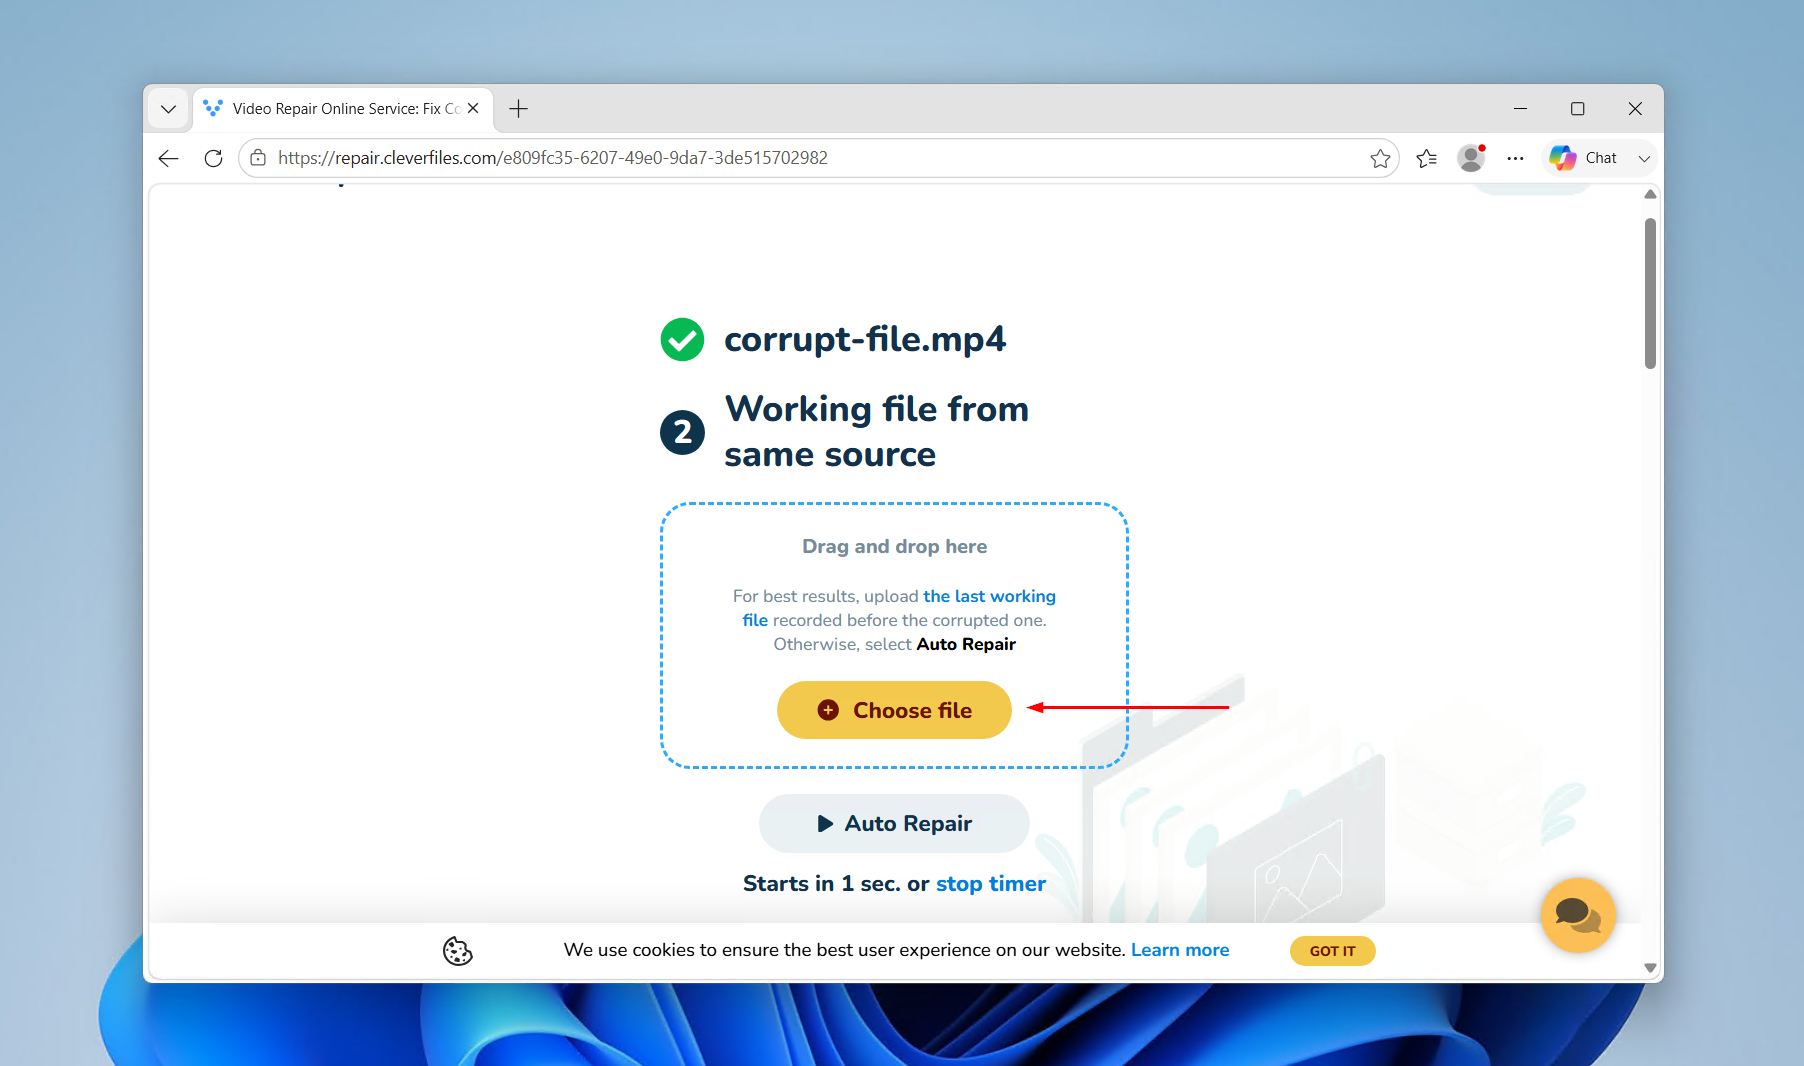
- Once it has processed, click Choose file and add a reference file (or leave it blank if you want to attempt automatic repairs only).
- Preview your clip. If you’re satisfied, download the fully repaired file. If you have a Disk Drill license, your repaired videos can be downloaded for free.

Conclusion
As soon as you find out the CCTV footage has been deleted, stop the CCTV system immediately to prevent active overwriting. Check whether another copy already exists, in a local export folder, in the camera’s cloud account, or on a secondary recording location such as the camera’s own SD card. If none of those turn up the footage, scan the original hard drive, SSD, or memory card with recovery software.
When no backup or cloud copy exists, the best way to recover CCTV footage is with Disk Drill, which reads the storage device directly and finds video files where traditional file search apps would fail. Provided the footage you need has not been overwritten, recovery software is the way to go, and on a drive that was shut down quickly, you have good odds of recovering what you need.
FAQ
Yes. CCTV footage gets deleted automatically because of loop recording. Once the drive fills up, the oldest footage is automatically overwritten to make room for new recordings. This is inherent to the nature of how CCTV works. Typical retention varies by manufacturer and implementation (home versus business), though a setup with many high-resolution cameras and a small drive can wrap around in just under 24 hours.
Until the system overwrites that space, and there is no fixed window. It depends on the size of the drive, how many cameras are recording, the resolution and frame rate, whether the system records continuously or only on motion, and above all whether the recorder is still running. A busy system can overwrite deleted footage within hours. The one thing entirely in your control is that a recorder powered off preserves its footage indefinitely, which is why shutting it down is the first step rather than a later one.
No. Overwritten CCTV footage cannot be recovered, as once new video data has overwritten the old data, the original is gone. You may be able to recover partially overwritten footage using the fragments of what survived, but there is otherwise no software or recovery service capable of bringing back footage that has already been overwritten. Video loss on security cameras can often be attributed to overwriting due to how often they operate.
Yes, it’s often possible to recover CCTV footage after formatting a DVR hard drive. A quick format only clears the index that tells the system where the footage lives, but it leaves the video data itself sitting on the drive. A signature-based scan can usually still find the data. However, if it was a full format, or the system uses a TRIM-supported SSD, the footage won’t be recoverable.
Sometimes. Copies of CCTV footage stored outside the recorder can be retrieved without opening anything, including cloud recordings, footage on a camera’s own SD card, files on a NAS or shared folder, and exports saved to a computer. Recovering from the recorder’s internal drive is different. Recovery software needs direct access to the storage device, and a DVR or NVR interface does not provide that. Therefore, to recover CCTV footage from an HDD, it must be removed and connected to a PC for recovery.
Yes, CCTV footage recovery software like Disk Drill can scan an HDD that Windows cannot open. It works on drives Windows reports as RAW, unformatted, or unrecognized, including DVR drives that use a manufacturer’s proprietary layout.
