Most Windows 11/10/8/7 users have seen the “USB device not recognized” warning message at least a few times in their life. While this problem affects all types of USB devices, it’s particularly concerning when it happens to storage devices like flash drives, external hard drives, or memory cards containing important data.
In this article, we explain how to fix the USB device not recognized Windows 11/10/8/7 error with any USB device, but our focus will be on storage devices containing valuable data since you can always buy a new mouse or some other USB peripheral device, but you can’t replace a storage device that already have valuable data on it without negative consequences. As such, fixing the issue should be your top priority, and our step-by-step instructions will make it easy for you.
Reasons Why USB Device Is Not Recognized
The main symptom of the USB device not recognized error is the following pop-up message:
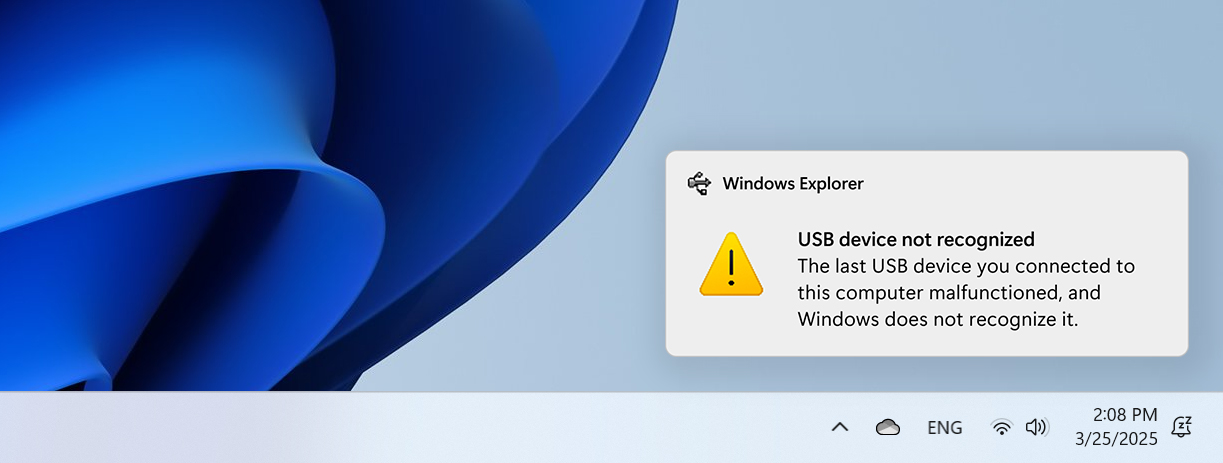
The pop-up message may disappear on its own after a while, so it’s possible to miss it if you’re not paying attention. However, you definitely won’t miss the other main symptom of the ‘USB device not recognized’ error: your USB device not being accessible.
The causes of this error can be divided into two main categories: physical issues that break the connection between your device and computer, and software problems where the operating system is unable to access the device properly even though the physical connection is fine.
If we dig a bit deeper, we can identify several specific common physical and software issues why a computer won’t recognize a USB:
| Problem | Solution |
| Damaged device connectors: USB flash drives and other storage devices with damaged or dirty connectors may fail to establish a proper connection with your computer. | You can try carefully cleaning the connectors with isopropyl alcohol, or try connecting the device to a different USB port on the same or another computer. For storage devices, if physical damage is severe, consider professional data recovery services to recover your files. |
| Damaged USB port: Sometimes the problem isn’t with your USB device but with the port you’re trying to use. Ports can become loose, damaged, or collect dust over time. | Connect your USB device to another USB port on your computer or try a different machine entirely. If the device works elsewhere, you’ve identified the issue is with the original port. |
| Program conflicts (software & firmware): Other applications or background processes may interfere with USB device recognition, especially for storage devices. | Restart your computer to clear all running processes that might be causing conflicts. If the USB device not recognized message keeps popping up after restart, try disabling USB selective suspend or check for conflicting applications. |
| System drivers: Outdated, corrupted, or missing drivers are a common reason why Windows won’t recognize USB devices. This is especially common after system updates. | Use the Windows Disk Error Checking Tool to automatically fix driver issues, uninstall the device and let Windows reinstall it, or manually update USB controllers and chipset drivers. |
| Logical damage or file system corruption: The drive’s file system or partition table may be corrupted and prevent Windows from properly recognizing or mounting the storage device. | Use the Windows Disk Error Checking Tool to scan for and repair file system errors. For more severe logical damage, try data recovery software to retrieve your files before reformatting the drive. In some cases, you may need to use disk partitioning tools to rebuild the partition table. |
| Power problems: Some USB devices, particularly external hard drives, require more power than your USB port can provide, causing recognition failures. | Connect your USB drive directly to your computer (not through a hub), try a powered USB hub, and make sure you’re using the correct power adapter that came with your external hard drive. You can also prevent your computer from turning off USB devices to save power. |
In the following sections, we’ll show you how to recover your data from the unrecognized drive and then resolve the issue so you can use it properly again.
How to Fix the “USB Device Not Recognized” Error
Listed below are 10 USB not detected fixes that you can try to repair a USB device that has decided to stop showing up. You can apply them in the order we present them or use the table in the first section to focus on the fixes that are most likely to deliver the desired results.
Fix 1: Restart Your Computer
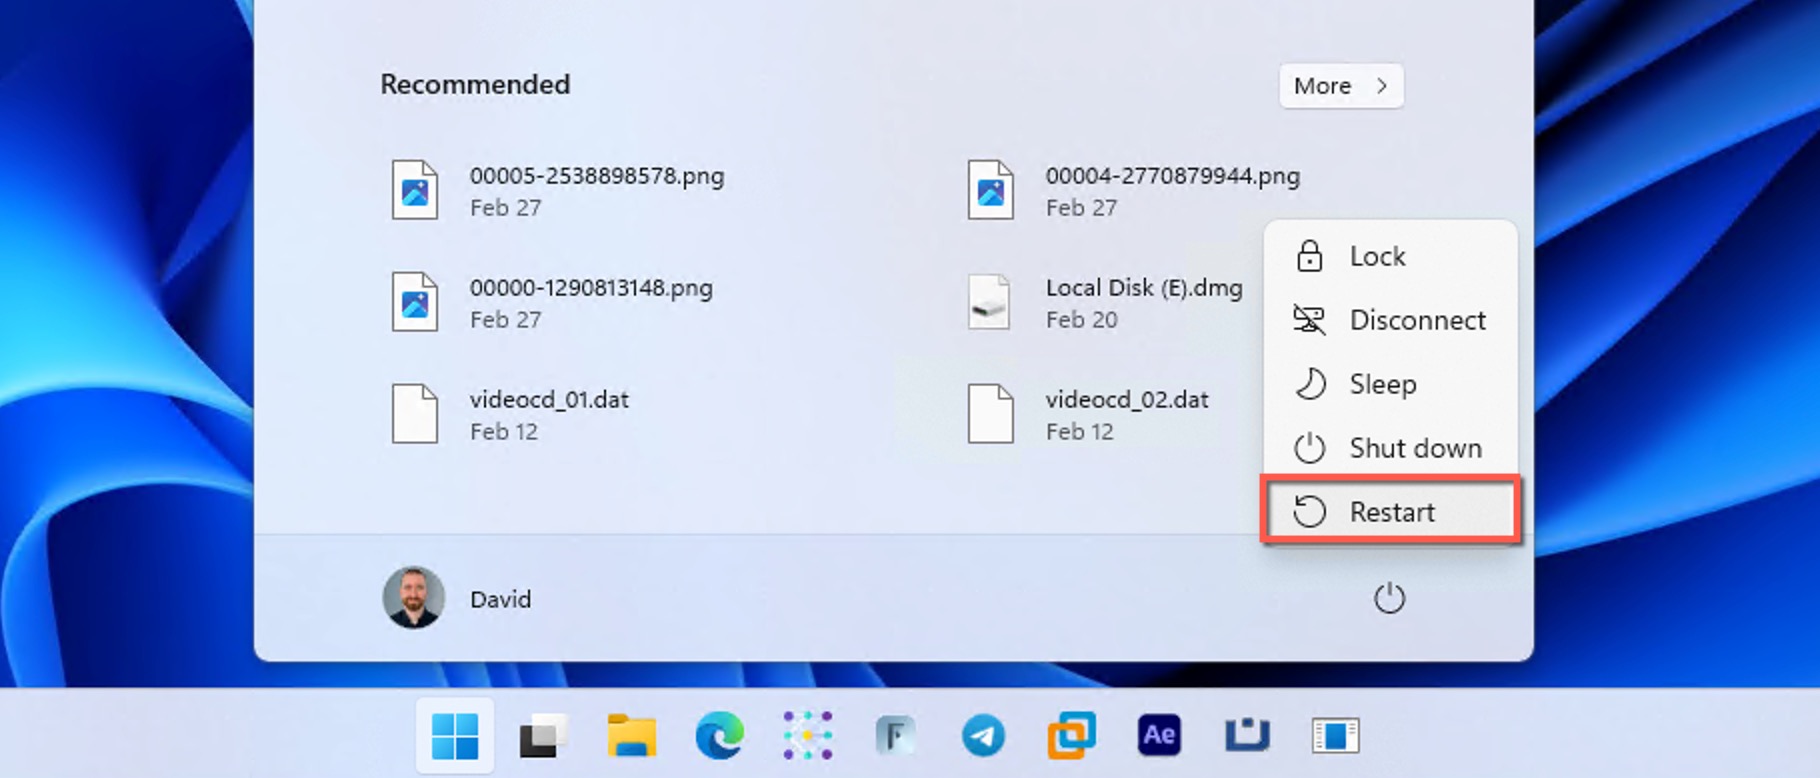
Have you tried turning it off and on again? Seriously, have you? If not, then go ahead and restart your computer right now. There’s a chance that the USB error will be gone.
This simple fix is so effective because restarting your computer forces all applications to close, stopping misbehaving applications from running and causing trouble. Important software, such as USB drivers, then automatically reopens once your computer is done booting up, leaving you with a clean slate.
When it comes to USB storage devices specifically (like external hard drives and flash drives), a restart can reset the connection between your computer and the storage controller. For example, a TrueNAS user reported a recurring issue where “after a reboot, most, but not always, one or two hard drives becomes unavailable” and found that “another reboot might fix it.”
Fix 2: Try a Different USB Port and/or Machine
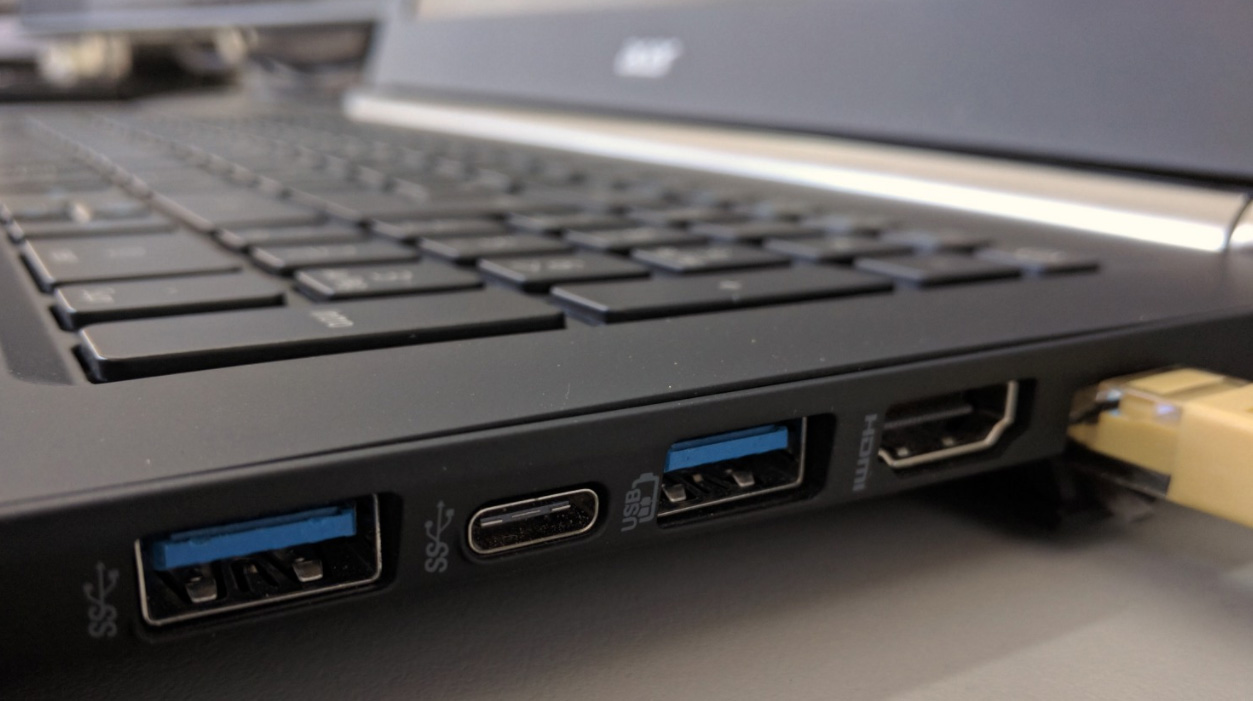
Broken USB cables and messed-up USB ports are to blame for many issues with USB devices not being recognized properly in Windows 11/10/8/7. The good news is that your computer most likely has more than one USB port, so go ahead and see if it works any better. Certain devices, such as external hard drives, often require more power than other USB peripherals, and some USB ports (particularly older USB 2.0 ports or those on the front of a desktop case) might not provide sufficient power for the drive to function properly.
On r/techsupport, one user explained that after ruling out drive failure, USB port damage, driver issues, and power supply problems, they noticed that “the drive lights up and spins but doesn’t show up” on one laptop, even though it worked fine on other computers.
If the issue persists, then the next step is to connect the USB device to a different computer to rule out a more serious hardware issue. When troubleshooting an external hard drive, make sure to swap the USB cable you use to connect the hard drive to your computer for a new one. If your external drive lives in an enclosure, then you can remove it from it and either try a different enclosure or connect it directly to your PC as an internal drive.
Fix 3: Run Disk Error Checking Tool
Windows includes a built-in disk error checking tool that helps diagnose and fix file system issues on storage devices, including USB drives.
By running the error checking tool from the drive’s Properties, you give Windows a chance to repair problems that could be causing the USB device not recognized issue:
- Launch File Explorer (Windows Explorer in Windows 7) and right-click your USB drive.
- Select Properties.
- Switch to the Tools tab and click the Check button.
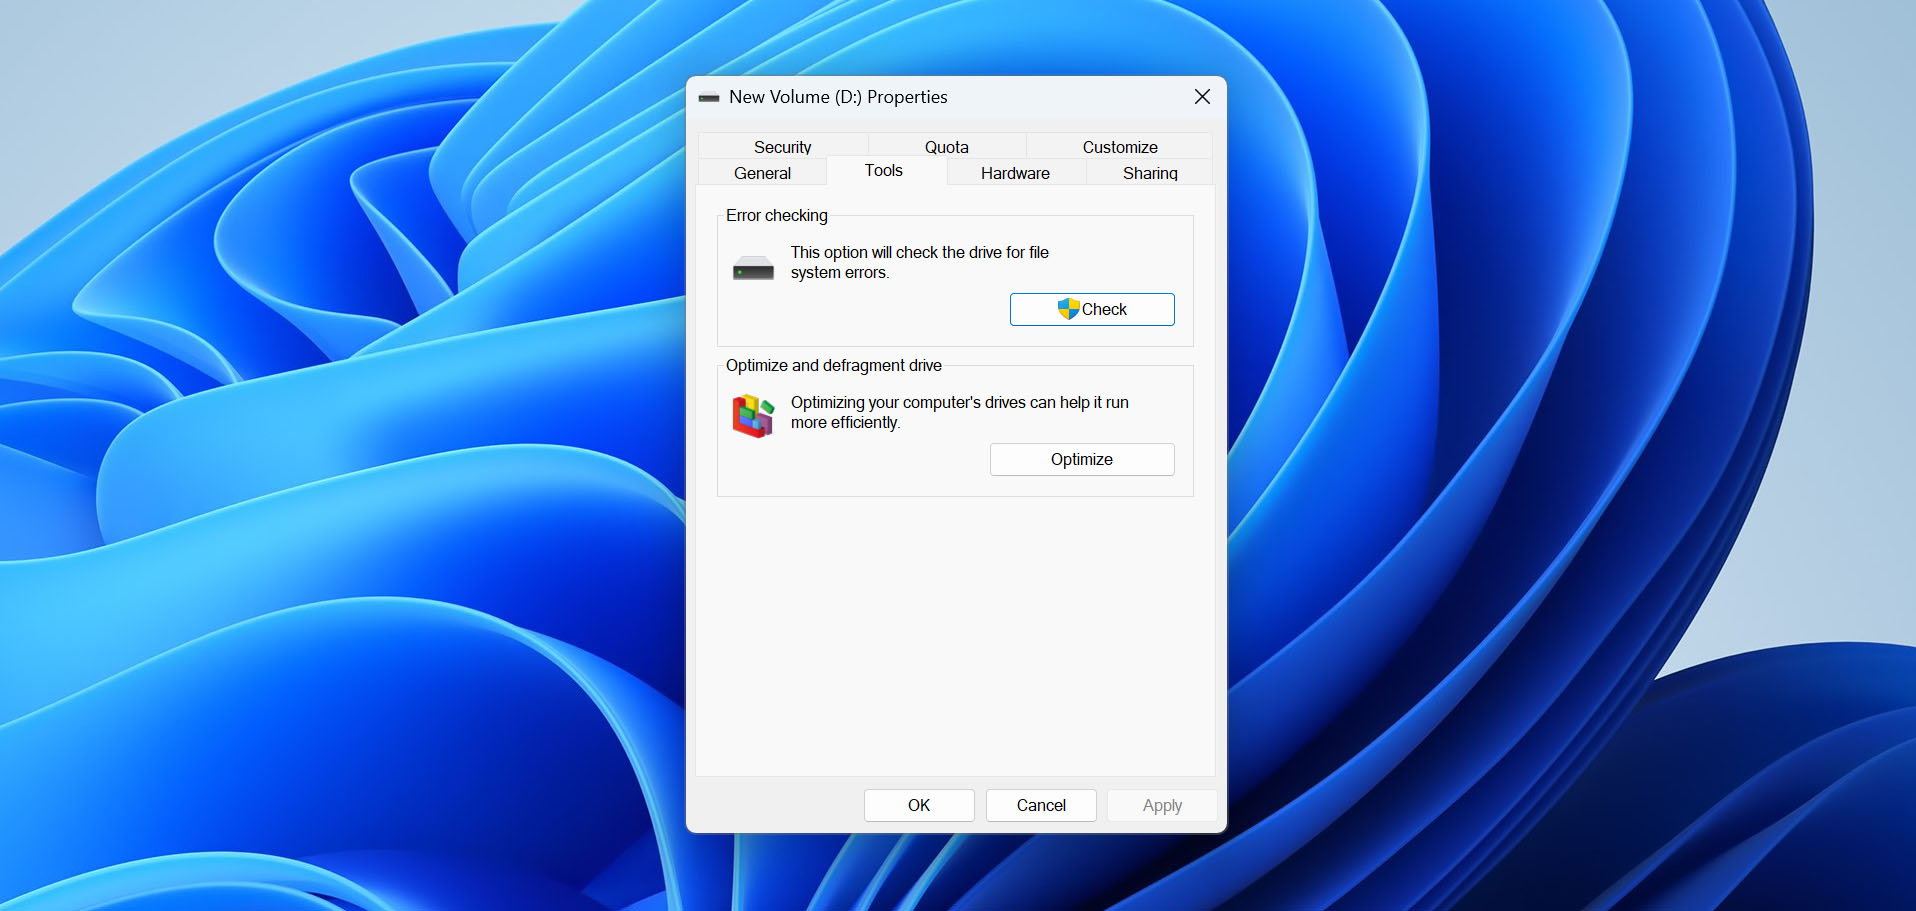
- Select the Scan and repair drive option.
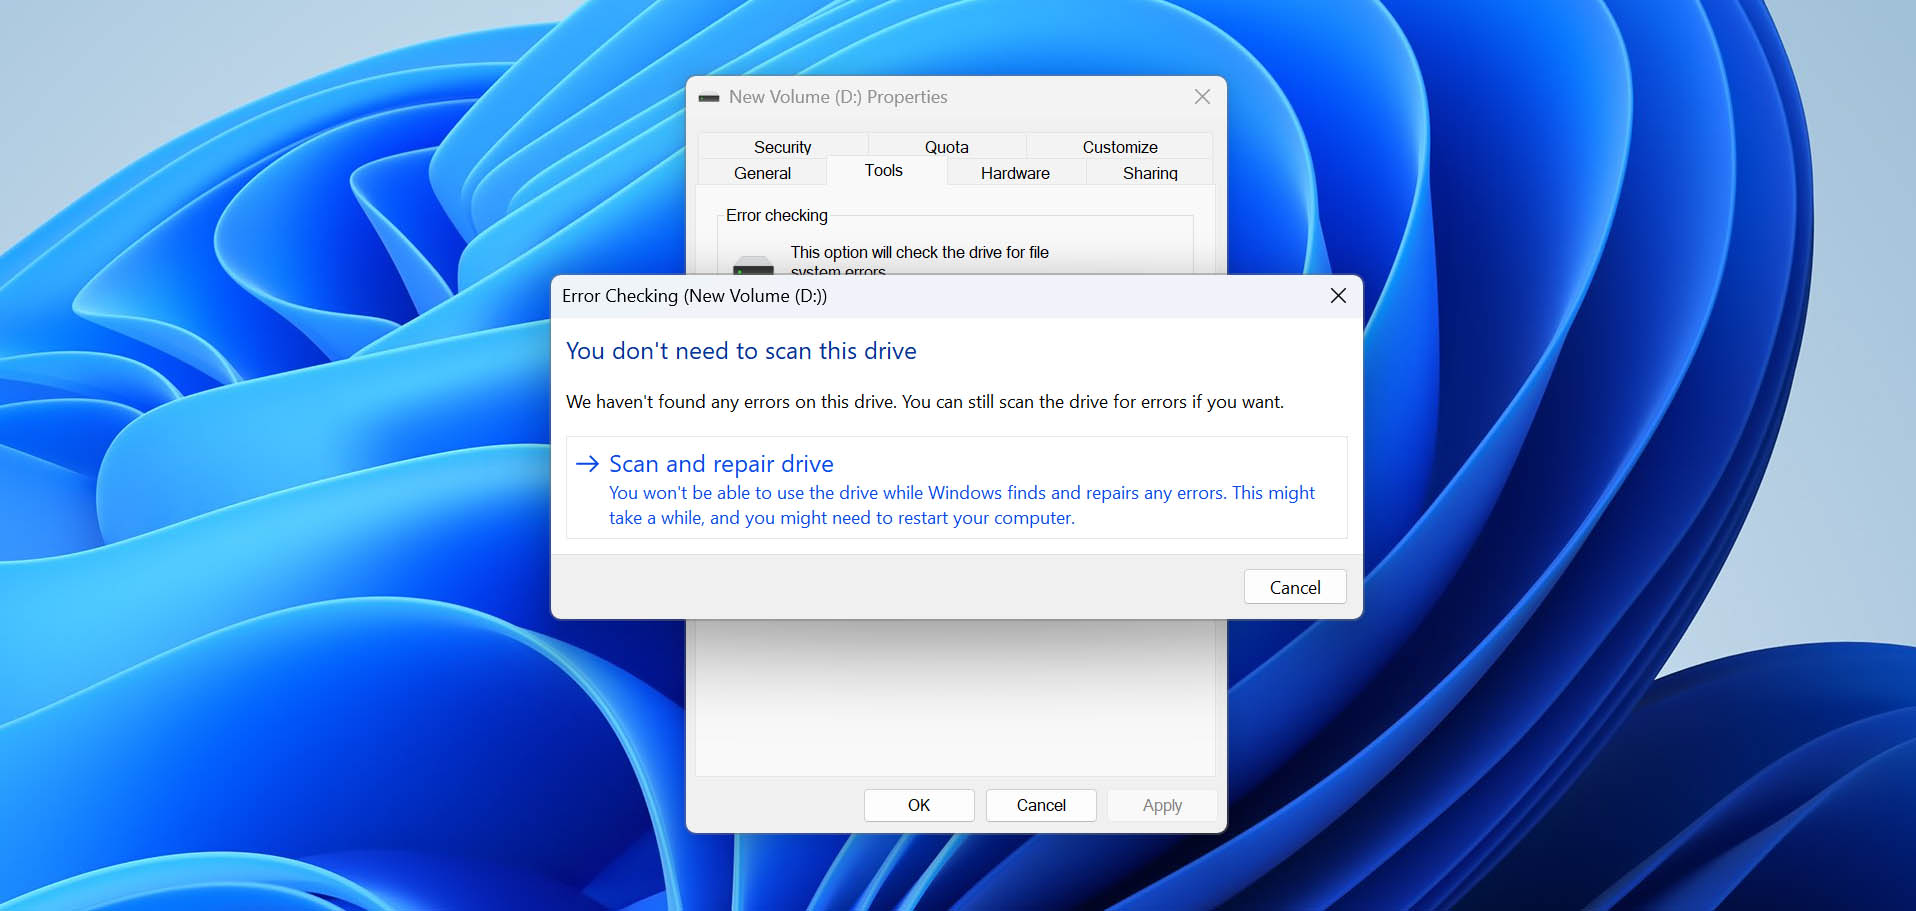
- Wait for Windows to find and repair any errors.
Fix 4: Uninstall the USB Device
Sometimes a USB device may not be recognized because its driver has become corrupted or an unsuitable driver was manually installed instead of letting Windows automatically manage it. Similarly, the USB controllers themselves, which act like traffic directors managing data flow between devices and your computer, can develop issues.
In all of these cases, uninstalling the device forces Windows to remove the problematic driver and then automatically reinstall a fresh, correct one when you restart your computer:
- Open the Start menu, type Device Manager in the Search box, and select Device Manager.
- Expand the Disk drives section.
- Right-click on your USB device and select the Uninstall device option.
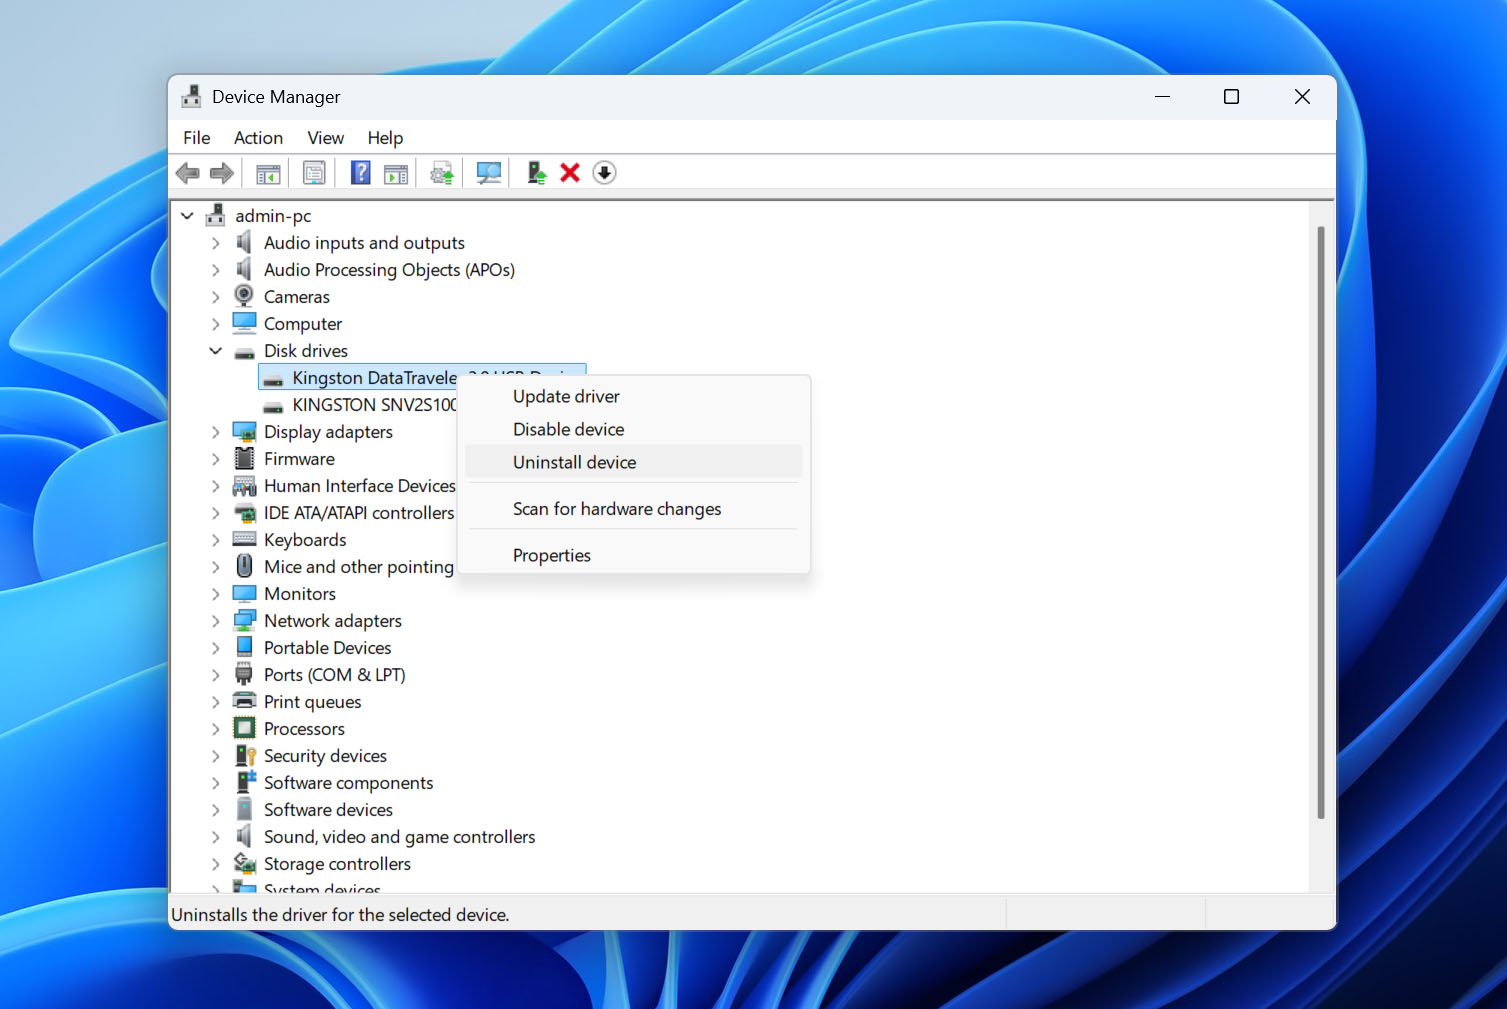
- Next, expand the Universal Serial Bus controllers section.
- Right-click the controller your USB device is connected to, and select Uninstall device. If you’re unsure which controller to uninstall, you can remove all of them—Windows will automatically reinstall them after a restart.
- Restart your computer.
- Reconnect the uninstalled USB device.
Keep in mind that most external hard drives communicate with the operating system in a standardized way, so they don’t require any special drivers besides those that come with the Windows operating system.
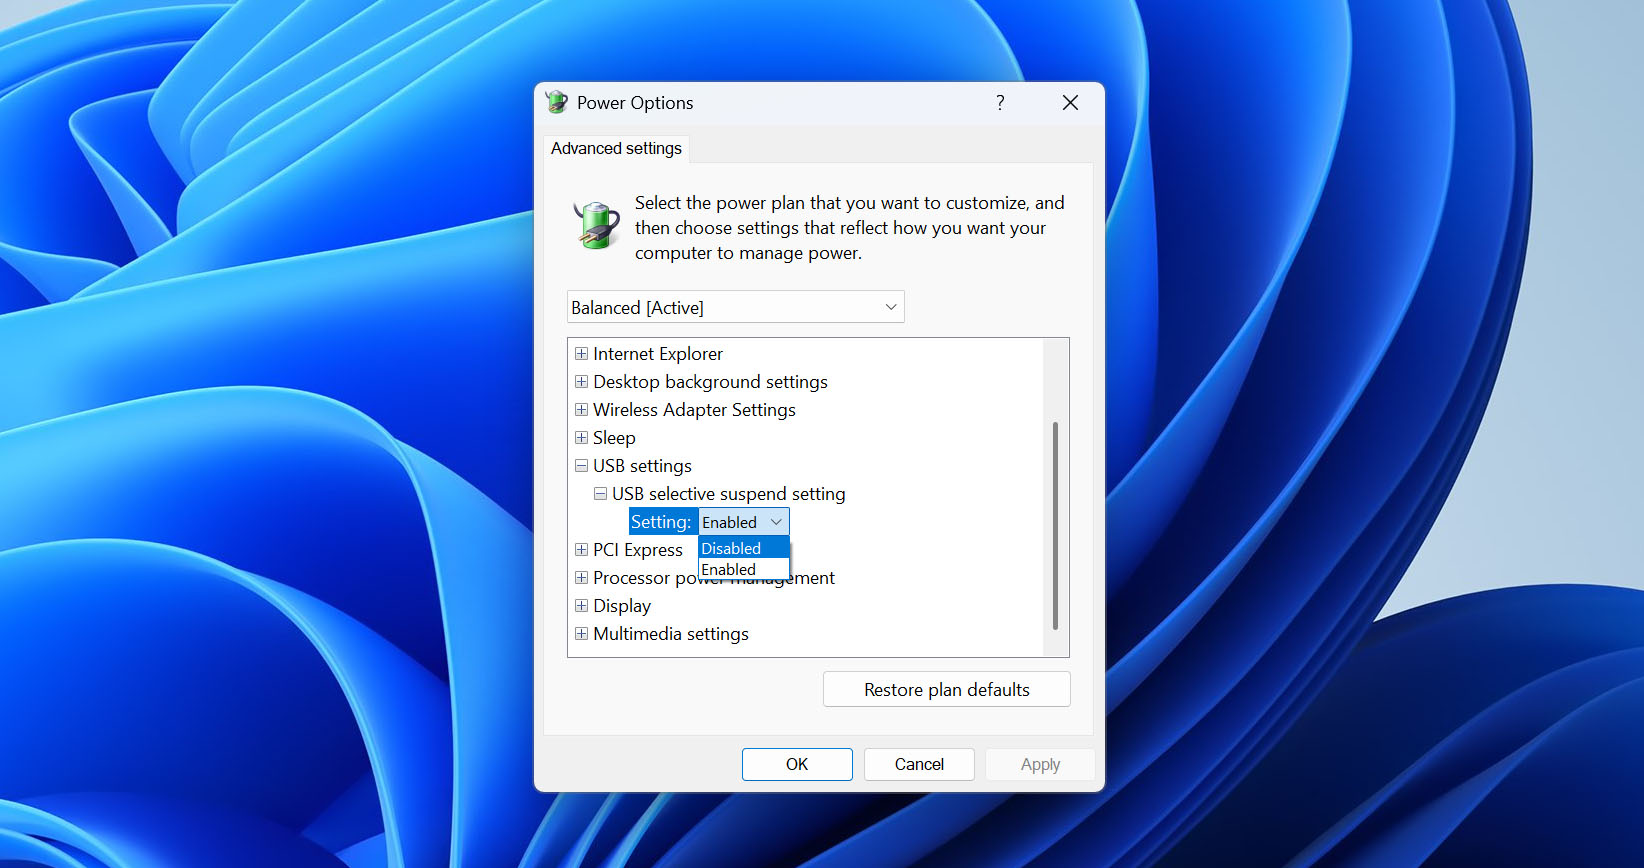
Fix 5: Disable the USB Selective Suspend Setting
Windows uses several different power management features to save energy, including the USB selective suspend setting and the ability to turn off USB devices completely. However, the same features can create recognition problems with USB storage devices.
For example, if you have a USB drive (like an external hard drive) connected to your computer and Windows puts it into suspend mode after a period of inactivity to save power, then any error during the resume process (when an application tries to access the drive) could result in the the “USB device not recognized” error.
You can address these issues by modifying Windows power settings in two key places:
Disable USB Selective Suspend:
- Open the Settings app and go to System > Power & sleep > Additional power settings. If you’re using an older version of Windows, open the Start menu, type power sleep in the Start Search box, and then click Change when the computer sleeps.
- Click Change plan settings and then select Change advanced power settings.
- Expand the USB settings group.
- Expand the USB selective suspend settings group.
- Select the drop-down menu and then select Disabled.
Prevent Windows from turning off USB devices
- Press Win + R to open the Run dialog box.
- Enter devmgmt.msc and click OK to open Device Manager.
- Expand the Universal Serial Bus controllers section.
- Right-click the USB hub your storage device is connected to.
- Select the Properties option.
- Navigate to the Power Management tab.
- Uncheck the Allow the computer to turn off this device to save power option and click OK.
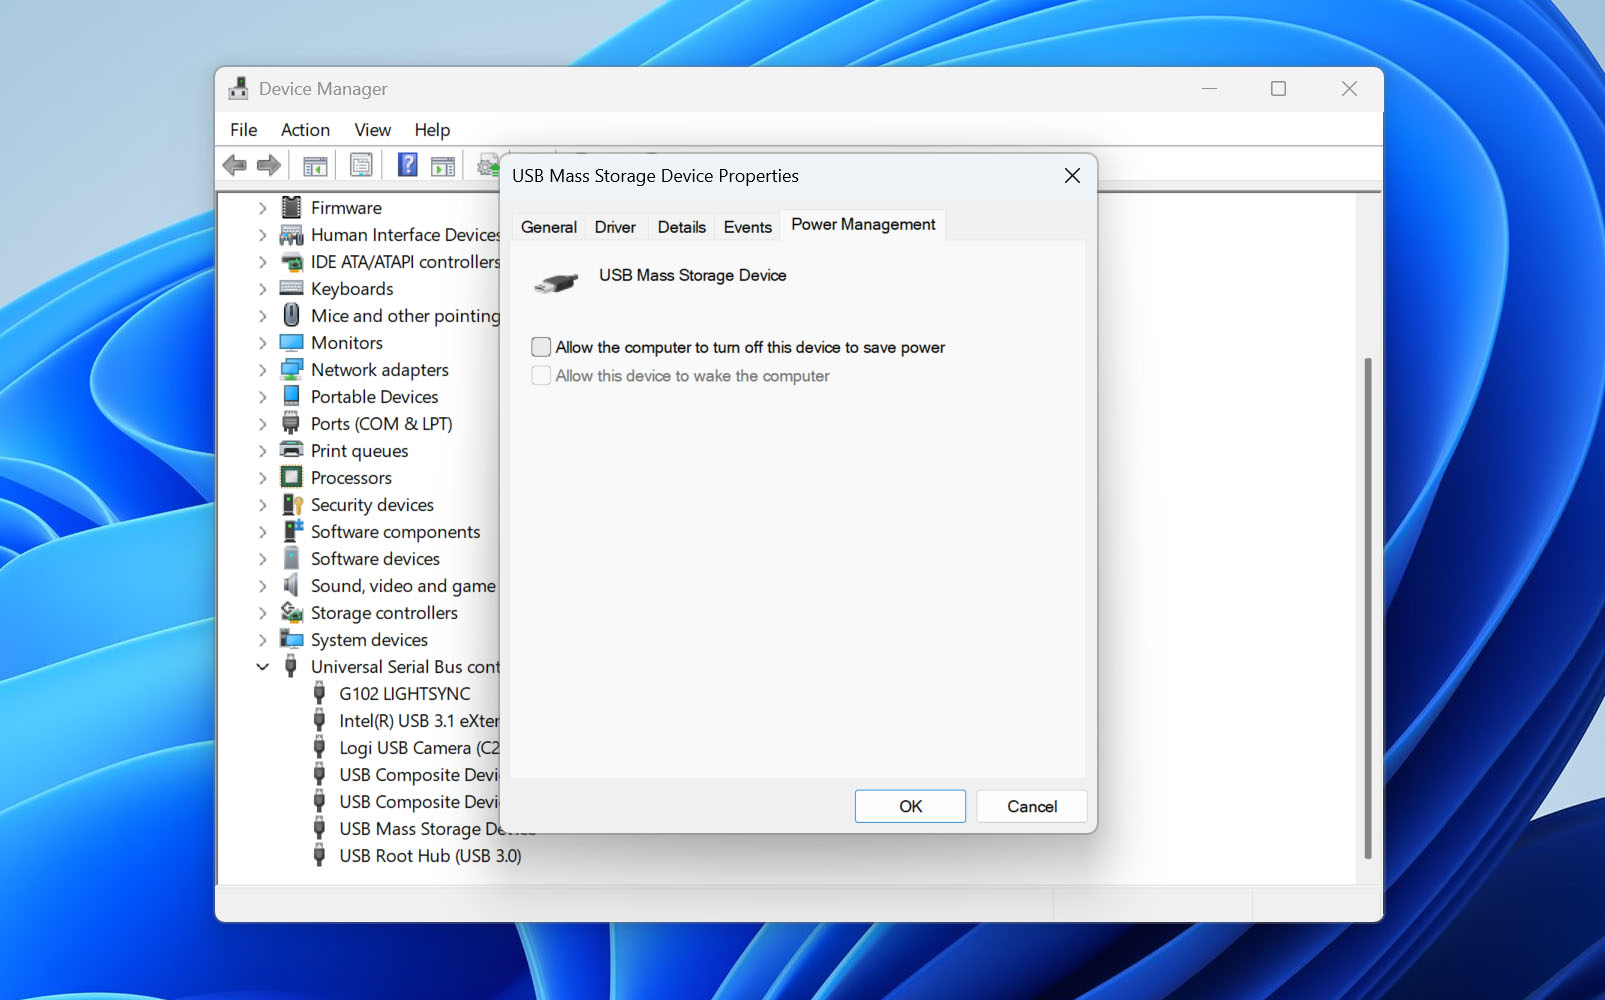
From now on, your device will remain in an active state even when not in use.
Fix 6: Install the Latest Chipset Drivers for Your Motherboard
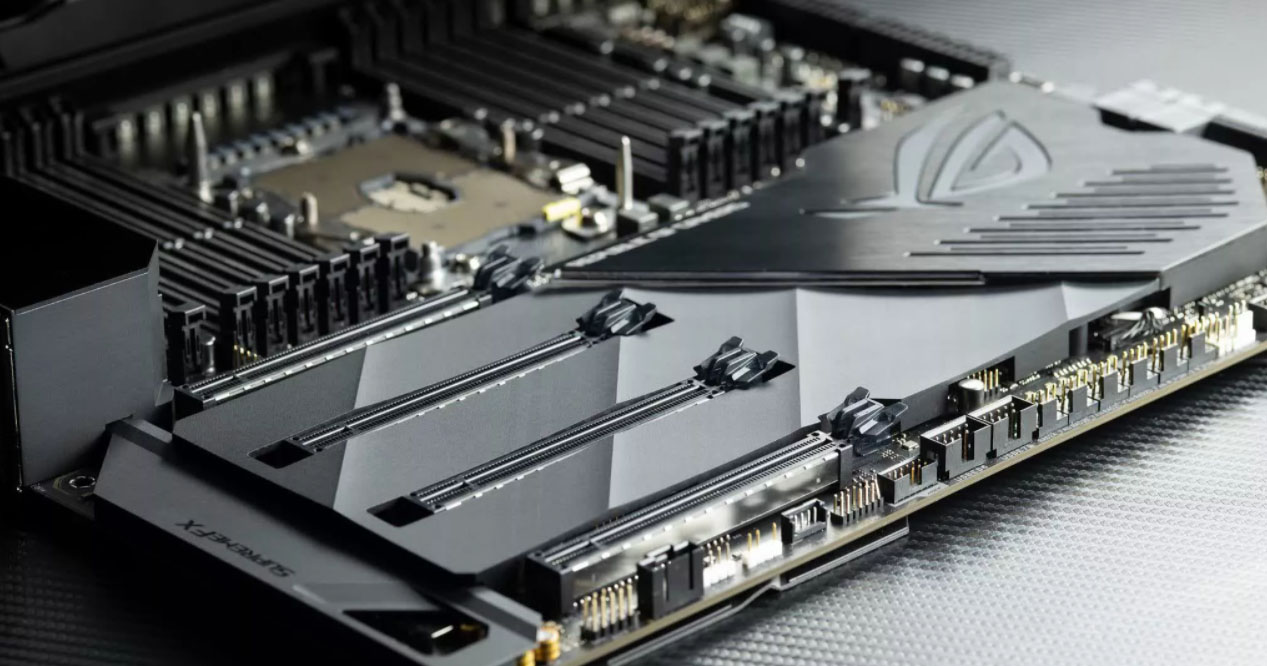
Just like all other hardware devices, your motherboard requires drivers to work correctly. If you haven’t done so in a while, you should check whether you’re using the latest chipset drivers available by going to the official website of the manufacturer of your motherboard.
Outdated or buggy chipset drivers can interfere with the communication between your motherboard and USB ports, potentially causing the USB device not recognized error to keep popping up or worse, as the serious flaw in AMD X670E motherboards, where Gen 5 NVMe slots dropped to Gen 1 speeds and prevented computers from booting up illustrates.
Fix 7: Install the Latest Windows Updates
From time to time, Microsoft releases hotfixes to patch critical issues. For example, KB976972 fixes problems with moving data over USB from a Windows 7-based computer that has an NVIDIA USB EHCI chipset and at least 4 GB of RAM, while KB974476 ensures that USB devices resume from the USB Selective Suspend state correctly.
To install the latest Windows updates:
- Open the Start menu, type Windows Update, and select the Windows Update option.
- Click the Check for updates button and review available updates.
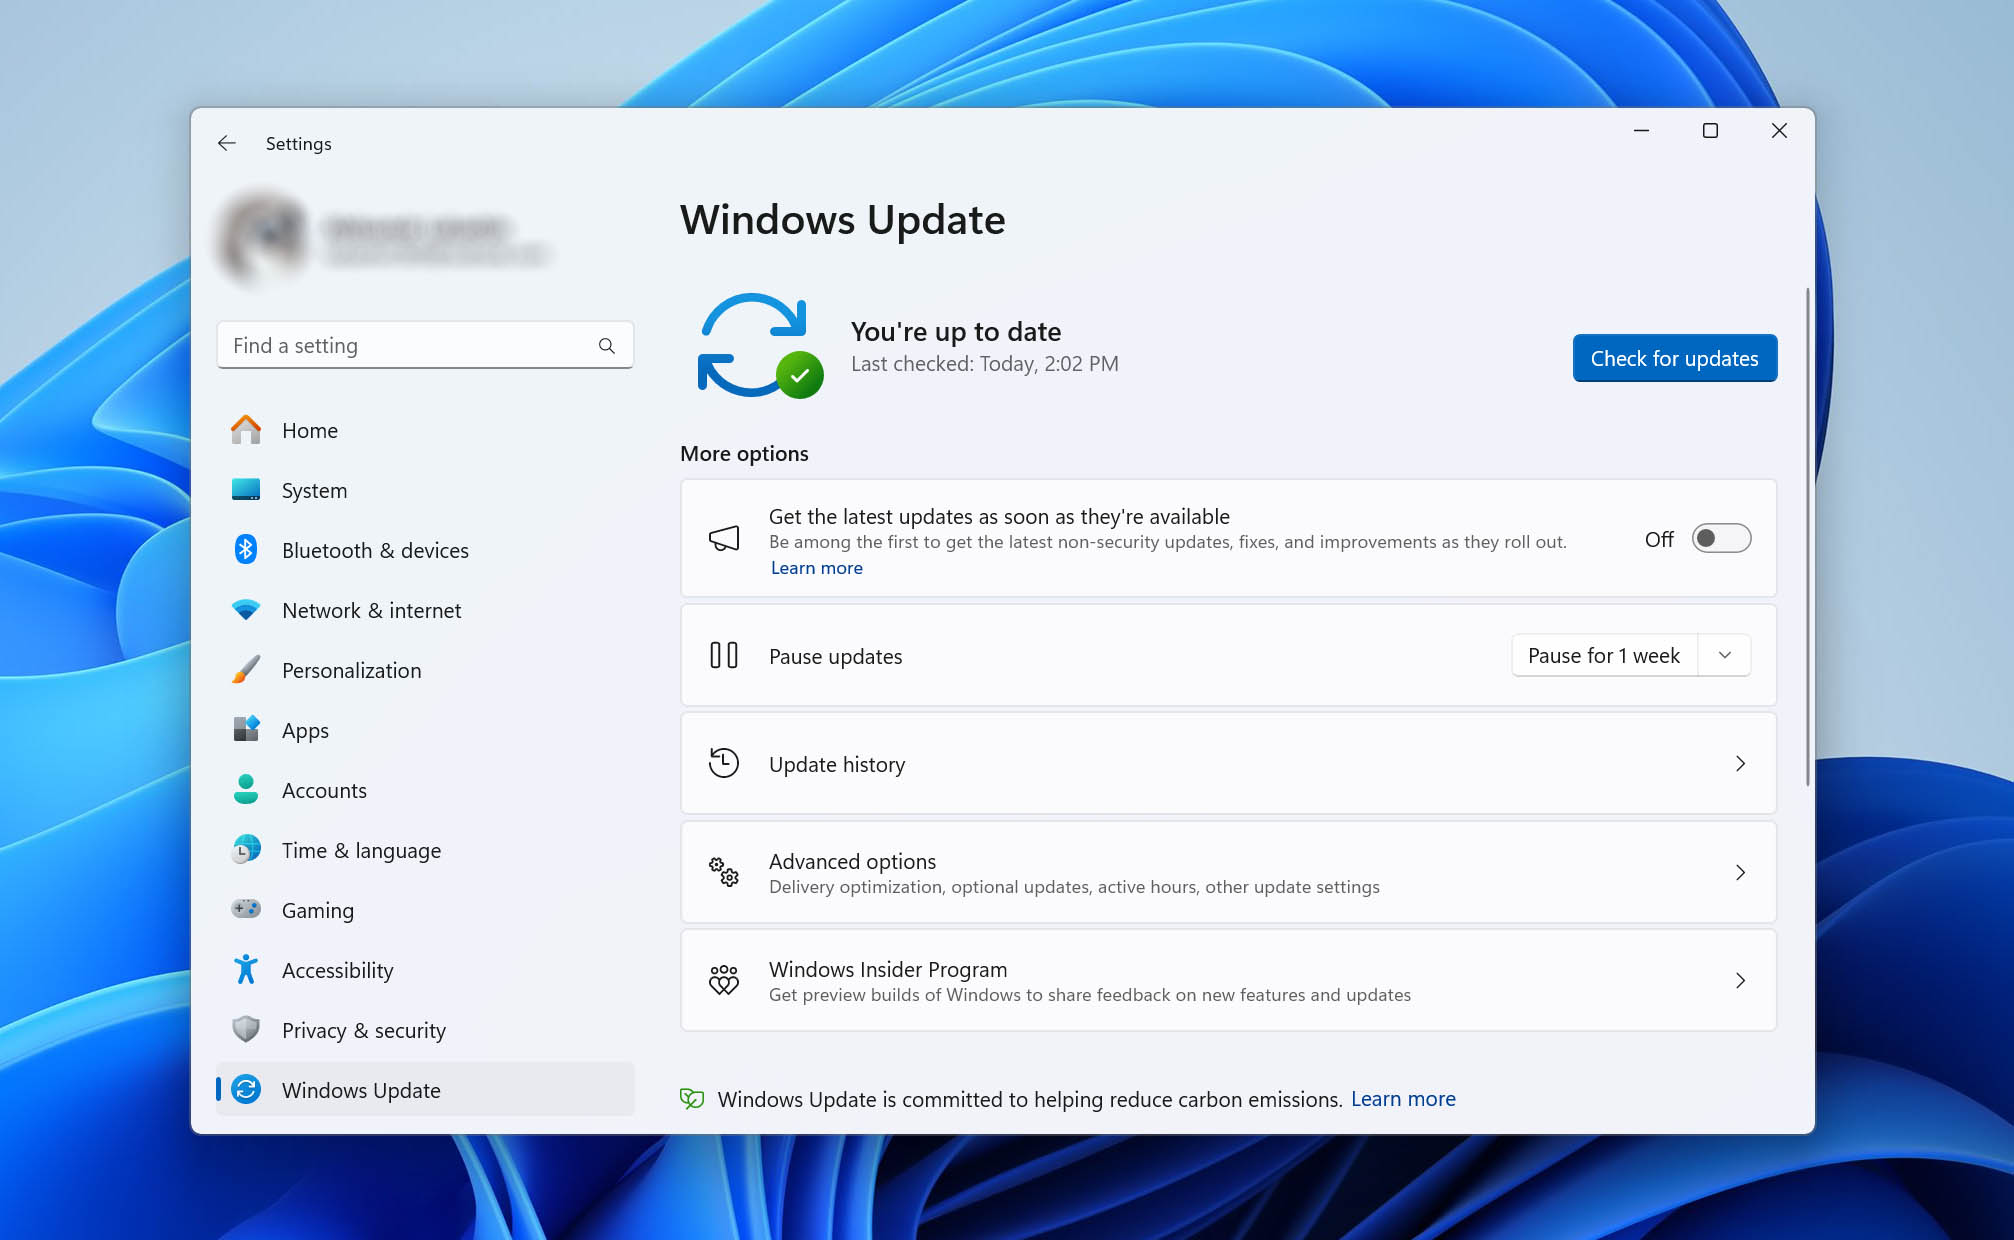
- Select each update you want to install and then click Install updates.
- Wait until all updates have been installed.
- Restart your computer.
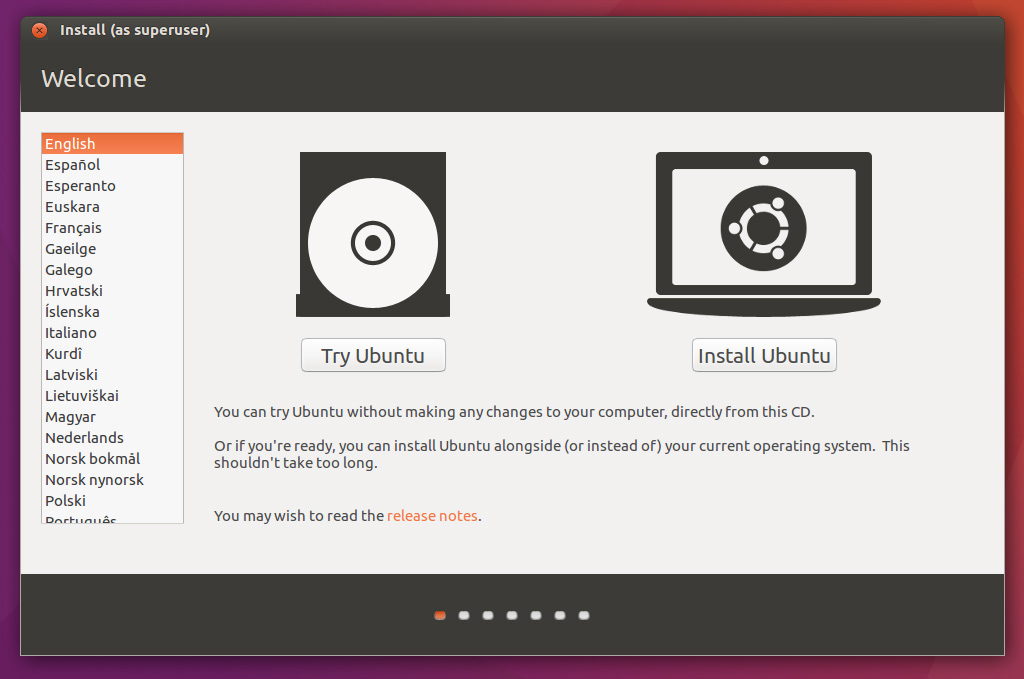
Fix 8: Access the USB Drive from Linux
Linux operating systems can be extraordinarily useful for fixing USB devices that aren’t recognized by Windows for two main reasons.
First, Linux distributions contain native drivers for file systems that Windows can’t natively recognize, such as EXT3/EXT4, which are common on Linux-formatted drives.
Second, even for file systems that Windows does support like NTFS and exFAT, Linux uses different driver implementations that may successfully read a drive when Windows fails.
For beginners, we recommend Ubuntu or Linux Mint as user-friendly distributions with excellent hardware support and intuitive interfaces. Both come with live boot options, meaning you can run them directly from a DVD or USB stick without installing anything on your computer. They also include graphical file managers similar to File Explorer in Windows.
If your USB drive works in Linux but not in Windows, you’ve learned something valuable: the problem isn’t hardware-related but rather a Windows-specific software issue. This knowledge narrows down your troubleshooting path considerably.
Fix 9: Repair Your Windows System
There’s a chance that the USB device not recognized error isn’t actually caused by your USB device. It could also be caused by operating system corruption. Luckily, recent versions of Windows come with useful tools that you can use to quickly and easily restore your system to a healthy state:
- Press Win + X and launch Windows Terminal or Windows PowerShell.

- Enter the following command to scan the integrity of all protected operating system files:
sfc /scannow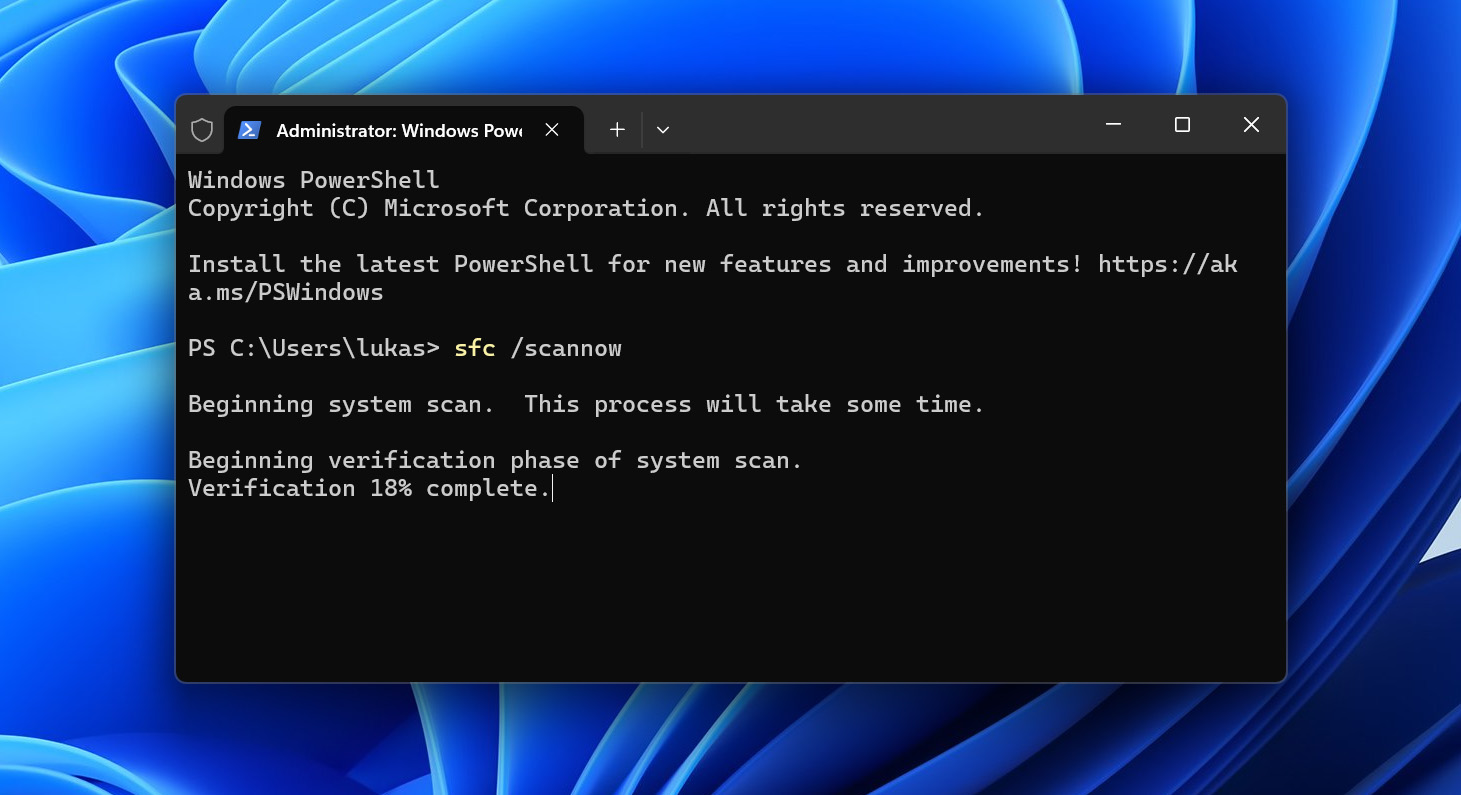
- Restart your computer.
You should now test if the USB device not recognized error went away. If it didn’t, you should repair the Windows Component Store, which contains the functions needed for the customization and updating of Windows:
- Press Win + X and launch Windows Terminal or Windows PowerShell.
- Enter the following command:
Dism.exe /Online /Cleanup-Image /RestoreHealth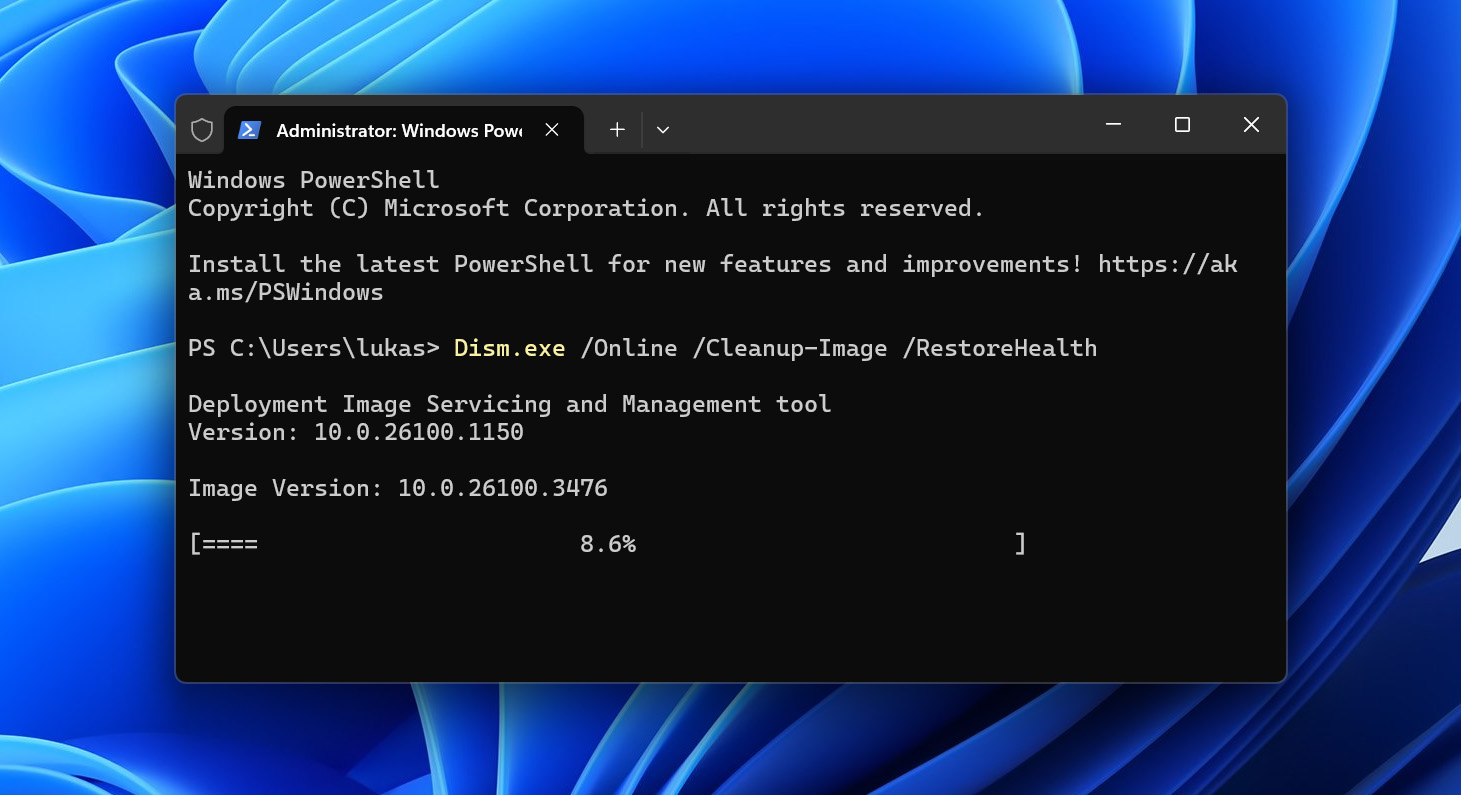
- And also this command:
Dism.exe /online /Cleanup-Image /StartComponentCleanup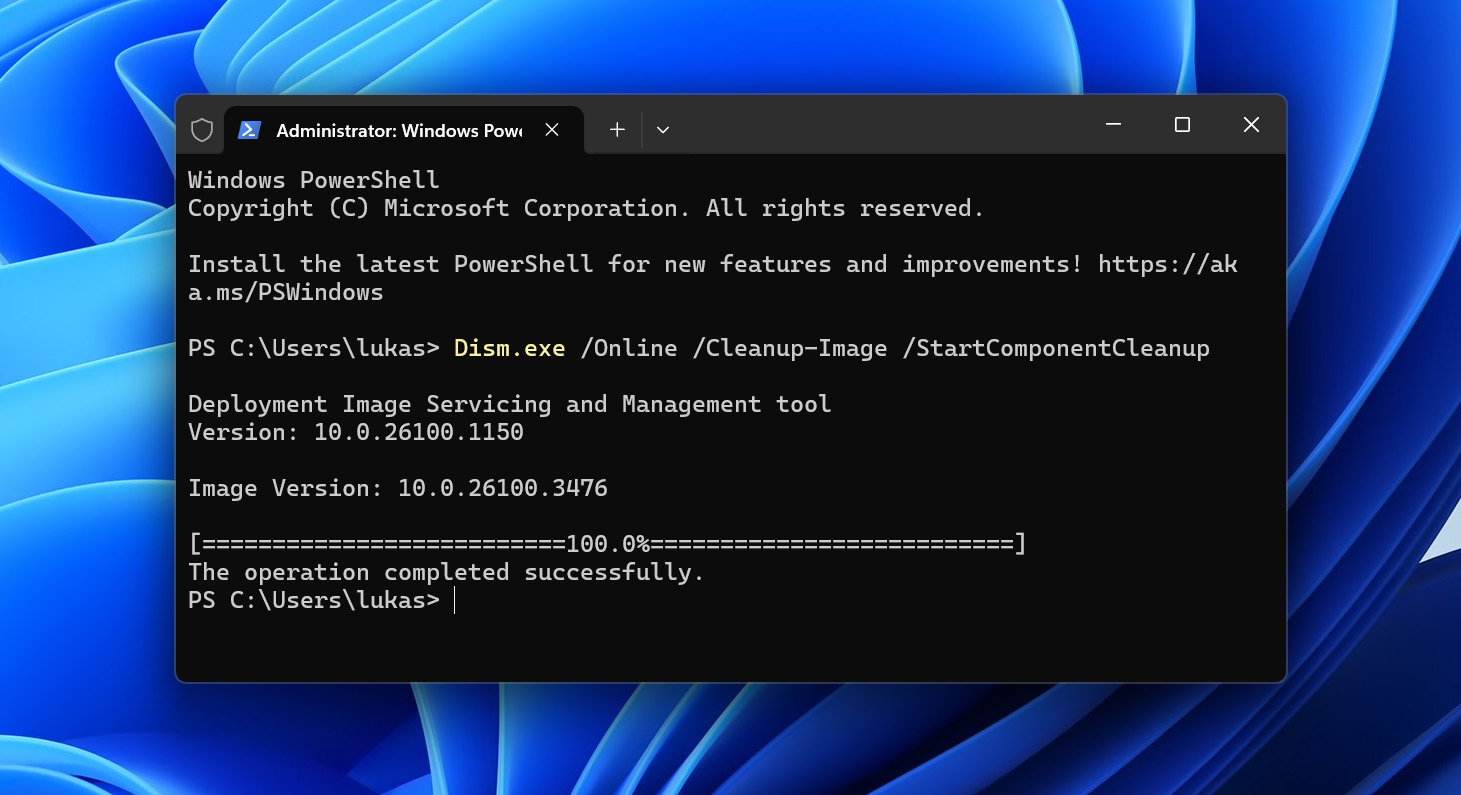
If these tools don’t help, then you can reinstall your entire operating system.
Fix 10: Pay for a Data Recovery Service
Still unable to fix the problem with your USB device not being recognized properly? Before you throw it into the bin and count your losses, consider sending it to a professional data recovery service.
This solution is specifically for USB devices that store data—such as flash drives, external hard drives, memory cards, and USB SSDs—where there are signs of physical damage or complete hardware failure that software solutions can’t address.
Data recovery professionals can, in many cases, fix even severe hardware damage that’s preventing your USB drive from being recognized and recoverable at home. They have specialized equipment and clean rooms that allow them to physically repair damaged components or even transfer the storage chips to new hardware if necessary.
While this solution may be more expensive than the others, the cost is often justified when weighed against the value of the data you’re trying to recover from your unrecognized USB drive and the fact that it’s sometimes the only option. For professional data recovery services that can handle even the most challenging cases of physical damage, you can contact CleverFiles Data Recovery Center.
How to Recover Data from USB Drive That Is Not Recognized
If you’ve tried the fixes above but your USB drive is still not working properly, or if you need to recover the USB drive regardless of whether the drive can be fixed, data recovery software is your best option. Disk Drill is designed to scan USB flash drives, external hard drives, and other storage devices for lost files even when Windows 11/10/8/7 can no longer access them using its sophisticated algorithms capable of locating files based on file system information and file signatures.
The only caveat is that data recovery software like Disk Drill can recover a USB drive that’s not recognized as long as the drive appears in Disk Management, which confirms the operating system can communicate it. If your USB drive is listed in Disk Management (and the displayed size matches the real storage capacity), then you can recover it using data recovery solution like Disk Drill.
In addition to its excellent USB drive recovery capabilities, Disk Drill is easily among the most user-friendly solutions of its kind, so it can help you even if you have limited technical experience. With the free version, you can preview an unlimited number of files to verify their recoverability, and you can even retrieve up to 100 MB of data from your USB drive for free. A good amount to start with, if you’re unsure about potential results.
Step 1: Install Disk Drill on Your Windows Computer
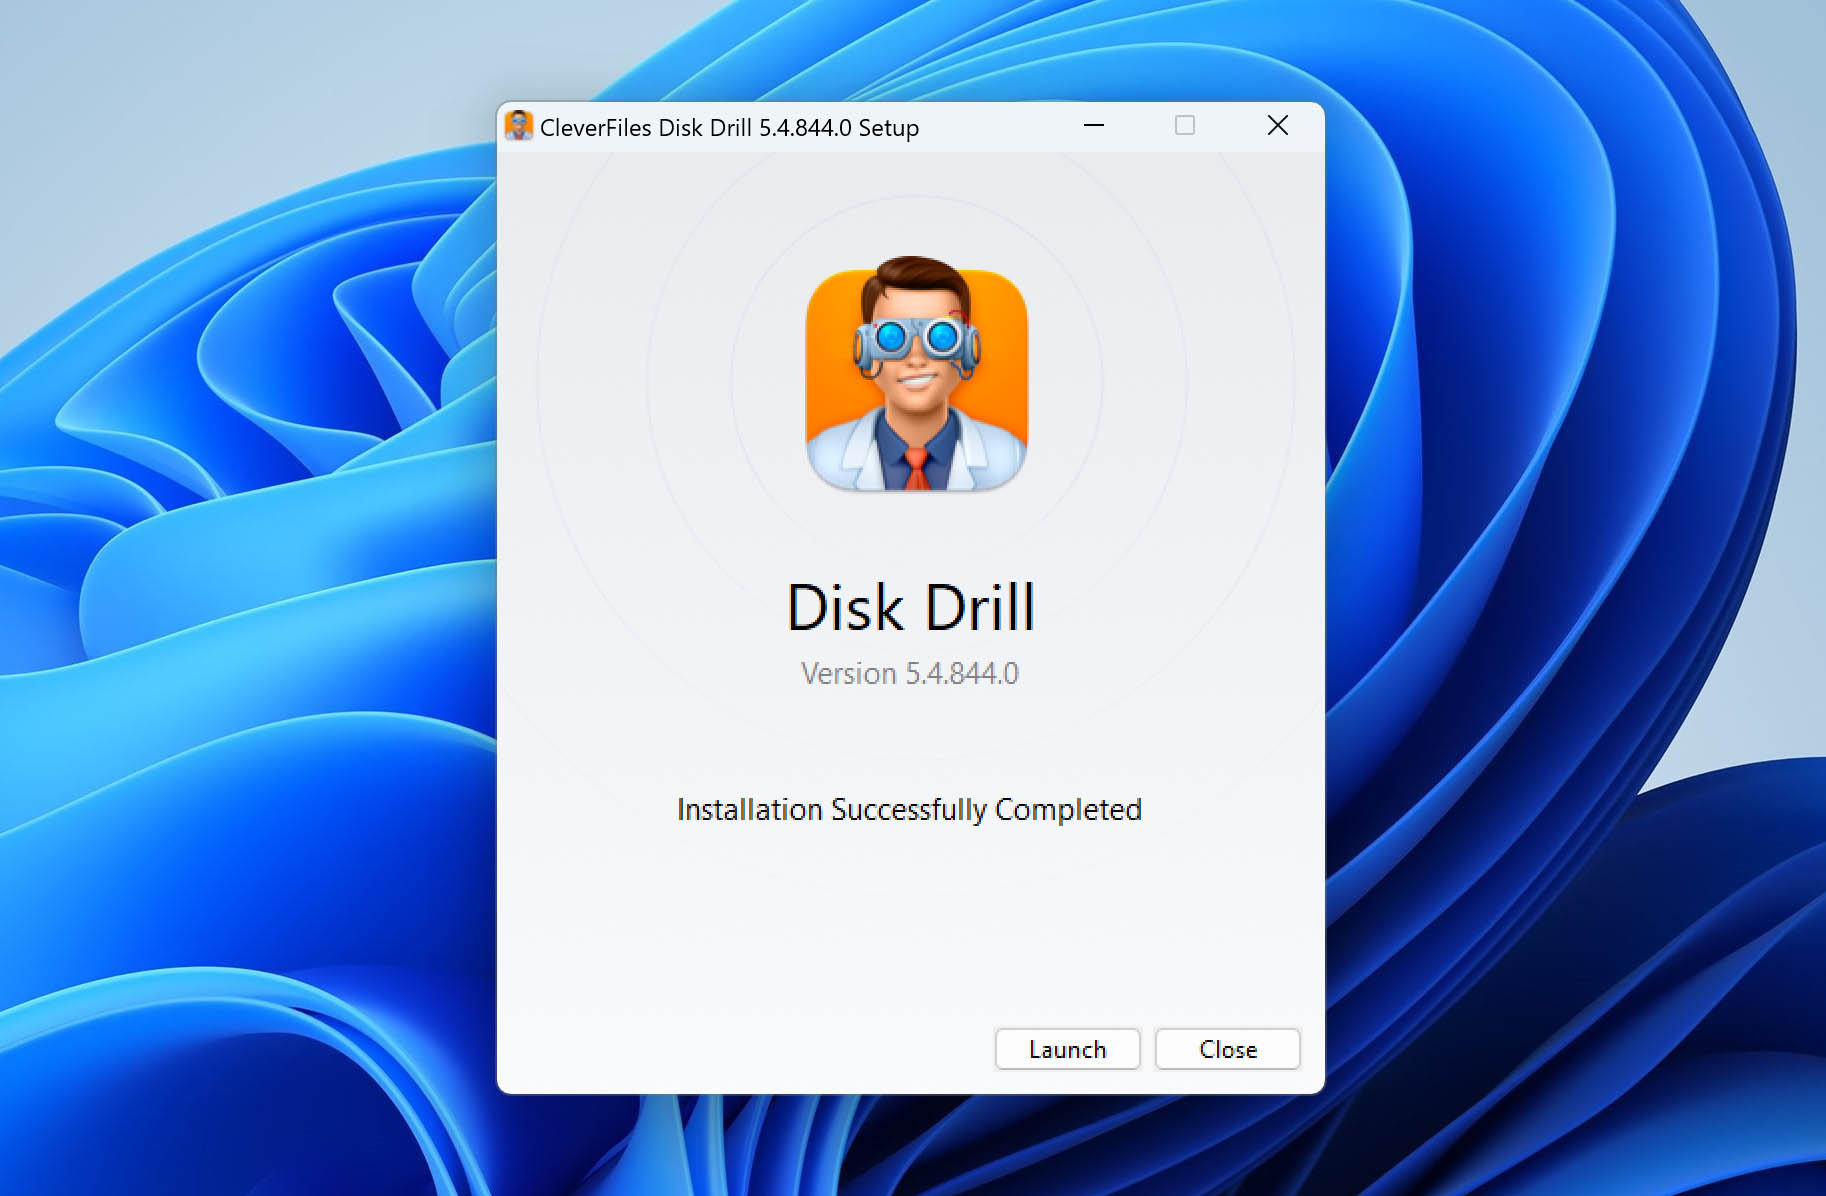
Disk Drill can be downloaded from its official website for free and used to recover up to 100 MB of lost data. Prioritize files you value the most, and upgrade to Disk Drill PRO if you need more.
Step 2: Scan the USB Device that’s Not Recognized

Once you have Disk Drill installed on your computer, you can go ahead and launch it. Then, select your storage device and click the Search for lost data button. The software will begin scanning your USB drive for recoverable files, even if Windows cannot normally access them.
Step 3: Select & Recover Your Files
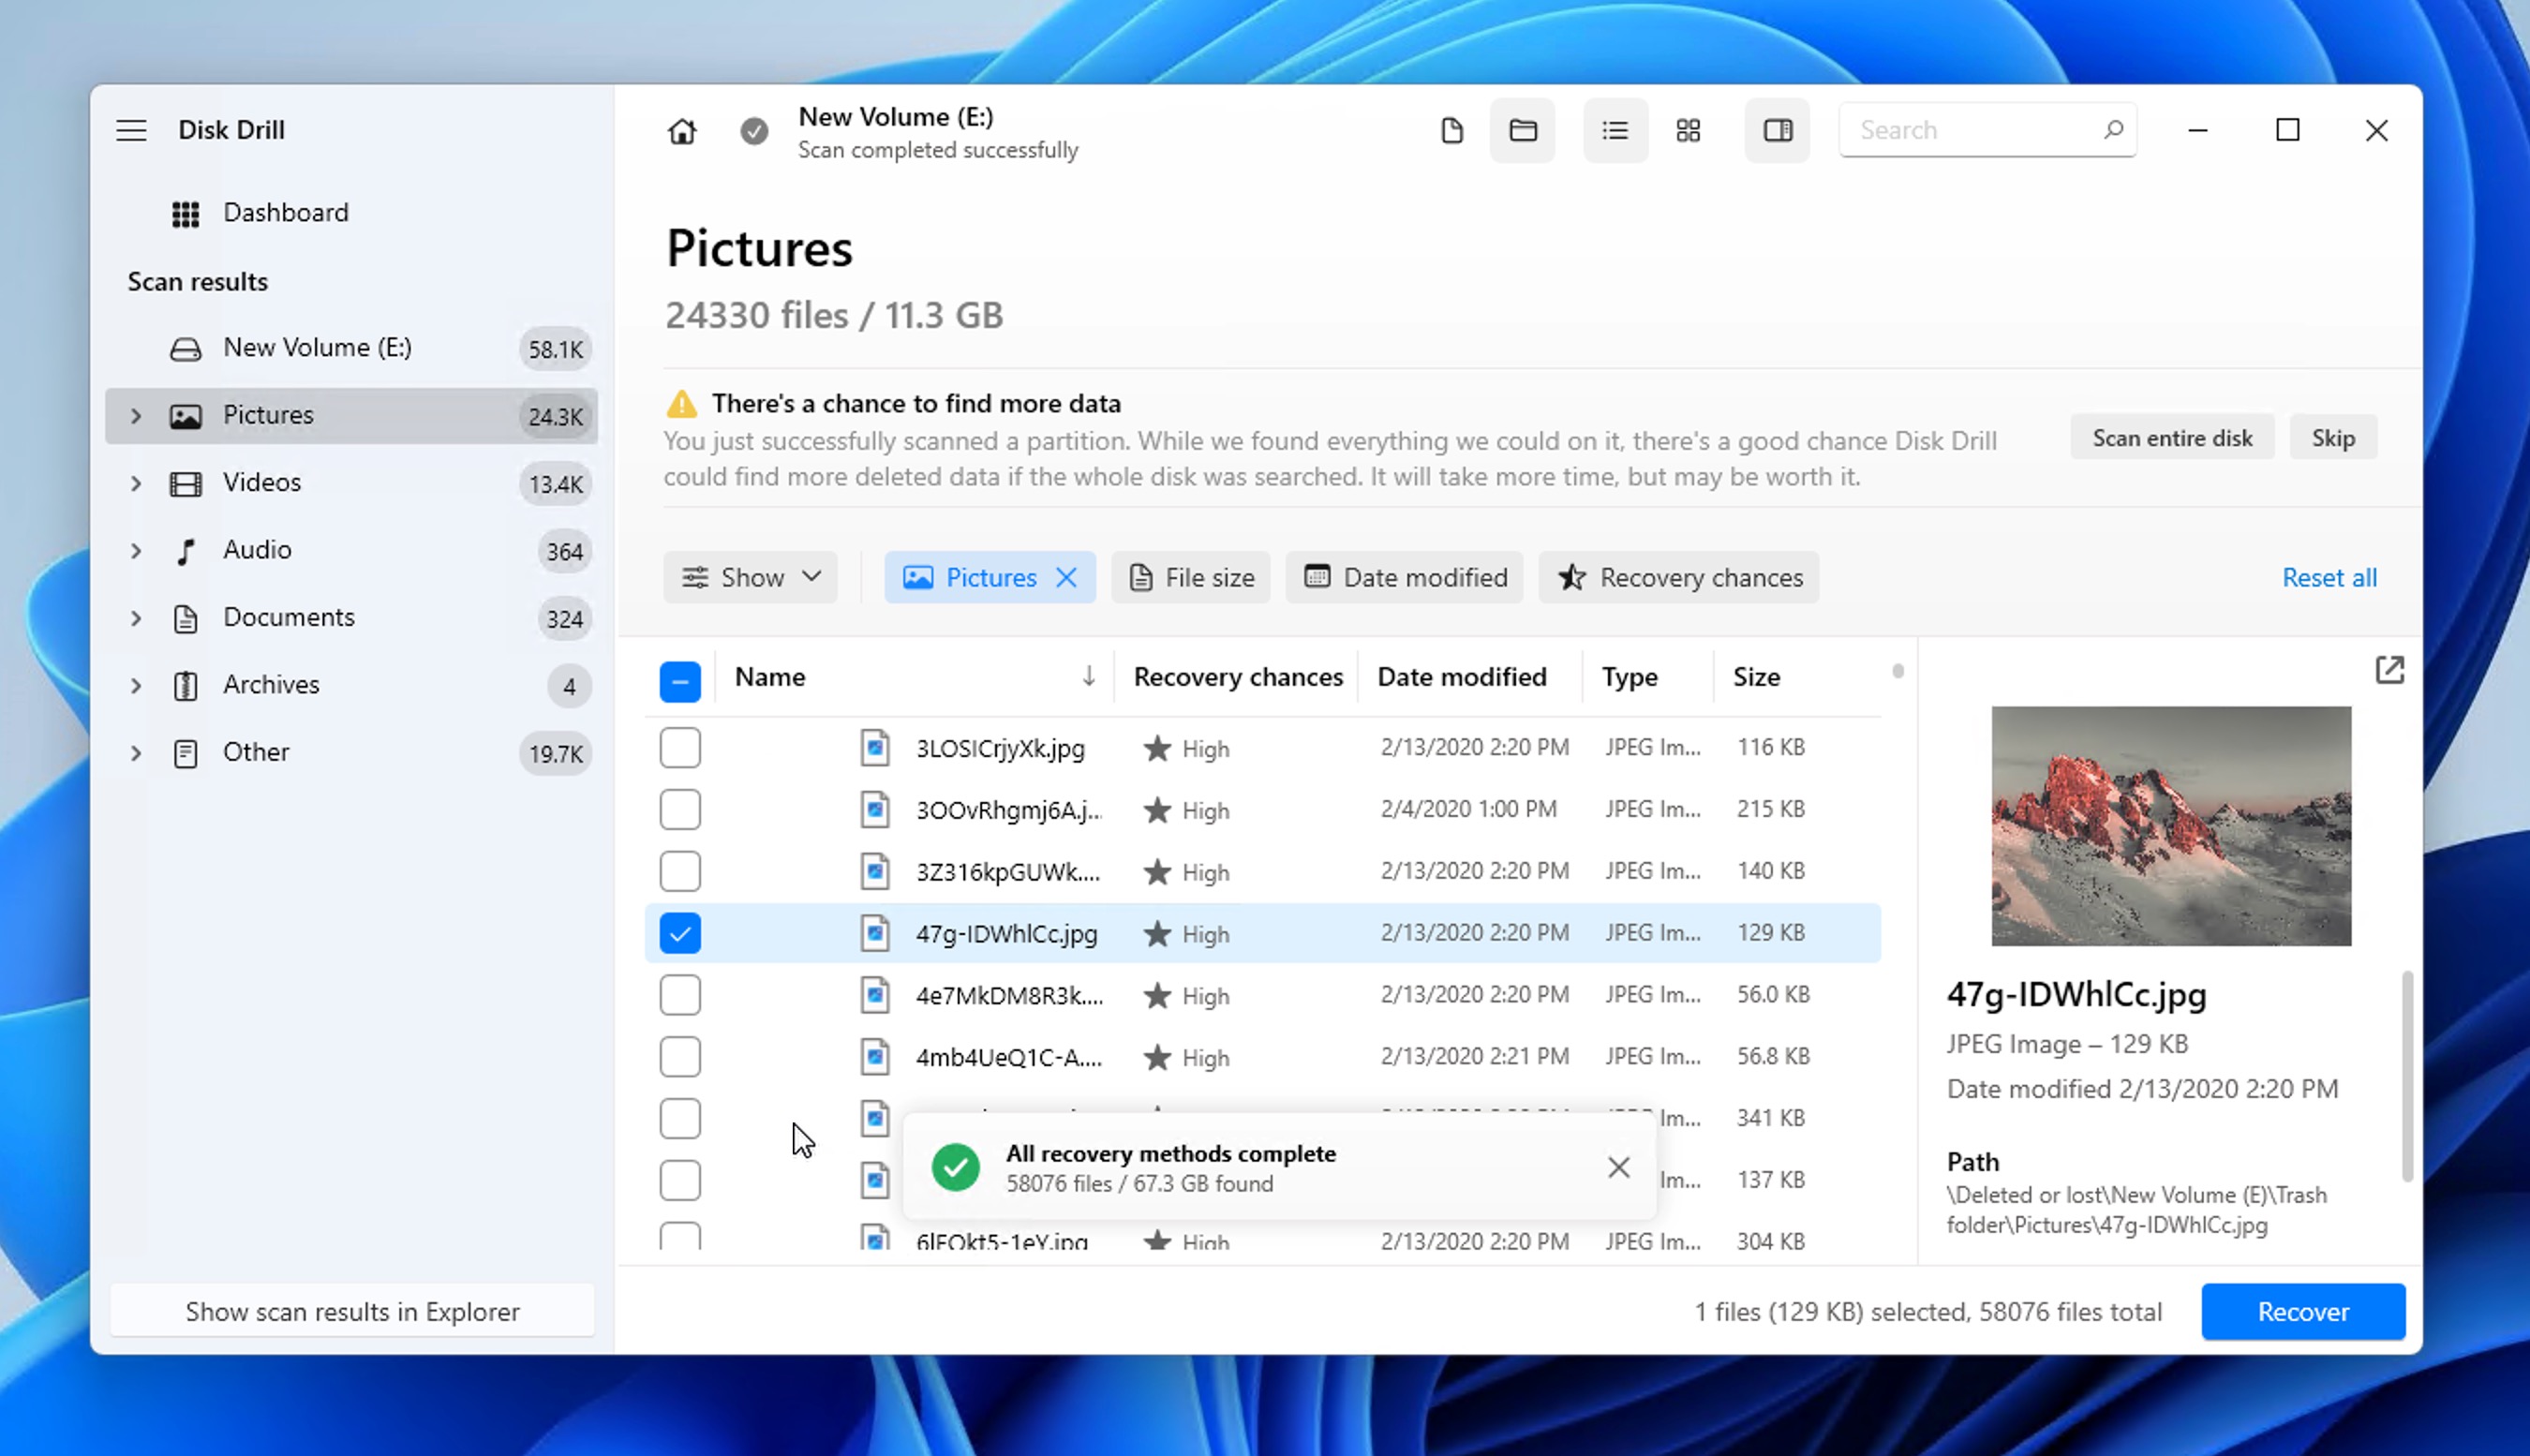
Using Disk Drill’s scan results filters and preview feature, find and select the files you want to recover. When you’re happy with your selection, click the Recover button, choose a suitable recovery destination (important: never recover files to the same drive you’re recovering from), and confirm. That’s all there is to it!
How to Prevent the USB Not Recognized Error
They say that an ounce of prevention is worth a pound of cure, and we wholeheartedly agree—especially when it comes to data loss.
As troubling as the USB device not recognized error may be, it’s actually not that difficult to prevent it (or at least greatly reduce the likelihood of it occurring). You just need to follow a few best practices when using your USB devices, especially those that store important data.
⏏️ Safely Eject Your USB Storage Devices
According to Microsoft’s support guidance, Windows 10 version 1809 and later uses “quick removal” as the default setting for external storage devices, which is designed to let you disconnect drives without using the safe removal process—so long as you’re not actively writing files to them. This works because Windows no longer continuously caches write operations to the drive, which reduces performance slightly but makes unexpected removals safer.
Despite this change, we still strongly recommend using the safe eject feature as a best practice. It’s always better to be cautious when dealing with important data, and the safe eject process guarantees that absolutely no write operations are in progress when you disconnect your drive. When you use the Eject option and Windows indicates it’s safe to remove the device, you can be confident you won’t experience data corruption that could lead to USB drive not recognized errors in the future.
💩 Avoid No-Name USB Storage Devices
The market is unfortunately flooded with counterfeit and fake USB drives, particularly on online marketplaces and auction sites. As noted by Data Clinic Ltd, these fake drives are often of “extremely poor quality and will stop working after a short while.” They may look identical to genuine products on the outside, but contain substandard electronics that are prone to failure and corruption.
What’s worse, these fake drives often report false capacities—you might think you’ve purchased a 256GB flash drive, but it actually contains only 16GB of usable storage. When the drive fills up beyond its actual capacity, it begins overwriting existing data, leading to corruption and recognition problems.
To protect yourself, purchase USB storage devices only from reputable retailers like authorized electronics stores or the manufacturer’s official website. If you suspect you might have a fake drive with misrepresented capacity, use validation tools like H2testw or Steve Gibson’s ValiDrive to verify its true capacity.
💧 Store Your USB Devices in Proper Conditions
Because USB storage devices that rely on flash memory chips don’t have any moving parts, they can withstand a fair amount of physical stress. What they can’t withstand, however, is prolonged exposure to high humidity, extreme temperatures, or magnetic fields. These environmental factors can damage the electronic components inside your USB drive, potentially leading to recognition failures.
If you frequently need to transport a drive in challenging environments, consider investing in a specialized waterproof and ruggedized USB drive. Products like the Flashbay Nox, which is water-resistant up to 100m depths, or Verbatim’s ToughMAX USB drive, which can withstand crushing, freezing, and even boiling temperatures, offer superior protection in harsh conditions.
Conclusion
Connecting an external hard drive, USB flash drive, or memory card to your computer and seeing the USB device not recognized error appear sucks. Fortunately, this annoying problem has multiple easy-to-apply solutions, and we’ve described 12 of them in this article to help you regain access to your data.


FAQ
There are many possible reasons for your USB device to not be recognized. The USB device itself could be damaged, there could be something wrong with the USB port, or you could be experiencing driver issues, just to give a few examples.
To figure out why your device is not showing up on your computer, you need to first rule out the possibility of your computer being to blame by connecting the device to a different machine. If you still get the same USB error message, then it’s time to apply the fixes described in this article.
The first thing you should do if your USB device is not showing file is run a data recovery tool like Disk Drill:
- Install Disk Drill on your computer.
- Launch it and scan your USB device.
- Select all recoverable files.
- Click the Recover button.
- Recover the files to your main hard drive.
It’s possible that you can’t see your USB drive in Windows 10 because the USB selective suspend setting, which controls when your drive powers down, is enabled. To disable it:
- Open the Settings app and go to System > Power & sleep > Additional power settings.
- Click Change plan settings and then select Change advanced power settings.
- Expand the USB Settings group.
- Expand the USB selective suspend settings group.
- Select the drop-down menu and then select disabled.
Not all phones are detected without additional steps. If you have an Android phone, you might need to activate the Media device (MTP) transfer option to see media files on Windows. Similarly, iPhone users are required to install iTunes to manage their iOS devices on Windows.
To fix the USB device not recognized error on Windows 11, you can use the built-in error checking tool:
- Open File Explorer.
- Select This PC from the left pane.
- Right-click the USB device you want to repair.
- Select the Properties option.
- Go to the Tools tab and click the Check button.
- Select the Scan drive option.
- Wait for the scan to finish.