


Decided it’s finally time to delete screenshots on your iPhone? Good call. At least Apple saves you from having to hunt for them one by one – the Photos app automatically puts every screenshot into its own album. But we found its cleanup options pretty limited. From there, our team reviewed those limitations one by one and picked alternative methods that make deleting screenshots on an iPhone more convenient.
How to Delete Screenshots on iPhone Using the Built-in Photos App
This is probably the most standard way to delete screenshots on an iPhone, but it’s also easy to overlook simply because of what screenshots are. We take them all the time, use them for a specific purpose, and then rarely think about them again. If you haven’t checked the Screenshots collection in Photos for a while, that’s where we recommend starting.
Here’s how to delete screenshots through the Photos app:
- Open the Photos app. From the bottom menu, select Collections.
- Scroll down to Media Types and tap Screenshots.
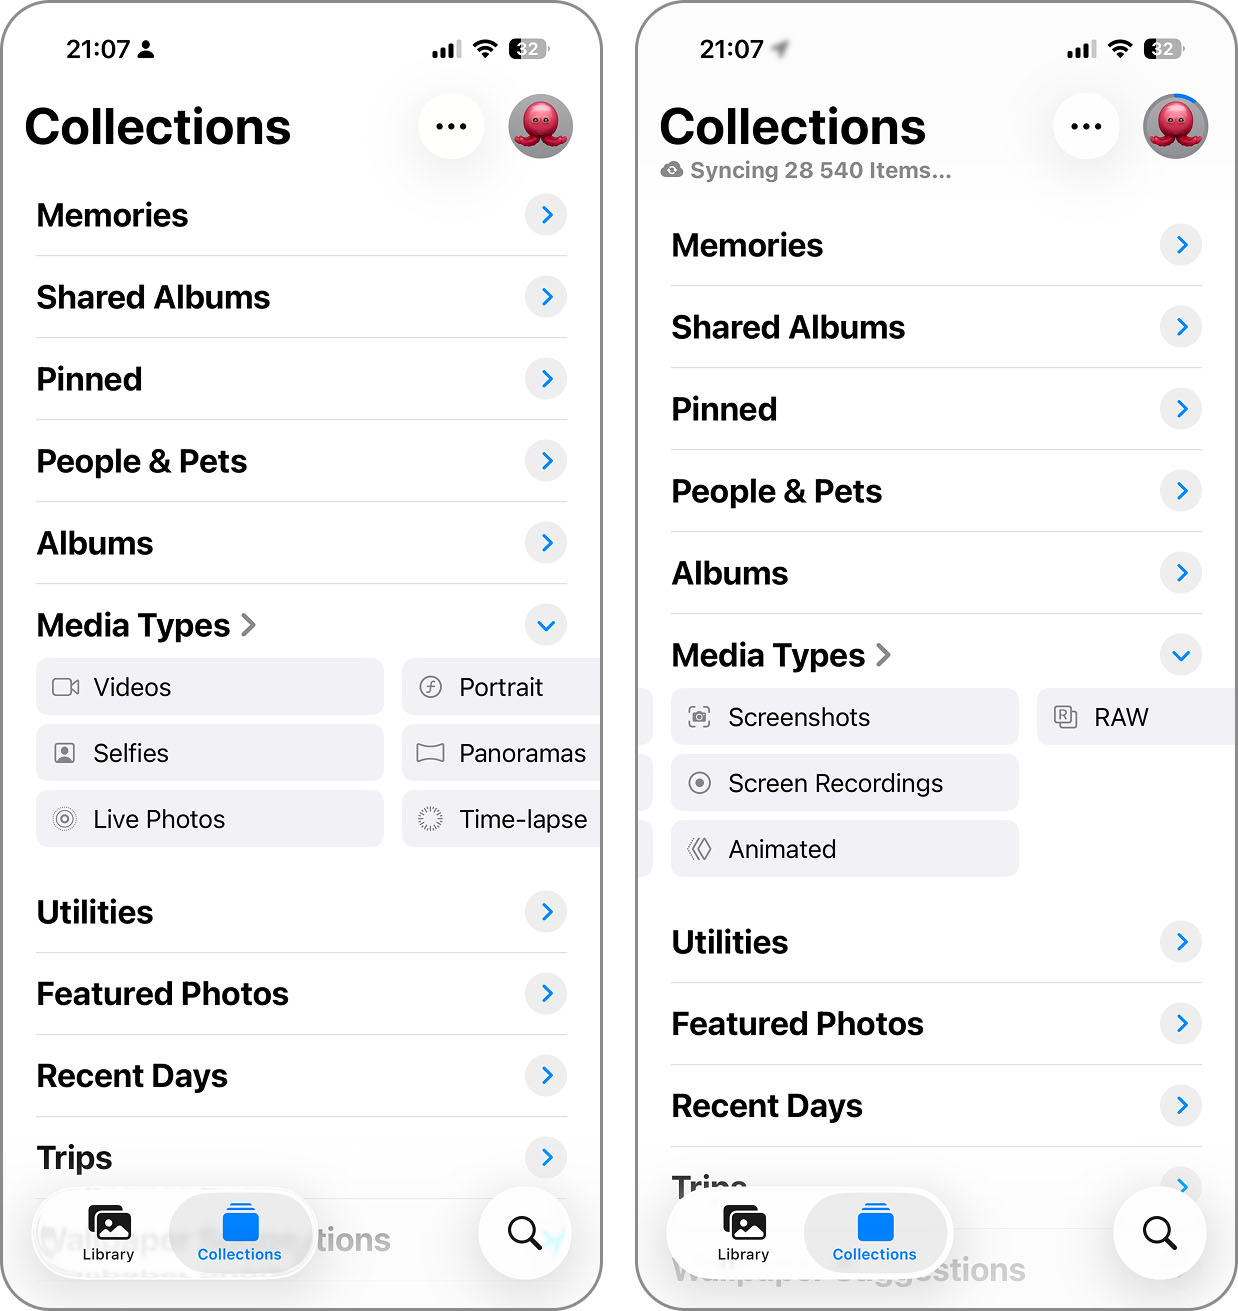
- By default, your screenshots are sorted from newest to oldest (from top to bottom). If you want to review your oldest screenshots first, tap the three-line button in the bottom left corner of the screen and select Sort by Oldest First.
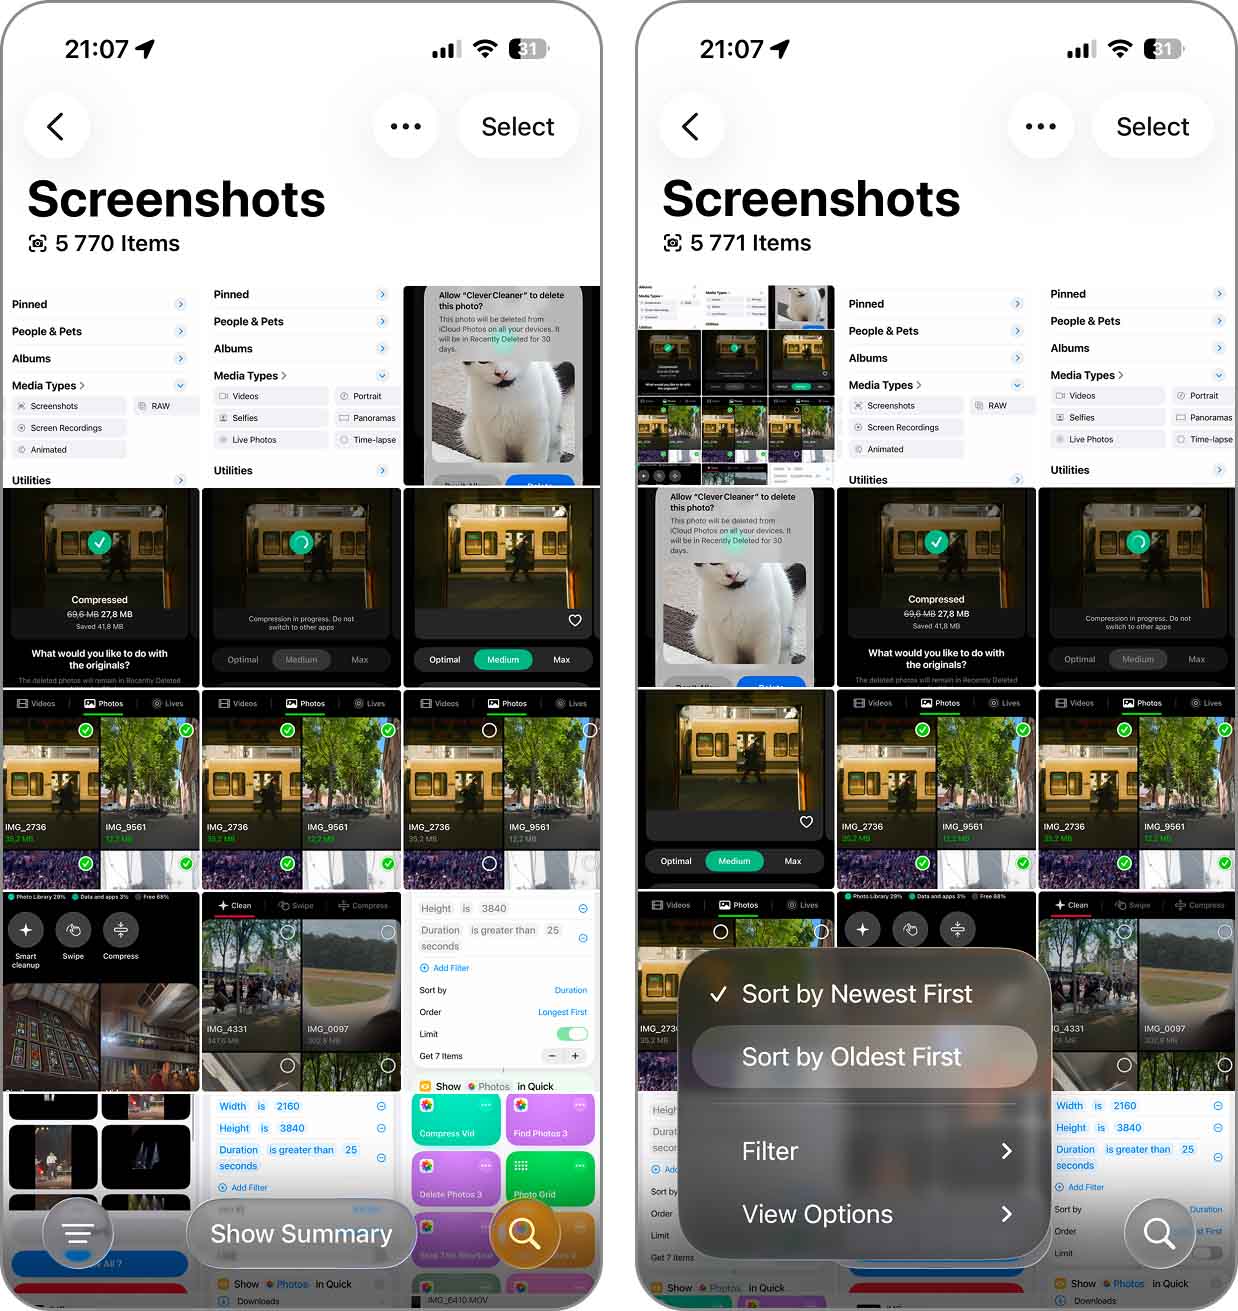
- Tap Select in the top right corner of the screen. Then, select the screenshots you want to remove and tap the Trash button.
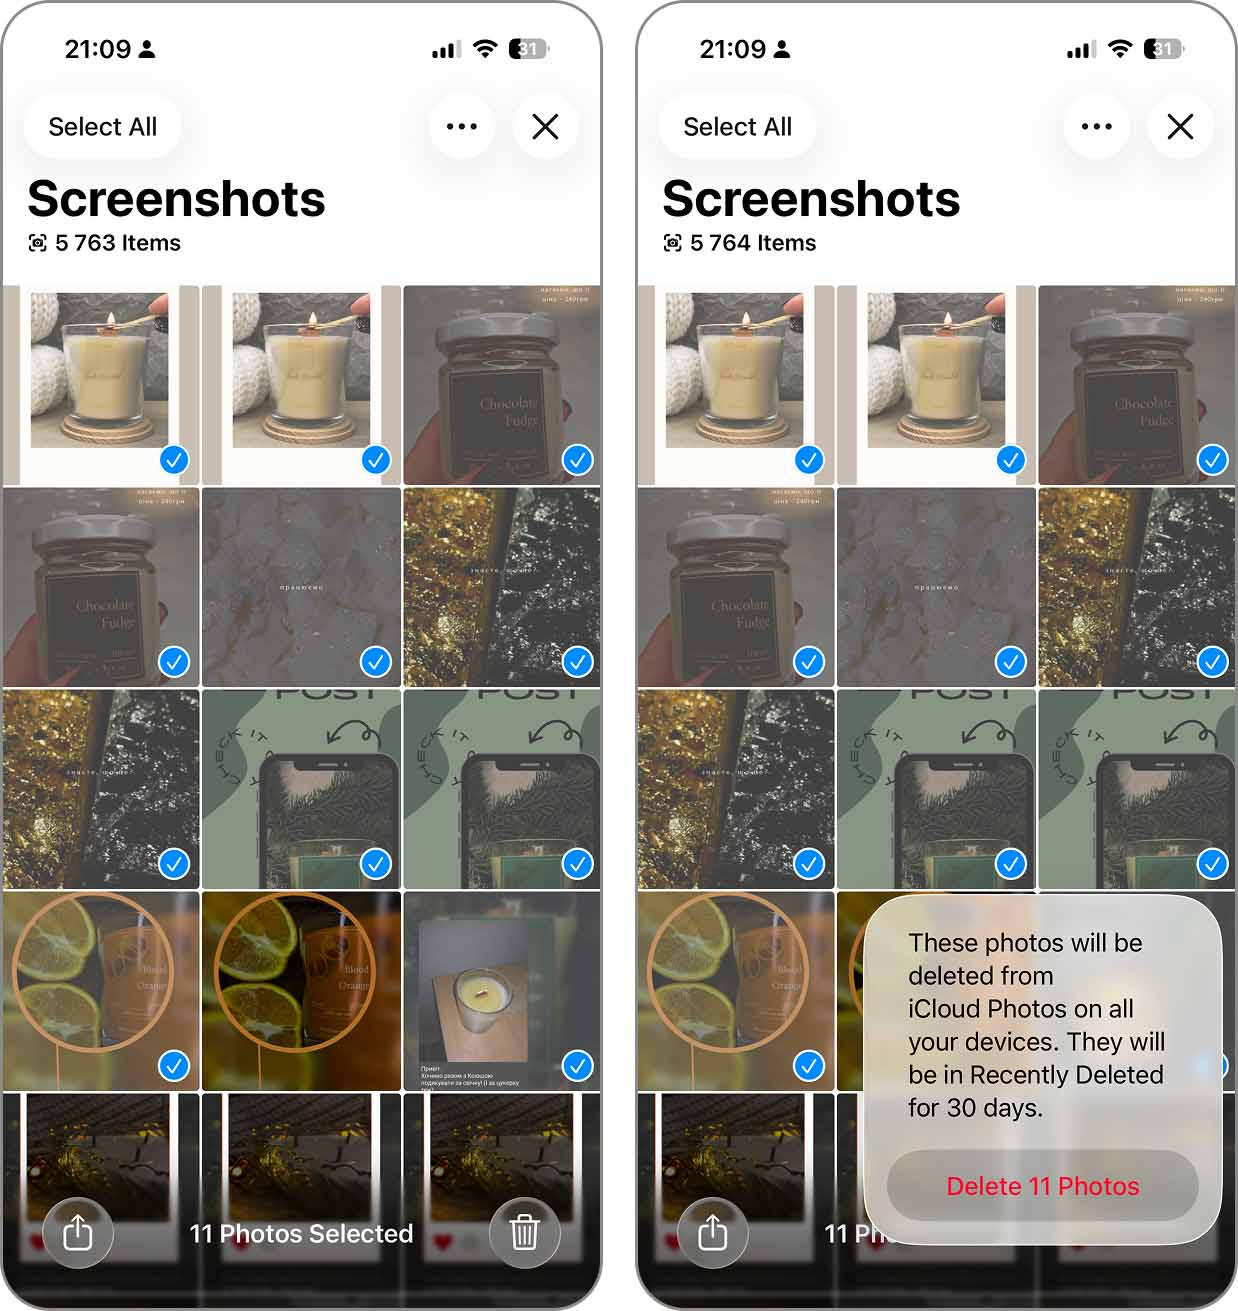
- Alternatively, if you want to delete all screenshots from your iPhone, tap Select and then Select All instead. Tap the Trash button to proceed.
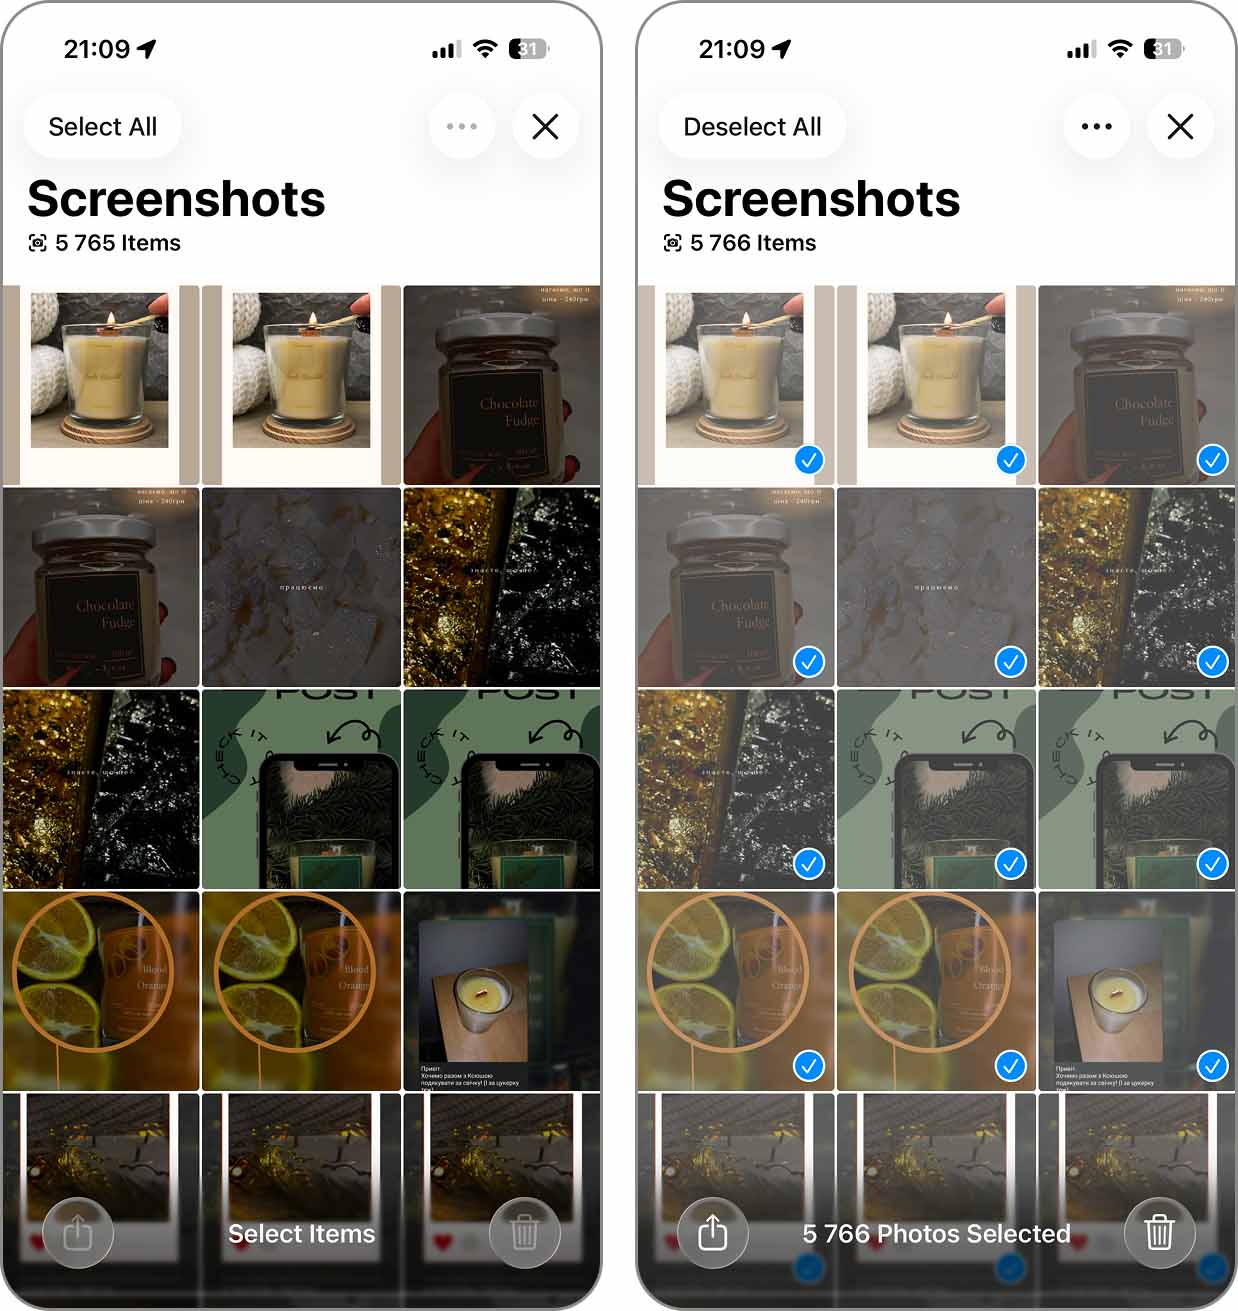
- Finally, tap Delete in the pop-up that appears to confirm the action.
And what if you want to find the biggest screenshots first? That’s where the Screenshots album falls short. There’s no size sorting here, so you’d have to open a screenshot, tap the Info button to check how much space it takes up, then move on to the next one and do the same thing again. With a few screenshots, that’s fine. With a few hundred, not so much.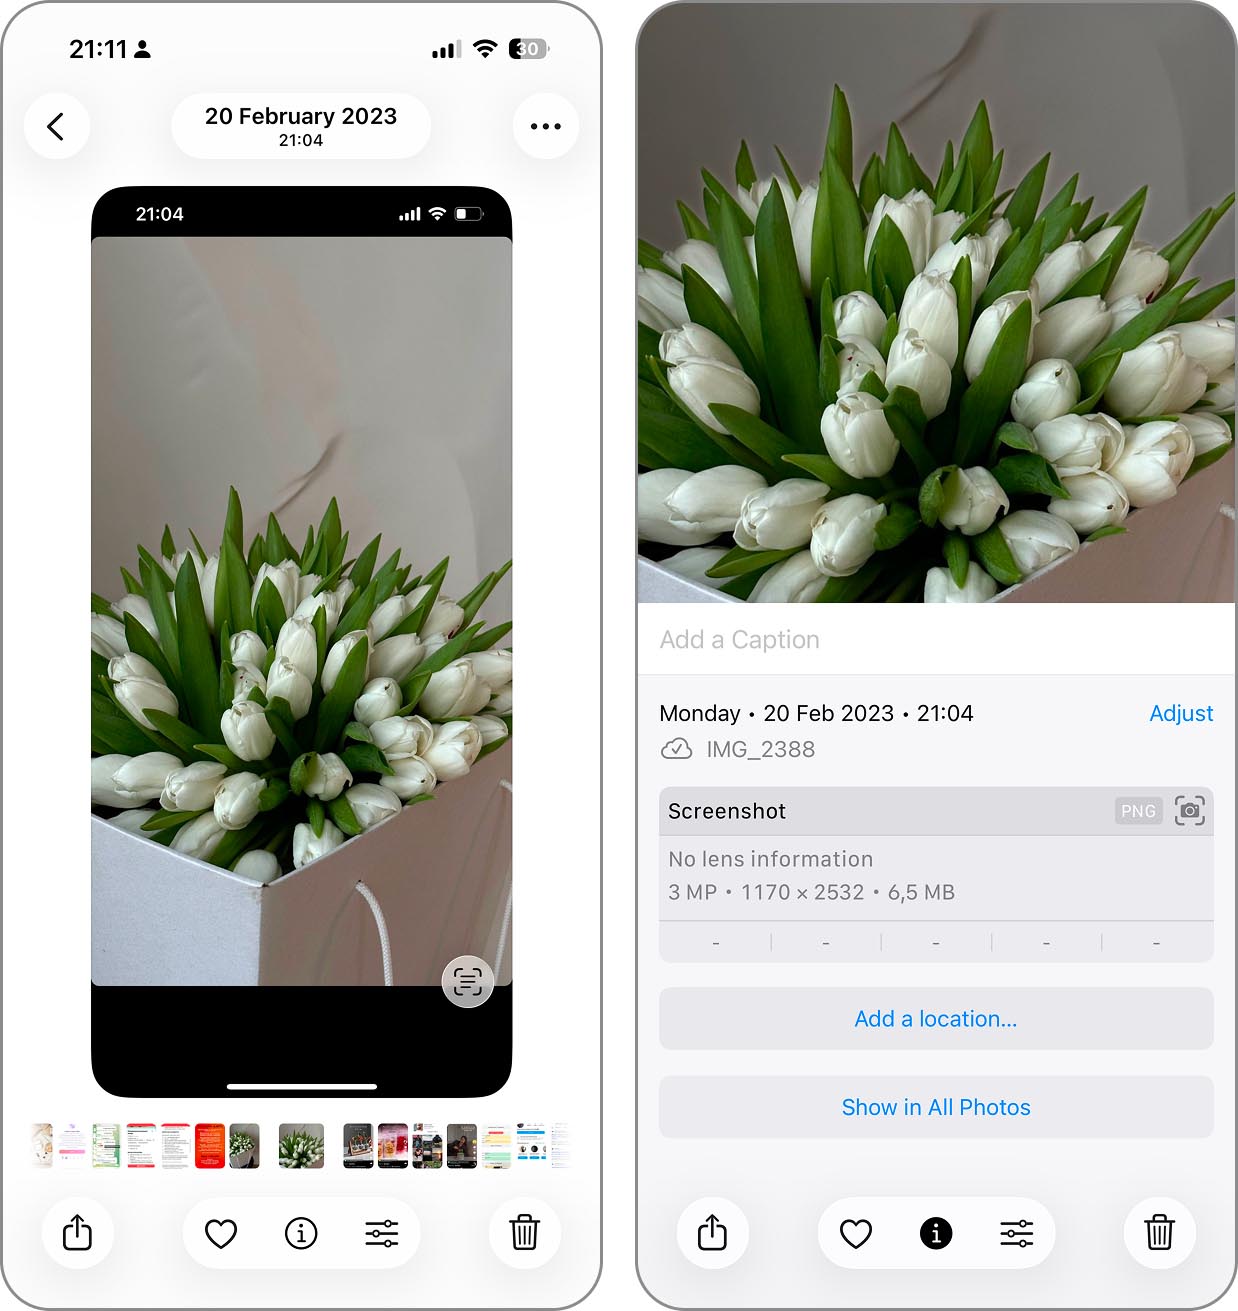
More Effective Methods to Delete Screenshots on iPhone
The more we worked with the Screenshots album for this guide, the more we noticed how little you can actually do with it. So we asked around our team to see if anyone was using something else – and we got two answers: a third-party cleaner for more sorting options, and a custom shortcut for cases where the Photos app can’t do what you need.
Method 1: Use an iPhone Cleaner App to Delete Screenshots
The obvious winner among our team for deleting screenshots was using an iPhone cleaning app, mostly because you get features that simply aren’t available in Apple’s Photos app.
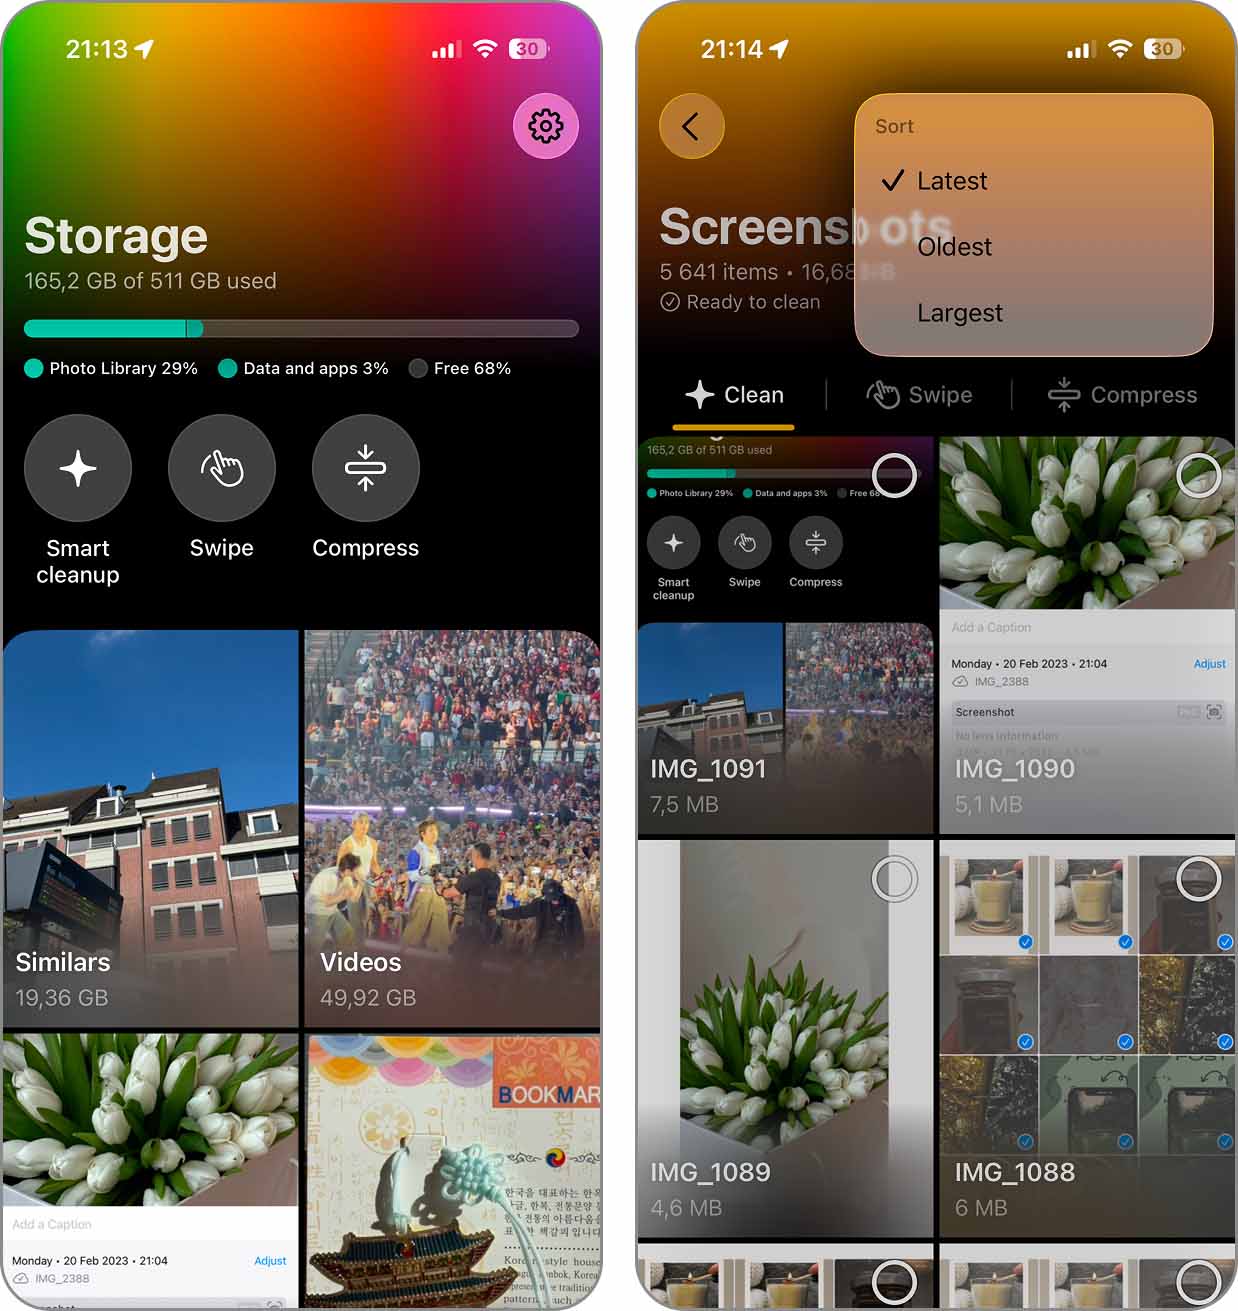
Take one of our favorites, Clever Cleaner. At first, its Screenshots tool looks like it simply mirrors the Screenshots album in Photos. But open it and there’s quite a bit more information to work with: you can see how much storage all your screenshots take up, as well as the size of each individual file. If size is what matters, sort them from largest to smallest and start there. If age matters more, you can put either the newest or oldest screenshots first.
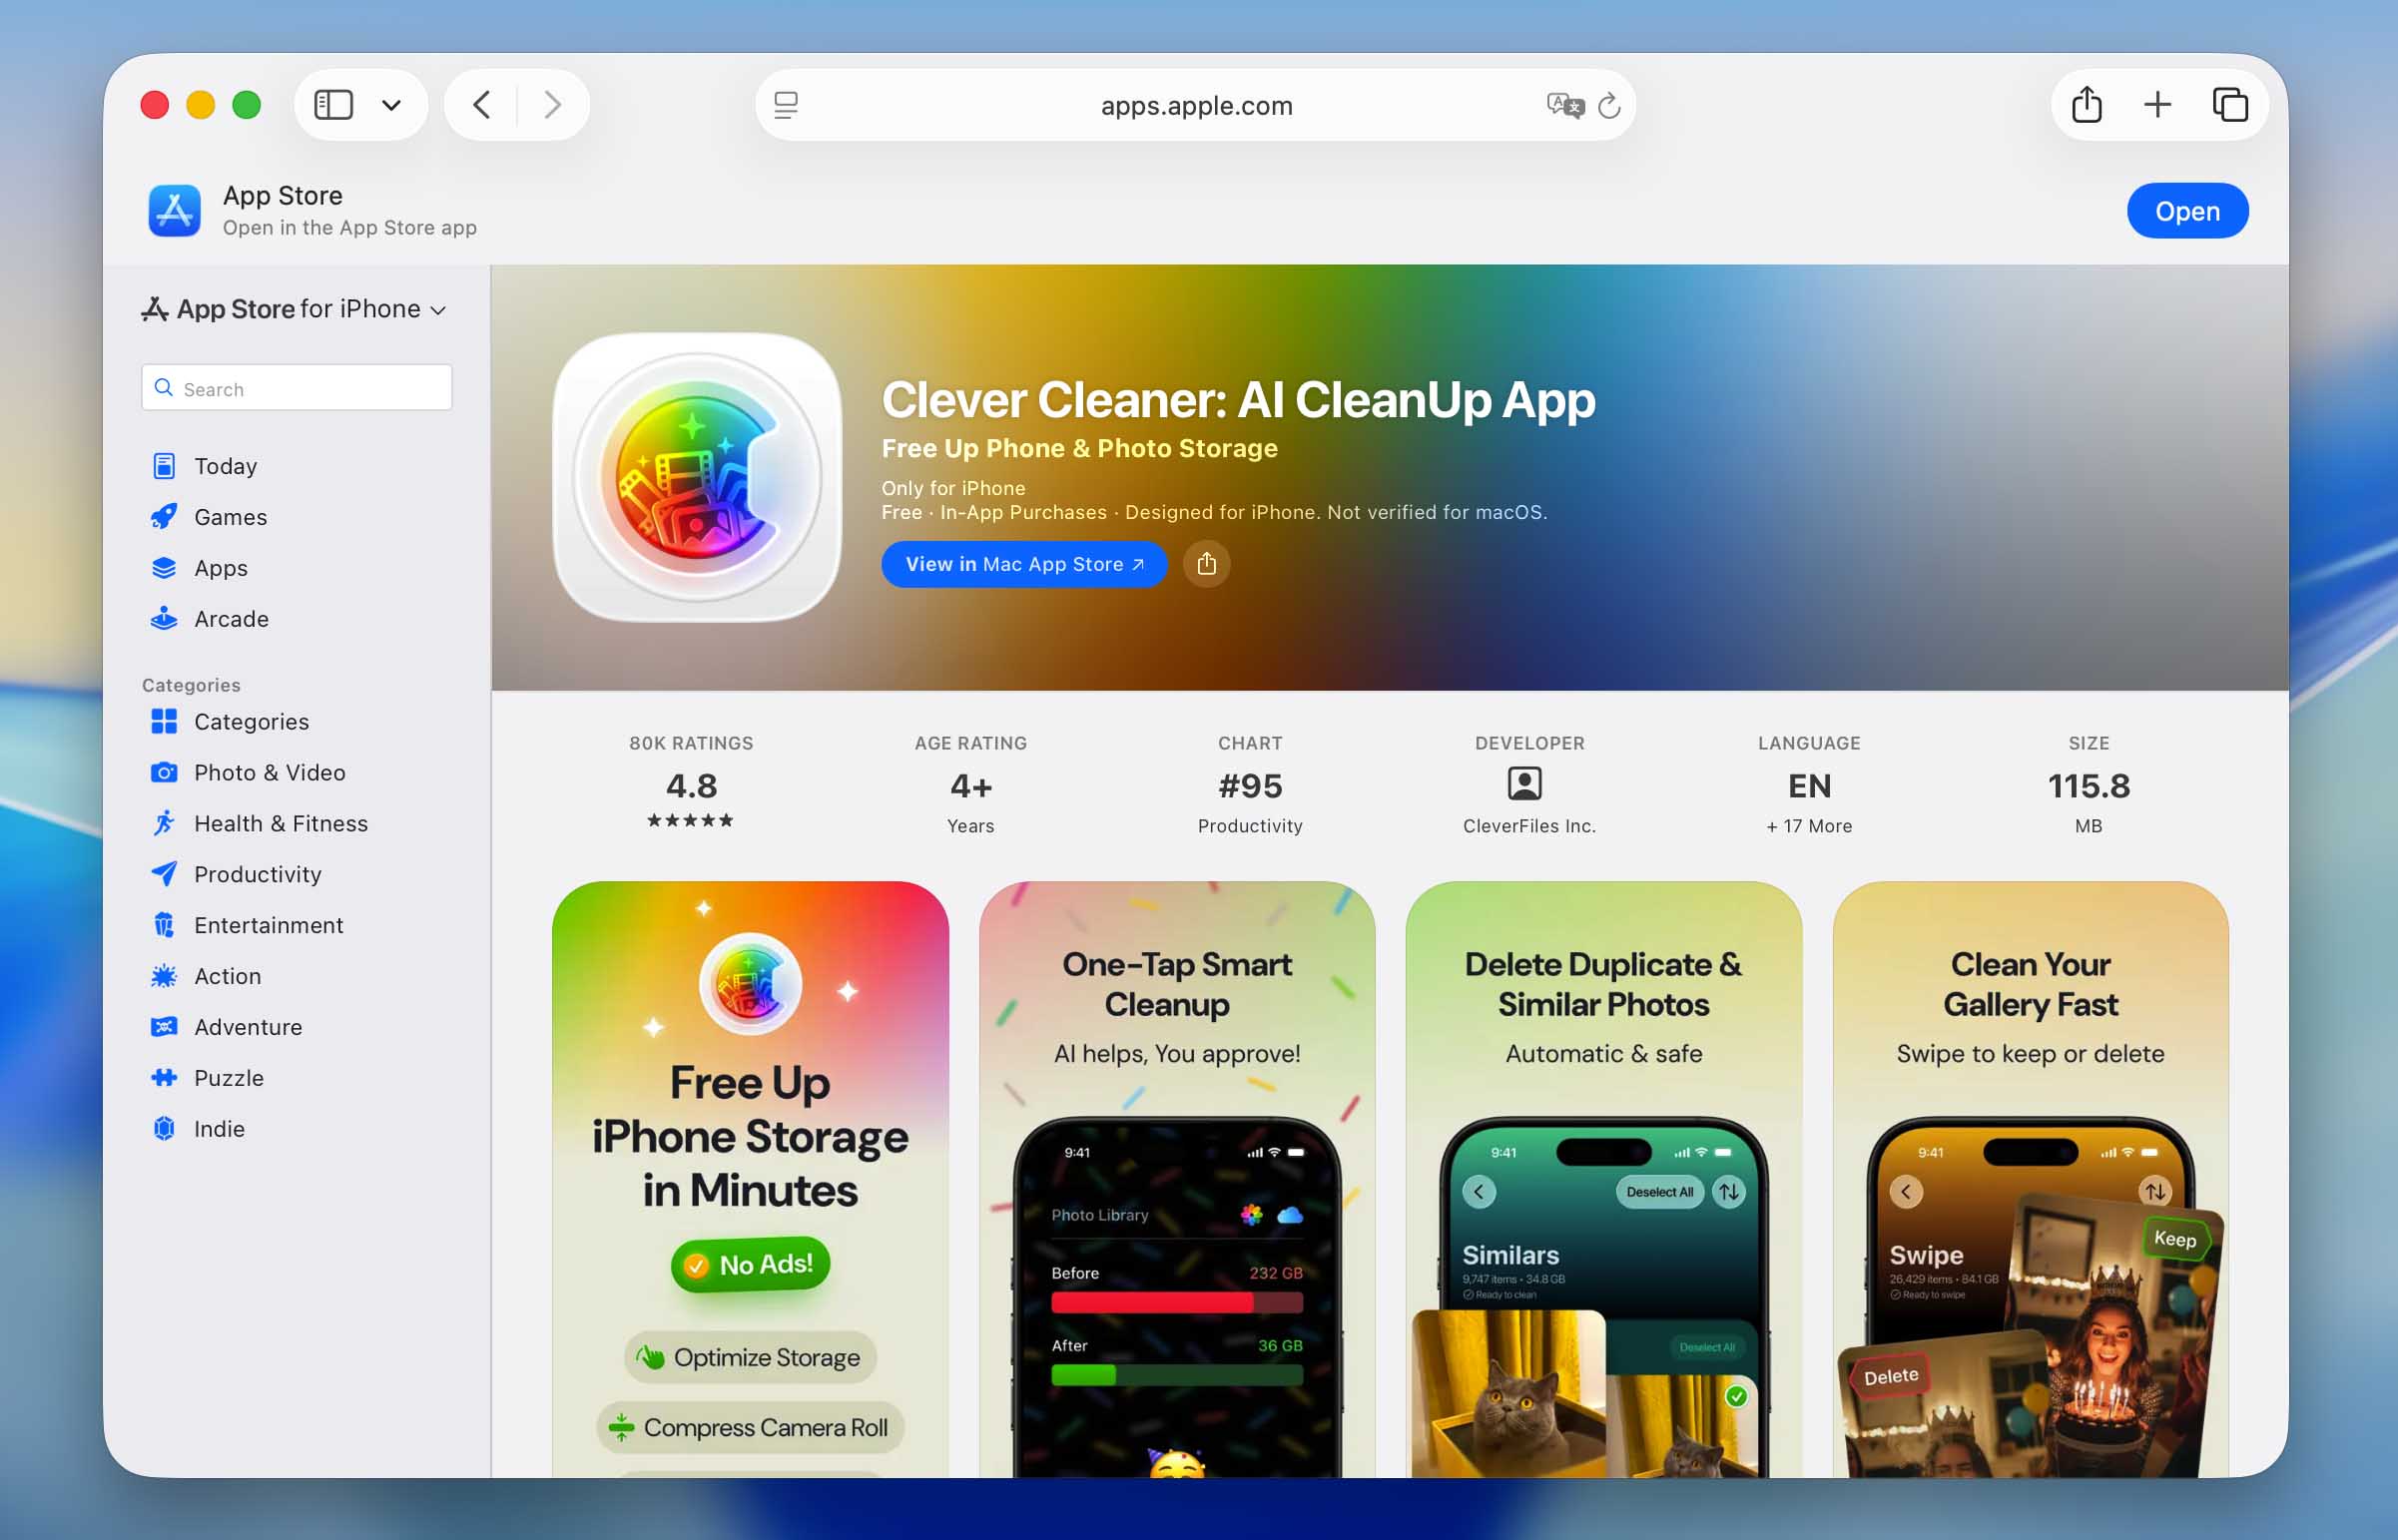
Clever Cleaner has no ads, and you can use its cleanup tools for free within the daily limits. If you hit one, you can wait until the next day and continue; there are also premium plans if you’d rather remove the limits altogether.
Here’s how to delete screenshots with Clever Cleaner:
- Download Clever Cleaner from the App Store and open it.
- Grant the app access to your photo library and wait for the initial scan to finish. After that, open the Screenshots section.
- Tap the two-arrow button at the top. Choose Latest, Oldest, or Largest, depending on how you want your screenshots sorted.
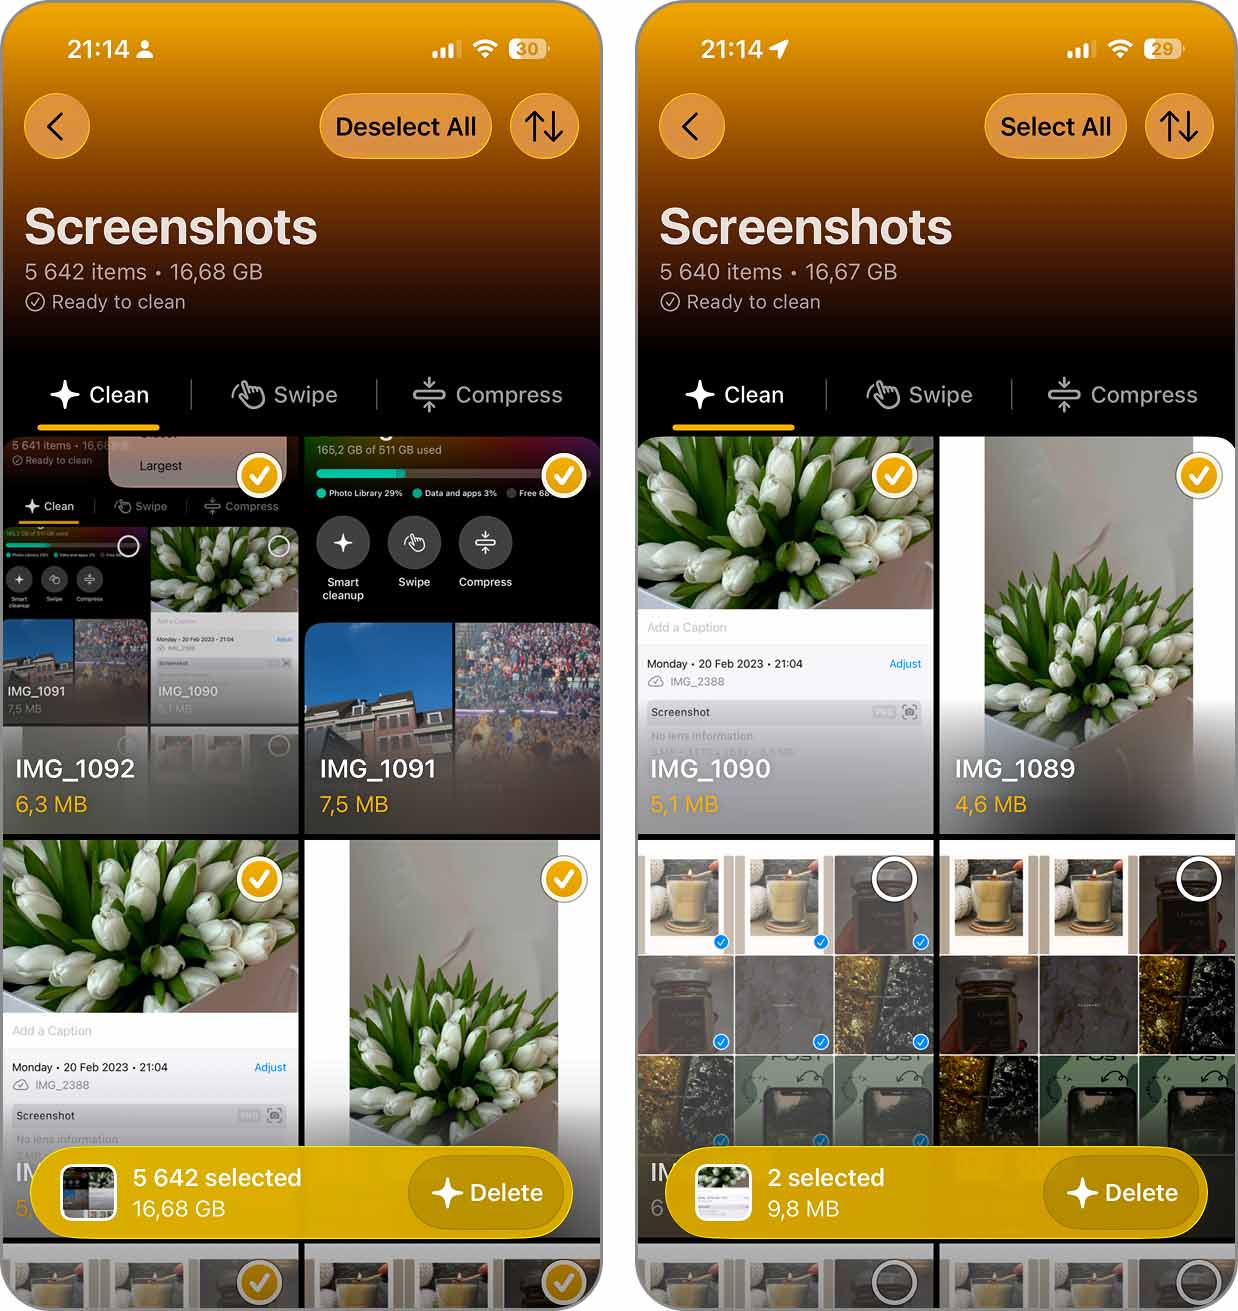
- To delete everything, tap Select All and then the yellow Delete button at the bottom of the screen.
- If you only want to get rid of some screenshots, select them using the check marks and tap Delete. You can also tap any screenshot to open it and go through your selection that way.
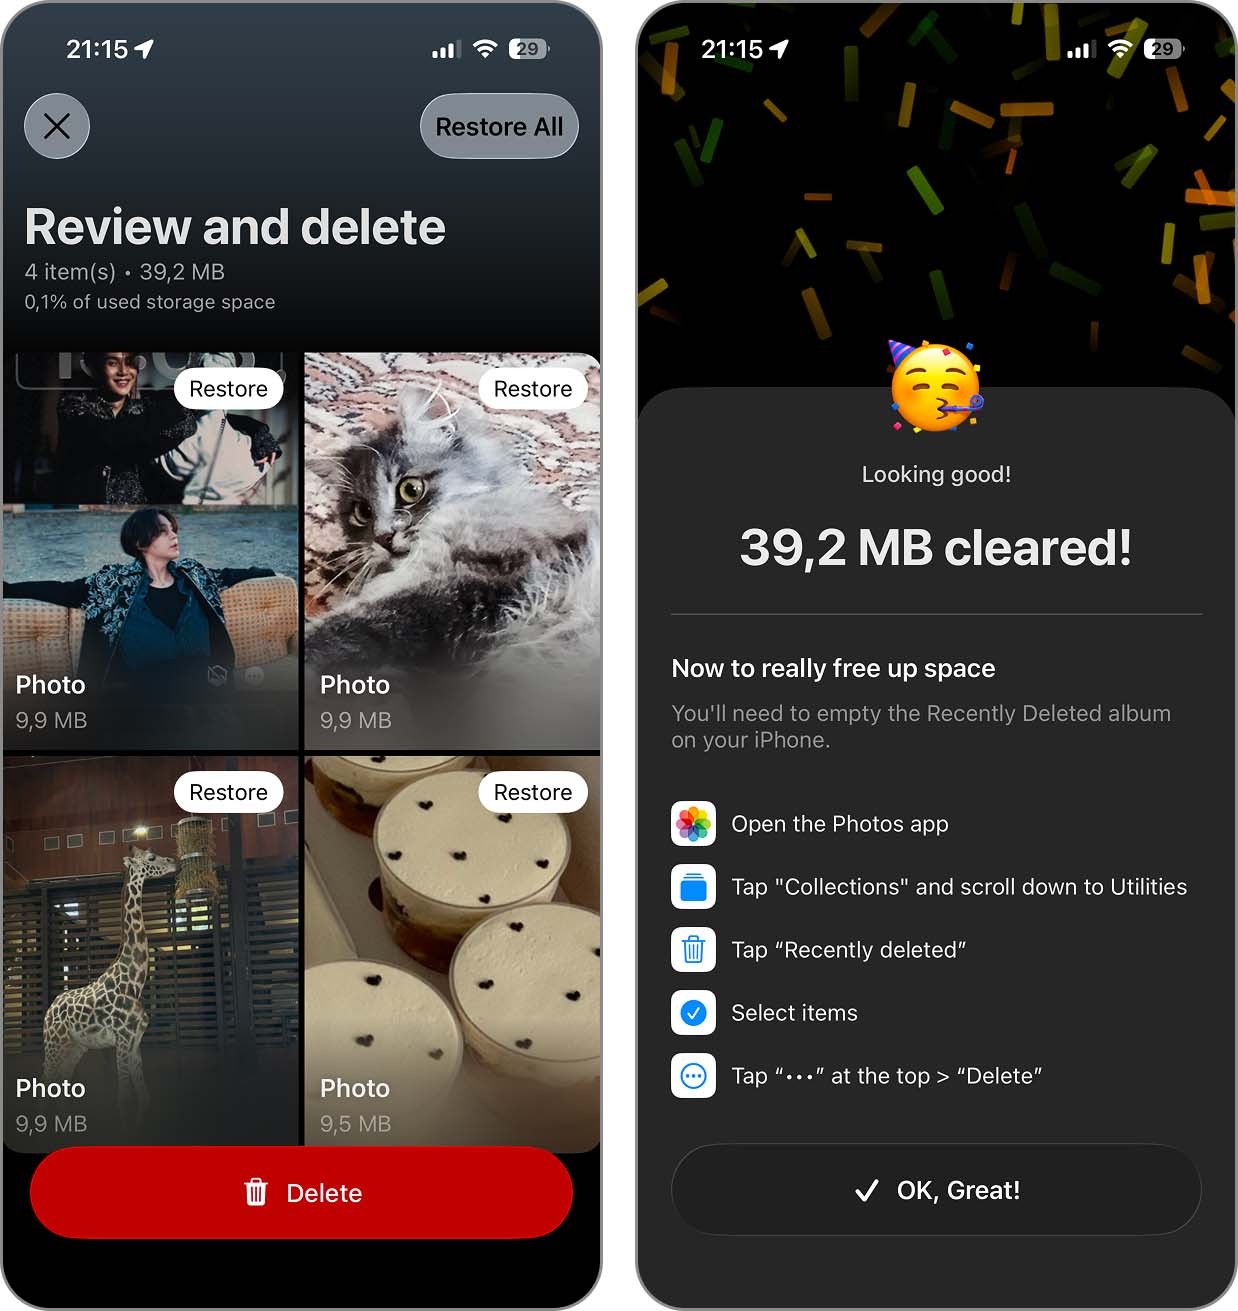
- On the Review and delete screen, check what you selected. You can restore anything you want to keep here. Tap Delete when you’re ready.
- Clever Cleaner will show how much space you cleared after the cleanup. It will also remind you to empty Recently Deleted in Photos, which you’ll need to do if you want to reclaim that storage right away.
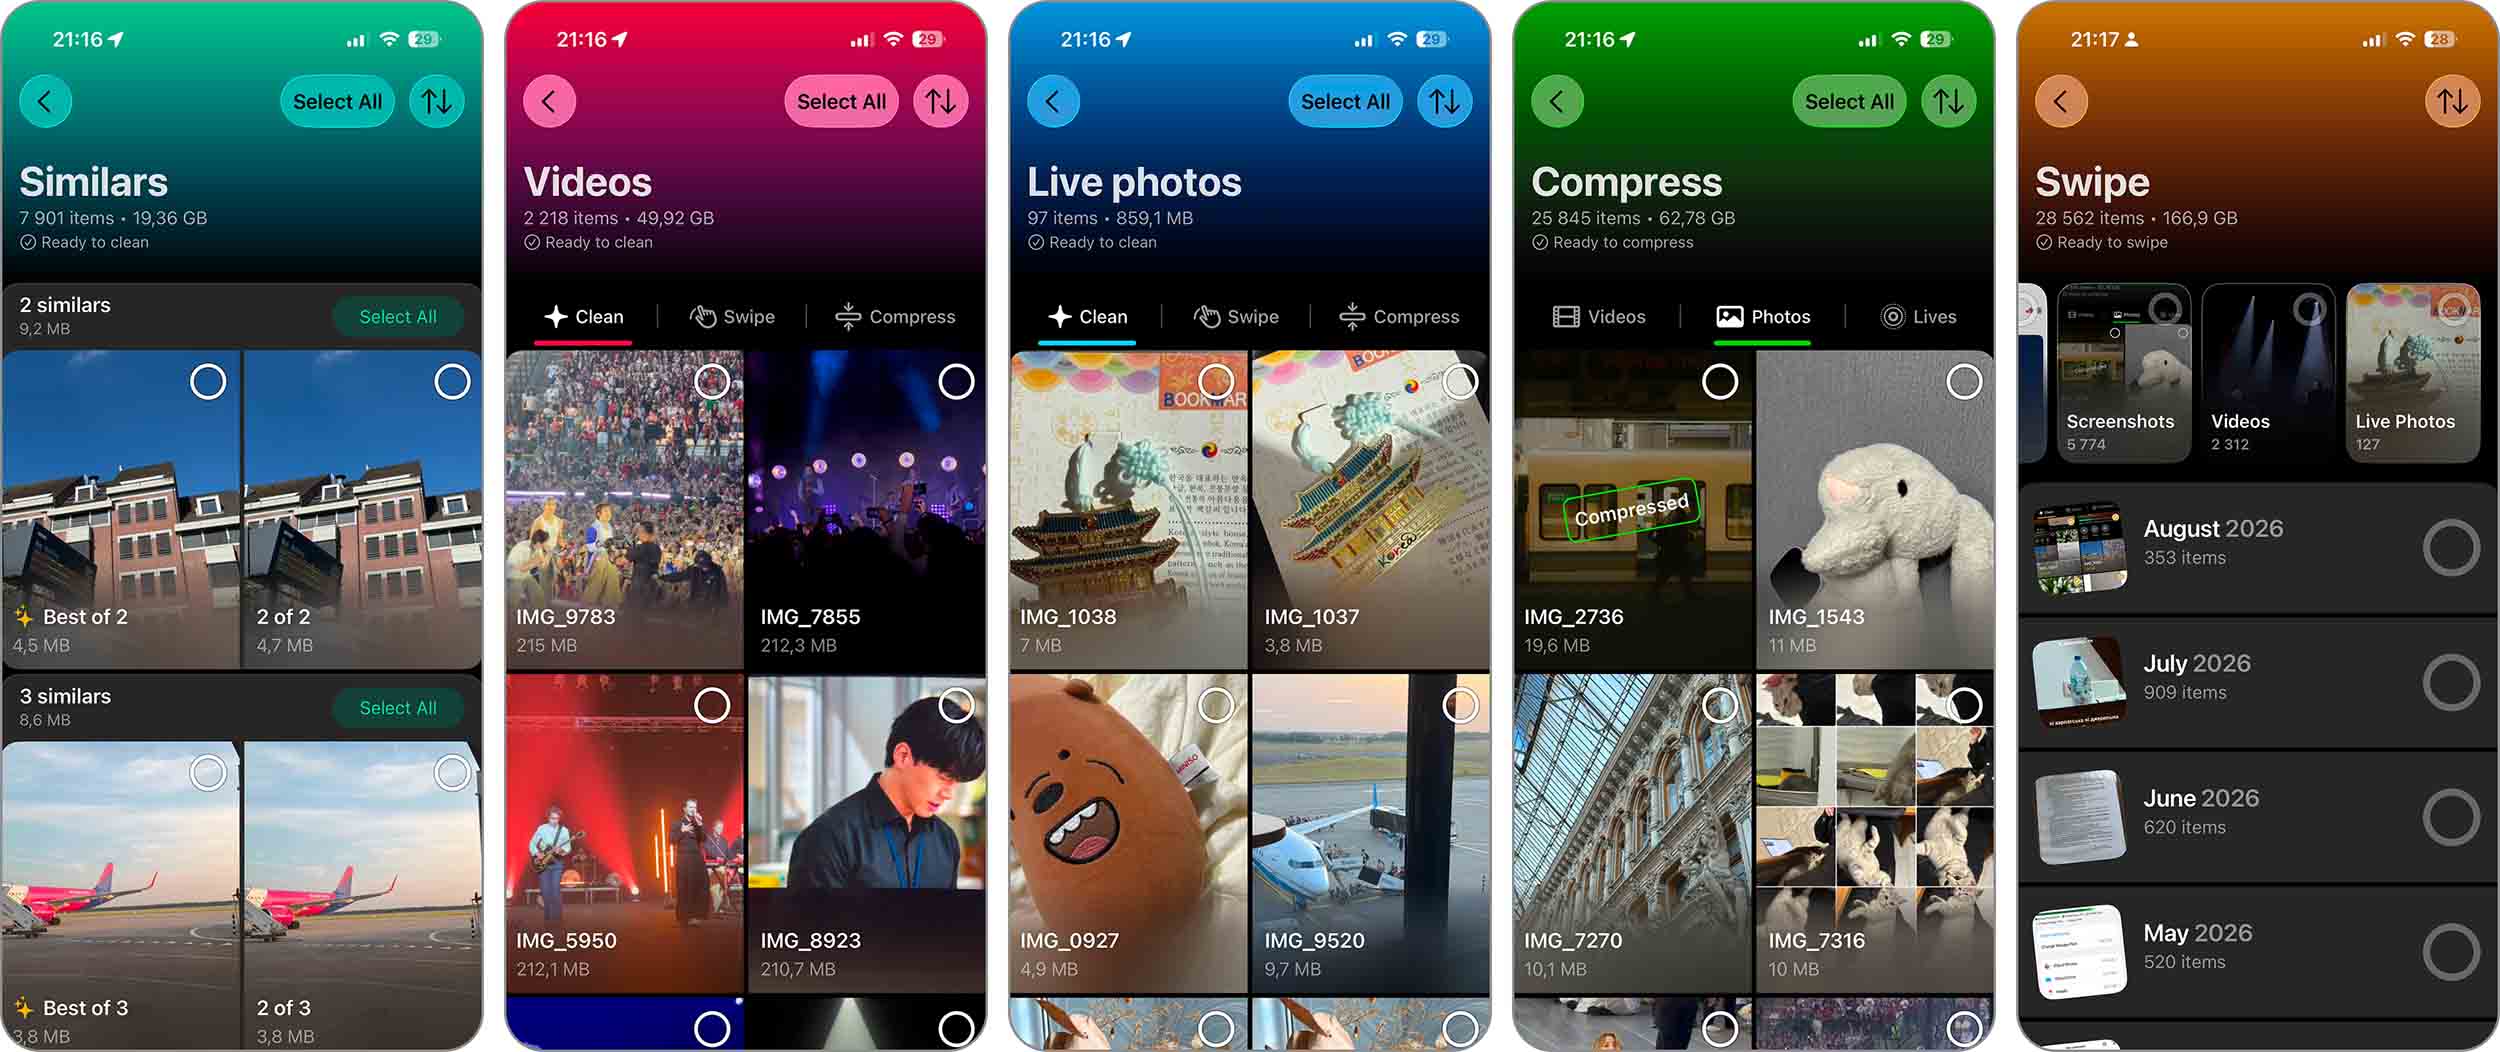
If deleting screenshots made you want to keep going with the rest of your Photos library, take a look at Clever Cleaner’s other tools as well. There’s quite a bit you can do without going through everything manually:
- Similars finds duplicate and visually similar photos, picks what it considers the Best Shot in each group, and marks the rest for deletion.
- Videos is a good place to start when storage is the problem. You can sort videos by size, put the largest ones first, and either delete or compress them.
- Live Photos gives you two options: delete the ones you don’t need or convert them into regular still images. The latter keeps the photo but gets rid of the video part that makes a Live Photo larger.
- Compress works with videos as well as images, so files you want to keep don’t necessarily have to stay at their original size.
- Swipe is probably the better fit if you like having the final say on everything. You can work through photos by month and swipe to keep or delete them, with a progress indicator showing how far you’ve made it through the library. There are also ready-made groups to jump into, including Random, Favorites, Videos, Screenshots, and Live Photos.
- Smart Cleanup is the closest you can get to leaving the cleanup to the app. In one run, it can remove duplicate and similar photos, compress screenshots, and convert Live Photos into still images. You don’t have to run all three actions either–pick one or two if that’s all you need.
Method 2: Create a Shortcut to Delete Screenshots
The next suggestion we got from our team was to try deleting screenshots with the Shortcuts app. We hadn’t paid much attention to it before, but that changed pretty quickly once we started playing around with it. You can create an action for almost anything you regularly do on an iPhone, including cleaning up screenshots.
For screenshots specifically, Shortcuts gives you more to work with than the Photos app, although not quite as much as Clever Cleaner. You can set it up to delete all screenshots on your iPhone, or narrow things down by date and only deal with screenshots from a certain period.
Here’s how it works:
- Open the Shortcuts app and tap the + button in the top right corner.
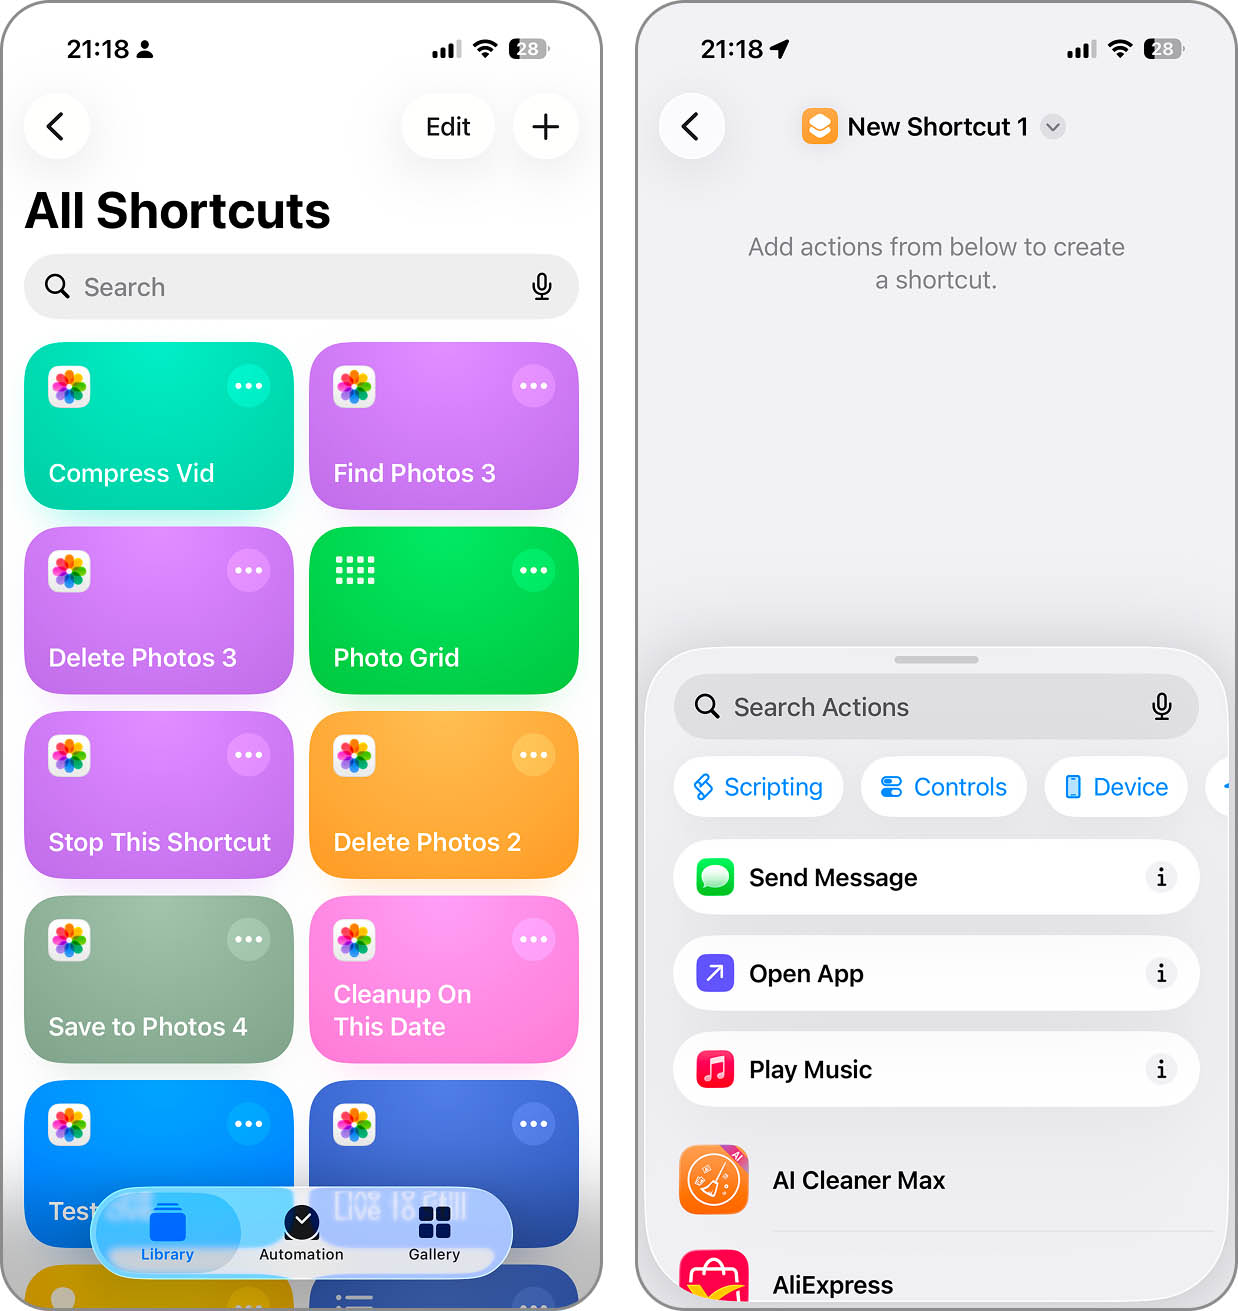
- Tap Add Action. Search for Find Photos and add it to your shortcut.
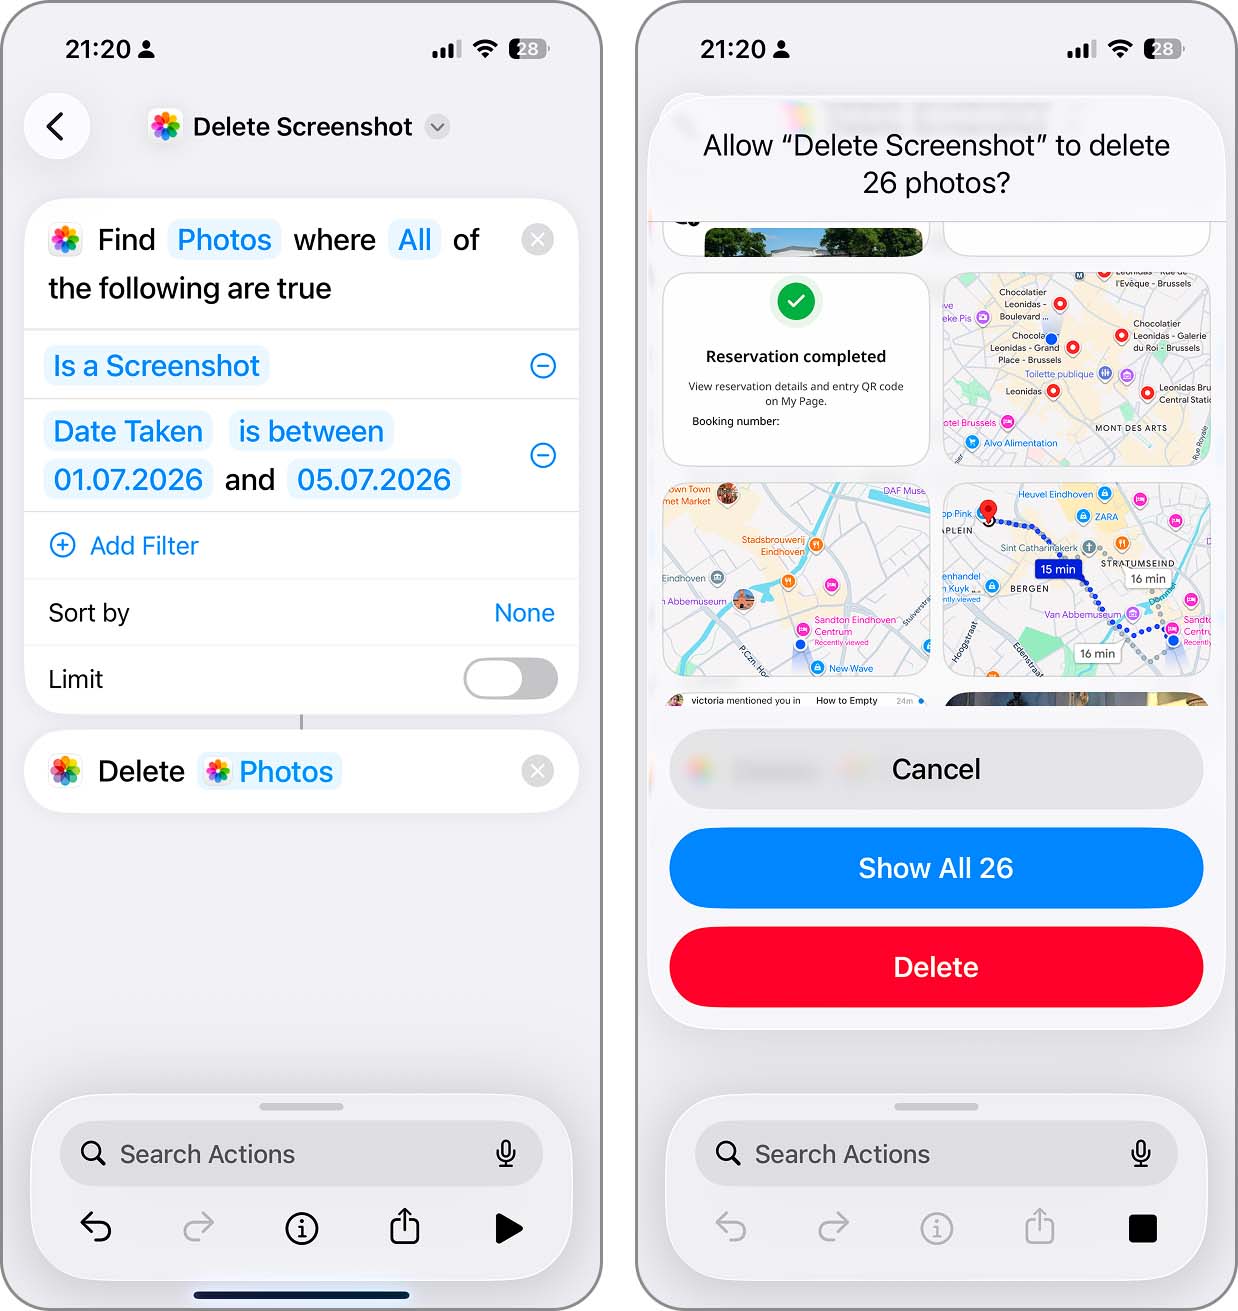
- In the Find Photos block, tap Add Filter and choose Is a Screenshot.
- Tap Add Filter again. This time, choose Date Taken and set the condition you need: Is, Is Before, Is After, or Is Between. Skip this filter if you want to delete all screenshots.
- Search for Delete Photos and add it as the next action.
- Tap the shortcut name at the top, rename it to Delete Screenshots (or anything you like), and tap Done.
- Run the shortcut. You’ll see all screenshots that match the conditions you set. Tap the red Delete button to remove them.
- The screenshots will go to Recently Deleted in Photos, so empty that album afterward if you want them gone right away.
What we ended up liking most about Shortcuts was how much you can change after setting one up. You can go back and change the filters whenever you need, or make several shortcuts for different jobs. For example, keep one that deletes all screenshots and another for a weekly cleanup, where you only change the date before running it.
Conclusion
So, as you’ve seen, deleting screenshots on an iPhone with the sorting options you actually need is possible – you just have to pick the right method. The Screenshots album is fine for a basic cleanup, Clever Cleaner gives you more control over size and storage, while Shortcuts lets you get much more specific with dates.
Here’s how the three methods compare:
| Feature | Screenshots Album | Clever Cleaner | Shortcuts |
| Delete all screenshots | ✓ | ✓ | ✓ |
| Put oldest screenshots first | ✓ | ✓ | ✓* |
| Put newest screenshots first | ✓ | ✓ | ✓* |
| Sort screenshots by size | ✗ | ✓ | ✗ |
| See the size of each screenshot right away | ✗ | ✓ | ✗ |
| Filter by a specific date or period | Limited | ✗ | ✓ |
| Review screenshots before deleting | ✓ | ✓ | ✓ |
| Compress screenshots instead of deleting them | ✗ | ✓ | ✓(if you create a shortcut for it) |
*With Shortcuts, you don’t sort the Screenshots album itself. Instead, you can set Date Taken conditions to control which screenshots the shortcut finds.
FAQ
No screenshots, no Screenshots album. Photos puts this album together automatically from the screenshots it finds in your library, so after you delete the last one, there may simply be nothing left to display.
When someone sends you a screenshot you save in Photos, iPhone doesn’t classify it as a screenshot, so it won’t be in your Screenshots album, and cleaners using Apple’s classification won’t delete it. You’ll have to find and delete it manually.
Yes, if you have iCloud Photos enabled. Your Photos library is synchronized across all Apple devices signed in with the same Apple Account, so deleting a screenshot from your iPhone also removes it from iCloud and your other devices. If you’d rather keep those screenshots in iCloud, you’ll need to disable iCloud Photos before deleting them, although, in our opinion, that’s rarely worth the trouble just for a few screenshots.
If you still need a screenshot but just don’t want it sitting in your main library, hiding it is another option. It’ll move to the Hidden album, but that’s all that changes–the screenshot still takes up the same amount of storage. So hiding won’t help much if storage space is the reason you’re cleaning up in the first place.
