When Windows users make a critical mistake or when a piece of software on their computer, such as a hardware driver, starts causing major issues, the System Restore tool can save the day—at least usually.
Sometimes, attempts to revert a computer’s state to that of a previous point in time result in various System Restore error messages, such as the “System Restore did not complete successfully” message.
As alarming as this problem can be, solving it is not that difficult. Let’s explore multiple possible solutions and the exact steps you need to follow to implement them.
What Is System Restore in Windows?
The System Restore tool was first introduced with the release of Windows Me, and it has since been included with every subsequent version of the operating system (Windows XP, Windows Vista, Windows 7, Windows 8/8.1, Windows 10, and Windows 11).
The tool can automatically or manually back up system files, installed applications, Windows Registry, and system settings. This data can then be used to rebuild the operating system to recover from system failures or other problems.
Possible Reasons Why System Restore Failed
Attempts to rebuild the operating system using the System Restore tool can fail for a number of different reasons, such as:
- File corruption
- Anti-malware software
- Configuration issues
- Lack of storage space
- Hardware problems
When the System Restore tool fails to finish its job, it can trigger several different error messages, such as the System Restore error 0x81000204, error 0x80071a91, error 0x80070005, or error 0x8000ffff. Here’s how they look:
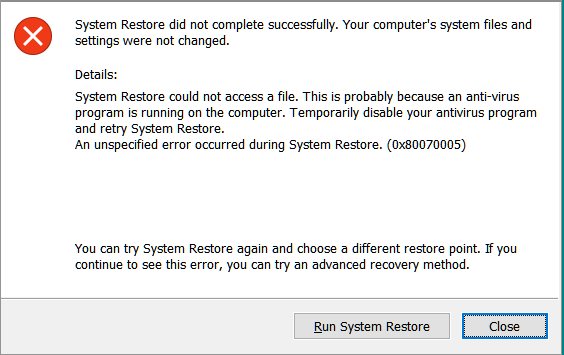
As you can see, the error message mentions the most likely cause of the problem, and it even provides brief instructions on how to solve it.
We recommend you first try the solution recommended by the error message. If it doesn’t solve the problem, try other solutions described in the next section of this article.
How to Back Up and Restore Windows When the System Restore Tool Doesn’t Work
You should always have at least one up-to-date backup of your system drive so that you can quickly and painlessly restore your computer to a working condition should anything happen to it.
If you currently don’t have one and the System Restore tool won’t complete the backup process as it should, then it’s a good idea to first use a third-party tool like Disk Drill to create a backup.
Disk Drill is a data recovery software application that comes with a free byte-to-byte backup feature. Here’s how to use it:
- Download and install Disk Drill.
- Launch Disk Drill and select the Drive Backup feature from the left pane.
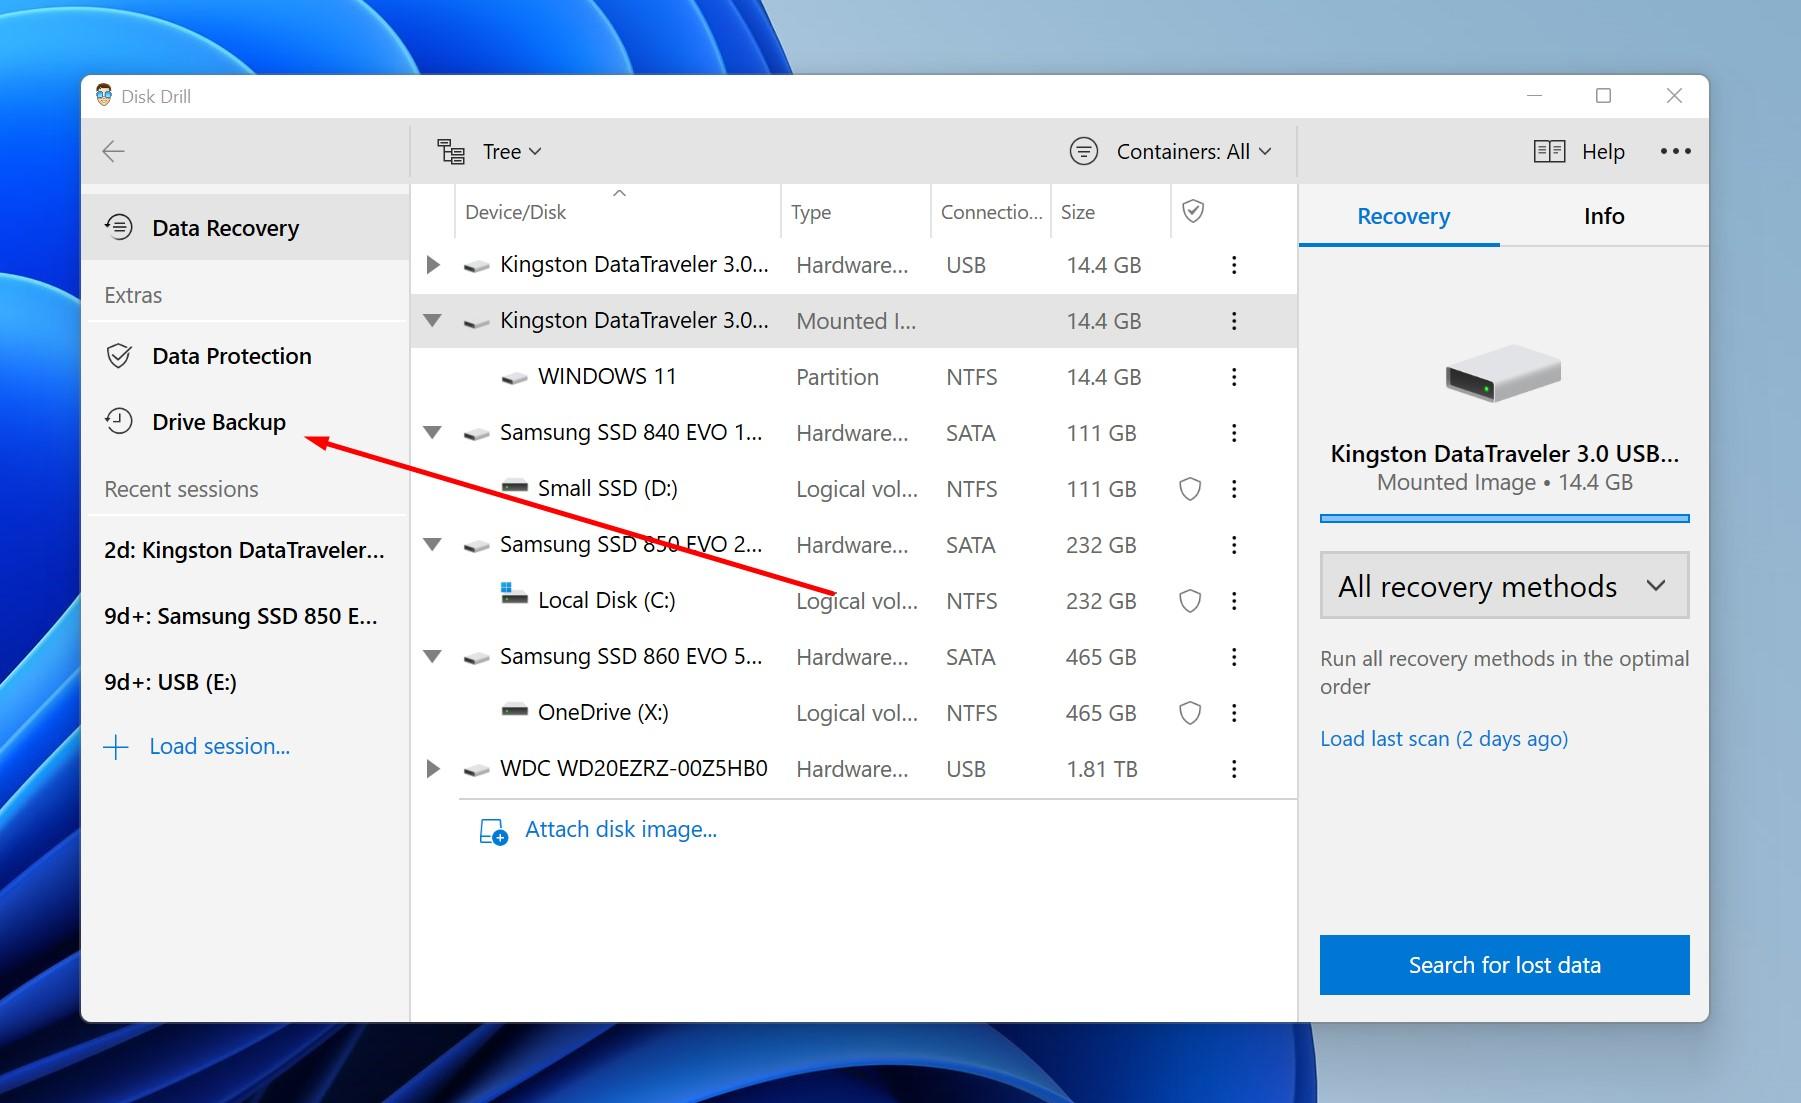
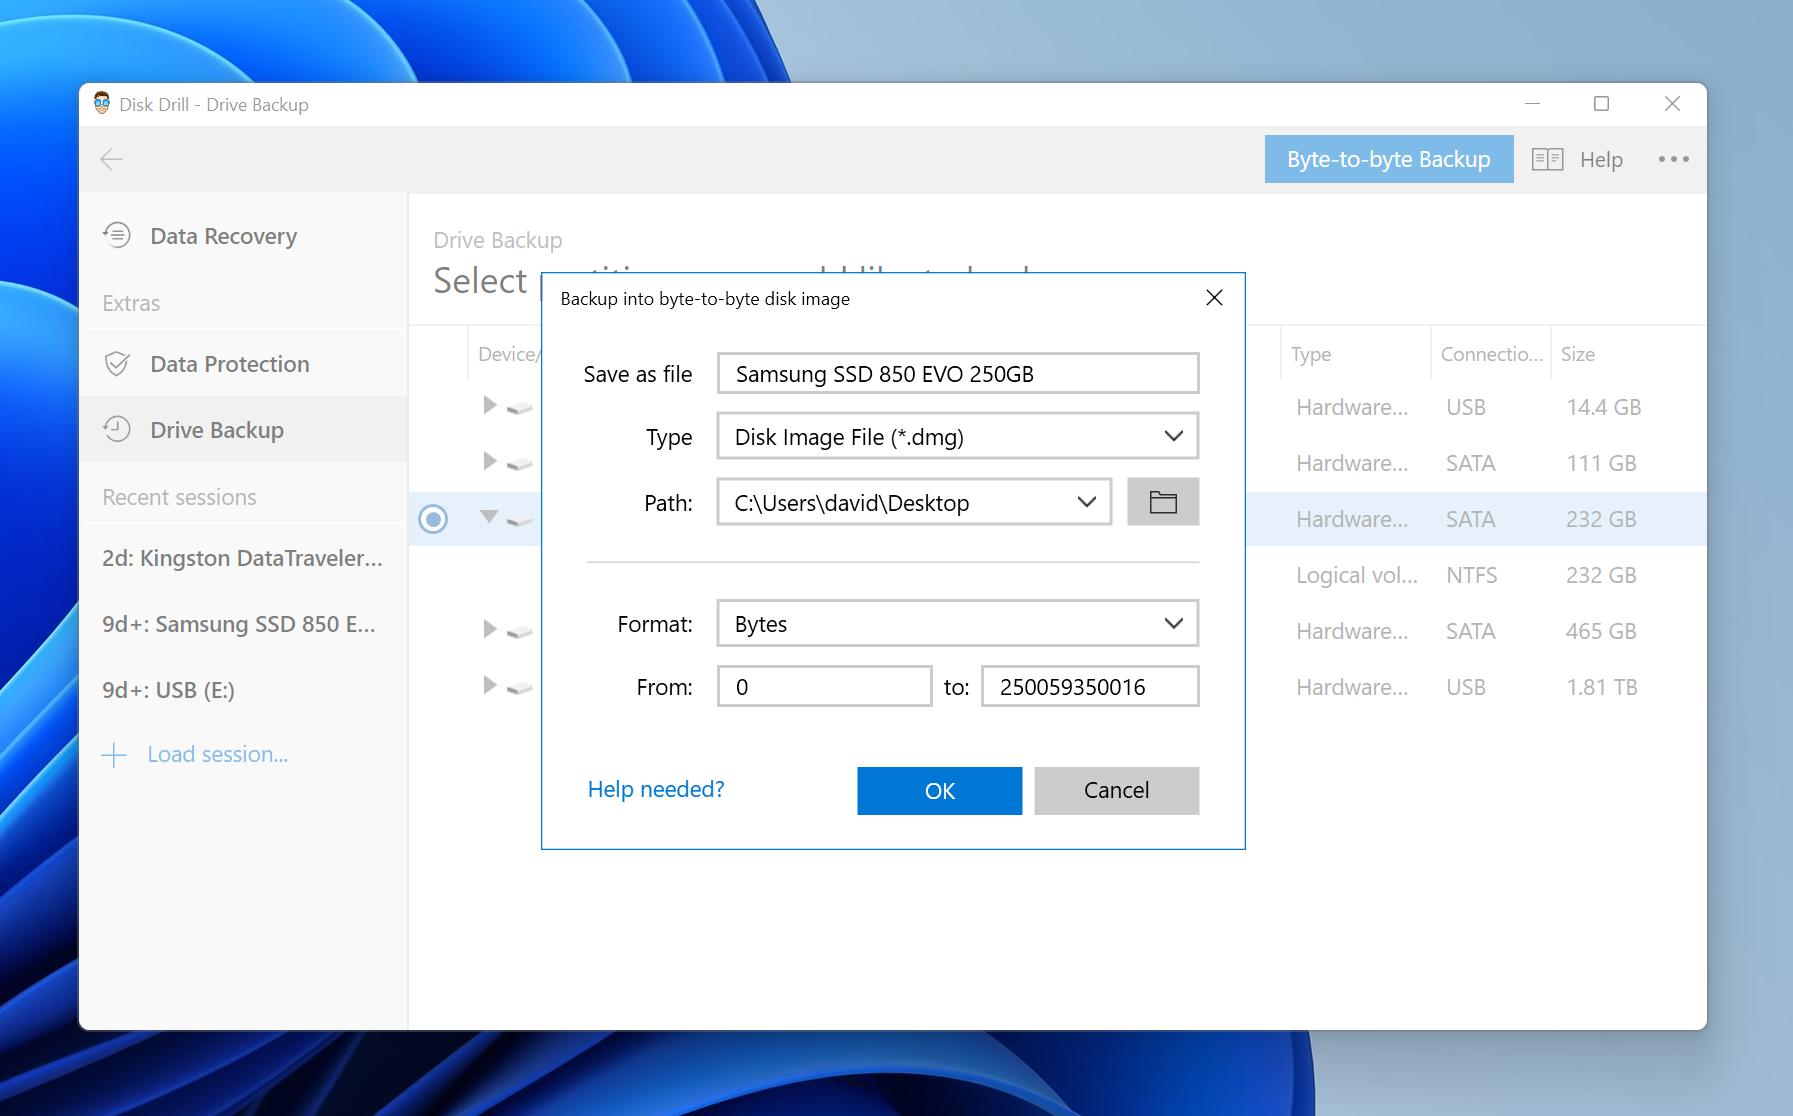
- Choose your system drive and click Byte-to-byte Backup.
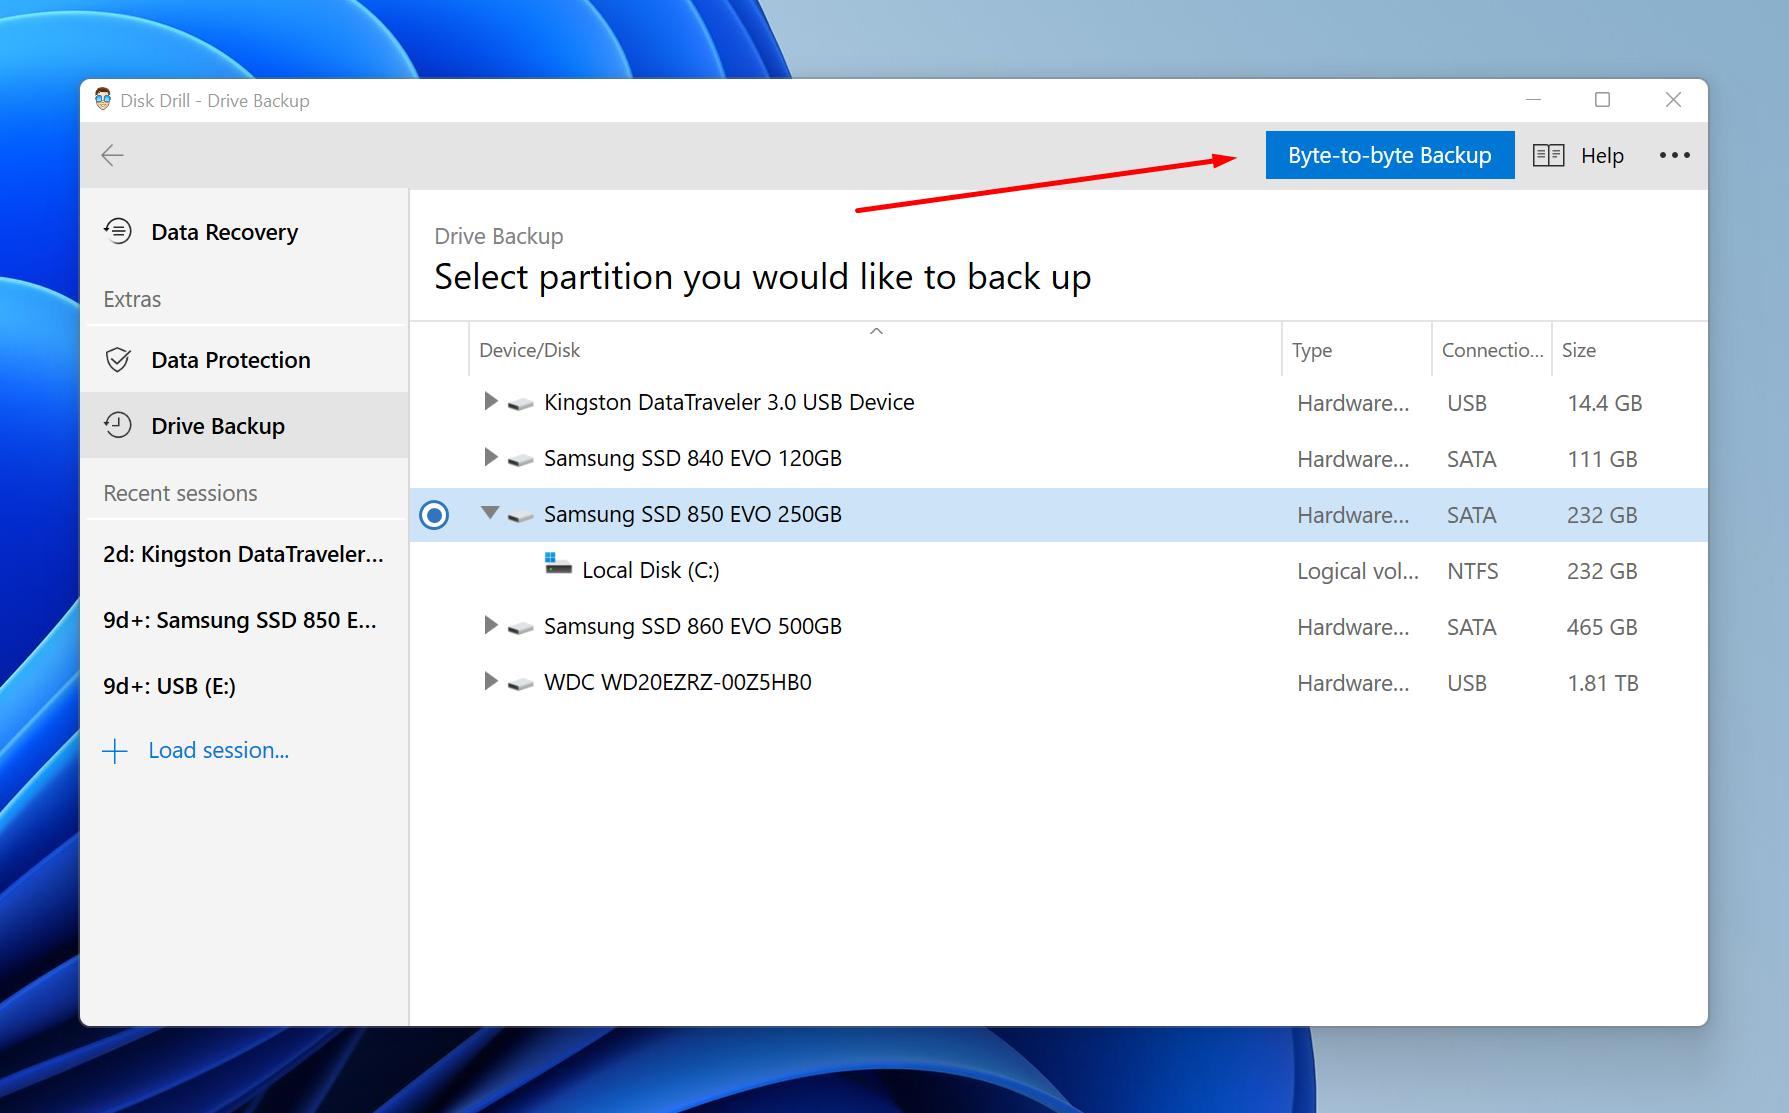
- Specify where you want to save the backup.
- Click OK to begin the backup process.
To restore your system from a backup created using Disk Drill:
- Launch Disk Drill and click the Attach disk image option.
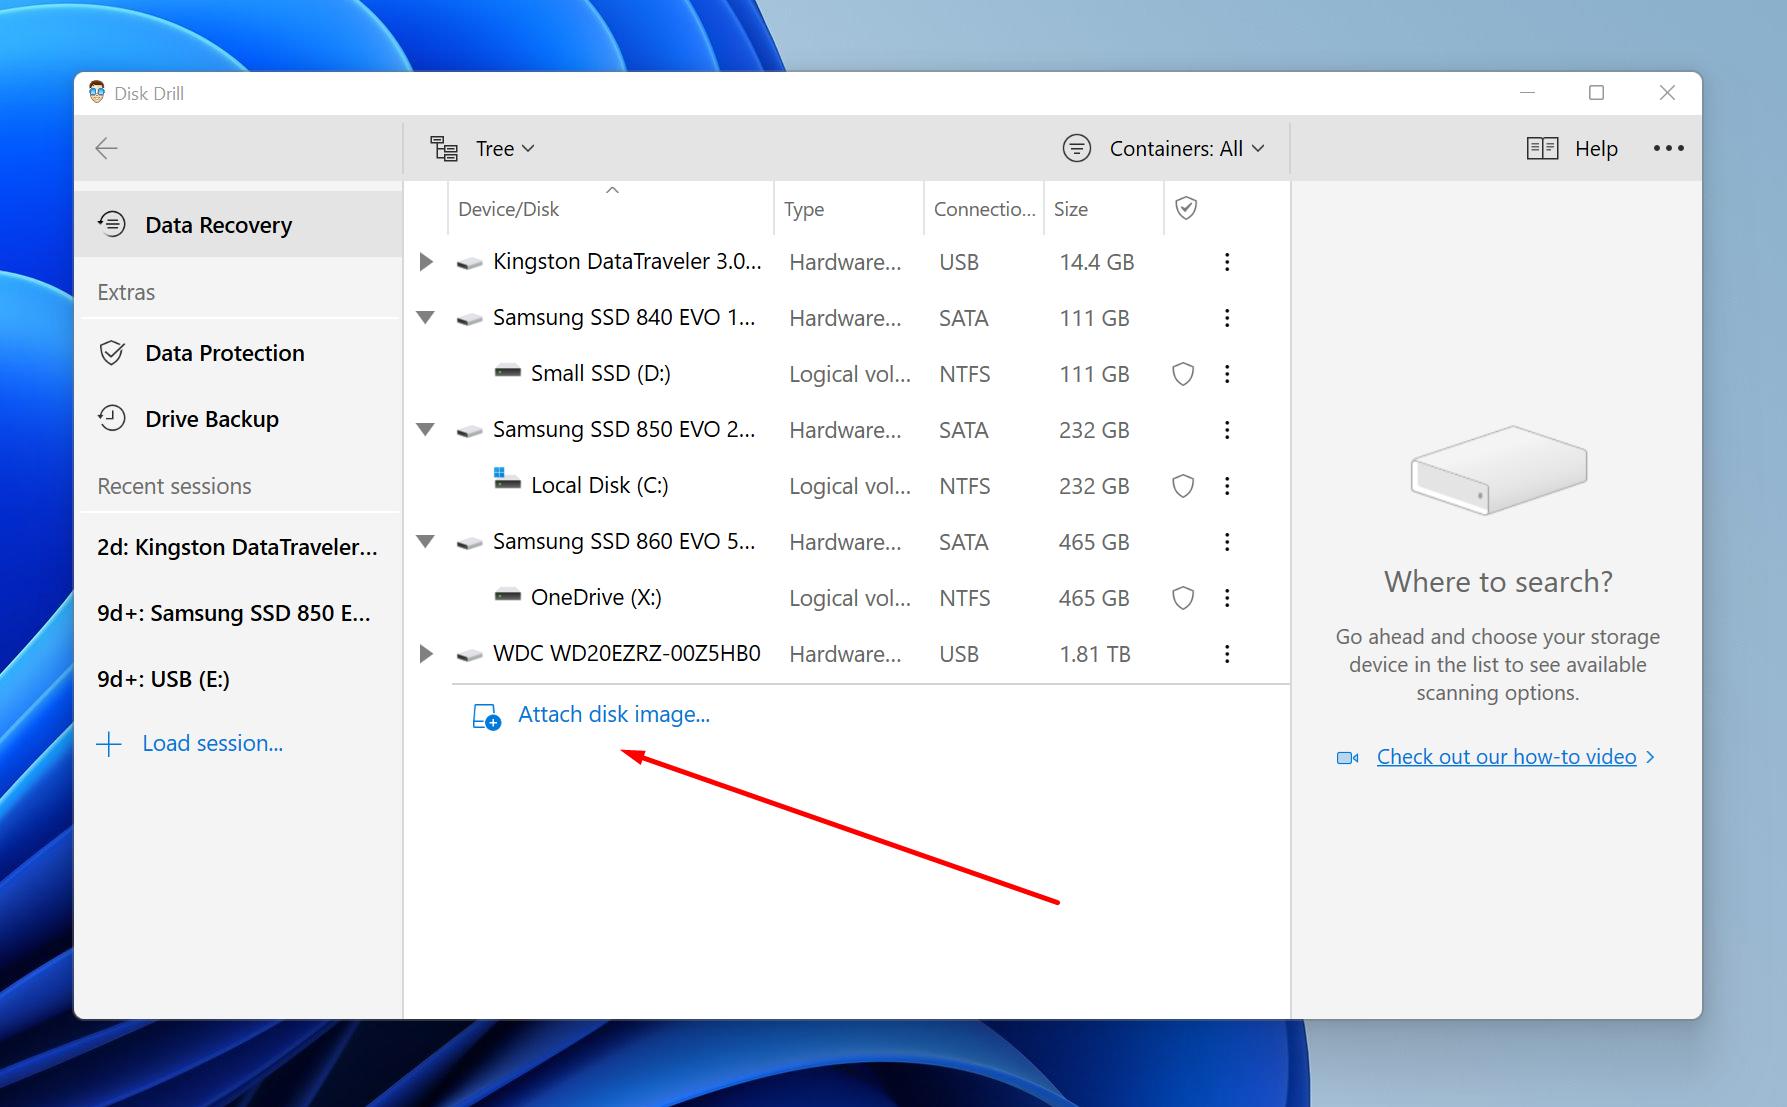
- Select your backup image and click Open.
- Scan the mounted image.
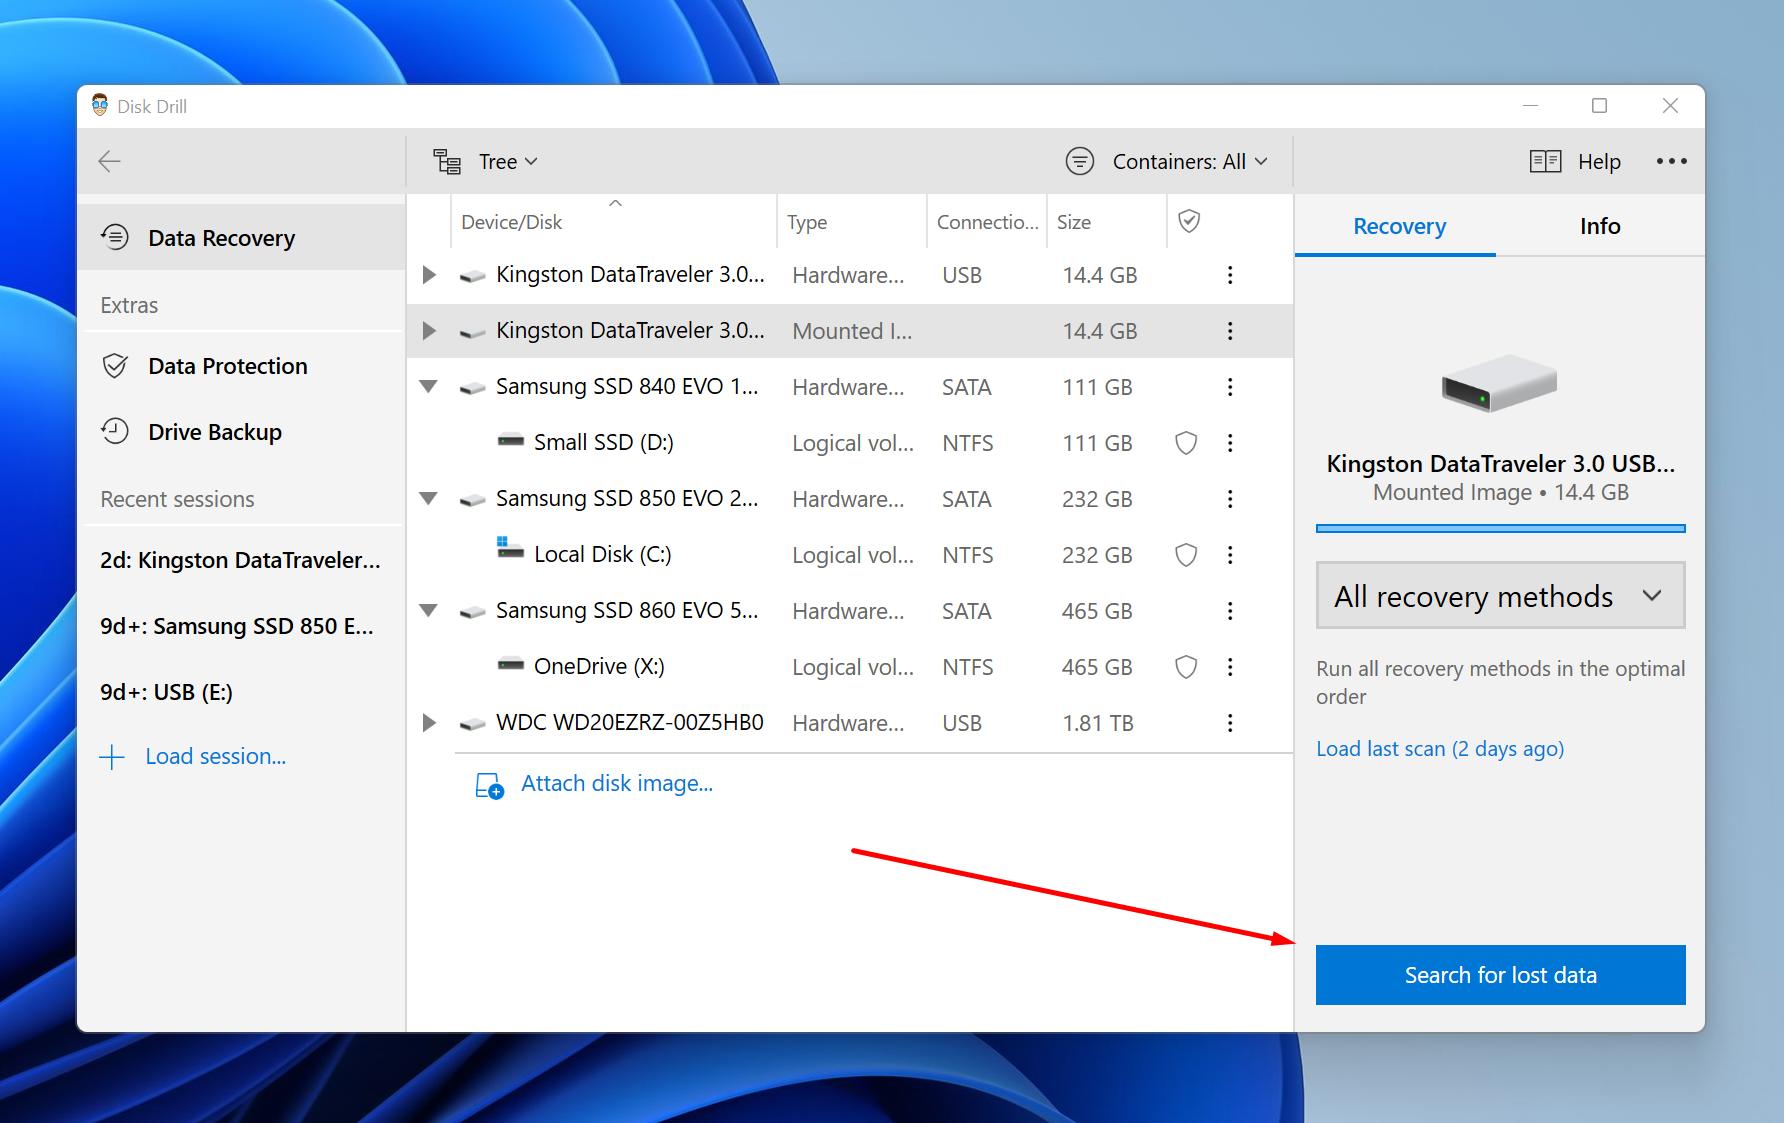
- Select all files you want to recover.
- Click the Recover button to restore selected files.
How to Fix System Restore Fail Errors in Windows 11 and Older
Even though free backup tools like Disk Drill’s Drive Backup feature are readily available, you should still fix any issues that result in file restore failed attempts to regain the ability to use the System Restore tool to protect your system files, installed applications, Windows Registry, and system settings.
The solutions below are here to help. Again, read the error message displayed by System Restore to determine which of the solutions is most likely to work and start with it.
Solution 1: Restore from a Different Restore Point
It’s possible that System Restore won’t complete because the restore point itself is corrupted. To rule out this possibility, you can select a different restore point.
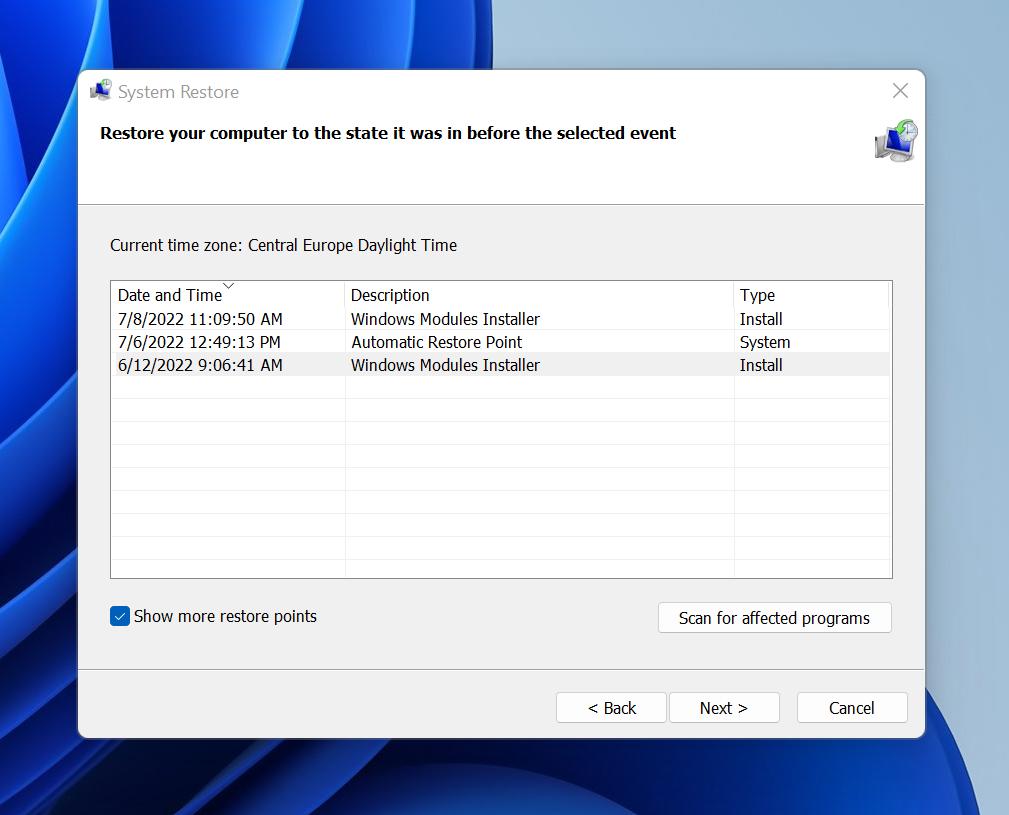
If you’ve configured the System Restore tool to create restore points on a regular basis, then you should have plenty of restore points to choose from, so it shouldn’t matter too much that you can’t use the latest one.
Solution 2: Use the CHKDSK Tool
CHKDSK is a command-line tool whose purpose is to verify the file system integrity of a storage device and fix logical file system errors. As such, it can help when System Restore fails because of hard drive corruption. To use it:
- Launch the Terminal app (Windows 11) or CMD (Windows 10 and earlier) with admin privileges. You can find both Terminal and CMD using the built-in search feature.
- Enter the following command and press enter: chkdsk C: /f
- If asked to schedule the volume to be checked the next time the system restarts, press Y on your keyboard.
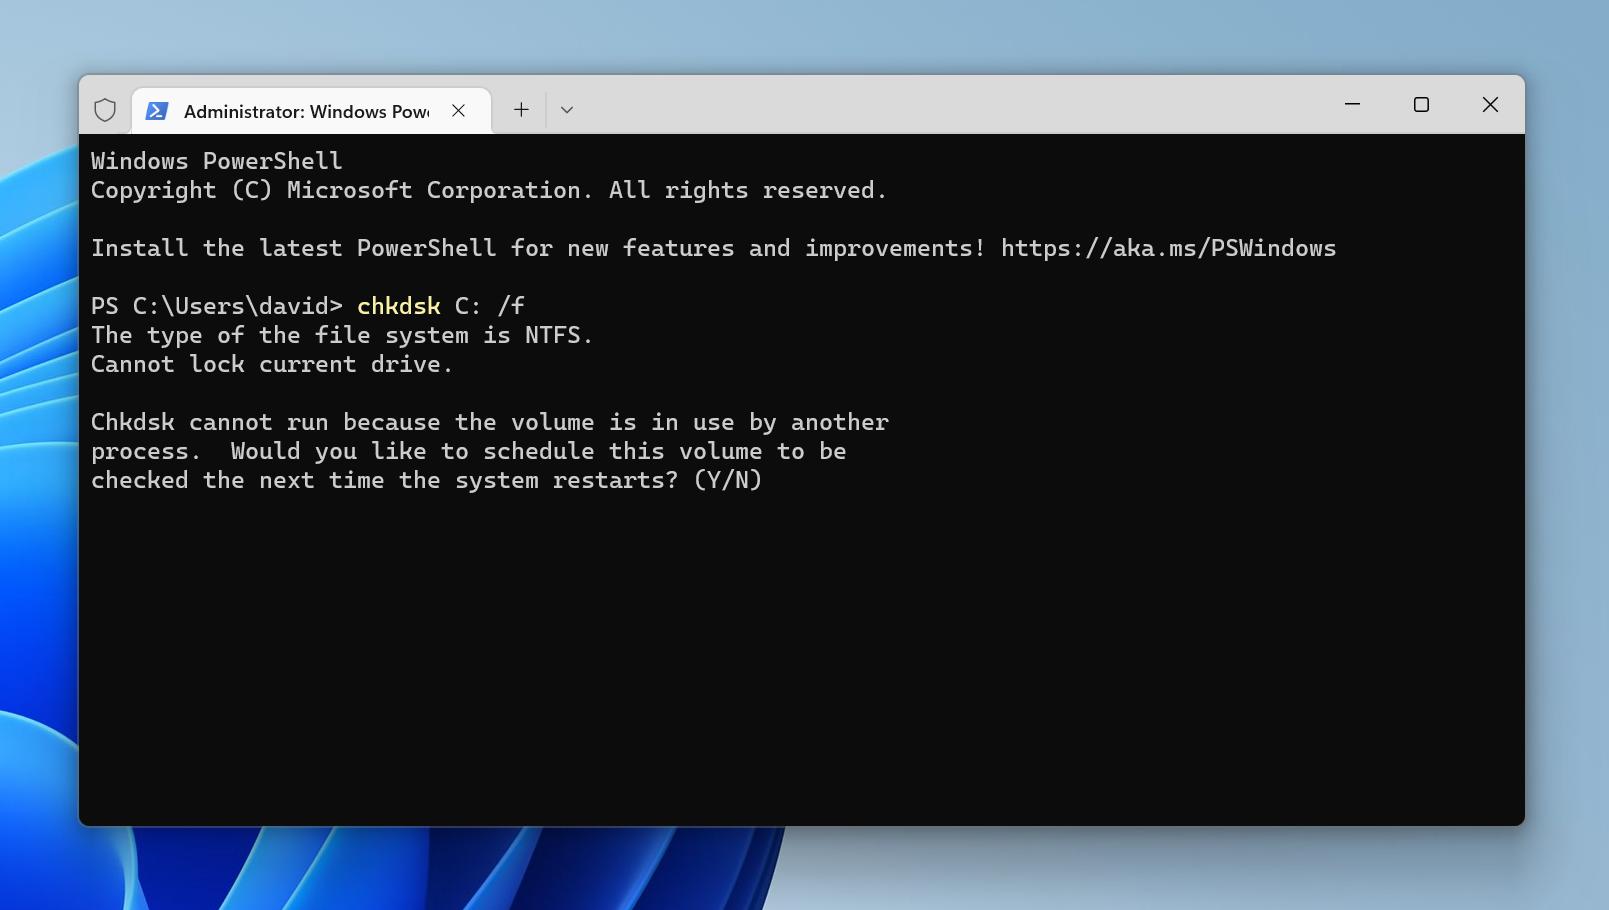
- Wait for CHKDSK to finish checking the system drive.
Solution 3: Use System File Checker (SFC)
When Windows system files become damaged or deleted, parts of the operating system can stop working, including the System Restore tool. In such situations, you can use System File Checker to restore the damaged or deleted files. Here’s how:
- Launch the Terminal app (Windows 11) or CMD (Windows 10 and earlier) with admin privileges. You can find both Terminal and CMD using the built-in search feature.
- Enter the following command and press enter: sfc /scannow
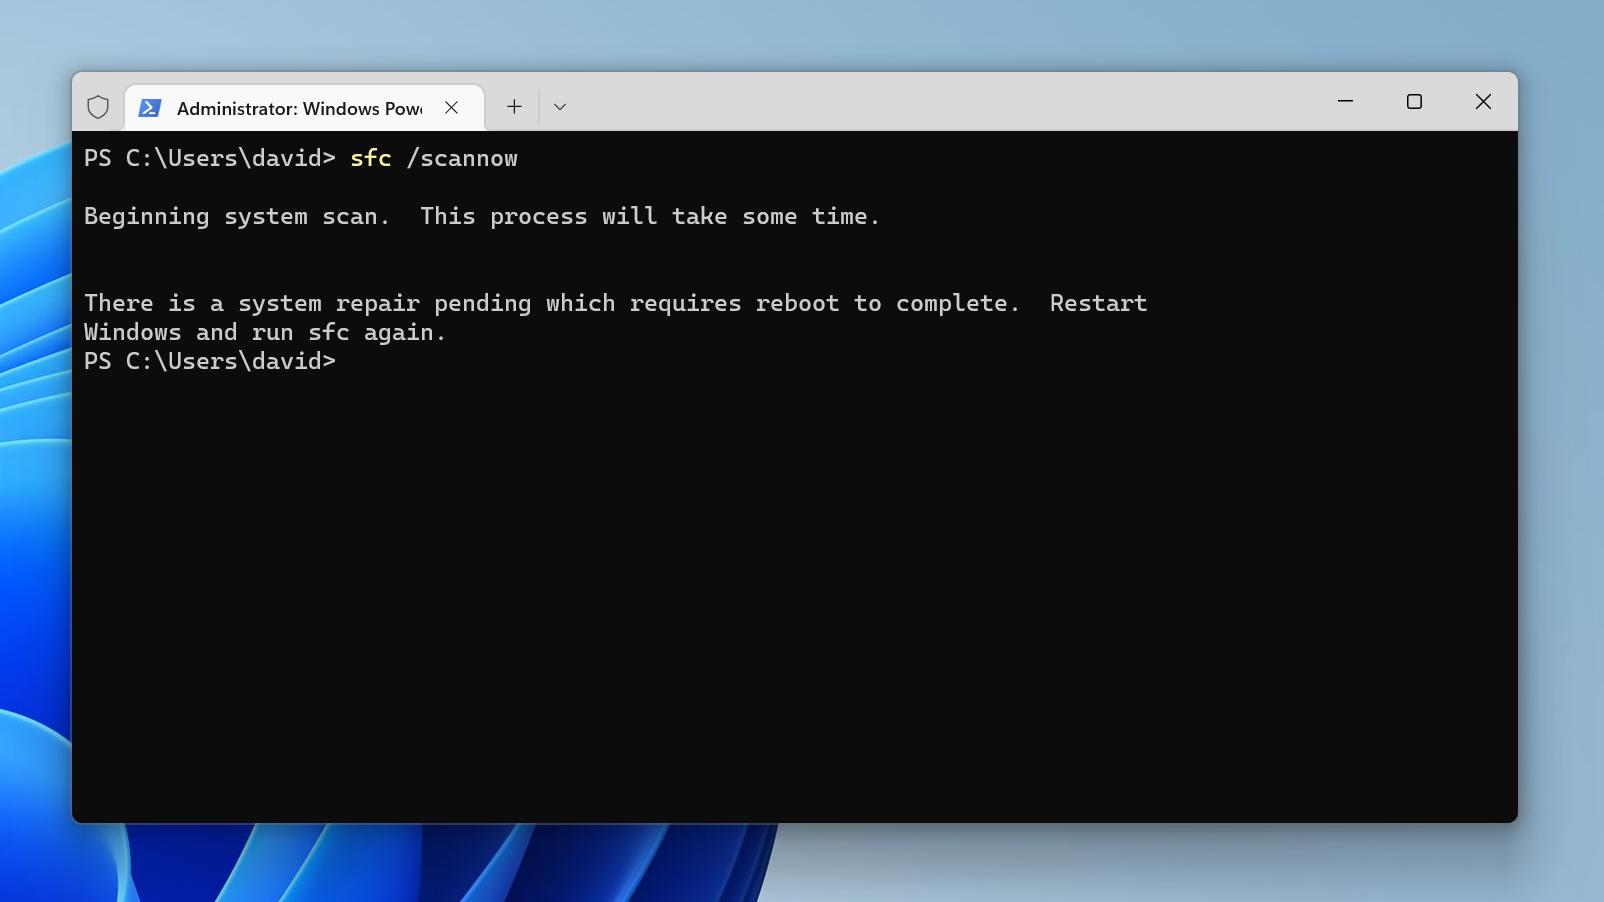
- Restart your computer to complete the scan process.
Solution 4: Use Deployment Image Servicing and Management (DISM)
Windows corruption errors can also be fixed using the Deployment Image Servicing and Management tool. This tool has a useful feature that uses Windows Update to fix system corruption, and this is how to use it:
- Launch the Terminal app (Windows 11) or CMD (Windows 10 and earlier) with admin privileges. You can find both Terminal and CMD using the built-in search feature.
- Enter the following command and press enter: DISM.exe /Online /Cleanup-image /Restorehealth
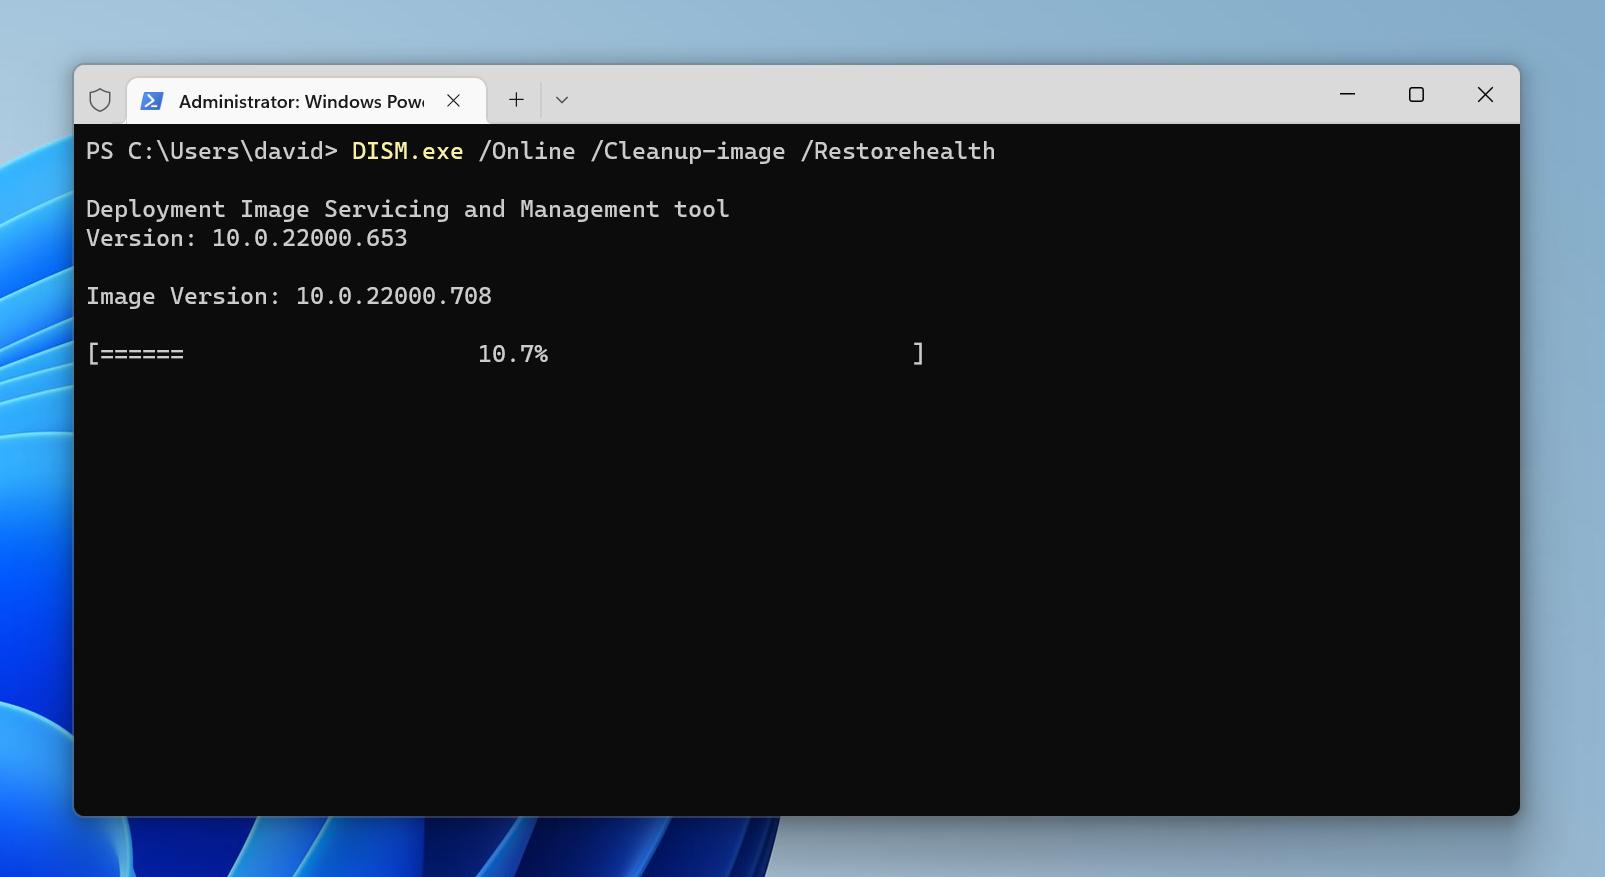
- Wait for DISM to finish checking system files.
Solution 5: Change Shadow Copy Settings
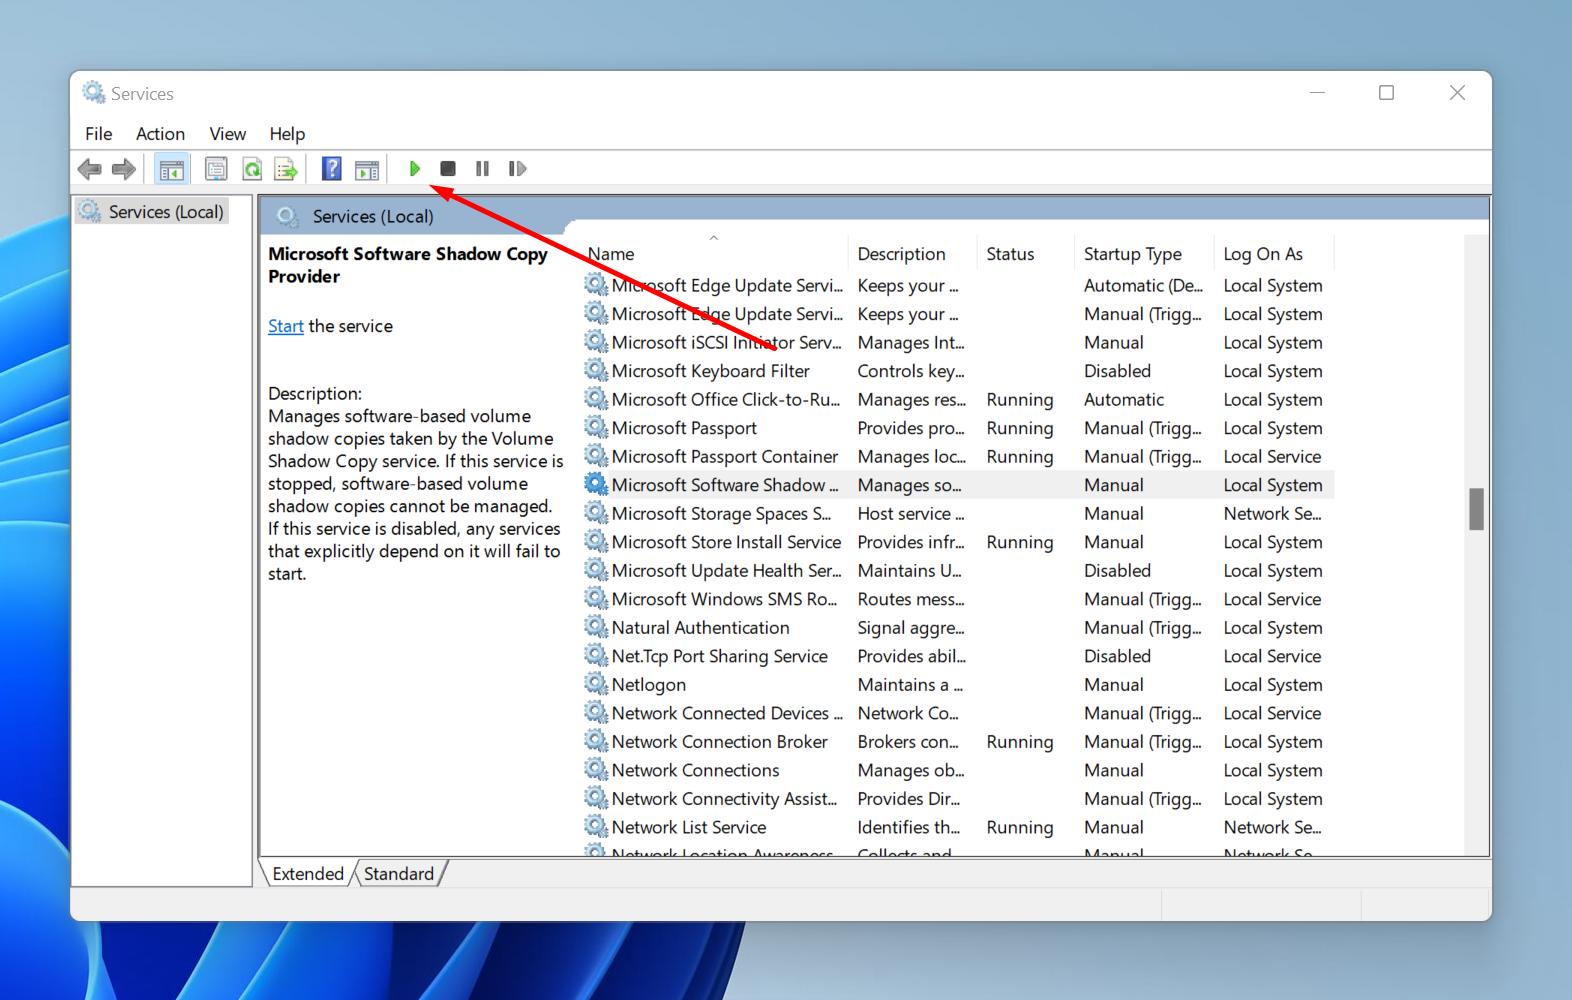
For the System Restore tool to work as intended, the Shadow Copy service should be running. To verify that it is and enable it if necessary, follow these steps:
- Press Win + R to launch the Run dialog box.
- Type services.msc in the Run dialog box and press Enter.
- Look for the “Microsoft Software Shadow Copy Provider” service.
- If the status of the service doesn’t say “Running,” then you need to enable it.
- To do that, click the Start Service button in the top toolbar.
Solution 6: Disable Your Anti-Malware Software
While it’s generally not a good idea to disable your anti-malware software because you can expose yourself to viruses and all kinds of other malware, you may have to do if System Restore won’t complete because your antivirus software keeps interfering with it.
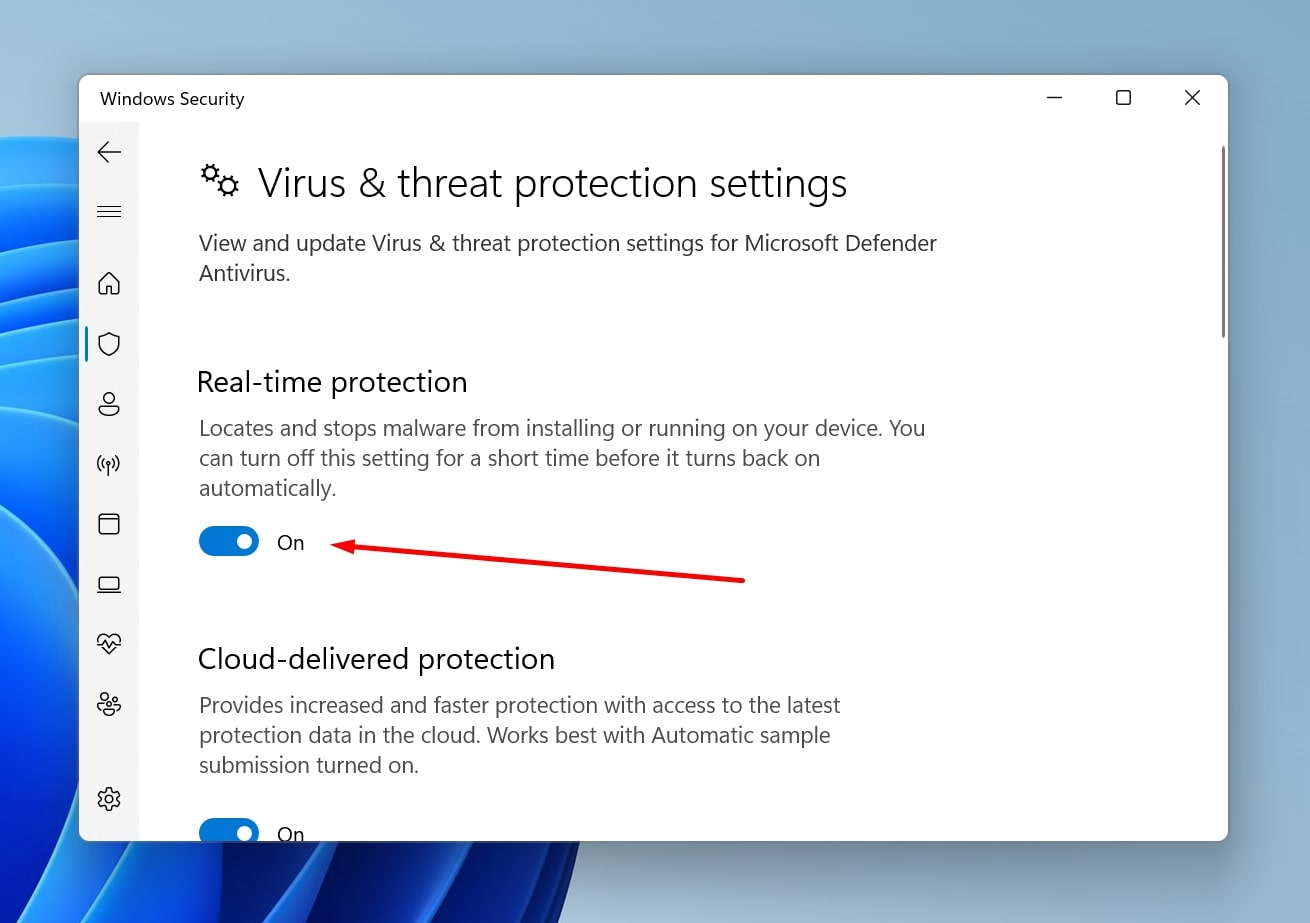
If you’re using Microsoft Defender, the built-in anti-malware component of Microsoft Windows, then you can follow these steps to disable it:
- Open the Start menu.
- Type “Windows Security” and launch the app.
- Navigate to Virus & threat protection > Manage settings.
- Switch Real-time protection to Off.
To learn how to disable other anti-malware software applications, consult their support pages.
Solution 7: Run System Restore in Safe Mode or Clean Boot
The Windows operating system can start in Safe Mode or Clean Boot. The former disables everything but the most essential parts of Windows, while the latter disables only third-party software applications and drivers that are automatically loaded on start-up.
These two special boot modes can make it possible to successfully complete a System Restore when some misbehaving app is interfering with it.
To run System Restore in Safe Mode:
- Press Win + R to launch the Run dialog box.
- Type msconfig in the Run dialog box and press Enter.
- Switch to the Boot tab.
- Enable the Safe boot option.
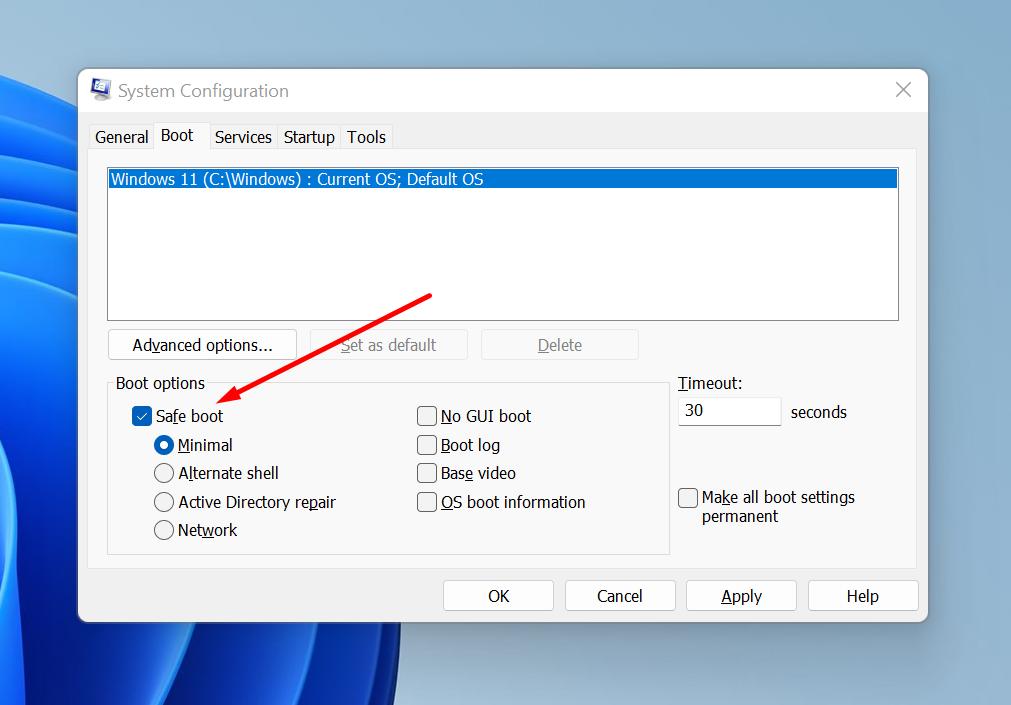
- Click Apply and OK.
- Restart your computer and run System Restore.
To run System Restore in Clean Boot:
- Press Win + R to launch the Run dialog box.
- Type msconfig in the Run dialog box and press Enter.
- Switch to the Services tab.
- Click Disable all.
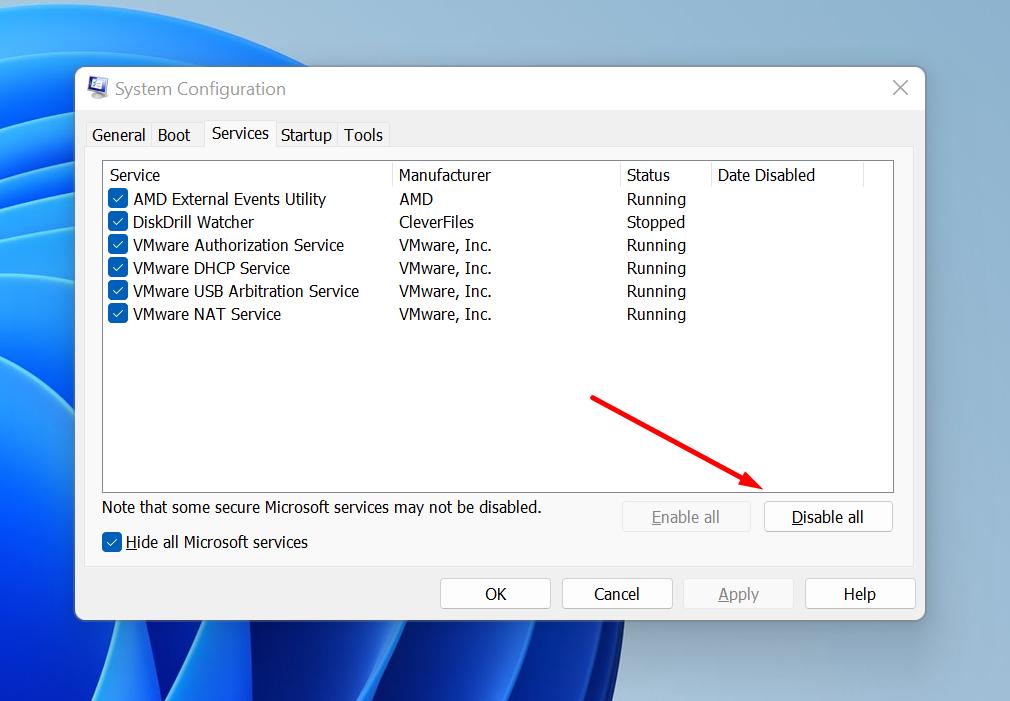
- Click Apply and OK.
- Restart your computer and run System Restore.
Conclusion
When the tool that’s supposed to fix even the worst system issues doesn’t work, it’s easy to feel desperate. Fortunately, System Restore errors are often not difficult to fix, especially if you follow the instructions provided in this article. What’s more, you can always use a third-party backup and restore tool like Disk Drill’s Drive Backup to protect your files even when System Restore keeps on failing.


FAQ
You can use the CHKDSK tool to fix System Restore that failed on Windows 10:
- Launch the Terminal app (Windows 11) or CMD (Windows 10 and earlier).
- Enter the following command and press enter: chkdsk C: /f
- Wait for CHKDSK to finish checking the system drive.
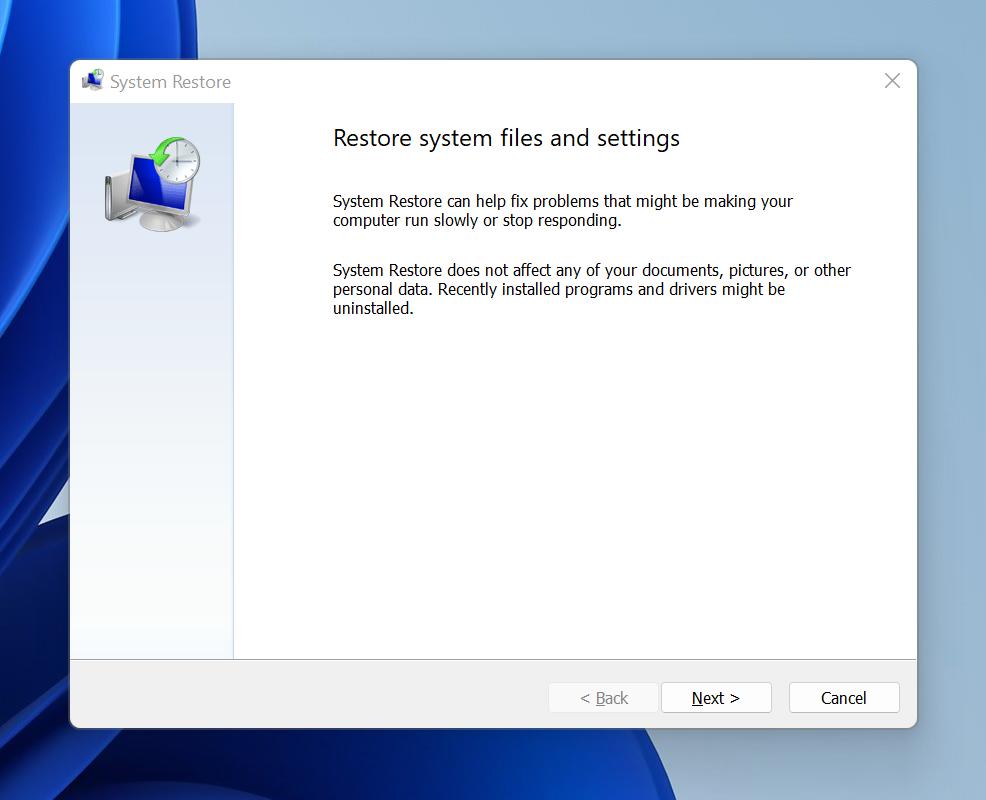
To force a System Restore:
- Open the Start menu and search for the Recovery app. Launch it.
- Click the Open System Restore option.
- Click Next and select the restore point you want to use.
- Click Next again.
- Confirm your restore point and click Finish.
To fix System Restore that failed on Windows 11, you can run it again with your anti-malware software disabled. Microsoft explains how to turn off Windows Defender on its support website, and other anti-malware software vendors provide similar instructions.
You can restore Windows 10 without a restore point using third-party backup software, such as Disk Drill’s Drive Backup feature.
Yes, the System Restore feature can recover system files, installed applications, Windows Registry, and system settings that have become corrupted.