


Your SSD isn’t working as intended. Maybe Windows suddenly asks you to format it, files refuse to open, or the drive shows up with no usable contents at all. These are symptoms of corruption. The files are not necessarily gone, just inaccessible. This guide shows you how to recover data from a corrupted SSD in the right order to maximize your data’s safety. Our team has spent years helping people pull data from corrupted and failing drives, so every step is built to protect your files first.
Can Data Be Recovered From a Corrupted SSD?
Yes, data can be recovered from a corrupted SSD with DIY methods, but one important condition must be met: your computer must still detect the drive and read the correct capacity. If the SSD is visible to the system at a basic level, recovery software can scan it and pull your files out even if it’s not appearing in File Explorer or Finder. So if you are wondering whether data can be recovered from an SSD at all, detection is what decides it.
Keep in mind that “corrupted SSD” covers very different situations. It can mean a drive whose file system turned RAW, which is Windows’ way of saying it can no longer read the drive’s filing structure. It can mean a partition that vanished, a drive that demands to be formatted, or a system SSD that no longer boots into Windows. Each case has different recovery chances, and SSD data recovery works differently from hard drive recovery in a few important ways.
Find your situation in the table below to see your next step:
| Corrupted SSD scenario | What to do next |
| SSD shows as RAW | Recover the data before formatting |
| SSD appears as unallocated | Recover the data first (or save it to a drive image), then try TestDisk to restore the partition |
| Windows asks to format the SSD | Recover the data first, then format the SSD |
| SSD is not detected | Start with SSD troubleshooting before recovery |
| System SSD does not boot | Start with SSD troubleshooting before recovery |
| SSD freezes or disconnects during access | Create a drive image, then recover the data from that |
| SSD shows 0 bytes or wrong capacity | Start with SSD troubleshooting and consider a data recovery service |
| SSD is not detected in BIOS/UEFI | Consult a data recovery service if the data matters |
So, where to from here? If the SSD does not show up in Disk Management at all, or it is the system SSD that will not boot, troubleshooting the SSD comes first. However, if the SSD is visible with the correct size, jump straight to the recovery section. And if your data is already safe, or you simply do not need it, jump to the fixes section.
Solid State Drive Troubleshooting Before Recovery
In this section we’re simply trying to get the SSD to a point where it’s detectable enough for data recovery software to scan it. Nothing more. You are not trying to fix the corruption yet, only to make the drive visible to the system.
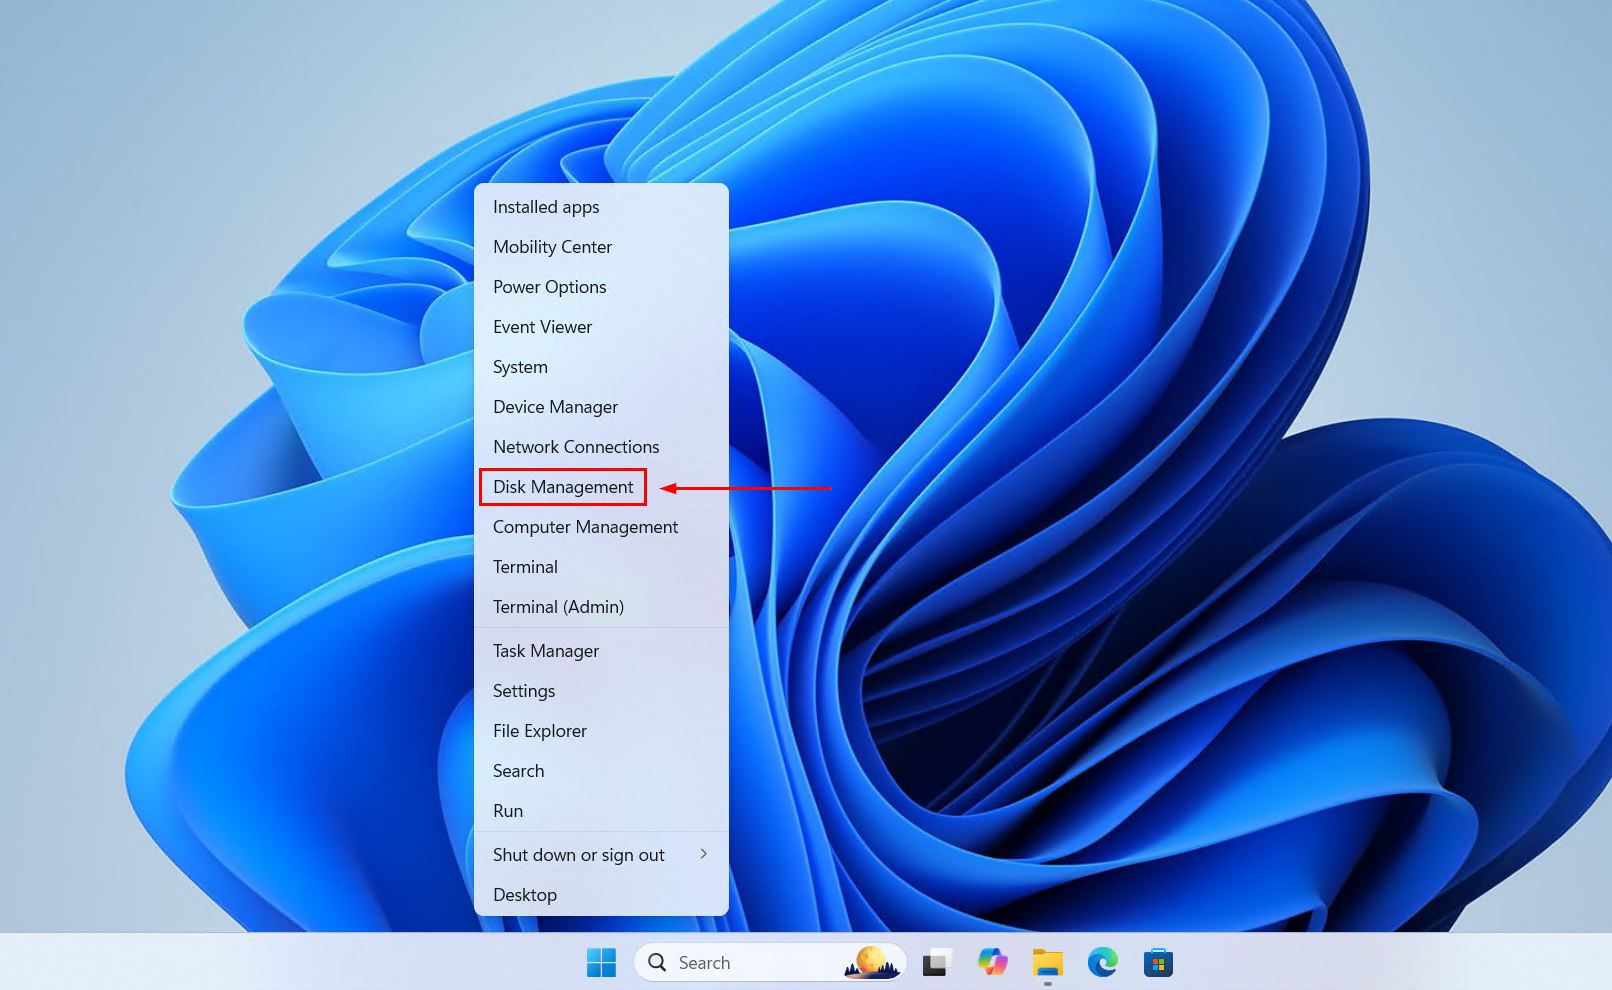
Start by checking what Windows actually sees. Right-click Start and click Disk Management. In the lower half of the window, look for a disk that matches your SSD’s size. If the SSD appears with its correct capacity, you are done here and can move on to recovery. If it doesn’t appear, or looks incorrect, work through these basics:
- Try another USB port. Ports fail more often than drives do. On a desktop PC, use a port on the back, which connects directly to the motherboard.
- Try another cable. Cables are the single most common culprit with external SSDs. Swap it before you blame the drive.
- Avoid USB hubs. Hubs and docks share power between devices and can starve an SSD. Always plug the drive straight into the computer while troubleshooting.
- Try another enclosure or adapter. If your SSD sits inside an external enclosure or connects through an adapter, the enclosure’s electronics may have failed rather than the SSD itself. Moving the drive to a different enclosure or a USB adapter often brings it right back.
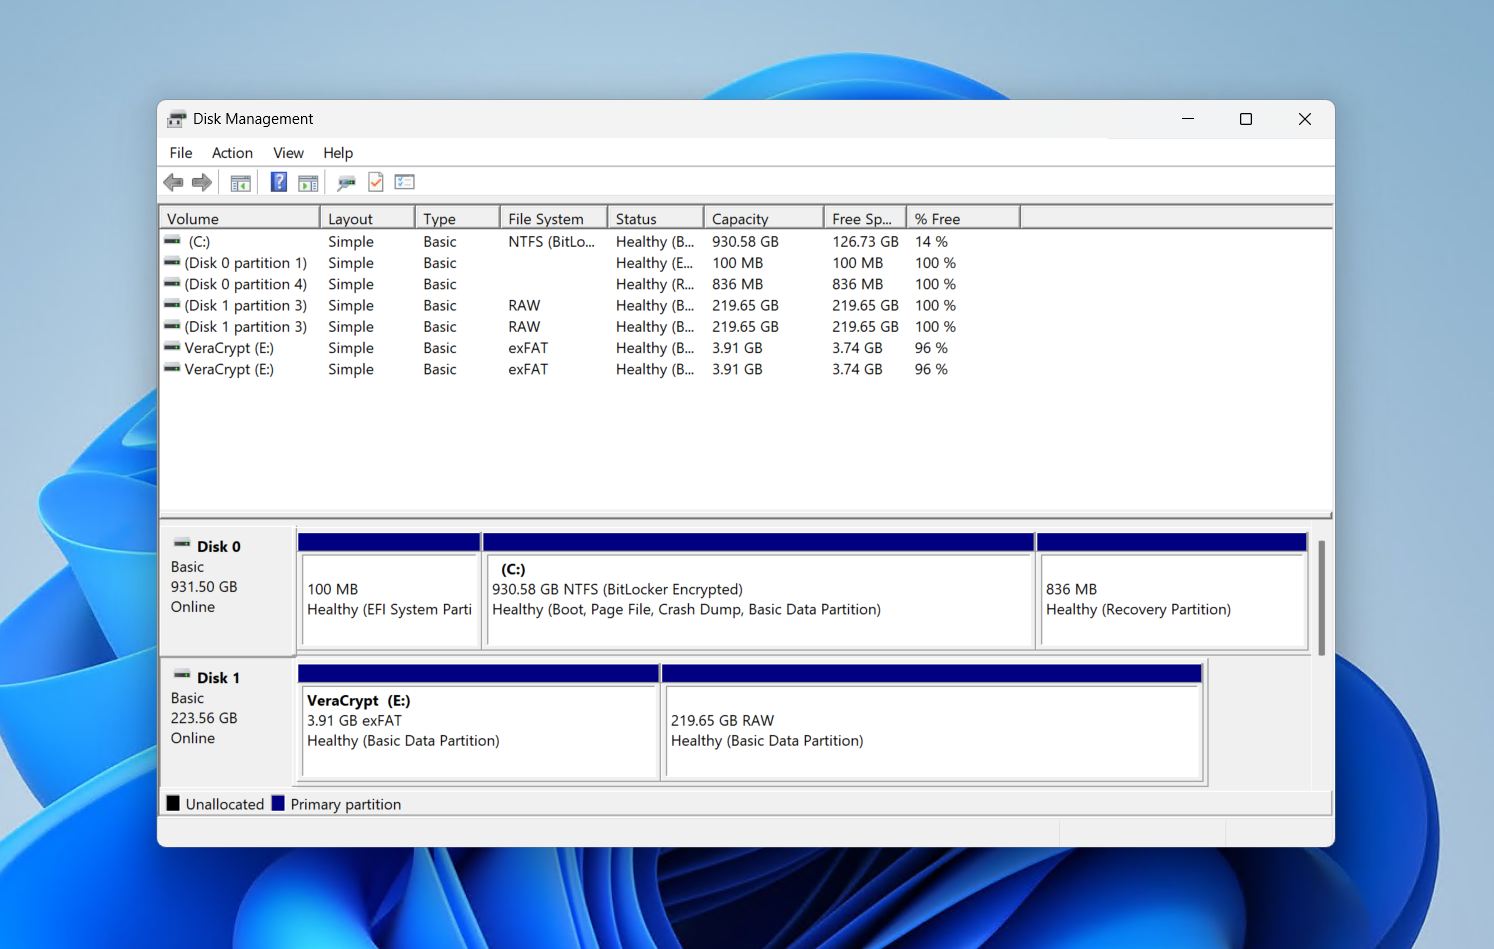
What if the corrupted SSD is your system drive and the computer no longer boots? Do not keep restarting the machine and hoping. Each failed boot attempt makes Windows poke at the damaged drive again. Instead, shut it down, remove the SSD, and connect it to another computer as an external or secondary drive.
How to Retrieve Data From a Corrupted SSD With Software
Windows can’t read corrupted file systems, so it can’t get your files back by itself. To solve a problem like this, you need data recovery software that is not only effective on SSDs, but also carries the features that matter when a drive’s file system has turned RAW. It has to be built for damaged and failing drives, and it should give you a clear idea of your recovery chances before you start.
Of all the SSD recovery tools we have tested over the years, Disk Drill is the best suited to this job. It reads the drive at a low level and reconstructs your files even when the filing structure is broken. Importantly, it can create a byte-to-byte drive image, so you can pull your data from a safe copy instead of the unstable original. And, it shows you which files are recoverable before you commit to the recovery, so you never work blind.
Follow these steps to go from imaging the drive to recovering your files:
- Download Disk Drill, then install and open it. Never install the software to the drive you’re recovering data from.
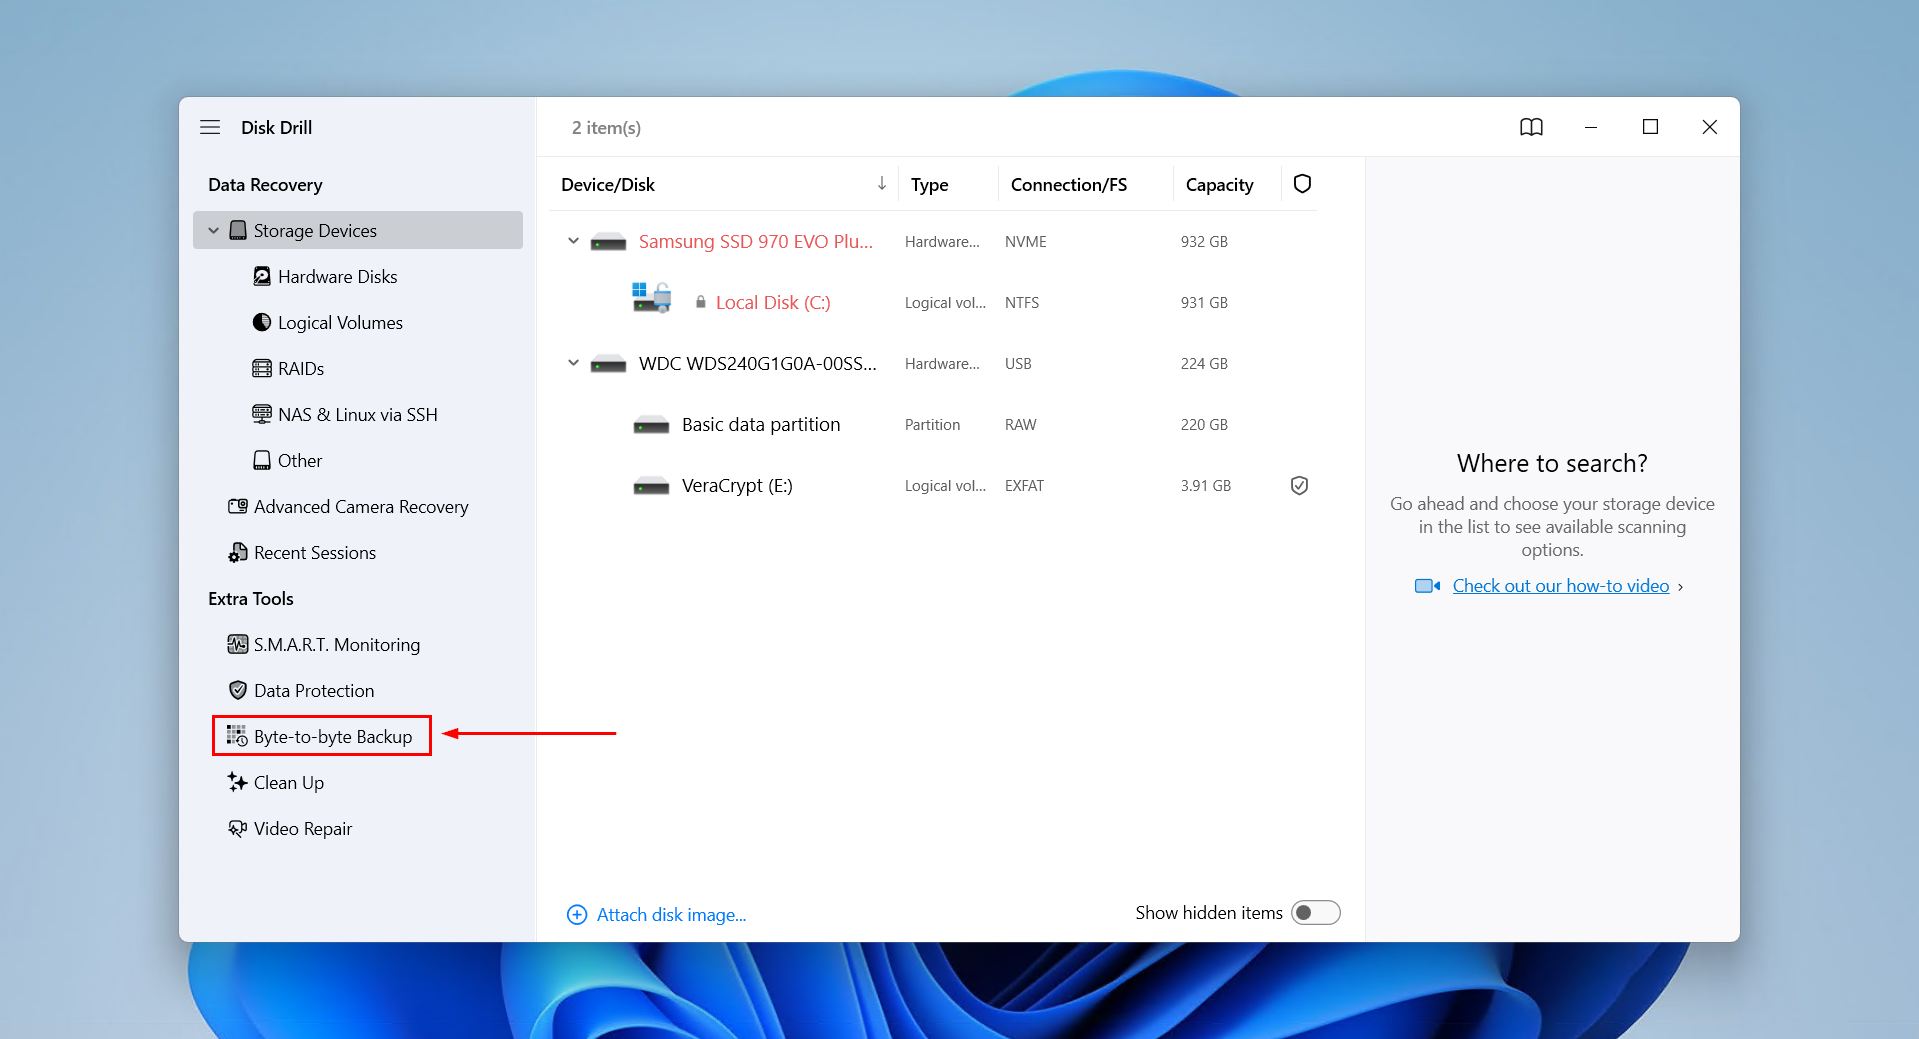
- Go to the Byteto-byte Backup section.
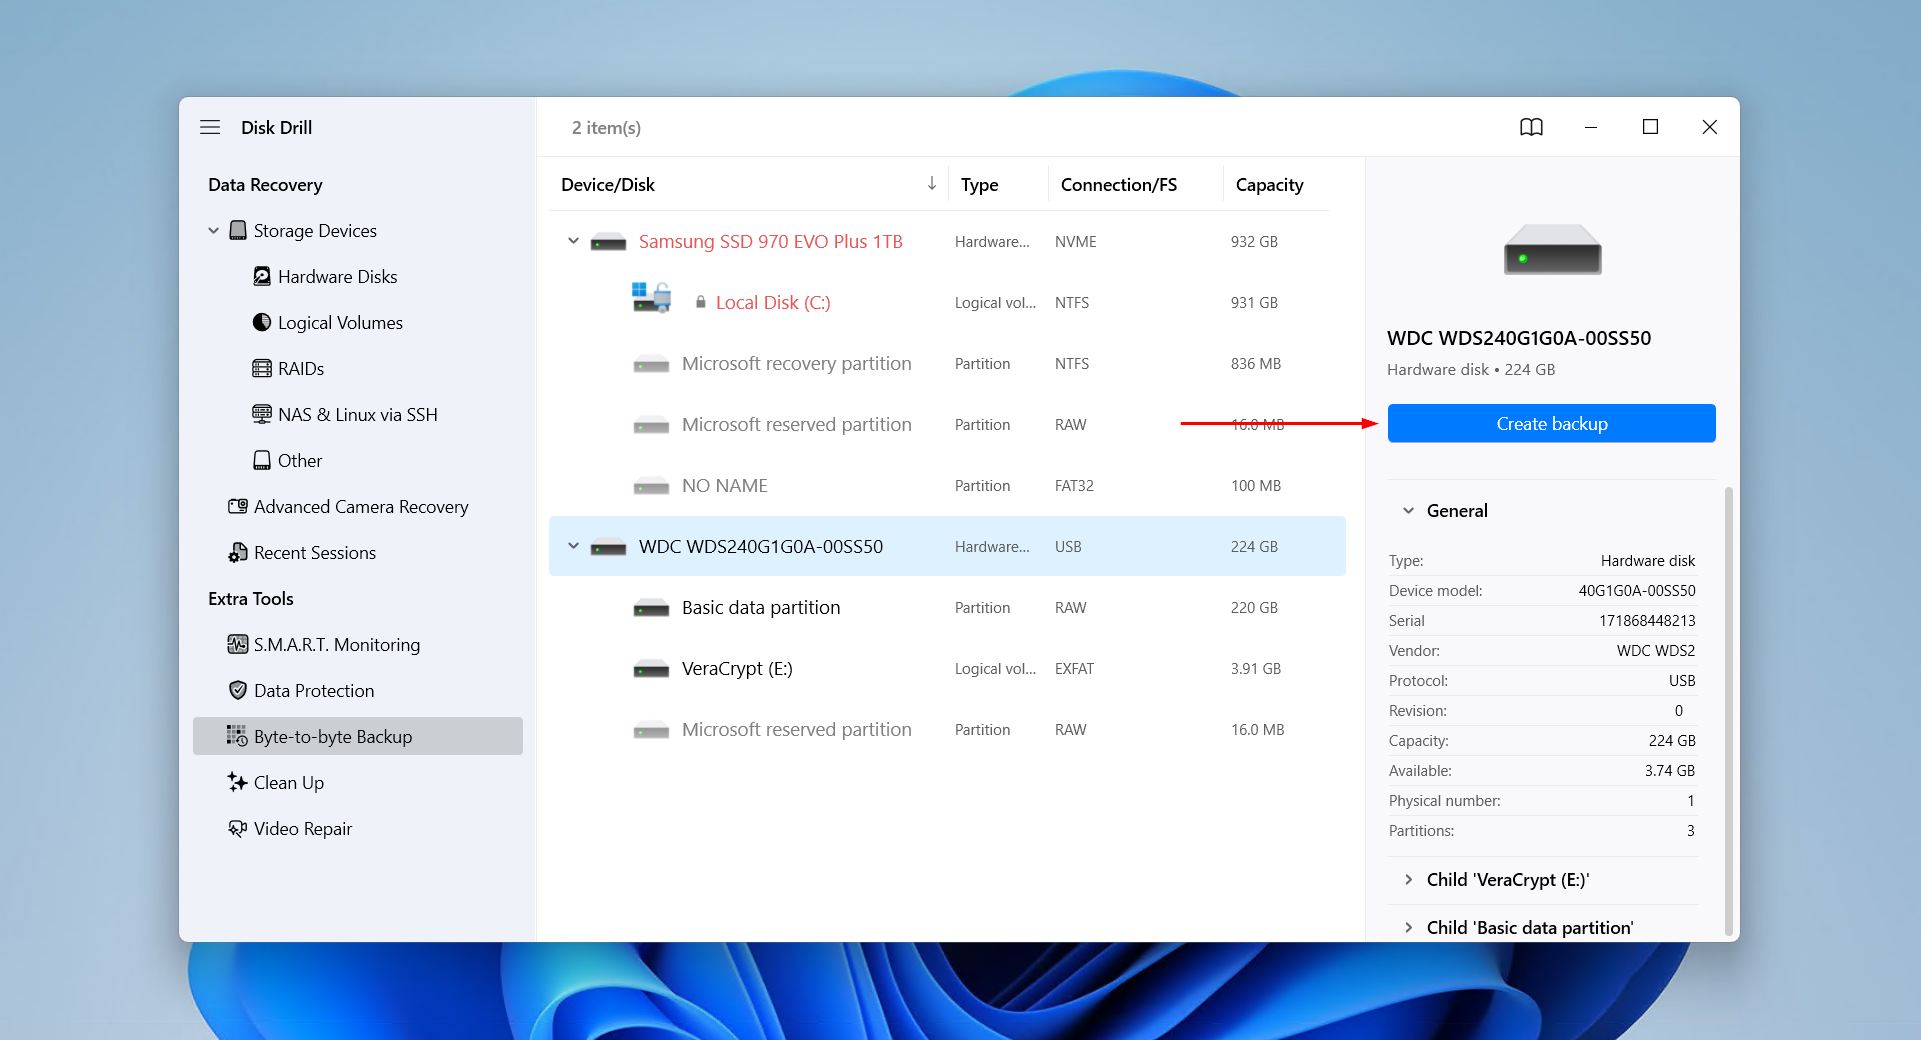
- Select your corrupted SSD from the list. Click Create backup.
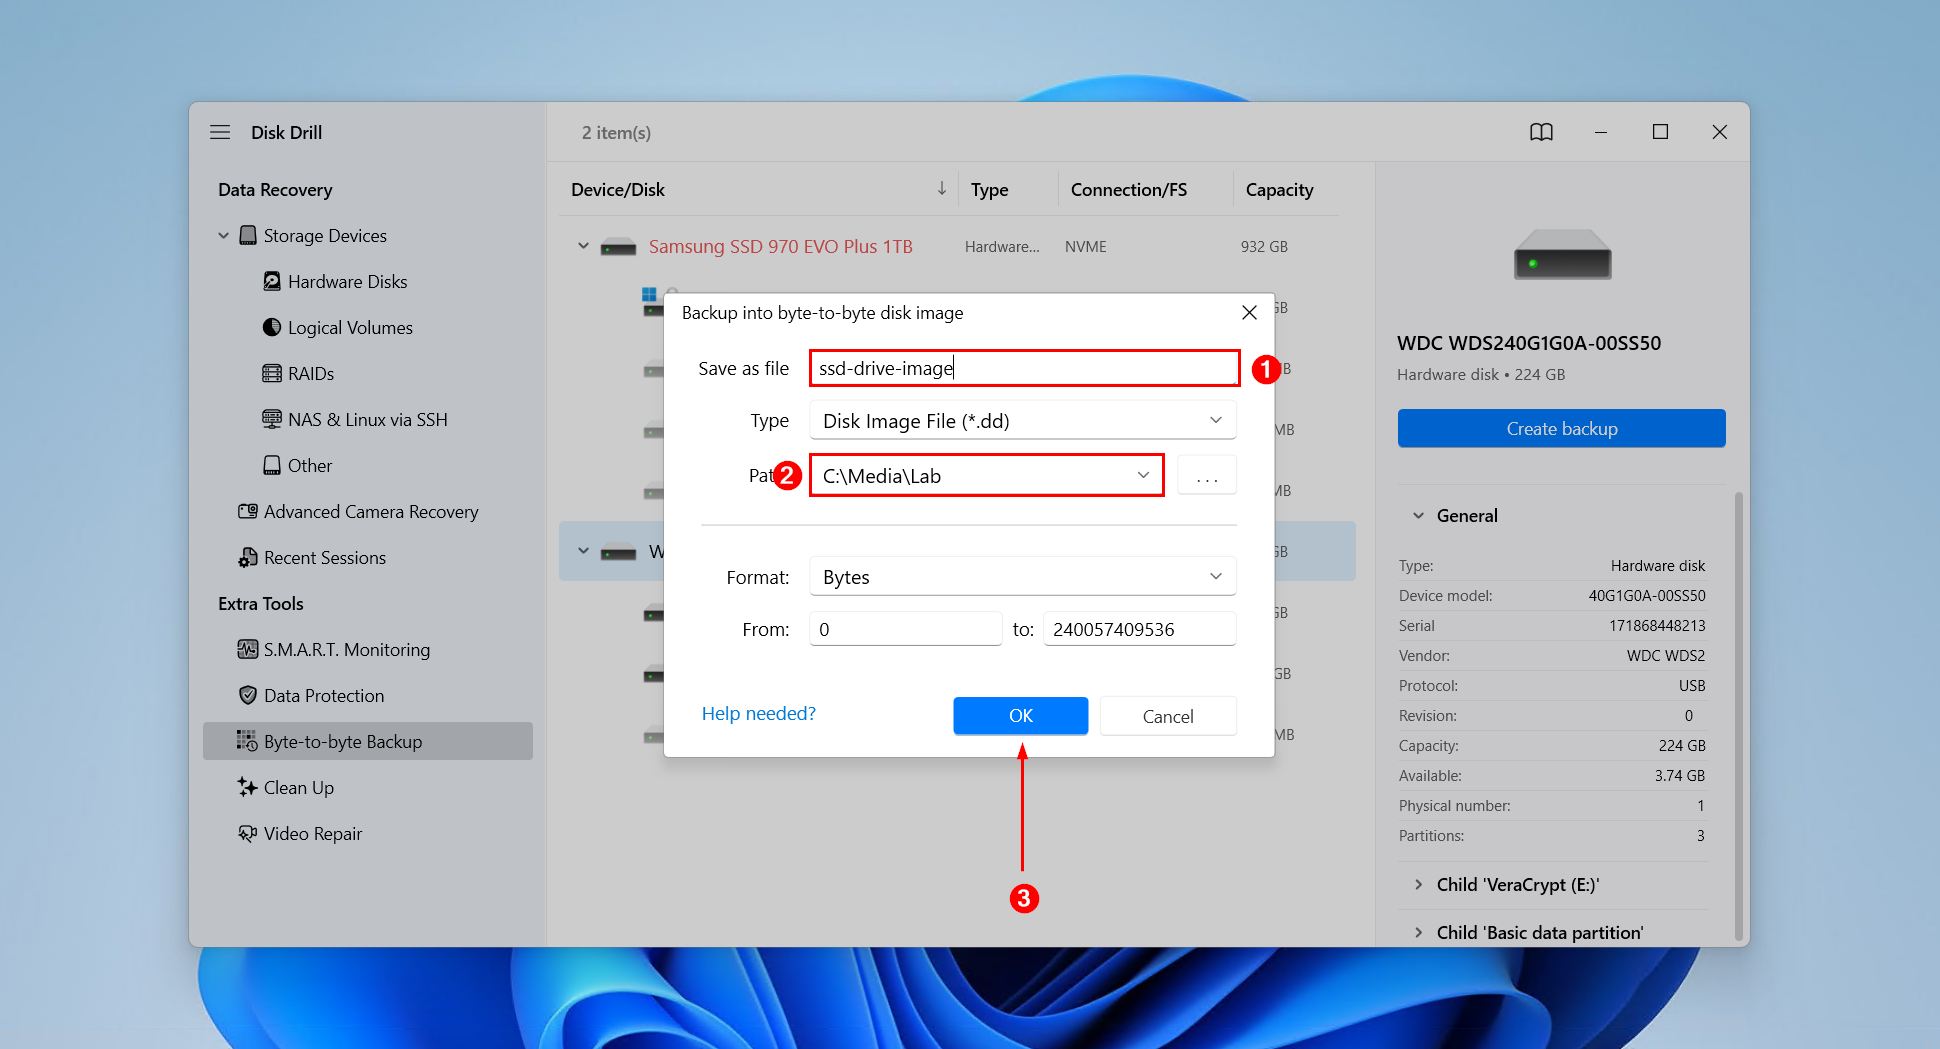
- Give the image file a name, choose where it will be saved, then click OK to start copying the drive’s contents to a file.
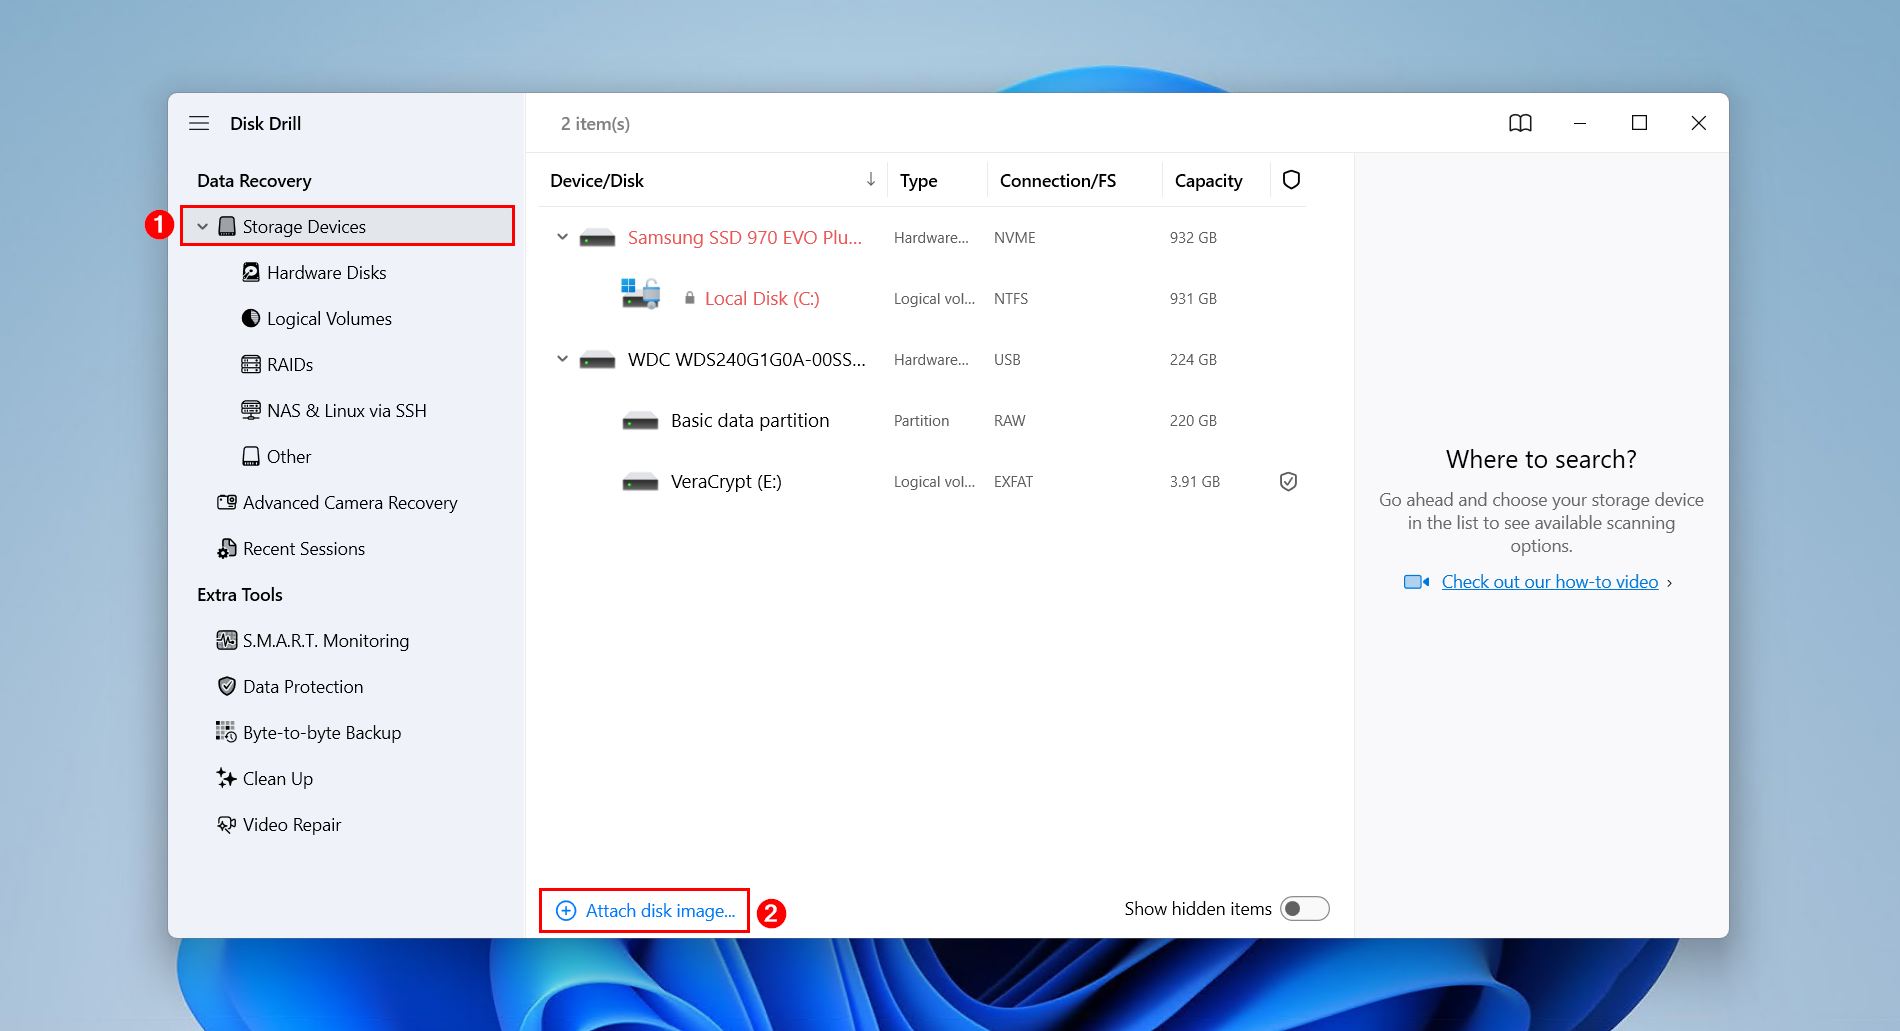
- Return to Storage Devices, then click Assign disk image to select the image you just created.
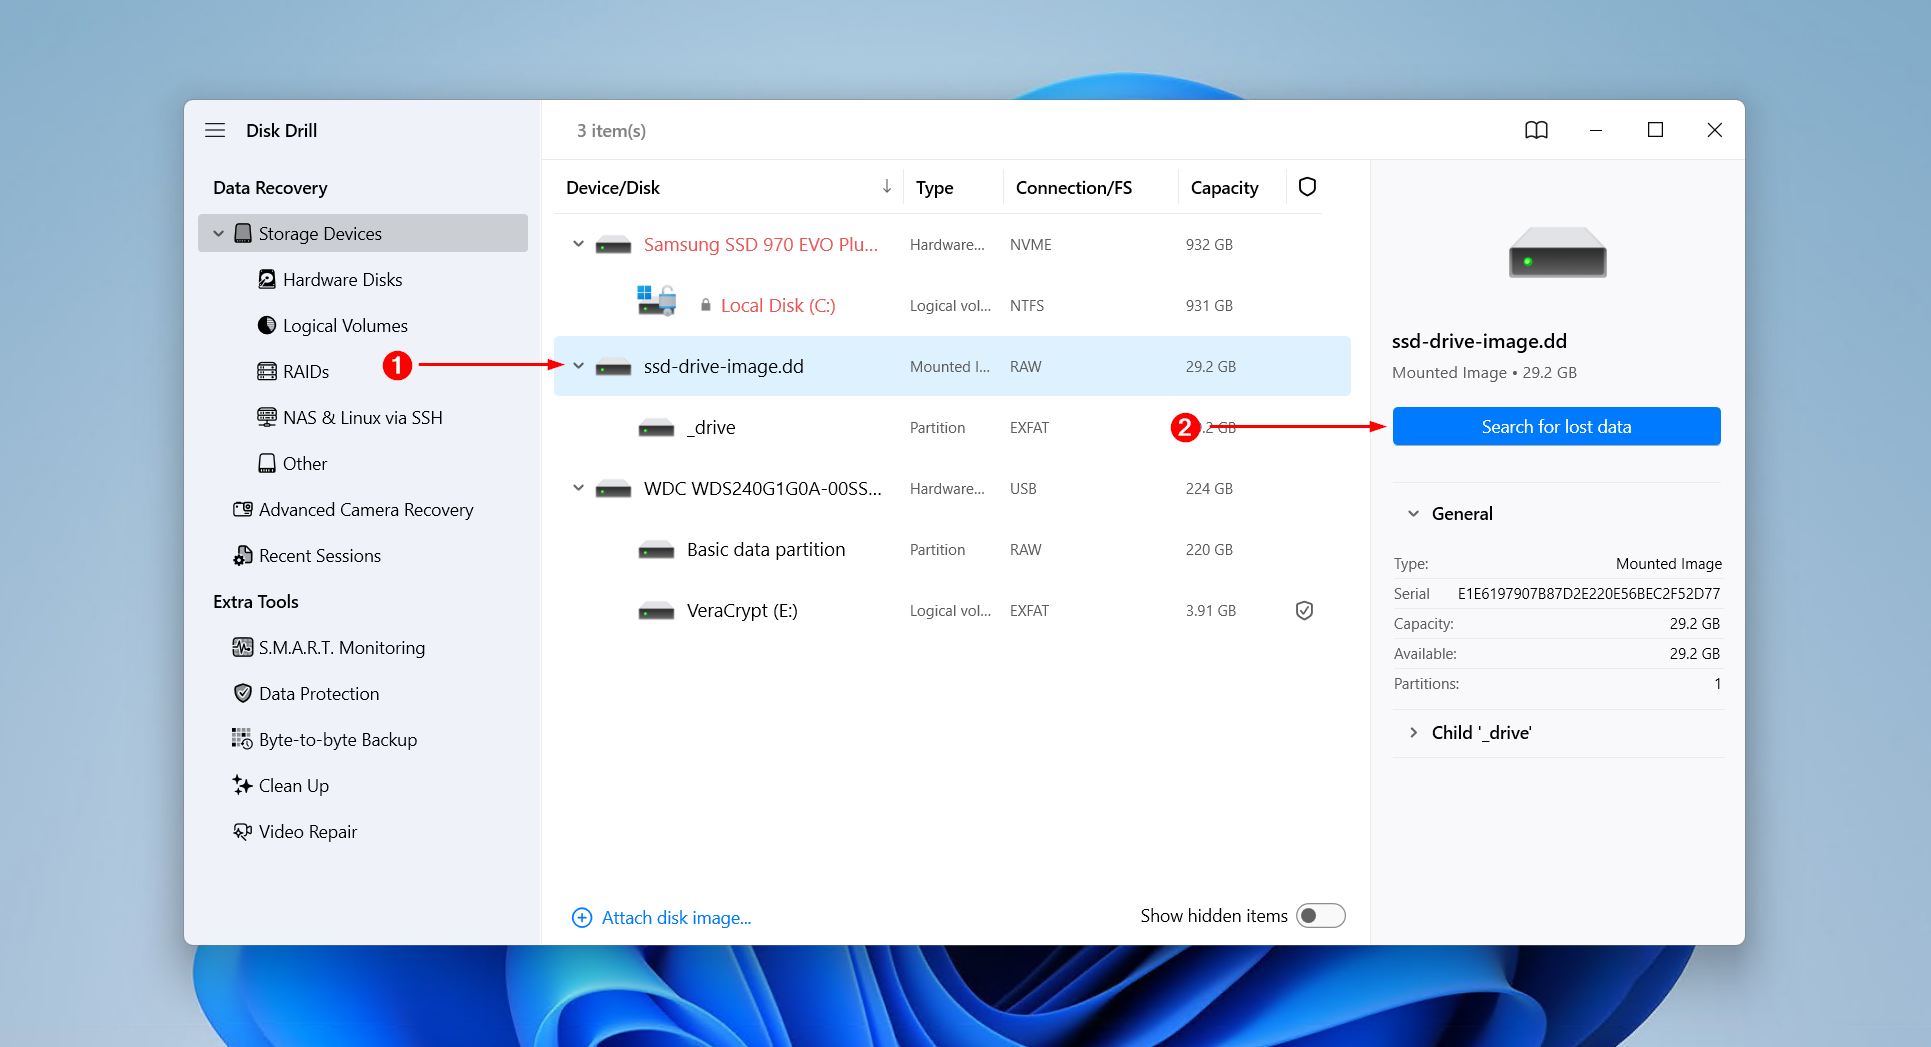
- Select the corrupted SSD drive image, then click Search for lost data.
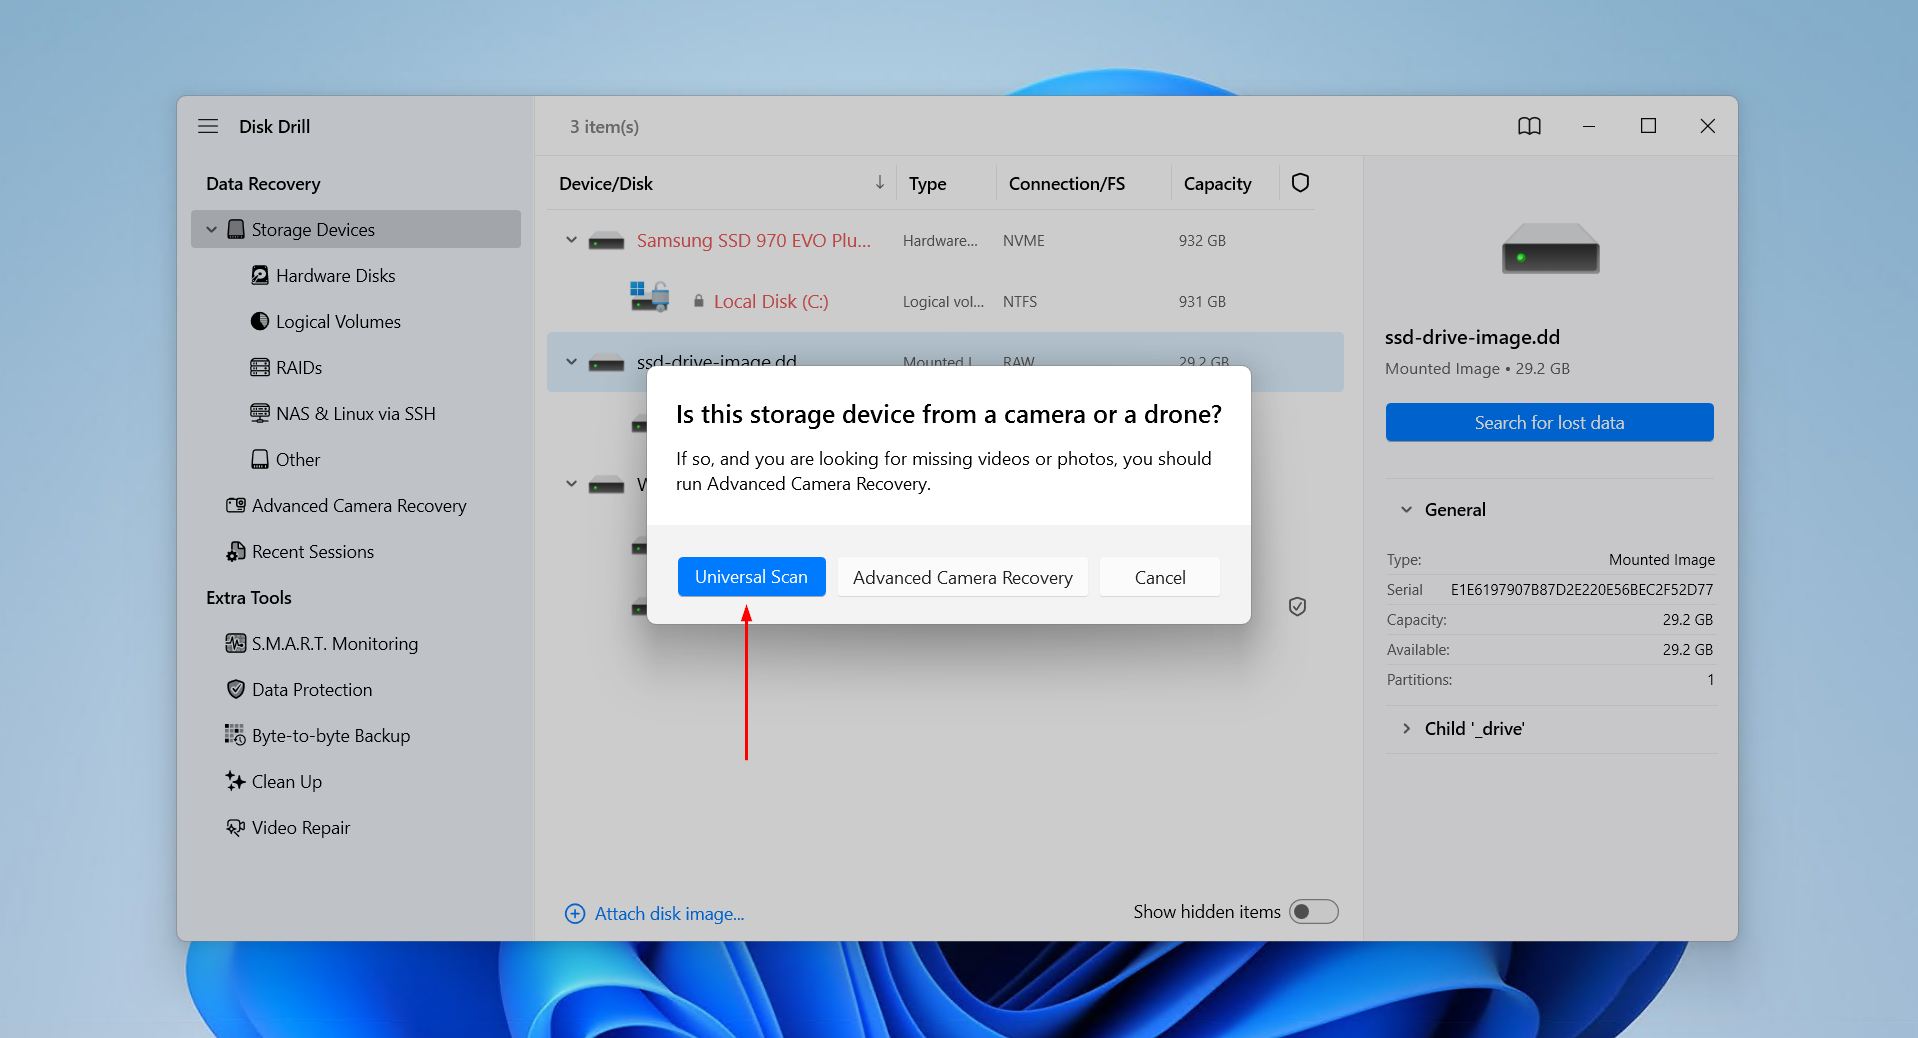
- Click Universal Scan, as this is ideal for recovering all types of files. Advanced Camera Recovery is best for restoring photos and videos shot by cameras and drones.
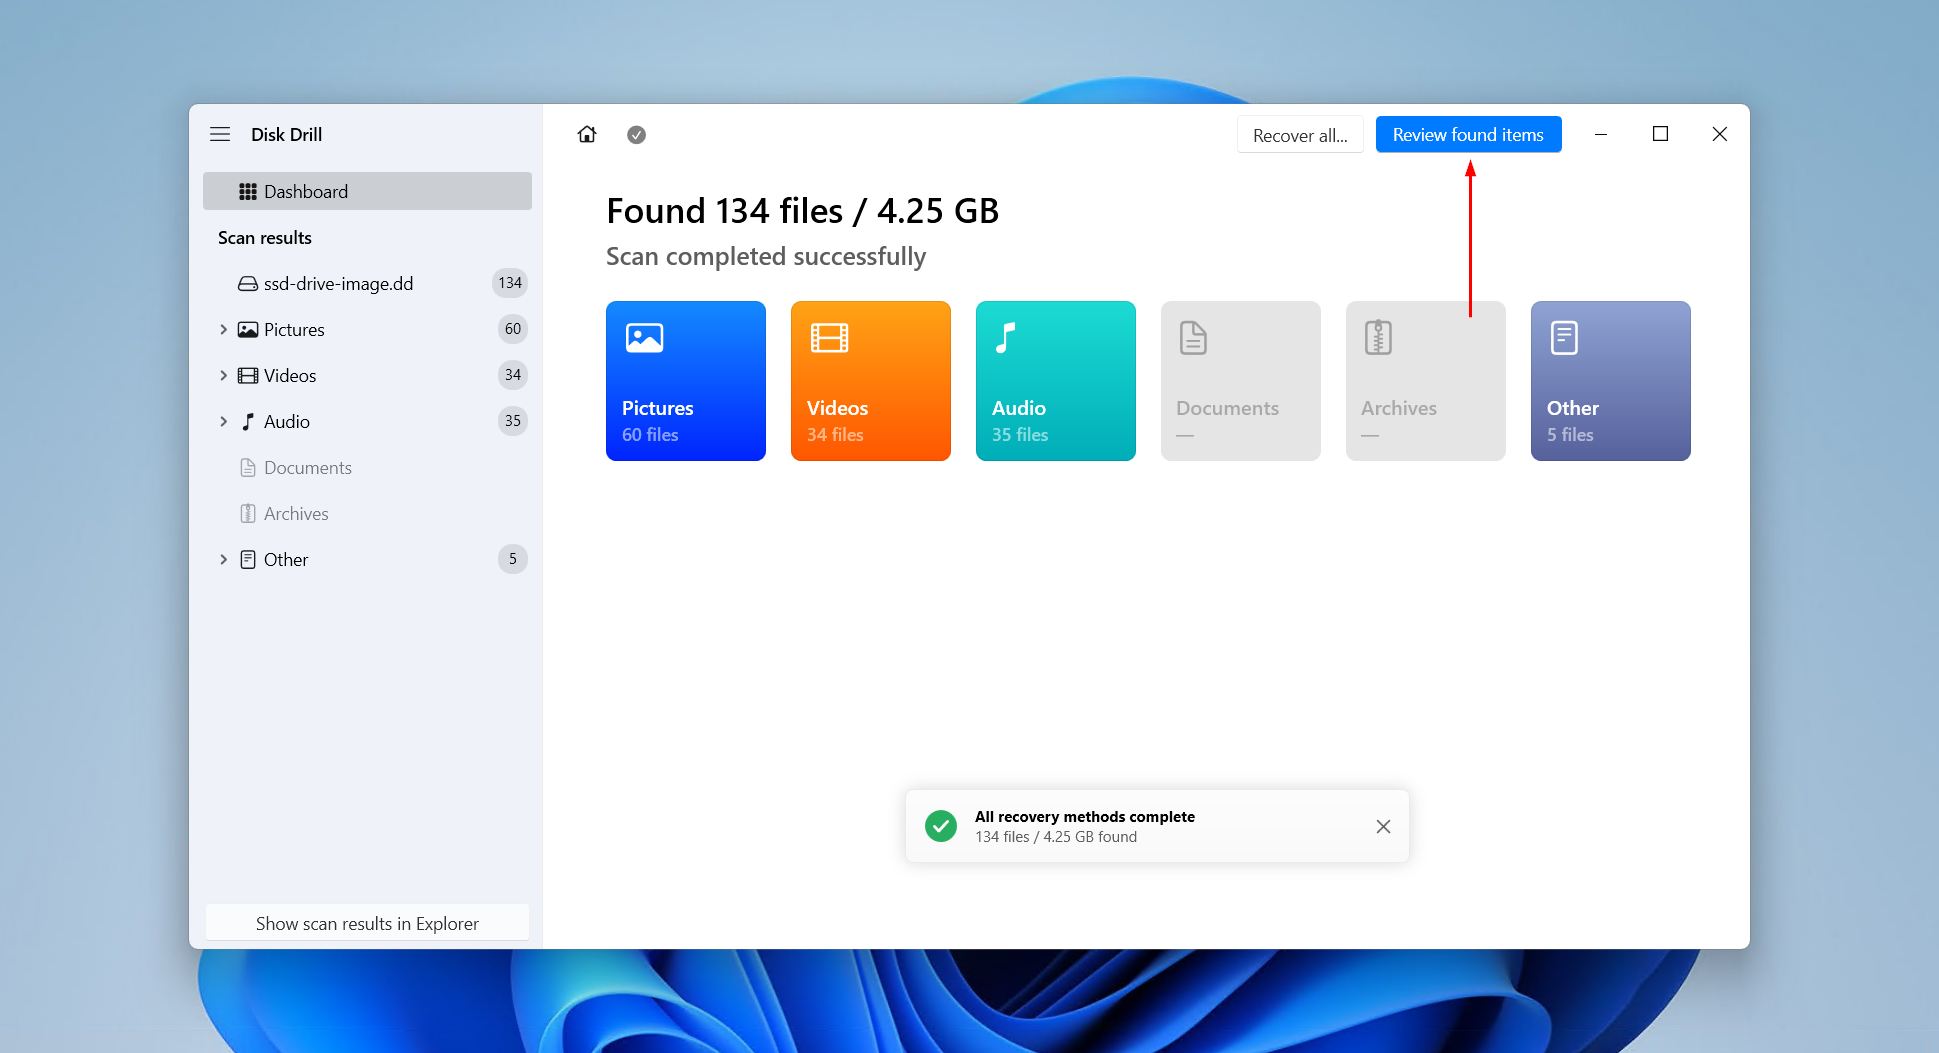
- Click Review found items once the scan is finished. Waiting until it’s finished guarantees you’ll see everything Disk Drill could find.
- Preview and select the files you want from the corrupted SSD. Use the built-in filter and search options to cut through extensive search results. When you’re ready, click Recover.
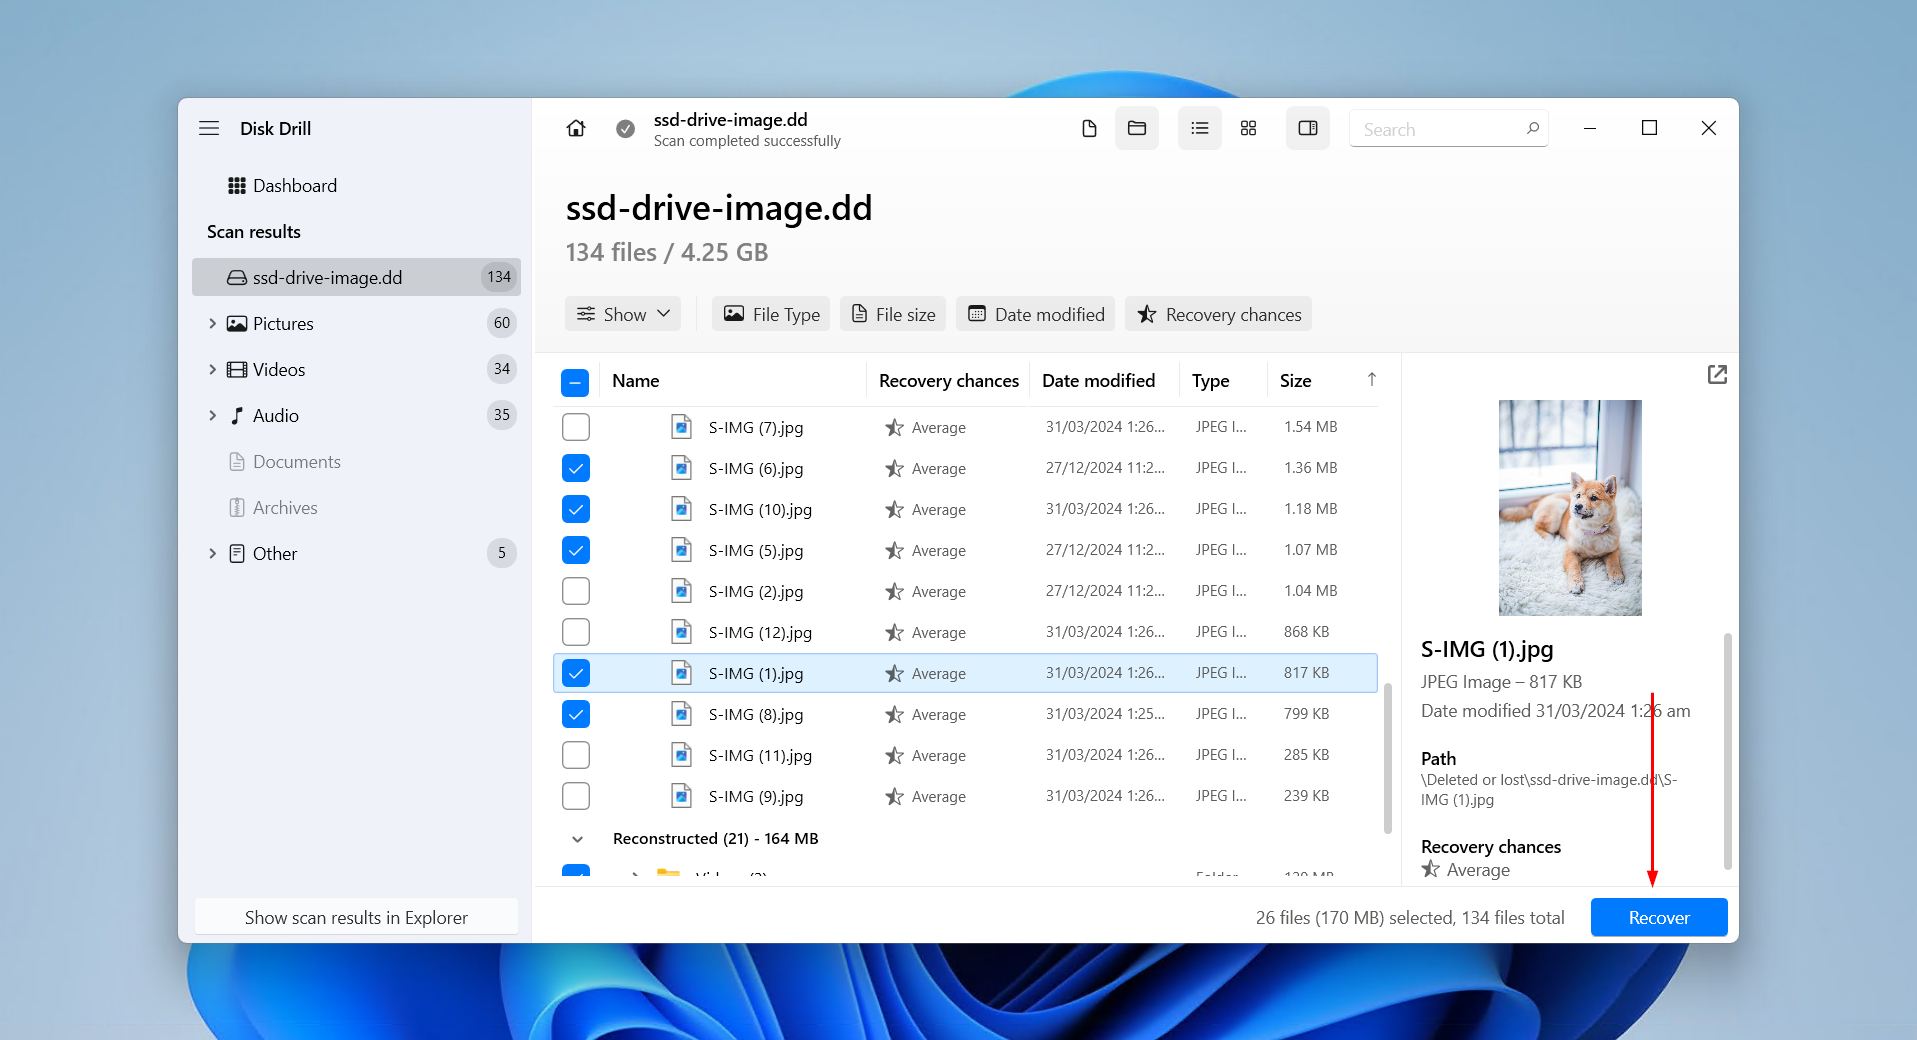
- Choose where to save the recovered files. Whether you’re recovering from an image or the drive itself, don’t choose a location on the corrupted SSD drive or it risks further complications.
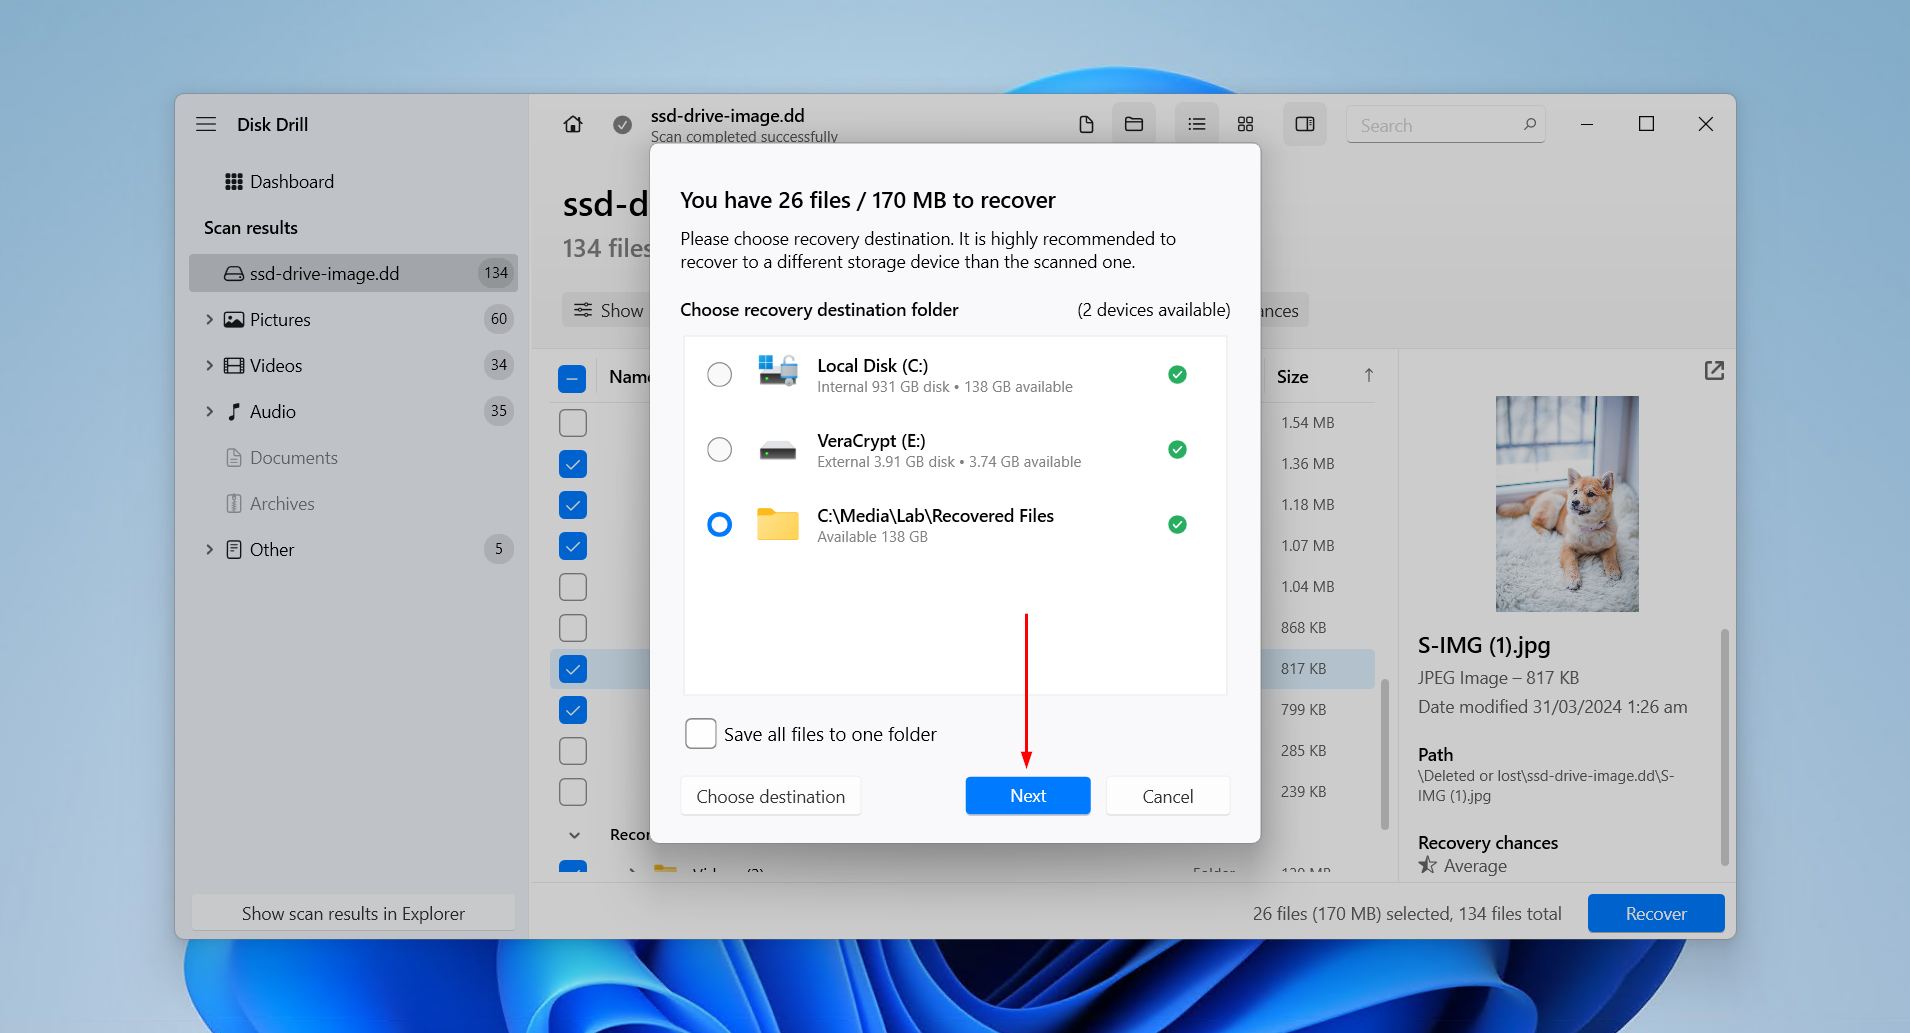
Once your files are safe and sound on another drive, you can start looking at repairs without concern of losing your data.
How to Fix a Corrupted SSD
After recovering data from the failed SSD, you can try to bring the drive itself back to working order. If the SSD’s problem is not physical, it is often possible to make the drive usable again with software-level fixes alone.
These three fixes go from the least to the most drastic. Which one you need depends on the type of corruption. CHKDSK for file system errors on a partly readable Windows volume, TestDisk for missing partition recovery, and formatting if you simply want a clean, working drive again.
Method 1. Run CHKDSK on the Corrupted SSD
Windows has CHKDSK as its built-in file system repair tool. It targets file system corruption on the volume, fixing issues like errors when opening files, the message “the file or directory is corrupted and unreadable,” folders that show different contents on different days, or a drive that opens one moment and errors the next.
Follow these steps to run CHKDSK:
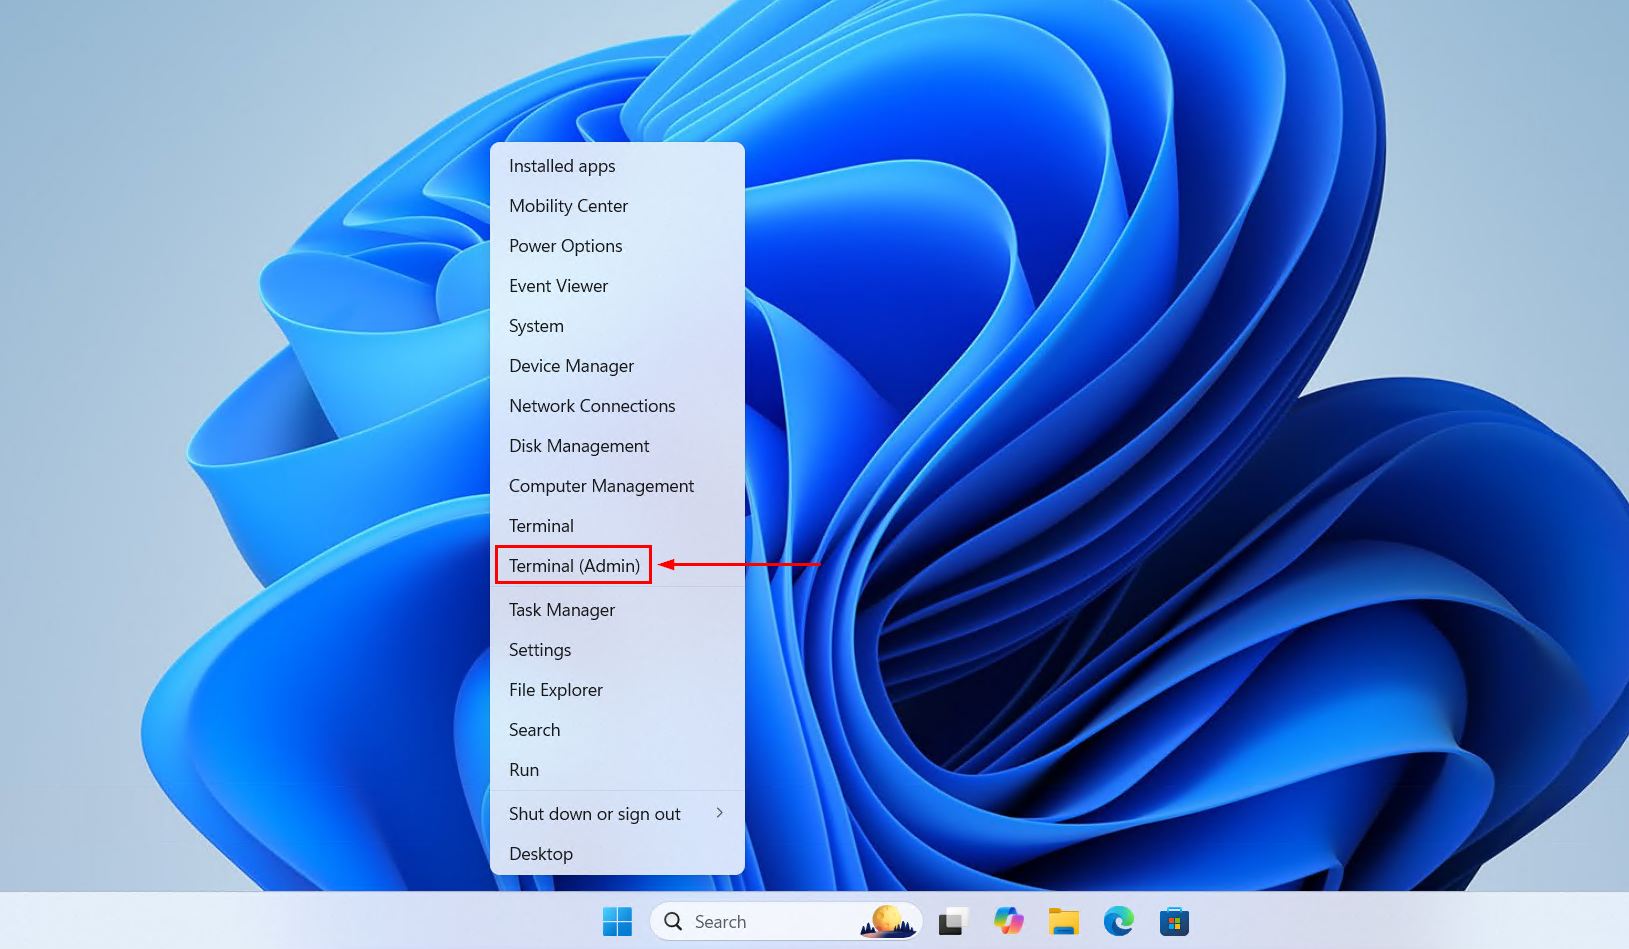
- Right-click Start and click Terminal (Admin).
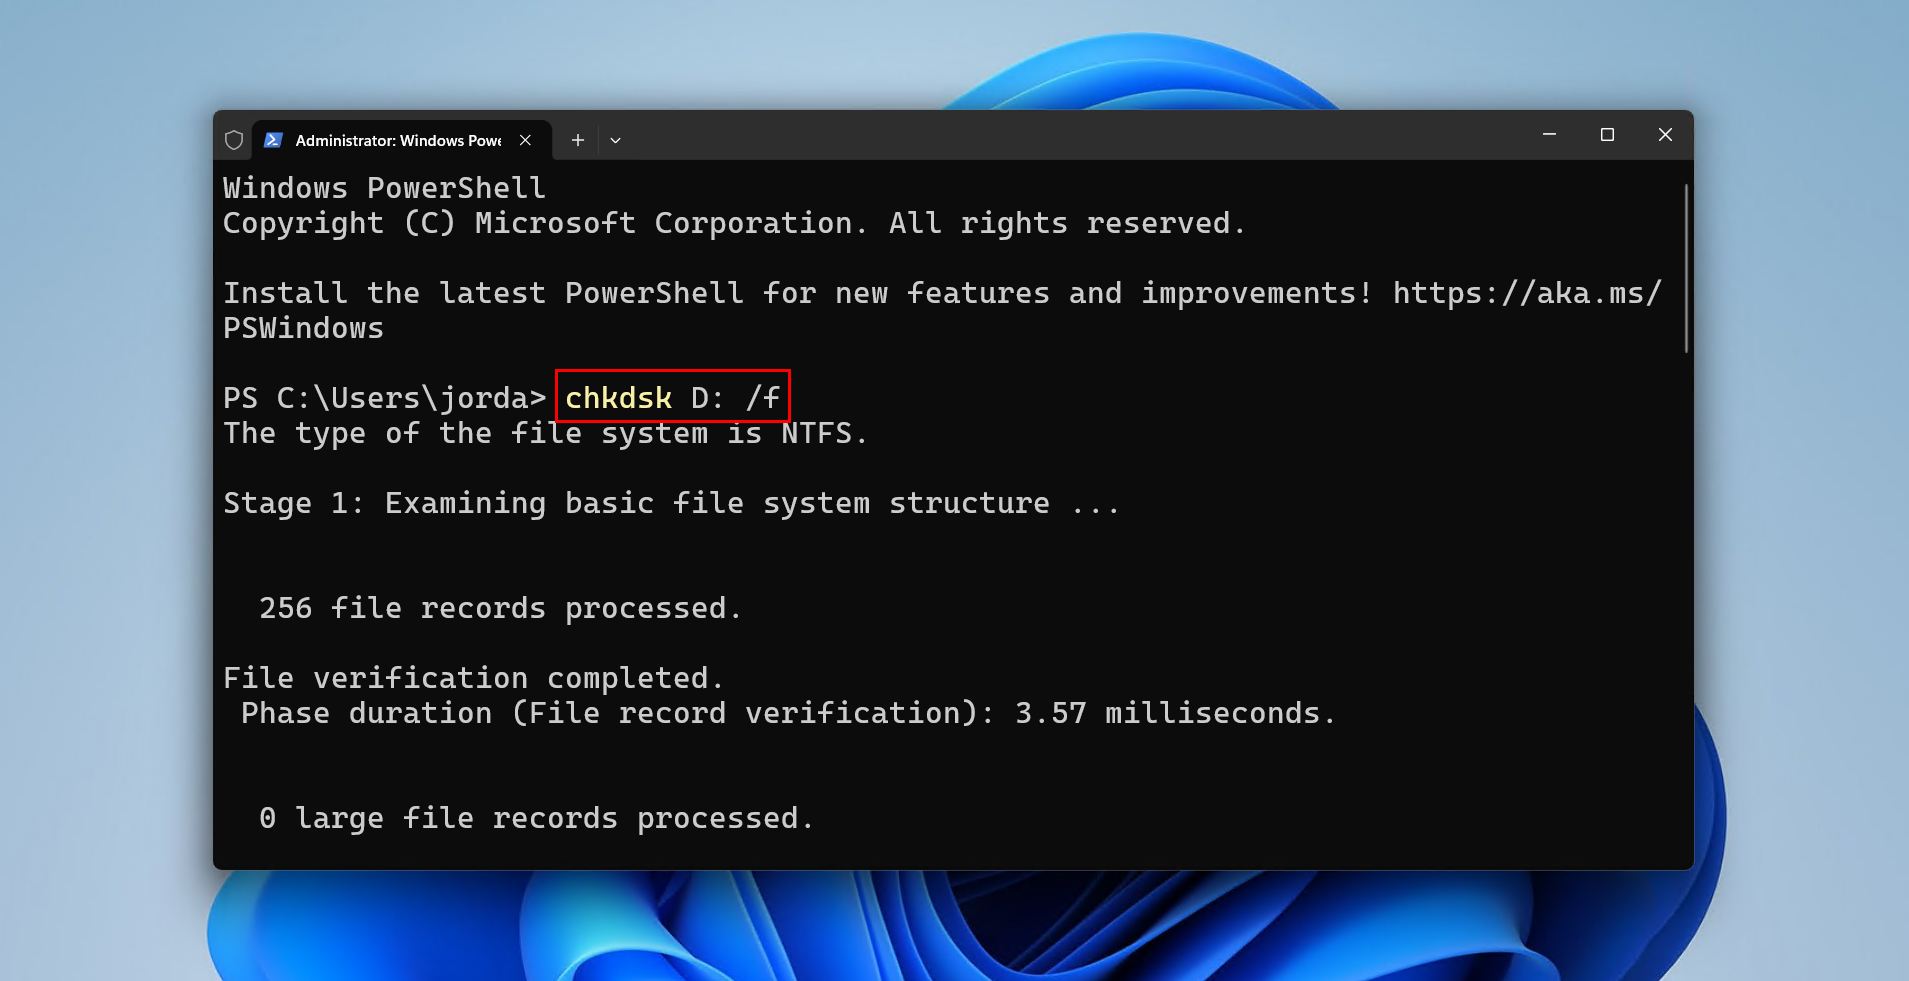
- Type chkdsk *: /f, replacing * with your SSD’s drive letter, and press Enter.
Method 2. Recover the Partition With TestDisk
TestDisk is a free partition recovery tool that can find partitions after they’ve become missing, RAW, unallocated, or otherwise unmountable. It scans the drive for traces of the old partition structure to locate the original partition, then writes it back to make the volume accessible again.
Here’s how to use TestDisk to restore a partition:
- Download and extract TestDisk. Open testdisk_win.exe.
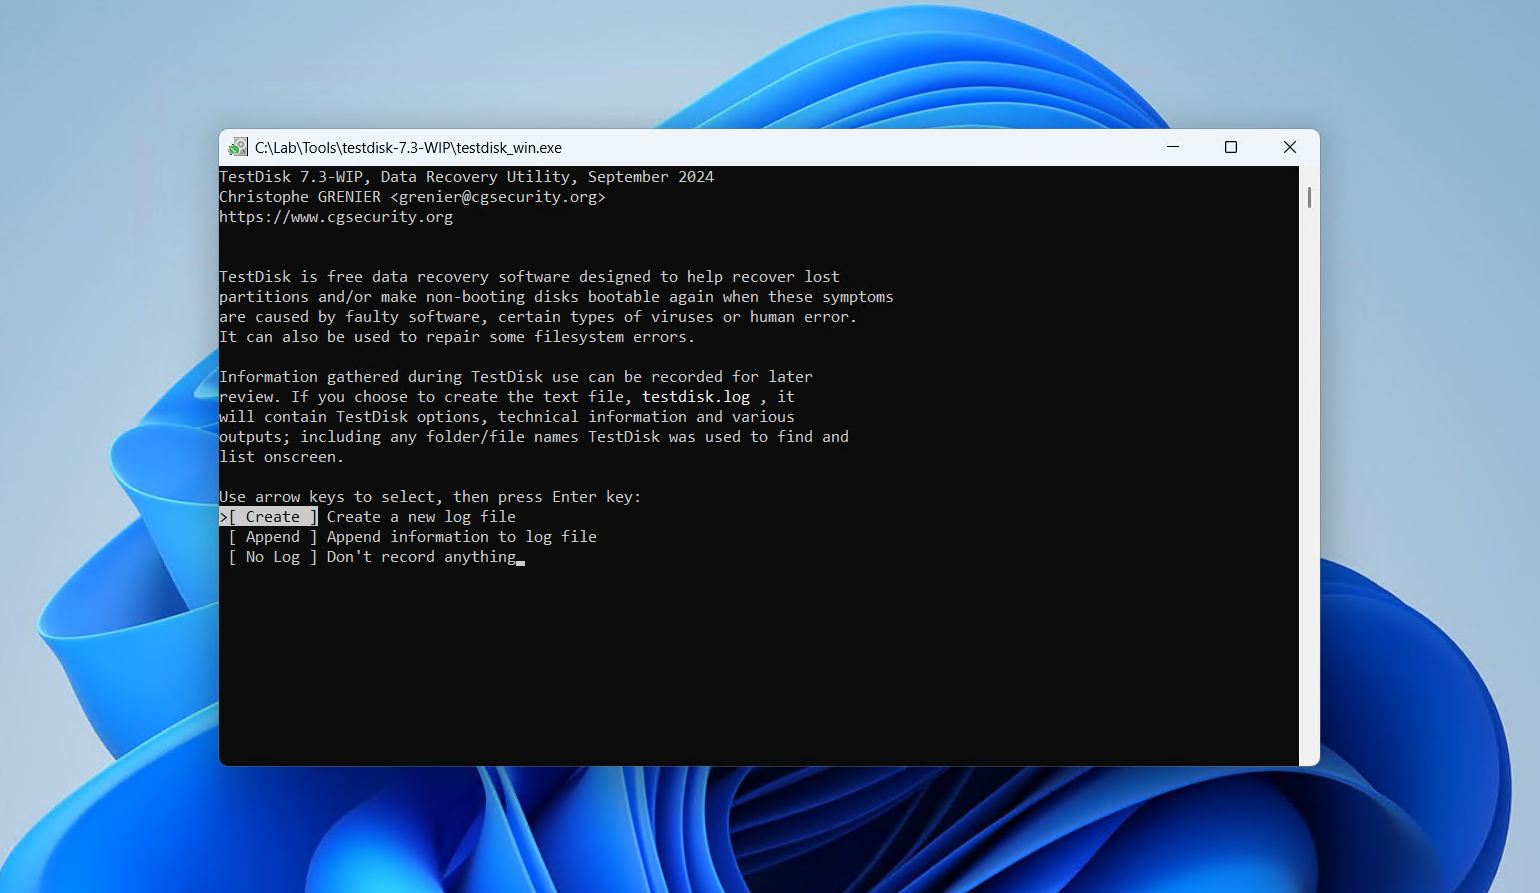
- Press Enter to create a log.
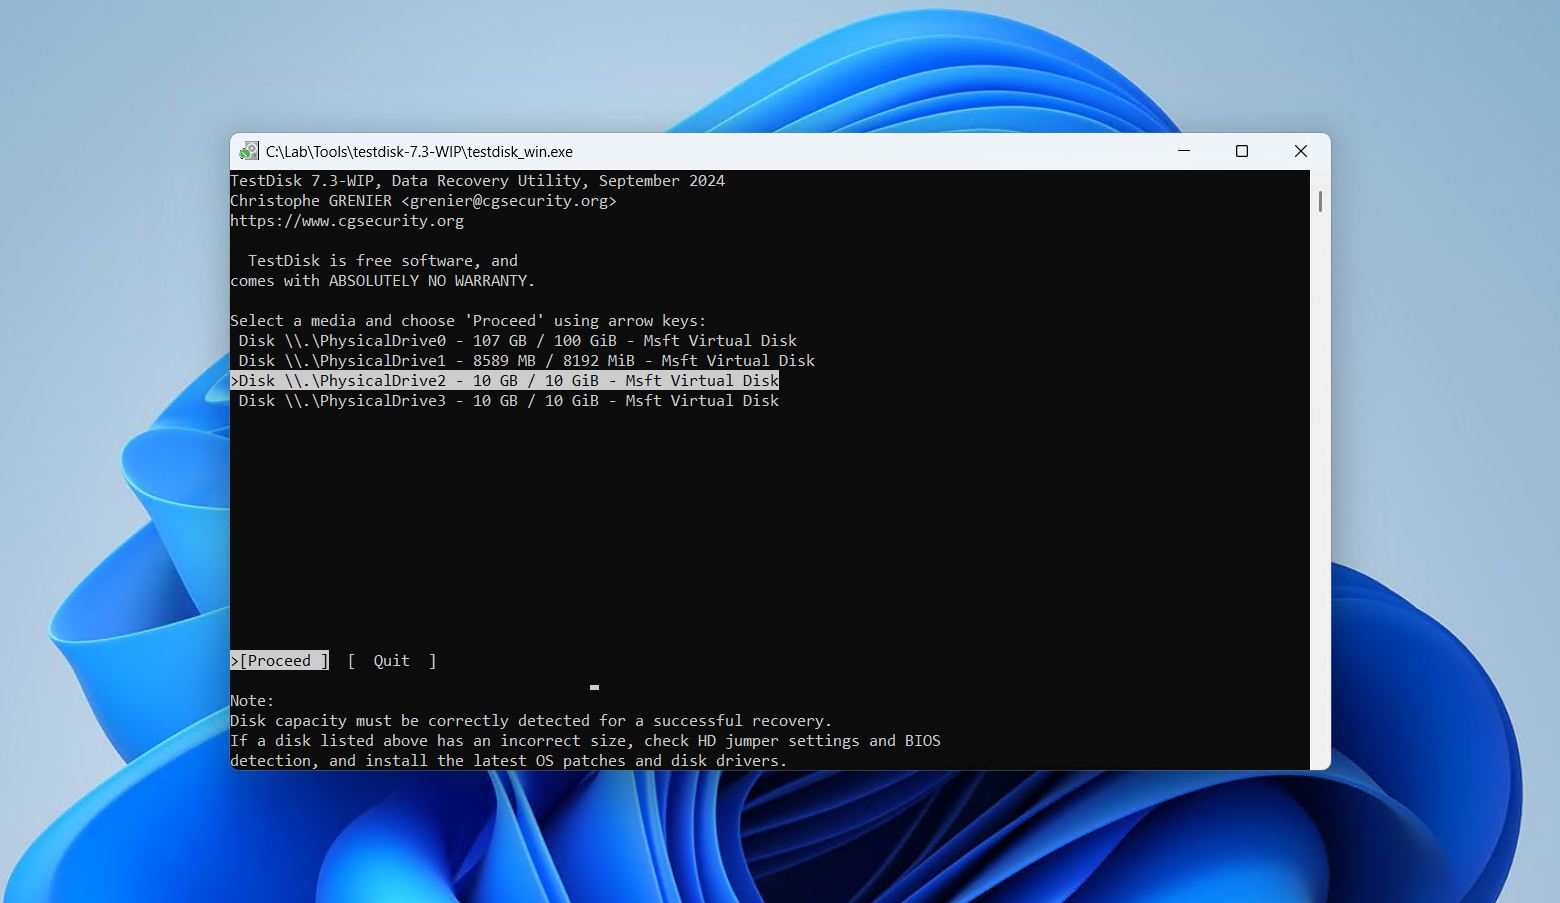
- Use the up and down arrow keys to highlight your SSD, then press Enter.
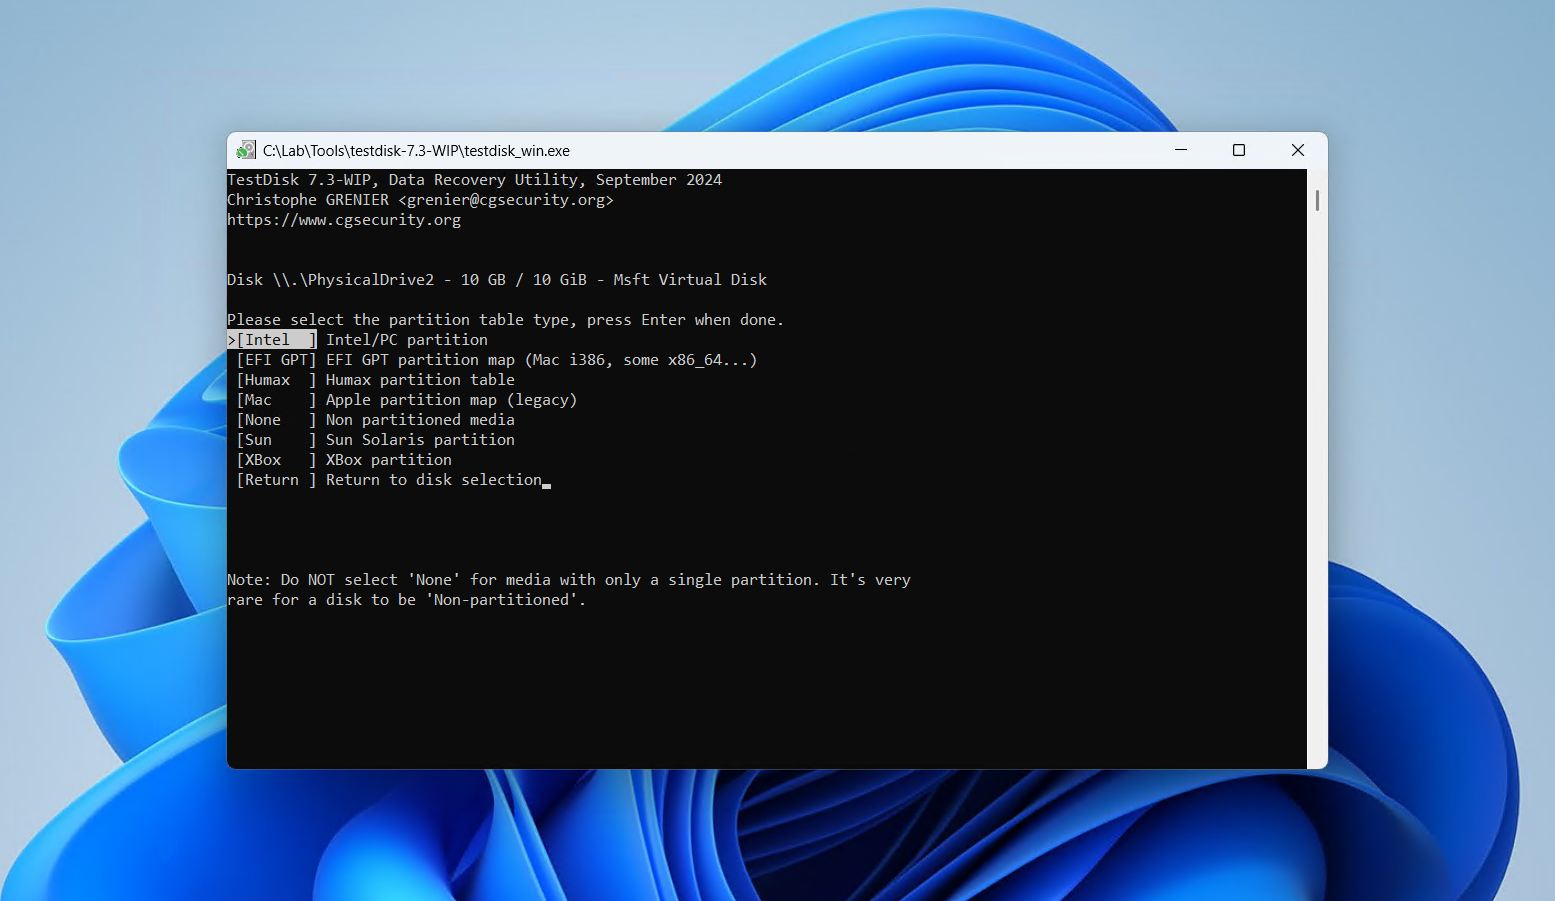
- Highlight your partition table type. TestDisk will try to detect it automatically. Press Enter.
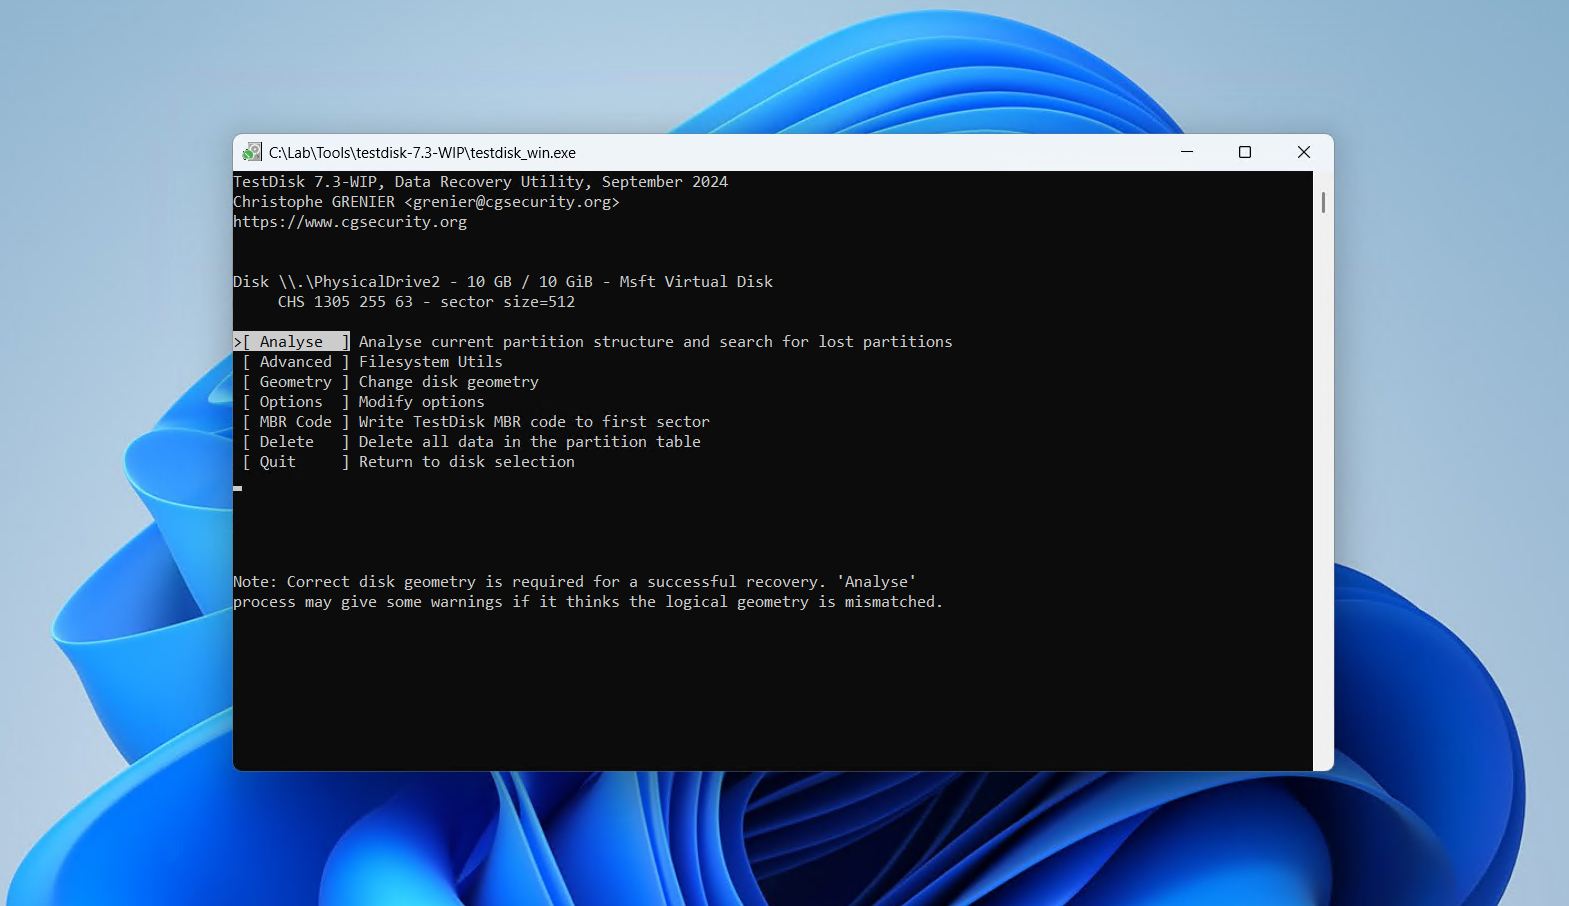
- Press Enter on the Analyse option.
- Press Enter on Quick Search to start the search.
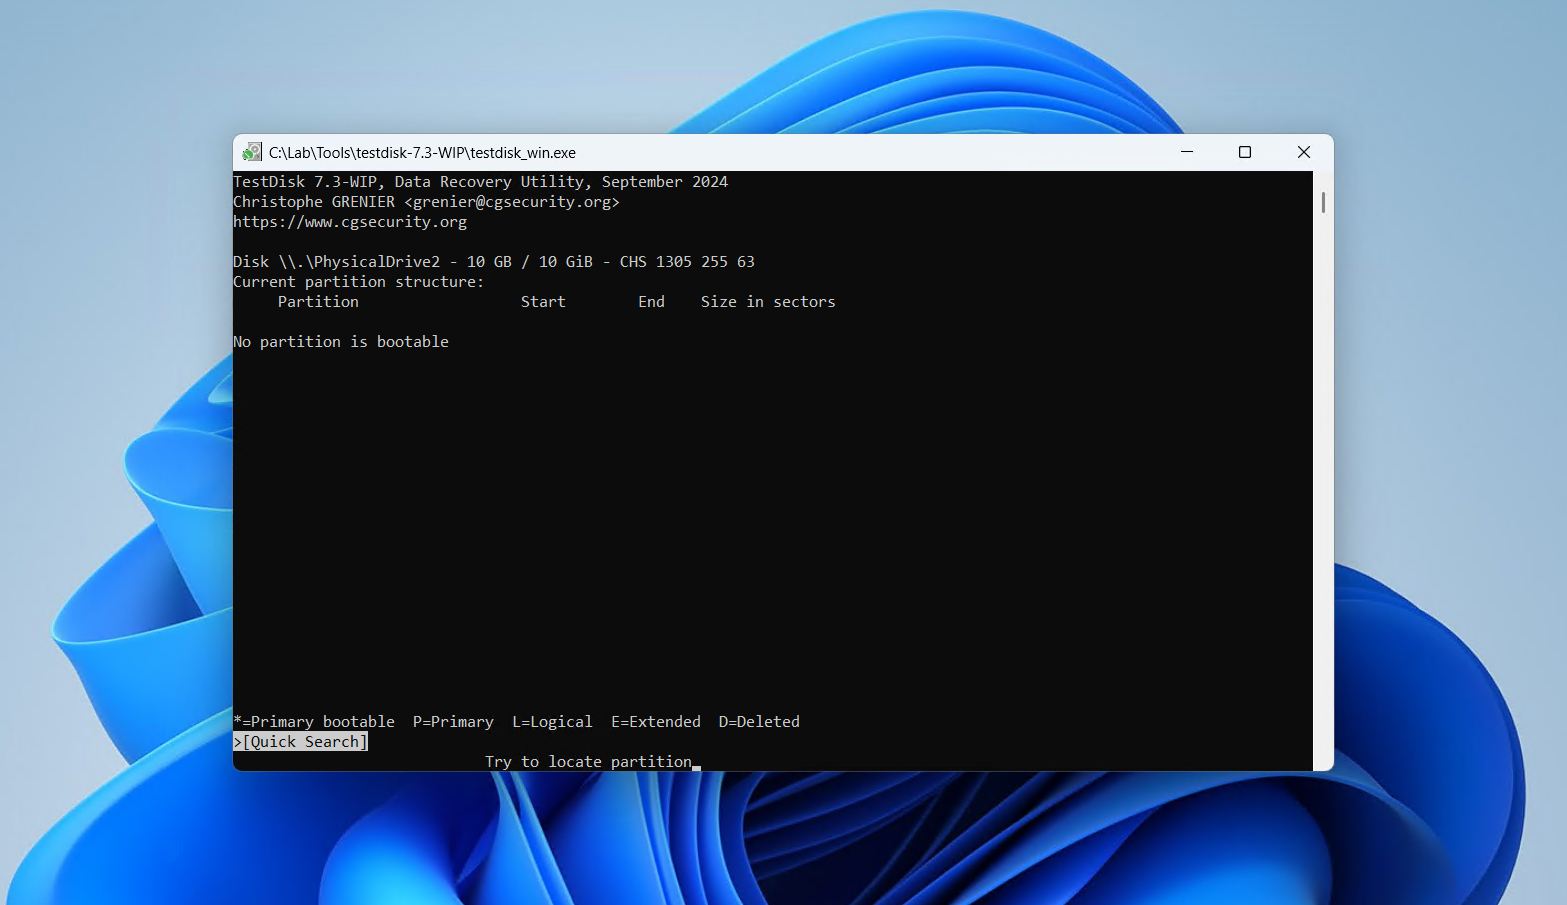
- Press Enter to continue.
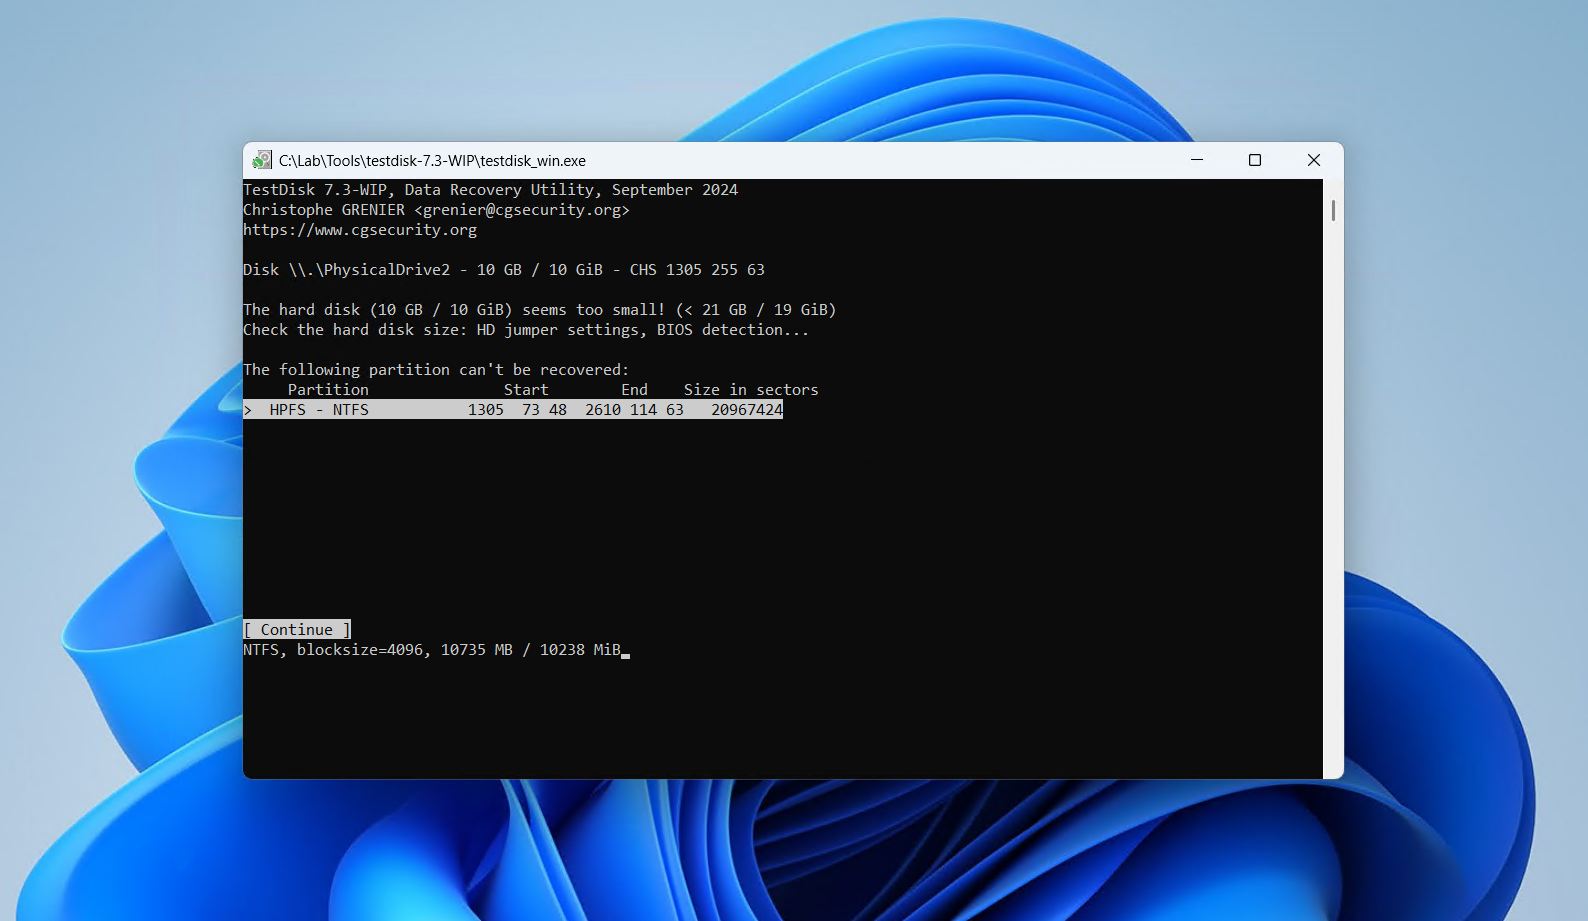
- Choose your partition, then press Enter. If it’s not appearing, you may need to perform a deeper search.
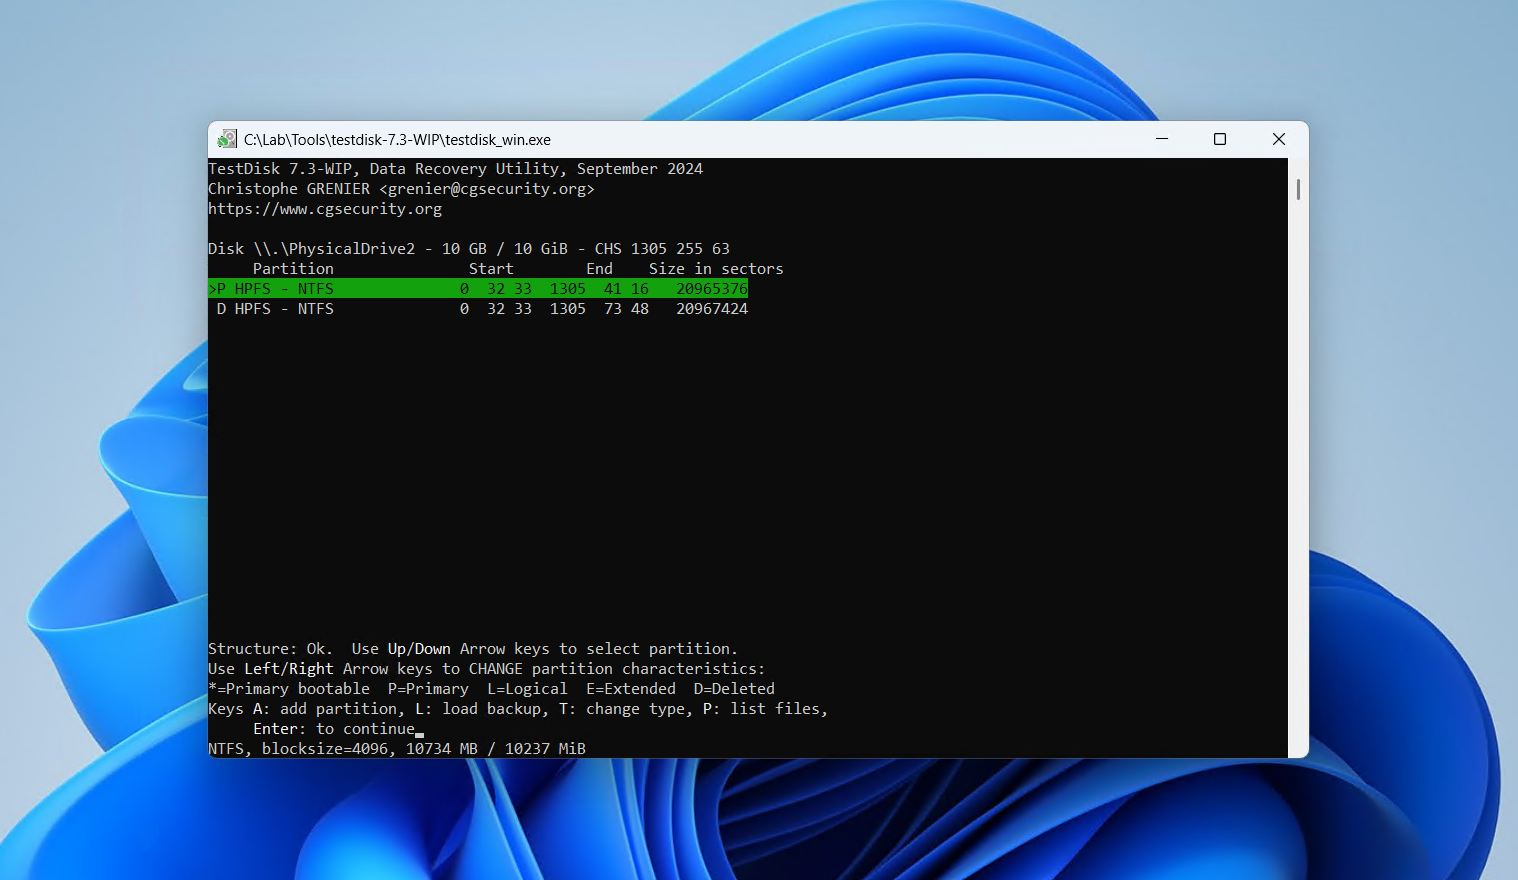
- Go to the Write option using the left and right arrow keys, then press Enter.
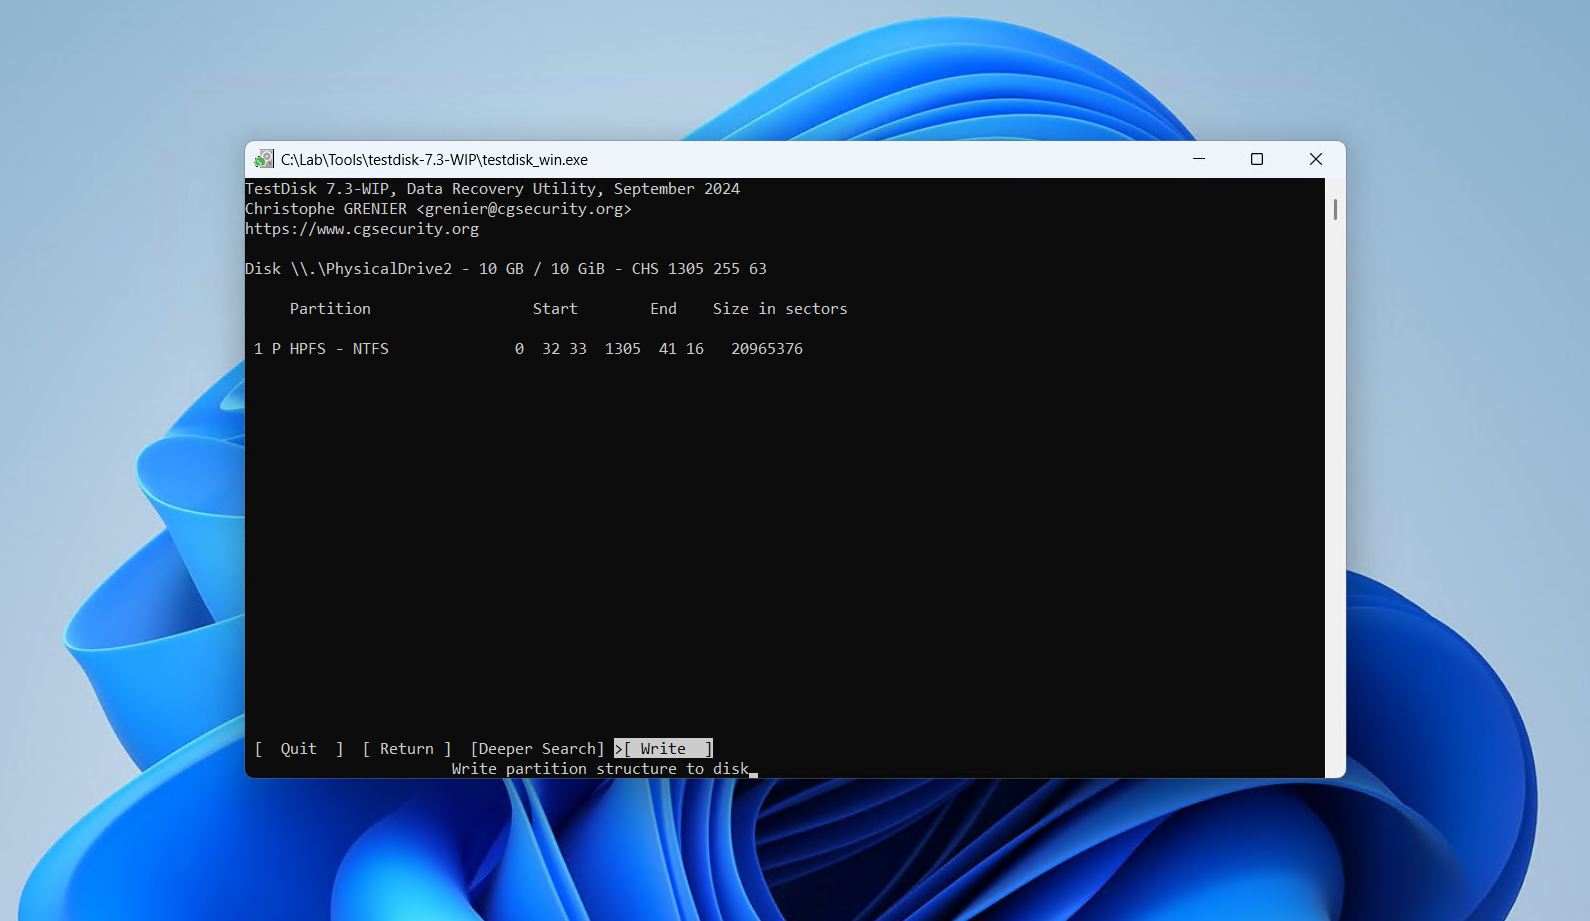
- Press Y to confirm the changes.
Method 3. Format the SSD
If your data is already recovered, formatting is the simplest and most reliable way to make a corrupted SSD usable again. A format creates a fresh, empty file system on the drive, which wipes out the corruption along with everything else. It resolves most non-physical issues in one step.
This is how you format an SSD:
- Right-click Start and click Disk Management.
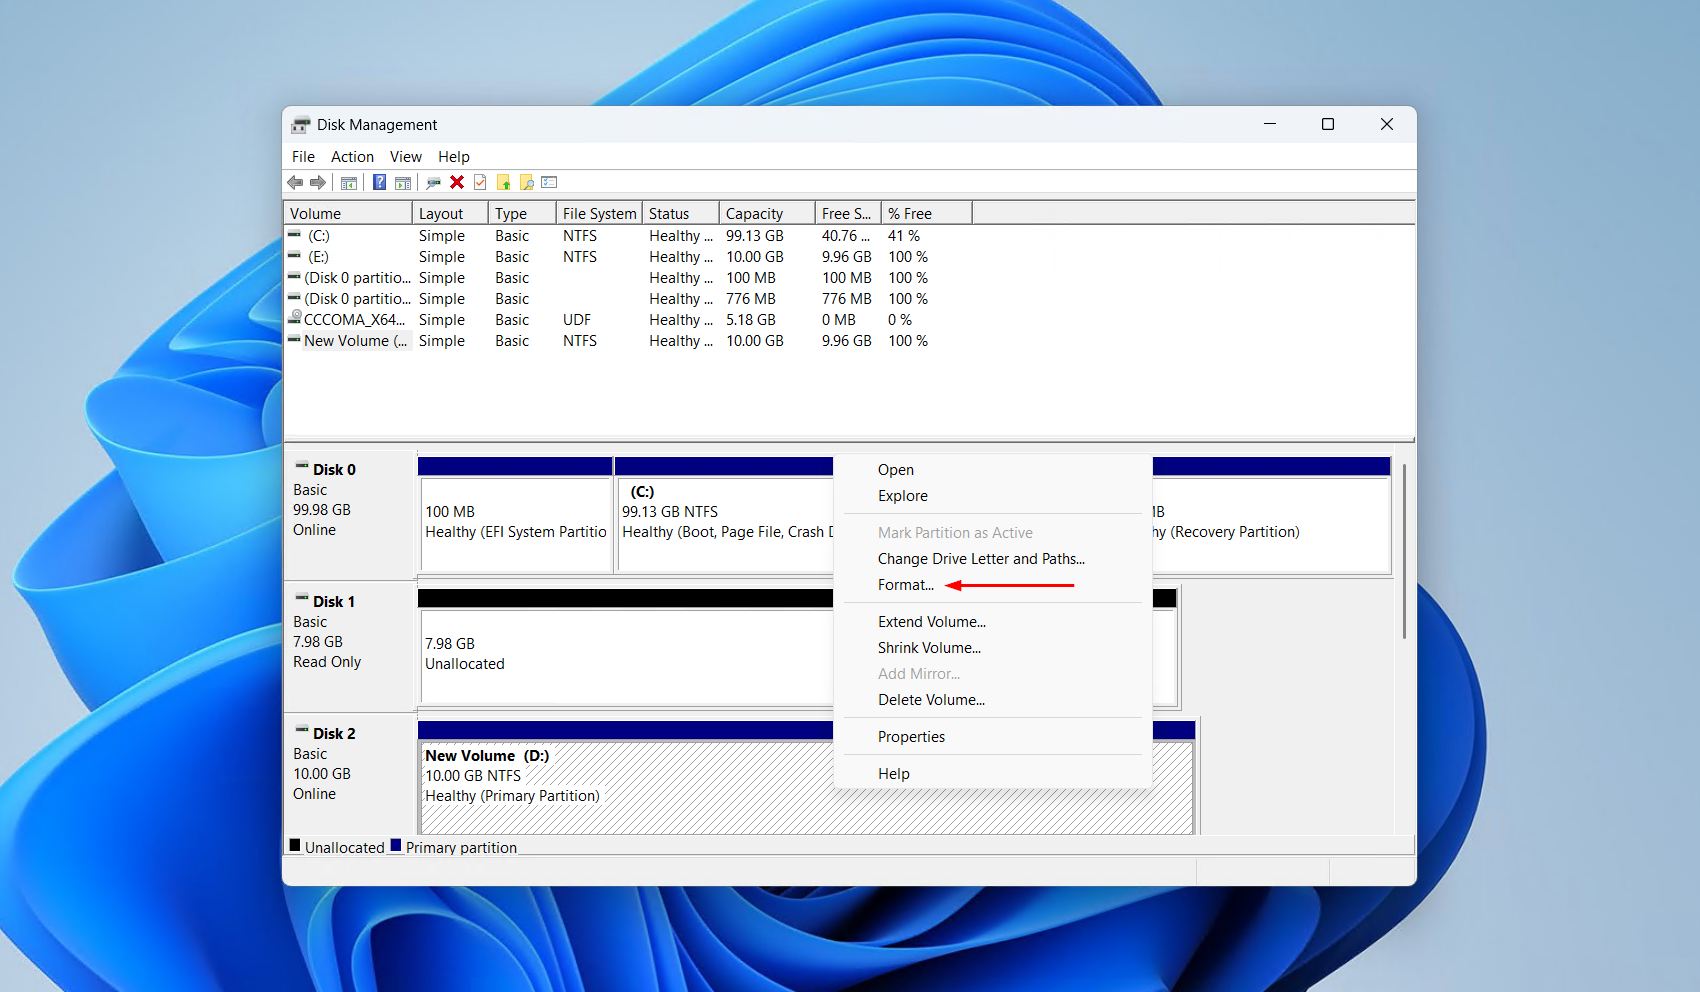
- Right-click the SSD’s partition, then click Format. If the SSD is showing as unallocated instead, you’ll need to click New Simple Volume.
- Choose a file system (NTFS for Windows, exFAT for cross-device use), give it a name, and make sure Perform a quick format is ticked. Click OK.
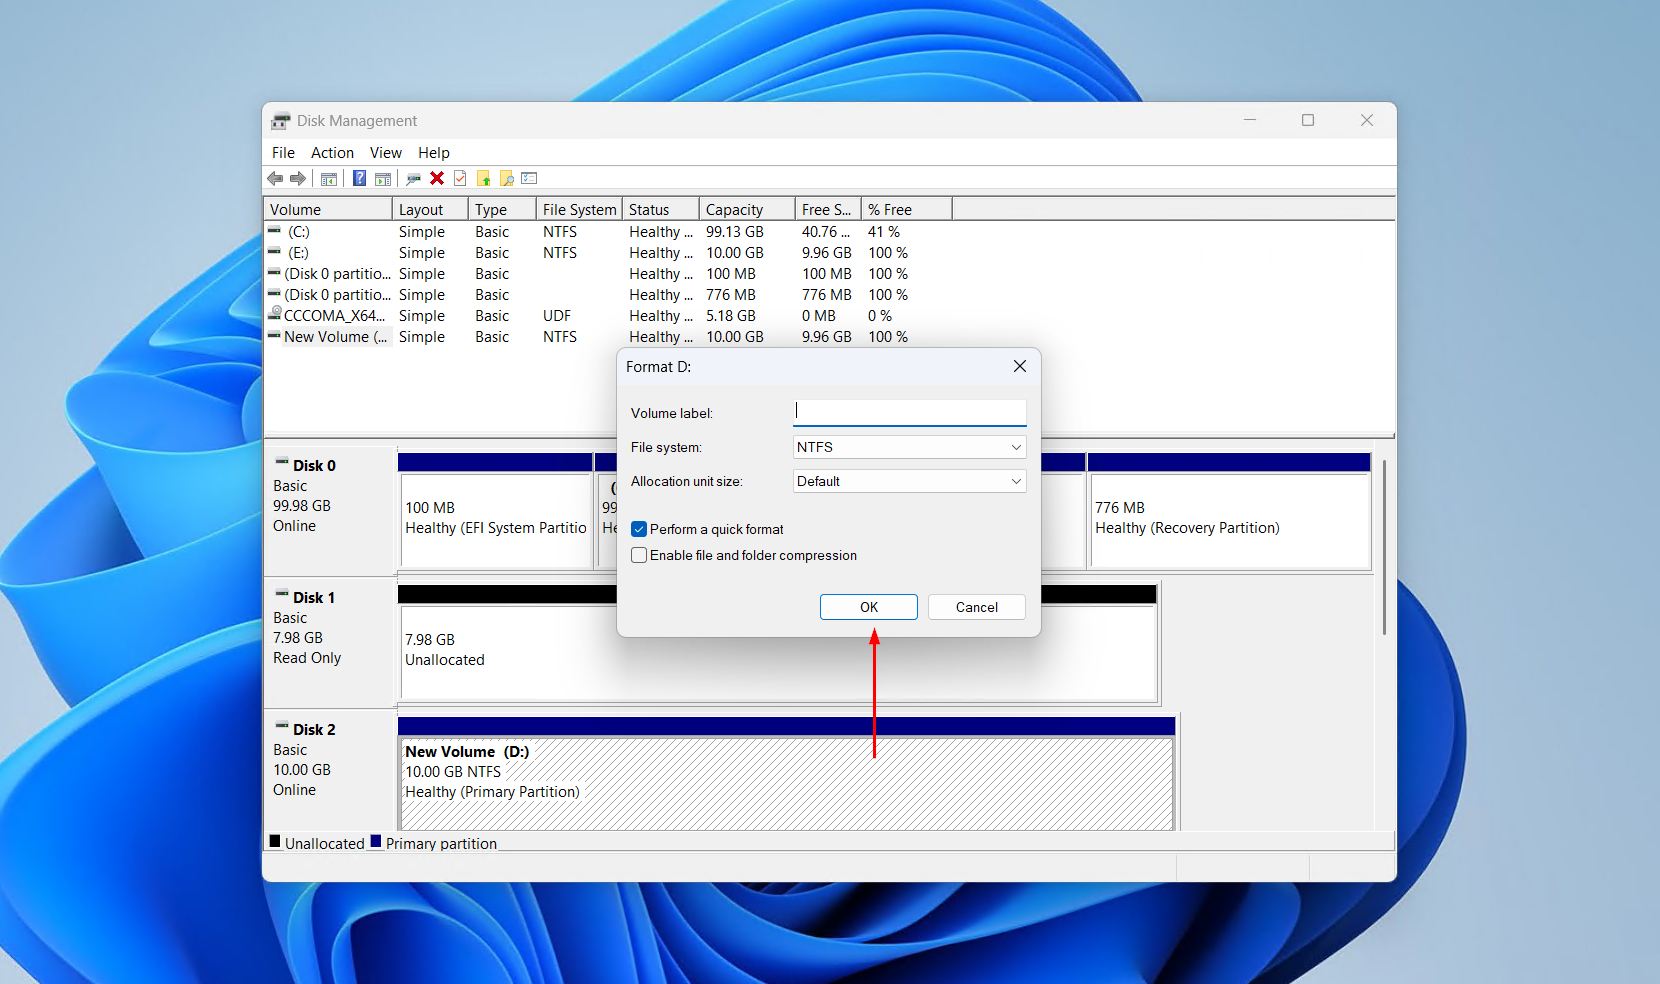
- Click OK again.
Is It Safe to Use an SSD After Fixing Corruption?
It’s normal to question the integrity of the SSD after corruption or failure. The question comes up constantly, like in this Superuser discussion on reusing an SSD after a failure, where the honest answer was: it depends on why the drive failed in the first place. Corruption caused by a one-off event, like a power cut mid-write or improper removal, says little about the drive’s health. However, corruption caused by failing memory cells tends to return.
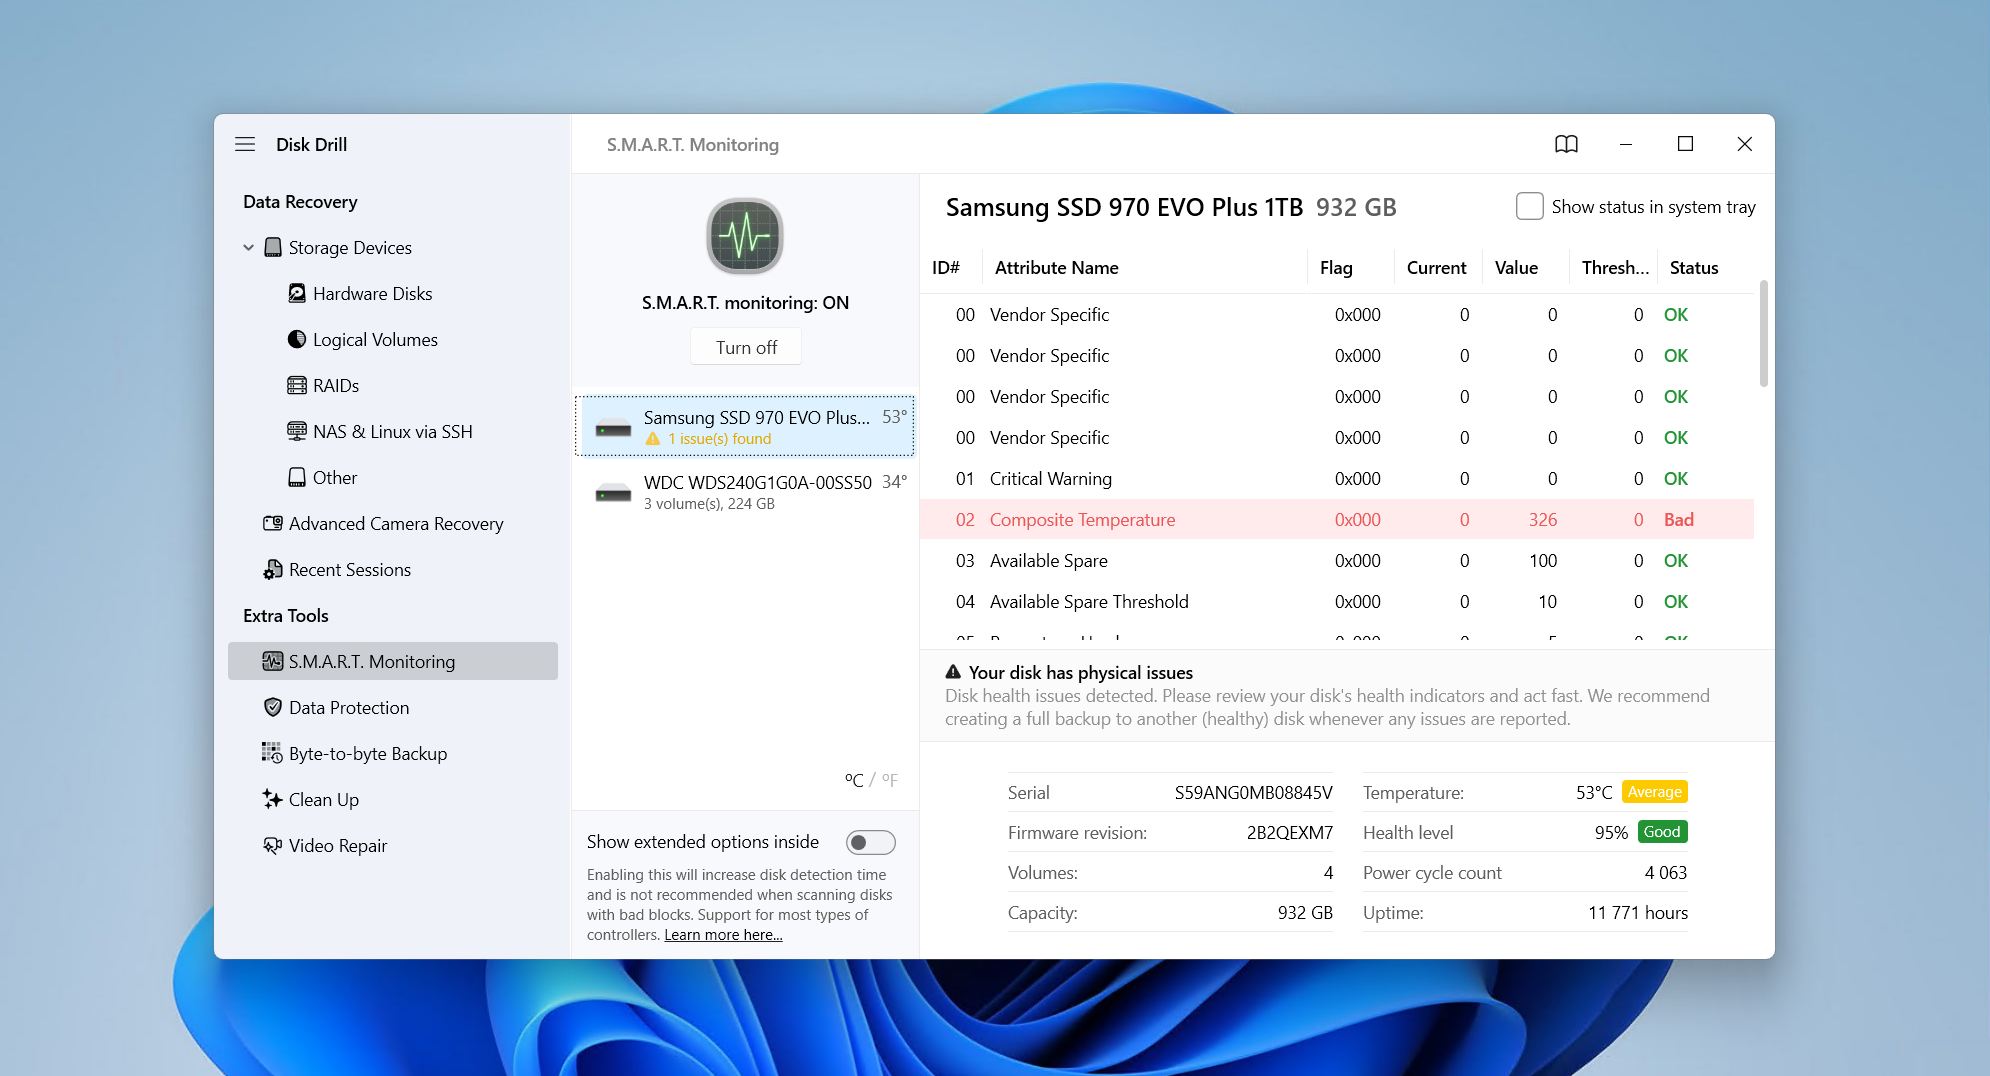
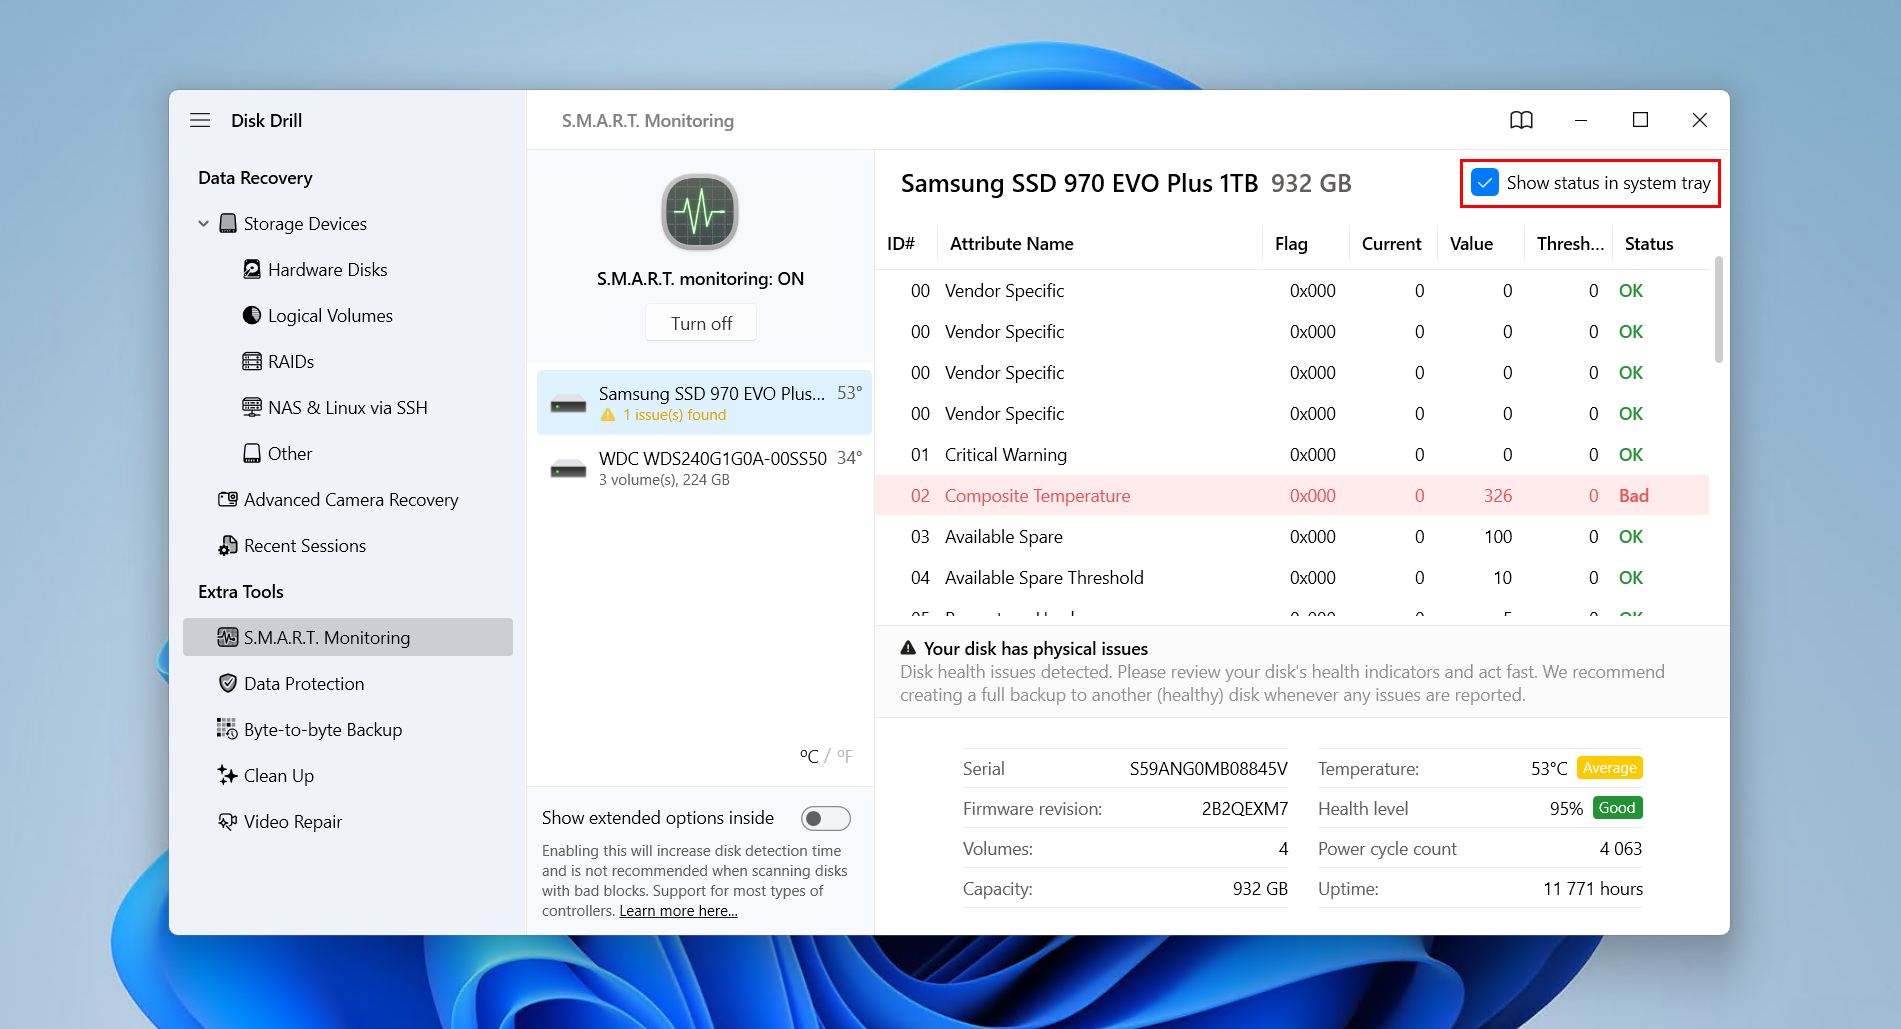
The practical answer is not to guess, but to watch. Every SSD keeps an internal health report called S.M.A.R.T., which logs errors and wear as they happen. Since you likely already installed Disk Drill for recovery, make use of its free S.M.A.R.T. monitoring feature to keep an eye on the drive:
- Open Disk Drill and go to the S.M.A.R.T. Monitoring tool.
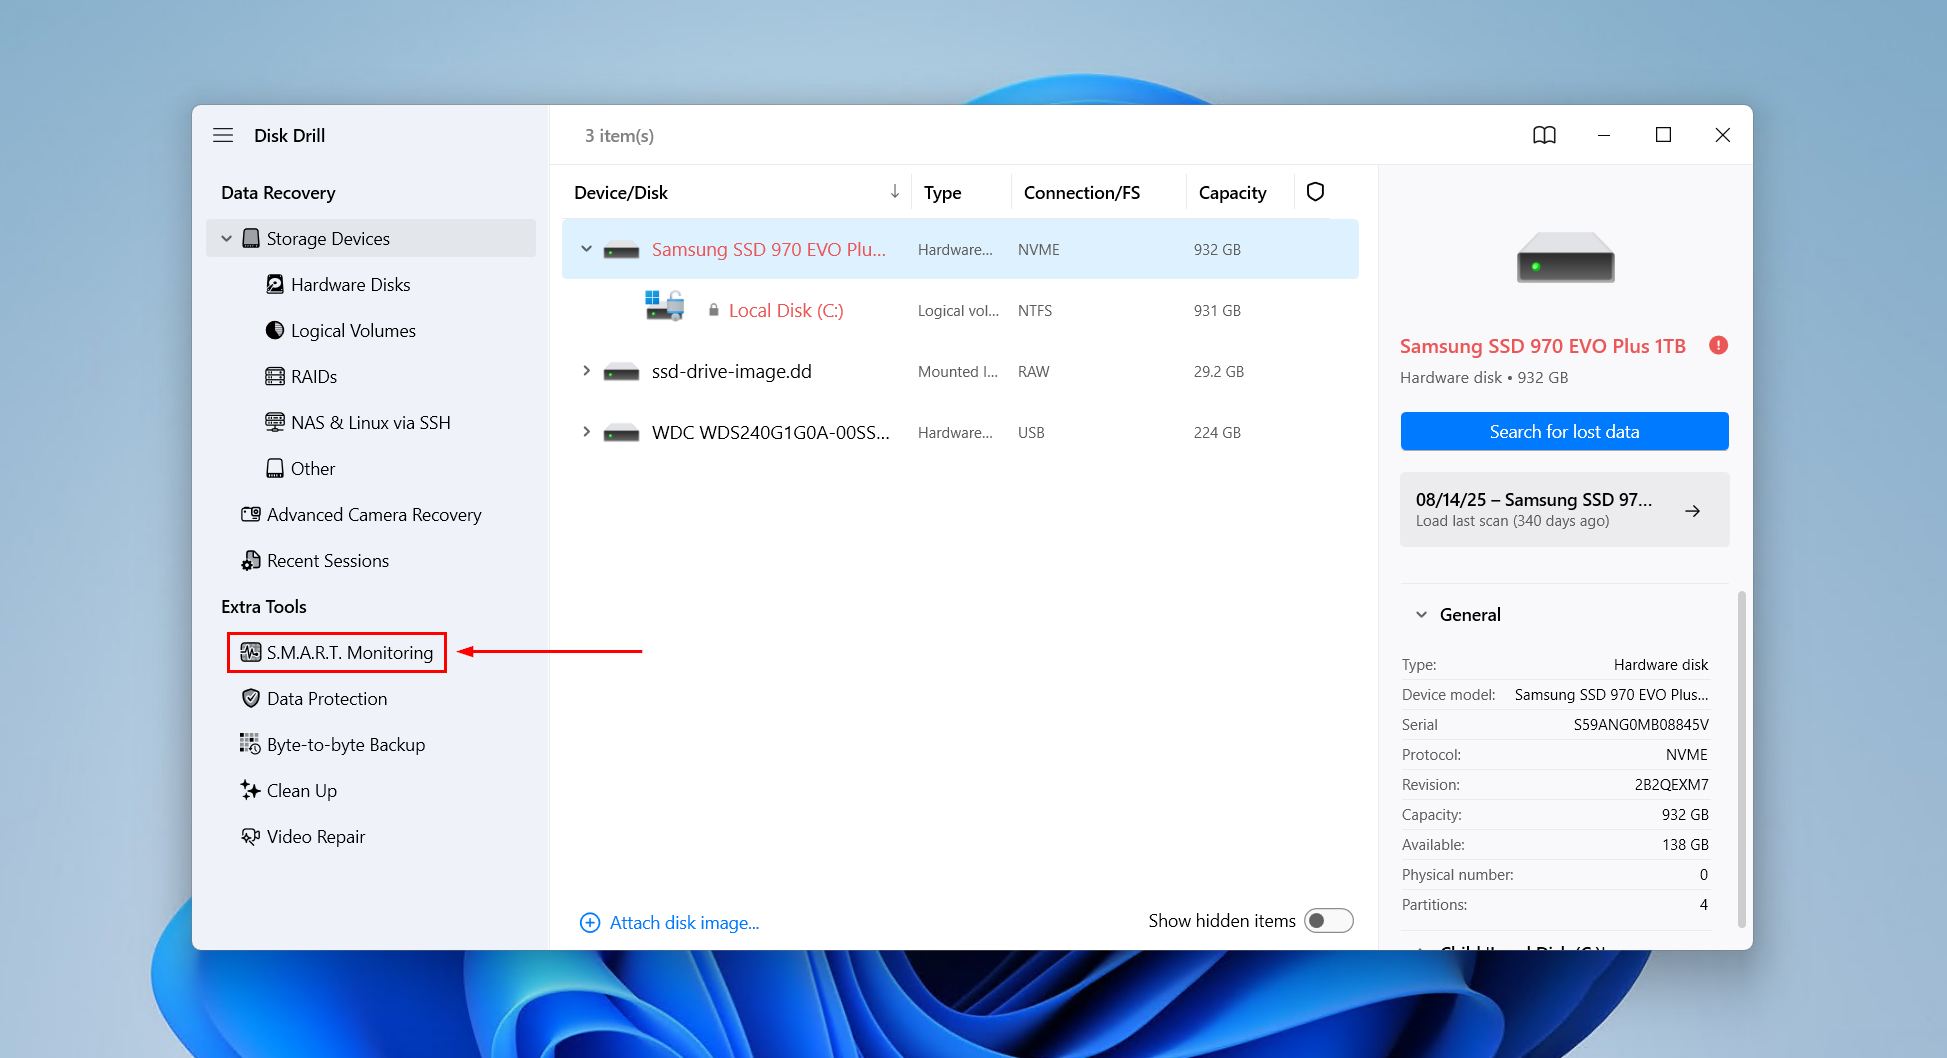
- Select your SSD and check for any concerning values.
- Enable Show status in system tray if you want it to run actively in the background.
A few things worth knowing about what S.M.A.R.T. can and cannot tell you:
- Use it to see warning signs. This includes reallocated sectors, media errors, high wear level, temperature problems, and overall health issues.
- It does not guarantee an SSD will not fail. Some failures happen so quickly that not even S.M.A.R.T. reports them in time. However, it can flag many problems before they become serious.
If S.M.A.R.T. reports warnings even after the SSD was “fixed,” treat the fix as temporary and replace the SSD or only use it for non-critical data.
Conclusion
Corrupt SSD recovery is very doable at home, so long as the SSD is showing up with the correct capacity and the issue isn’t physical. It really boils down to a four-stage process of making sure the SSD is detectable, scanning it with reliable recovery software, writing the recovered files to another drive, and then repairing the drive with fixes like CHKDSK, TestDisk, or a format.
Being realistic, not all problems fall within DIY territory. If the SSD keeps disconnecting, reports the wrong size, cannot be detected anywhere, or has physical damage, a professional data recovery service is the best option. DIY attempts in this case may actually add more risk. But when the drive is physically fine and the problem is logical corruption, recovery software is usually all you need.
FAQ
To tell if your SSD is corrupted, common signs include Windows suddenly asking you to format the drive, the SSD shows as RAW or unallocated in Disk Management, files throw “corrupted and unreadable” errors or disappear, or the drive is visible but will not open. If the SSD is corrupted and still shows its correct capacity in Disk Management, the corruption is likely logical and means the data may be recovered. A wrong size or 0 bytes points to a deeper hardware problem.
The key to recover data from a corrupted SSD without losing files is recovering the data first, then repairing the drive second. If the drive is unstable, this also includes creating a byte-to-byte drive image and working from that instead. Use reliable data recovery software like Disk Drill to recover the files and save them to another drive. Then, repair the SSD with CHKDSK, TestDisk, or a format.
Damaged SSD data recovery is DIY-friendly when the SSD is detected in Disk Management, it reports its correct capacity, and it is not physically failing (no disconnects, no overheating, no wrong-size readings). Basically, when the damage is only logical. The brand does not change the process, so the same steps work whether it is a Samsung SSD or any other make. When the drive isn’t detected anywhere, or shows physical symptoms, consult a recovery lab.
Windows 11 has no built-in tool to recover data from a corrupted SSD. Your best bet is to check whether File History, OneDrive, or another backup holds your files. Attempting to repair the damage before recovery is never recommended, and if you’re steadfast on doing repairs anyway, make sure you create an image of the drive first.
