Noticed some files have vanished from your Samsung SSD (solid-state drive)? Or maybe the drive has become inaccessible, and you’re no longer able to access your files. Worse yet, the presence of TRIM on SSDs means your data could be permanently cleared at any moment.
It is possible to recover the data, but in order to do so safely, you must follow a specific workflow. Stop all write operations, create a byte-to-byte image of the drive, and then scan it with a Samsung SSD recovery tool.
When Does DIY Samsung SSD Recovery Actually Work?
Samsung SSD data recovery can be done at home with really good odds in most cases, so long as the drive is not physically damaged. While TRIM will permanently erase files deleted either deliberately or via formatting, there are many instances where it won’t run at all. For example, file system corruption, a partition turning RAW, or the accidental deletion of a partition (without formatting) do not trigger TRIM, since the operating system (OS) cannot determine which blocks are free. In these cases, your chances of recovering data from the SSD are very good if you act quickly and correctly.
Here are two preliminary steps you can take to significantly improve your odds of recovering the data:
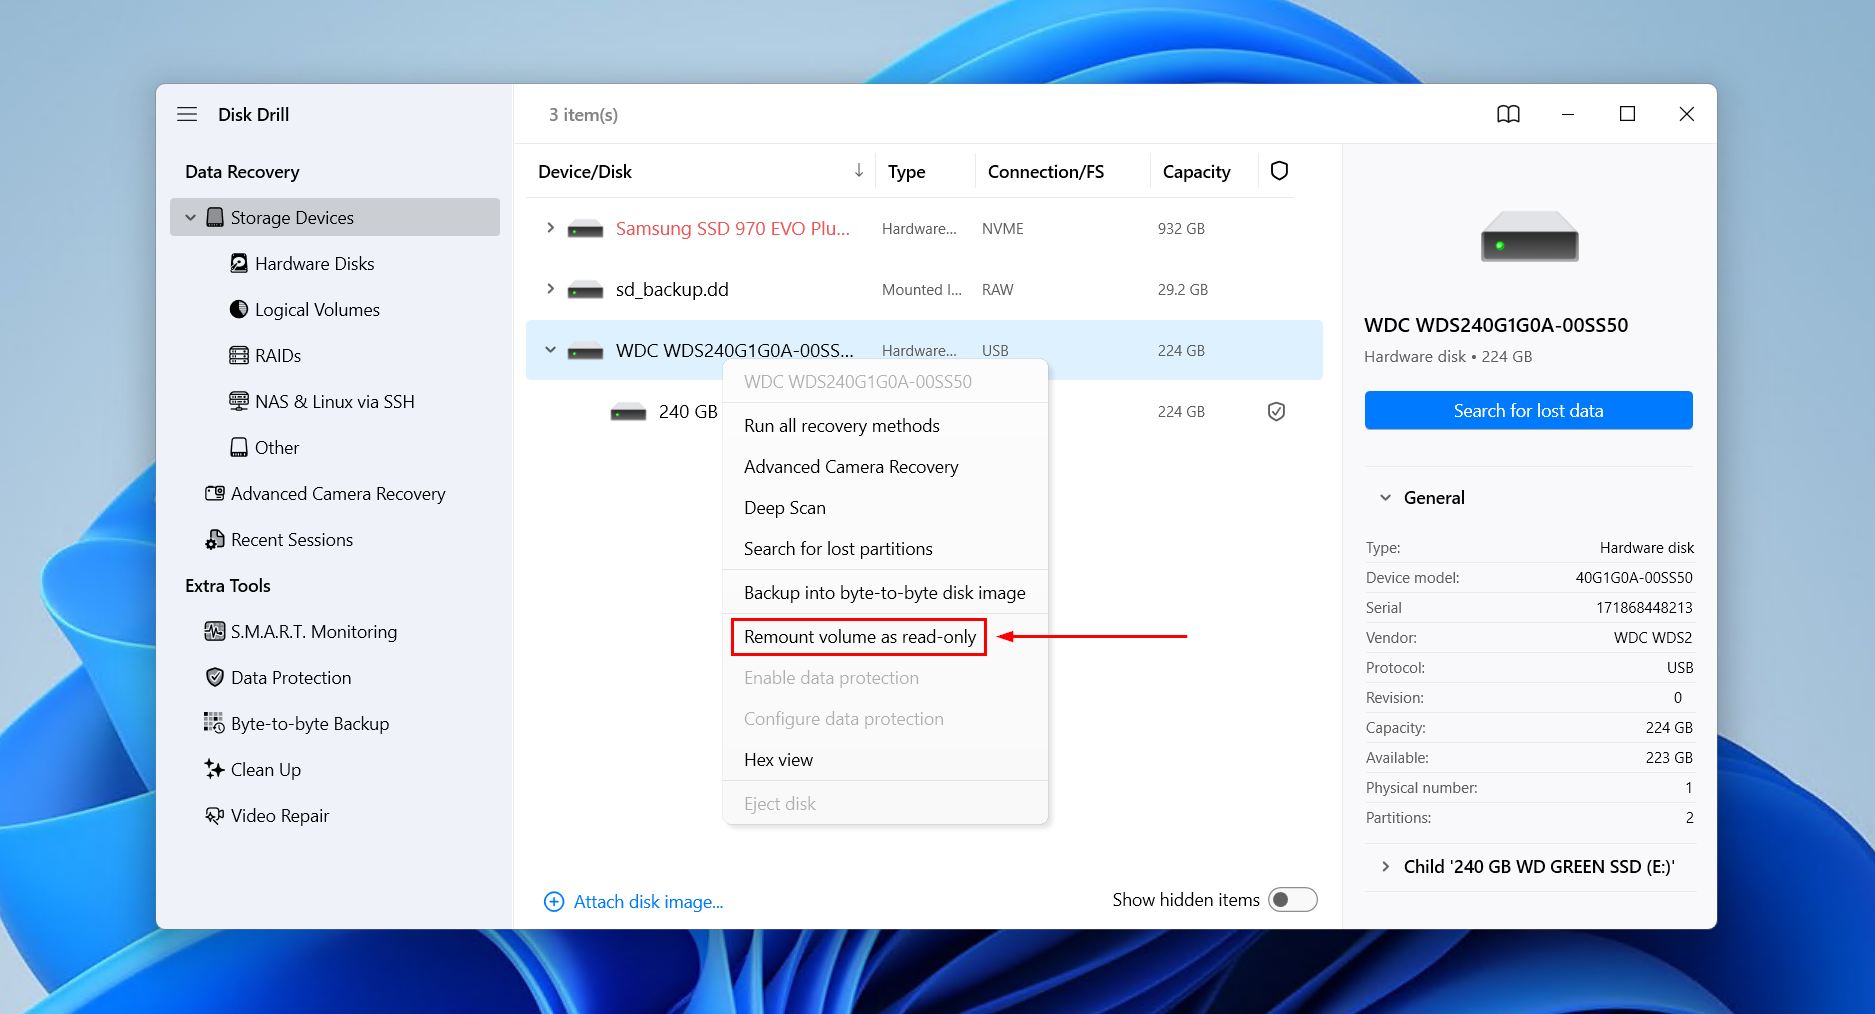
- Switch the SSD to read-only mode. Typically, this is done by modifying the disk’s attributes with DiskPart, but it’s much easier to do with software like Disk Drill (which we demonstrate below). Read-only mode prevents new data from being written to the SSD, which would otherwise overwrite the data you’re trying to recover.
- Create a byte-to-byte disk image. An image of the entire SSD in its current state preserves the data, so that even if TRIM, drive failure, or background processes erase the data, you can still work from the image. Disk Drill can do this too, or with dedicated software like Macrium Reflect.
We’ll show you how to make the SSD read-only and create a backup in the next set of steps, which encompasses the entire recovery workflow from start to finish.
How to Use Samsung SSD Data Recovery Software
Acting quickly is key to recovering as much data as possible. To do this, you need to scan the drive with SSD data recovery software. We use Disk Drill for this task, as it comes with all the necessary tools to scan the SSD, see what data is present, and recover it, whether it’s Windows or macOS.
Step 1: Download and Open Disk Drill
Download, install, and open Disk Drill. Do not install Disk Drill to the same SSD you’re recovering data from, as this risks corrupting data beyond recovery (another reason why we make the drive read-only).
Step 2: Create a Byte-to-Byte Backup (Optional)
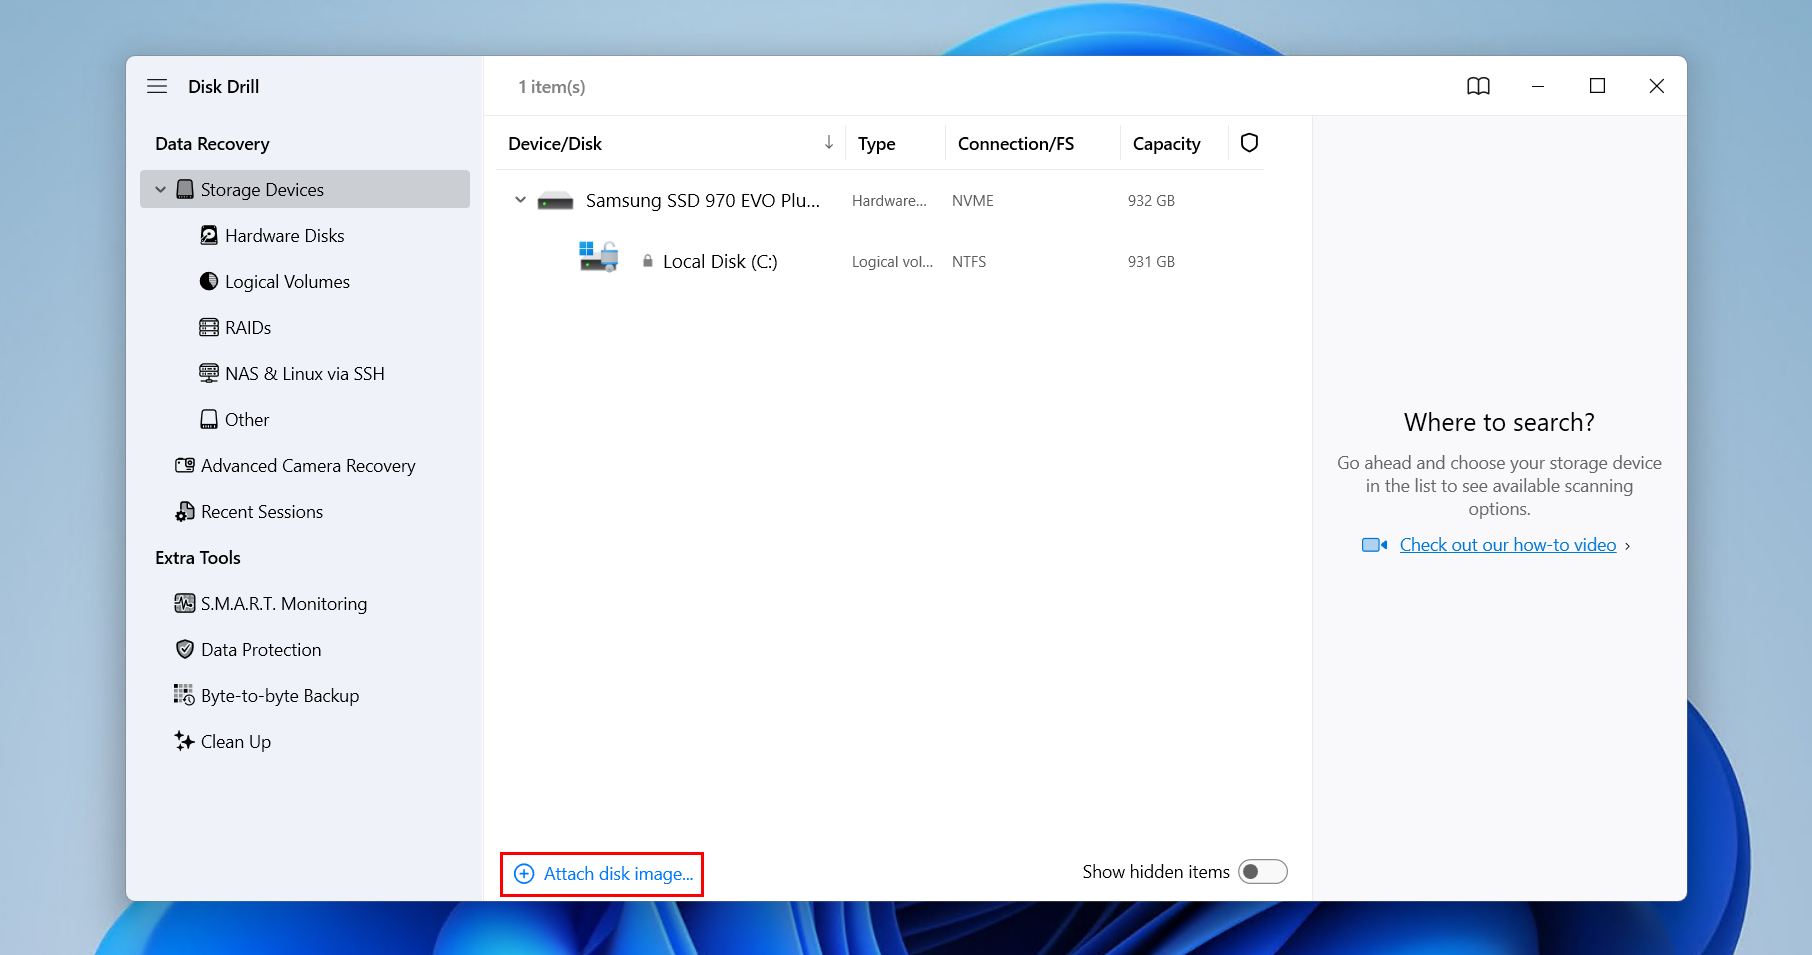
If you have the means, creating a backup of the drive is highly recommended. However, this step is optional in case you don’t have time or sufficient space to handle a backup. Click Byte-to-byte Backup in the left pane. From there, you can select your Samsung SSD, then click Create backup. Give the backup a name, choose where it will be stored, then click OK. You can then return to the Storage Devices screen and add the byte-to-byte image to Disk Drill using the Assign disk image option, making it a scannable option.
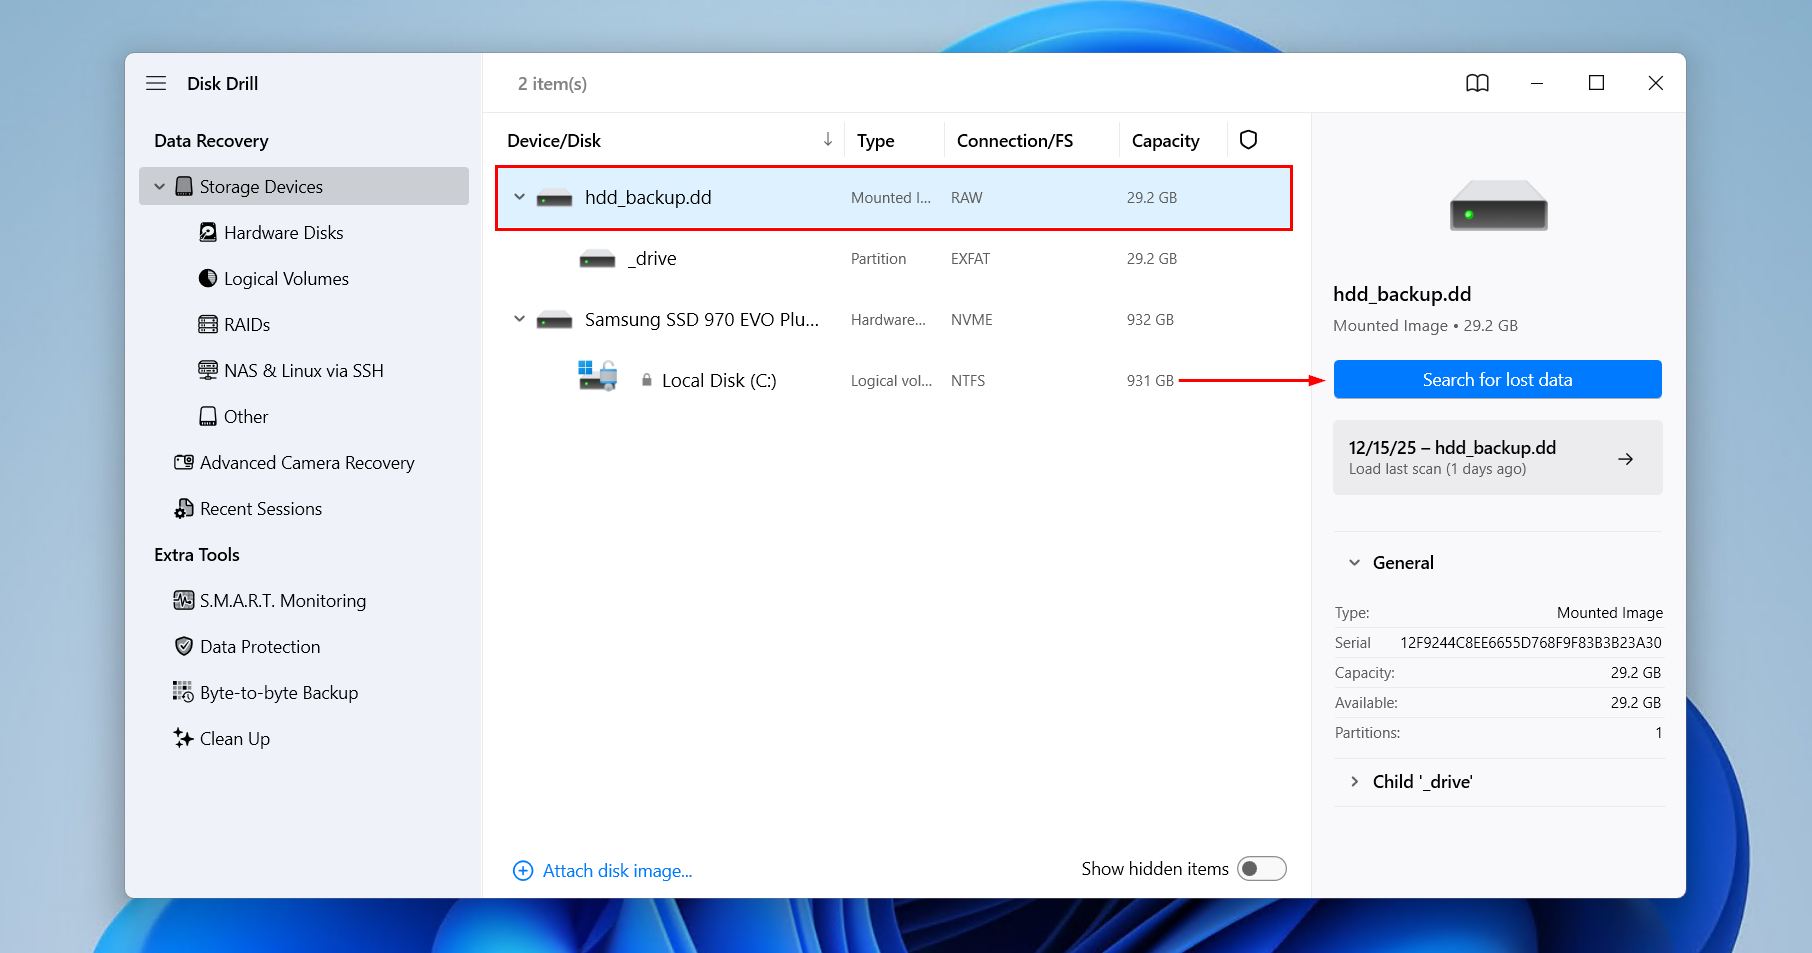
Step 3: Scan for Lost Data
Select your SSD or created image and click Search for lost data. From there, if prompted, click Universal Scan to begin an all-encompassing scan that searches for all files, utilizing all possible scanning methods. Advanced Camera Recovery is reserved for recovering fragmented videos shot by cameras and drones. If your drive isn’t appearing, confirm all cables and ports are working and firmly connected.
Step 4: Preview Recovery Results
Preview what files were found and select the ones you want to recover. Quick tip: Any file that can be previewed is recoverable. Your data will be broken down into three categories:
- Existing for files that are still logically present, including those that are visible but refusing to open.
- Deleted or lost for files marked as ready for rewriting by the file system but still locatable with metadata.
- Reconstructed for files that were rebuilt by signature when file system metadata was missing.
To make your search easier, you can also use the built-in filter options to organize data by file type, size, modified date, or recovery chance.
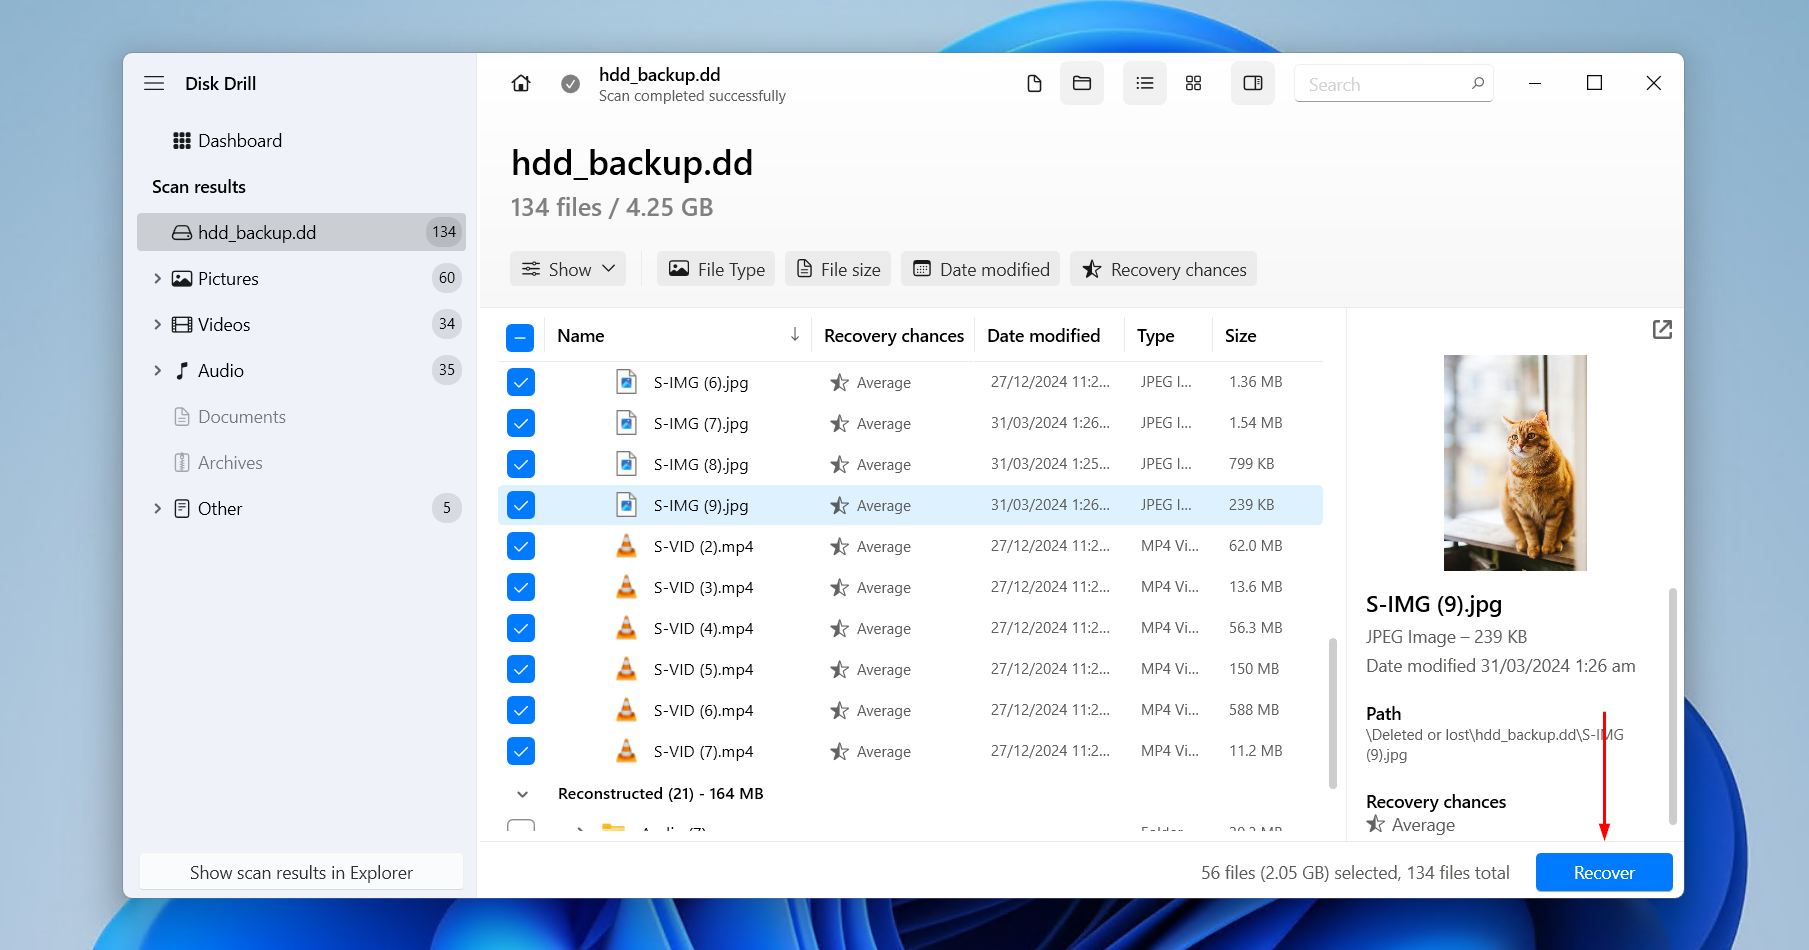
Step 5: Recover Found Files
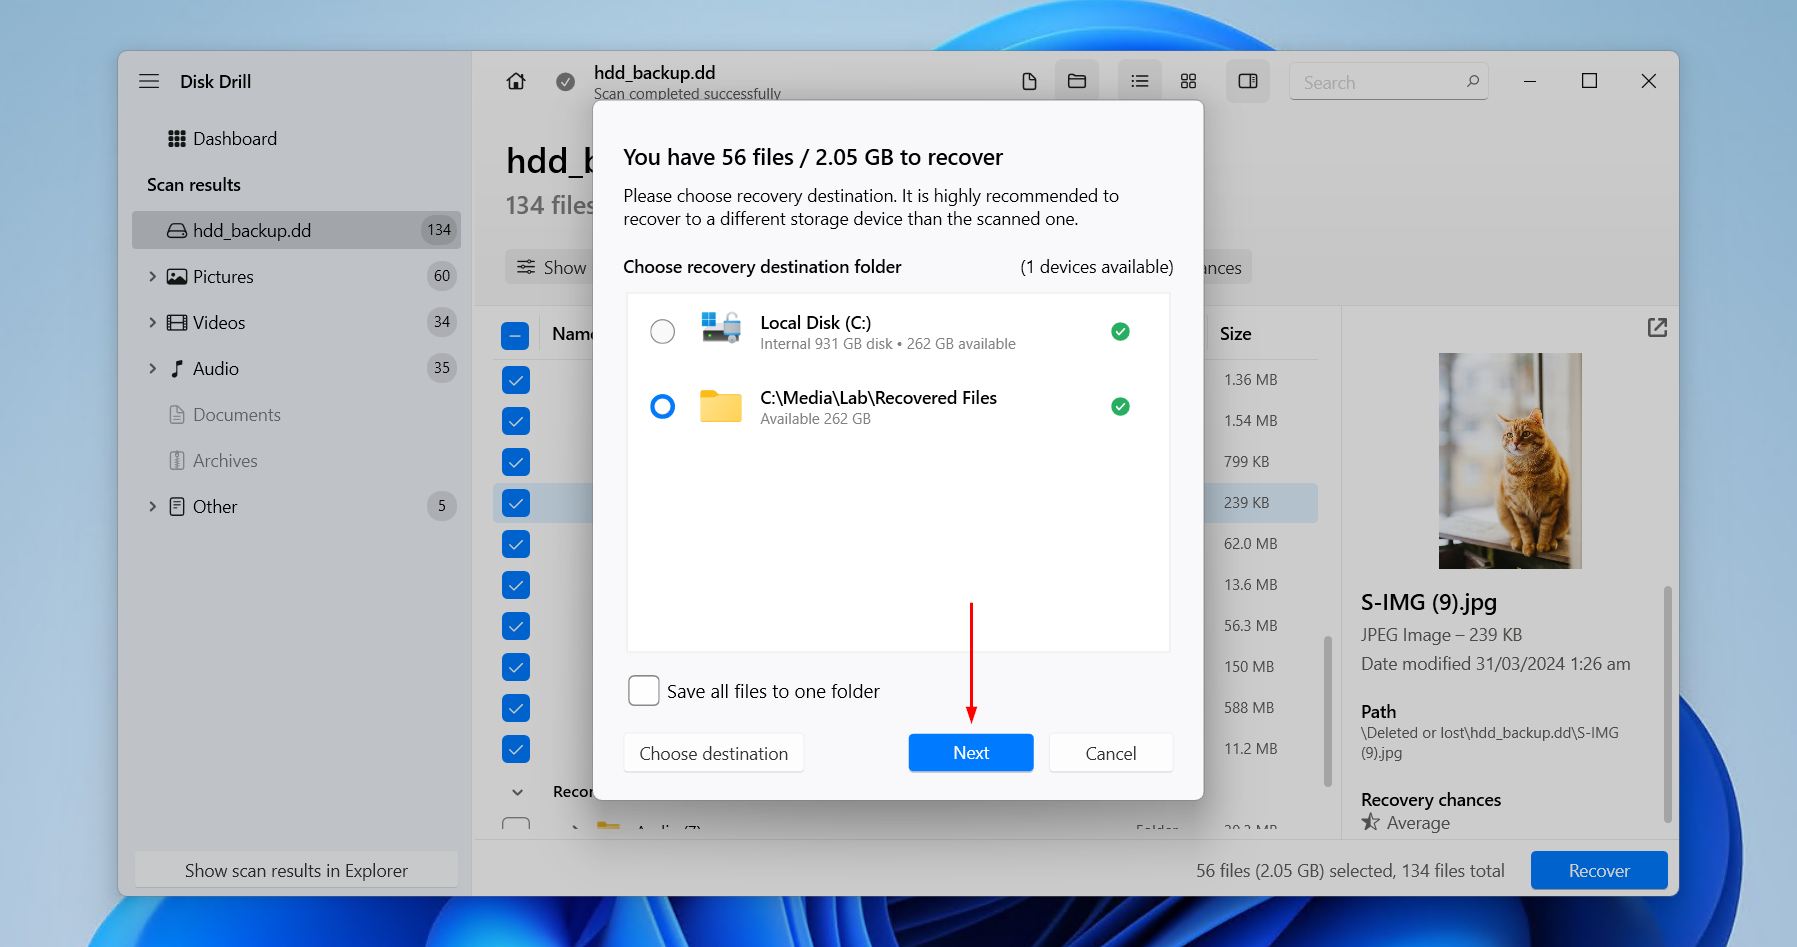
When you’ve selected what you wish to recover, click Recover. Choose where you want to store the recovered files. Just like before, don’t choose anywhere on the SSD you’re recovering the data from, as this risks corrupting it in the process. Instead, use a separate physical drive. When you’re ready, click Next to finish recovery.
The free version of Disk Drill for Windows lets you recover up to 100 MB of data, enough to recover critical files and confirm they’re intact before you commit to a full purchase. In addition to data recovery, Disk Drill lets you view the raw contents of the drive with hex view to confirm that there’s data still present to recover. And, because it can bypass error messages and logical access issues, it’s ideal for recovering data from corrupted SSDs that are, for all intents and purposes, unusable through traditional means.
Does Samsung Offer Proprietary Solutions for Protection and Recovery?
Samsung offers several utilities designed to maintain, monitor, and secure SSDs, but nothing specifically for file recovery. These tools are geared toward prevention and maintenance, and are therefore ineffective when faced with a data loss event. In fact, using them after data loss can sometimes hinder your recovery chances.
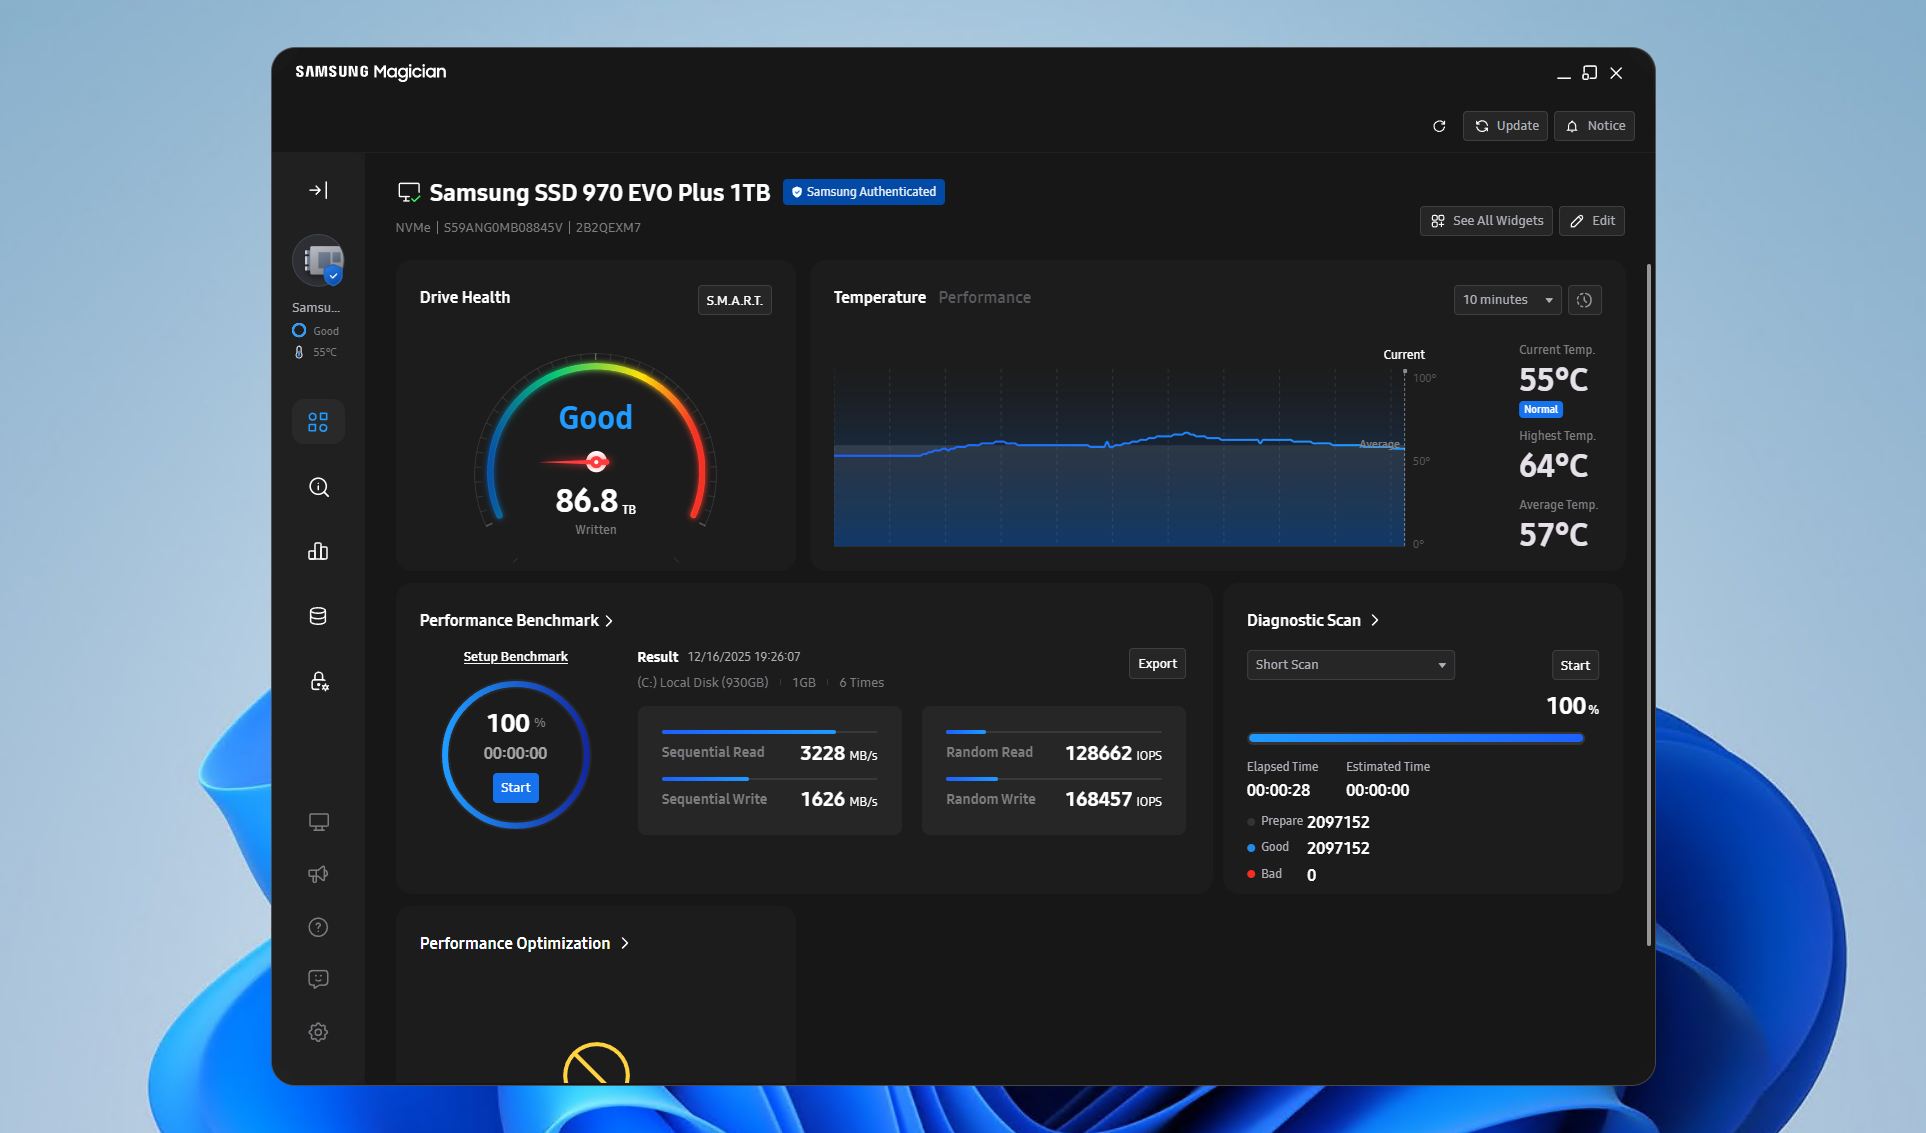
Samsung Magician is the company’s primary SSD management utility. It lets you monitor drive health and S.M.A.R.T. data, install firmware updates and run diagnostics, secure erase or encrypt your drive, and modify TRIM and “Performance Optimization” functions. All of these functions are optimal for warning about impending data loss, but data loss can happen without warning sometimes.
Previous utilities, like Samsung Data Migration, were absorbed into Samsung Magician. This data migration feature allows copying files from one drive to another, provided the source drive isn’t encrypted. However, it’s not the same as a byte-to-byte backup, which (1) backs up the entire disk structure, including deleted data, and (2) allows the backup of encrypted drives, provided the drive is unencrypted at the time of backup.
What to Do with Faulty Samsung SSDs?
Failed to scan your Samsung SSD because it’s not recognized or is refusing to respond? In most cases, this points towards a physical problem. However, before we write it off completely, there are some basic troubleshooting steps you can take in a last-ditch effort to make the drive scannable:
- Safely eject (where possible) and remove the SSD.
- Check all physical connections. Make sure cables and ports are working, and use a direct connection instead of something like a USB hub. Try the SSD in another PC, or even another enclosure if it’s an internal SATA/NVMe drive.
- Check BIOS/Dism Management to confirm the drive is visible. Make sure the SATA or NVMe (M.2) port/slot is enabled.
From here, if the drive is now appearing, follow our earlier guide to create a byte-to-byte backup of the drive and recover data from the image. After that, you can attempt at-home Samsung SSD repairs to restore the failed, dead, or crashed SSD. If, however, the drive is still not detected at all or is showing signs of physical damage, performing Samsung disk recovery at home is too risky. Your best option is to contact a data recovery service to have the data professionally recovered.
FAQ
In most cases, yes, a quick format will issue a TRIM request, as it tells the SSD what blocks to erase. This will render deleted data unrecoverable. However, this mostly pertains to internal SSDs, as the vast majority of external SSDs do not support TRIM.
The safest approach is to stop using the SSD immediately, keep it in read-only mode, and create a byte-to-byte image of the drive. From there, you can scan the image with data recovery software and save it to another storage device. Avoid performing any type of format, running repairs, or using optimization tools, as this will overwrite some data and may issue a TRIM command, rendering deleted data unrecoverable.
Samsung Data Migration, now a part of Samsung Magician, is designed for cloning working drives, not for recovering data or as a means of Samsung hard drive recovery. It copies existing, readable files and skips deleted data, unallocated space, and damaged areas. As a result, if it even does manage to clone the drive, it will simply reproduce the broken state on the new drive.