You realized you still need some of the files you’ve accidentally deleted from an external hard drive, but can’t find them in the Recycle Bin “that’s on your desktop” or see a Recycle Bin folder on the external disk. Have your files vanished? If not, where could they be hiding?
It’s possible that the Recycle Bin folder exists, but is hidden from view. Even if you don’t see a Recycle Bin folder on your external hard drive, or you cannot access it, you can still recover lost files, and we will explain how.
What Is the $Recycle.Bin Folder on the External Hard Drive and Should You See It?
Windows creates a hidden $Recycle.Bin folder on each storage device permanently attached to a PC to temporarily store deleted files. The user can access the Recycle Bin from its desktop icon or a file manager, and recover its contents until they are deleted (by default after 30 days) or the space is needed for other files.
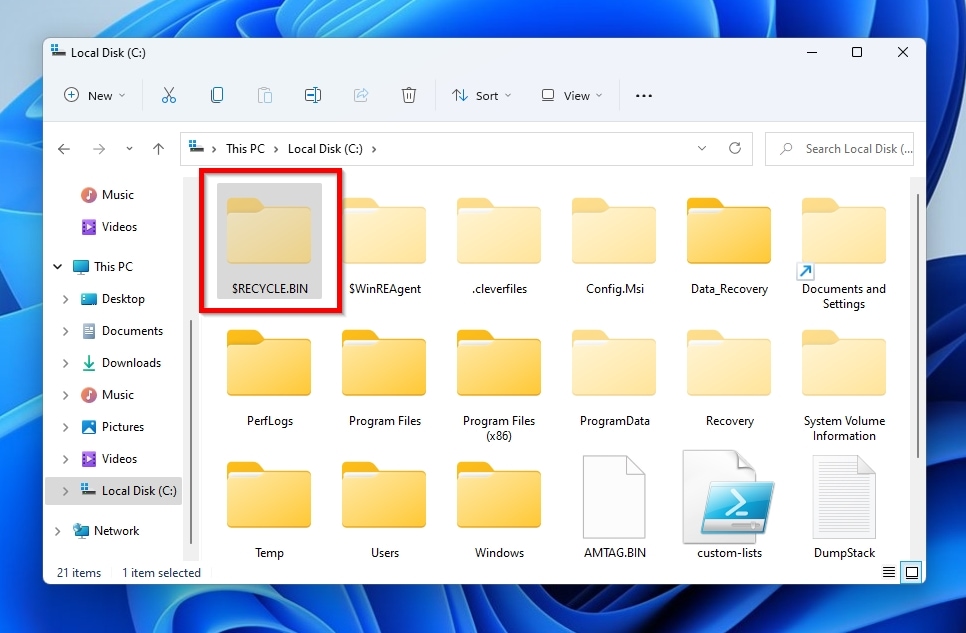
Not being able to see a Recycle Bin folder on your external hard drive is normal: the Recycle Bin is normally accessible only from its icon on the desktop or from its top-level entry in a file manager, and not its individual $Recycle.Bin folders. Those are treated as system folders by Windows and are hidden by default to prevent accidental tampering.
If you can’t find some files you recently deleted from an external hard drive in the Recycle Bin, or even the $Recycle.Bin folder itself, that doesn’t mean you’ve already lost them. However, it’s also a hint that your files probably skipped the Recycle Bin altogether and are now one step closer to being permanently deleted from the disk. That may happen when:
- Instead of performing a “soft-deletion” that would move the files to the $Recycle.Bin folder, the user chose to delete the files “permanently” or used the Shift+Delete shortcut.
- An “invisible” $Recycle.Bin folder may not exist because Windows didn’t create one on an external drive in the first place, or it was corrupted, or the user turned the feature off for one or more drives.
Although in such scenarios deleted files seem nowhere to be found, it’s possible to get them back, but each case requires a different solution. Still, as long as you act quickly and minimize use of the drive where your files were deleted, it’s highly probable you can get your deleted files back intact, even after emptying the Recycle Bin. And although we’re using Windows in this article, you can also recover files after emptying the Trash on Macs.
How to Access the Recycle Bin on an External Hard Drive
The three most usual causes for a missing external hard drive Recycle Bin are that it’s hidden, it was turned off for that drive, or it somehow got corrupted. Let’s see the best solutions for those issues.
Make the Recycle Bin Visible in Options
If Windows doesn’t show a Recycle Bin on your external hard drive, it could be playing hide-and-seek because of Microsoft’s security settings. As we mentioned earlier, it the Recycle Bin is hidden by default. Even if you have tweaked your file manager to display hidden files, the $Recycle.Bin folder would remain hidden, since it’s flagged as a system-related folder. Usually, rendering it visible requires delving deeper into a file manager’s settings and tweaking another option.
To unhide the Recycle Bin folder on your external drive in Windows File Explorer in Windows 11:
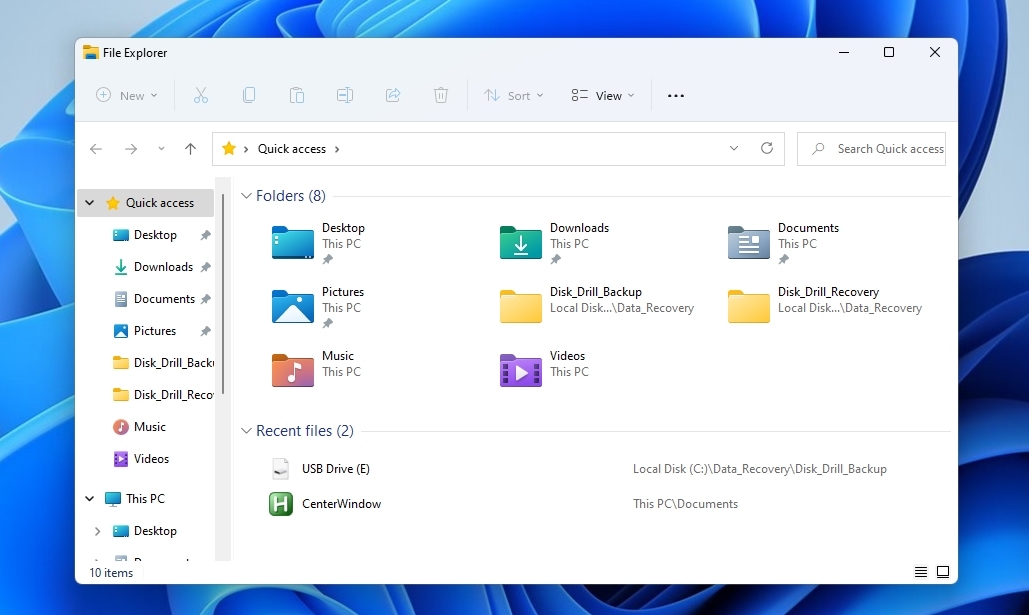
- Launch a Windows File Explorer window – the quickest and easiest way is with its default Windows shortcut, Windows Key + E.
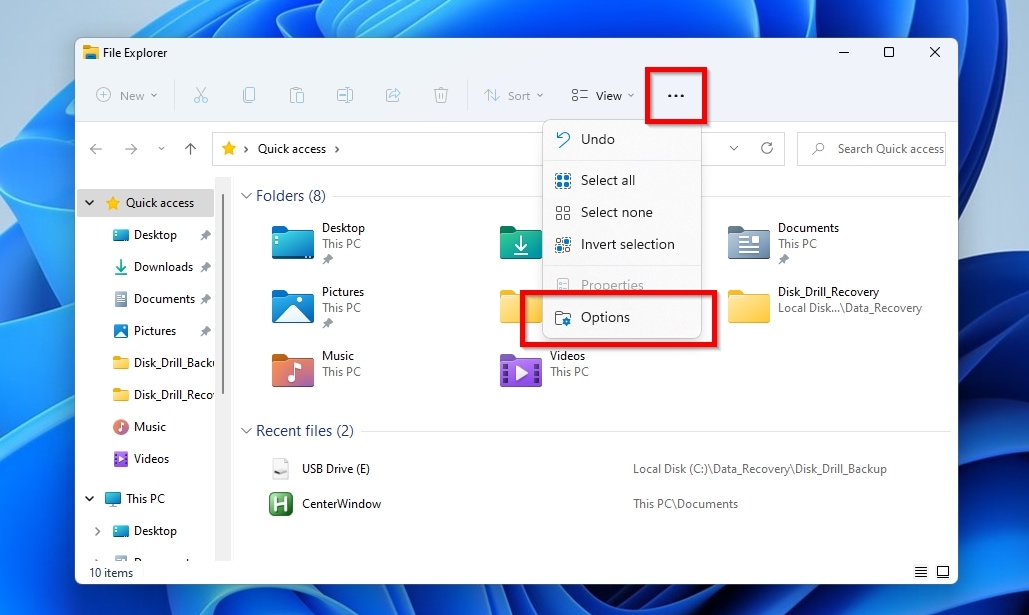
- Click the icon with the three dots, right next to the View entry of Windows File Explorer’s toolbar, and select Options.
- Move to the View tab, and look at the contents of the Advanced settings list of options. There, change the setting of Files and Folders > Hidden files and folders from “Don’t show hidden files, folders, or drives” to “Show hidden files, folders, and drives“.
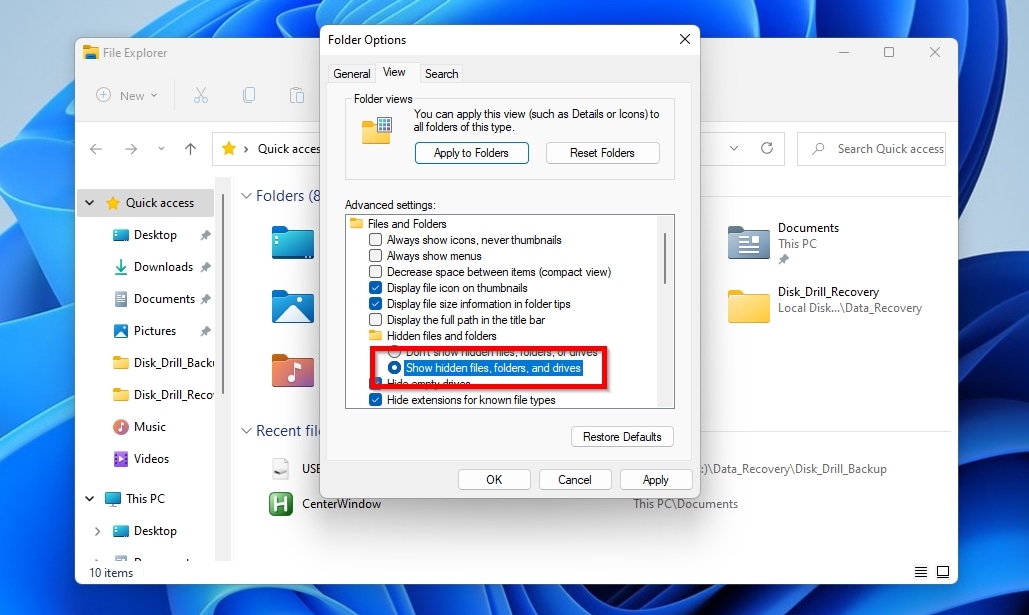
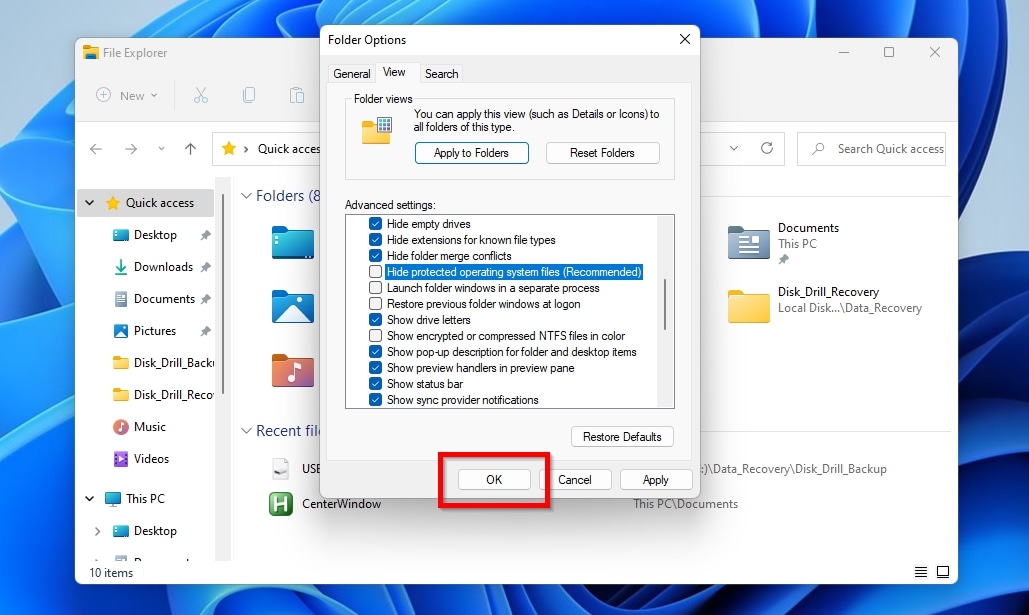
- Scroll down one or two times, and notice the fourth entry after the one you just changed, “Hide protected operating system files (Recommended).” Turn it off by removing its checkmark.
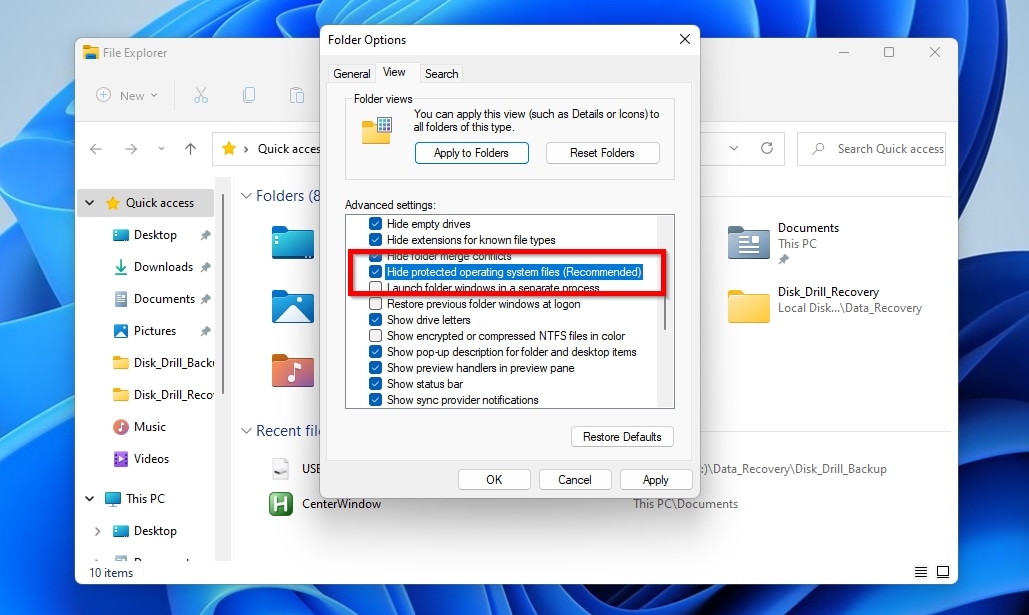
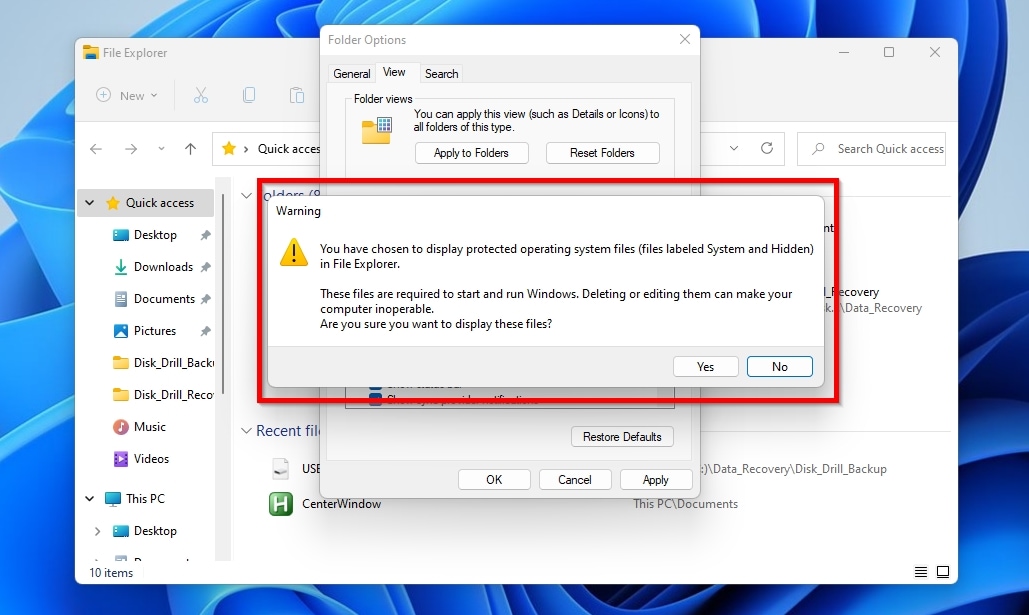
- Answer positively to the warning that will show up that informs you about how this tweak can lead to issues caused by mishandling files and folders that are crucial for the OS’s operation.
- Click OK, and the $Recycle.Bin folder should be visible again.
Enable Recycle Bin from the Desktop
One of the reasons you might not be able to find a Recycle Bin on an external hard drive could be that it doesn’t exist. Windows allows the individual configuration of each drive’s Recycle Bin folder size, but also offers the option to turn it off entirely. When disabled, all files deleted on the drive are immediately marked as removed rather than moved to the $Recycle.Bin folder.
If you couldn’t find a $Recycle.Bin folder on the drive, the easiest way to check whether it has an active Recycle Bin and, if not, re-enable it, is through the Recycle Bin’s “Properties” panel.
To access the Recycle Bin’s Properties and re-enable or configure any drive’s $Recycle.Bin folder:
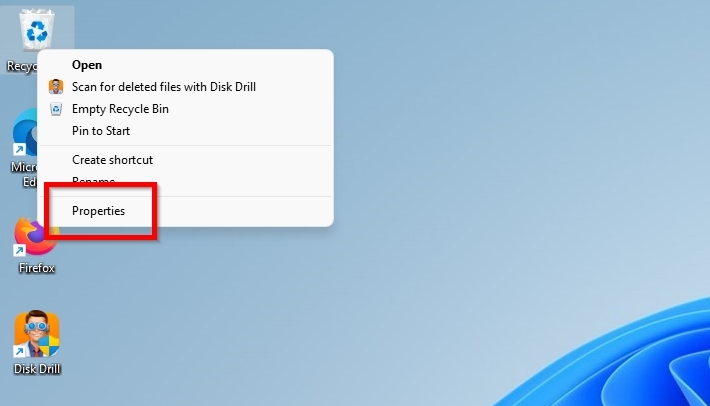
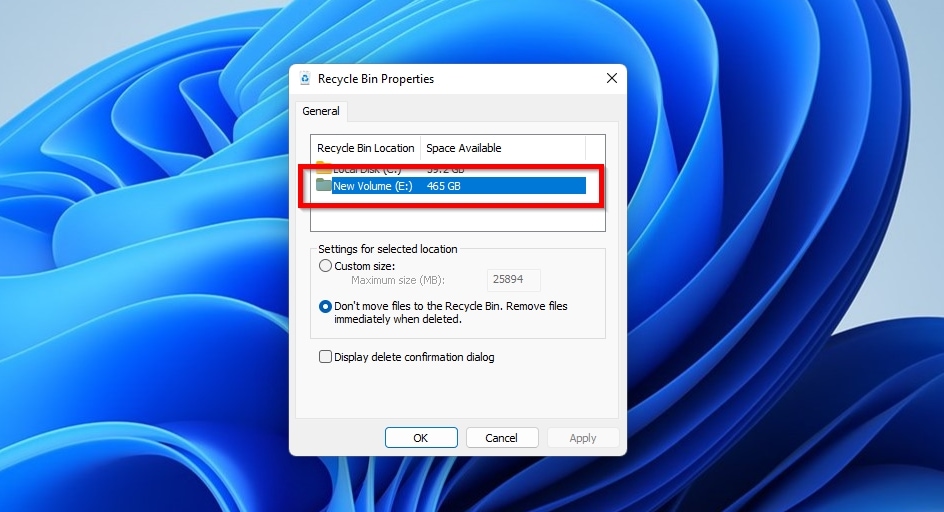
- Right-click on the Recycle Bin icon on the Windows desktop, or on the main Recycle Bin folder in a file manager like Windows File Explorer, and choose Properties.
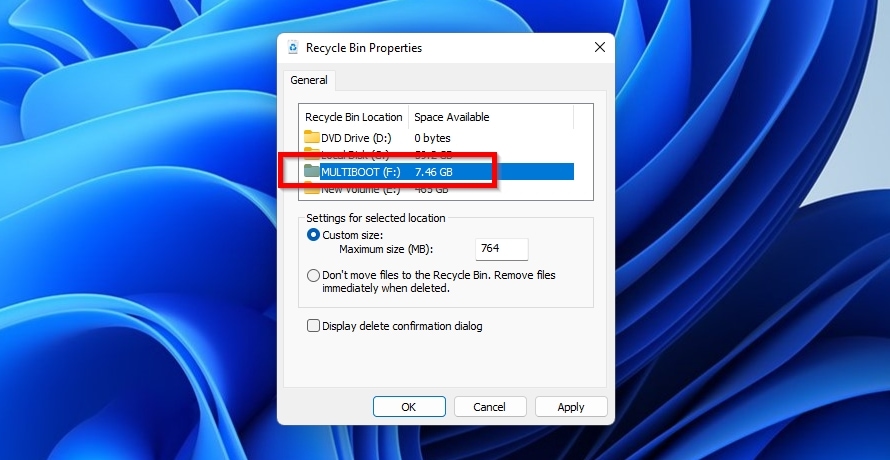
- Select the drive that seemingly lacks a $Recycle.Bin folder from the list at the top, under “Recycle Bin Location“.
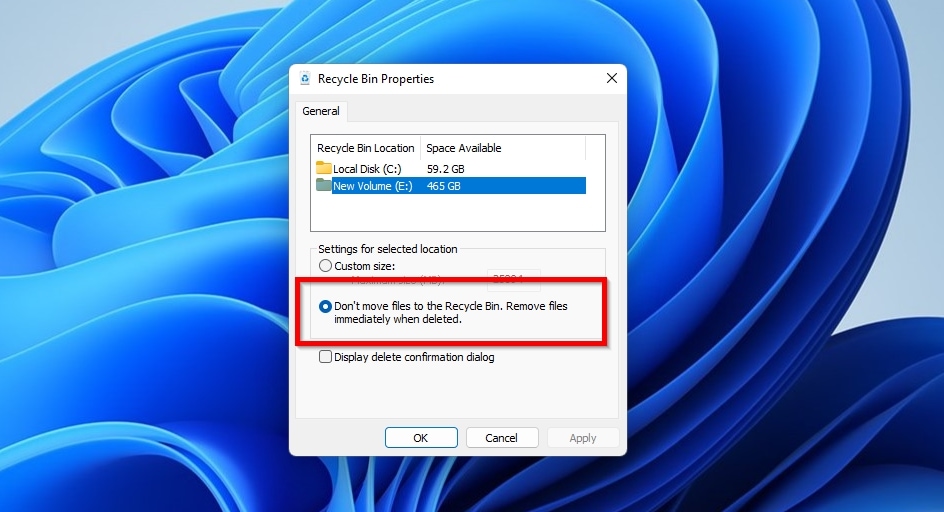
- Make sure that the option “Don’t move files to the Recycle Bin. Remove files immediately when deleted.” is turned off.
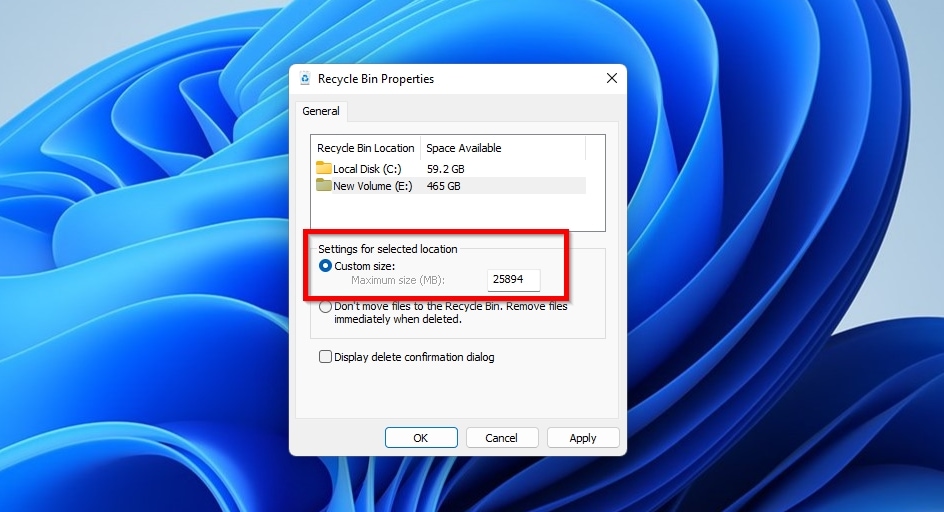
- Enable the option “Custom size“. Its “Maximum size (MB)” value will have been automatically set by Windows to what the OS considers an ideal value for the storage capacity of the drive. You can decrease that number to have the Recycle Bin’s contents consume less space on the drive, or increase it to have the opposite effect, allowing the drive’s Recycle Bin to hold more/larger files.
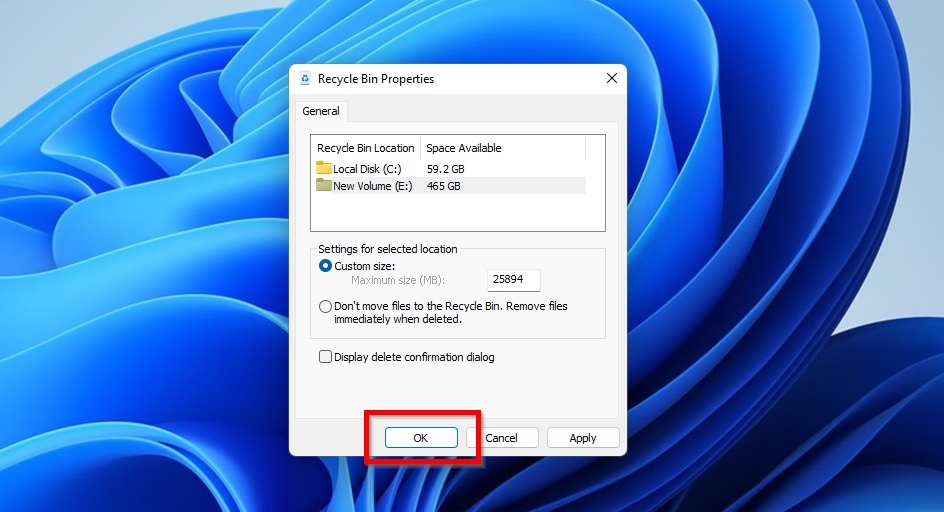
- Click Apply or OK, and your drive should now use its own Recycle Bin folder whenever you delete data. It’s worth mentioning that a $Recycle.Bin folder won’t be created on the drive until, after enabling the feature, you delete a file on it.
Enable the Recycle Bin In the Registry
As a rule established back when removable storage solutions like USB flash drives and SD cards were used only for the temporary storage and transfer of a handful of files, Windows doesn’t create $Recycle.Bin folders on them. Doing so would consume a chunk of their limited and precious space and necessitate more writes, leading to increased wear on those storage devices.
That rule still applies, despite modern portable storage solutions offering capacities that allow storing multiple terabytes of data and often being used as permanent extensions of a PC’s internal storage. Even worse, Windows may decide to treat a multi-terabyte external hard drive, SSD, or NVMe drive the same as a 4GB SD card and skip the $Recycle.Bin for it, too.
Thankfully, there’s a way to deal with such scenarios, by forcing Windows to allow creating a $Recycle.Bin folder on any storage device. However, it’s a bit “hacky” since it requires modifying the Windows Registry.
To have Windows 11 allow creating $Recycle.Bin folders on all storage devices:
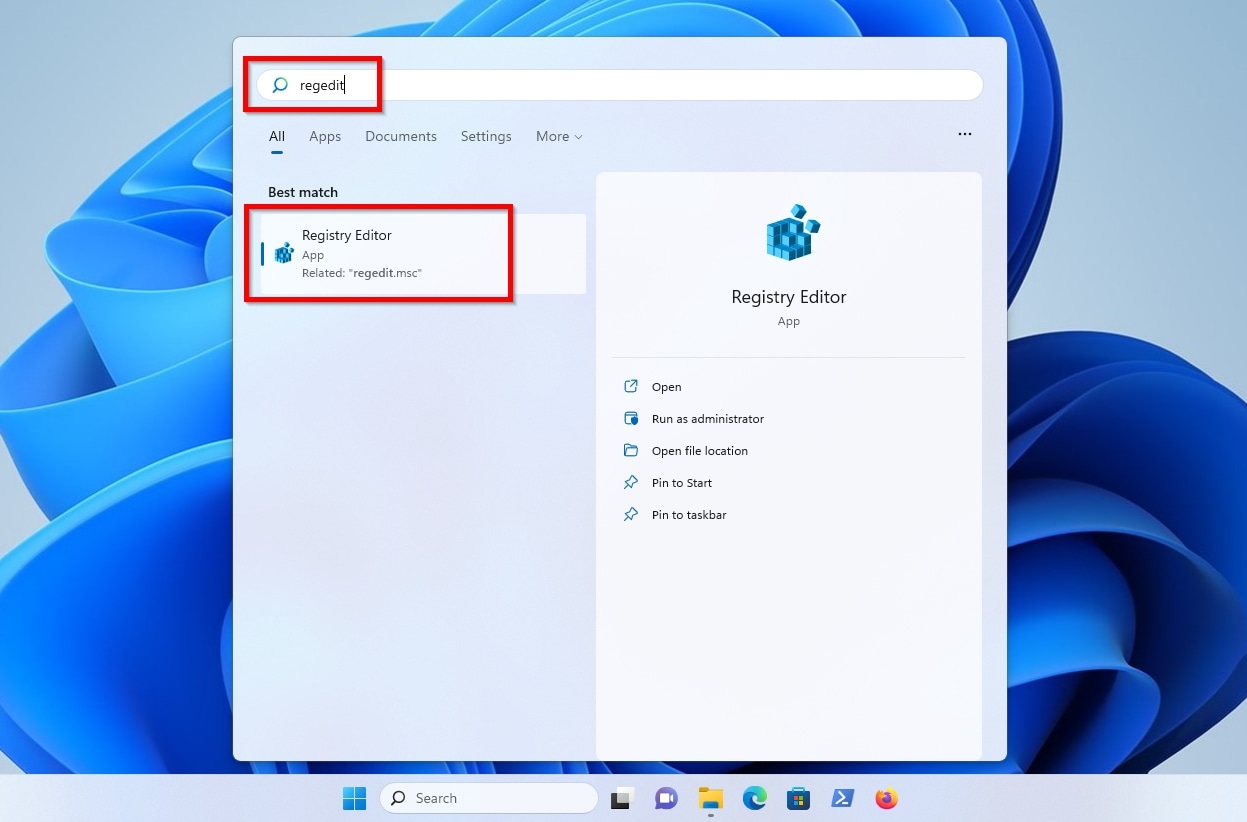
- Run the Registry Editor by either seeking it in the Start menu using its name, or by launching the “Run” dialog by pressing Windows Key + R and then typing the app’s shortcode, “regedit“, and pressing Enter.
- Use the navigation pane on the left to move to
Computer>HKEY_LOCAL_MACHINE>Software>Microsoft>Windows>CurrentVersion>Policies>Explorer.
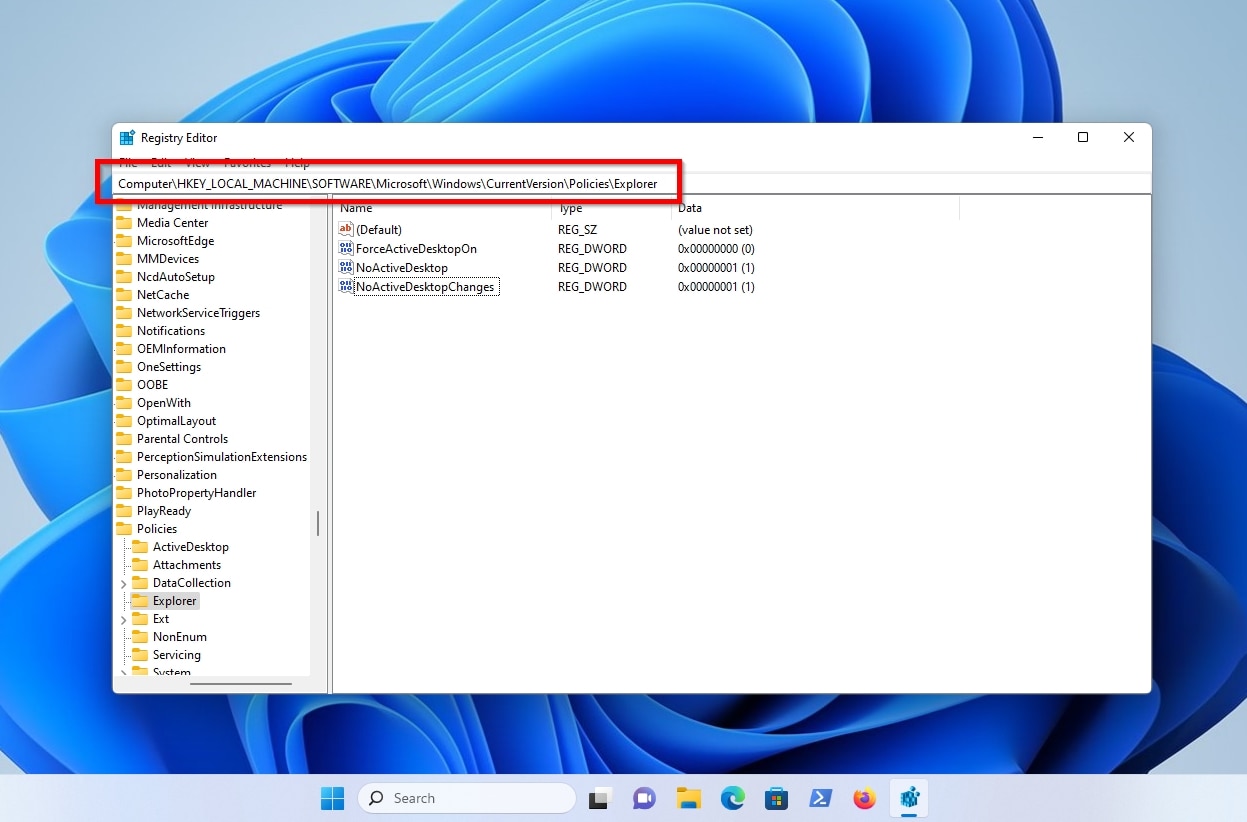
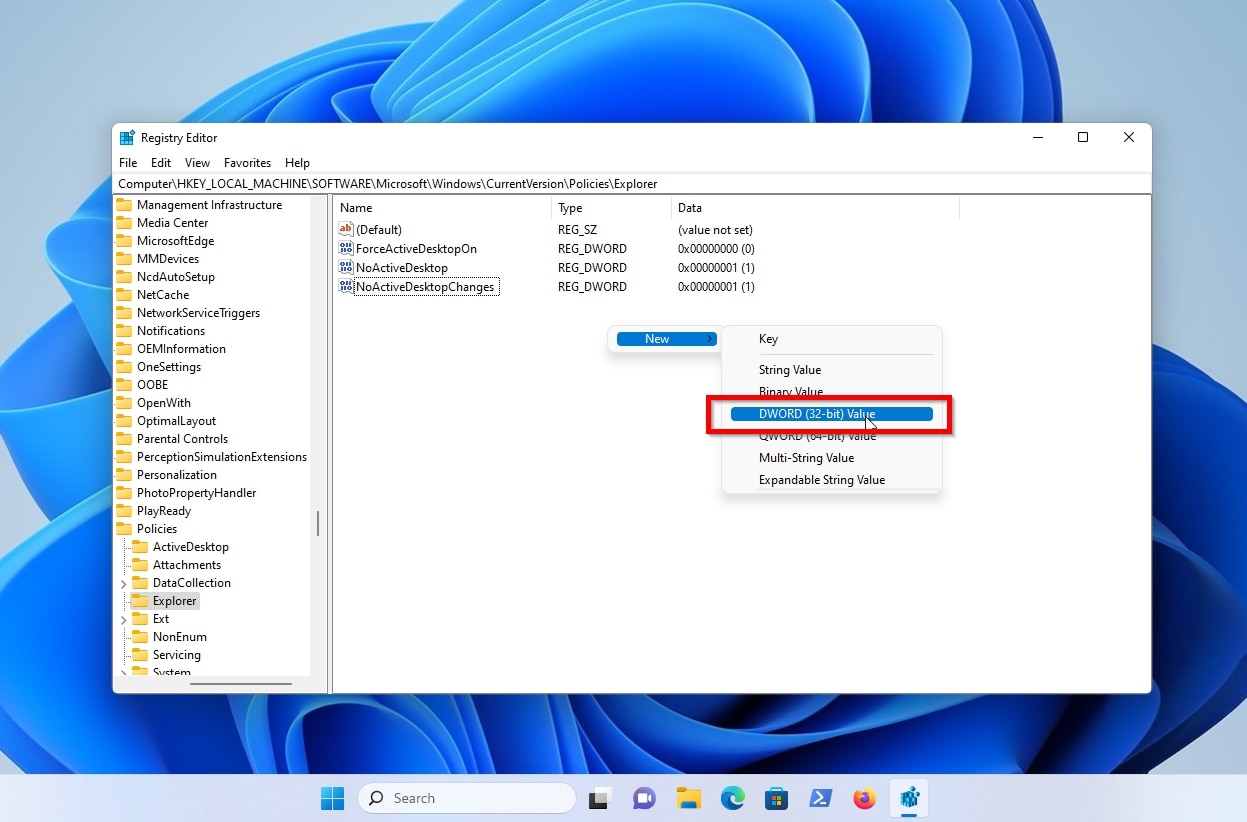
- With the “
Explorer” entry selected on the left pane, you’ll see various entries on the right that dictate different aspects and features of Windows File Explorer’s integration with the OS. Leave them as they are, and add a new one by right-clicking on the empty space and selecting that you want to create a New > DWORD (32-bit) Value.
- Give the new DWORD (32-Bit) Value the name “RecycleBinDrives“.
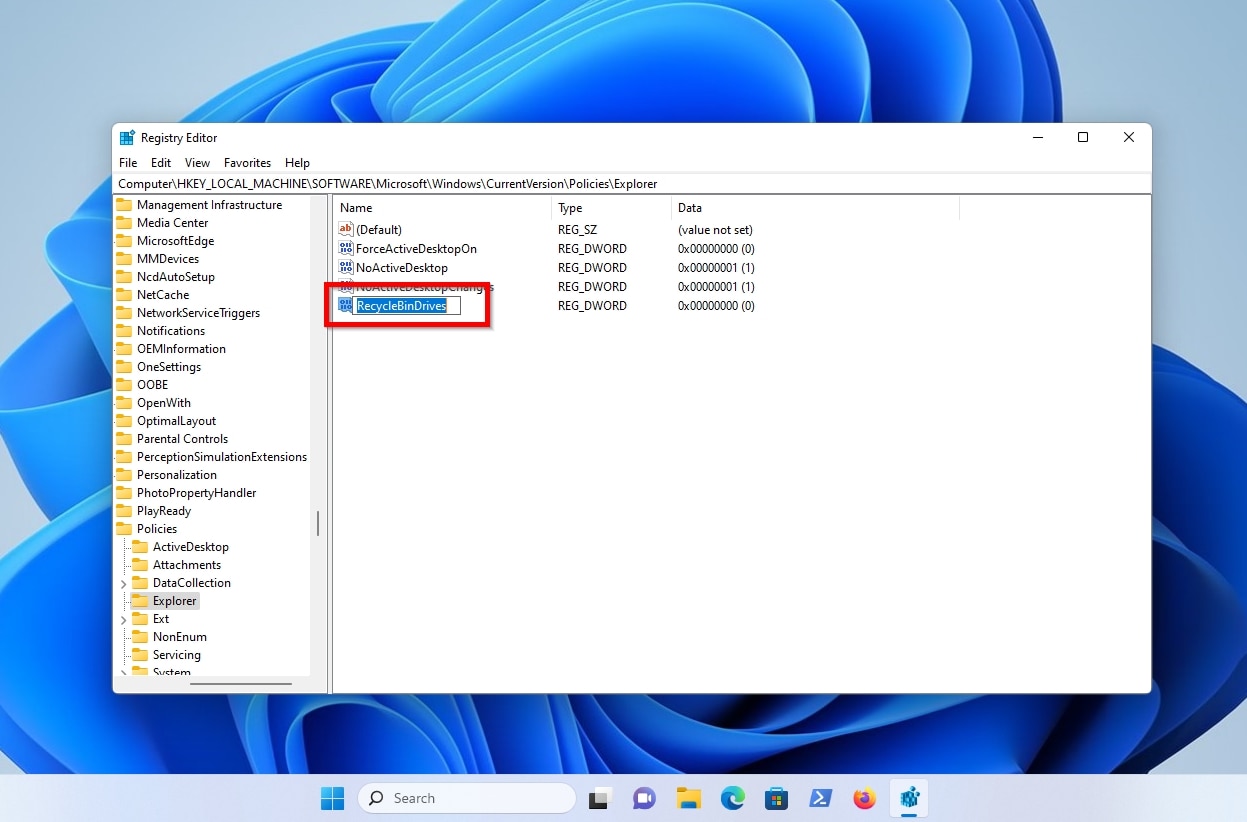
- With the new RecycleBinDrives parameter added to the list, double-click on it to edit it, leave Base set to Hexadecimal, and set the Value data to “ffffffff“. That’s eight “f” characters, which, if you temporarily switch the value to Decimal, translate to “4294967295”.

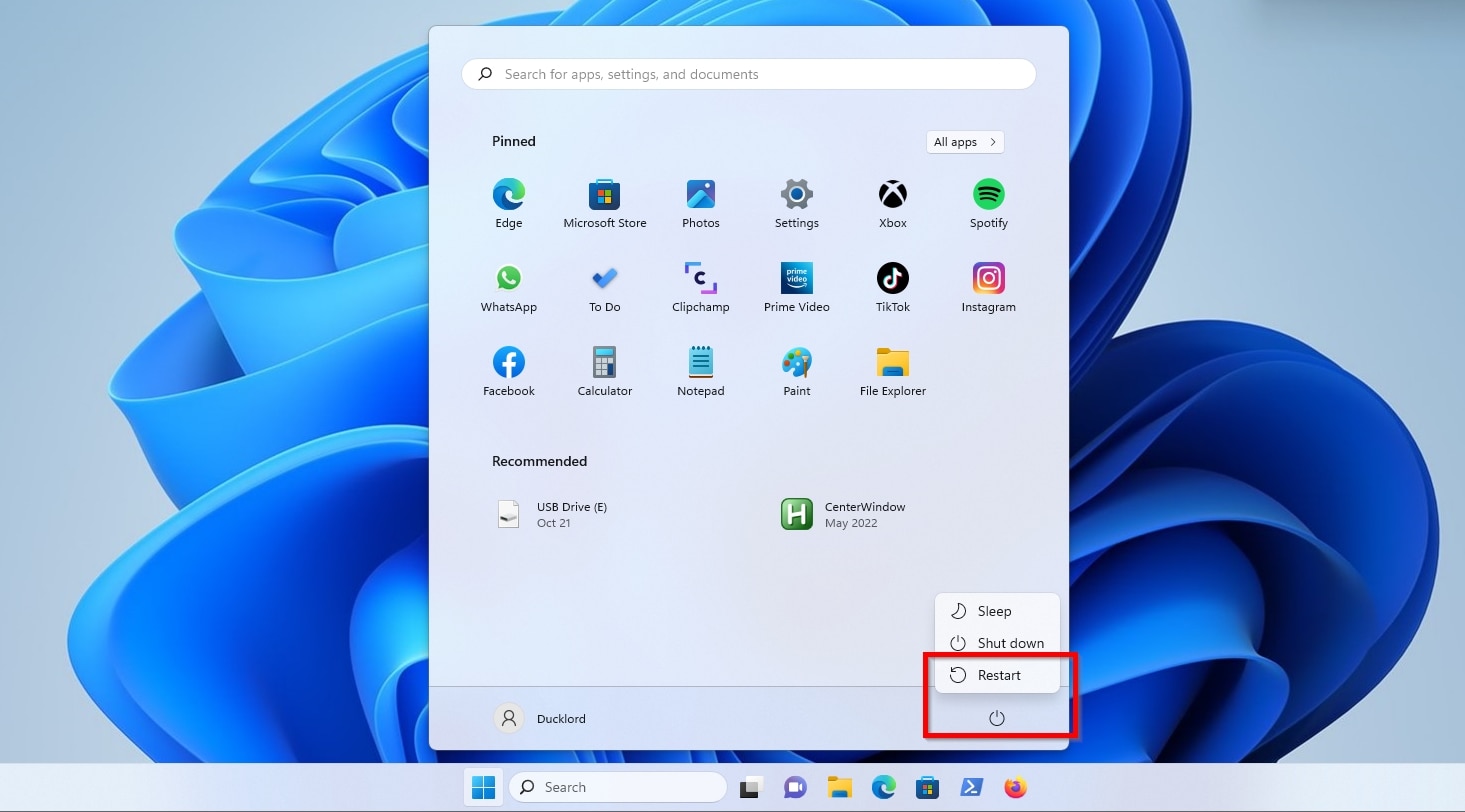
- Click OK and close the Registry editor to store the changes, and restart Windows to have them take effect. After you’re back on your Windows desktop, you should be able to right-click on the Recycle Bin icon and select Properties to extend its functionality to all attached and accessible drives.
Fix Recycle Bin If It’s Corrupted
If a Recycle Bin folder becomes corrupted and inaccessible, you can delete the current damaged iteration to have Windows create a new one in its place. Instead of fighting with a file manager to do that, it’s quicker to use the Windows terminal’s command for Removing a Directory, rd, for although it demands typing to use, it can delete a $Recycle.Bin folder directly.
To fix a corrupted Recycle Bin by “rebooting” it with the terminal:
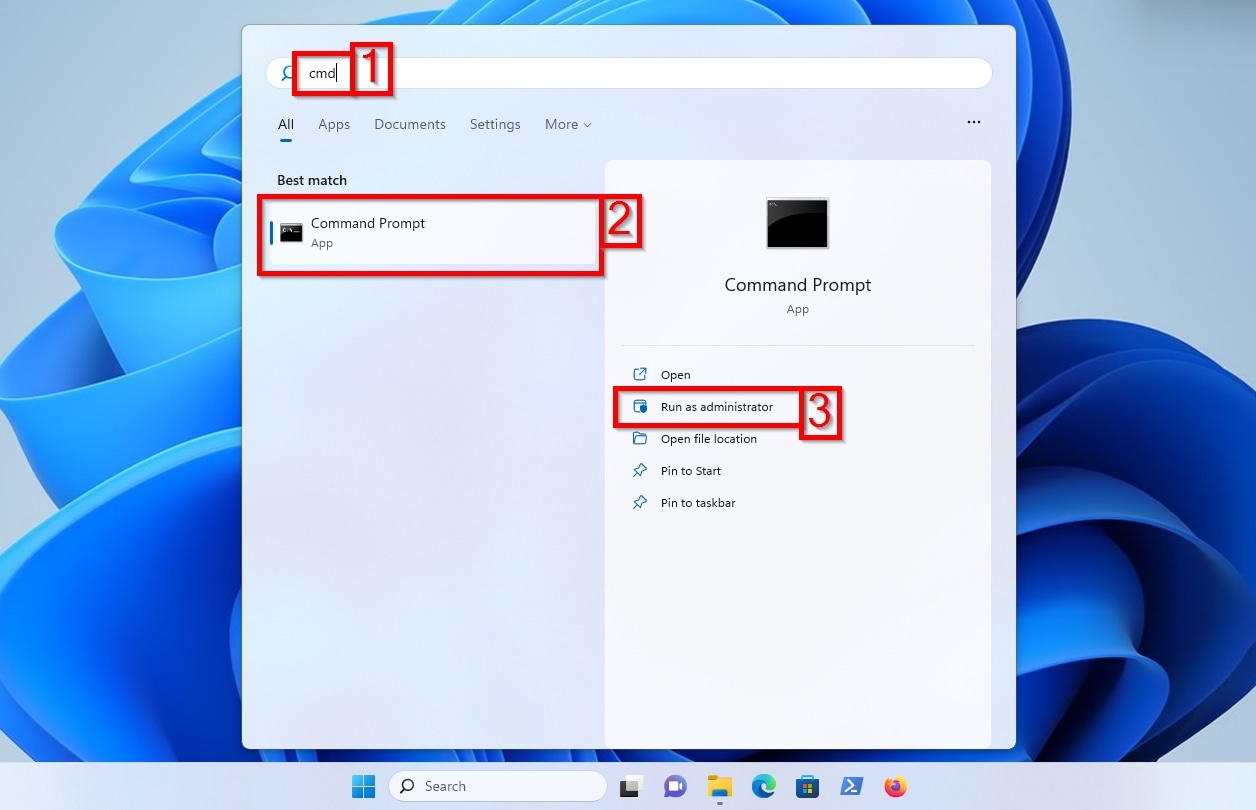
- Seek the Command Prompt terminal (not PowerShell) using its name or its shortcode, “cmd“, in the Start menu, and choose you want to Run (it) as administrator.
- Type the command
rd DRIVE_LETTER:$Recycle.Bin /s /q, where “DRIVE_LETTER” is the letter through which the drive with the corrupted Recycle Bin is accessible. For example, on a PC with a single NVMe drive hosting one partition for the OS and all other uses, accessible through the letter “C”, the command will berd C:$Recycle.Bin /s /q. The flag “/s” instructs the command to act “sequentially” to delete everything in the Recycle Bin, also recursively searching into subfolders, before removing its folder. “/q” stands for “quiet”, suppressing the command’s output to the terminal, to keep the process “clean”, “tidy”, and user-friendly.

- Restart Windows to allow the OS to recreate the removed Recycle Bin folder.
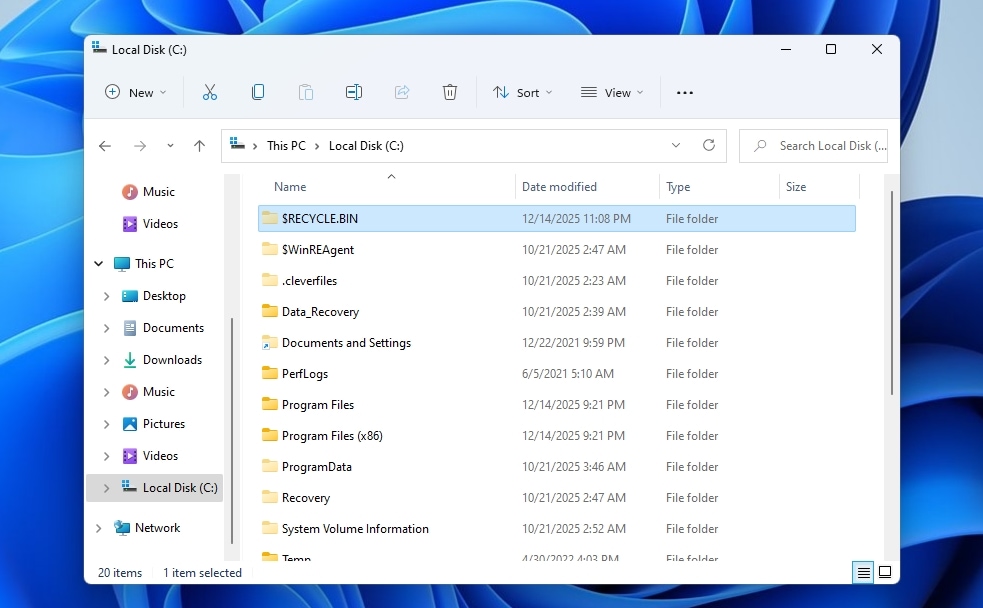
- It should now be possible to access the new $Recycle.Bin folder on your external hard drive using any file manager that’s configured as we saw before to display hidden system-protected files and folders.
What to Do If You Can’t Access the Recycle Bin on an External Drive or It’s Empty?
Sometimes, things don’t go as planned. Despite trying seemingly everything, the Recycle Bin may be nowhere to be found or appear empty. Or, you might have emptied its contents without realizing you’d still need some of them, and some of the methods we covered above, despite being effective for re-enabling, unhiding, or recreating the Recycle Bin, simply won’t help bring your files back. That’s when data recovery proves the best (if not the only) way to recover files on Windows 10 or Windows 11.
Using a modern, trustworthy, and performant recycle bin recovery software like Disk Drill is a much quicker, easier, and straightforward way to regain access to your deleted files.
All you need to do is download the app, scan the external drive from which your data was deleted, and once you confirm your files are found, recover them. Easy as pie! Let’s see the more detailed version.
To recover your lost files from an external hard drive using Disk Drill, despite the state (or existence) of a $Recycle.Bin folder:
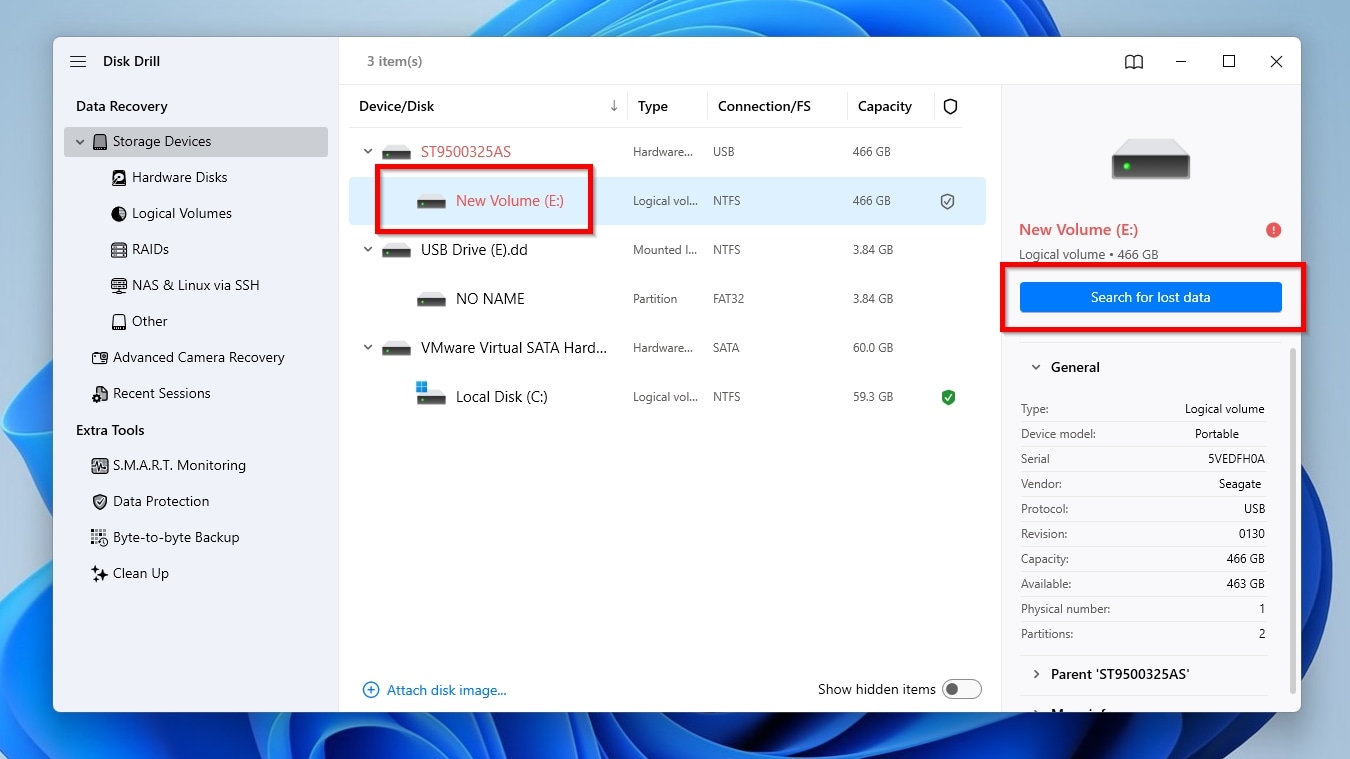
- Download Disk Drill from it official webpage, install it, and run it. If you don’t find yourself on the app’s default starting page, move to the Data Recovery > Storage Devices page from the app’s navigational pane on the left of its window. Select the drive you want scan for lost files, and click Search for lost data.
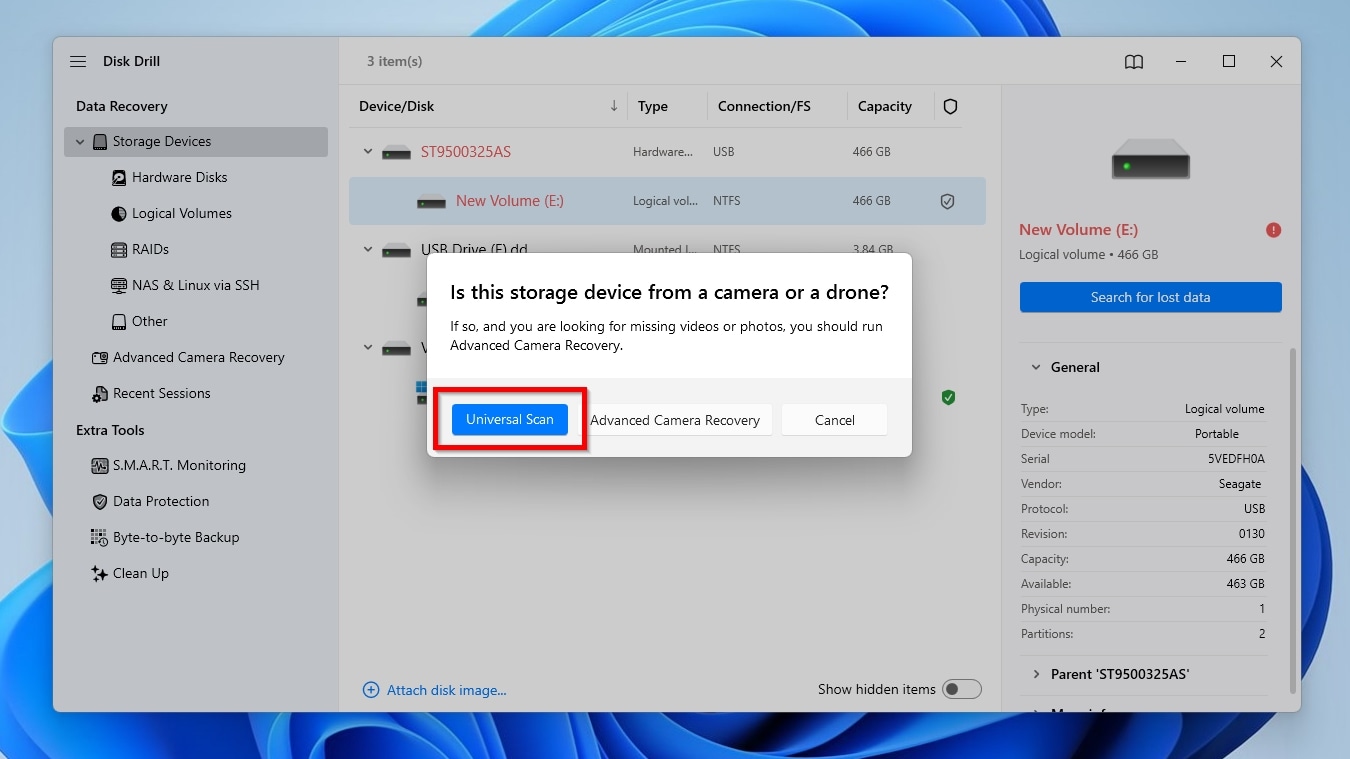
- The latest versions of Disk Drill come with a specialized mode, Advanced Camera Recovery, designed for recovering pictures and videos from cameras and drones. For all other scenarios where you want to recover more types of files, or from drives that weren’t used with cameras or drones, like what we’re tackling in this article, skip that mode, and go for the classic Universal Scan.
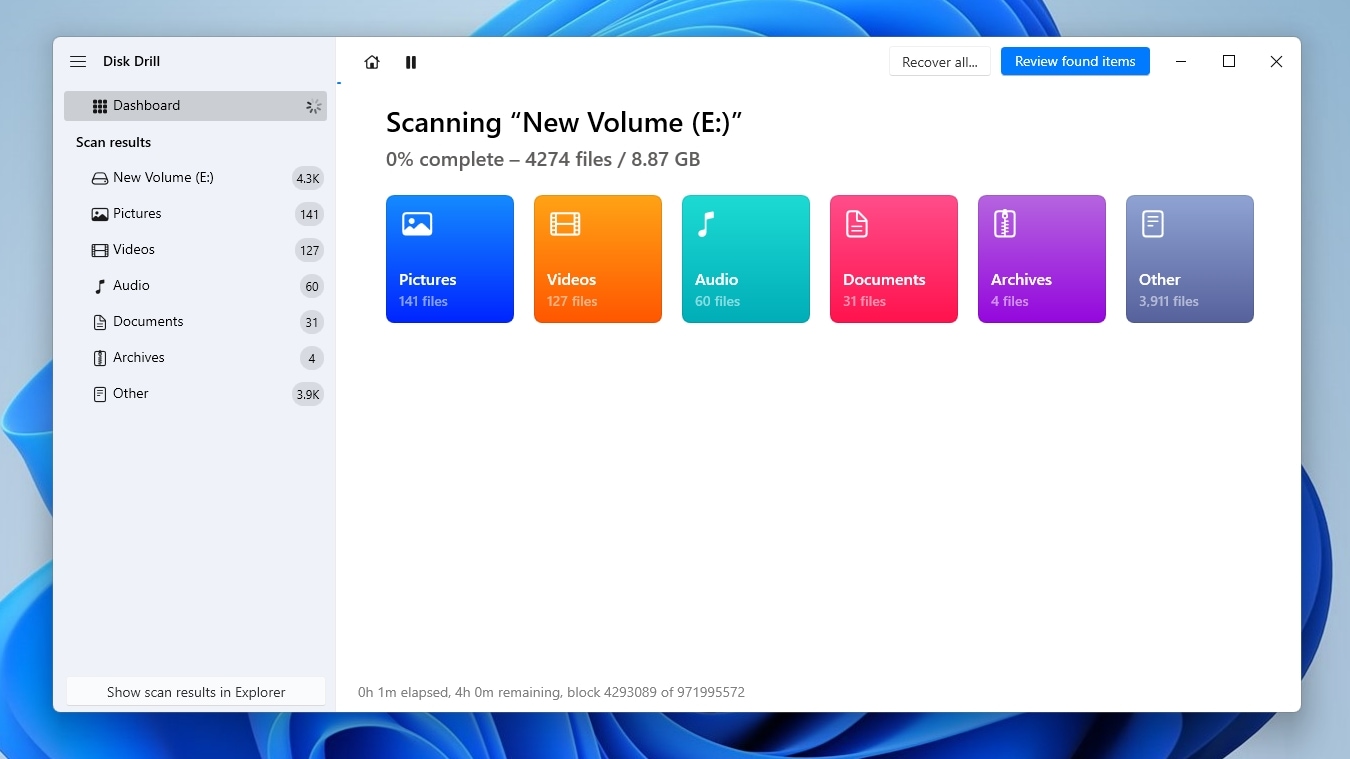
- You can check what Disk Drill has found up to that moment by clicking Review found items while it’s still scanning a drive, but it’s best to let it complete its scan, to locate as many files as possible. The time required for that process depends mainly on the drive’s capacity, speed, and condition, as well as the number of files stored on it.
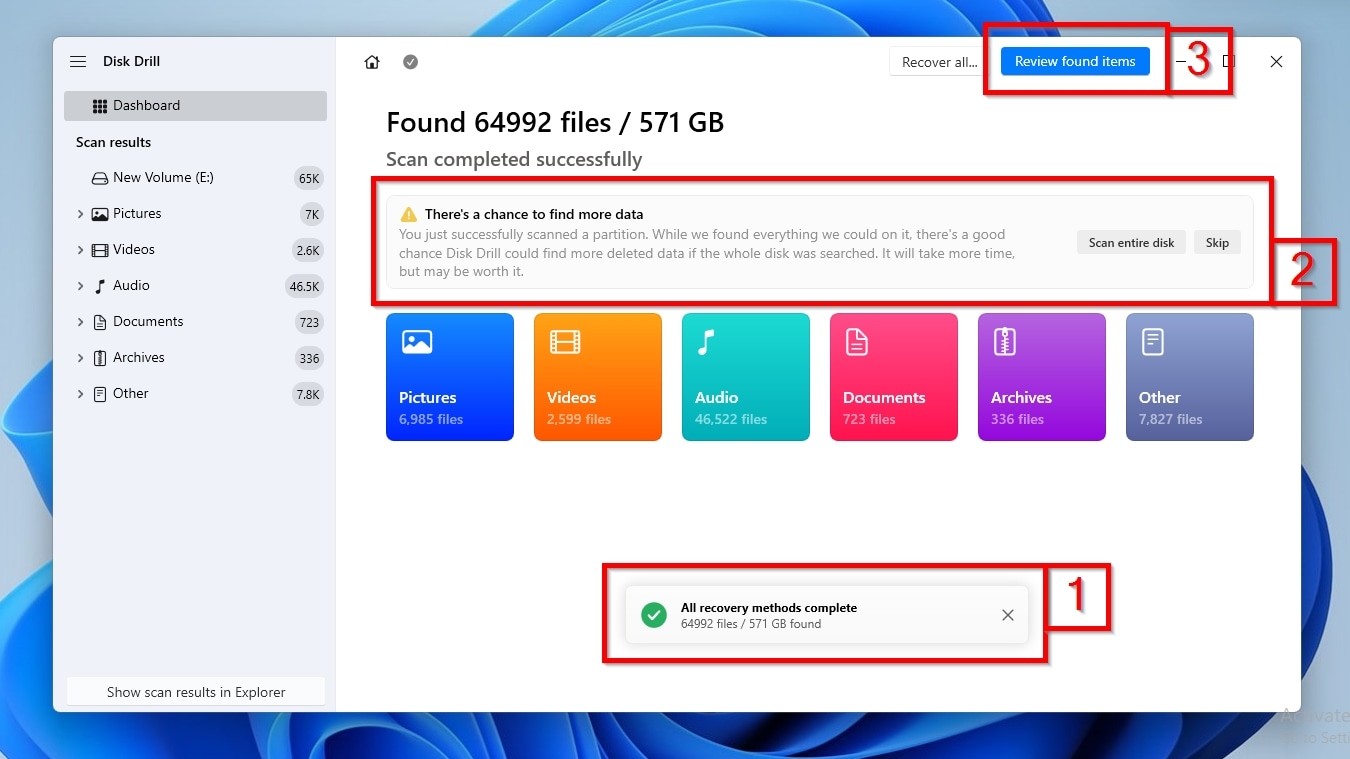
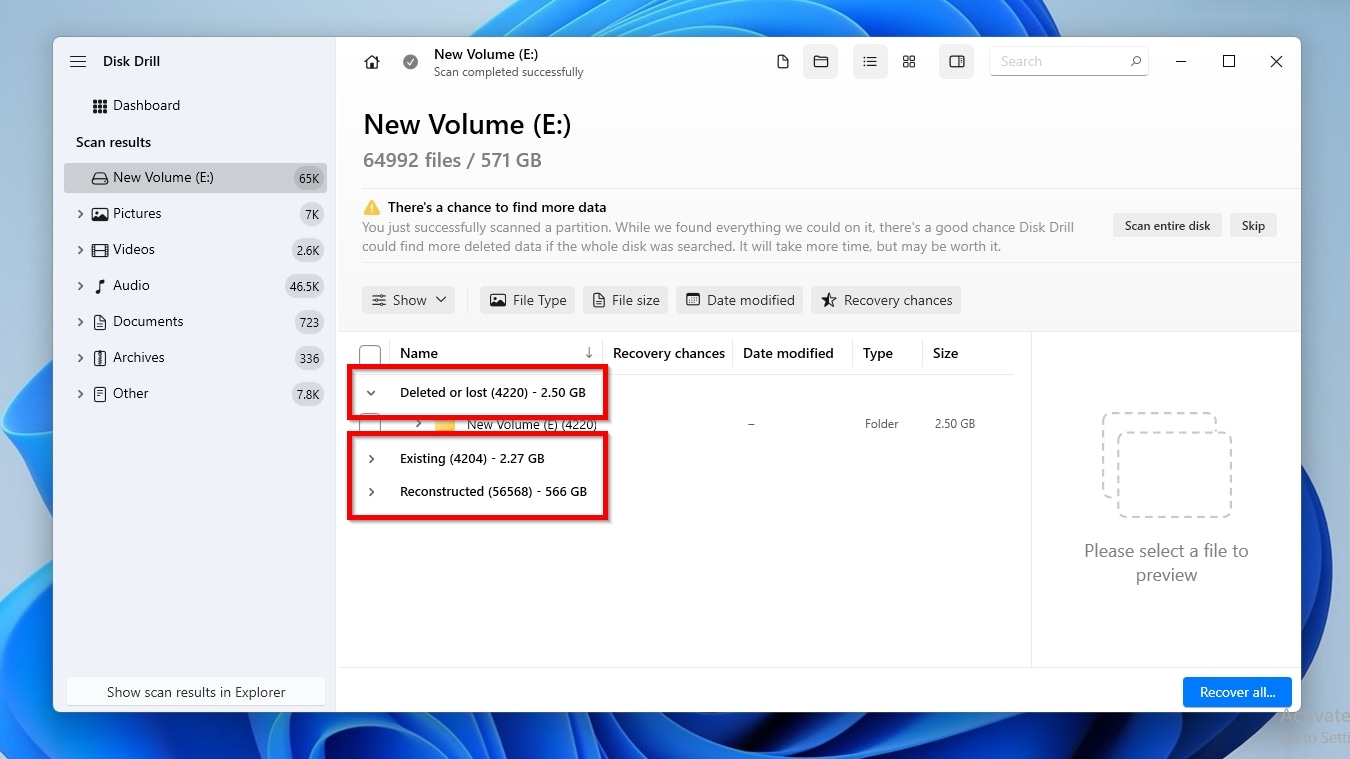
- When the scan runs its course, Disk Drill will inform you, through a pop up window, that All recovery methods (are) complete (1). If, though, you’ve only scanned a single partition, the app might prompt you to scan the whole disk (2), to maximize the chances of finding even more files. If you choose to do it, Disk Drill will rescan your drive from scratch. When done, click Review found items (3) to see all the files Disk Drill found on your drive.
- Disk Drill presents its results in three groups, based on their state: Existing are the files that still exist on the drive. A recovery app isn’t necessary for accessing them, but Disk Drill presents them to help when, for example, you’ve misplaced a file and can’t find it. This includes files that were still in an unemptied Recycle Bin. Deleted or lost are files that are seemingly gone from the drive. Among them are files from a recently emptied Recycle Bin, or that was itself deleted or somehow rendered inaccessible. Apart from those differences, the files in those categories have one thing in common: they’re otherwise intact, unlike the ones in the third and final group, Reconstructed. Those are files that Disk Drill “reassembled” from their bits and pieces based on their “signatures” with which the app is familiar, digital fingerprints, and metadata that define their type and other parameters.
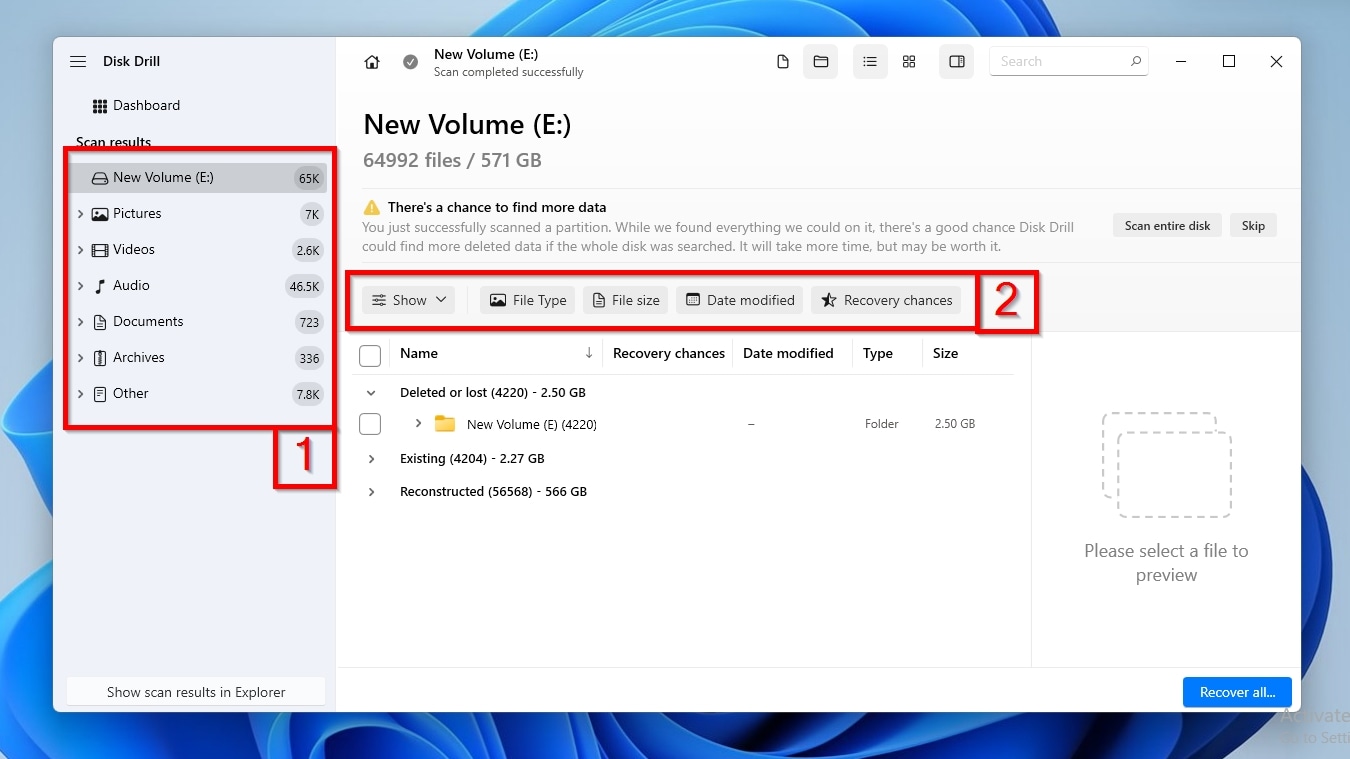
- Did Disk Drill’s ultra-powerful scan engine find gazillions of files? You can use its generalized Categories on the left, and various more granular Filters above the results list, to only see files based on the criteria you’re interested in. For example, you can have Disk Drill show you only the Audio files it found by selecting the respective category, or instruct it to present only files that were modified between dates A and B, or with sizes over X but under Y, by configuring the appropriate filter’s values.
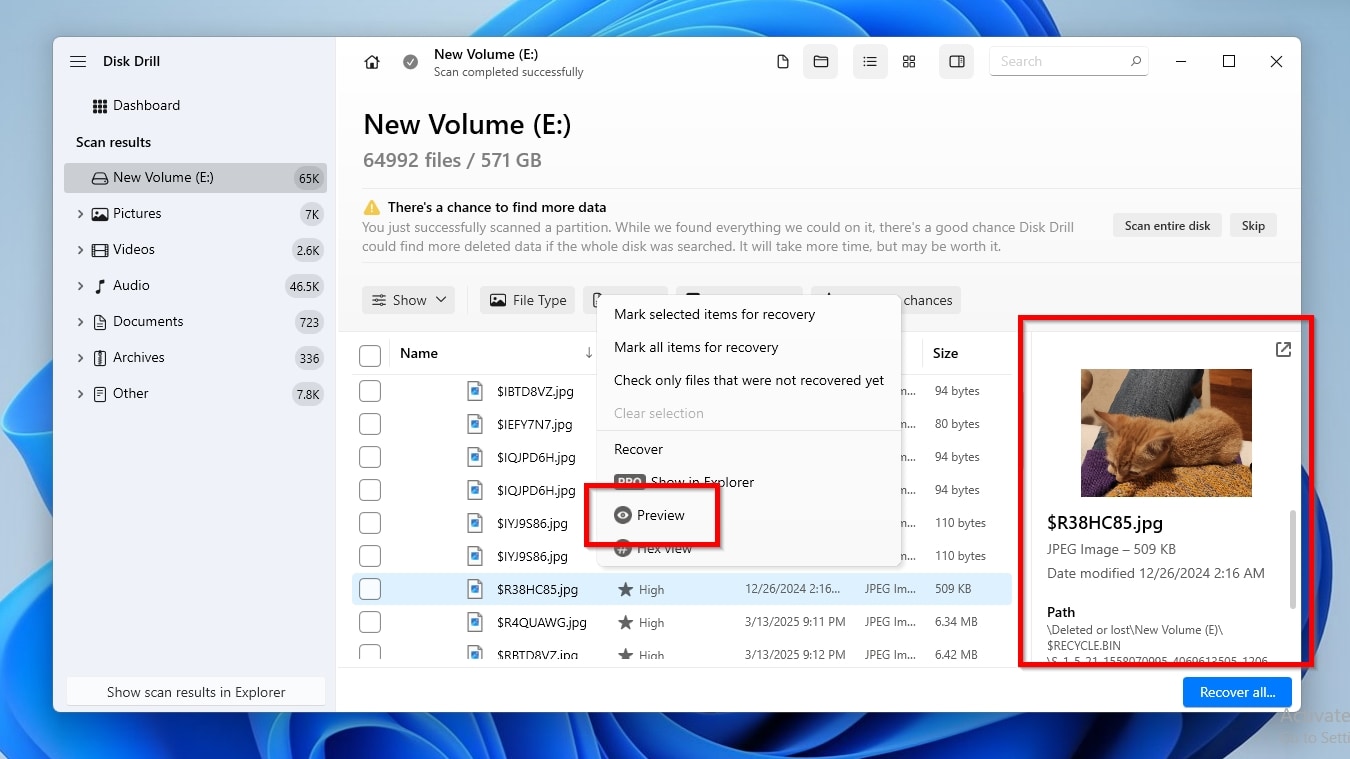
- No need to guess if you need to recover a file strictly based on its name: Disk Drill allows you to preview various files in many formats, like documents and images, with which it’s familiar, or for which there’s a default “viewer” app installed. The app’s Preview pane, on the right of the results, should appear when you click on such a file. If it doesn’t, you can enable it manually, by either clicking on the little hovering eye icon, or by right-clicking on a file and selecting Preview. It’s also worth noting that if a file is “preview-able”, that’s also a hint it can be successfully recovered (since its “contents” are intact).
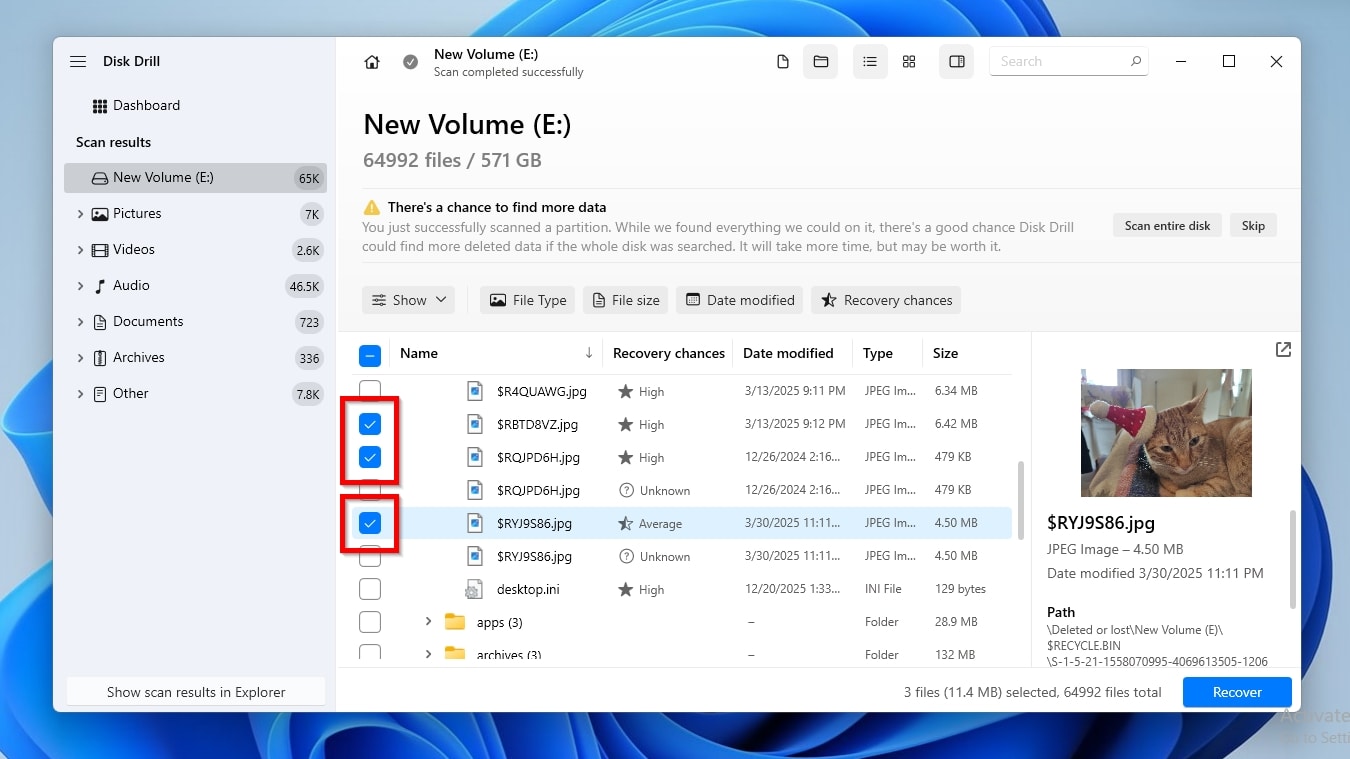
- When you find the files you want to get back, mark them for recovery by placing a checkmark on the left of their filenames. Then, click Recover.
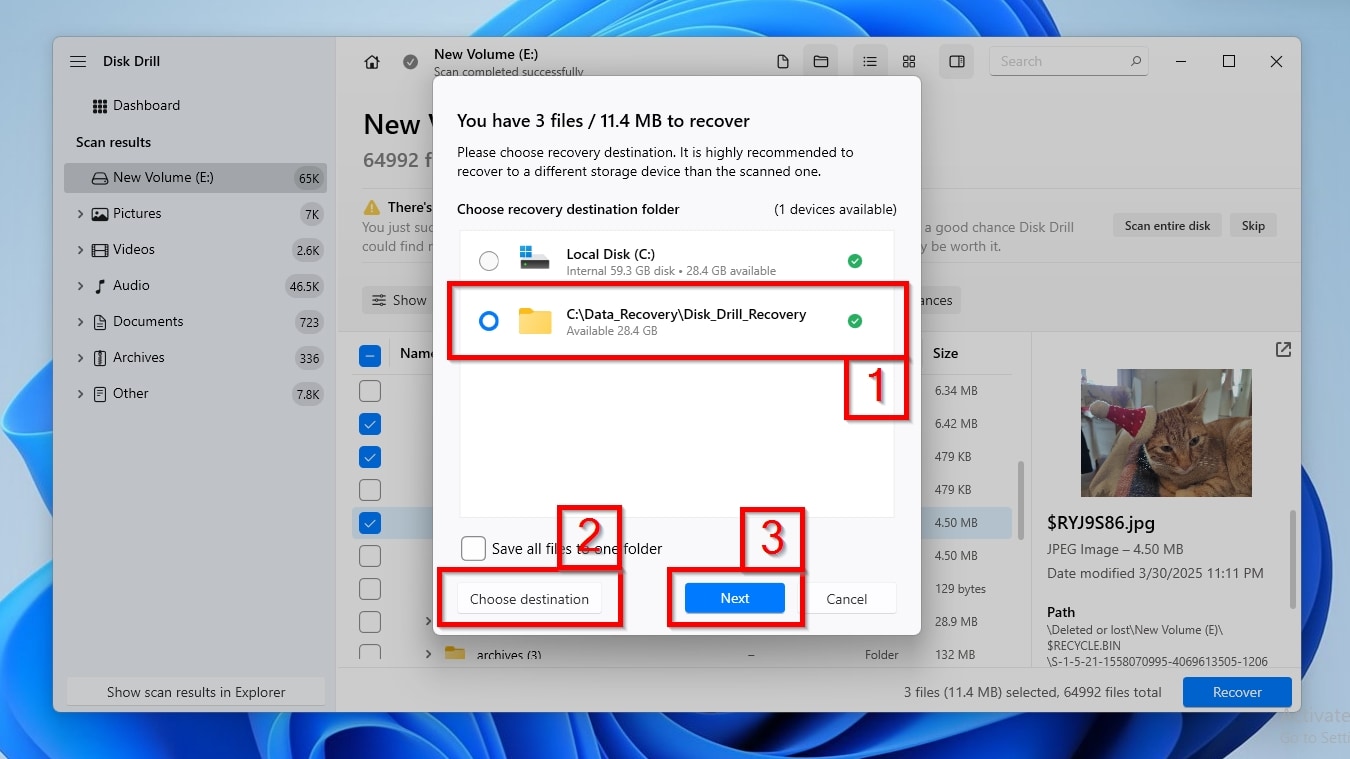
- Disk Drill will ask you where you want to store the recovered files, and present a list of locations, including ones you might have used in the past with the app (1). If the one you want isn’t among them, click Choose destination and select a new folder from the requester window that will show up. It’s best to choose a different destination than the “source” drive from which you’re trying to recover files, to avoid having the newly recovered files overwrite older ones that you might also want to get back. When done, click Next.
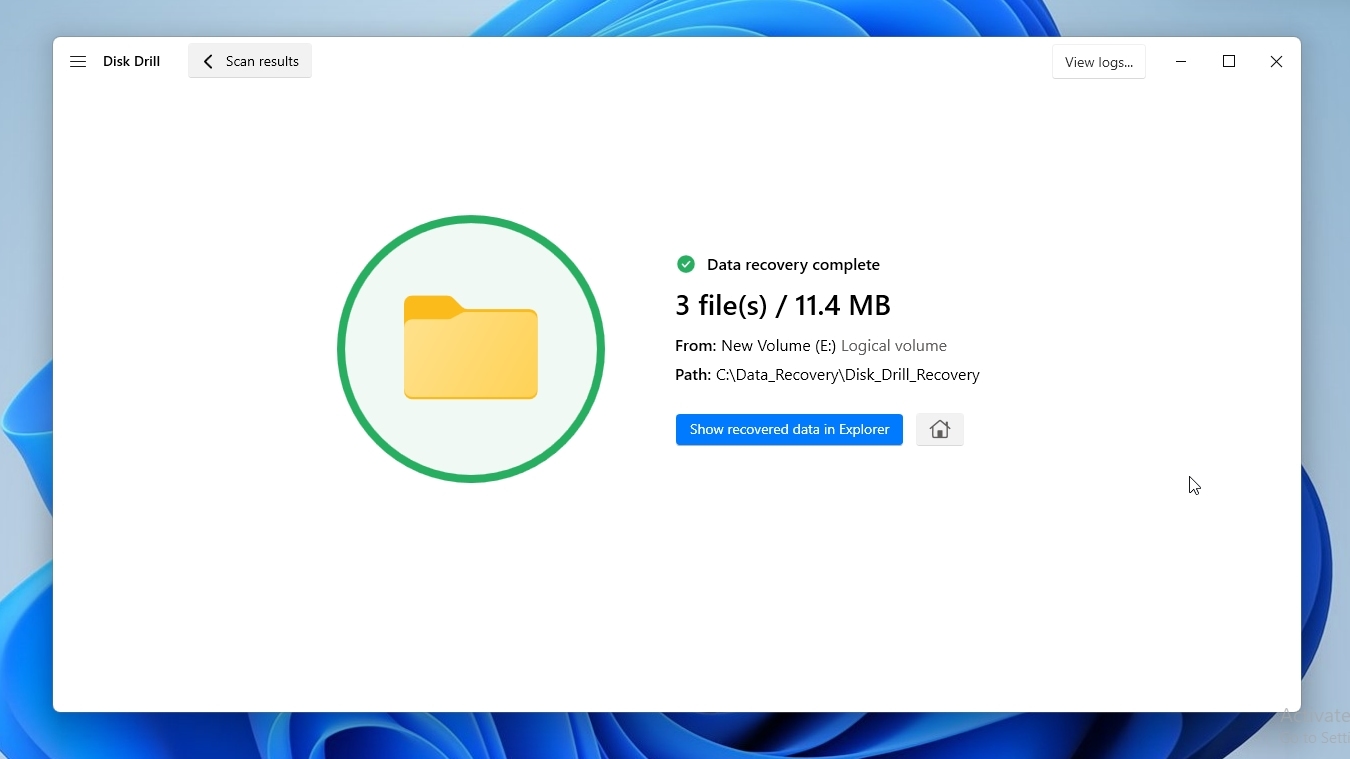
- The app will start recovering the files you selected and storing them in the folder you chose as the destination location. When it’s done, Disk Drill will inform you that the Data recovery (is) complete, with some additional information about the number of recovered files and involved paths, and a friendly blue Show recovered data in Explorer button. Click it to visit the destination folder where Disk Drill stored the recovered files using the OS’s default file manager.
As we saw, Disk Drill can find and restore your lost or deleted files, but why choose it over one of its peers for this task?
- 🌍 Universal Recovery: Disk Drill supports all popular file systems used on external hard drives on Windows (FAT16/32/exFAT, NTFS, ReFS), Linux (EXT2/3/4, BTRFS), and, in its latest version, macOS (HFS, HFS+, APFS). This allows the app to recover virtually any type of file, from almost any when recovering files from an external hard drive, while preserving their original file names and folder structure.
- 🧬 Versatile Retrieval: Disk Drill is intimately familiar with almost 400 file types, enabling it to recover them based on their “signatures”, their identifying “digital DNA”. That’s especially crucial when there are issues with an external disk’s file system, it shows up as RAW, or was reformatted. Among them are the file types one would expect to find on external hard drives, like AVI, MKV, MP4, and WMV videos, AAC, FLAC, MP3, and WMA audio files, BMP, JPG, PNG, and TIFF photo/image/graphic files, CHM, DOCX, and PDF documents, as well as 7Z, DMG, GZ, and ZIP archives. And those are but a small sample of all the types of files “it knows about”.
- 🦺 Data Safety: Disk Drill can read and interpret a disk’s SMART data to assess its condition, based on its own official health metrics. What’s best is that even if there are signs of trouble, and the disk is unstable or quickly failing, instead of directly trying to recover data from the external hard drive, Disk Drill can create a complete byte-to-byte backup of its contents and scan that instead of the original drive, for safe recovery of all files without further damage.
Its only minor limitation is that the free version allows scanning and previewing all files and doesn’t restrict any of its other functions, but it can recover up to 100 MB of data. Still, this should be more than enough to quickly get back your most important documents and verify the integrity of the rest of your files.
FAQ
Macs also use the concept of Recycle Bin folders, but unlike on Windows, on macOS they’re called Trashes.
To access a drive’s Recycle Bin/Trashes folder on an external hard drive on a Mac:
- Launch Finder and “visit” the external drive.
- With Finder’s default settings, the Trashes folder will remain hidden. If you can’t see it, use the Command + Shift + . (full stop) shortcut to have Finder display hidden files and folders.
- You should now be able to see and enter the .Trashes folder of the selected drive.
There are many reasons files you delete on external drives might not show up on the “main” Recycle Bin that’s accessible from its desktop icon or a file manager’s “global” Recycle Bin entry, with some of the most usual being that:
- The Recycle Bin might not be enabled for that drive.
- The drive’s $Recycle.Bin folder could have been deleted or corrupted.
- After manually enabling the Recycle Bin on a drive, it might not yet be “active” or somehow “gotten stuck”.
Although Windows doesn’t create a Recycle Bin on all removable drives by default, it’s possible to enable this functionality through what can be described as a “Registry hack,” then manually turning the feature on for each drive (individually).
- Seek “regedit” in the Start menu or use that shortcode in the Windows Key + R dialog, and launch the app.
- Create a New > DWORD (32-bit) Value at the Computer > HKEY_LOCAL_MACHINE > Software > Microsoft > Windows > CurrentVersion > Policies > Explorer path, name it “RecycleBinDrives”, and give it the value “ffffffff”.
- Close the Registry Editor and restart Windows to have the changes applied.
- Right-click on the Recycle Bin’s desktop icon or default entry in a file manager and choose its Properties. The new entries on this panel’s drive list will let you enable the Recycle Bin on any storage device recognized by the OS, including your removable drives.
Fiddling with the $Recycle.Bin and all related options and tweaks can’t help bring back a deleted file that doesn’t appear within that folder. Quite the opposite, it can actually make things worse by overwriting crucial data.
Instead, use a data recovery app like Disk Drill to analyze the external HDD where the file was stored, find it, and recover it.