


Lost files on a USB flash drive aren’t usually gone for good. If you’ve deleted the wrong files by mistake, or formatted the drive, or pulled it out mid-transfer, then the data is probably still recoverable, but you must stop using the drive right now, because every new write to it lowers your chances of getting those files back.
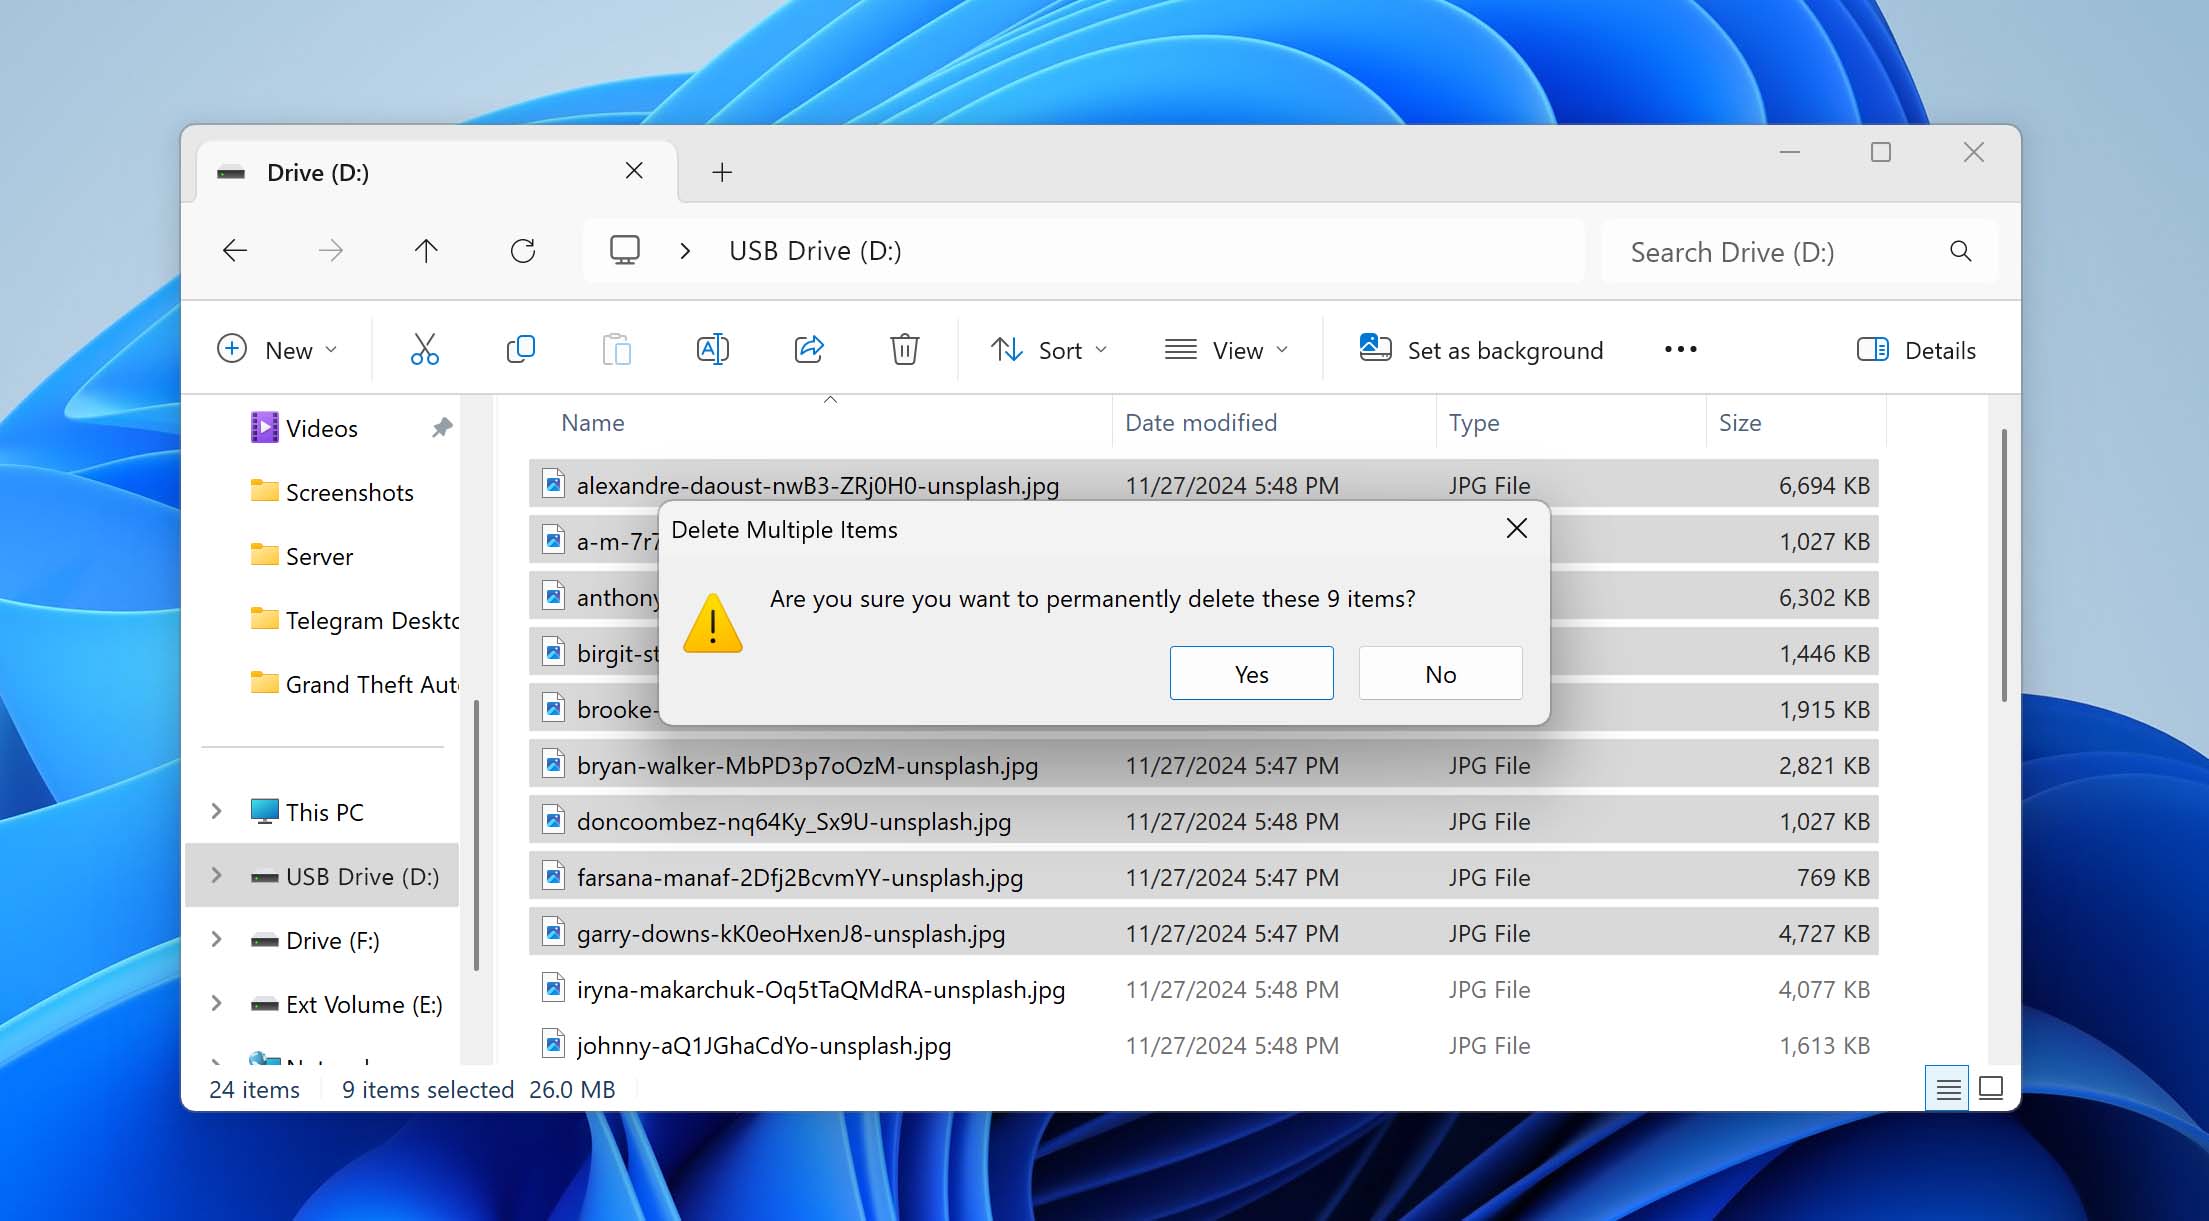
In this guide, we show you how to recover deleted files from USB drives using four tested methods. Our team ran each method on real flash drives (multiple storage sizes and brands) and data loss scenarios, then ranked them by how well they actually work. Some of the methods don’t need any additional software besides what you already have, while other methods rely on a dedicated recovery tool. In any case, the right starting point depends on what happened to your drive, and we will walk you through that decision next.
Reasons for USB Data Loss
USB drive data loss most commonly happens because users accidentally delete the wrong file or format the wrong storage device. It can also happen due to improper USB flash drive removal, file system corruption, file name attribute changes, malware, and hardware damage/failure.
That said, there are certain things you need to do to successfully recover deleted files from flash drives:
- ❗ Stop using the flash drive immediately after discovering that your data has been lost.
- 🔌 Safely disconnect the flash drive from your computer and store it somewhere safe until you have time to start the USB data recovery process.
- 💾 If possible, make a byte-to-byte (b2b) copy of the entire USB flash drive before attempting any recovery. Having a complete backup of the drive is especially important if the drive shows signs of physical damage and could stop working during your recovery attempts.
The table below maps the most common data loss scenarios to the methods we recommend trying first. Some methods work better than others depending on what actually happened to your drive, but data recovery software applies in almost every case.
| Data Loss Scenario | Recommended Recovery Methods |
| ❓ Accidental deletion |
Try using data recovery software ✅ for best results. Check Windows Previous Versions if file history was enabled. |
| ♻ Formatted drive |
Use specialized data recovery software for deep scanning. Check Windows Previous Versions if you have a recent backup. |
| 🔌 Improper removal |
If files are missing, use data recovery software for thorough scanning. Run CHKDSK command to fix file system errors. |
| 😧 File System corruption |
Start with data recovery software for any remaining lost files. Then use CHKDSK repair command to fix corruption. |
| 👻 Hidden files |
Use ATTRIB command to reveal hidden files and restore attributes. |
| 🐜 Malware attack |
Run a complete antivirus scan first to remove threats. Then use data recovery software to restore affected files. |
| 💥 Hardware failure |
Try data recovery software if the drive is still detected by the system. Contact a professional recovery service if the drive isn’t recognized. |
| ⛔ Physical damage |
Contact a professional data recovery service immediately (DIY repairs not recommended). |
How to Recover Permanently Deleted Files from a USB Drive
If you didn’t have a backup of the files you lost, you’re far from alone. According to our data, most people who reach for a USB drive don’t keep backups of what they store on it. In that case, data recovery software is your best chance of getting those files back, and it’s more reliable than the manual fixes further down this article.
We cover two software options here:
- The first is Disk Drill, which is a full-featured recovery tool that handles a wide range of scenarios (accidental deletion, formatted drives, file system corruption, and more).
- The second is Windows File Recovery, a free command-line utility from Microsoft, which works for simpler data loss cases.
Method 1: Recover Data from USB Drive with Third-Party Software
Data recovery software is built to recover files that have been permanently deleted from a USB drive. It can also help when files have gone missing for less obvious reasons, like file system errors, corruption, or pulling the drive out without ejecting it first.
What’s nice about data recovery software is that you don’t need to know exactly what happened before running it. You can just scan your drive and see what the software actually finds. Once the scan completes, you can decide what to recover and where to save it.
We use Disk Drill in the steps below because it’s the tool we recommend for most USB flash drive recovery situations.
To recover deleted files from a USB flash drive:
- Download and install Disk Drill for Windows or macOS. The free version lets you recover up to 100 MB of data on Windows. On both platforms, you can scan and preview files without any limit, so you can confirm what’s recoverable before deciding whether to upgrade. Plenty of real recoveries fit comfortably within the free limit.
- Connect your USB drive and launch Disk Drill. Before scanning, you can create a byte-to-byte backup of the drive by selecting the Drive Backup extra tool in the left sidebar. To then scan the backup image instead of the live drive, click Attach disk image at the bottom of the Storage Devices window and continue with Step 3.
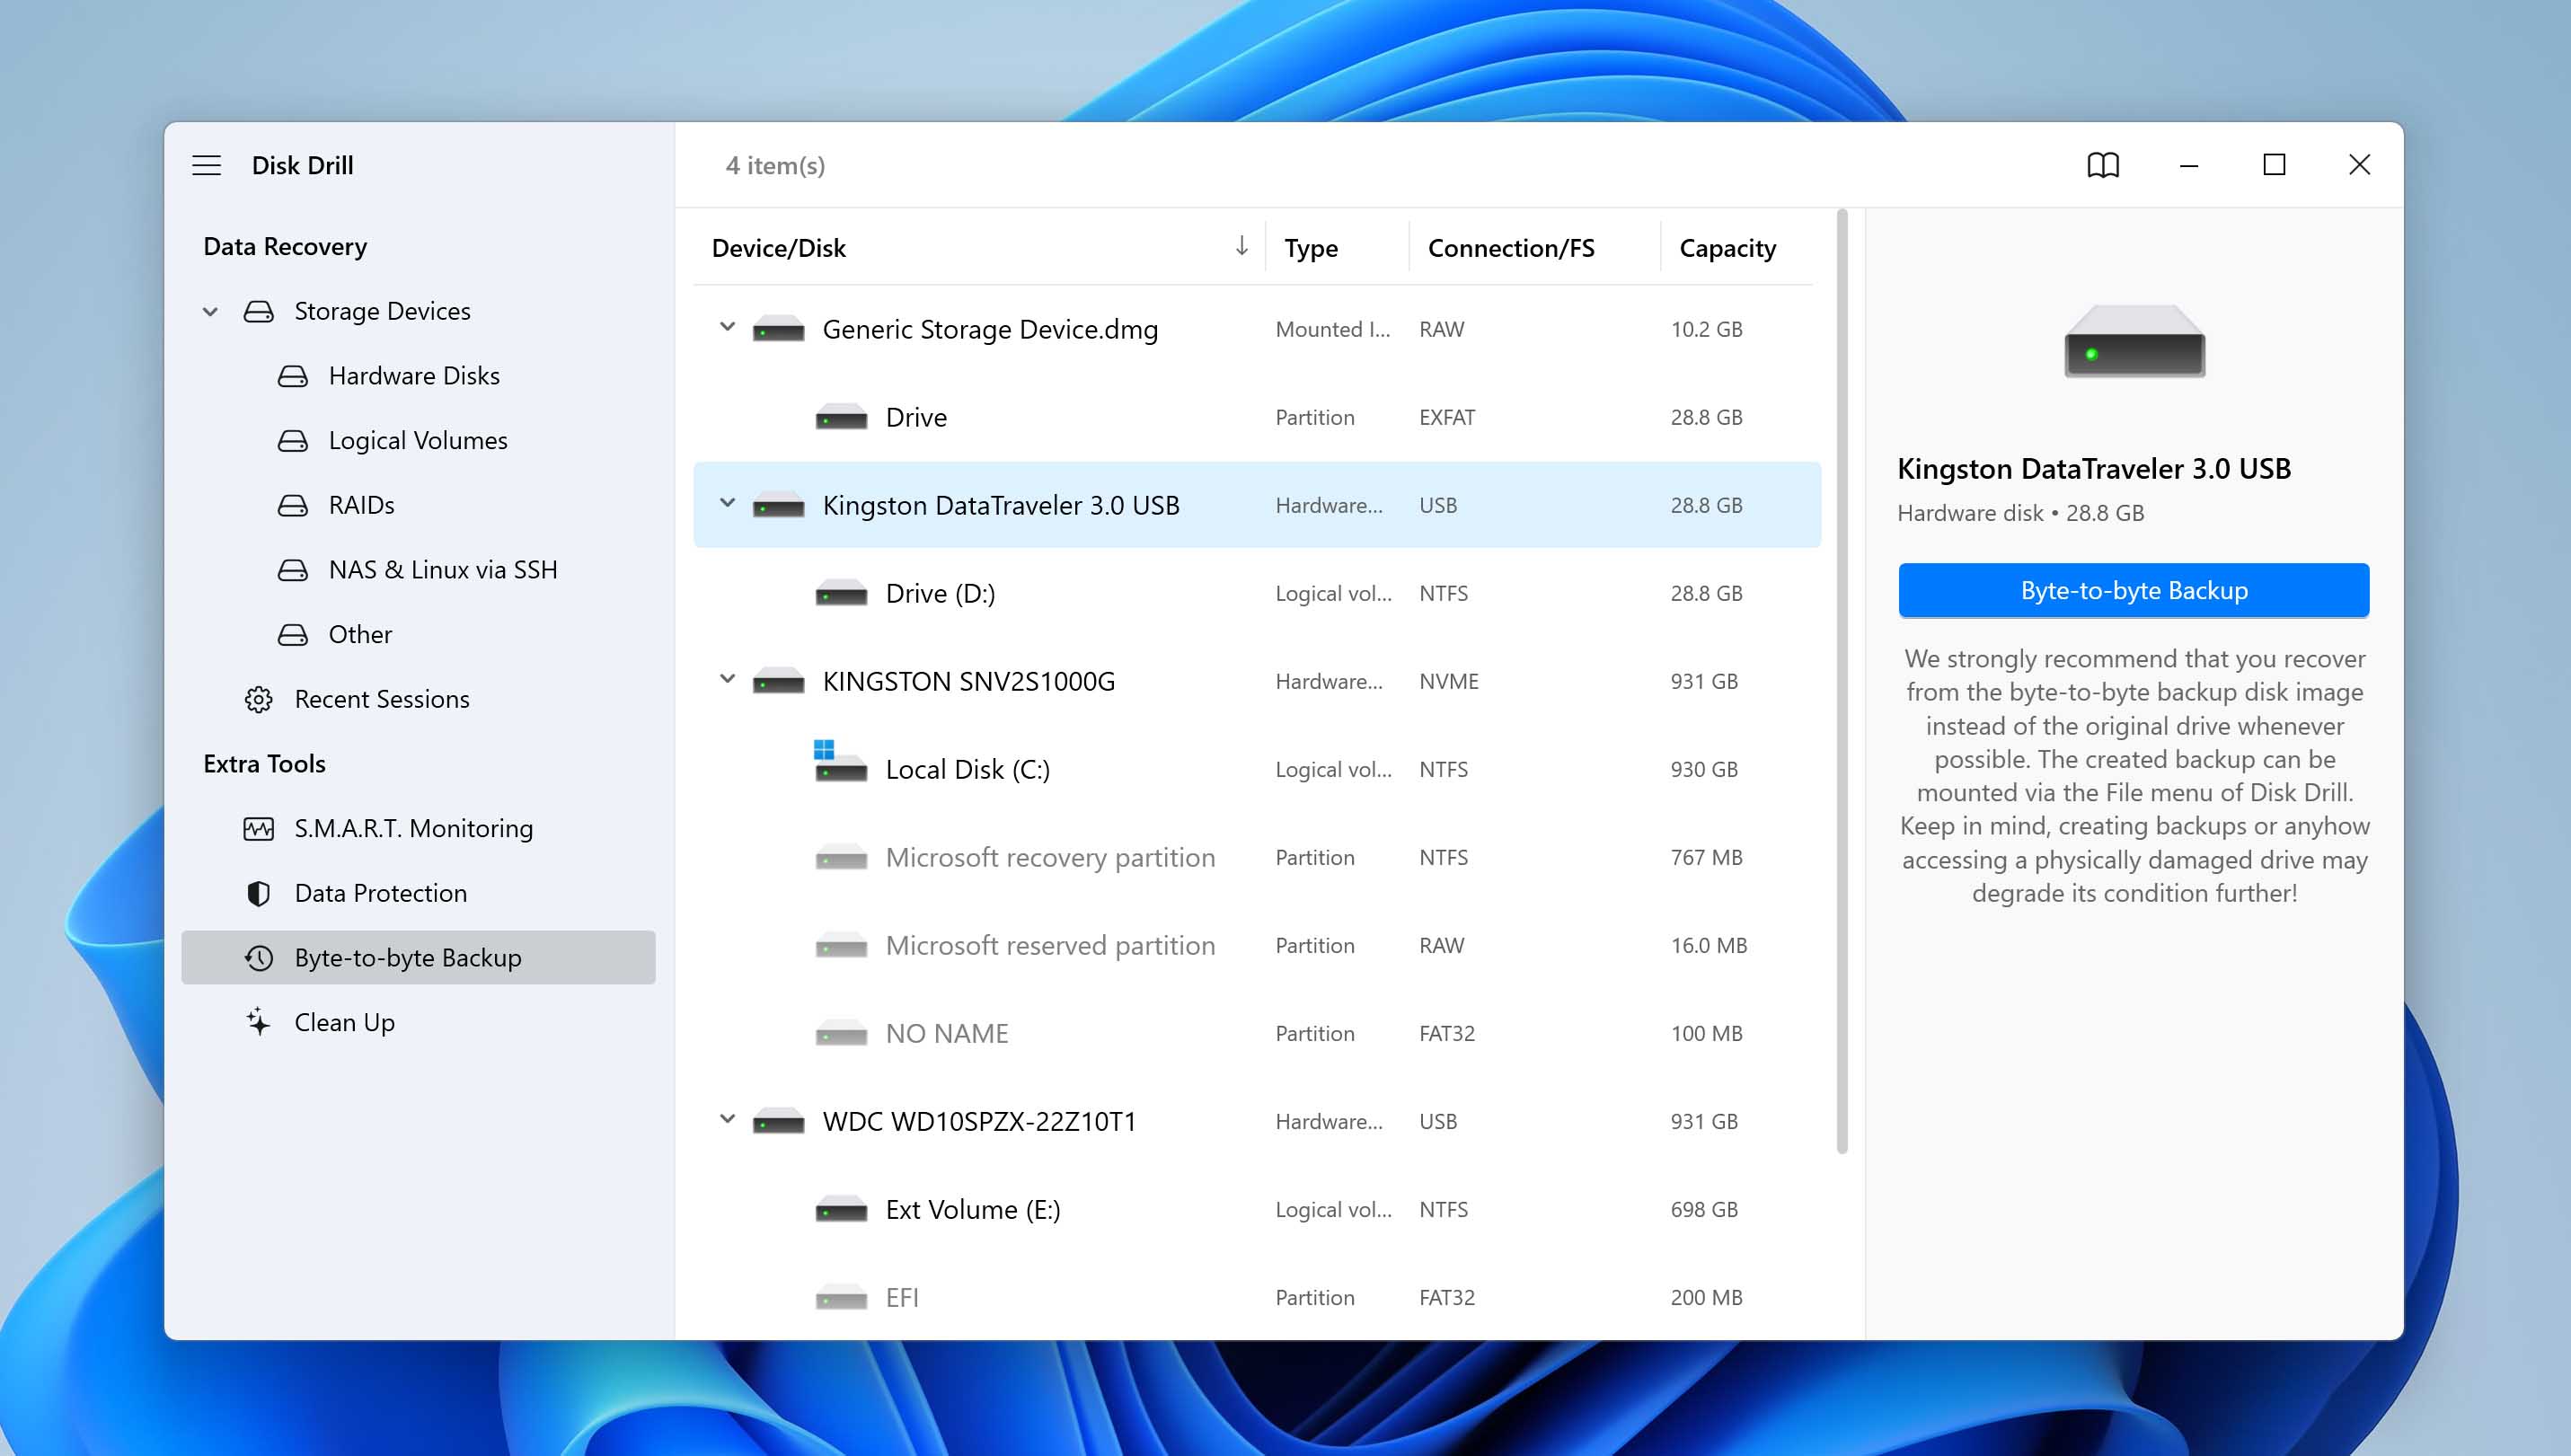
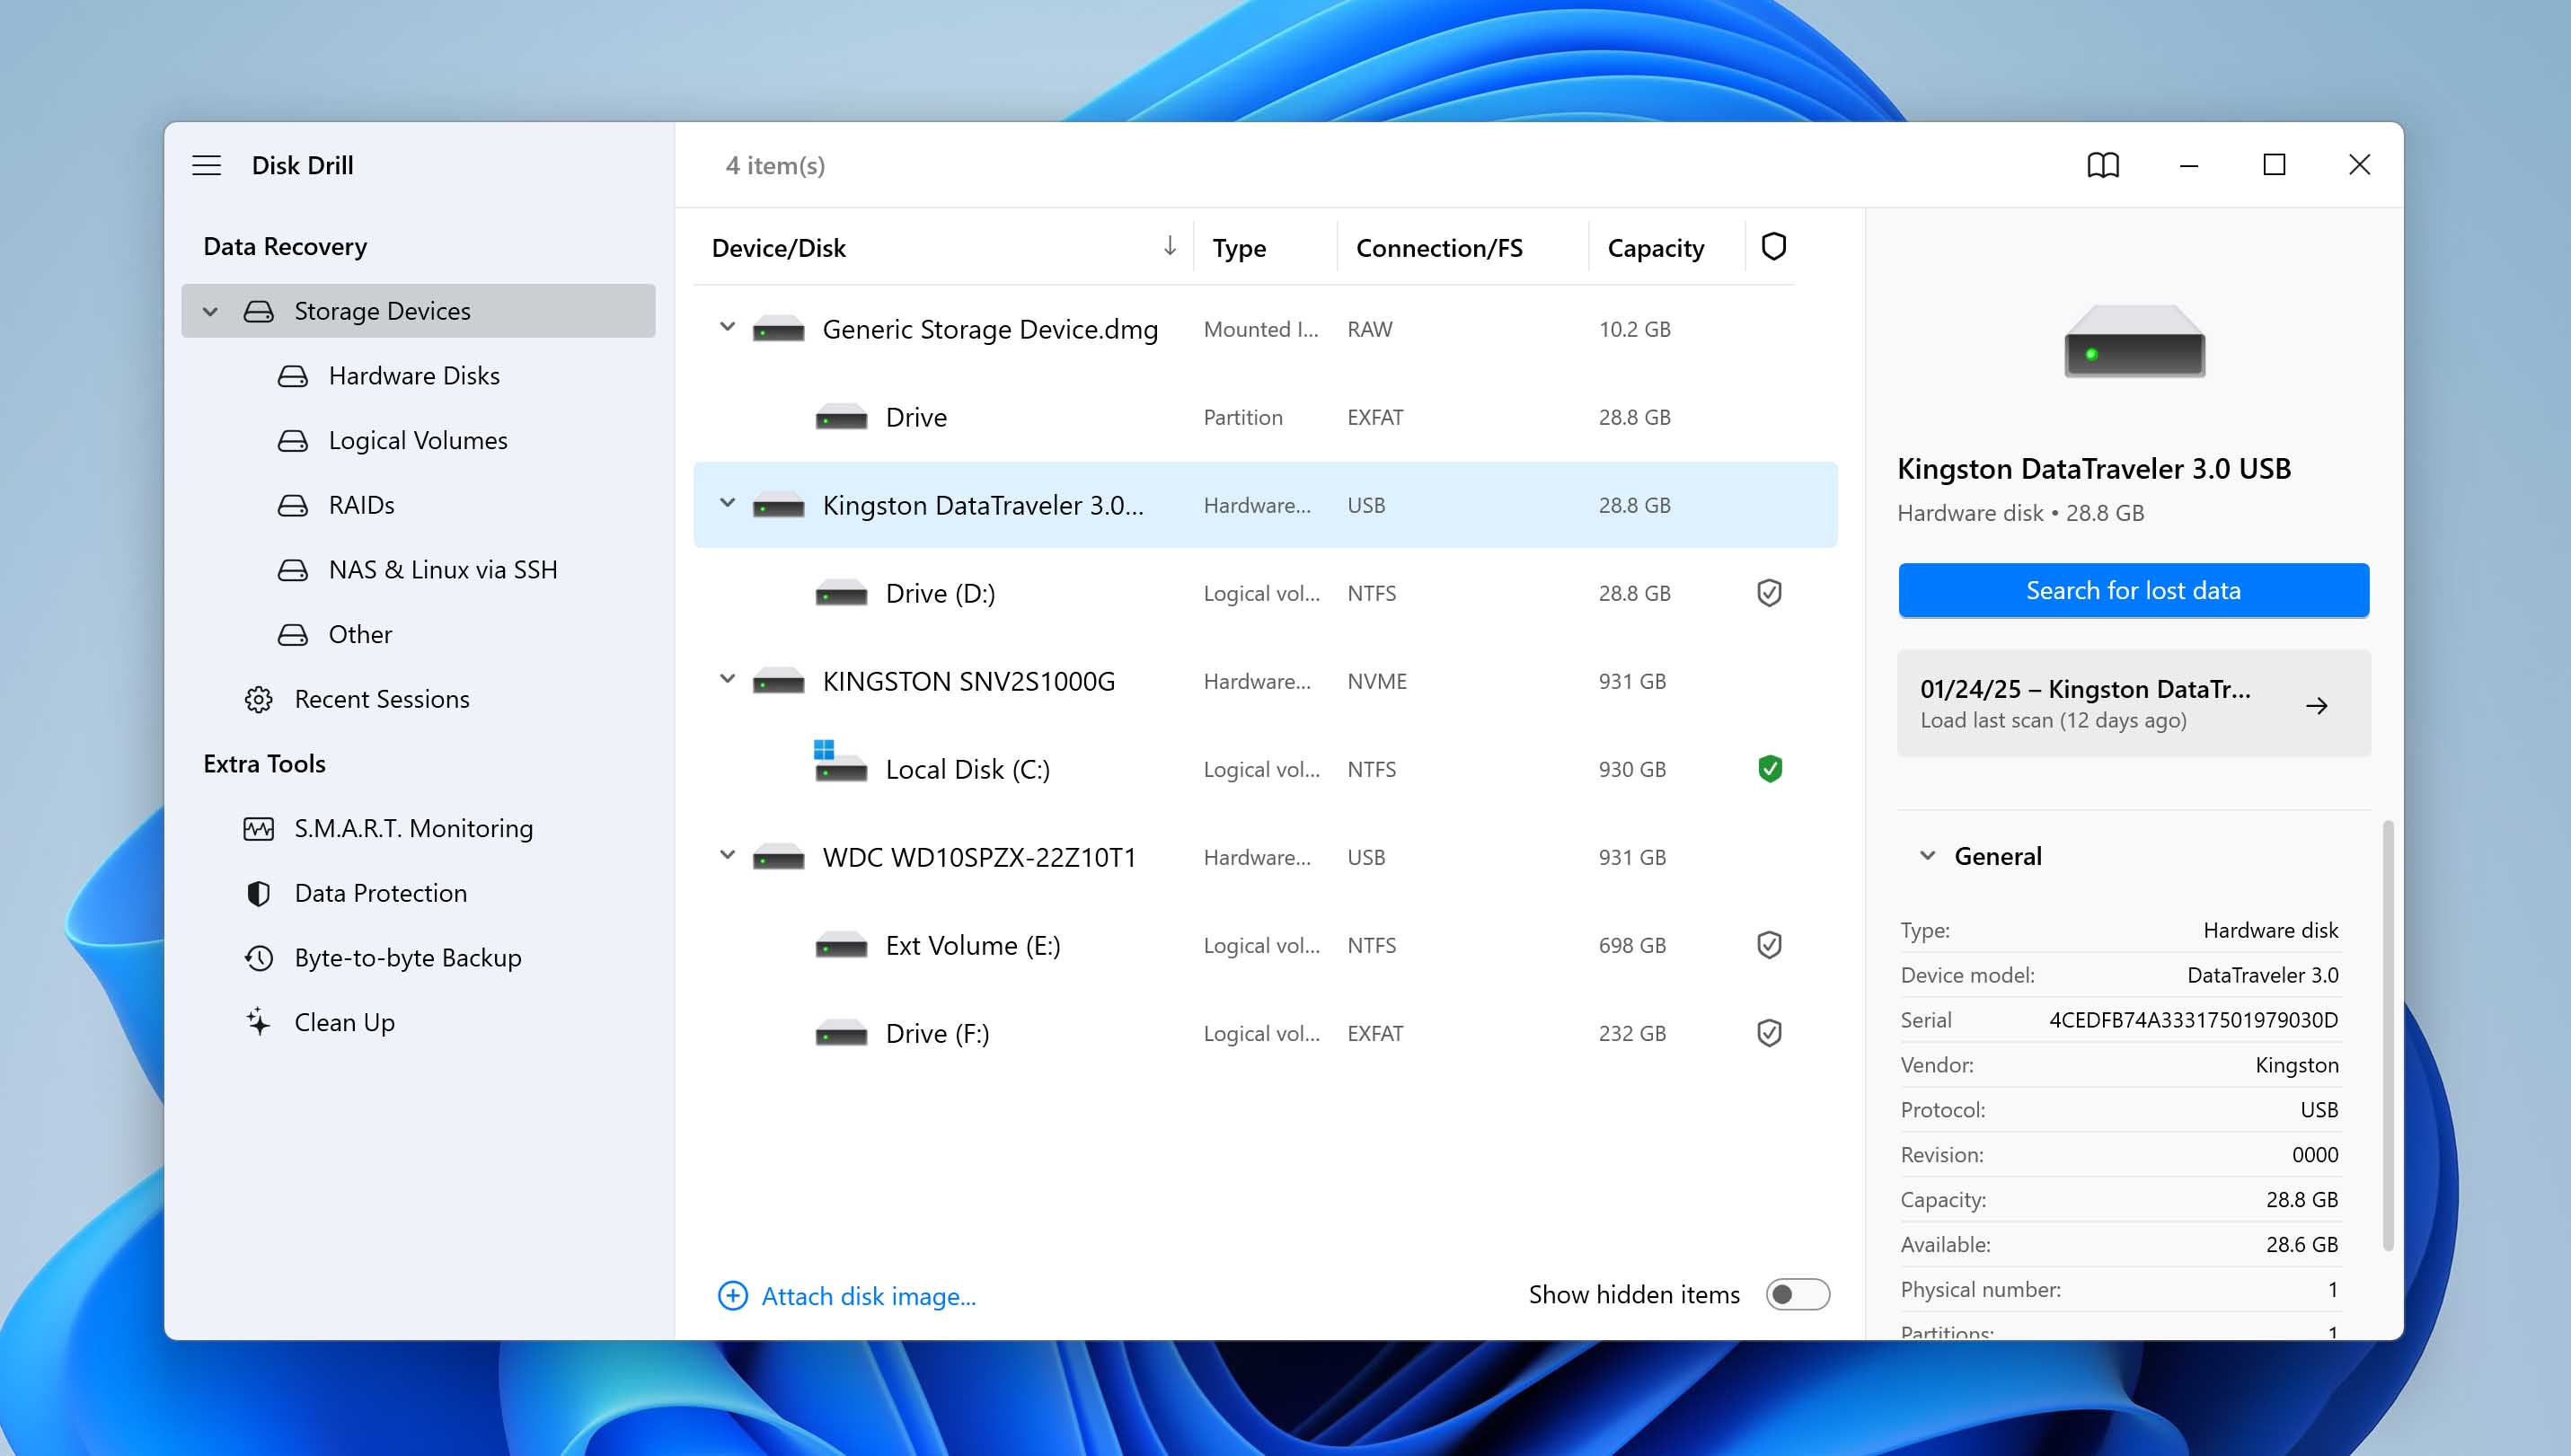
- Click the Search for lost data button next to your USB drive. As the scan progresses, you’ll see information about the number of found files and the estimated time remaining. You can click the Review found files button to view scan results while Disk Drill continues in the background.

- Locate and select your lost files. The scan results interface lets you search by filename, filter by date range, and narrow down by file size or type. For supported formats, you can preview the contents inside the program before recovering.
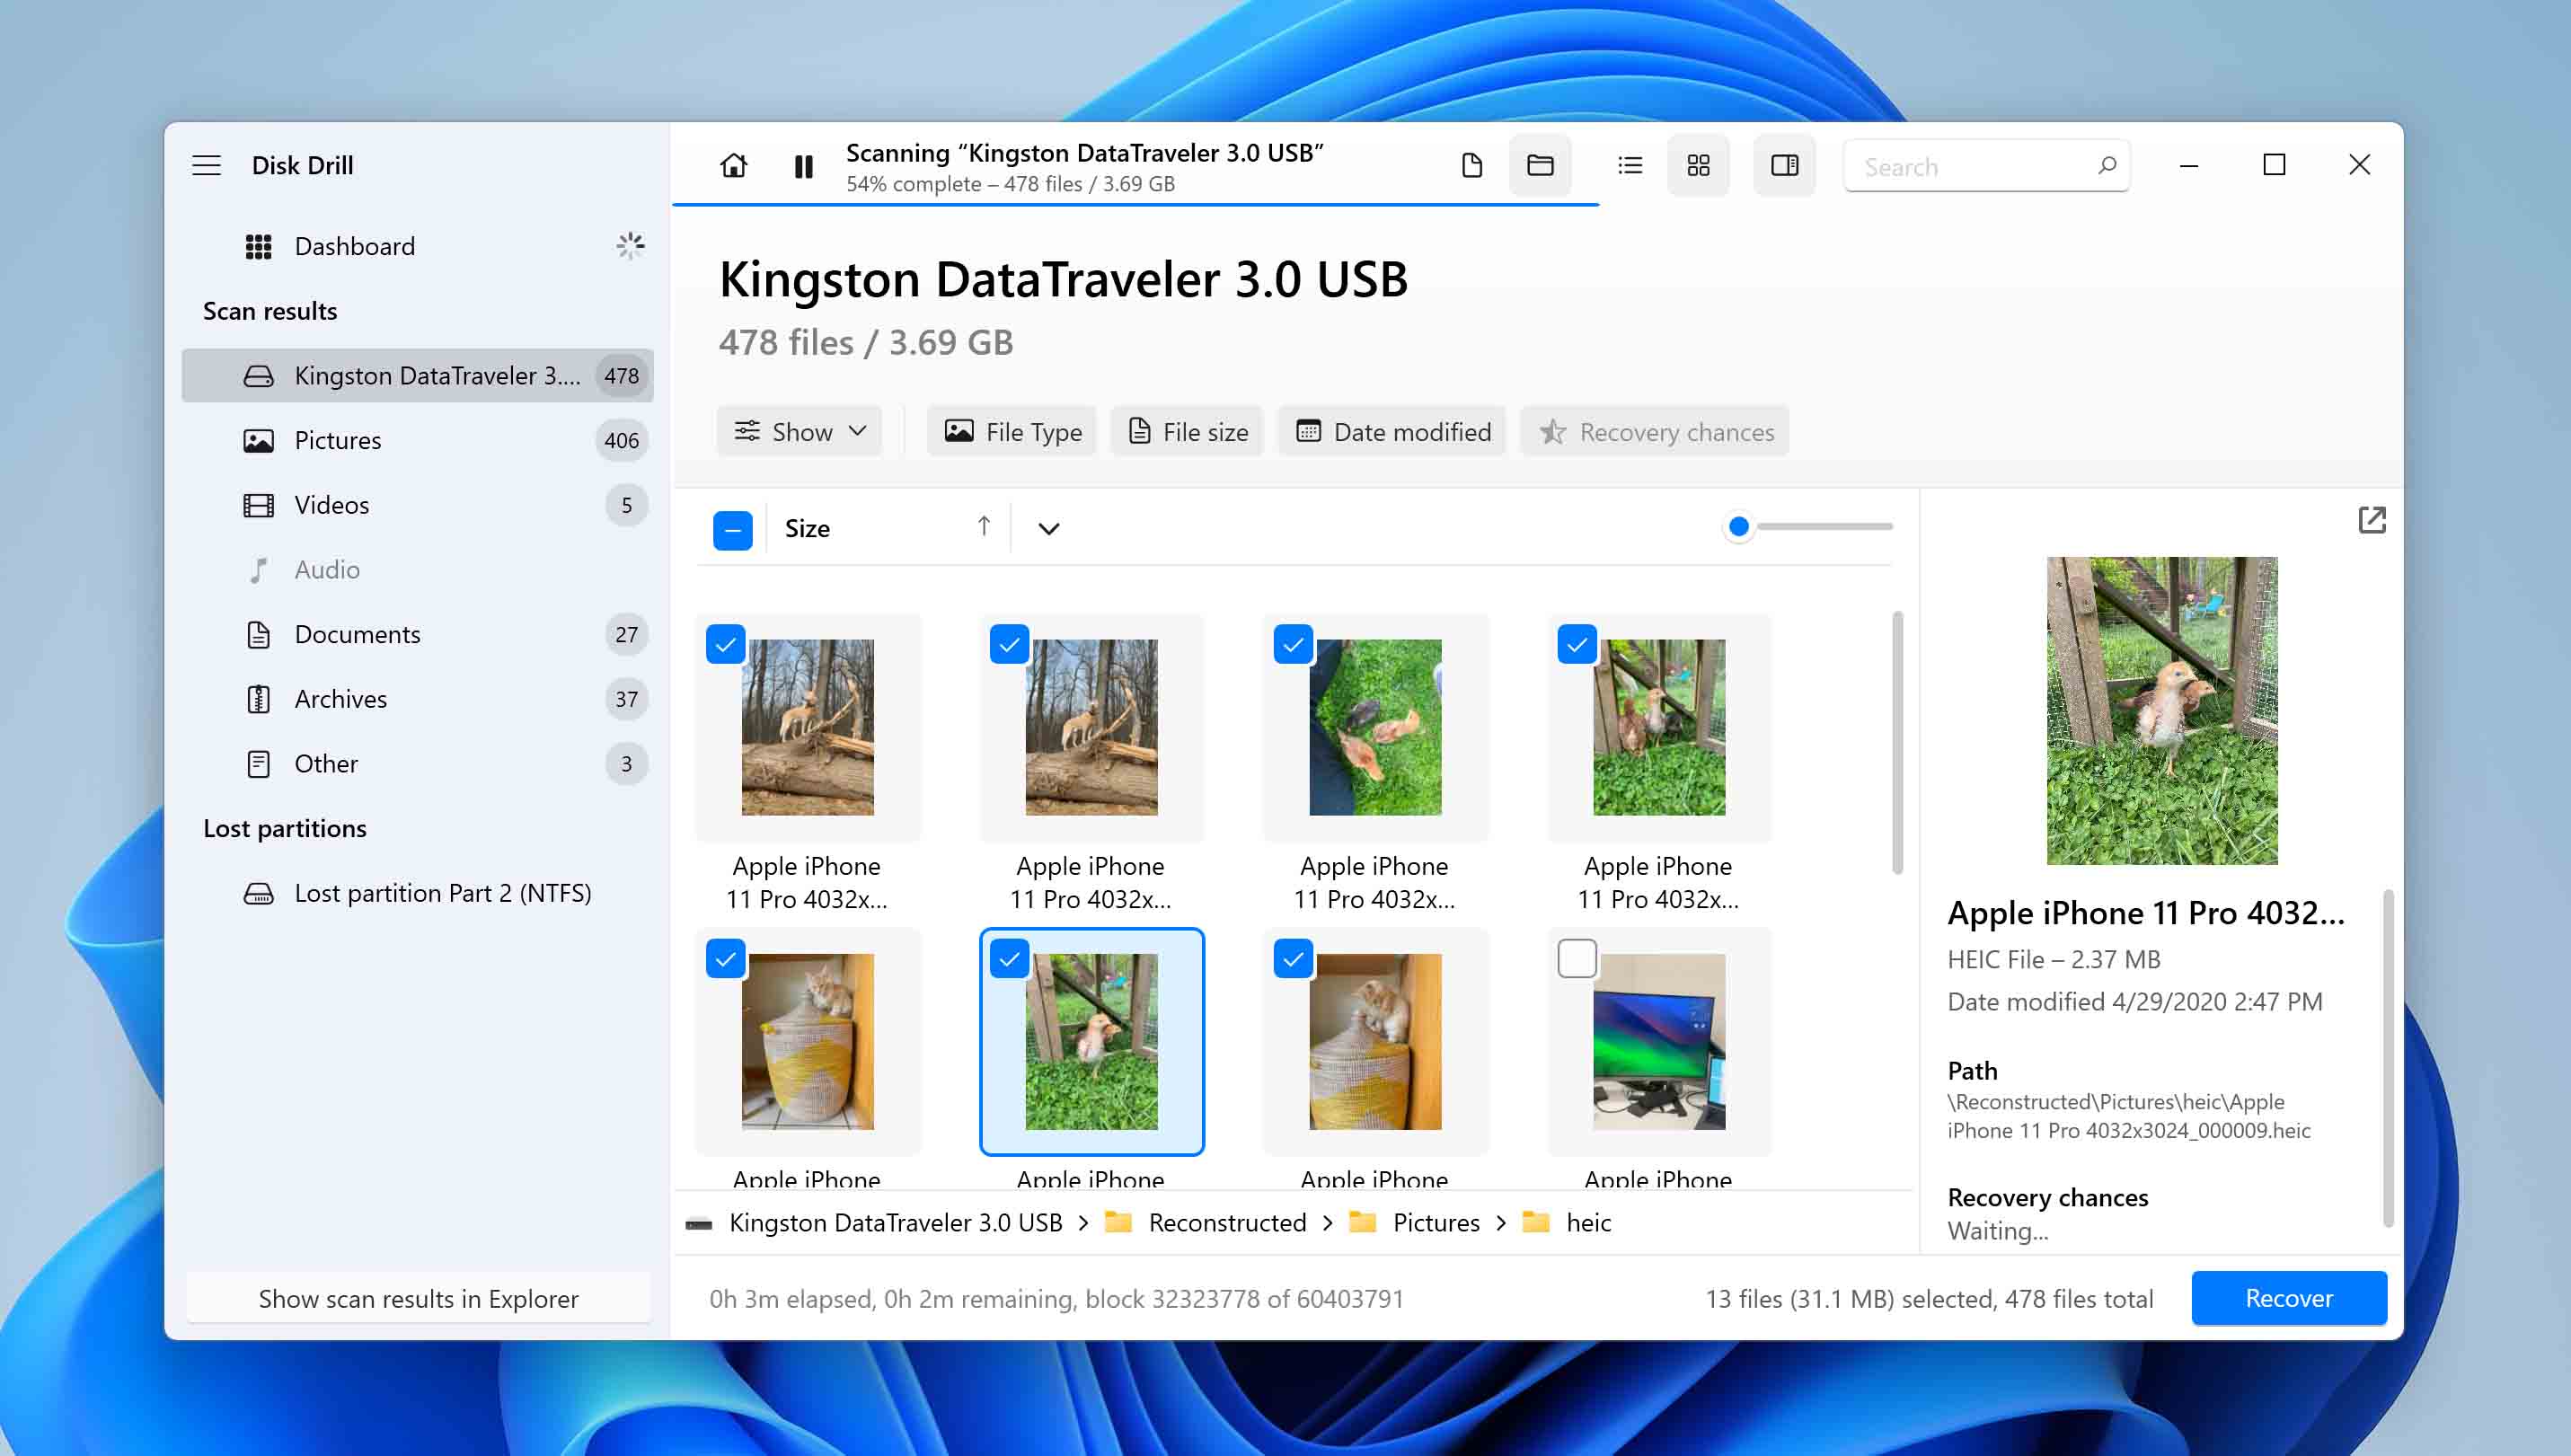
- Click the Recover button to recover the selected files. Choose a destination drive different from your USB drive to avoid overwriting data.
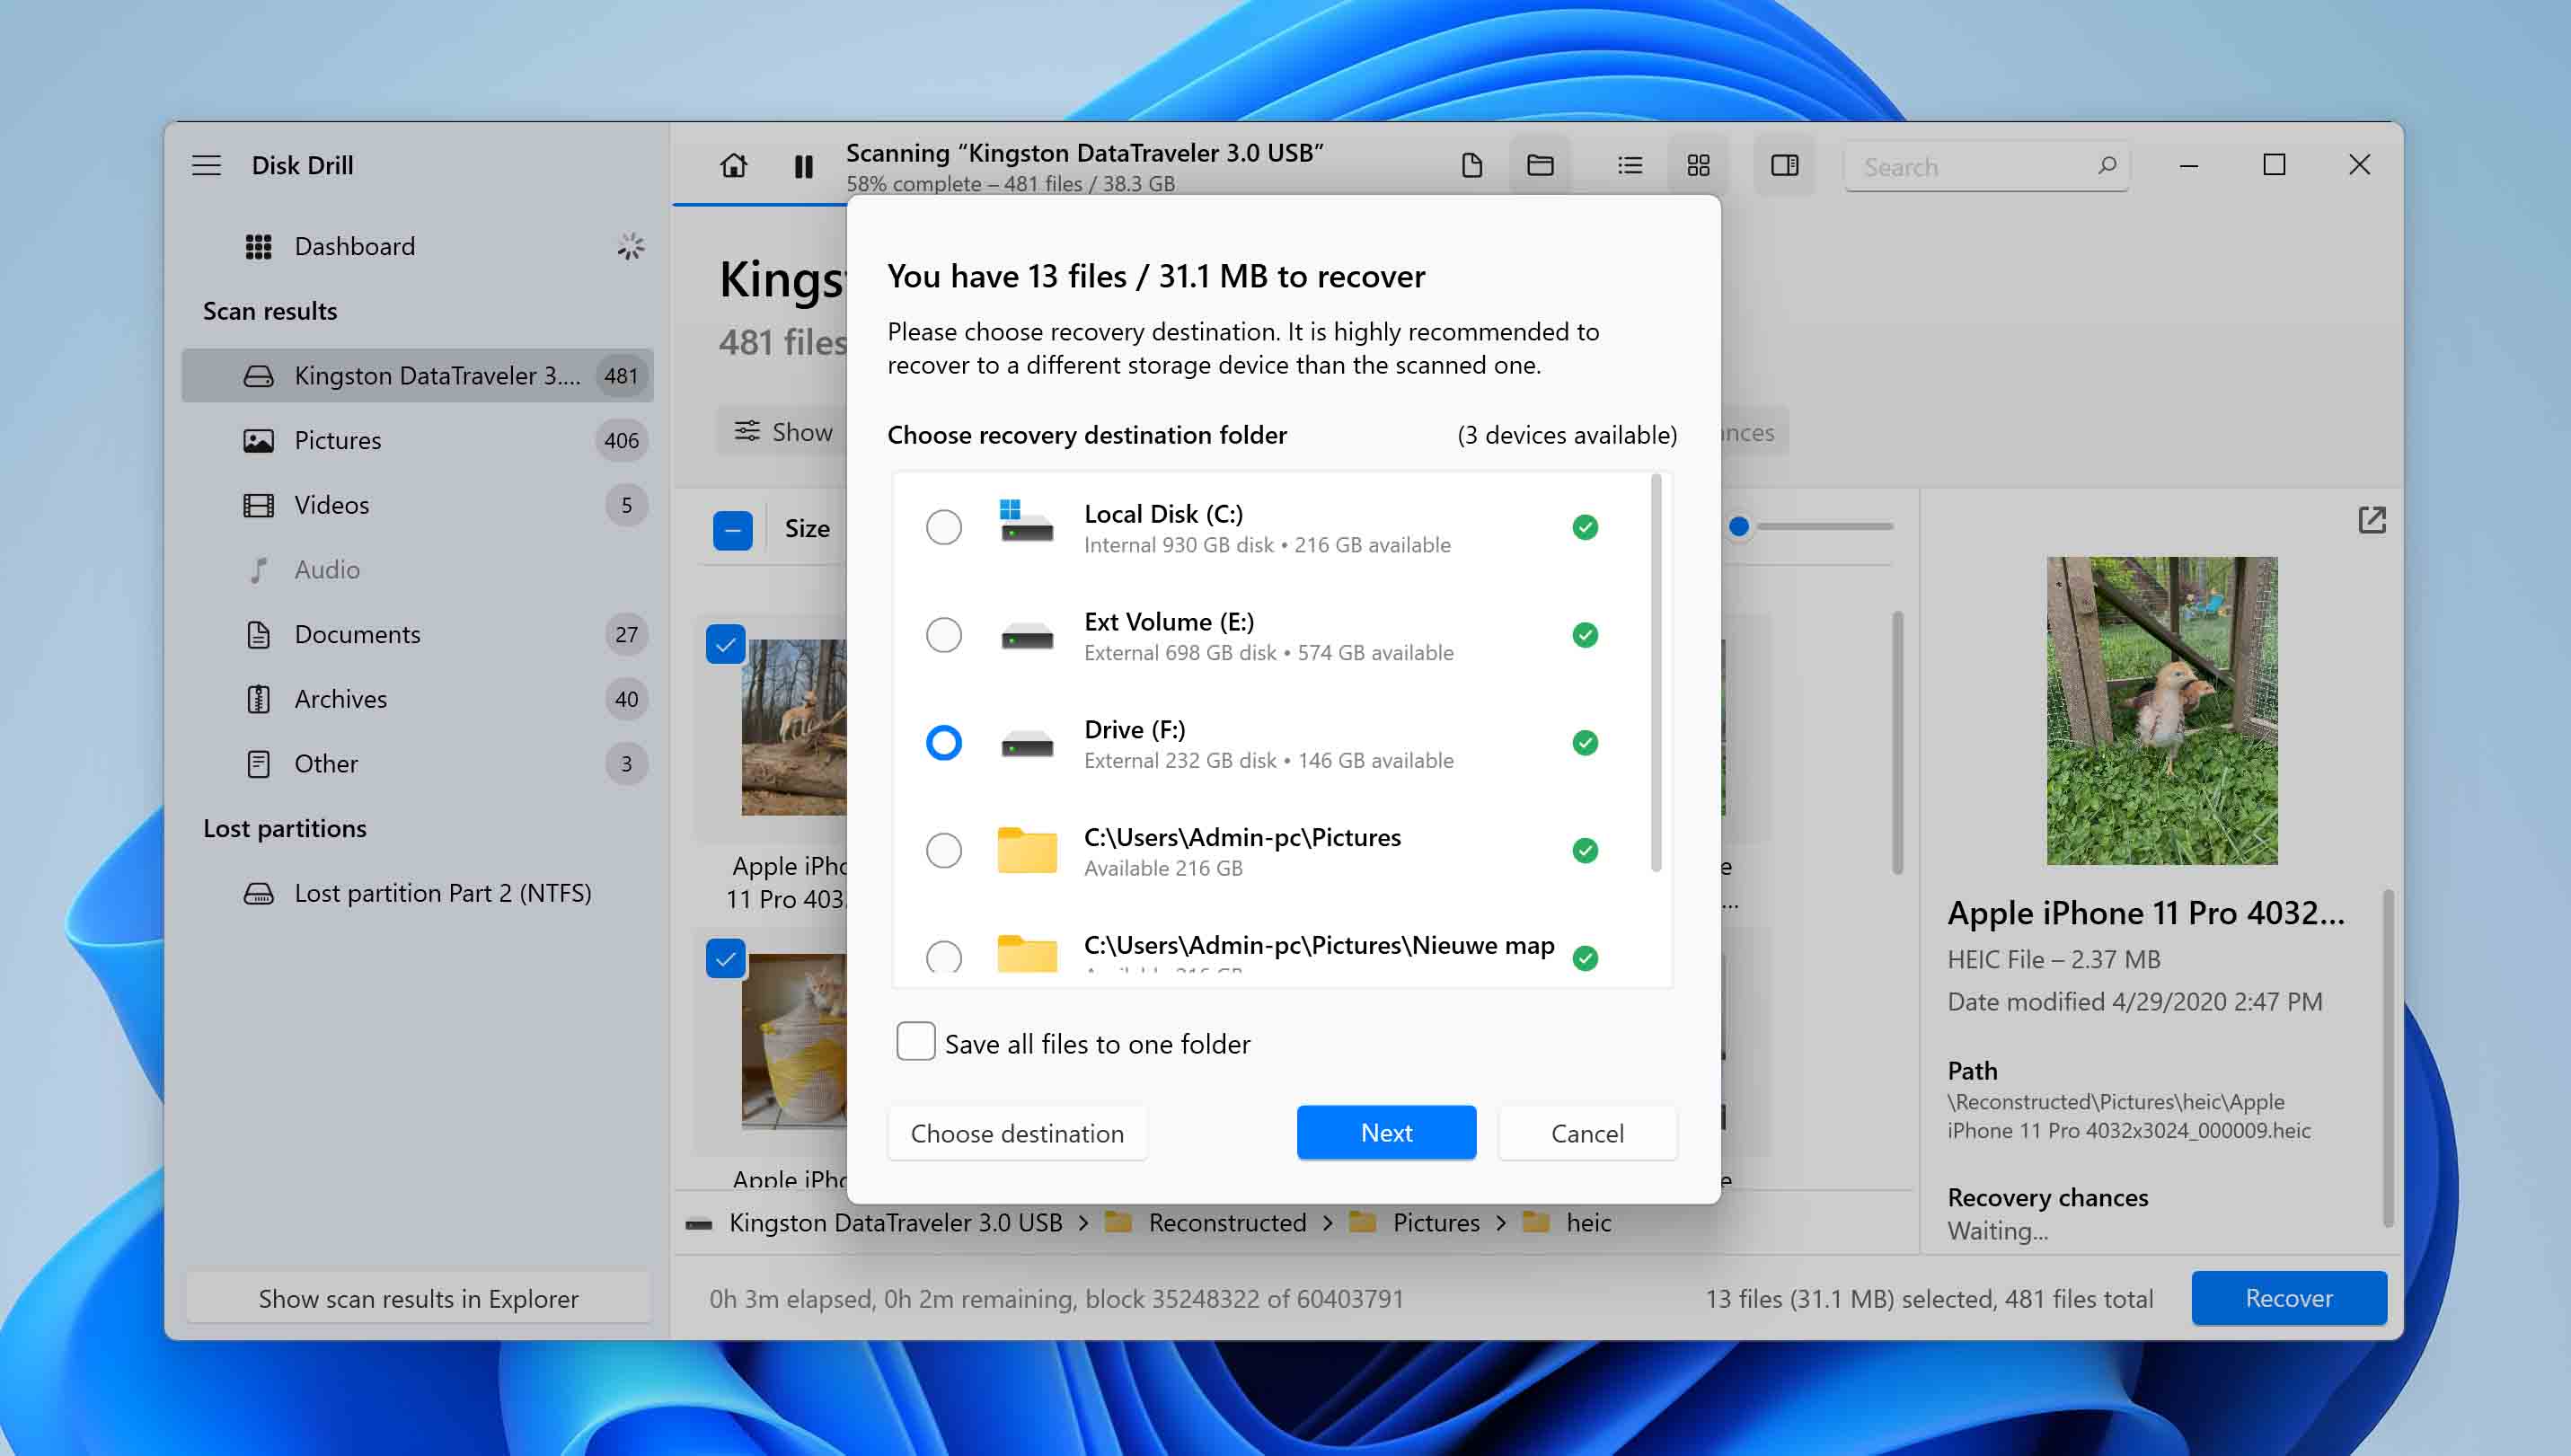
Behind the scenes, Disk Drill finds your files in two ways, and it runs both during every scan. The first is a file system scan, which is what usually preserves original filenames and folder structure. The second is a signature-based scan that recognizes files by their content patterns and still finds your data even when the file system is corrupted, formatted over, or otherwise damaged. The signature scan supports around 400 file types, which cover almost anything you’re likely to have stored on a USB drive: photos, videos, audio, documents, archives, and so on. On the file system side, Disk Drill works with FAT, FAT32, exFAT, and NTFS, which are the formats USB flash drives almost always use.
Method 2: Use Windows File Recovery to Get Back Deleted Files
Windows File Recovery (WFR) is the basic alternative we offer for users who would rather not pay for software. It’s a free command-line tool from Microsoft that you install separately from the Microsoft Store, and because it has no recovery limit, you can technically recover more data with it than with the free version of Disk Drill. The catch is that “more” only matters if Windows File Recovery actually finds your files in the first place.
The scanning algorithms of WFR are simpler than Disk Drill’s, the list of supported file types is much shorter, and the tool was clearly designed around the NTFS file system. NTFS is rare on USB flash drives, which almost always ship formatted as FAT32 or exFAT, so results on a typical flash drive tend to be slim.
To recover deleted data from a USB flash drive using Windows File Recovery:
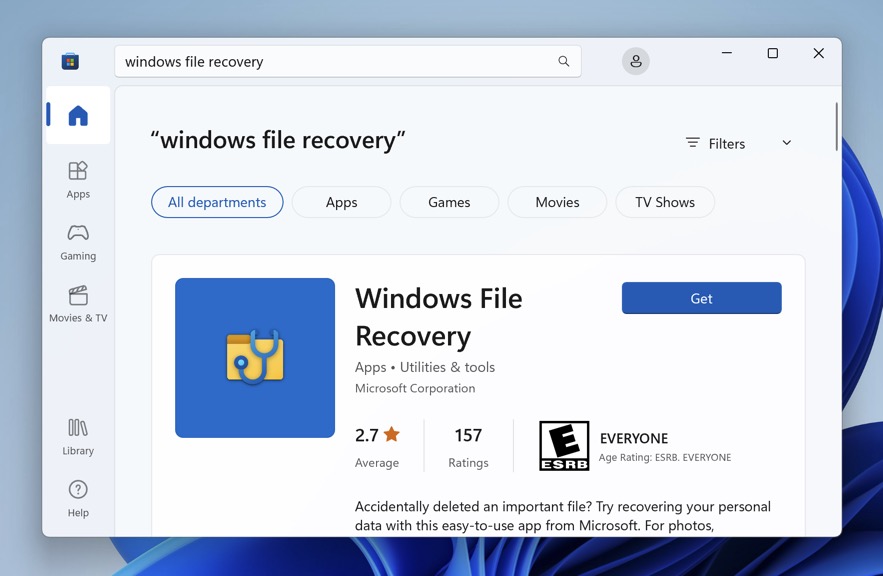
- Download Windows File Recovery from the Microsoft Store.
- Connect your USB flash drive to your computer and note the drive letter assigned to it.
- Open Windows Terminal or Command Prompt as administrator.
- Enter the following command:
Winfr E: C: /extensive. Replace E: with the drive letter of your USB flash drive, and C: with the drive letter where you want the recovered files saved.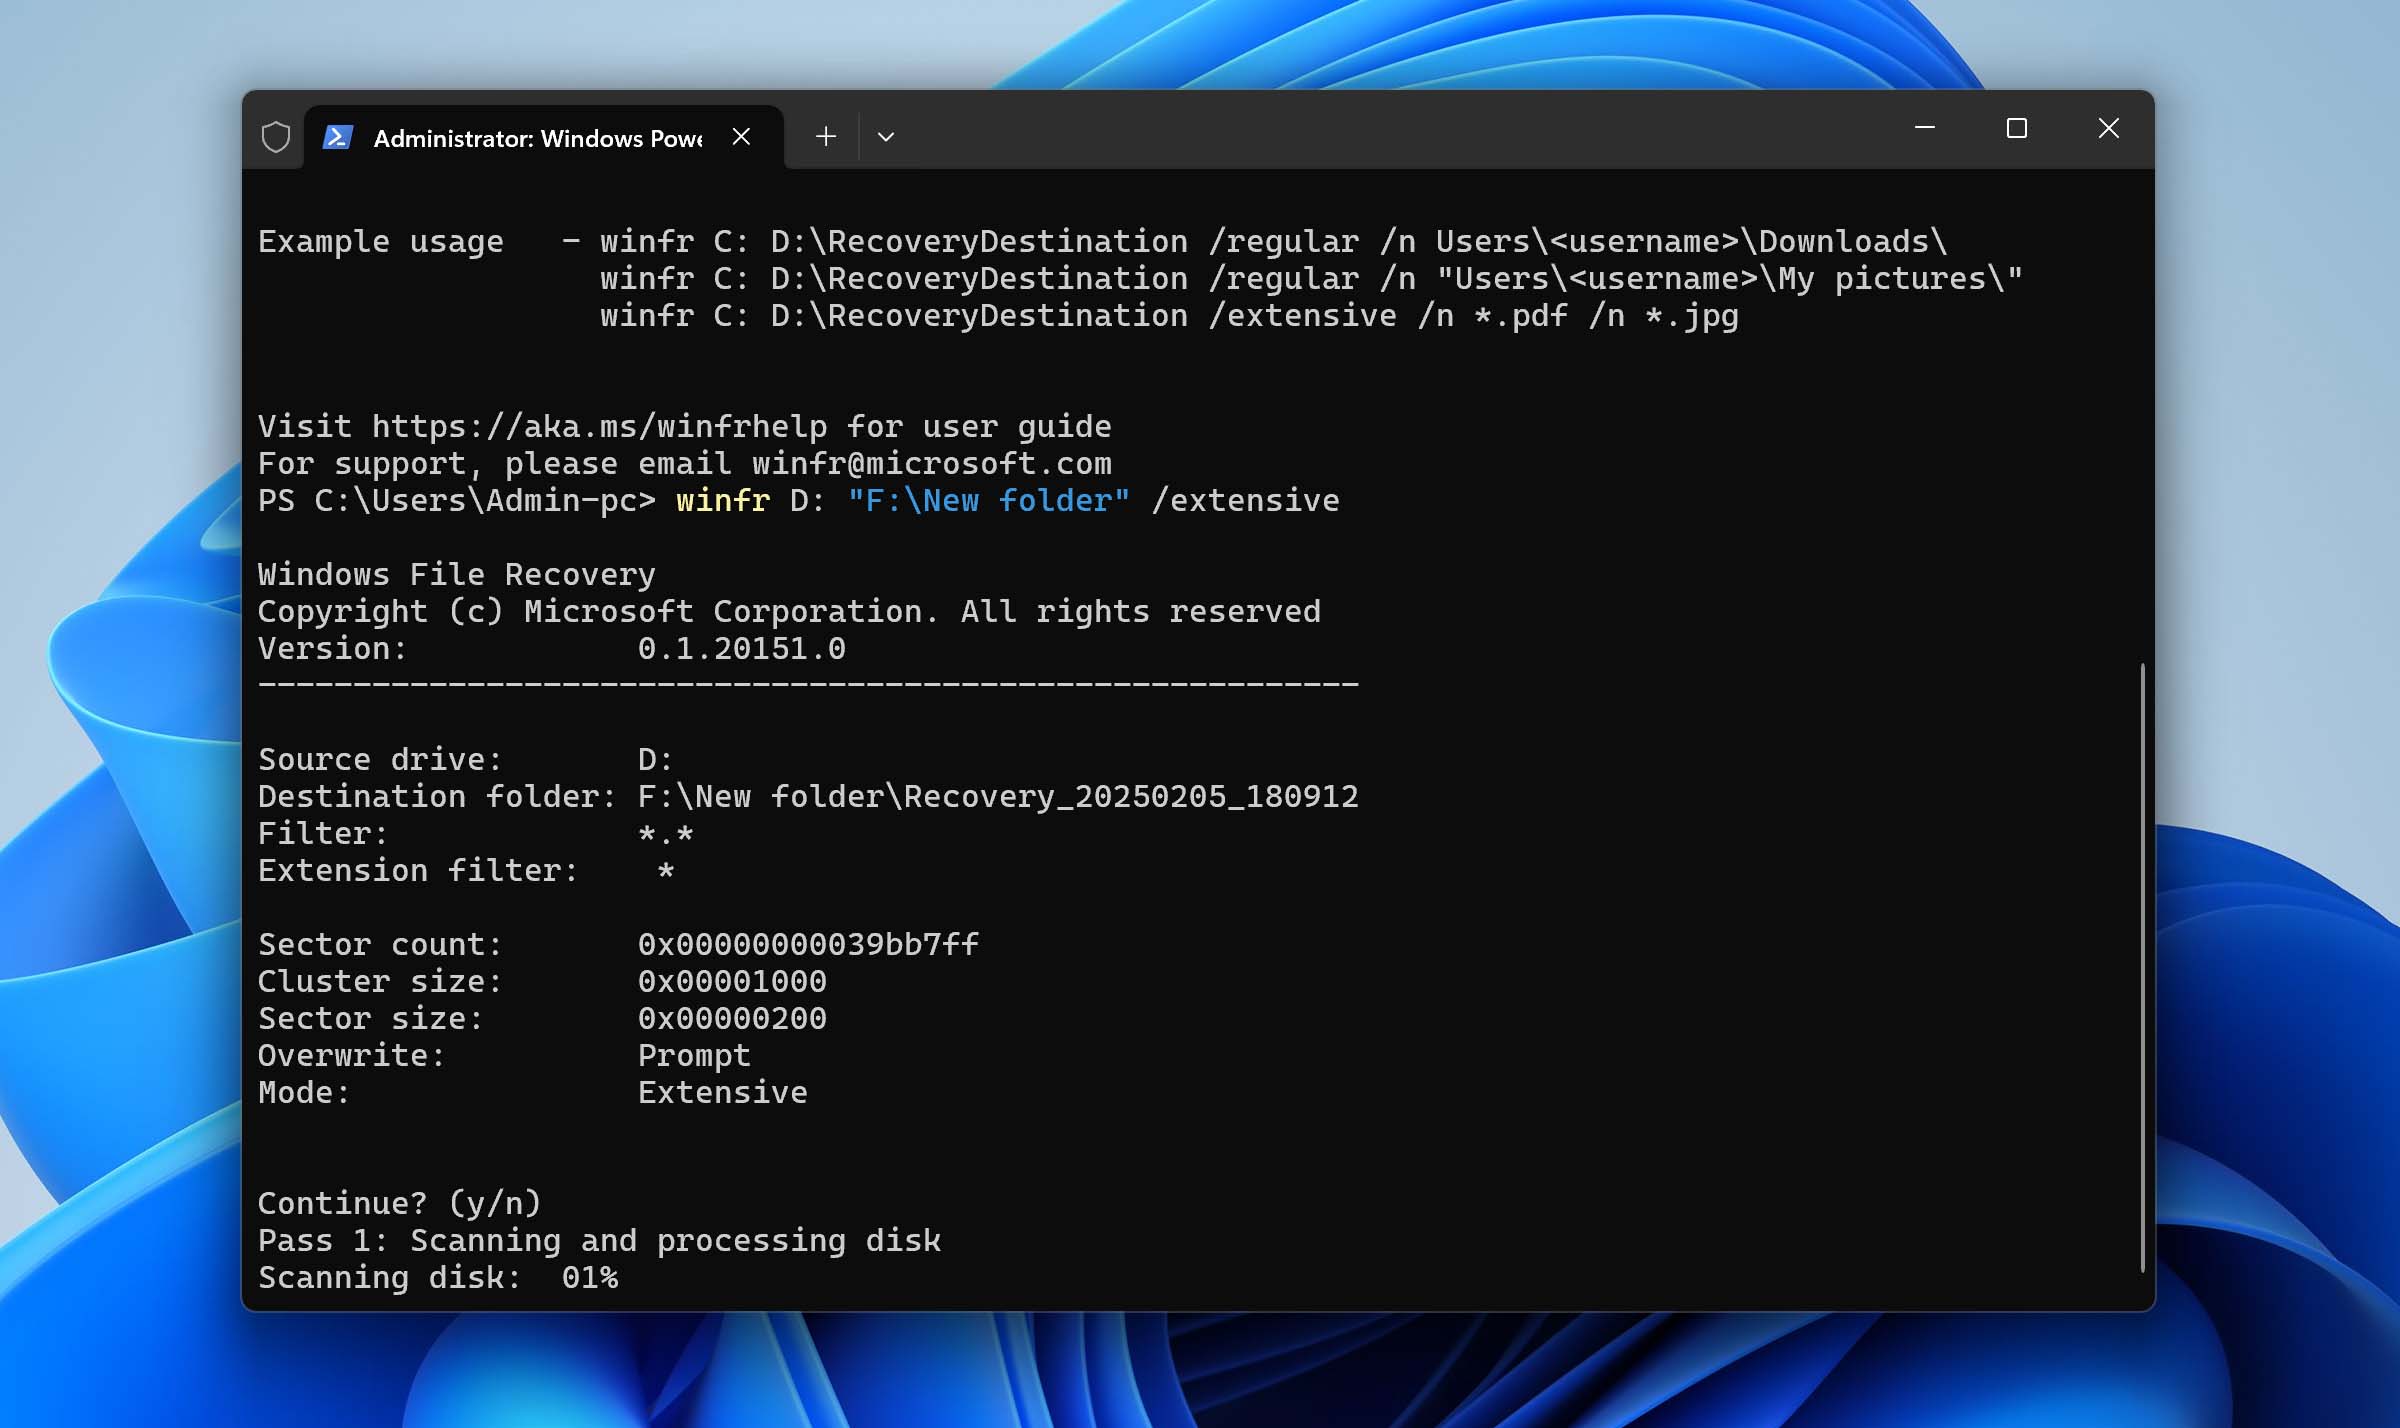
- Wait for Windows File Recovery to finish.
We tested both Disk Drill and Windows File Recovery on real USB drives over several weeks, across scenarios involving accidental deletion, formatting, and even corruption. Based on those tests, here’s how they compare:
| Criteria | Disk Drill | Windows File Recovery |
| 🖥️ Interface | Easy-to-use GUI suitable for all skill levels | Command-line interface requiring technical knowledge |
| ⚙️ Compatibility | Available for both Windows and macOS | Only available for Windows 10 version 2004 and later |
| 🦾 Functionality | Advanced file recovery for various scenarios including corruption, formatting, and damage | Mainly focused on recovering deleted files, with options for more thorough scans |
| 🤗 User Friendliness | Straightforward process with visual guidance and file previews | More complex, best for users comfortable with CMD or Windows Terminal |
| 📉 Data Recovery Limit | Free recovery of up to 100 MB, with paid upgrades for more | No data recovery limit, but less intuitive for average users |
| 📄 File Support | Supports a wide range of file types and formats with around 400 file signatures | Only basic document formats (such as DOCX, XLSX, PPTX), common image types (like JPEG, PNG), and popular media files (MP3, MPEG, ASF, and others) |
| 📖 Learning Resources | Tutorials and video guides | Primarily documented guides and support articles |
| 🕹️ Usage | Ideal for beginners and those preferring a GUI | Suited for tech-savvy users and those familiar with command-line tools |
To sum up, the main advantage of Windows File Recovery is that it’s free with no recovery limit. In every other way, Disk Drill wins by a wide margin. Recovery performance is significantly better thanks to its much broader file type support, and the graphical interface makes the tool usable for anyone who isn’t comfortable with command-line tools.
How to Recover Deleted Files from a USB Drive without Software
The two methods below don’t require any software you don’t already have, but they’re also more limited than the recovery software in Method 1. Use them as alternatives if you can’t or don’t want to install anything.
Here’s a quick rundown of what’s in this section:
- Method 3: Restore Previous Versions uses Windows File History to roll the drive back to a previous backup point.
- Method 4: CMD uses two built-in Windows commands,
chkdsk(fixes file system errors) andattrib(reveals hidden files). These help in situations where files appear deleted but are actually just inaccessible.
We’ve arranged the methods by usefulness and safety. Restore Previous Versions comes first because it’s safer and produces clean recoveries when it works, though it only helps if File History was set up on the drive before the files were lost. CMD comes second because CHKDSK can damage your recovery chances if used carelessly, so it’s worth trying only after you’ve ruled out the other options.
Method 3: Use the Restore Previous Versions Feature
The Restore Previous Versions feature (available in Windows 7, 8, 10, and 11) can help recover deleted files without third-party tools. However, the method only works if you set up File History before data loss occurred and manually added the flash drive to File History by including it in your Windows Libraries or pinning specific files to Favorites.
Still, it doesn’t take much time at all to check, and you can always continue with data recovery software if this one doesn’t work for you.
To recover deleted data from a USB flash drive:
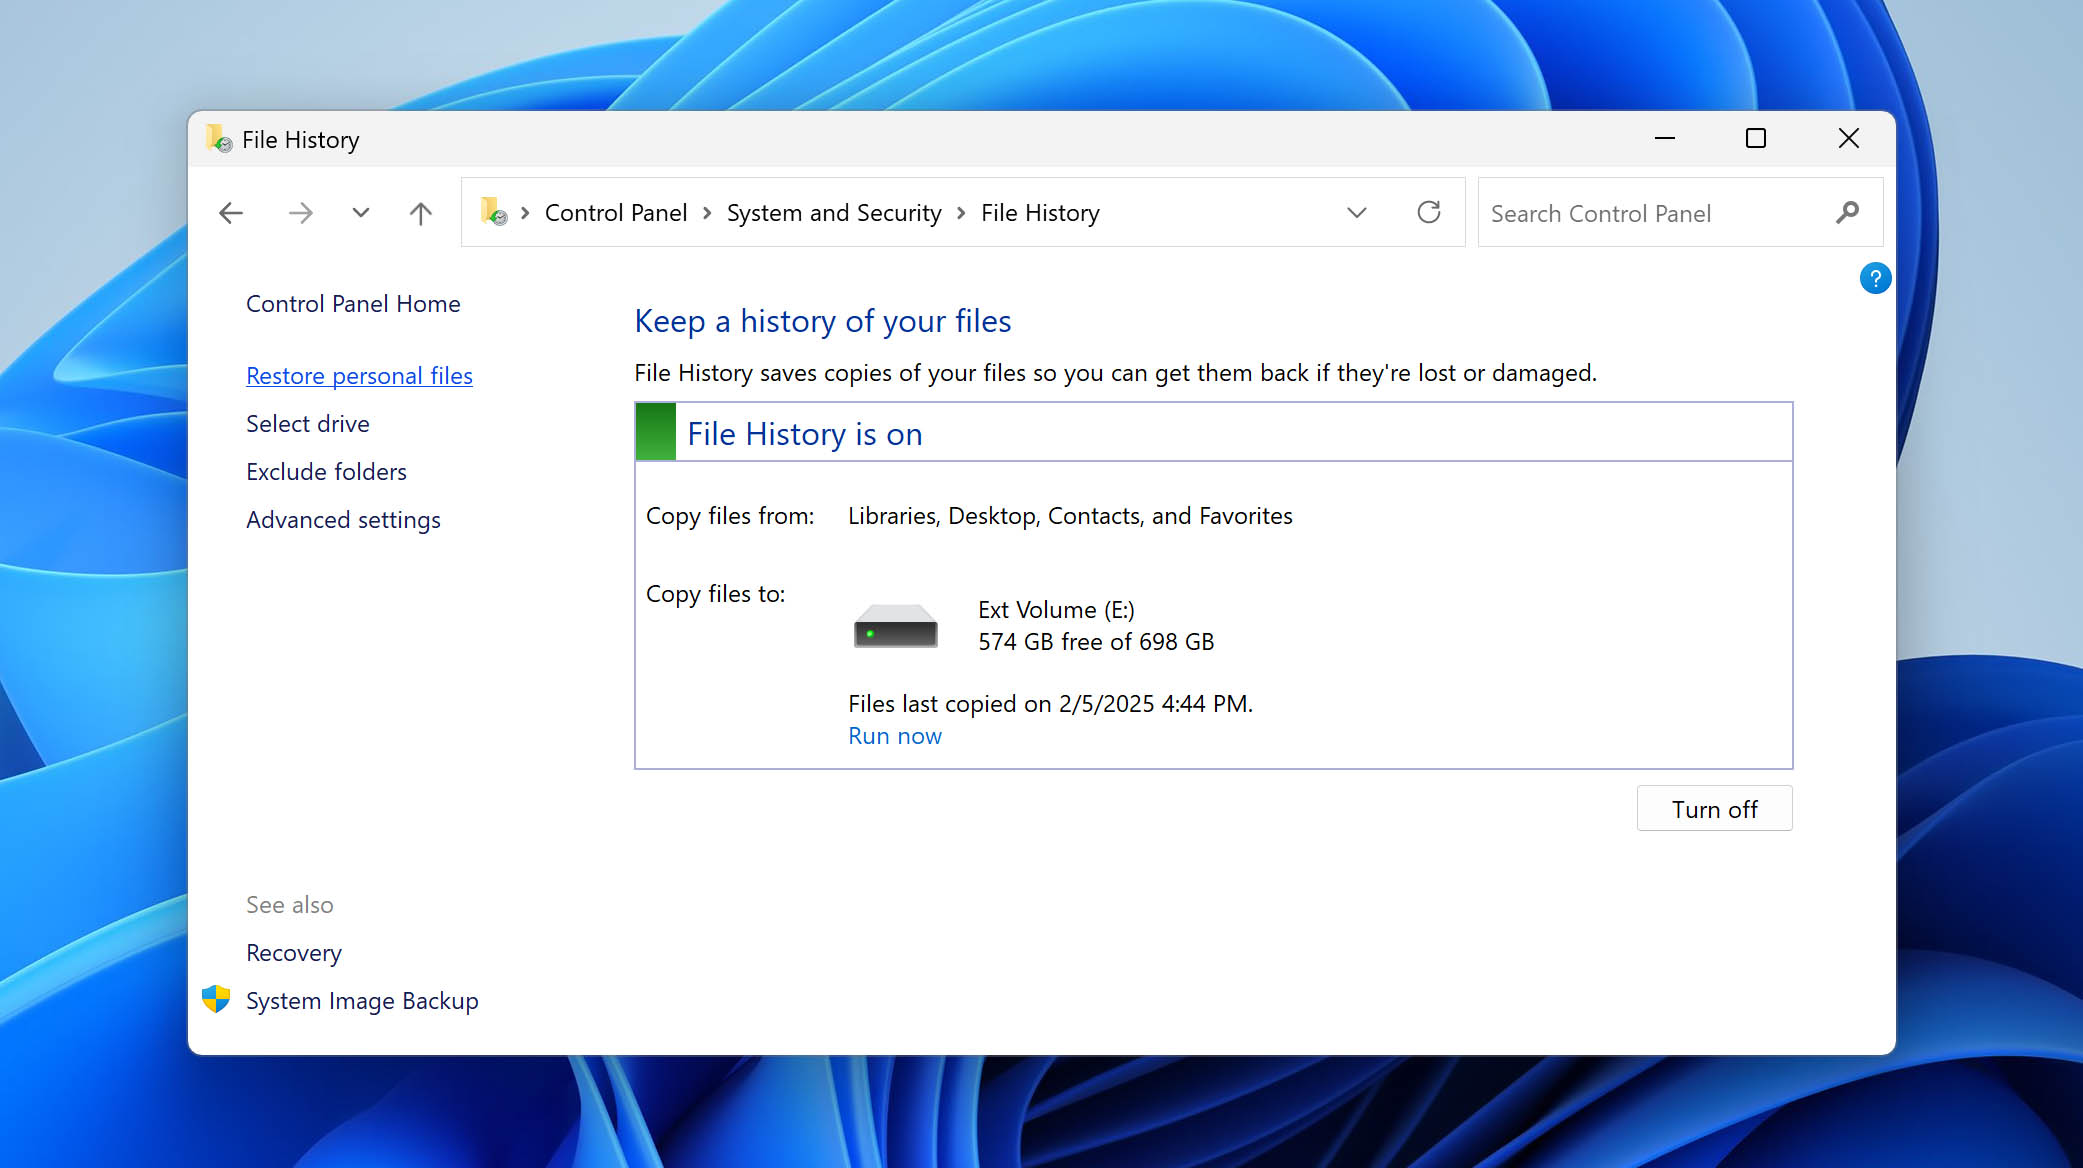
- Open Windows Control Panel and navigate to System and Security, and then Save backup copies of your files with File History. This is the only way to access previous versions in the latest version of Windows.
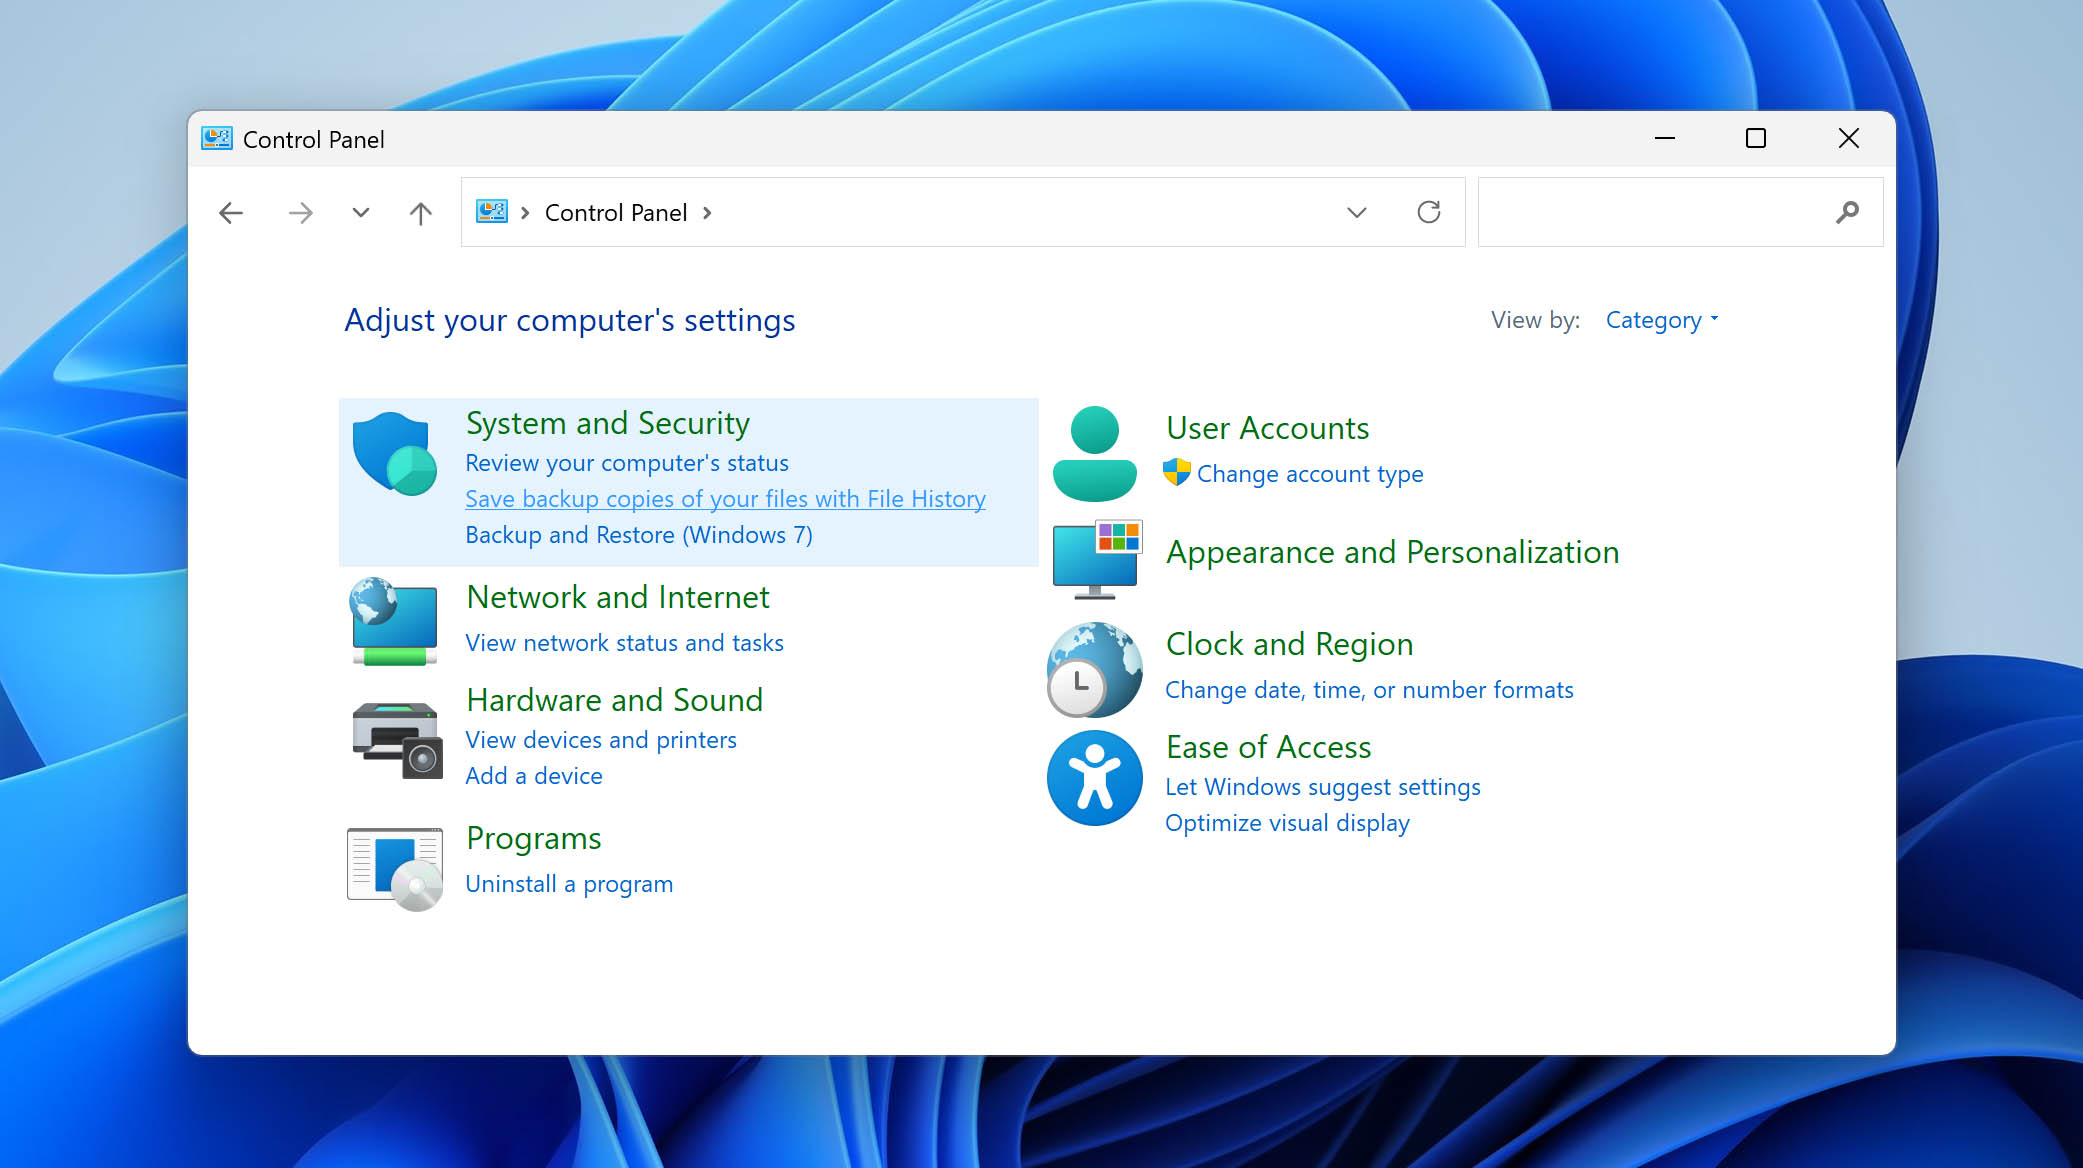
- Look for and click the Restore personal files button in the left pane. This will open the recovery interface where you can browse through available backups.
- Navigate to the library or folder where your USB flash drive was previously added.
💡 Tip: File History’s built-in search is slow and unreliable, so a failed search doesn’t necessarily mean your files aren’t in the backup. A faster option is the free Everything search tool, which lets you quickly search File History backups (Windows stores them as regular files in a FileHistory folder on the backup drive, with the backup date and time appended to each file name) and then copy what you need straight from the results.
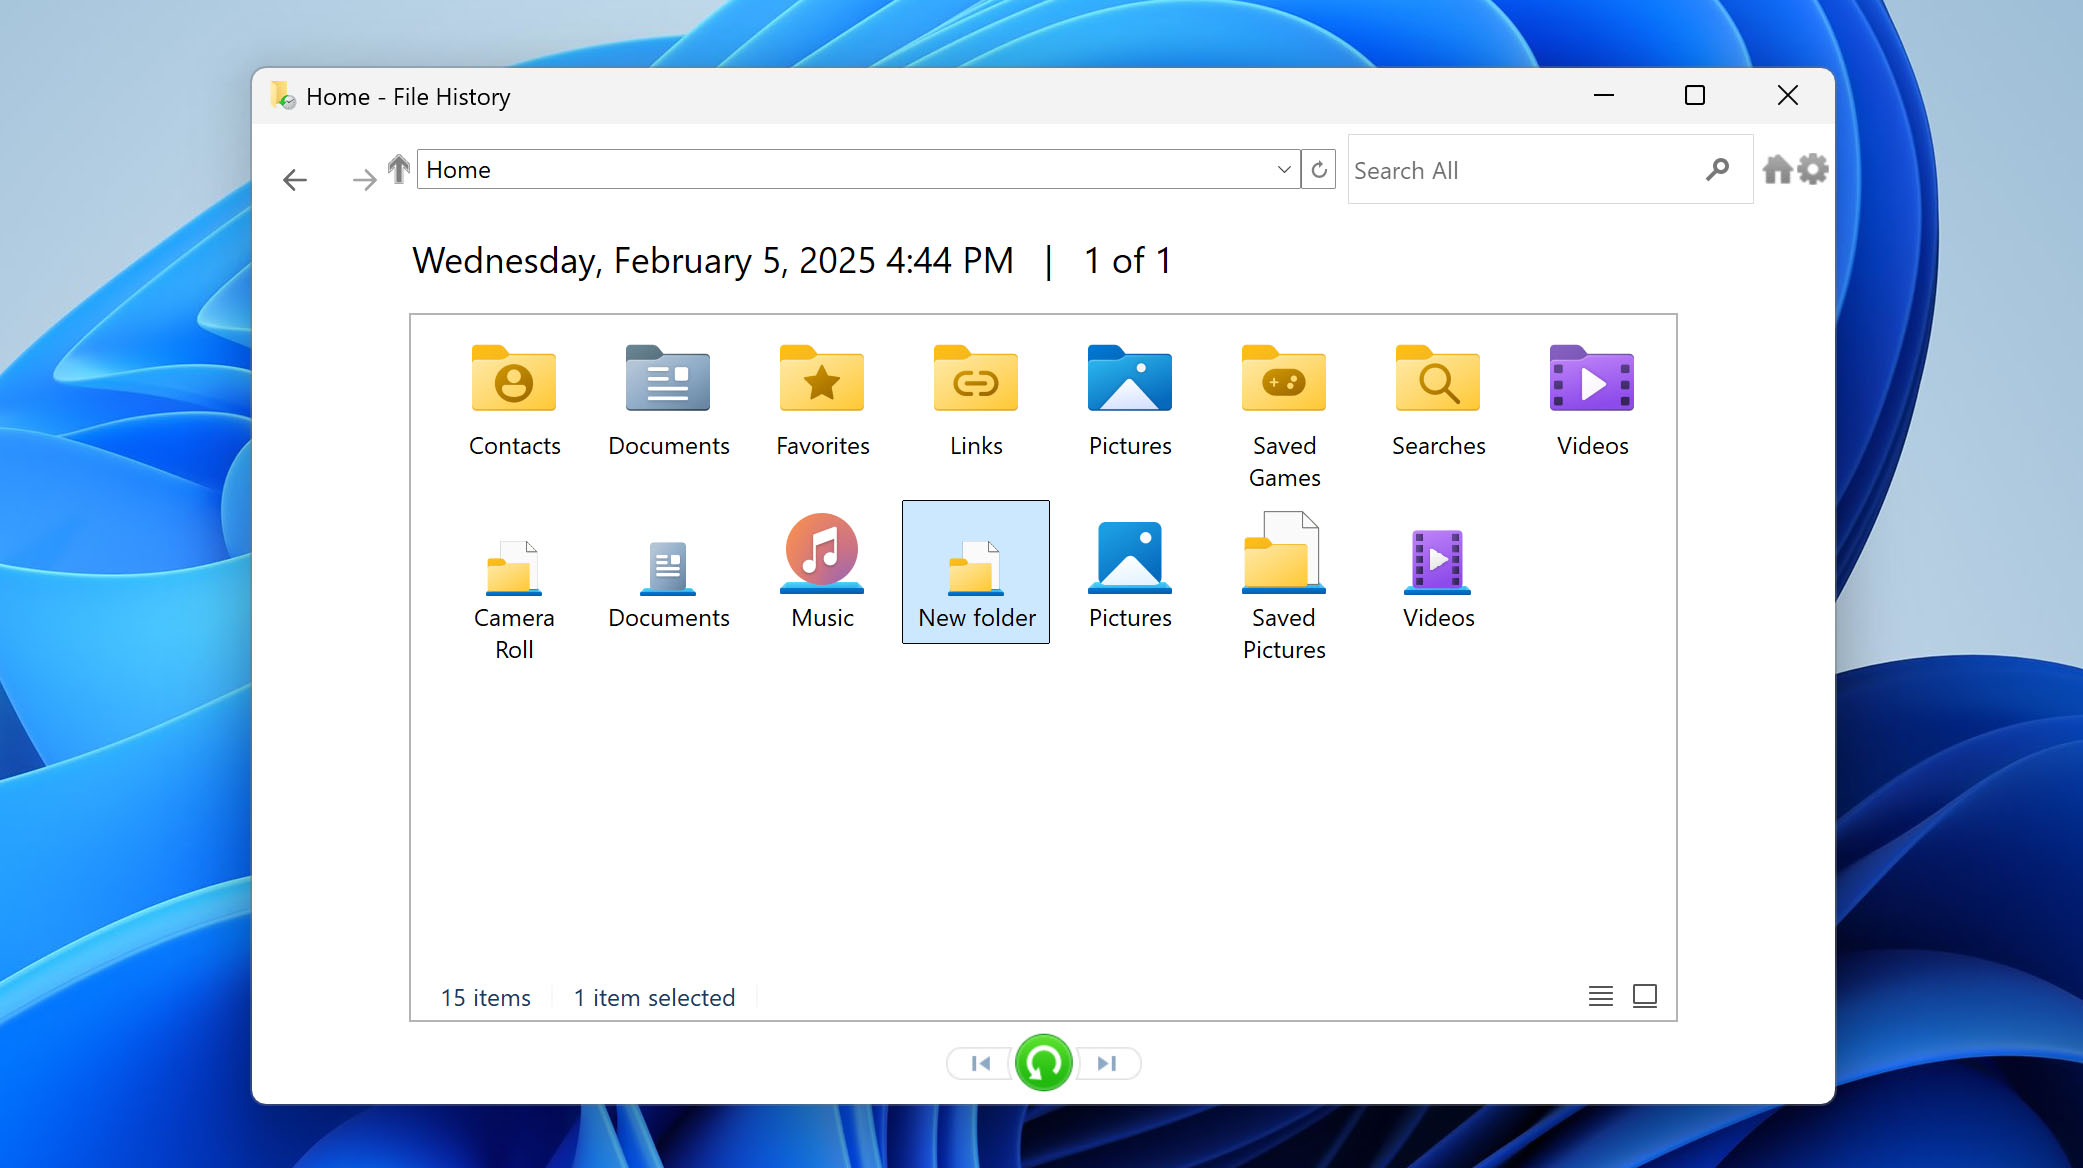
- Browse through the available backup versions using the timeline controls. Select the specific files and folders you want to restore from your USB drive.
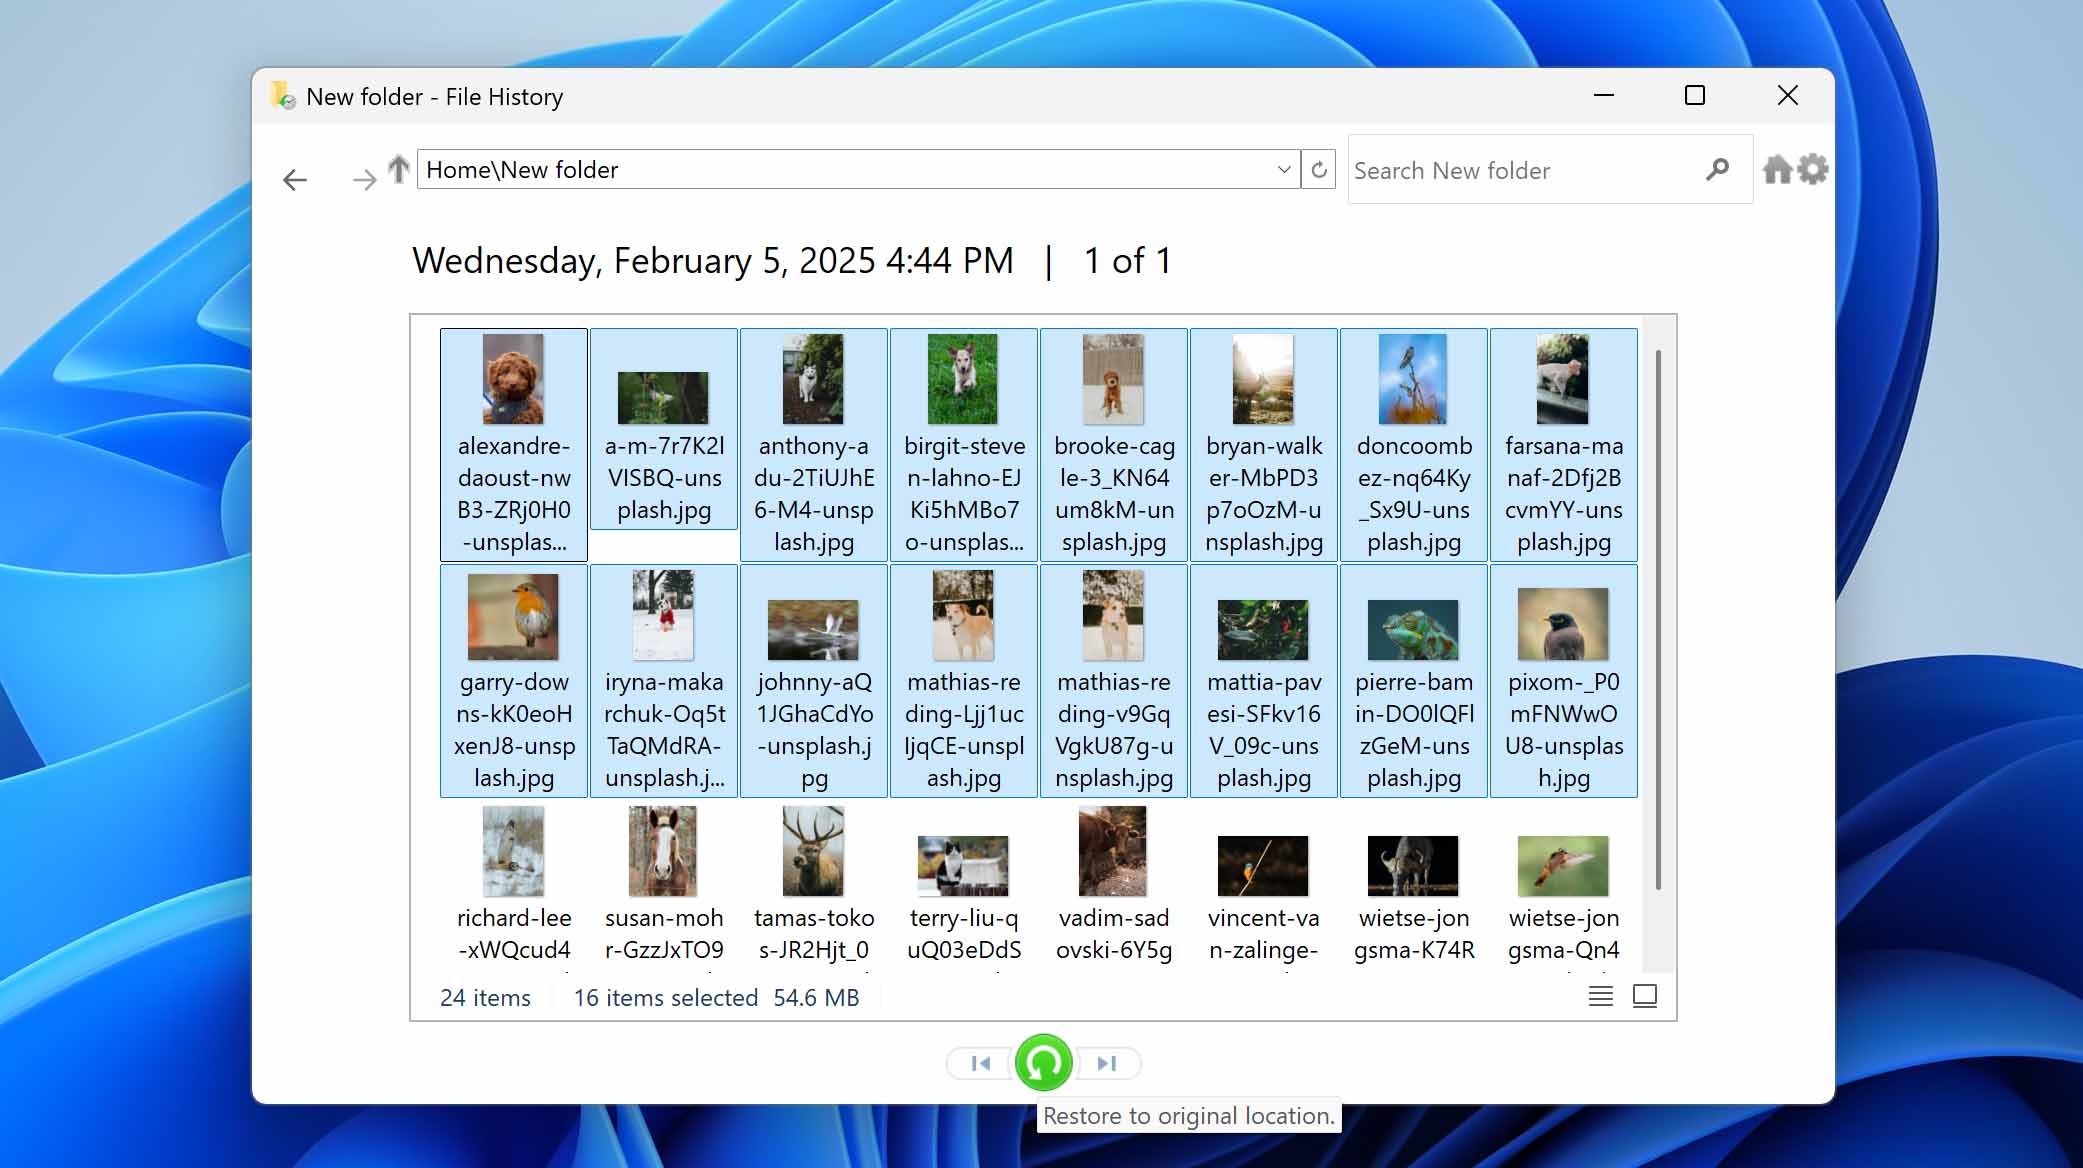
- Finally, click the green Restore button to recover your selected files to their original location. You can then open File Explorer and navigate to the recovery location, where your files should be waiting.
Method 4: Recover Deleted Files from a USB Drive Using CMD
Command Prompt (CMD) offers two built-in commands that can help recover access to your files from your USB drive without any third-party tools:
chkdskidentifies and tries to fix file system errorsattribreveals hidden files that might appear deleted
The two tools can help in situations where files appear to be mysteriously deleted but have actually just become inaccessible due to file system errors, corruption, or attribute changes.
If you have Disk Drill installed from Method 1, you don’t actually need the attrib command. After running a scan, hidden files appear in the Existing category of results, which is usually easier than working through command-line tools.
To recover files from a USB flash drive using Command Prompt:
- Connect the USB flash drive to your computer.
- Press Windows + X and select Terminal (Admin) or Command Prompt (Admin).
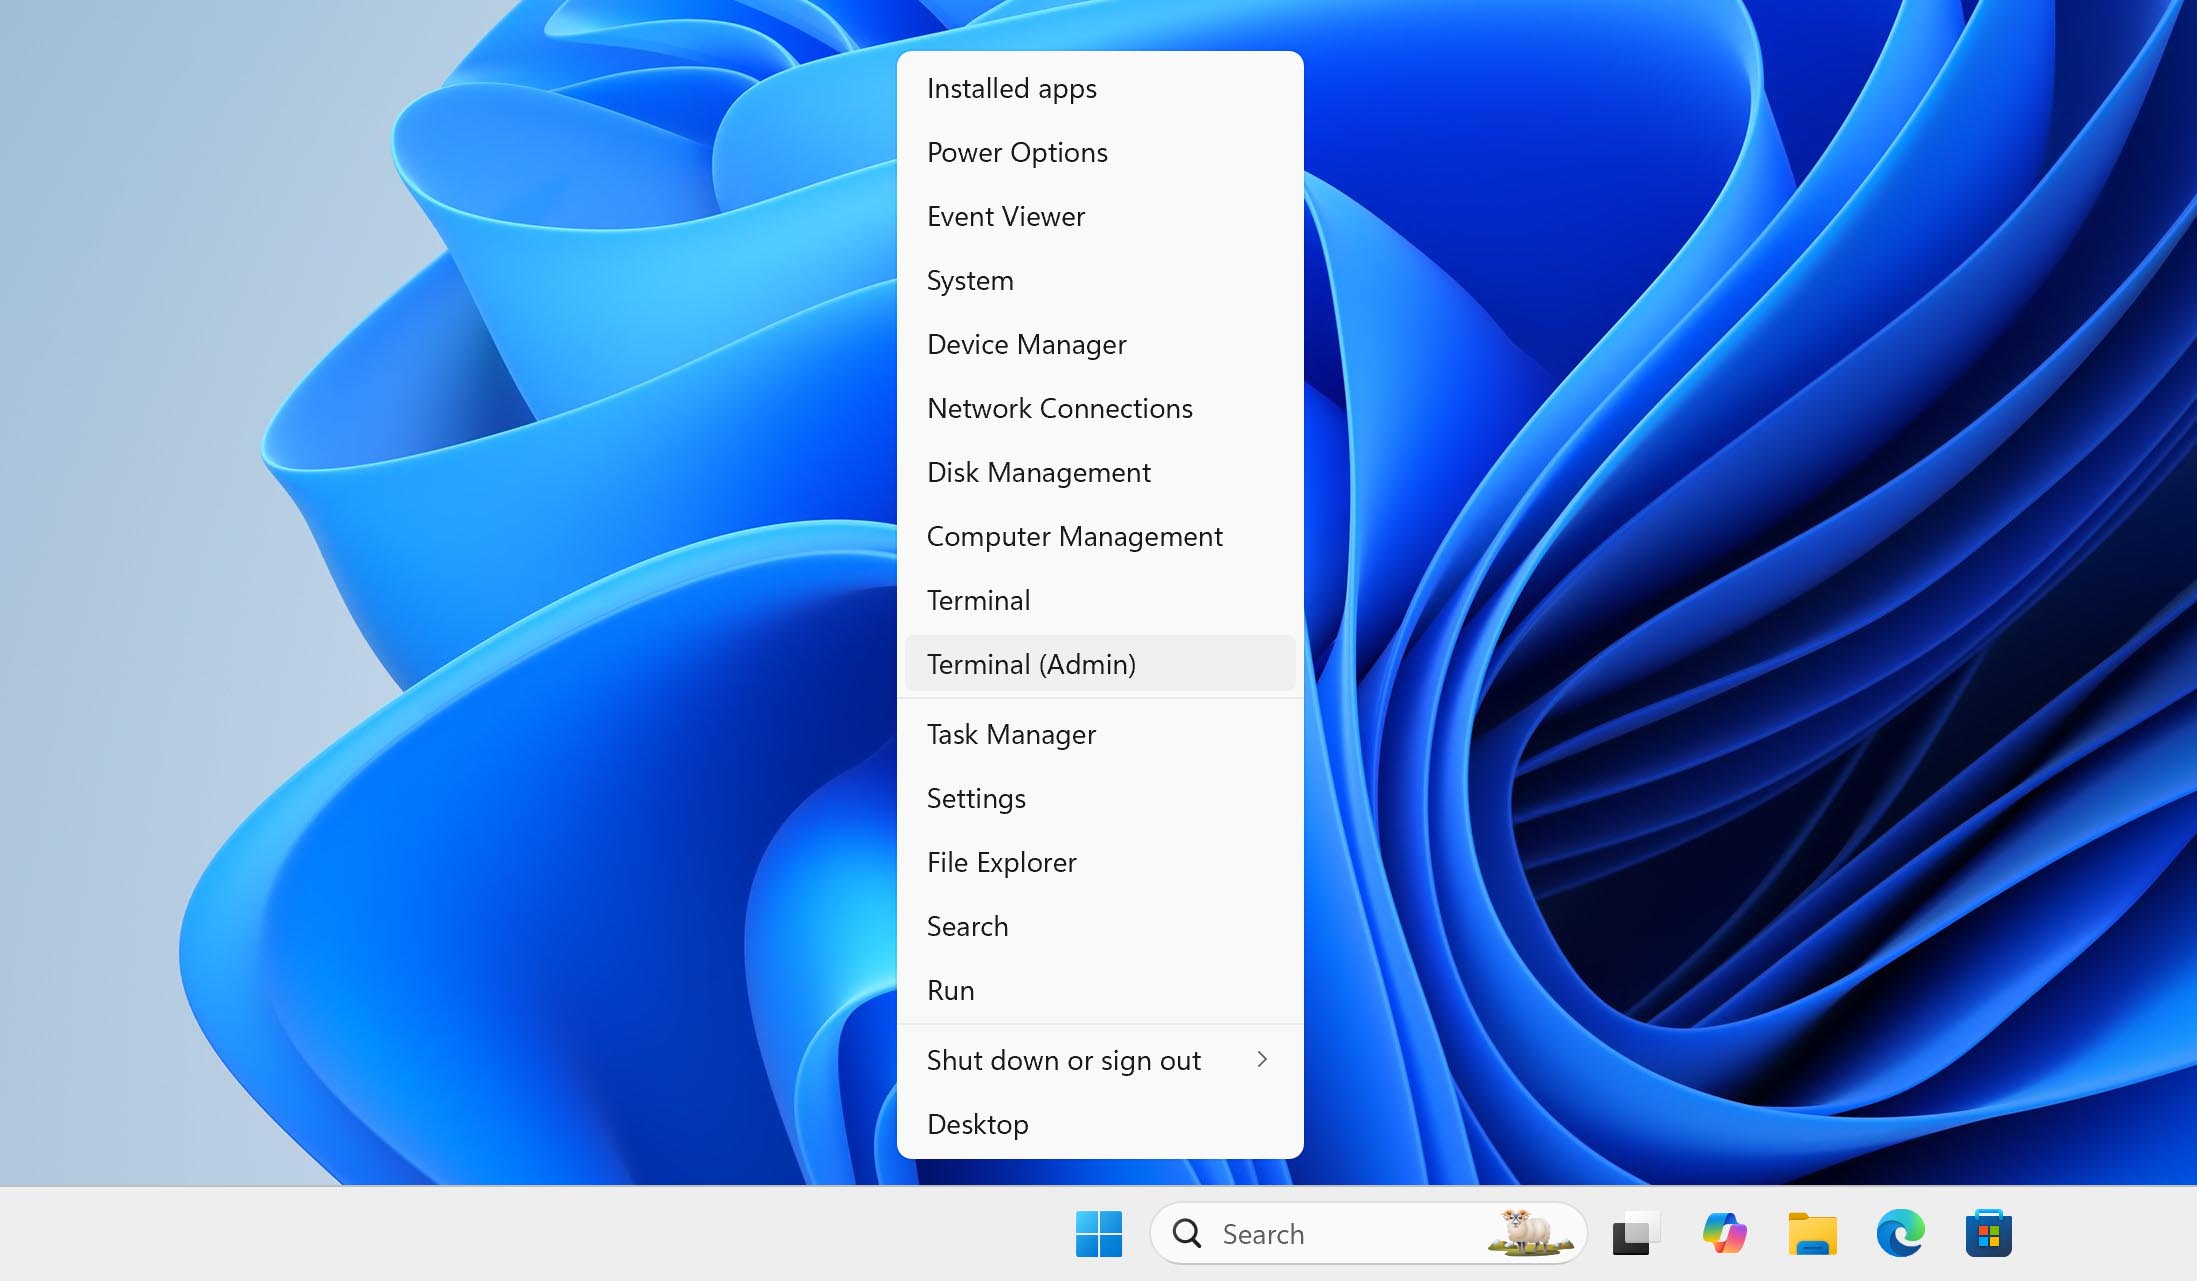
- Type
chkdsk X: /f(replace X with your drive letter) to tell chkdsk to fix any errors it finds on your USB flash drive. Wait for the scan and repairs to complete.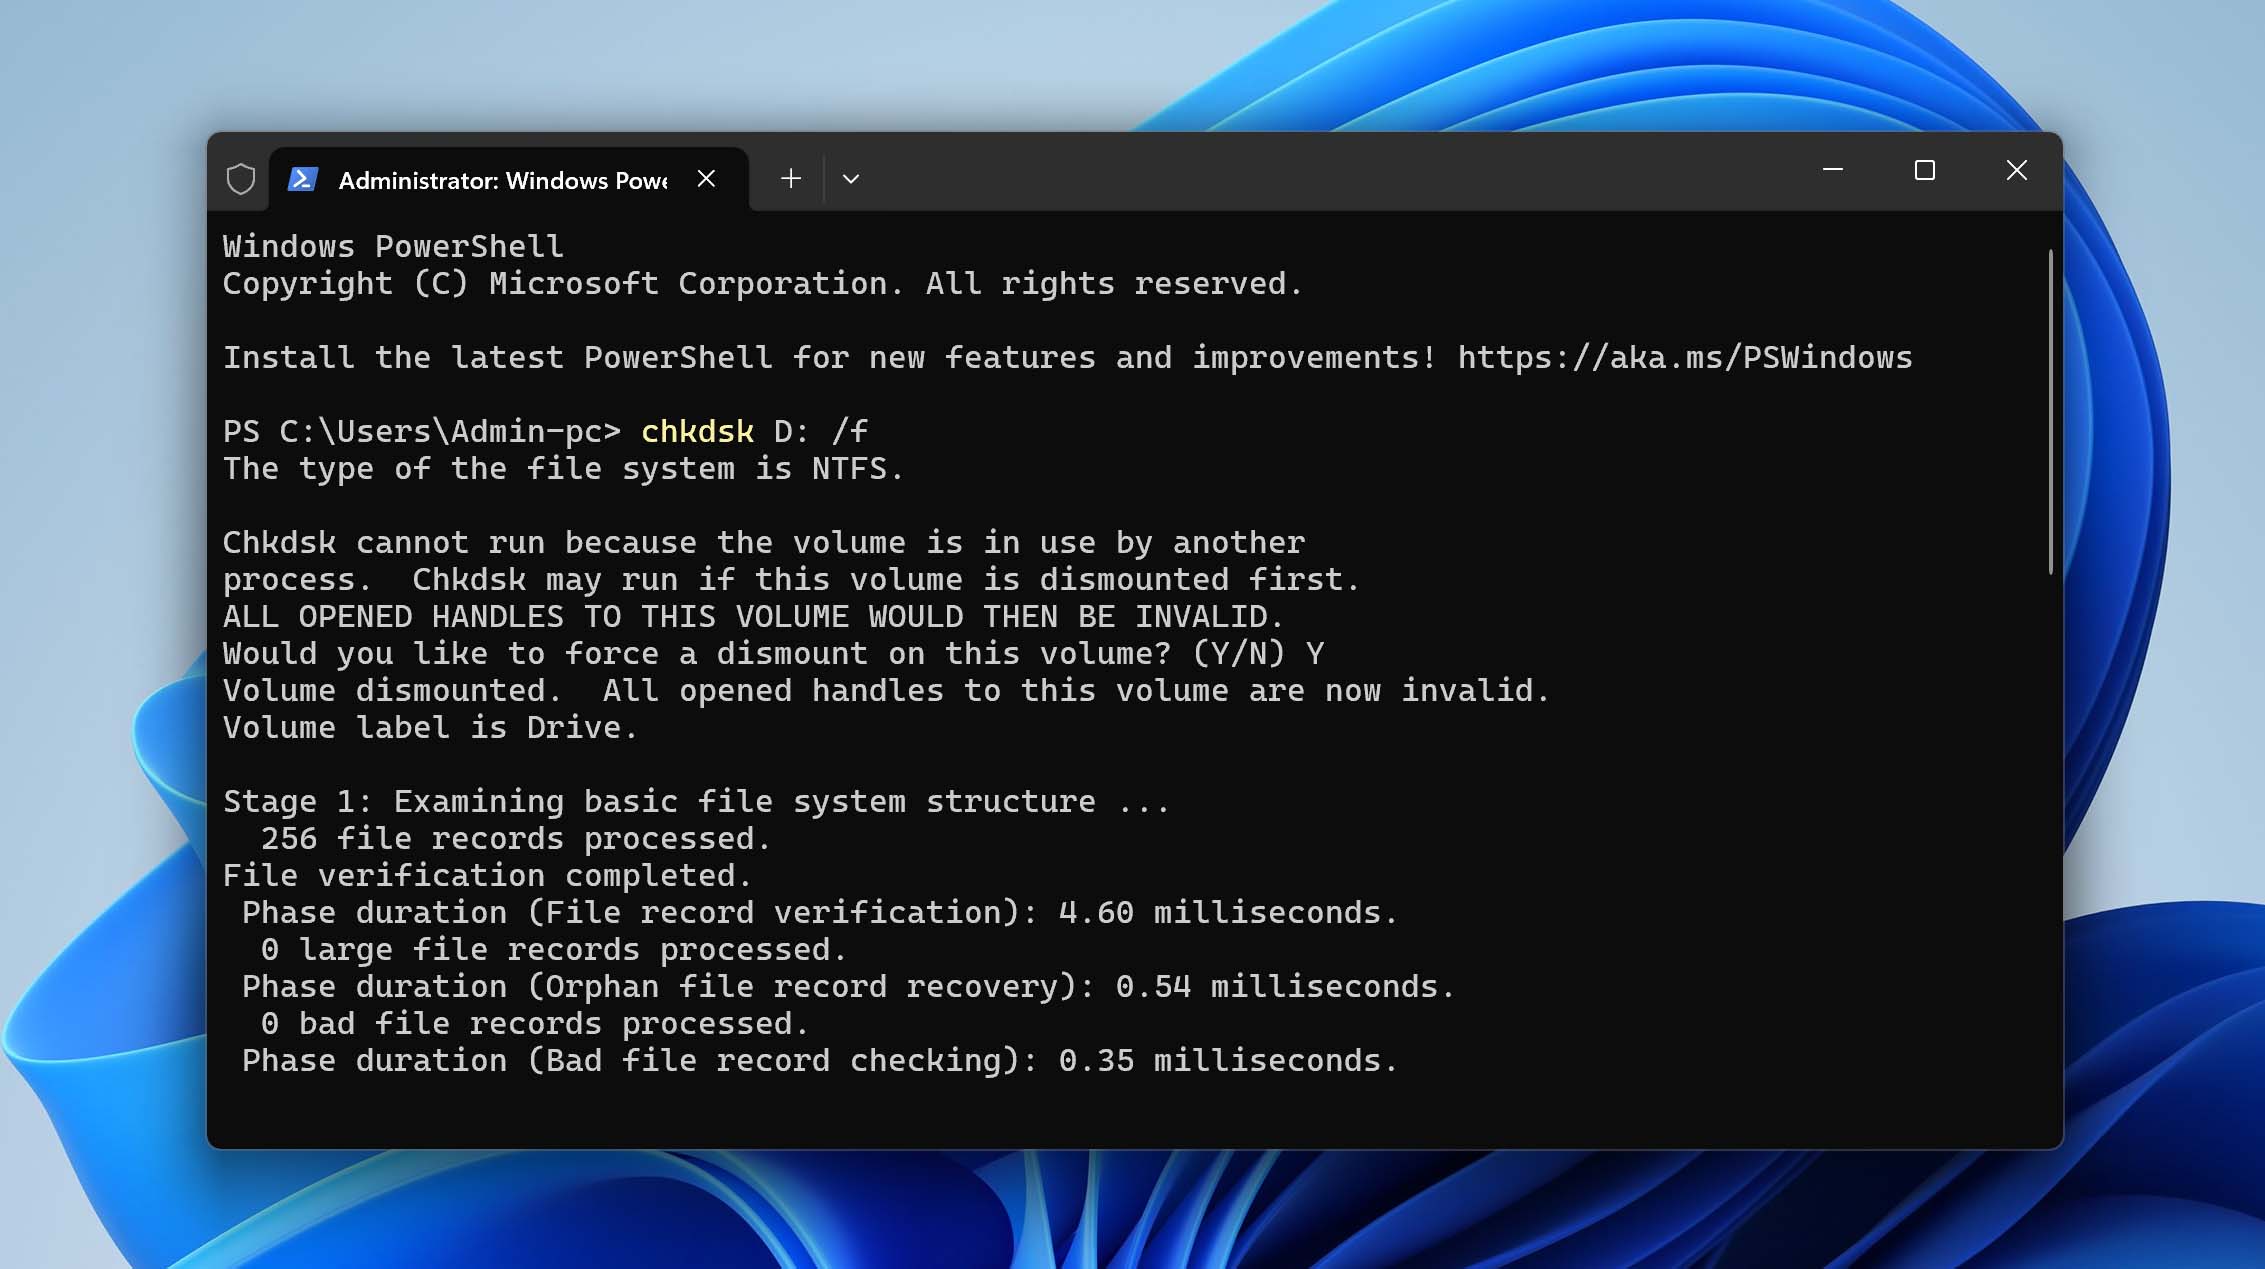
- Then, type
ATTRIB -H -R -S /S /D X:*.*and hit the Enter key (again, replace X with the drive letter of the USB drive). This removes Hidden, Read-only, and System attributes from all files across all folders and subfolders.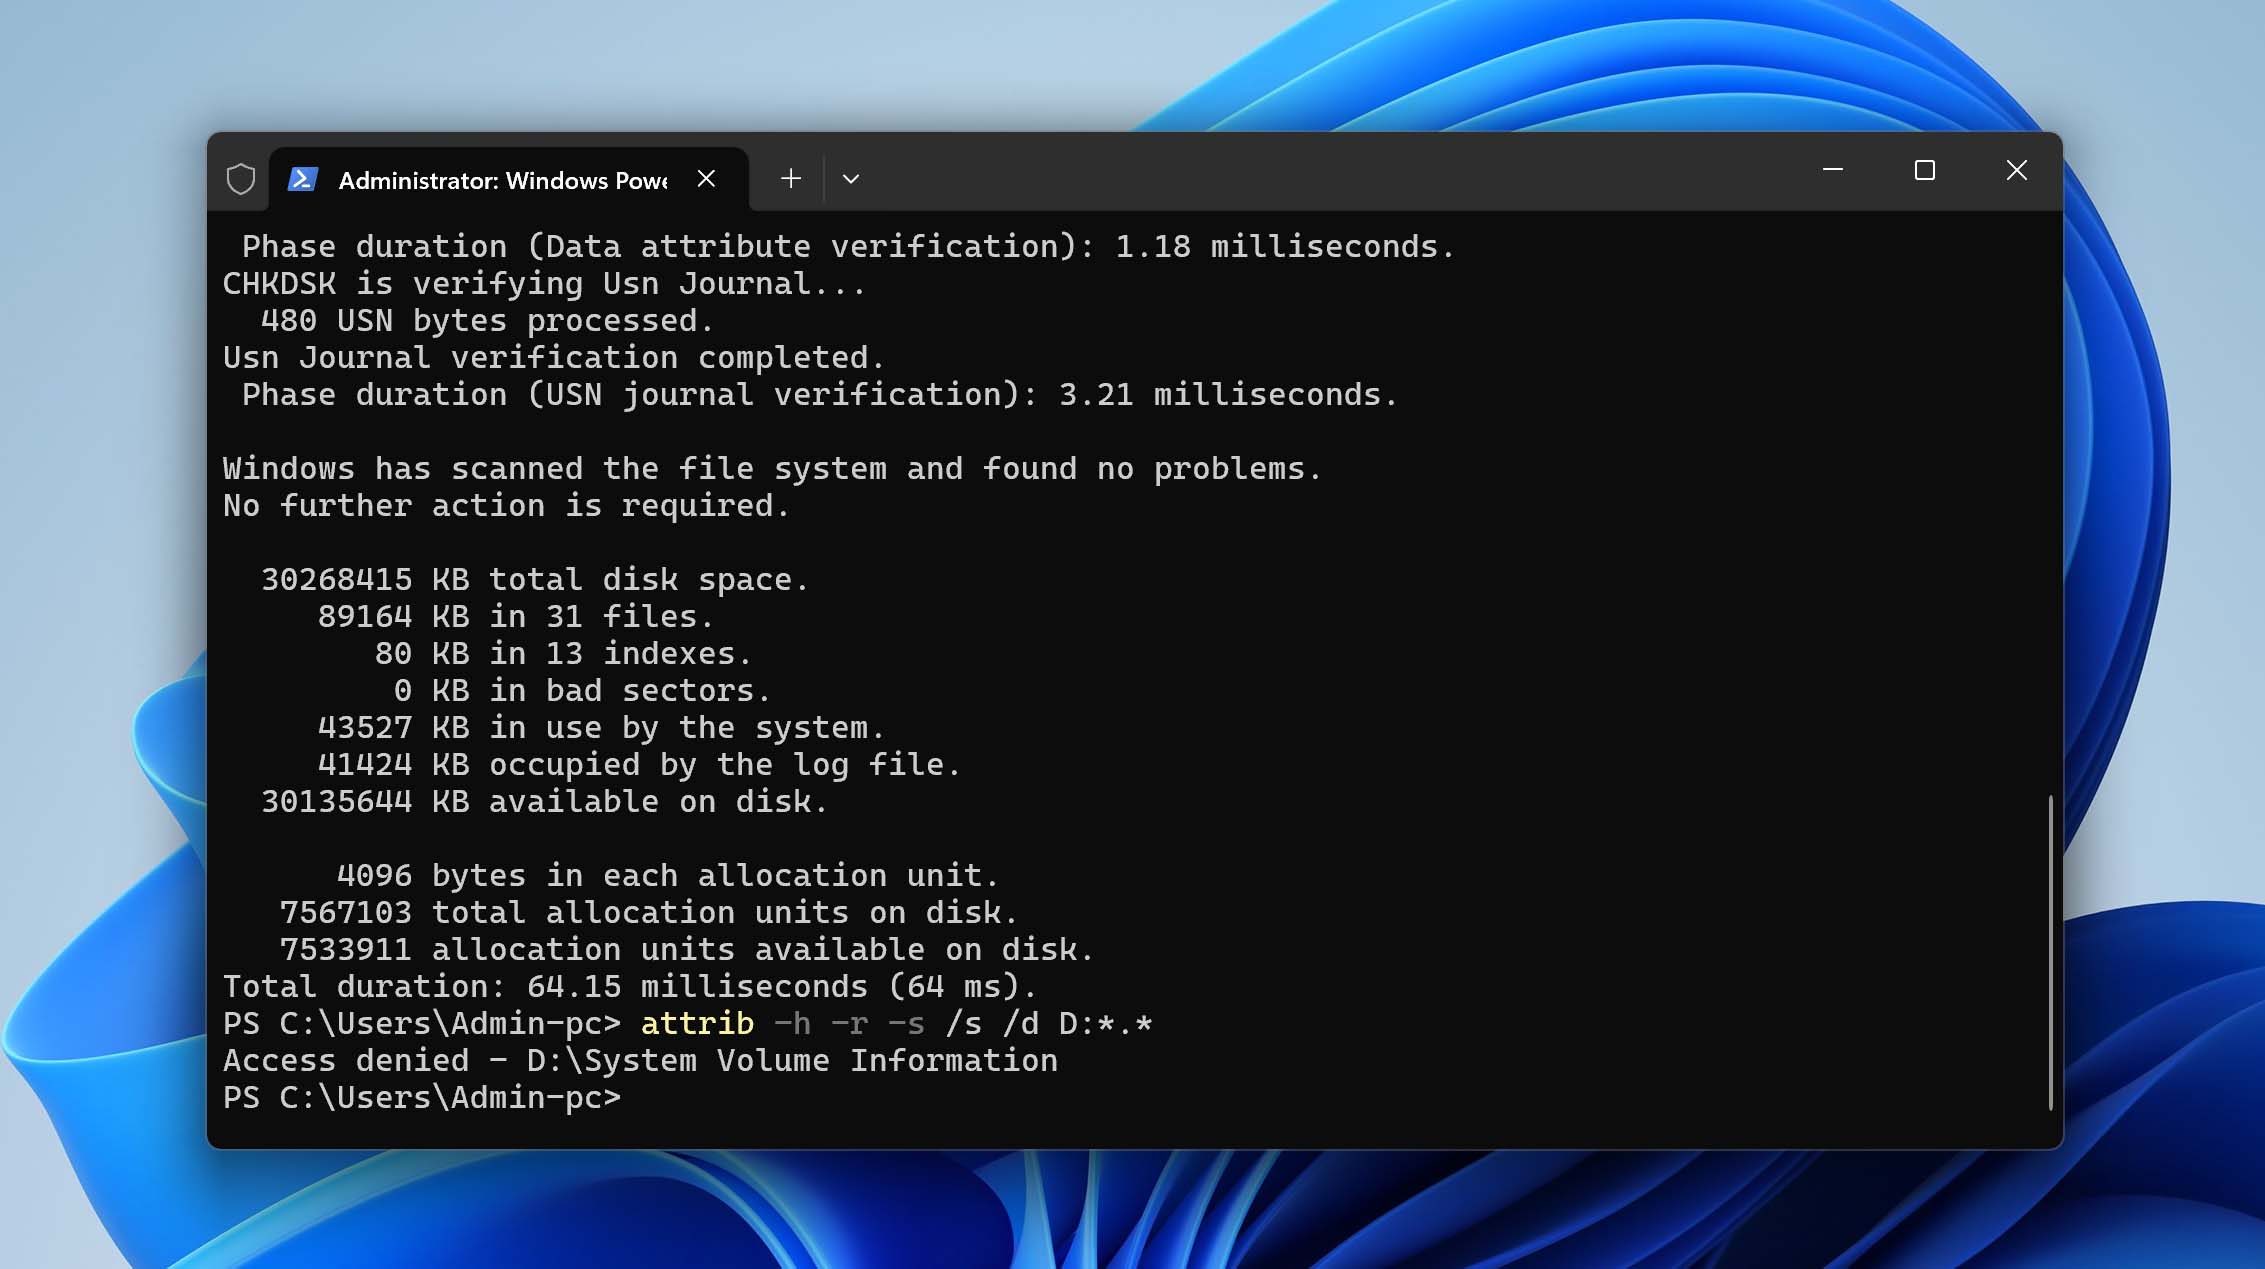
- Wait for the process to finish.
If your seemingly deleted files were really just corrupted or hidden, you should now be able to access them normally through File Explorer. If you still can’t see your files, that means they were actually deleted rather than just hidden or corrupted. In that case, head back up to Method 1: data recovery software, which can recover truly deleted files.
Conclusion
If you don’t have any backup of your lost data, then data recovery software is the only reliable way to get your files back from a USB flash drive. Of course, even the best software can’t guarantee perfect results because how well it works depends on the drive’s condition and how much you’ve used it since the files were lost. That’s why you should stop using the drive and start scanning as soon as possible.
FAQ
Yes, you can recover files from a formatted USB drive, but your approach depends on the type of format used. After a quick format, most files can be retrieved with data recovery software because only the file system table is cleared. After a full format, you’ll need to rely on your backups, because a full format overwrites the entire drive and makes the data unrecoverable.
To recover deleted files from a USB drive, download and launch Disk Drill, select your USB drive from the device list, click Search for lost data to scan it, wait for the scan to finish, review the found files and pick the ones you want back, then recover them to a location other than the USB drive itself.
Yes, there are several free solutions for restoring deleted files from a USB flash drive, including Disk Drill USB Data Recovery Software, Windows File Recovery, PhotoRec, TestDisk, and R-Photo. Of those, Disk Drill is the easiest to use thanks to its graphical interface. For a more detailed look at how these tools compare on features, pricing, and recovery results, see our review of the top data recovery solutions for Windows.
They don’t go anywhere. When you delete a file from a USB drive, the file remains physically present on the drive, but the storage space occupied by it is marked as empty. That’s why it’s possible to recover deleted files that haven’t been overwritten yet using USB recovery software.
Fixing a physically damaged USB flash drive is not easy, and it often requires the flash memory chip to be removed from the drive and soldered onto a new circuit board. If that’s not something you feel confident doing, we highly recommend you take the flash drive to a professional data recovery center.
For OTG pen drives, you can either use Command Prompt (which requires some tech knowledge) or data recovery software. The easier path is software. Download and install Disk Drill, connect your OTG pen drive, launch the app, select your pen drive from the device list, click Search for lost data to scan it, review the found items, pick the files you want back, and click Recover to save them to a location other than the pen drive itself.
