With our Mac, we can take screen recordings to show others how to do something, share information, or present something to someone. These can be a powerful way to get a message across as visually showing someone something can be much more productive than trying to explain it to them.

If you’ve created or received a screen recording from someone and can’t find it anymore then this article is for you because we’re going to take a look at how to recover screen recordings on our Mac.
First, let’s take a look at how to restore from the Trash on our Mac.
Method 1: Restoring From the Trash
When we delete something it goes into the Trash and will be saved there for 30 days. We can go back into the Trash during this time and restore the item back onto our Mac.
- Launch the Trash from the Dock.

- Find the screen recording that you want to recover.
- Right-click on it and choose Put Back.
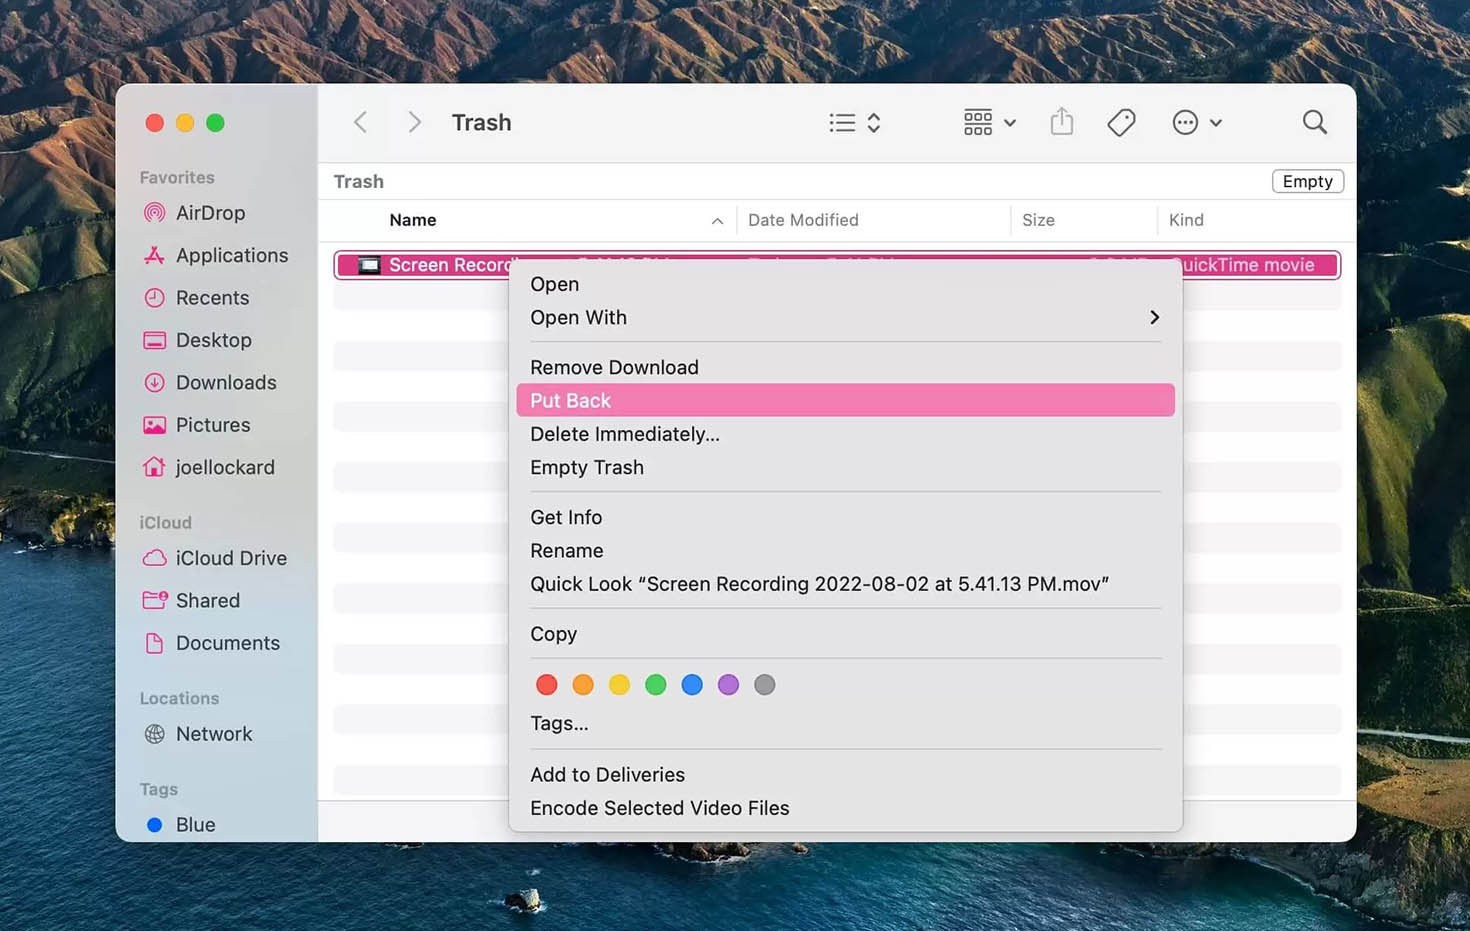
- The screen recording will now be back where it was before.
Method 2: How to Use Time Machine to Restore Screen Recordings That Have Been Deleted
We can recover screen recordings on Mac by using Time Machine. To use this method you must have a backup in place. If you don’t, that is fine. Simply move onto the next method as there are other ways that we can recover them.
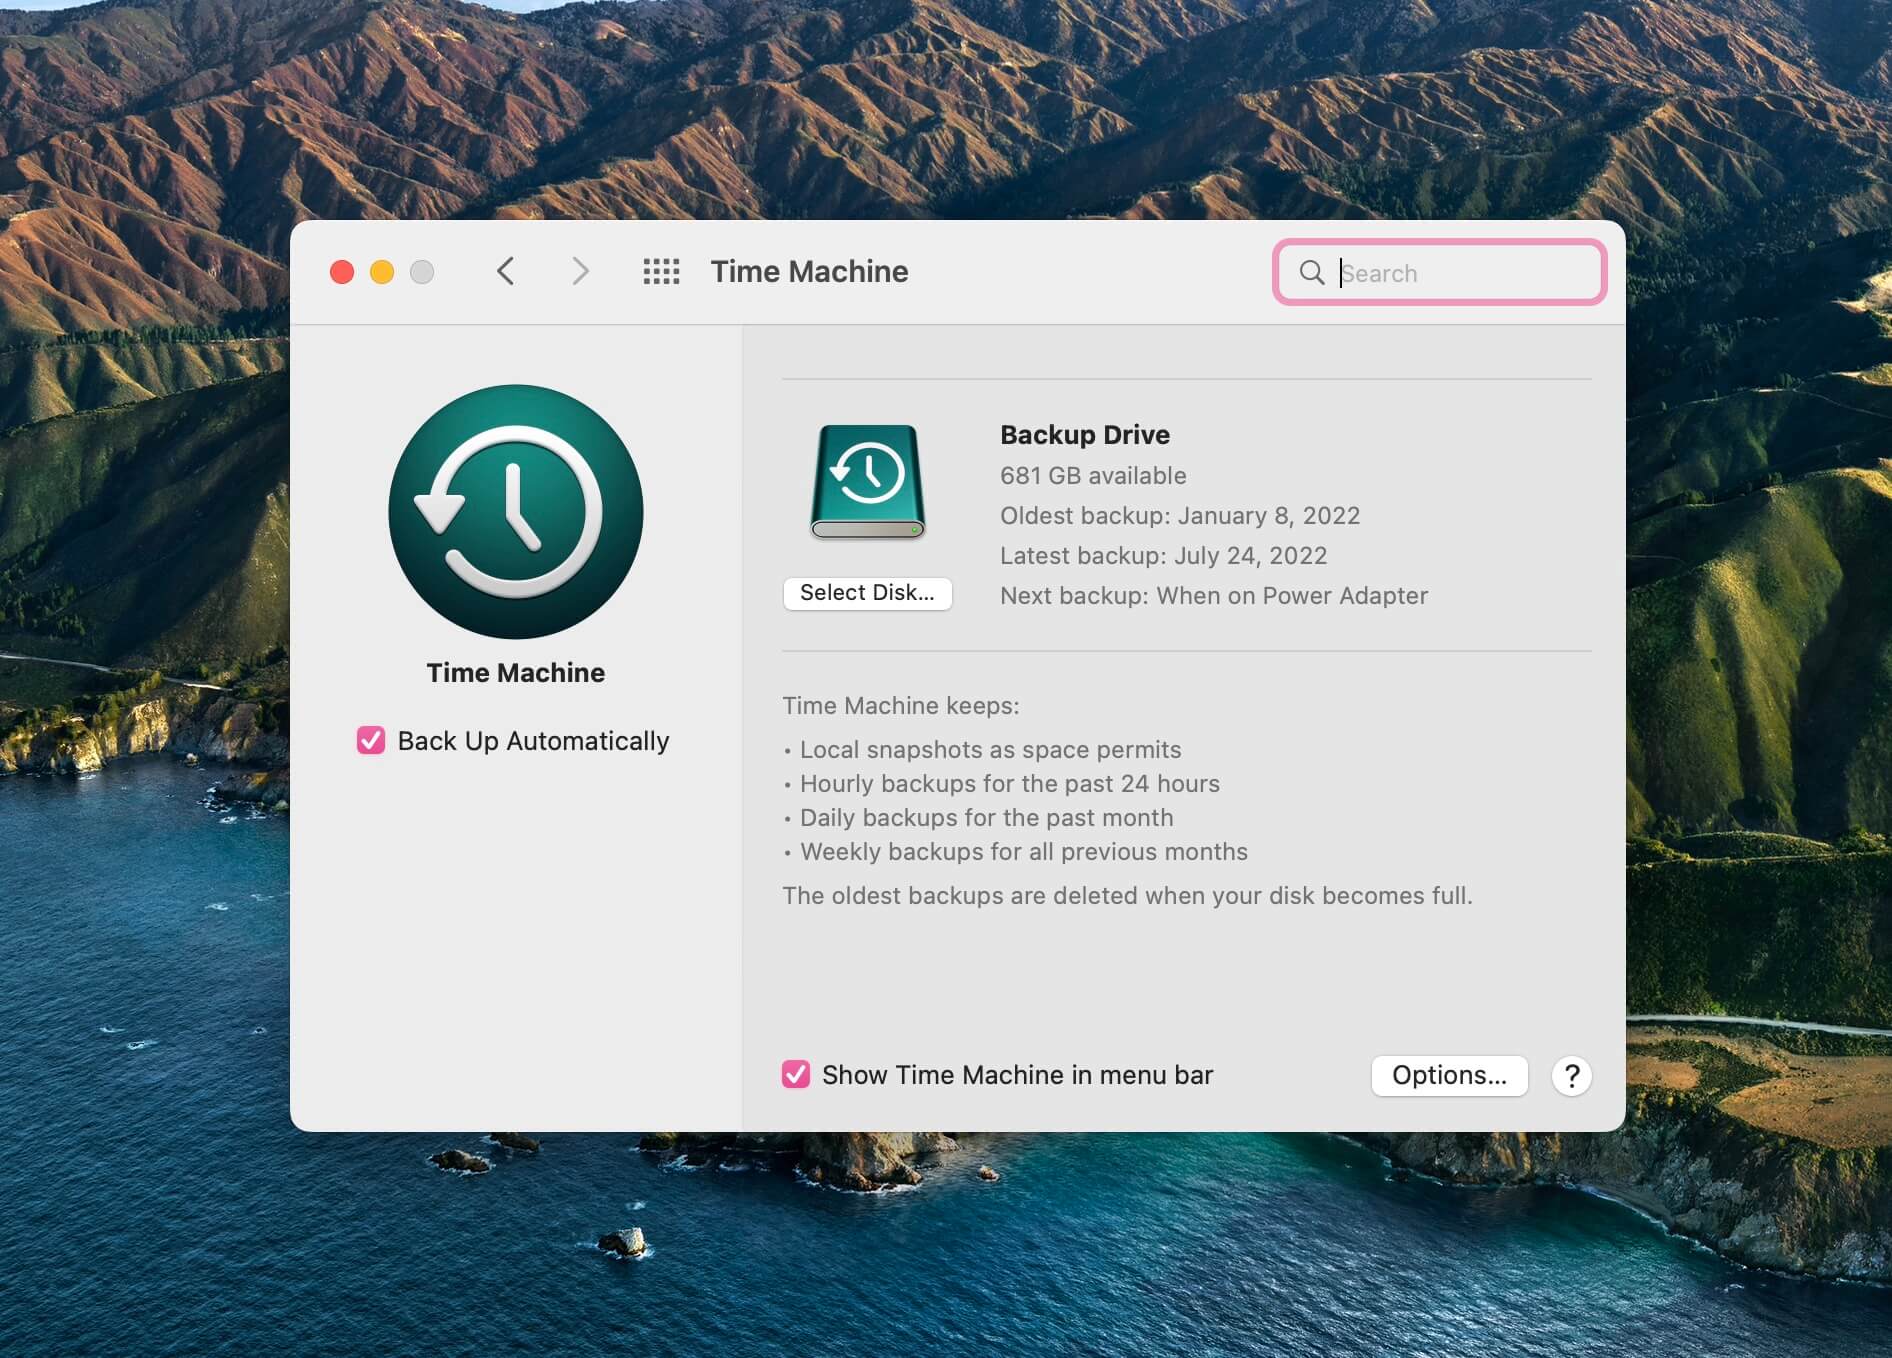
Time Machine comes built into macOS for free and it allows you to back up the data on your Mac. Time Machine will keep the following:
- Local snapshots
- Hourly backups
- Daily backups for the past month
- Weekly backups for all previous months
Using Time Machine to recover screen recordings is easy and it only takes a couple of steps.
- Plug your external hard drive into your Mac.
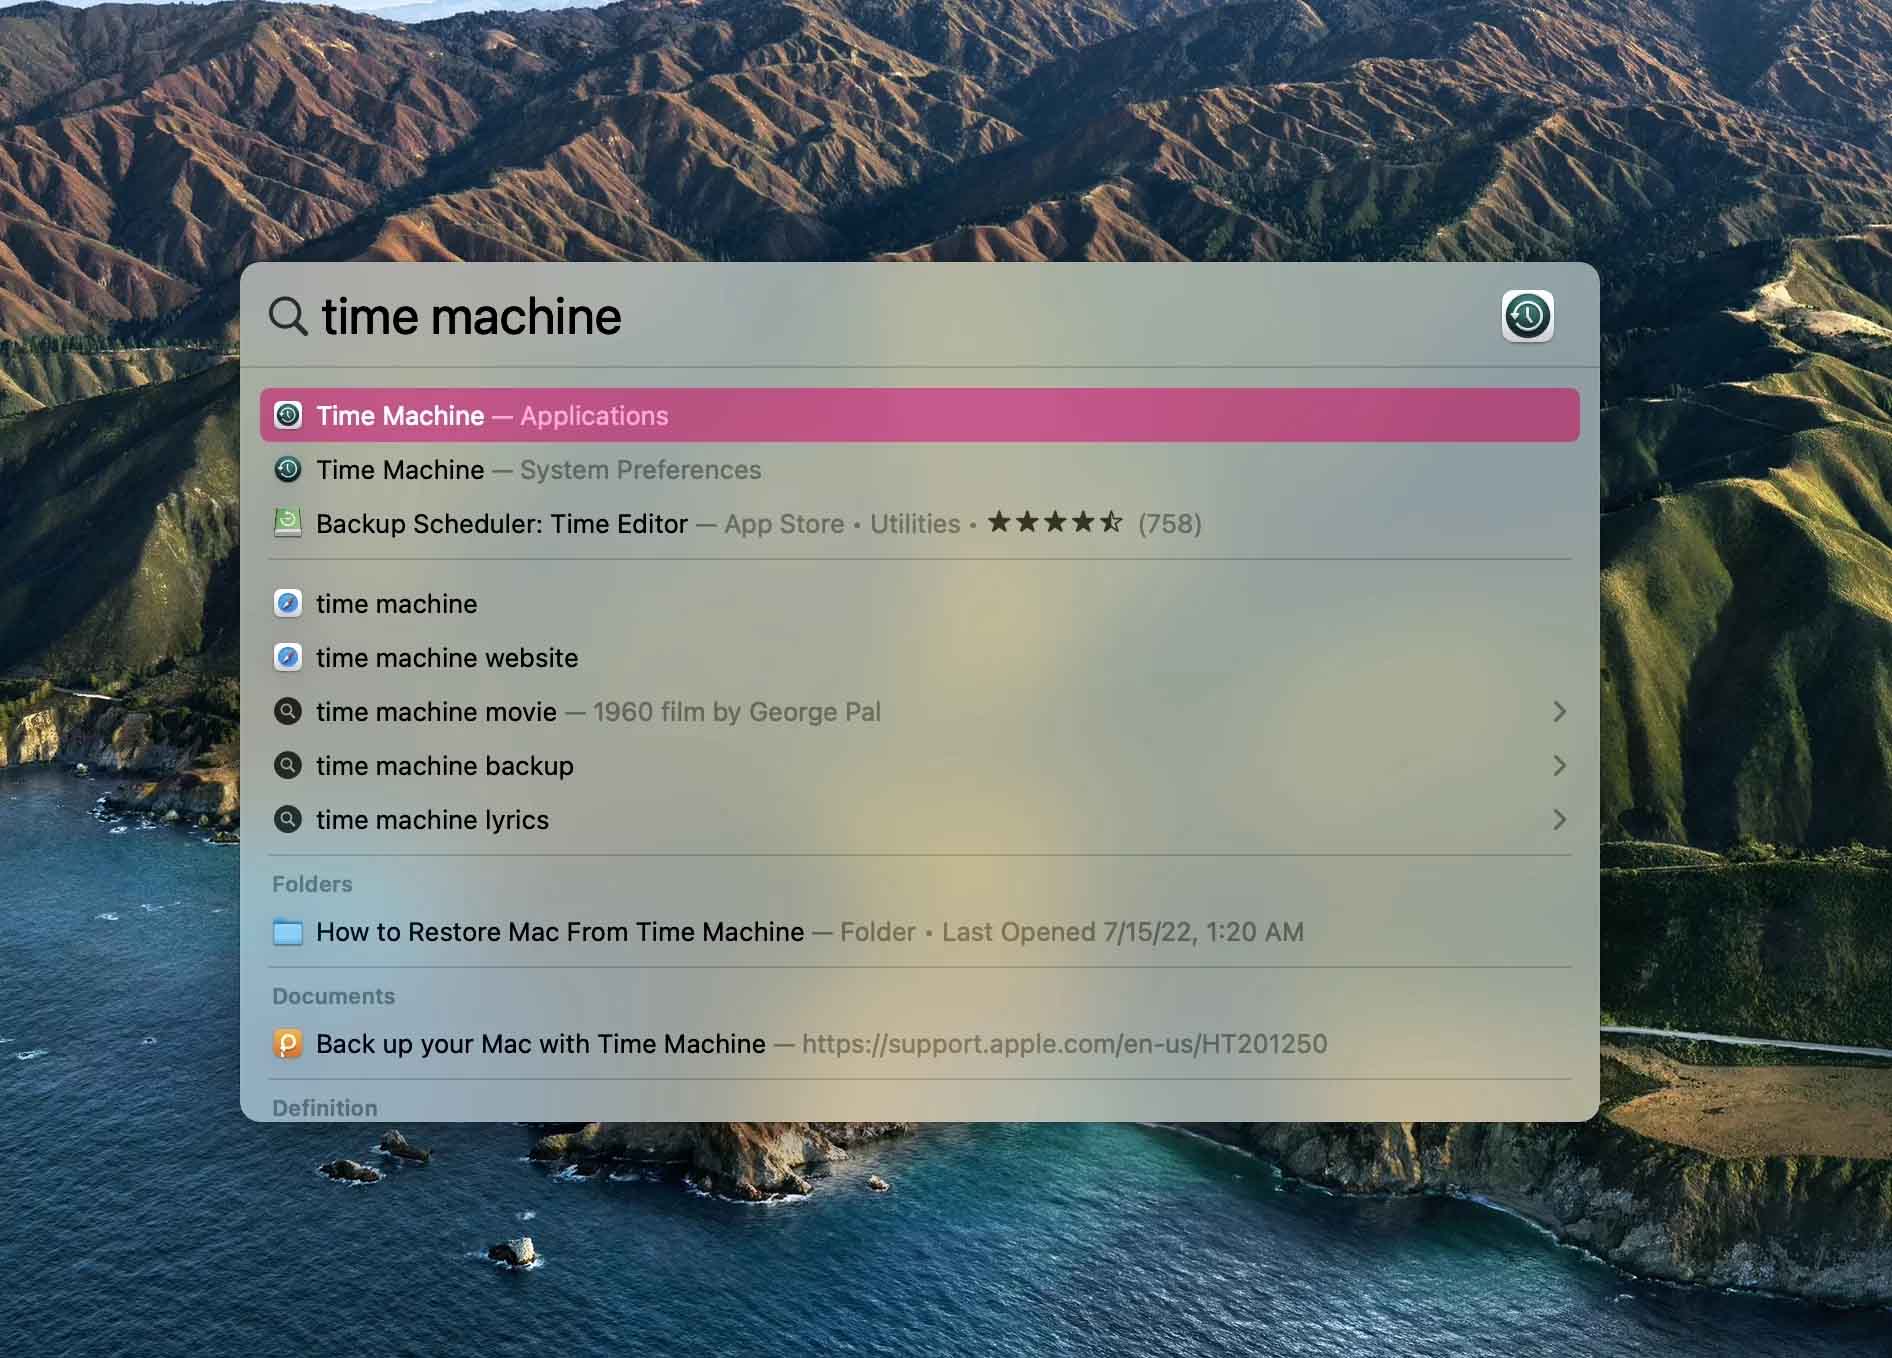
- Launch Spotlight by pressing the keys COMMAND+SPACE BAR. You can also click on the magnifying glass in the upper right-hand corner of your Mac.
- Type in Time Machine and then hit return on your Mac keyboard.
- Navigate through your Mac to find the screen recordings that you want to restore. You can use the up and down arrows on the right-hand side to navigate to an older date.
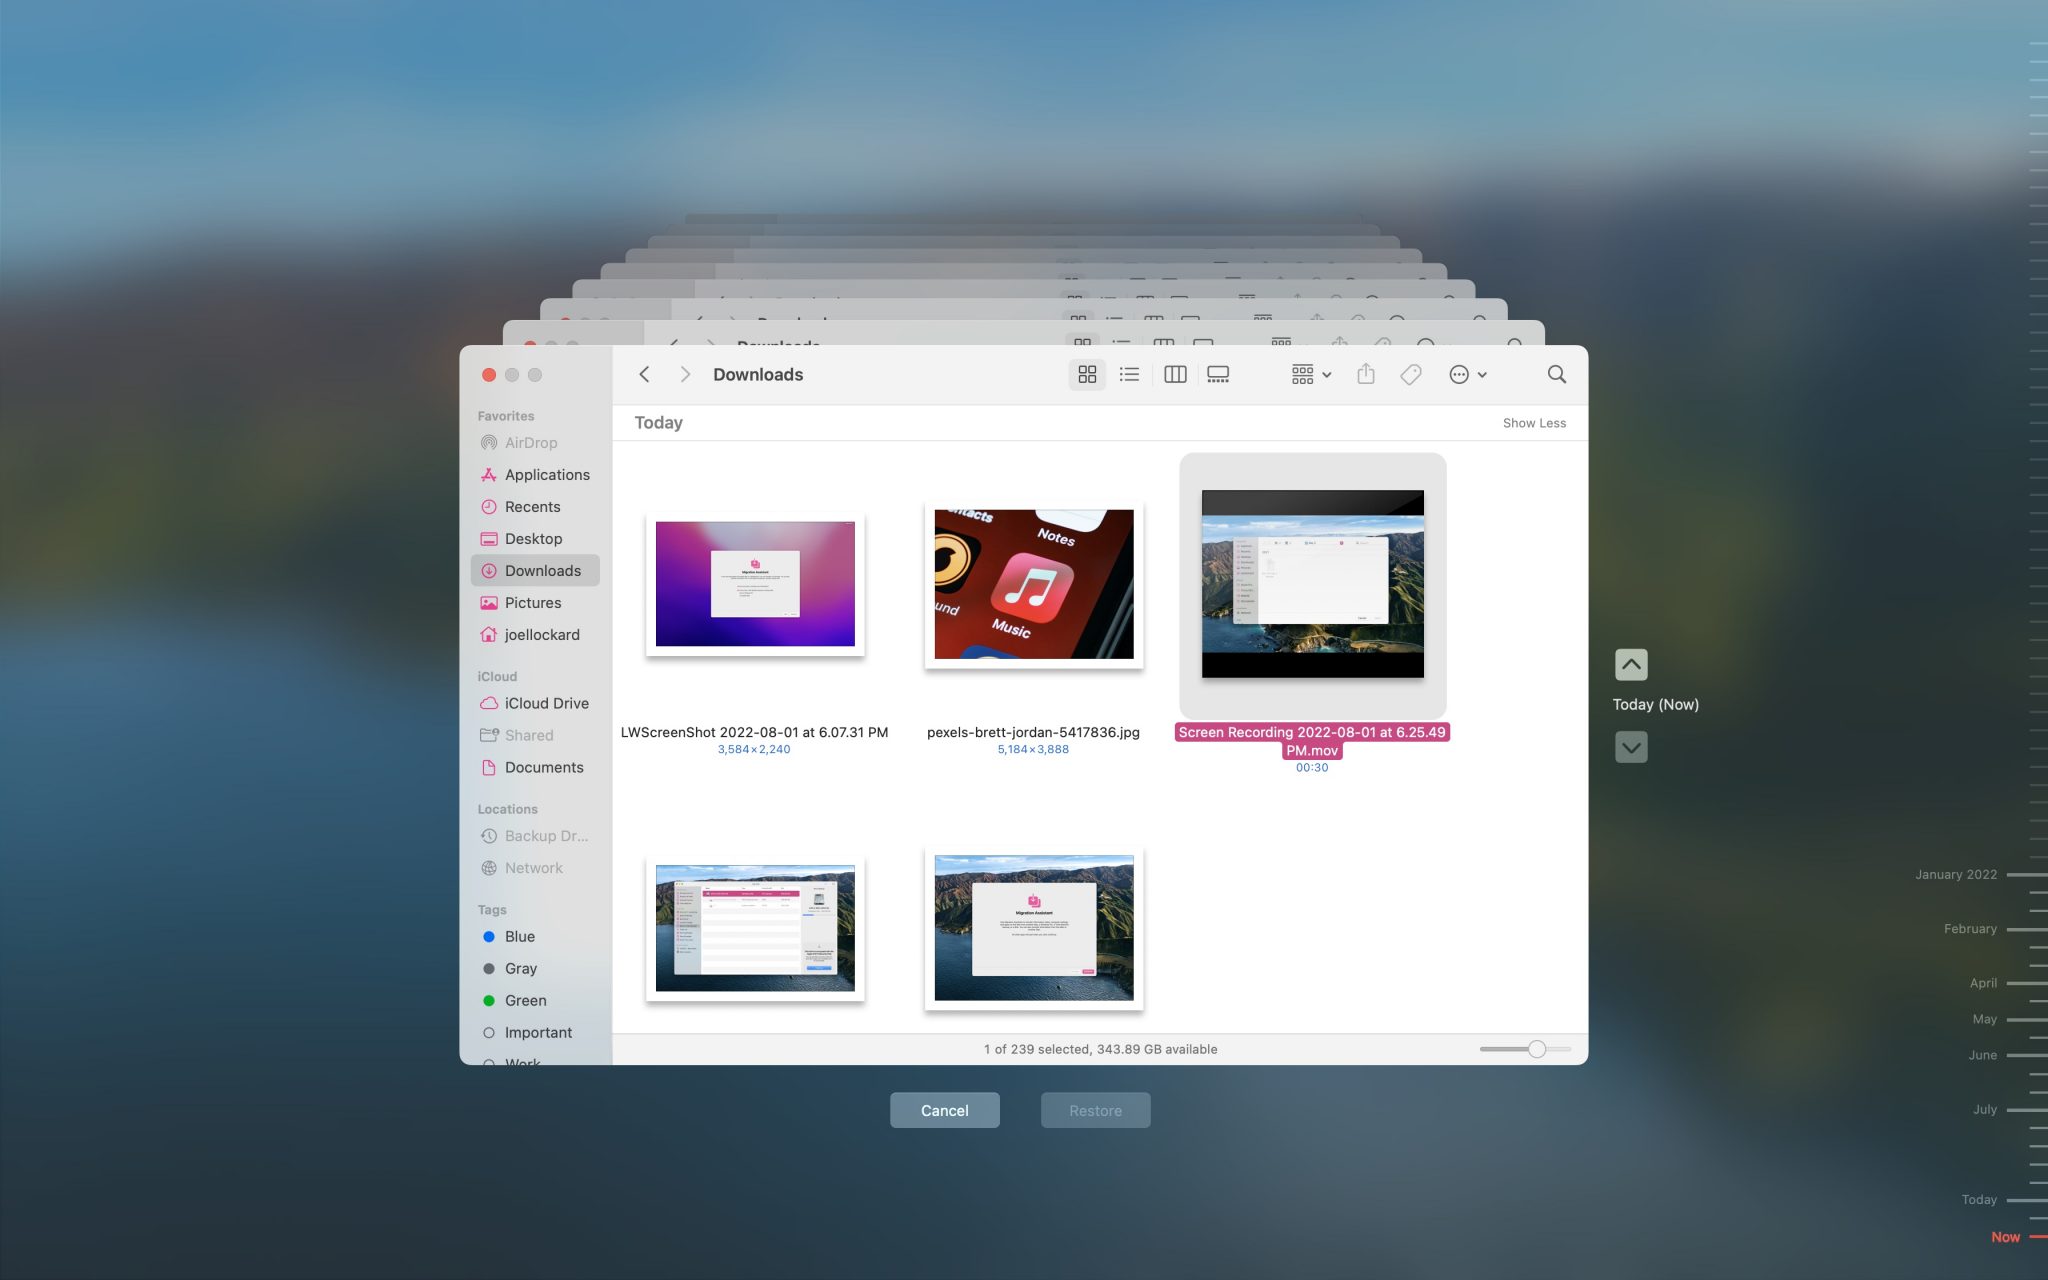
- Click on Restore once you’ve selected the screen recording that you want to recover.
That’s all that there is to it! I love Time Machine and I’ve been using it for a while now at this point.
No one ever thinks that data loss is going to happen to them so it’s always a good idea to back up your Mac and make sure that your data is safe. Not to mention that it also just gives you relief that you always have the ability to go back and recover a file should you need to.
Method 3: Recovering Screen Recordings Without a Backup
If you don’t back up your Mac, don’t worry as we can try and recover screen recordings without having a backup in place. This can be done by using third-party data recovery software.
Disk Drill will allow you to recover data on your Mac even if you don’t have a backup in place. I have a long history of using Disk Drill and I can’t recommend it enough. Some of my favorite features when it comes to using it are:
- Easy to use and understand interface that actually makes sense.
- Powerful data recovery that can scan and find pretty much any data format that has ever existed.
- It works on the newer Macs with Apple Silicon inside.
- Reliable, robust, and the app doesn’t crash.
- Affordable and comes with more features than just data recovery.
Let’s walk through how to use Disk Drill.
- Download and install Disk Drill onto your Mac. The download is free and it doesn’t cost you anything as mentioned above.
- Launch Disk Drill and scan the storage device that you would like to scan to find and recover screen recordings.
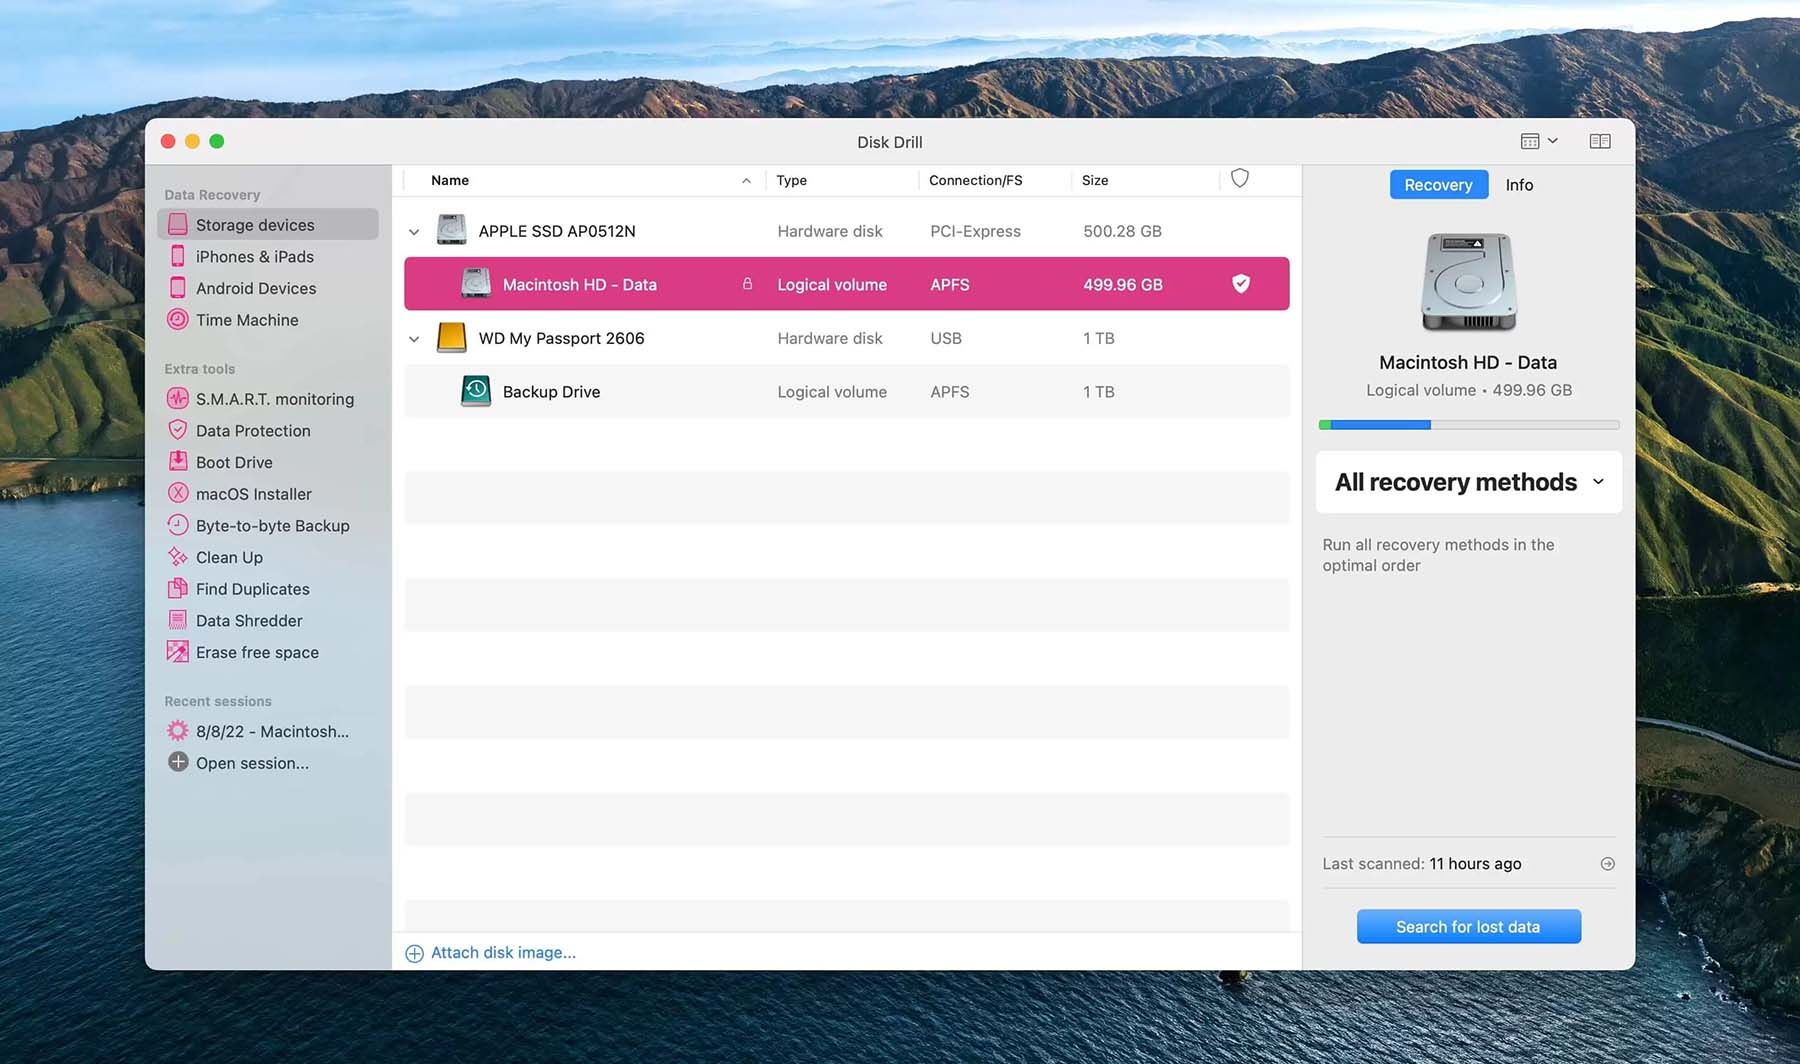
- Wait for the scan process to complete.
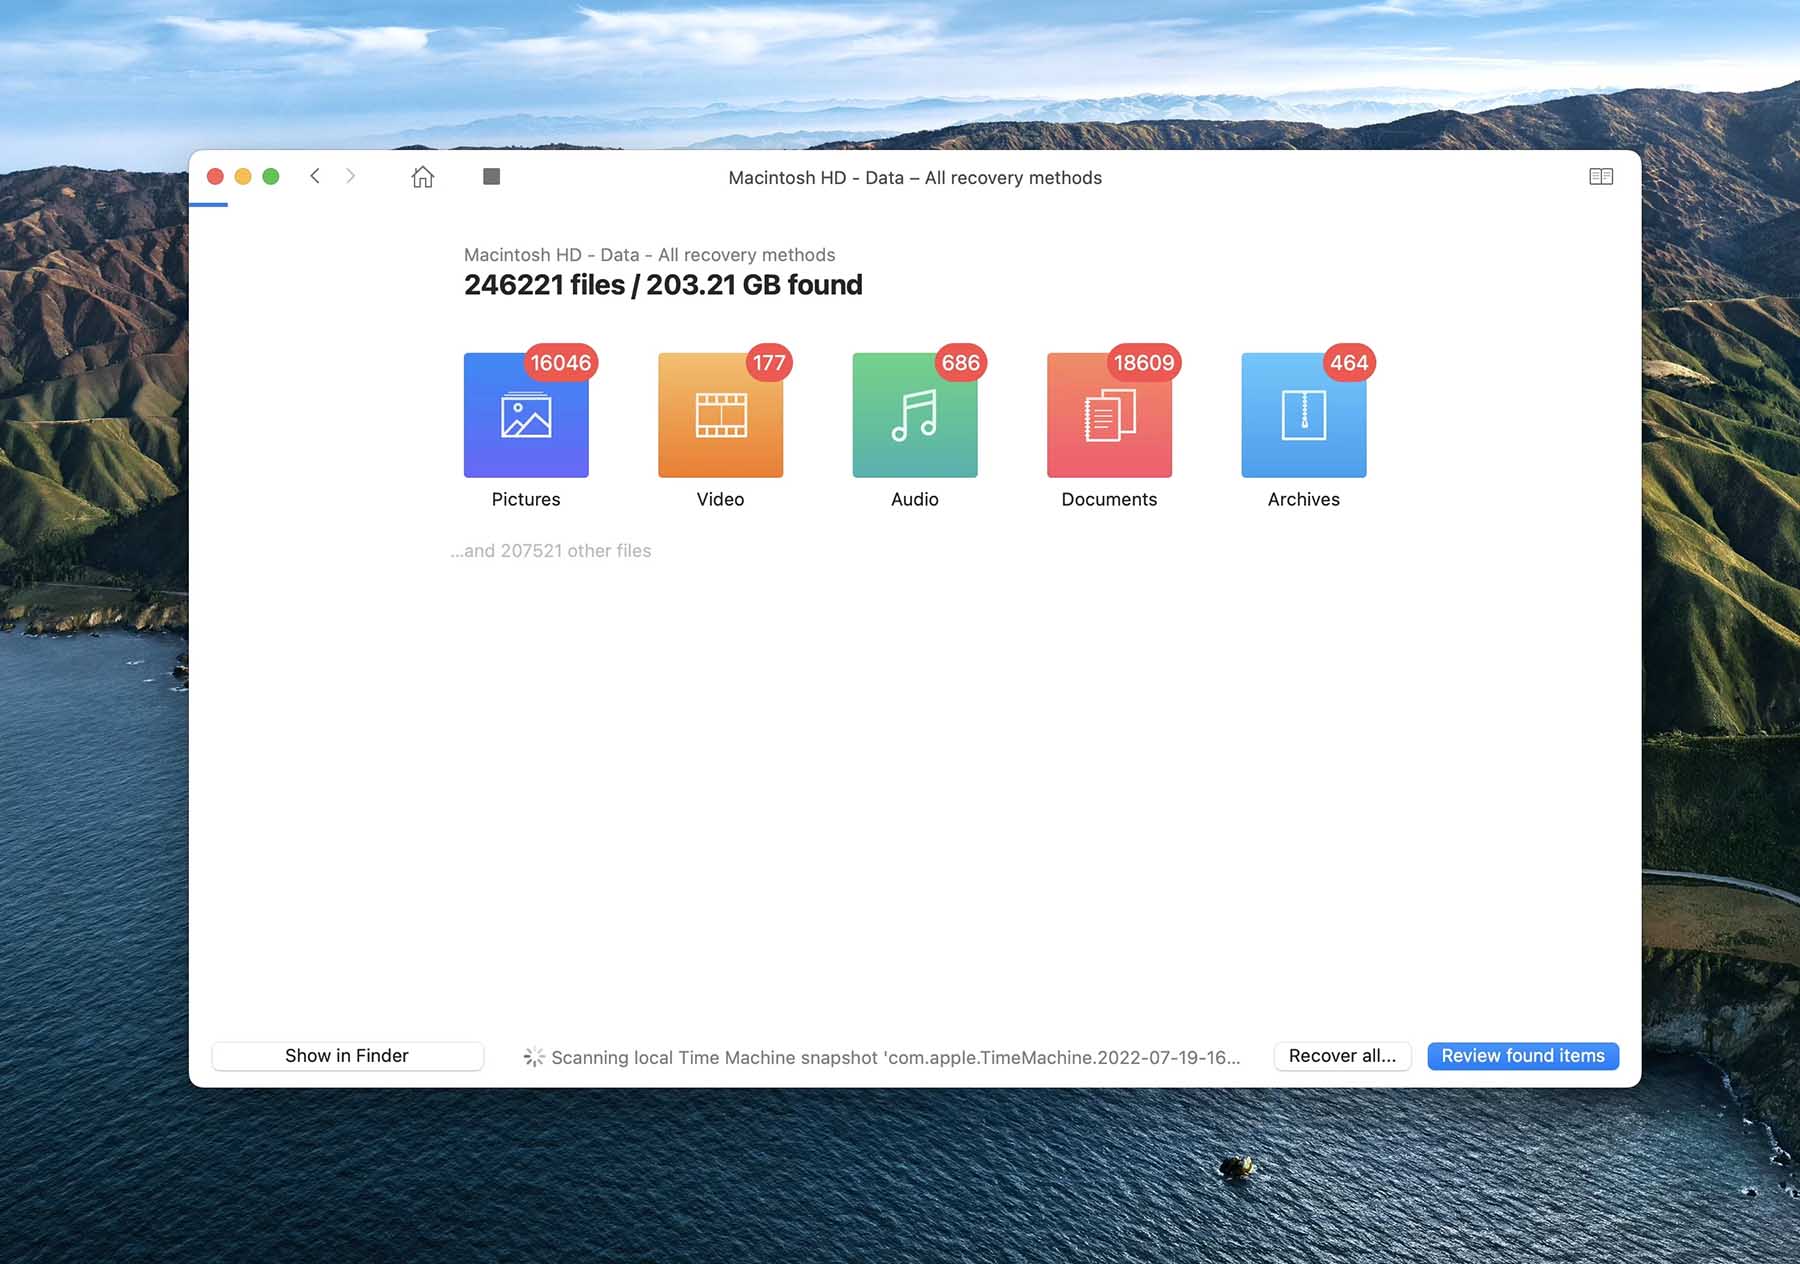
- Once the scan process has been completed, you can review what Disk Drill was able to find. I like using the powerful Preview feature which requires you to hit an eye icon that then expands the screen recording into a movable image so that you can view the file before recovering it.
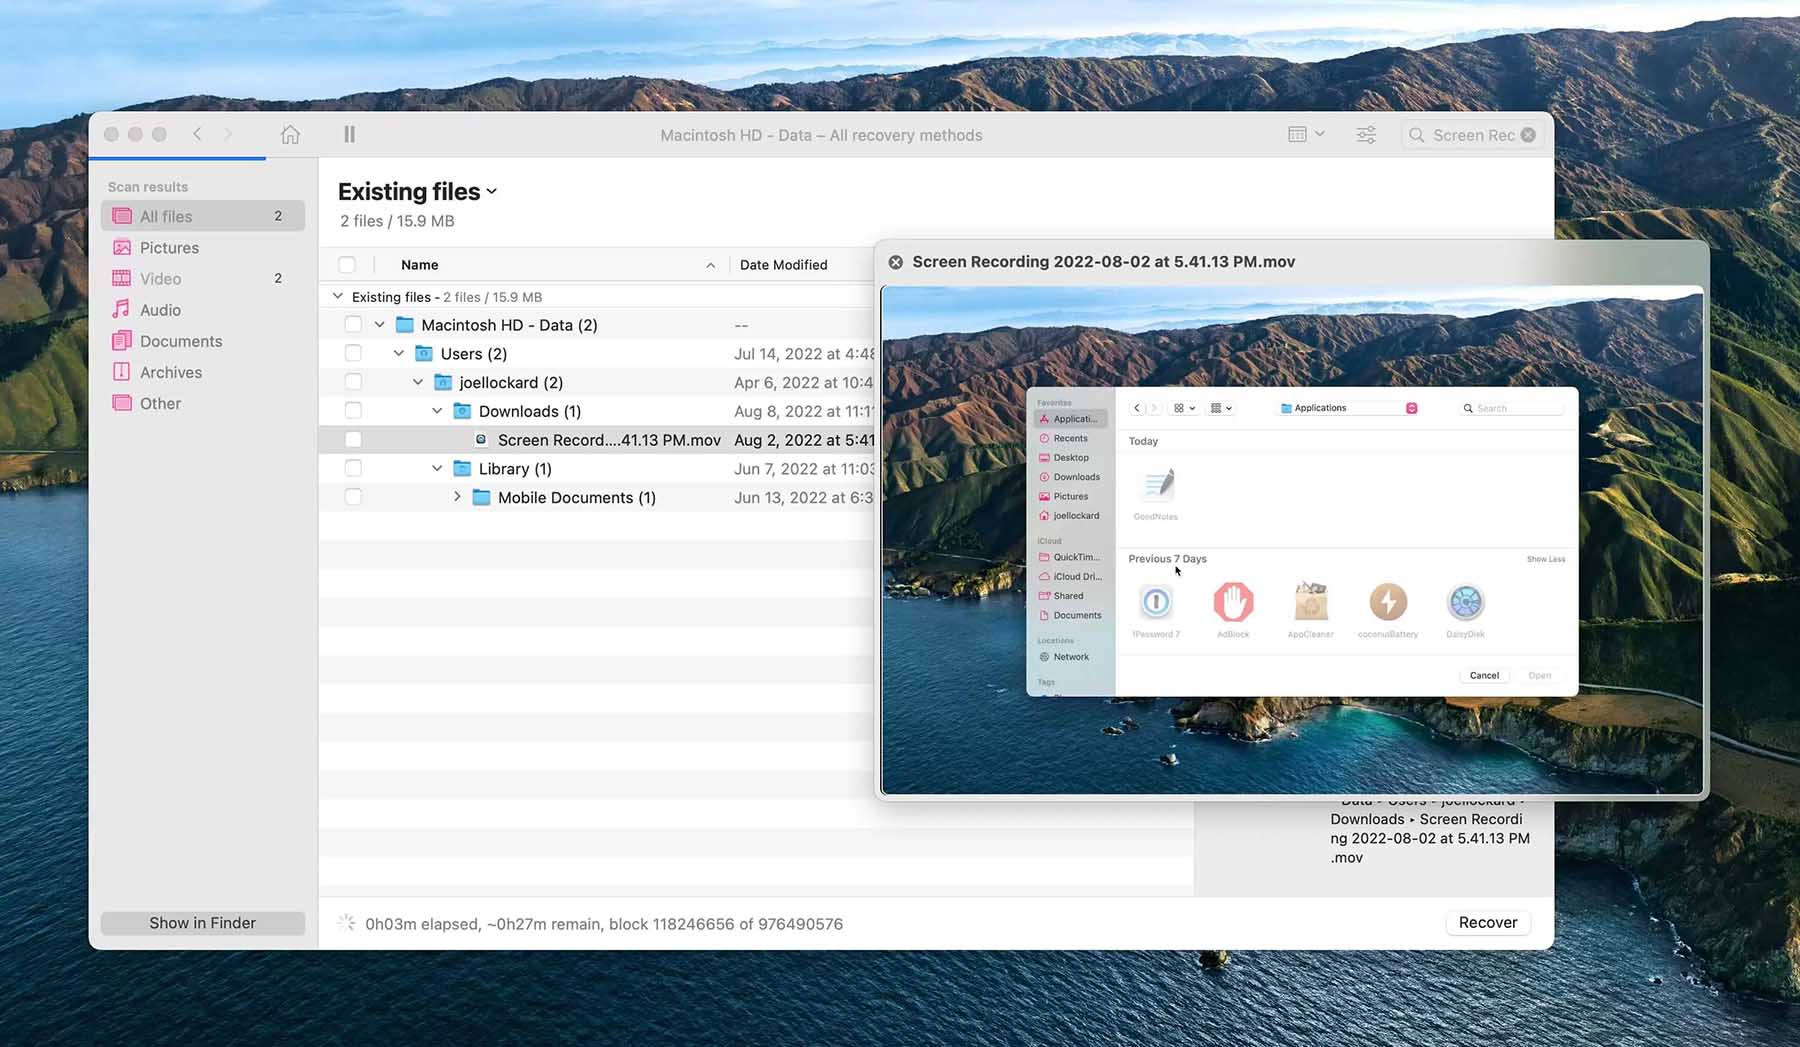
- Select the files that you would like Disk Drill to recover and then click on the blue Recover button.

That’s all that there is to it! Now that we’ve recovered our screen recordings on our Mac, let’s talk about what we can do to prevent us from losing them in the future.
Tip #1: How to Save Your Screen Recordings With Time Machine
We talked about recovering files from a Time Machine backup above. If you didn’t happen to have a backup in place, that’s okay as we will show you how to create one so that if you lose data in the future the recovery process will be much easier.
Now let’s walk through how to use Time Machine to make sure that our data is saved from here on out.
- Plug your external hard drive into your Mac.
- Launch System Preferences and then go to Time Machine.
- Select the external hard drive that you’ve plugged into your Mac and give it a name, mine is called “Backup Drive”.
- Wait for the backup to complete.
I would recommend that you back up your Mac once a week or anytime that you make huge changes to the files that are on it or work on something super important that is stored locally on your Mac.
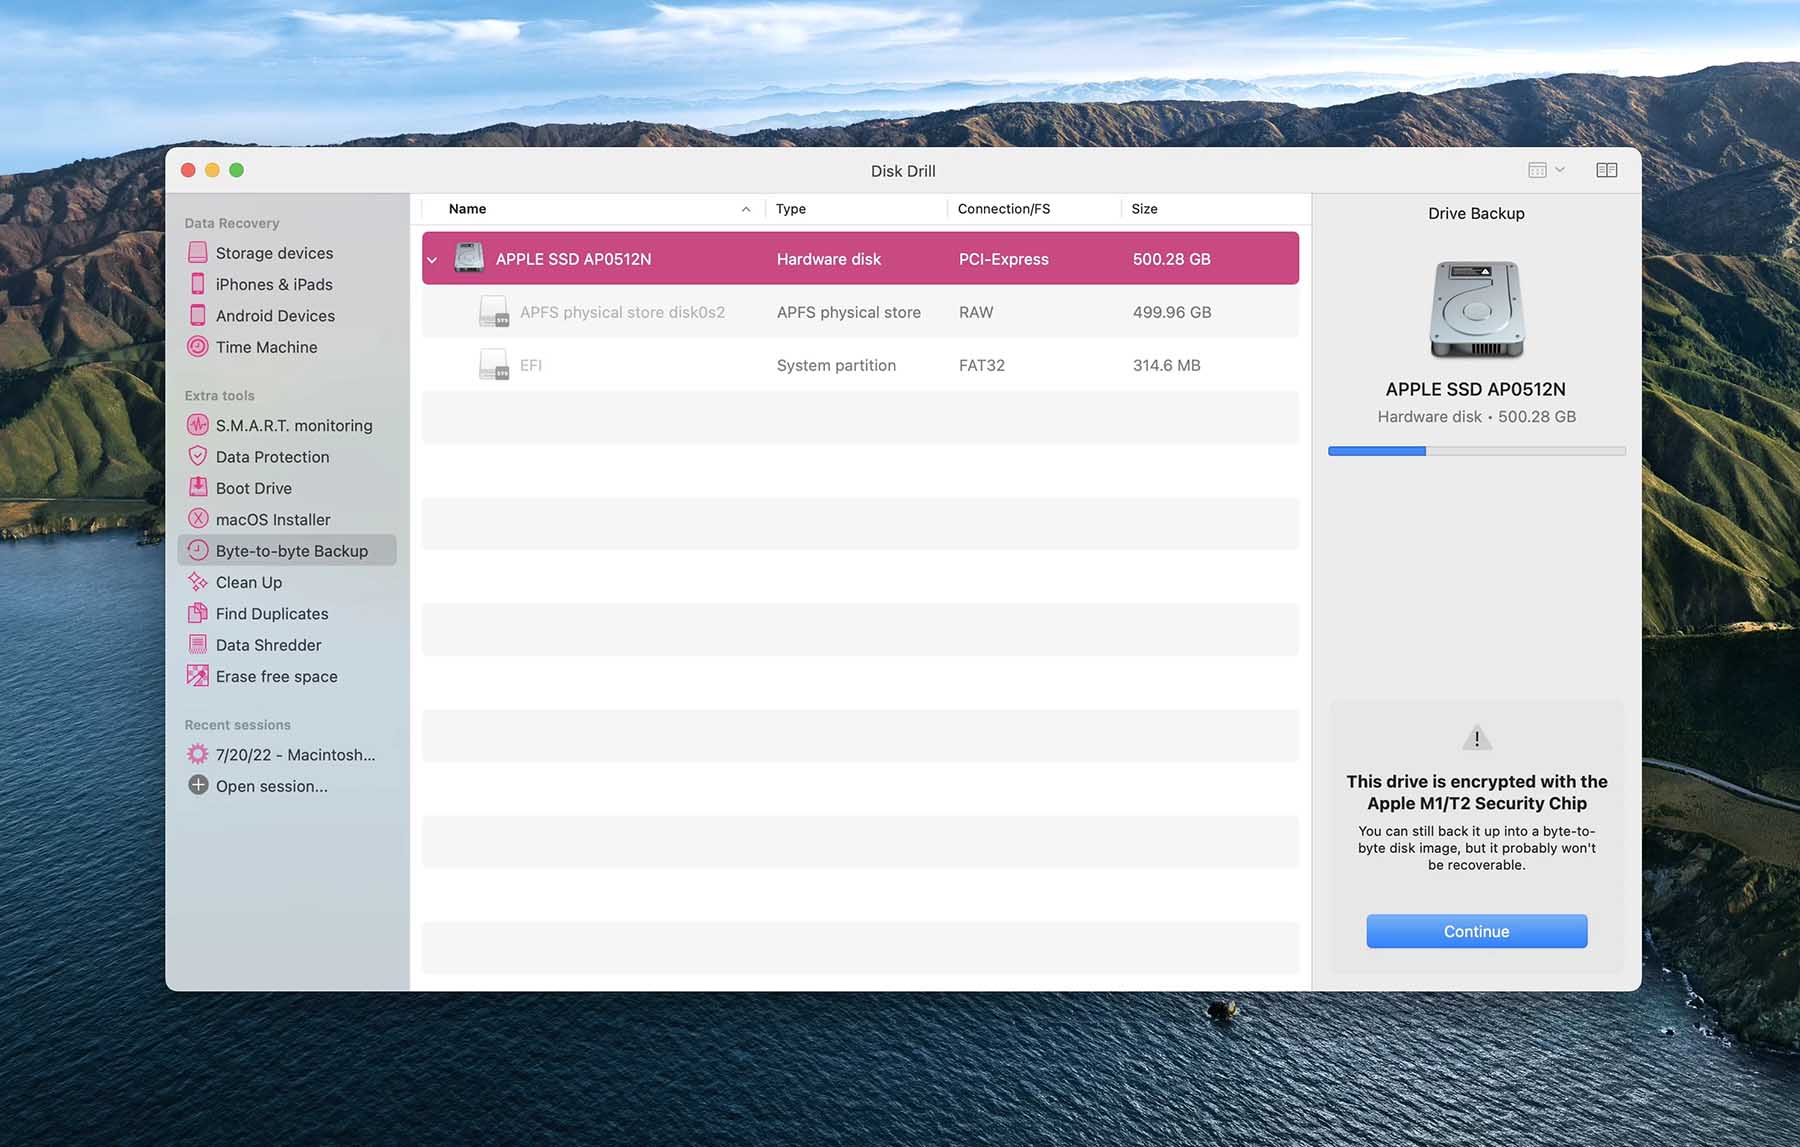
We can also use the Byte-to-byte backup feature as well to save our data. This is found within Disk Drill which is the data recovery app that we used earlier in the article to recover our screen recordings.
Tip #2: How to Back Up Using Byte-to-byte Backup
Backing up our data using Byte-to-byte backup is free and doesn’t cost you anything. Not to mention that it’s super easy to use and it won’t take you hardly any time at all.
- Download and install Disk Drill onto your Mac. This is a free download.
- Launch the app and connect an external hard drive or any other storage device that you want to back up to.
- Navigate to the Byte-to-byte backup section of Disk Drill.
- Now, select the storage device that you want to back up to.
- Choose the name of the backup and where you want to save the backup to. I just let Disk Drill choose the default name for the backup but you can change it to something custom if you would like to.
- Wait for the backup to complete.
Conclusion
Screen recordings make life on our Mac easier. With the ability to share them with others and we’re more productive because of that.
We’re even more productive now because we also have the ability to back up our Mac and save all of our data should something happen to it which means less downtime and fewer frustrations.


FAQ
If the screen recording is lost but not deleted from our Mac we can find it by using Spotlight which will search our entire Mac for the lost screen recording.
- On your Mac, click the Spotlight icon in the menu bar or you can press the keys Command + Space bar to pull up the Spotlight search menu.
- Type in the name of the screen recording.
- View the results and see if you were able to find the lost screen recording.
If you want to view the screen recordings that you’ve been working on recently, that can be done by using the Finder.
- Launch a new Finder window.
- Click on the Recents tab on the left-hand side.
- Look for the screen recording that you want to recover.
If your screen recording did not save on your Mac, it most likely is because the screen recording was taken but then not saved.
When you create a screen recording make sure you either press the keys Command + S or go to the menu bar and click on File and from under there choose the save option to save the screen recording to your Mac.
If you took a screen recording on your iPhone and want to recover it, you can do so by using Disk Drill.
- Download and install Disk Drill onto your Mac.
- Plug your iPhone into your Mac.
- Launch Disk Drill and then select your iPhone as the device that you want to scan for the deleted screen recordings.
- Wait for the scan process to complete.
- Review what Disk Drill was able to find and recover the deleted screen recordings.