If you need to recover deleted screenshots on a Mac, there are various approaches you can use. Sometimes, it’s as easy as pulling the file out of the Trash. In other cases, you may have to dig deeper and utilize a specialized solution for recovering deleted data.
But even if you’ve gone as far as to format your hard drive completely, not all hope is lost. Data is very rarely physically erased from your hard drive. Often, it’s just marked as deleted behind the scenes, allowing applications to write over it. This means that you can still recover your deleted files with the help of the right tools.
Common Situations Where Screenshots Can Be Lost
While it’s important to pay attention to how you’re storing and organizing your data, that’s still not a full guarantee against accidental deletion. In some cases, you may still end up with data loss even if you’ve taken all reasonable precautions. With that in mind, don’t blame yourself if you accidentally lose some screenshots on your Mac – it’s entirely possible that it’s not your fault.
Here are some cases where you might lose your screenshots on a Mac:
- ❌ Deleting the files by accident
- 🗑️ Moving the files to Trash and forgetting to check
- 💽 Hard drive error
- ⚠️ Malware
How to Retrieve Deleted or Lost Screenshots and Documents on a Mac
Knowing where to find your screenshots on a Mac is a good first step to recovering them after accidental data loss. There are many other options available to you in most cases. Here are some of the best approaches.
Method #1: Try to Open Recent Files
The easiest way to find a screenshot on Mac which you suspect has been deleted or moved is to check your Recent Files. To do that:
- Click on the Apple icon at the top menu.
- Click on Recent Items.`
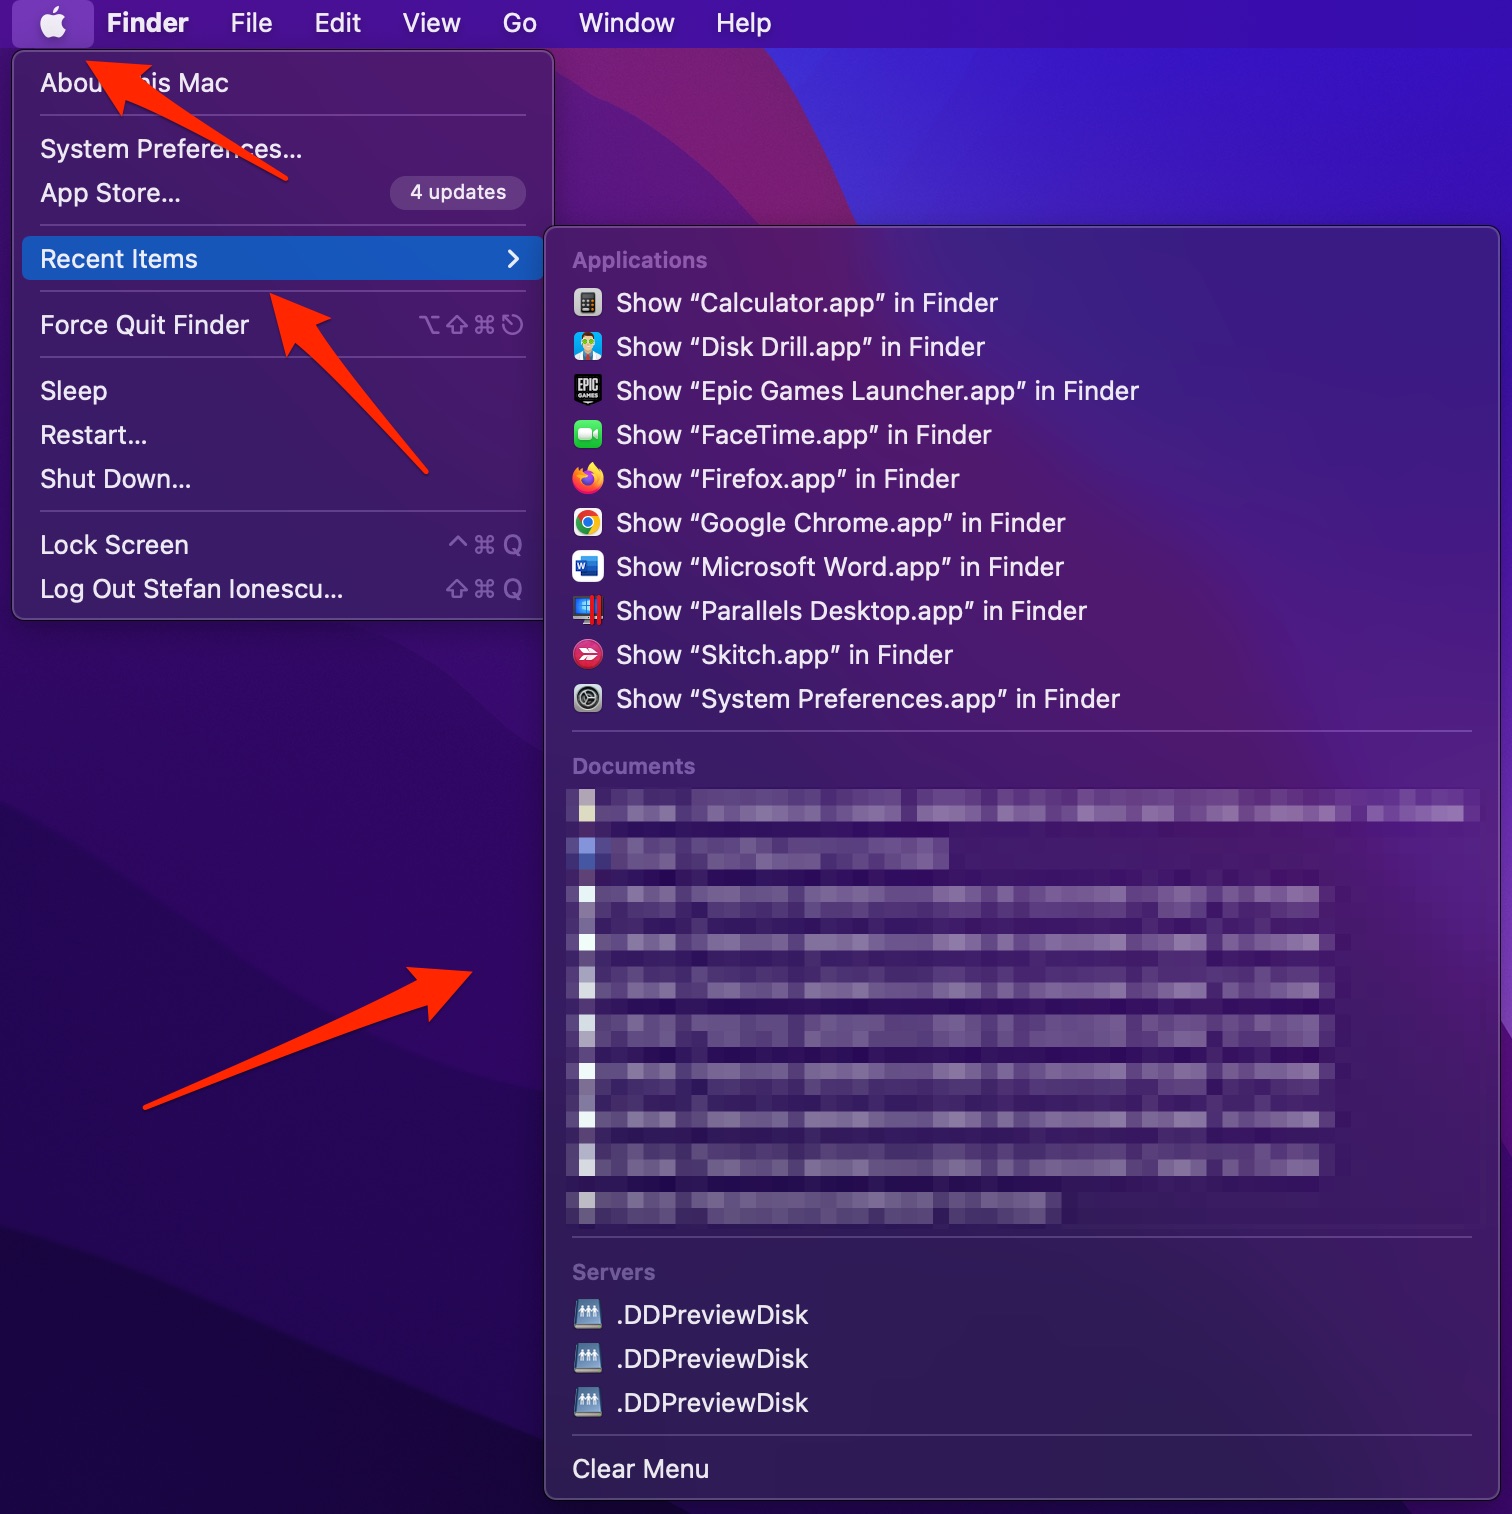
- Check the list to see if your files are in there.
Method #2: Data Recovery Software
With the help of data recovery software, you can often get back files that you thought were gone forever. It’s sometimes even possible to recover files from a formatted hard drive. There are various solutions on the market that can get this job done. Disk Drill is a recommended choice for beginners who want to recover their files with minimal hassle
- Download and install Disk Drill.
- Launch Disk Drill.
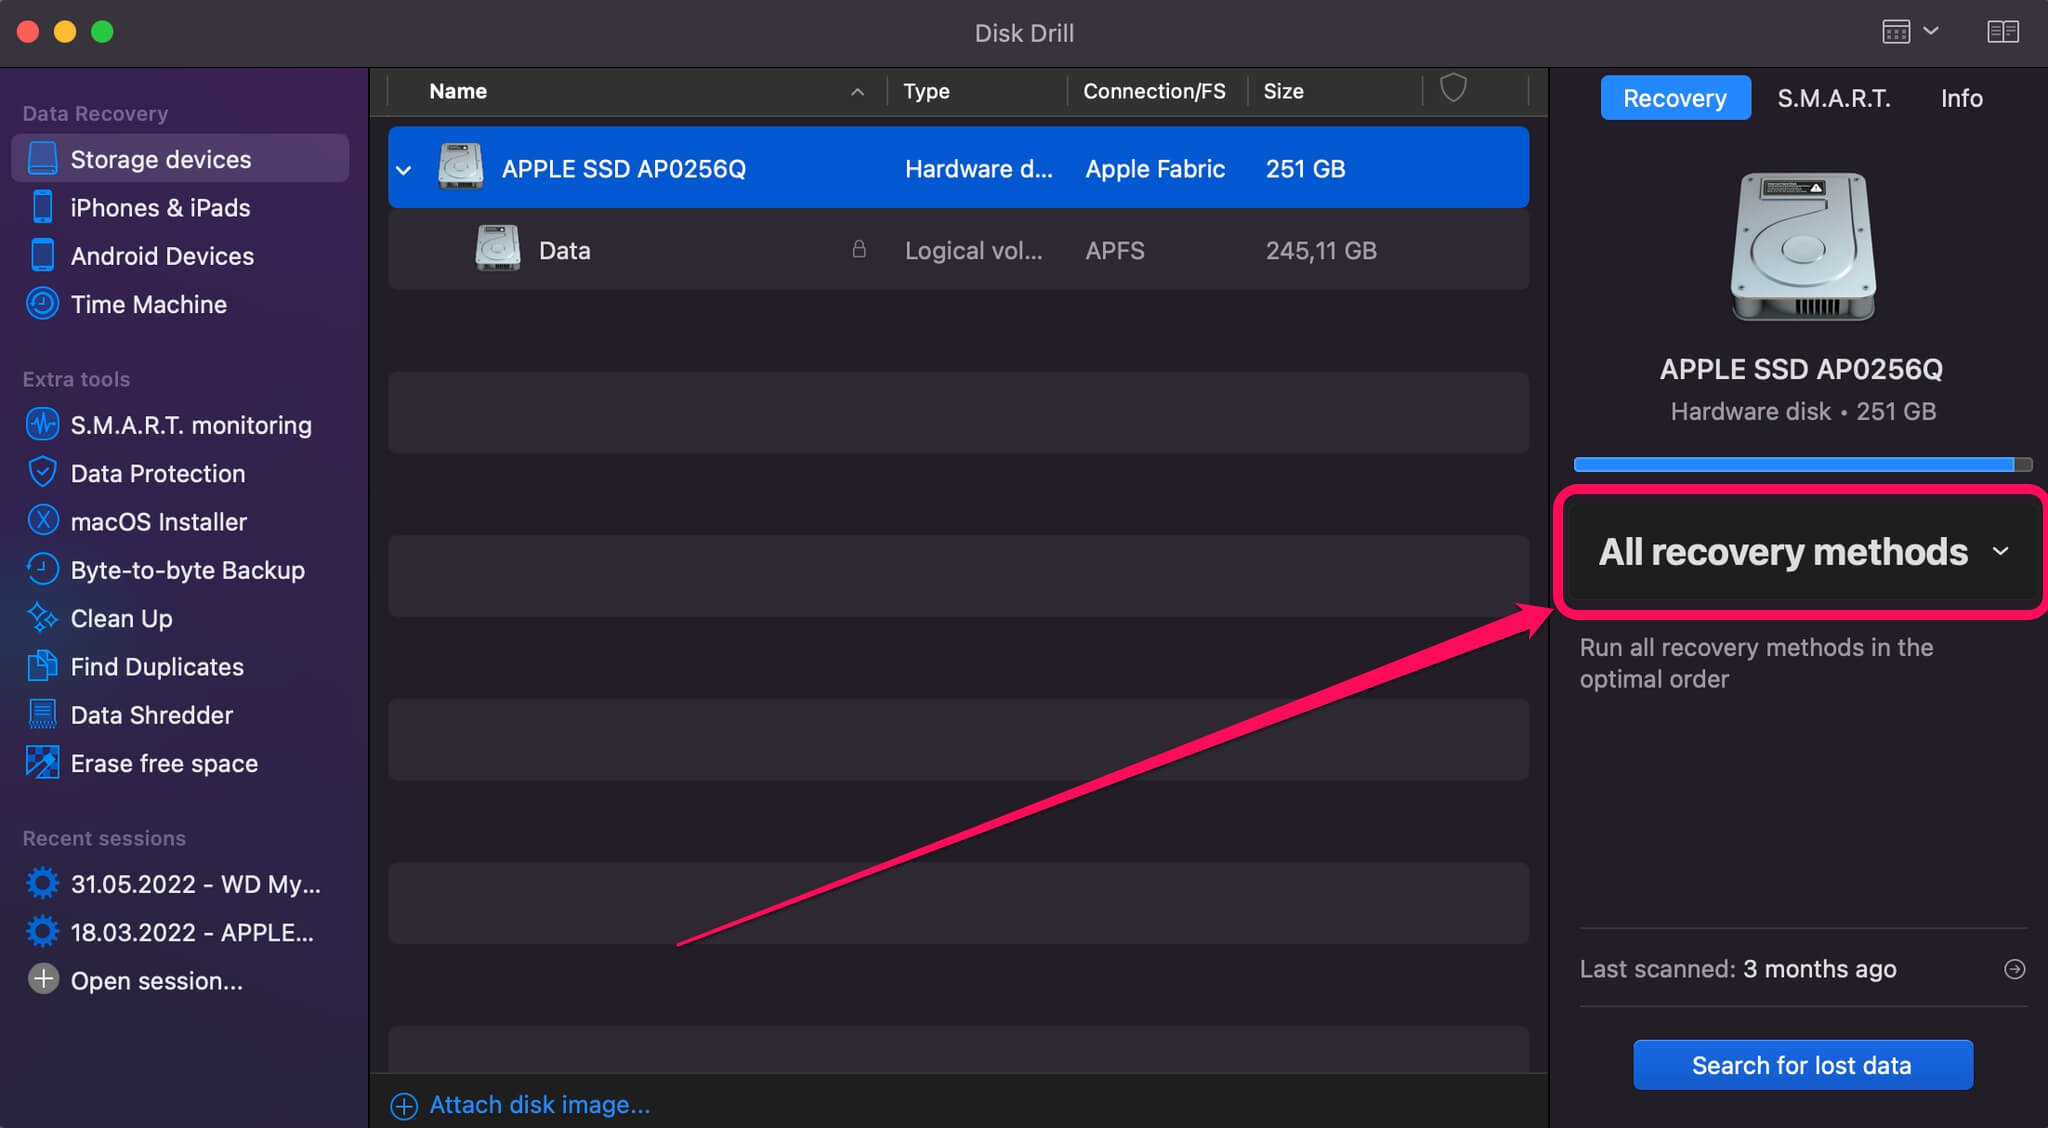
- Choose the drive you want to recover.
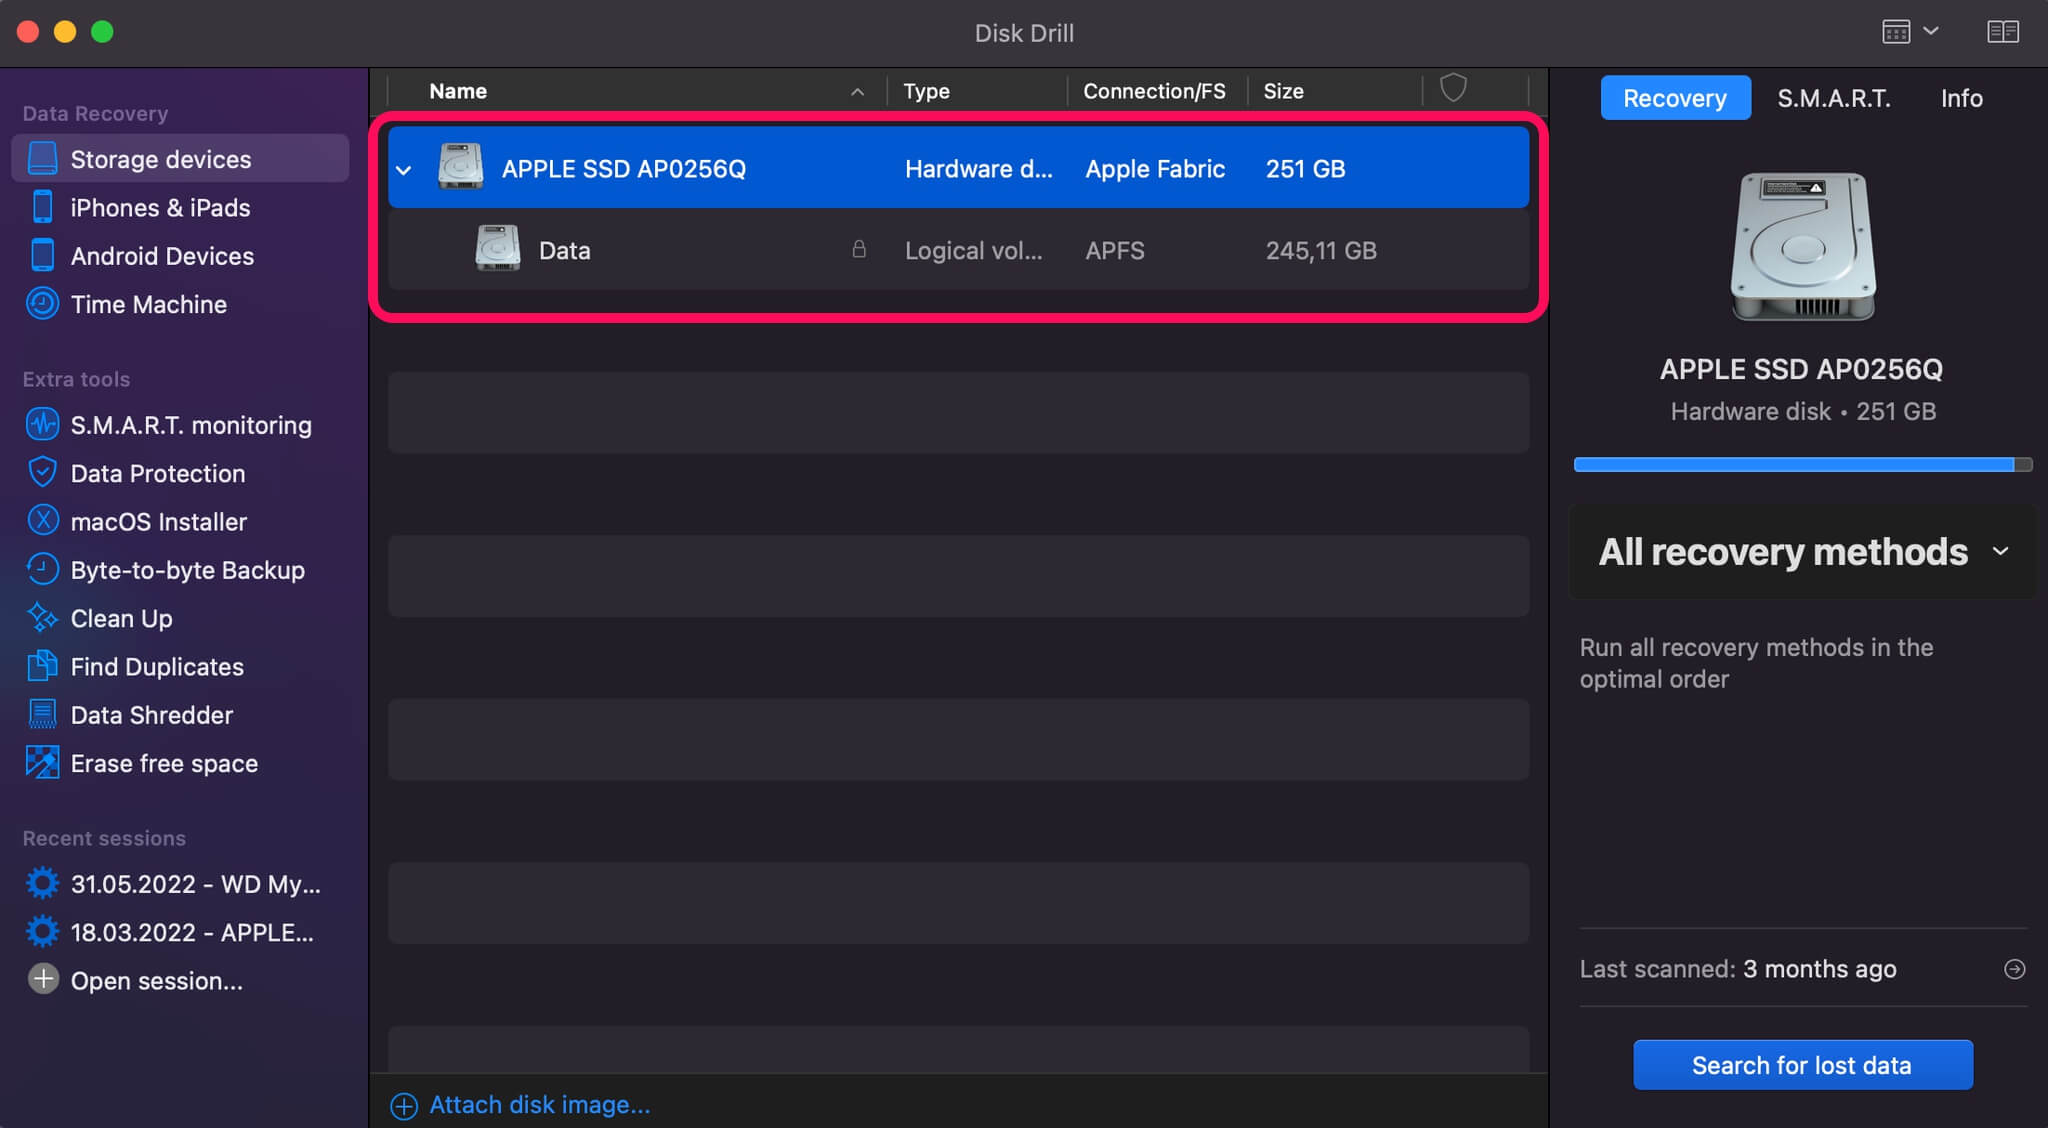
- Select on All Recovery Methods on the right.
- Click Search for lost data. The recovery process will now start – wait for it to finish.
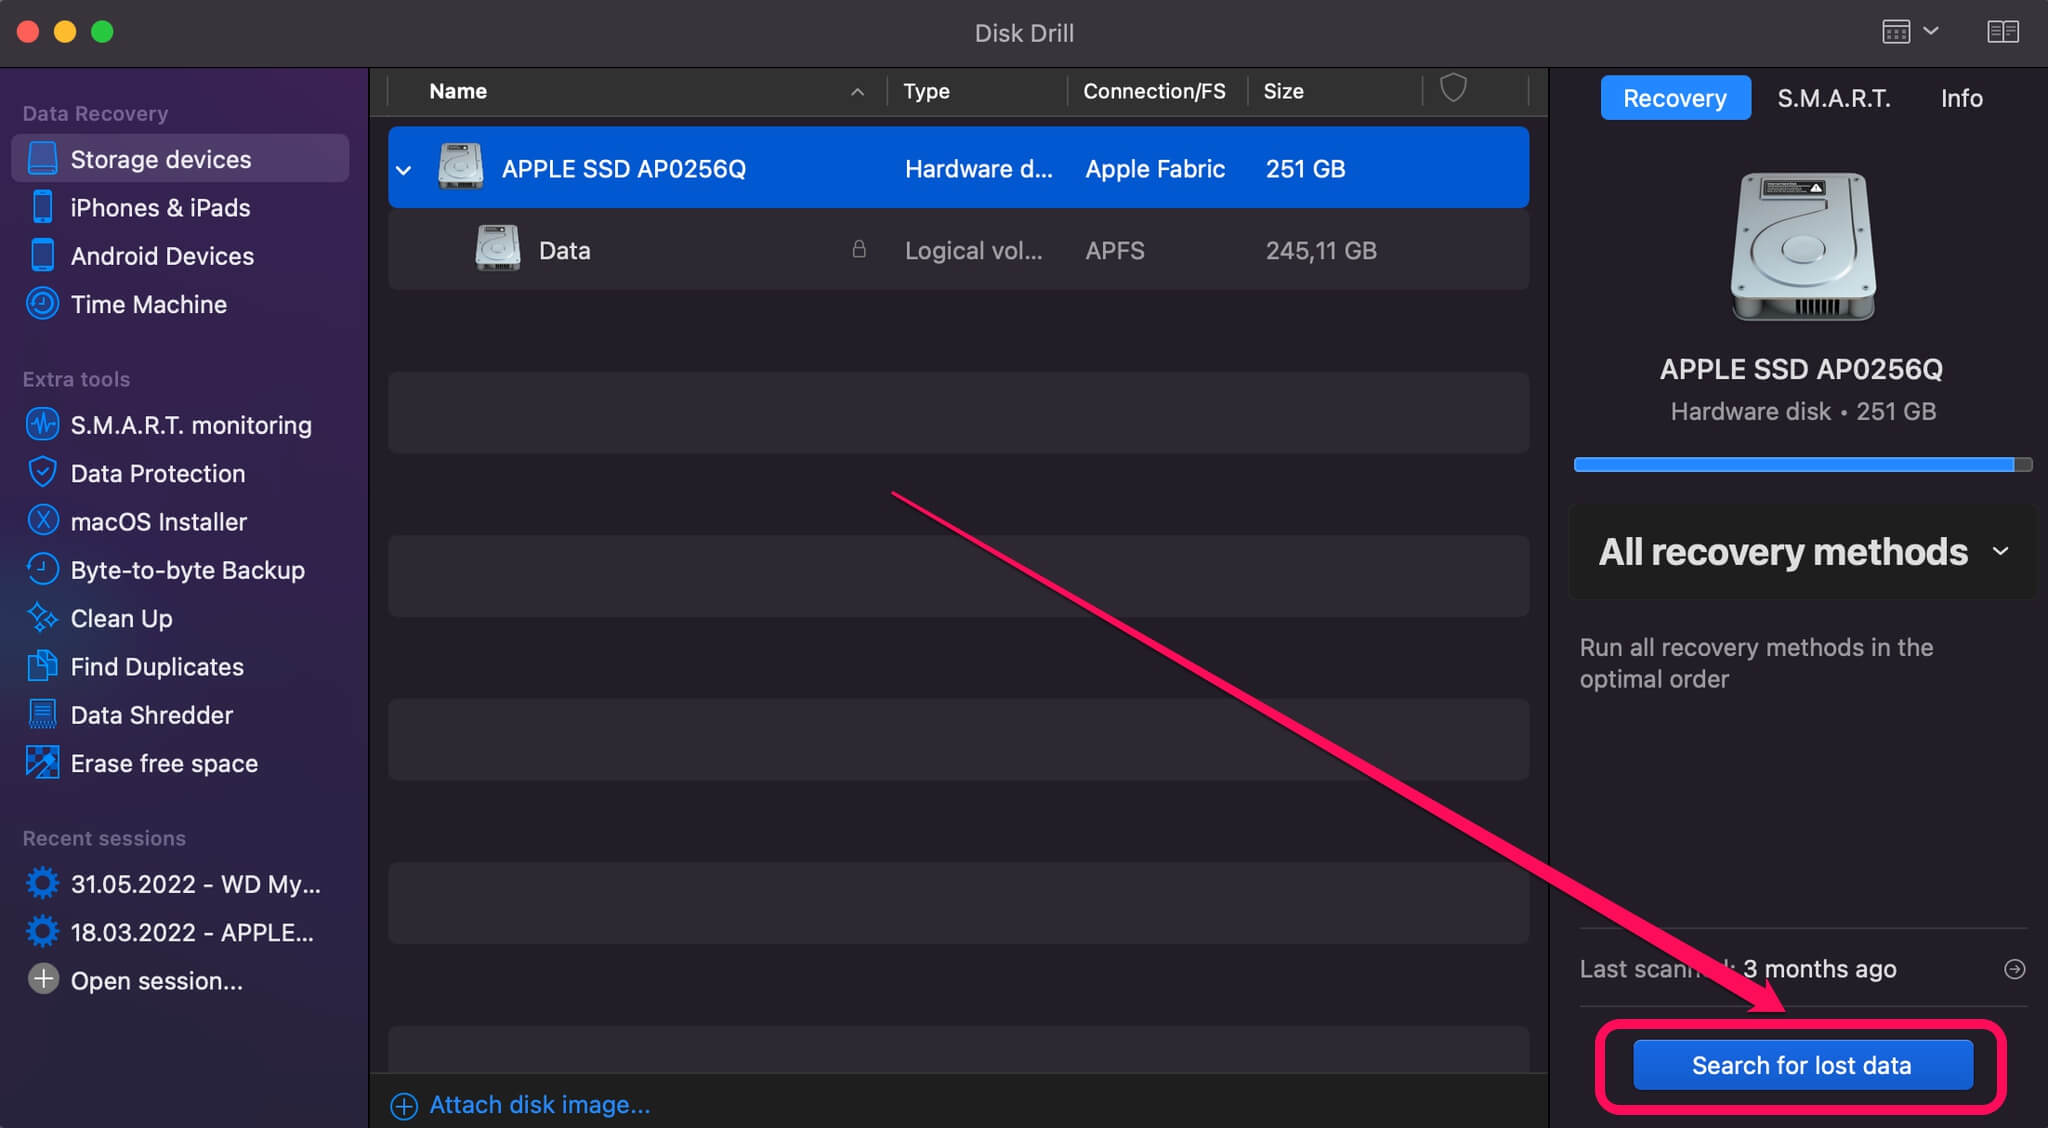
- Once that’s done, click Review found items in the bottom right.
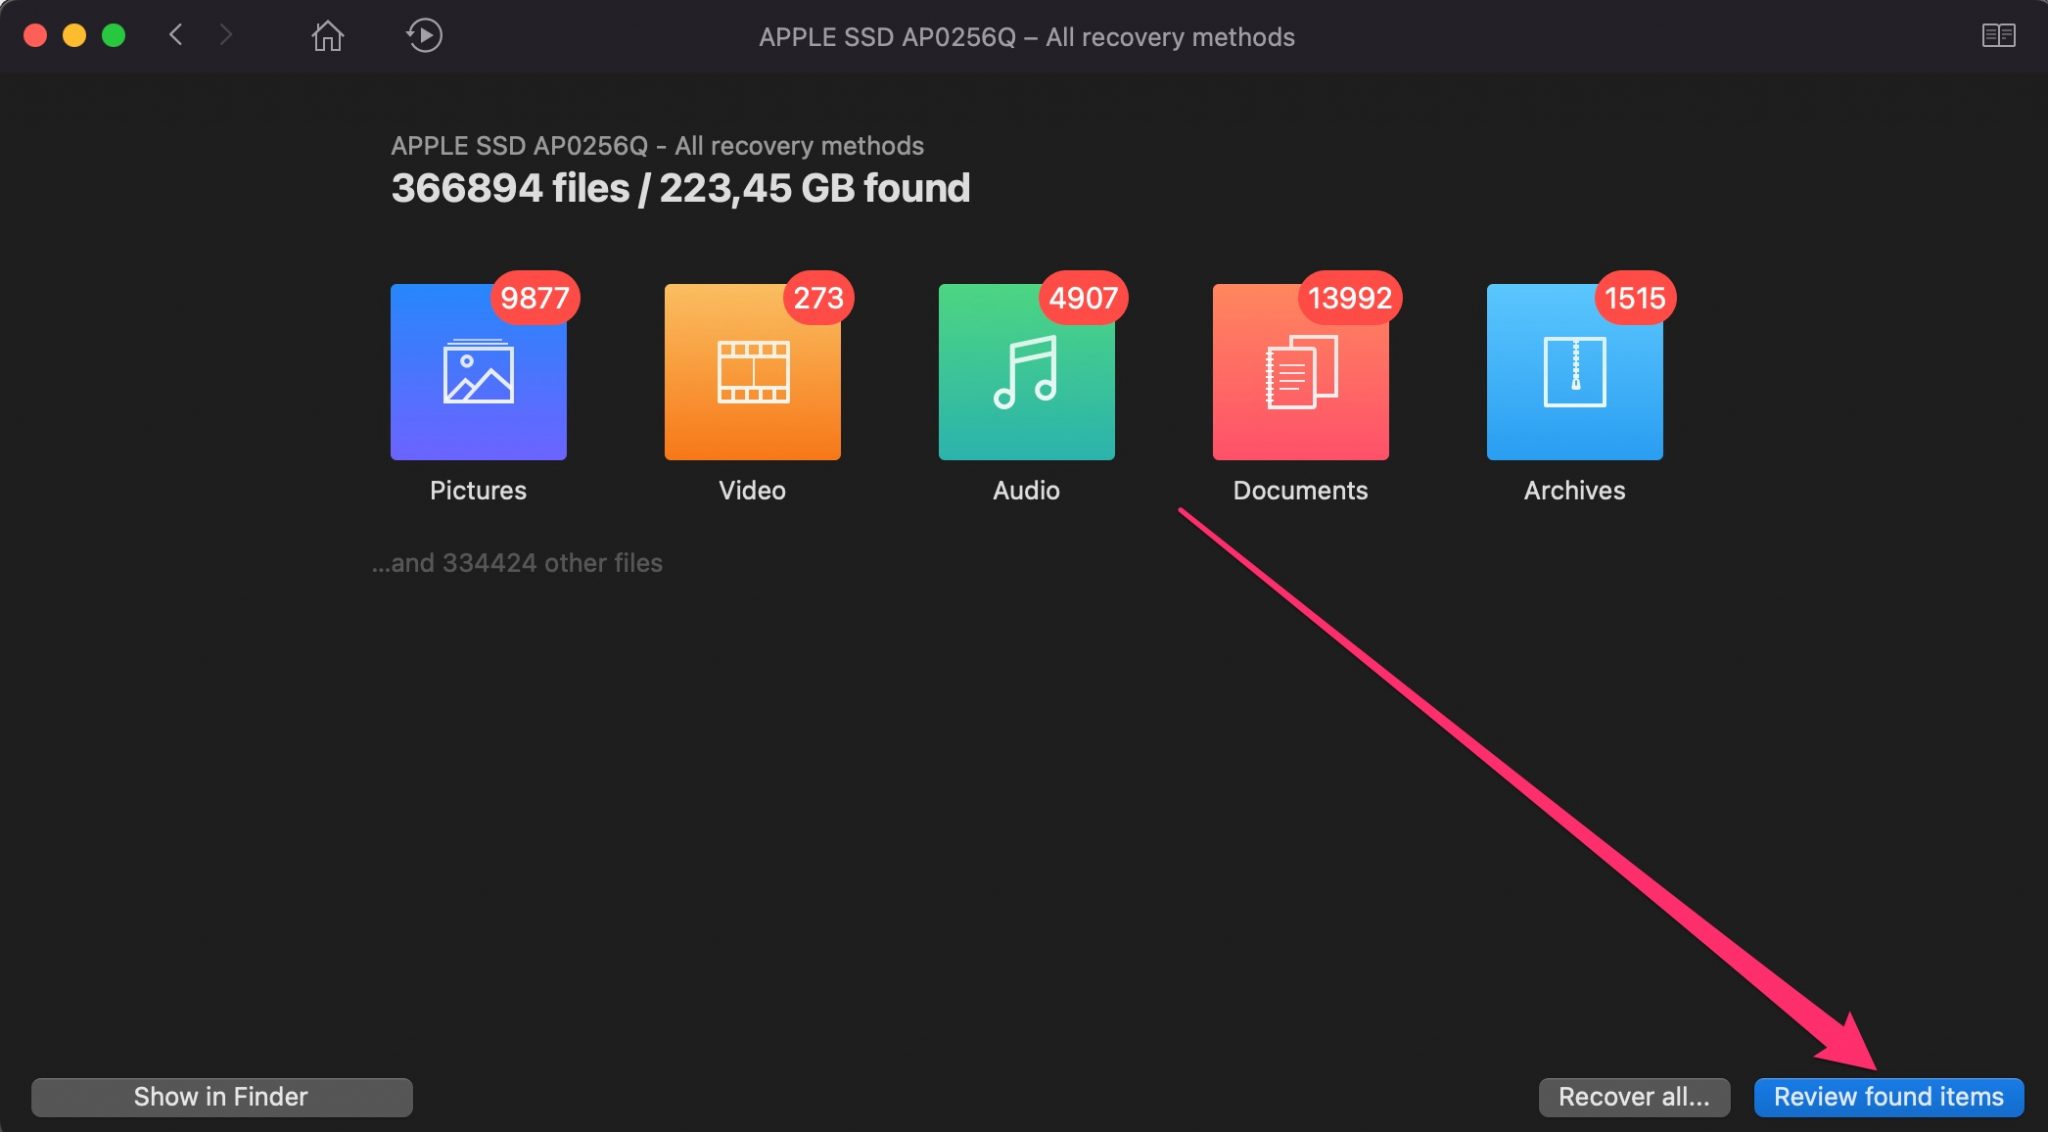
- You’ll see a list of all recoverable files. Scroll through it to see if your files are in there.
- Mark files you want to get back and click Recover in the bottom right.
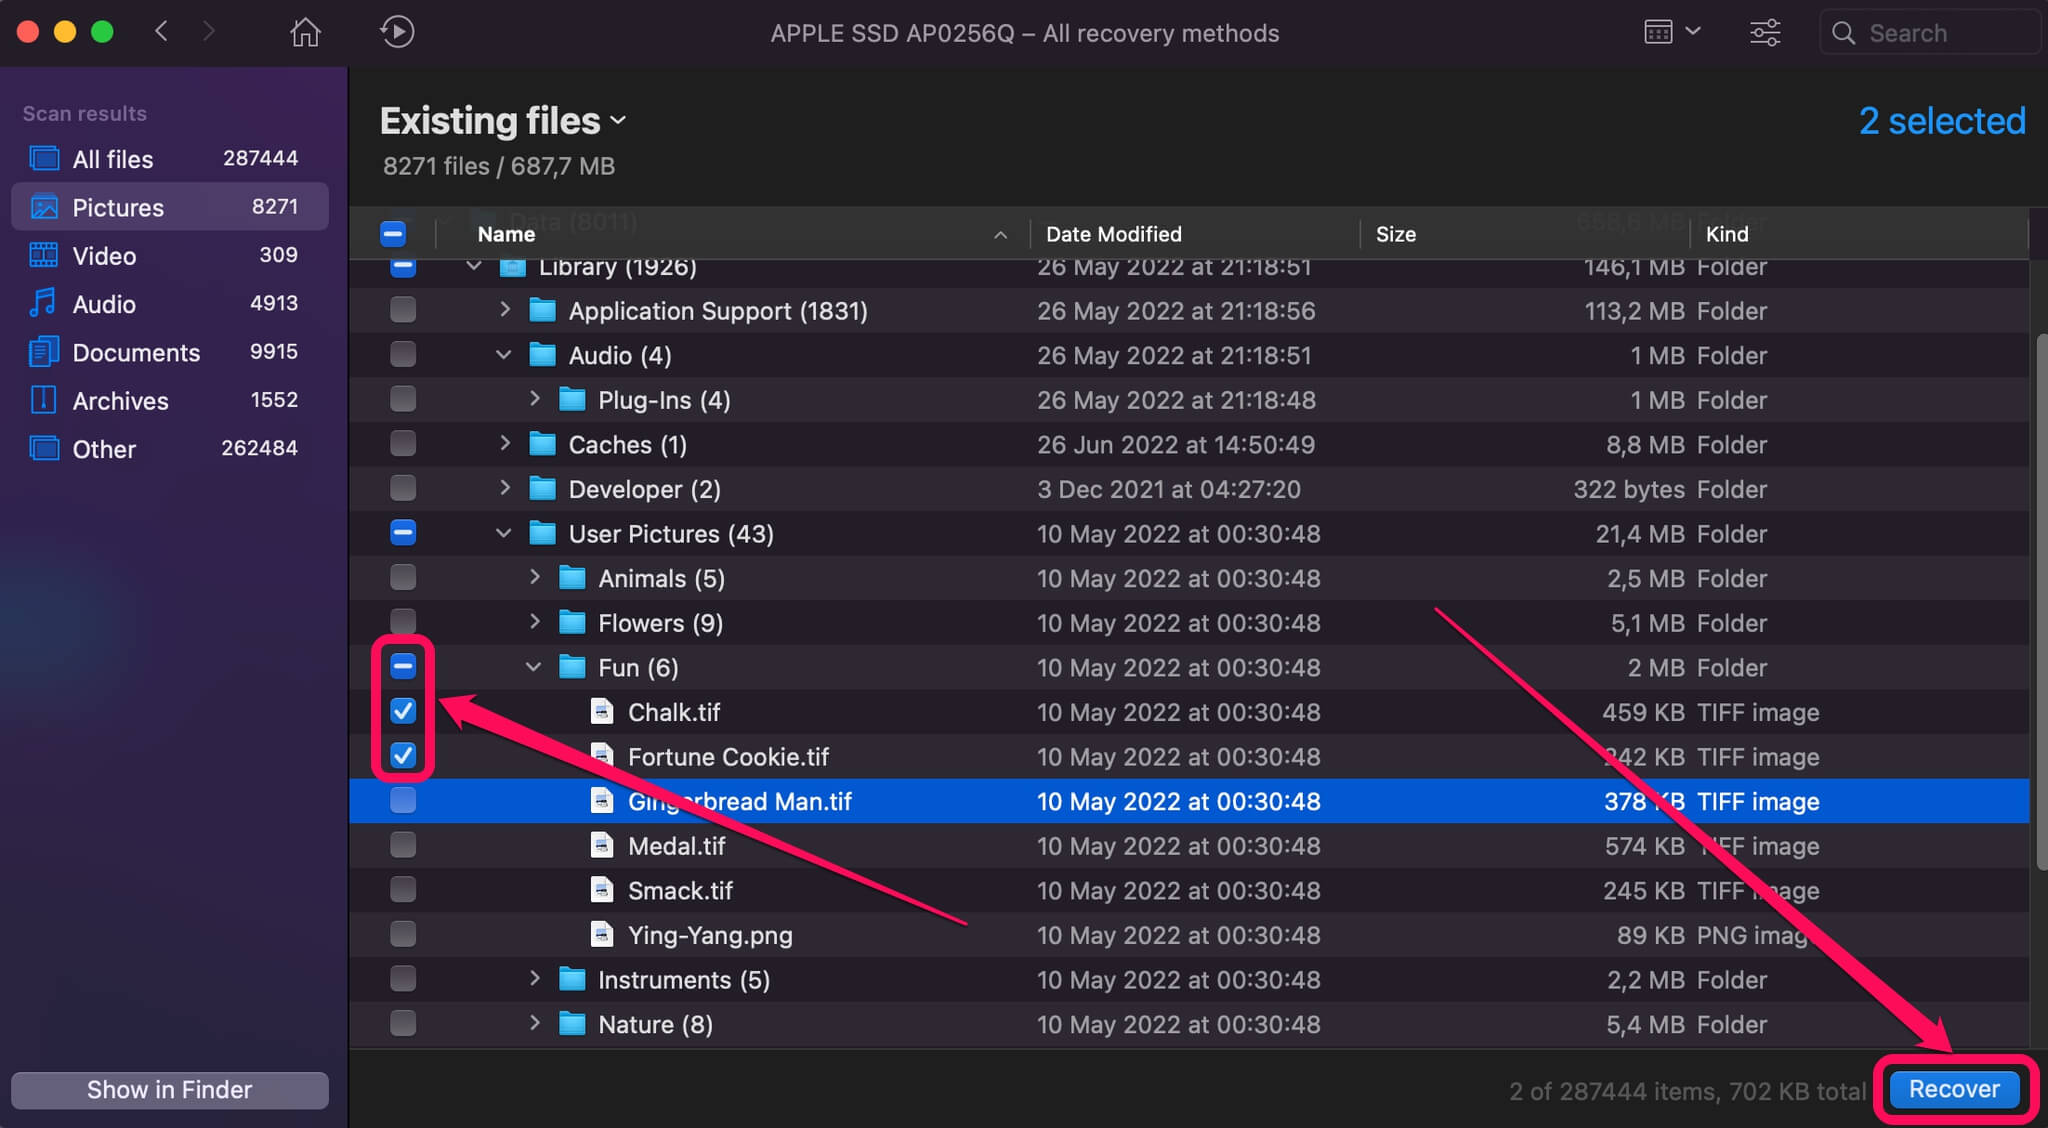
- Choose a separate disk drive for their recovery. This is very important – recovering files to the same drive means that you may accidentally overwrite existing data that’s currently marked as deleted.

Method #3: Try the “Revert To” Function
If you still have a copy of a screenshot, but it’s been overwritten or otherwise modified, you can use the Revert To function to get an older version of that file.
- Open the current version of the screenshot you want to recover.
- From the top menu, go to File -> Revert To -> Browse All Versions.

- You will be presented with one or more older versions of the screenshot. Scroll through the list to see if your desired version is somewhere in there, and recover it if so.
Method #4: Recover from Bin
Sometimes you may have moved a file to the Trash and have forgotten about it. In this case, recovery is very simple and only takes a few clicks.
- Open Bin.
- Browse through the current contents to see if your lost screenshot is there.
- Select the screenshot(s) you want to recover, right-click on them, and select Put Back.
Method #5: Recover from Finder
Perhaps you’ve just moved the screenshots somewhere else? Finder can help you locate them and restore them back to their original location.
- Start Finder.
- Type the name of your screenshot in the search box in the top-right corner.
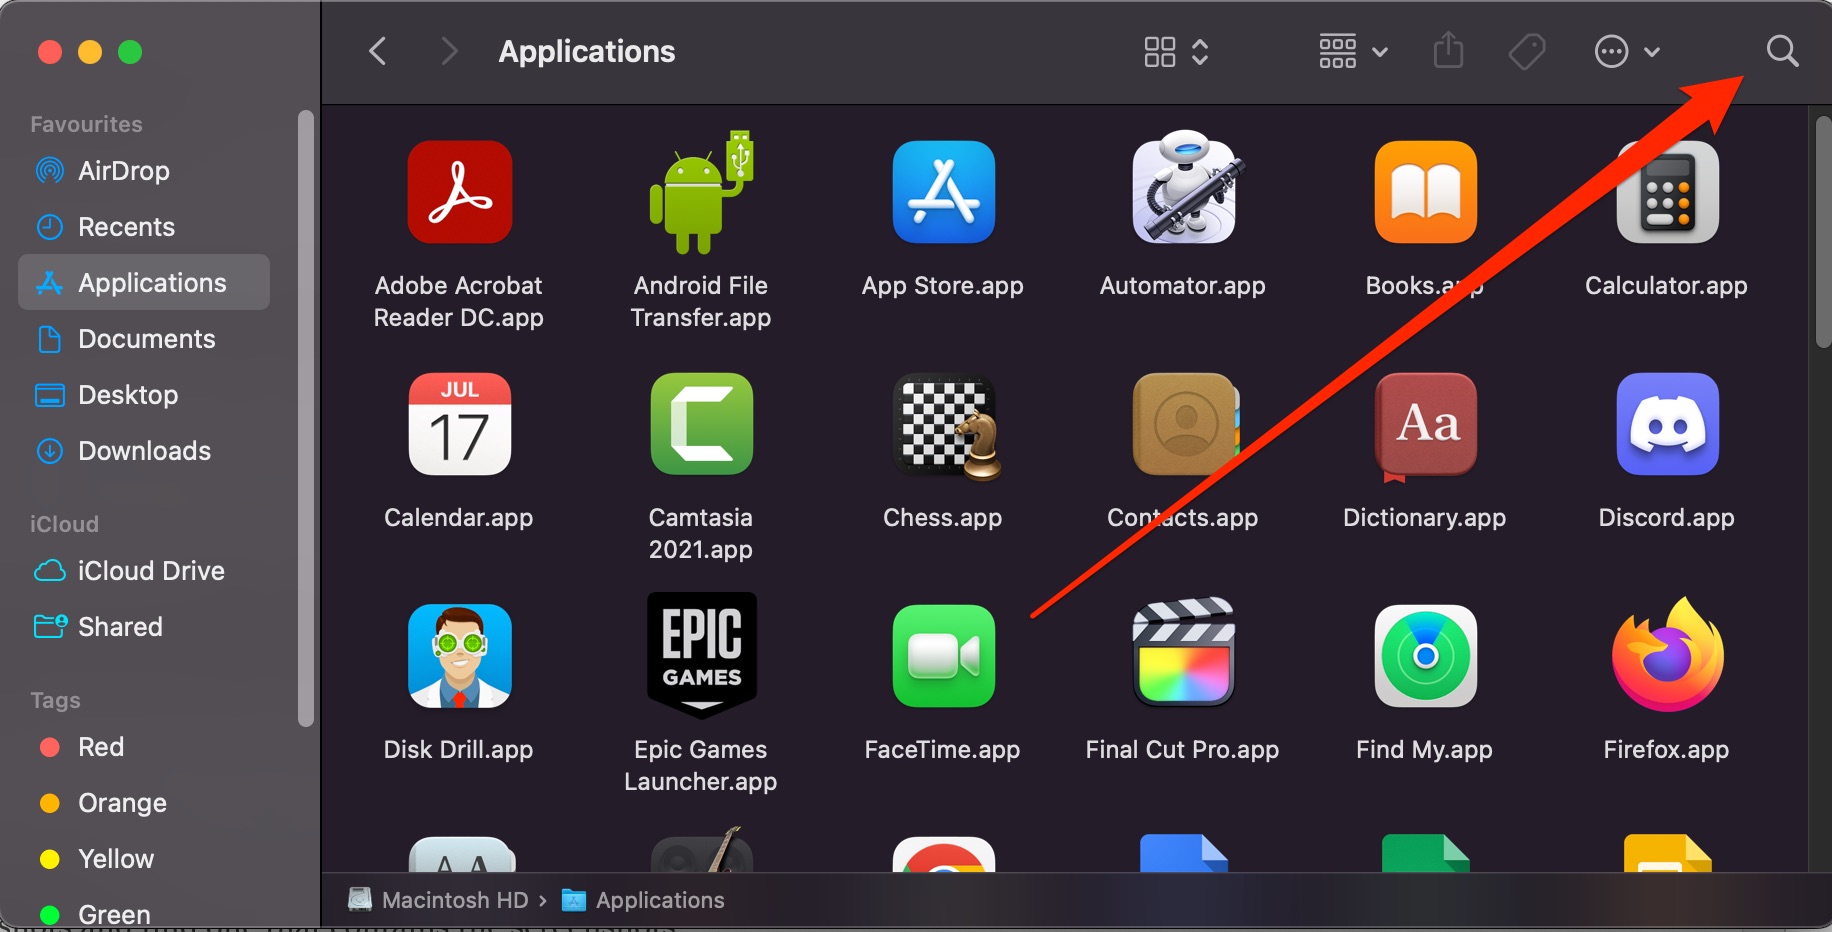
- See if the screenshot appears in the search results, and copy it to another location if you find it.
Method #6: Recover from Time Machine
Using Time Machine is a good idea if you’re afraid of data loss and want to stay as safe as possible. It will create periodic backups of your data, allowing you to easily revisit an older version in case something gets lost.
- Launch Time Machine.
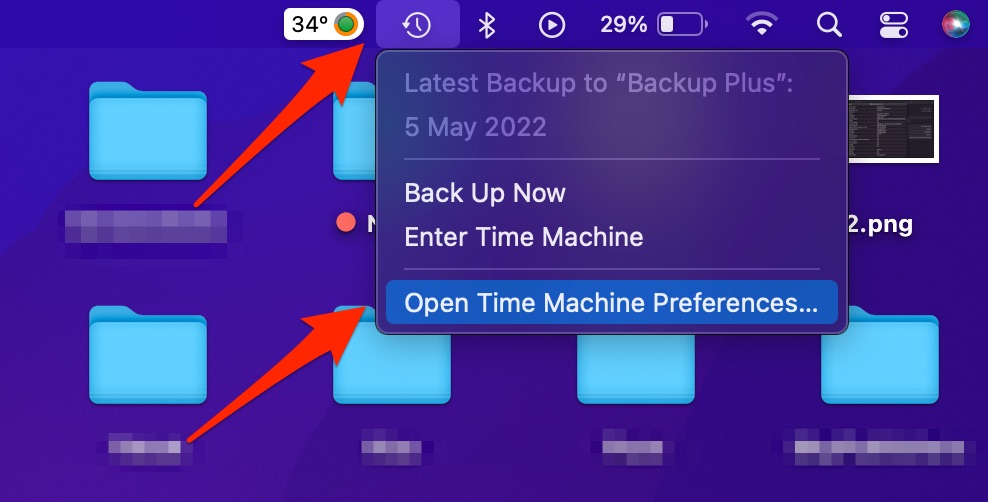
- Select the drive you want to recover a backup for.
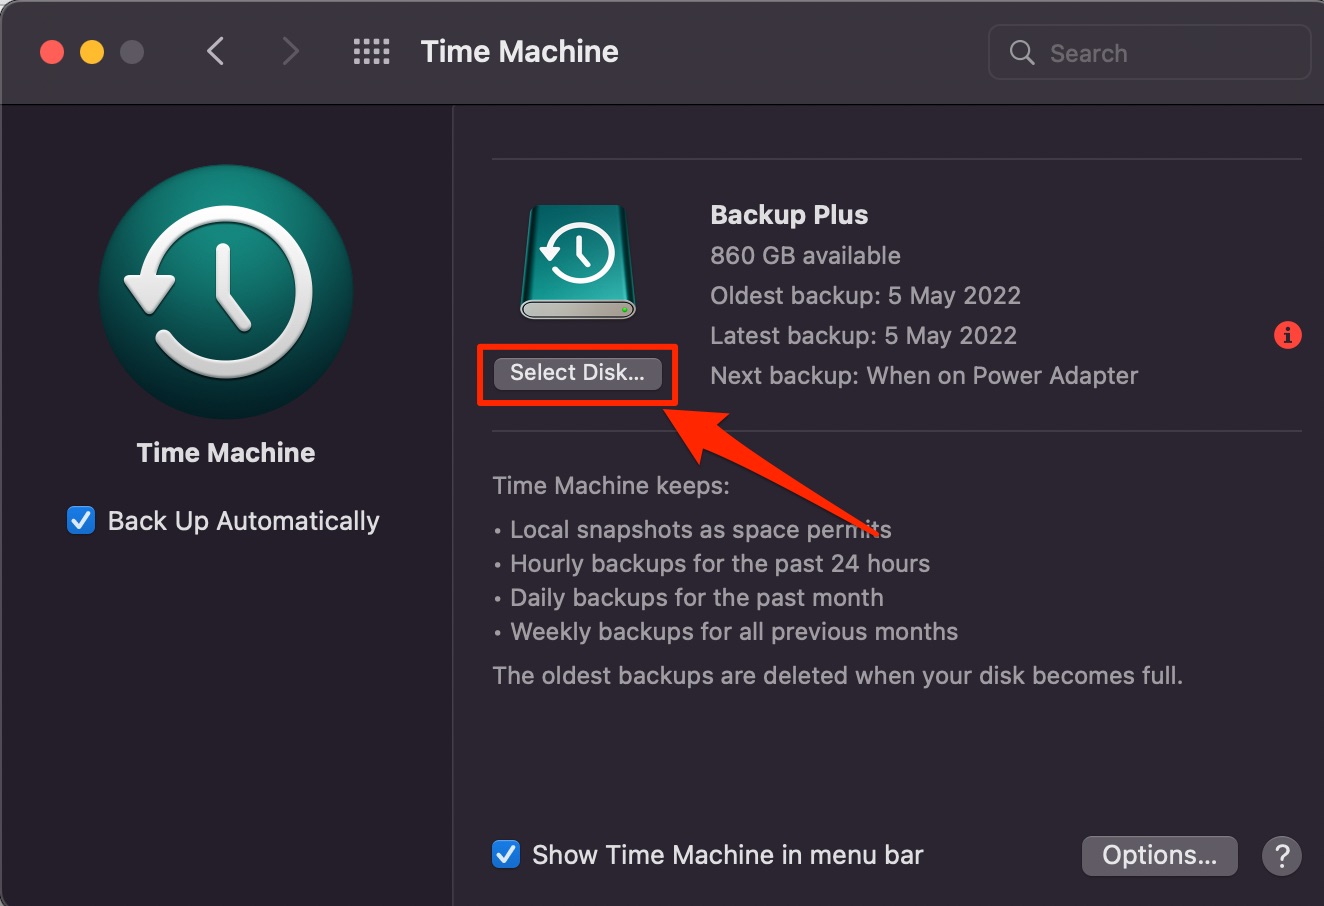
- Browse through the list of backup snapshots and find one that contains the screenshots. you want to recover.
- Click Restore.
Method #7: Recover from iCloud
Using iCloud as a backup solution? Then your screenshots may be available there. Just follow these steps to see if you can find anything useful.
- Go to iCloud.com
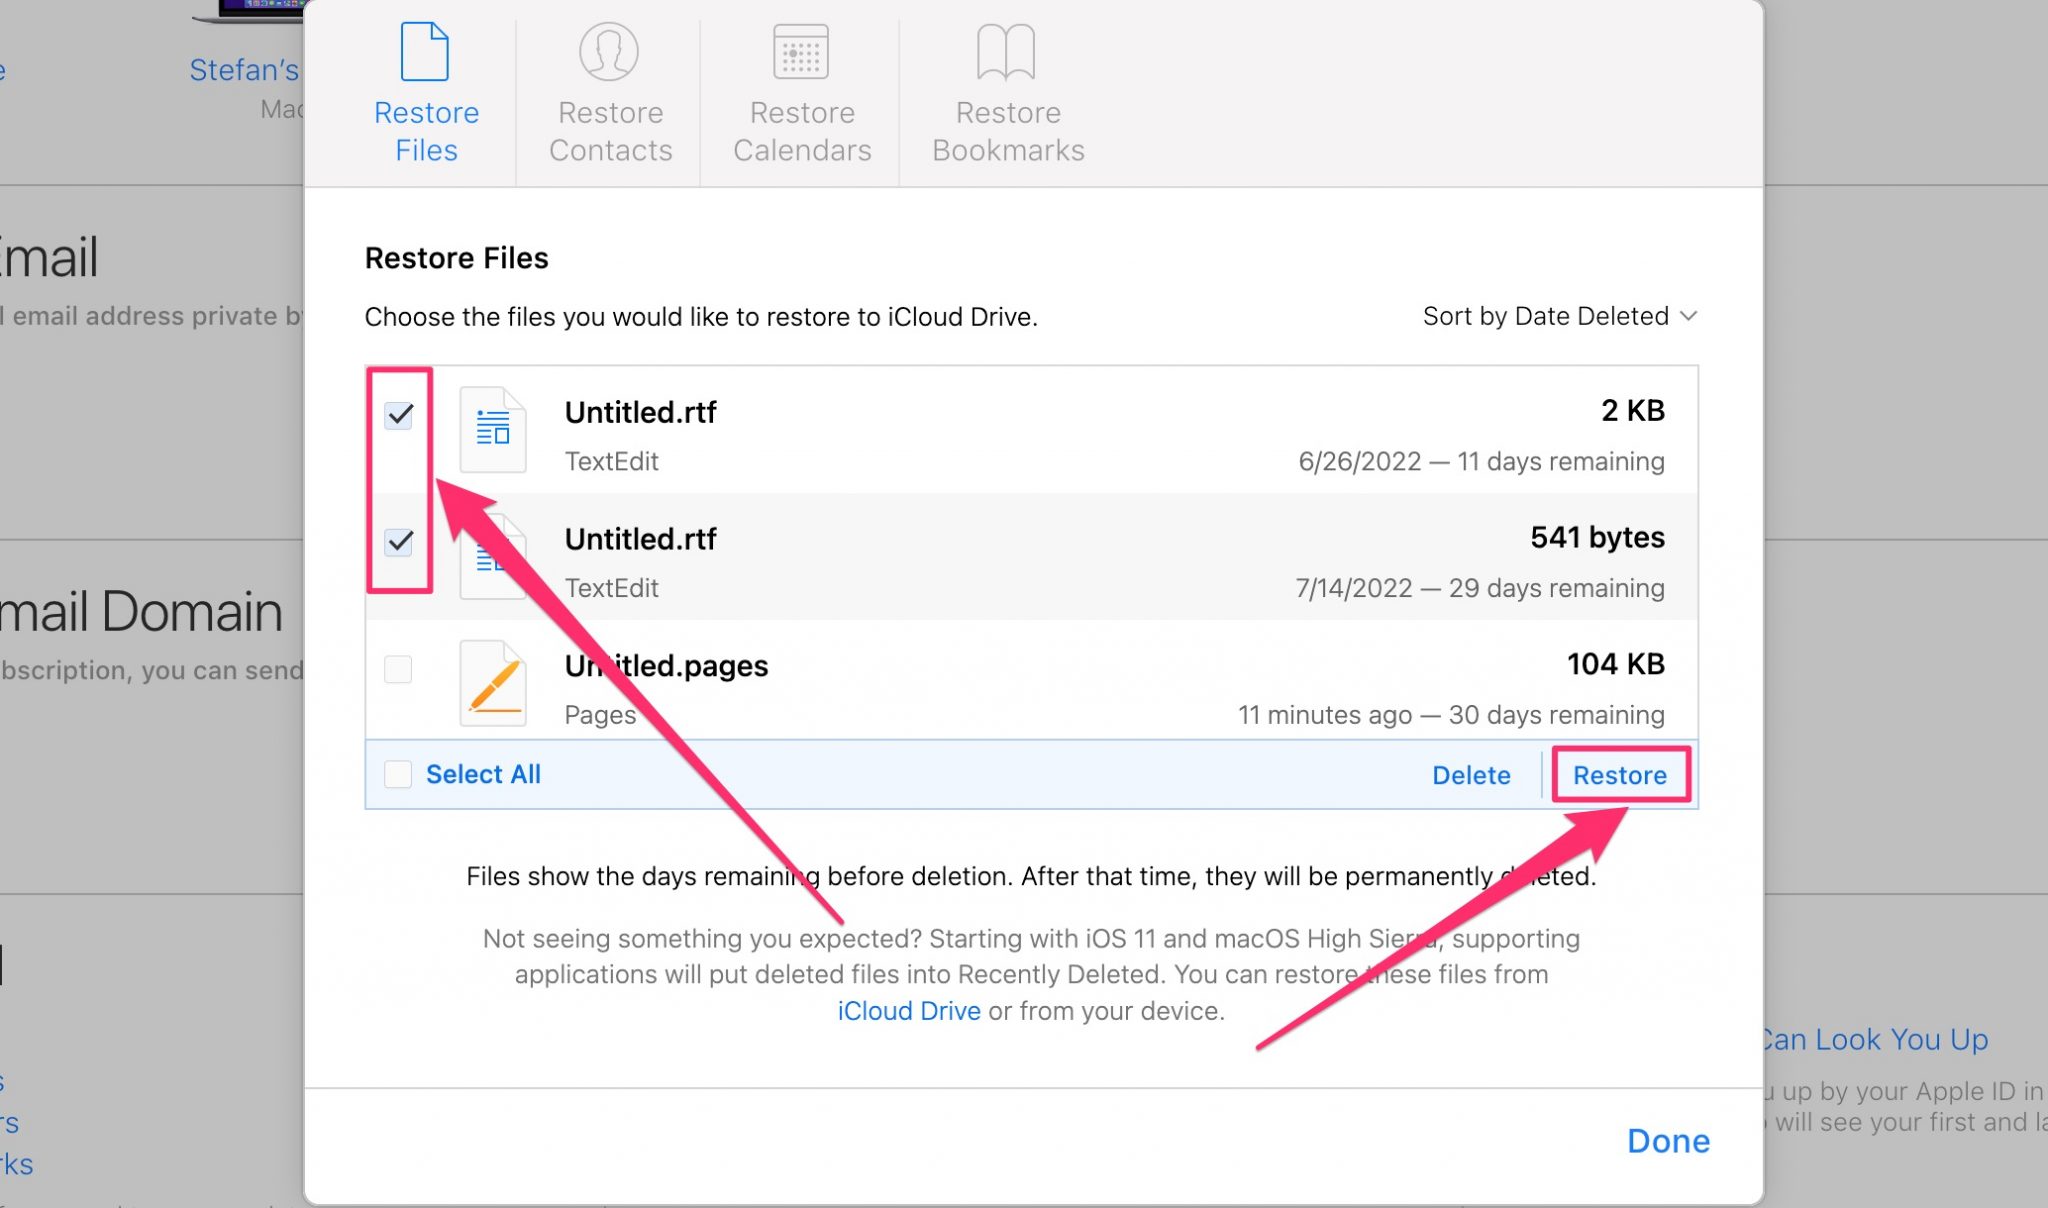
- Go to Settings -> Advanced -> Restore Files
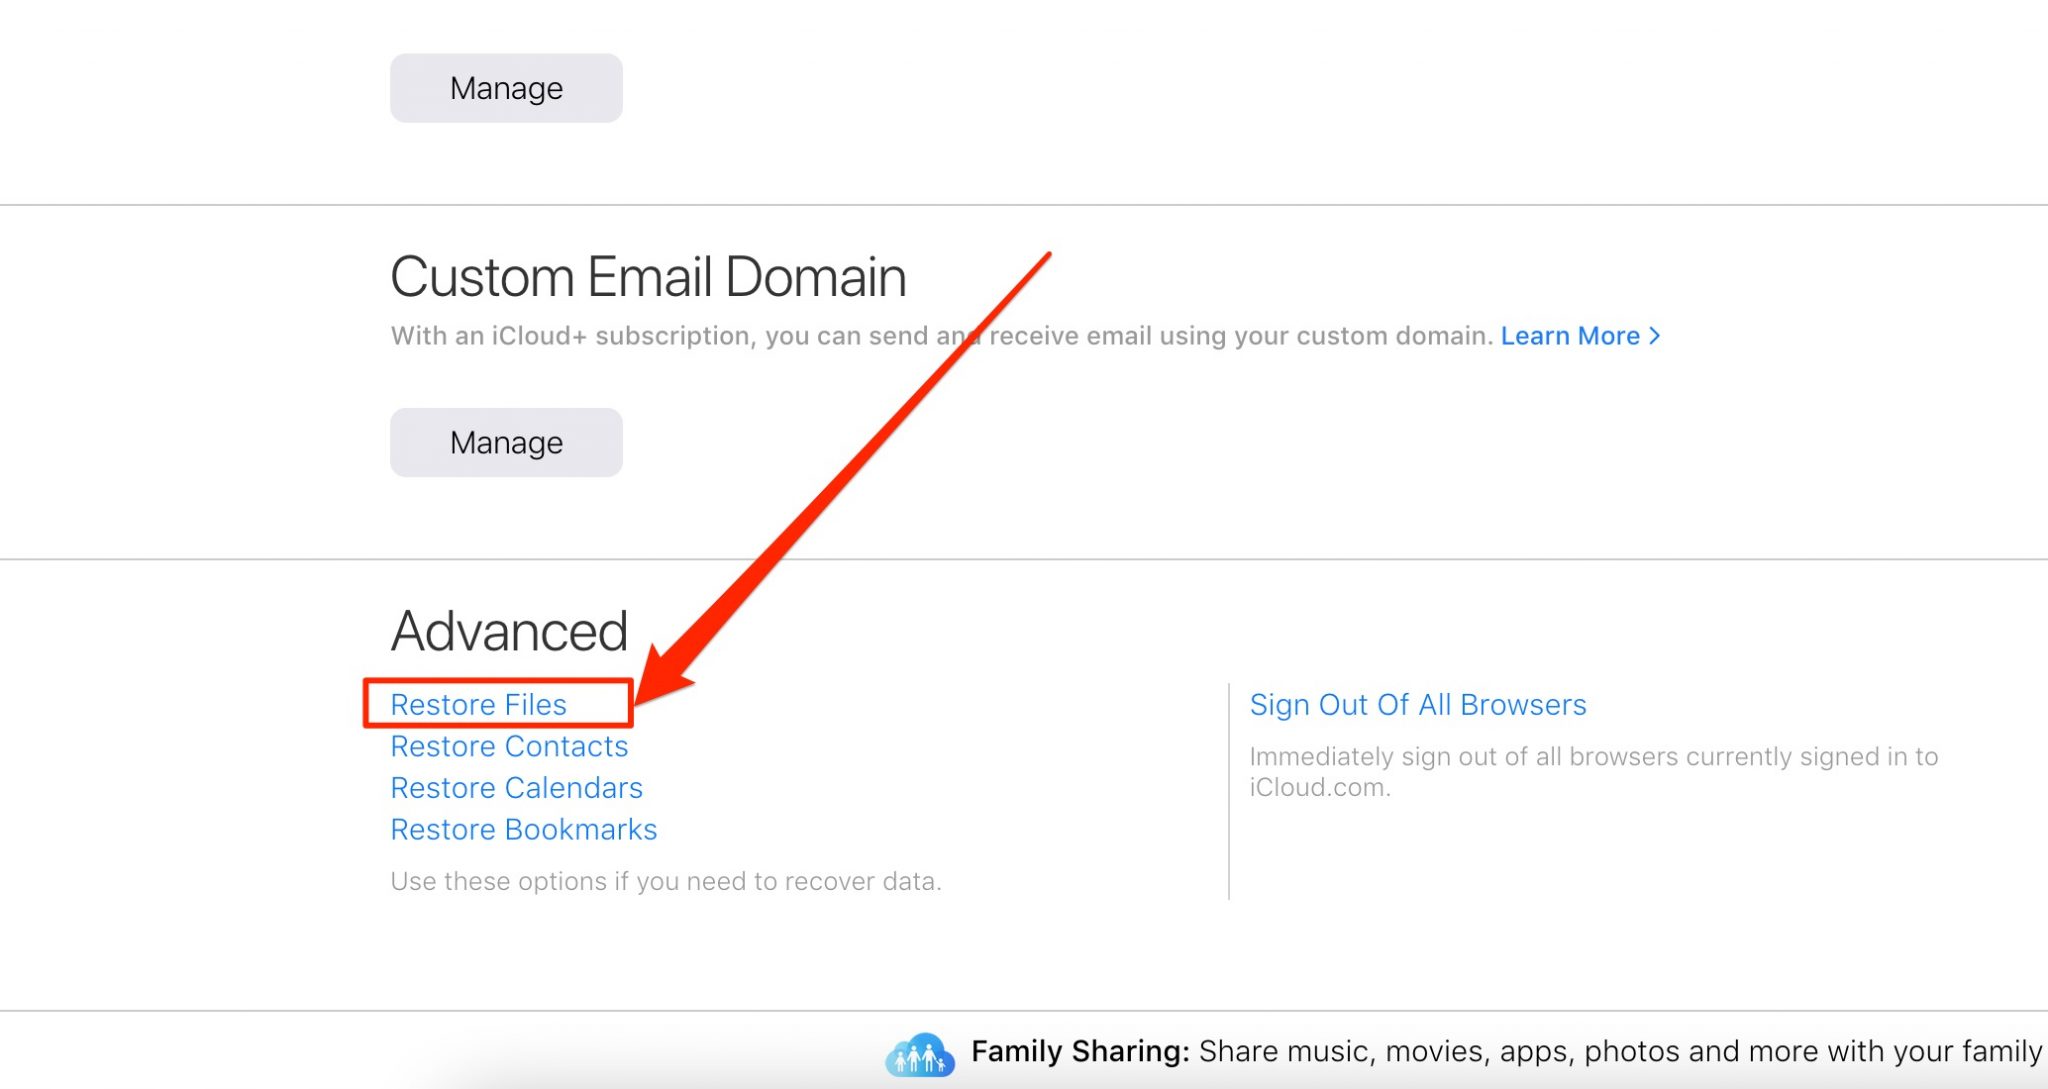
- Click on the files you want to restore to select them
- Click on Restore
Method #8: Recover from Temporary Folders
Some of your screenshots may also get saved to your temporary folders, depending on how you’ve taken them and which applications you’ve used. Follow these steps to see if you can get your data back:
- Launch Terminal
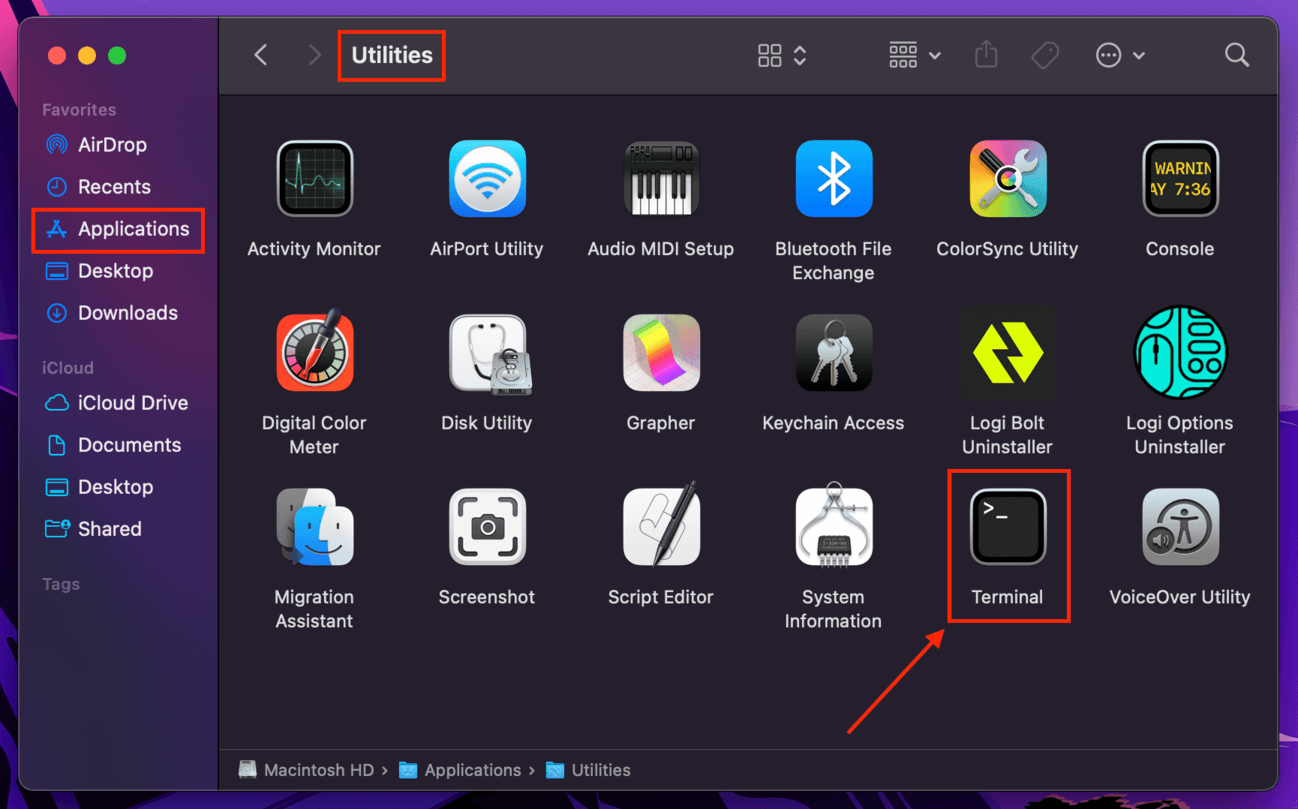
- Type in the following: open $TMPDIR, then press Enter
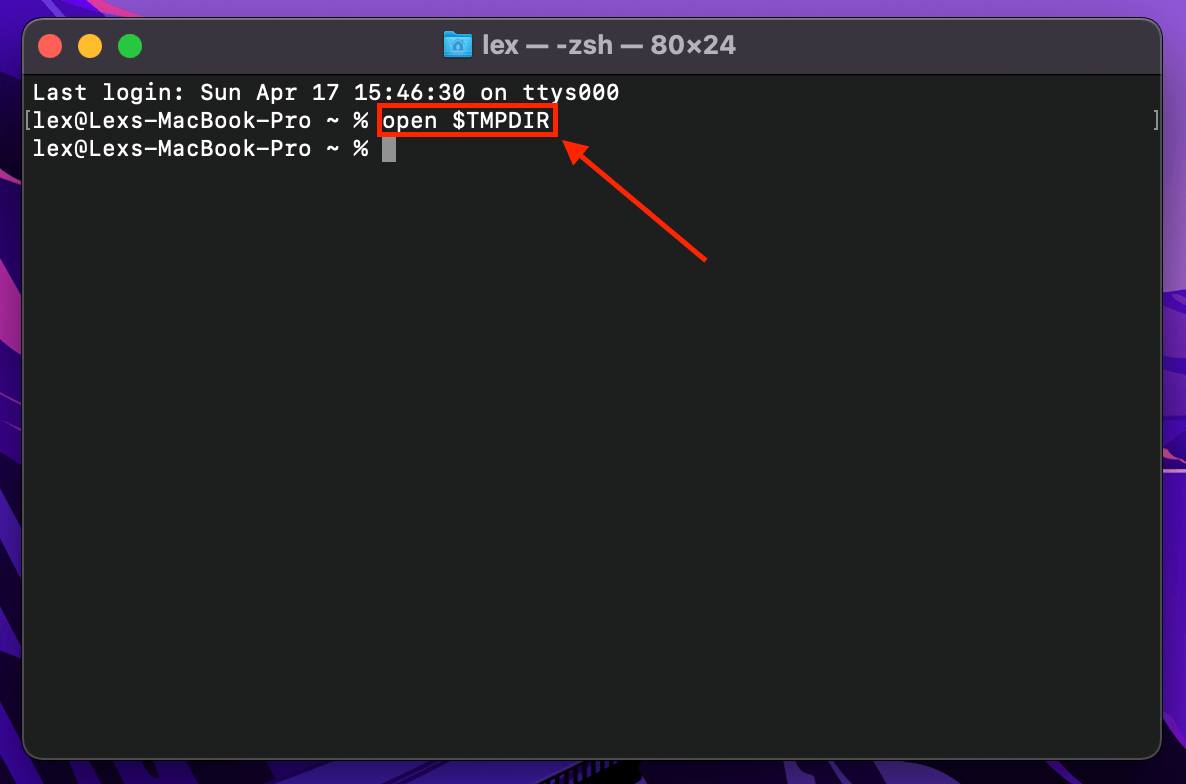
- A Finder window should appear, pointed at your temporary folders. Go through them to see if you can find your screenshots.
- Copy any files you want to save, or directly move them to a separate location
Method #9: Data Recovery Center
There are specialized services that can help you recover lost files, even from a hard drive that you can no longer access in your computer. These companies may sometimes charge a lot for their work, and it can take a while until you get your hard drive back. What’s more, there’s no guarantee for success.
If you have exhausted all your other options, this is something still worth trying. Just be aware of the implications, and understand that you might still not be able to get your data back in the end – and you’ll still have to pay.
Clverfiles Data Recovery Center is a reliable service that can serve as a good starting point for your search.
How to Protect Screenshots on a Mac
Regularly backing up your data is the best protection against its loss – and this extends to screenshots. If you want to keep your data as safely as possible, try the following:
- 💾 Manually backup your screenshots on external storage media
- 💻 Set up an automated backup system that regularly saves copies of your files
- 📱 Keep your applications up to date to avoid falling victim to cyber attacks
- 🛑 Shut down your Mac properly
Conclusion
Knowing how to find a screenshot on a Mac in a pinch can save you if you believe you may have lost that file forever. It’s also good to know what your other options are. Knowing how to access screenshots on a Mac from a failed hard drive can be an invaluable skill when you’re faced with a serious data loss situation.


FAQ
You can see recently deleted screenshots on your Mac with these steps:
- Open Bin.
- Browse through the current contents to see if your lost screenshot is there
- Select the screenshot(s) you want to recover, right-click on them, and select Put Back.
Recovering deleted screenshots is possible and can be done in several ways. That’s because deleted data is often not physically erased from the hard drive, but rather just marked as unused so that other applications can freely write over it.
You can recover deleted computer screenshots on your Mac by following these steps:
- Download and install Disk Drill.
- Launch Disk Drill.
- From the right-side menu, choose the drive you want to recover.
- Click on All Recovery Methods. The recovery process will now start – wait for it to finish.
- Once that’s done, you’ll see a list of all recoverable files. Scroll through it to see if your files are in there. The filter menu at the top can help you narrow down your selection.
- Mark files you want to recover.
- Choose a separate disk drive for their recovery. This is very important – recovering files to the same drive means that you may accidentally overwrite existing data that’s currently marked as deleted.