After connecting your flash drive, Windows refuses to open it and prevents you from accessing your files. You’ll see a message saying “You need to format the disk before you can use it,” or maybe your USB shows as RAW or unreadable. While formatting will fix it, your data will be deleted in the process.
Thankfully, you can get your data back and fix the flash drive. We have compiled everything we know about this problem in this article so that it becomes the only guide on how to fix a corrupted flash drive without formatting that you need. Our content department teamed up with our in-house recovery team to simulate common types of USB corruption and test these solutions against FAT32, exFAT, and NTFS drives to confirm they actually work.
Need to Fix a Corrupted USB Without Formatting? Do this First
Leading up to recovery and repairs, there are some precautionary dos and don’ts to keep in mind when recovering a corrupted USB without formatting. Your data is in a very vulnerable state, so any action could worsen your chances of recovery.
✅ Do:
- Stop using the drive immediately. Any action, like running error-checking, attempting manual or automatic repairs, or formatting the drive, can overwrite the data you’re trying to recover.
- Test the USB on another computer or port. This helps localize whether it’s the drive, the port, or the system.
- Create a full image backup of the flash drive. Allows for safe recovery of files without working directly on the already unstable flash drive. (We’ll show you how this is done in the next section).
❌ Don’t:
- Run CHKDSK or other disk repair utilities. These tools can modify the file system, making recovery more difficult.
- Initialize, partition, or format the drive. We need to preserve the drive as much as possible, and these actions can and will erase essential data structures.
- Keep plugging and unplugging the drive. The storage controller may be damaged without you being aware, and repeated connections will stress the hardware, speeding up failure.
Next, let’s jump into recovering the data from the corrupted USB flash drive.
How to Recover Data from a Corrupted USB Without Formatting
We start with recovery because implementing any fix comes with a risk of data loss. This is an essential step in the repair process if you want to confirm what data is available, and its condition, before recovery. To do this, we’ll be using the flash drive recovery software tool Disk Drill, as it can scan even corrupted or RAW USB drives, bypassing file system errors to access the data directly.
Let’s start with creating the byte-to-byte image. If you want to scan the flash drive directly, recovery begins after the final step.
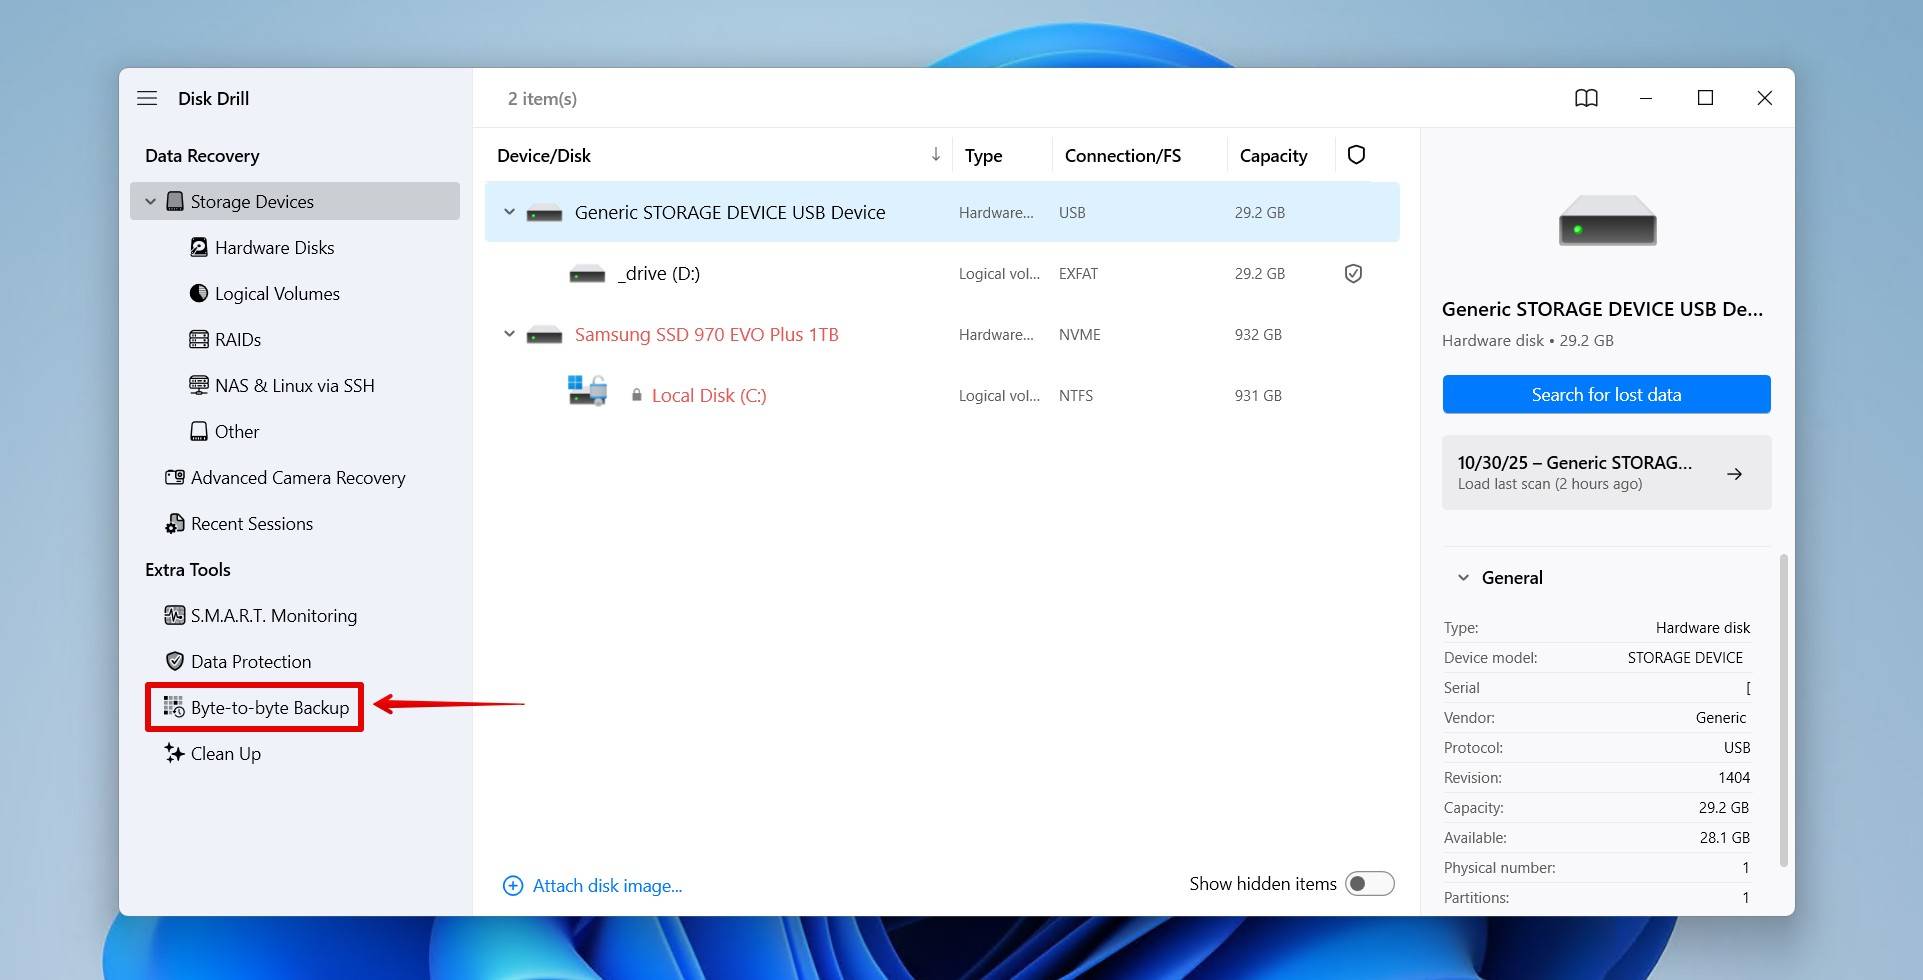
- Download, install, and open Disk Drill.
- Click Byte-to-byte Backup in the left pane.
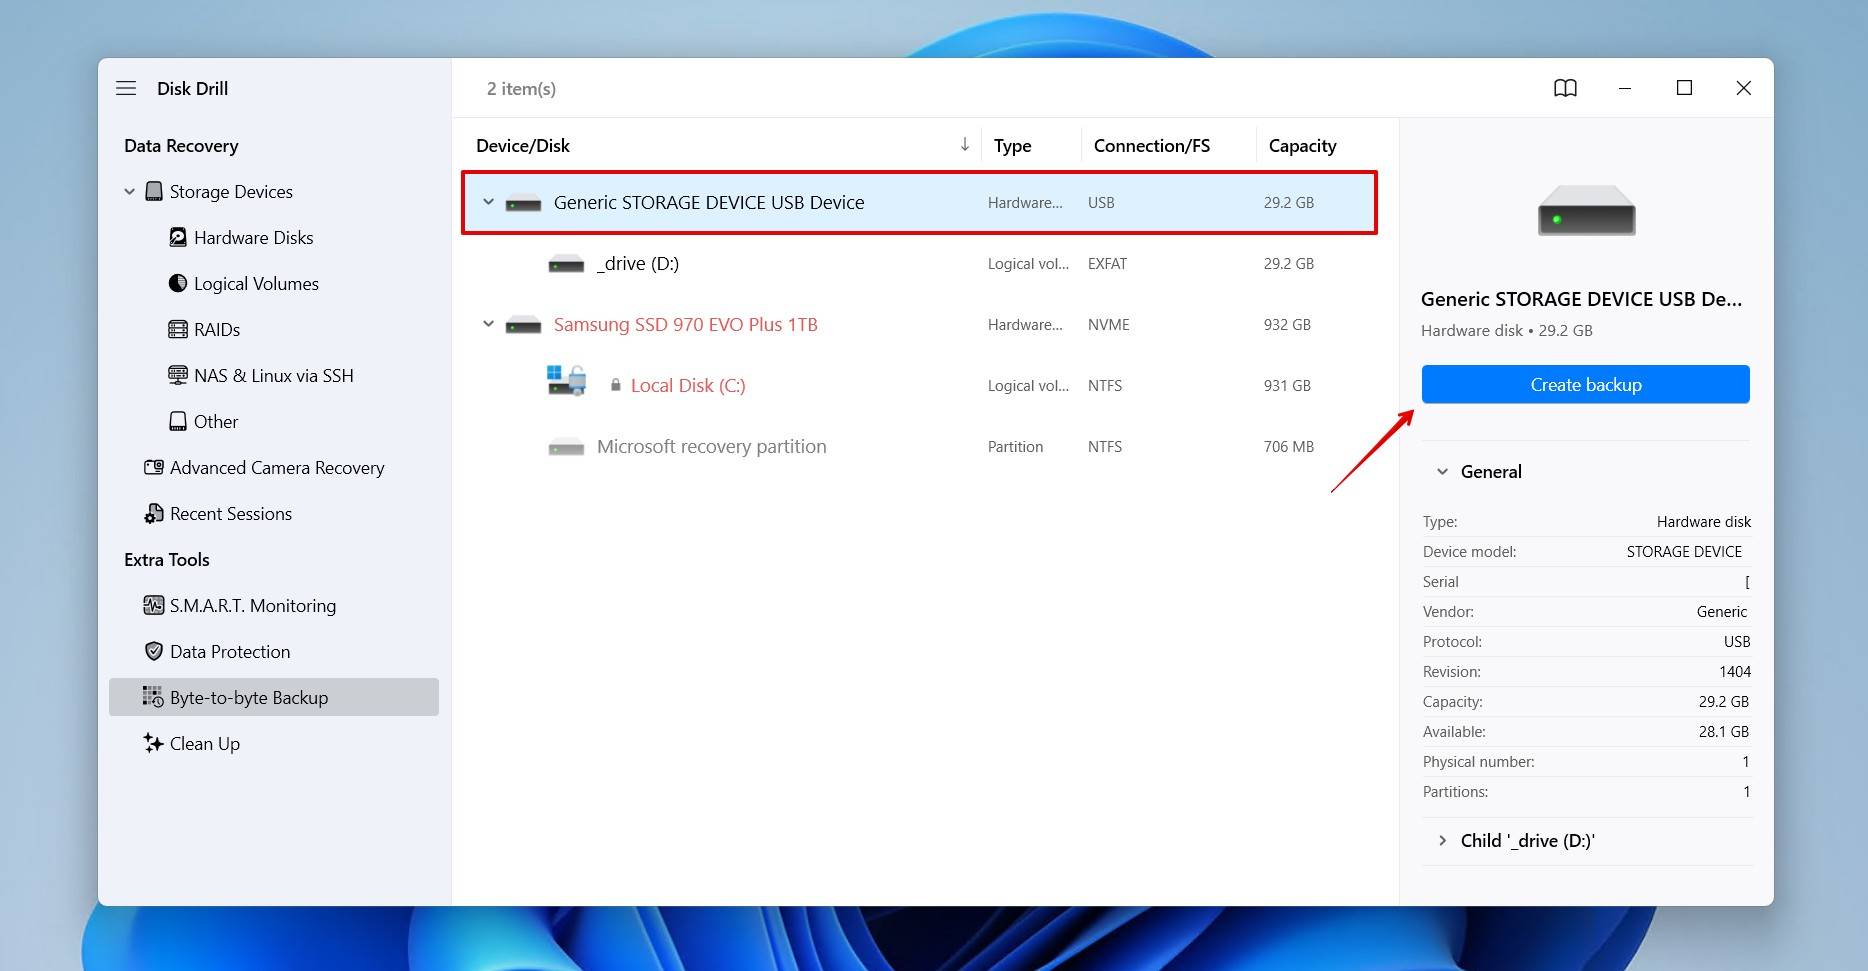
- Select your corrupted USB flash drive, then click Create backup.
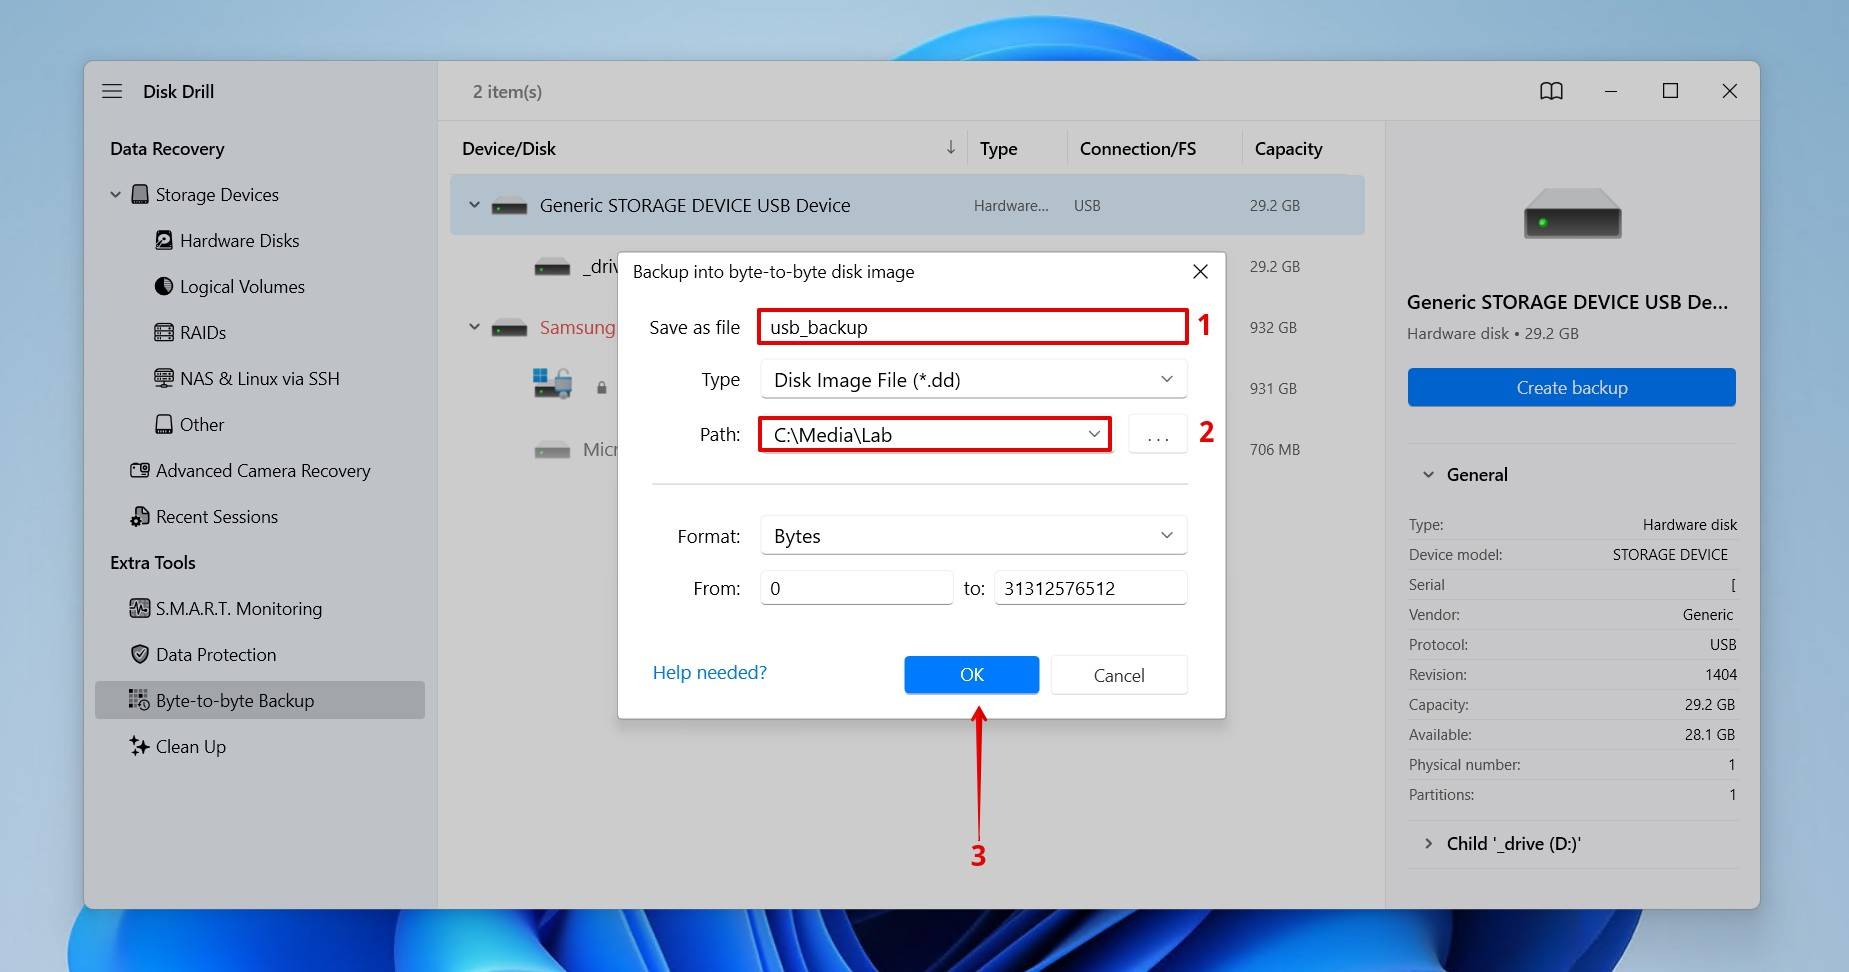
- Give the backup a name, choose where you want to store it, then click OK to create it.
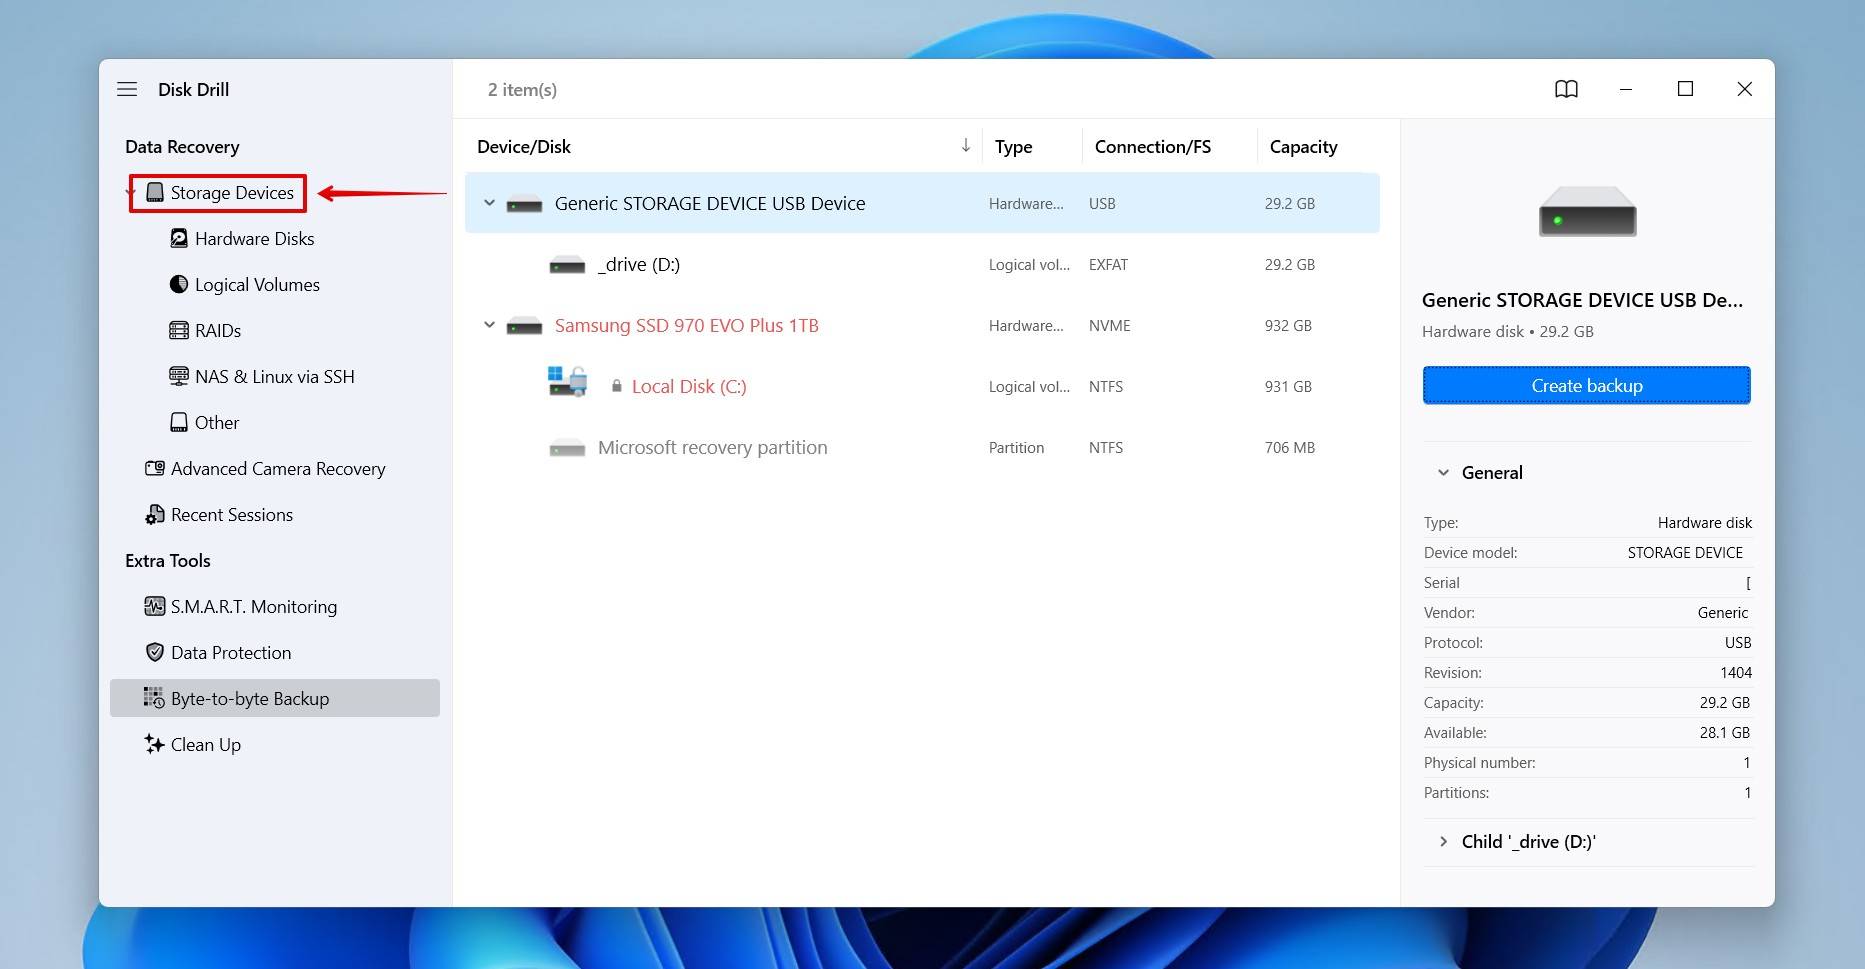
- Once the backup is done, return to the Storage Devices screen.

At this point, you should either (1) have a byte-to-byte image to scan, or (2) connect your corrupted flash drive to scan directly. Once you’re ready to recover the data, follow the steps below:
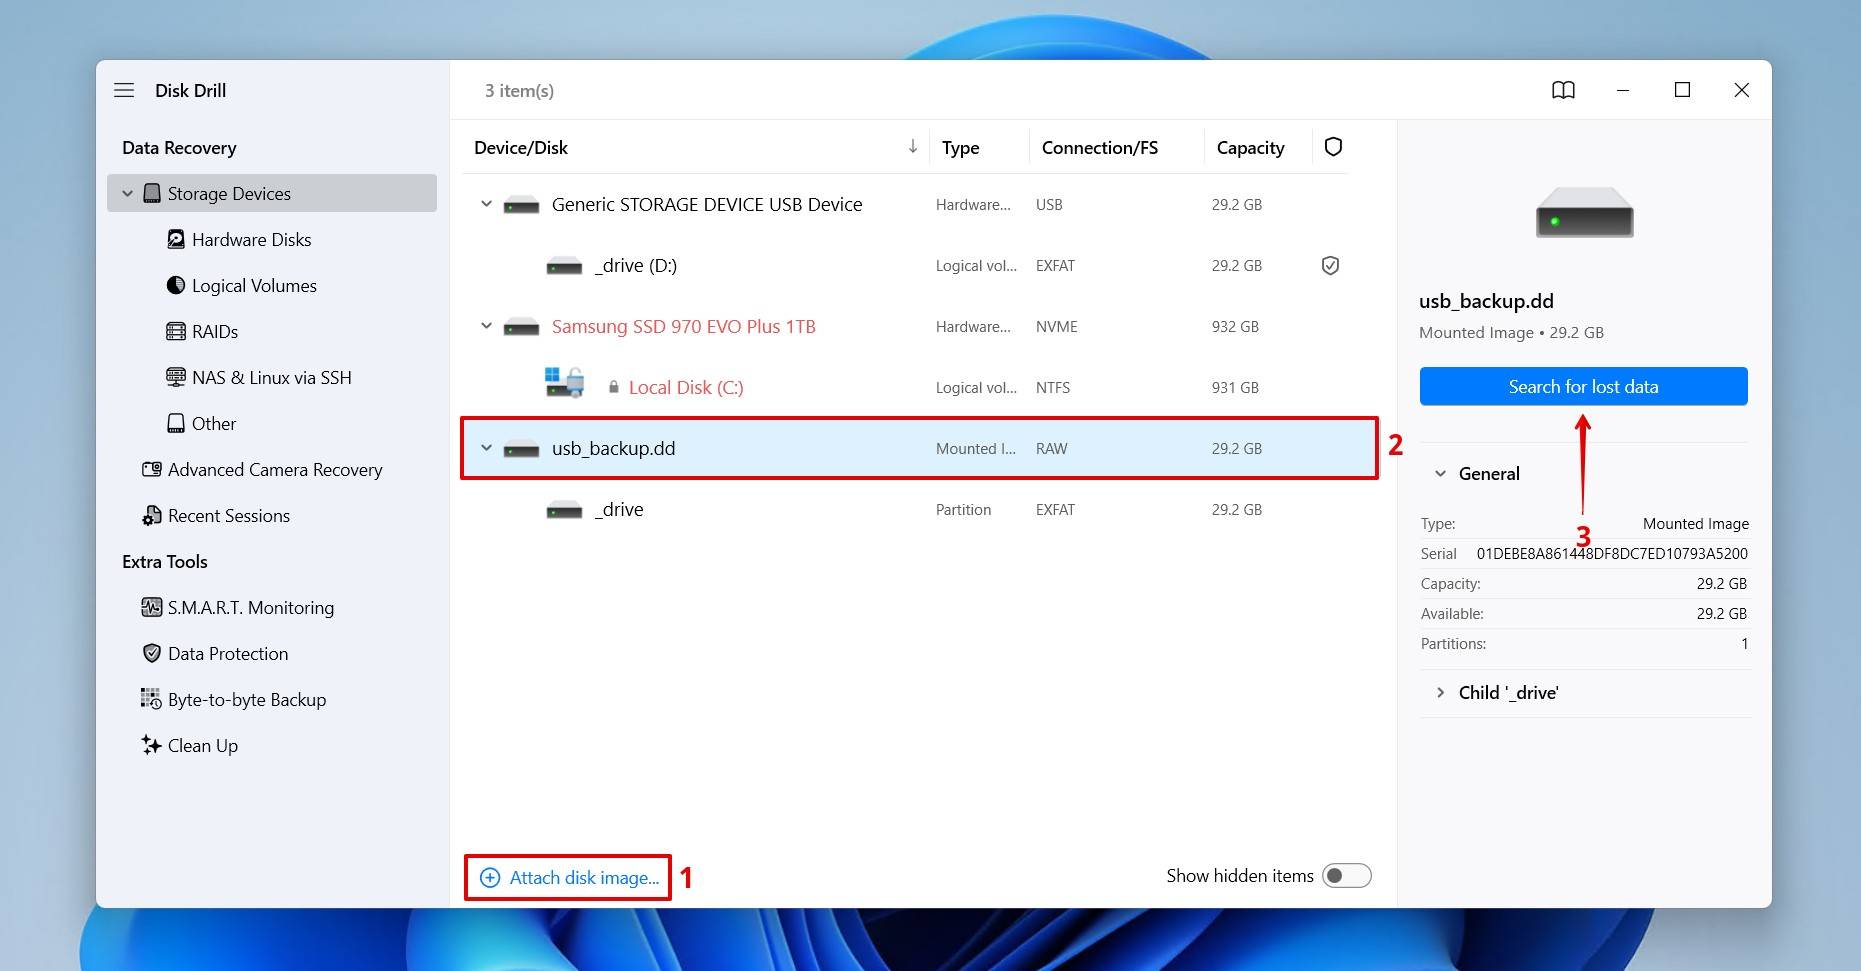
- Select the corrupted flash drive. If you’re using a byte-to-byte image, attach your flash drive image using the Attach disk image option, then select it. Click Search for lost data.
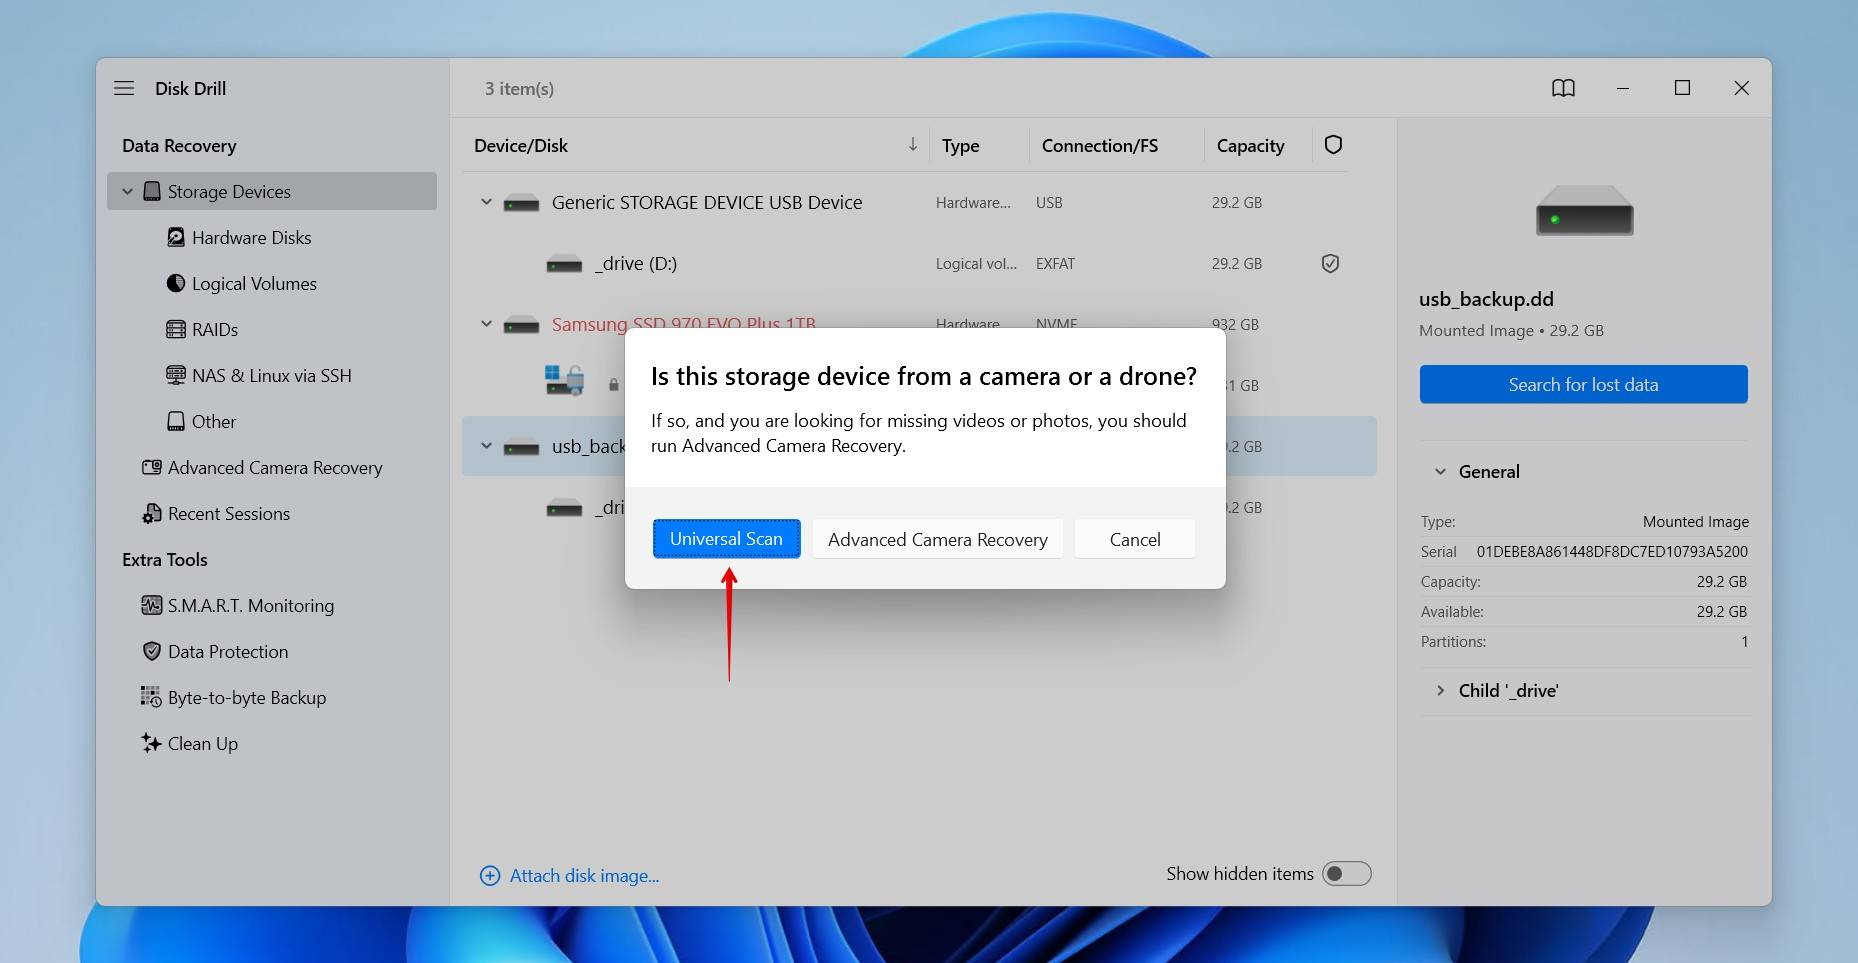
- Click Universal Scan, which will aim to find any and all data. The Advanced Camera Recovery scan is reserved for the recovery of fragmented videos shot from cameras and drones.
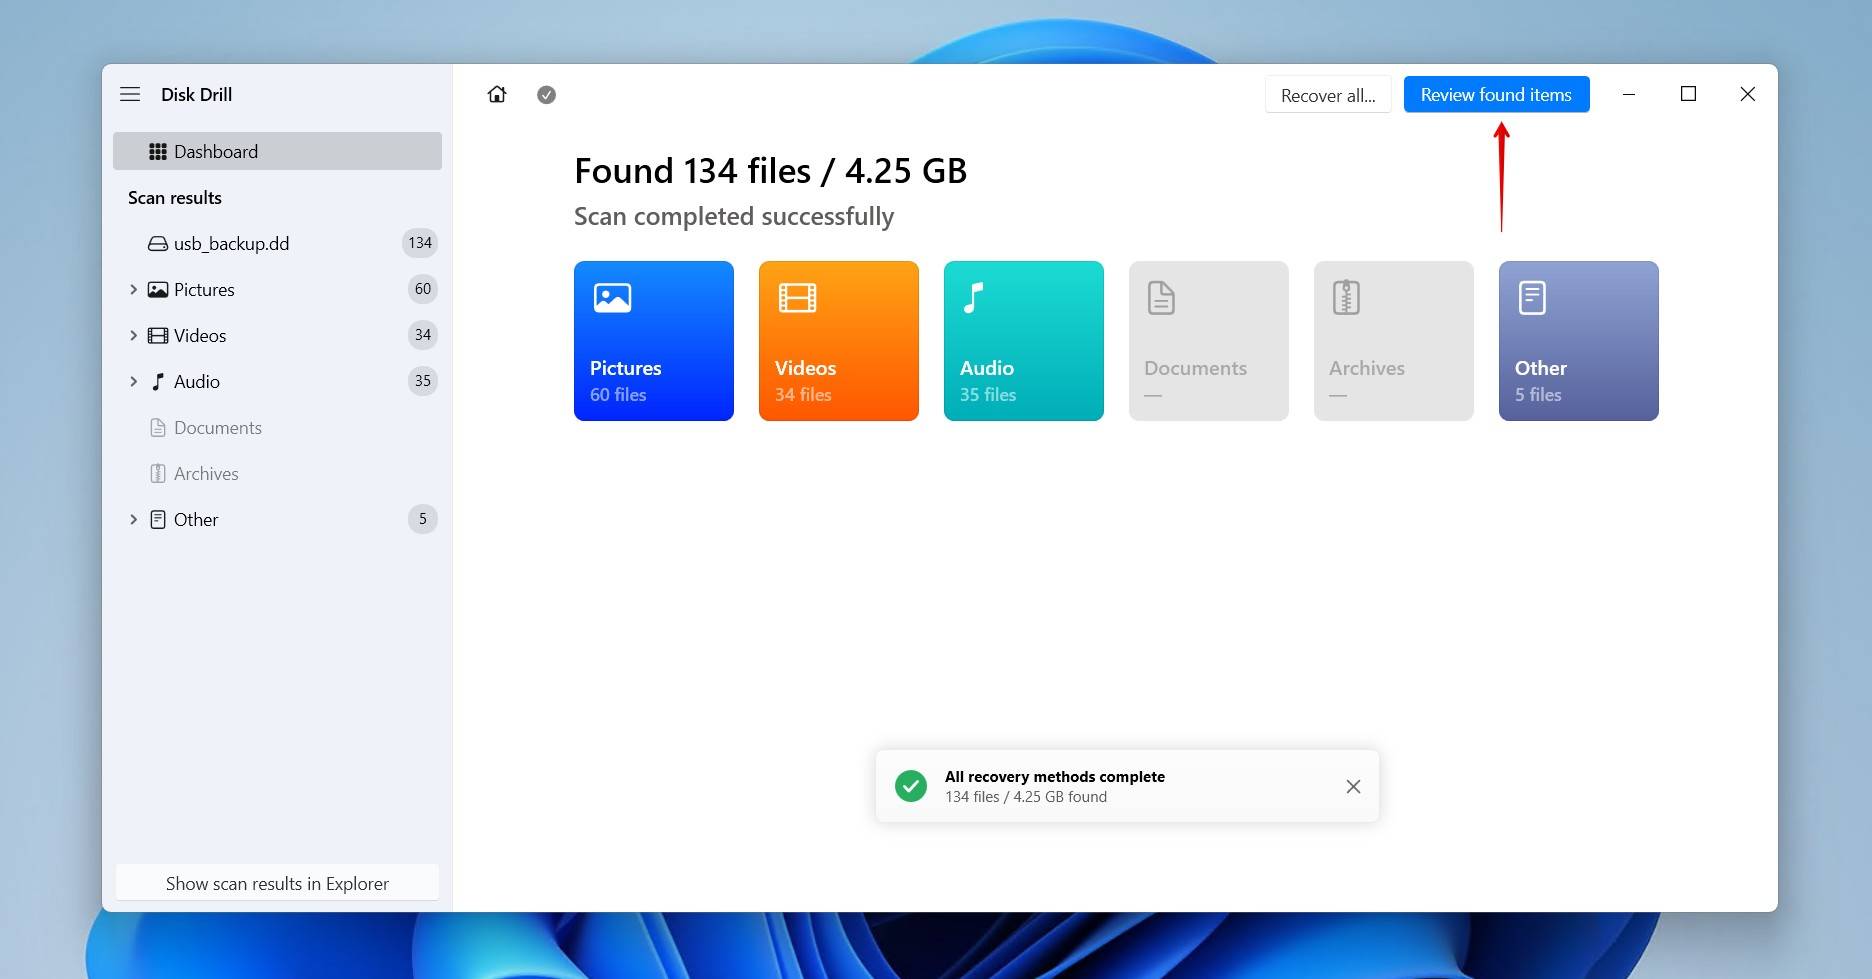
- Click Review found items to see what files Disk Drill found. If you want to filter the results to only show a certain type of file, click one of the colored file format options.
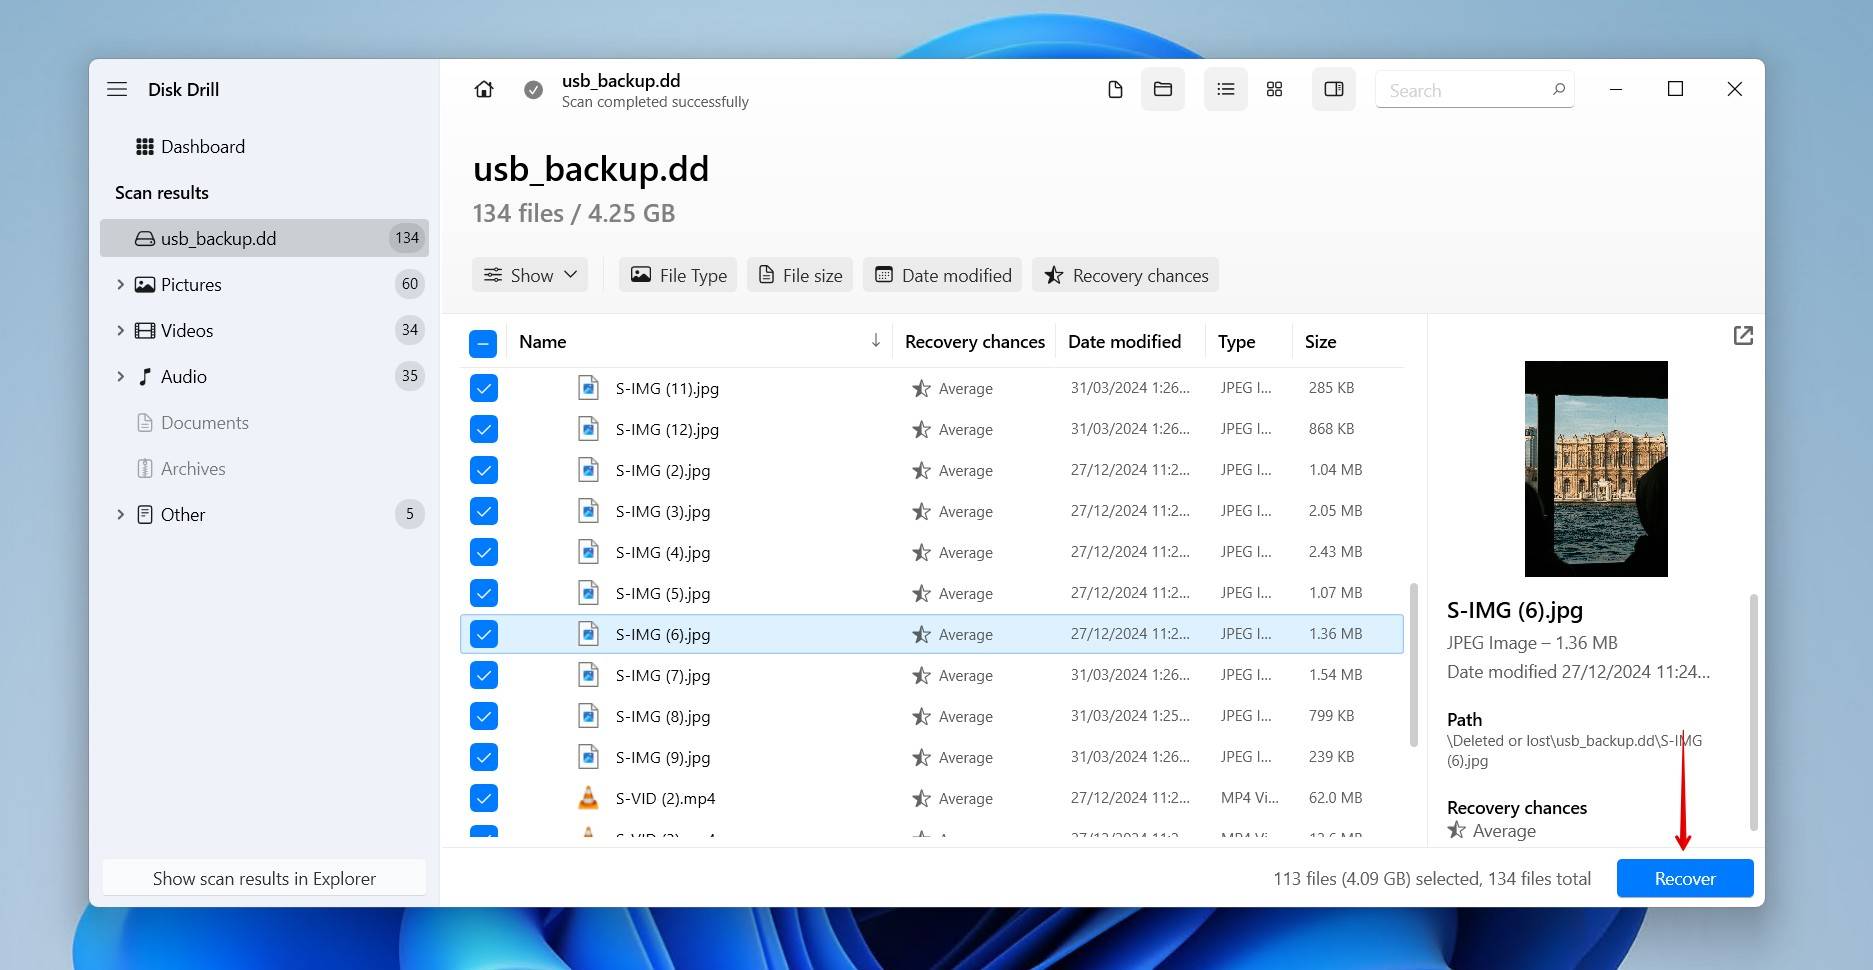
- Preview and select the files you want to recover. Regular data will be under the Existing dropdown, whereas deleted or lost data will be under Deleted or lost and Existing. The filter options can be used to refine results by file type, size, and modified date. Click Recover to continue.
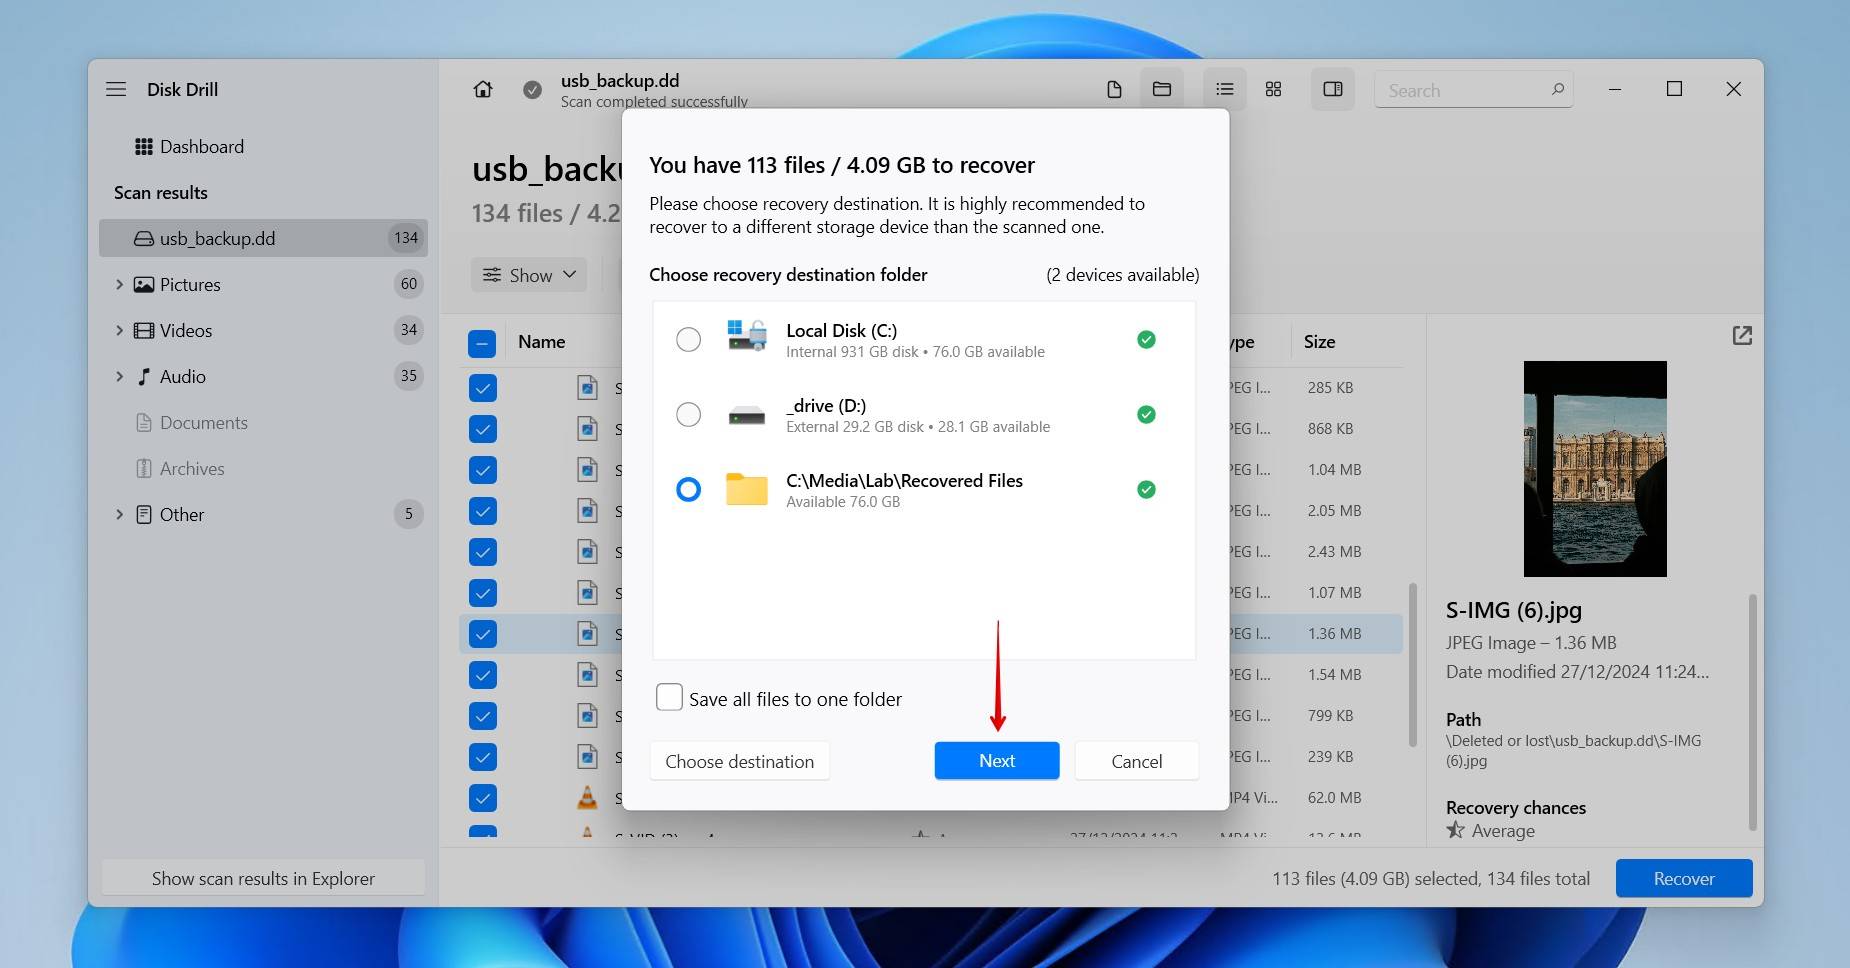
- Choose where you want to store the recovered files on a separate physical storage device. Disk Drill allows up to 100 MB of free recovery, usually enough to recover essential data, or at least trial the software. Click Next to finish recovery.
Disk Drill is just one of many data recovery tools capable of recovering deleted files from a USB drive, but it does have some additional qualities that make it stand out amongst others for corrupted drives in particular:
- Byte-to-byte backups (drive imaging) for safe, repeatable recovery
- Several scan types to find data both with file system records and by unique file signature, even after a quick format
- Built-in hex view to check raw data and perform high-level recovery
- Non-invasive, read-only scanning algorithms that keep your data safe
How to Repair a Flash Drive Without Formatting
Once you’ve got your flash drive data back, it’s time to restore it to working order. We left it till now as some methods to repair a flash drive without formatting can alter or overwrite data unexpectedly, but since the data is now backed up or recovered, it’ll be fine. These solutions are geared more towards fixing corrupted drives, and we have a separate guide for fixing a broken flash stick.
Method 1. Run CHKDSK
When Windows asks you to format, but the USB flash drive isn’t showing as RAW in Disk Management, you may just be able to fix a corrupted USB without formatting using CHKDSK, a file system-repair tool.
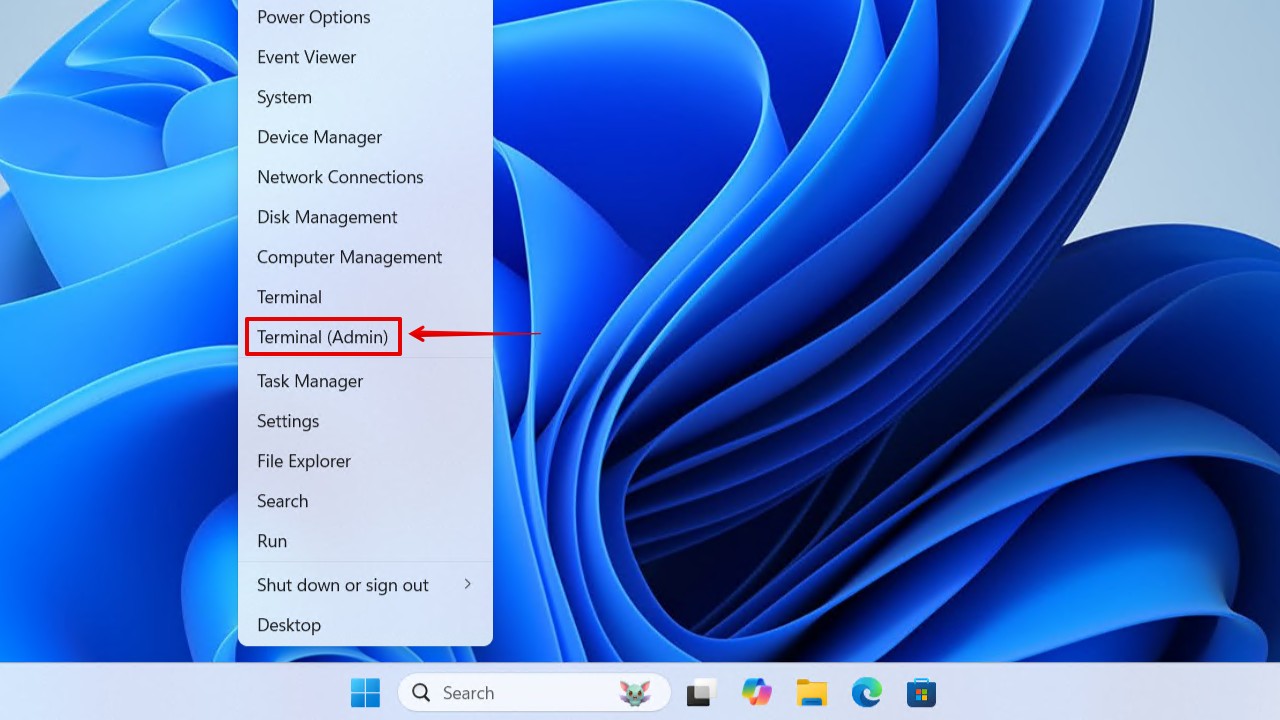
- Right-click Start and click Terminal (Admin).
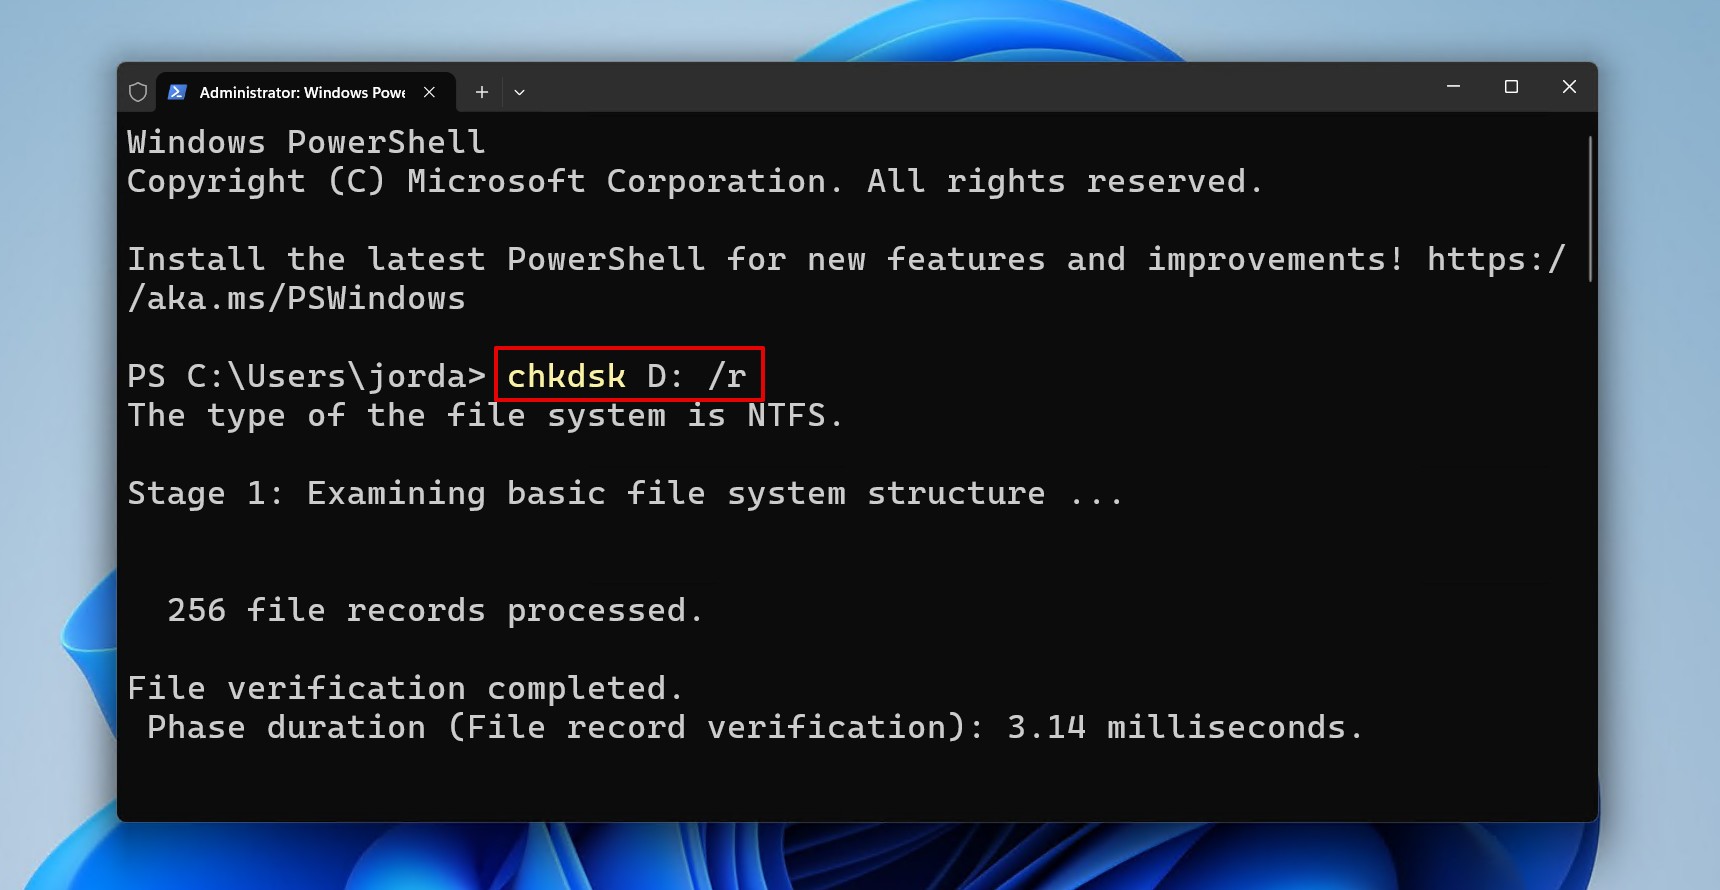
- Type chkdsk *: /r. Replace * with your drive letter. Press Enter.
Method 2. Use TestDisk to Fix Flash Drive Partition
TestDisk is a partition recovery tool that, instead of recovering individual files, restores the entire partition by addressing the underlying file system corruption to fix a corrupted flash drive without formatting if it’s RAW. It’s similar to CHKDSK, but safer in the sense that it doesn’t interact with your data. However, it’s a fairly complicated tool, which could lead to mistakes. Therefore, it’s best to recover or back up your data before trying this.
- Download and extract TestDisk. Open testdisk_win.exe.
- Press Enter to create a log file.
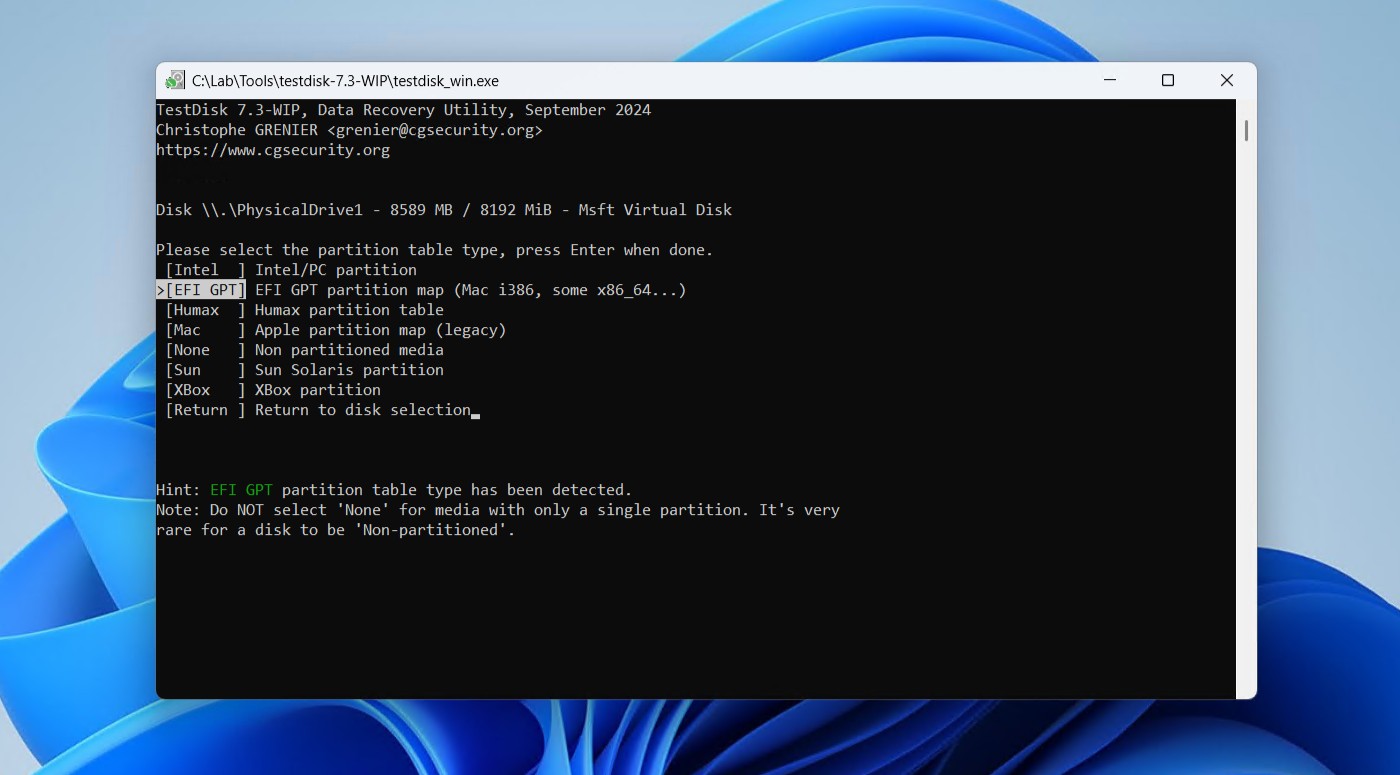
- Select your partition table type, then press Enter.
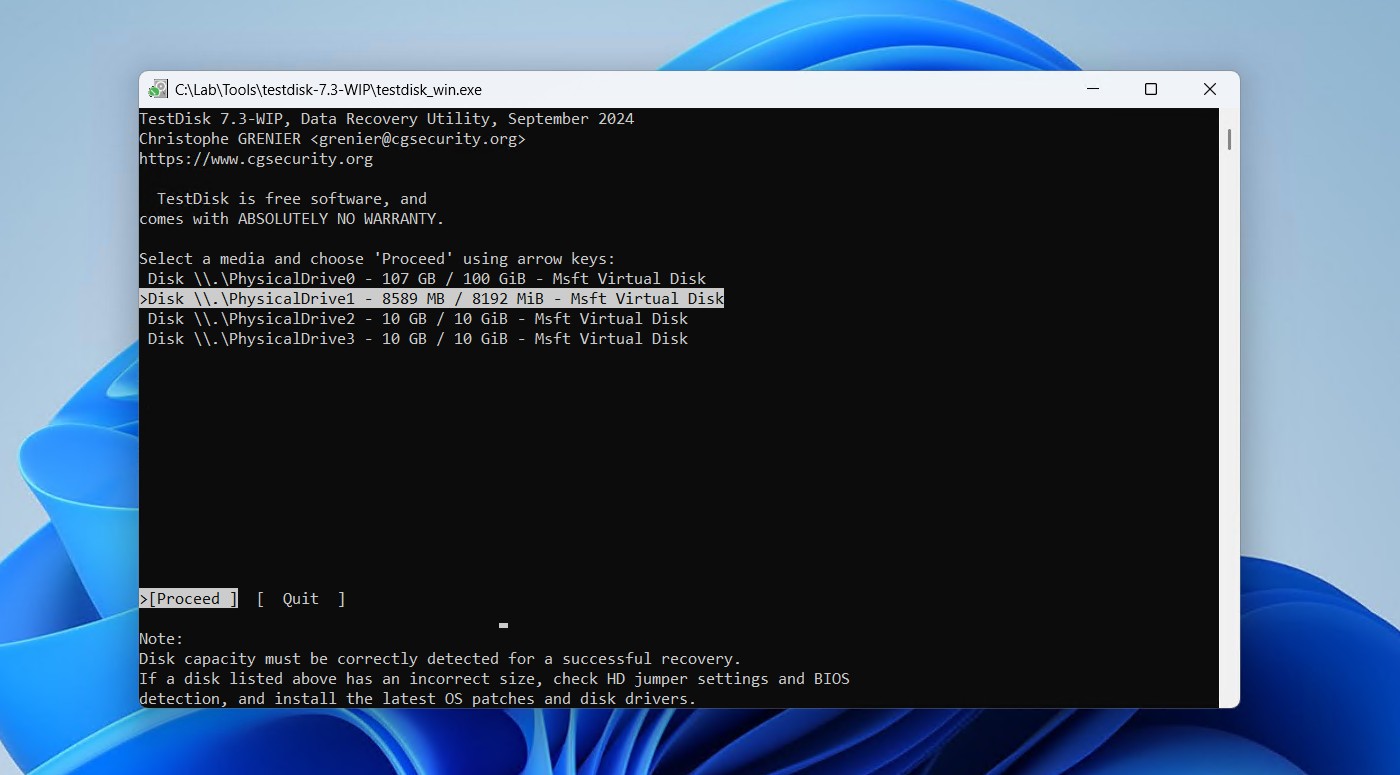
- Select your corrupted USB flash drive from the list of devices. Press Enter.
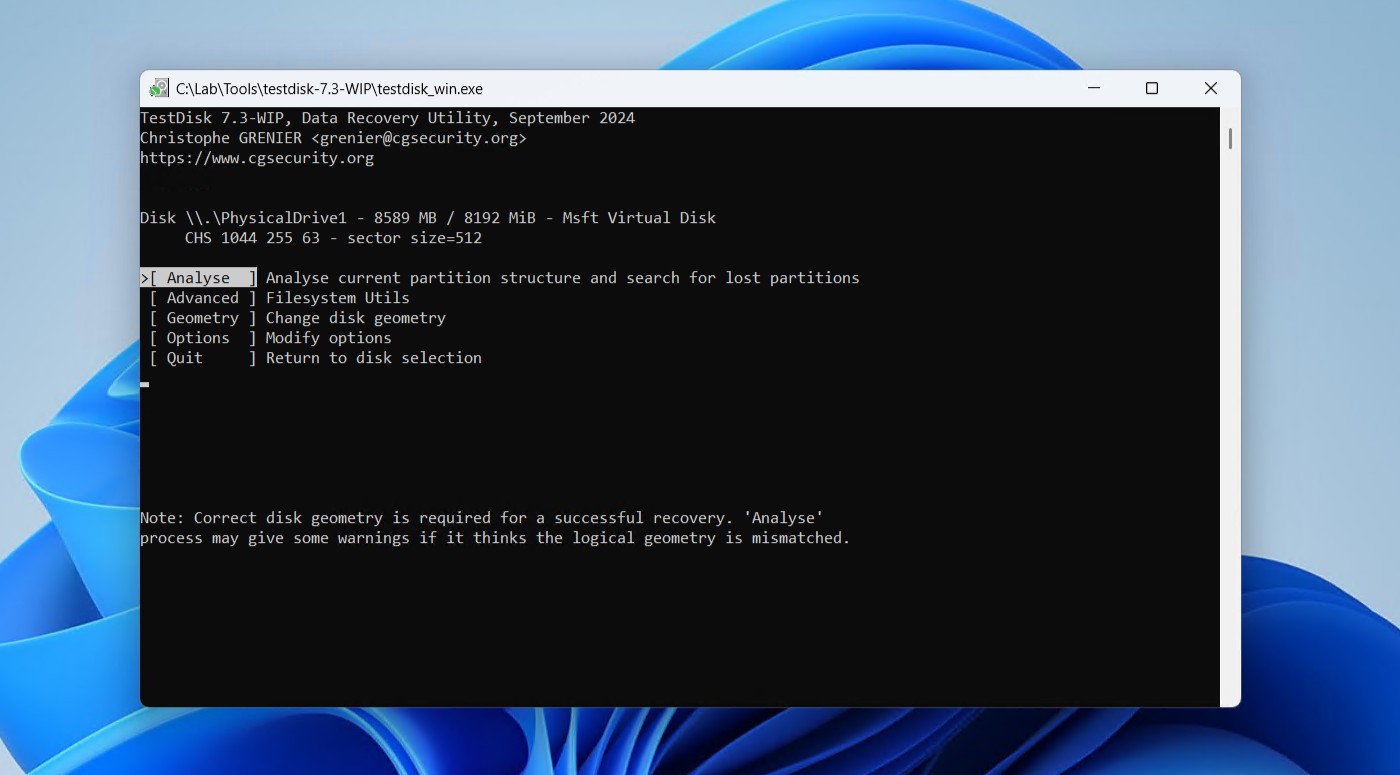
- Press Enter on the Analyse option.
- Press Enter to begin the Quick Search.
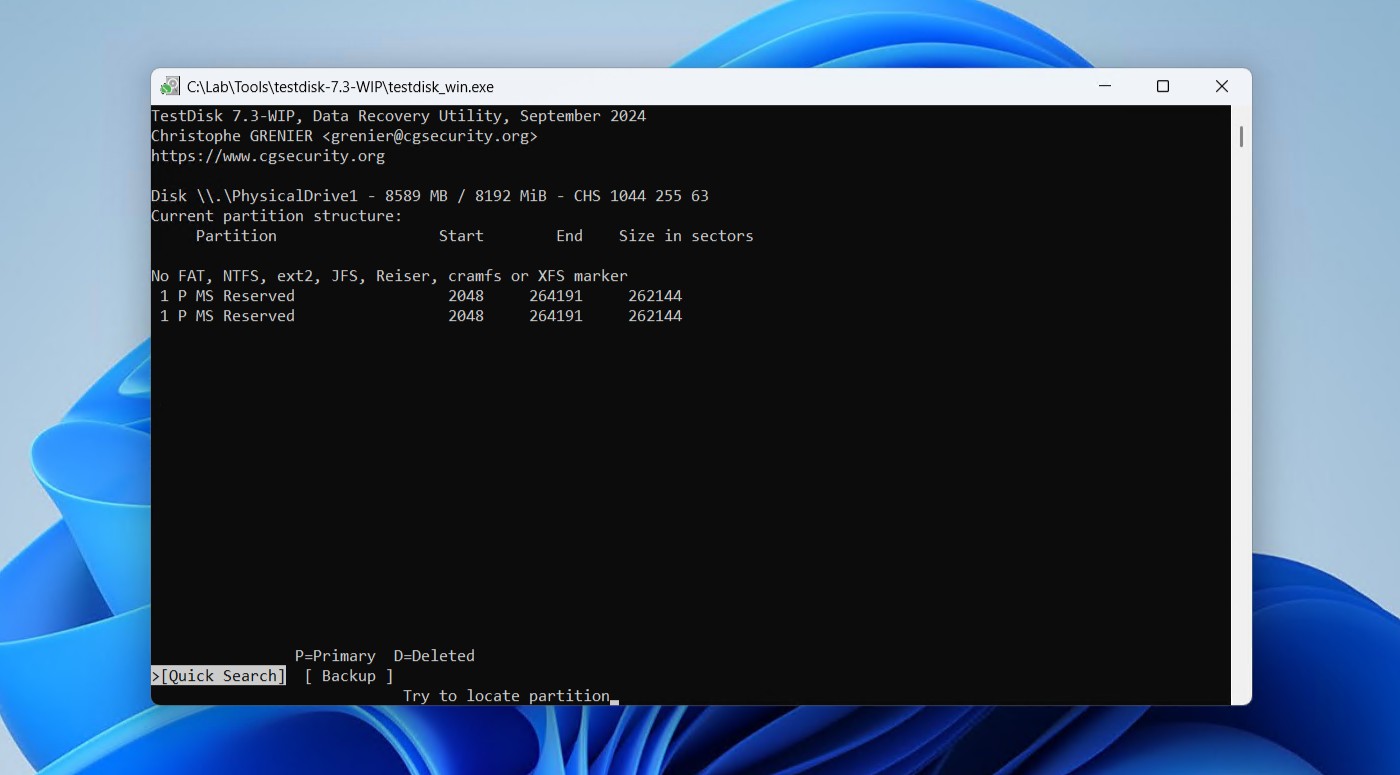
- Press Enter.
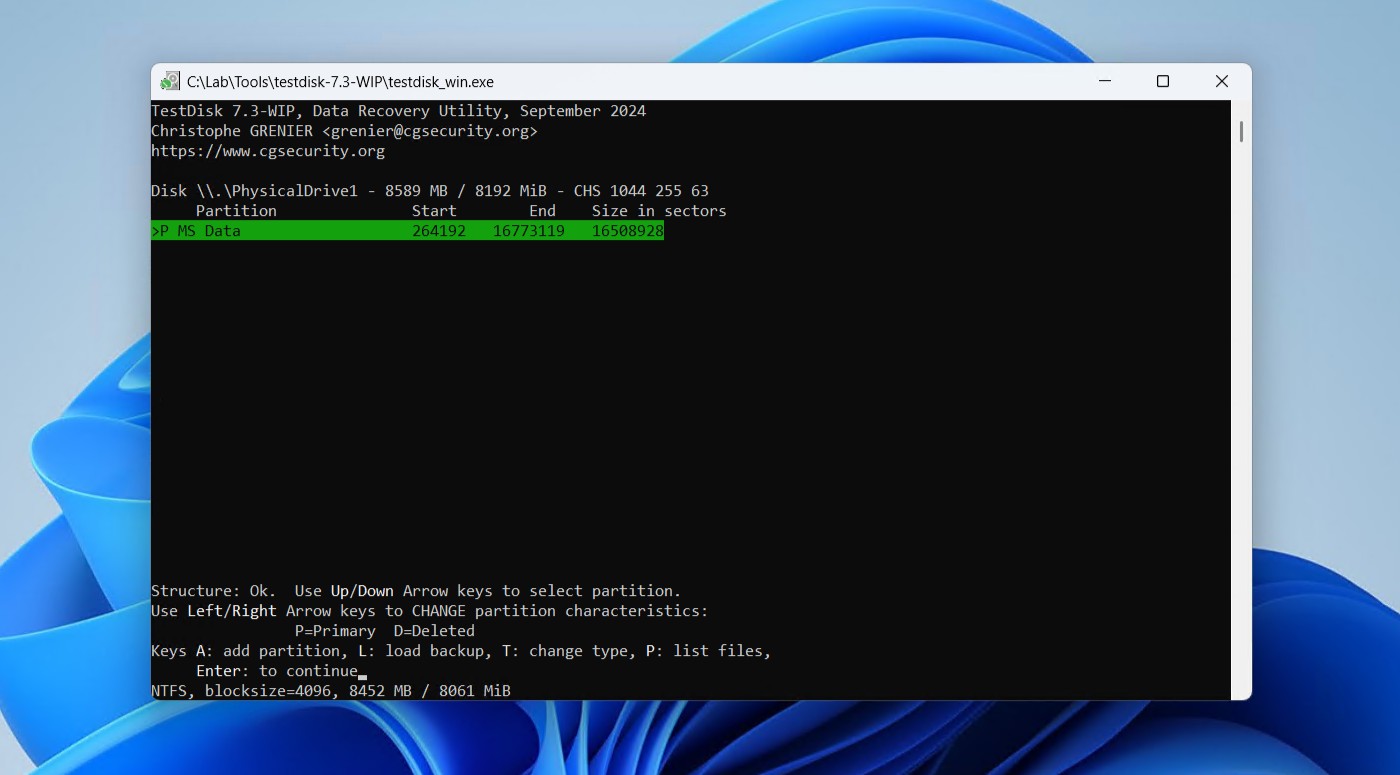
- Go to the Write option. If no partition was found, try a Deeper Search instead. Press Enter.
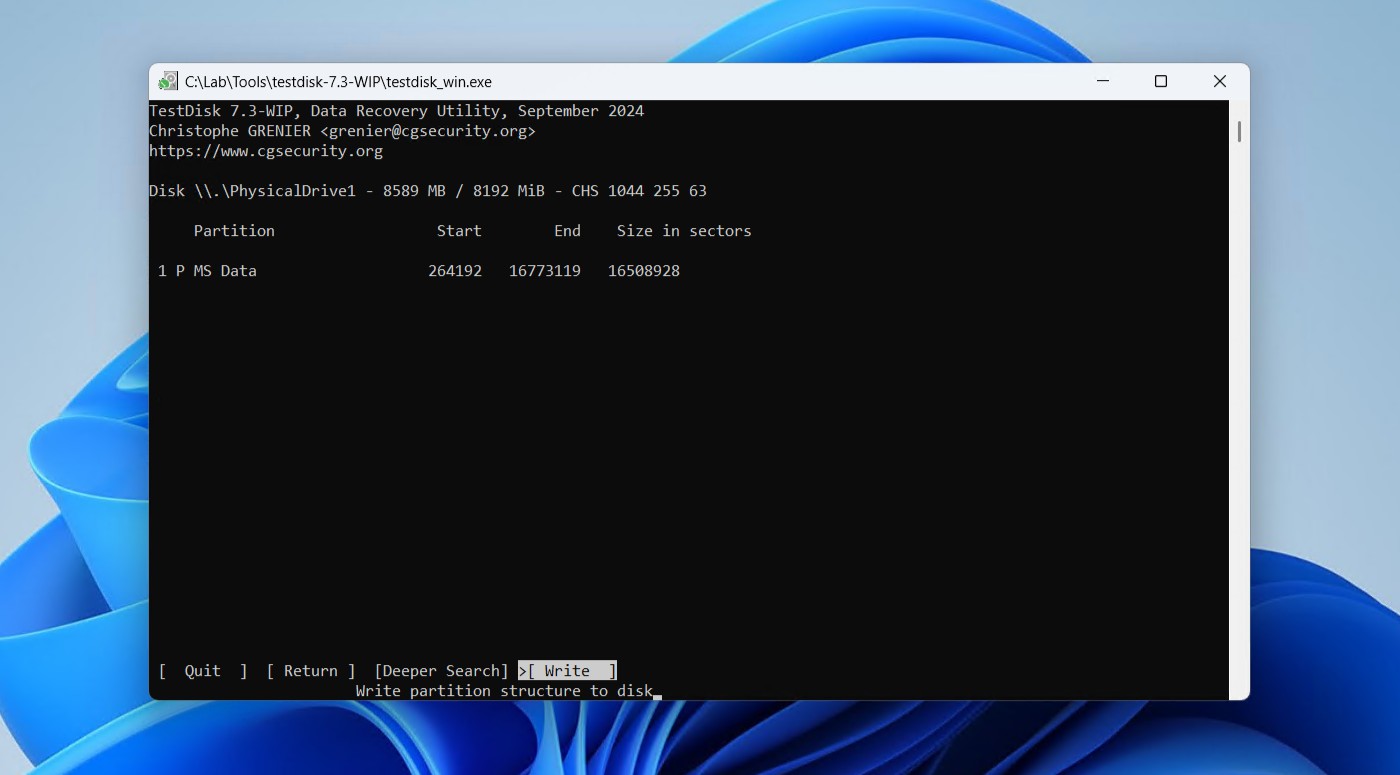
- Press Y to continue.
Safely eject your USB flash drive and reconnect it. The corrupted partition should now be restored. If that didn’t work, your drive may be write-protected.
Method 3. Solve Write Protection Issues
Sometimes your flash drive won’t even let you perform any fixes because it’s write-protected, similar to how you can’t open a corrupted USB without formatting. This is a common issue, and a write-protected flash drive will display the message “Windows cannot run disk checking on this volume because it is write protected.” if you try to run CHKDSK, or a very simple “The disk is write protected.” for other actions.
This is easily solved by removing the “readonly” attribute from the flash drive to fix the USB drive without formatting. We’ll be doing this with DiskPart, which utilizes CMD.
- Right-click Start and click Terminal (Admin).
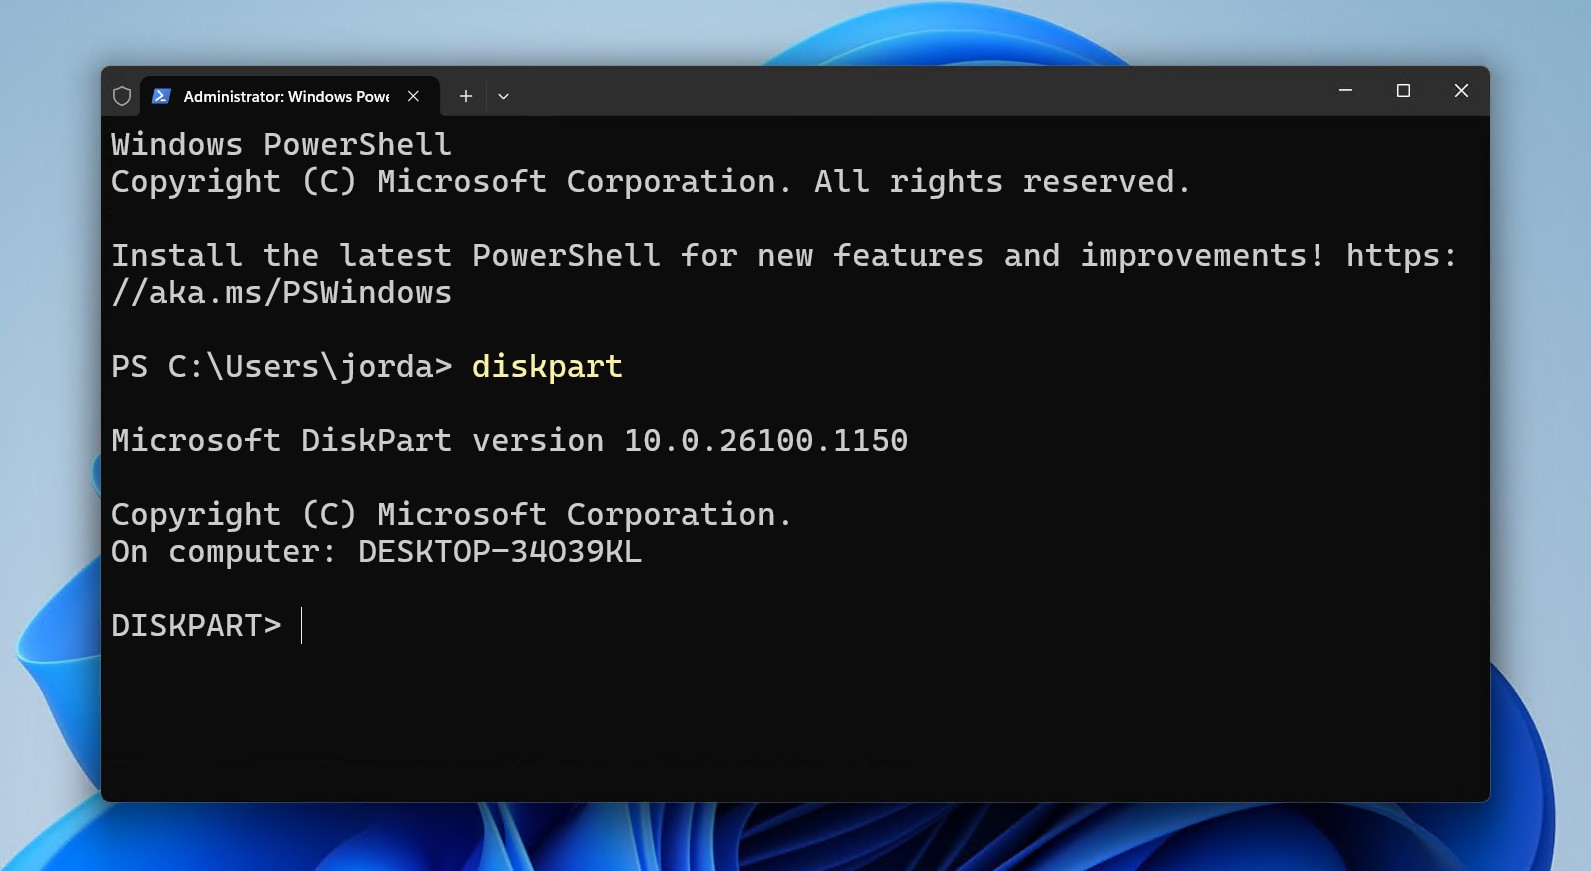
- Type diskpart and press Enter.
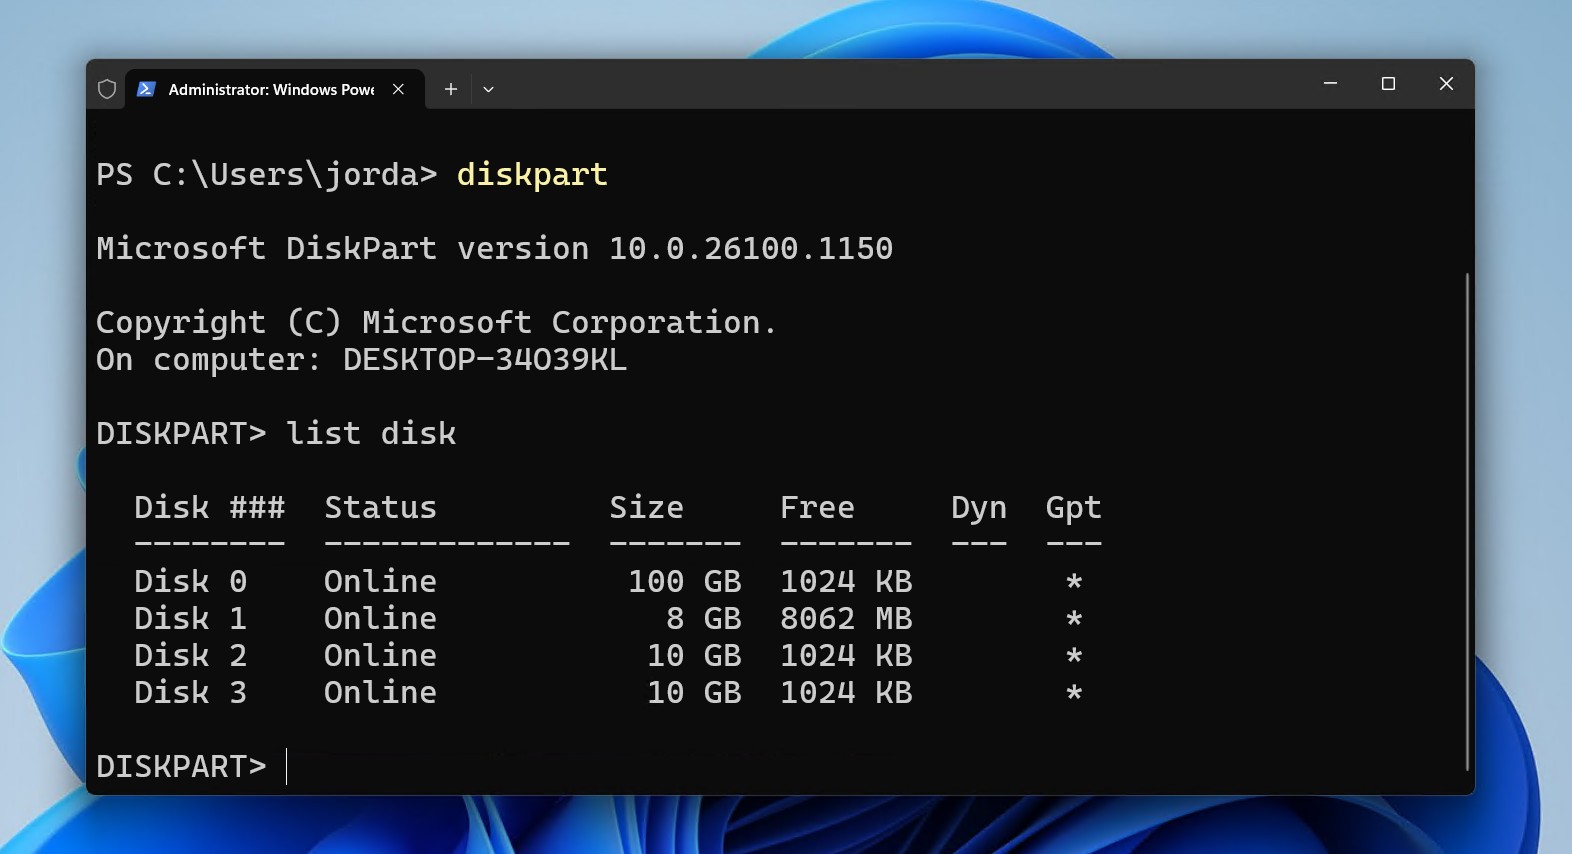
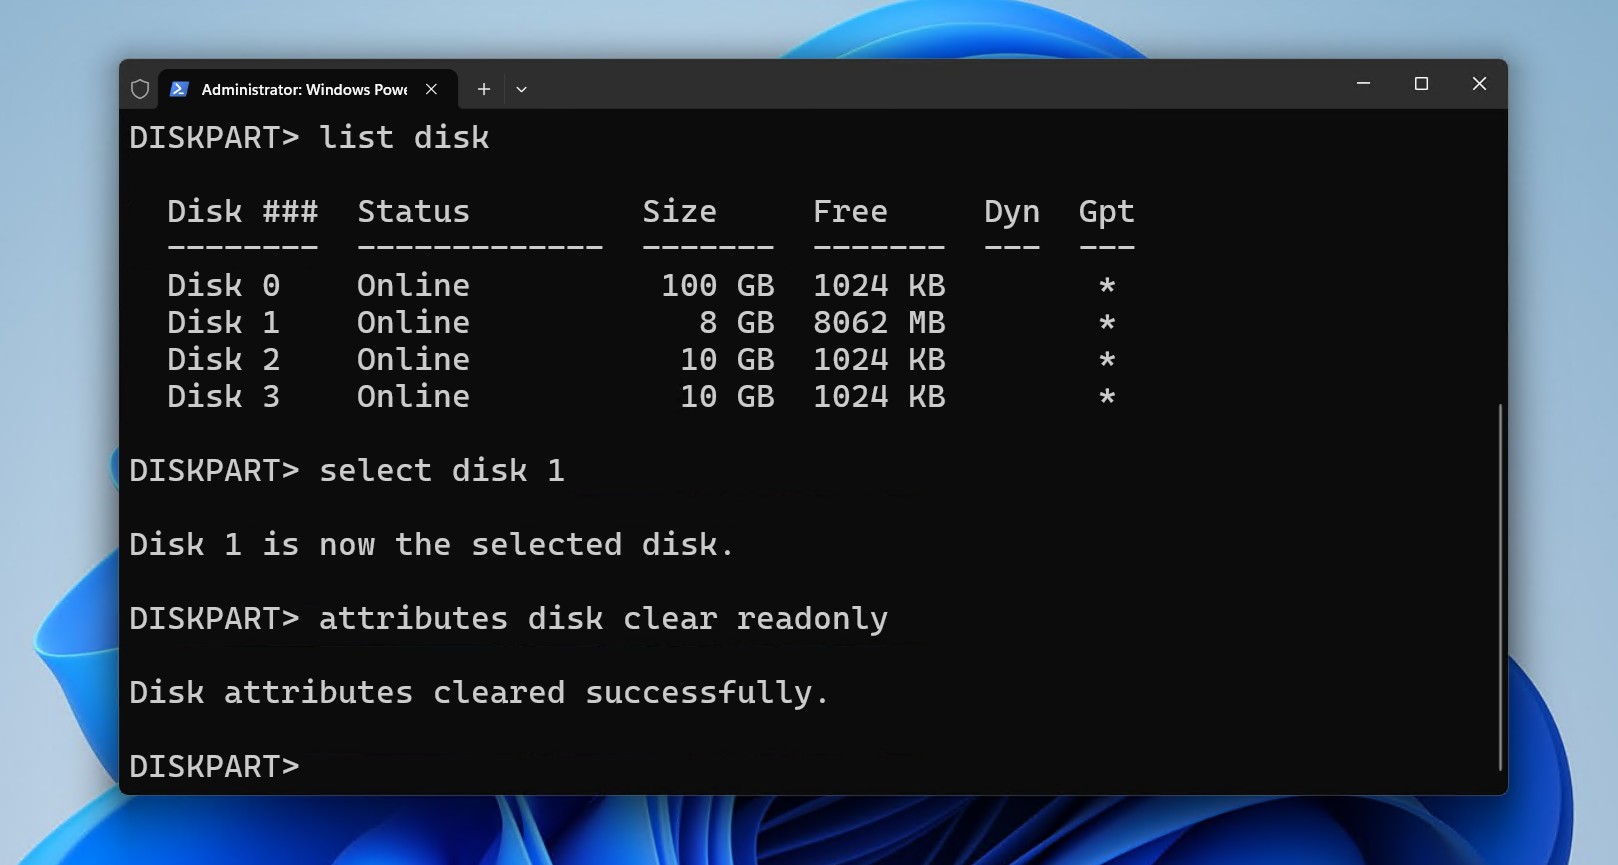
- Type list disk and press Enter. Take note of your flash drive disk number.
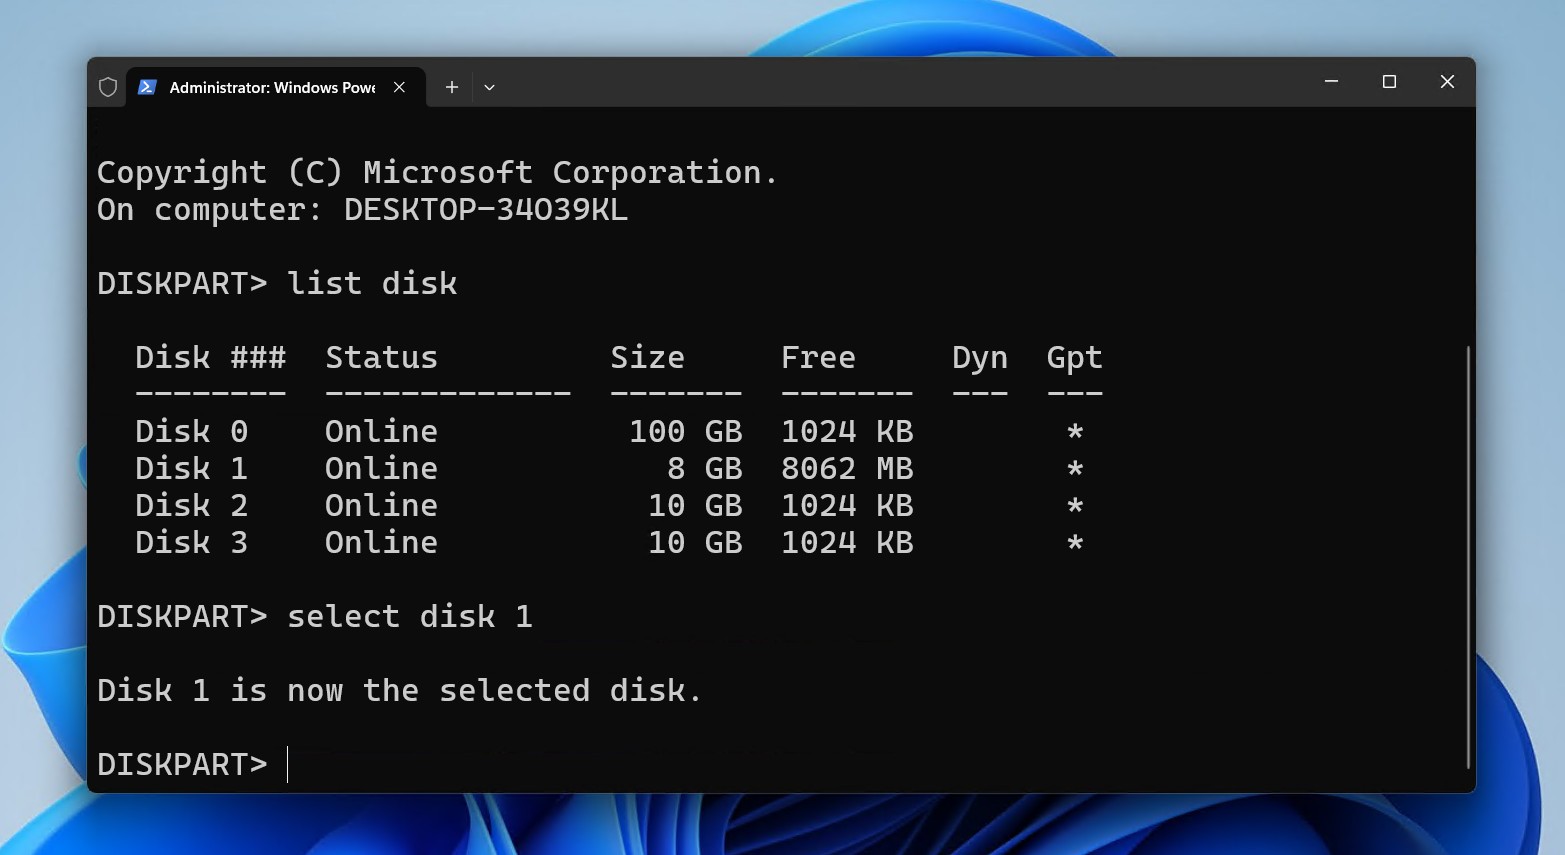
- Type select disk *. Replace * with the disk number associated with the flash drive. Press Enter.
- Type attributes disk clear readonly and press Enter.
- Type exit, press Enter, and close the terminal window.

This should remove any regular instance of write-protection. However, there are instances where the flash drive will be write-protected at a hardware level, which can happen when the drive detects an internal controller or NAND failure. These drives are beyond DIY repair at home, and require professional recovery capable of bypassing the physical lock. You can consult a data recovery service for a professional evaluation, and then send it away if the price is right.
Possible Outcomes and How to Address Them
Hopefully these methods proved useful in recovering data from a corrupted USB without formatting. After all is said and done, your next steps will depend on what state your flash drive ended up in:
- Drive works normally: Continue using it like normal, but keep an eye on performance.
- Minor issues remain: After the data is safe, quick format to exFAT (cross-platform) or NTFS (Windows-only) and test stability with a tool like H2TestW.
- Errors persist: Restore and replace the drive to avoid future data loss, and keep essential files stored elsewhere.
FAQ
If Windows prompts you to format your USB flash drive, ignore the message and instead focus on recovering the data with data recovery software. Such software, like Disk Drill, can scan the flash drive directly, even when it’s corrupted or appears as RAW, and recovers the files to a separate storage device. Once the files are secured, you can then format the drive.
Even if the drive is showing as RAW and Explorer is asking to format, data recovery software can bypass these errors and access the data directly. Recover the data first, and then once the data is recovered, you can fix a corrupted pen drive without formatting with a repair tool like CHKDSK, or simply format it.
Reinstalling or resetting your USB controllers may help if Windows is misreading the flash drive due to a corrupted driver. Disconnect the drive, uninstall the USB controllers in Device Manager, reboot, and reconnect the drive. This may restore access to the data if it was a communication issue, but not if file system corruption or a hardware issue is present.