


Accidentally deleted files from your Toshiba drive? Or maybe you can’t access them because of drive corruption, or they were wiped out by formatting–fortunately, these are problems that most users can resolve at home with the right tools and information.
This guide is here to help. With the guidance of our technical team and years of accumulated research, we’ll show you the safest and most user-friendly Toshiba HDD recovery and Toshiba drive repair methods.
Where to Start with Toshiba Recovery
Readers arrive at this guide because of very different problems–maybe you accidentally deleted your files or formatted your drive. Or maybe your drive is corrupted or missing a partition. Most of these file system-related problems can usually be fixed by an average user at home.
This guide focuses on demonstrating these fixes, as well as the hard drive recovery process on Toshiba HDDs. But before you start any repair or recovery attempts, the first step is to check your drive in Disk Management.
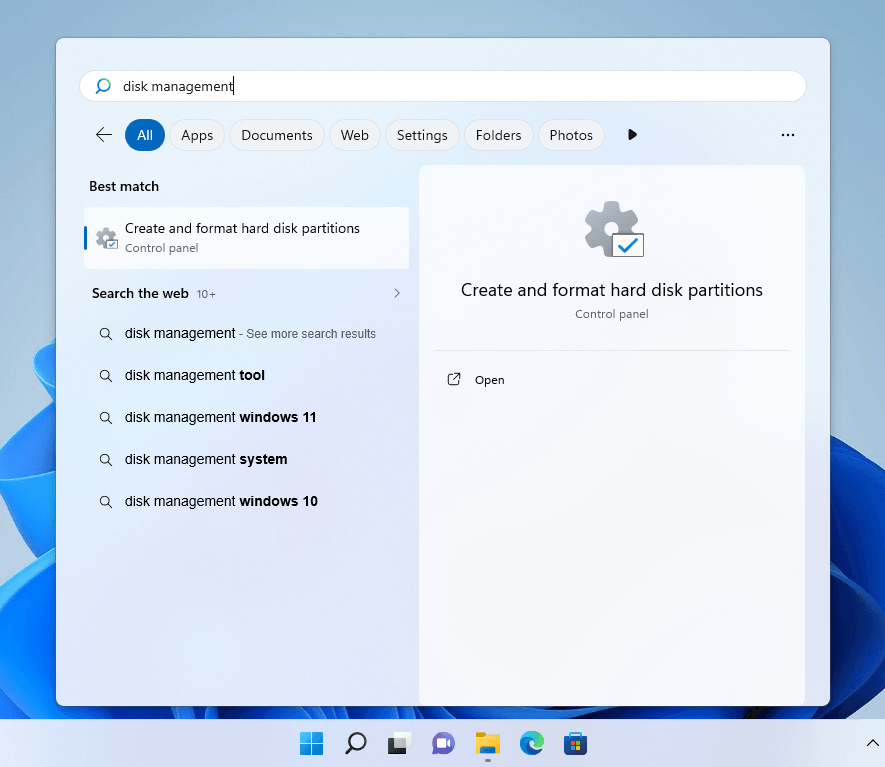
- Open Disk Management through the Start Menu.
- Note the Capacity entry for your Toshiba drive.
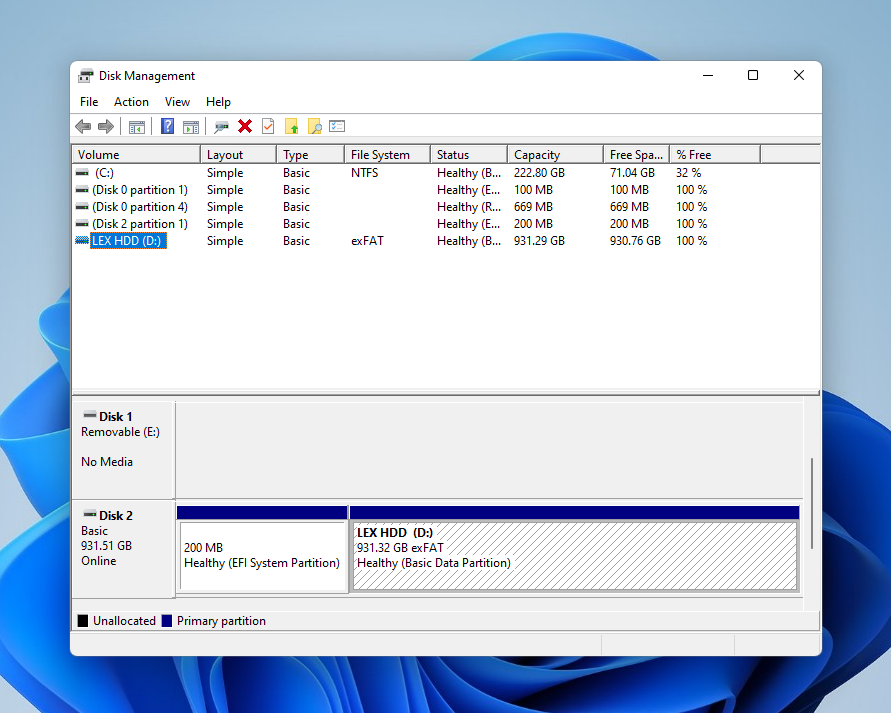
If your drive’s capacity looks correct to you, see the table below to identify the best next steps for your situation. Use the links in the second column to quickly jump to the appropriate section of the guide:
| Situation | What to try |
| Your files were accidentally deleted. | Use data recovery software. |
| The Toshiba drive was formatted. | Scan your drive with data recovery software before saving new files to it. |
| Drive appears as RAW. | Recover important files first, then repair your drive with TestDisk. If you don’t need to repair your drive, format it instead. |
| The drive’s partition is missing. | Use data recovery software to extract your files, then repair the drive with TestDisk. Alternatively, format the drive. |
| Your drive gets errors, or Windows asks to repair or reformat it. | Recover your data first, then repair the drive with CHKDSK or reformat it. |
| Toshiba drive does not appear at all. |
If the Toshiba drive doesn’t appear in Disk Management, you usually can’t recover your data. Troubleshoot the physical connection first:
|
| Drive is detected but seems unstable. | Scan it with the TOSHIBA Storage Diagnostic Tool. |
| Disk Management is displaying an incorrect storage capacity for your drive. | Consider professional data recovery. |
| You hear clicking/grinding noises from the Toshiba drive when you use it. | Do not attempt any DIY repair or recovery methods. Only professional data recovery services can safely handle your drive. |
How to Recover Data with Toshiba Recovery Software
Data recovery is the first and most important step in any DIY route, especially when the drive is unstable. As long as your Toshiba drive appears in Disk Management with the correct capacity, it may be possible to get your files back with data recovery software (regardless of what caused the data loss).
For this guide, we’ll be using an application called Disk Drill to demonstrate how Toshiba hard drive data recovery works. It’s capable of scanning Toshiba drives running most modern file systems, including NTFS, exFAT, HFS+, APFS, and ext2/ext3/ext4.
To recover files from a Toshiba hard drive with Disk Drill:
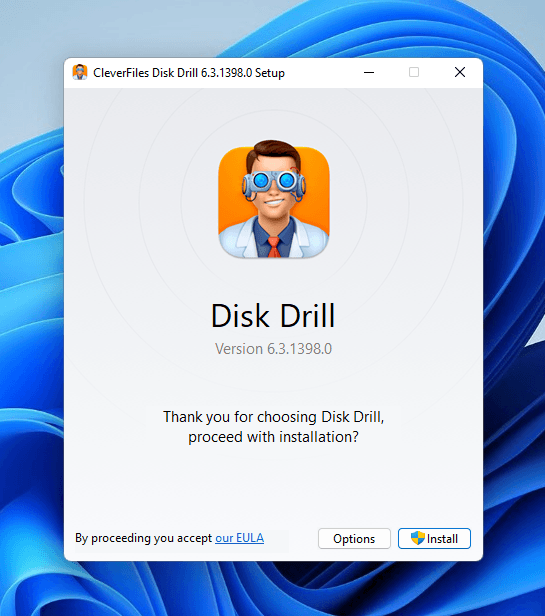
- Download Disk Drill and install it to a different drive (not your Toshiba hard drive) via the Options button in the installer. For example, install the software to your system drive if you’re recovering an external HDD.
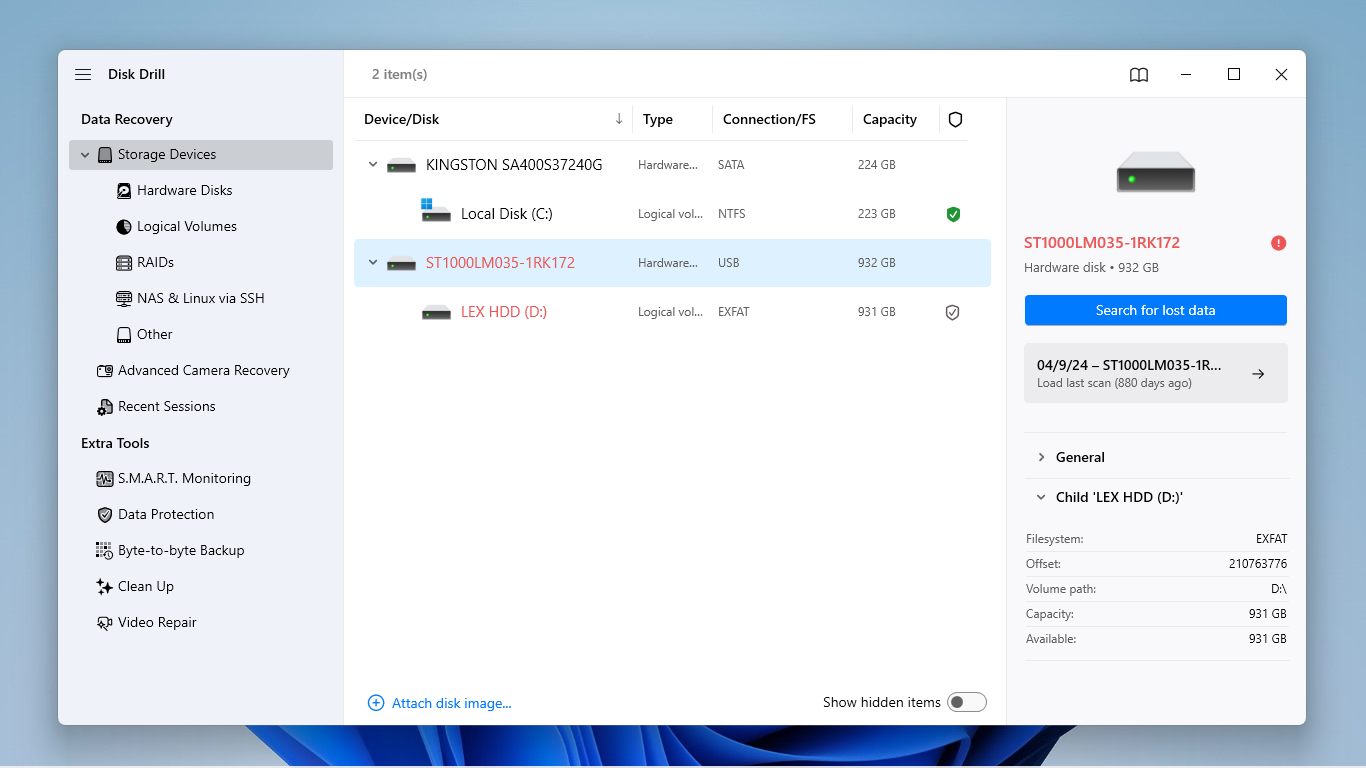
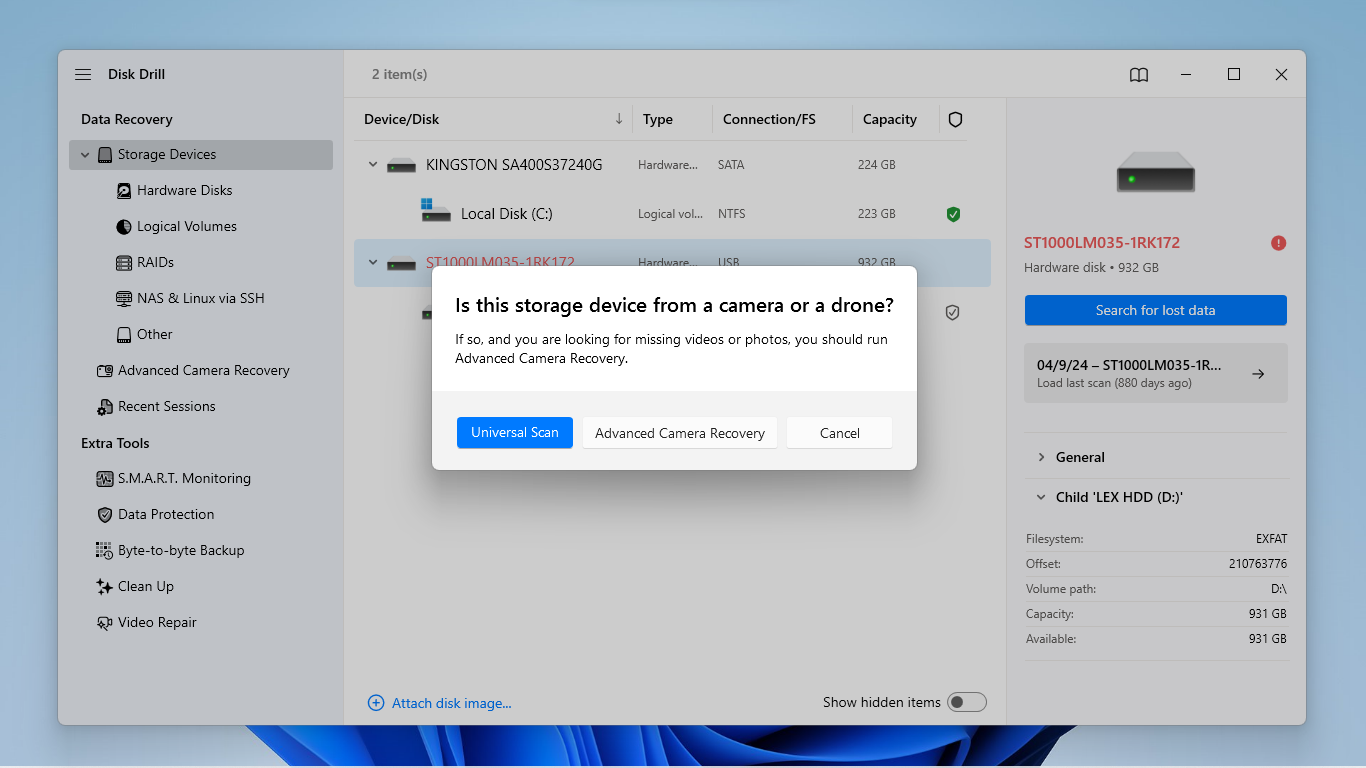
- Ensure your Toshiba drive is securely connected to your PC. Then, run Disk Drill. In the main menu, select your Toshiba drive and click Search for lost data.
- A prompt may appear (not always), asking if the storage device is from a camera or drone. Select Universal scan for now. If you end up restoring unplayable videos (or none of them play during preview), scan your drive again with Advanced Camera Recovery. If this prompt doesn’t appear for you at all, just proceed to step 4.
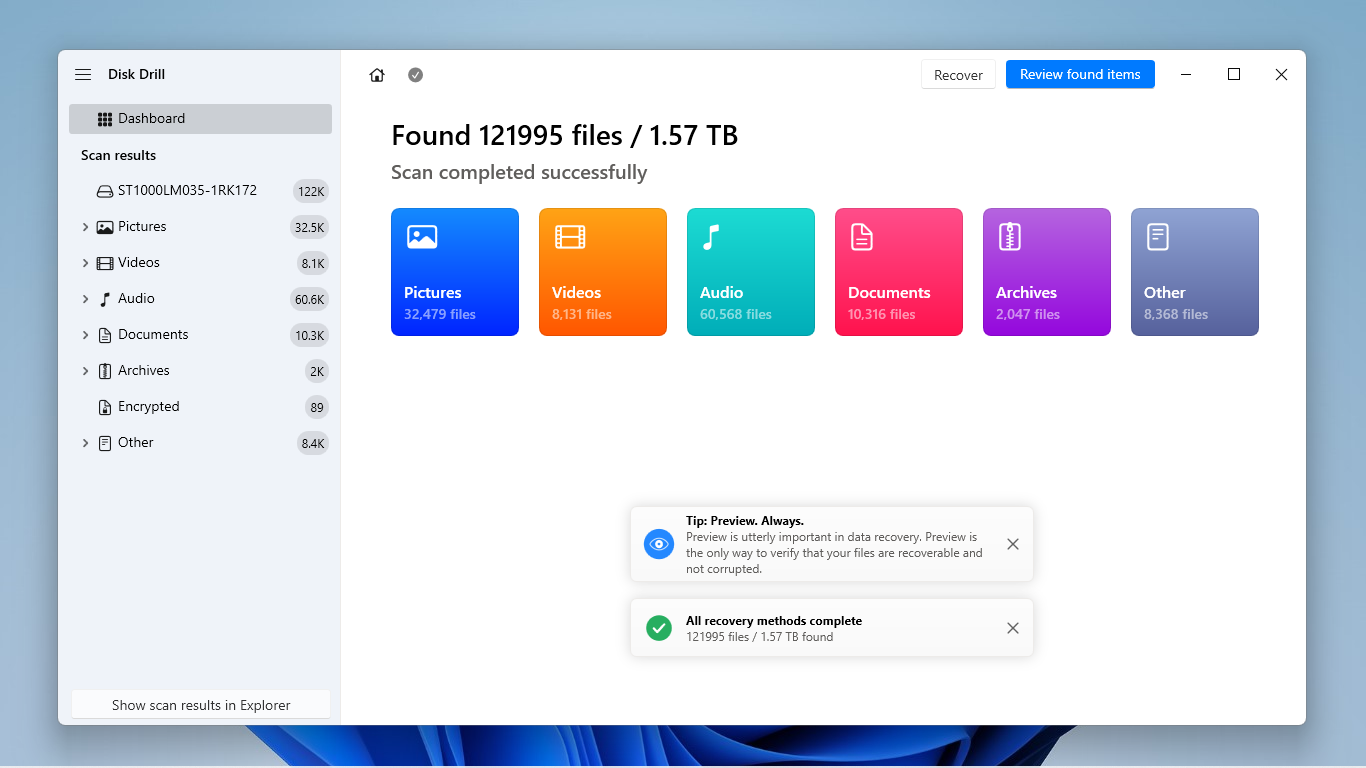
- Once the scan is complete, you can click Recover and proceed to step 8 to restore everything Disk Drill found on your Toshiba drive. If you want to review your files before recovery (recommended), click Review found items.
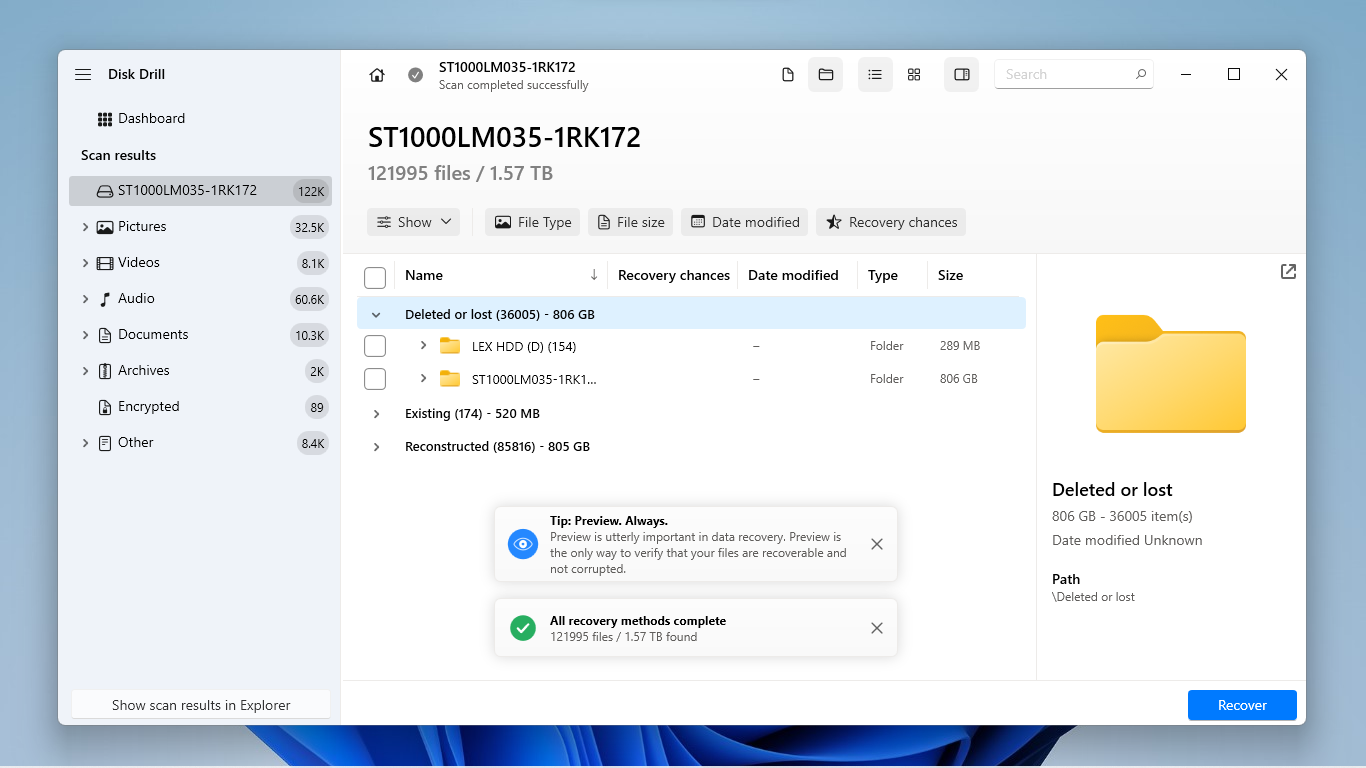
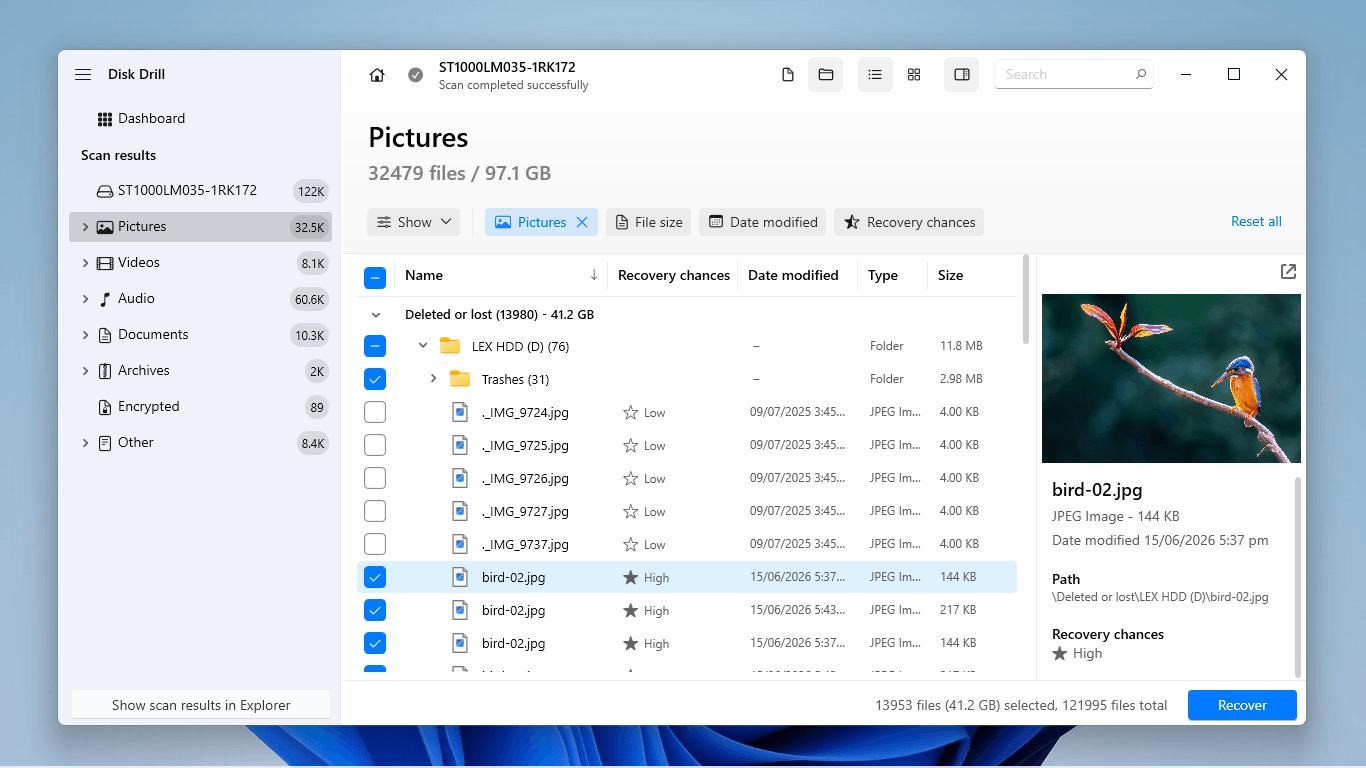
- Expand the Existing, Deleted or lost, and Reconstructed tabs, depending on your situation (e.g., choose Existing for inaccessible drives, Deleted or lost for formatted drives, etc.). Alternatively, you can just go through them one by one.
- Use the Search field in the top right corner, as well as the filters in the sidebar, to find specific files, file types, or folders you want to restore. Then, click on each file once to preview it, and ensure you can recover it intact.
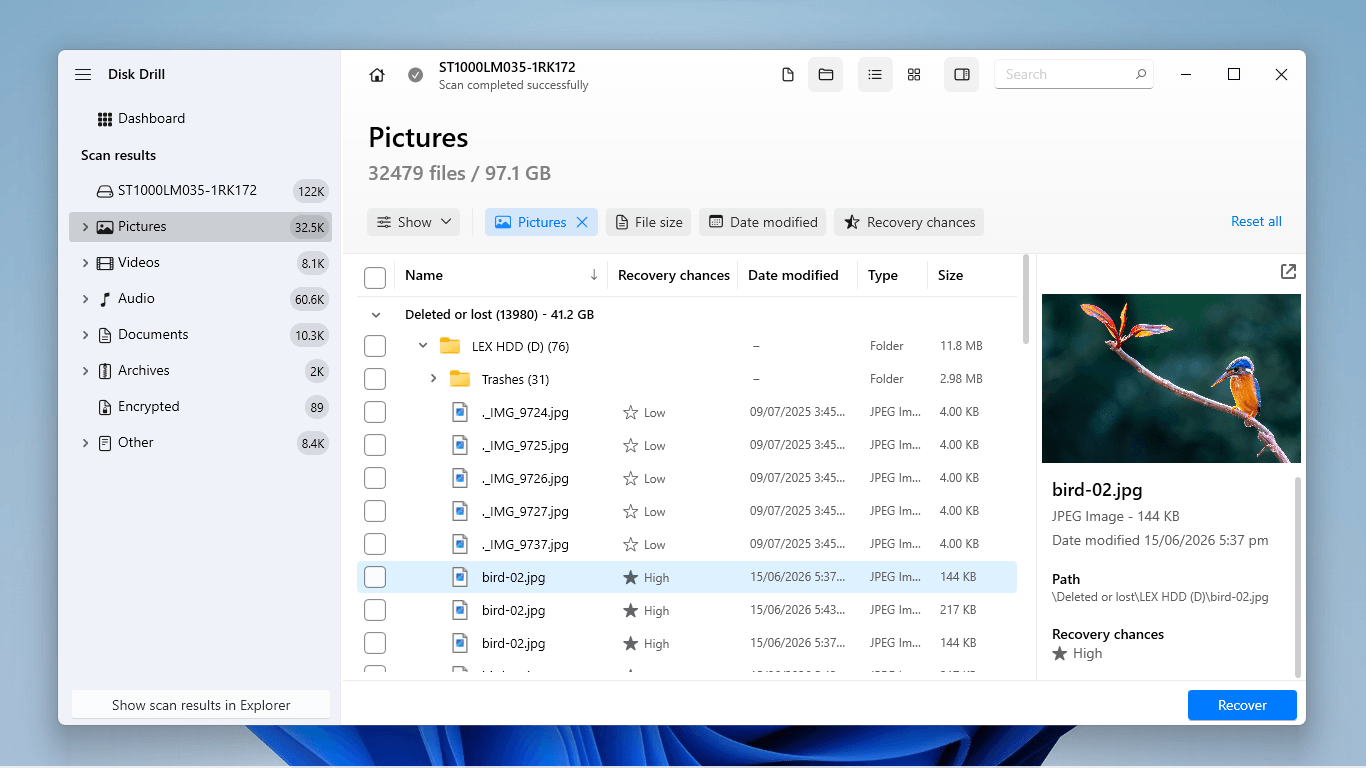
- Once you find the files and folders you want to save, use the checkboxes in the leftmost column to make your selection. Then, click the Recover button.
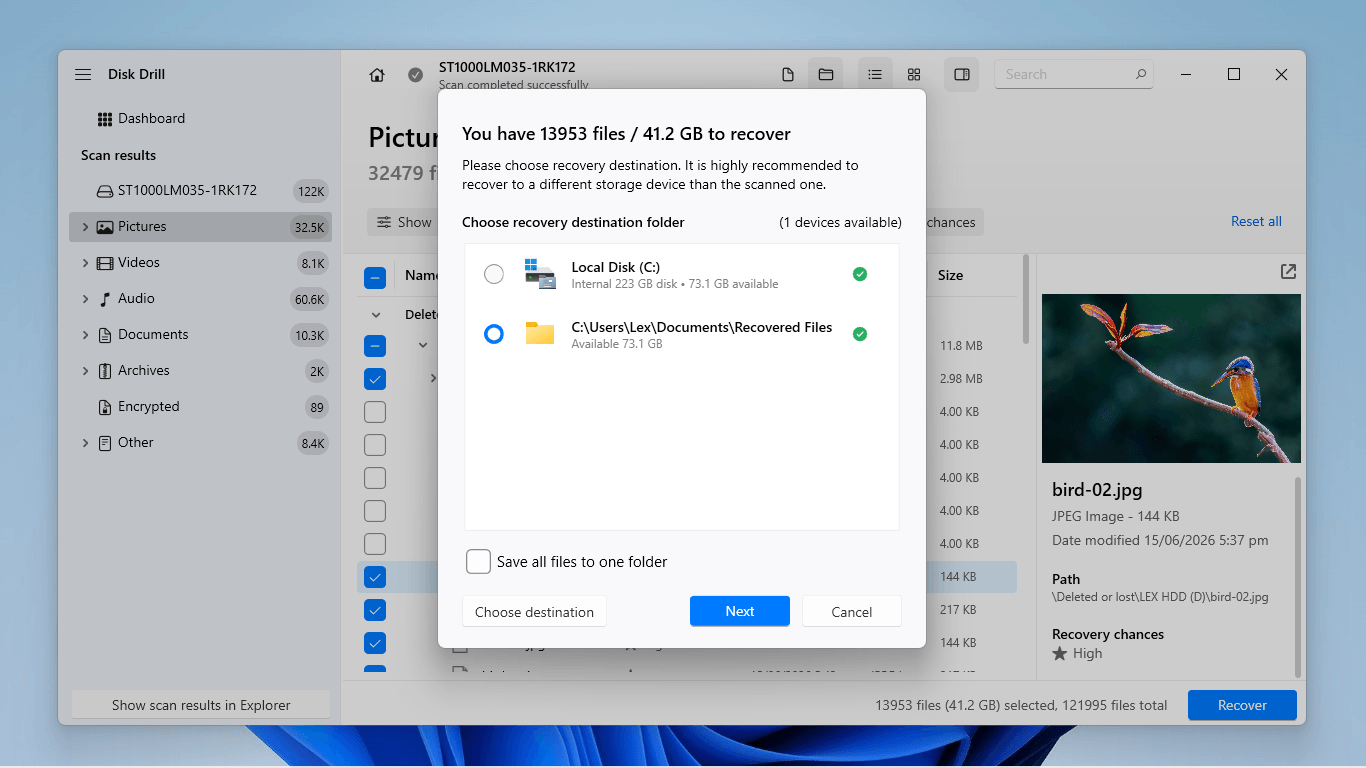
- Choose a location on a different drive (not your Toshiba drive) where you want Disk Drill to save the restored files. Finally, click Next to start the recovery operation.
Toshiba data recovery chances depend on several factors, including the type of data loss, how much the drive was used after the data loss occurred, whether the drive was an HDD or SSD, and whether it was internal or external. Disk Drill has an indicator that estimates “Recovery Chances”, but it can also preview a file to guarantee it’s intact.
Here are specific situations where Disk Drill can help:
- The files on your Toshiba drive were accidentally deleted.
- Your Toshiba drive was formatted.
- A partition on your Toshiba drive was lost or became inaccessible.
- Your Toshiba drive appears as RAW.
- Files are still on the disk, but Windows can’t access them normally.
If your Toshiba drive seems unstable during the recovery attempt, try checking its S.M.A.R.T. status, which indicates the drive’s health. In case of warnings, we strongly recommend using the app’s Byte-to-byte backup feature to create a disk image of your drive. Then, you can scan that image file instead of the Toshiba drive itself.
You can find the S.M.A.R.T. status and Byte-to-byte backup feature in the left sidebar if you open up Disk Drill’s main menu (step 2 above).
Toshiba Hard Drive Repair Methods
If your primary issue was unwanted file deletion or accidental formatting, you don’t really have to do anything else at this point. But if the data loss was caused by a broader problem with the drive itself, additional steps are needed to fix it–otherwise, you’ll continue experiencing the same kind of data loss over and over again.
This section focuses on demonstrating different methods to repair your drive after securing your missing files.
Method 1: Run CHKDSK to Repair File System Errors
CHKDSK is a repair operation you can run using Command Prompt. It’s a great first step for troubleshooting, since it can potentially resolve a number of different cases. Windows reporting file-system errors or asking to scan/repair/format the drive, files or folders not opening, volumes behaving inconsistently–as long as your drive is only logically damaged (not physically), CHKDSK may fix it.
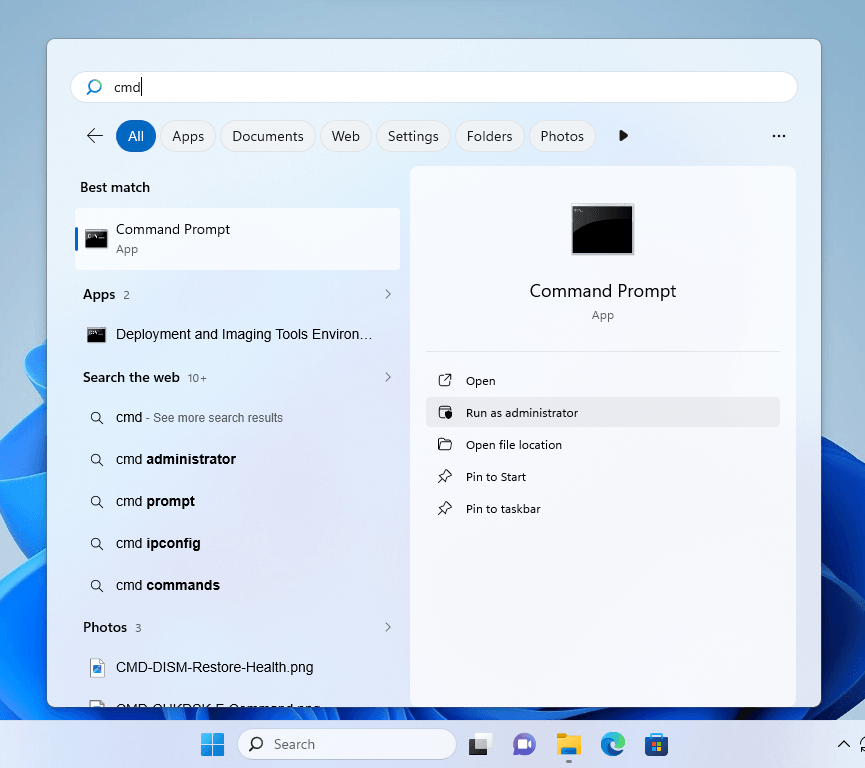
- Using the Start menu, open Command Prompt as Administrator.
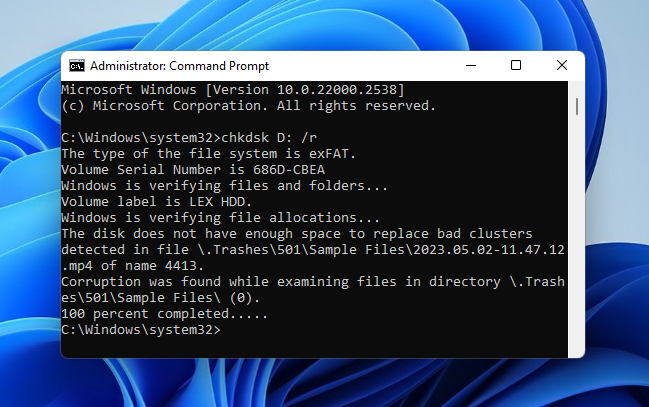
- Type the following command in the empty field and press Enter: chkdsk D: /r Replace D: with your Toshiba drive’s assigned letter.
Method 2: Use TOSHIBA Storage Diagnostic Tool
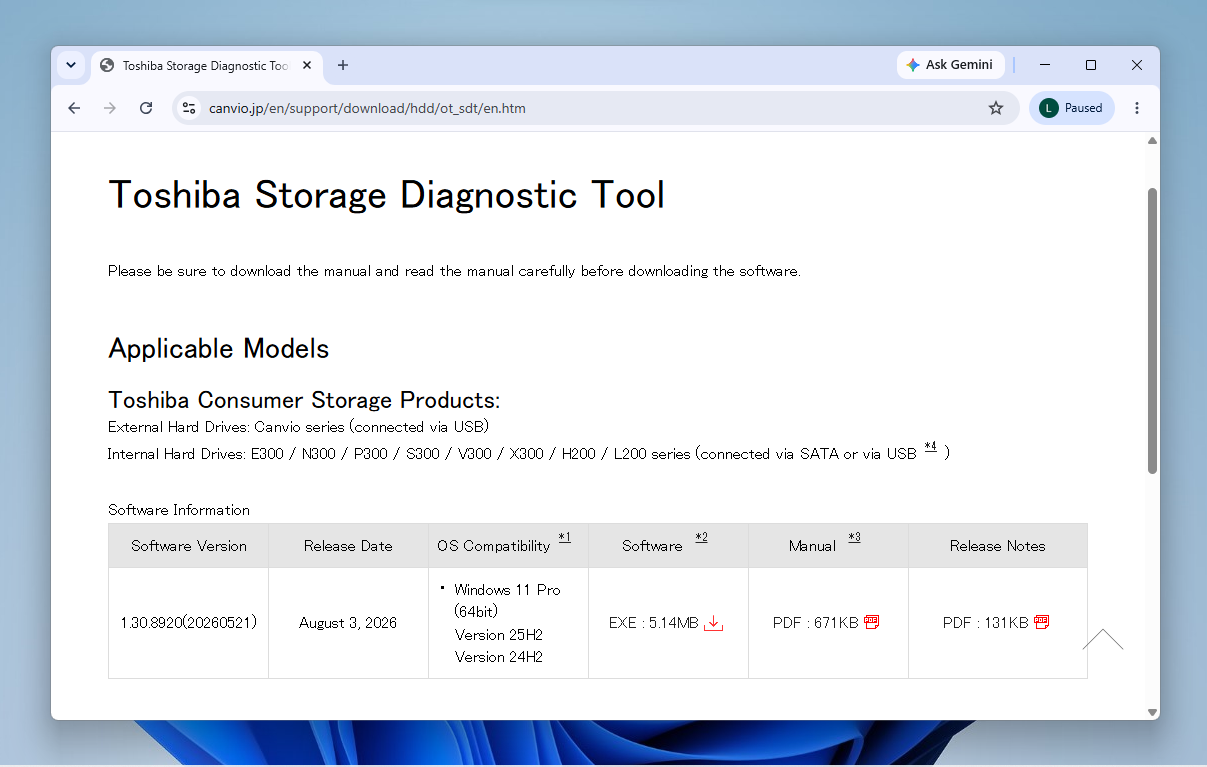
The Toshiba Storage Diagnostic Tool is Toshiba’s official drive maintenance software. While it can’t recover your data or repair your drive, it can scan your drive or its partitions for read errors. And it’s the closest we’ll get to an official Toshiba recovery software or HDD maintenance tool, so we wanted to make sure to include it in this Toshiba-specific guide.
- Download the Toshiba Storage Diagnostic Tool from Toshiba’s official website.
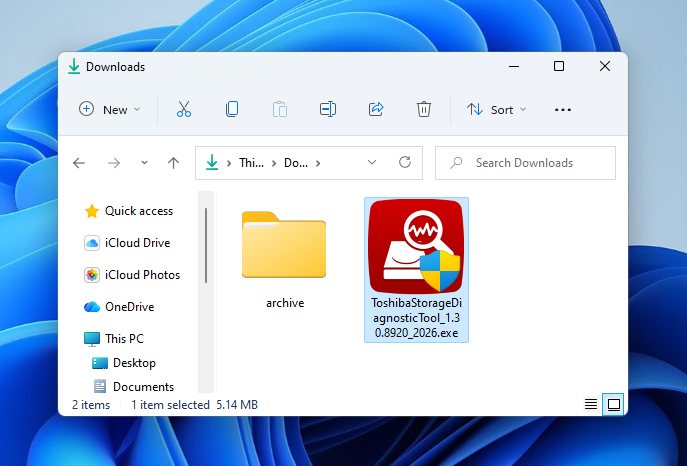
- Double-click the downloaded exe, follow the instructions in the wizard, and accept the User Agreement.
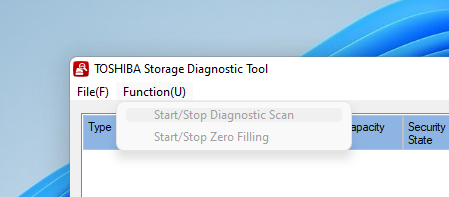
- Open the Toshiba Storage Diagnostic Tool and select the drive you want to scan. Then, click Function(U) > Start/Stop Diagnostics Scan and select a scan type. We recommend running a full scan if you have the time, so you can check the entire drive.
Method 3: Repair Toshiba HDD with TestDisk
If your Toshiba drive appears as RAW, unallocated, or it has a missing/damaged partition, try using TestDisk to fix it. In some cases, TestDisk can rebuild partition information and restore access all on its own, without needing further repair attempts. TestDisk is free and open-source, well-respected by its community, and highly capable.
But it uses a terminal-style interface and is less beginner-friendly than most recovery software. For users who have already recovered or backed up their data, formatting (Method 4) is a simpler option–but TestDisk remains a viable alternative if you want to restore the existing partition structure rather than immediately wiping and recreating it.
- Download TestDisk from CGSecurity’s website.
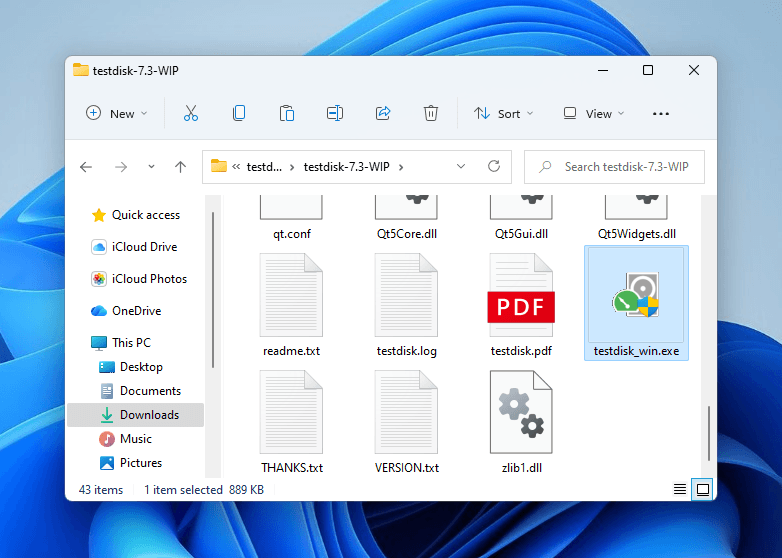
- Run TestDisk by double-clicking testdisk_win.exe in the downloaded folder.
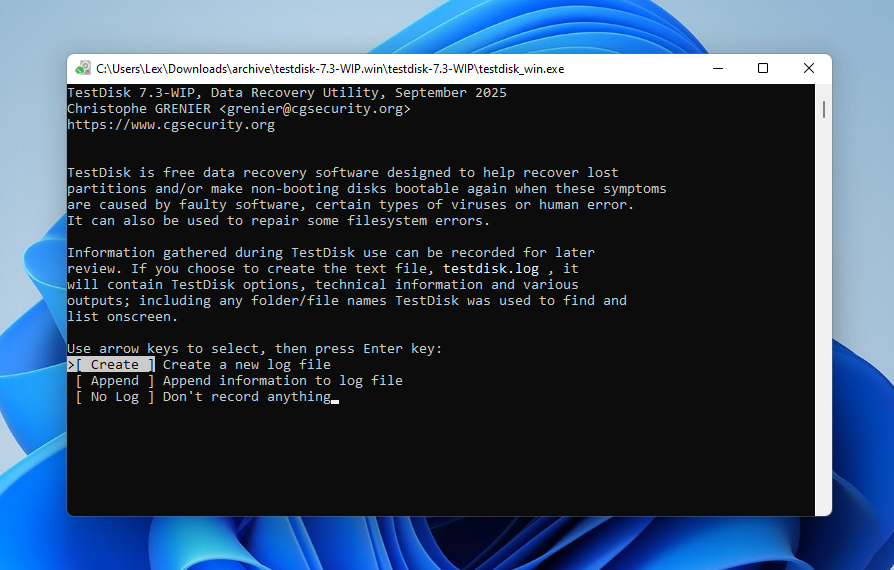
- Use your arrow keys to select the Create option, then press Enter.
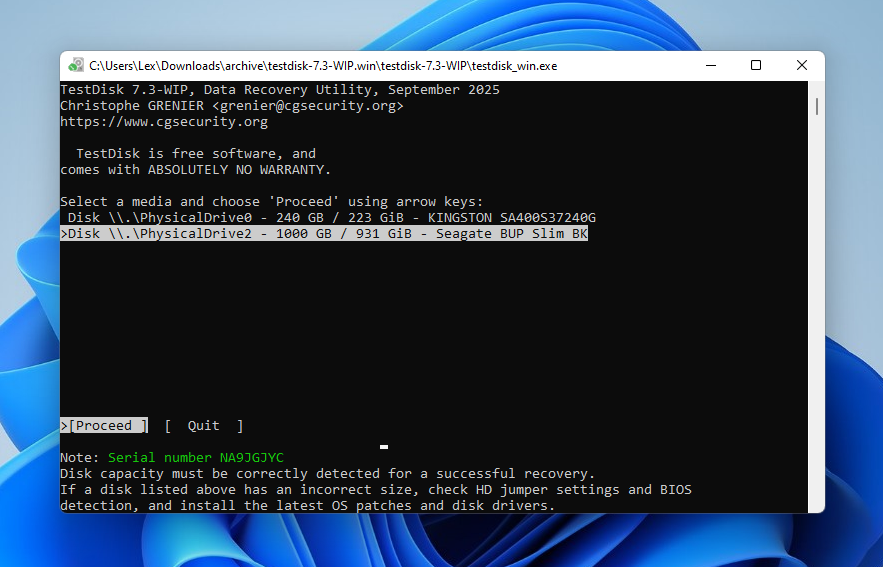
- In the next screen, select your Toshiba drive from the list. Then, use your left and right arrow keys to select the Proceed option and press Enter.
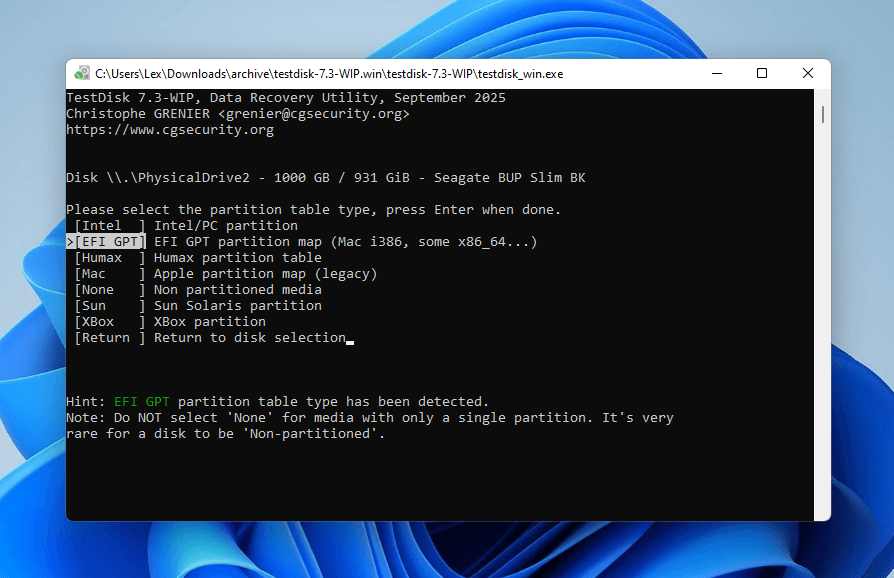
- Select your Toshiba drive’s partition type. TestDisk will try to detect it automatically, and it’s usually correct. Either way, press Enter.
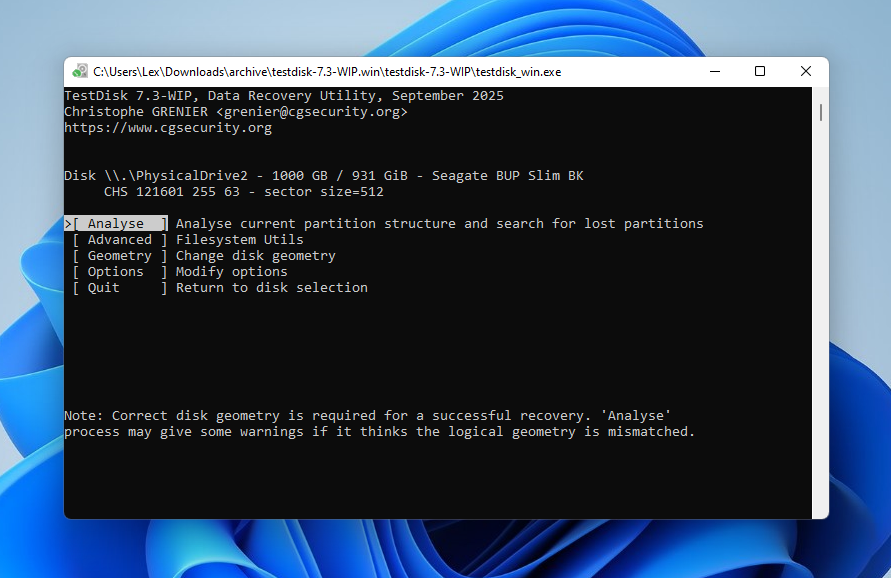
- Select Analyse and press Enter.
- Choose Quick Search and press Enter.
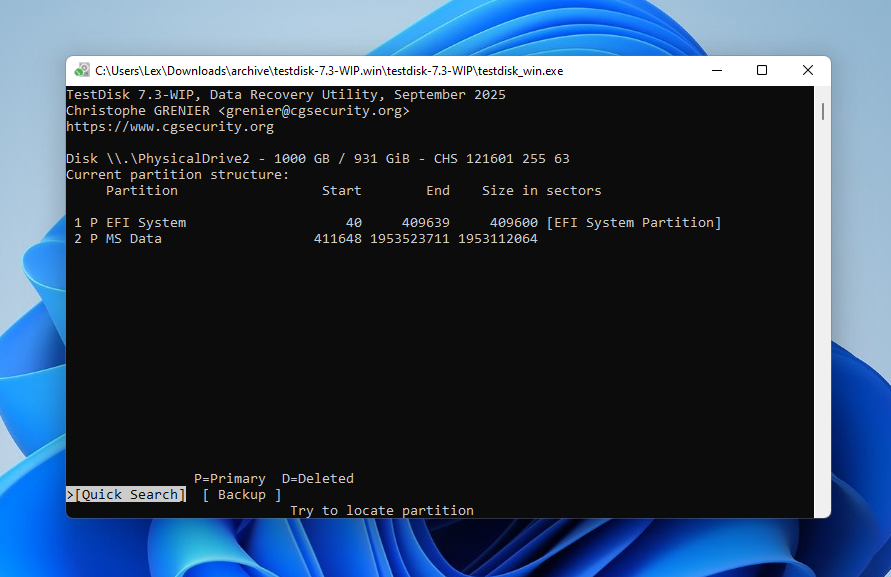
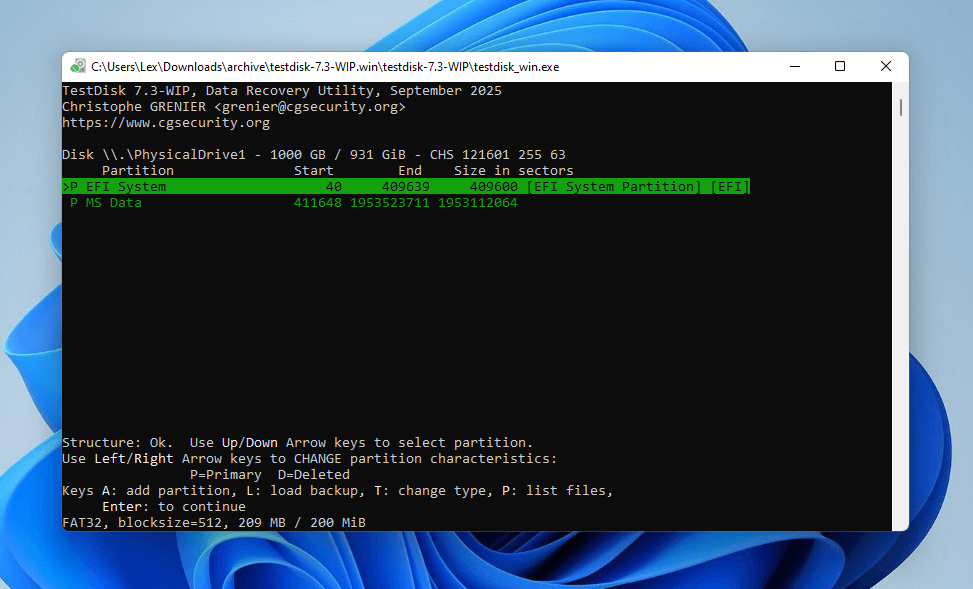
- Identify the partition you want to restore (you can press the P key to check the selected partition’s files). Then, select it with your arrow keys and press Enter.
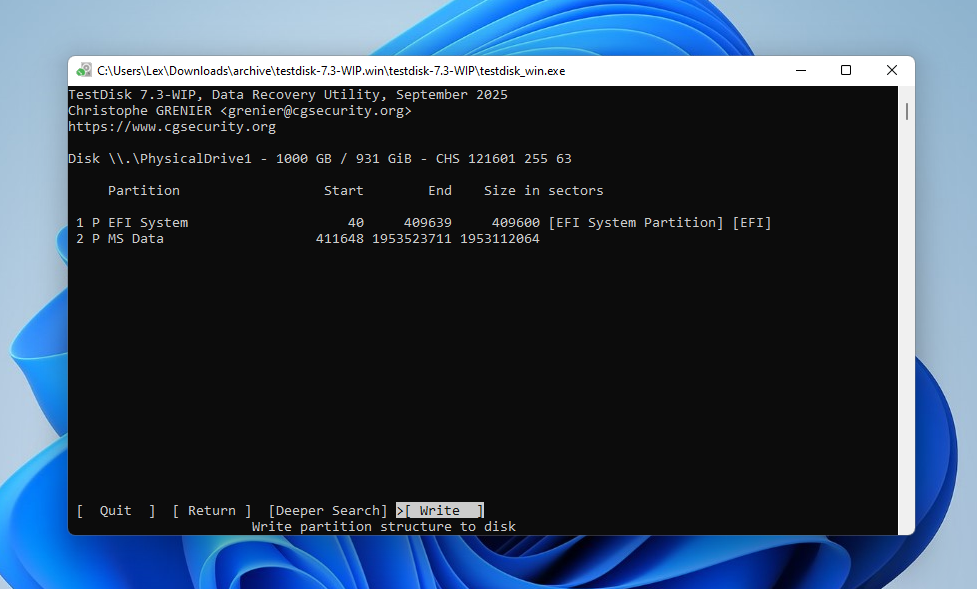
- Finally, select Write and press Enter. Alternatively, you can run a Deeper Search if the partition you wanted to restore didn’t appear on the list.
Method 4: Format the Toshiba Drive
The simplest and most final DIY repair method for non-physical Toshiba drive problems is formatting. Whether your drive’s file system is severely corrupted, missing a partition, or triggering countless errors, formatting can fix it because the process wipes your drive clean and writes a completely new file system structure to the disk.
There are two ways to format a Toshiba drive: (1) If your drive appears in File Explorer, format it from there. (2) If it doesn’t appear in File Explorer, try formatting it in Disk Management. We’ll show you both methods below.
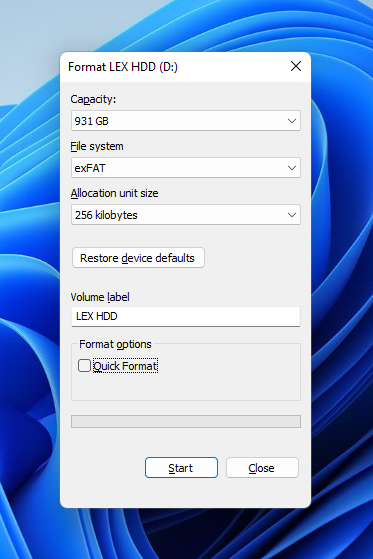
To format your drive in File Explorer:
- Open File Explorer.
- Locate your drive in the left sidebar or in This PC. Then, right-click your drive and select Format.
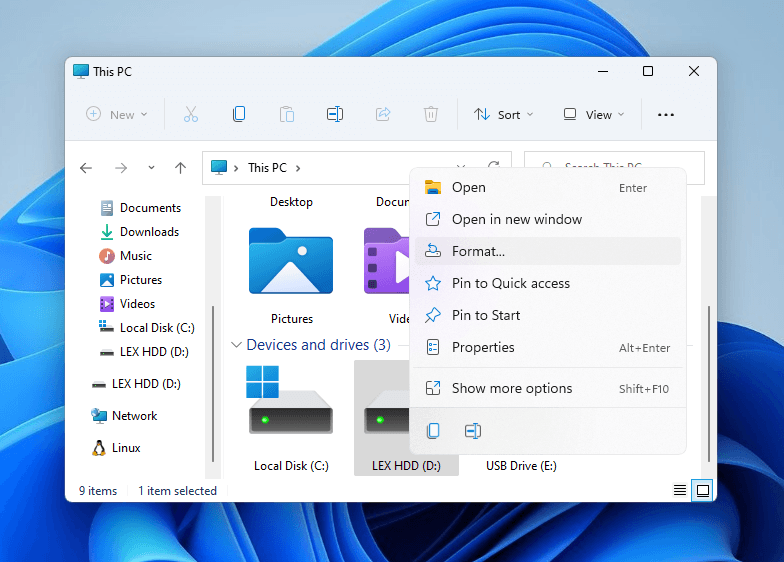
- In the Volume label field, type a new name for your drive. Then, we recommend unselecting the Quick Format option to make sure that Windows also scans for bad sectors. Finally, click Start to begin the process.
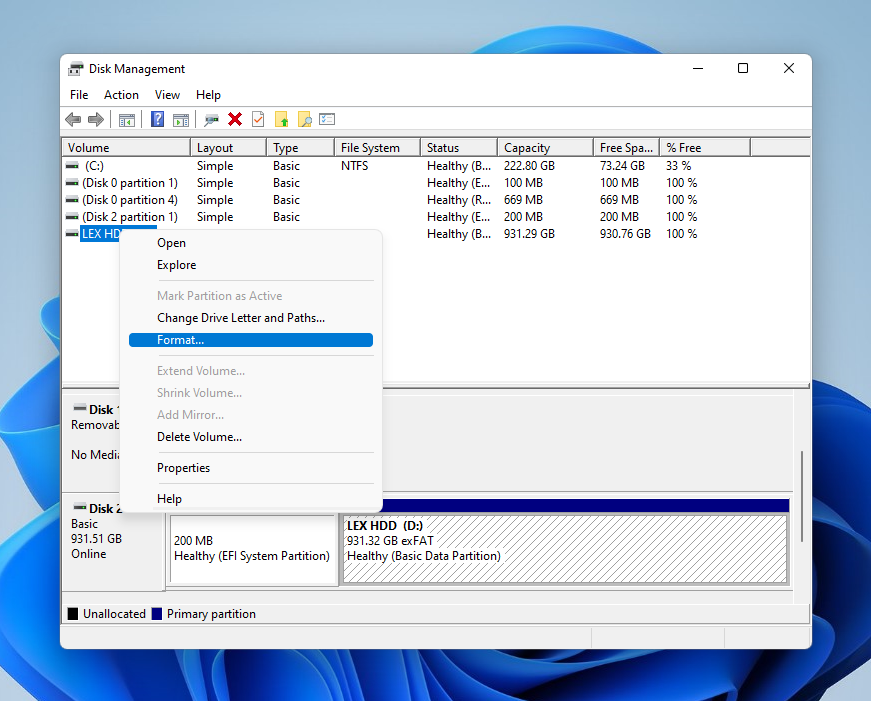
To format your drive in Disk Management:
- Open Disk Management via the Start Menu.
- Select your Toshiba drive from the volume list. Then, right-click your drive and select Format…
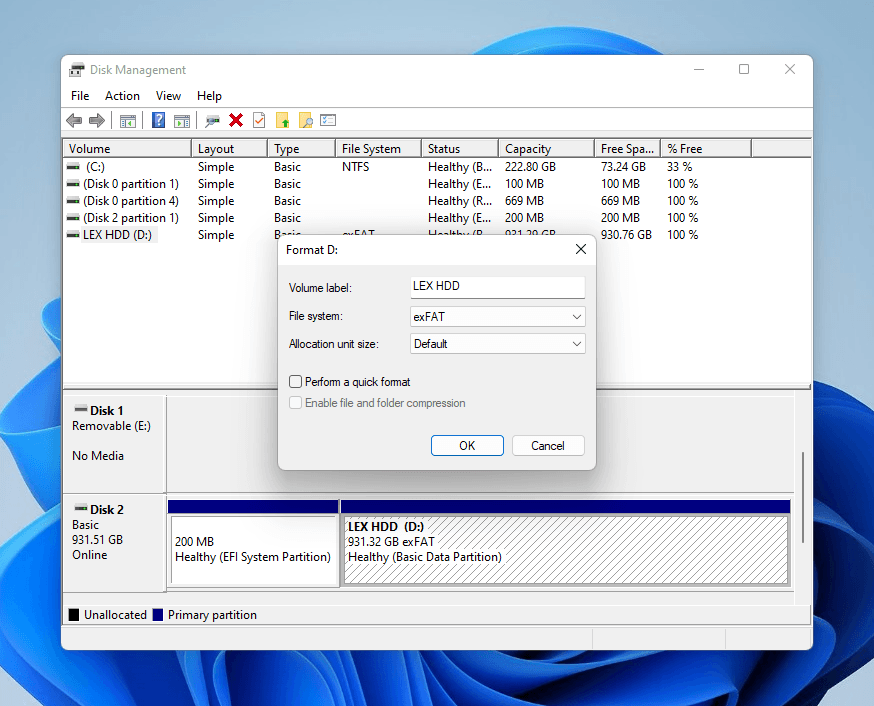
- Name your drive, then select a file system. Then, we recommend that you leave the Perform a quick format option unchecked, so it can also scan for bad sectors. Finally, click OK.
If Windows can’t complete the formatting process, the drive keeps disconnecting, or diagnostics report hardware problems, repeated formatting attempts are unlikely to fix your drive. Replace it.
Method 5: Consider Data Recovery Services
If your Toshiba drive is suffering from mechanical failure, bad sectors, or internal component damage, do not attempt to fix it yourself or attempt to extract your data. These issues are beyond the ability of repair and recovery software.
Instead, we strongly recommend that you send your drive to a professional data recovery service instead. They have the necessary tools and expertise to safely retrieve your data (but repair is highly unlikely). There are several great options you can choose from depending on your location, but here’s the gist of what to look for:
- No Data – No Charge: Some data recovery services offer a “No Data – No Charge” policy or guarantee where you only get charged if you get back the data you originally wanted.
- Free estimate: We recommend only considering services that provide a free estimate or guaranteed price quote after receiving the drive, but before operating on it. This means no surprises on the bill post-recovery.
- Shipping: Make sure to read each service’s shipping policy properly; many offer free inbound shipping, but outbound shipping is rarely covered.
- Expedited recovery: If you need to get your data back ASAP, look for recovery services that offer faster turnaround times–but expect to pay a higher fee.
Final Words
To give you an easy reference you can return to anytime, we boiled down the essentials of our Toshiba recovery and repair guide into a few bullets. You can use the links to instantly jump to the appropriate section of the guide.
- For non-physical Toshiba drive problems, the DIY approach consists of 2 parts: recovering your data (if you don’t have a backup) and repairing your drive. Data recovery comes first because all repair operations have the potential to cause data loss.
- Using data recovery software, like Disk Drill, is the safest and most convenient way to restore files from a Toshiba drive–whether it’s corrupted, you accidentally formatted your drive, or you deleted important files.
- Once your data has been recovered and saved to another drive, you can attempt different DIY repair methods on your Toshiba drive. There are several you can try, but formatting is the easiest fix if you don’t need to preserve anything.
- If your drive doesn’t appear in the system at all, try another cable, USB port, or computer. If that doesn’t work, stop any DIY attempts and contact a professional data recovery service instead.
Does Toshiba itself offer professional data recovery services? We answer this and other common questions in the FAQ below.
FAQ
No, Toshiba doesn’t offer its own hard disk repair or recovery service. It does provide a free diagnostics software called the Toshiba Storage Diagnostic tool, which you can download from the company’s website. It’s useful for checking the health of your drive, but it can’t fix it.
Toshiba doesn’t offer its own official recovery service. Instead, you’ll need to rely on third-party professional data recovery services (here’s our list of the best ones). The cost of recovery depends on several factors; based on our research, the range usually falls between $300 and $1,000. Expect to pay more for expedited service and severely damaged drives.
No, Toshiba doesn’t have its own data recovery software. The Toshiba Storage Diagnostic Tool can only scan your drive for errors, which is useful before data loss. Instead, you’ll need to rely on third-party data recovery software.
If you’re willing to do a bit of research, there are several data recovery software programs you can choose from. But we recommend Disk Drill because it’s easy to use for beginners, supports all modern Windows file systems (NTFS, ExFAT, FAT32), and works for RAW or corrupted drives, as long as they appear in Disk Management. You can also recover up to 100 MB of data for free, which should be enough for several important files and to test the software’s capabilities.
These are the general steps to recover a Toshiba hard drive:
- Immediately stop saving any new files to your drive.
- Download and install third-party data recovery software on your computer.
- Use data recovery software to scan your drive and retrieve your files.
- If your drive is corrupted, you can format it or attempt repairs (with CHKDSK or TestDisk) once your files are safe.
Note that DIY repair and recovery methods are only advisable for logically damaged drives. If your drive is physically damaged, contact a professional data recovery service instead.
If your Toshiba drive is physically damaged, only professional data recovery services can handle it safely (for getting your files back, not repairing it–you can only replace a broken drive). If you don’t spot any damage, follow these steps:
- Use data recovery software to recover or back up your data immediately.
- Once your files are safe, try running the CHKDSK command on your Toshiba drive. If a partition is missing or your drive appears as RAW, use TestDisk instead (be careful with this tool).
- If CHKDSK and TestDisk don’t work, or you want a simpler solution that doesn’t require manually repairing the errors, format your drive instead.
