


Noticed that some or all of your files have vanished from your Seagate external hard drive? Maybe you deleted them by mistake, or maybe Windows prompted you to format it and you ran with it without knowing the consequences. In most cases, you can actually get this data back with ease, so long as you stop writing to the drive. This guide breaks down everything needed to recover files from a Seagate external hard drive, and even restore it to working order afterward. We’ve helped many Seagate owners recover their data over the years using this exact advice.
What to Check Before Seagate Hard Drive Recovery
It matters less than you would think how the data disappeared. Deleted files, a formatted drive, a drive appearing as RAW: the same short checklist comes first to determine whether software can help or not.
When you’re ready, we’ll check the drive’s status in Disk Management to confirm (1) it’s recognized, and (2) it’s reading the correct capacity:
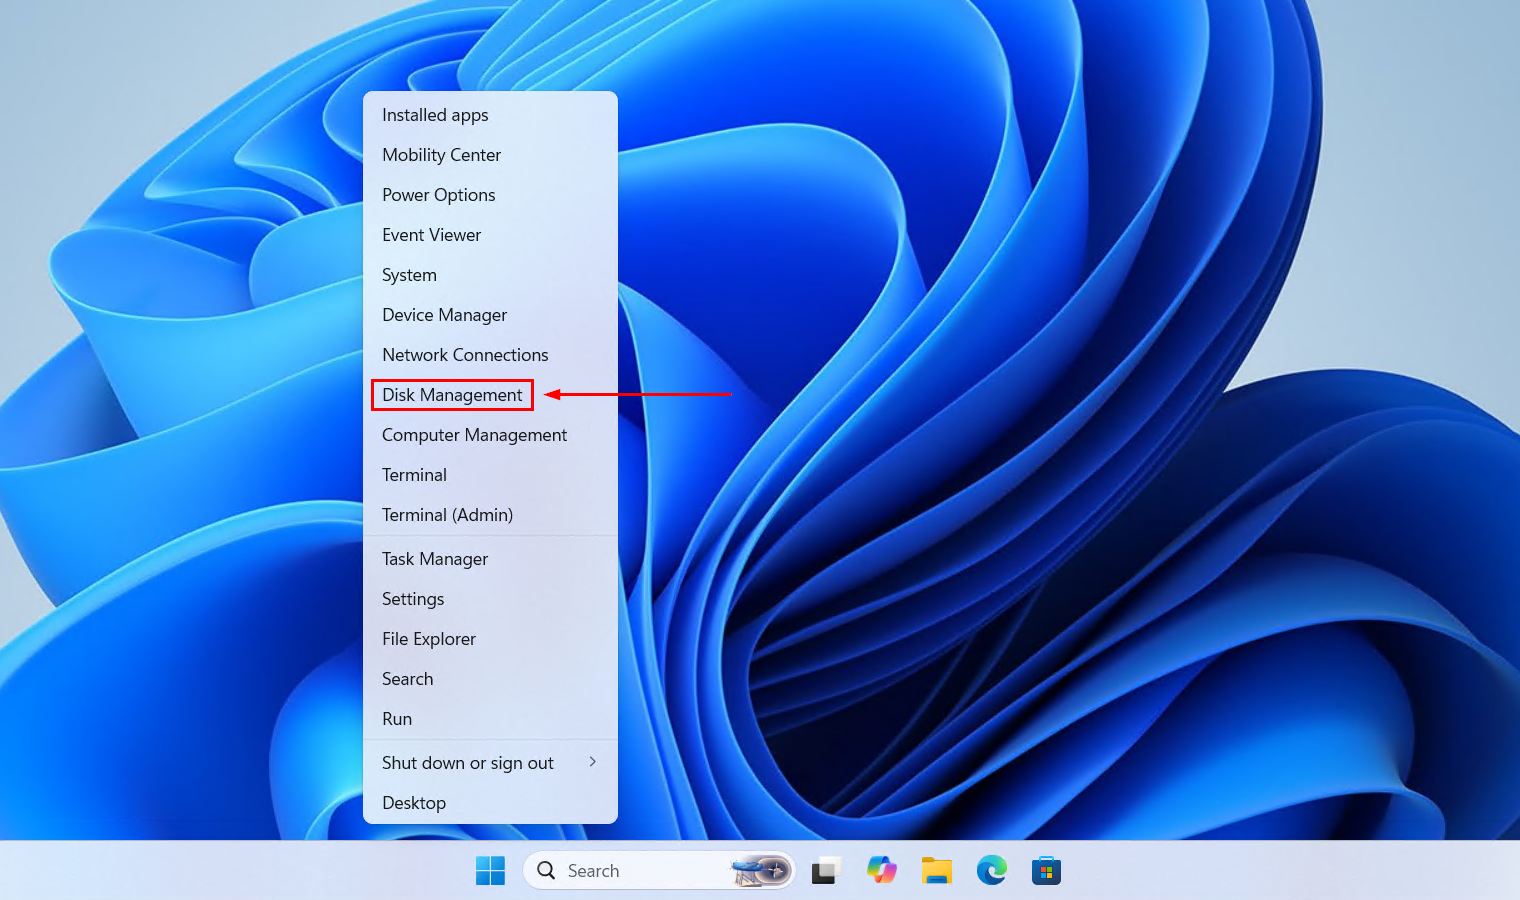
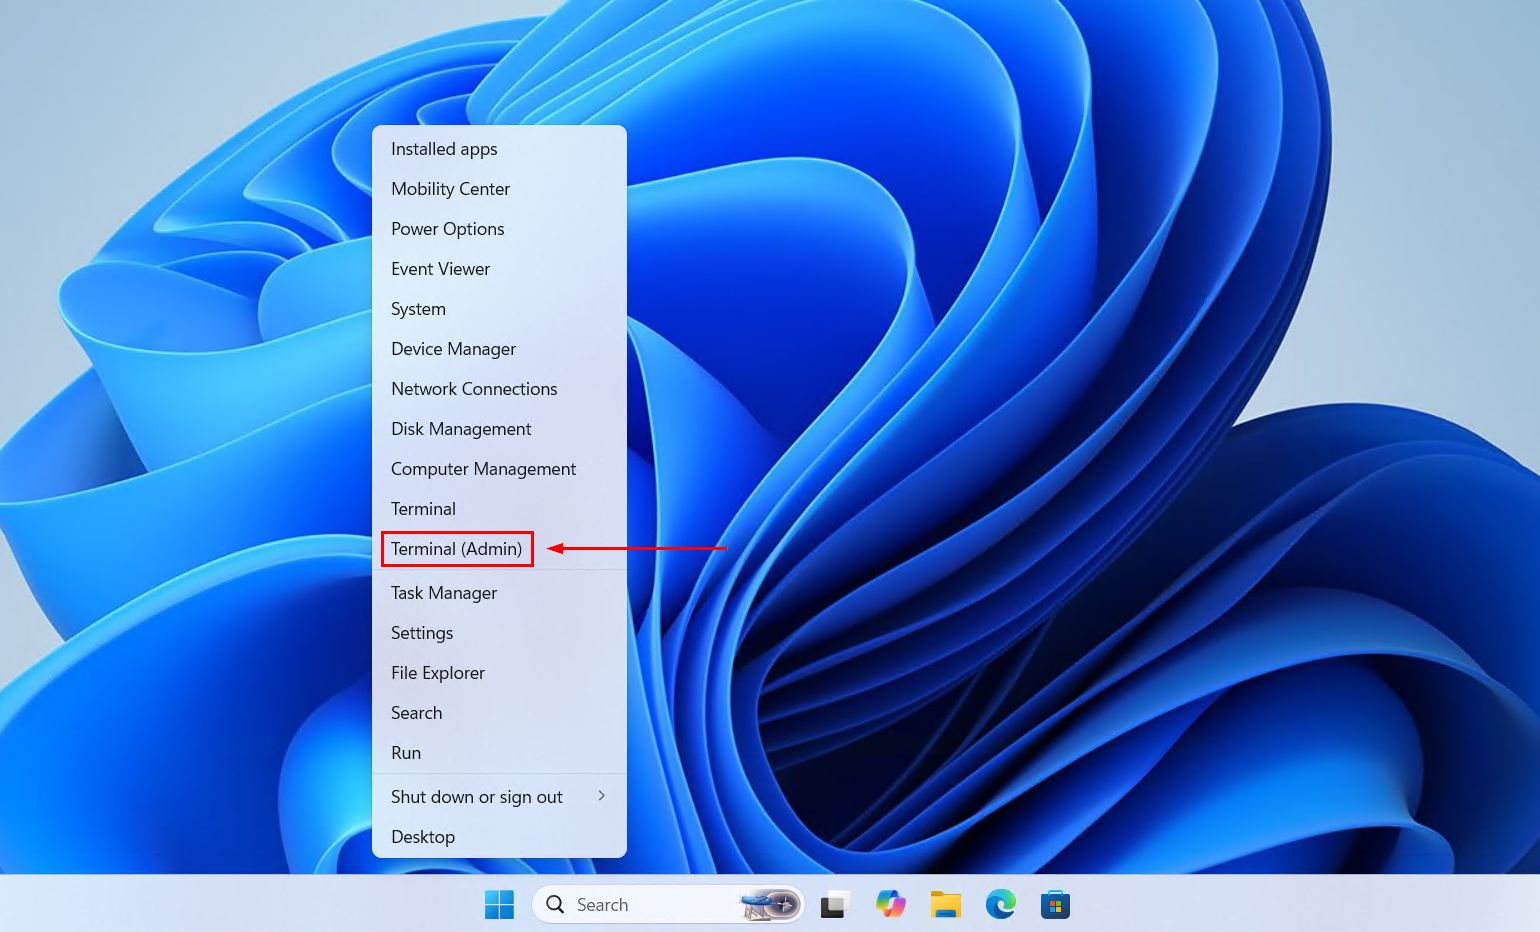
- Right-click Start and click Disk Management.
- Make sure the Seagate drive is visible and showing the correct storage size.
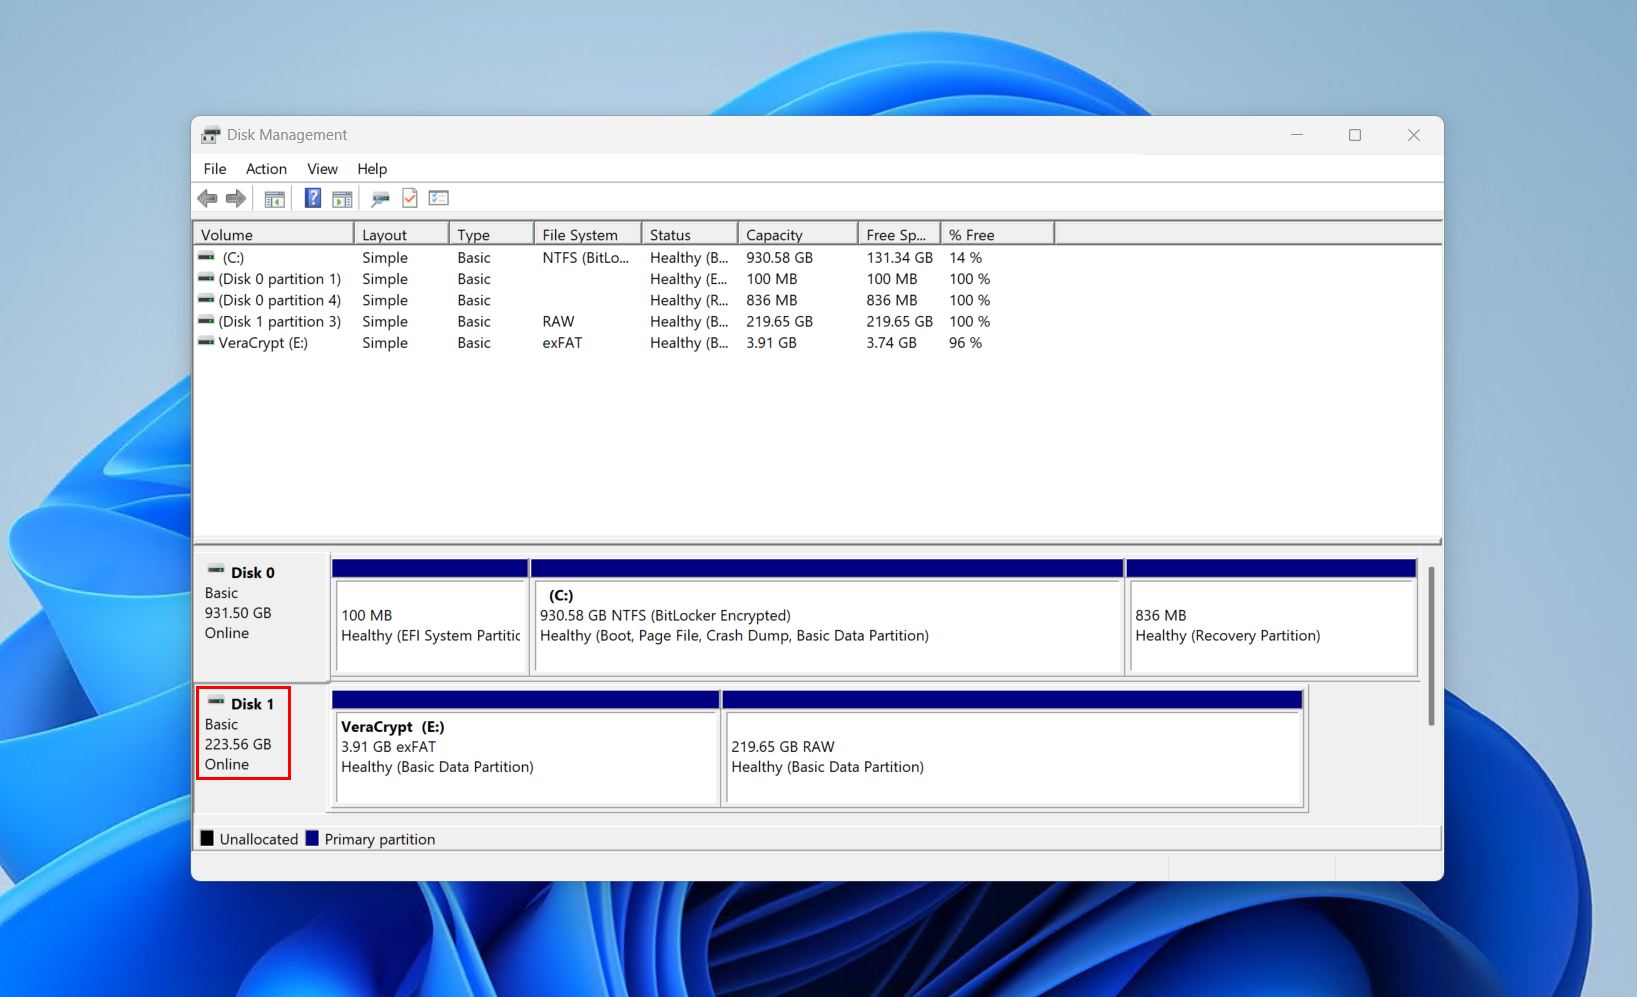
If the drive isn’t appearing in Disk Management, check that the USB cable is securely connected, and try an alternate cable if you have one on-hand. It’s also a good idea to try another port, and even another computer entirely. If none of that works, see our guide on recovering data from an external hard drive that’s not detected for your next steps.
How to Recover Data From a Seagate External Hard Drive
After confirmation that the drive is detected and reporting its correct capacity, Seagate hard drive data recovery is a do-it-yourself job. All you need is dedicated data recovery software, which reads every sector on the disk instead of relying solely on what Windows sees.
Disk Drill is our go-to recovery solution for Seagate external hard drives. Its low-level scan reaches every part of the disk and bypasses typical obstructions and error messages presented by RAW file systems, corrupted or damaged file systems, and drives that appear in Disk Management but won’t open properly. It uses a mix of metadata and file carving-based scan methods to recover data that’s been accidentally deleted, quick formatted, or lost due to partition deletion.
Follow these steps to recover data from a Seagate external hard drive with Disk Drill:
- Download Disk Drill. After it’s installed, open it.
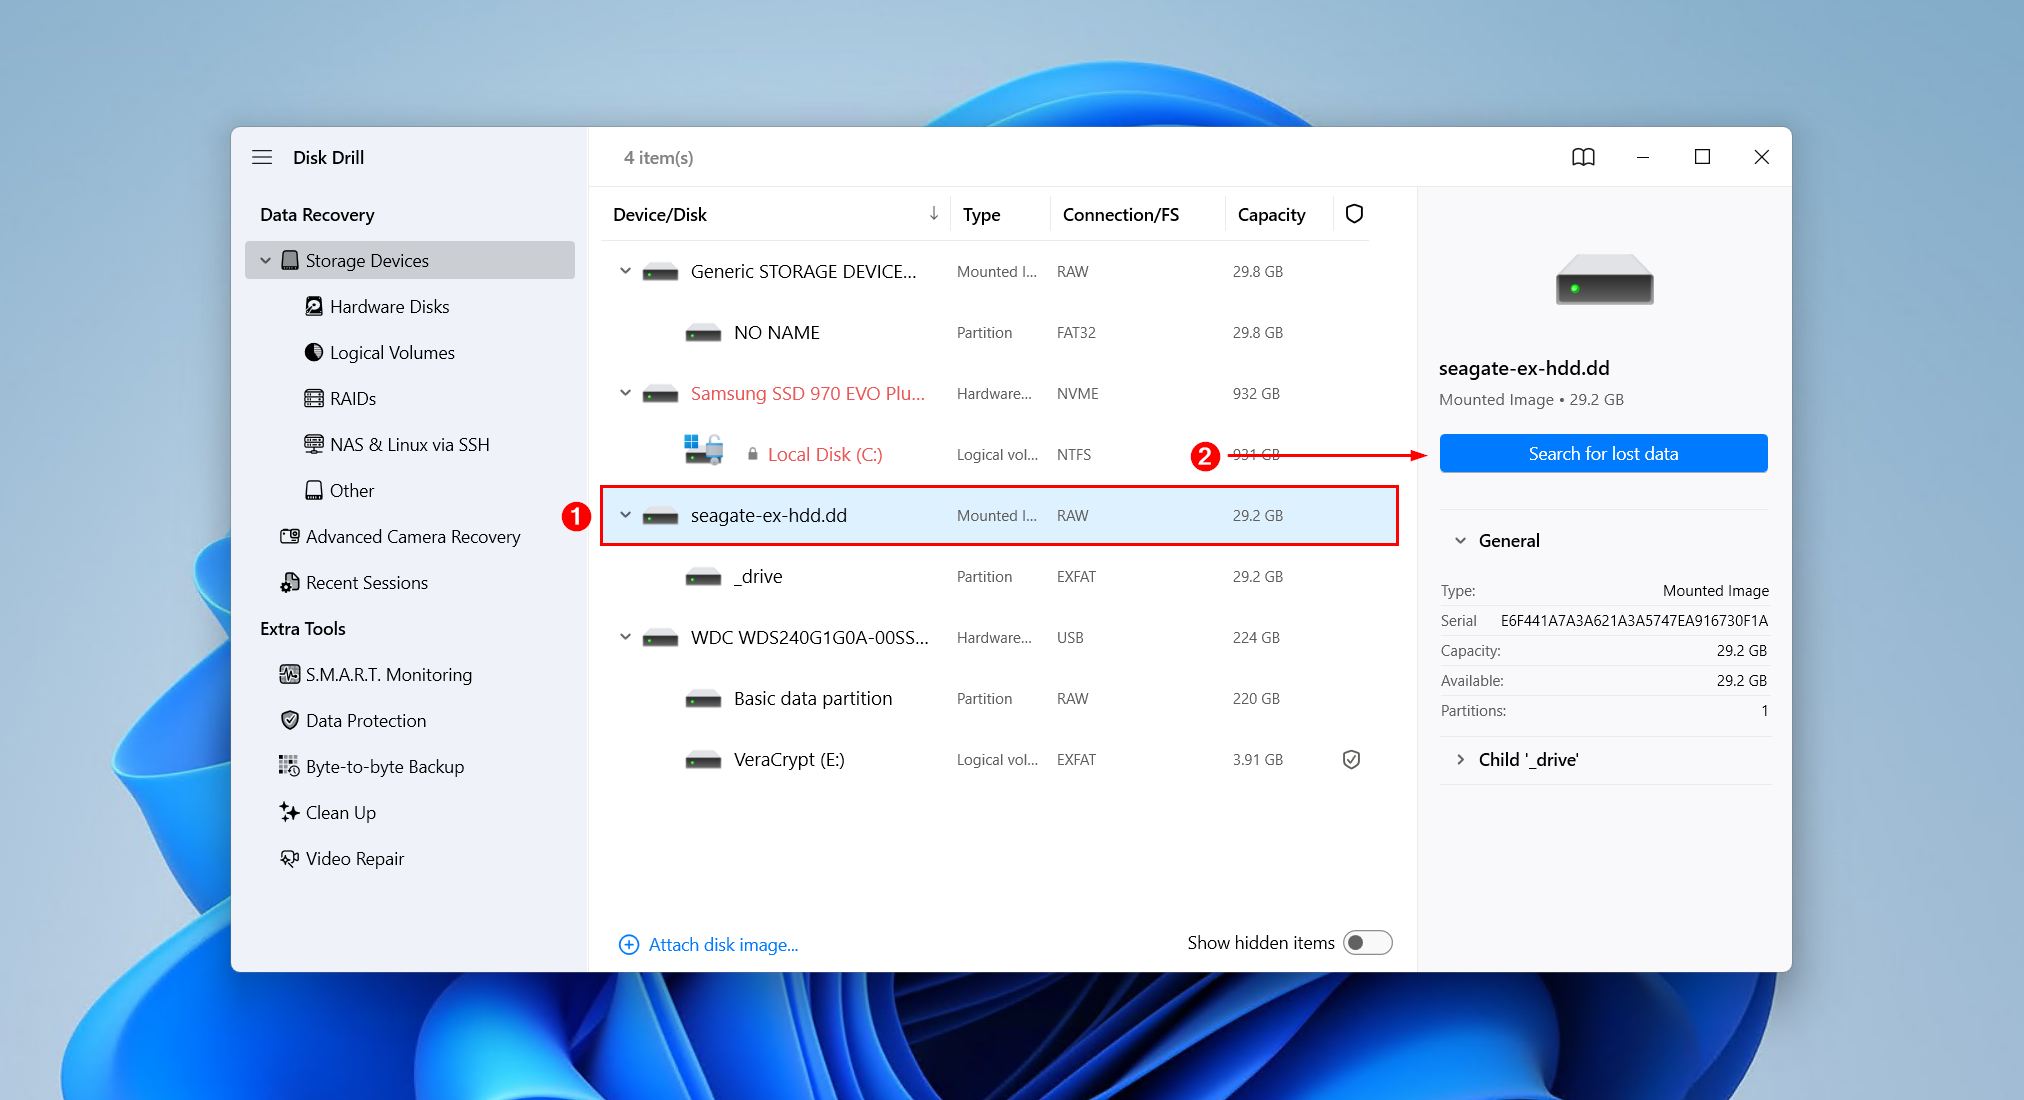
- Select your Seagate Drive (or drive image) and click Search for lost data.
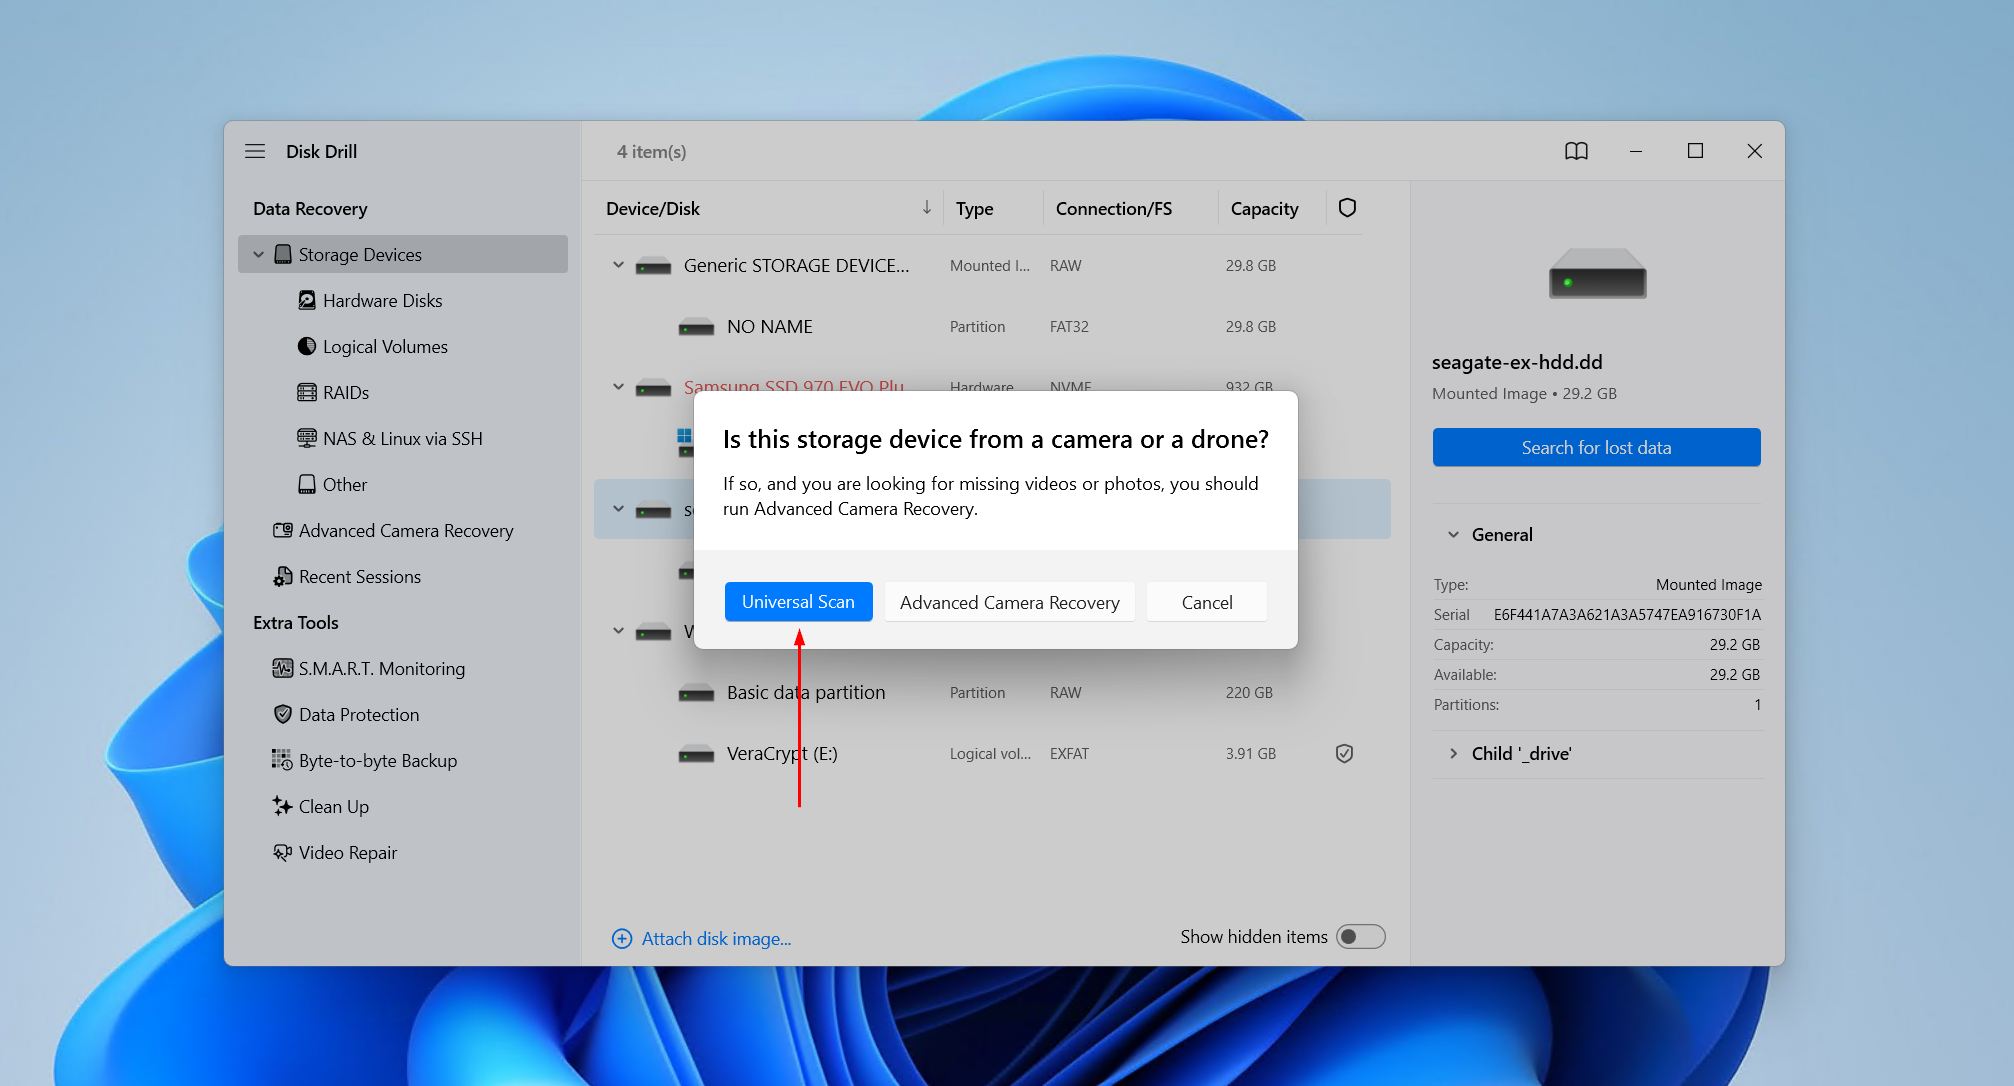
- If suggested, click Universal Scan to scan for all possible data. Advanced Camera Recovery is best for recovering fragmented videos from cameras and drones.
- Click Review found items to see what Disk Drill found. If you simply want to restore everything, click Recover all instead.
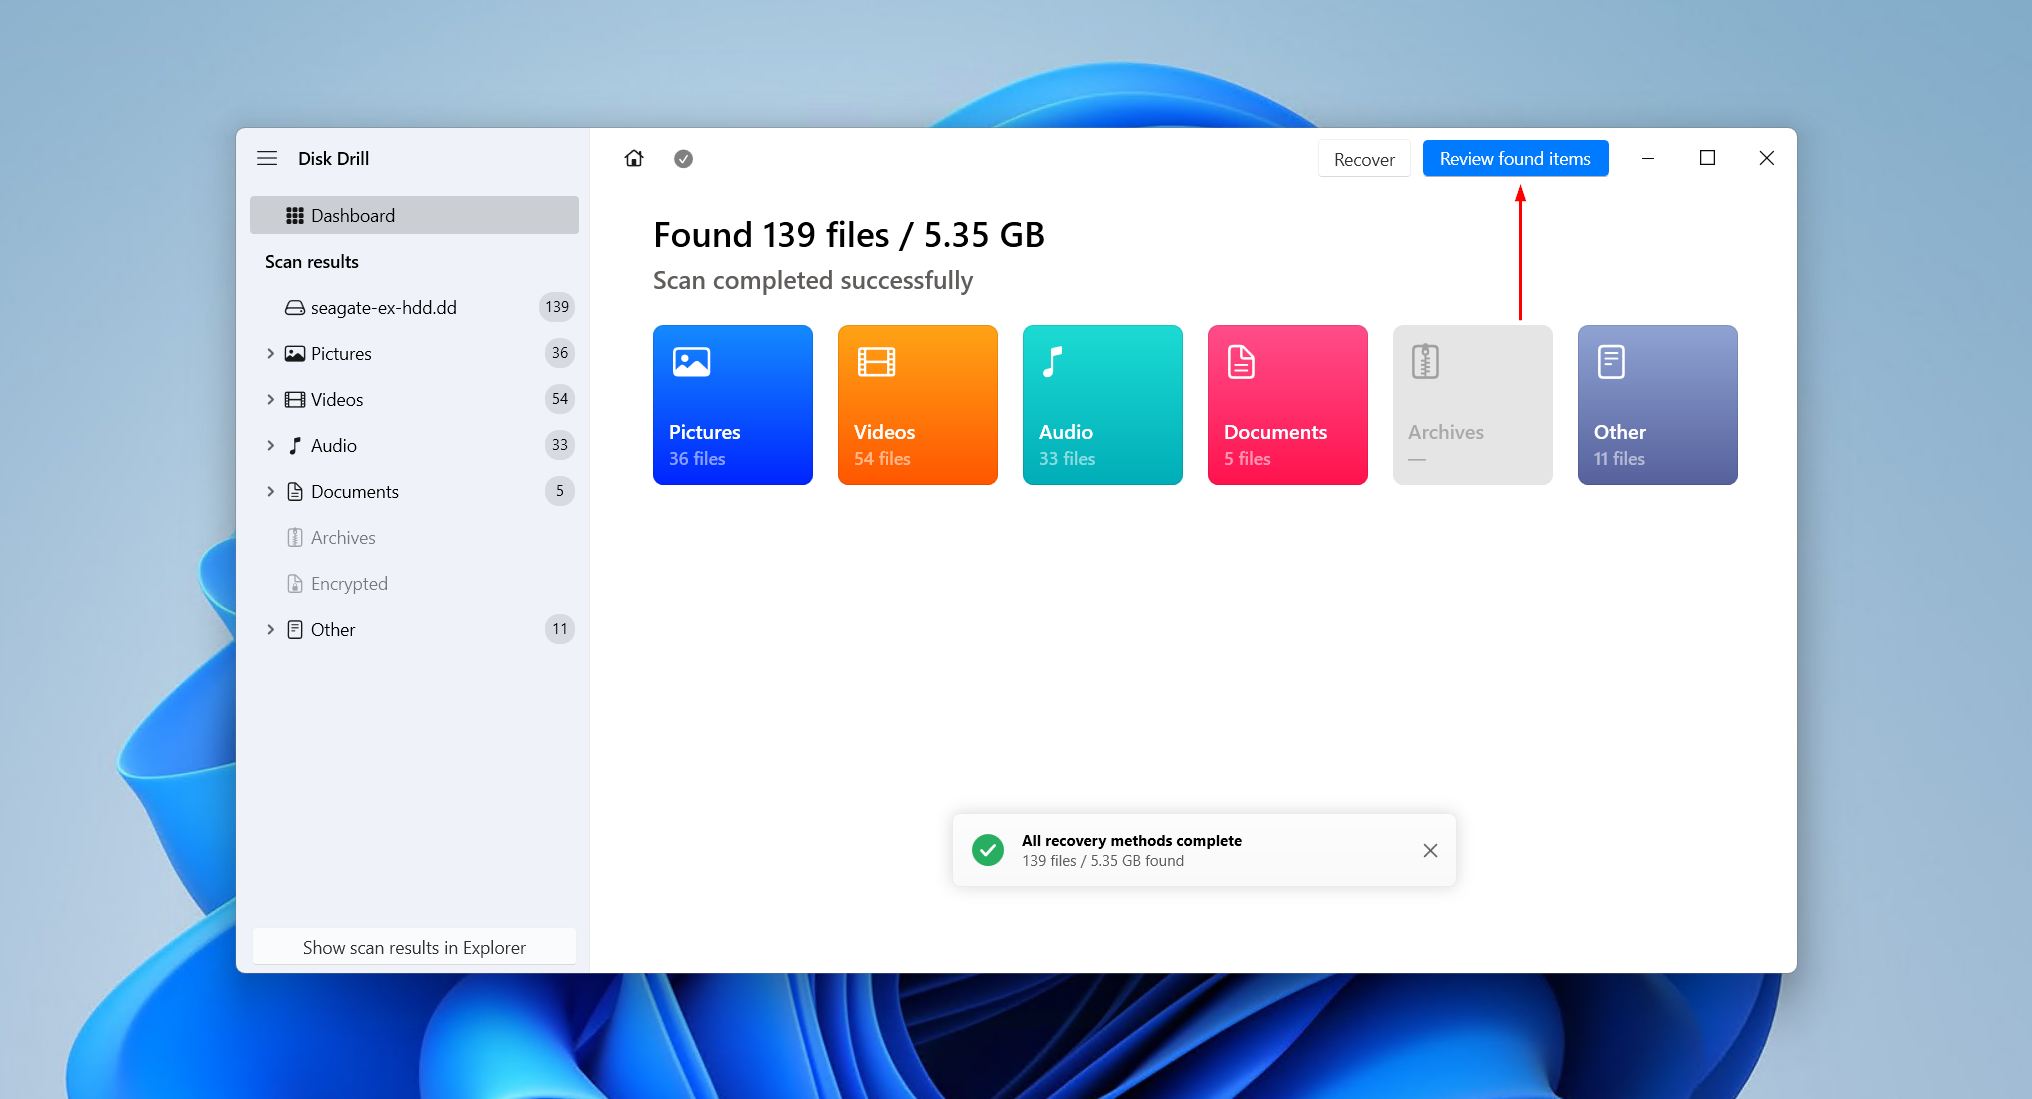
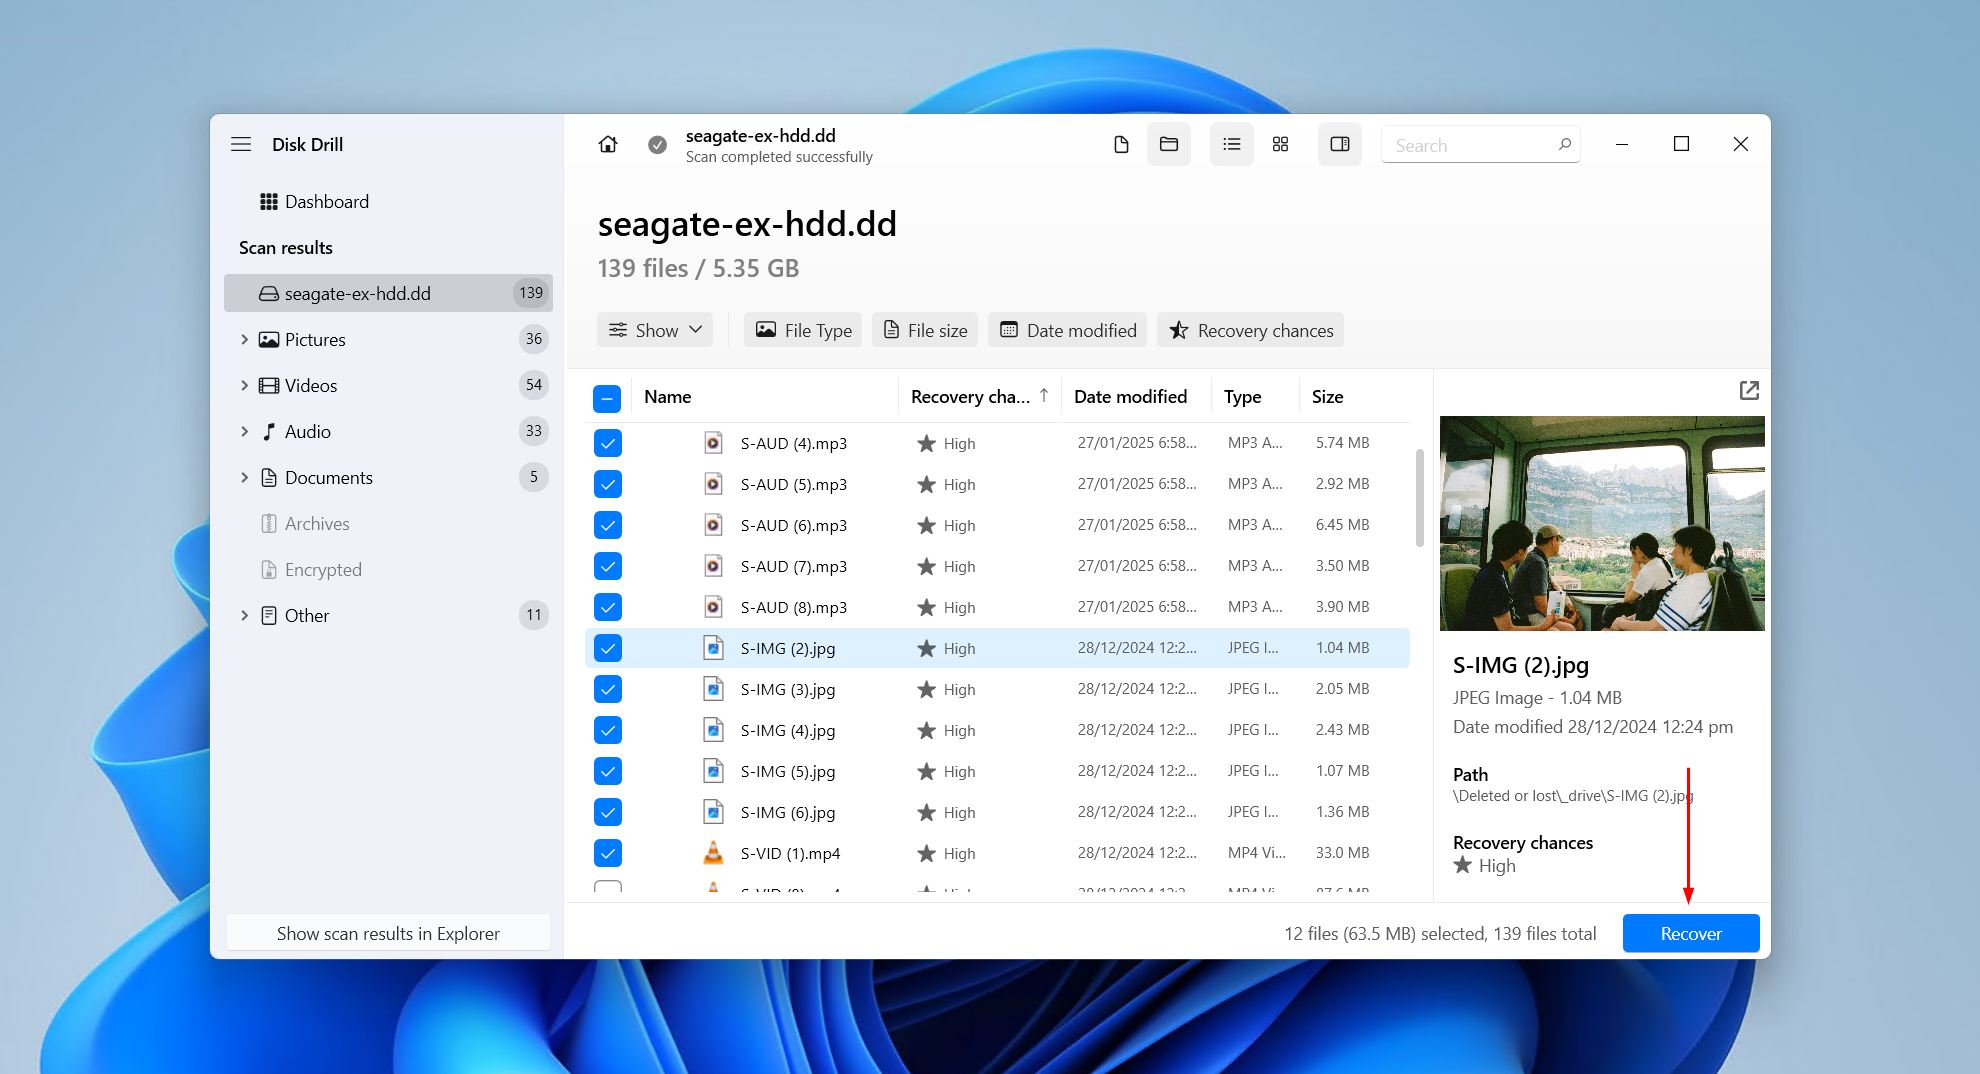
- Preview and select the Seagate files you want to recover. If the search results are long, use the filter options to home in on the data you actually want. Pay special attention to the Deleted or lost and Reconstructed dropdowns if your files were deleted. Click Recover when ready.
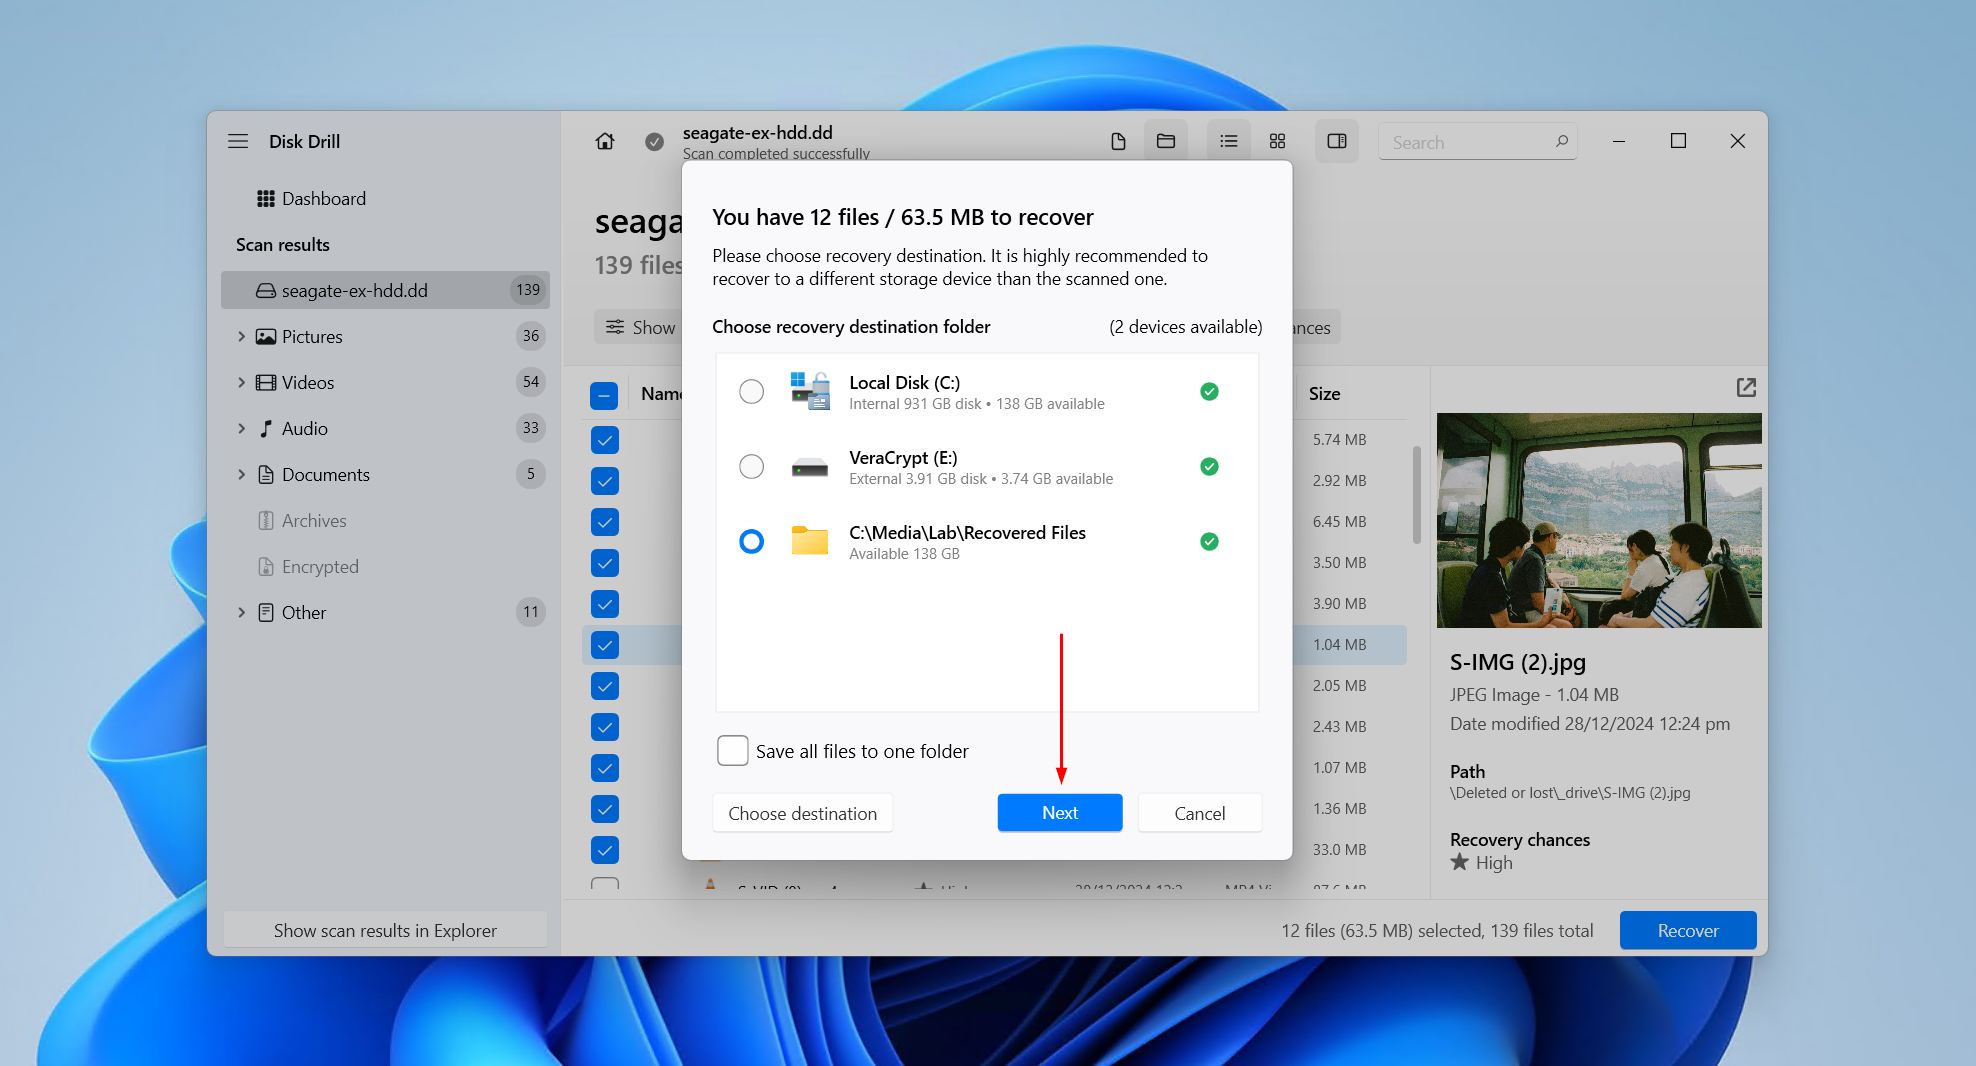
- Choose where the recovered files will be stored. Don’t choose anywhere on the same Seagate drive. Click Next to finish the recovery process.
How to Fix Seagate Hard Drive Problems
If you only needed to recover those missing files, there may be nothing to fix at all. But if your Seagate drive is throwing errors, has a volume that won’t open, shows as RAW, or is still missing from File Explorer, then there are a few fixes available to you.
Method 1: Run CHKDSK to Fix Errors
Windows includes CHKDSK, a file system repair tool that can fix problems on Seagate drives like file system errors, a corrupted directory structure, files that won’t open, and Windows messages prompting you to repair the drive.
Follow these steps to run CHKDSK on your Seagate drive:
- Right-click Start and click Terminal (Admin). Approve the permission prompt.
- Type chkdsk *: /r, replacing * with the drive letter of your Seagate external HDD. Press Enter.
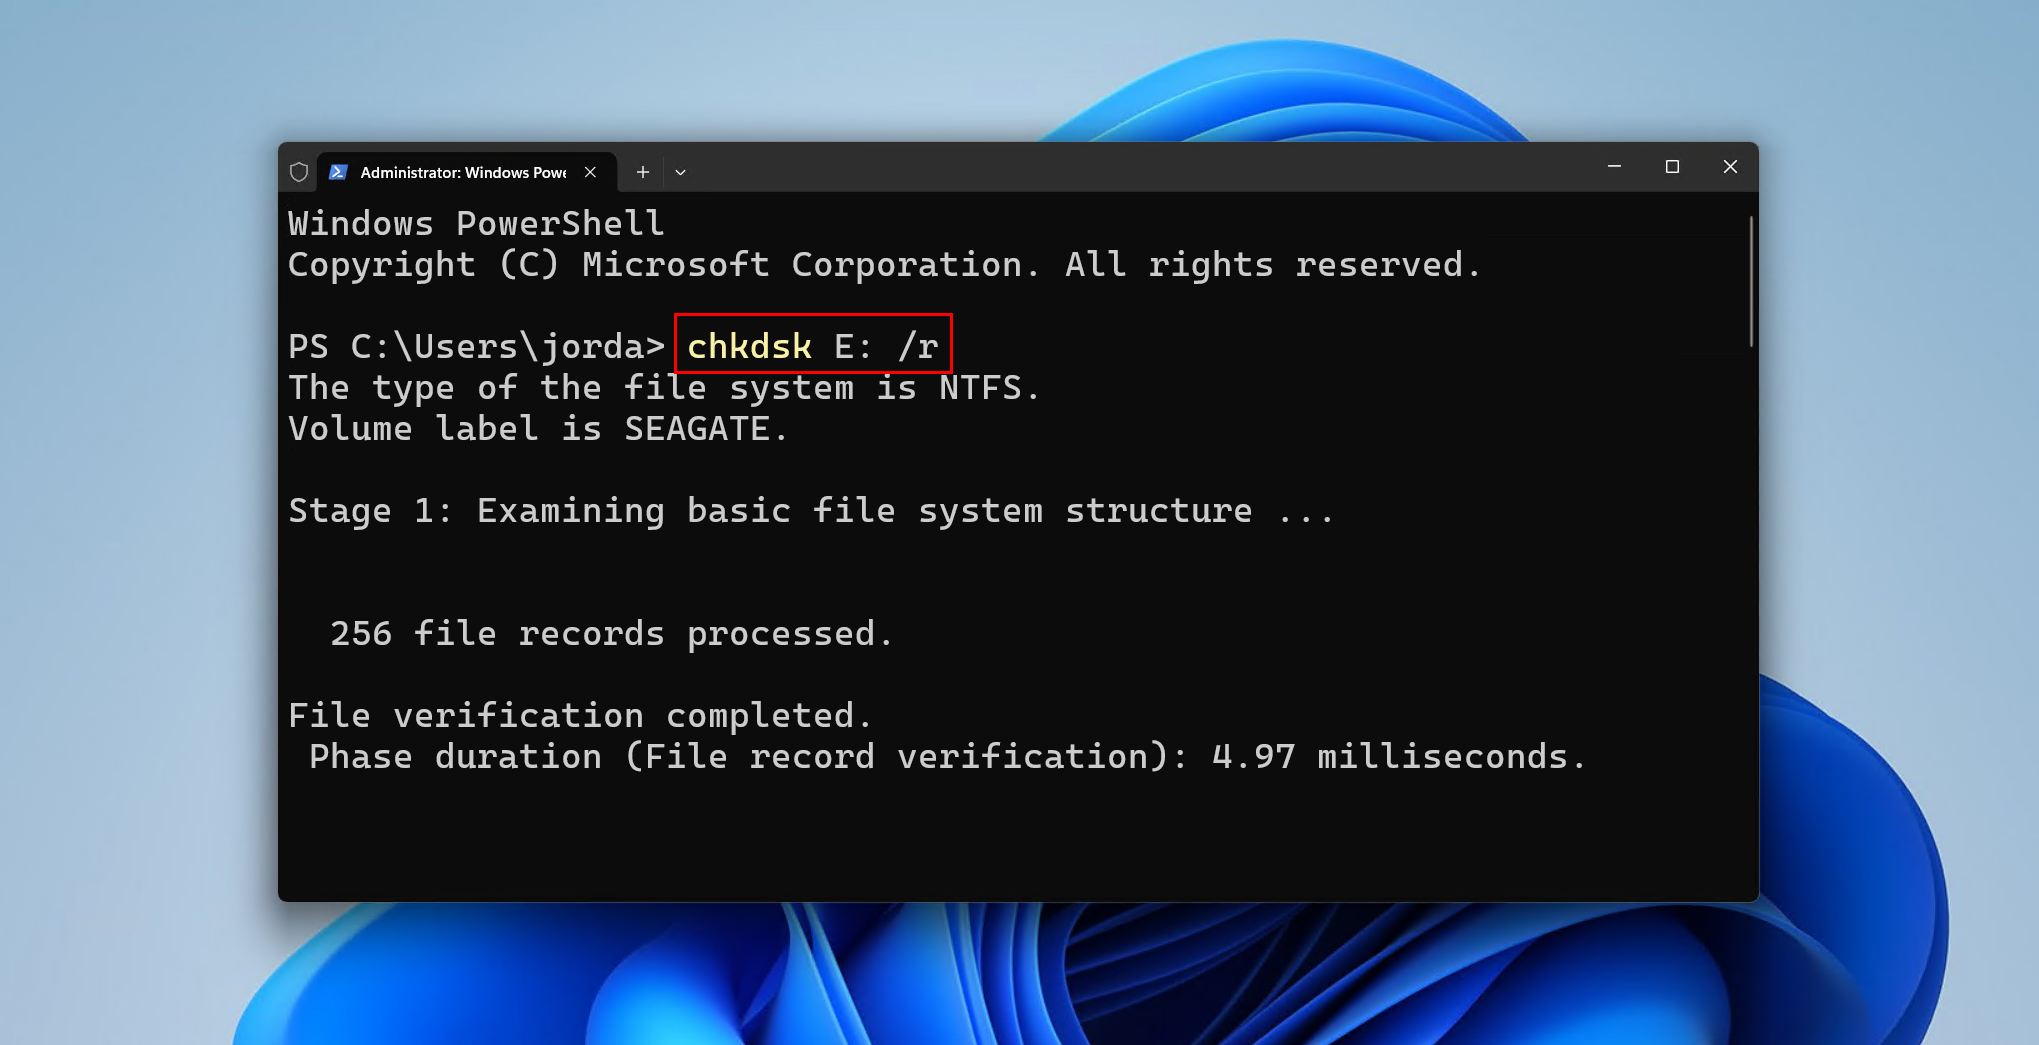
CHKDSK won’t work for RAW drives that don’t have an intact file system, with the exception of an NTFS volume that’s missing its boot sector. If CHKDSK isn’t working, reformatting is the next option.
Method 2: Reformat the Seagate Drive
If the Seagate drive’s S.M.A.R.T. status is fine and the issues are purely logical (software-related), formatting is enough to restore the drive to working order by building a fresh, empty file system.
These steps will guide you through quick formatting a Seagate external hard drive:
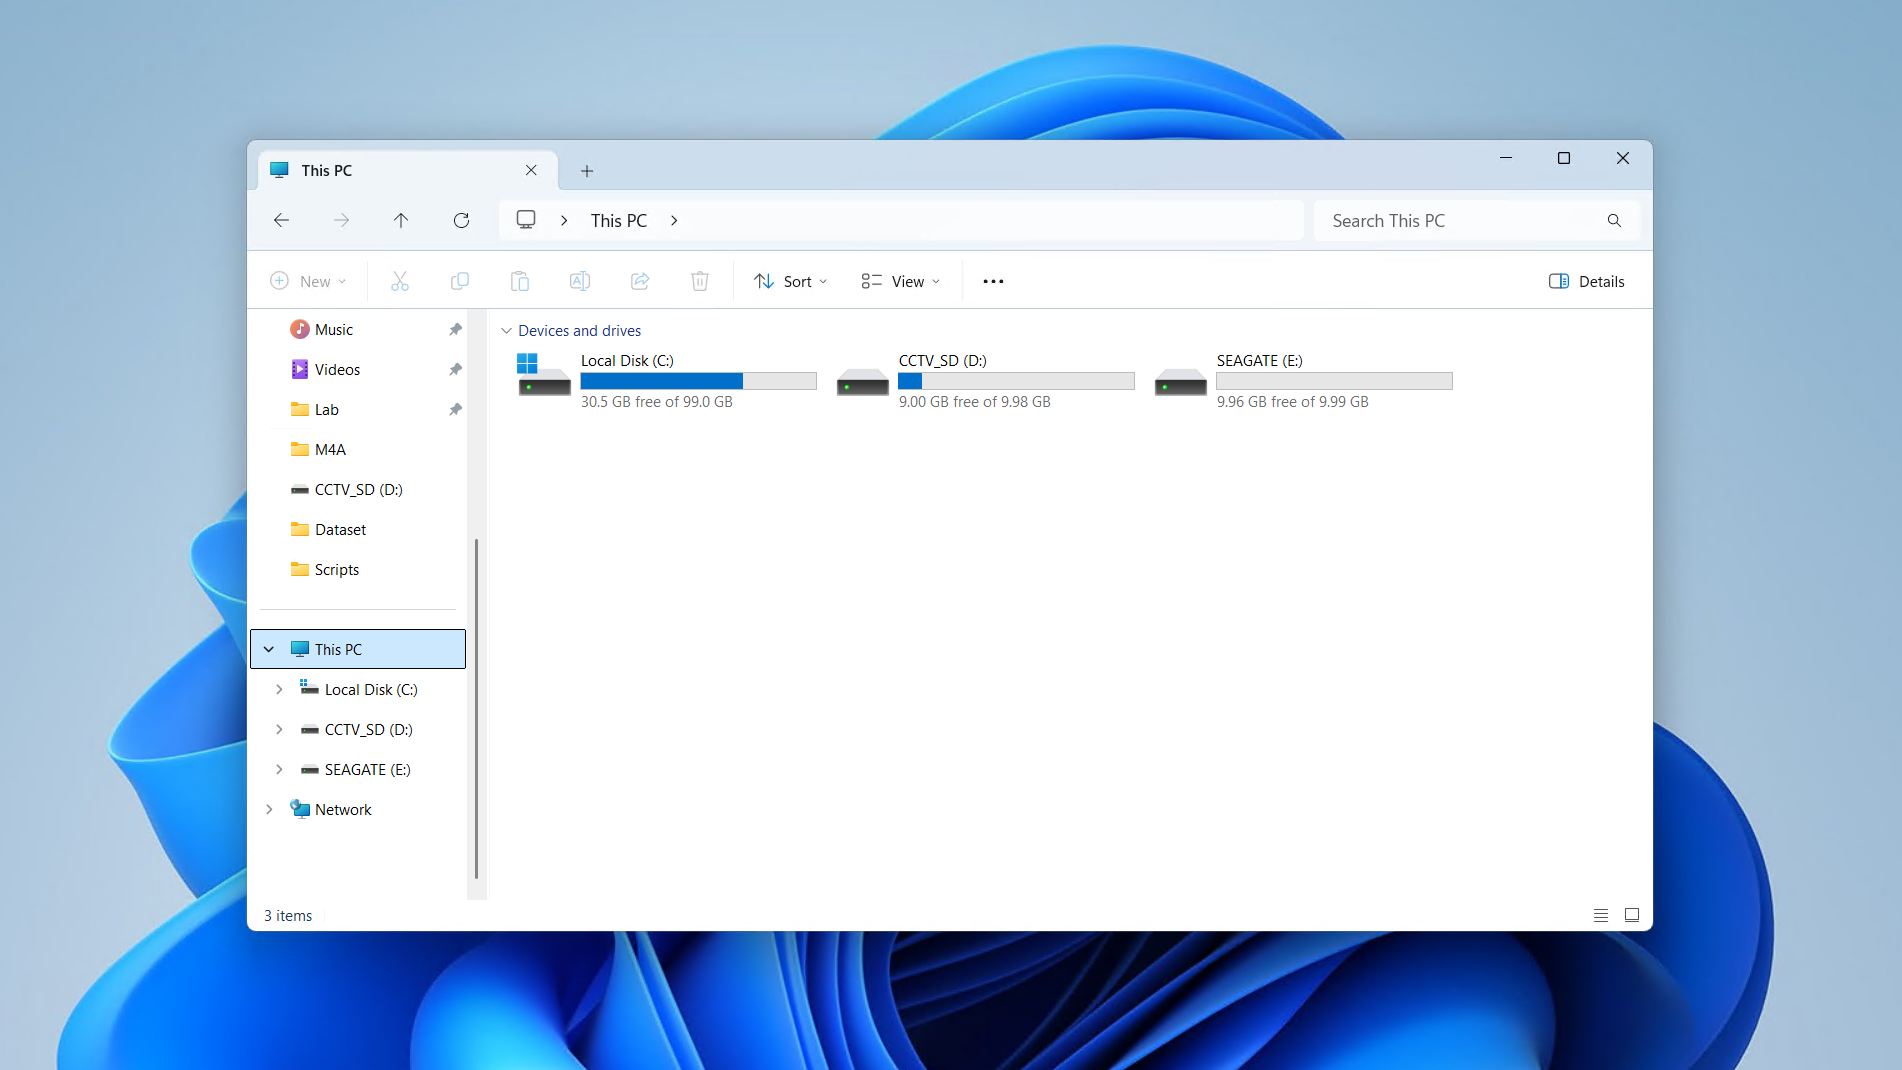
- Open File Explorer, then click This PC. Locate your Seagate external hard drive in the list based on its letter and capacity.
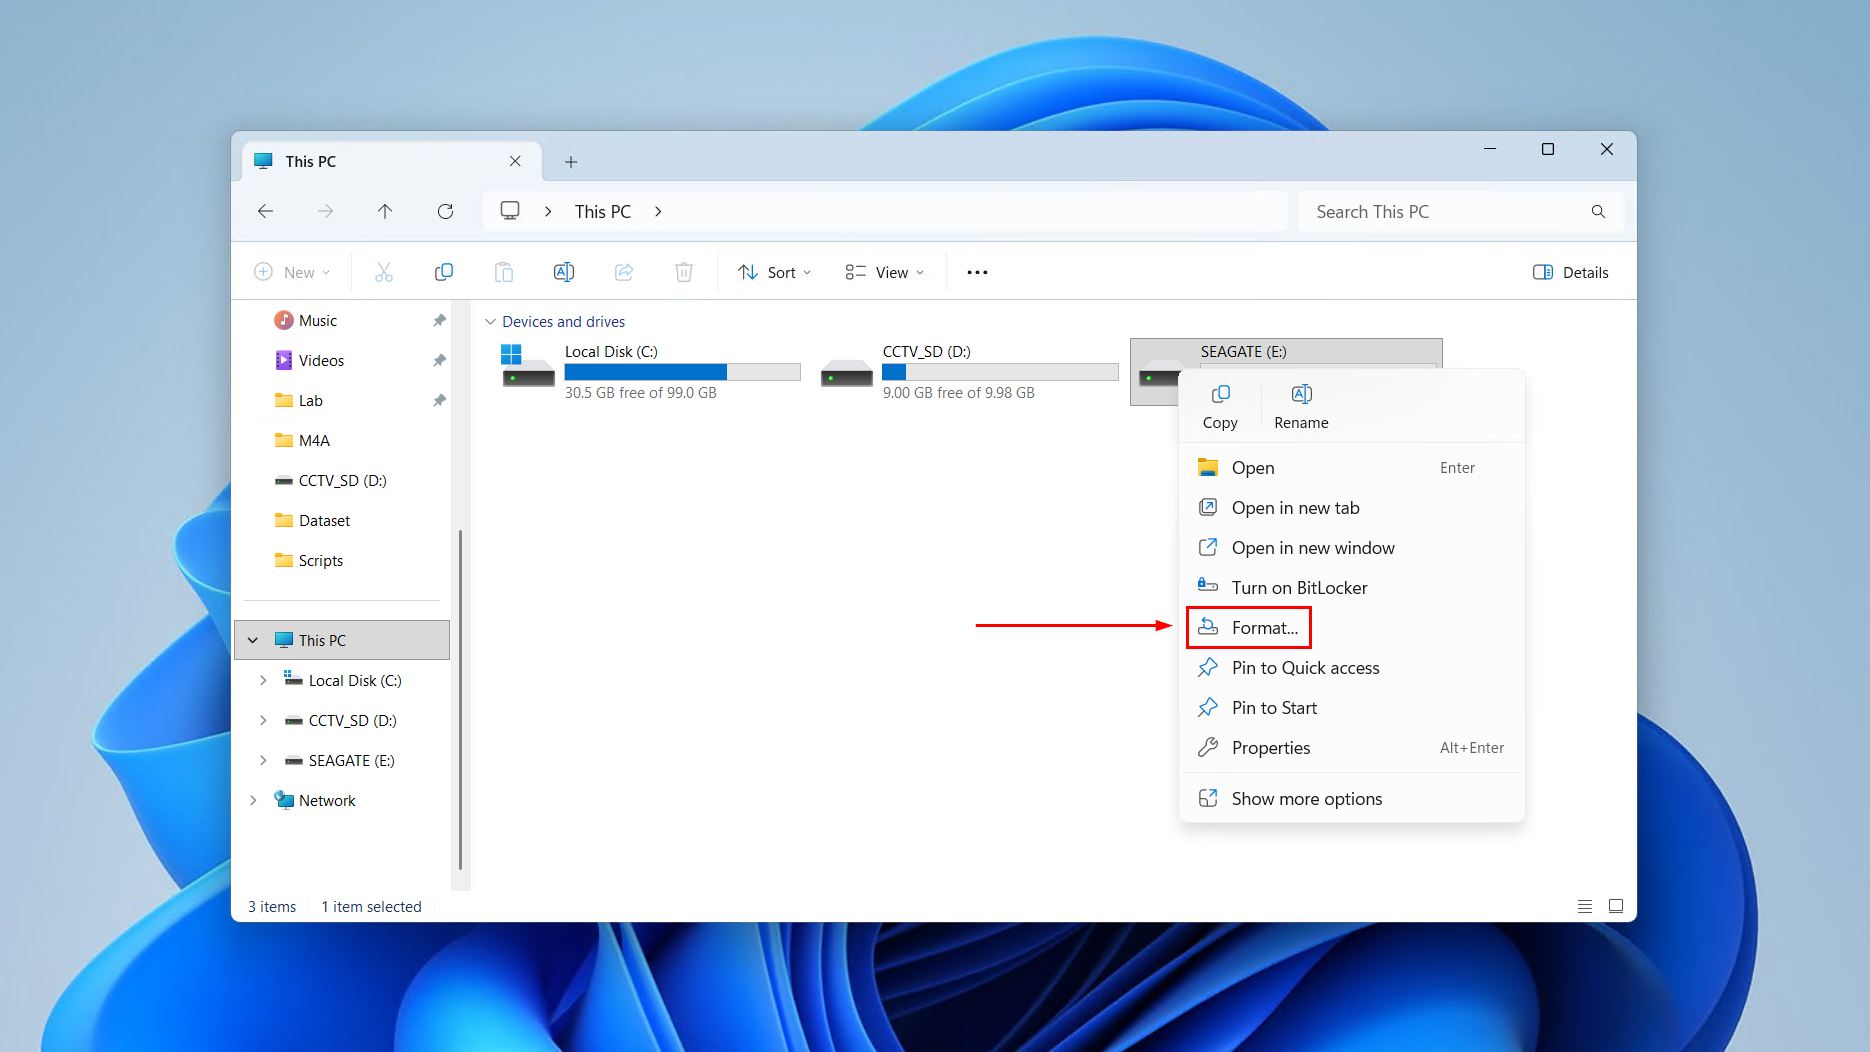
- Right-click the Seagate drive, then click Format.
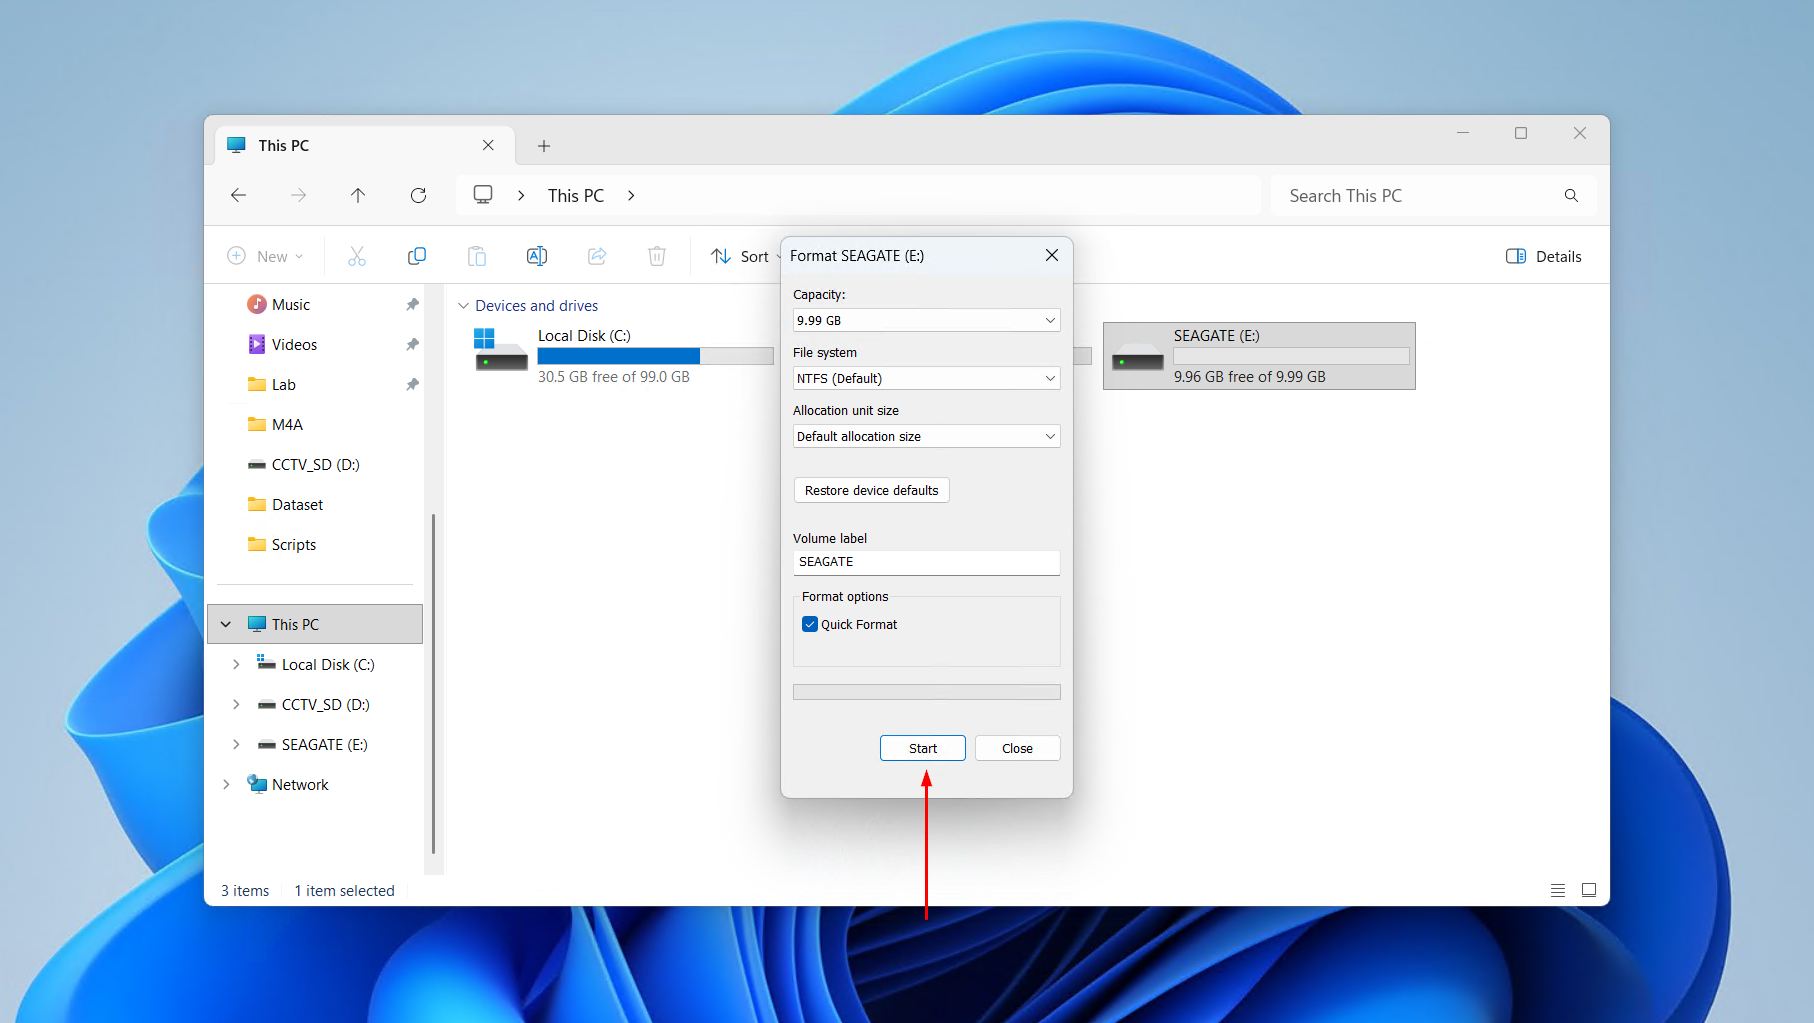
- Update the parameters according to how the drive will be used.
- File system: NTFS for drives used with Windows, exFAT for compatibility across operating systems and platforms.
- Allocation unit size: Set to Default allocation size.
- Volume label: The name associated with the drive.
- Quick format: Leave ticked to perform a quick format (recommended). Untick to perform a full format.
- Click Start, then OK to confirm.
What Recovery Tools and Services Does Seagate Offer?
No guide to Seagate hard drive recovery is complete without looking at what Seagate itself provides, which is a free diagnostic tool and a paid recovery service.
Seagate SeaTools
SeaTools is Seagate’s official drive health utility that’s available for free. It doesn’t recover files, but it’s not supposed to. Instead, it acts as an easy way to verify the integrity of your drive after the data is recovered.
This is how you use SeaTools to diagnose a Seagate drive:
- Download, install, and launch SeaTools. This process involves selecting your language and agreeing to the end user agreement.
- Select your Seagate drive by clicking it to highlight.
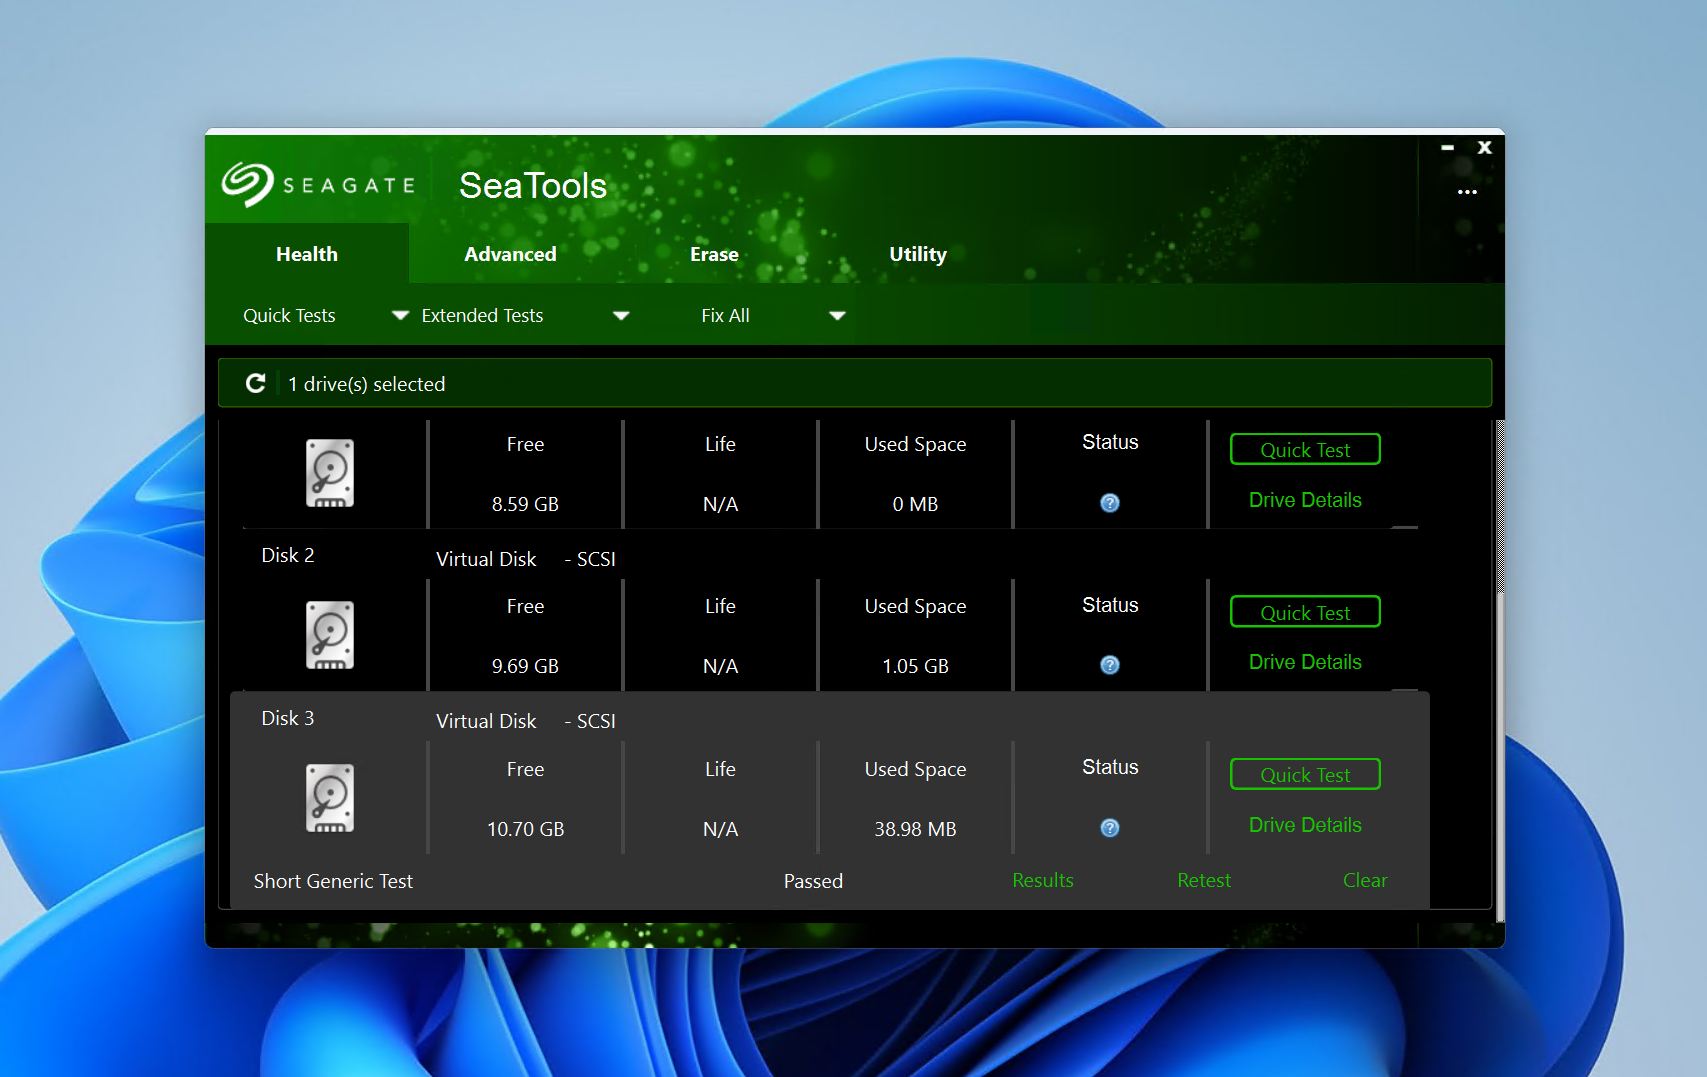
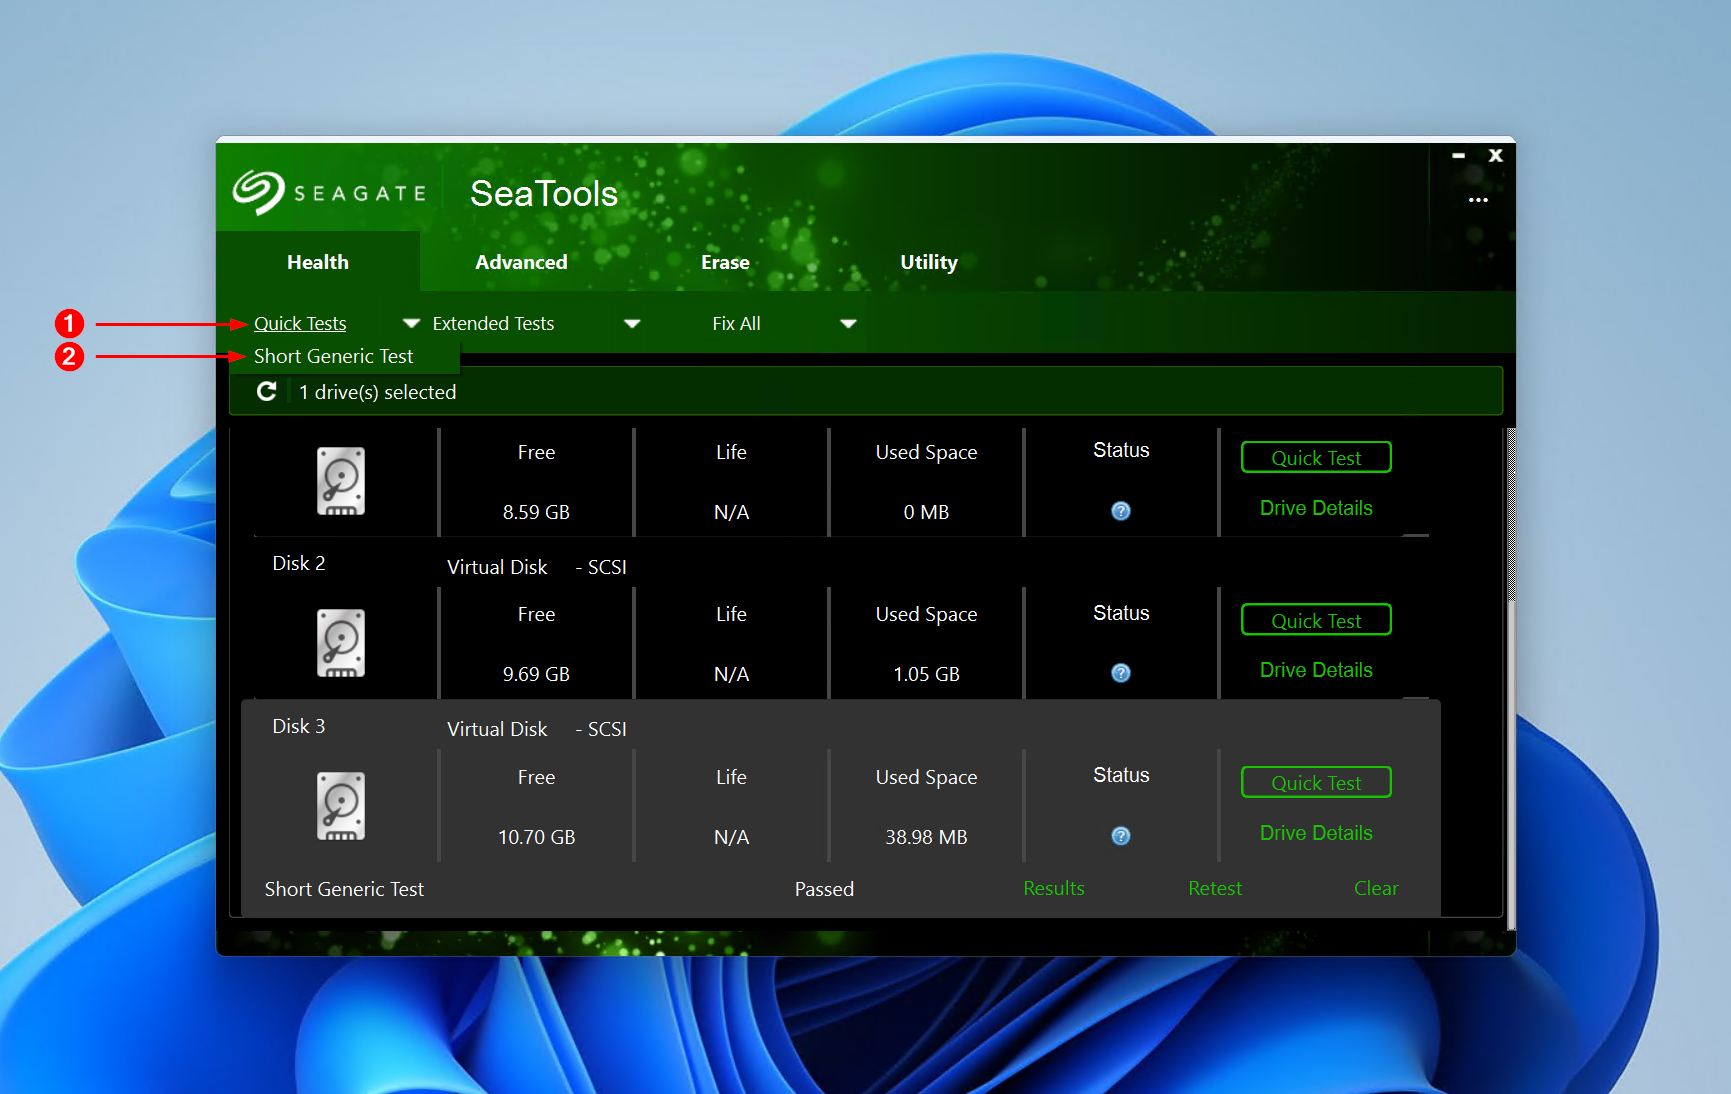
- Click on Quick Tests, then click Short Generic Test.
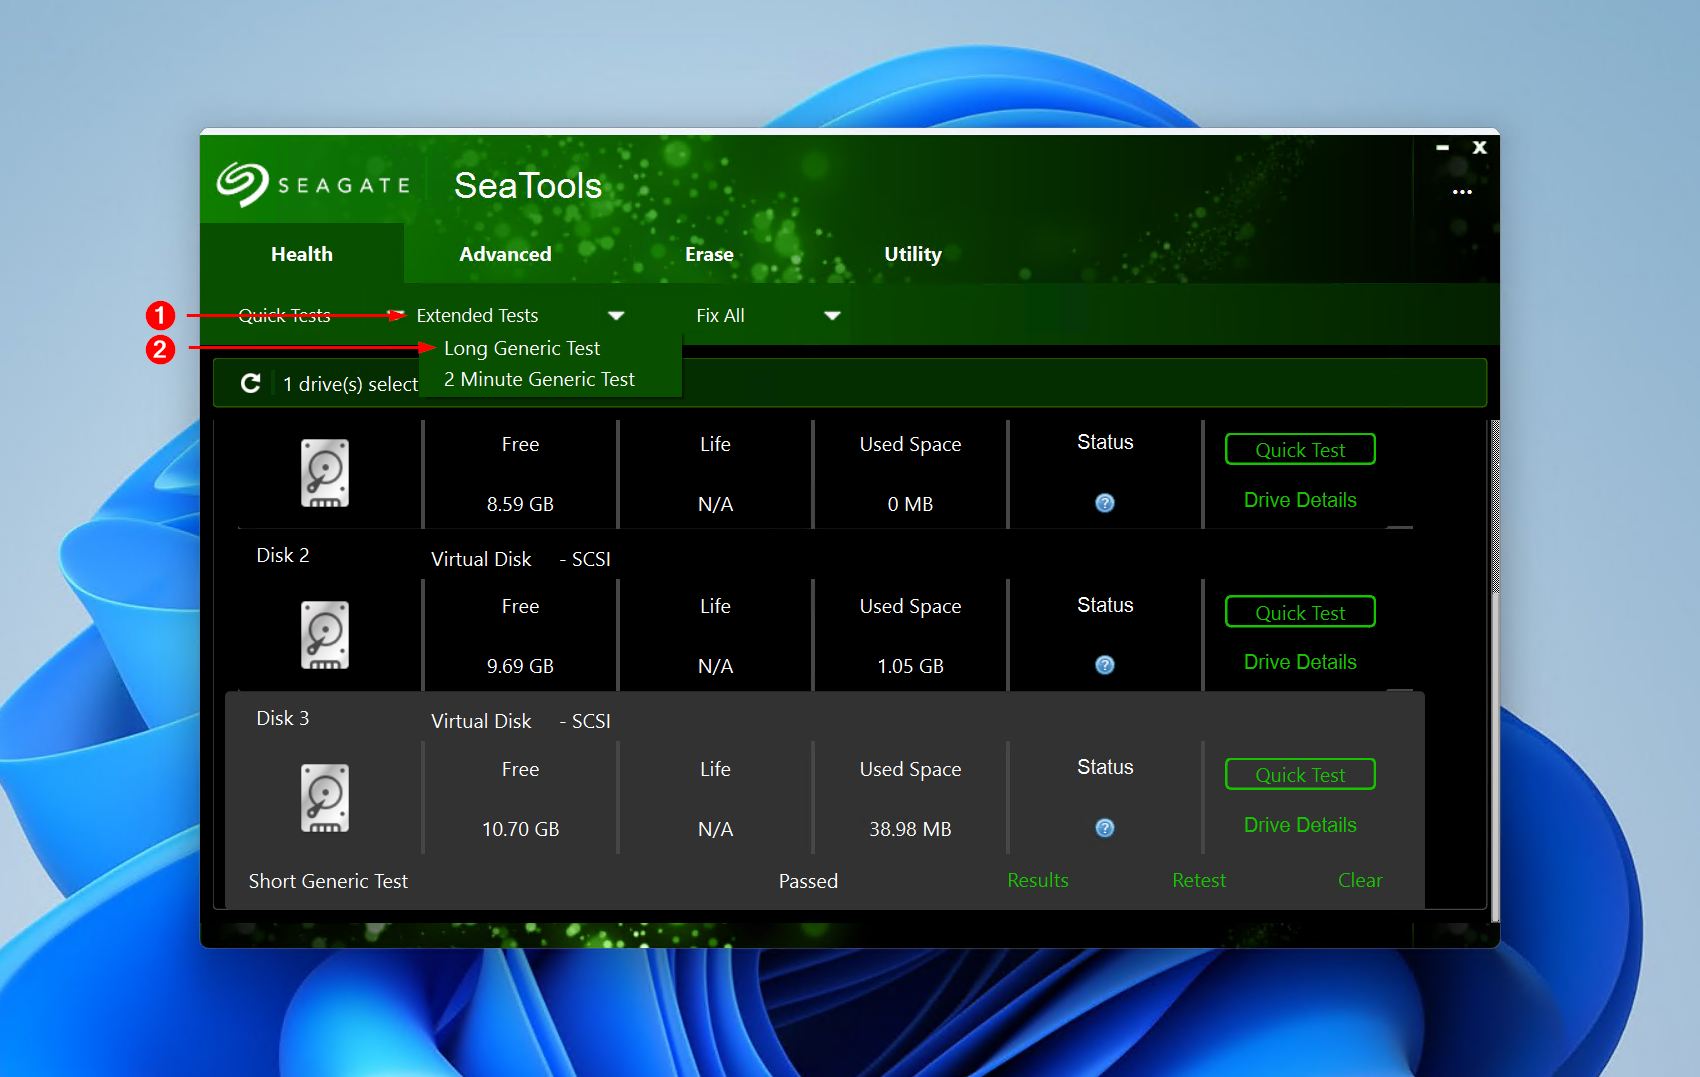
- For a more comprehensive test, you can follow up with a long generic test by clicking Extended Tests, then clicking Long Generic Test.
Seagate Rescue Data Recovery Services
Rescue Data Recovery Services is Seagate’s professional recovery arm which exists for the cases where software is the wrong tool, like a physically failed drive, one no computer detects, one that clicks or beeps, or a drive damaged by water, fire, or a drop.
Some Seagate drives are sold with Rescue coverage included and some are not. It varies by model, region, and purchase date, so guessing is pointless. Check yours:
- Find the drive’s serial number. It can be found on the drive and on the original box.
- Go to Seagate’s Data Recovery Services page.
- Enter the serial number and choose your country or region.
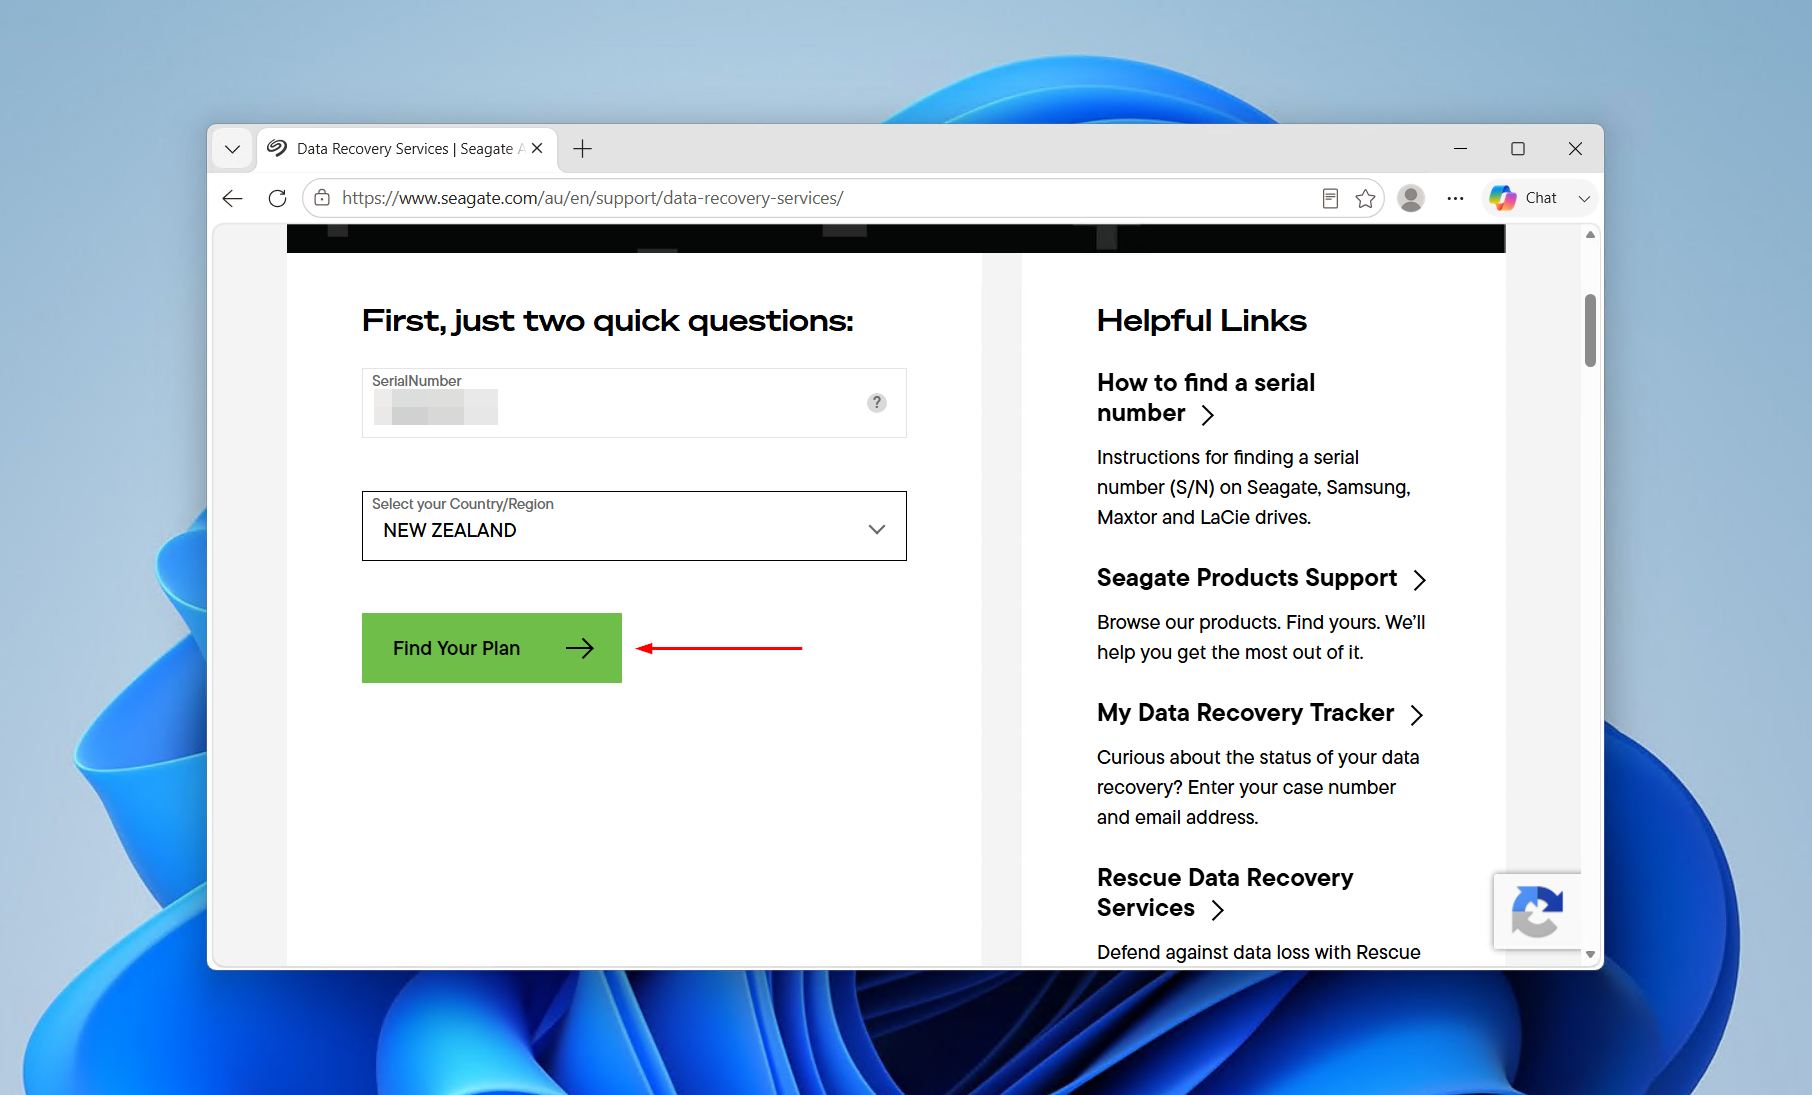
- Read the result, which says either that your product includes Rescue Data Recovery Services or that it does not.
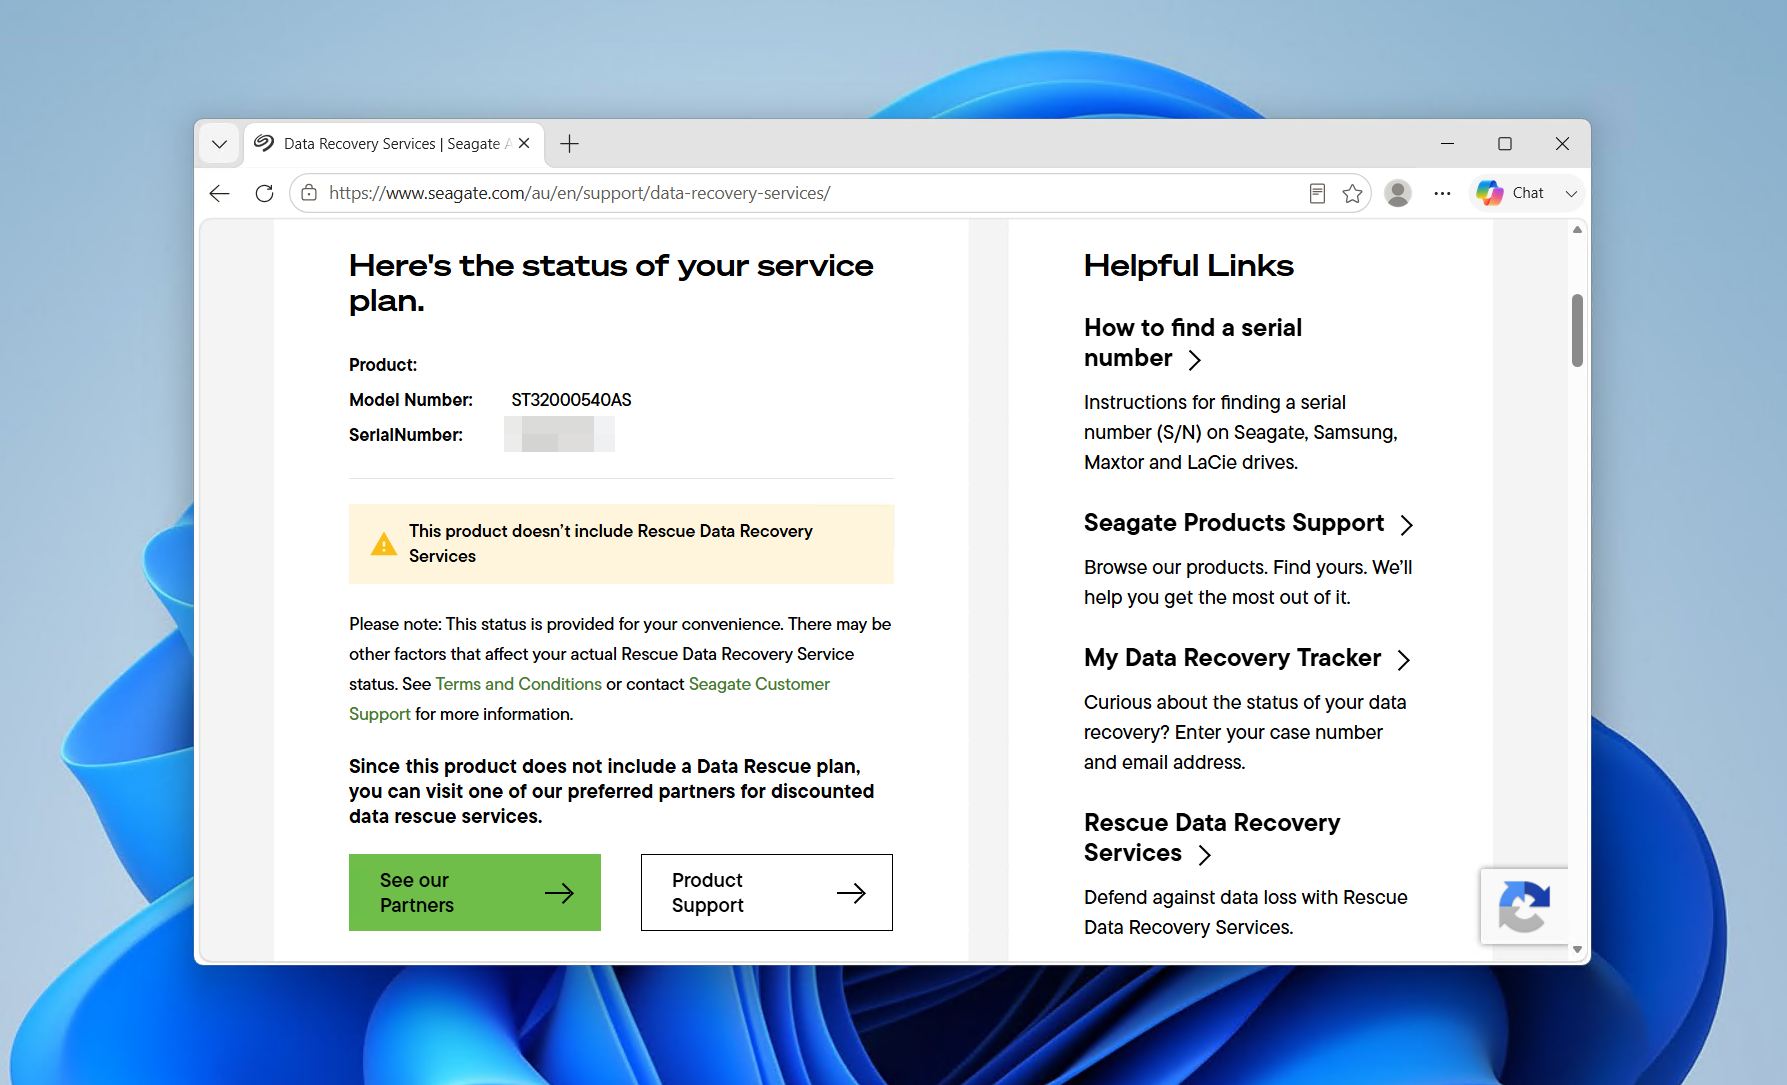
If you’re covered, request an evaluation, wait for the shipping authorization email and label, then send the drive in.
How to Get the Best Results From Seagate Hard Drive Recovery
While the software you use will definitely impact your chances of Seagate external hard drive data recovery, it also depends on what happened to the drive in the hours after the files went missing. There are countless examples online of Seagate owners who’ve hindered their success due to one small mistake. Here are some of the most important things to keep in mind to maximize your recovery chances:
✅ Do this:
- Stop using the drive the moment you notice files are missing. Every write that lands on the drive can set you back. This habit saves more recoveries than anything else on the list.
- Recover before you repair. CHKDSK, formatting, initializing and partition tools all make changes to the drive. Therefore, they should all be left until after recovery is complete.
- Recover to a different device. Another external drive, a second internal disk, anything but the drive you are scanning.
- Image an unstable drive. If it disconnects, stalls, runs slowly or fails a health check, make one byte-to-byte drive image and work from the copy.
- Go professional at the first sign of physical failure. Clicking, beeping, grinding, a drive that vanishes and reappears, a nonsense capacity, or a drive that was dropped or got wet. Software cannot fix mechanics.
⛔ Avoid this:
- Copying anything onto the drive, including installing recovery software onto it or saving recovered files back to it.
- Running repair tools first and recovery second. This is the most common way a fixable case turns into an expensive one.
- Scanning a failing hard drive repeatedly. Repeated full scans of a disk with bad sectors can be what finally kills it. Image it instead.
- Opening the drive’s enclosure at home. It’s a big no-no to open a drive’s enclosure anywhere outside a clean room. Dust settles on the platters and the damage is permanent.
For do-it-yourself Seagate external hard drive recovery, a dedicated tool like Disk Drill is usually the simplest route to your files. Connect the drive, scan it, preview the data, then recover it elsewhere.
FAQ
No. Seagate does not make a consumer data recovery application. It offers SeaTools, a free tool for checking drive health, and Seagate Toolkit, which handles backup, mirroring, syncing, and drive encryption. For Seagate external hard drive data recovery you need third-party software like Disk Drill, or Seagate’s paid Rescue Data Recovery Services when the drive has physically failed.
Windows 11 gives you three options, all limited. Check the Recycle Bin on the external drive first (linked to the Recycle Bin on your Desktop when connected), as this will be the first place it goes in most instances. If the data was removed with Shift + Delete or wiped by a format, you’ll need to try restoring from File History or Backup and Restore. Lastly, Windows File Recovery is the free official command-line recovery tool available via the Microsoft Store.
Given the number of Seagate external hard drives available across the world, it would be impossible to assume based on the model alone. Instead, you’ll need to enter the serial number (available on the drive or the box it came in) into the lookup on Seagate’s Data Recovery Services page. If you’re not covered, you can buy a Rescue plan or use an independent recovery lab.
Rule out the simple causes first. Try a different USB cable, port, connection, or computer rather than a hub or dock. Then check Disk Management to confirm the drive is detected, as File Explorer isn’t reliable for this. If the drive’s visible with the correct capacity, recovery software can scan and recover the data. If it’s not appearing anywhere, even BIOS, then it’s a case for a recovery professional instead. Our guide to an external hard disk that is not detected has the full steps.
No, SeaTools is a diagnostic tool. It reads the drive’s S.M.A.R.T. health data and runs self tests to tell you whether the hardware is failing, but it cannot find or restore deleted files. It also includes functions that write to the drive, such as repair and erase, and running those before recovery can destroy whatever is left.
