SD cards are great for storing data as they’re compact in size and have no moving parts, making them very reliable storage devices. While mostly used for photos due to their high speeds, they can also be used to store any other type of file.
Sometimes we may want to format them and start over. This could be due to multiple reasons which we will talk about below. In this article, we’re going to take a look at how to format an SD card on Mac and what you can do first to make sure that you don’t lose any data.

Why Should You Format Your SD Memory Card on a Mac?
There are many reasons why we might want to format a SD card on Mac. Some of the most common reasons are listed below:
- The SD card is having issues with corrupted data and we format the SD card so try and fix the issue.
- The data on the SD card is old and we no longer want it.
We’re using the SD card on a new device and it needs to be formatted so that the device can use it. - We’re selling the SD card or giving it to someone and we don’t want them to have access to our data that’s currently on the SD card.
- You want to free up the space on your SD card and start over.
No matter what the reason that you want to format your SD card, the process is mostly the same and is easy to do.
First, you may want to save the data that’s on your SD card as formatting will erase everything on it and then you won’t have access to it anymore.
Once formatted, it can be very hard to get the data back so I would highly recommend that you recover the data first. Even if you don’t think that you want the data, it’s still a good idea to recover it in case you change your mind later.
How to Protect Your Data Using Data Recovery Software
It’s important to make sure that we recover the data off of our SD card before we format it if what we have on it is important to us.
Once the SD card is formatted, we won’t be able to access the data as easily from the SD card. We can use Disk Drill to get the data off of our SD card and I like using Disk Drill as it’s powerful and easy to use.
Disk Drill is a data recovery tool that will allow us to get the data off of our SD card before we format it.
- Download and install Disk Drill onto your Mac.
- Launch Disk Drill and select the storage device that you would like to recover the data from.
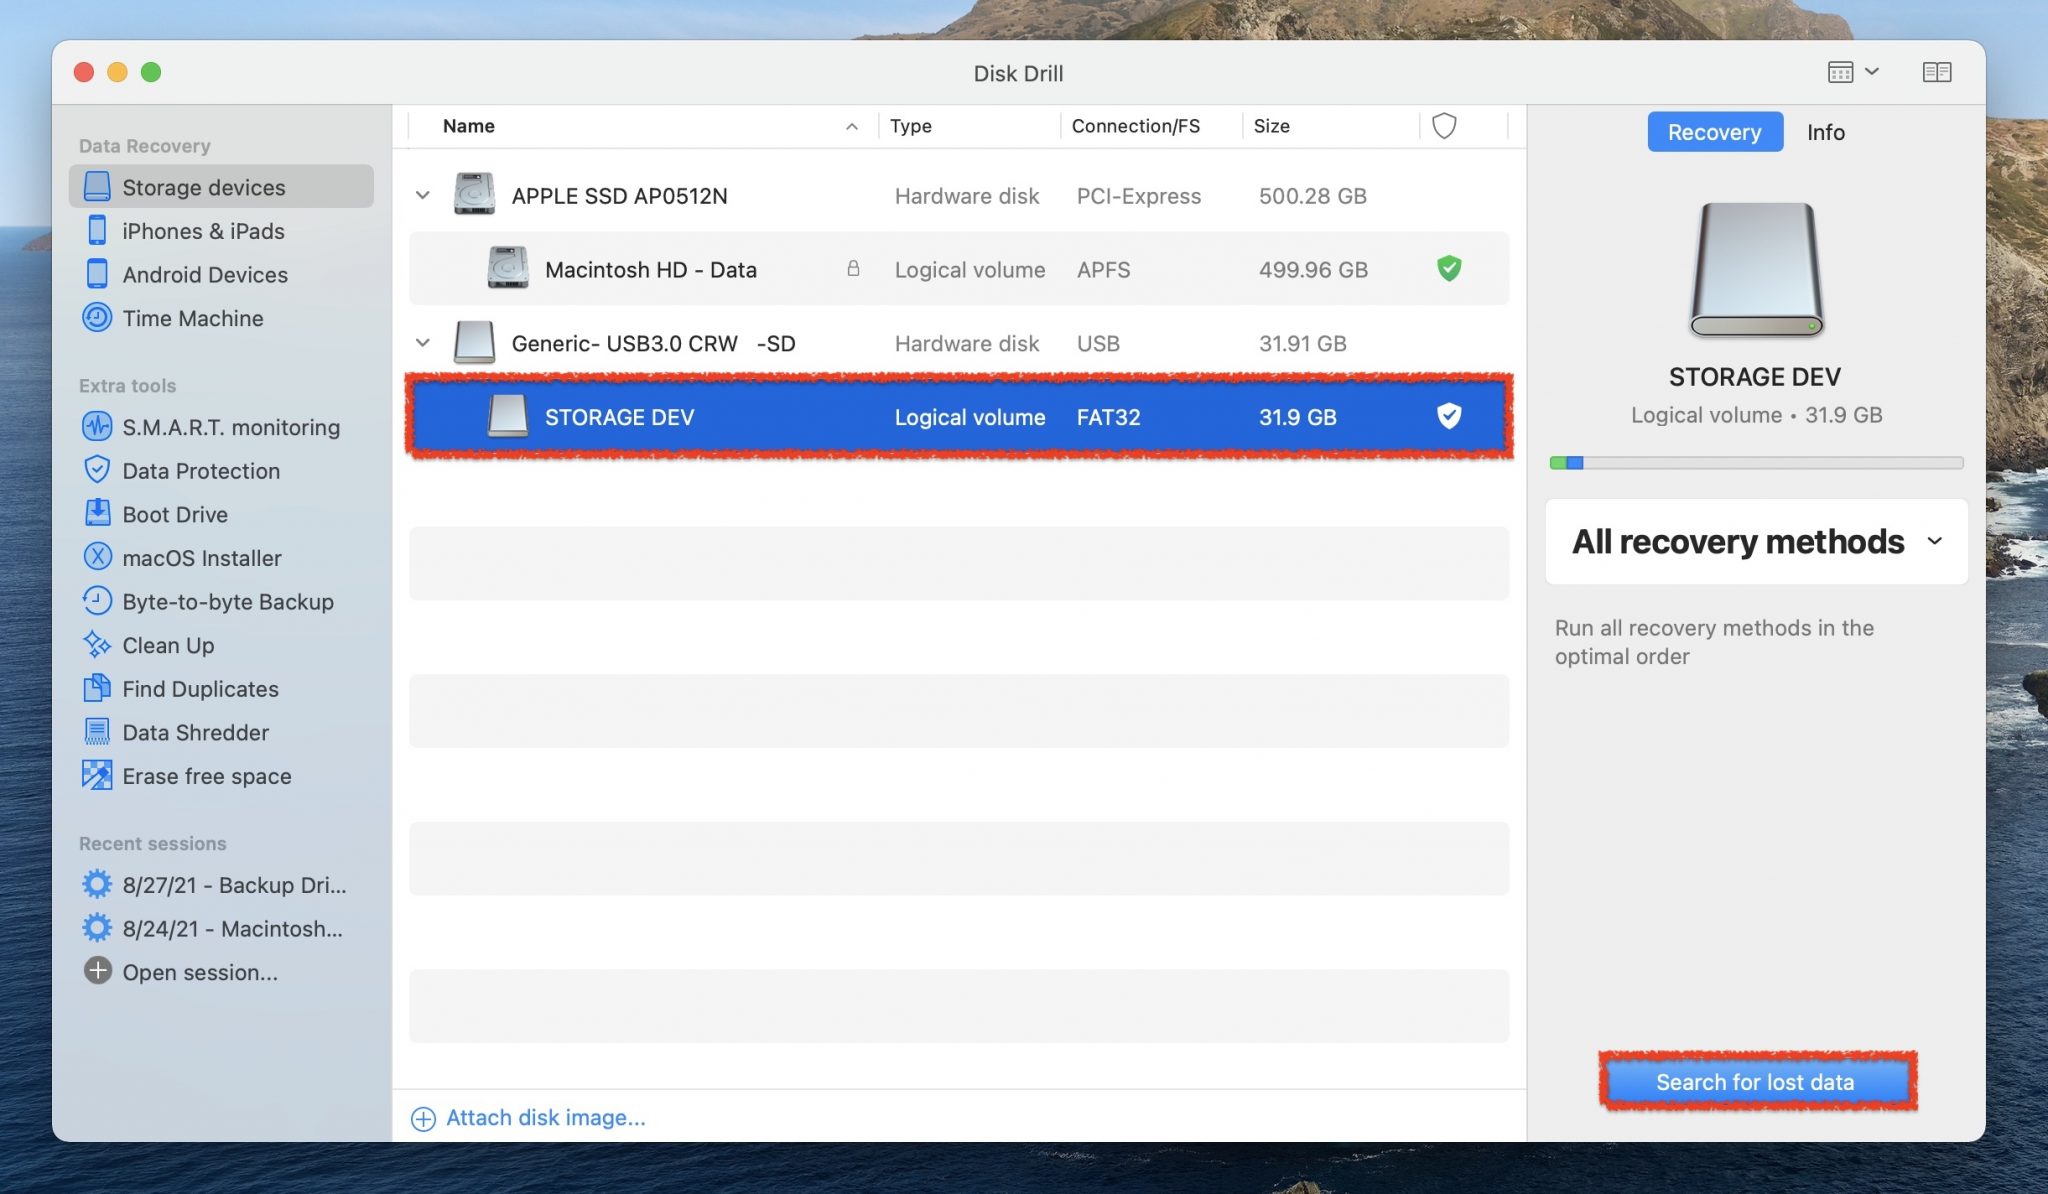
- Wait for the scan on your storage device to complete. This can take some time depending on how much data that you have on your SD card. You can also scan other storage devices as well to recover data from them, it doesn’t have to be an SD card.

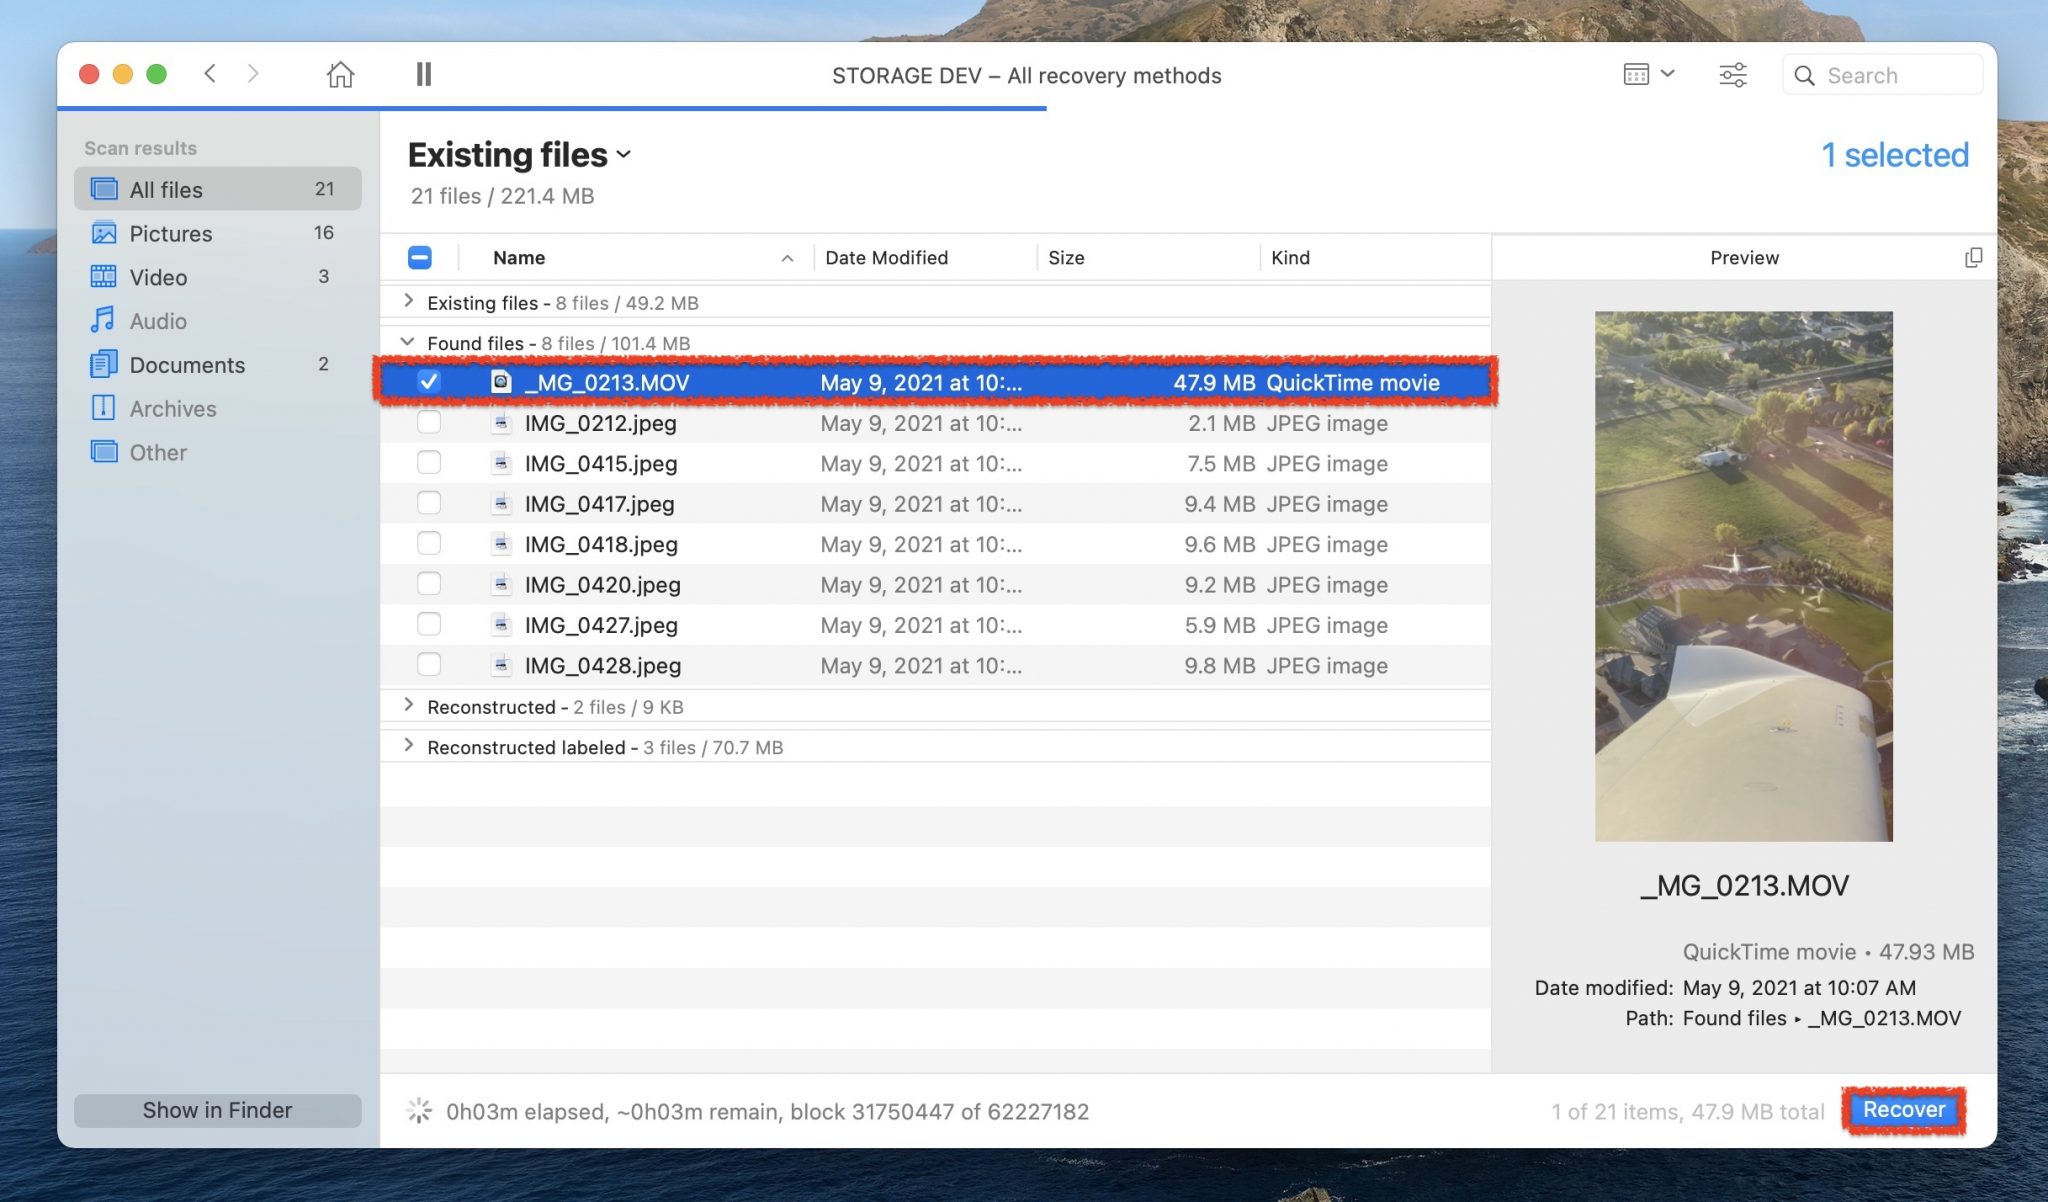
- After the scan has been completed, you can review the items that Disk Drill was able to recover from your SD card. Select the files that you would like to recover and click on the blue Recover button.
Now that we have the data off of our SD card, let’s format it. Below we will look at how to format the SD card into different file formats as different devices essentially speak different languages and you will want to choose the correct one. I will mention below which one that you should use depending on what device you’re using.
How to Format Your SD Card on Mac
Now that we have saved our data, it’s time to format our SD card. We can format our SD card into multiple file formats which is useful depending on what you would like to do with your SD card.
Formatting Into FAT32 for Windows
FAT32 is the file system used on Windows and if you’re planning on using your SD card with a windows machine, you will want to format the storage device to this file format.
- Plug your SD card into your Mac and launch Disk Utility.
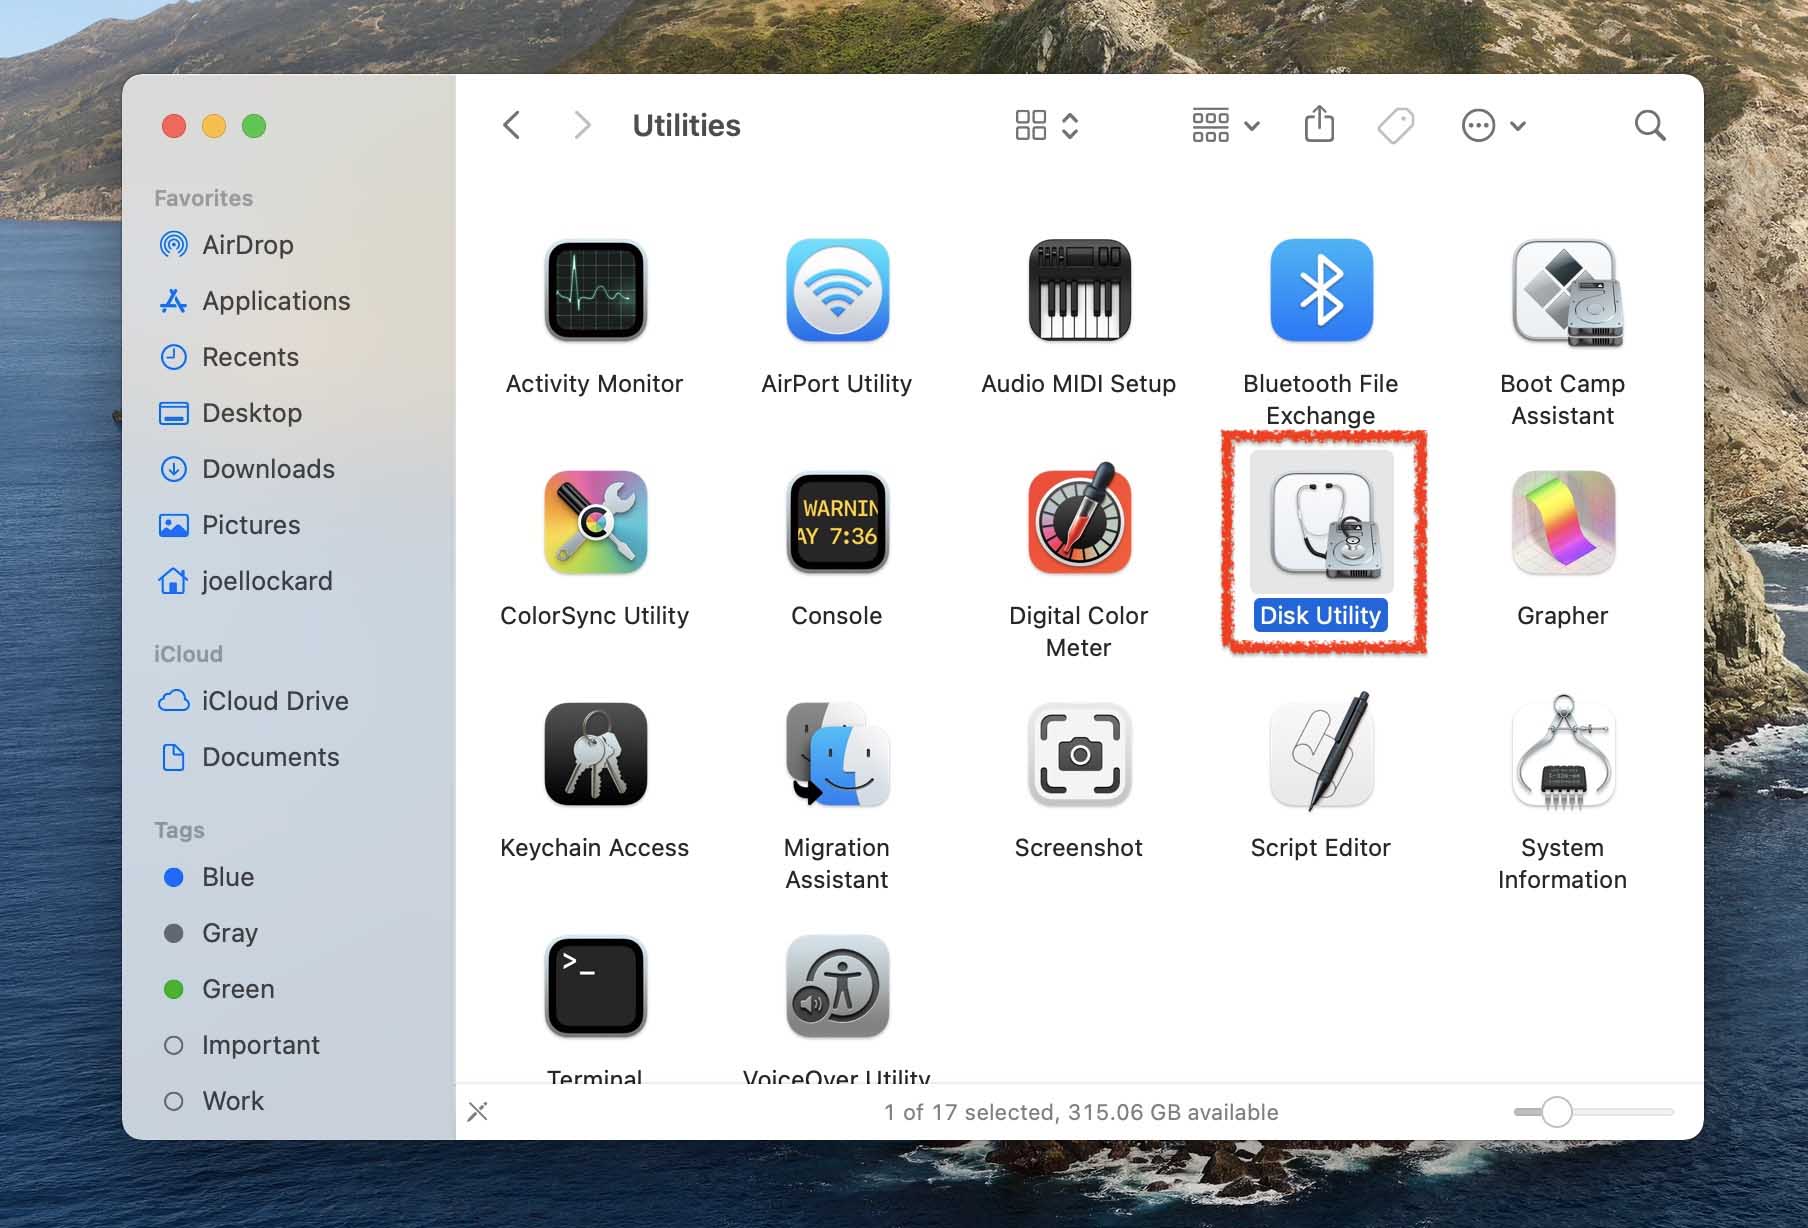
- From within Disk Utility, select your SD card and choose Erase.
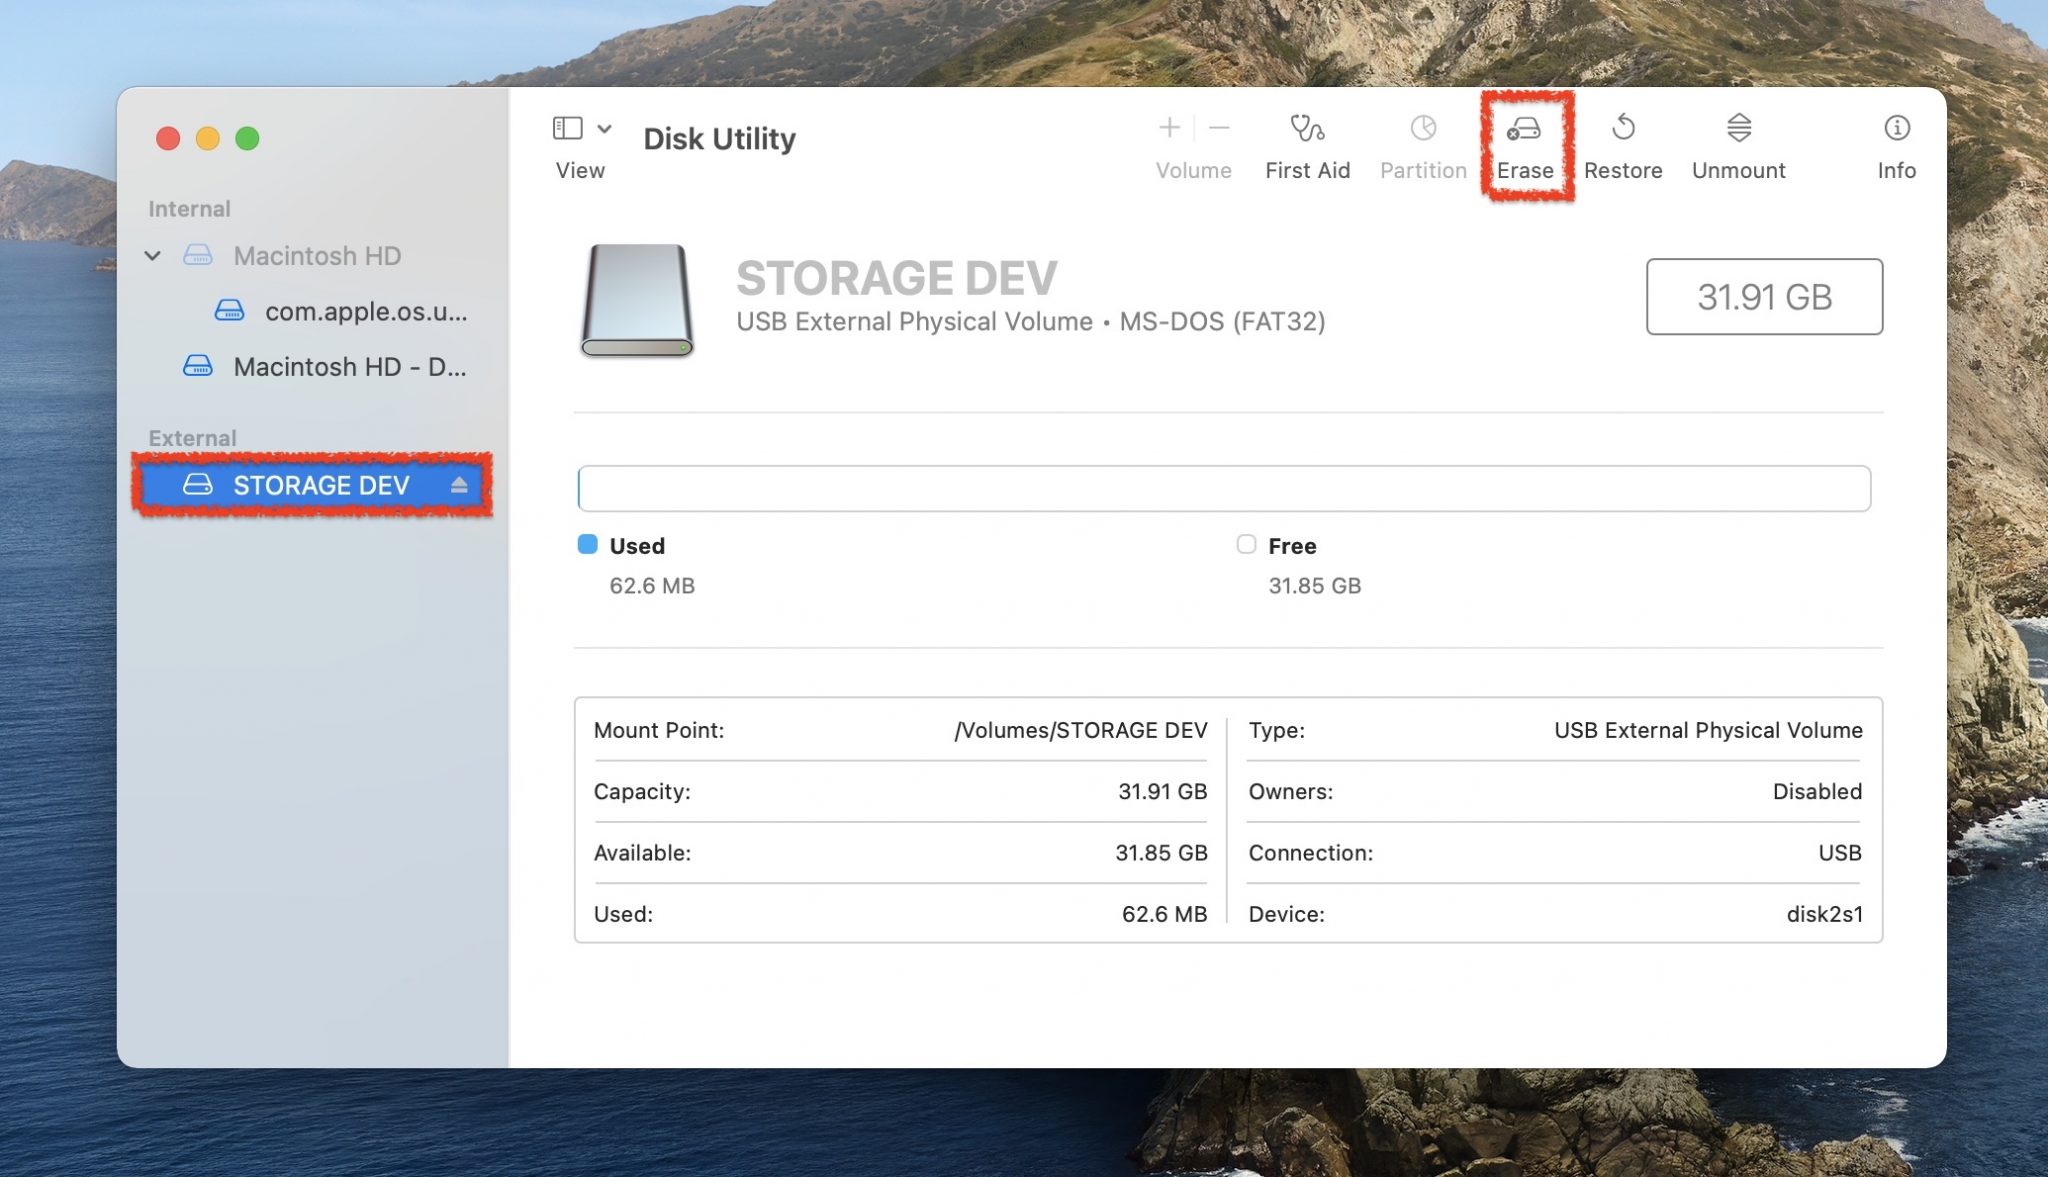
- Choose the FAT32 file format and then erase your SD card.
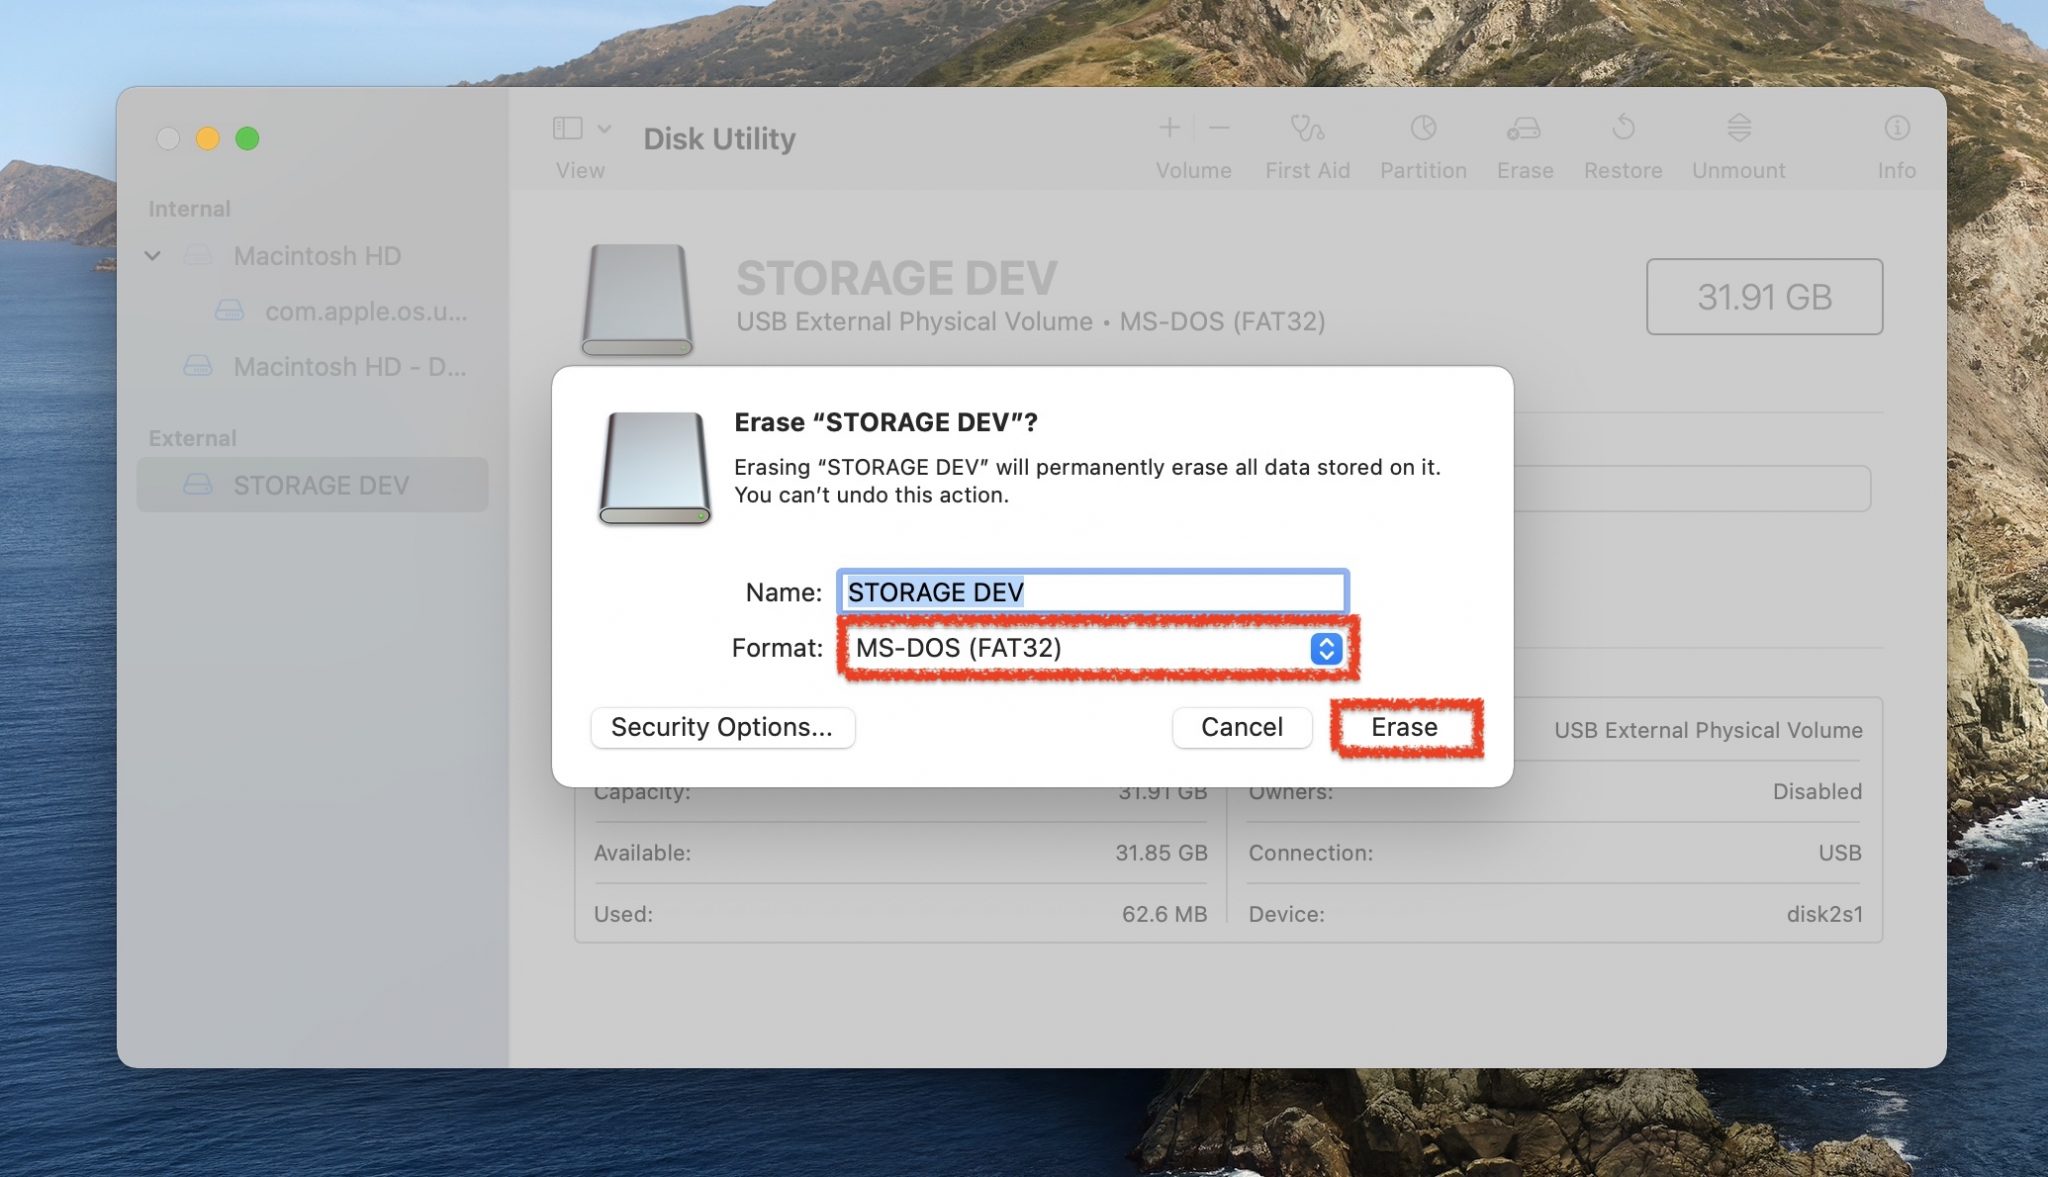
- That’s it! Your SD card is now formatted into the FAT32 file format and is ready to be used.
Now, let’s take a look into how to format a corrupted SD card.
How to Format a Corrupted SD Card
Even if your SD card is corrupted, the process is still the same when it comes to formatting it. Keep in mind that if your SD card isn’t working correctly, there could be a hardware issue with it which could cause it to not format correctly, but it’s worth trying.
- Plug your SD card into your Mac and launch Disk Utility.
- From within Disk Utility, select your SD card and choose Erase.
- Choose the file format that you would like to use and then click on Erase.
If your SD card isn’t connecting or you weren’t able to successfully format it, we have an entire article on corrupted SD cards that you can take a look into for a more in-depth look.
Also make sure that the lock slider on the side of the SD card isn’t on as this will not allow your Mac to view the card.
How to Format a Micro SD Card for Use on Android
If you’re trying to use a micro SD card on Android, there are multiple file formats that we can format the storage device too. Android supports the following:
- FAT32
- Ext3
- Ext4
All of these should work on your Android device, so you can’t go wrong with any of them. The recommended file format is FAT32.
- Plug your micro SD card into your Mac and launch Disk Utility.
- From within Disk Utility, select your micro SD card and choose Erase.
- Choose either FAT32, Ext3, or Ext4 and then click on Erase.
- That’s it! Your micro SD card is now ready for use and can be put into your Android smartphone.
How to Format an SD for Use With a GoPro
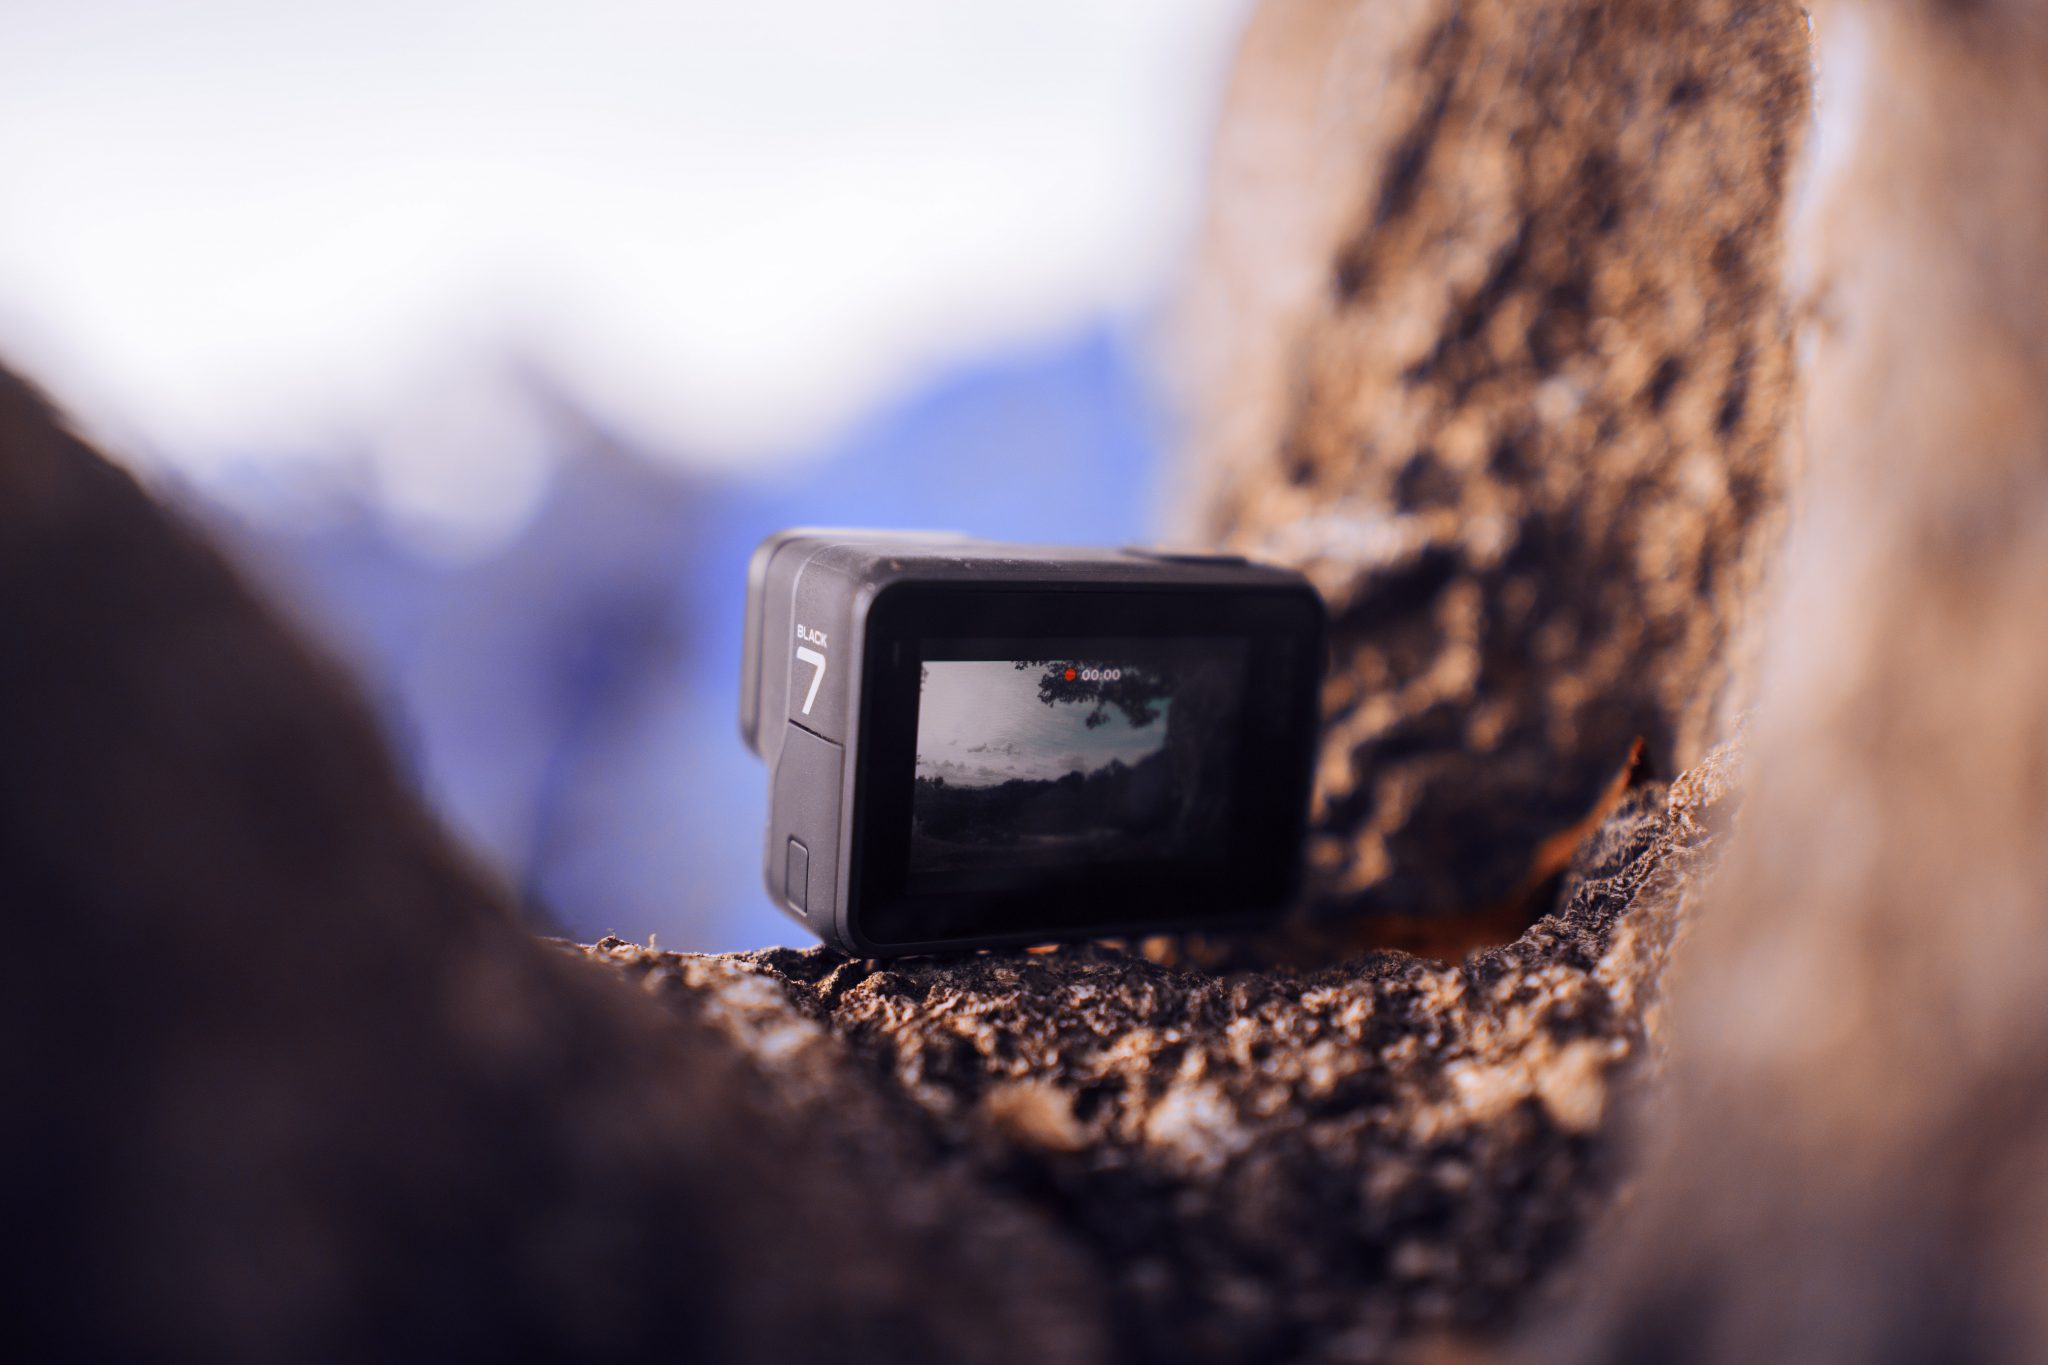
GoPros are awesome for taking action pictures and videos. If you’re using an SD card or micro SD card, the steps will be the same.
With an SD card of 32Gb or less, you should format it into the FAT32 format. If you’re using an SD card of 64GB or larger, then you will want to format the SD card into ExFAT.
The steps below will walk you through how to format your SD card into either the FAT32 or ExFAT format.
- Plug your SD card into your Mac and launch Disk Utility.
- From within Disk Utility, select your micro SD card and choose Erase.
- Now depending on the size of your SD card, you will want to choose either FAT32 or ExFAT and then click on Erase.
- That’s it! Your SD card or micro SD card can now be used with your GoPro.
Conclusion
Knowing how to format an SD card without losing the data on it is a useful skill to know as if you ever want to start over, give the card away, or if it’s not working correctly you will know how to fix it now. Keep in mind that you can format almost any storage device using the steps that are mentioned above as the process is mostly the same.

FAQ
- Plug the memory card into your Mac.
- Go to your Applications folder and launch Disk Utility.
- Select your memory card and then click on Erase.
- Choose the file format that you would like to format the memory card to.
- Click on Erase.
If you want to format your SD in a more secure manner vs. doing it quickly, then there is a setting in Disk Utility that will allow you to do this.
- Plug the memory card into your Mac.
- Go to your Applications folder and launch Disk Utility.
- Select your memory card and then click on Erase.
- Within the Erase window you will see a button called Security Options… click on that and move the slider to Most Secure and then click OK.
- Choose the file format that you want to format the SD card to.
- Click on Erase.
That’s it! This way is better as it will make it harder for someone to get your SD card and then recover the data from it by using a powerful data recovery app such as Disk Drill.
If your SD card is unreadable by your Mac, it might not necessarily be the SD card that is causing an issue. It could be something with your Mac. I would recommend doing the following to see if you can get your Mac to recognize it.
- Restart your Mac and see if that fixed the issue.
- If you’re using a dongle, there could be an issue with it or the port on your Mac. Try the dongle on another computer and see if the SD card is recognizable. You could also try another dongle and see if that works.
- Power down your Mac and then try resetting the NVRAM or PRAM by pressing the power button and then hold the keys Option-Command-P-R for about 20 seconds and then let go. Your Mac’s screen will flicker multiple times during this process.
- Plug your SD card into your Mac and see if you can view it now. Then, follow these steps to format it.
- Plug the memory card into your Mac.
- Go to your Applications folder and launch Disk Utility.
- Select your memory card and then click on Erase.
- Choose the file format that you would like to format the memory card to.
- Click on Erase.
You might not be able to format your SD card because it is corrupted or it could be experiencing a hardware issue. If this is the case, the most important thing to do would be trying to get your data off of it which you can do using Disk Drill. We have an entire article where we walk through how to fix a SD card and use it again on Mac that would be able to help you in this situation.
- Plug the memory card into your Mac.
- Go to your Applications folder and launch Disk Utility.
- Select your memory card and then click on Erase.
- Choose the file format that you would like to format the memory card to.
- Click on Erase.
- There isn’t a way to convert a memory card to another file format without losing all of the data on it so keep that in mind before you do these steps.
- Plug the memory card into your Mac.
- Go to your Applications folder and launch Disk Utility.
- Select your memory card and then click on Erase.
- Click on the Format dropdown box and choose FAT32.
- Click on Erase.