The Photos app on Mac has come a long way since it was iPhoto back in the day. Now with features such as a beautiful modern interface, photo editing right within the app, and organization like no other, it’s easy to see why so many Apple users love and use Photos. I use it personally, and I love it.
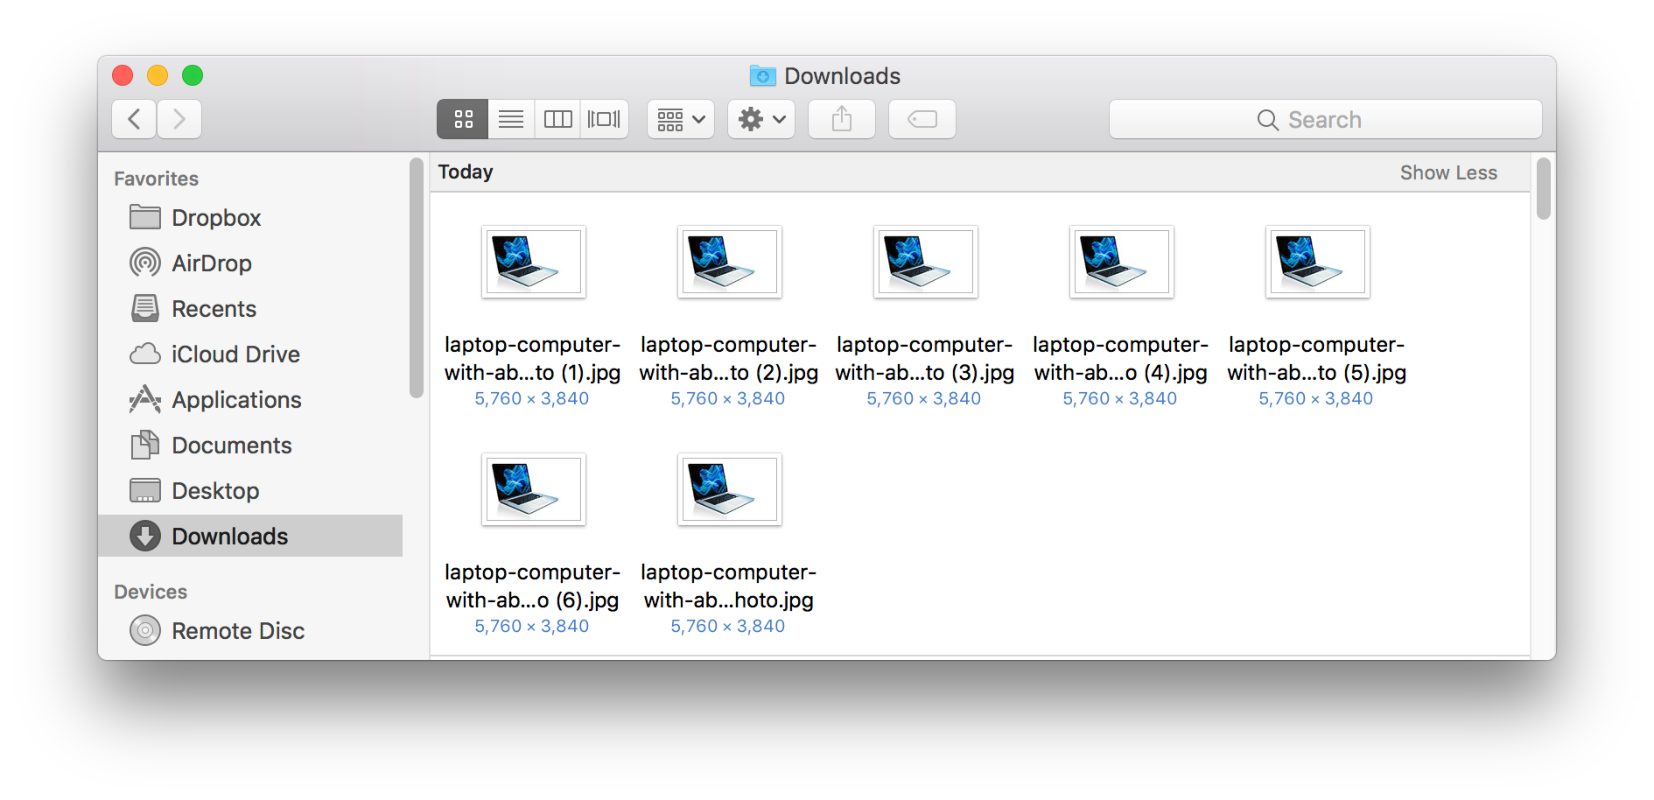
With us taking so many photos these days, sometimes we can get duplicates in the Photos app which not only takes up space on our Mac but can also be frustrating.
In this article, we’re going to take a look at how to find and remove duplicate photos on Mac.
Why Do I Have Duplicate Photos in the First Place?
There are many reasons why we might have duplicate photos within the Photos app on Mac.
- Importing the same set of photos more than one time.
- Taking multiple pictures that appear to be duplicated, but are actually just duplicates of the same photo.
- If you have more than one device trying to sync the same picture, this could also cause duplicates to appear on your device.
No matter what the case may be, having your hard drive filled with the same photo can be frustrating and something that we don’t want to have to deal with. Let’s take a look at some of the best apps that can remove duplicate pictures on Mac.
Method 1: Finding and Removing Duplicate Photos Using Disk Drill
Disk Drill is a data recovery tool but it can also be used to find and remove duplicate photos from your Mac for free. Using Disk Drill to find and remove duplicate photos is also easy to do, and it is on my favorite apps as it just can do so much, and it does it all very well.
Disk Drill has a duplicate remover feature built right in, plus some of the best data recovery that you can get. If you do decide to purchase the app, you will get much more than just duplicate removal. Not to mention that Disk Drill has a very beautiful and easy-to-use user interface.
Step 1. Download and install Disk Drill onto your Mac.
Step 2. Launch Disk Drill and select Find Duplicates from the sidebar. You then can drag your photos folder into Disk Drill to start scanning for duplicate photos.
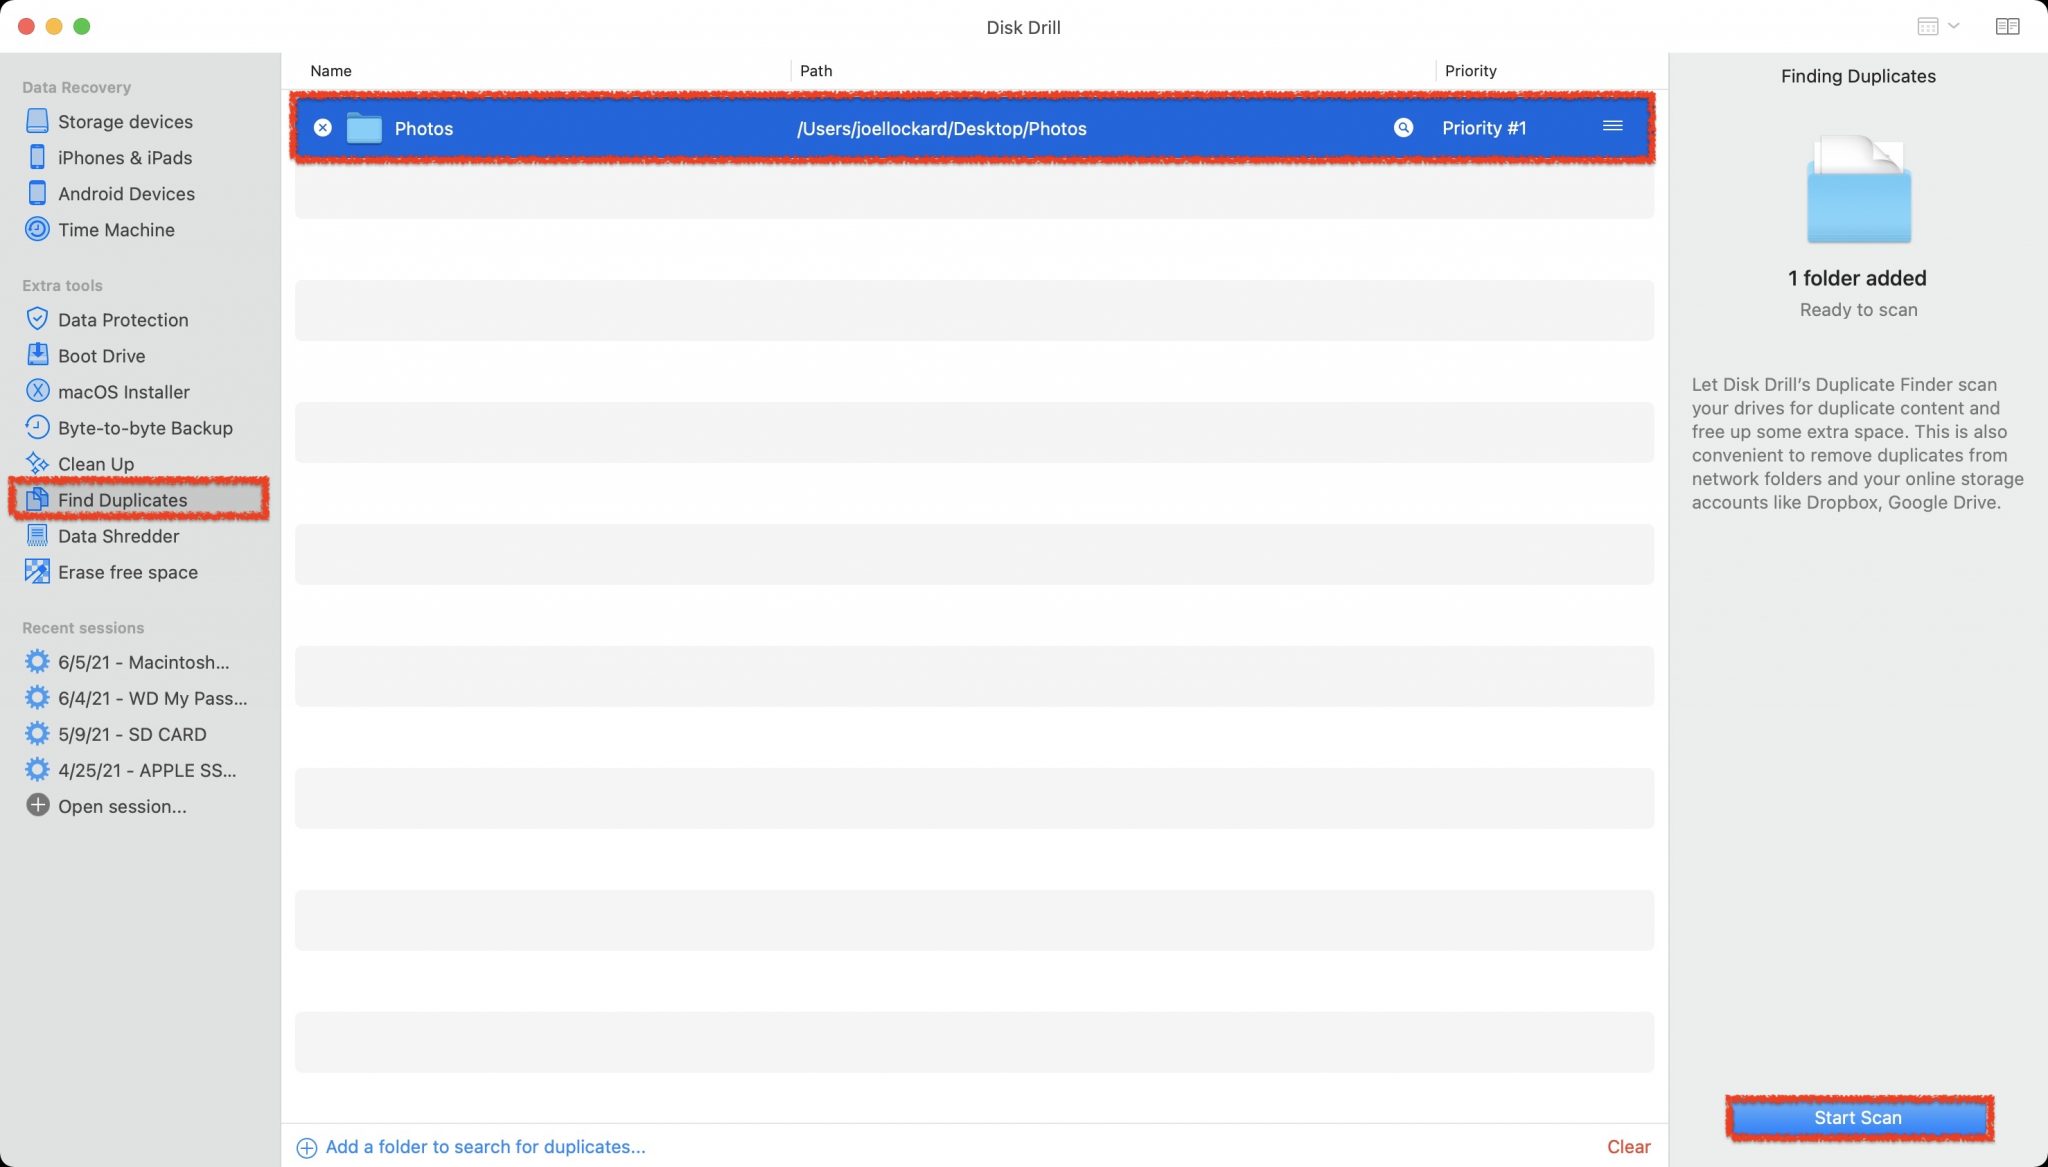
Step 3. Start the scan and wait for it to finish. I don’t have a ton of photos in my Photos folder, but if you have a larger amount, the scanning process will take more time. Either way, it’s normally pretty quick and easy to do.
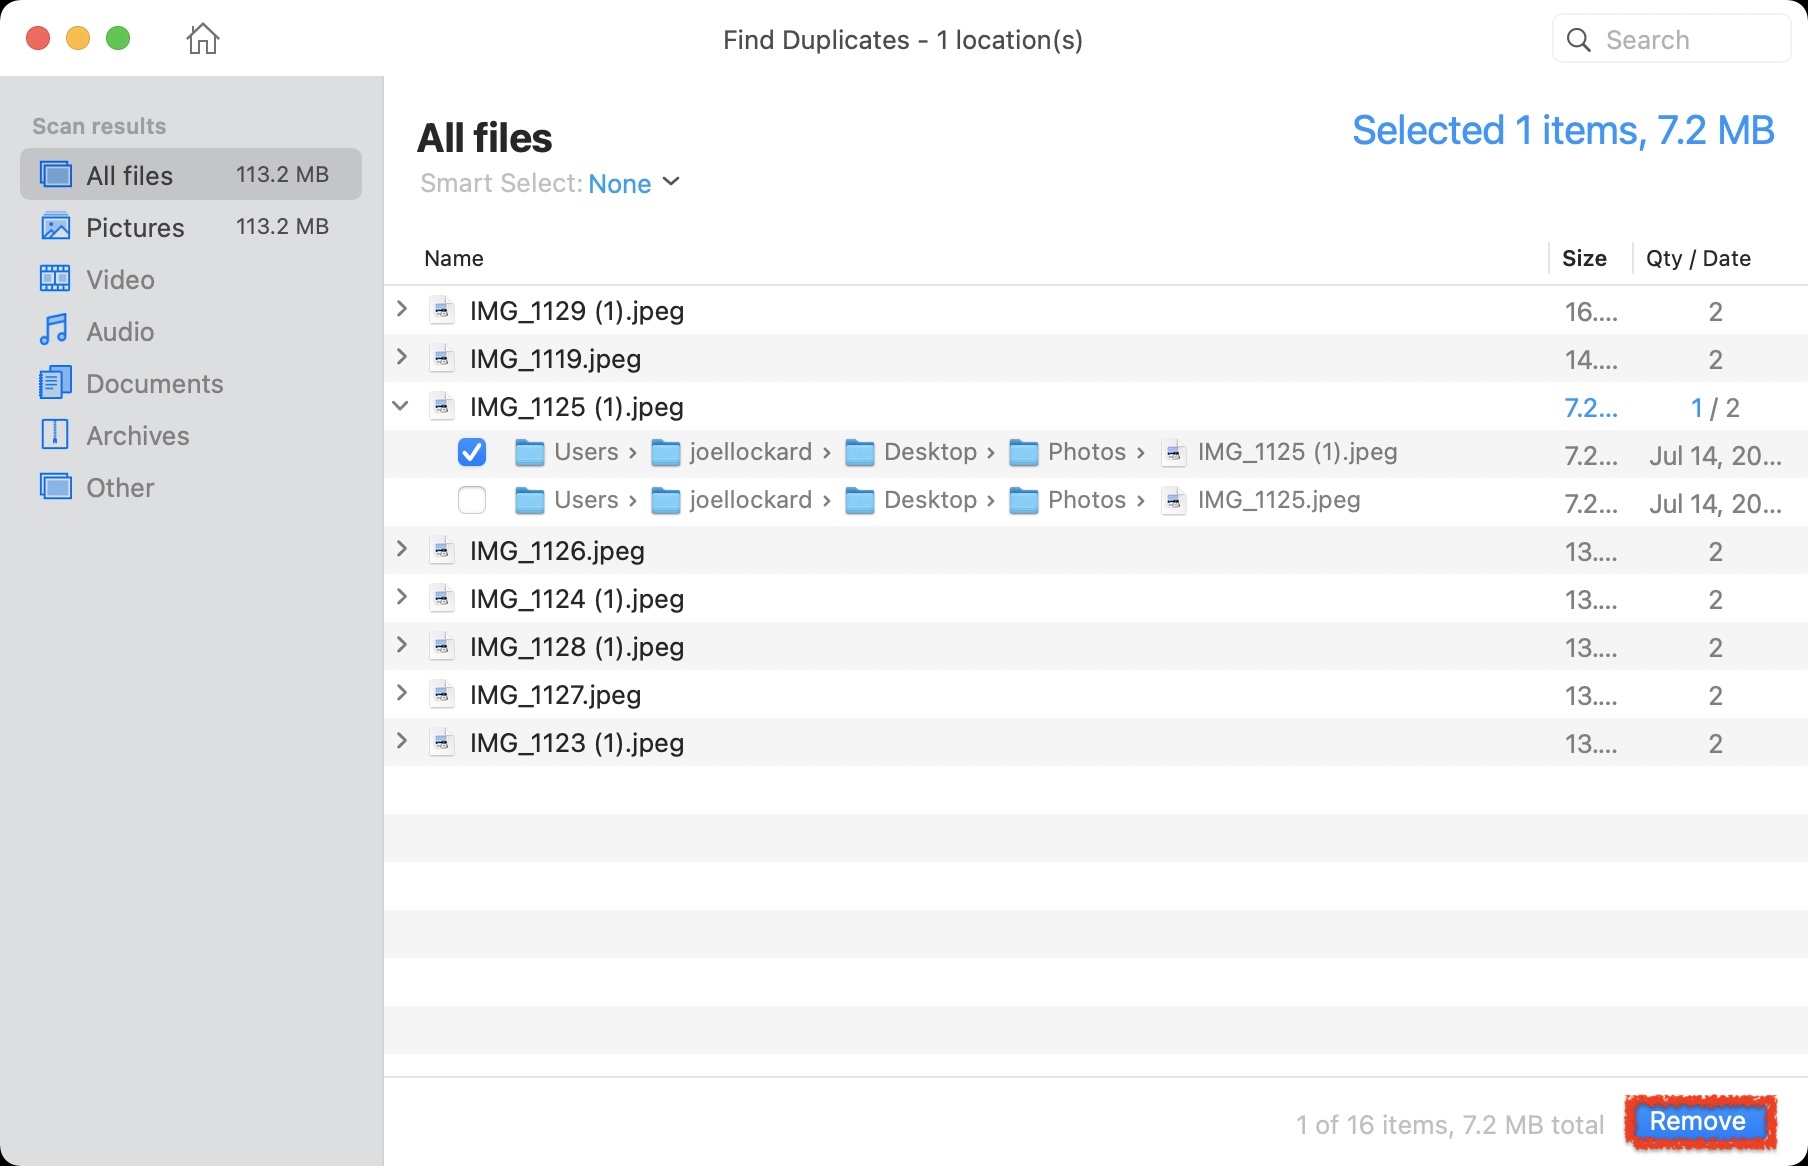
Step 4. Once the scan process has completed, you will then be shown all of the duplicates that you have within this folder. Select the duplicate photos that you would like to remove and then click on the Remove button which is located in the lower right-hand corner.
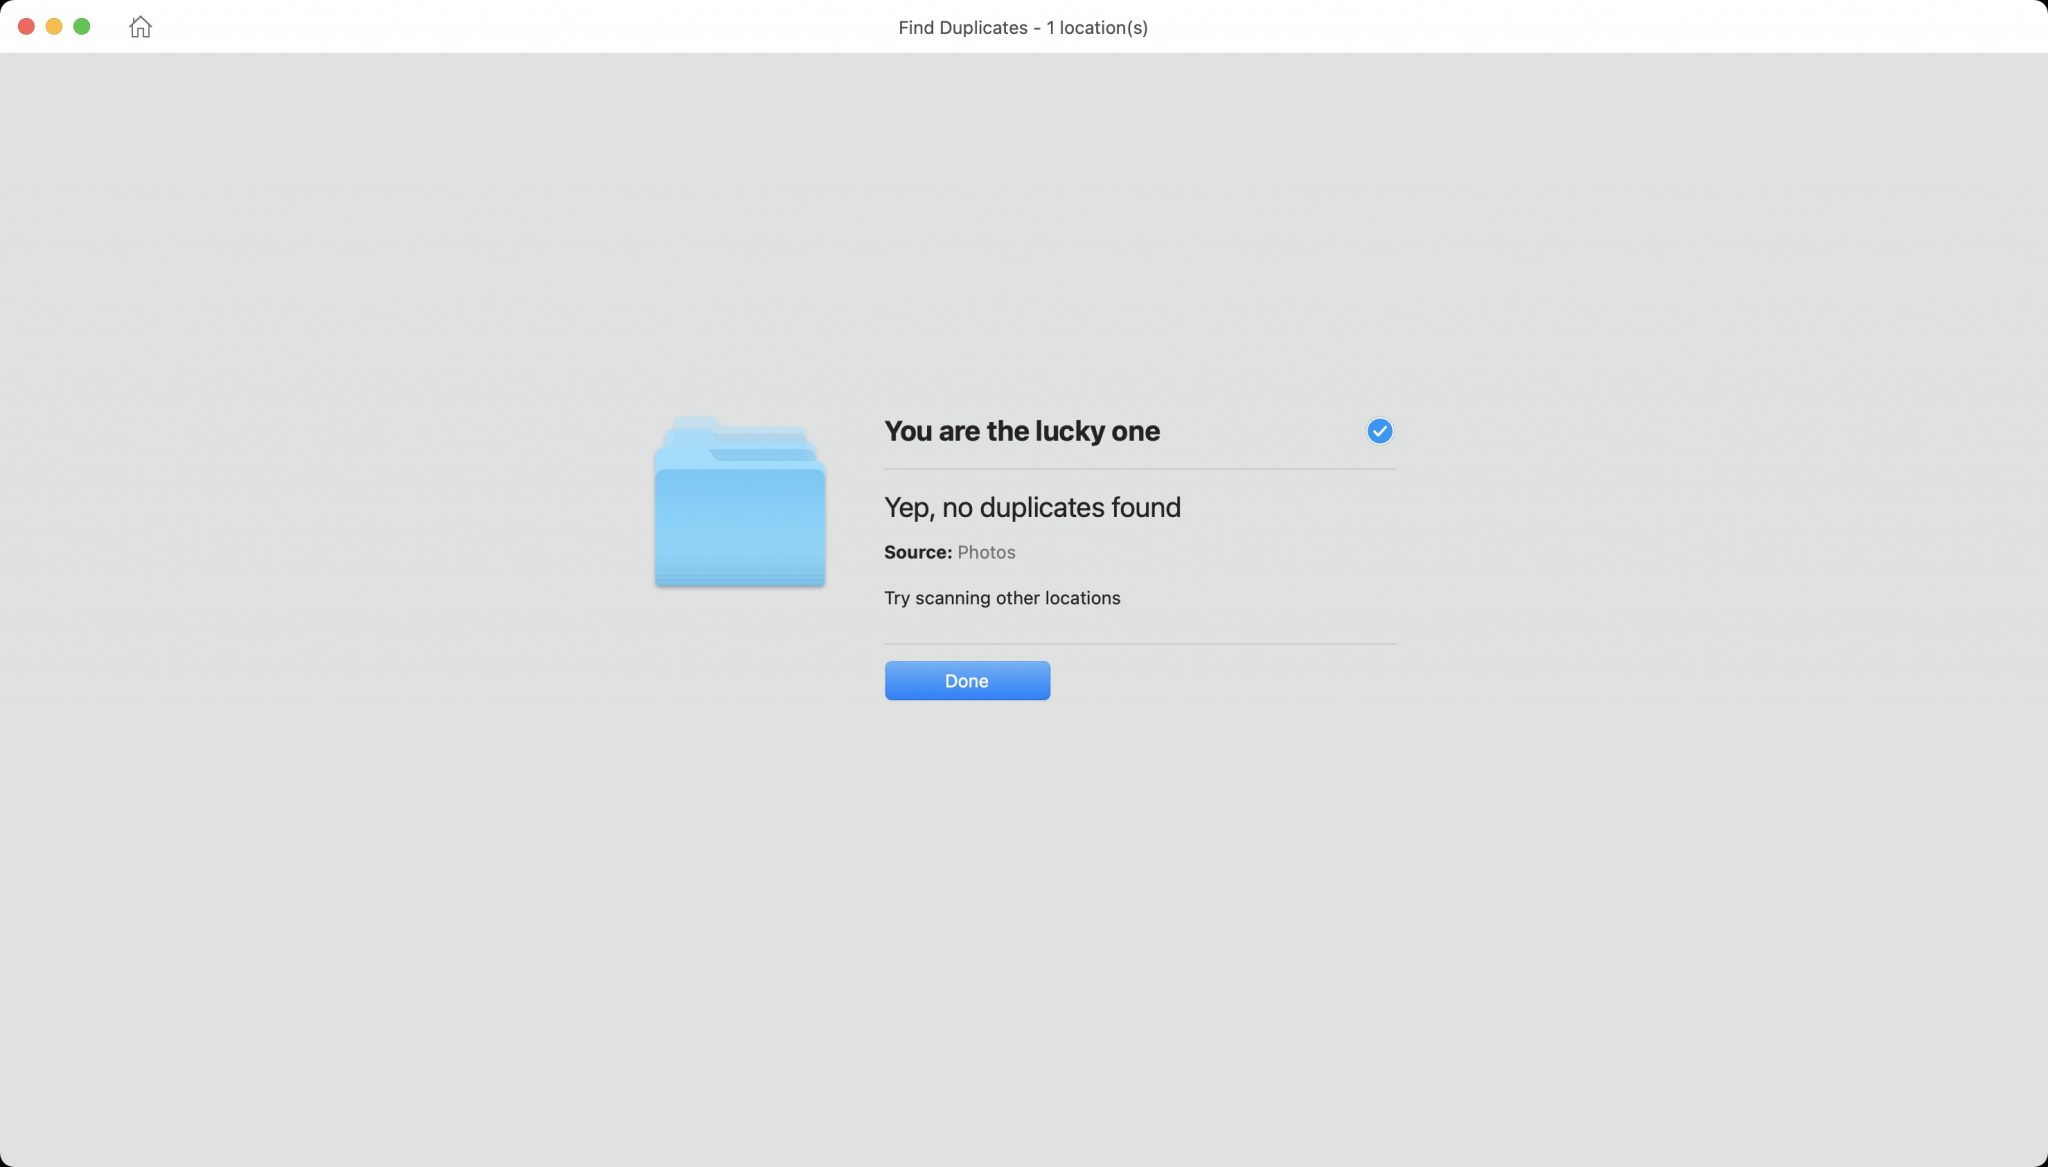
Note: If you happened to not have any duplicate photos, then you will see this message when you go to start the scan. This is what you want to have happen!
That’s it! It’s pretty easy to find duplicate photos on Mac using Disk Drill and remove them. Let’s take a look at another method for finding and removing duplicate photos on Mac.
Method 2: Removing Duplicate Photos Using Gemini 2
Gemini 2 is a great way to find and remove duplicate photos on Mac. The app is developed by MacPaw and I have been a fan of it for quite some time. It will allow you to detect and delete duplicate photos by scanning your Mac and looking through your files. Let’s take a look at how to use Gemini 2.
Step 1. Download and install Gemini 2.
Step 2. Launch the app and then either scan your entire Mac, or you can pick a folder that you would like to scan by dragging it to the Gemini 2 screen, which is what I am doing in this example.
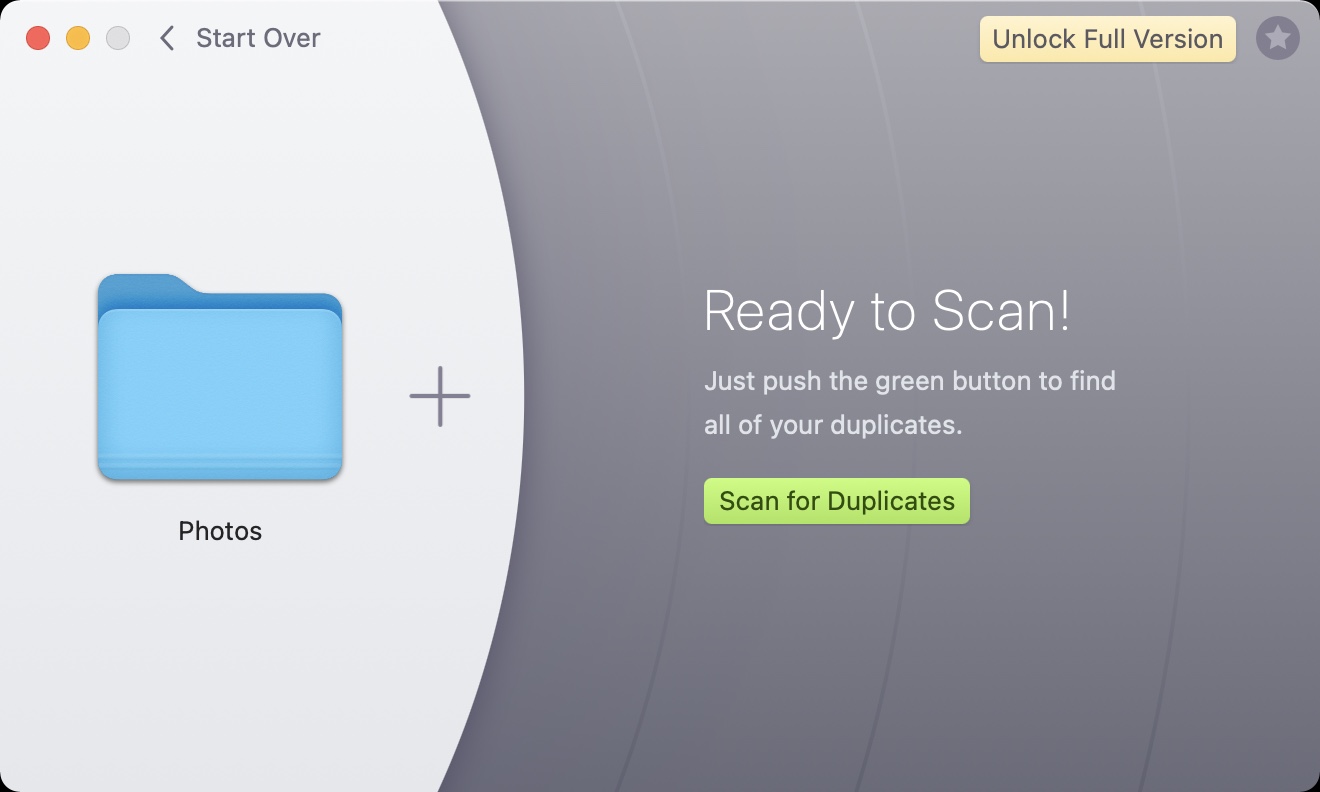
Step 3. Once you’re ready to start the scan, you will want to click on Scan for Duplicates button, and the scan process will start. The amount of time that this can take will vary depending on how many pictures are in the folder or the settings that you choose for the scan. Once the scan has completed, you can then review what Gemini 2 was able to find.
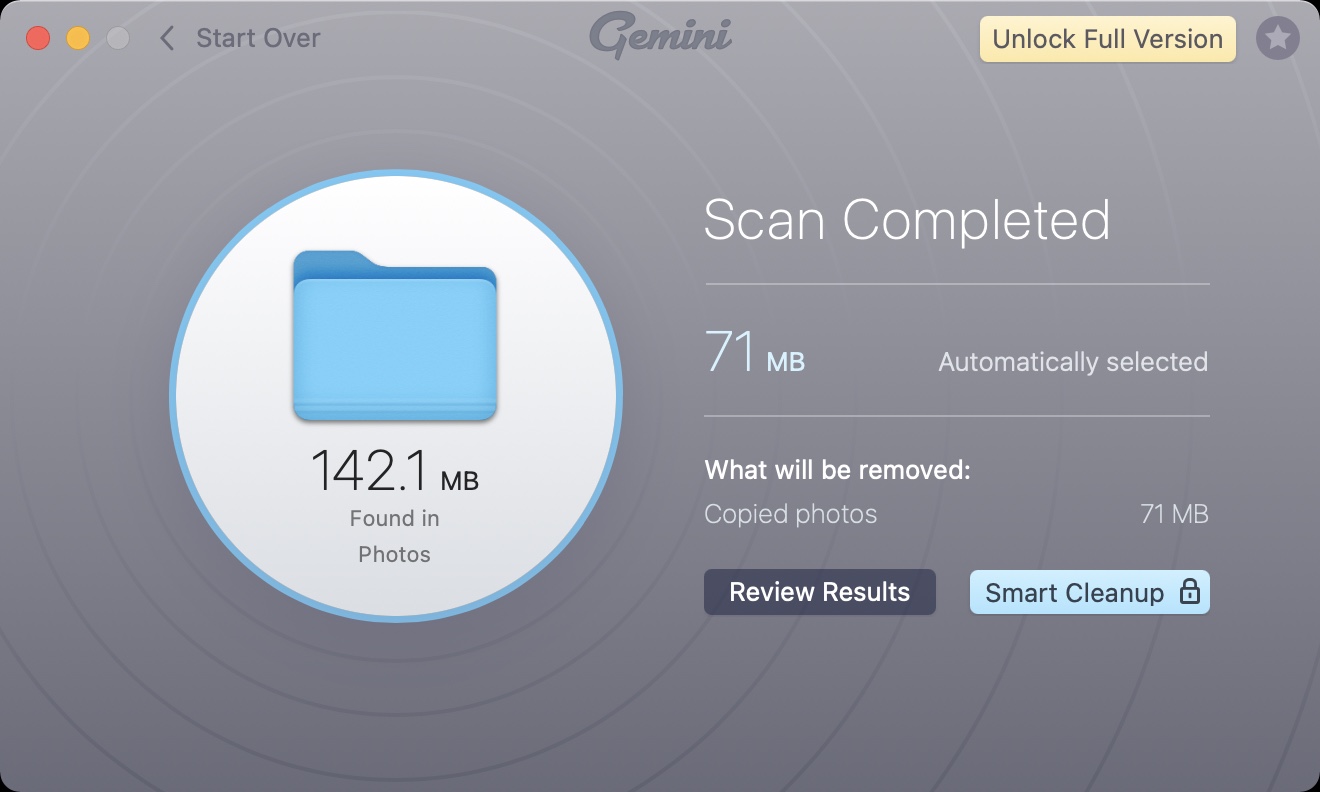
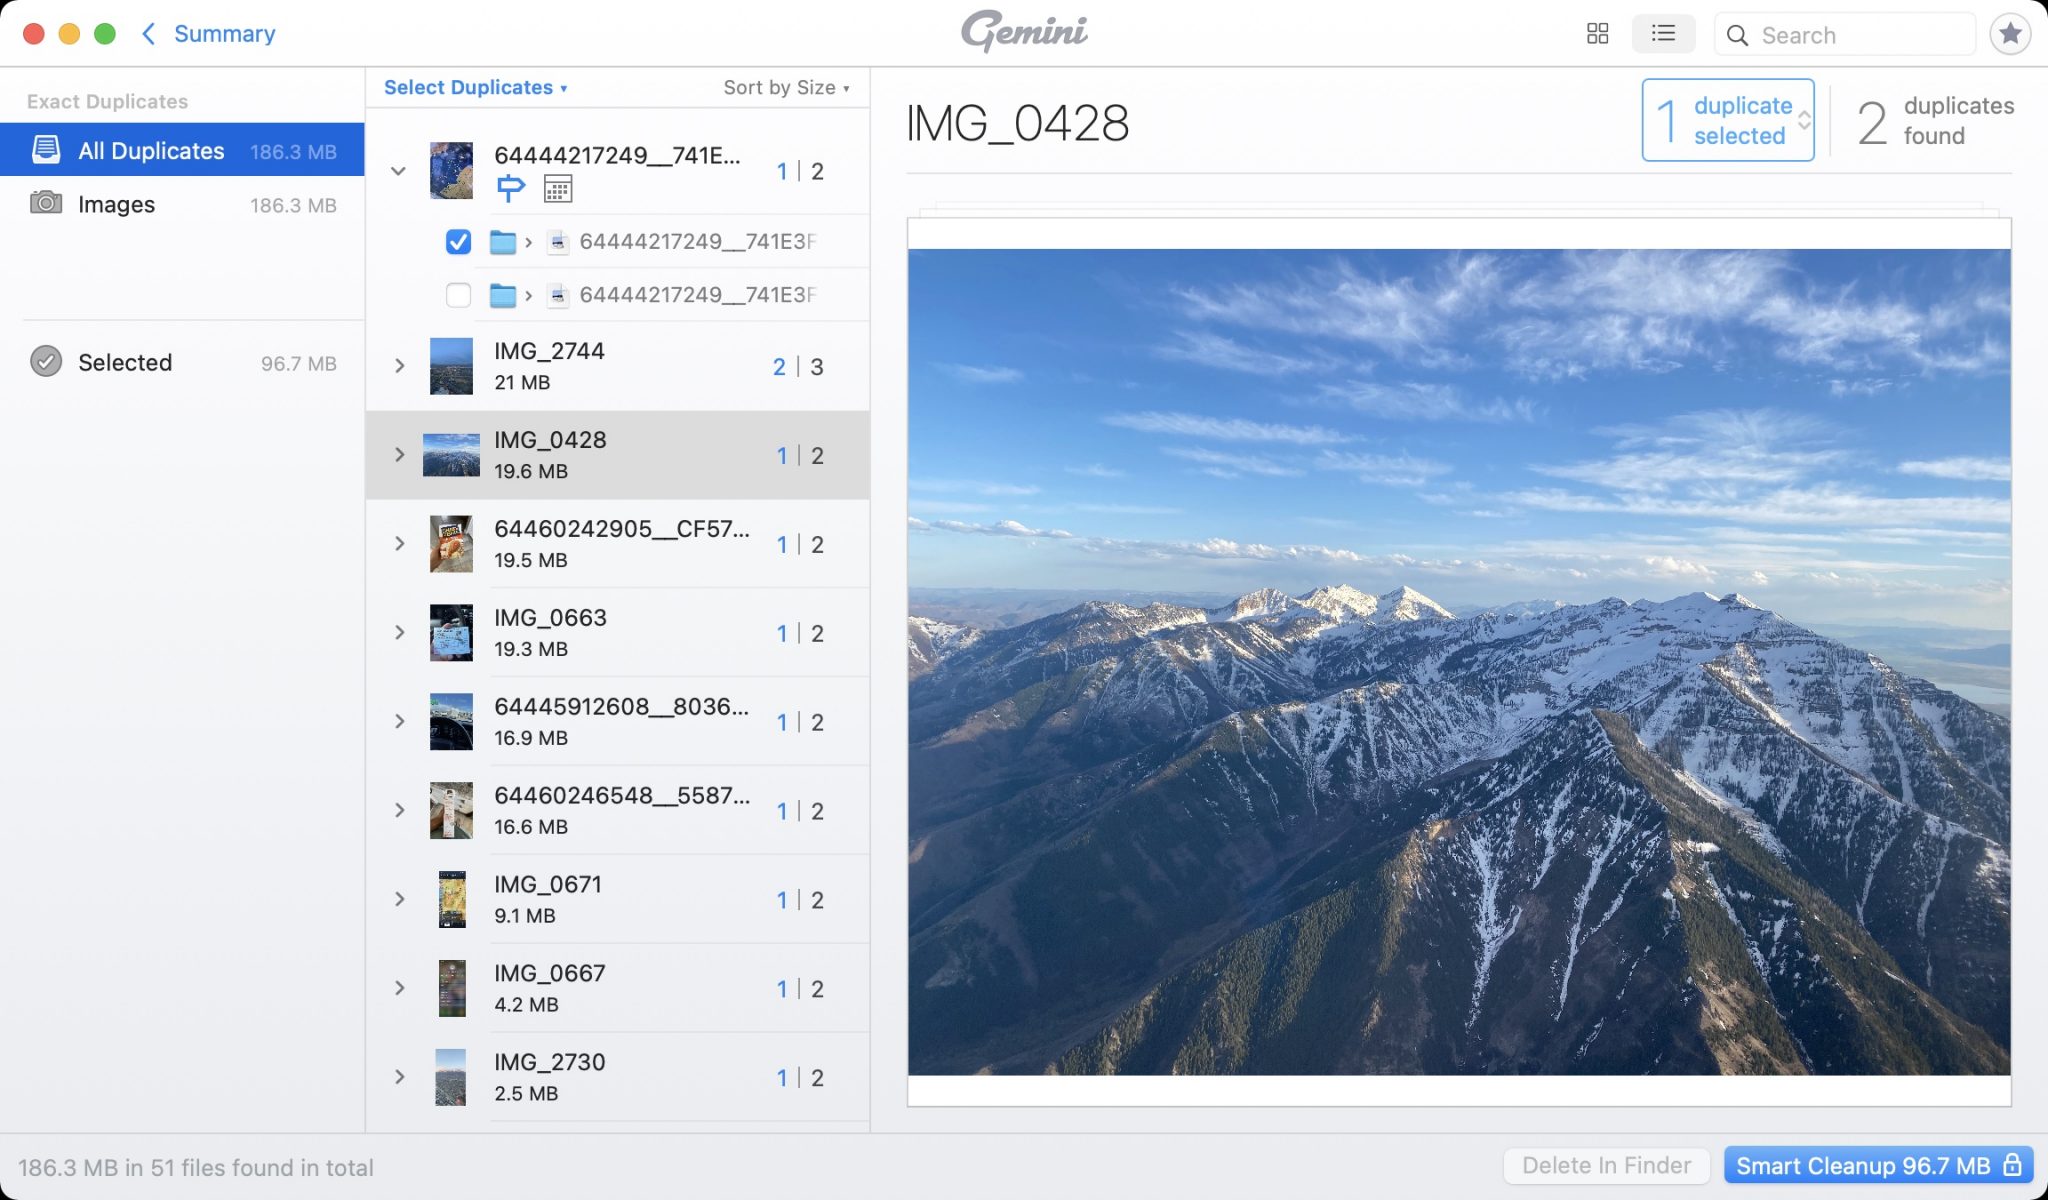
Step 4. Within the results, all of the duplicates that were found will be shown here. Decide what you would like to keep, and what you want to delete from your Mac. After you have found what you would like to delete, click the Smart Cleanup blue button in the lower right-hand corner of your screen to remove the duplicate photos.
The free version of the app doesn’t allow you to delete any of the photos within the app, it will only show you what duplicates that were found from your scan results. This is helpful as it will allow you to see how any duplicates that you have before making a purchase decision. If you only have a couple of duplicates, it might be worth manually going in, finding the photos, and deleting them.
The price of the app isn’t much, and I would recommend that you get it. Not only does it have a beautiful interface, but it runs very well too and it gets the job done.
Lastly, let’s take a look at a third option for finding and removing duplicate photos.
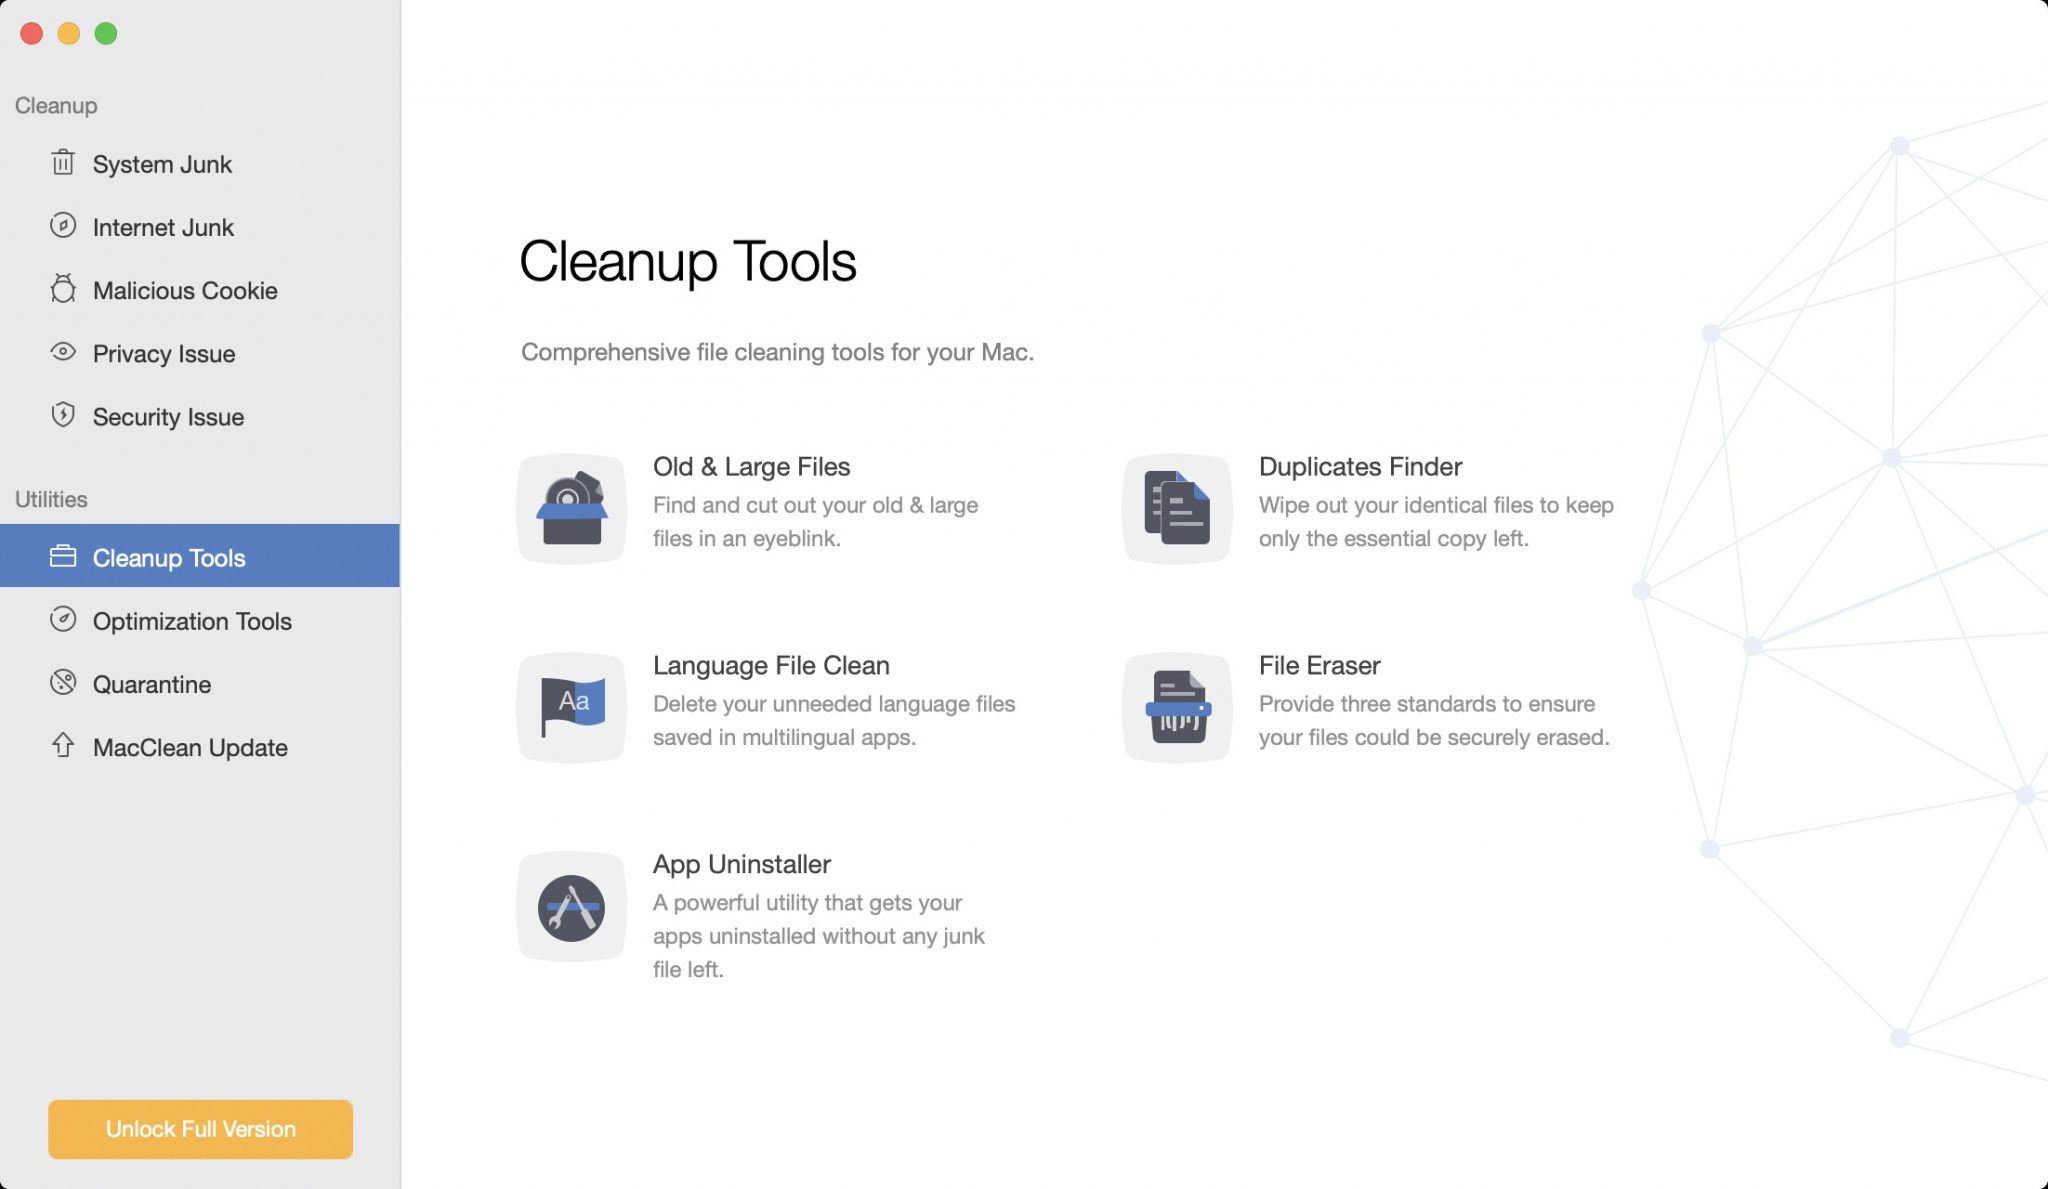
Method 3: Deleting Duplicate Photos With MacClean
MacClean is a Mac app that allows you to locate and remove things such as duplicate photos, documents, songs, apps, and any other file that could be on your Mac. Developed by iMobie, MacClean is a solid choice when it comes to finding and removing duplicate photos on Mac. The easy interface isn’t my favorite, but it’s easy-to-use and it will get the job done.
Let’s take a look at how to use the app and see what it can do.
Step 1. Download and install MacClean.
Step 2. Launch the app where you will then be greeted by the welcome screen.
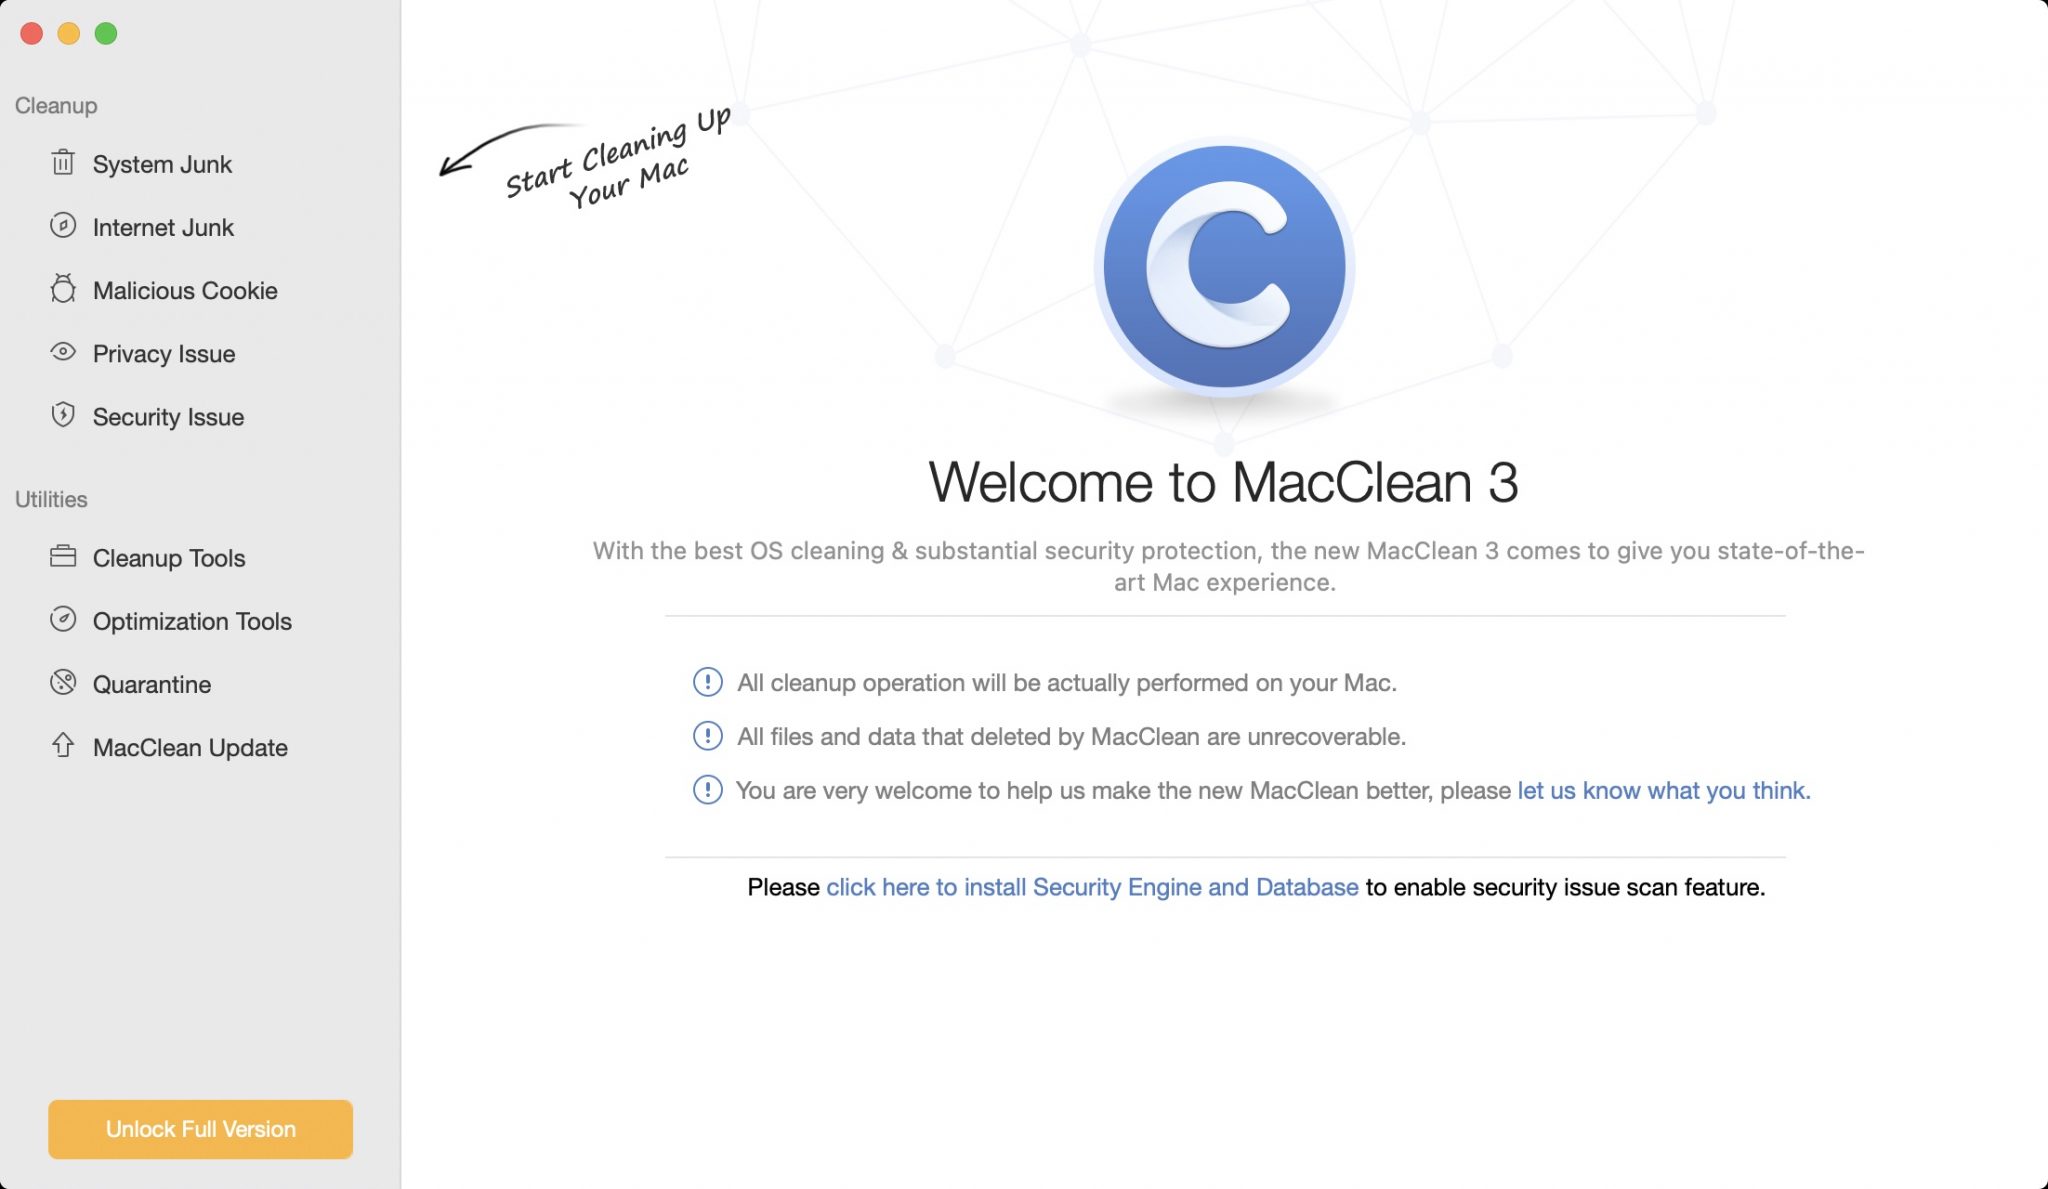
Step 2. We can navigate to the sidebar and go under Utilities. Under this section, we want to select Cleanup Tools as that is where the Duplicates Finder option is located. Once within there, select the Duplicates Finder option.
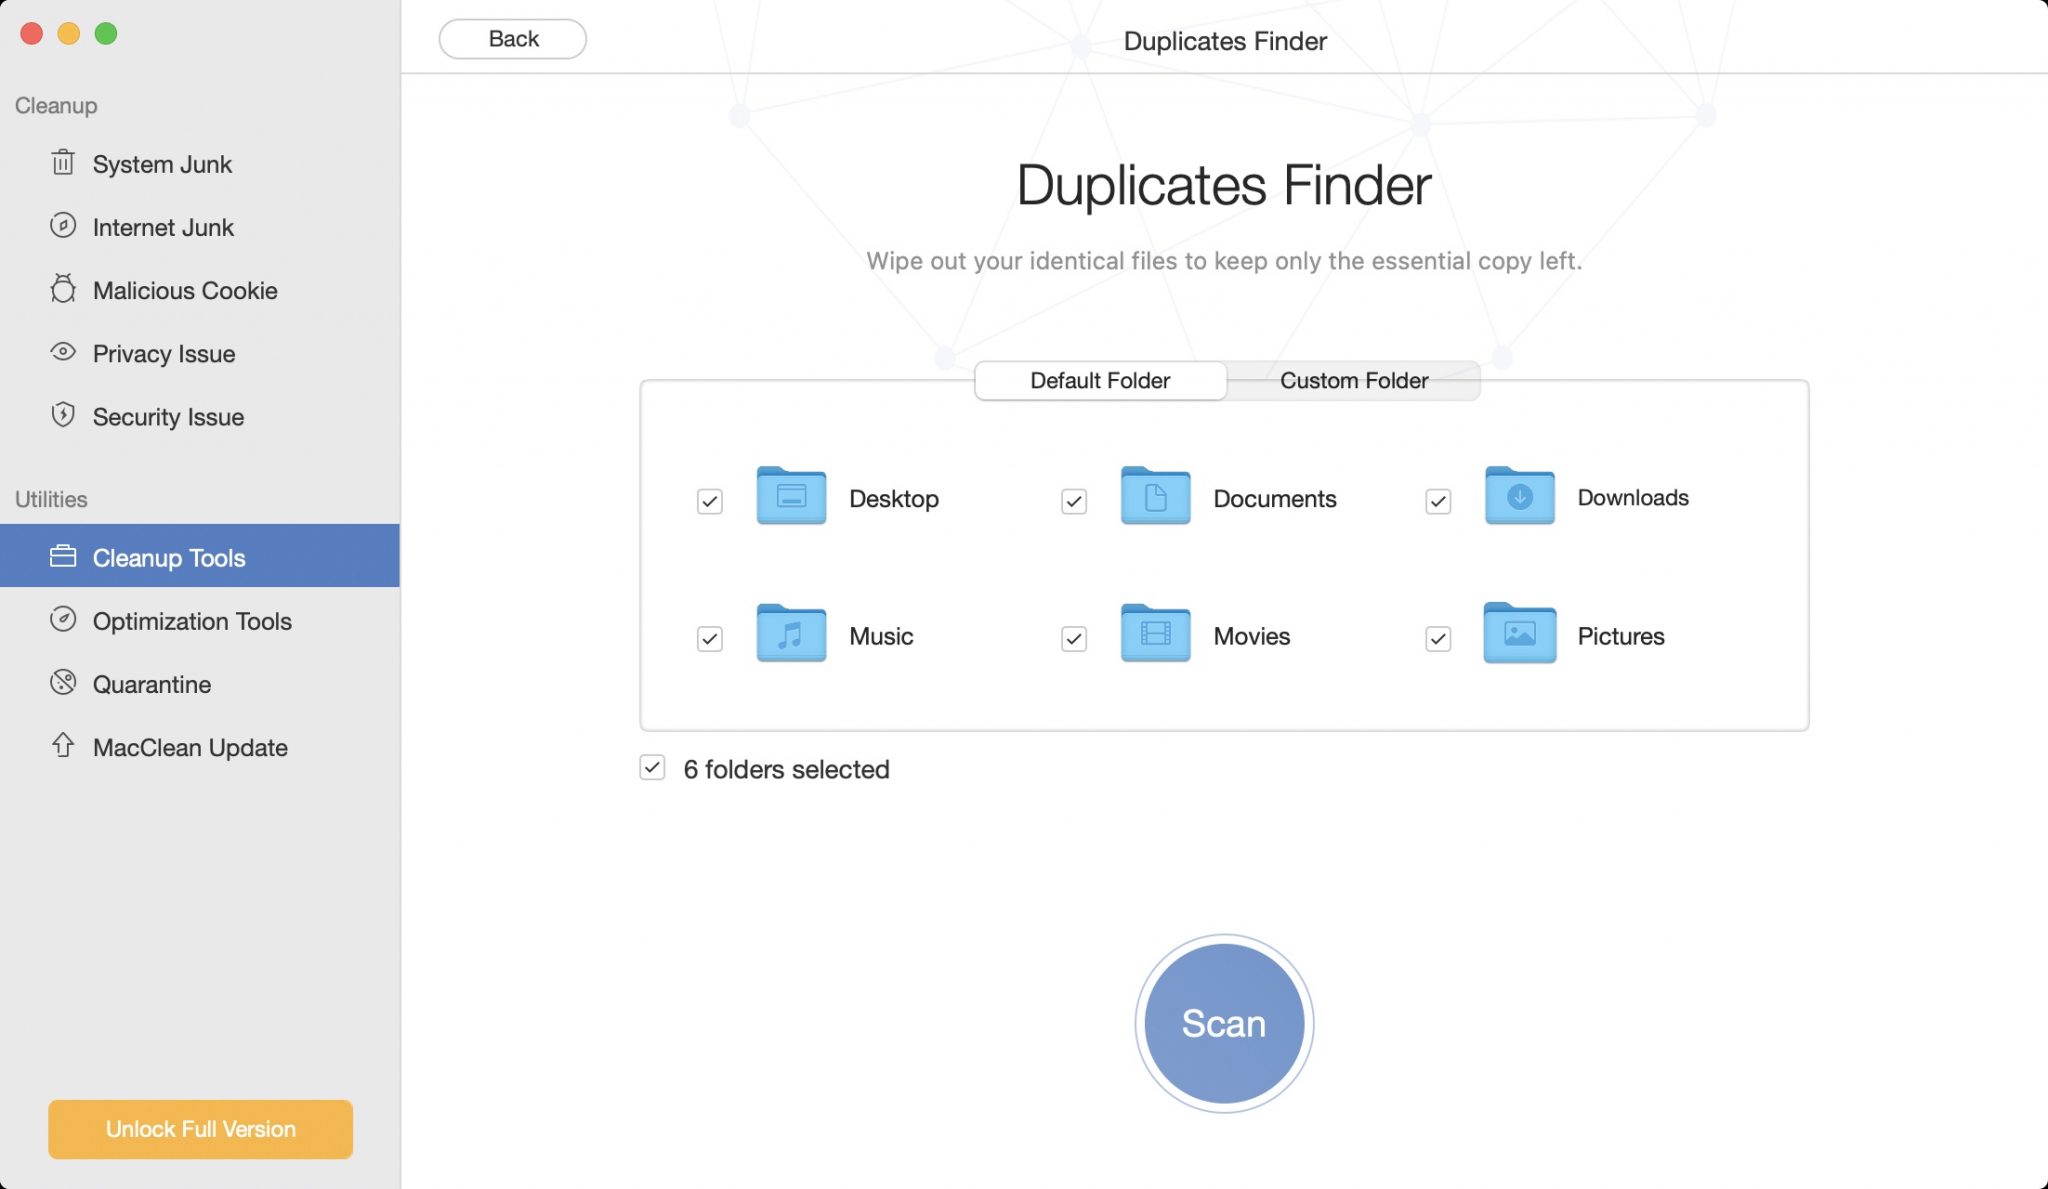
Step 3. After clicking on Duplicates Finder, you can now choose what you would like MacClean to scan on your Mac. I choose to let it scan everything as I want to know of every duplicate file that my Mac could have on it. The more items that you select, the longer that the scan process will take so keep that in mind.
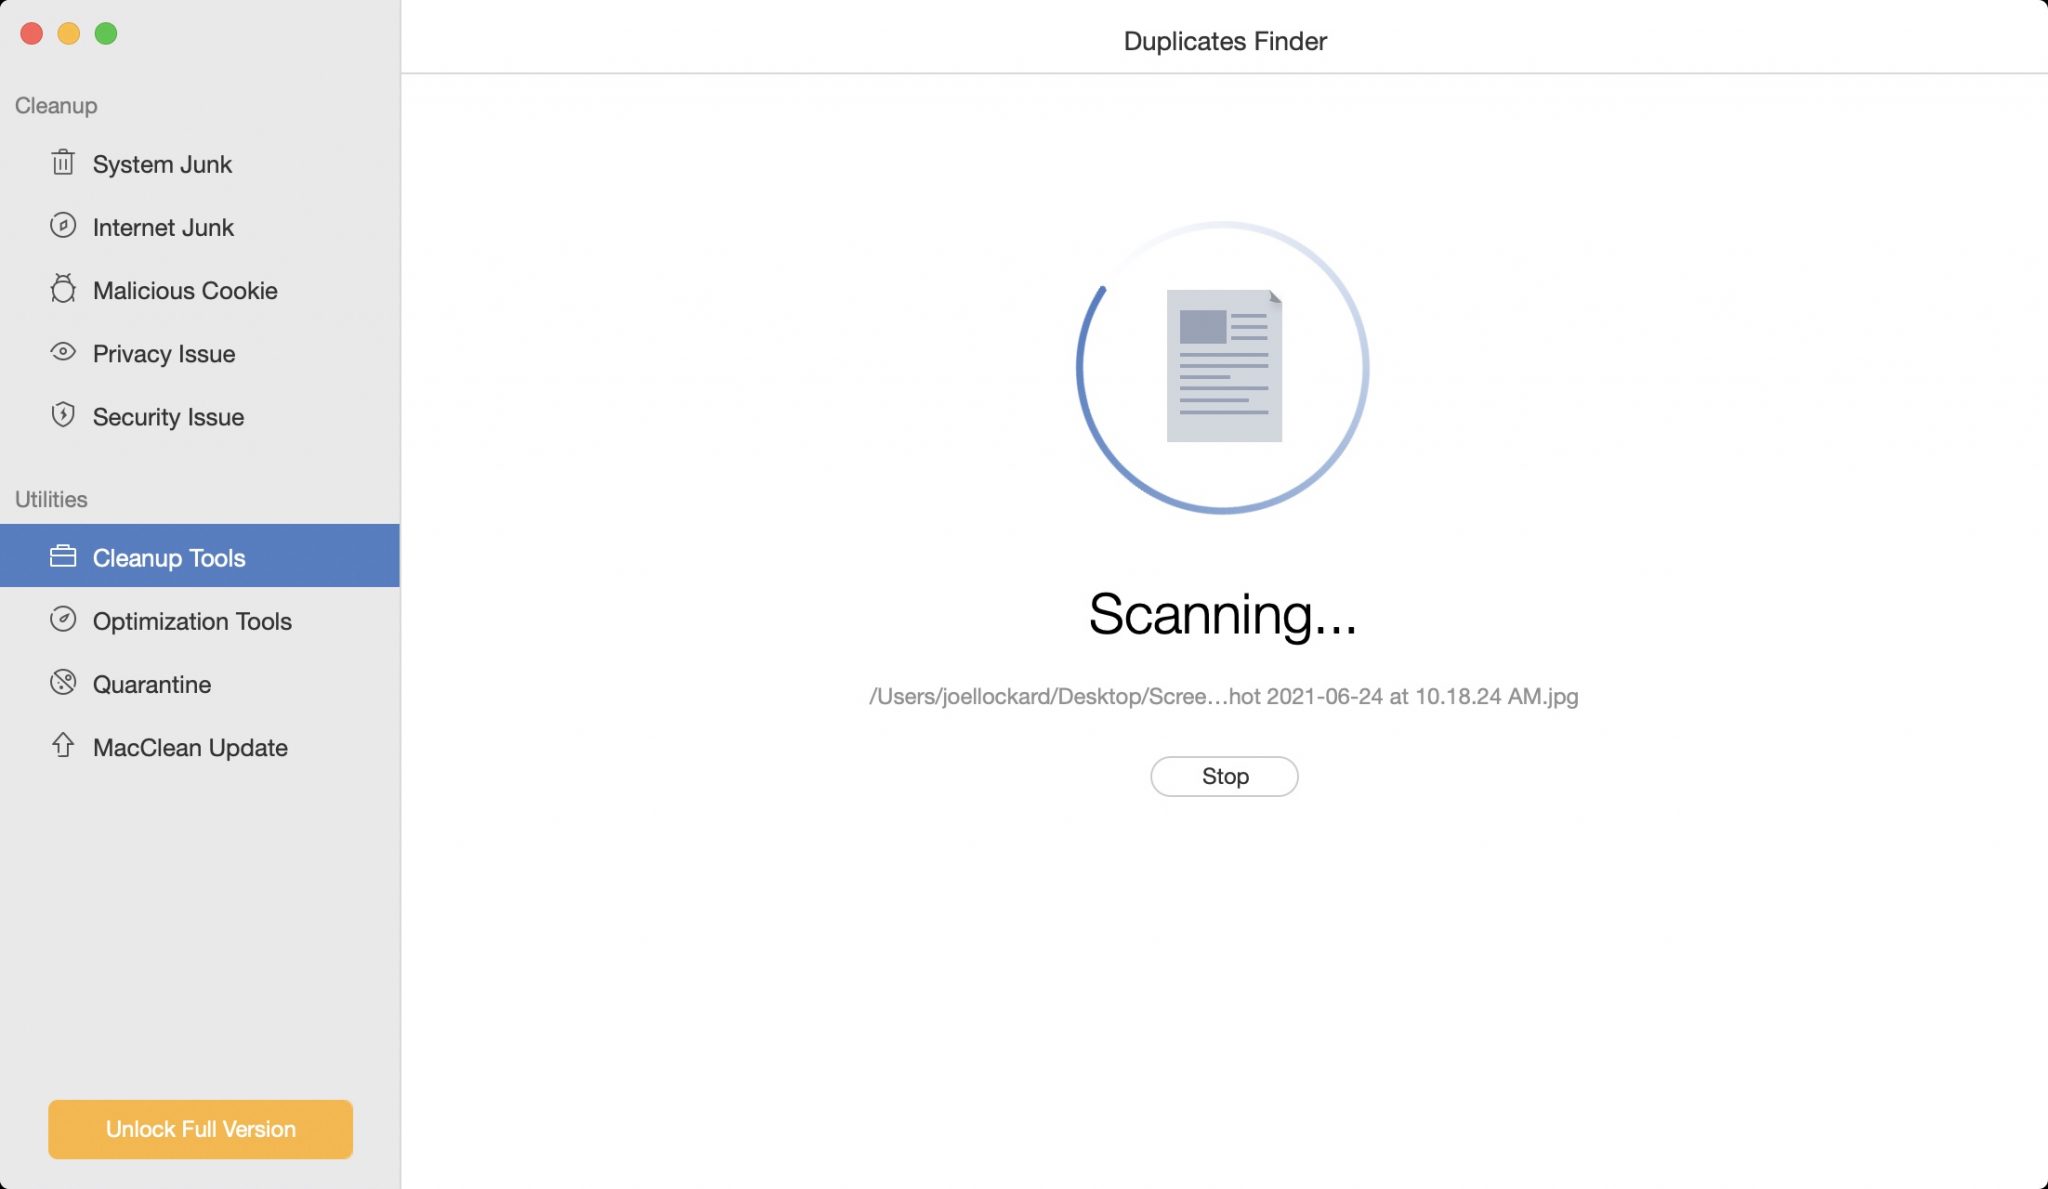
Step 4. After you have made your selections, hit the scan button, and the scanning process will start.
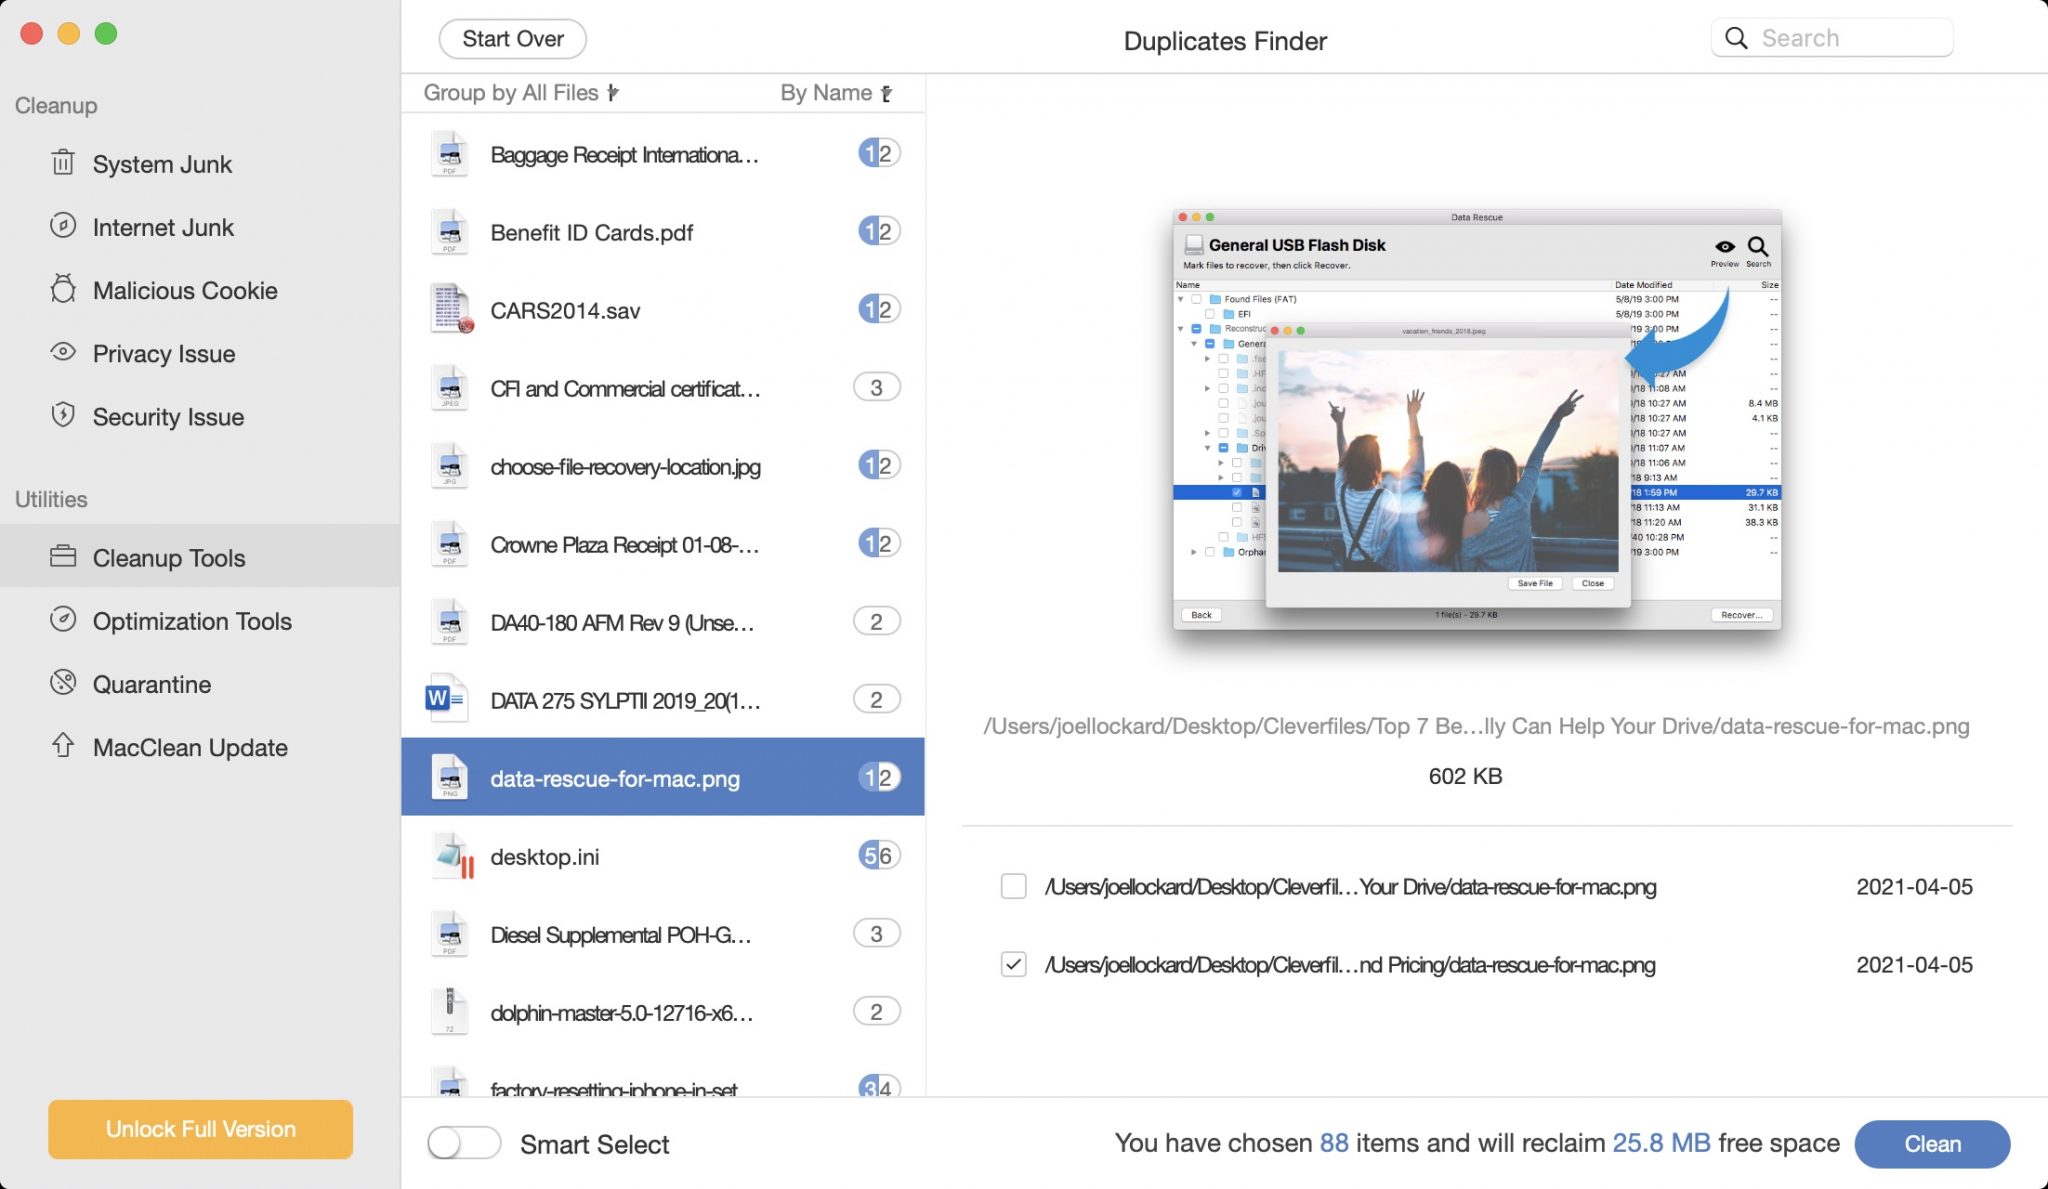
Step 5. Once the scanning process has completed, you will be greeted by everything that MacClean was able to find on your Mac. You can look through this list and select what you would like to remove. Once you have selected everything that you want to remove, click the Clean button in the lower right-hand corner of the screen. Keep in mind that you will have to pay to use the Clean feature. Without purchasing the software, you can only view the duplicate files that are on your Mac.
That’s it! Next, let’s take a look at how to prevent duplicate photos from getting on your Mac in the first place.
Tips: How to Prevent Duplicate Photos on Mac
Now that we have been able to get rid of those pesky annoying duplicate photos, and make your photo library take up less space as well as look better, how do we ensure that we won’t have duplicates in the future?
Use the Same Account With All of Your Devices
Double-check that you’re using the same Apple ID on your Mac, iPhone, and iPad as having more than one or having the wrong one signed into one of your devices could cause photos to not sync, causing duplicate photo issues.
Only Import Your Photos From a Camera Once
If you use a camera other than your iPhone, you want to make sure that when you import the photos from your camera, that you only do this once. It might be best to import the photos and then clear them off of your SD card to ensure that when you import the next time, you don’t create duplicates.
Clean Up Photos Right Away
Did you just go on an awesome trip and take a bunch of photos? Chances are you might have taken multiple pictures of the same group of people or scene. It would be a good practice to sit down and clear out the photos right then. That way, it won’t be an overwhelming task later and it will help reduce the chance of duplicate pictures.
Conclusion
Pictures are something that all of us love taking and reflecting on later in life. It can be frustrating though if our Mac has run out of space or when we go to look at these photos, we have a ton of duplicates.
With what we have gone over in this article, hopefully, we won’t have to look at those duplicate photos anymore!


FAQ
To find and remove duplicate photos on your Mac, simply follow the steps below.
- Download and install Disk Drill.
- Launch the app.
- Drag the folder that you would like to scan for duplicates into Disk Drill.
- Review the results and delete the duplicate photos.
Deleting duplicate photos on your Mac is easy and there are many software options that allow you to accomplish this task.
Duplicate photos can be deleted by using the software options mentioned in this article. They are:
- Disk Drill
- Gemini 2
- MacClean
Once downloaded, you can scan your Mac for duplicate photos and remove them.
You can have duplicate photos on your Mac for a couple of reasons. The most common are the following:
- Importing the same set of photos more than one time.
- Taking multiple pictures of the same group of people or scene will give you what appears to be duplicate photos. This is really just a lot of pictures that look alike.
- If you have more than one device trying to sync the same picture this can cause duplicate photos to appear.
Disk Drill can be used to remove duplicates on your Mac for free.
- Download and install Disk Drill.
- After launching the app, you can select the folder that you can want to scan for duplicates.
- Scan the folder for duplicates.
- Review the duplicates and then select Remove.
Below is a list of the 5 best duplicate photo finder Mac apps that I would recommend you give a try. My personal favorites are Disk Drill and Gemini.
- Disk Drill
- Gemini 2
- CleanMyMac X
- PhotoSweeper
- Duplicate Photo Cleaner