Your iPhone is an incredible feat of technological engineering. It provides you with what is essentially a very small and extremely powerful computer that can be used to accomplish a wide variety of personal and business tasks. Making phone calls is often an afterthought, as the iPhone is used for connecting to the Internet, running applications, and of course, taking photos.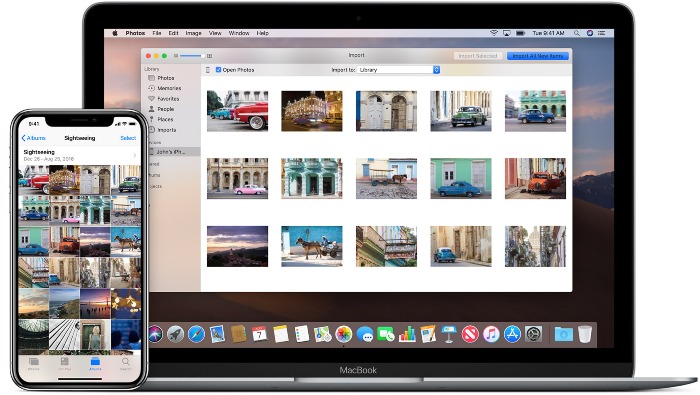
The quality of the camera built into the iPhone makes it unnecessary for most users to have another digital camera. It is certainly more convenient to only be carrying around one device that can serve all of your communication and photographic needs. There is, however, a tendency to take too many photos and fill up your phone’s storage.
There may come a time when you want to get rid of all of these photos. Maybe you are upgrading your phone and want to delete all pictures from your iPhone before passing it on to another family member. You might be preparing to sell it and need to clear all photos from the iPhone before offering it for sale.
Tips to Delete Photos from iPhone
Let’s take a look at how to delete all images from an iPhone in case you need to perform this action. We’ll also look at how to get them back if you’ve deleted them by accident.
#1 Manual Deletion of Photos and Albums
Steps to delete Photos from an iPhone:
- Open the Photo app on your iPhone and select the photo or photos that you want to delete.
- Tap the trash icon and confirm your desire to delete the photos. This will move them to the Recently Deleted Folder.
- You can delete all of the photos in an album by navigating to the album and selecting Select and then Select All. Tap the trash icon to send them to the Recently Deleted Folder.
#2 Using a Computer to Delete Photos
 Mac users can avail themselves of the Image Capture application to delete photos from their iPhone.
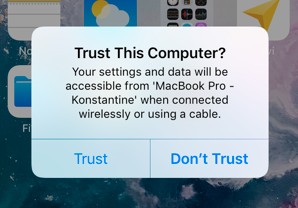
Connect your iPhone and make sure it trusts your Mac. You will see all of your iPhone’s photos in image capture and you can select as many as you would like to delete.
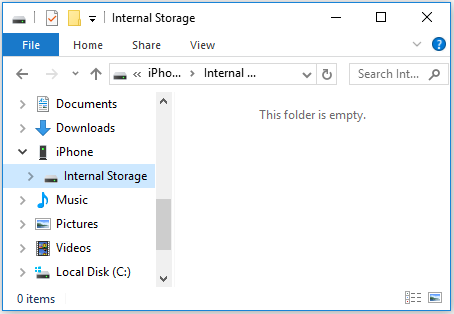
Windows users can also access their iPhone’s photos by attaching the device to their computer and making sure that the phone trusts the machine.
Then, simply use Windows Explorer to navigate to your iPhone’s DCIM photo folder. Select the pictures that you want to remove and delete them with the Shift + Del keystroke combination.
#3 Resetting Your iPhone
If you want to use the quickest method and are getting ready to pass your phone to another user, then this is how to delete all pictures from your iPhone in one shot.
Resetting your iPhone to its factory settings will remove any customization that you have done to your device as well as delete all of the data that resides on its storage. This obviously includes all of your photos and videos.
Resetting your iPhone is a relatively simple process, but one that needs some careful consideration before being put into action. After the procedure, your iPhone will be in the state it was when you first purchased it, so you don’t want to take this step lightly.
Steps to reset your iPhone:
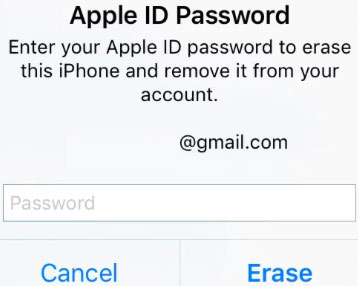
- Go to Settings > General > Reset and select the option to Erase All Content and Settings.
- Type in your iPhone passcode. You will see a warning box in red with the option to Erase iPhone.
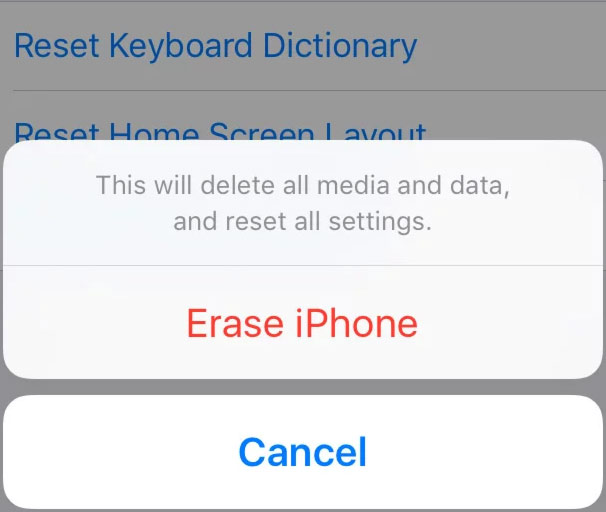
- Confirm the action by entering your Apple ID’s password. After confirmation, the device will wipe everything from its storage and present you with its initial setup screen.
How to Recover Accidentally Deleted Photos
Way 1 – Check the Recently Deleted Folder
Deleted photos may still be located in the “Recently Deleted” folder on your iPhone. They remain there for 30 days unless you select the “Recently Deleted” album and delete those photos. In that case, they are gone for good.
Photos that are still in the Recently deleted folder are easily recovered by navigating to Photos > Albums > “Recently Deleted”, selecting the photo or photos you want to restore, and then tapping the “Recover” button.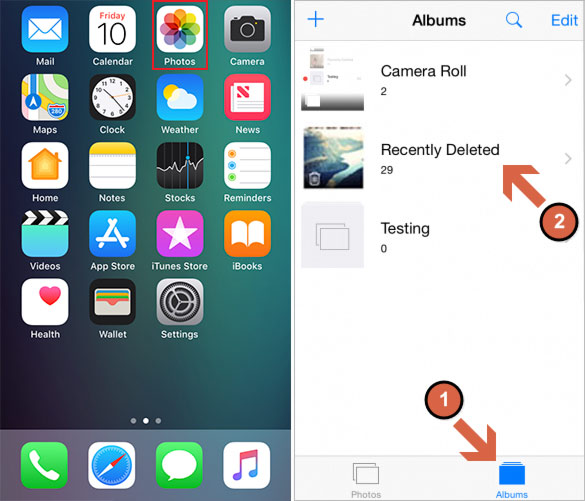
Way 2 – Recovering Deleted Photos with Disk Drill
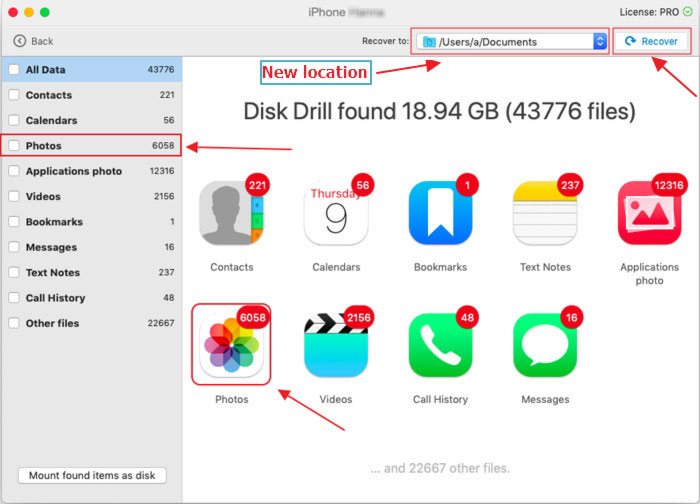
If you realize that you have deleted photos that you would like to recover which are no longer in the Recently Deleted folder, don’t panic. Disk Drill – iPhone data recovery software may be able to recover photos that were deleted more than 30 days ago.
Disk Drill is available as a free download which will scan your iPhone and allow you to preview the files that it can recover for you. This is a risk-free opportunity to see if the tool can recover the photos you would like to restore.
Follow these simple steps to recover deleted photos from iPhone:
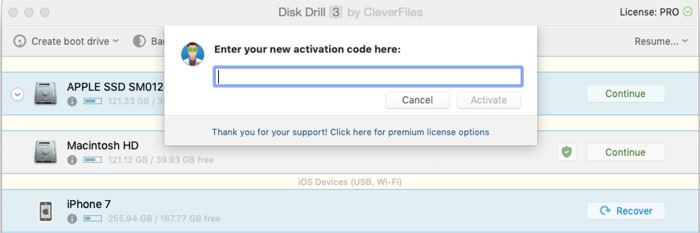
- Download and Install Disk Drill. You will need to provide administrator-level permission for the app to perform its data recovery functions.
- Attach the iPhone to your computer and ensure that the computer is trusted by the phone.
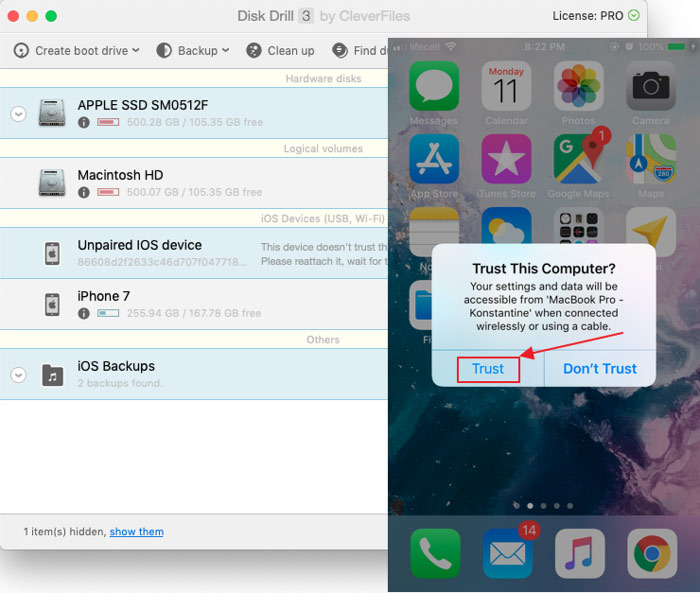
- Select the iPhone from the list of disks presented by Disk Drill.
- Click the Recover button to preview the files that can be recovered using the data recovery tool.

- Upgrade to Disk Drill Pro if you want to recover the identified files on a Mac computer.
- Select the photos to be recovered and a new location at which to store them and click the Recover button. Your photos will be restored to the new storage location 🎉

So there you have it. We have shown you how you can clean all of the photos from your iPhone and how to recover photos if you deleted them from iPhone inadvertently or have a need to get them back.