TL;DR
Why This Guide?
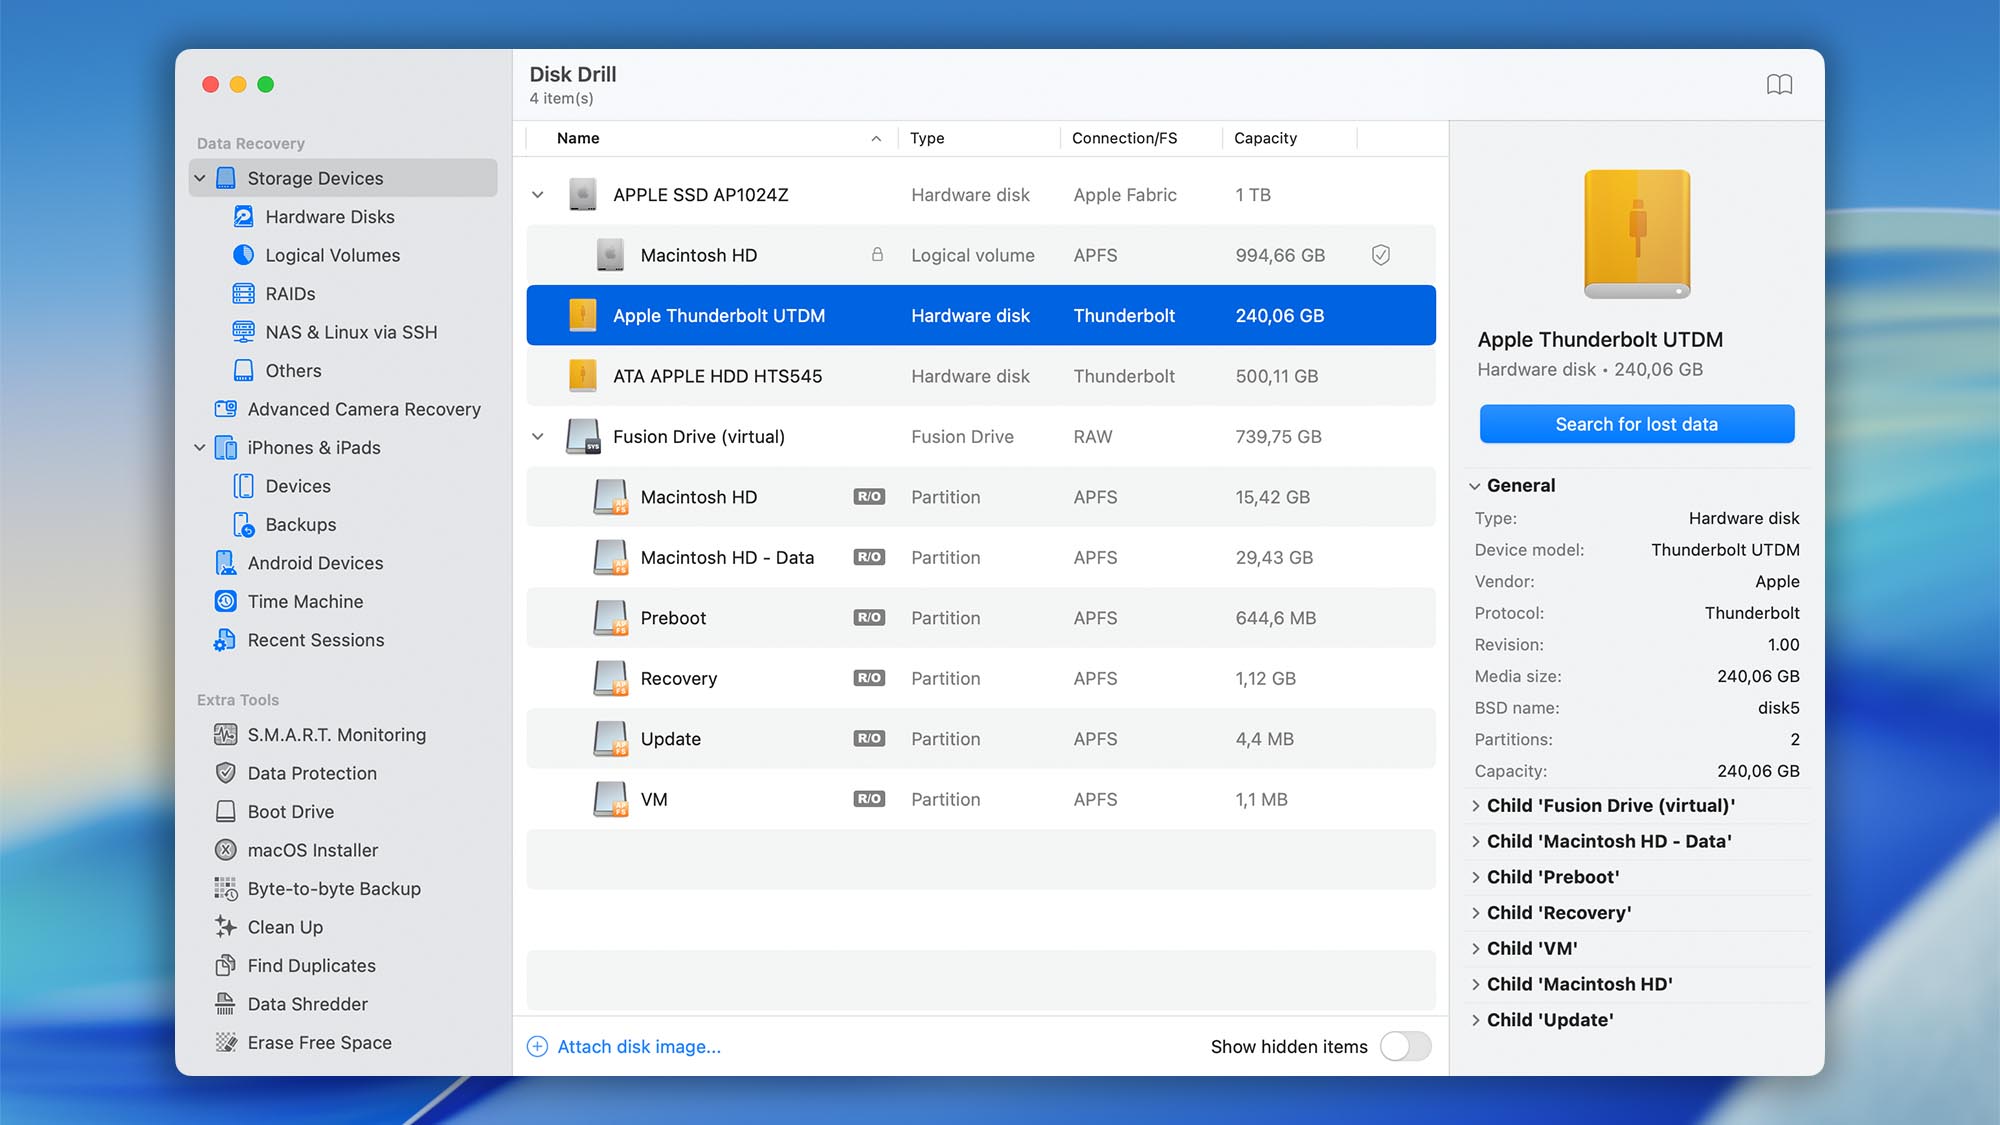
If your Mac won’t boot, or you deleted files on a Mac you’d rather not touch any further, connecting it to another Mac and scanning the disk from the safe host is often the cleanest way to recover data. Disk Drill recognizes a Target Disk Mode volume like a locally attached drive, so you can scan it and recover to a separate destination.
Another great use of Target Disk Mode is if you still possess an older, unbootable Mac that is not mounting well and the internal drive from which you want to recover files no longer boots, Target Disk Mode can be used to access the drive. The use of Target Disk Mode requires that you have another computer that is working and a Thunderbolt or FireWire cable to link the two of them.
What You’ll Need
- Two Macs (one “target” with the lost data; one healthy “host”).
- A proper cable: For Intel TDM: USB‑C/Thunderbolt/Thunderbolt‑to‑Thunderbolt depending on ports. If either Mac runs macOS 11 or later, Apple requires a Thunderbolt cable between the two.
- Disk Drill for Mac installed on the host Mac (for Intel TDM flow).
- Enough free space on an external drive or the host Mac to store recovered files (never recover back to the same disk you’re scanning).
Part A. Intel-Based Mac: Recover via Target Disk Mode
If the Mac with lost data is Intel‑based, you can present its internal storage to another Mac as an external disk (Target Disk Mode), then run Disk Drill on the host.
Step 1. Cable Up and Enter Target Disk Mode on the Target Mac
- Connect both Macs with a Thunderbolt/USB‑C cable appropriate for their ports (use Thunderbolt if either Mac is on macOS 11+).
- On the target Intel Mac, start TDM by either:
- Holding T at power‑on, or
- System Settings ▸ Startup Disk ▸ Target Disk Mode. The target will appear as an external disk on the host Mac.

Step 2. Unlock FileVault (if Needed)
If the internal APFS volume is encrypted, macOS may prompt you to unlock it with the user password. In managed environments, admins can also unlock a FileVault disk connected in TDM using a Personal Recovery Key (PRK) from Terminal (example workflow in Apple’s deployment guide).
Step 3. (Strongly Recommended) Create a Byte‑to‑Byte Backup Image
Before scanning, use Byte‑to‑byte Backup to create a sector‑by‑sector image of the target disk and scan the image instead of the live disk—this keeps reads minimal and protects fragile media.
Step 4. Scan & Recover With Disk Drill
Open Disk Drill on the host Mac, select the target disk (or its image) in the disk list, and click Search for lost data button. Disk Drill treats the TDM disk like a locally attached drive, so normal recovery workflows apply. Recover found data to a different disk (never to the source).
Step 5. Eject Cleanly
When finished, eject the target disk from Finder and power off the target Mac to exit TDM.
Part B. Intel Macs with the Apple T2 Security Chip
What T2 Encryption Really Means
- Encryption is automatic. On Macs with the Apple T2 chip (and on Apple silicon), macOS encrypts your internal storage by default. Enabling FileVault adds a user‑password gate at boot and for mounts, but the disk is hardware‑encrypted either way.
- Key handling happens inside Secure Enclave. With FileVault on, APFS volume keys are wrapped with a key‑encryption key tied to your password + the hardware UID; keys are never exposed to the Intel CPU. With FileVault off, the volume is still encrypted—the volume key is just protected by the hardware UID in the Secure Enclave.
- Consequence for data recovery: If you don’t have valid credentials (user password or recovery key), the volume can’t be decrypted—even if you transplant the storage to another Mac.
Target Disk Mode on T2 Macs: What Changes
- TDM still works on Intel, including T2 models—but you’ll be prompted to unlock any encrypted APFS volumes before the host Mac can read them. In enterprise setups, an MDM‑escrowed Personal Recovery Key (PRK) can be used to unlock a FileVault volume connected in Target Disk Mode (not applicable to Apple silicon because classic TDM is gone there).
- Use the right cable. If either Mac runs macOS 11 or later, Apple requires a Thunderbolt cable for TDM (USB‑C charge‑only cables won’t work).
- Firmware password can block TDM. On Intel Macs with T2, a firmware password set in Startup Security Utility can explicitly prevent booting into Target Disk Mode (and other alternate boot modes). You must clear or enter that password to proceed.
Practical Recovery Game‑plan for T2 Macs With Disk Drill
- Prefer TDM when the Mac powers on. Connect with a Thunderbolt cable, boot the target Intel Mac into Target Disk Mode, and unlock the APFS volume with the user password (or PRK in managed environments). Then use Disk Drill on the host Mac to scan the target disk.
- If the Mac won’t enter TDM but powers on to Recovery: Launch Disk Drill from macOS Recovery on the affected Mac and scan internally (you’ll still need to unlock FileVault).
- If the Mac is bricked: Attempt a Revive (non‑destructive); do not Restore unless you’ve resigned to losing the data. Consider professional logic‑board repair to bring the T2 back long enough to unlock the disk.
Part C. Apple Silicon (M1-M4): Your Options (and Limitations)
On Apple silicon Macs, classic Target Disk Mode is not supported. Apple replaced it with Share Disk (in macOS Recovery). Apple’s security documentation explicitly notes that TDM is no longer available on Apple silicon.
What Share Disk Actually Provides
Share Disk lets you connect two Macs with a cable, boot the M‑series Mac to macOS Recovery, then Utilities ▸ Share Disk the internal volume. On the host Mac, you access it via Finder ▸ Network, then connect and copy files. That workflow exposes file‑level access for transfer, not a raw block device.
FAQ
Absolutely, please read this article at Apple Support.
TDM was introduced with the original PowerBook 100, and it was never removed from macOS. However, with the release of Apple Silicon, TDM will no longer provide the required low-level access to disk’s data layer, which is required for data recovery. Thus this article is marked as not relevant for Apple silicon based Macs.
To complete data recovery from the startup disk on macOS 10.14 Mojave and macOS 10.15 Catalina, we also recommend temporarily lowering System Integrity Protection settings or running your data recovery from a boot drive.
Target Disk Mode can be tricky if you are trying to connect an older Mac to a newer one, or even if macOS versions are slightly different. To add to the mess, not all USB-C cables are compatible. Unfortunately, this level of troubleshooting is beyond the scope of this article, but these are the two potential issues to look into: try a different/better cable, or if possible, try to match the macOS versions.