It’s not uncommon to encounter the sudden disappearance of files and folders from your Mac’s Desktop. This can happen for various reasons, often linked to syncing issues with iCloud or accidental deletions. Imagine my surprise when, after tweaking some iCloud settings, I found my Desktop stripped of its files and folders. Losing important data this way is a scenario we’d all like to avoid.
In this article, we’re going to take a look at how to recover desktop files that have disappeared on your Mac and look at various ways to restore and get them back.

Why Do Files Disappear From My Mac?
Files can go missing from our Mac for many reasons, and the way you restore them depends on what caused the problem in the first place. In most cases, it usually comes down to one of these:
- ♻ Issues syncing with iCloud Drive as I experienced
- 👤 Accidentally deleting the file thinking that you won’t need it anymore
- 🌩 Power outage causing data loss
- 💥 Computer crash
- 🔍 Attribute changes causing files and folders to become hidden
- 💾 Forgetting to save a file that you’re working on
- 😐 Overwriting a file with a new one
- 👩💻 Misplacing the file on your MacBook
While the list above doesn’t list every instance that you may lose a file if you have experienced a desktop file or folders disappearing, there are ways for us to recover them back onto our Mac.
Below, we will look at various ways to recover desktop files and even give you a tip on how to protect your data!
Method 1: Use Spotlight Search to Find the File
You may have accidentally misplaced a file on your desktop or put it into another folder by accident. We can use Spotlight to locate this file on our Mac.
Spotlight is a powerful search tool that comes built-in as part of macOS. Spotlight can help you quickly find apps, documents, and other files on your Mac. Spotlight can even perform calculations and conversions for you which is really handy.
It’s quite easy to use and it only takes a few steps to search for the name of the file that we’re trying to recover.
Step 1. Click the Spotlight magnifying glass icon in the upper right-hand corner of your screen.

Step 2. You will then have a search box popup where you can type in the name of the file. Sometimes it can be hard to remember the exact name of the file so you can also type in keywords or even text that is located within the file to try and locate it.

Step 3. From this screen, you have a couple of options. You can click the file and open it or you can click and drag the file to your desktop helping you recover the lost desktop file on your Mac.
Method 2: Restore Desktop Files Using the Trash
It’s also a good idea to double-check the Trash manually if files or folders have disappeared from your desktop on your Mac, since you may have deleted them without noticing.
Items will stay in the Trash until it is emptied. If you have your Trash set to empty on its own, your files will stay there for 30 days. This setting is off by default, but it is something that you should be aware of.
The good news is that it only takes a few steps to recover a deleted file from your Trash.
Step 1. Launch the Trash by finding it on your dock and double-clicking on it.

Step 2. Once within the Trash, look for the name of the file that you’re trying to recover. You can also click on the magnifying glass in the upper right-hand corner to type in the name of the file and that will allow you to search your Trash for it. This is handy if you have a lot of items in your Trash as it may be hard to navigate through all of them.
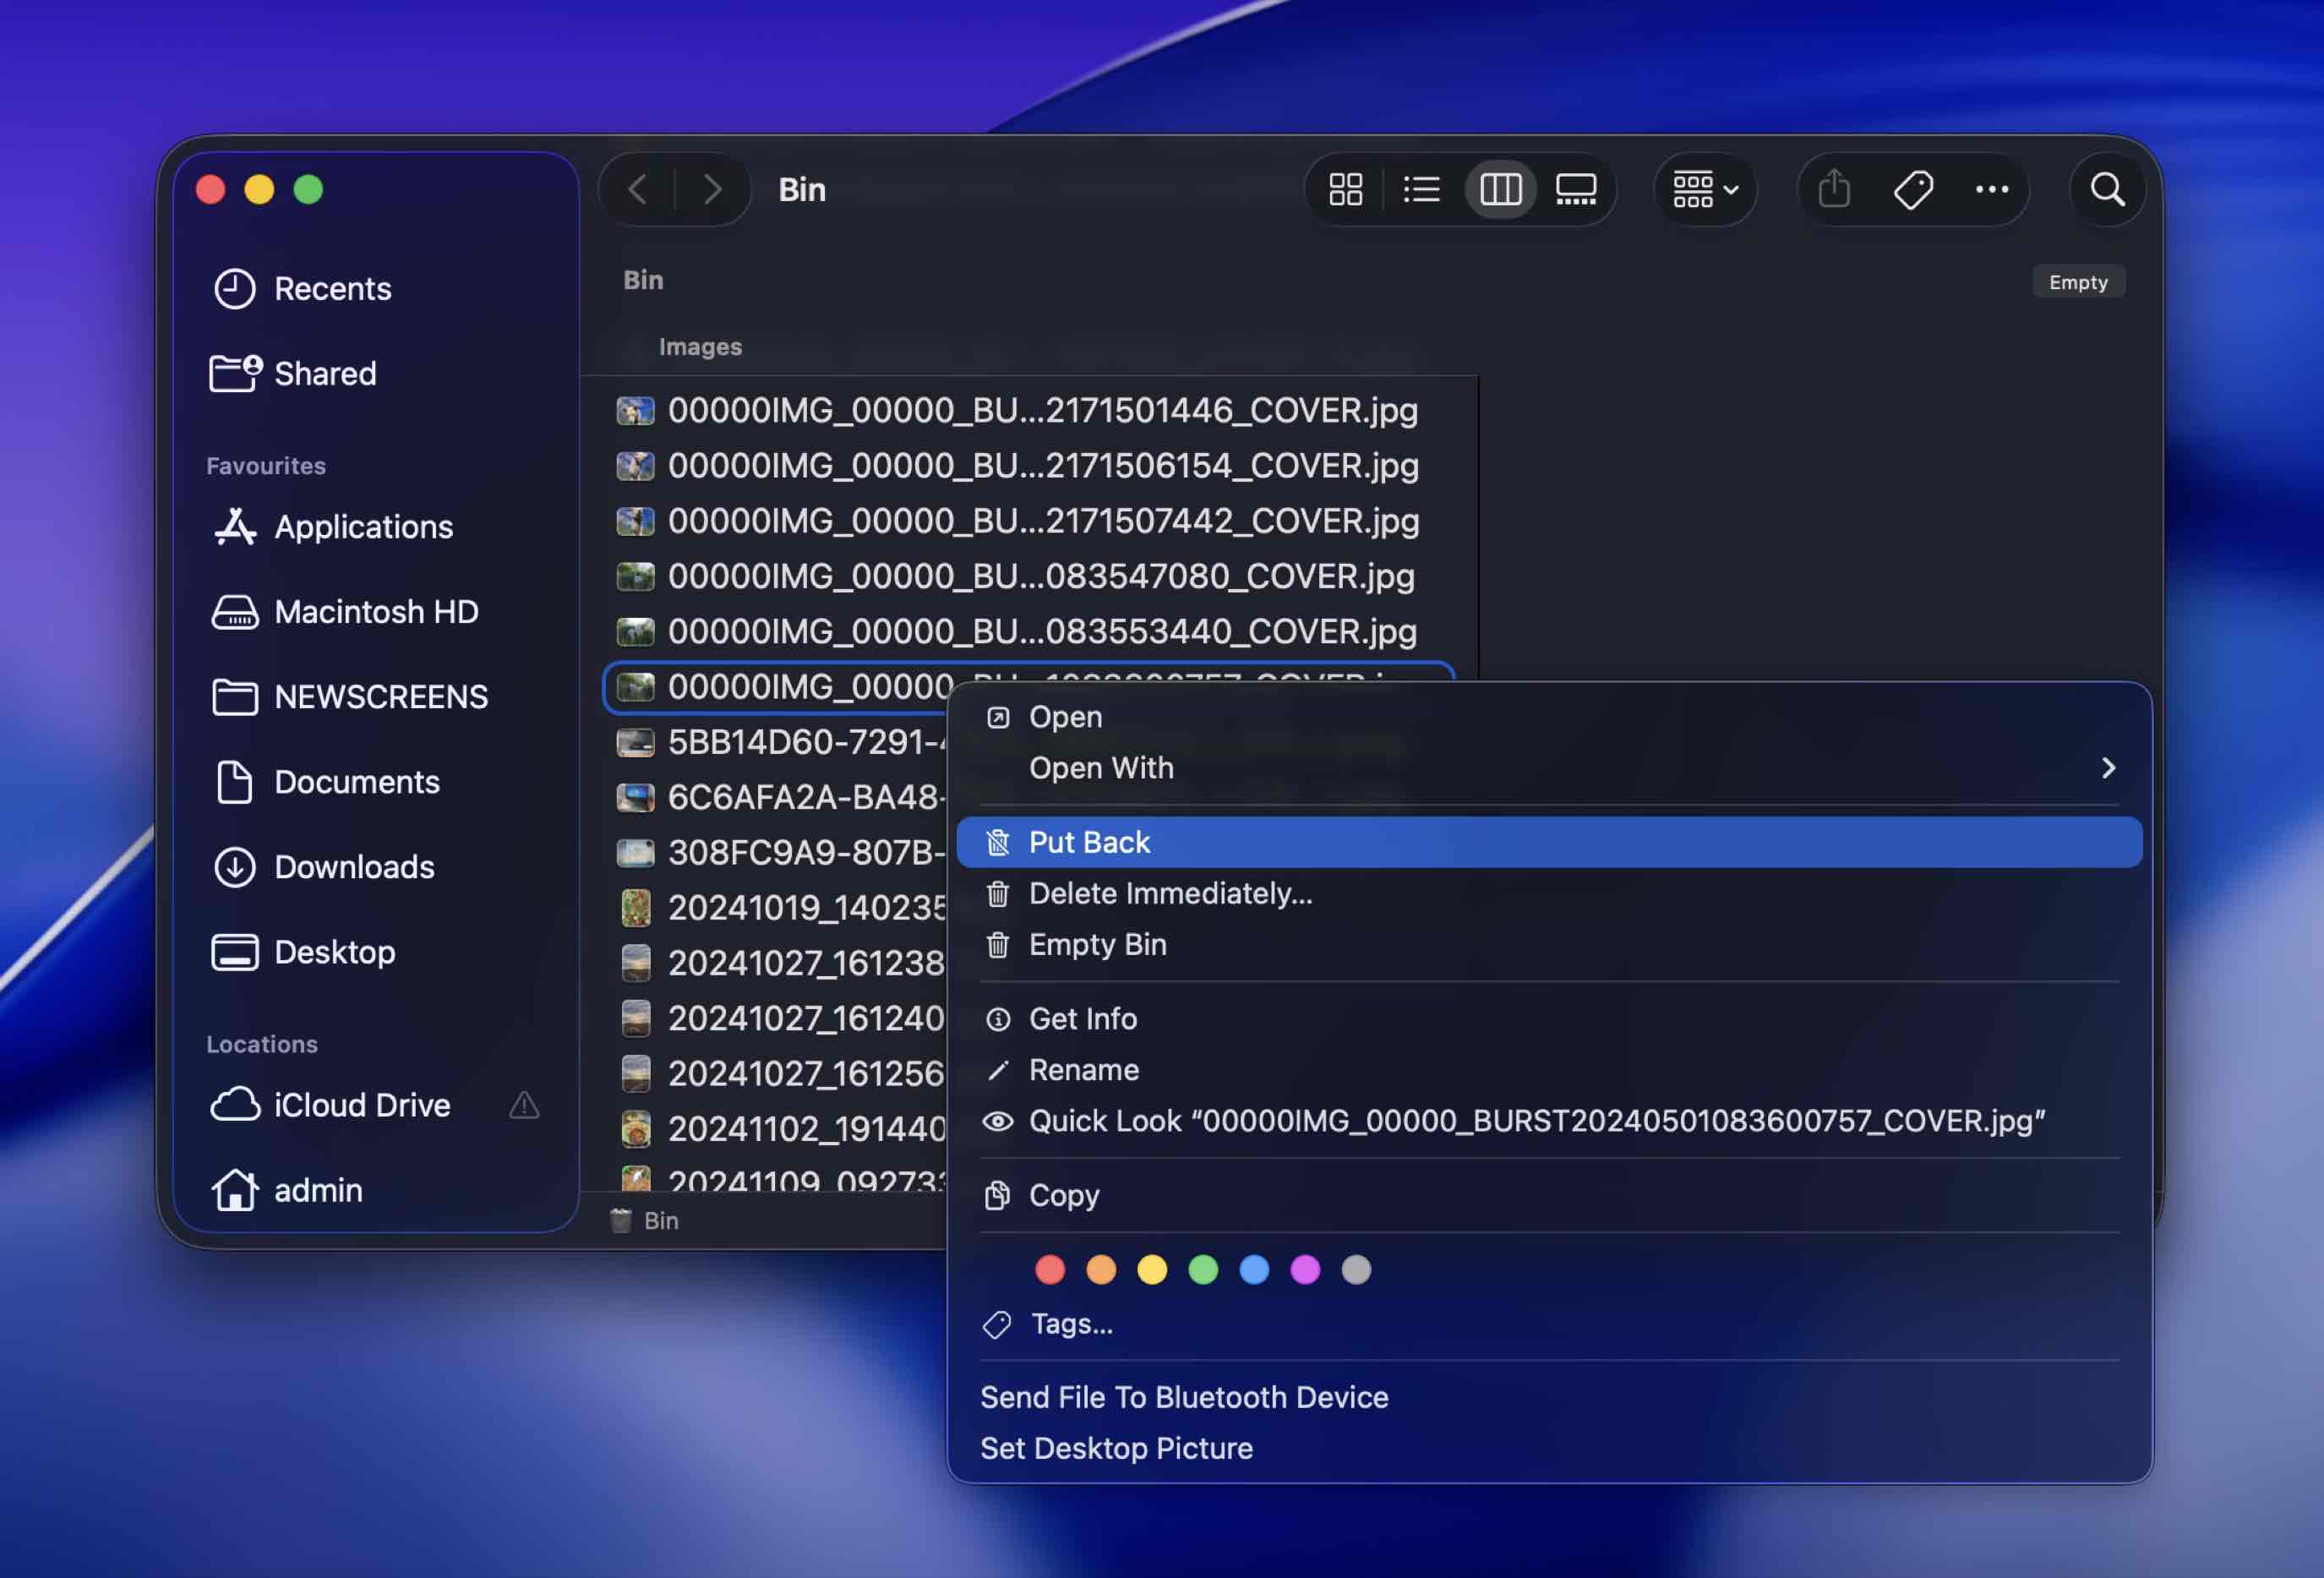
Now that we have found the file that we’re trying to recover, you can either drag it out from the trash and put it back onto your desktop or click “Put Back” which will put it back to where it was in the first place. Keep in mind that this may not be on your desktop though. It could go back to a folder or another place on your Mac.
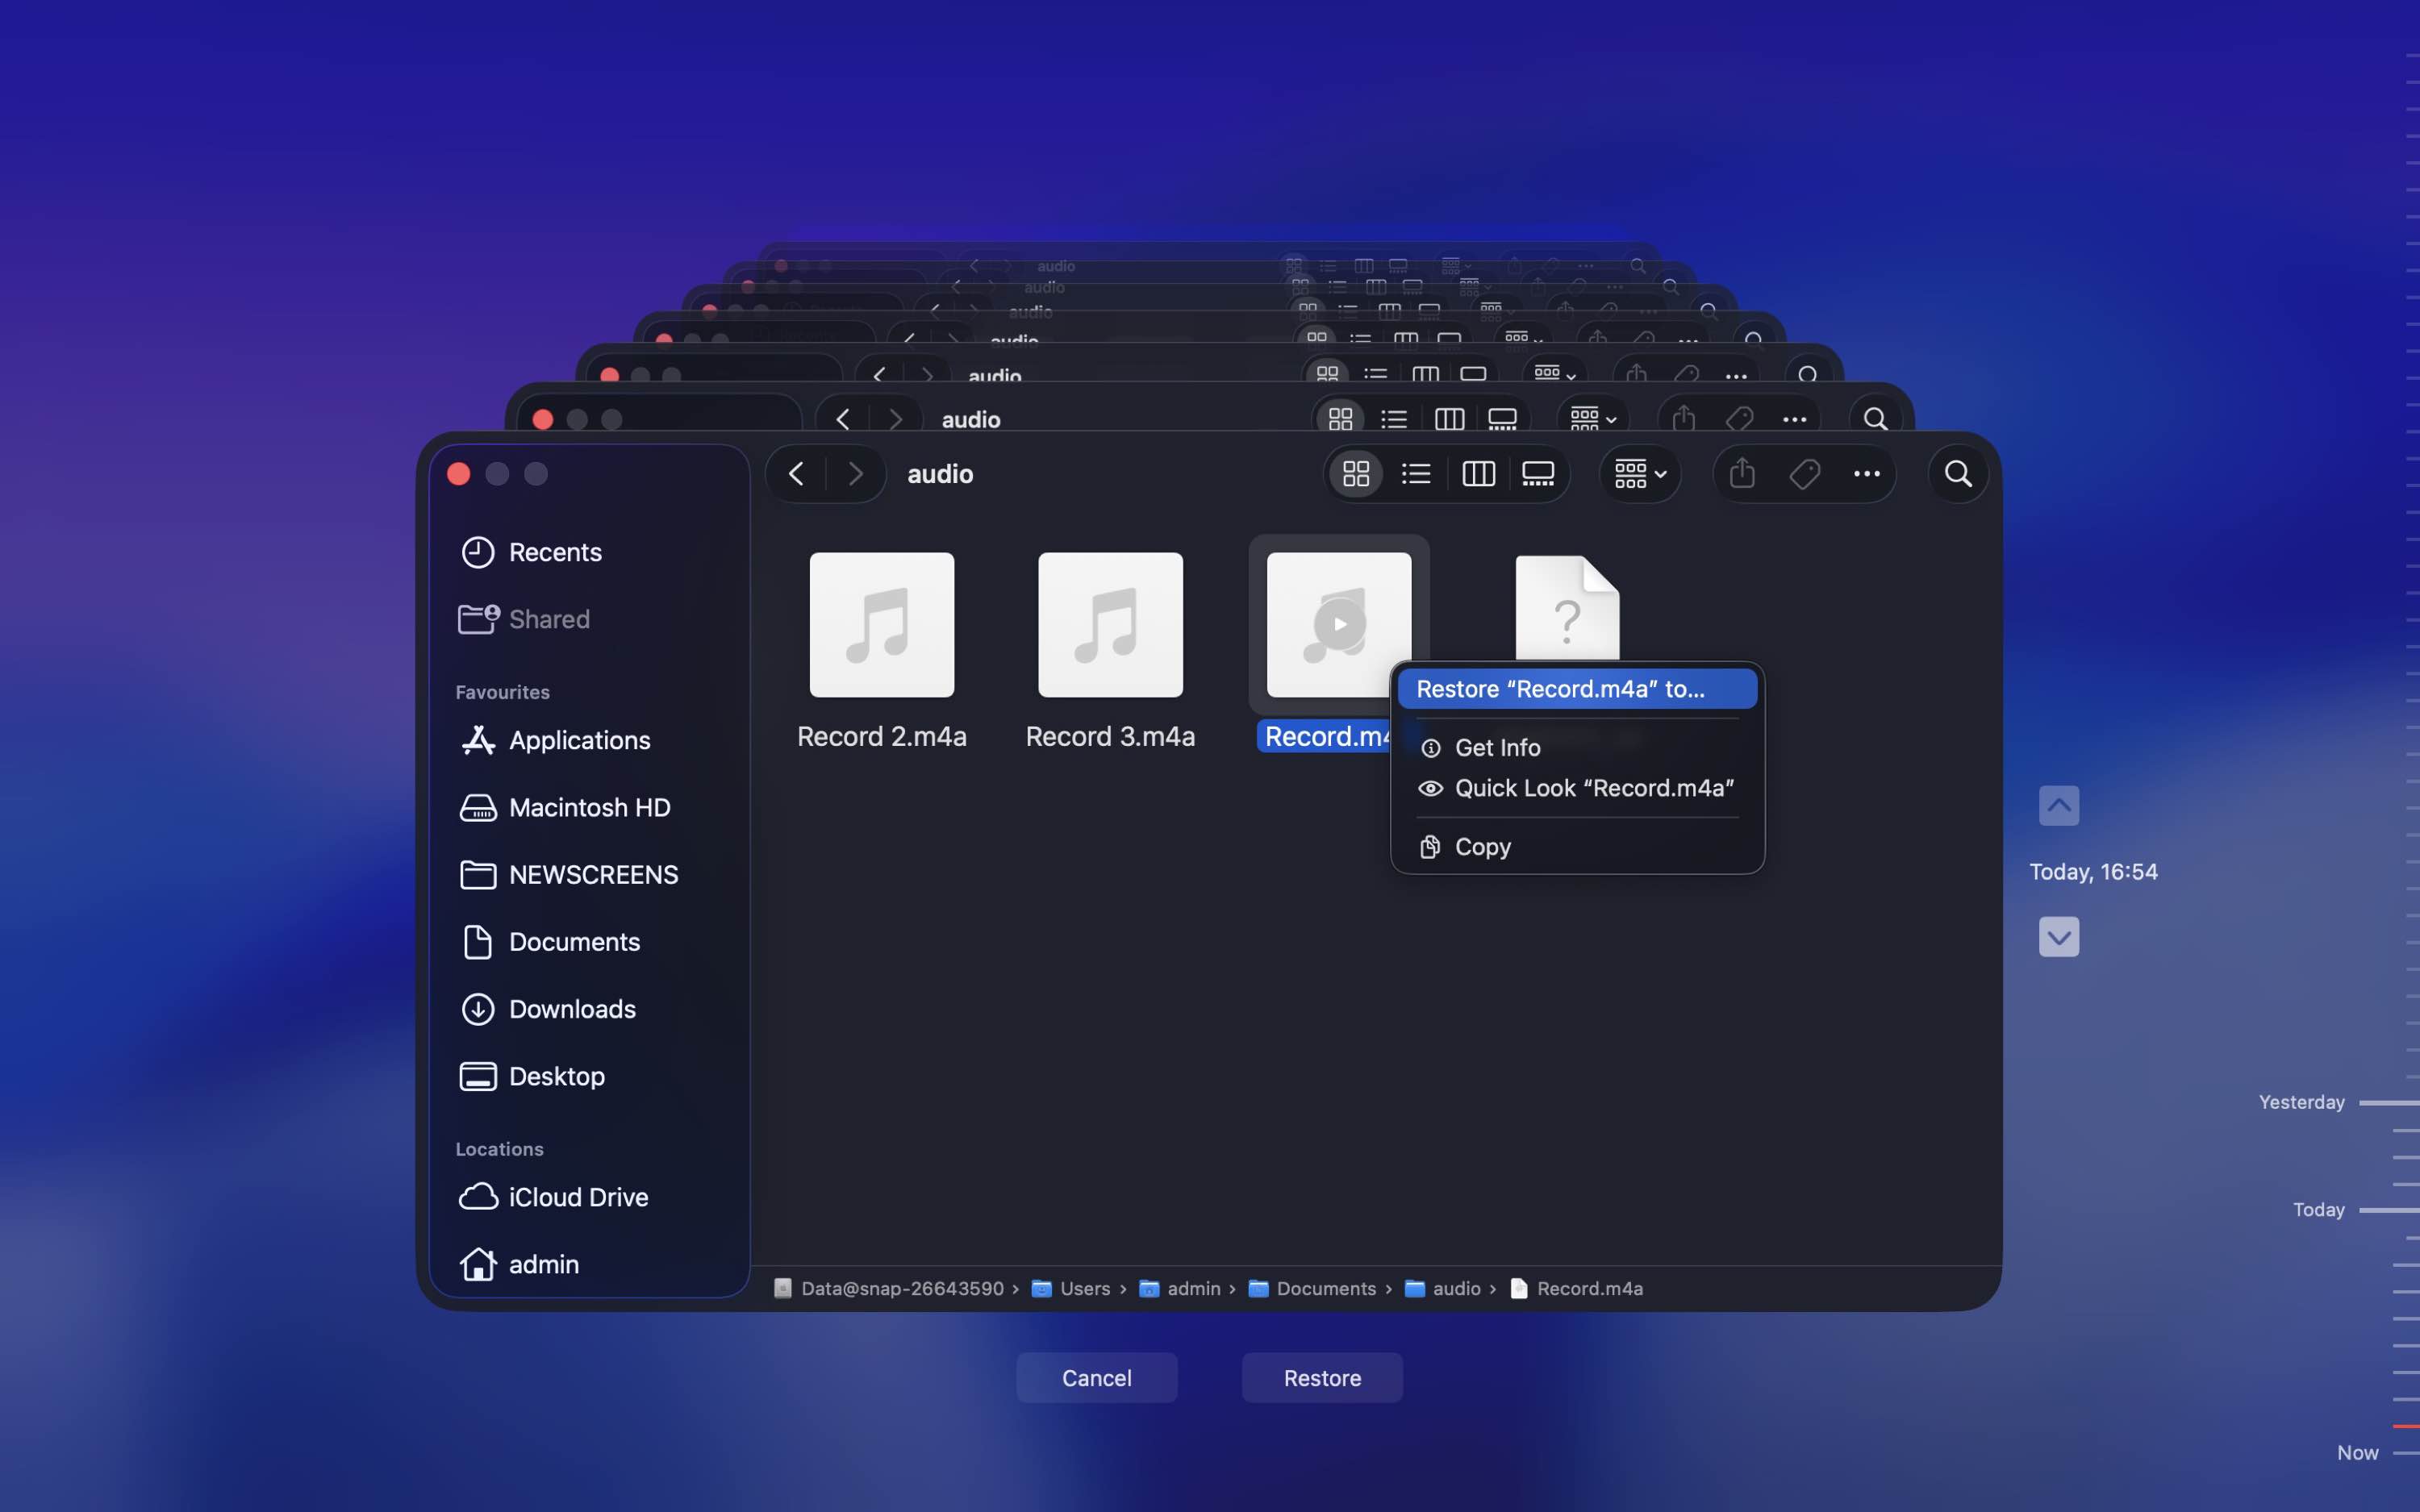
Method 3: Restore Files Using iCloud Recovery
If your Desktop and Documents folders are synced with iCloud Drive, there’s one more place worth checking. When files get deleted from those synced locations, they may also appear in iCloud’s recovery area for a limited time.
This can help in cases where files disappeared from your desktop on your Mac, especially if the Desktop was synced through iCloud and the files no longer show up in Finder, the Trash, or their usual folder.
Step 1. Open iCloud in your browser and sign in with your Apple account.
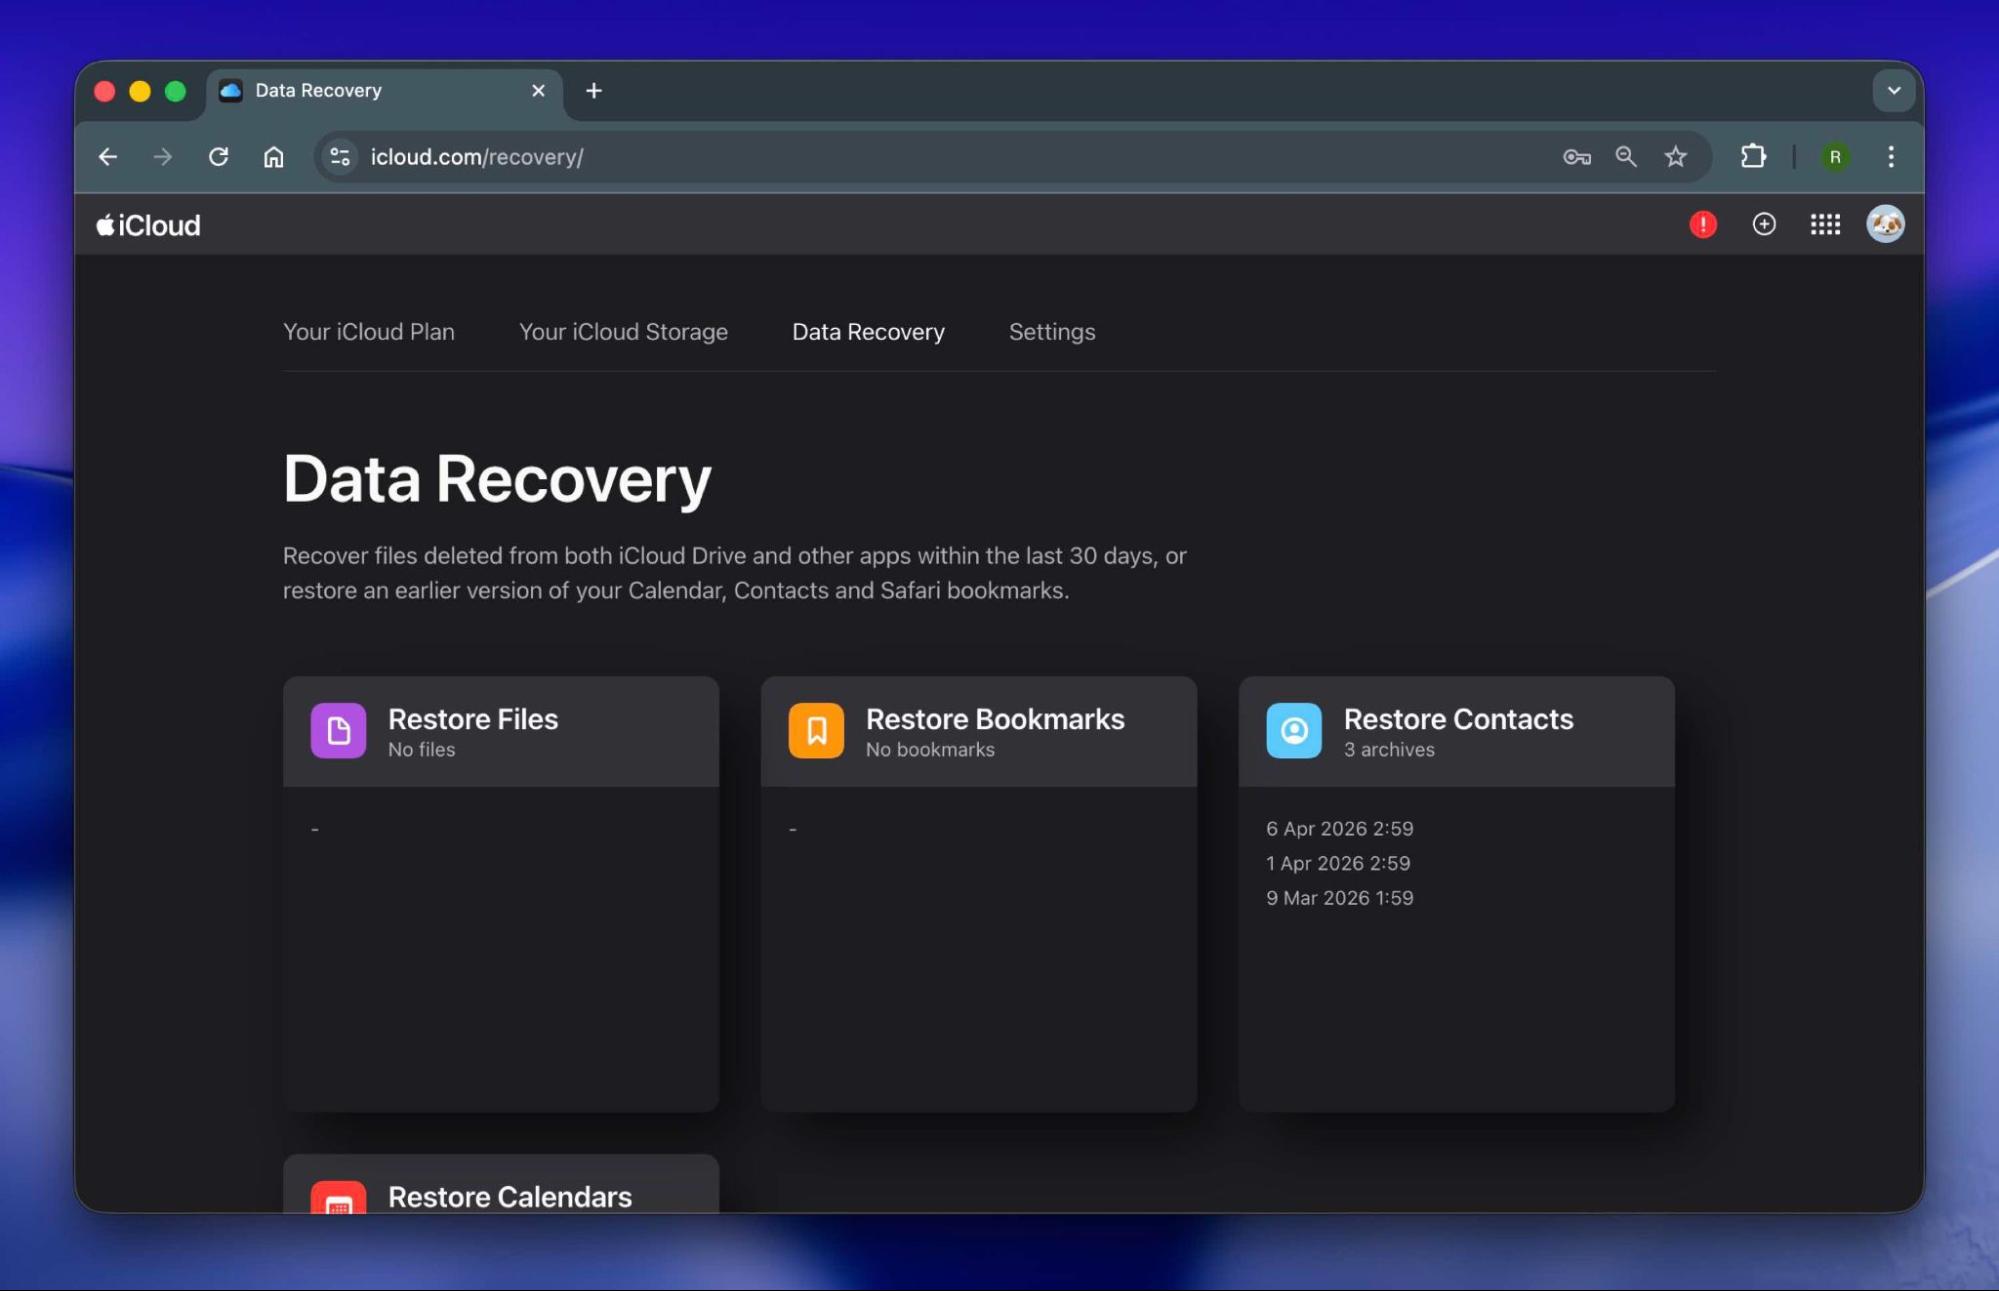
Step 2. From there, go to Data Recovery and look for the option to restore files. If the missing items are still available, you may be able to restore them back to iCloud Drive and have them sync to your Mac again.
This is worth trying because it only takes a minute, and in some cases it saves you from having to scan the drive with recovery software.
Method 4: Recover Desktop Files Using Time Machine
Time Machine is a built-in backup feature that comes as part of macOS. Time Machine automatically makes hourly backups for the past 24 hours, daily backups for the past month, and weekly backups for all previous months. The oldest backups are deleted when your backup disk is full.
macOS can also create local snapshots on the internal drive when the backup disk isn’t connected, which means you may still be able to restore files even if your usual Time Machine drive is not currently available.
Keep in mind that to use Time Machine, you would have had to of already been backing up your computer ahead of time.
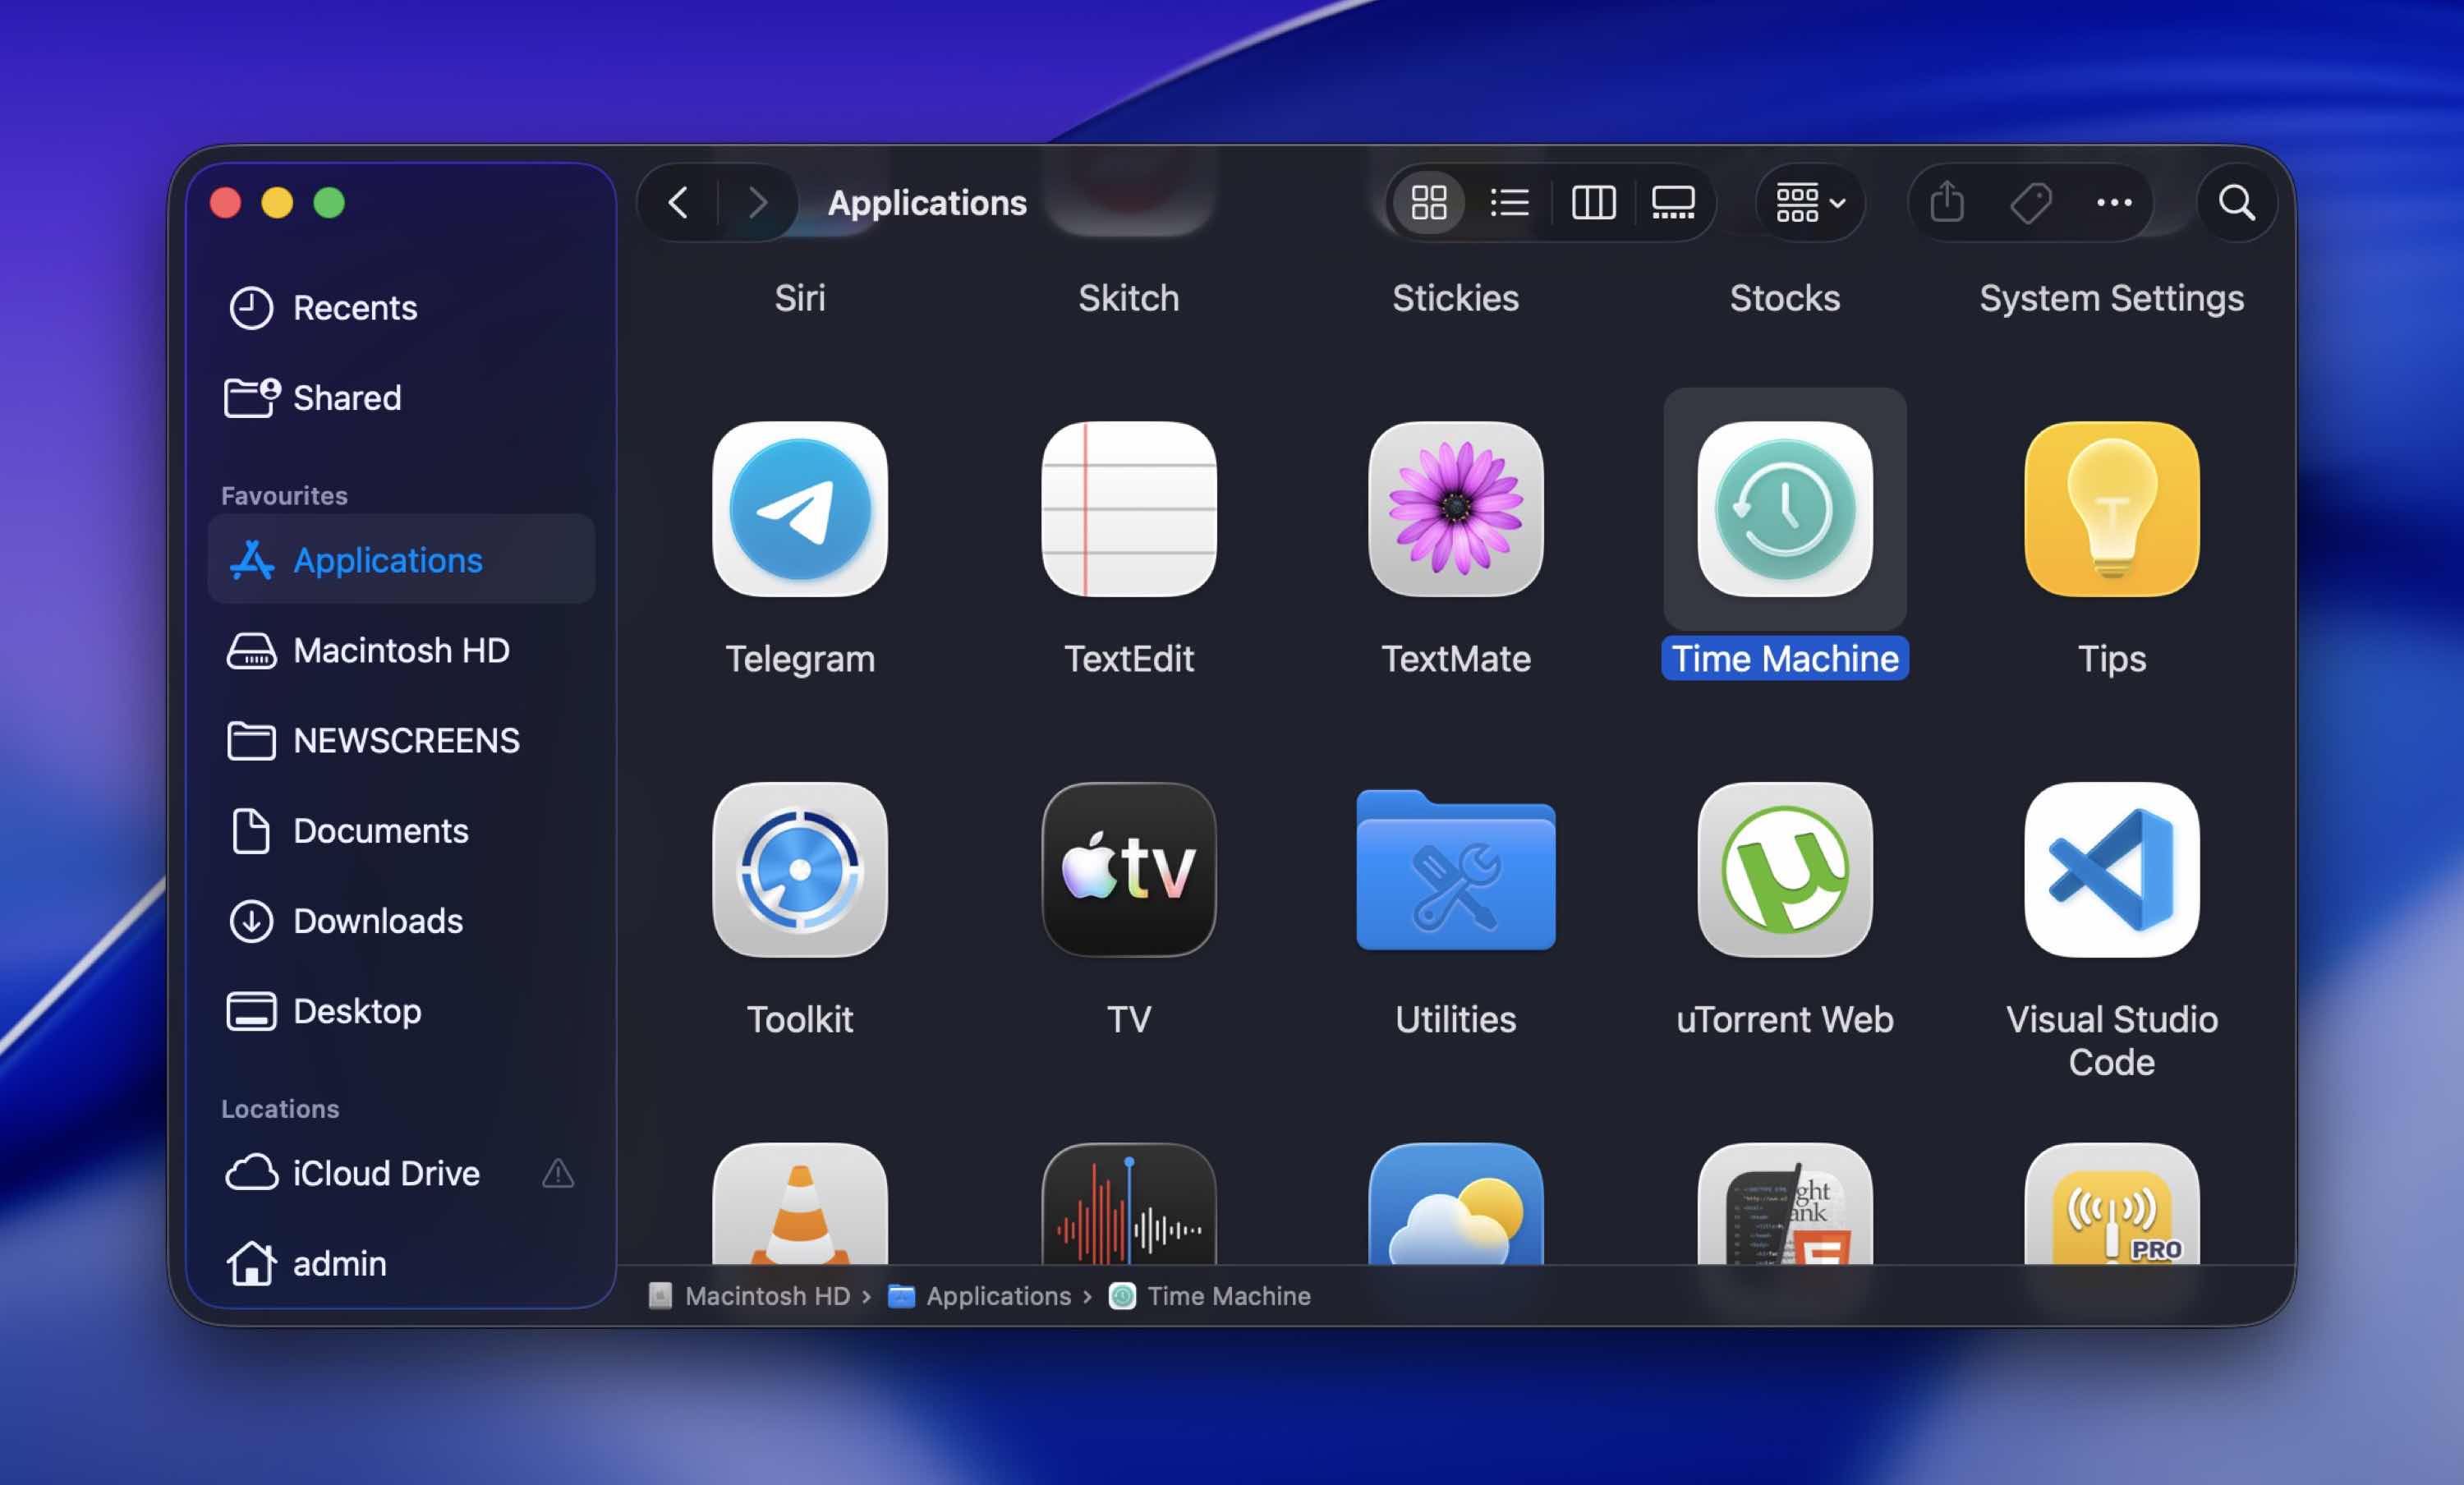
Step 1. Plug in the external hard drive that you back up your Mac with.
Step 2. Launch Time Machine. You can find Time Machine in your Applications folder on your Mac.
Step 3. You then will have the ability to scroll on the lower right-hand side and select a previous date on your Mac. This will allow you to see how your Mac looked on that date and time. If you remember the last time that you had your file, simply just go to that date and the file should be there. The longer that you have been backing up your machine, the further back you will be able to restore files from.
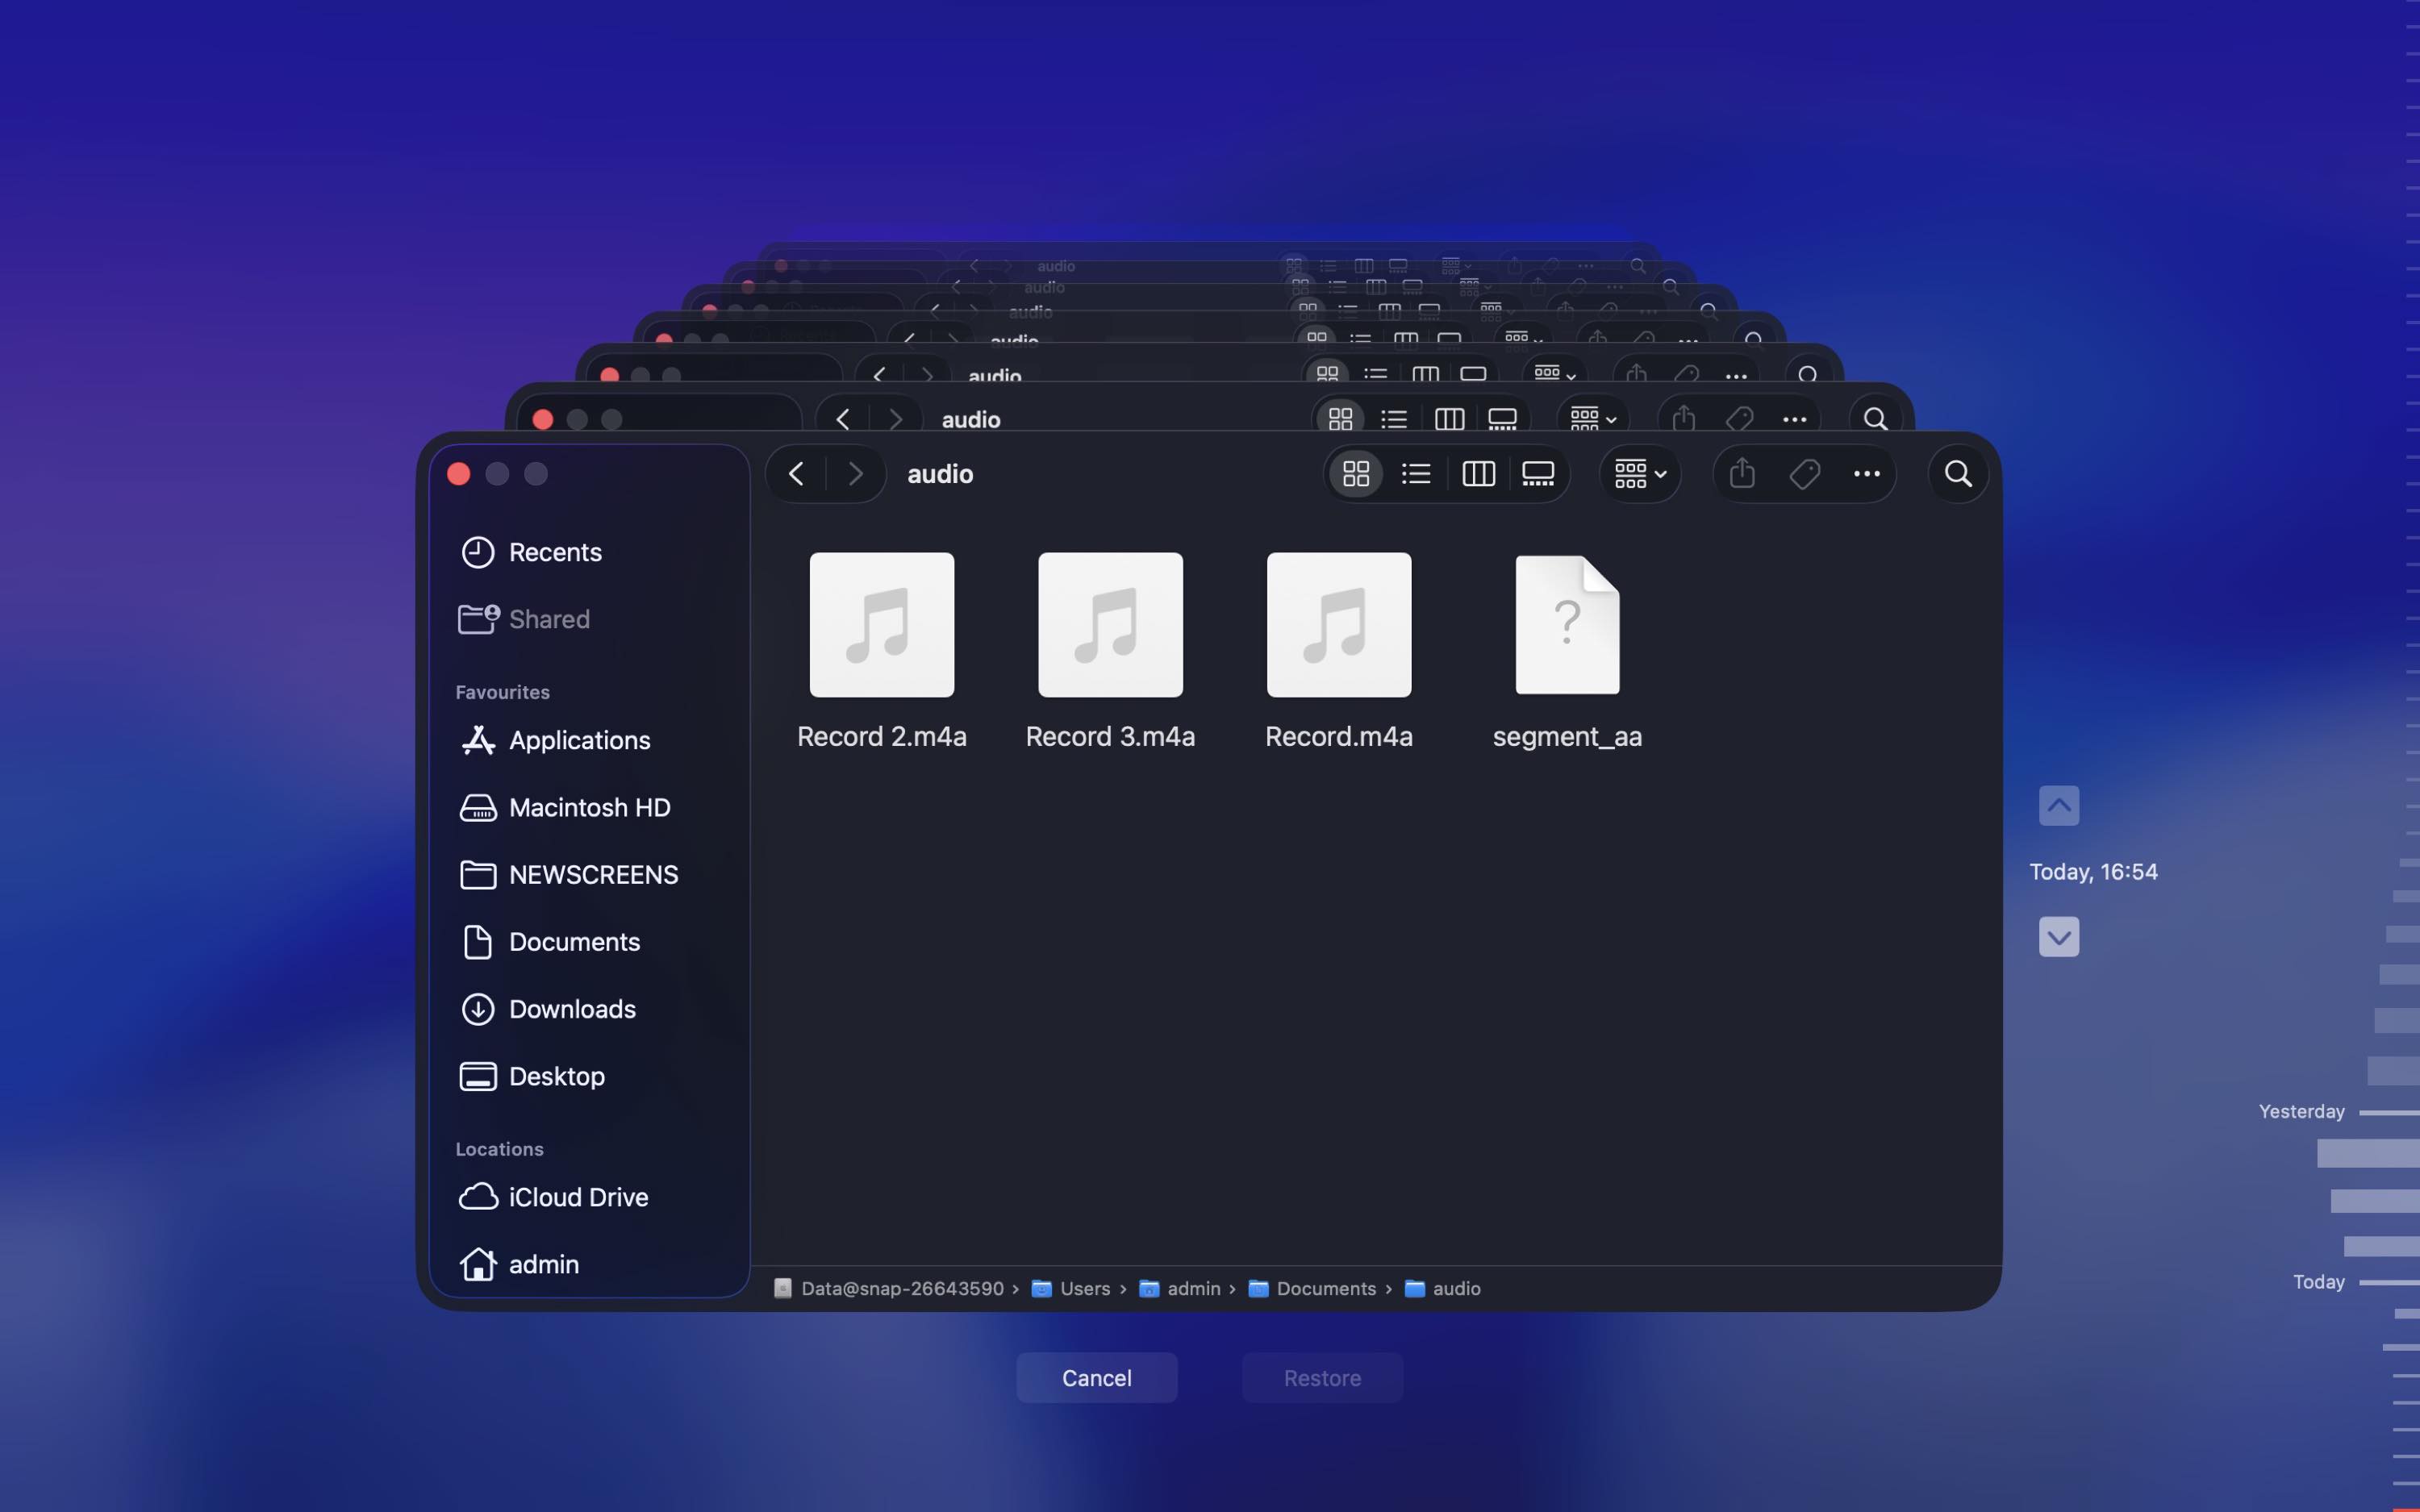
Step 4. After you have found the disappeared desktop file, you can click on it and choose Restore. This will put it back onto your Mac from your external hard drive. You can also use this method to restore to a previous version of the file if you don’t like the changes that you have made to it with time. It doesn’t just have to be used for data recovery.
If you’re not backing up using Time Machine, let’s take a look into third-party data recovery software as anyone can use and benefit from this. I have used data recovery software in the past to find recently deleted photos on my Mac. When you don’t have backups, these tools can be incredibly useful.
Method 5: Recover Desktop Files Using Disk Drill
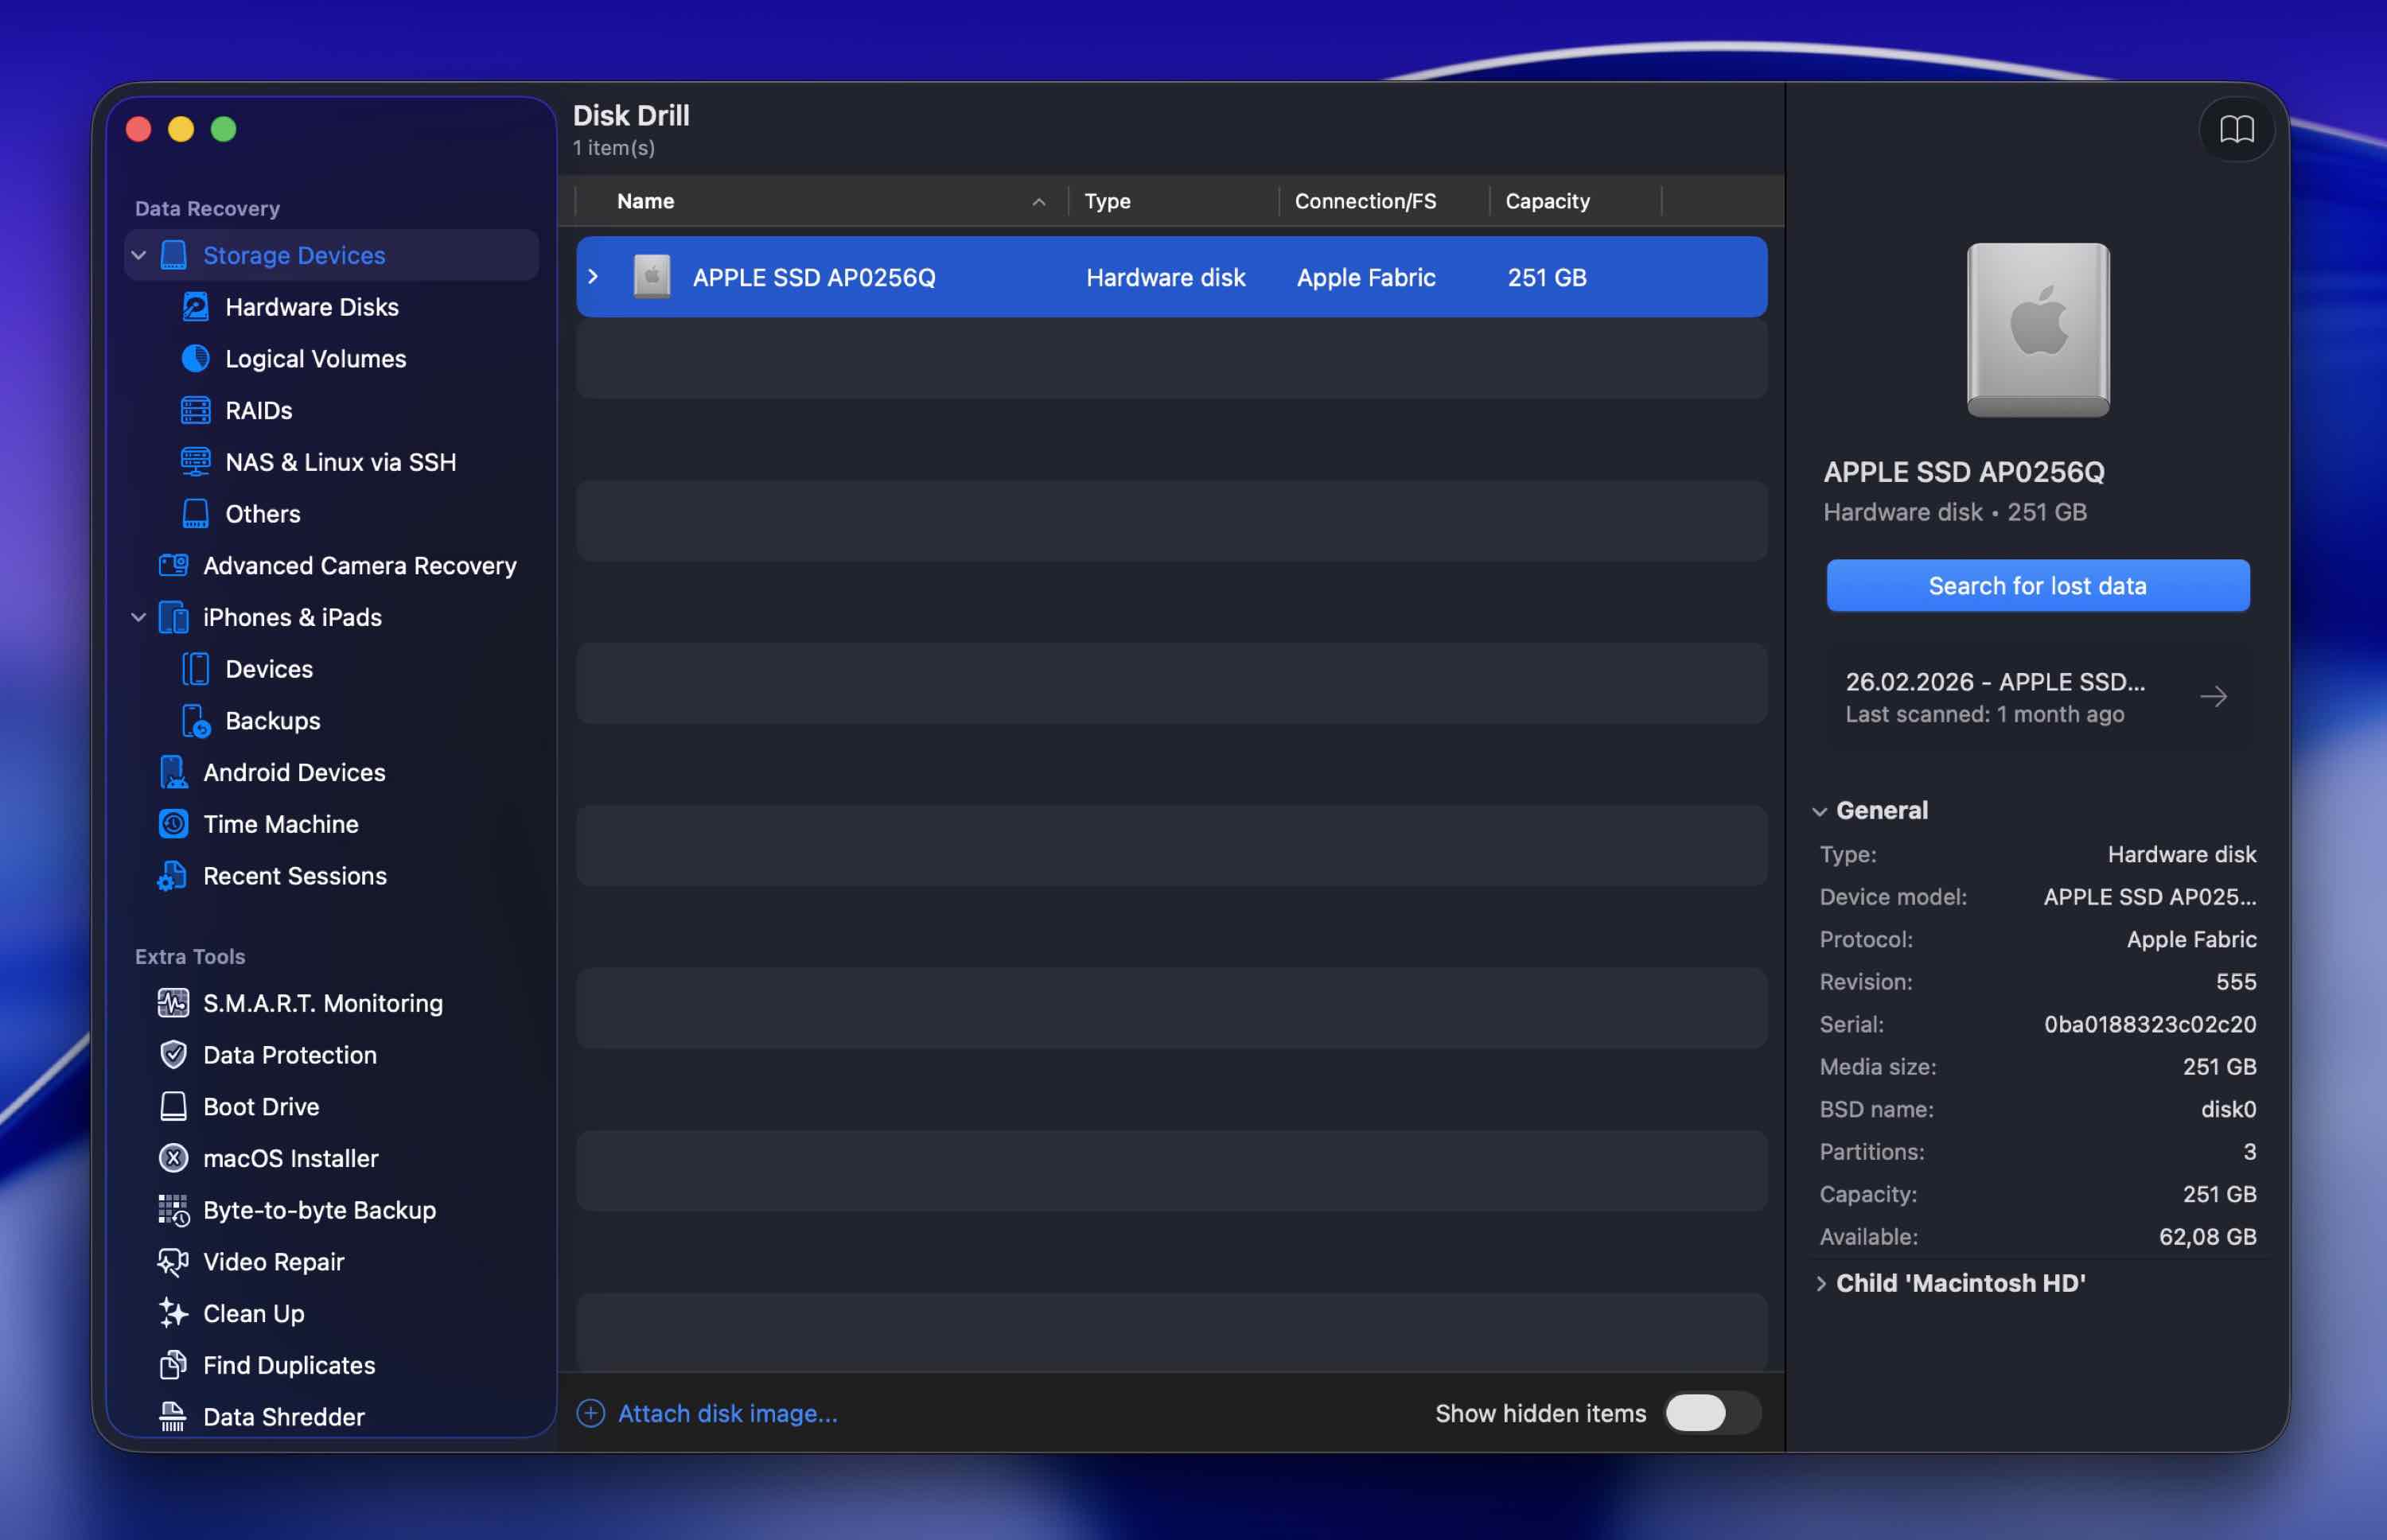
If you still can’t locate your file, we can try using Disk Drill to find and recover the disappeared desktop file.
I’ve used Disk Drill for recovery jobs like this before, so I’m going to use it again for this demonstration. It can scan your drive and look for files that were deleted, lost, or became inaccessible for some reason.
To give yourself the best chance of recovery (especially if the files were actually deleted), it’s smarter to install Disk Drill on a different drive instead of your main system drive (since files from your Mac Desktop are stored on your system drive). If you have an external drive or even a USB flash drive, use that. It helps reduce the chance of new data overwriting the missing files.
If you don’t have another drive available, go ahead and install it on your system drive anyway. That’s still better than doing nothing.
Disk Drill is easy to use, and generally, you can recover desktop items disappeared on Mac like this:
Step 1. Download and install Disk Drill onto your Mac.

Step 2. Launch Disk Drill and select the storage device that you would like to recover the desktop file from. (Which in this case will be your Mac’s main internal drive.)
Step 3. Click the Search for lost data button and let Disk Drill scan your drive. This can take some time depending on how much data that you have.
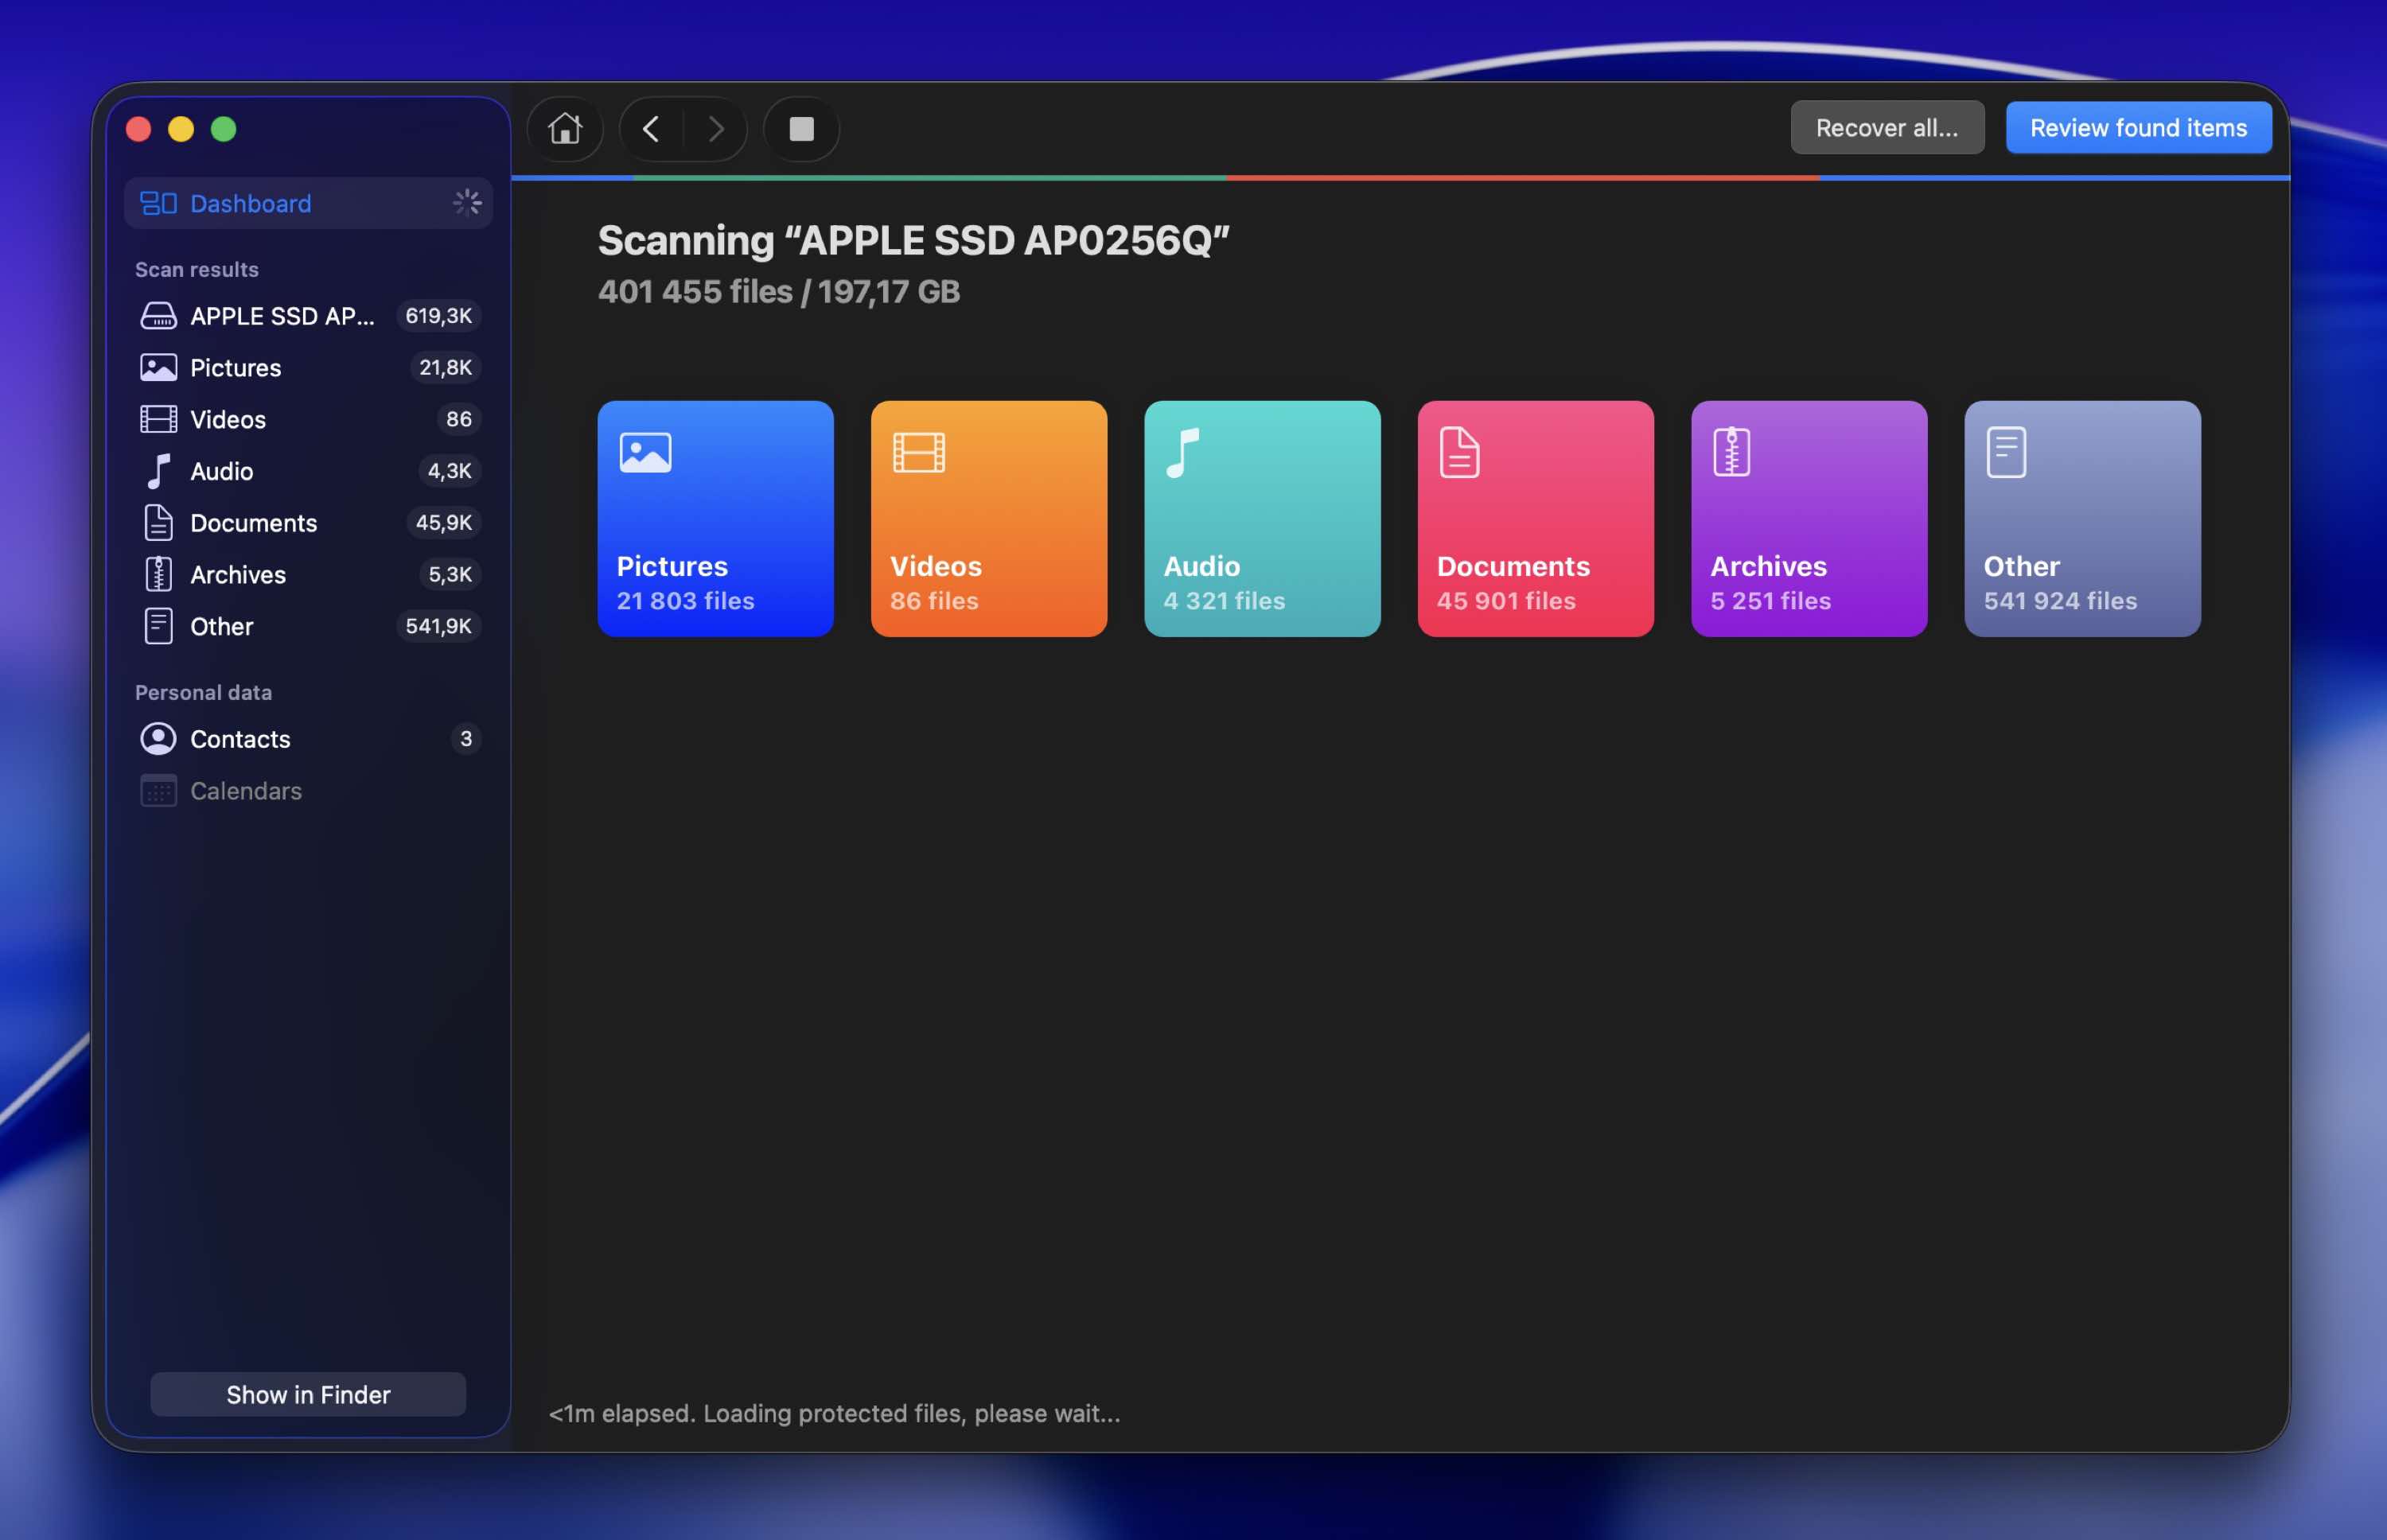
Step 4. After the scan process has completed (or even right away if you want to watch the results appear in real time), you can click on Review found items and look through what Disk Drill was able to find. You can then see if you can recover the lost file on your Mac.
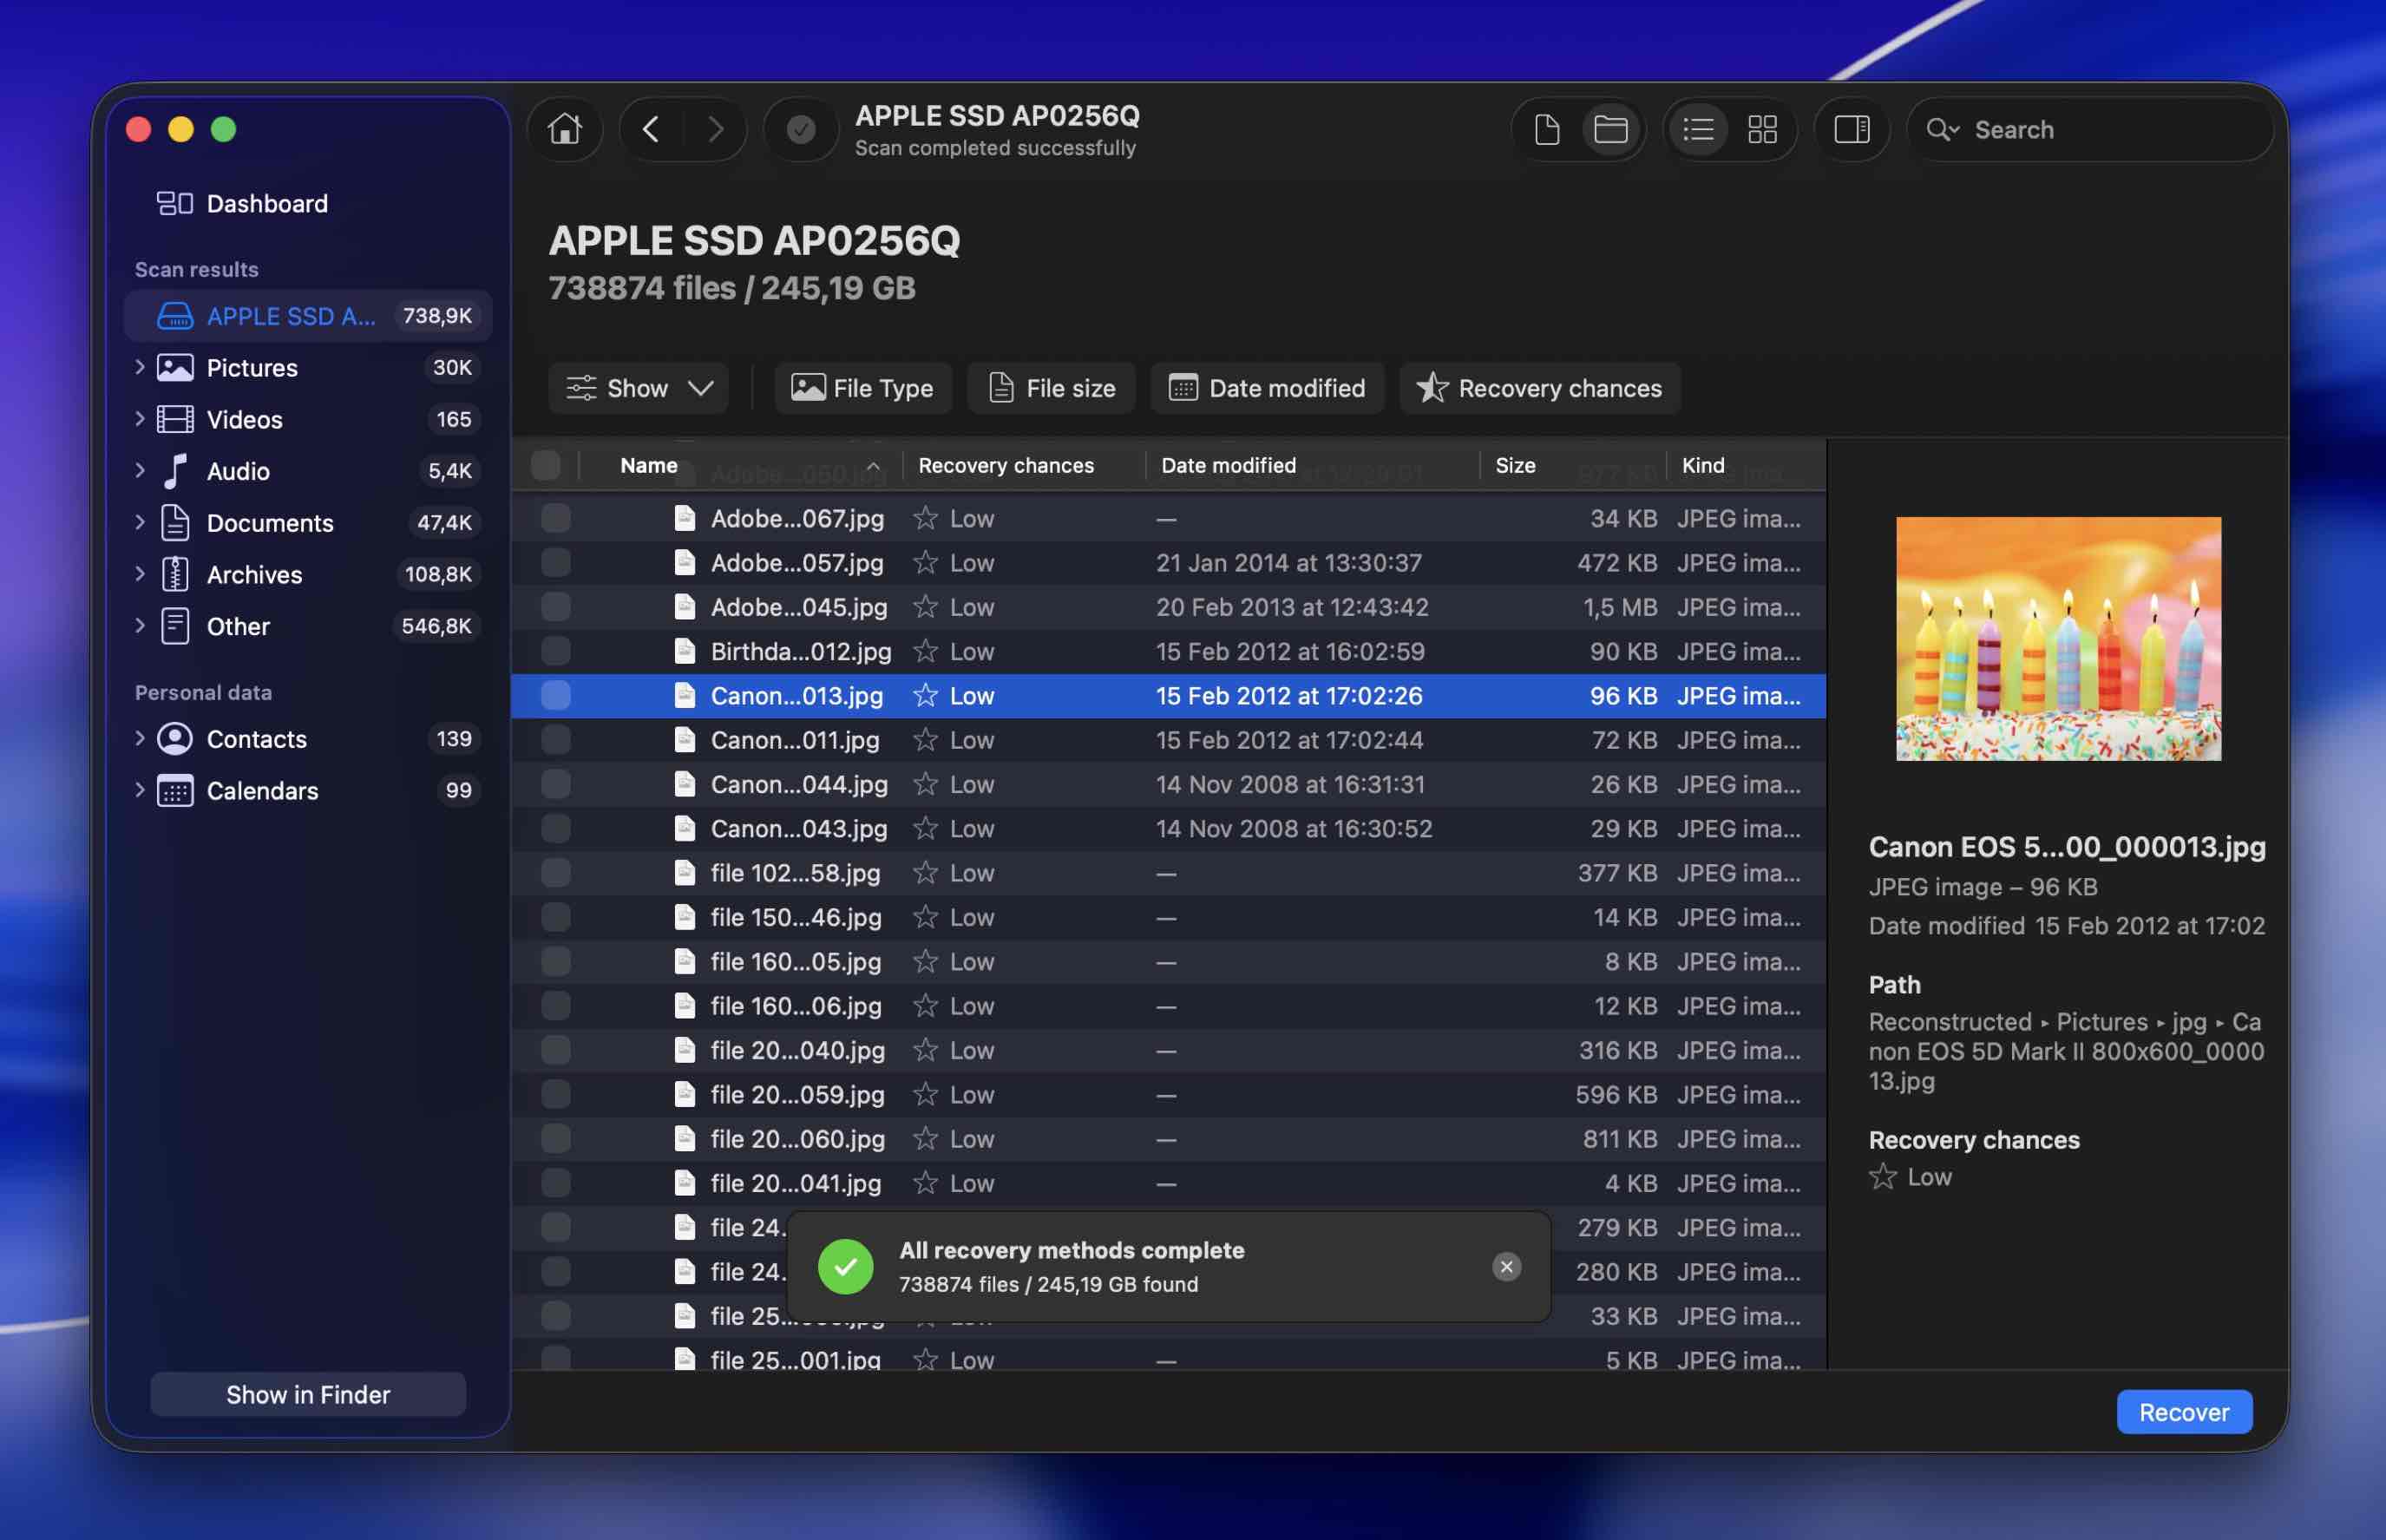
Step 5. I am recovering an image file that was on my desktop and the nice thing about Disk Drill is that it has a preview function that will allow you to see a nice clear preview of the file before you recover it. (As a practical tip, if Disk Drill shows you a proper preview of the file, you can recover that file with no issues.)
There is also a search box in the upper right-hand side of the screen that you can type in the name of your file to search for it.
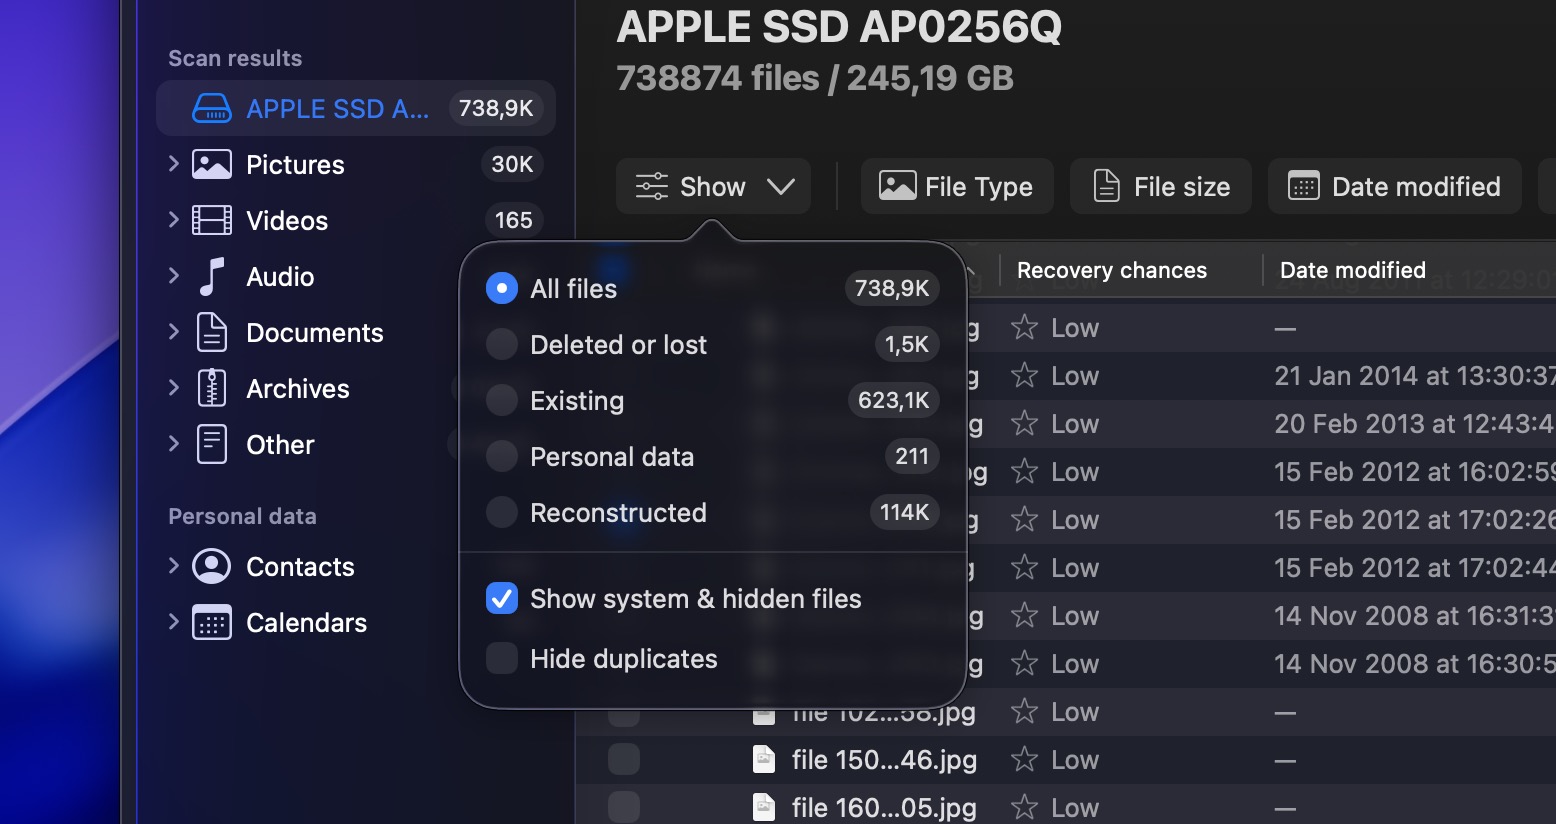
Step 6. Click the blue Recover button, then choose a save location for the restored files. You’ll notice that your main drive is marked with a yellow warning triangle. That’s because Disk Drill always recommends saving recovered files to a different drive, not the same one you’re recovering from. The reason is simple: writing recovered data back to the same drive can overwrite other deleted files that app hasn’t restored yet, which lowers your chances of getting everything back.

That’s it! Disk Drill is great for recovering files and it’s a nice software tool to know about as if you can’t find your file using the above methods, you can usually recover it this way.
Method 6: Unhide Hidden Files and Folders in Finder
Another reason why your MacBook desktop files disappeared might be because they became hidden. While not super common, it does happen. A Finder setting change, a visibility attribute change, or a weird little system hiccup can make files and folders stop showing up normally even though they’re still on your Mac.
Fortunately, hidden files and folders can be revealed with a simple shortcut:
Step 1. Open Finder by clicking on its icon in your Dock.
Step 2. Navigate to the folder where the hidden files and folders you’re trying to unhide are located.
Step 3. Press Command + Shift + Period (.) on your keyboard once you’re in the desired folder. This shortcut will cause all hidden files and folders to become visible.
Step 4. Look for files and folders that are lighter in color.
Often, such files and folders start with the dot (.) symbol. These are typically system and application files, which macOS hides by default to prevent accidental modifications. For example, a file like .zprofile is typically hidden for that reason. I recommend leaving these “dot files” alone unless you know exactly what they do. If you only want to see them, use Finder’s hidden-files shortcut instead of renaming them.
Lightly colored files and folders that don’t start with the dot symbol can be made permanently visible from the Terminal using the following command:
chflags nohidden /path/to/file-or-folder
To unhide multiple files or folders, you can use this recursive command instead:
chflags -R nohidden ~/Path/folder
Mac Tip! How Do I Prevent Files From Disappearing in the Future?
Remember the steps above where I showed you how to recover a file using Time Machine? Here we’re going to talk about how to start backing up using Time Machine.
If you have not been using Time Machine, I would recommend that you start. You can purchase an external hard drive for pretty cheap these days.
Setting up Time Machine is quite easy and I will walk you through it below.
Step 1. Plug in an external hard drive.
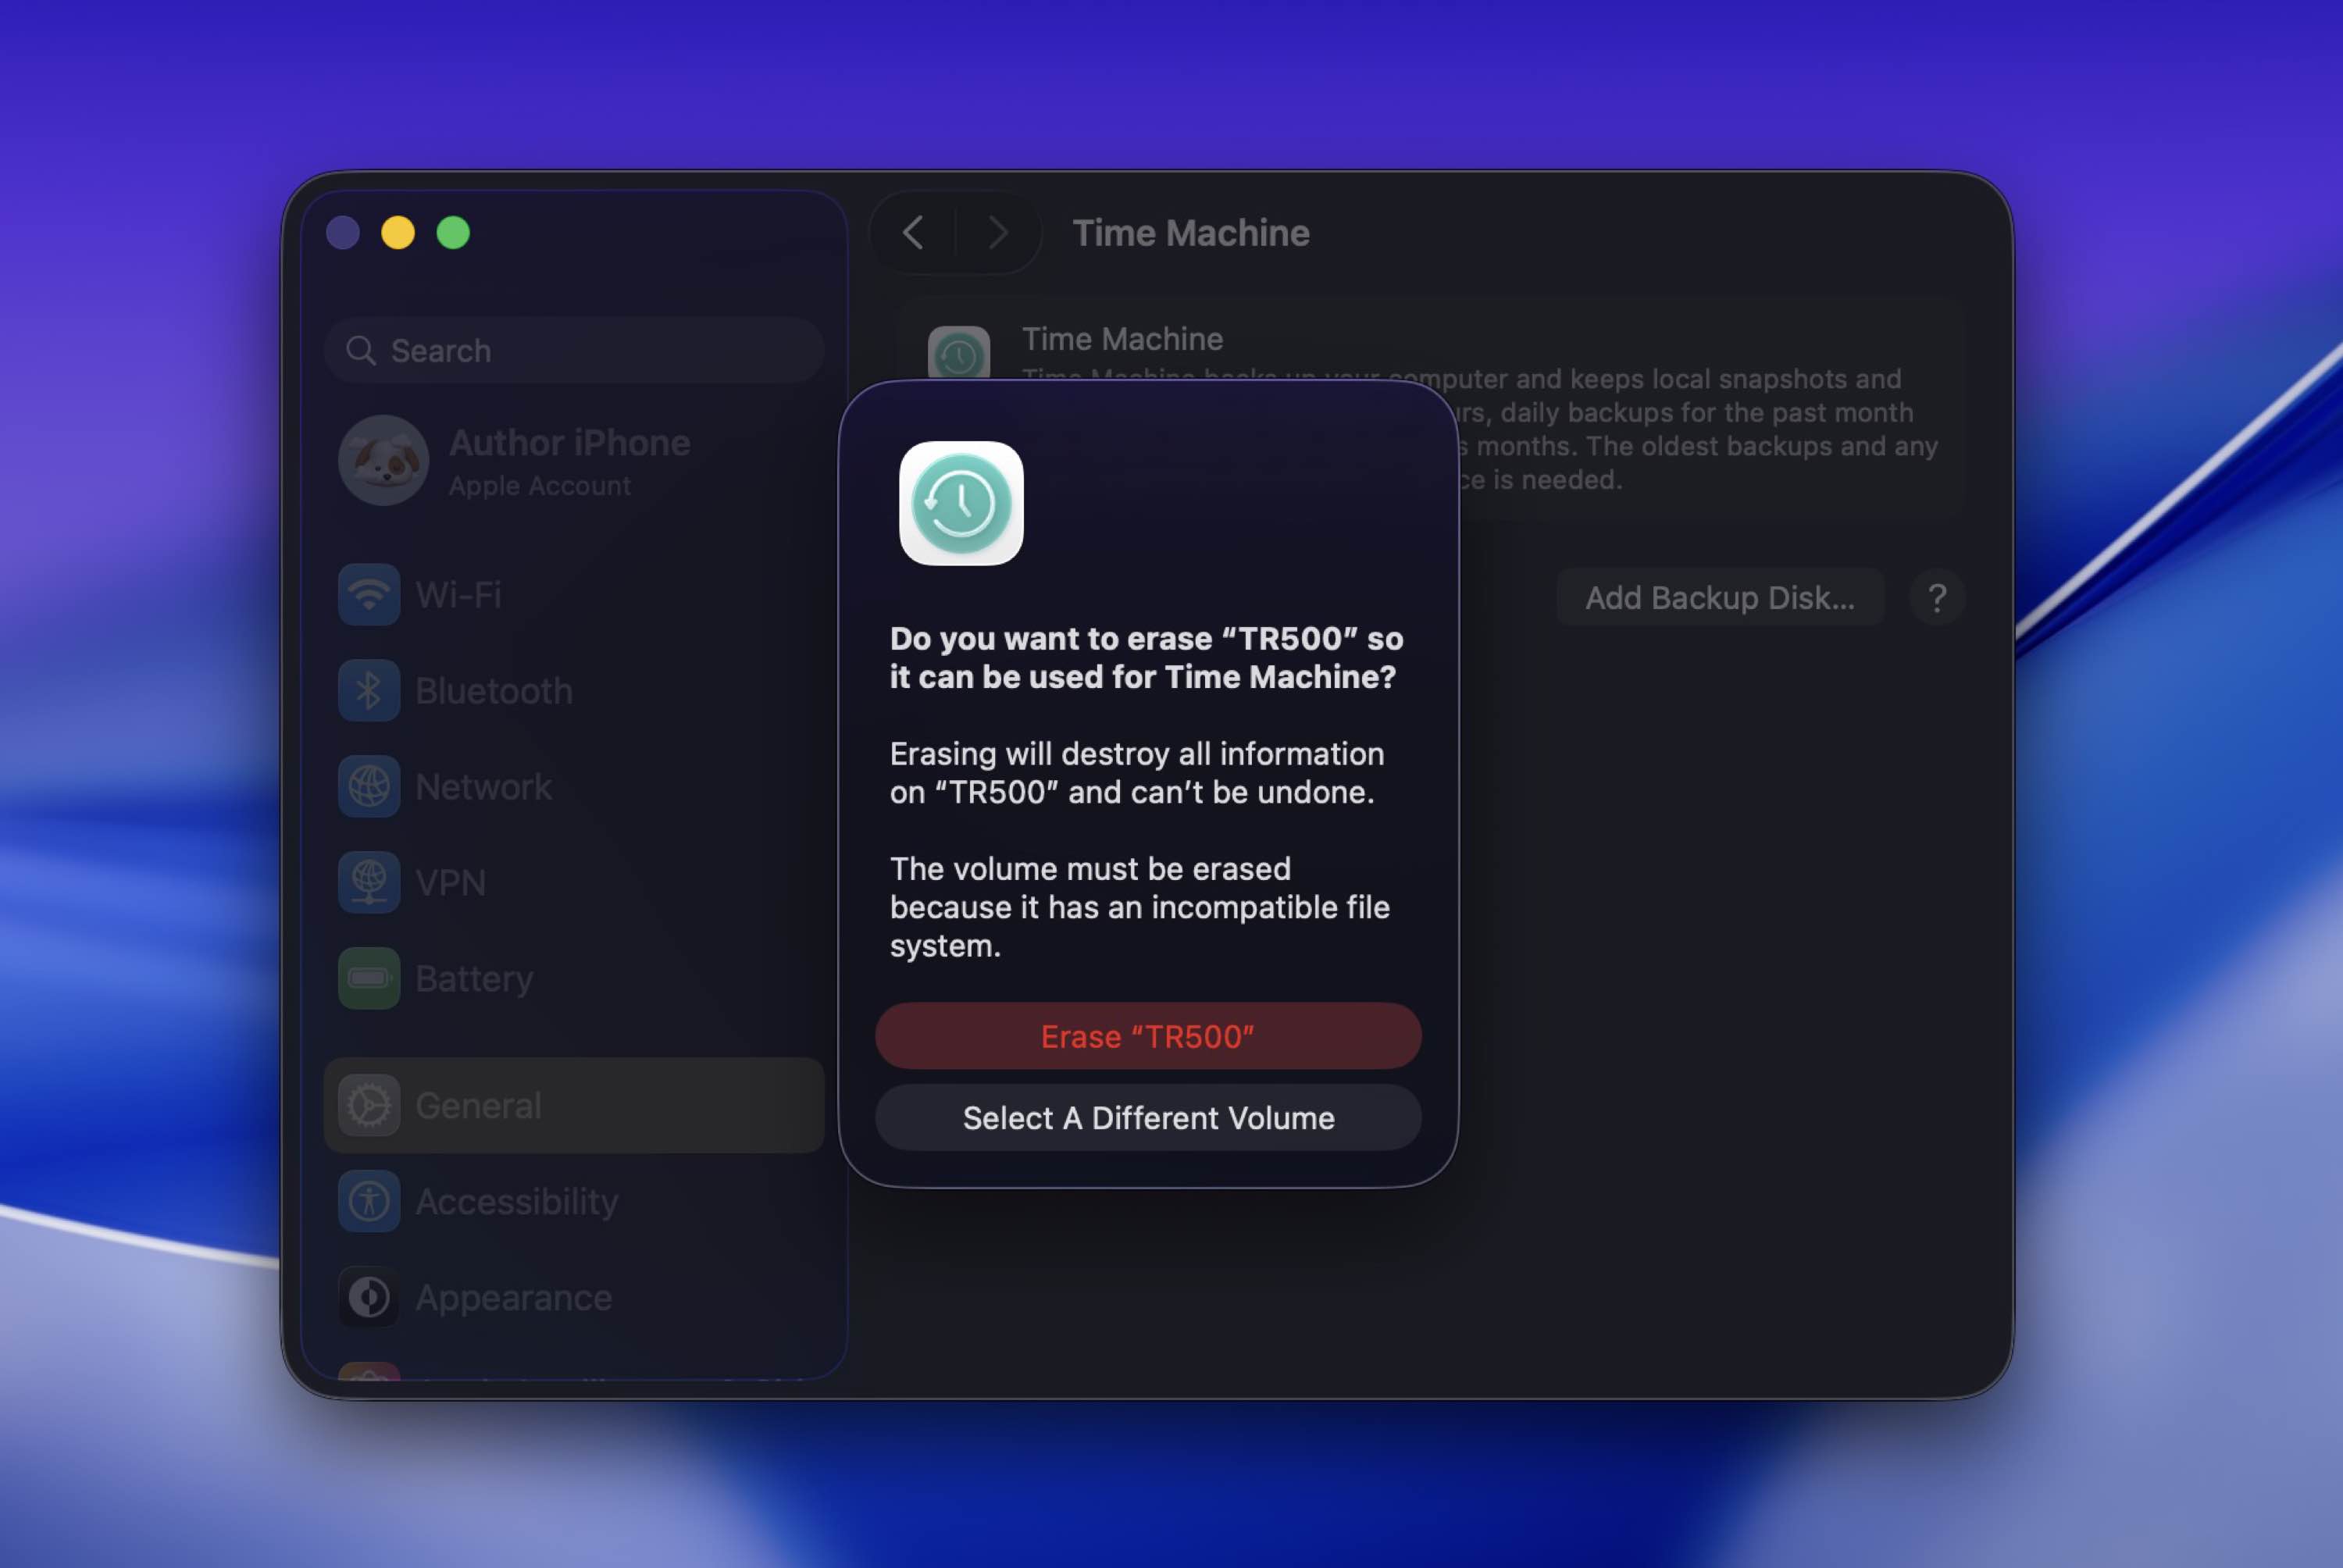
Step 2. Open System Settings, scroll down to General, and click Time Machine. When the window opens, you’ll see the Add Backup Disk button on the right.
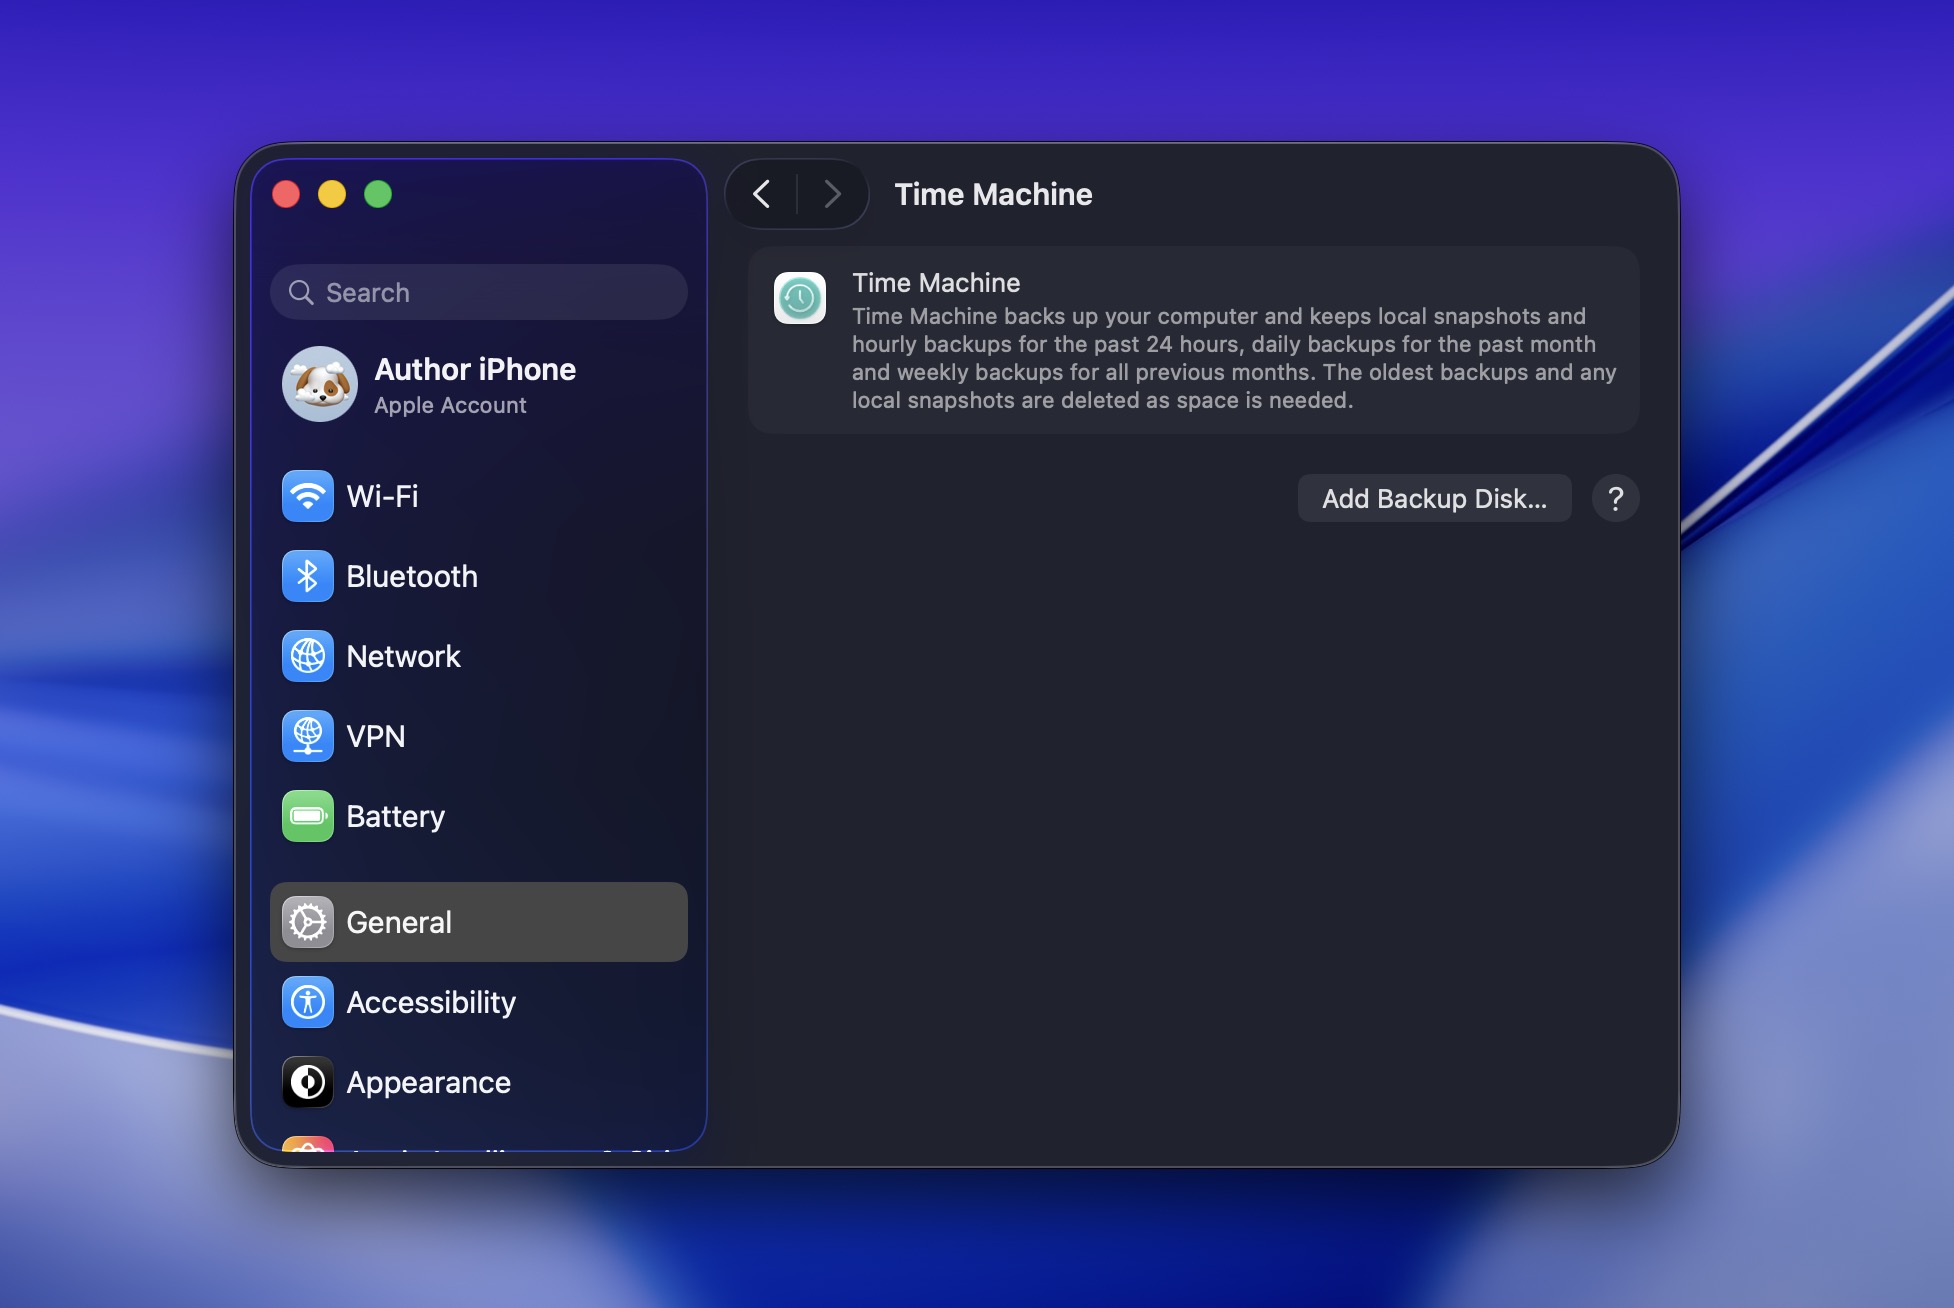
Step 3. Click Add Backup Disk, then choose your external drive from the list.
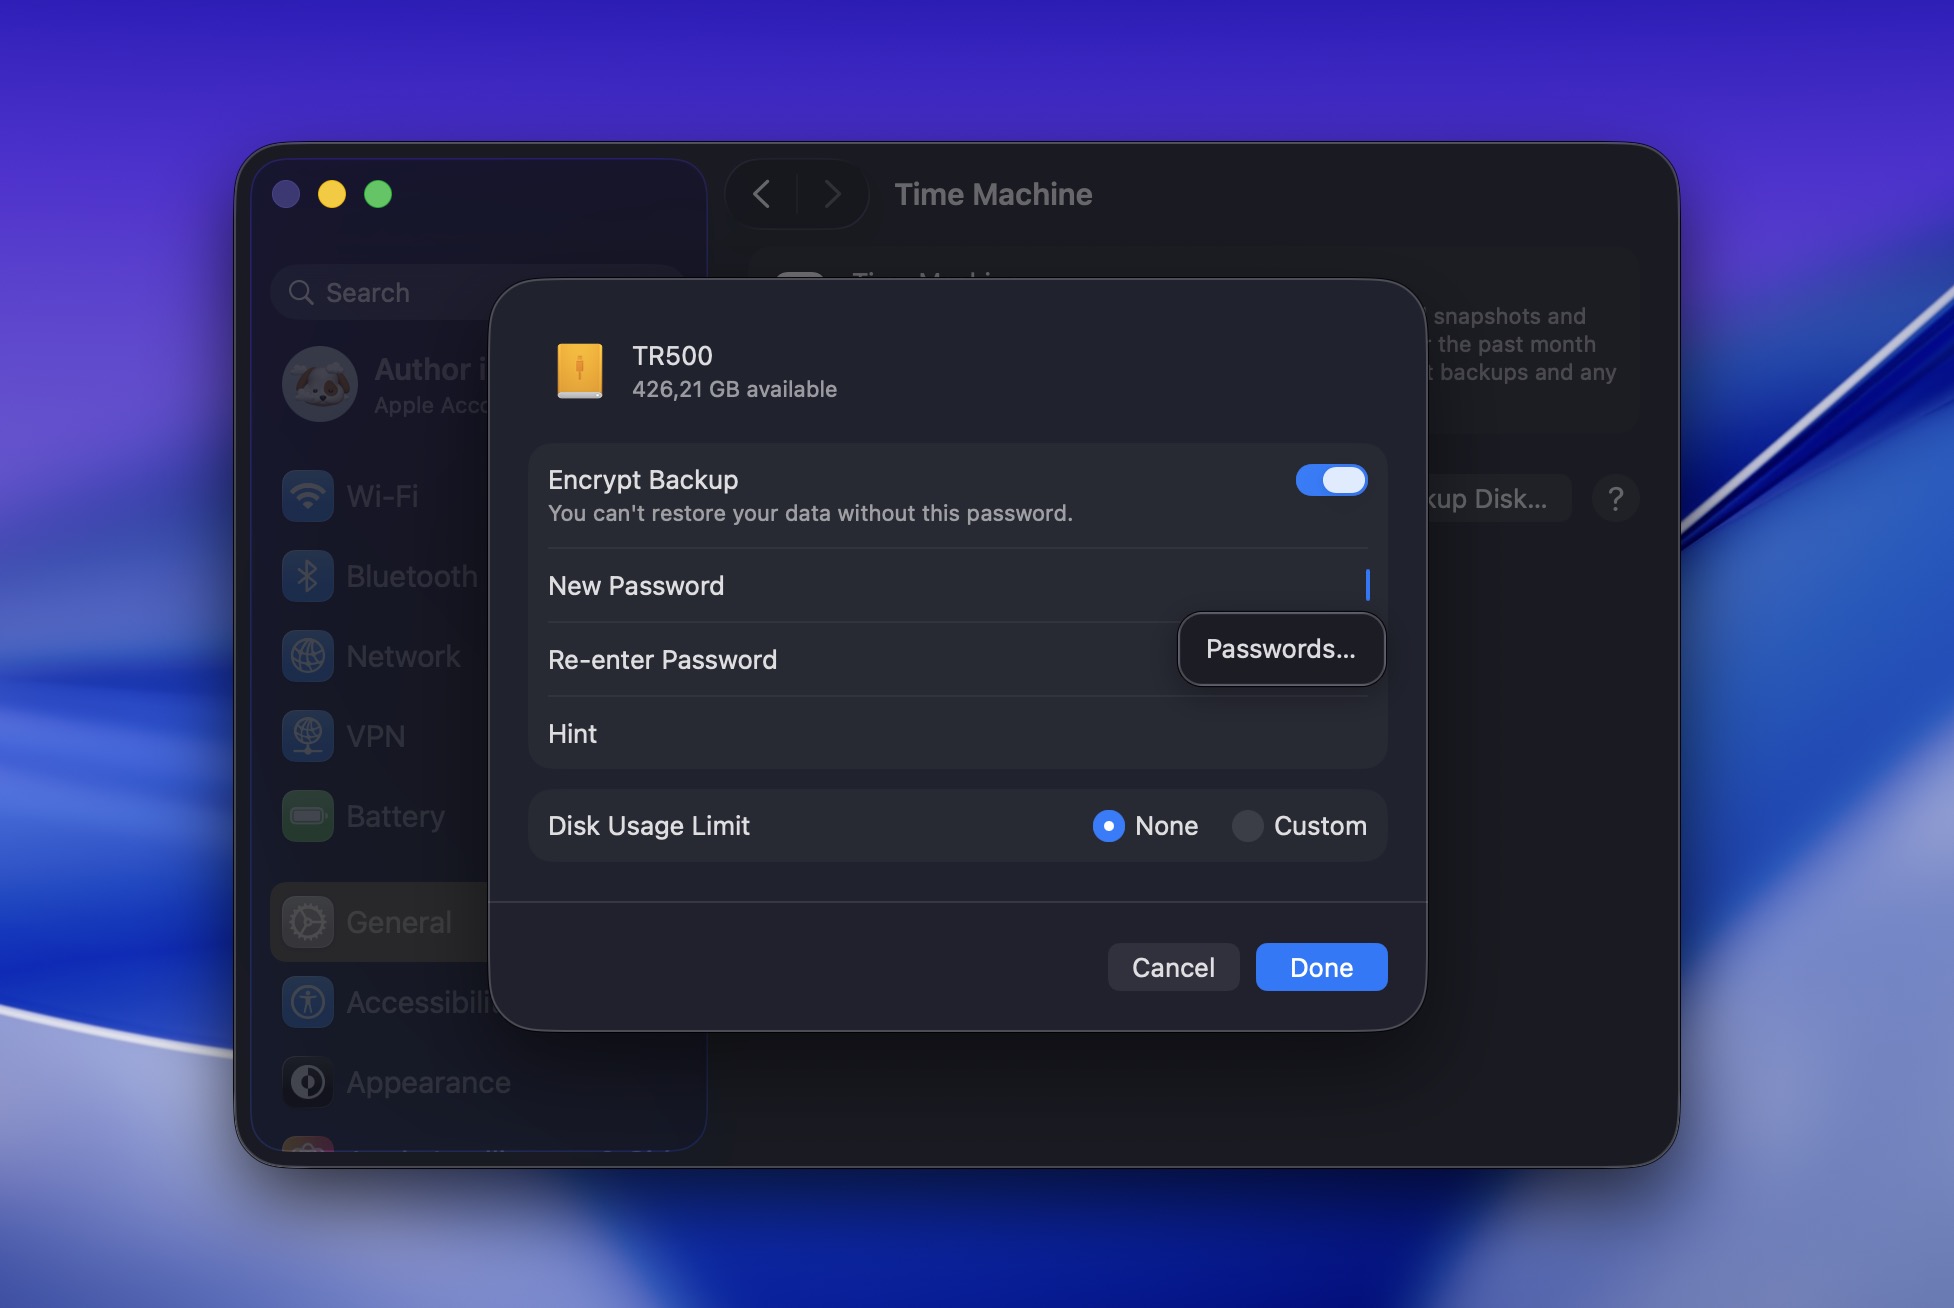
Step 4. If macOS asks, decide whether you want to encrypt the backup. You can turn on Encrypt Backup, create a password, add a hint, and then click Done.
Step 5. If the drive uses a file system that Time Machine can’t use, your Mac will warn you that the disk needs to be erased first. Read that message carefully. If the drive doesn’t contain anything you need, click Erase to let macOS prepare it for Time Machine. If it already has important files on it, stop here and pick a different drive or move those files off first.
Time Machine will then back up anytime that you plug your external hard drive into your Mac from here on out. I would recommend backing up every week or anytime that you make big changes to the data on your Mac or are working on an important file.
Conclusion
Files can go missing on our Mac sometimes. It happens to all of us sooner or later. In my experience, most cases come down to something fairly ordinary: a file got deleted, a folder got moved, iCloud changed where the Desktop contents show up, or Finder stopped displaying things the way you expected.
That’s the good news, honestly. A missing file does not mean permanent loss. A lot of the time, the data is still there somewhere on the Mac, and the fix is more about finding the right path than doing anything dramatic. You check Spotlight. You open the Trash. You look in iCloud Drive. Try Time Machine (this is a must). And if none of that works, Disk Drill may still help pull the file back.
I’d still recommend treating this kind of problem seriously. The longer you wait, the more chances there are for deleted data to get overwritten, especially on modern Macs. That’s why I always like having Time Machine set up and a solid recovery tool ready, even if I hope I won’t ever have to recover a file that has disappeared on your Mac. It’s one of those things that feels unnecessary right up until the day it saves you.

FAQ
To quickly troubleshoot why a file may not be on your desktop, Spotlight is a good first method:
- Click the Spotlight magnifying glass.
- Within the Spotlight search box, type in the name of the file.
- View the results and see if the file is there.
- Drag the file to your desktop. If this didn’t work, try one of the other methods mentioned above.
If desktop folders disappeared on a Mac, the cause is usually one of these things:
- In many cases, the folders were not actually deleted. They were moved, hidden, or changed location because of iCloud sync settings.
- Another common cause is accidental movement. It takes one quick drag to drop a folder into another folder or onto a different part of the Mac without noticing.
- Finder display issues, hidden file attributes, macOS updates, and account or iCloud sign-in changes can also make it look like desktop folders disappeared when they’re still somewhere on the system.
If your Mac or MacBook desktop folders disappeared, they usually went to one of a few places:
- The most common one is iCloud Drive, especially if Desktop & Documents Folders syncing is turned on. In that case, your missing files may now be in Finder > iCloud Drive > Desktop.
- Another possibility is that the files were moved into a different folder by accident. Check the Desktop folder in Finder, use Spotlight search, and look through nearby folders like Documents and Downloads.
- The Trash is another obvious place to check. If the files were deleted, they may still be there unless the Trash was emptied or your Mac removed old items automatically.
- And in some cases, the files never left at all. They may be hidden because of a Finder visibility issue or a hidden file flag, which can make it look like your Mac desktop folders disappeared when they’re still sitting right there on the drive.
Even though it’s rare, but still, sometimes files may disappear from your Mac after an update. If that’s your case, the quickest and most effective way to recover lost desktop files is with the help of a data recovery tool like Disk Drill.
Follow these steps to restore lost desktop files on Mac:
- Download Disk Drill and follow the onscreen instructions to install the application.
- Click the Disk Drill icon to open it.
- Choose the hardware disk from which you wish to recover the disappeared desktop files.
- Click Review found items. Once you’ve found the needed files, click the box near each file to select them.
- When ready, click Recover and choose a location for the restored files.
Signing in to iCloud usually does not make Desktop files disappear from your Mac. If Desktop & Documents syncing is enabled, the files normally stay in the same place and simply start syncing with iCloud. In some cases, your Mac may also download files that were already stored in iCloud, but it should not make your Desktop items vanish on its own. If that happened, check that you signed into the correct Apple ID, make sure you’re in the right macOS user account, and look at your iCloud Drive / Desktop & Documents settings.