It goes without saying that security is a very important issue, especially since Mac computers are very portable these days. Carrying your Macbook Pro, Macbook Air or Macbook open up the possibility of theft, loss or damage which could put your personal files at risk. Since your personal data and files being protected is always important, it’s useful to lock your Mac computer when you are away. Locking your Mac helps safeguard your data from prying eyes or maybe even a potential criminal. It also protects your devices from any unauthorized access from friends, family or strangers. If your Mac is locked your personal data will not be easily accessed even if your Mac becomes lost or compromised by someone else.
There are several ways of locking your Mac computer. We bet you have some questions, such as: How to Lock Mac computers? How to lock a folder on Mac? How to lock keyboard on Mac computers? How to lock Mac screen? Is the Mac notebook lock safe?
While we will go into more details in this article, the easiest way to put your Mac computer in a locked state is simply to put it to sleep while having a password set:
- On your Mac device, navigate to System Preferences
- From System Preferences, click on Security & Privacy
- After you click on Security & Privacy, select General
- After selecting General, what you need to do is enable your password protection
How to Lock a Mac: How to Enable Password Protection
Locking your Mac device is useful, but to effectively protect your personal data, files and other peripherals, you will need to activate the password option. Activation of the password will prompt whoever is attempting to access your Mac while you are not around to input a password.
To enable password protection navigate to System Preferences. Then click on Security & Privacy. From there, click on General and select the first option which is ‘Require password’. You can also edit the length of inactivity time before your Mac will demand a password. This means that if you want to lock your Mac device when you are using it (such as stepping away shortly) but don’t want to password-protect it you are in luck. This option can be set at any time between an immediate password-prompt to eight hours.
How to Lock a Mac: How to Use Your Keyboard to Lock Your Mac
Once you’ve configured the settings of your Mac computer, it is very easy and quick to lock your Mac. Just press Control + Shift + Eject at the same time. Alternatively, you can press Power if you are using a newer Mac computer and your Mac will be locked instantly.

To log back in, just press any key on your keyboard and you will be prompted to enter a password. This is dependent on your configured settings above.
It is worthy of note that locking your Mac allows your background tasks to continue working while they are secured by a password. This means that if you lock your Mac while uploading a video to YouTube or editing a file, your file upload and file editing will remain functional and continue to run even when you are away.
How to Lock a Mac: How to Put Your Display to Sleep
Putting your Mac’s display to sleep is the same thing as locking your Mac. Though this can be done via a quick shortcut. The shortcut is accessed by assigning a corner of your Mac to send your display to sleep.
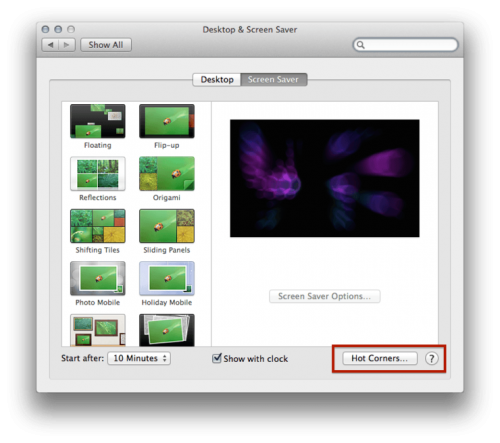
To enable the option to put your Mac display to sleep, navigate to Desktop & Screensaver. Click on Screensaver and from there click on the ‘Hot Corners’ option within this window. This will pop-up another prompt giving you the option to customize the four corners of your Mac computer.
From there, simply click on ‘Put Display to Sleep’ and click on OK. Note that each time you navigate your mouse to that corner of the Mac screen it will automatically put the display to sleep, at the same time locking your Mac.
Like the lock option, this will keep your background tasks running even when you are away and your Mac is locked and secured.
How to Send Your Mac to Sleep
Sending your Mac to sleep is different from locking and putting your display to sleep. Sending the entire Mac to sleep shuts down all background tasks. This means that if you send your Mac to sleep while uploading to YouTube or editing a file, those tasks will halt. Make sure you send your Mac to sleep only if you know your work is saved and no important task is running in the background.
To send your Mac to sleep, press Command + Option + Eject at the same time. Alternatively you can press the power key or button if you are using a newer Mac. If you have enabled a password with the prior steps your Mac will be password-protected upon returning from sleep mode.
How to Lock a Folder on Mac
Locking your Mac computer is not the only way of safe-keeping your files. You can also lock an entire folder on your Mac. To lock a folder on Mac a few more steps are required and the general process is a bit more complicated but it’s worth the risk of allowing someone to access your personal files without permission.
To begin, open the Applications folder. Then open the Utilities folder. Look for Disk Utility option and open it, then click on the File Menu and click on New Image. Select Image from Folder, in the next step select the Folder you want to protect and click on the Open button. Now select the Image Format: “read/write” and for the encryption option select: 128-bit AES encryption.
Disk Utility will request that you enter a password and confirm it to continue. Now name the Disk image and click on the location you want to save it. Click on the Save icon and the process will start. Once completed you will have a new Image file with password protection.
To open your protected files, simply click on the Disk Image and enter your password, a new Unit icon will appear on your desktop and you can access the files through this option. When you are done working with your private files, simply click on the disk icon and eject it. Your files will be stored and safe again.
How to Recover Locked and Encrypted Files on Mac
Disk Drill is a leading file recovery solution for Mac trusted by thousands of people every day. With Disk Drill it is possible to locate and recover all types of files on your Mac including those that have been accidentally or purposely deleted and even files that “just disappeared”.
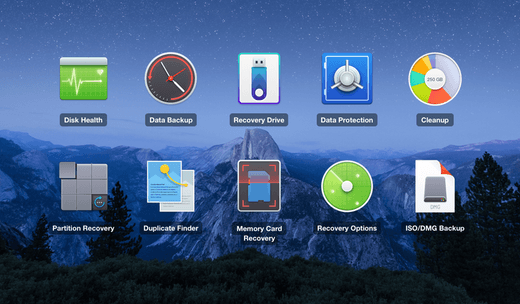
Disk Drill makes it possible to recover many types of files, including music, videos and much more, from all types of drives, including USB flash drives and portable storage. To get started Disk Drill Basic allows you to scan and protect your drive for free. After downloading and launching Disk Drill all you have to do is locate your drive in the list, hit the recover button and celebrate outstanding file recovery. No messy computer code, headaches, technical documents or stress.
