Guaranteed Recovery is a macOS-only feature in Disk Drill designed to help protect your files from future data loss. This FAQ covers the most common questions about how Guaranteed Recovery works, what it protects, and how it can improve your chances of successful data recovery on Mac.
What is Guaranteed Recovery?
When Guaranteed Recovery (GR) is enabled, Disk Drill monitors the Trash on a selected drive or partition, along with any other folders you choose to protect. Each time you move a file to the Trash or into a protected folder, Guaranteed Recovery creates a hard link to that file, giving you a fast way to restore it later — even after the Trash has been emptied.
The feature runs quietly in the background, adding an extra layer of protection against accidental file deletion on Mac and helping improve your chances of successful data recovery when important files are lost.
Guaranteed Recovery by CleverFiles can also monitor additional folders on your drive, which is useful for protecting important files stored outside the Trash. This can be especially helpful because files may be lost for reasons other than manual deletion. If you’re using Mac OS X 10.7 Lion or earlier, Guaranteed Recovery can monitor the Trash, but it cannot protect custom folders.
Keep in mind that Guaranteed Recovery saves the file exactly as it was when it was moved to the Trash or another protected folder. It does not save previous versions of the file. GR also requires enough free disk space to store protected files, but you can adjust how much storage space you want to allocate to it.
Why Should I Use Guaranteed Recovery?
When it comes to files on your Mac internal hard drive, Guaranteed Recovery is the absolute safest way to guarantee data recovery. While it does require allocating hard drive space, it is the only way you can be sure you can get your files back. All other Disk Drill methods of scanning and recovery can fail due to the original file data being overwritten by new data. GR is the only one that prevents this from happening. Even with a regular backup system in place, key changes to a file can still be made in between backup sessions and then lost. And if you use Time Machine, getting that last version from the Trash can be complicated.
Guaranteed Recovery helps prevent files from disappearing permanently by keeping them protected according to your GR settings. As long as Guaranteed Recovery has not been reset and the protected data has not been removed due to storage limits, Disk Drill can use it to restore files that might otherwise be lost forever.
How to Enable and Configure Guaranteed Recovery Protection in Disk Drill for macOS
1. How Do I Enable Protection?
To enable Guaranteed Recovery protection for a specific partition, follow these steps:
- Connect the drive to your Mac. If you want to protect an external drive, make sure it is connected to the Mac where Disk Drill is installed.
💡 Important: Guaranteed Recovery protection works only when Disk Drill is installed locally on the Mac connected to the drive you want to protect.
- Launch Disk Drill.
- Select the partition you want to protect. Disk Drill will display a list of available drives and partitions. If the drive or partition you want to protect is not visible, click Show them in the bottom-right corner of the screen to reveal hidden devices or partitions. If it still does not appear, refer to the Scanning FAQs for troubleshooting steps.
- Click the shield icon next to the partition you want to protect.
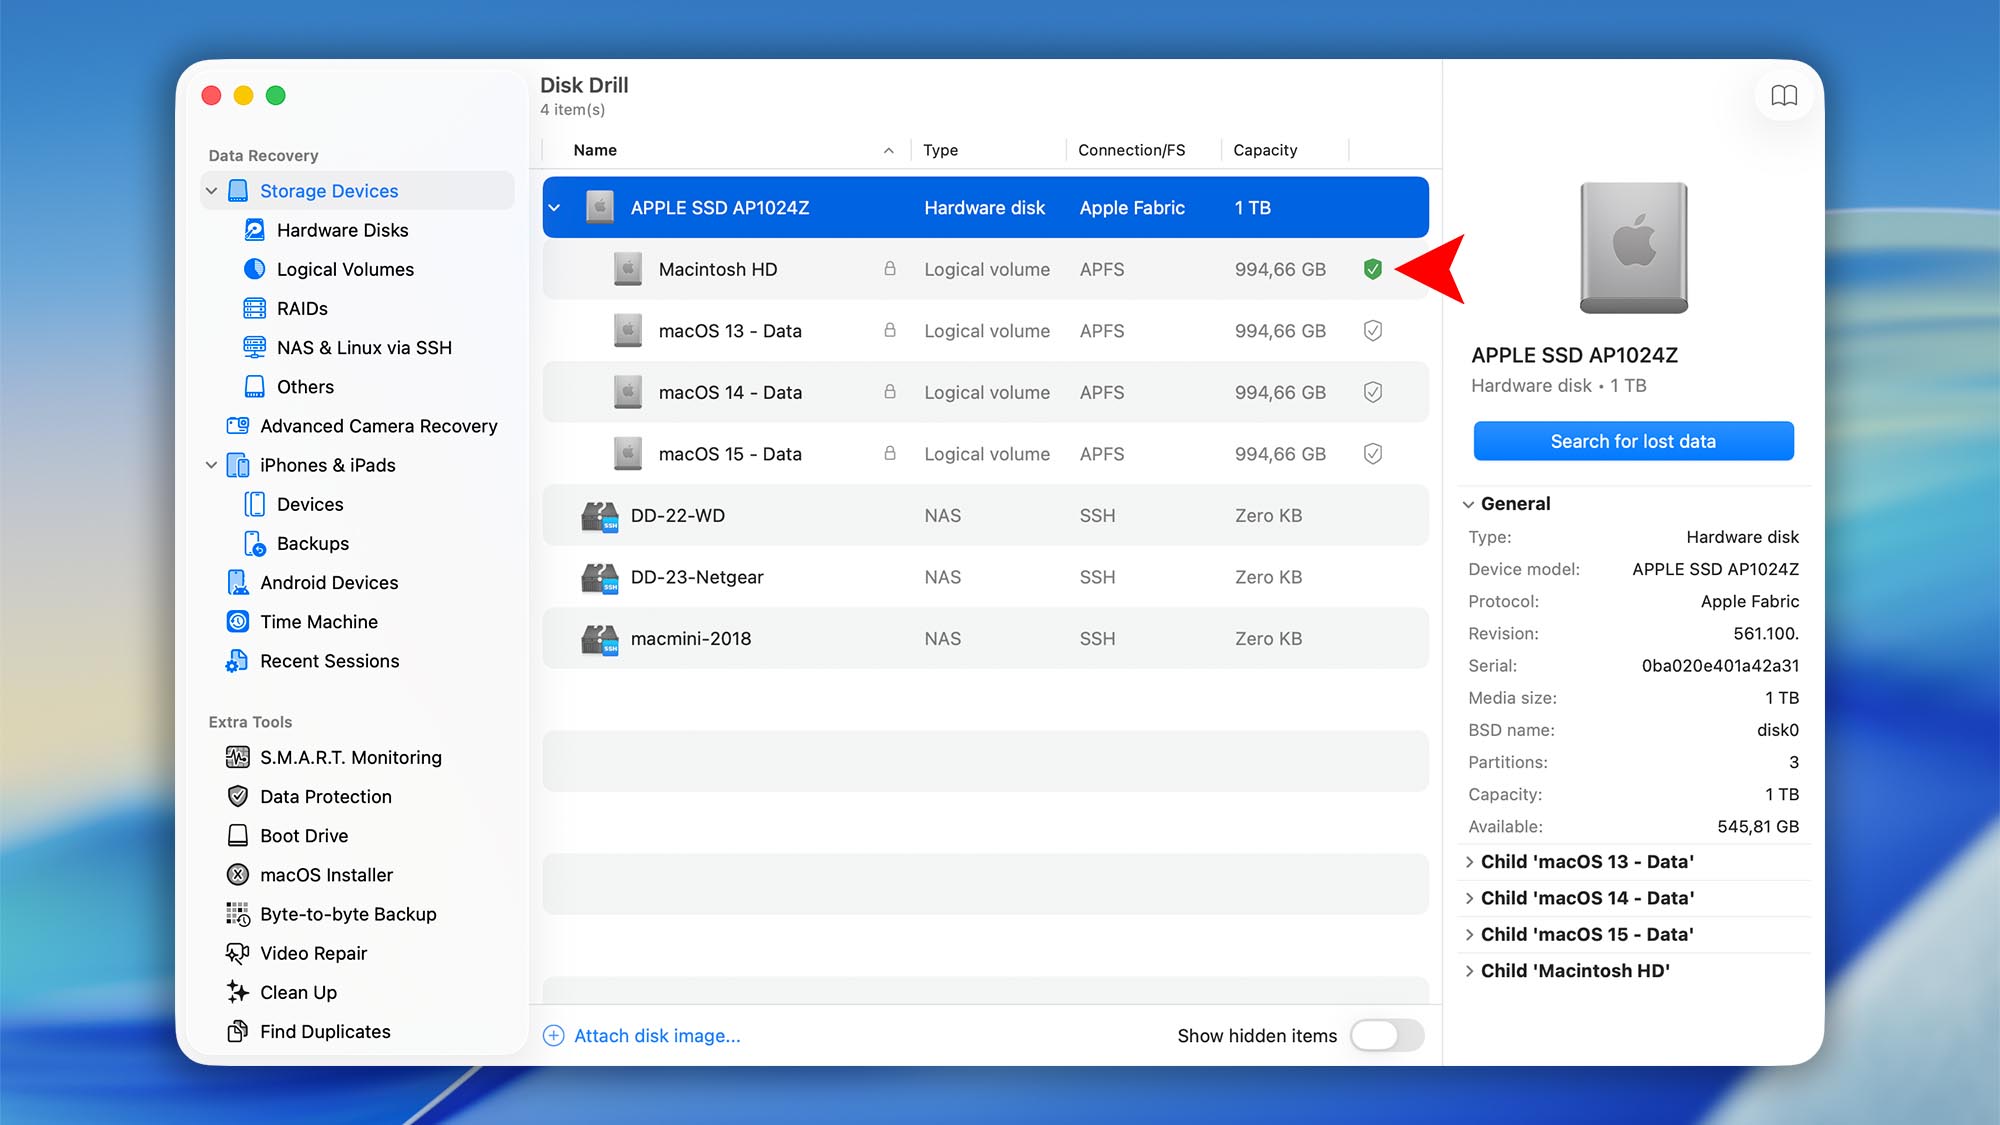
That’s it — Guaranteed Recovery protection is now enabled for the selected partition.
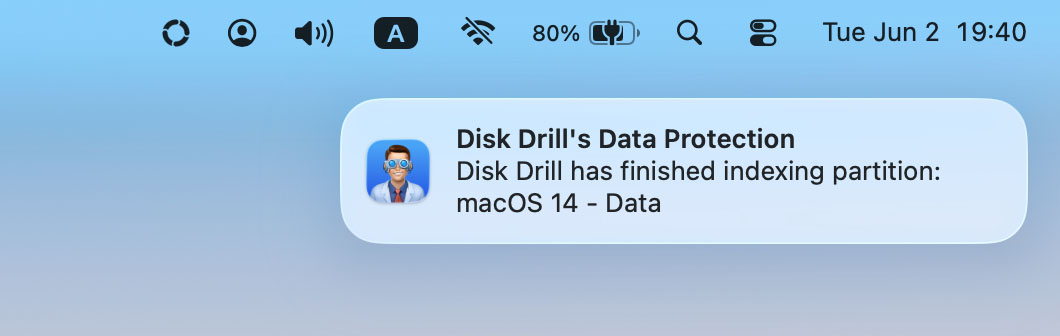
Disk Drill may need some time to index the drive, especially if it contains a large number of files. The indexing process will continue quietly in the background, and Disk Drill will display a notification once it is complete.
2. What Are the Advanced Options for Guaranteed Recovery?
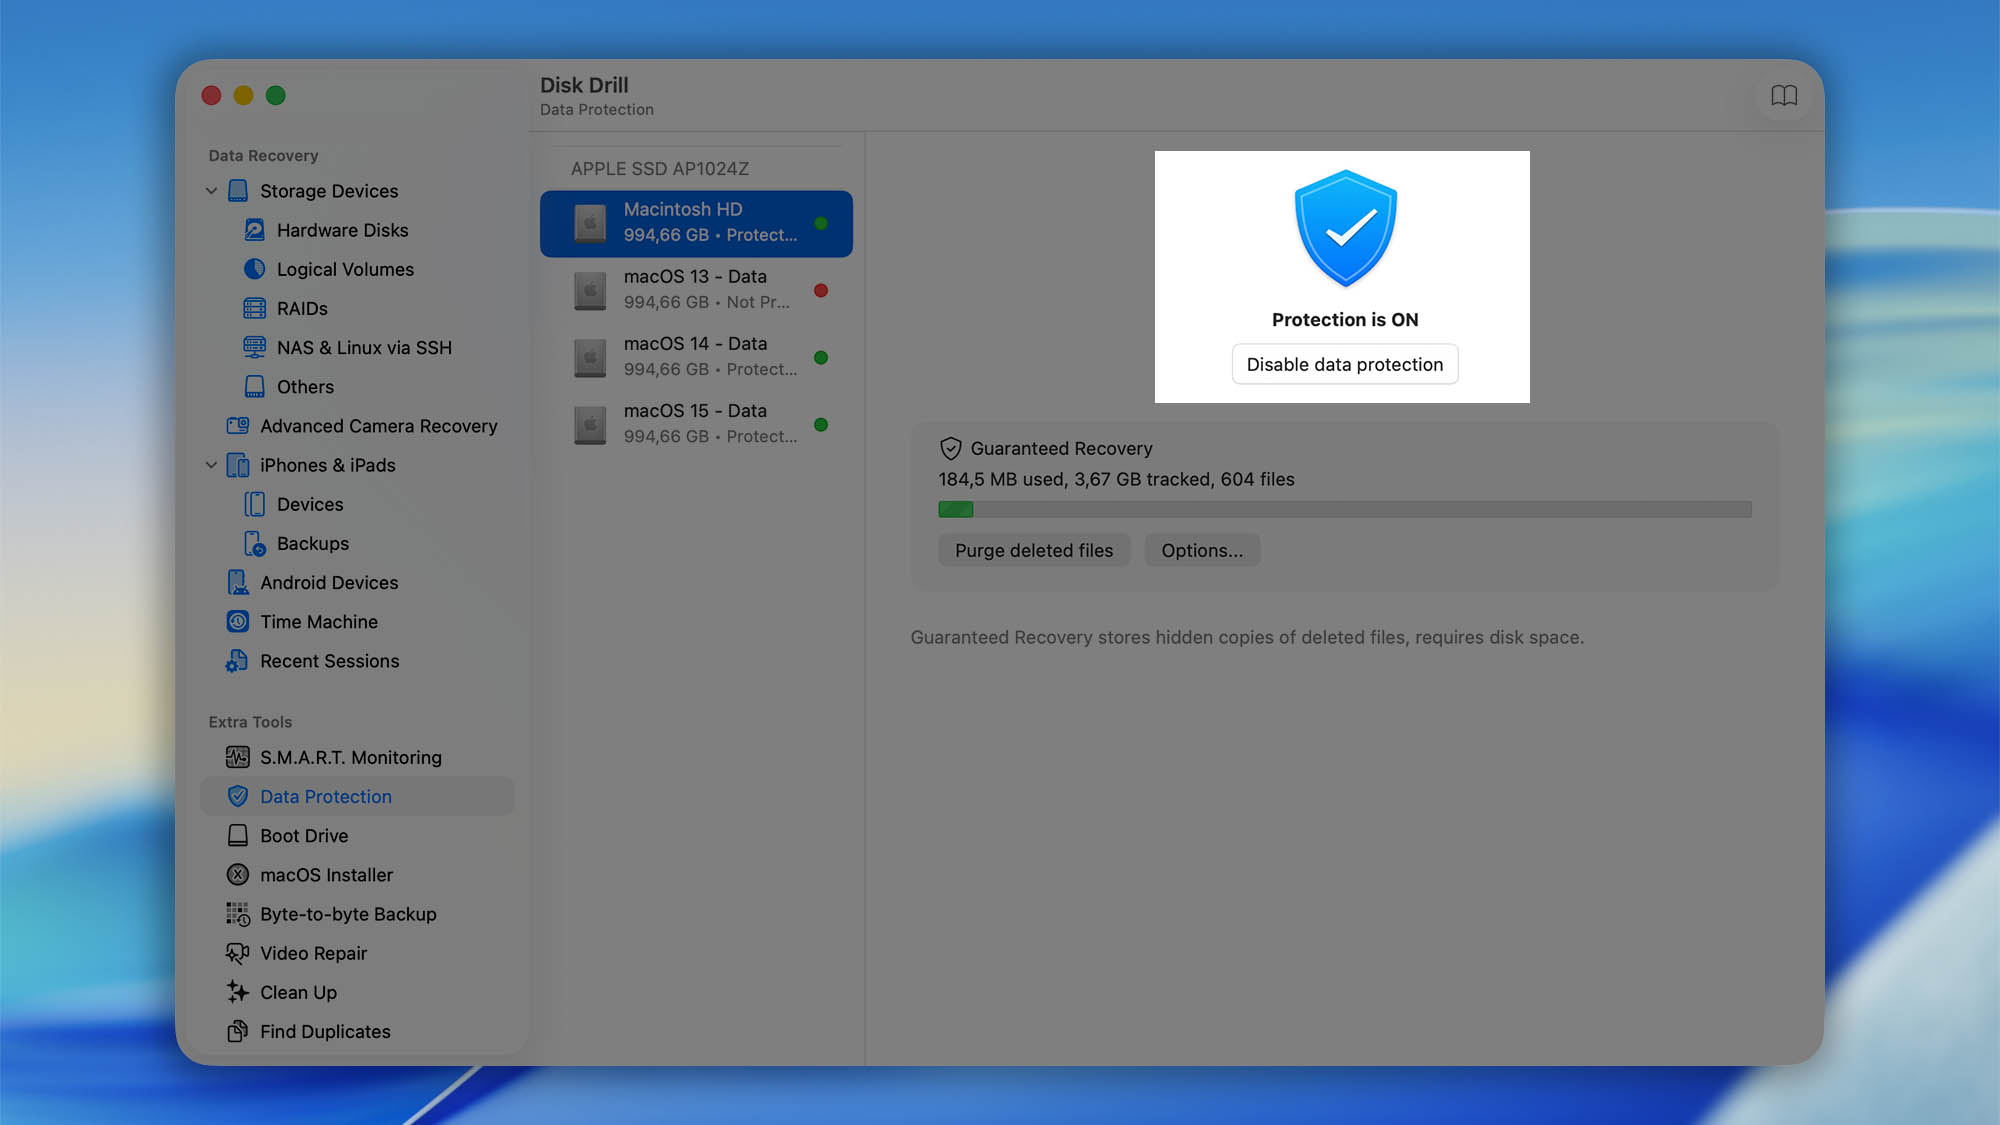
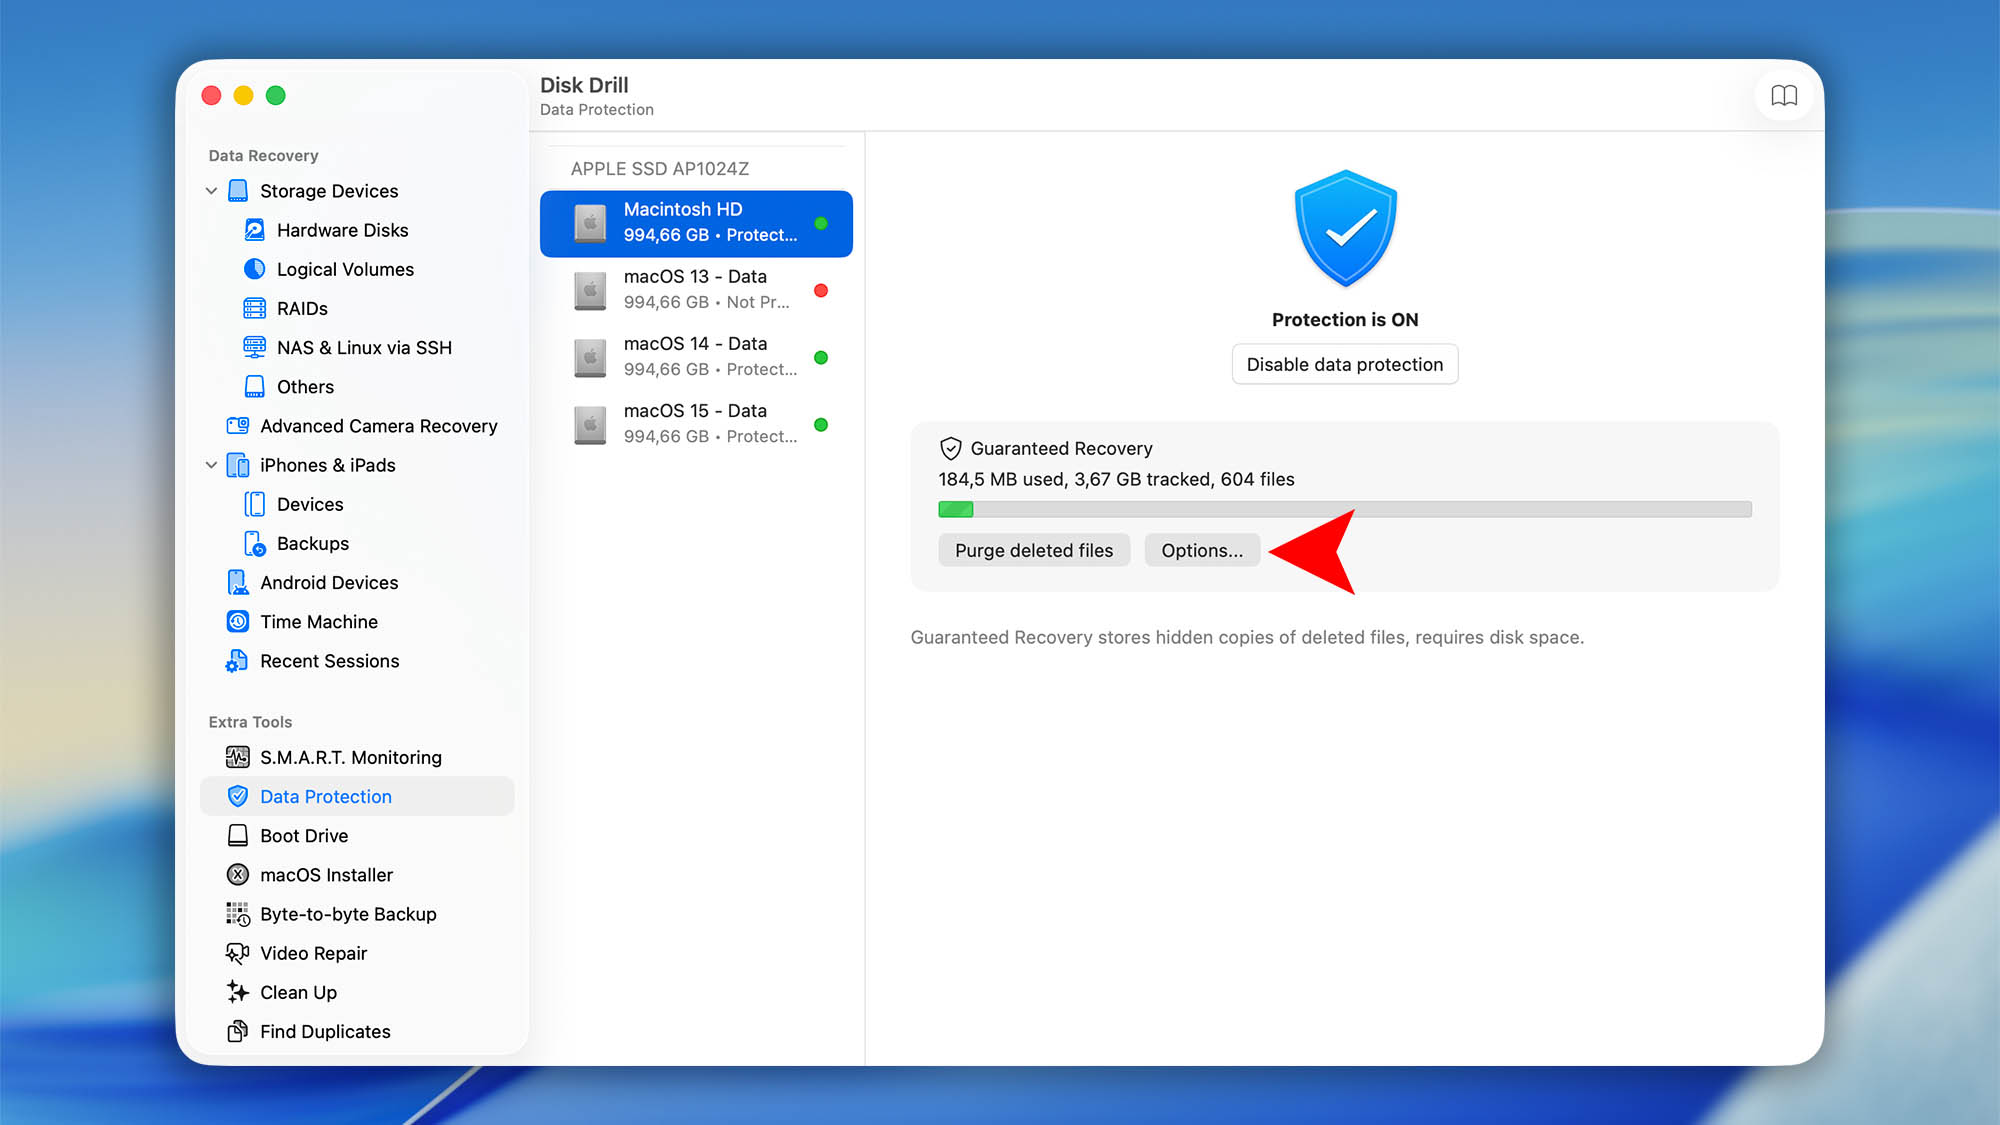
Go to Extra Tools > Data Protection in Disk Drill to view the Guaranteed Recovery protection status for each available drive and partition. From this screen, you’ll see three options:
- Enable or Disable Protection: Click the corresponding button to turn Guaranteed Recovery on or off for the selected drive or partition.
- Purge Deleted Files: Use this option carefully. Purging deleted files will remove all data currently stored by Guaranteed Recovery, which means those files will no longer be recoverable through Undelete Protected Data. Only use this option if you’re sure you no longer need to recover any protected deleted files. When used intentionally, purging deleted files can help free up disk space on your Mac or external drive.
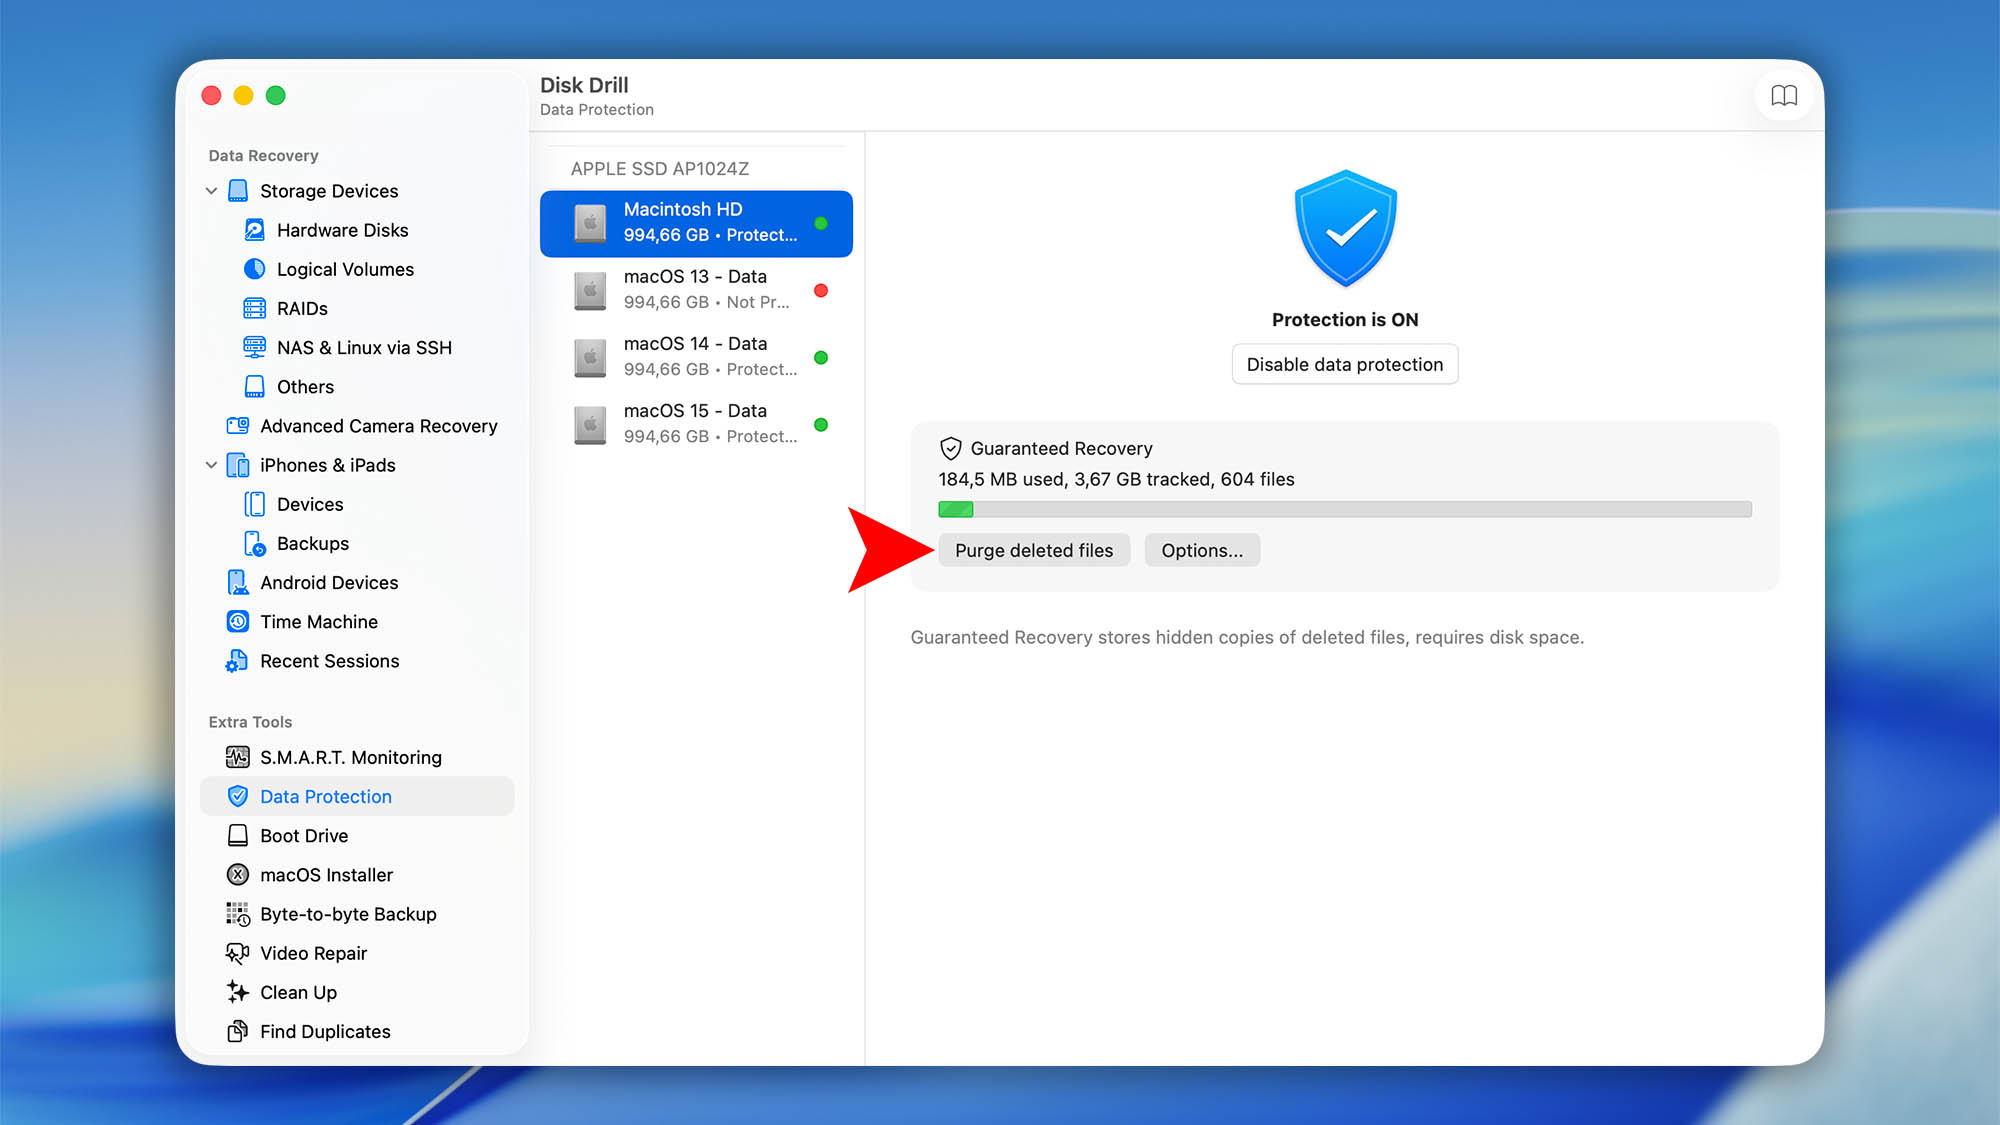
- Options: Click Options to open the Guaranteed Recovery settings for the selected partition. From this window, you can control which files and folders Disk Drill protects, which items should be excluded, and how much disk space Guaranteed Recovery can use. At the bottom of the window, you can also enable or disable Trash protection for this partition for all users.
- Protected folders: Add custom folders you want Guaranteed Recovery to monitor, remove existing protected locations, or click Reset to defaults to restore the default folder settings.
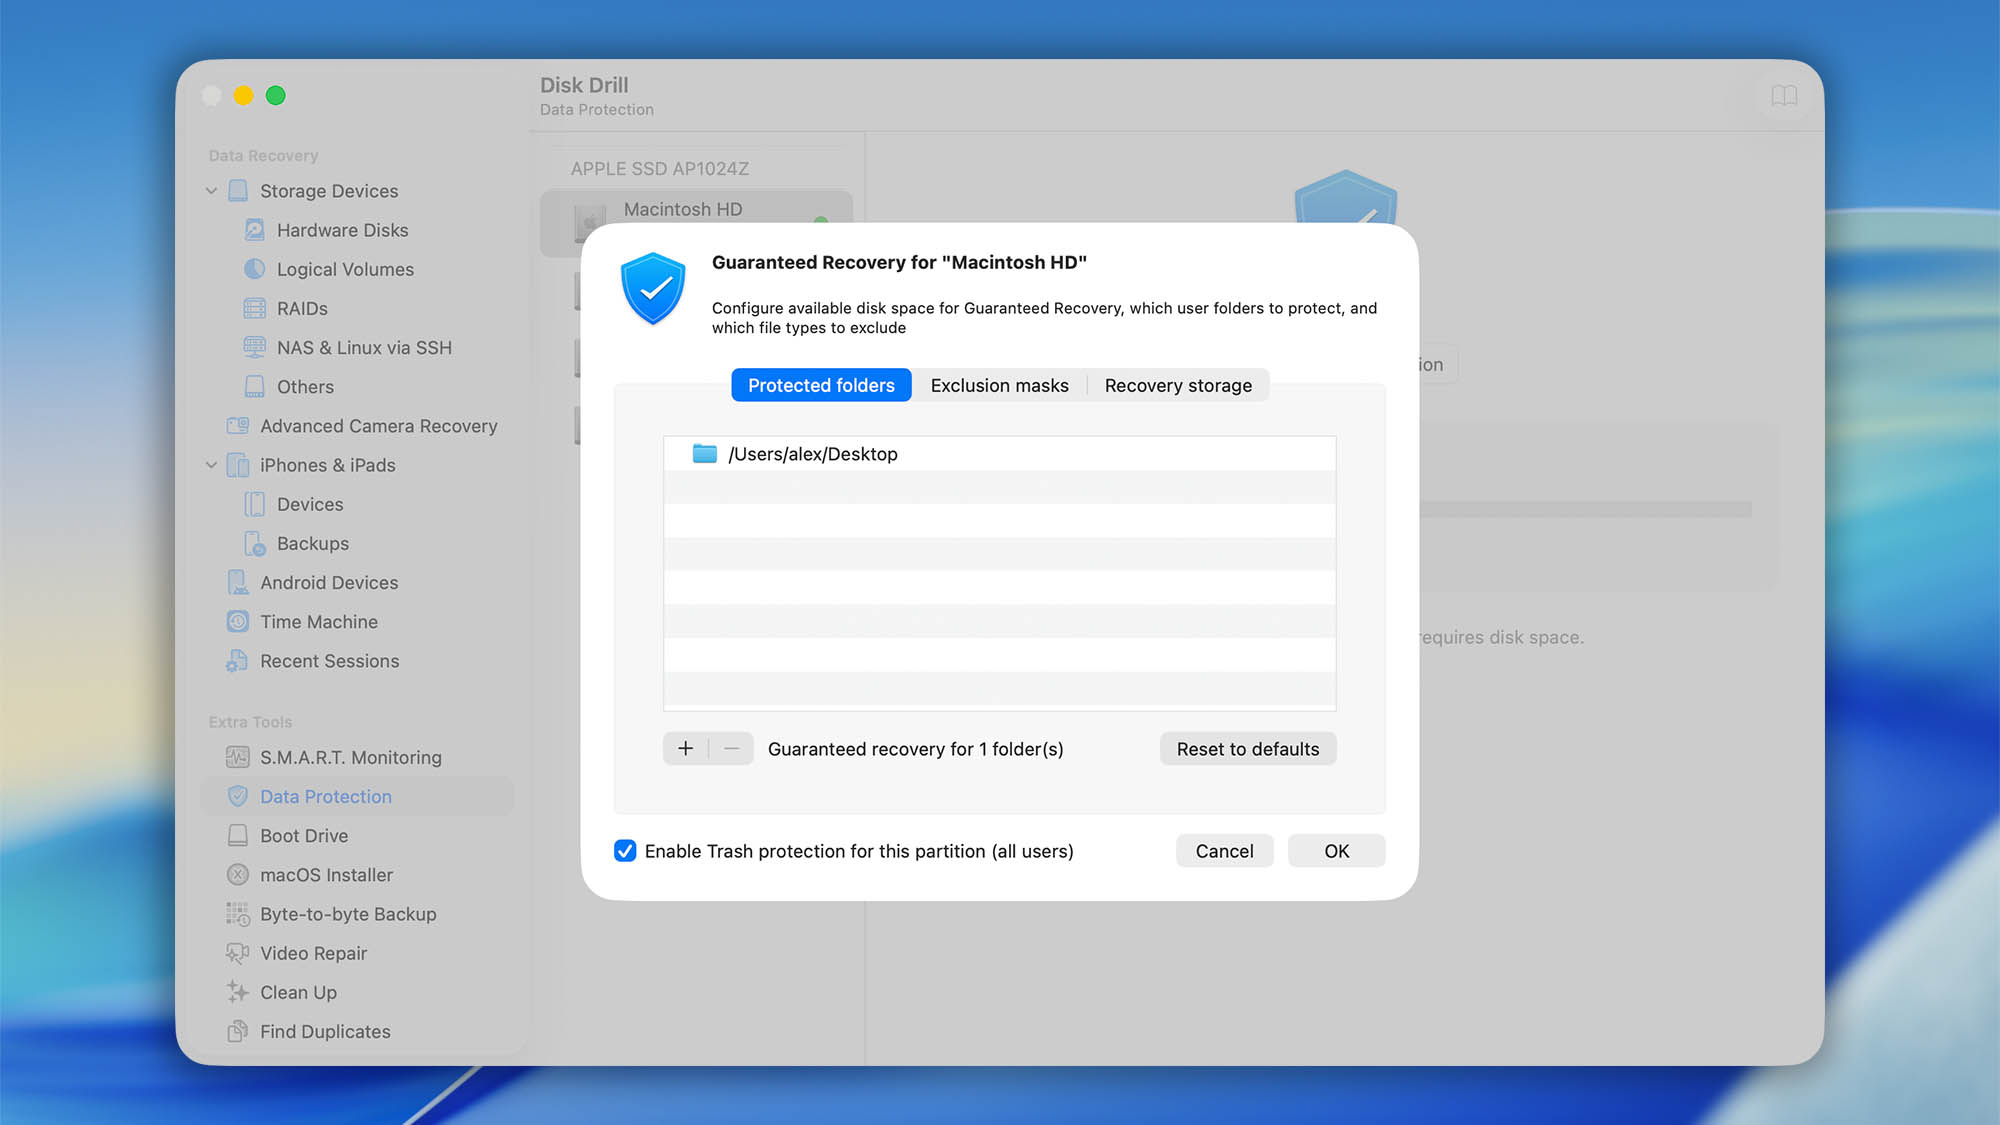
- Exclusion masks: Set rules for files, subfolders, or paths that should not be saved to Guaranteed Recovery storage. This is useful for excluding temporary files, cache files, partial downloads, or other items you do not need to recover. You can also reset the exclusion list to its default settings.

- Recovery storage: Configure how much space Guaranteed Recovery can use and how long protected files should be kept:

- Storage cap: Set the maximum amount of disk space reserved for Guaranteed Recovery on the selected partition. Depending on the selected mode, you can limit GR storage by total size or by the amount of free space that should remain available.
- Skip files larger than: Set a file size limit for items stored by Guaranteed Recovery. Files larger than the selected limit will not be added to GR storage.
- Keep files in storage: Choose how long files should remain in Guaranteed Recovery storage before they are automatically removed.
- Protected folders: Add custom folders you want Guaranteed Recovery to monitor, remove existing protected locations, or click Reset to defaults to restore the default folder settings.
3. How Do I Scan for and Recover Lost Files Protected by Guaranteed Recovery?
You can recover deleted files with this method only if Guaranteed Recovery was enabled for the protected folder or partition before the data loss occurred. If GR was not active when the files were deleted, the Undelete Protected Data option may not be available.
To recover files protected by Guaranteed Recovery in Disk Drill for Mac, follow these steps:
- Connect the drive to your Mac. If you want to recover files from an external drive, make sure it is connected to your Mac. If you want to recover files from your Mac’s internal drive, connect an external drive first. This gives you a safe location to save the recovered files.
- Launch Disk Drill.
- Select the partition you want to recover deleted files from.
- Right-click or Control-click the selected partition, then choose Undelete Protected Data from the drop-down menu.
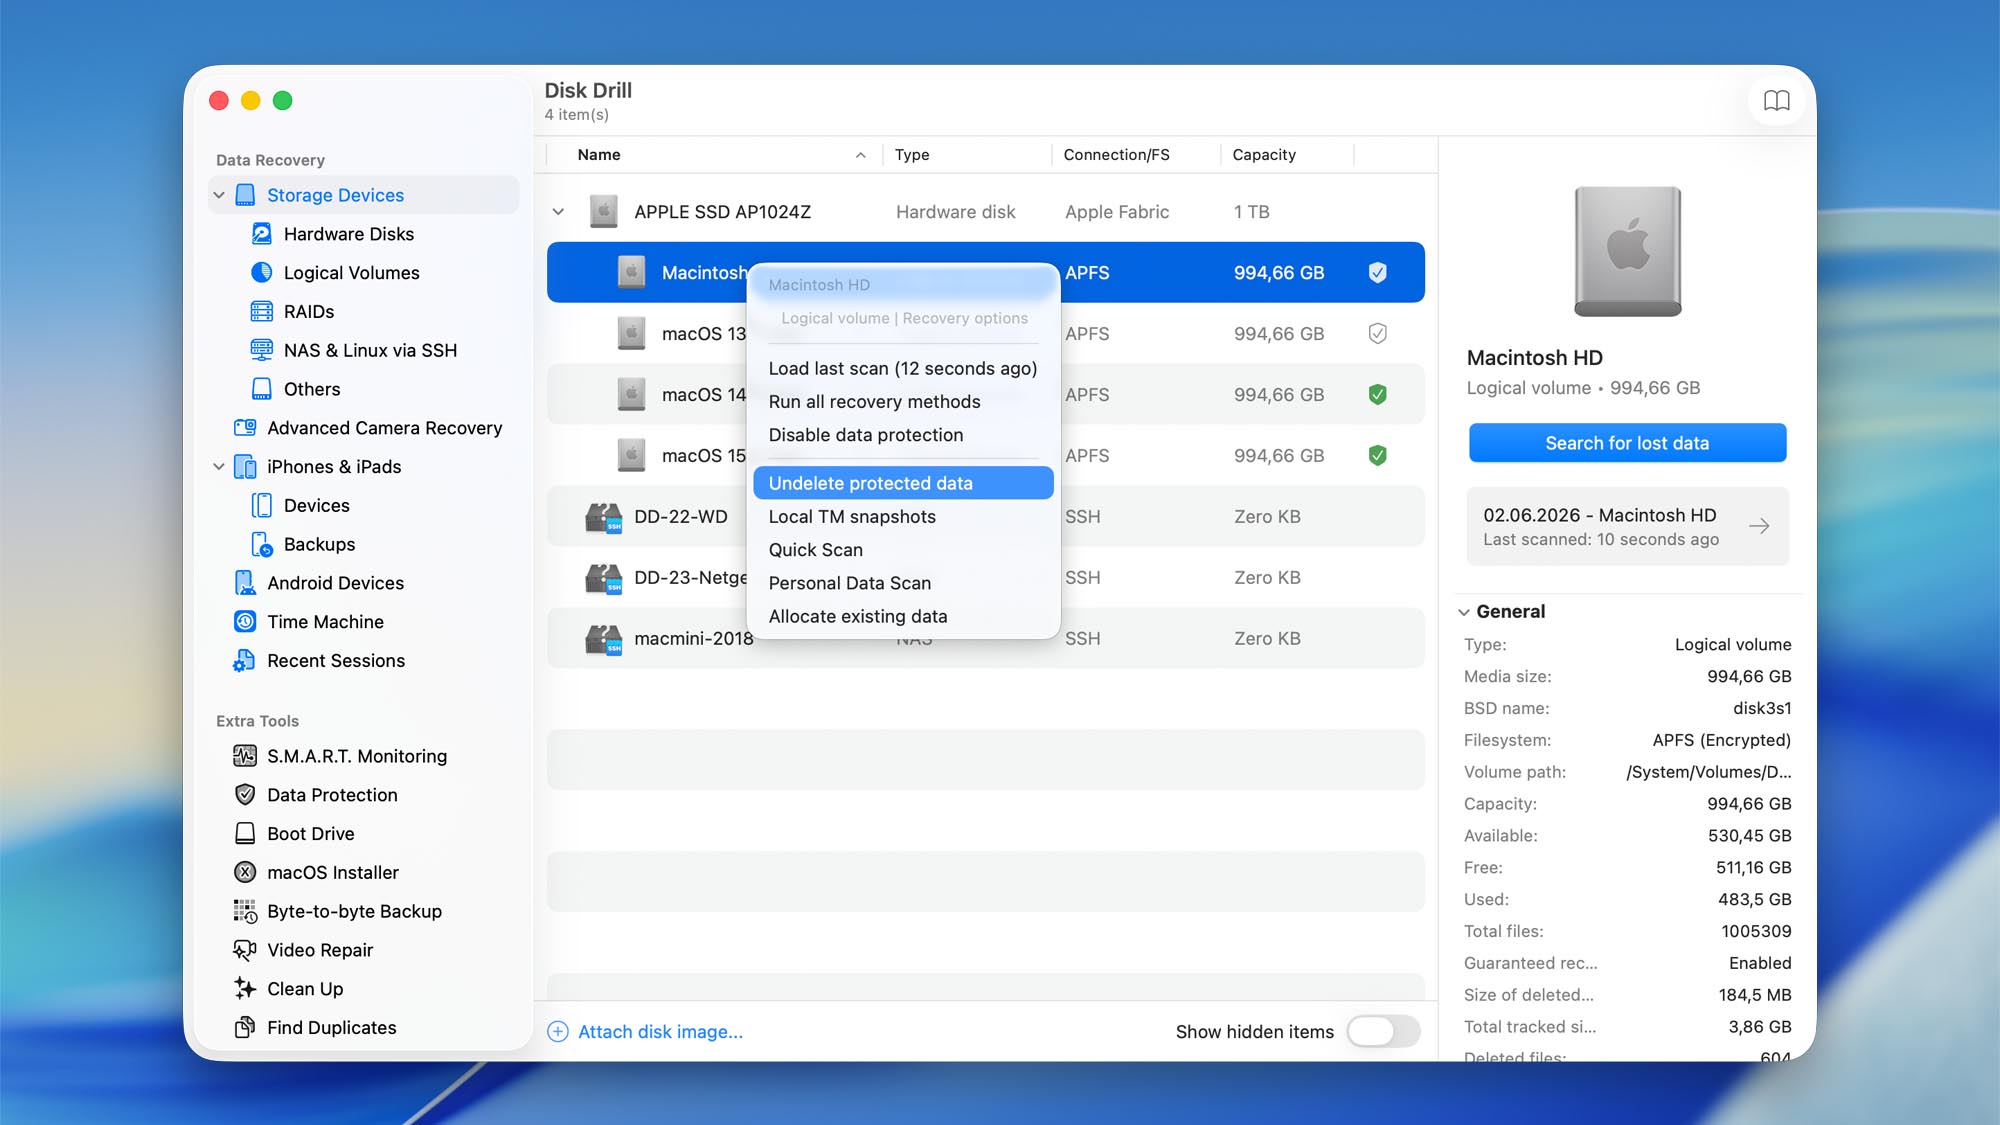 💡 Note: If you do not see the Undelete Protected Data option, there is no Guaranteed Recovery database associated with that partition.
 - Wait for Disk Drill to finish scanning. Once the scan is complete, Disk Drill will display a list of recoverable files protected by Guaranteed Recovery.
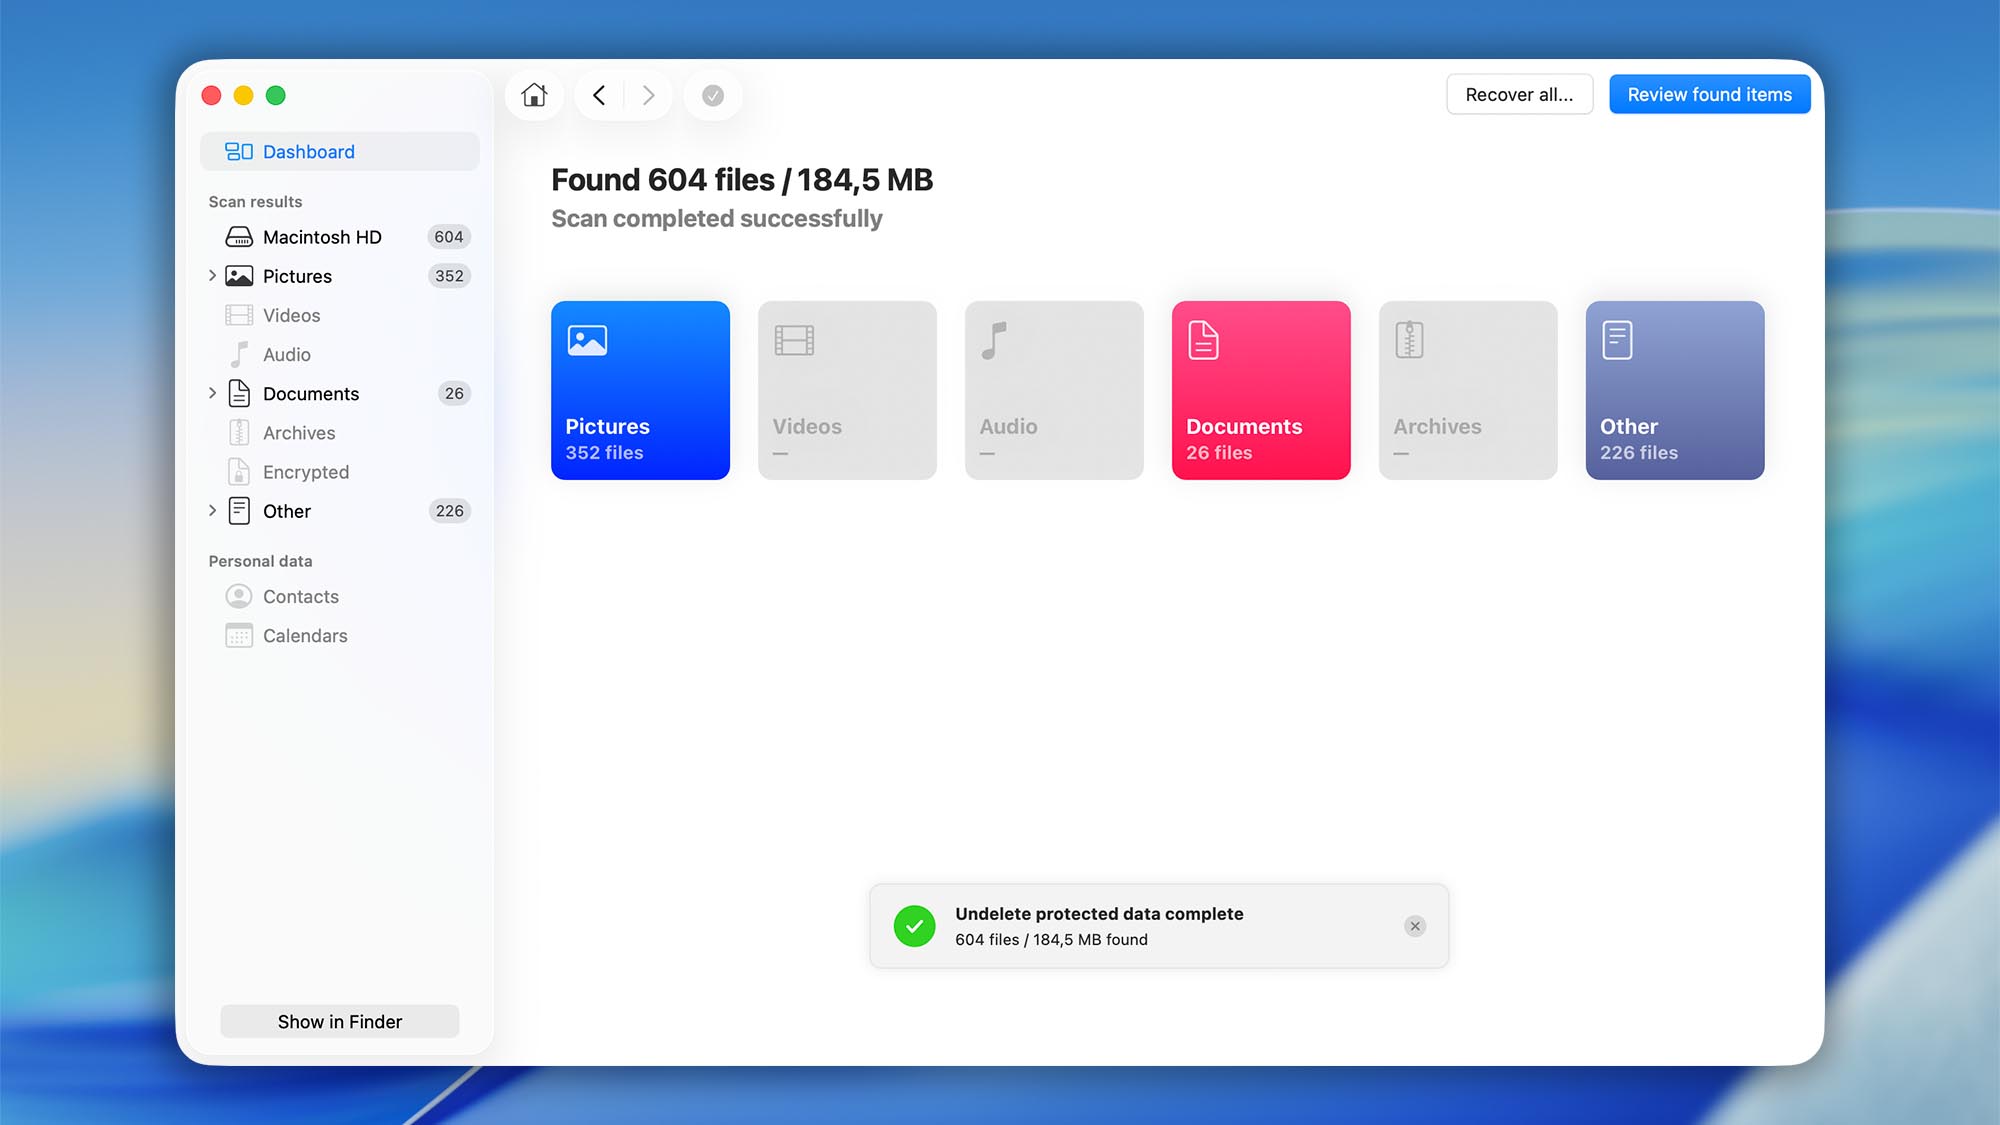
- Filter the scan results as needed by keyword, file type, file size, or date. For more information about filtering recoverable files, refer to the Scanning FAQs.
ℹ️ Tip: Previewing files is optional when using this method, because files protected by Guaranteed Recovery can be recovered for free.
- Select the files you want to restore by checking the box next to each item, then click Recover.

- Choose a safe destination folder for the recovered files.
⚠️ Warning: We strongly recommend saving recovered files to a different drive than the one you are recovering data from. Saving files back to the same drive may overwrite deleted data and reduce your chances of successful recovery.
Technical Details and FAQs About Disk Drill’s Guaranteed Recovery
Learn how Guaranteed Recovery works in Disk Drill for macOS, what file information it stores, and how it can help improve your chances of recovering deleted files on a Mac. This guide answers the most common questions about Guaranteed Recovery, explains important technical details, and shares best practices for protecting your drives against future data loss.
1. Is Guaranteed Recovery Resource Hungry?
No, it is not particularly resource hungry. By default, it only monitors the Trash folder, so it is only active when it needs to make a copy of a deleted file. If you have set it to monitor another folder, it will be active whenever a file is saved to that folder.
2. What Kind of Drives Can I Protect with Guaranteed Recovery?
You can enable Guaranteed Recovery protection on any APFS or HFS+ partition. By default, Disk Drill monitors only the Trash folder on protected partitions, but you can add custom folders in the Guaranteed Recovery settings to expand protection to other important locations on your drive.
3. What Kind of Files Can I Protect with Guaranteed Recovery?
Guaranteed Recovery can protect any file type — it is not restricted to certain file types like Deep Scan recovery is.
4. Should I Protect My System or Applications Folder?
No, we don’t recommend it. The activity in the system folder is enormous and trying to protect it may slow your Mac down. These aren’t normally the type of files you would need to recover anyway. With applications, licensed users can usually download a new copy of the app from the developer as needed, so backing them up is normally unnecessary.
5. Should I Protect a Time Machine Volume?
No. There is no need to enable Guaranteed Recovery for a Time Machine volume, and your system could experience slowdowns if you enable protection on it. If you have Time Machine on a partitioned drive, you can enable protection on the non-Time-Machine partitions, and just leave the Time Machine partition unprotected.
6. Why Didn’t a File I Deleted Show Up in Guaranteed Recovery?
There are a few reasons why a file might not show up:
- The disk or partition you deleted the file from was not protected. Go through this tutorial to ensure you have the right volumes protected.
- You moved a file to another drive, instead of sending it to the Trash (or to another protected folder).
- The files were deleted bypassing the Trash or other protected folders (macOS can delete certain files without moving them to Trash).
7. Why Can’t Some of My Volumes/Partitions Be Protected with Guaranteed Recovery?
You should be aware that the partition must meet certain requirements to be eligible for Guaranteed Recovery protection. Here they are:
- Guaranteed Recovery can only be applied to HFS+ or APFS partitions.
- The partition has to be formatted using the file system mentioned above. Meaning… you can’t protect an unallocated space or raw partition without a file system on it.
- The partition has to be correctly mounted to your Mac to be protected.
- The partition has to be write/read enabled. Read-only partitions or disk images cannot be protected.
8. Can Guaranteed Recovery be Used in Forensic Research?
No. Guaranteed Recovery is not designed for forensic research and should not be treated as a forensic tracking or evidence-preservation tool. It does not maintain a complete audit trail, track file-system activity, or store forensic metadata about protected files.
That said, Disk Drill for macOS includes a separate Forensic Data Export option that can export data in DFXML format. This may be useful for certain technical, investigative, or data recovery workflows where structured file-system information is needed.
If you’re interested in using Disk Drill for forensic or investigative purposes please contact our team. We’re happy to help government agencies, law enforcement departments, and authorized forensic contractors better understand how Disk Drill’s data recovery tools can support their work.