Lost data on an SSD drive? Stop using it immediately and follow these instructions!
What Is TRIM and Why Does It Matter for Data Recovery?
- 🧹 TRIM Command: When you delete a file on an SSD, the operating system sends a TRIM command to mark the associated flash memory blocks as unused.
- 📝 Immediate Overwrite: Unlike HDDs, where deleted data lingers until overwritten, TRIM zeroes out SSD sectors almost instantly, preventing standard recovery methods from reading residual data.
- 📉 Performance Benefit: TRIM improves SSD performance and longevity by evenly distributing writes and avoiding unnecessary erase cycles.
What Happens Under the Hood: TRIM, Garbage Collection, and NAND Flash
- NAND Flash Architecture
- SSDs store data in NAND flash cells, grouped into pages (typically 4 KB–16 KB each) and blocks (typically 256–512 pages).
- Unlike HDDs, NAND flash must be erased at the block level before pages can be rewritten.
- TRIM Command
- When you delete a file, the OS issues a TRIM command (via ATA or NVMe protocol) to mark its pages as invalid.
- The SSD controller moves those pages to a garbage collection queue and eventually erases the entire block, making the deleted data unrecoverable at the flash level.
- Garbage Collection & Over-Provisioning
- Garbage collection runs automatically in the background, consolidating valid pages and freeing up blocks for new writes.
- Over-provisioning reserves extra capacity (typically 7 %–28 % of drive space) to optimize performance but also accelerates block erasures once TRIM occurs.
Is SSD Data Recovery Possible?
Solid-state drives (SSDs) use a TRIM command that typically makes deleted files irrecoverable—TRIM zeroes out the sectors where files lived, so most data recovery tools can’t retrieve that information. However, SSD recovery can succeed in certain circumstances if you act immediately.
Quick Prevention Tips to Safeguard Your SSD Data (more detailed info here):
- 🛑 Stop using the SSD right away. As soon as you realize data is missing, power down your computer and disconnect the SSD (if you can). Continued writes—even operating-system background tasks—can trigger TRIM and overwrite the sectors you need.
- ⁉️ Why recovery sometimes works. TRIM only runs when the OS explicitly tells the SSD which blocks are free. If that command never reaches the drive—because of a crash, power loss, or delayed CPU response—the deleted data remains intact and readable by Disk Drill.
- 🔎 Check your TRIM status.
- On modern Macs, TRIM is enabled by default on Apple-shipped SSDs.
- Third-party SSDs may not have TRIM active. Use the Terminal command (macOS) or check your SSD’s utility software (Windows).
- ✅ Enable Guaranteed Recovery for protection. Even on TRIM-enabled SSDs, Disk Drill’s Guaranteed Recovery feature creates hidden copies of files as you work. If you’ve turned on Guaranteed Recovery before data loss, Disk Drill preserves those copies, making SSD data recovery far more reliable.
- 🗃️ Adopt a robust backup strategy.
- Use Time Machine, Windows File History, or cloud backup services.
- Consider a dual-drive setup: run your OS and apps on the SSD and store personal files on a secondary HDD or network volume.
Why TRIM-Enabled SSD Recovery Is Tough—and When It’s Possible
- Immediate Block Erasure
- Once the SSD processes TRIM, the entire block containing your deleted file is wiped—no residual data fragments remain.
- Delayed or Failed TRIM Execution
- Power failures, system crashes, firmware bugs, or outdated NVMe/ATA drivers can prevent TRIM commands from reaching the SSD. In these narrow windows, data stays intact until the next garbage collection cycle.
- Over-Provisioning Buffer
- If your SSD’s controller hasn’t yet reclaimed the block (e.g., because of insufficient free-space pressure), the deleted pages might still reside in NAND.
Technical Recovery Techniques for TRIM-Enabled SSDs
Have you just realized you deleted important data from an SSD drive? Please follow these emergency steps. You still have a chance to get it back:
- Stop All Writes Immediately
- Mount the SSD read-only (use a hardware write-blocker or disable writes in your OS).
- Prevent background processes or indexing services from writing to the drive.
- Low-Level Forensic Imaging
- Use specialized hardware (e.g., Tableau TD3 or Logicube Forensic Falcon) to acquire a bit-for-bit image of the SSD’s raw NAND.
- Some forensic imagers can bypass firmware-level TRIM handling and read blocks before garbage collection.
- You can create a byte-to-byte backup of the SSD drive in question. Use this backup for data recovery.
- Target Disk Mode
- Connect your Mac to the host in Target Disk Mode.
- Go ahead and scan your Mac directly using Disk Drill installed on the host Mac.
- Run macOS in Recovery mode
- Turn on your Mac and immediately press and hold these two keys Command (⌘) and R (intel based Mac).
- Press and hold your Mac’s power button until the startup volume slider and the “Options” icon appear (silicon based Mac).
- Read this article to know How to Run Disk Drill in macOS Recovery Mode.
- Custom Firmware or Controller Exploits
- Advanced labs sometimes flash custom firmware to disable garbage collection/over-provisioning temporarily.
- This allows access to pages marked “invalid” but not yet erased.
- Cold Power Cycling (“Cold Boot”)
- Power down the SSD, then power it back on and immediately image it before the TRIM queue is processed.
- Works only if the drive’s firmware doesn’t instantly run garbage collection on boot.
- Guaranteed Recovery & Software-Level Snapshots
- Disk Drill’s Guaranteed Recovery proactively copies files to a hidden folder before deletion.
- Even with TRIM enabled, those snapshots bypass flash-level erasures and allow 1:1 file restoration.
As you know, with every recovery situation, it’s always about good luck and Disk Drill’s advanced recovery mechanisms. With SSD recovery, it’s also about your fast reaction to the problem. Get in touch if you need help with Disk Drill.
Conclusion
While TRIM is essential for SSD health and speed, it inherently limits post-deletion recovery. The key to successful SSD data recovery—even with TRIM enabled—is speed, prevention, and the right tools. By enabling Guaranteed Recovery, stopping writes immediately, and running a thorough deep scan, you can maximize your chances of retrieving lost files from a TRIM-enabled SSD. Don’t wait—download Disk Drill today and safeguard your data.
FAQ
- Click the Apple menu and choose About This Mac.
- In the window that appears, click More Info….
- Scroll down and click System Report….
- In the sidebar, select Storage.
- Click on Macintosh HD (or your startup volume’s name).
- Under Medium Type, read whether it’s listed as “Solid-State (SSD)” or “Rotational (HDD)”.

- Open Settings from the Start menu.
- Go to System → Storage → Advanced storage settings → Disks & Volumes.
- Click Properties under the drive you want to check.
- Check the Bus type field—it will show whether your drive is an “SSD/NVME” or “HDD”.

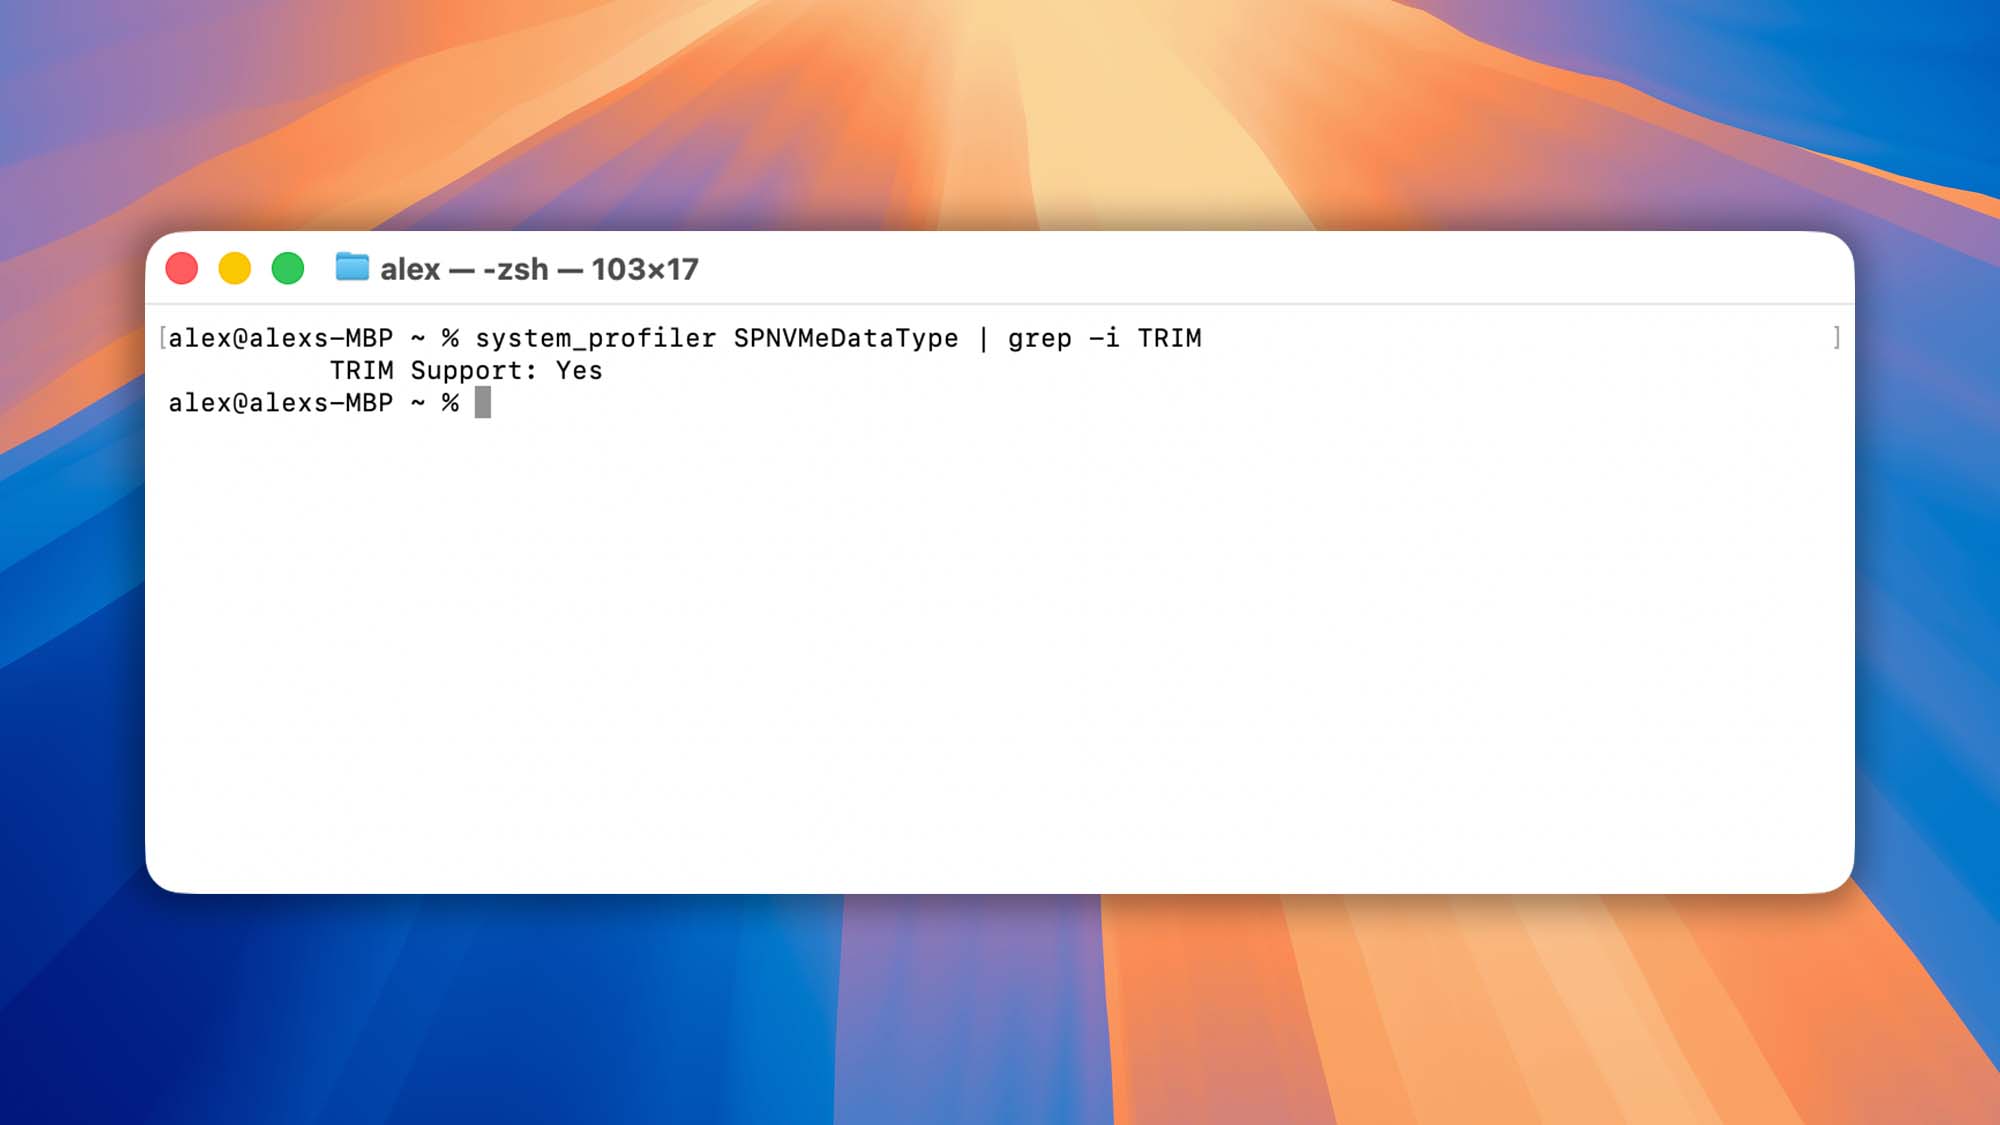
To check if TRIM is active, use one of these commands in Terminal:
- For NVMe/PCIe SSDs
system_profiler SPNVMeDataType | grep -i TRIM - For SATA SSDs
system_profiler SPSerialATADataType | grep -i TRIM - Or for any internal drive
diskutil info / | grep -i "TRIM"
If TRIM is enabled, you’ll see “TRIM Support: Yes“.
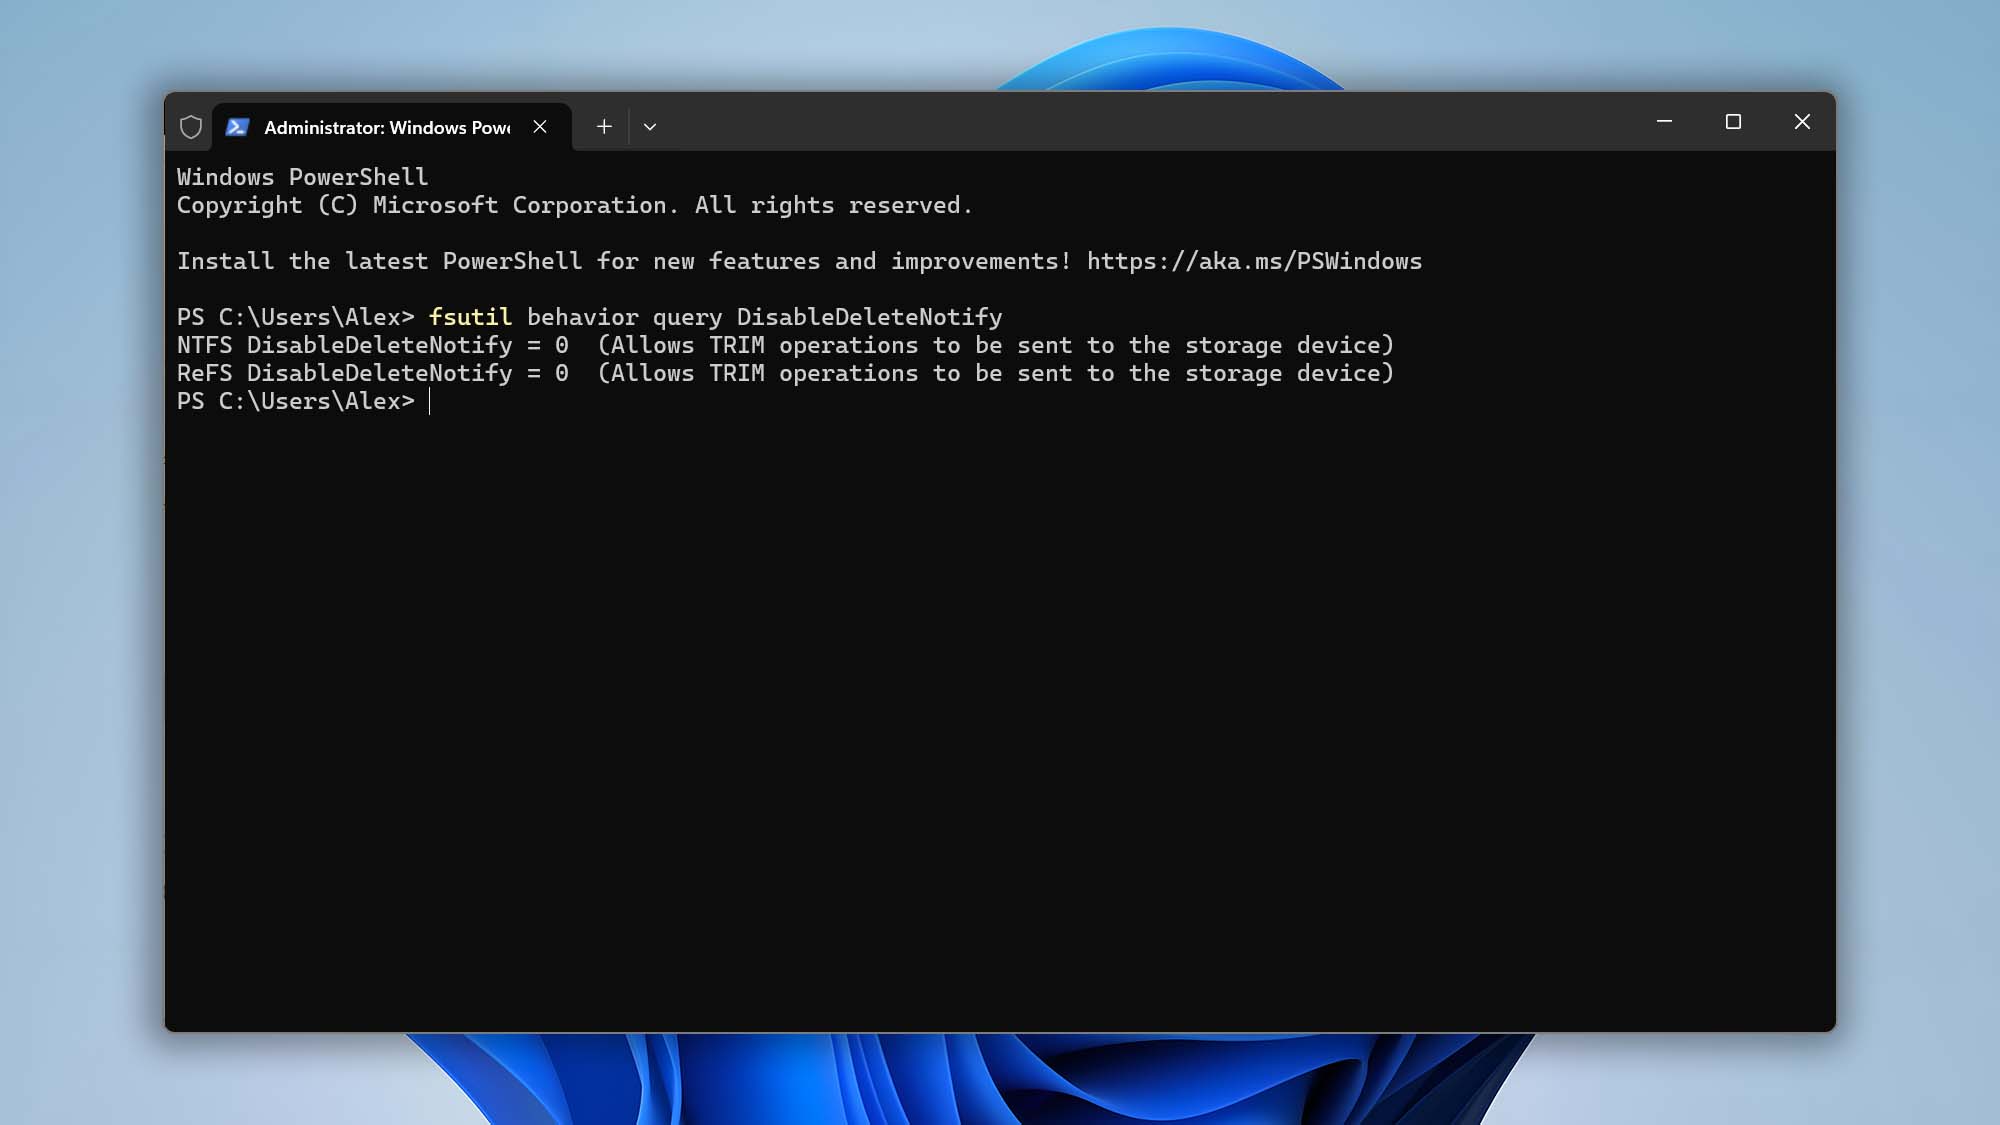
Open Command Prompt as Administrator and run:
fsutil behavior query DisableDeleteNotify
If it returns DisableDeleteNotify = 0, TRIM is enabled. If it returns 1, TRIM is disabled.