If you’ve lost or deleted a .fla file and aren’t sure how to recover it, you’ve come to the right place. Data loss can happen in multiple scenarios, and our step-by-step methods can help you restore your .fla files. It doesn’t matter if you’re an amateur; follow our guide for quick file recovery.
What is .fla?
 .fla stands for Macromedia .flash .fla Project File Format, and it is a file extension primarily used by Adobe Animate. It is an interactive multimedia software used to design vector graphics, animations for television and the web, games, etc. Formerly known as Adobe .flash Professional or even Shockwave .flash, Adobe Animate is the leading software to create 2D and character animations.
Macromedia first developed the .fla file type for the Macromedia .flash application. In 2005, Adobe Systems Inc. acquired the company. Adobe Animate has used the .fla file format ever since. The .fla file stores all the resources from the project. It contains assets like graphics, audio, videos, etc., and the other tools and the project timeline.
How to Recover Deleted .fla Files?
There are several tools available in the market to assist you with .fla file recovery. While it can seem like a daunting task, most of these recovery processes are pretty straightforward and user-friendly. They can help restore files in situations like device crashes, accidental loss, or file deletion.
However, you must also be careful while working on your Adobe Animate .fla file. Certain practices and techniques that might be effective while attempting to retrieve your files are:
- 💿 It’s helpful to have backups of your .fla project files and to keep saving them regularly. In case the file is lost, following this practice can make the recovery process more convenient.
- ⚓ Do not overload the drive from which you want to retrieve data. Doing this can slow down recovery and result in issues during restoration.
- 💥 If the system has crashed or you want a file restored, start the recovery process immediately. The more time passes, the more challenging file recovery will become.
- 💯 Try and use the most productive technique on the first try. Repetitive recovery trials can lead to file corruption and permanent data loss.
In case you are dealing with virus-infected files, check out our easy-to-follow guide on recovering your precious data.
How to Recover .fla with Software?
Don’t fret if you accidentally forgot to save your important video editing data.
Perhaps, the most efficient way to recover lost .fla files is to use trusted data recovery software. Other methods would only work to recover data from the recycle bin or recent file history. However, software like Disk Drill can help retrieve permanently deleted files.
Let’s understand the steps to retrieve your .fla file using Disk Drill:
- Download and Install Disk Drill on your Mac or Windows device.
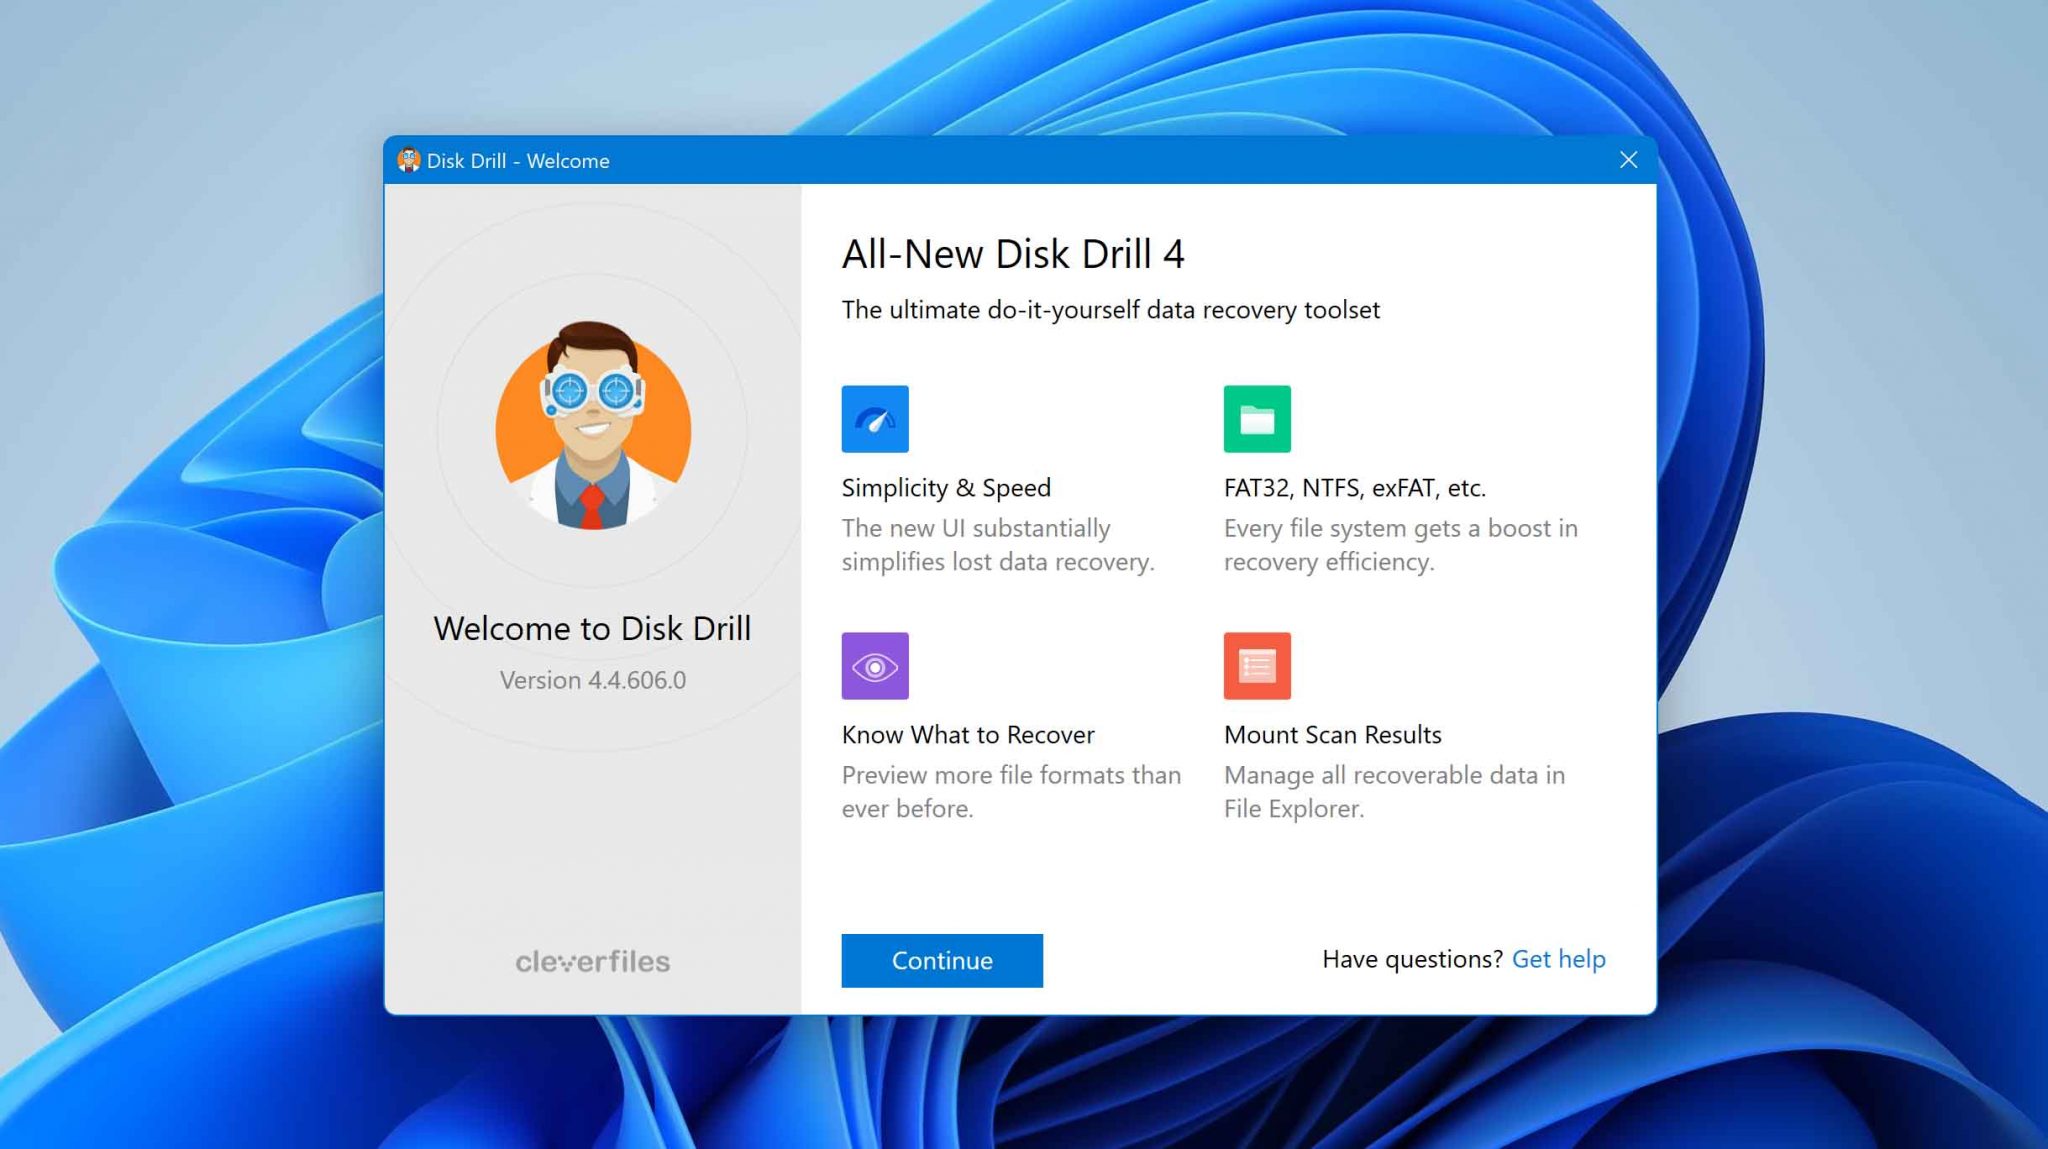
- Launch the application on your system and accept both the privacy policy and the user agreement.
- Select the drive or the storage device from which you want to recover your .fla file. Now, click Search for Lost Data.
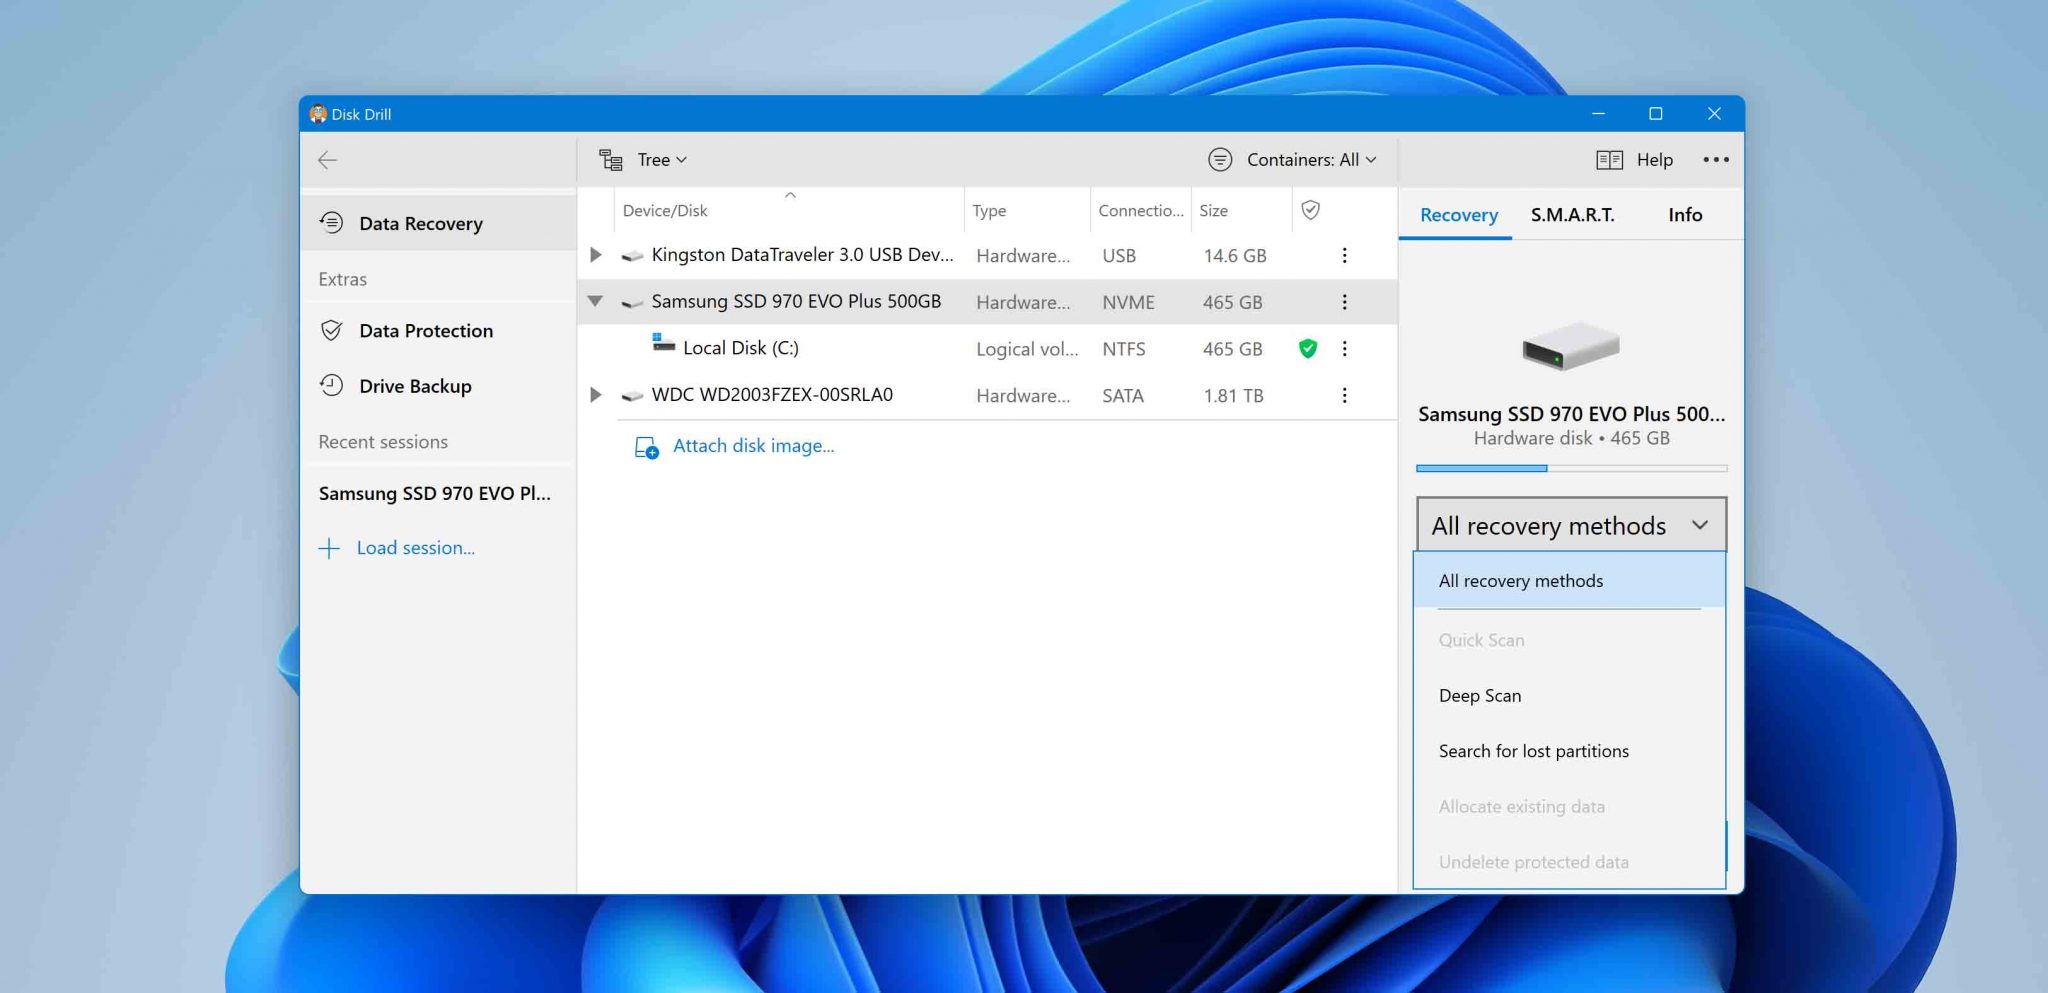
- Disk Drill might take some time to scan your device. You can choose your recovery method — Quick Scan or Deep Scan.
⏯️ Believe it or not: Disk Drill allows you to save, load, and even resume scans.
- While the software is scanning your device, you can preview lost data to select the missing file you’d like to restore. You also have the option to filter your search.
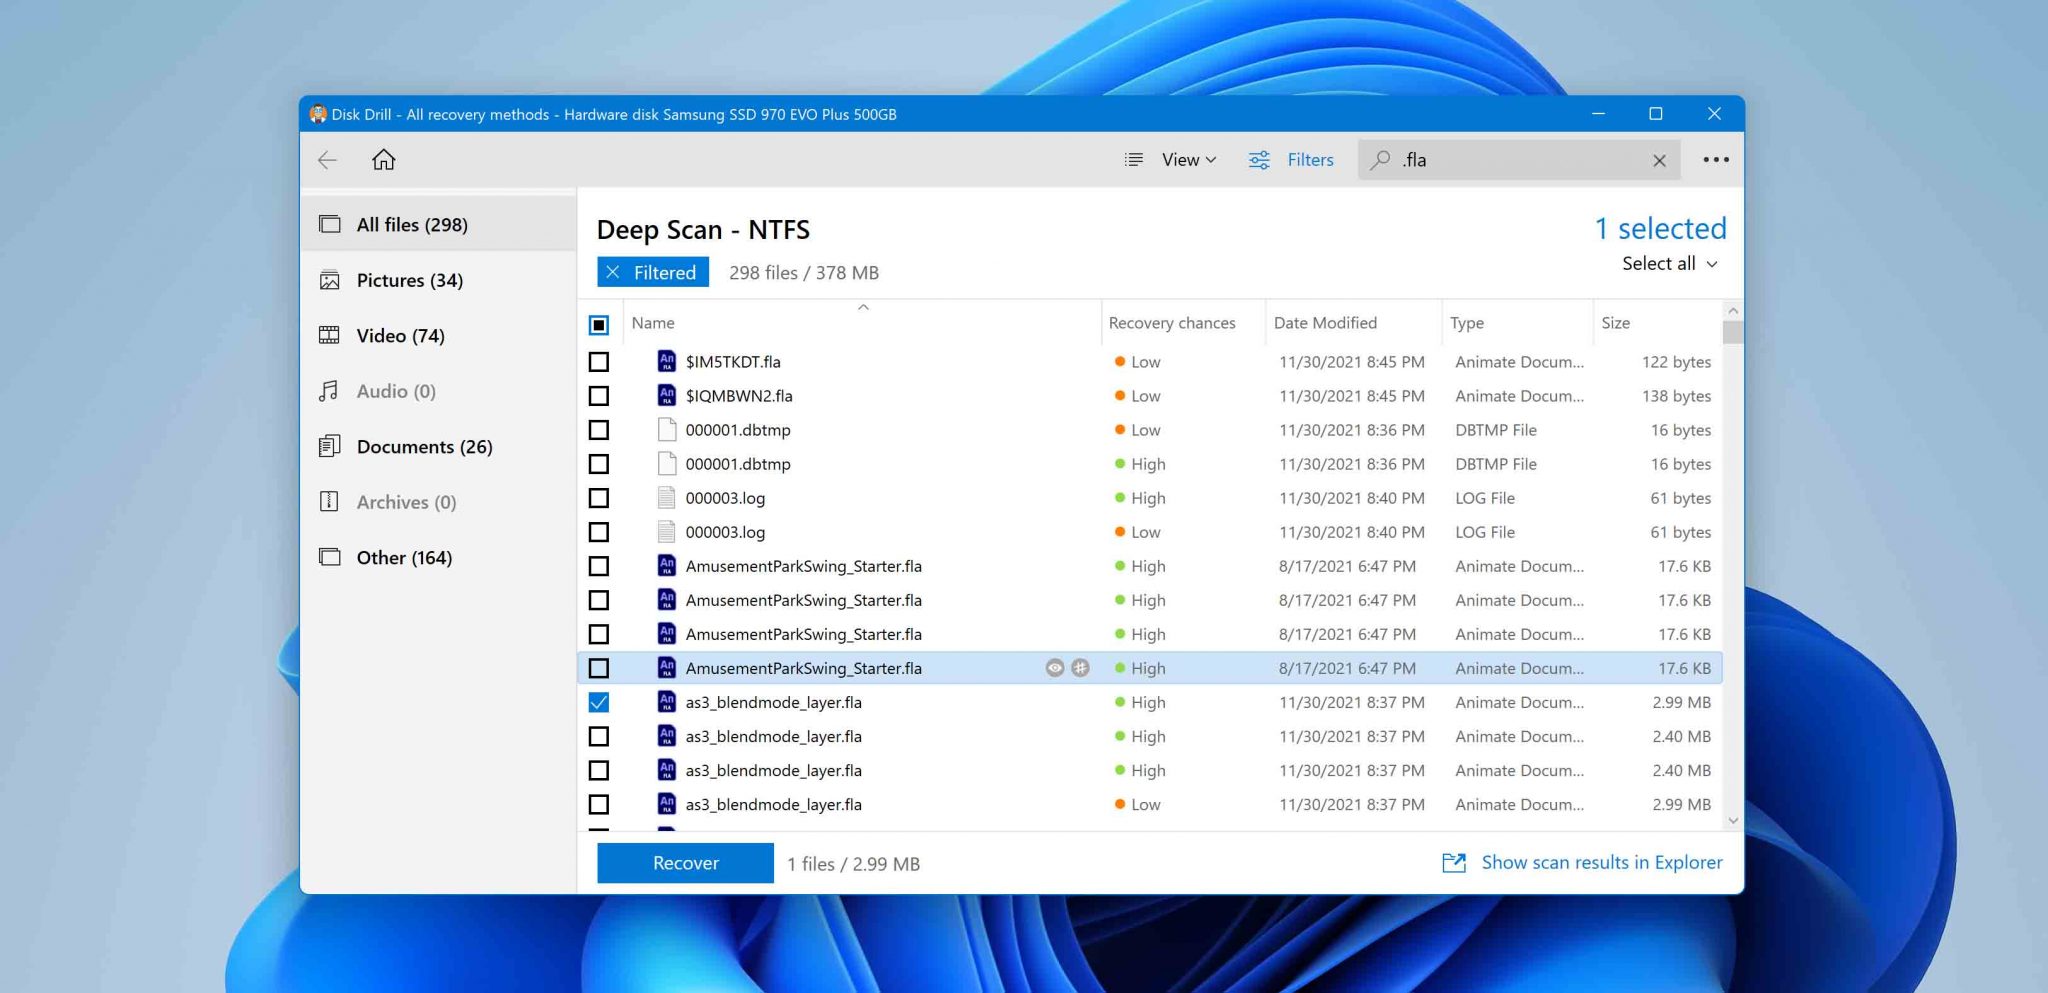
- Select the .fla file you want to retrieve and click on Recover. Now, all you need to do is select the file recovery location to reconstruct your file.
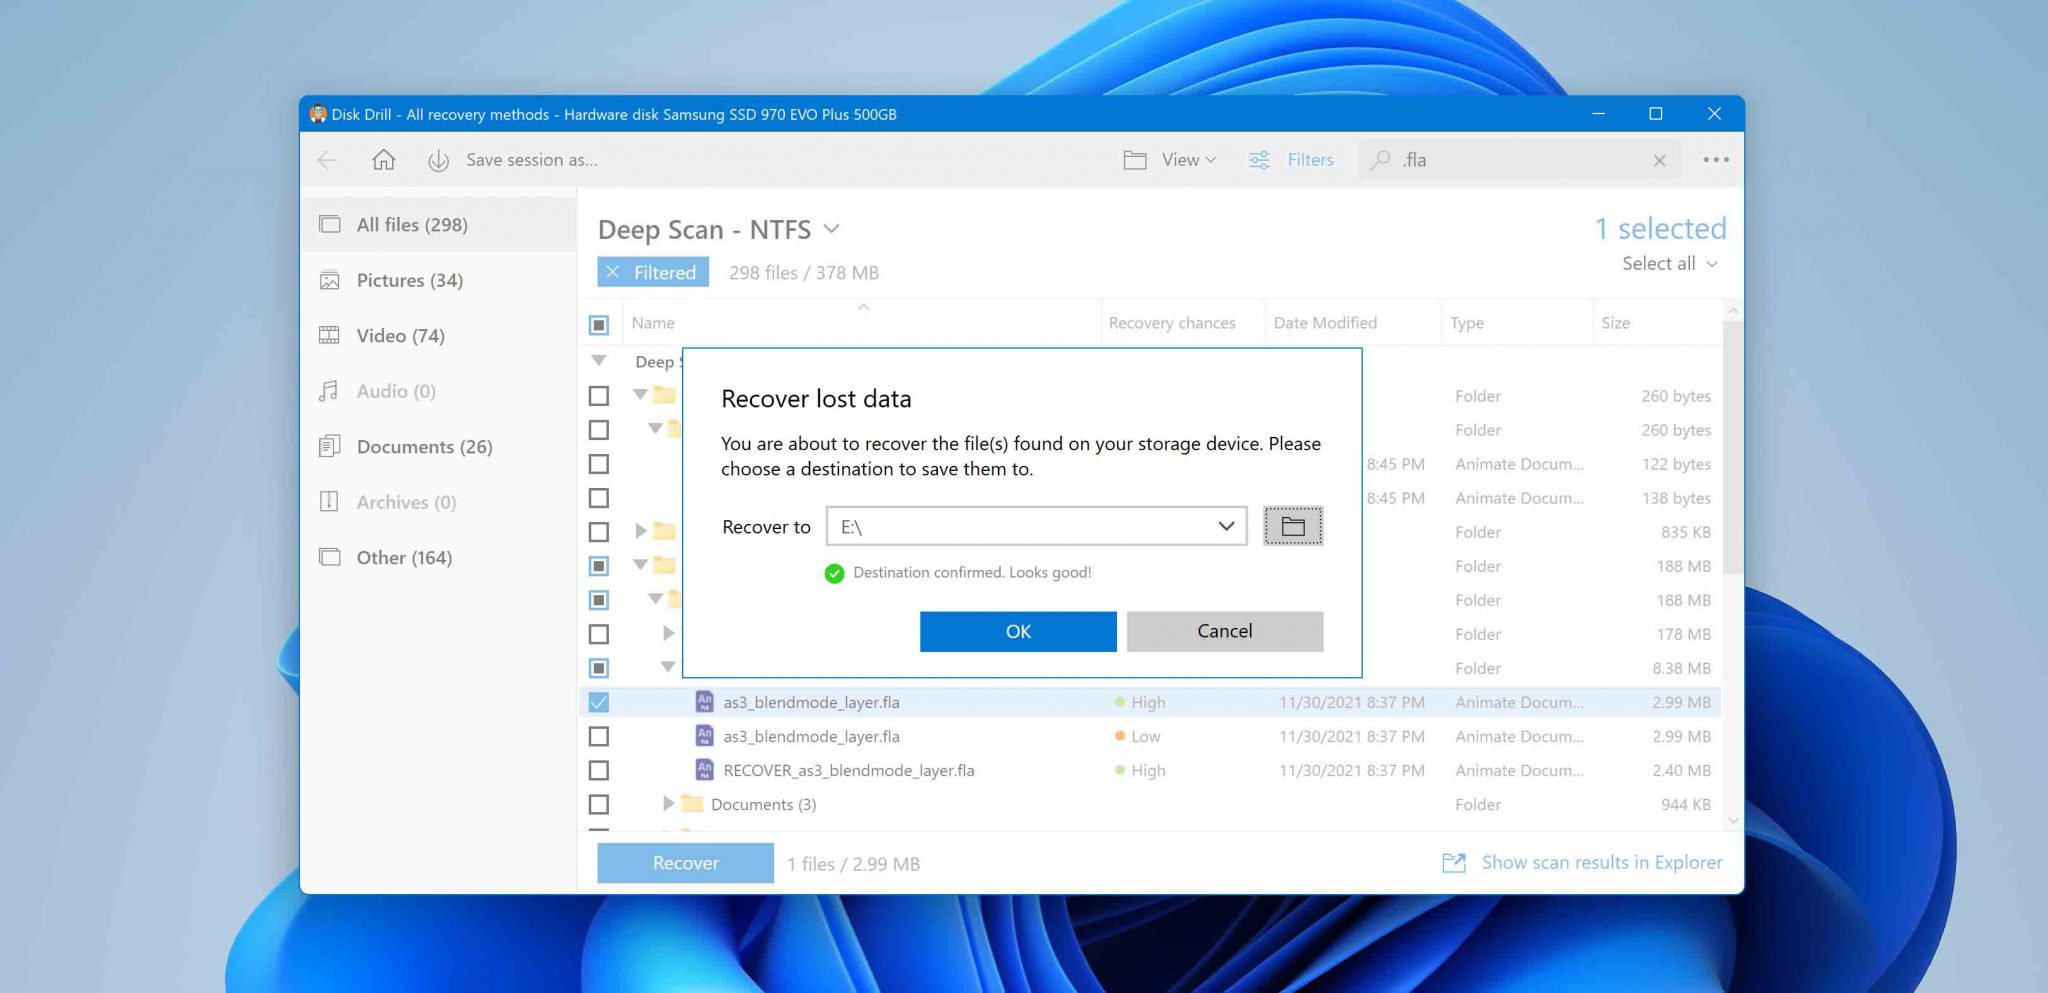
Using Disk Drill to get back your .fla files is a simple, effective solution. It is free software that can help you with your problem in just a few odd steps. You can also follow these instructions to recover various kinds of data quickly.
Recover .fla from Windows Recycle Bin or Mac Trash
Suppose your .fla file has disappeared due to accidental or purposeful deletion. In that case, there is an effortless way to restore them from the Windows Recycle Bin or the Mac Trash.
Both these folders serve as a temporary space that stores your deleted files. It is thus possible to seamlessly recover all the files stored in these folders.
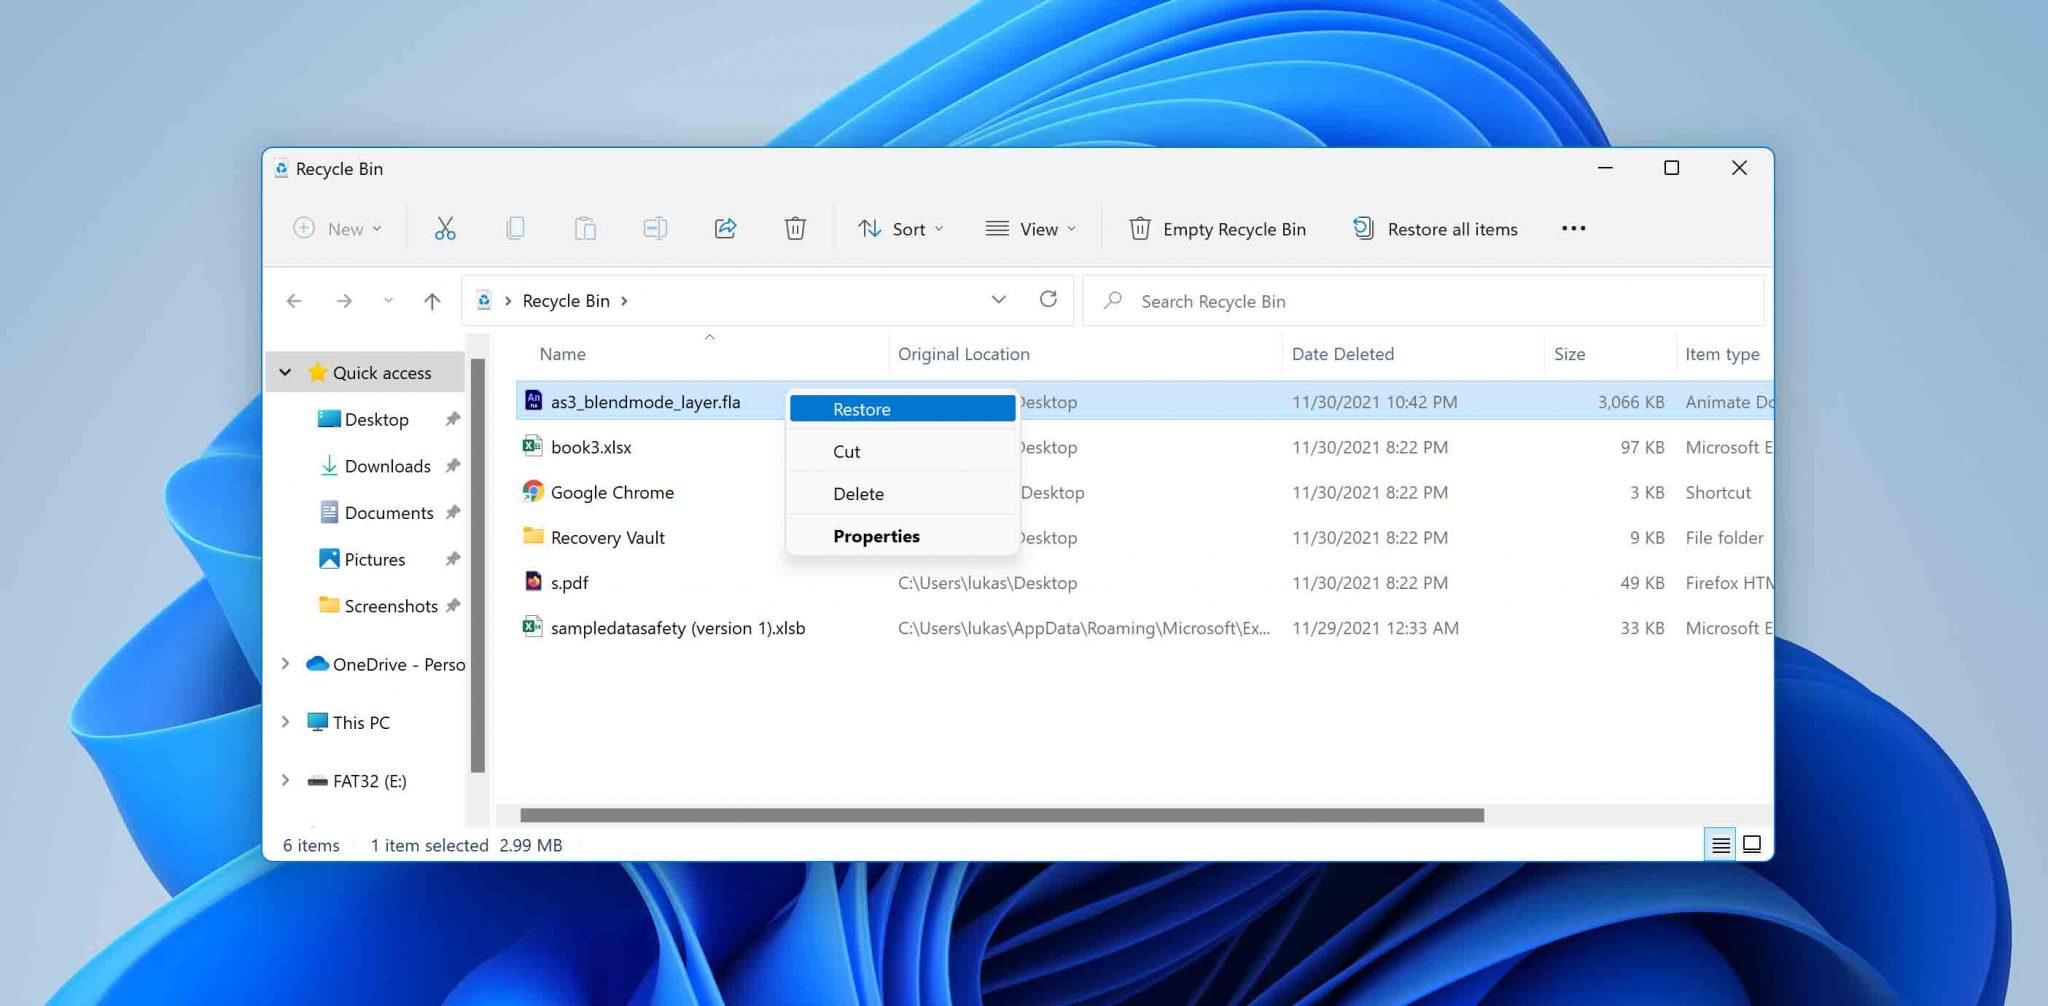
Recovering .fla files from Windows Recycle Bin
Here’s how you can recover your .fla files from the Recycle Bin:
- Go to the Recycle Bin icon on your computer’s desktop.
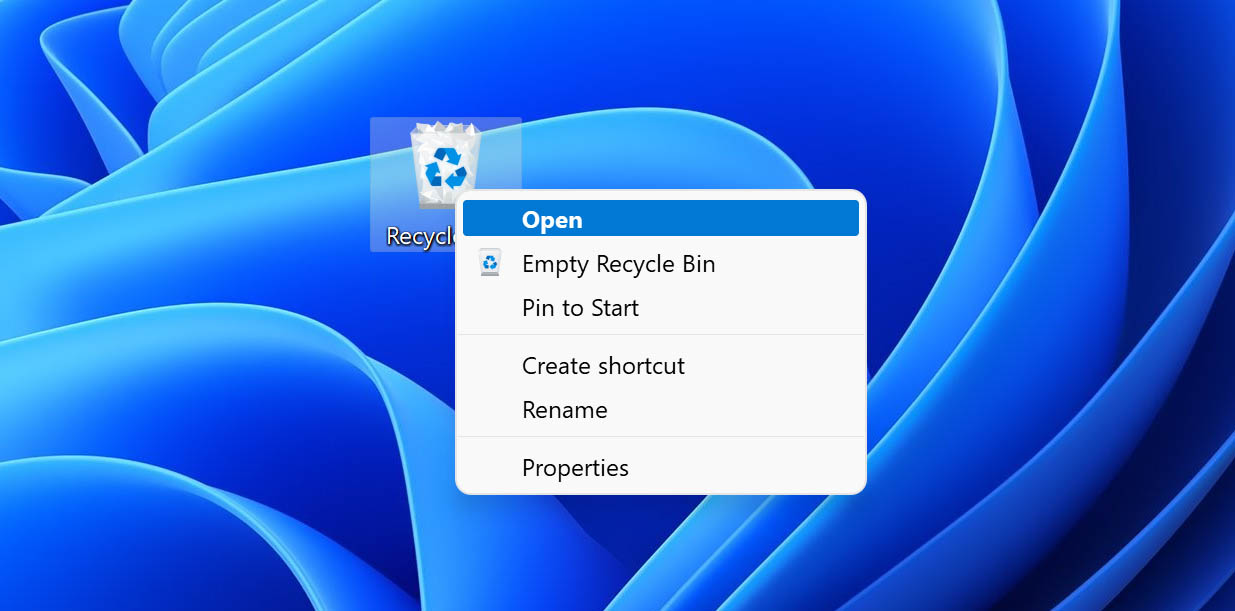
- Now, find and select the .fla files you wish to recover.
- Right-click on the selected file. Use the Restore option to send the file back to its original location.
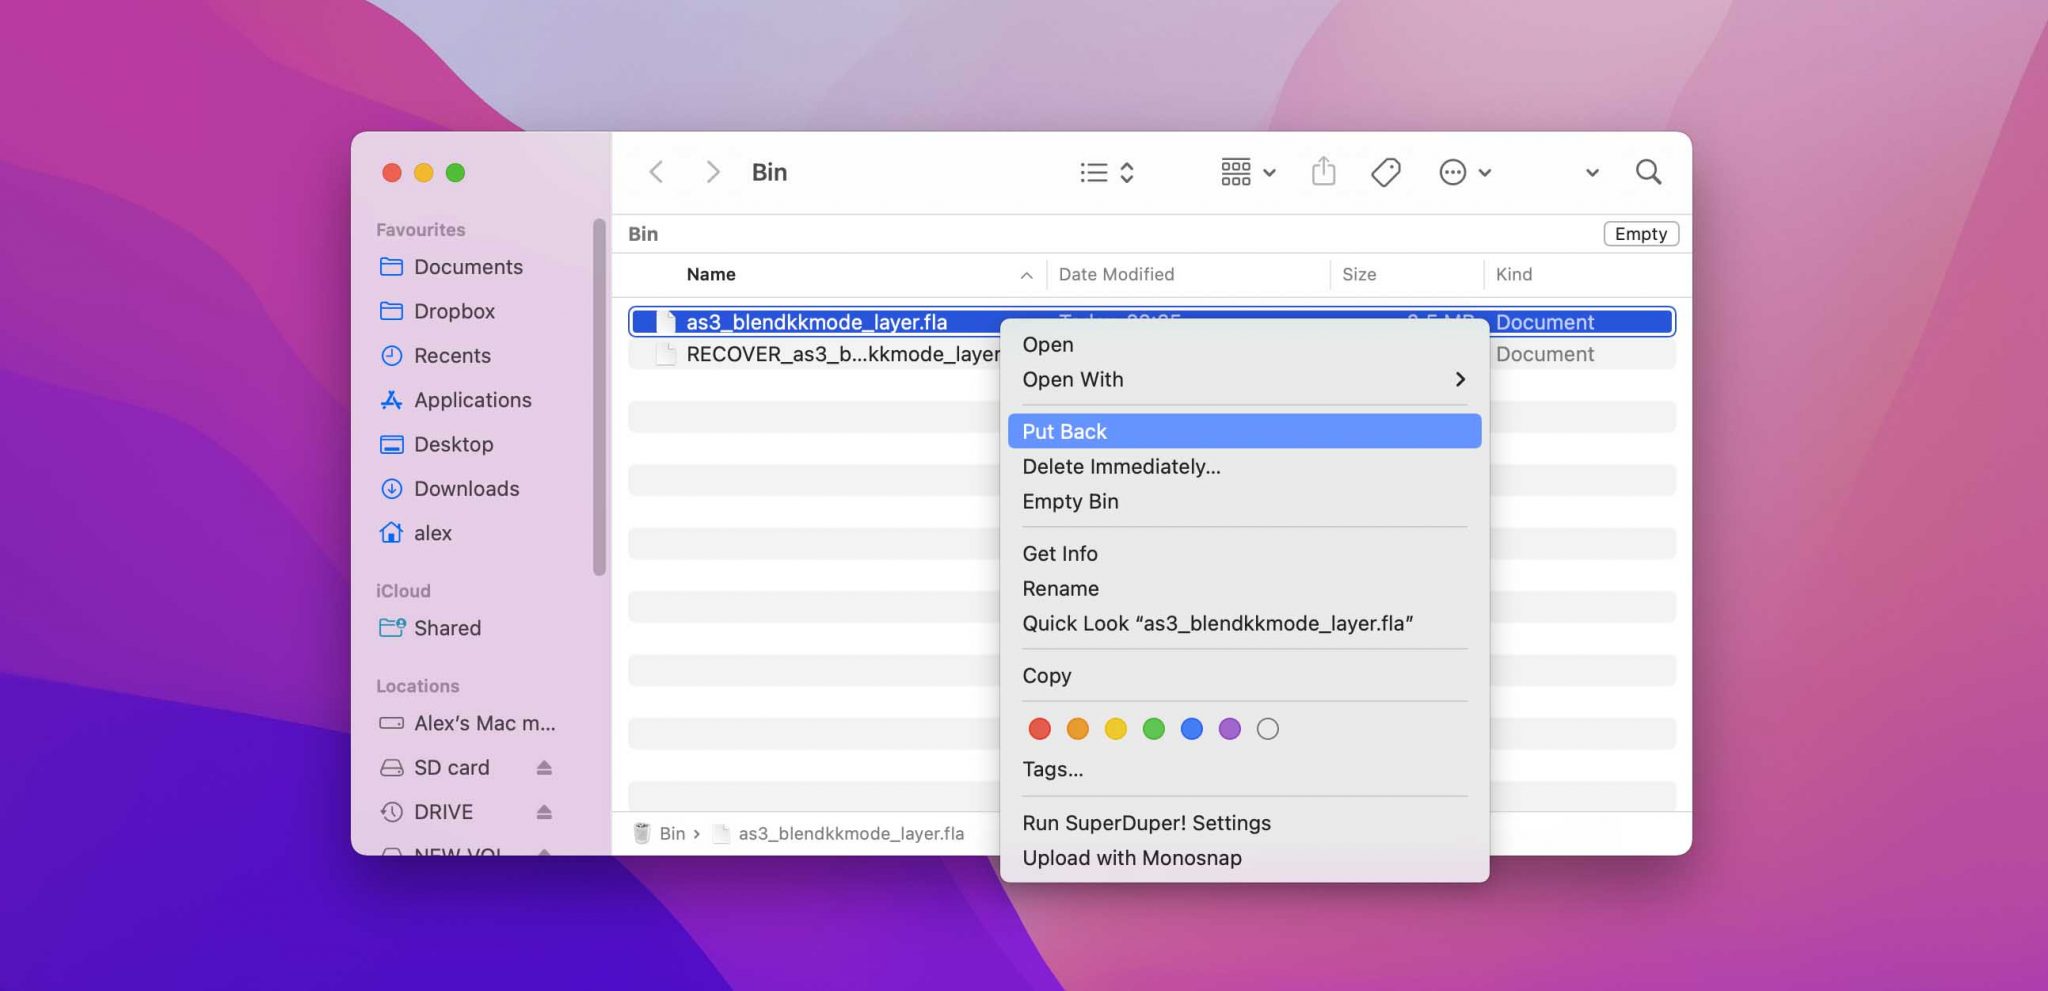
Recovering .fla files from Mac Trash
- Go to the Trash Icon on the dock of your Mac.

- Once the folder is open, find and select the .fla file you wish to recover.
- Either drag and drop the selected file to the desired location or right-click and select the Put Back option to restore the file to its original location.
 💻 This seems incredulous, but here’s how you can Recover Deleted, Unsaved or Corrupted Photoshop (PSD) Files on Mac.
Restore from a Recent Files Folder
While file recovery from Windows Recycle Bin and Mac Trash is relatively uncomplicated, it has its limitations. They can only recover deleted files. On the other hand, professional solutions might seem difficult for beginners and amateurs. In these cases, there is an in-between method to recover your .fla files.
Let’s take a look at these processes:
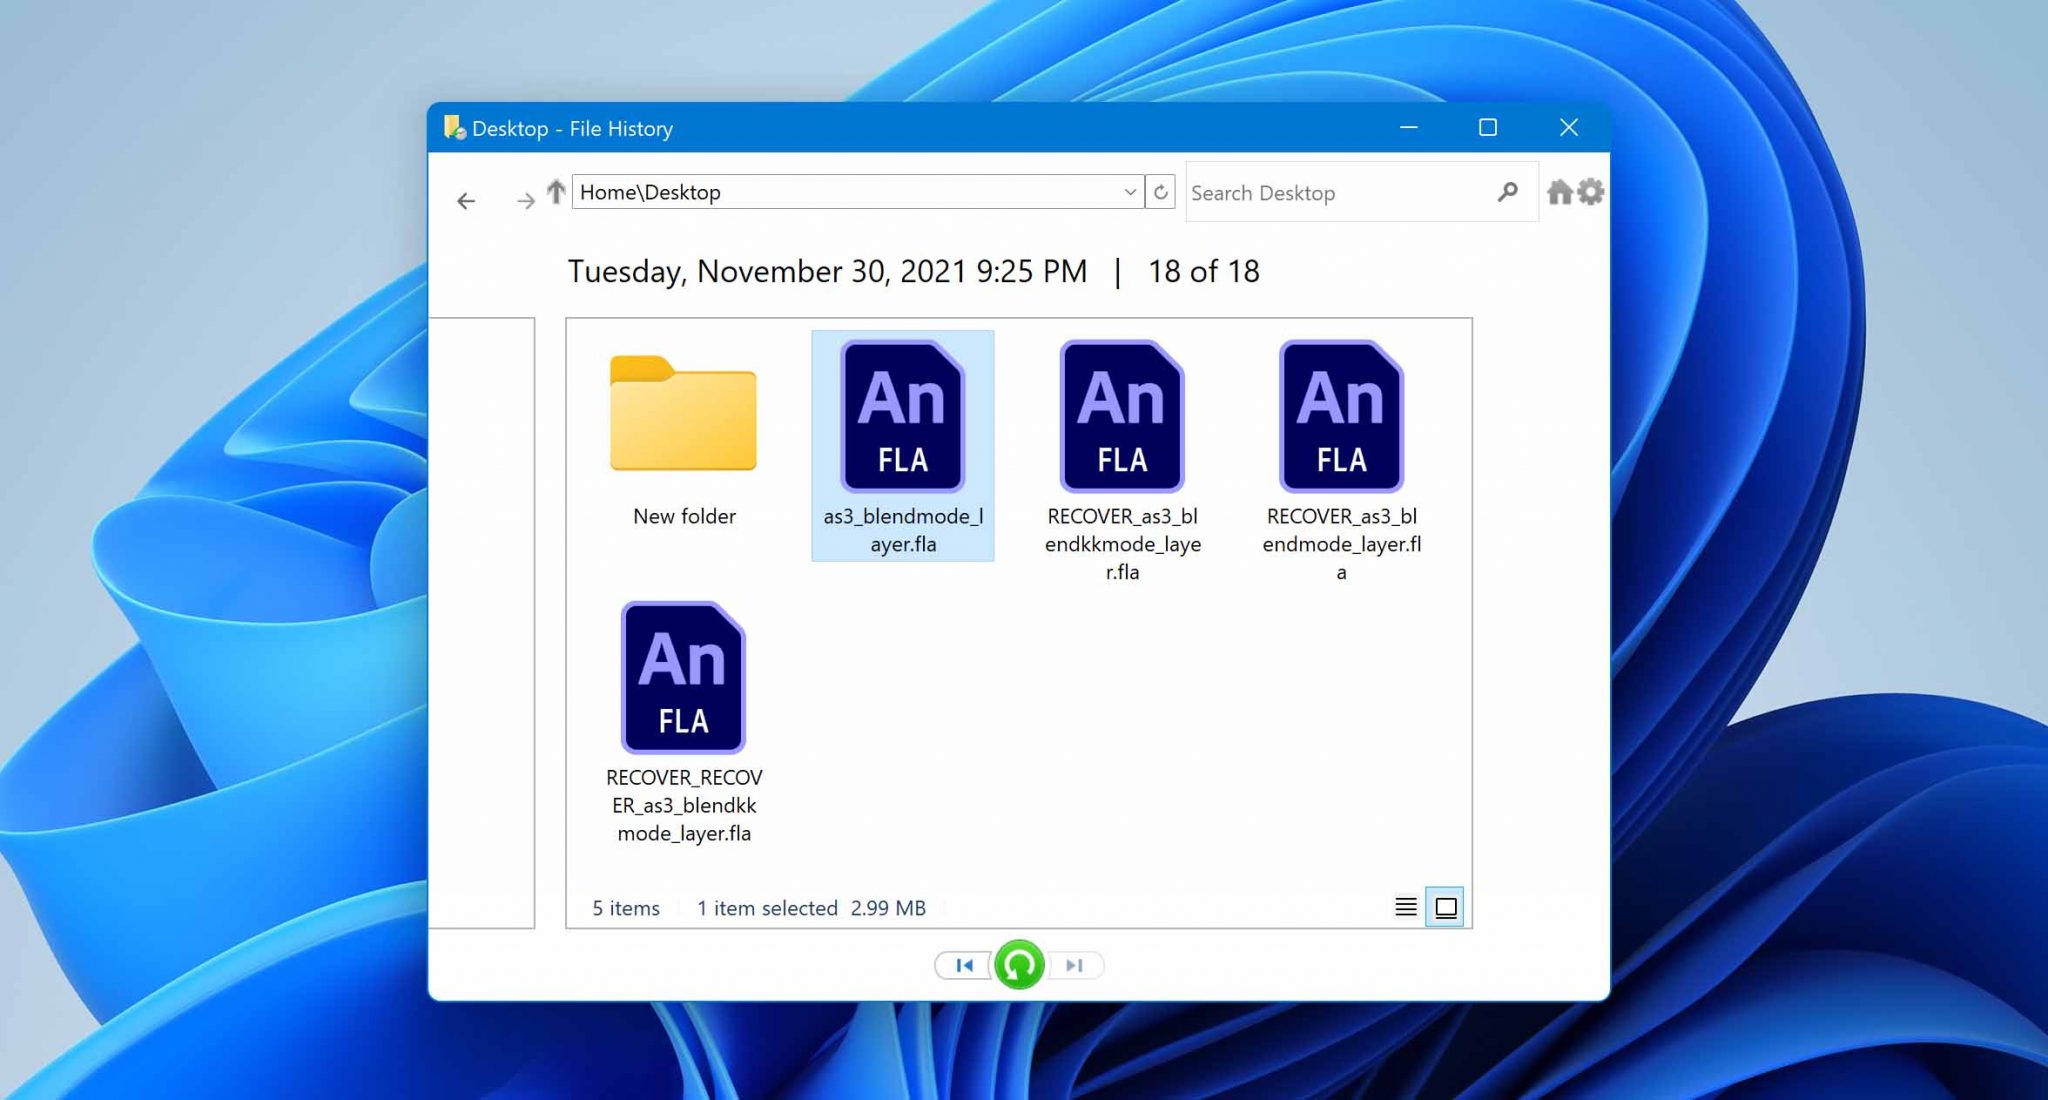
Recovering files using Windows File History
- Open the windows menu and type in Restore your files using File History. Consequently, this will lead you to the control panel.
- Make sure you have turned on the File History option. If not, select a drive to backup your information to, and turn it on.
- Now, click on the Restore personal files option on the left.
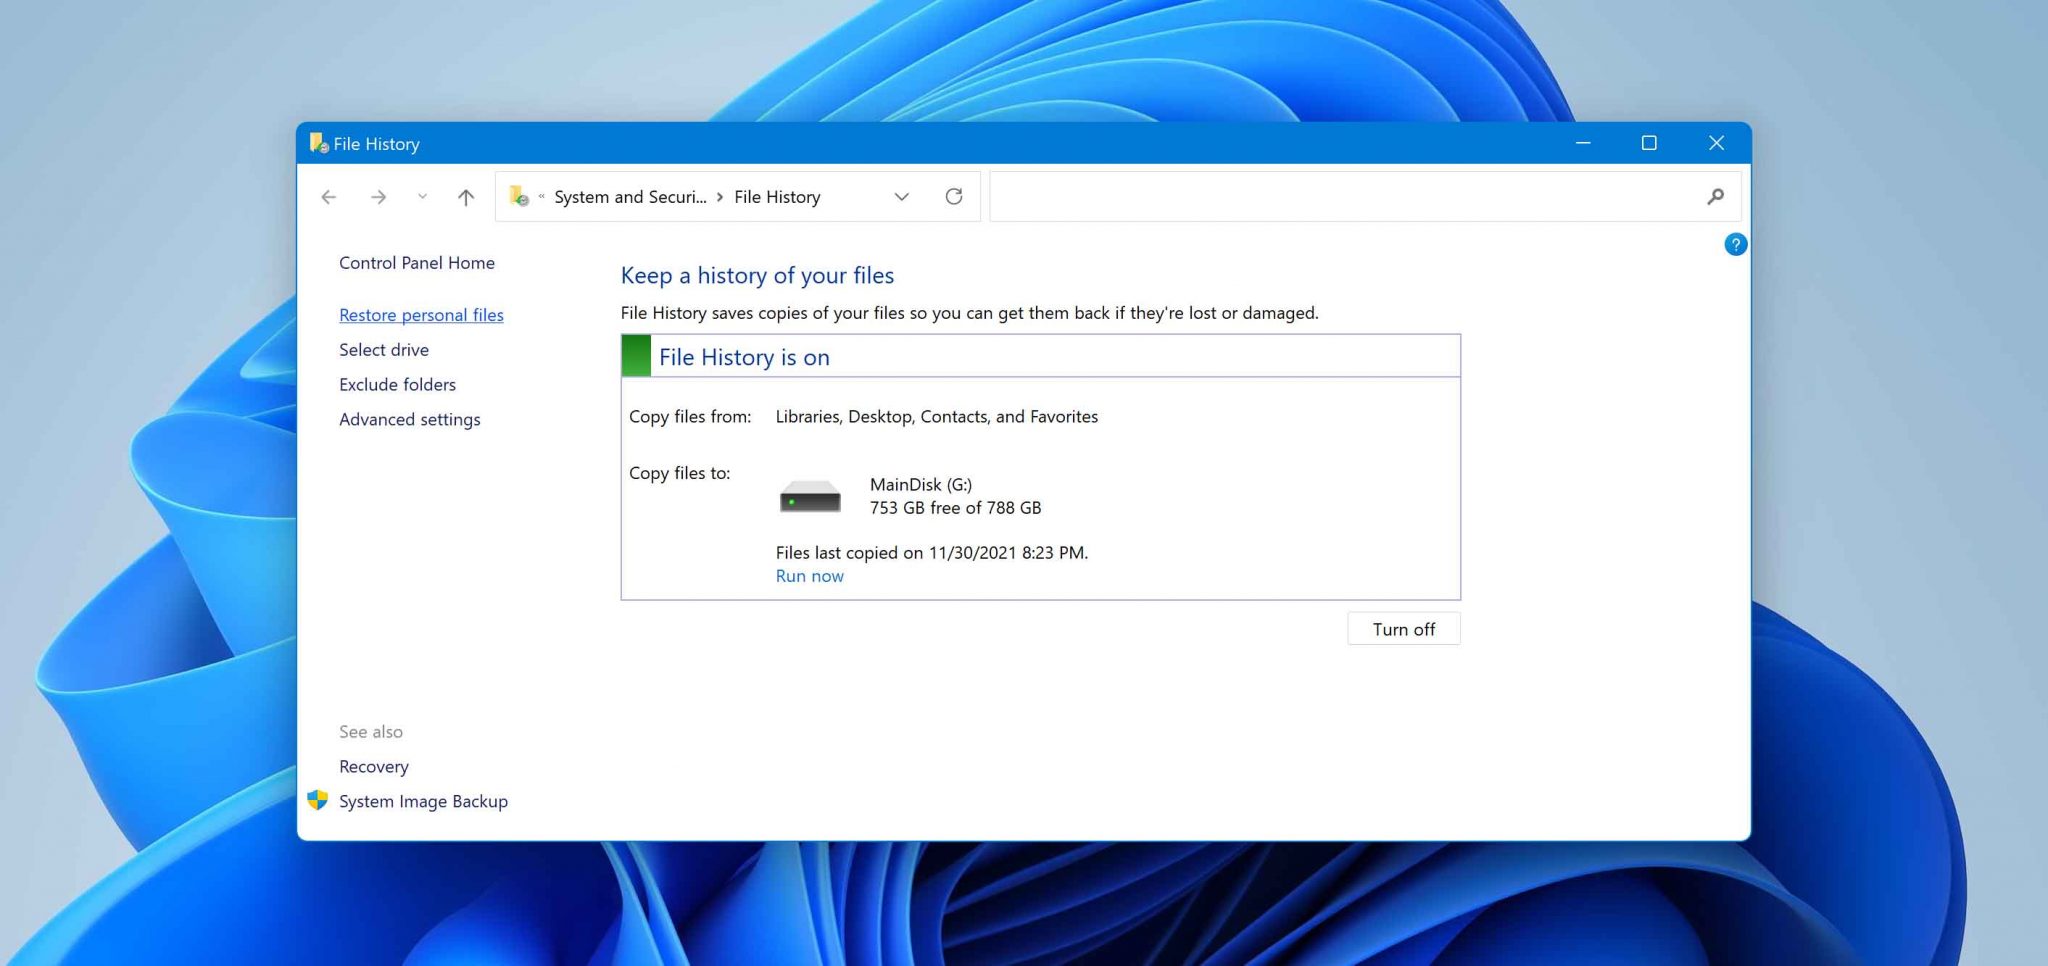
- Go through available backups and locate the .fla file you want to recover.
- Once you’ve found your file, click on the green recover button at the bottom. Your file will be restored to its original location.
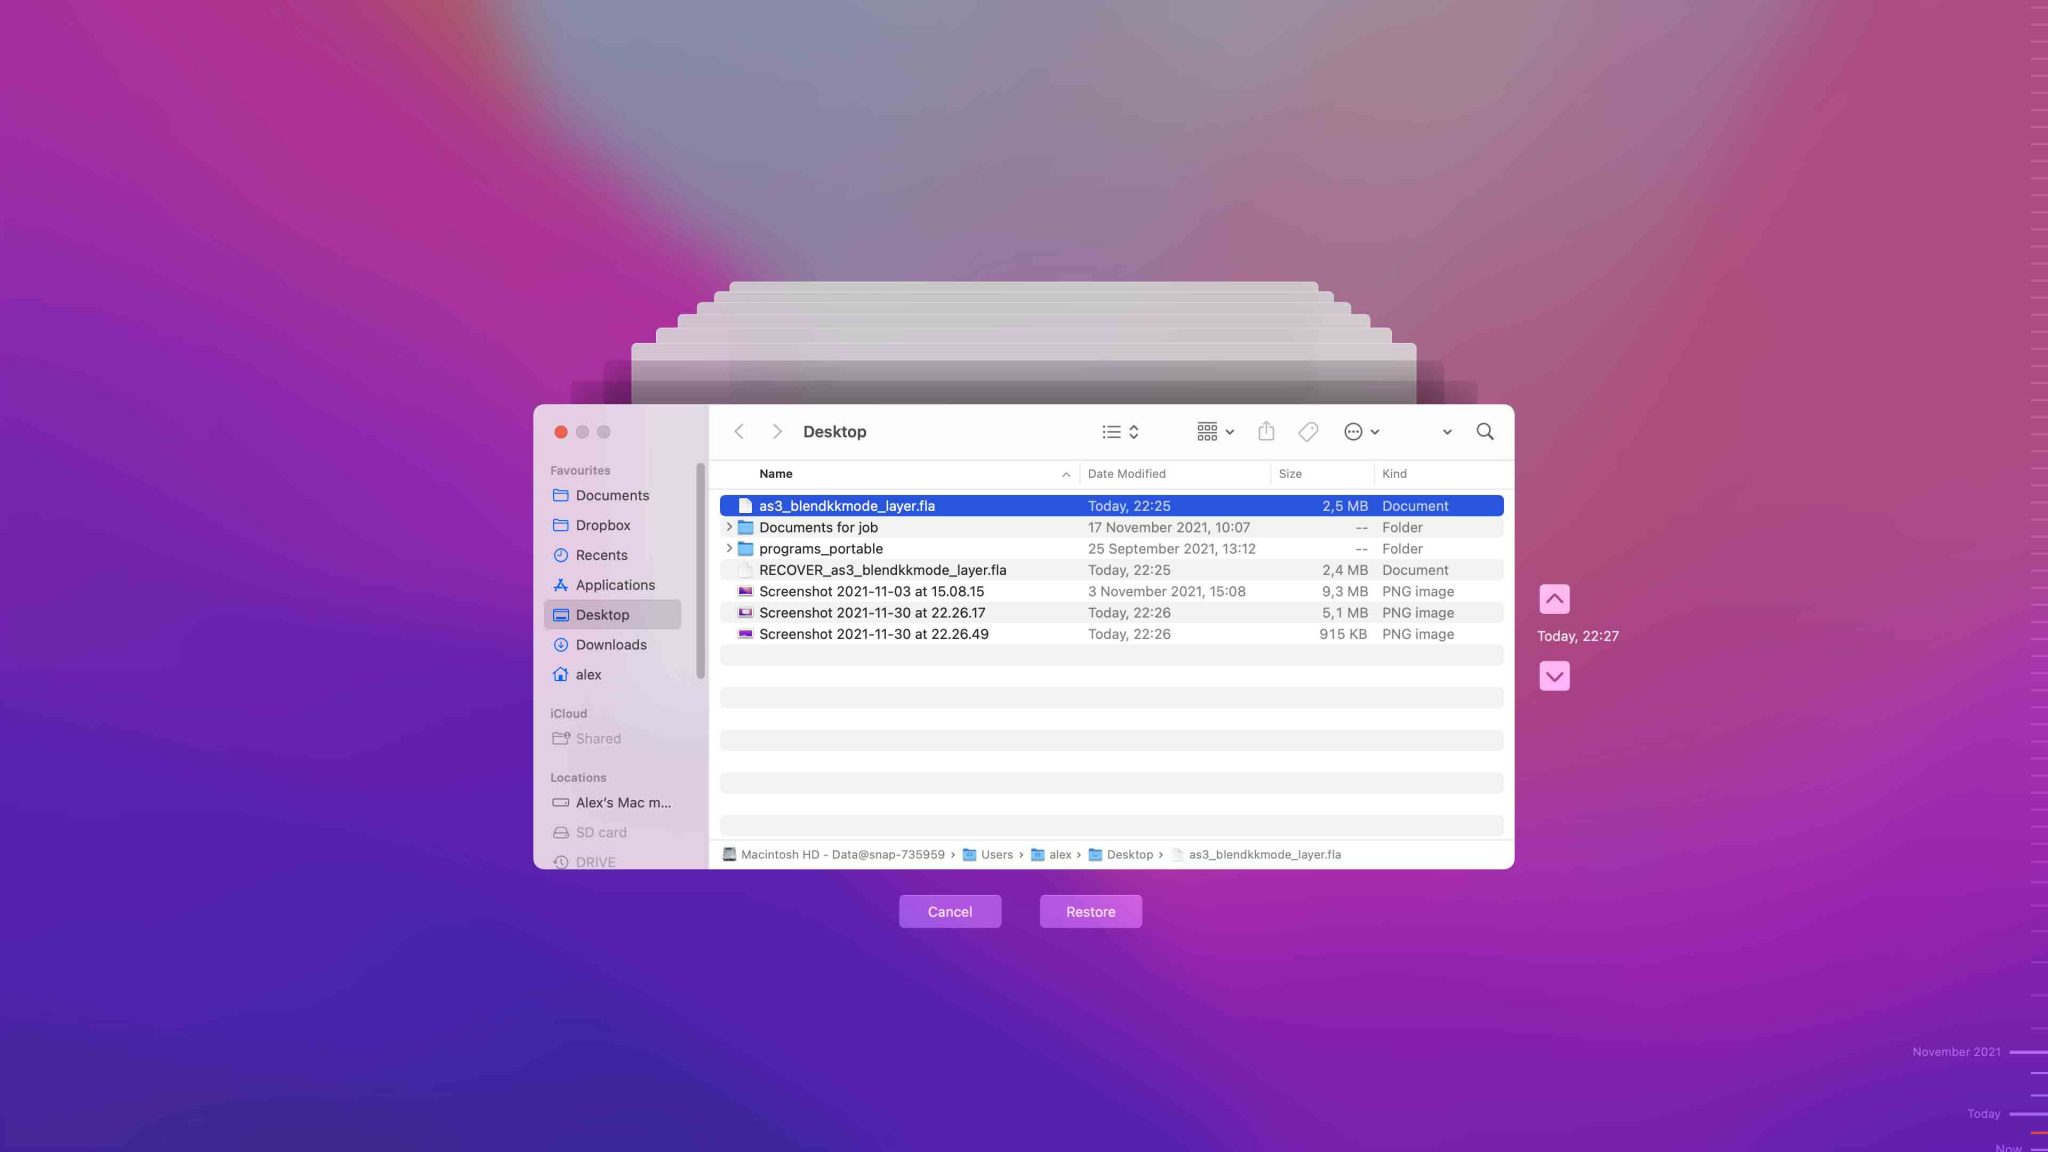
Recovering files using Mac Time Machine
- Open Spotlight [Shortcut: Command key + Spacebar]. Now, type Time Machine.
- Navigate through the folders to locate your .fla file from available backups.
- Once you’ve selected the desired file, click on Restore.
These file restoration methods can help you effectively recover .fla files as long as you have saved them. While they are not as limited as restoration from the Recycle Bin or Trash, they only undelete files and restore them to their original location. However, another solution other than professional recovery software can be helpful while recovering .fla files.
How to Open FLA Files on Mac or Windows
FLA files are configured to open with Adobe Animate primarily. To download these files, you will have to install the software on your device. You can either purchase a subscription or download a free trial from the official Adobe website. The 7-day trial gives you an authentic glimpse of how the program functions.
Once the installation process is complete, launch Animate. You can now open a new or existing FLA file and start working on your project. With the introduction of more recent versions, there are several tutorials available within the program. Its interface is also the same in both Windows and Mac operating systems.
Programs that Open FLA Files
Adobe Animate almost exclusively supports the FLA file extension. It stores animations, graphics, etc., that are created on the platform. The programs that completely support FLA on both Mac and Windows are:
- Adobe Creative Suite
- Adobe Animate CC
Bonus Read: Recover .fla from the Adobe Animate Recovery Folder
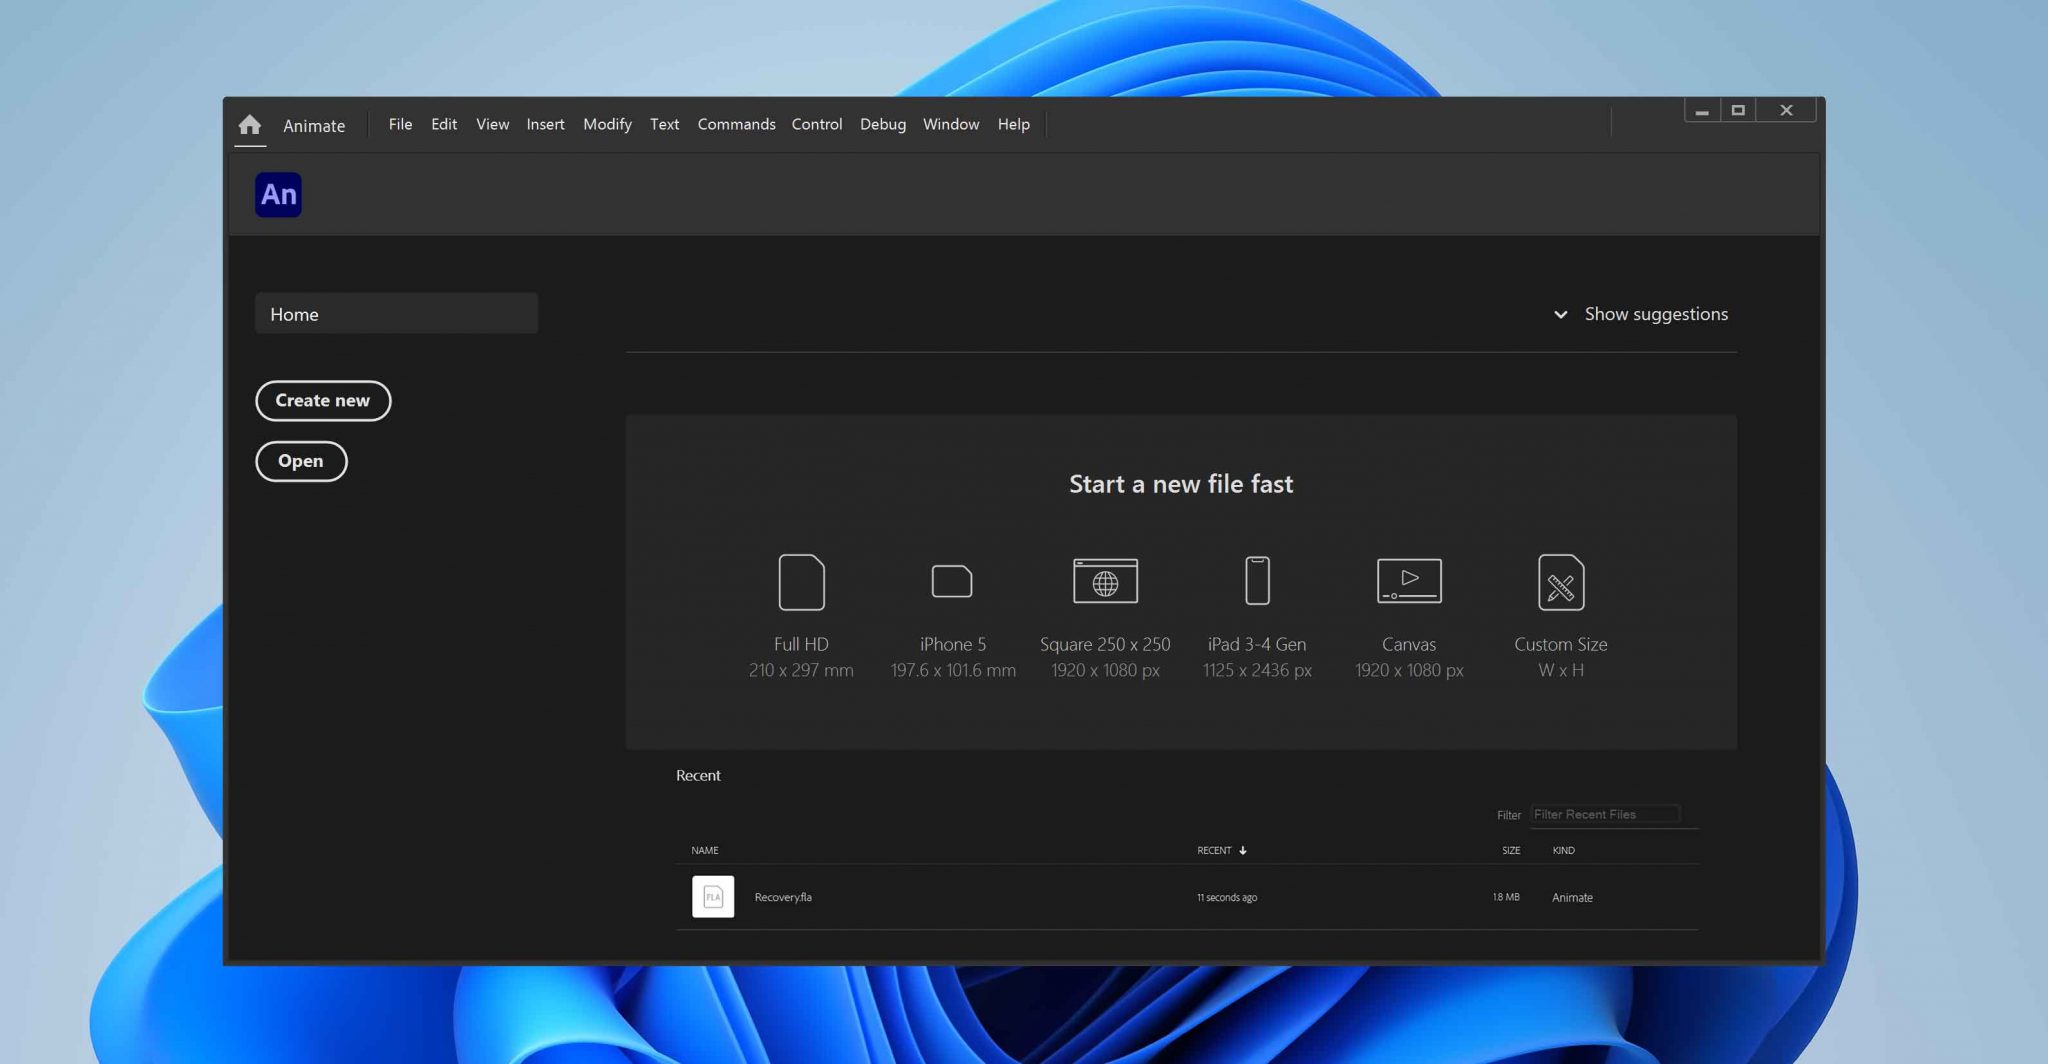
Adobe’s creative software constantly gets updated versions, and they are becoming more innovative, more user-friendly. One such feature from Adobe Animate is auto-recovery. If selected, this feature continues to save the .fla project file you’re working on at regular intervals. Moreover, Animate saves file versions in a temporary folder.
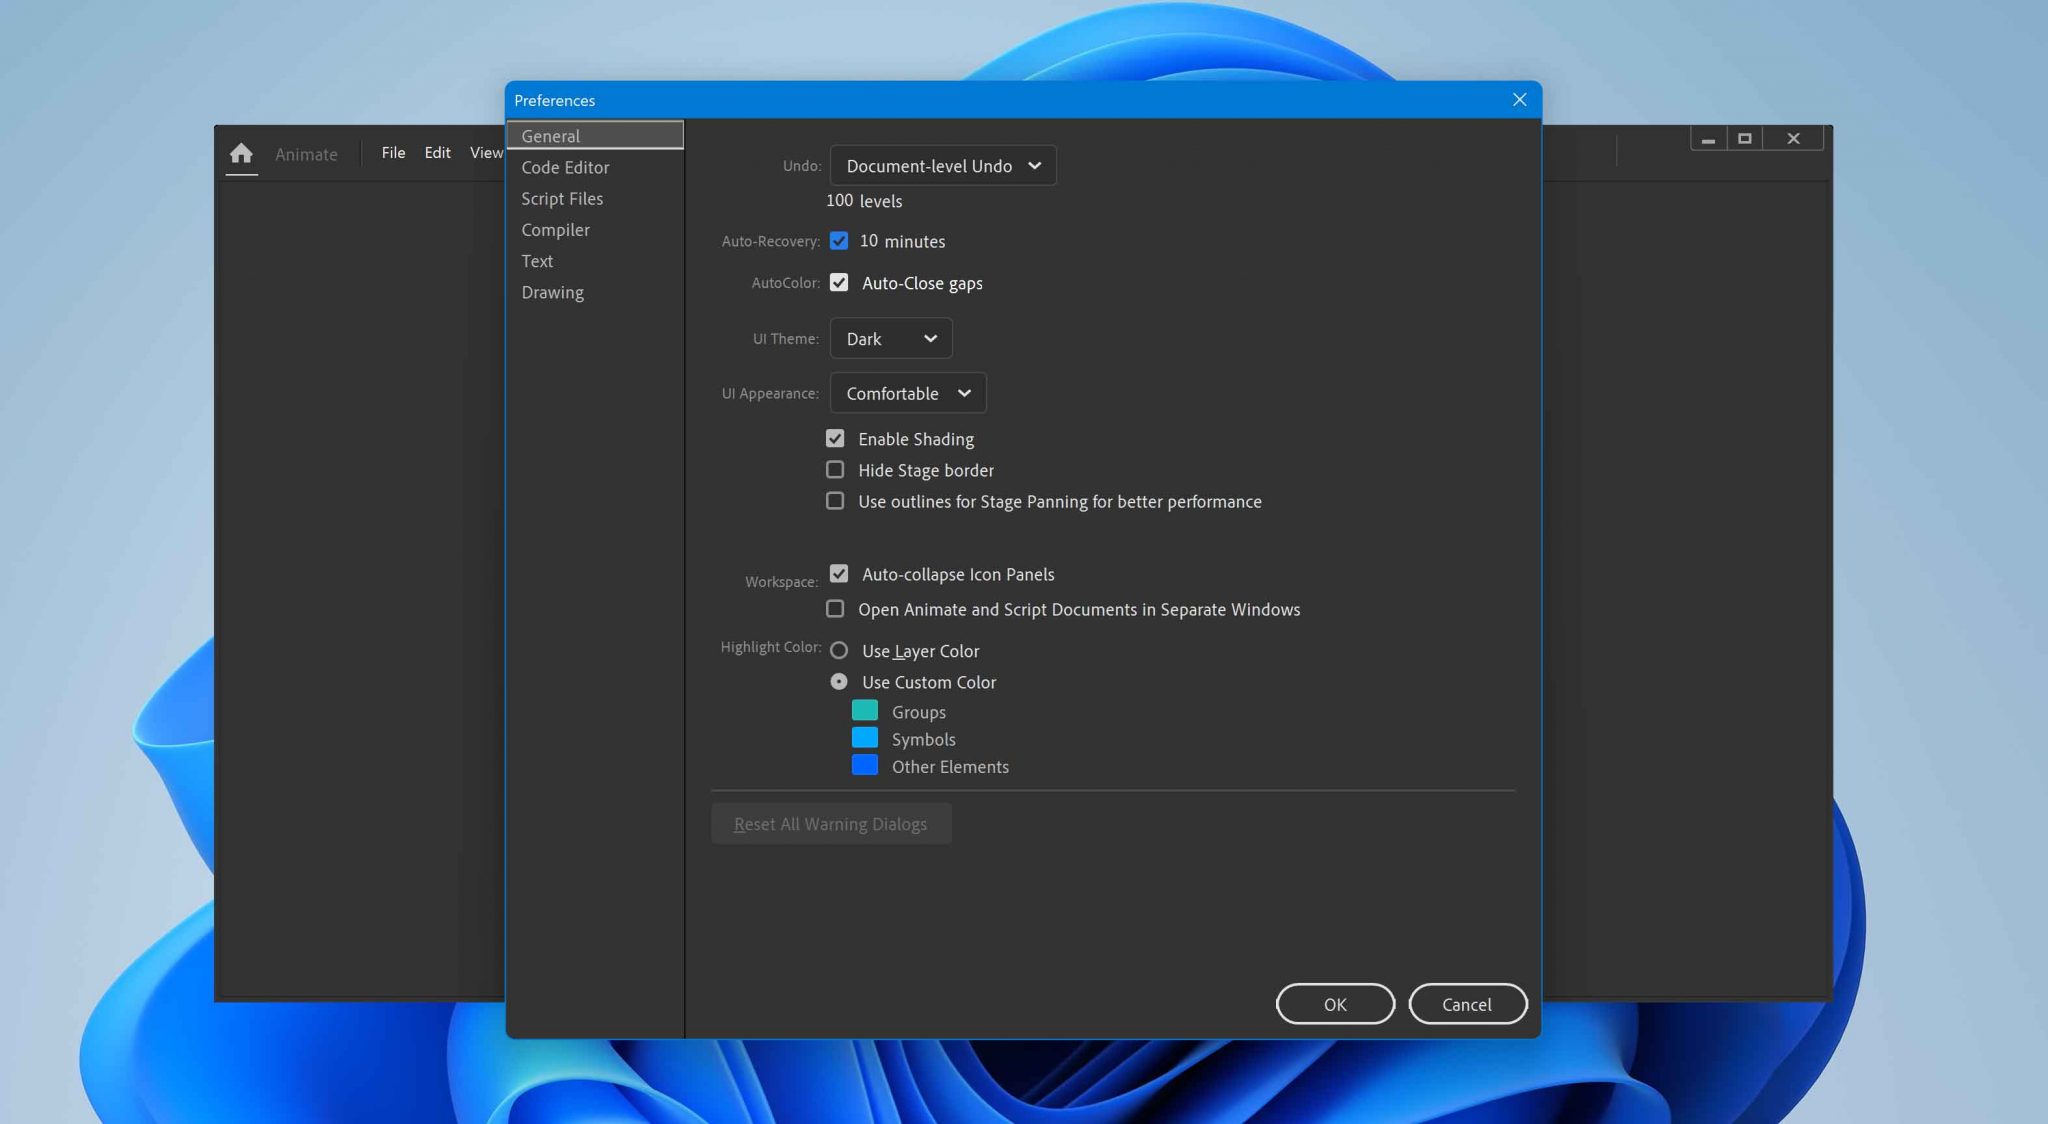
To enable or tweak the auto-recovery settings, head over to Edit > Preferences (for Windows users) or Animate > Preferences (on Mac OS).
In case your computer or the program crashes while you’re working on a project, quit and relaunch Animate. In such situations, it is crucial to turn on your auto-recovery option. If it is, the software would have made copies of your project. Once you open Animate, give it some time to recover your file. It will automatically open the file and allow you to save it.
You can find more information on this recovery method on Adobe Support Community.
Tips to Avoid .fla File Loss
In this section, we’ve covered some tips and tricks to prevent .fla file loss:
Optimizing .fla files
The .fla file contains all the information and assets that are critical to the Animate project. If the .fla file is heavy, it will run slowly, increasing the possibility of a system crash. To prevent this, you must optimize the file.
There are several ways in which the user can enhance the file’s performance:
- First, you should optimize the documents, elements and lines, texts and fonts, and even colors.
- Make sure to turn off rendering features that increase the computing time and slow down document display.
- Moreover, try applying best practices like using animations that take less file space or sorting out and identifying important assets.
- Finally, once you have made changes to some of these settings, you can download a final report. This feature allows you to view your assets per frame.

There are other specific points that one should keep in mind to avoid .fla file loss. Some of them are:
- 💻 Keep your program up-to-date – It is imperative to make sure your program (in this case, Adobe Animate) is continuously updated. These updates help fix technical bugs or issues and help make the software more adaptable.
- 💾 Save your work at regular intervals – Unsaved work is the most common recipe for data loss. It would help save your work at regular intervals to avoid losing data in unforeseen situations. While you can remember to do it manually, newer versions of Animate have introduced the auto-recovery setting. All you need to do is turn this setting on, and you can continue working without any disruptions.
- ☁️ Ensure file backups – Both Windows and Apple’s Mac operating systems have advanced features to assist you in backing up your data. Take advantage of these technological advancements and keep backups of your .fla files in different drives or storage devices. In situations where data recovery software might not be available, this practice can help restore your data.
- ❌ Avoid using pirated/cracked programs – The availability of pirated software has become quite widespread. While they may seem easy on the wallet, they can be very harmful. These cracked versions of software like Animate offer no guarantee to protect your information, are prone to malware, and result in system crashes or file corruption.
- 🔋 System and Power requirements – Ensure that your system’s specs align with the program’s needs that you are using. If not, this can lead to disruptions and wear down the device performance.
- 🗄️ Separate your work and software spaces – It is good to keep your software and your media files and programs on different drives. If you don’t follow this, it can cause your system or freeze or crash, thus resulting in severe data loss.
Following these pointers can help you avoid significant data loss. However, if you lose your .fla files, the methods mentioned above can guide you in retrieving your important data.