How To Record Video On Mac
Have you ever wanted to record a video on Mac or an important event happening on your MacBook, MacBook Pro or iMac? Maybe you are watching a video and want to record and save it or you are attempting to show someone how to do something and you think a video would make things easier and be more useful to them? There are many potential reasons to record a video on your Mac, we began this article with just a few.
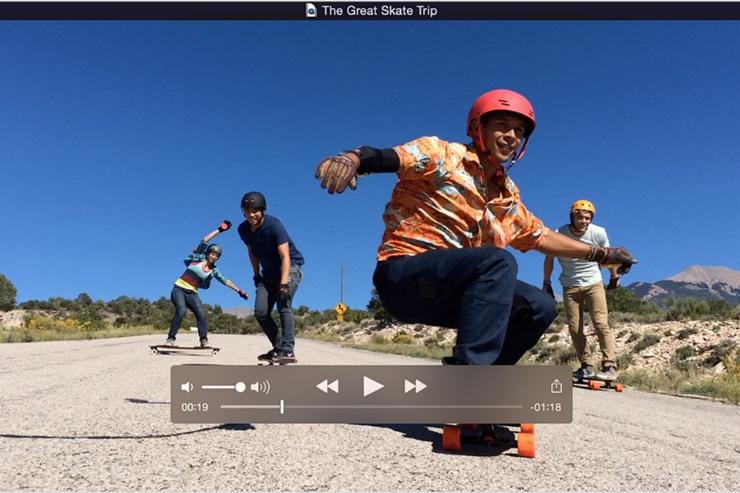
There are quite a few ways to record video on a Mac, this article will focus on some of the basic measures including built-in software. Such as with QuickTime and the built-in webcam on a Mac computer. We chose these tools mainly because they are available on mostly all Macs and just about every Mac computer includes a built-in camera these days. The goal is to produce a video file that can be uploaded, edited and shared. This article will help you understand how to record video on Mac and learn the simple steps needed to record a video on any Mac computer (Macbook, Macbook Pro, Macbook Air and iMac).
How to Record Your Screen on a Mac
Step 1. Open QuickTime
It’s not hard to record any event you are watching on your Mac. To start screen recording just open QuickTime, which comes installed by default with your Mac. You should find QuickTime in the dock, if not check Applications in the Finder or press F4 on your keyboard to see if it can be found in LaunchPad. You can also find QuickTime by simply search in Spotlight by pressing CMD+SPACE BAR and type QuickTime.
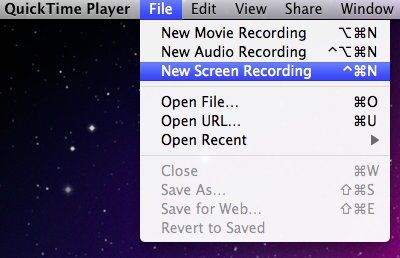
After opening QuickTime click on New Screen Recording from the File menu or right-click on the QuickTime icon in your Dock and select New Screen Recording from the menu. While you may notice other suggestions online for how to record screen on mac, this is the easiest option as it uses QuickTime which comes with most Mac computers.
Step 2. Choose recording options
A Screen Recording box will appear on your desktop. Click on the white drop down arrow to view more options. You can choose whether to use the built-in microphone or an external microphone for audio, this is one of the most important options. You can also adjust some other basic options such as turning on off visible mouse clicks.
Step 3. Record a Voice-over
To record a voiceover when you are recording your video you need to click on the small triangle located by the side of the record button in the recording window. This will enable you to choose the source of your audio. For example, you can choose Built-In Microphone and External Microphone. Note that you won’t be able to record audio from the streaming on your screen using this method.
Bonus tip: If you own an iPhone, your iPhone headphones can be used to record your voice while speaking.
Step 4. Partial or Full-Screen Recording
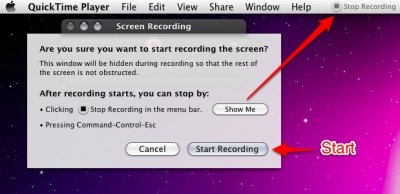
You can decide to record part of the screen or the whole screen. If you want to record part of the screen all you have to do is click on the red Record button. A message will pop up and tell you to drag to record part of your screen. Drag a the box over the area you want to record (it will appear visible marked on your screen). Once you have the area chosen click on the Record button again. You can record the whole screen too, click on the red Record button and then click anywhere on the screen to commence recording, since you did not drag to select an area the entire screen will be recorded by default.
Pro Tip: If you have multiple monitors only the primary monitor is recorded by default. You need to specify an area / click the secondary monitor to specify it for recording.
Step 5. Stop The Recording Process
Once you are finished with the recording right-click on the QuickTime icon in the Dock and select Stop Recording from the menu. This will stop recording video on your Mac and prompt you to save the recording.
Step 6. Save Your Video
Once you have recorded everything you wanted, you need to save the QuickTime video. The saved videos can be used in iMovie and Final Cut Pro (for example) and can even be shared on YouTube.
The default video format QuickTime will record is “.mov” (QuickTime file) but the recorded file can be saved in multiple other formats or converted later if you wish. The .mov file format is highly compatible and it can be uploaded directly to any social media site or viewed by any Mac, iPhone, iPad, Windows, or Android device without format conversion.
Resolution of recorded video depends on the model of your Mac and the native screen resolution. Generally speaking, you can expect resolutions ranging from 480p to 720p for most recorded videos. QuickTime may compress these videos by default and thus the quality may vary.
Best Video Editing Software for Mac
ScreenFlow
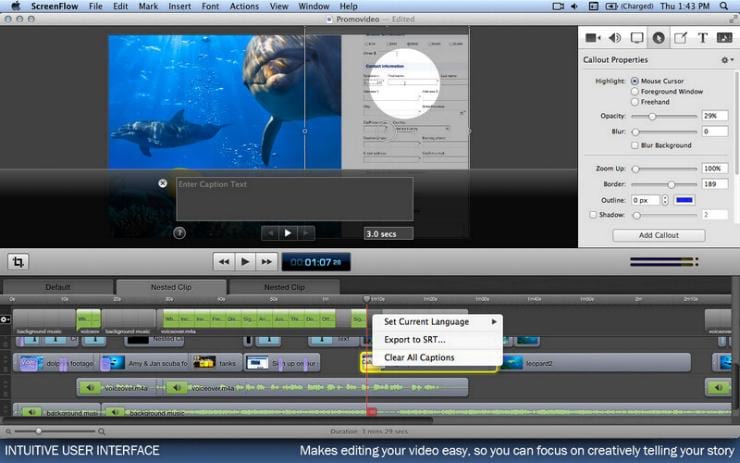
Through the ScreenFlow app, you can create computer-based video tutorials by recording your screen activities that can be later shared online with your friends, family or even fans. This app lets you record your screen and edit the recording without stress. ScreenFlow can also capture video from your iSight camera while recording screen activity. ScreenFlow is available in the App Store and recorded videos can be uploaded to cloud storage for easier sharing.
Voila
Voila enables you to capture screenshots or full-motion videos. Video can be recorded either full screen or partial areas and windows, much like the QuickTime method. Unlike some of the other recording solutions, Voila can capture stereo audio and offers you a choice of frame rates. You can do simple as well as professional trimming and editing of videos in Viola’s full-featured editor. Voila is also available in the App Store and can be used for free (trial).
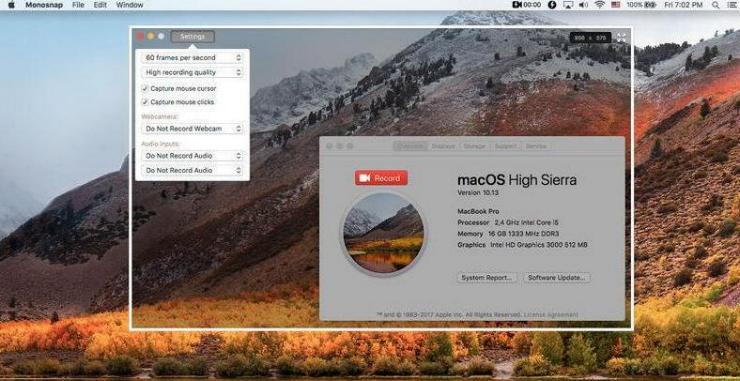
Monosnap
Monosnap is a free Mac screen recording software that can use your webcam, microphone and system audio. The app allows recording of screen at 60 fps to ensure an ultra-smooth playback. It’s best suited for short recordings and the resulting video may be larger in size and less suitable for sharing if the clips are long. Social media and video sharing websites will often automatically compress videos when uploading, make sure to be mindful of this if you are using Monosnap for the high quality mode.
Screen Recorder Robot Lite
This is one of the simplest tools for recording a video on Mac and editing the recorded video. With plenty of easy to use features this tool should be considered for anyone looking for a simple and free solution. Screen Recorder Robot Lite does not watermark resulting videos like some of the other free solutions. It has a max limit of 600 seconds but it allows you to record over and over then edit the video to make a longer one (merge).
Snagit
Snagit is not free but has a low price tag and is a single lifetime purchase. This option combines some of the best editing features on the market and makes it easy to record your screen or desktop. The resulting video is saved in MP4 format by default, quality can be controlled easily and Snagit supports multiple audio sources including system audio. There is a free trial version of Snagit which features limited recording capabilities.
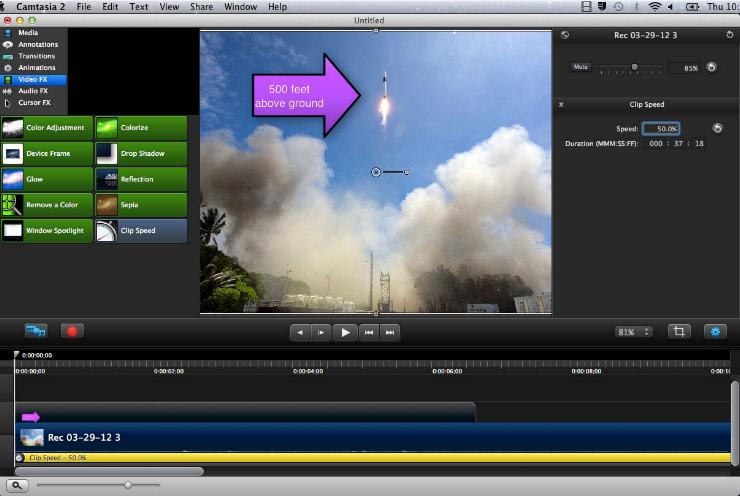
Camtasia 2
One of the most famous professional screen recording utilities for Mac OS X with a moderate price tag that many argue is well worth it. Its extensive layout allows you to easily perform smooth editing and mixing on recorded videos. You can add titles, annotations, transitions and panning animations on the recorded video to increase production value. Camtasia 2 is a much more complex solution for creating full featured video tutorials, interactive presentations and guided screen shares. You generally will not need a separate external editor with Camtasia 2 as many of the common filters and features are built right in, including multiple opening and closing credit reels, custom transitions and color and blur correction tools.
We have discussed quite a few ways to record videos on Mac computers in this article. This should aid you in recording custom videos as well as screen activity on a Mac. Mac computers are very versatile and have a reputation for being the ideal platform for multimedia editing. It should come as no surprise that your Mac can make easy work of a screen recording and editing with just a few clicks.
Now that we know a bit more on how to record a video on Mac and how to record your screen on Mac, we need to learn as well that this video files can be lost for any Hardware or Software possible reason and that there is always a solution for recovering lost media files from your MacBook, MacBook Pro, iMac or any other Mac computer.
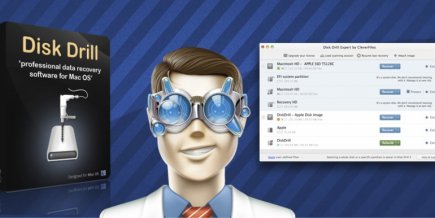
Lost Video Files Recovery Using Disk Drill
There are endless possible cases when a video file can get lost or accidentally deleted. Disk Drill for Mac can come in handy and help regardless of the scenario. Accidentally emptied trash, virus attacks, power failure, partition damage, failed boot ups? No problem! Disk Drill’s powerful scanning engine can find your lost files and videos in just a few clicks.
You can begin with a simple download, Disk Drill is available for both Mac and Windows. Once installed, Disk Drill scans your storage devices for lost data and locates recoverable data. With smart detection of bad sectors on a drive’s surface, you increase your data recovery chances.
More than 300 types of files can be recovered with Disk Drill including many popular audio and video formats. In addition to the outstanding data recovery capabilities of Disk Drill, our Basic Edition includes free tools that help prevent data loss and guarantee success recovery of future data loss. Download Disk Drill today to take advantage of Guaranteed Recovery and Recovery Vault, protect your files from loss.
