The all-new Windows 11 is finally available to the public. Microsoft has given users a few options to choose from when it comes to installing Windows 11, and for the most part, it’s quite straightforward.
However, the worry of losing your data still remains. Rightfully so, as upgrading your operating system can be quite scary if you haven’t done it before. In this article, we’ll cover the required specifications and how to install Windows 11 without losing data.
System Requirements for Windows 11
As you might expect, Windows 11’s system requirements are a slight step up from Windows 10’s. While most modern computer systems will be able to install it with no issues, older machines may struggle with some of the new requirements.
Here are the minimum system requirements needed to install and run Windows 11:
- Processor: 1GHz, 2 Cores, 64-bit
- RAM: 4GB
- Storage: 64GB
- Firmware: UEFI with Secure Boot
- TPM: Version 2.0
As you’ll notice, Secure Boot and TPM 2.0 are required. These are two features that weren’t necessarily required in previous operating systems, but Windows has decided to enforce them with the new Windows 11 to help better protect users and their data.
Windows 11 requires that Secure boot be enabled before it can be installed. Secure boot is a security feature that only allows your PC to boot if it can verify the signature of your operating system, as well as the UEFI firmware drivers and EFI applications. This is to prevent malicious software from taking over the boot sequence of your computer.
TPM (Trusted Platform Module) is another security requirement to install Windows 11. A TPM is a small chip on your motherboard that serves many functions, but for Windows 11 specifically, it’s used for Windows Hello identity protection and BitLocker encryption.
Common Reasons for Data Loss
Data loss isn’t uncommon when upgrading to a new operating system. During the upgrade, your computer is in a very vulnerable state. Any disruption to the upgrade process can be detrimental to your data. Here are some common causes for data loss to be aware of.
- ❌ Interrupted upgrade/install – If the Windows 11 installation process is interrupted by sudden power loss, this can corrupt your data and potentially your hard drive. If your system files have become corrupted, this could render your computer unusable.
- 😮 Incorrect install type – When you’re installing a new operating system, you will often have the choice between two install types: Upgrade or Custom. If you choose Custom and you’re unfamiliar with what steps to take, it’s very easy to wipe everything from your computer by making a mistake.
- 💻 Failing hard drive – A failing hard drive or solid-state drive can crash during the Windows 11 installation. If incomplete, system files can become corrupted and result in the loss of your data.
- 🙅♂️ Human error – Everyone makes mistakes. It could be as simple as deleting the wrong folder, or as complex as using the wrong parameters while using DiskPart. Regardless, data loss as a result of human error is very common.
- 🦠 Virus attacks – There are unfathomable numbers of viruses lurking on the internet. Hackers with malicious intent are just waiting to prey on unsuspecting internet users. Viruses are a leading cause of data loss, so protect yourself with an antivirus application.
Keep these reasons in mind going forward to ensure you install Windows 11 without a hitch. After all, you wouldn’t want to be in a position where you accidentally format your main drive or get stuck on an infinite loading screen because you installed an unstable version.
How to Install Windows 11 Without Data Loss
You may be excited to try out the new Windows 11 operating system. Why wouldn’t you be? There’s a whole new user interface, as well as cool new features like the ability to run Android applications natively within Windows.
Before we begin, it’s imperative that you make a backup of all your important data. Even though these methods work, something could happen to interrupt the process like sudden power or hardware failure. Creating a backup of your files now ensures you can easily restore them in case the worst-case scenario becomes a reality.
Let’s get you set up. Use the below methods to install Windows 11 without losing your data. Bear in mind that upgrading to a new operating system can take time, so ensure you do not shut down your computer during the process.
Method #1: Upgrade from Windows 10 to Windows 11
If you have a valid version of Windows 10 installed already, you can upgrade to Windows 11 through the Windows Update section. This is probably the easiest and most popular way of installing Windows 11.
Not all Windows 10 computers will have the ability to upgrade to Windows 11 straight away. Microsoft is gradually rolling out this update to all compatible computers and plans to be finished by mid-2022, prioritizing new eligible devices first.
If you notice that your computer is eligible for the upgrade but there’s no option yet, proceed to one of the following methods to upgrade.
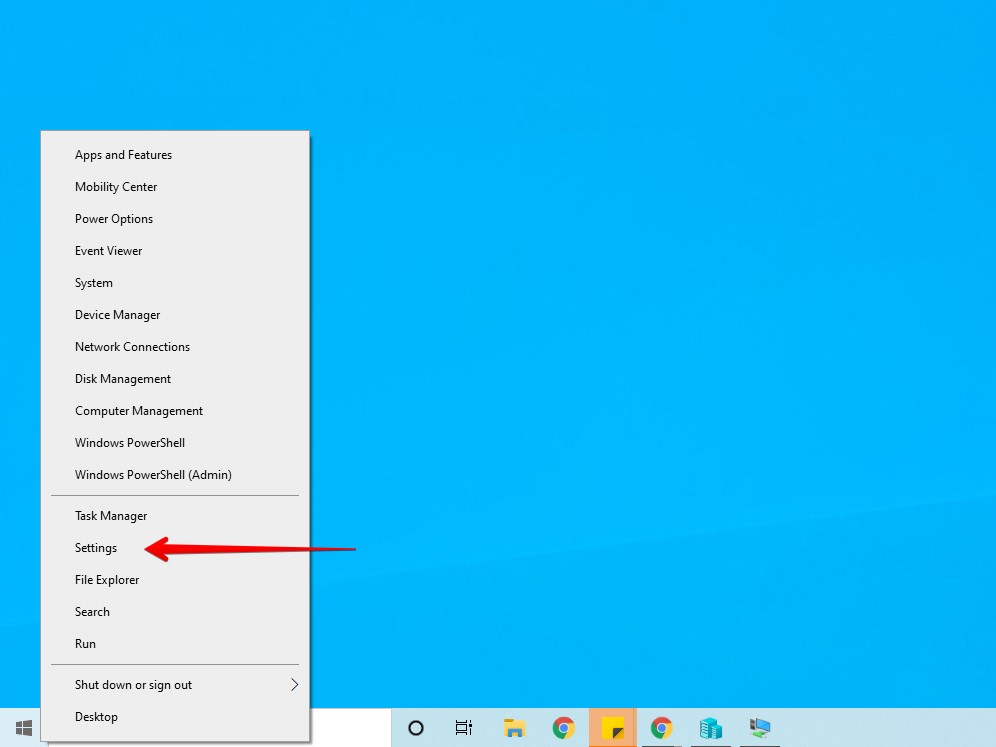
- Right-click Start and click Settings.
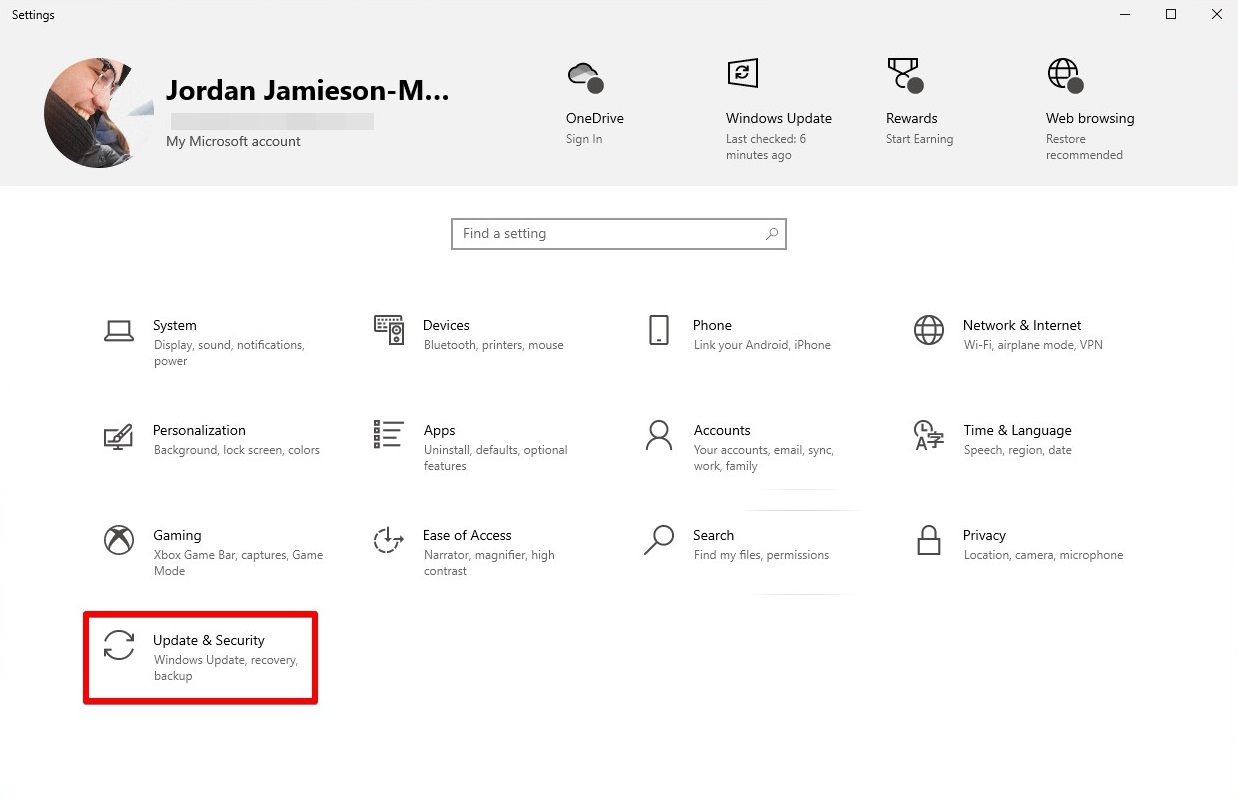
- Click Update & Security.
- Click Check for updates.
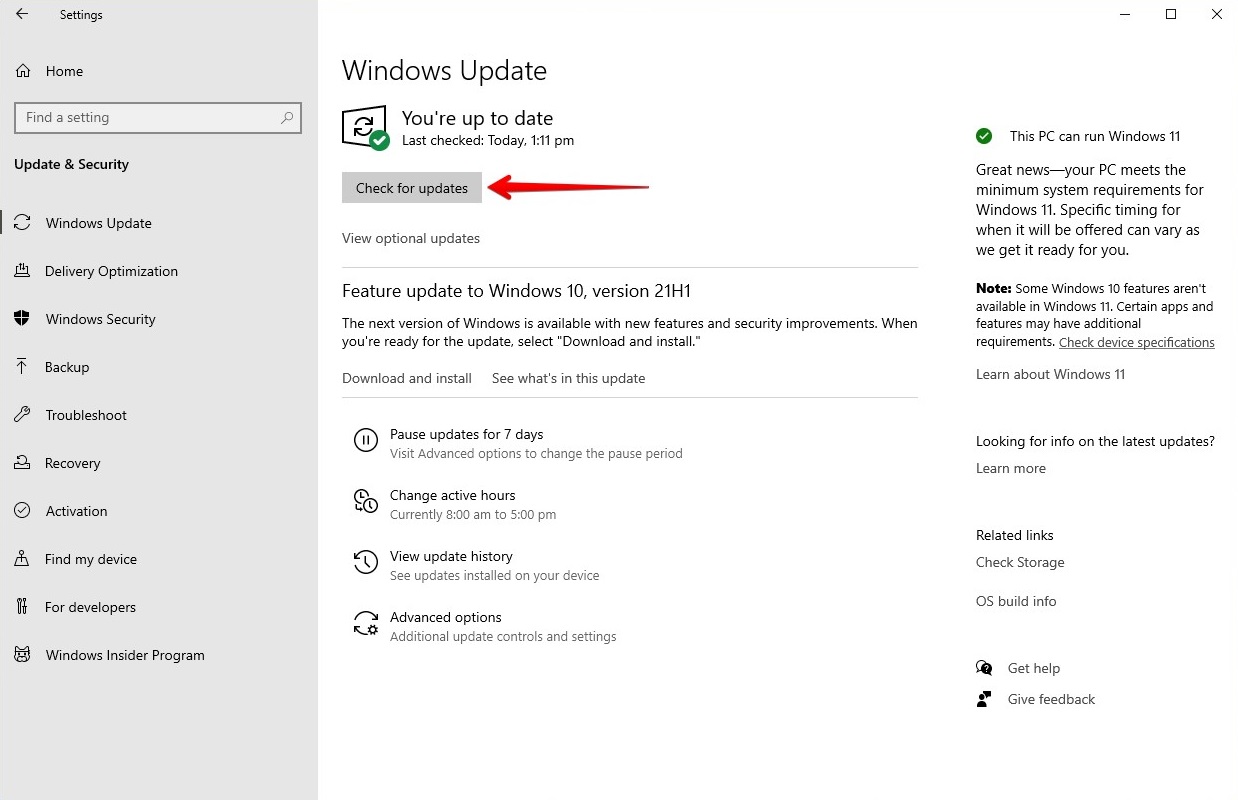
- Click Download and install in the Upgrade to Windows 11 section.
Method #2: Windows 11 Installation Assistant
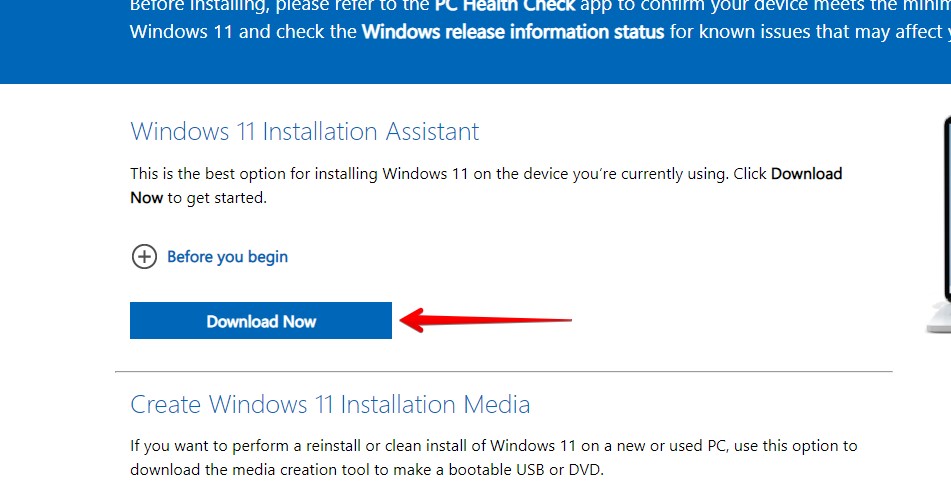
Microsoft allows you to upgrade using the Windows 11 Installation Assistant if the update isn’t available just yet through Windows Update. The tool will download the updated operating system and install it for you. In terms of effort, this method is one of the easiest as it doesn’t require the creation of any bootable media.
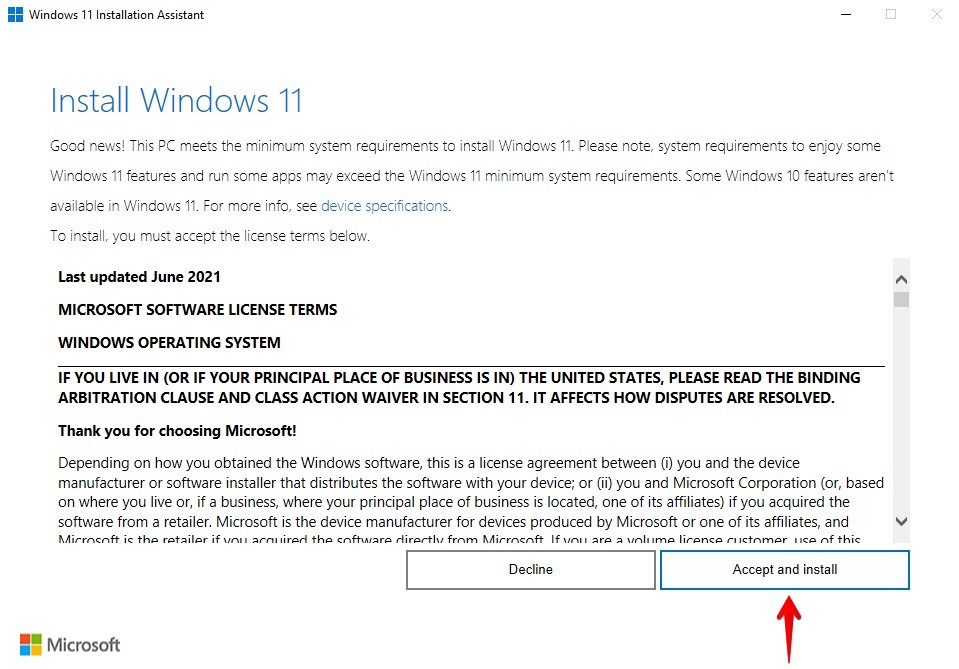
- Download the Windows 11 Installation Assistant and open it. If prompted by UAC to allow permission, click Yes.
- Read and accept the license terms.
- When Windows 11 has been downloaded and prepared for install, click Restart now.
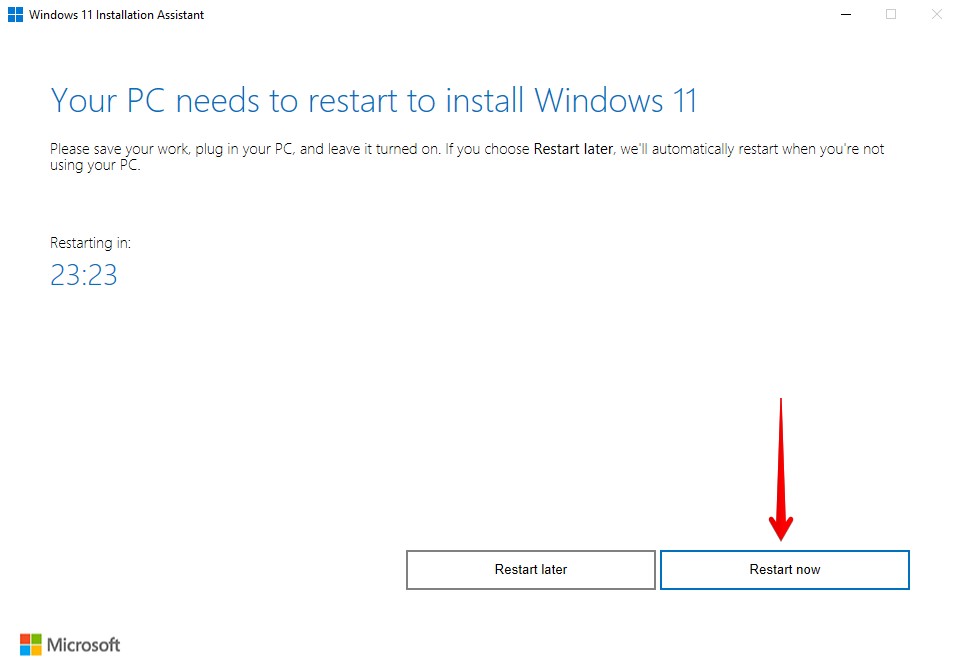
- Windows 11 will install in the background. Eventually, you’ll be met with a login screen where you can log in to your new Windows 11 desktop.
Method #3: Download the Windows 11 ISO
ISO files are disk images that are used to install operating systems. You can download the Windows 11 ISO from the Microsoft website and use it to perform an in-place upgrade. To do so, you’re going to need a USB to create a bootable USB installation drive. Alternatively, if you don’t have a usable USB, you can virtually mount the ISO using a tool like DAEMON Tools Lite.
Before starting this process, you will need to download the following:
- Windows 11 ISO – The ISO file contains Windows 11 and all files necessary for installation. Download it in the Download Windows 11 Disk Image (ISO) section.
- Rufus – Utility tool used to create bootable USB drives.
Once ready, follow the below instructions to create a bootable USB and install Windows 11.
- Open Rufus.
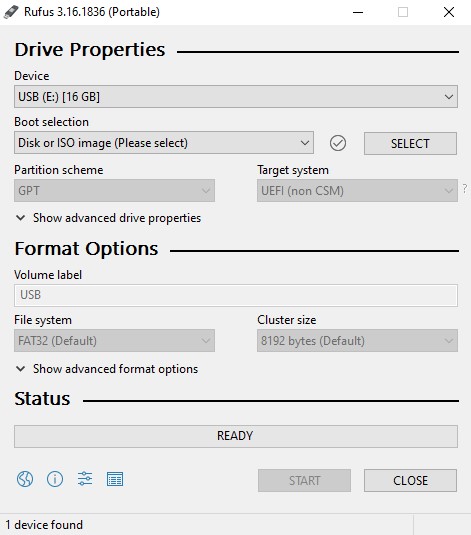
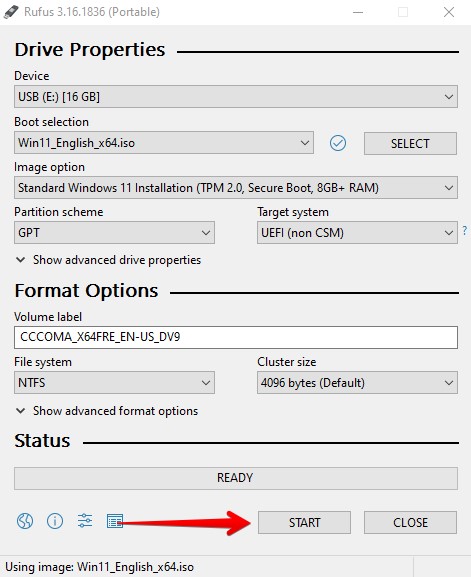
- Click Select and choose the Windows 11 ISO file.

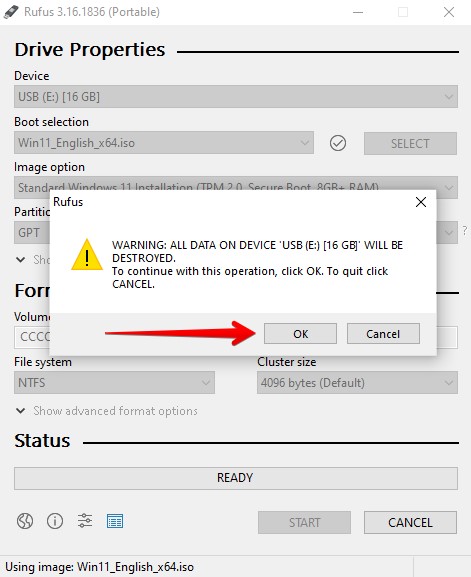
- Click Start.
- It will ask you to confirm your decision. Click OK.
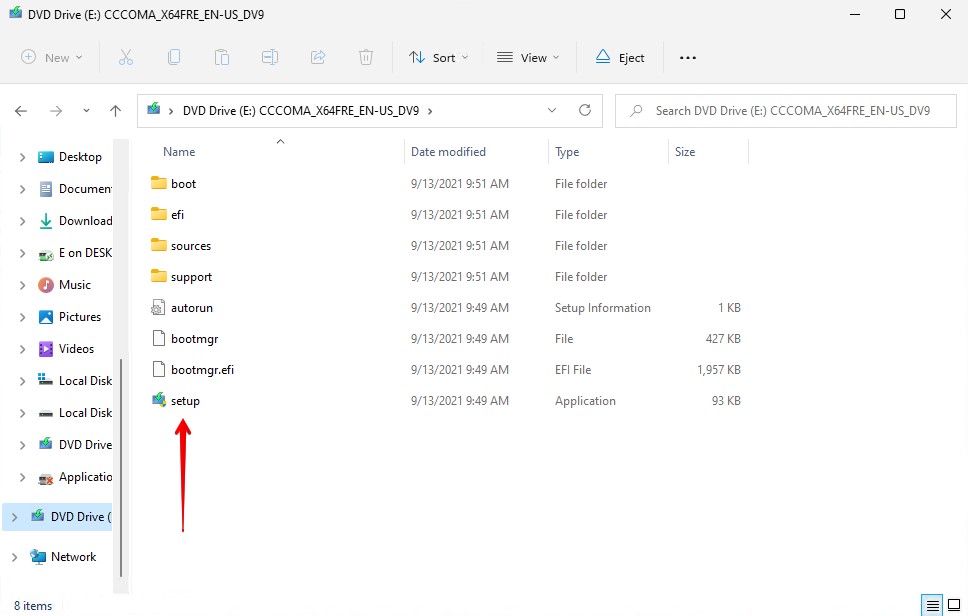
 When finished, click Close. Open Windows Explorer and open your USB. Open Setup. Click Yes if prompted by UAC.
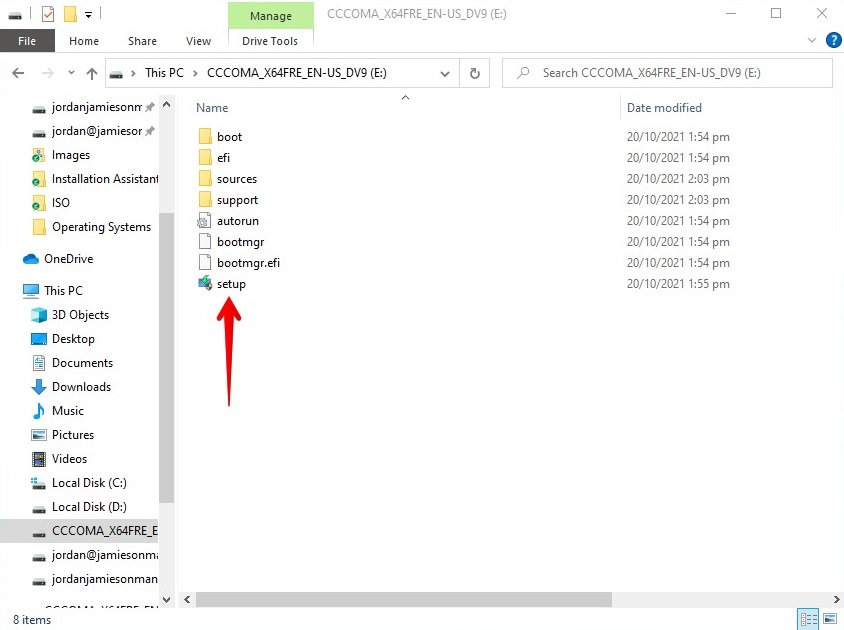
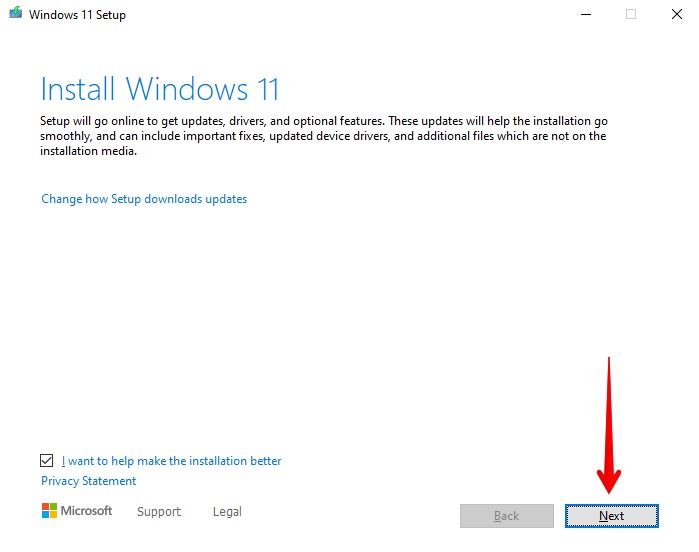
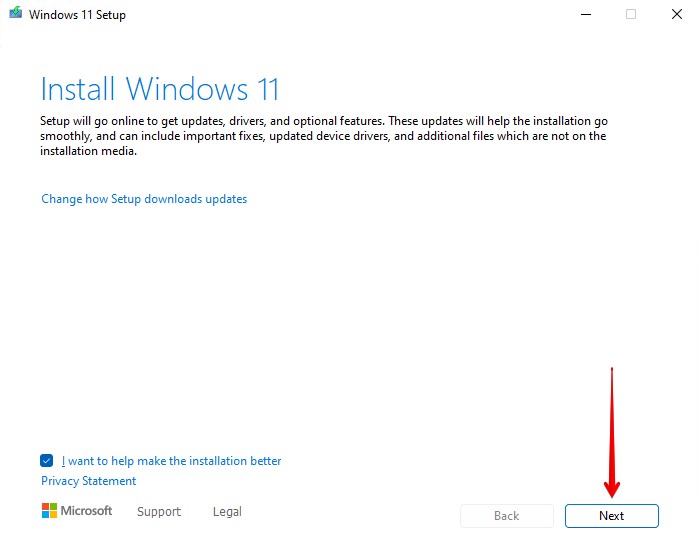
- Click Next. It will begin to check for updates and ensure your computer is ready for the upgrade.
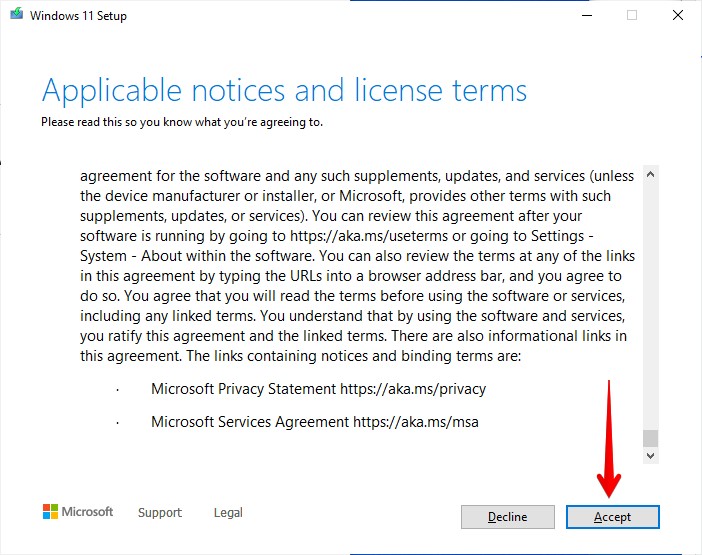
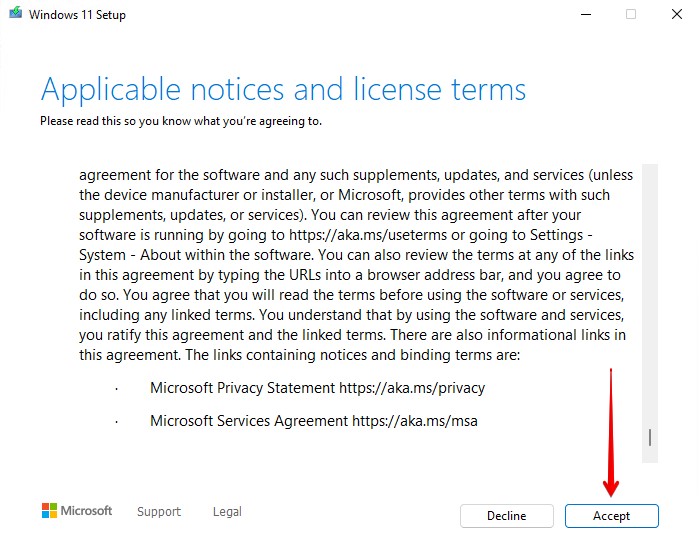
- Read the license terms and click Accept.
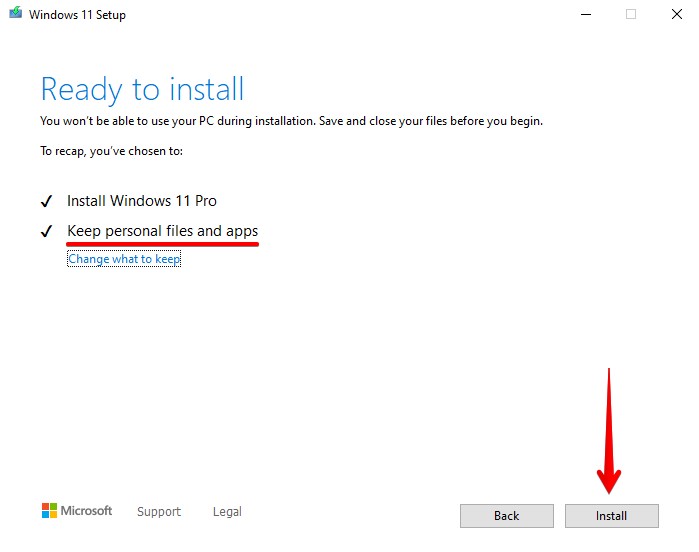
- Ensure that Keep personal files and apps is selected. If it’s not, you can choose this option by clicking Change what to keep. When ready, click Install.
After a few restarts, your computer will boot into Windows 11. You can sign-in using your regular Microsoft or local account and begin using your PC.
How to Reset Windows 11 Without Data Loss
If you’ve already installed Windows 11 but need to reset it again, Windows gives you several options to do so without losing your data or apps. Again, before actioning any of the below methods, ensure you’ve backed up your data.
Method #1: Reset Windows 11 PC
This method of resetting your Windows 11 computer without losing your data is the easiest. It allows you to choose whether you want to reset from local files or by downloading the necessary files online.
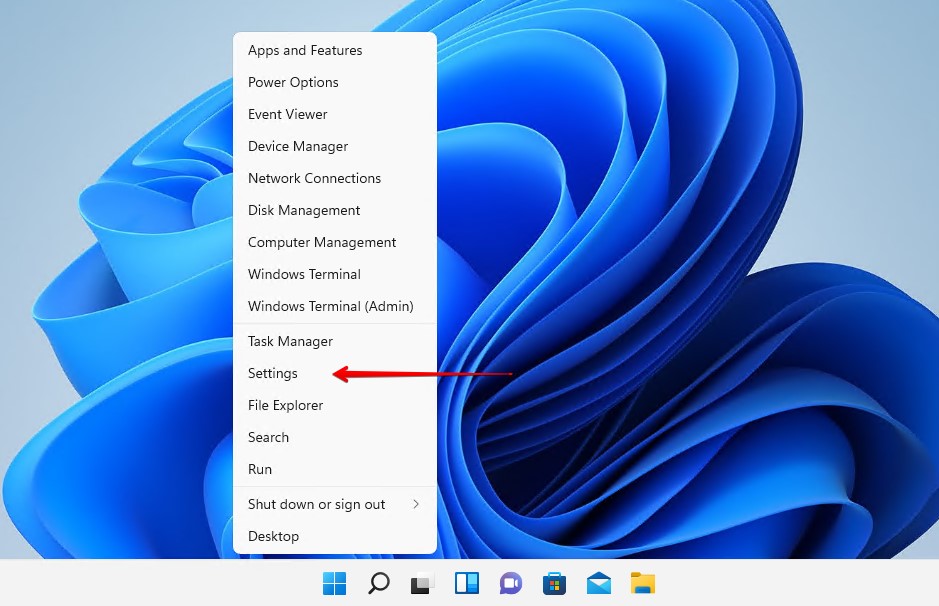
- Right-click Start and click Settings.
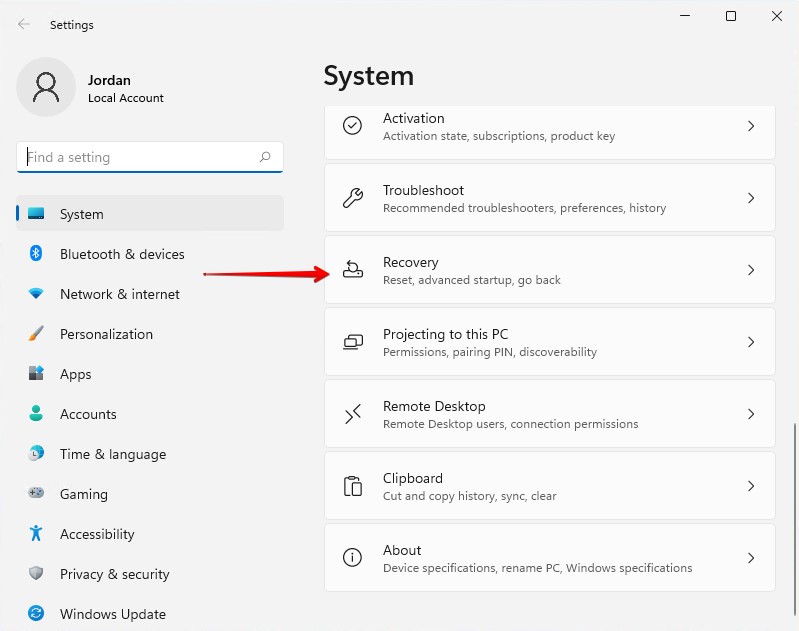
- Click Recovery.
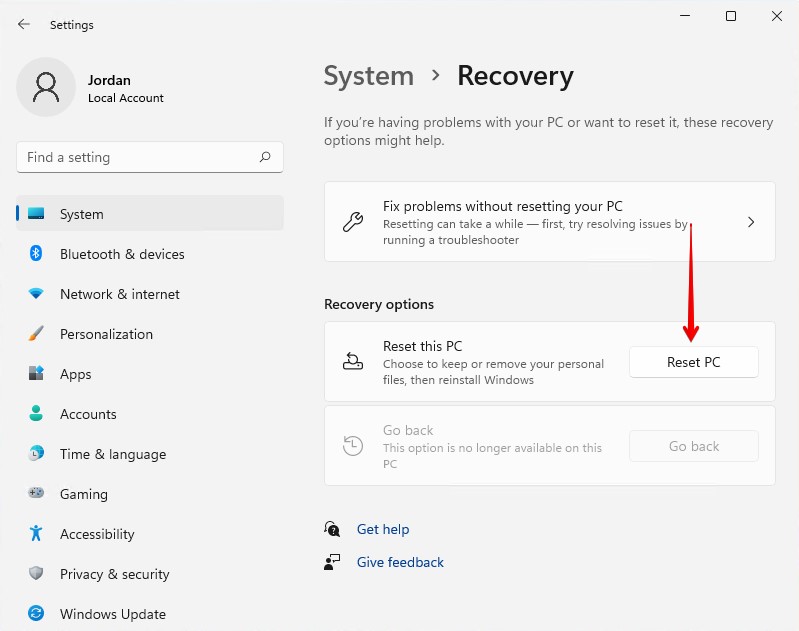
- Click Reset PC.
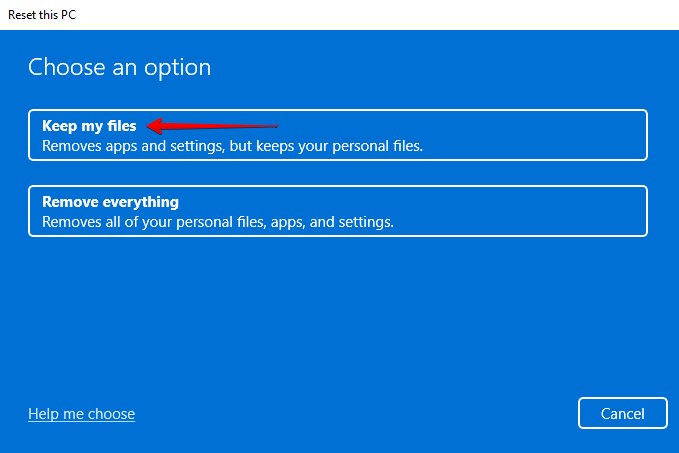
- Click Keep my files.
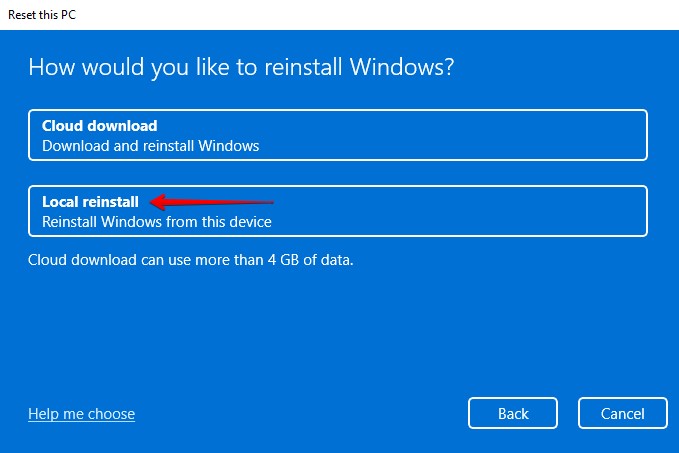
- Click Local reinstall.
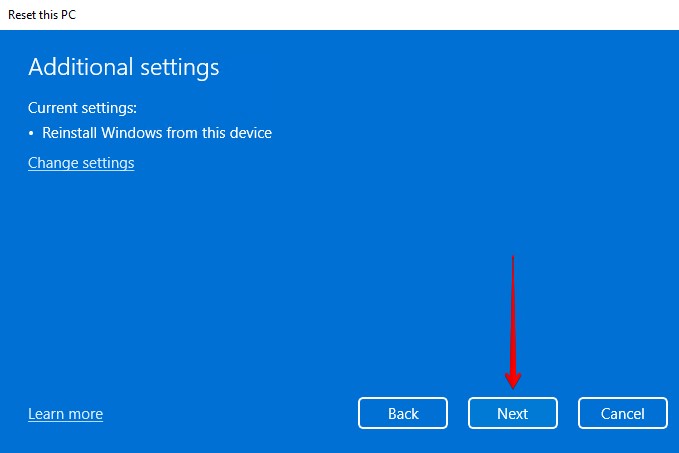
- Click Next.
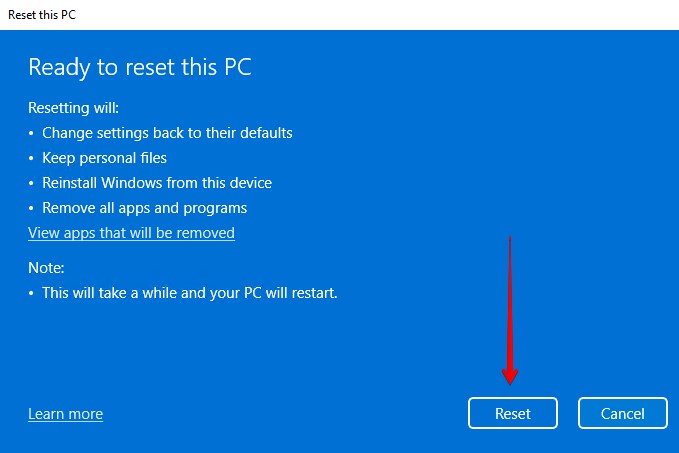
- Click Reset.
Method #2: Perform a Repair Install
Using the bootable USB we created earlier, you can perform a repair install of Windows 11 using an in-place upgrade. This uses the Windows 11 ISO to repair any corrupted or missing system files.
- Plug the bootable USB into your computer.
- Open the USB in File Explorer and run Setup. If prompted to confirm by UAC, click Yes.
- Click Next.
- Read the license terms and click Accept.
 Ensure Keep personal files and apps is the selected option and click Install.
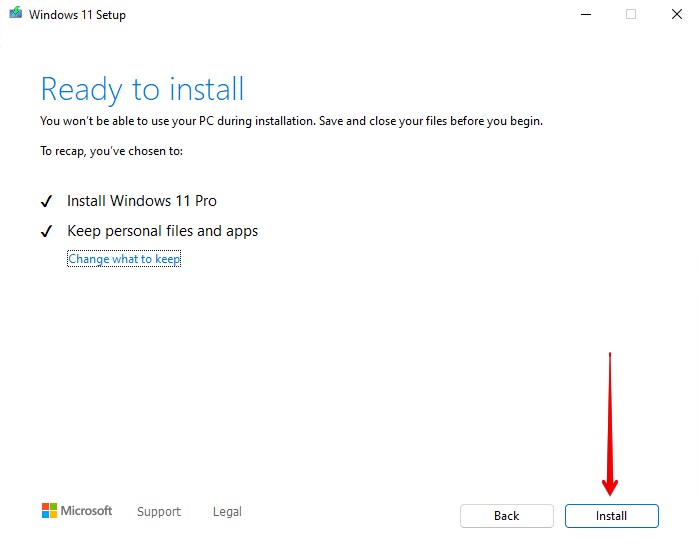
How to Prevent Losing Data in Windows 11
Upgrading to a new operating system can be intimidating, especially if you haven’t done it before. While Microsoft have done a great job at making it as easy as possible for the user, hiccups are always a possibility along the way.
- 💾 Make backups – By far the most effective way of preventing data loss is by making backups. Backing up your data ensures you have a full copy of your files that can be restored if the originals are lost.
- 👀 Monitor your drive – Monitoring your hard drive’s S.M.A.R.T. data can alert you to problems that arise before they become a major issue. You can use Disk Drill’s disk monitoring feature to stay updated on any problems that arise instead of manually checking it often.
- 💂♂️ Use antivirus software – Protect your data from virus attacks by using a reliable antivirus application that can prevent and contain malicious attacks.
- 👌 Eject devices safely – Removing storage devices in the middle of write processes can corrupt your data. Instead of just physically disconnecting it, be sure to eject the device safely. This will make sure all important processes are stopped safely.
- 👍 Use official ISO files – Before Windows 11 launched, it was leaked to the public. The problem with unofficial ISO files is that they’re unstable and potentially compromised by hackers. Always download ISO files from the official Microsoft website.
The above tips can help keep your data safe. Of course, data loss is always a possibility due to circumstances outside of our control. For that reason, keeping a backup on hand is the most effective data protection method.
Conclusion
By using the methods outlined in this article, you can install Windows 11 without losing any of your precious data. But, even though these methods work, there’s always a chance that something can go wrong.
Recovering your data from a backup is much easier than recovering it from a failed Windows installation. For that reason, we recommend making a backup of your data before attempting anything.

FAQ
No, your data won’t be lost if you install Windows 11 correctly. Of course, if you perform a custom install and format your drive, then your data will be lost. When upgrading to Windows 11, always ensure you choose the option to keep your data.
Regardless, you should back up your data any time you change operating systems.
You can easily upgrade to Windows 11 using the Windows 11 Installation Assistant. Before doing so, create a backup of your important data.
- Download and install the Windows 11 Installation Assistant. Open it.
- Read and accept the license terms.
- Click Restart now.
When completed, you you will be prompted to log into your new Windows 11 desktop using either your Microsoft or local credentials.
If your computer can support it, the Windows 11 update will appear in the Windows Update section of your settings when it’s ready. This is happening gradually by Microsoft. If you don’t want to wait, you can try installing it using the Windows Installation Assistant or ISO found on the Download Windows 11 page by Microsoft.
If you use the Reset PC option to reinstall Windows 11, you will be provided with two options:
- Keep my files: Removes apps and settings, but keeps your personal files.
- Remove everything: Removes all of your personal files, apps, and settings.
Yes, you can reinstall Windows without losing your personal files by using the Keep my files option after clicking the Reset PC button in the Settings app. That said, you should still backup your personal files to a secure location just to be extra safe.
If Windows 11 is taking a long time to install on your computer, it could be because your system hard drive or internet connection is too slow. It’s also possible that your system hard drive is nearing the end of its life and Windows is encountering a lot of bad sectors.
It typically takes around 45 minutes to perform a clean installation of Windows 11, but the time depends on the performance of your computer and the speed of your internet connection, so it may vary a lot.