AirDrop is a feature that allows Mac computers and iOS devices (iPhones, iPads, iPods, etc) to share files like photos, videos, websites, locations, and much more with just a few clicks (or taps)! Designed to be easy to use and built right into your favorite Mac and iOS devices, Airdrop is a quick and easy way to move things between the devices you own.
What You Need to Get Started
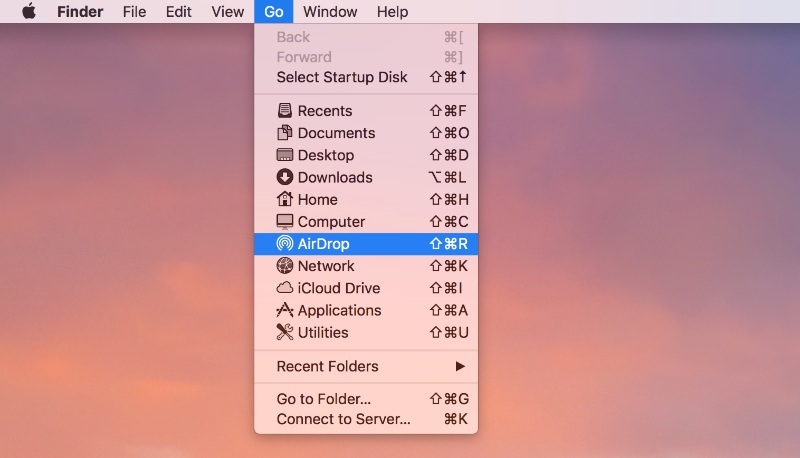
You need to enable the app on your Mac device, this way it can use AirDrop. To find out if your Mac device can use AirDrop, select “Go” from the menu bar in the Finder on your Mac. If the “Go” menu displays AirDrop, your Mac is AirDrop-ready and you can proceed with the instructions below to get started!
How to Turn on AirDrop on Mac
To turn on and set up AirDrop on Mac computer:
Step 1. Select “Go” in the Finder menu.
Step 2. Choose AirDrop from the menu that appears. The AirDrop settings window will appear on your screen. If your Bluetooth or WiFi is turned off you will see a button you can use to turn them on. AirDrop turns on automatically when Bluetooth and WiFi are enabled on your Mac computer.
Step 3. To get files from people not included in your Contacts app use the “Allow me to be discovered by” setting that is available at the bottom of the AirDrop window.
How to Send Items Via AirDrop
To send files and folders via AirDrop:
- Select “Go” from the Finder menu.
- Next, choose AirDrop from the main system menu bar or choose AirDrop from the sidebar of any Finder window.
- The AirDrop window displays the list of AirDrop users that are available nearby. All you need to do is drop the items you want to send one after the other onto the receiver’s image (or name) in the window.
- After that, click the Send button and your files are on the way.

Alternatively, you can use the Share feature:
- Start by clicking Share if it’s available within the app you are using. You can also start by control-clicking an item in Finder and then selecting Share from the shortcut menu.
- From the list of several sharing options that appear, select “AirDrop”.
- After selecting AirDrop, choose a recipient from the AirDrop list and click Done.
- If the receiver is signed into the same iCloud account, then the item you are sending is accepted and stored automatically. If the receiver is not signed into the same iCloud account, the recipient will be asked to accept the item before it can be saved to their device.
On a Mac device, the sent item is saved to the Downloads folder while on iOS, the item displays in the associated app. For instance, photos will be stored in the Photos app and websites can be viewed in Safari.
Things You Need to Know About Sending Files over AirDrop
In case you cannot see the recipient in the AirDrop window ensure that AirDrop is turned on for both devices and they are within 30 feet (9 meters) of each other.
If you are sending an item to an iPhone, iPad, or iPod Touch, your Mac must be a 2012 or newer model running OS X Yosemite or later. iOS devices must be using iOS 7 or later versions and their Personal Hotspot must be turned off (by going to Settings and selecting Cellular).
If you are sending data wirelessly to a Mac and the receiving Mac is using OS X Mavericks, Mountain Lion, or Lion, you need to have its AirDrop window open. To open the AirDrop window, select “Go” in Finder and choose AirDrop from the menu bar.
If you are sending an item to a Mac device and the receiving Mac is a 2012 or older model, just click on “Don’t see who you’re looking for?” that is located in the AirDrop window of the sending Mac device. From there, click “Search for an Older Mac” and select your computer from the list.
You may also need to check if the receiving Mac has “Block all incoming connections” turned on in Security & Privacy preferences. A Mac computer will not receive anything via AirDrop if this setting is turned on.
If the receiving Mac’s AirDrop is configured to accept items from contacts only, ensure that both devices are signed in to iCloud. You also need to make sure that the email address or phone number linked to your Apple ID is in the Contacts app of the receiving device.
System Requirements of AirDrop
Sending or receiving items from an iPhone, iPad or iPod touch requires a 2012 or later Mac with OS X Yosemite or newer. This excludes the Mac Pro (Mid 2012) by default.
To send items to another Mac device, you need a MacBook Pro (late 2008) or newer excluding the MacBook Pro (17-inch, late 2008), MacBook Air (late 2010), MacBook (late 2008), iMac (early 2009), Mac Mini (mid 2010), Mac Pro (early 2009 with AirPort Extreme card, or mid 2010). Many of these models did not come with compatible software by default, however may be compatible with system upgrades. You can verify if your Mac is compatible by checking for the AirDrop feature in the “Go” menu of Finder.
How to AirDrop to from iPhone to Mac
AirDrop is the quickest and easiest way to send items from an iOS device to a Mac computer. Though AirDropping from iOS to Mac OS X is convenient, how AirDrop works is not always common knowledge. Please keep reading to learn how to AirDrop from iPhone to Mac and vice versa. It’s easy to learn how to use AirDrop on Mac to send files from an iPhone to a Mac, which is why we created this short guide with just a few tips. AirDrop provides a simple and reliable way to send photos, videos, notes, and other files between devices that are not far from each other.
To use AirDrop to send files from iOS to Mac OS X, you need to have a modern version of iOS on the iPhone or iPad. Specifically iOS 7 or newer for the AirDrop feature to work on your iOS device.
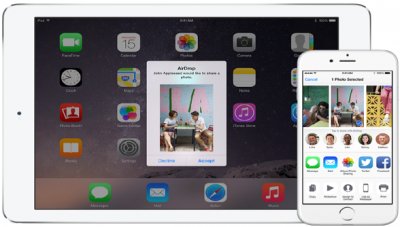
To AirDrop from iPhone to Mac computers (this refers to any iOS device), tap the Sharing icon on the iPhone (note that the Sharing icon looks like a little box with an arrow flying out of it). From the Mac device, open a Finder window and select “AirDrop” from the sidebar. Alternatively, click on the “Go” menu and select “AirDrop”.
On the Mac device, verify the ‘Allow me to be discovered by’ setting is set to display “Everyone” or “Contacts Only” (based on your preference). You must keep this Finder window open because it enables AirDrop to receive files (this is a security feature).
Now back to the iPhone on the sharing screen, click on the AirDrop icon and wait a moment, the Mac with AirDrop enabled will show up in the list of nearby devices. Tap on Mac or User ID to begin sending the files to the Mac.
The AirDropped files will start transferring immediately from the iPhone to the Mac. When the transfer is finished, the Mac will let you know on screen and with an audible alert. So now you are probably wondering, where does AirDrop go on mac? The files will be sent to the Downloads folder on your Mac. Easy enough, right?
The Mac will keep accepting inbound AirDrop file transfers from iPhone, iPad, or other Macs if the Finder AirDrop window is open. Once you are done transferring files with AirDrop on the Mac, close the AirDrop Finder window to stop and prevent further transfers.
AirDrop Alternatives
Rather it be due to the age of your device or personal preference, if Airdrop is not the ideal solution for you there are quite a few third party alternatives which can work very similar to Airdrop. We will discuss just a few of these below although the list is quite long and far beyond what we can cover in the scope of this article, a quick online search reveals close to a hundred different options!
- Zapya – Available for free on just about every platform including Mac, Zapya proclaims itself as the fastest file transfer tool available. Zapya is easy to use, quick and, “it just works”! You can download Zapya and get it setup in less than 5 minutes, once set up transferring files is a matter of one to two taps (or clicks) on any device. Any file type can be transferred and speed depends only on the proximity of the two devices which determines signal strength.
- AnySend – This tool is available directly in the App Store and generally recognized to the easiest solution. Any Send will add a simple icon to your menubar (and on any Mac which its installed on). Click to send, its as easy as that! The receiving Mac gets a brief notification and the file begins to transfer, no special configuration or messy menus are needed.
- FileDrop – Another easy to use service, FileDrop is available on the App Store and via their gorgeous website. The idea of FileDrop is to make things simple, as they say, “No Clouds, No Cables”. The main goal of file drop is to make transferring files as easy and a simple click and drop with minimal effort and configuration. This tool is free and well worth a quick look if you need an alternative to Airdrop.
AirDrop Mishaps & Lost Files
It is important to know that in case you accidentally AirDropped your files to the wrong destination or your AirDropped files disappear suddenly on your Mac, Disk Drill can help you recover these files. Disk Drill is the right tool for the job with multiple powerful scanning methods for finding lost and deleted files on your Mac.

After downloading and launching Disk Drill, you will see a list of available storage devices where you can select the device you want to recover the AirDropped files from. Click on the recover button and watch as Disk Drill shows you a list of deleted or wrongly sent files, you only need to select the files you want to restore.
Disk Drill can be downloaded for free and offers many advanced data protection features and basic scanning capabilities with just a few clicks!
