Have you been struggling with slow load times on your Windows 10 system, only to open Task Manager and discover that it’s reporting 100% disk usage? This can be normal in times when you’re performing disk-intensive tasks, but if you’re consistently seeing disk usage of 100% during idle periods, you’re going to be battling performance issues with everything you do.
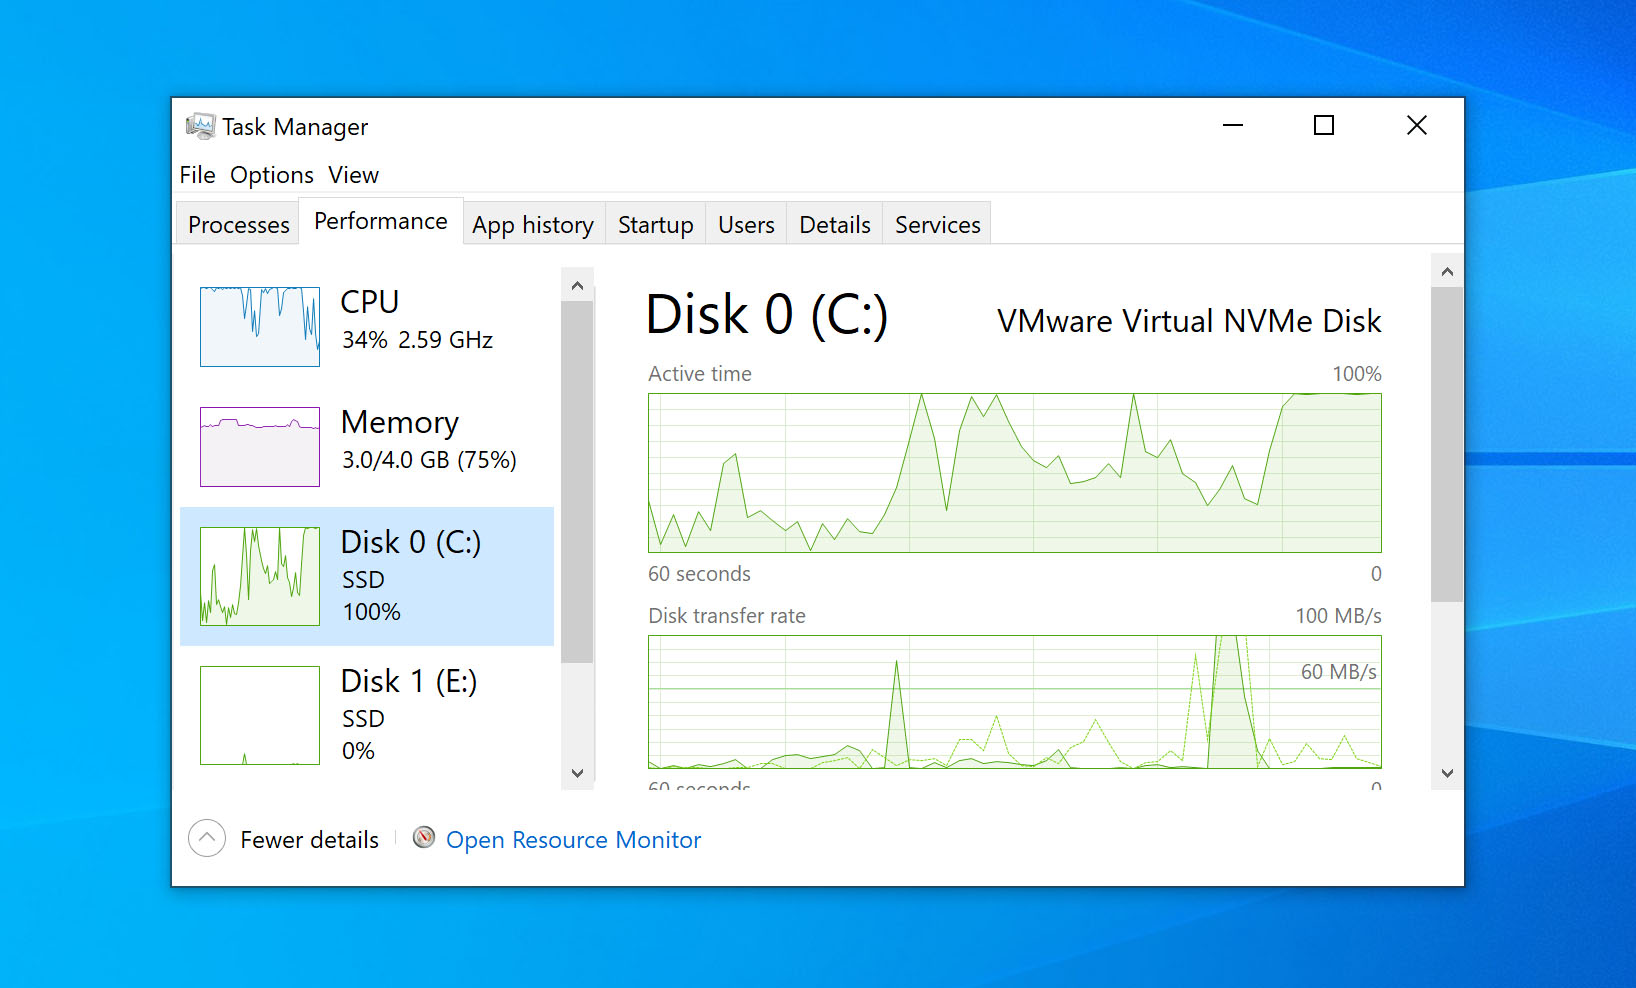
The disk usage metric measures how much load the drive is under and what tasks are using the most resources. As with any component in your computer, there are limits to how fast the drive can work. The good news is that there are actions you can take to reduce the stress on your drive, making your experience faster and smoother. Here’s how you can resolve the problem of high disk usage on your Windows 10 system.

Way 1: Restart Your System
You know from experience that restarting your machine can often resolve all kinds of issues. Your Windows 10 100% disk usage problem is no exception. While taking this route may not help you find out the underlying reason for the problem, if it goes away, that may be sufficient for you.
Windows 10 is constantly running programs, services, and other processes in the background as part of normal operation. The reason why we recommend doing a “Restart” is because these programs and processes can get stalled at some point. Rebooting your system can be enough to return them to a working state.
Way 2: Update Windows
Installing the latest updates can often resolve mysterious problems with your Windows 10 system. Additionally, updates that have been automatically downloaded will remain in standby mode until they’re installed, consuming additional resources and putting more load on the disk.
Check if you are up to date by going into the “Update and security” section of the Windows Settings app. You can check for new updates and install them if they are available.
Follow these steps to update Windows 10:
- Open Start and click Settings.
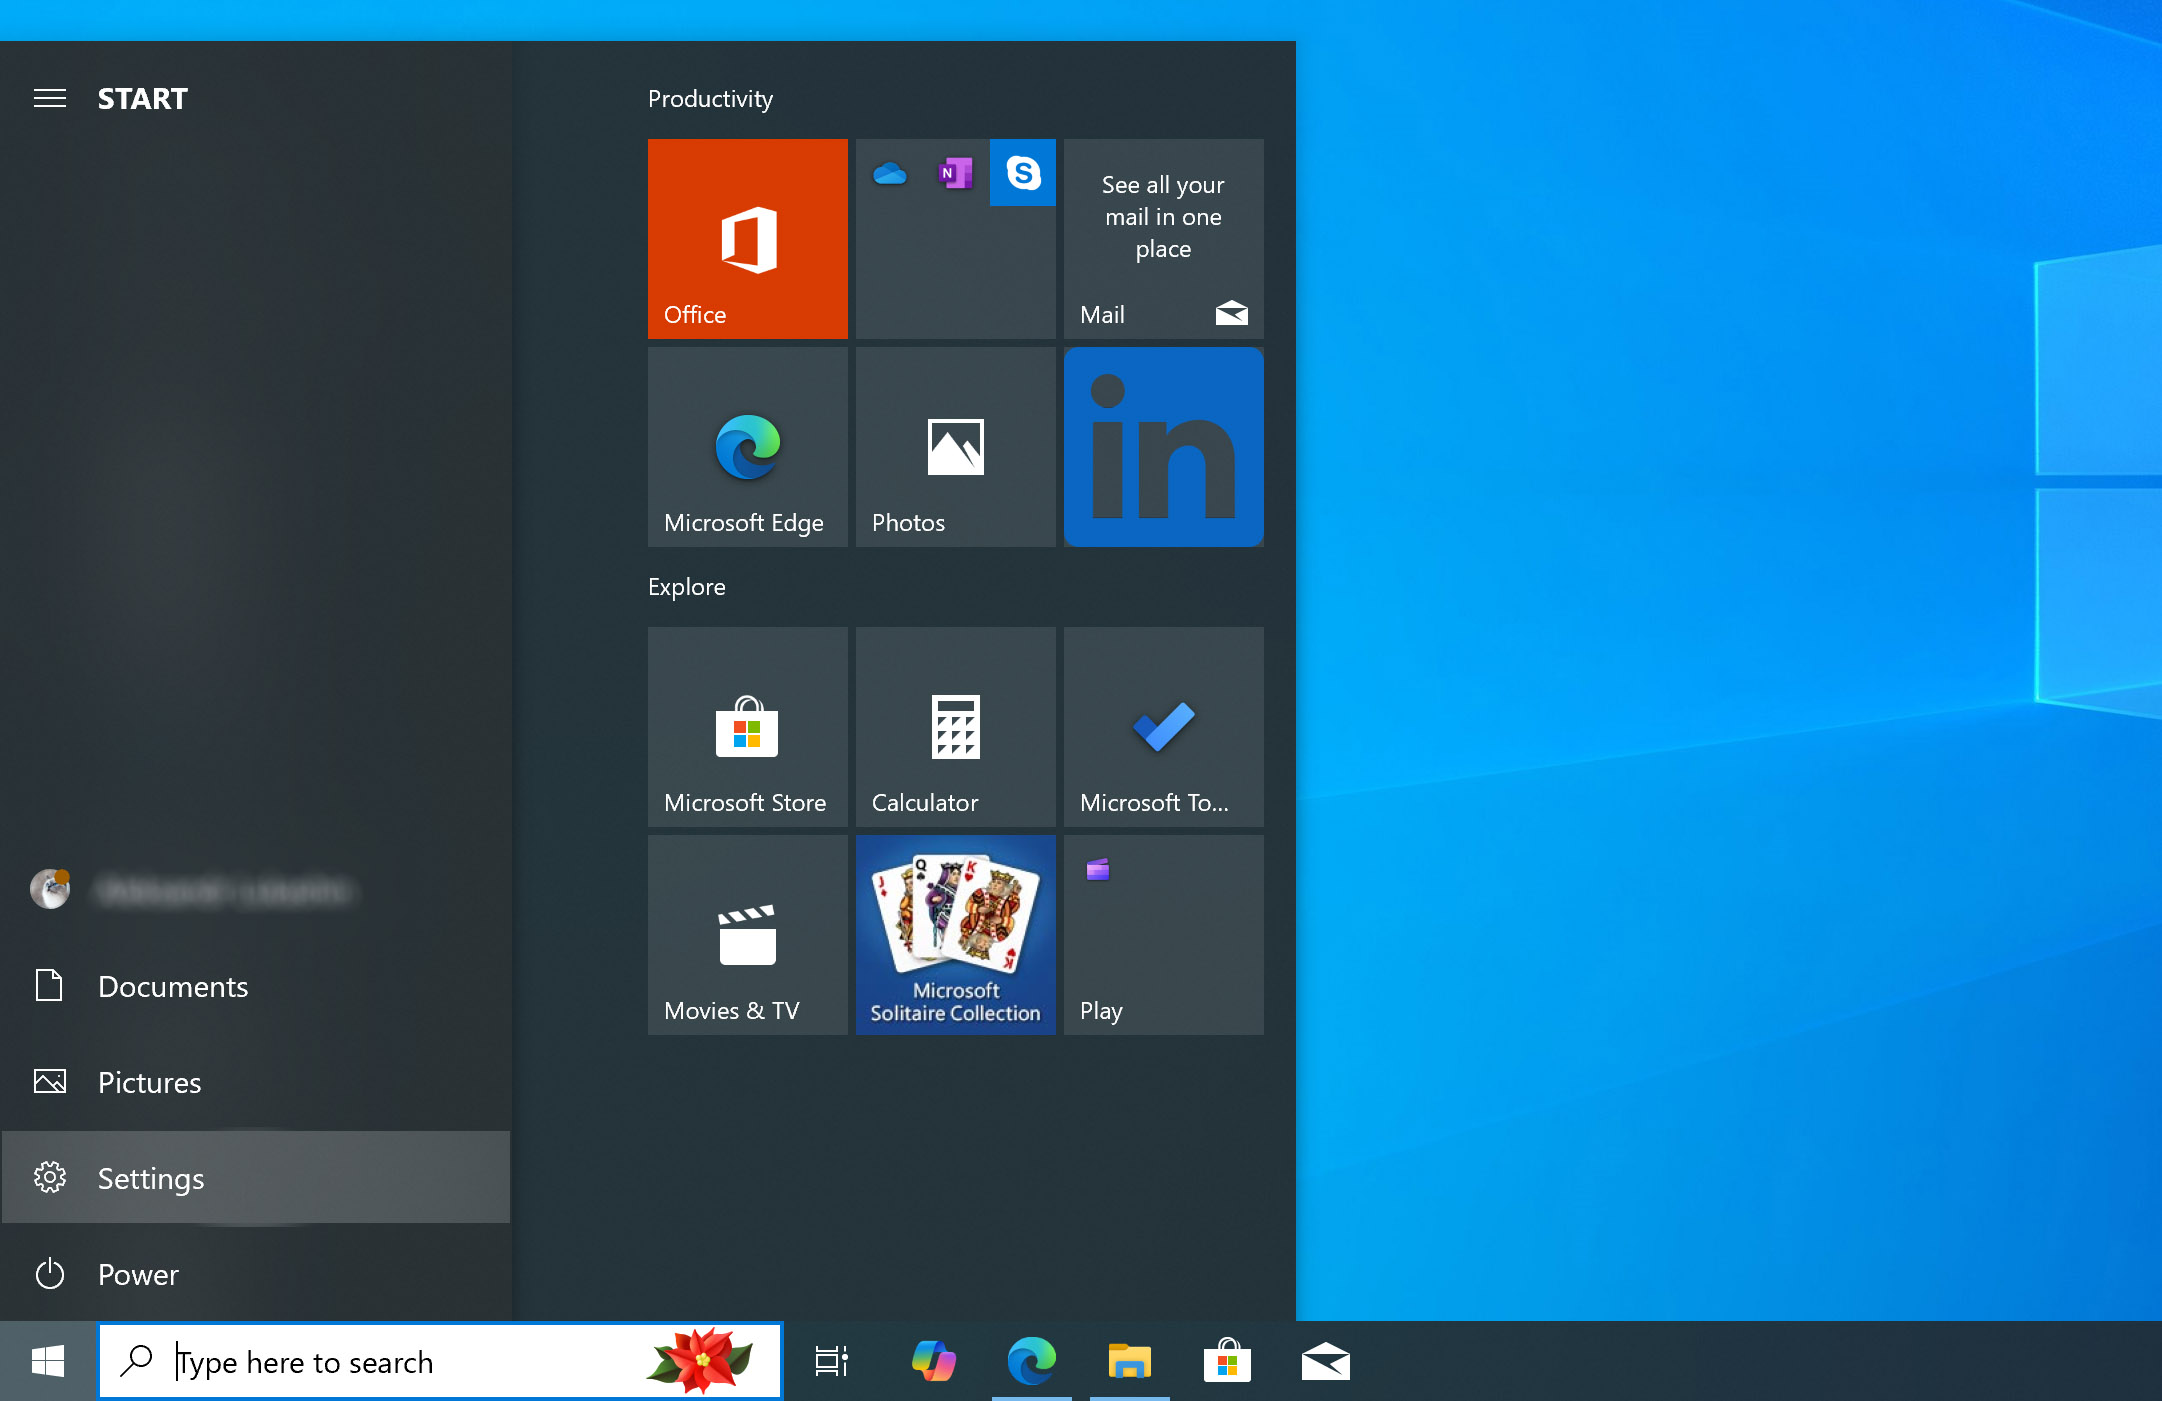
- Click Update & security.
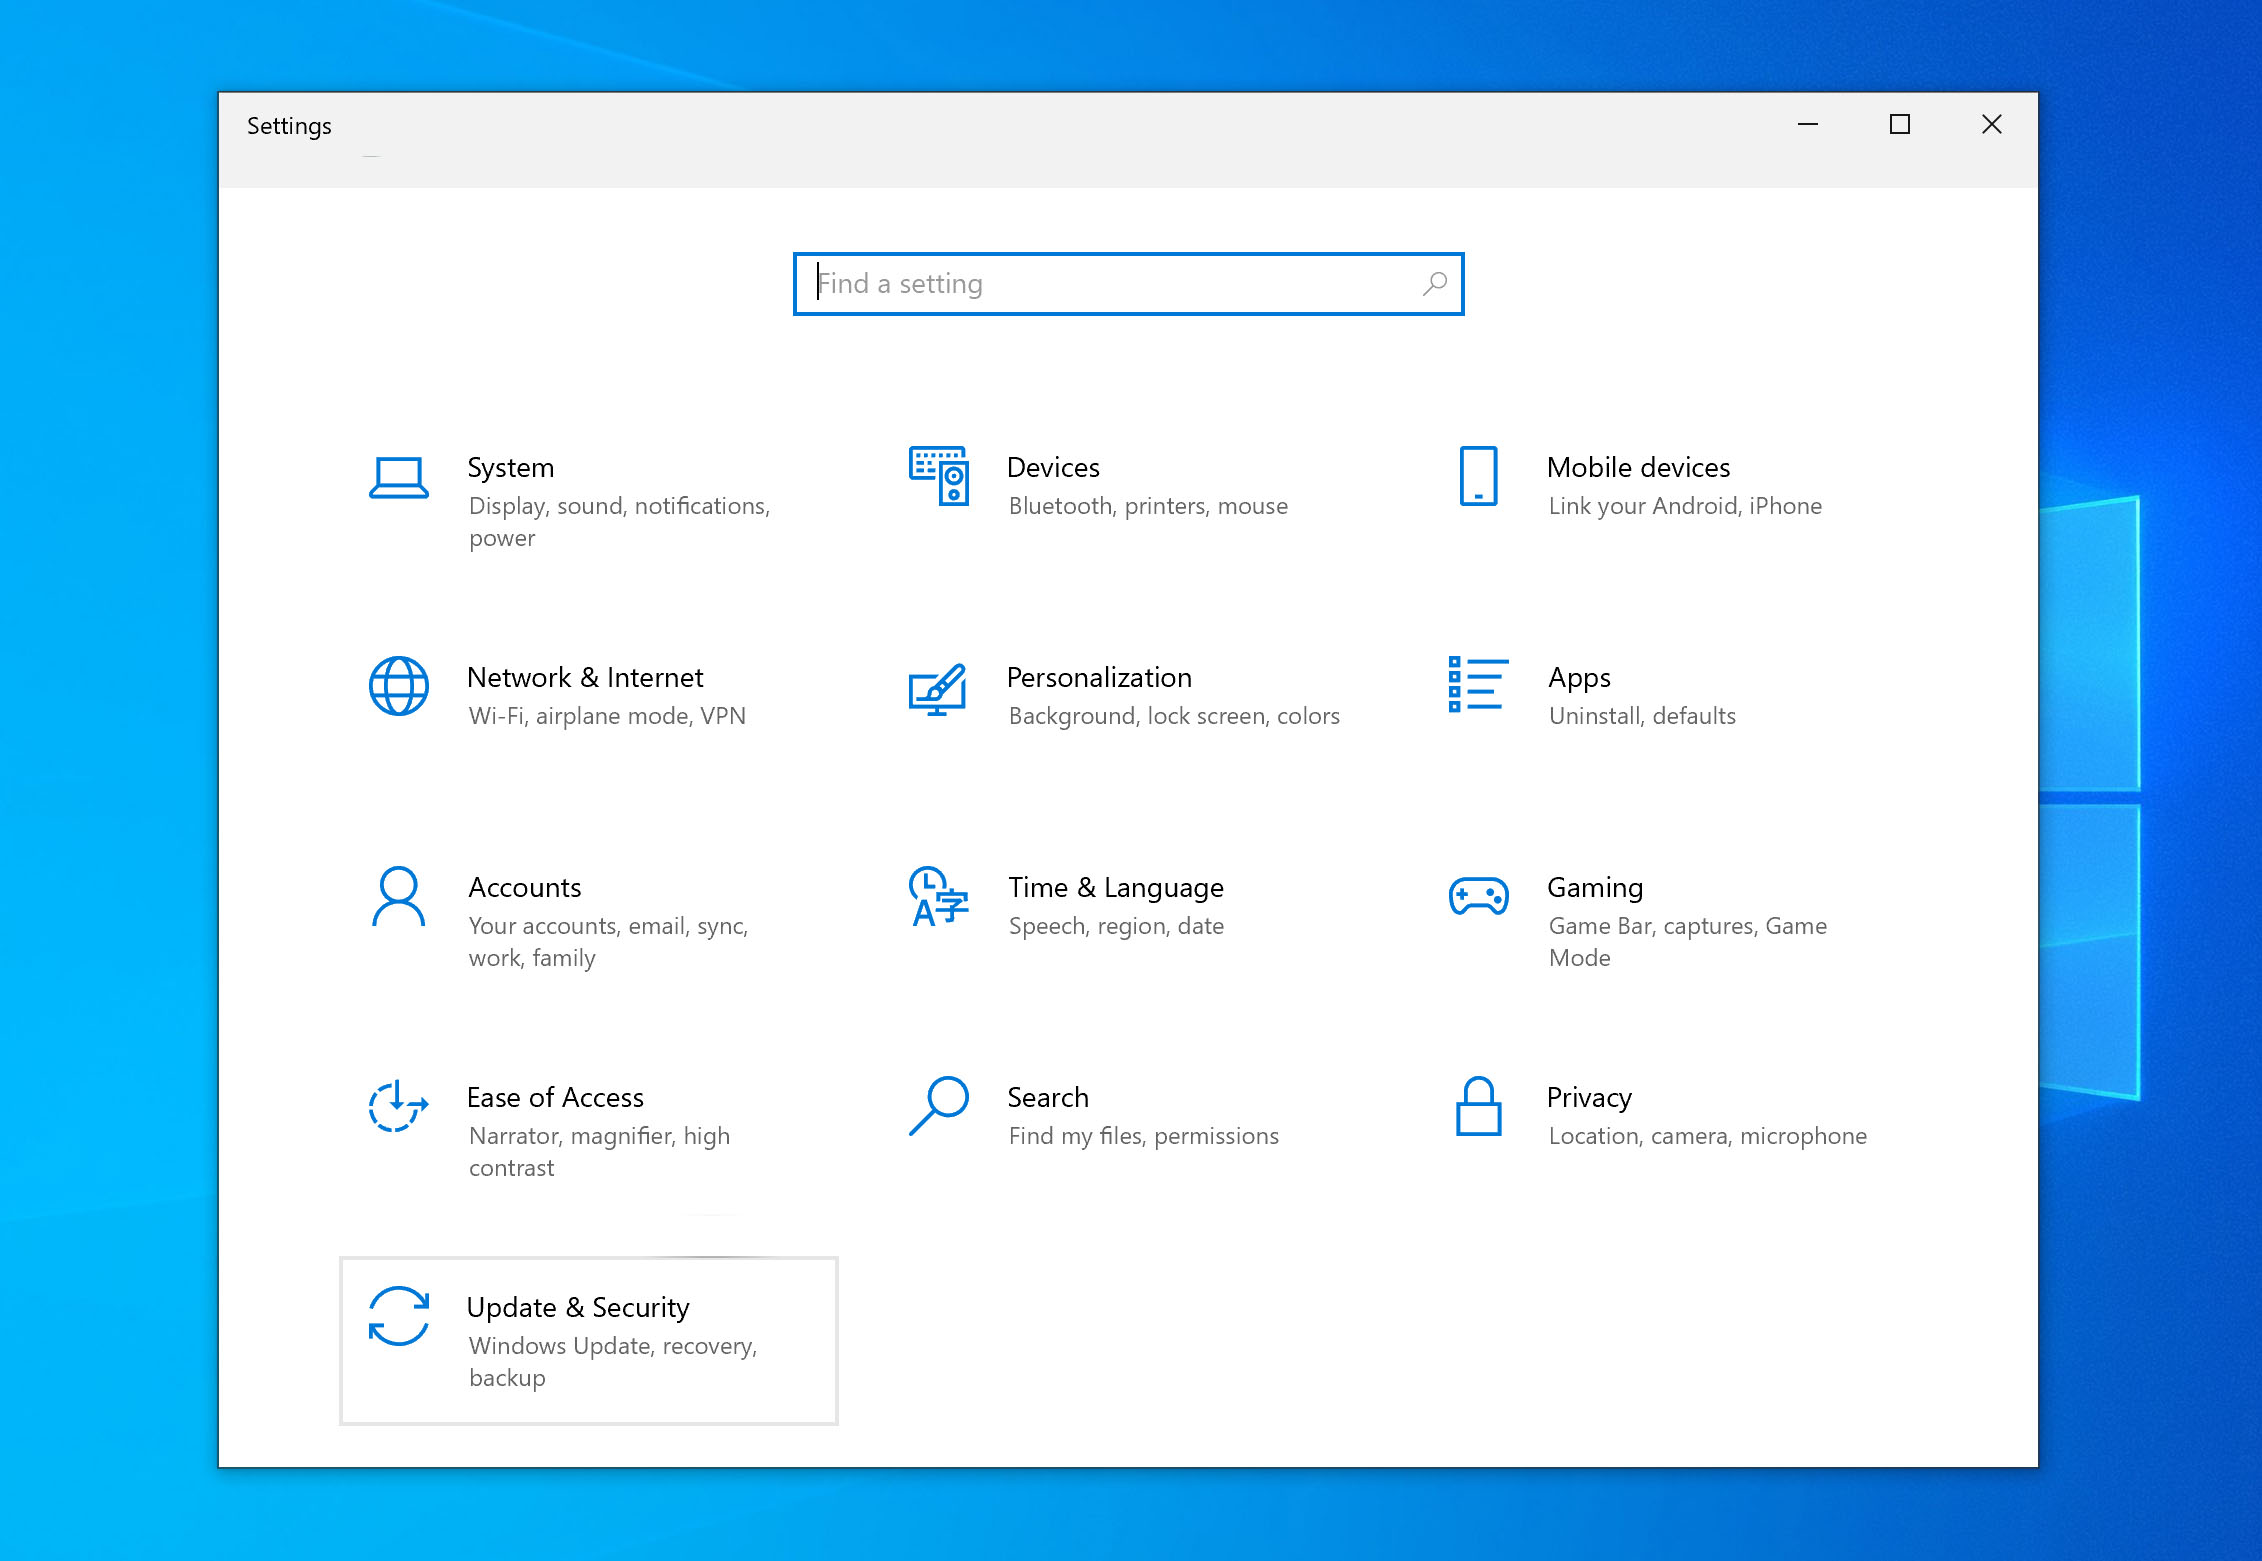
- Click Check for updates.
- Wait for the updates to download and install.
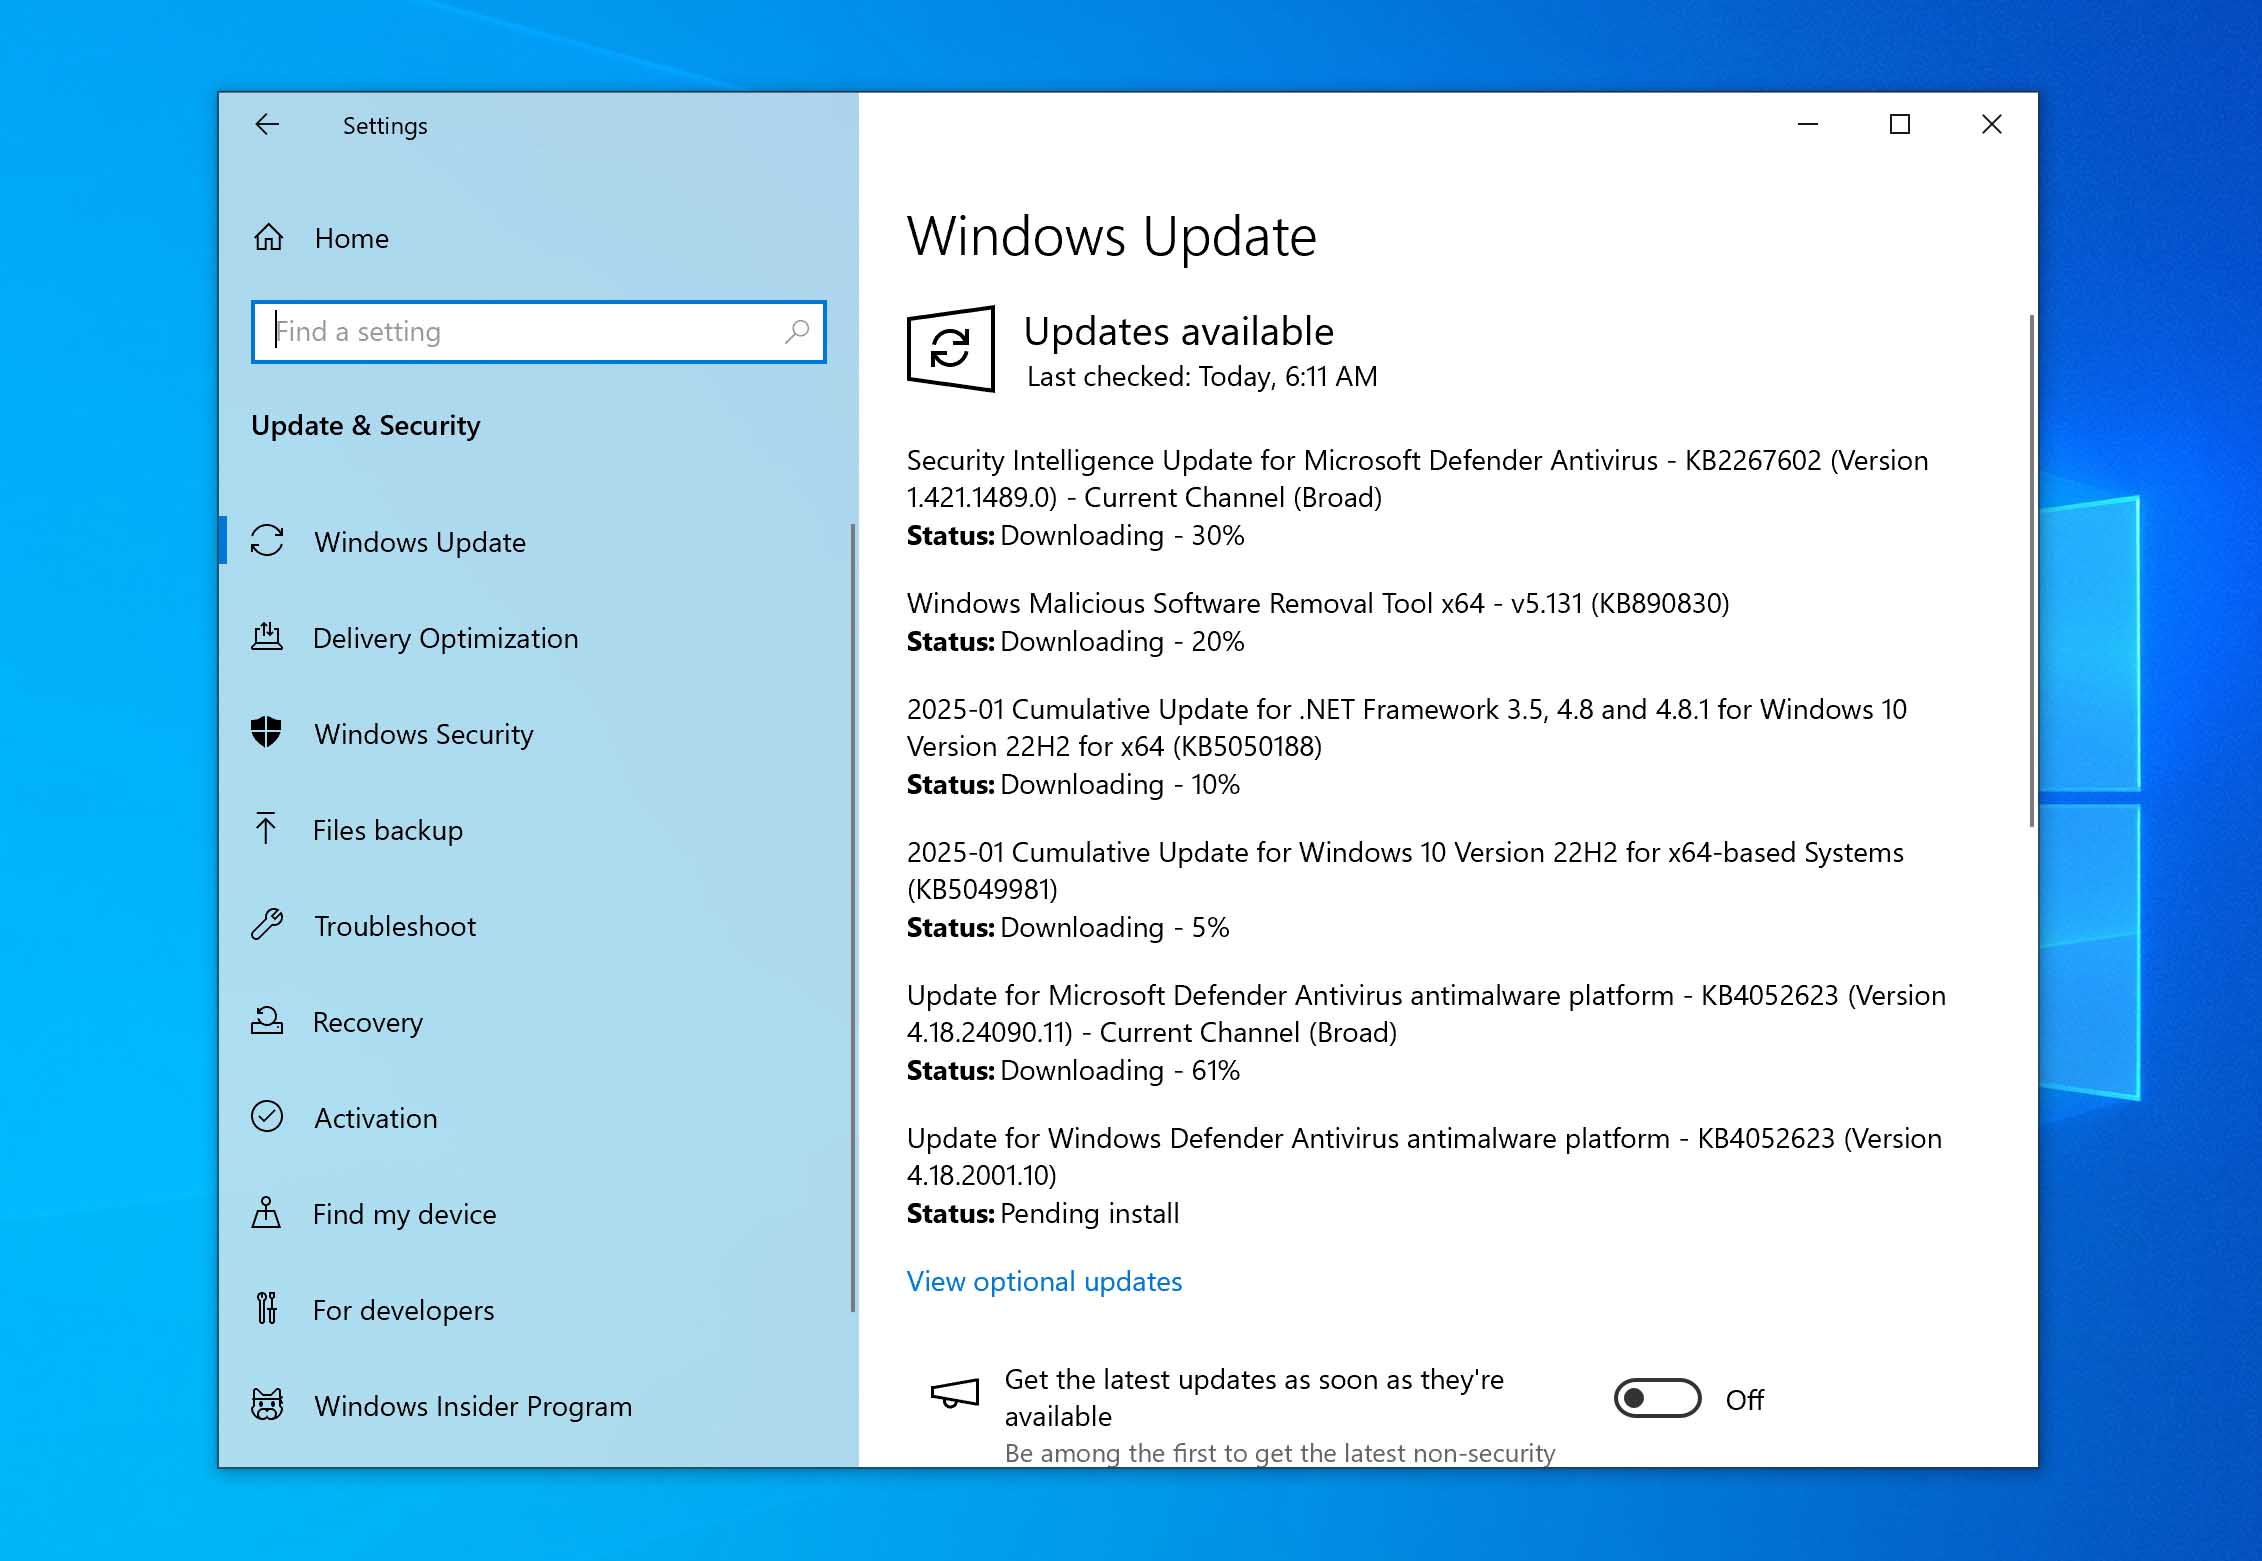
This may improve the overall performance of your system including that of your hard drive.
Way 3: Disable Windows Search
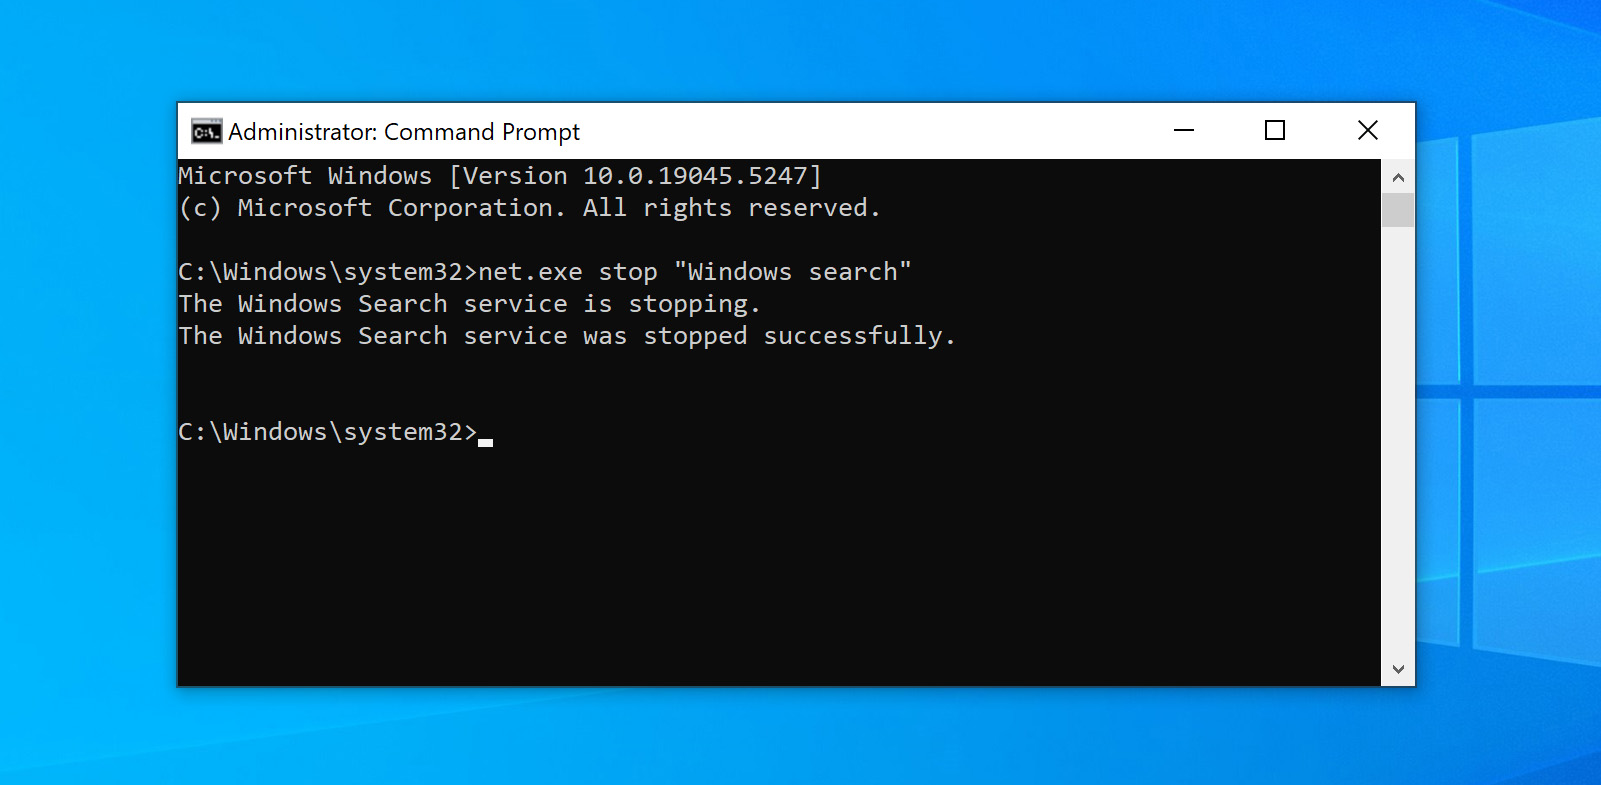
A known bug in Windows 8 and 10 can cause a search loop that can be the cause of your high disk usage. To temporarily stop the Windows Search facility and see if it improves your disk issue, open an admin prompt and enter the command: net.exe stop “Windows search”. This will stop Windows search from running until the next time Windows is restarted.
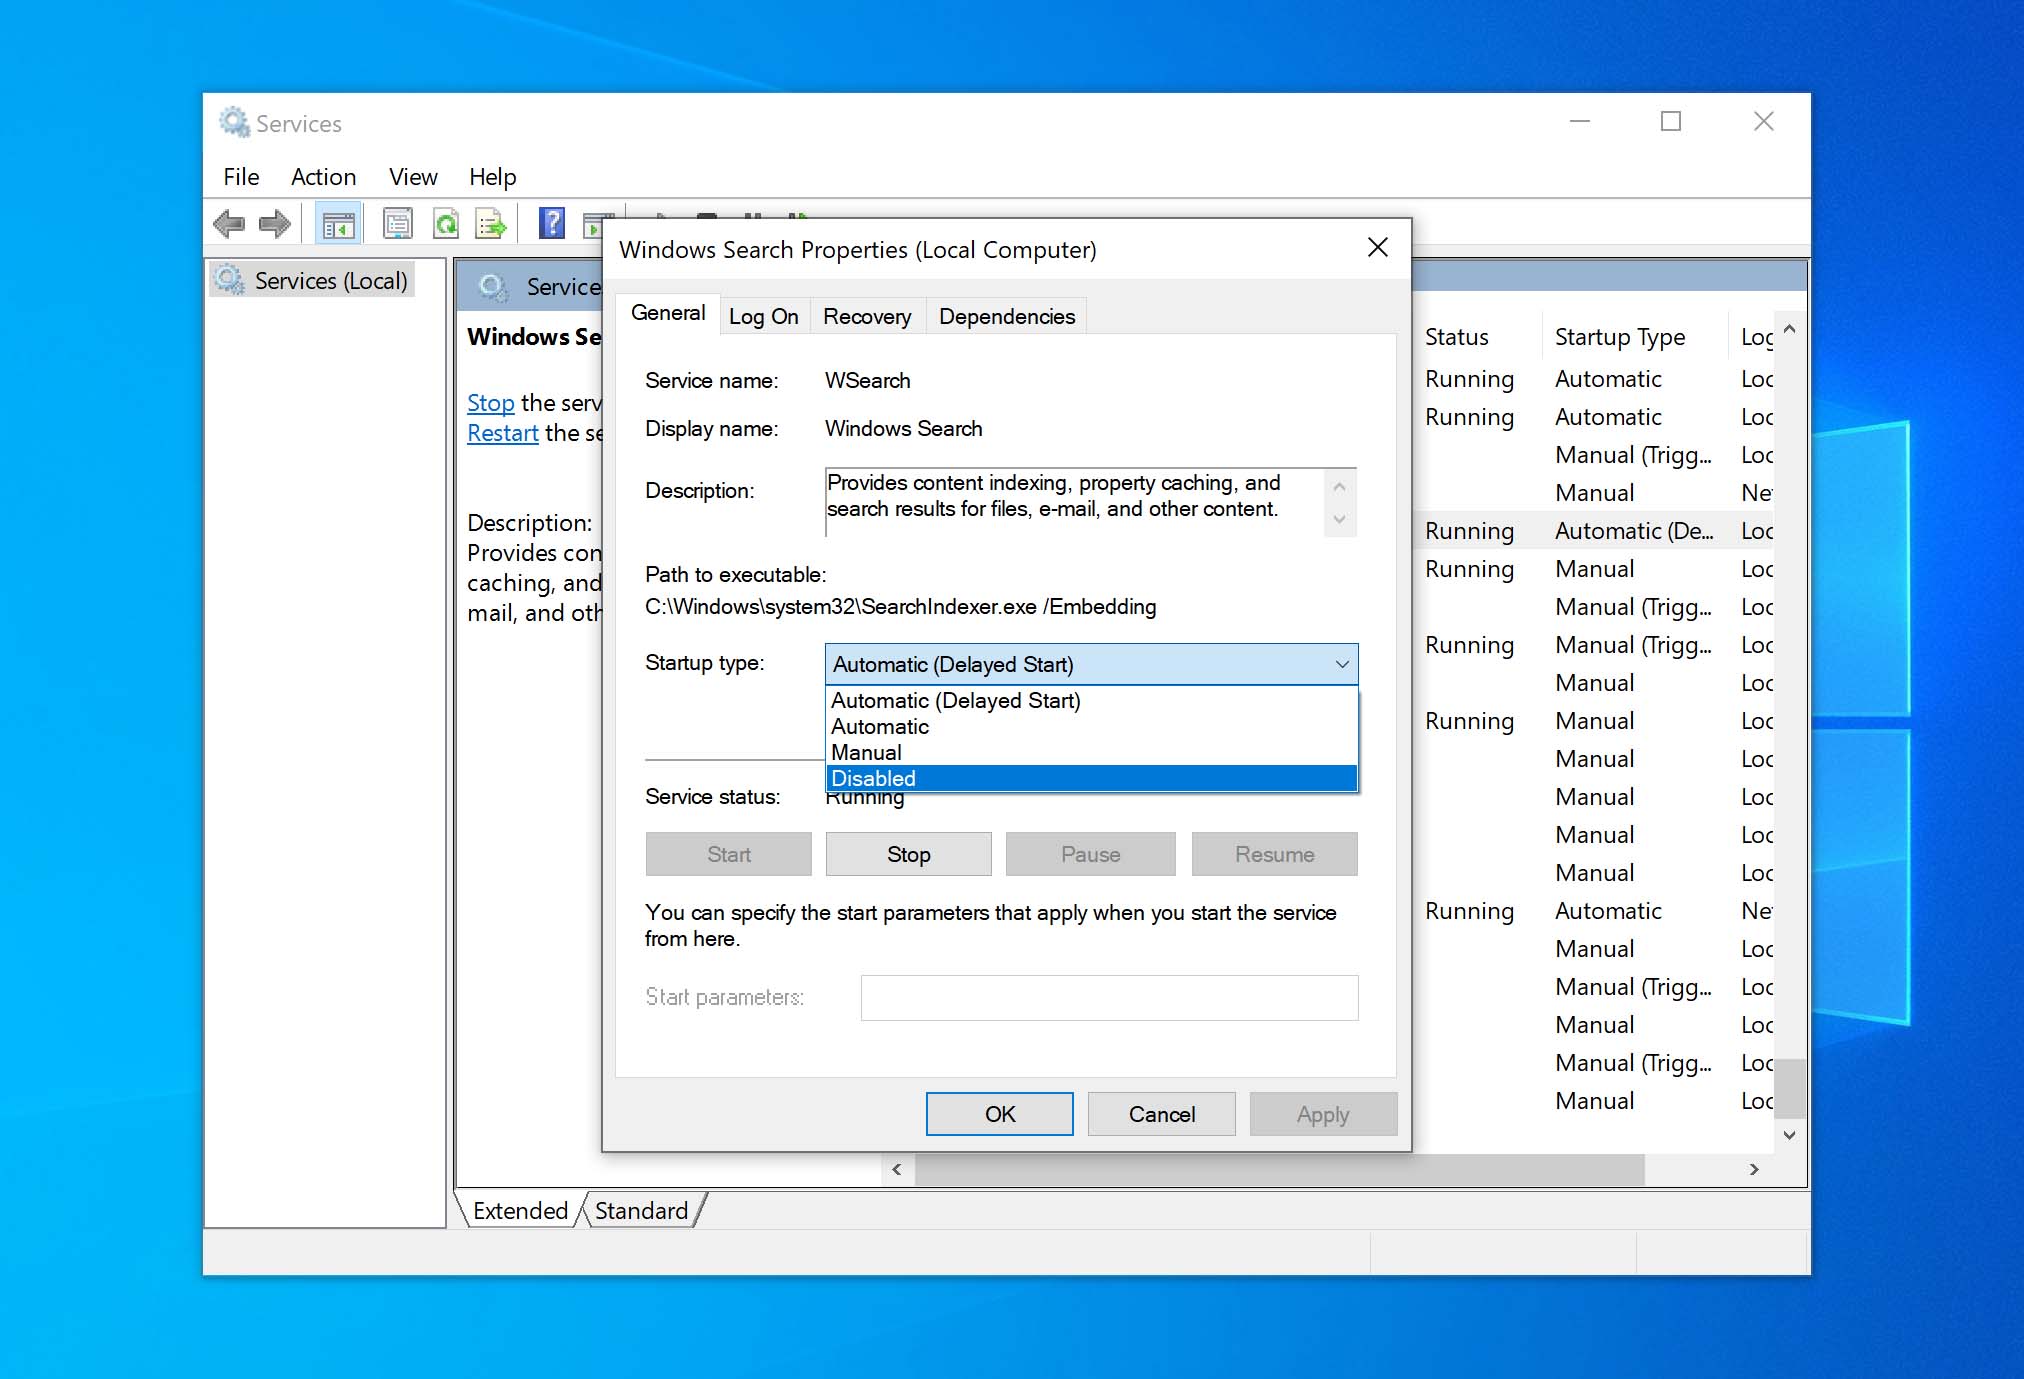
If it turns out that Windows Search was responsible for your Windows 10 disk usage reaching 100%, you can disable it permanently by following this procedure:
- Press the Windows key + R, enter services.msc and hit Enter.
- The services window will open. Select the Windows Search entry and double-click it to update its properties.
- Select Disabled under Startup type and then OK to save your changes.
Way 4: Disable Automatic Startup
Upon launching, Windows will automatically start a number of applications and processes. Some of them are essential to the performance of your PC. Others, not so much. Unnecessary programs launching at Windows startup will passively run in the background, increasing your disk usage and providing no benefit.
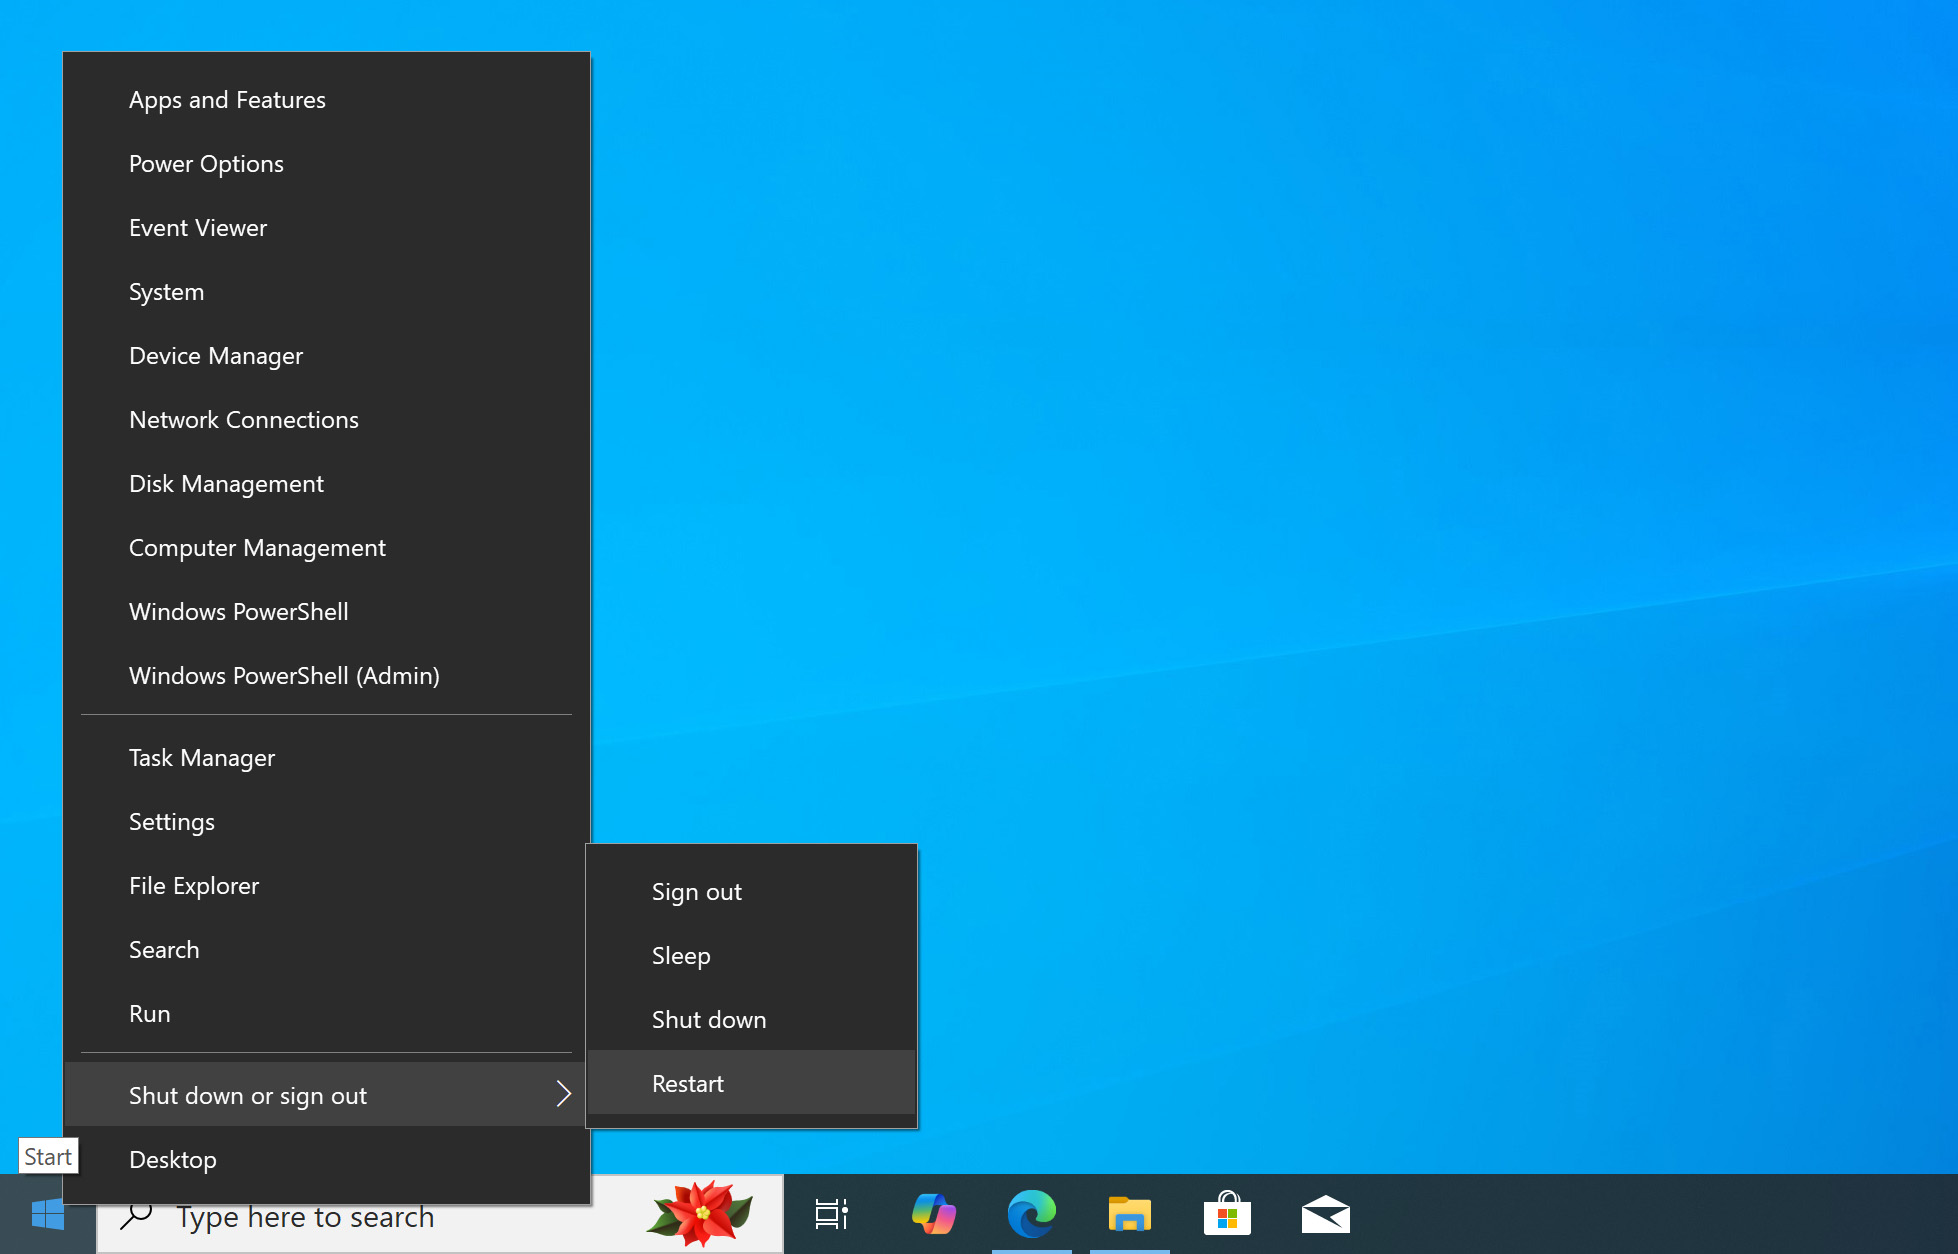
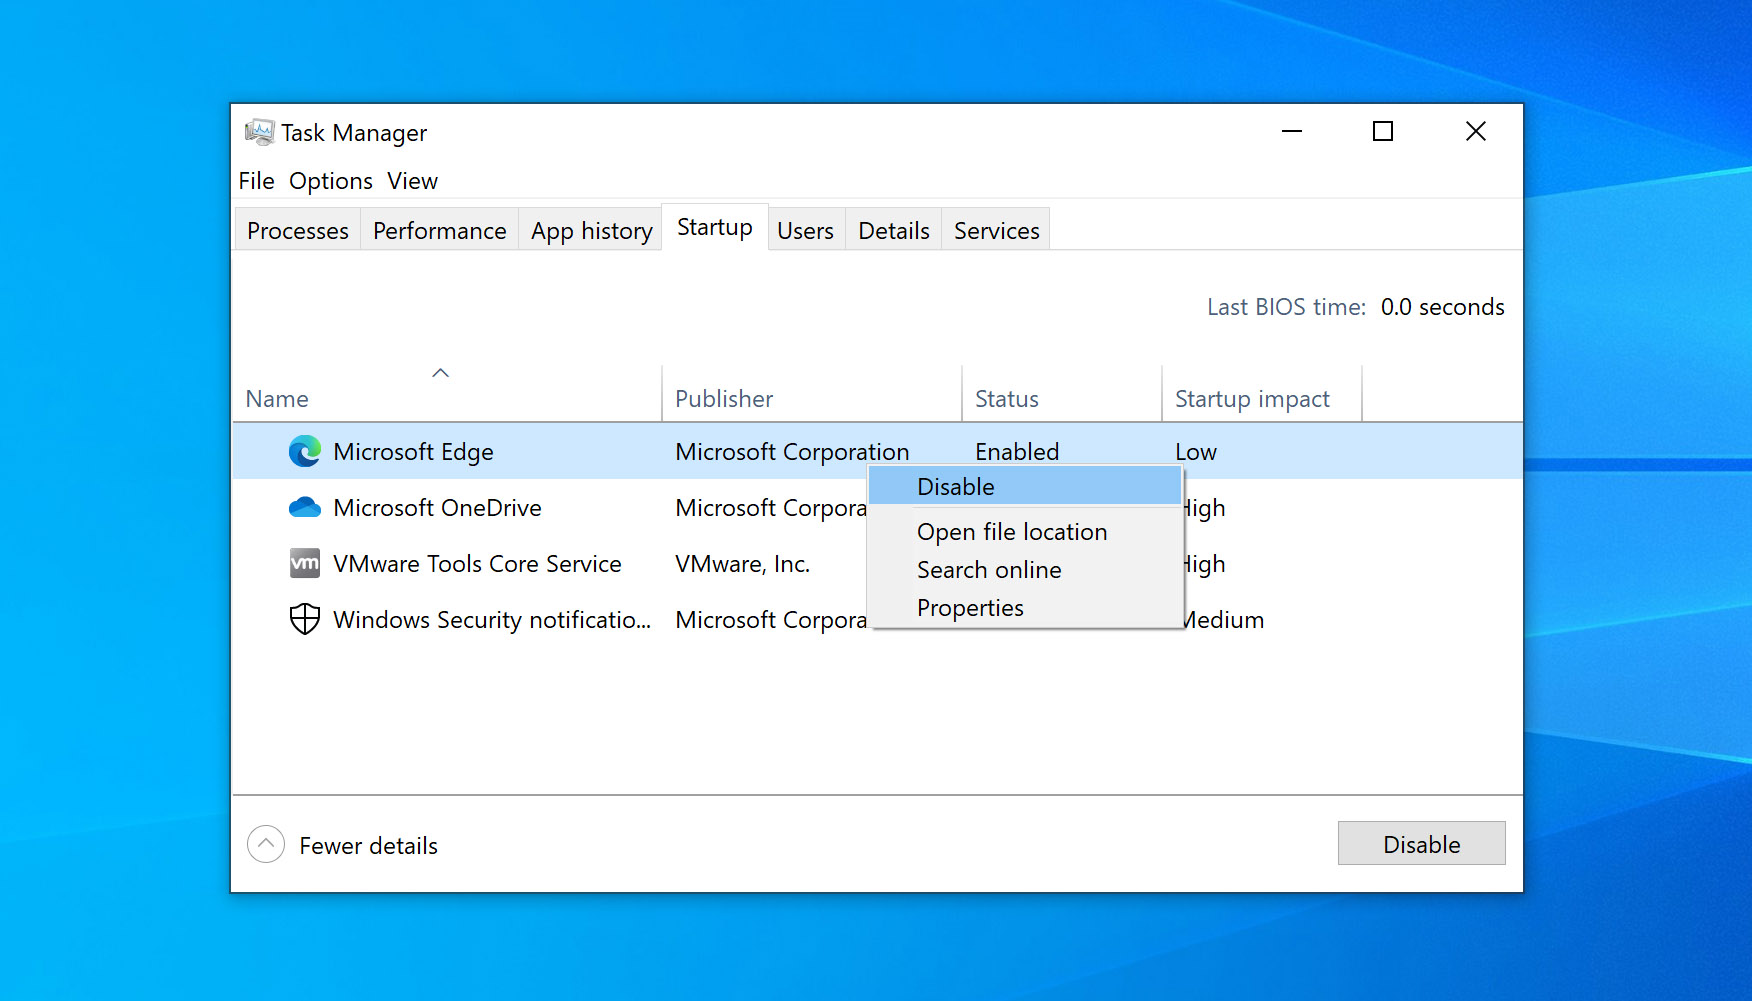
You can fix 100 percent disk usage by disabling auto startup using these steps:
- Right-click Start and open Task Manager.
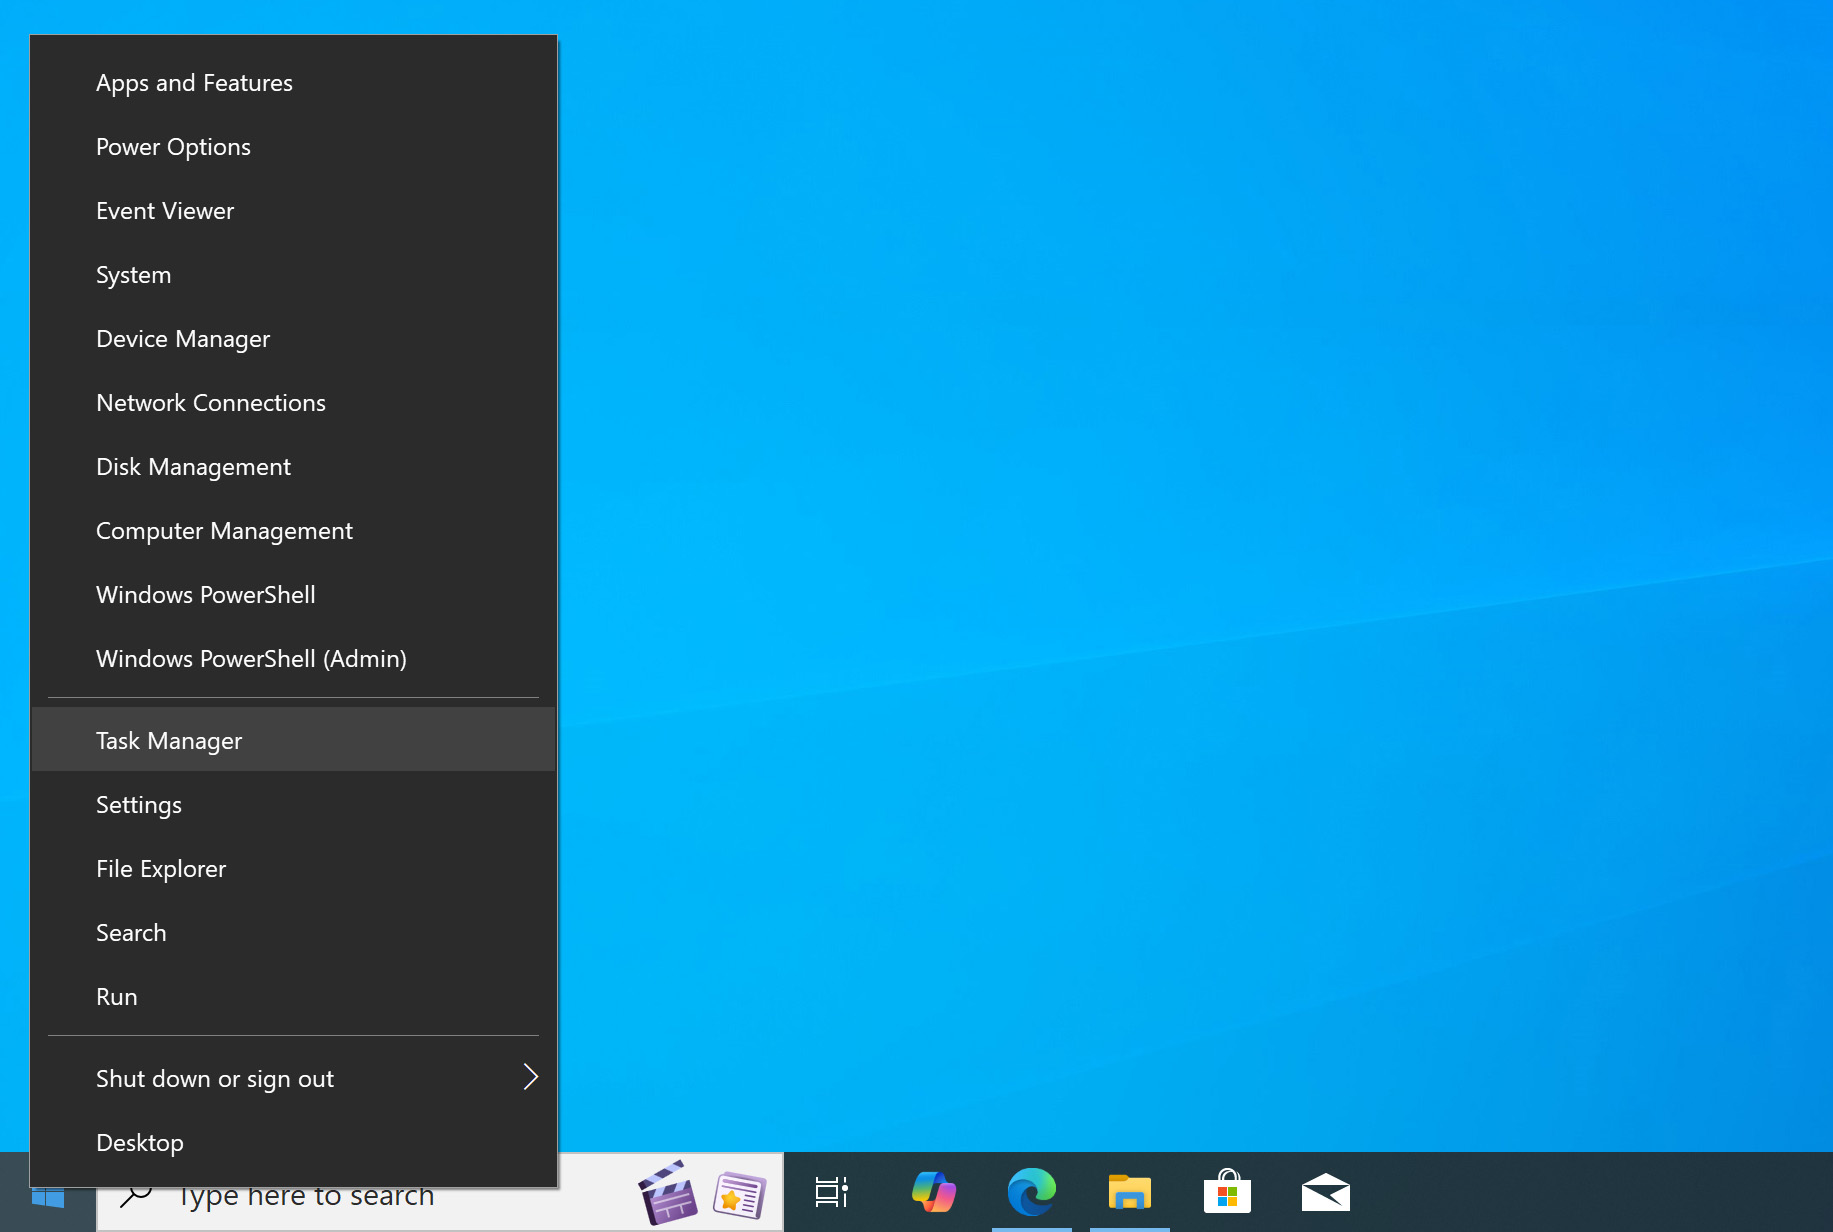
- Click the Startup tab.
- Locate the programs that you don’t want to run at startup. Right-click each one and click Disable.
- Reboot your computer and review.
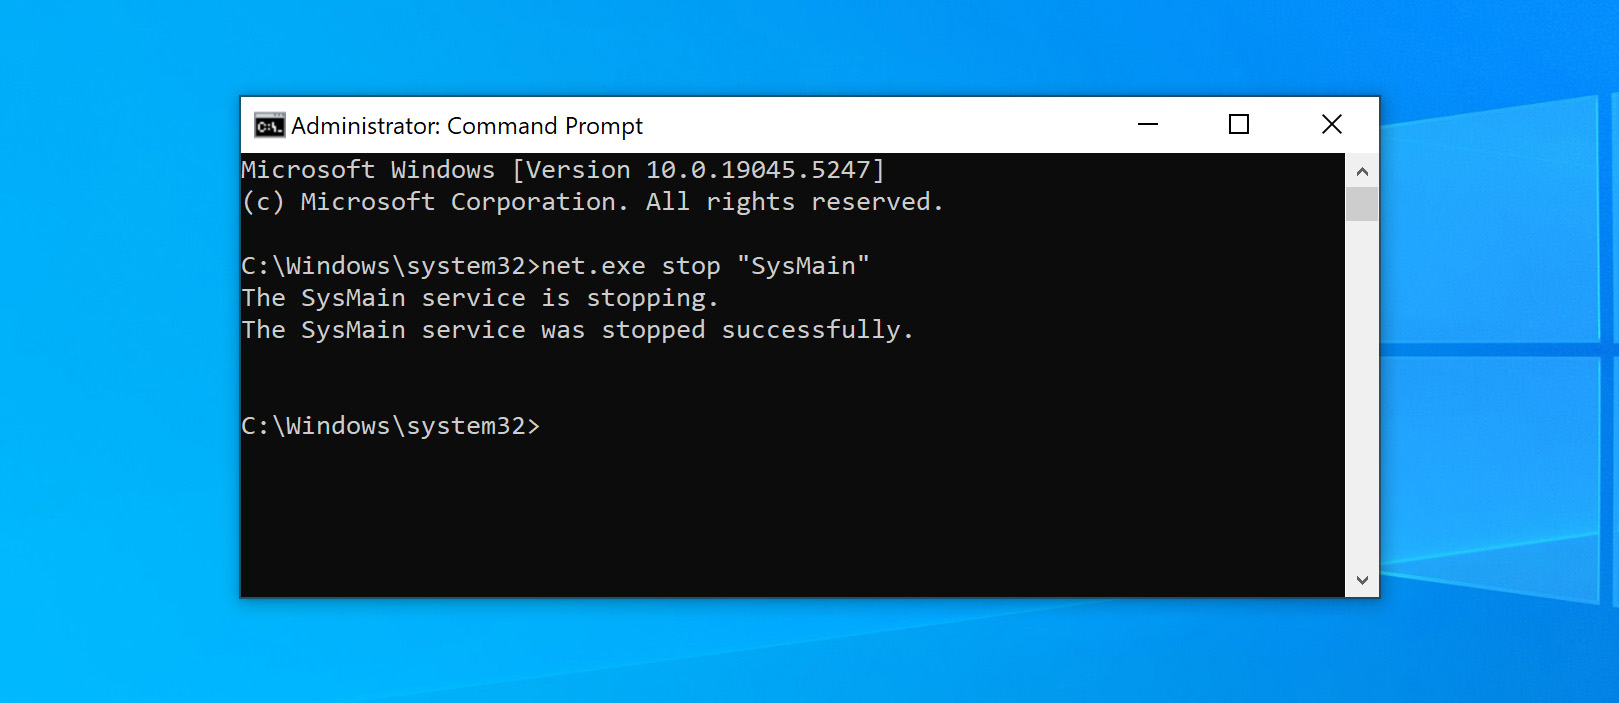
Way 5: Stop the Superfetch Service
Another Windows 10 feature that can cause problems is the Windows Superfetch service. You can disable this service temporarily in a similar fashion to Windows search with the command: net.exe stop "SysMain".
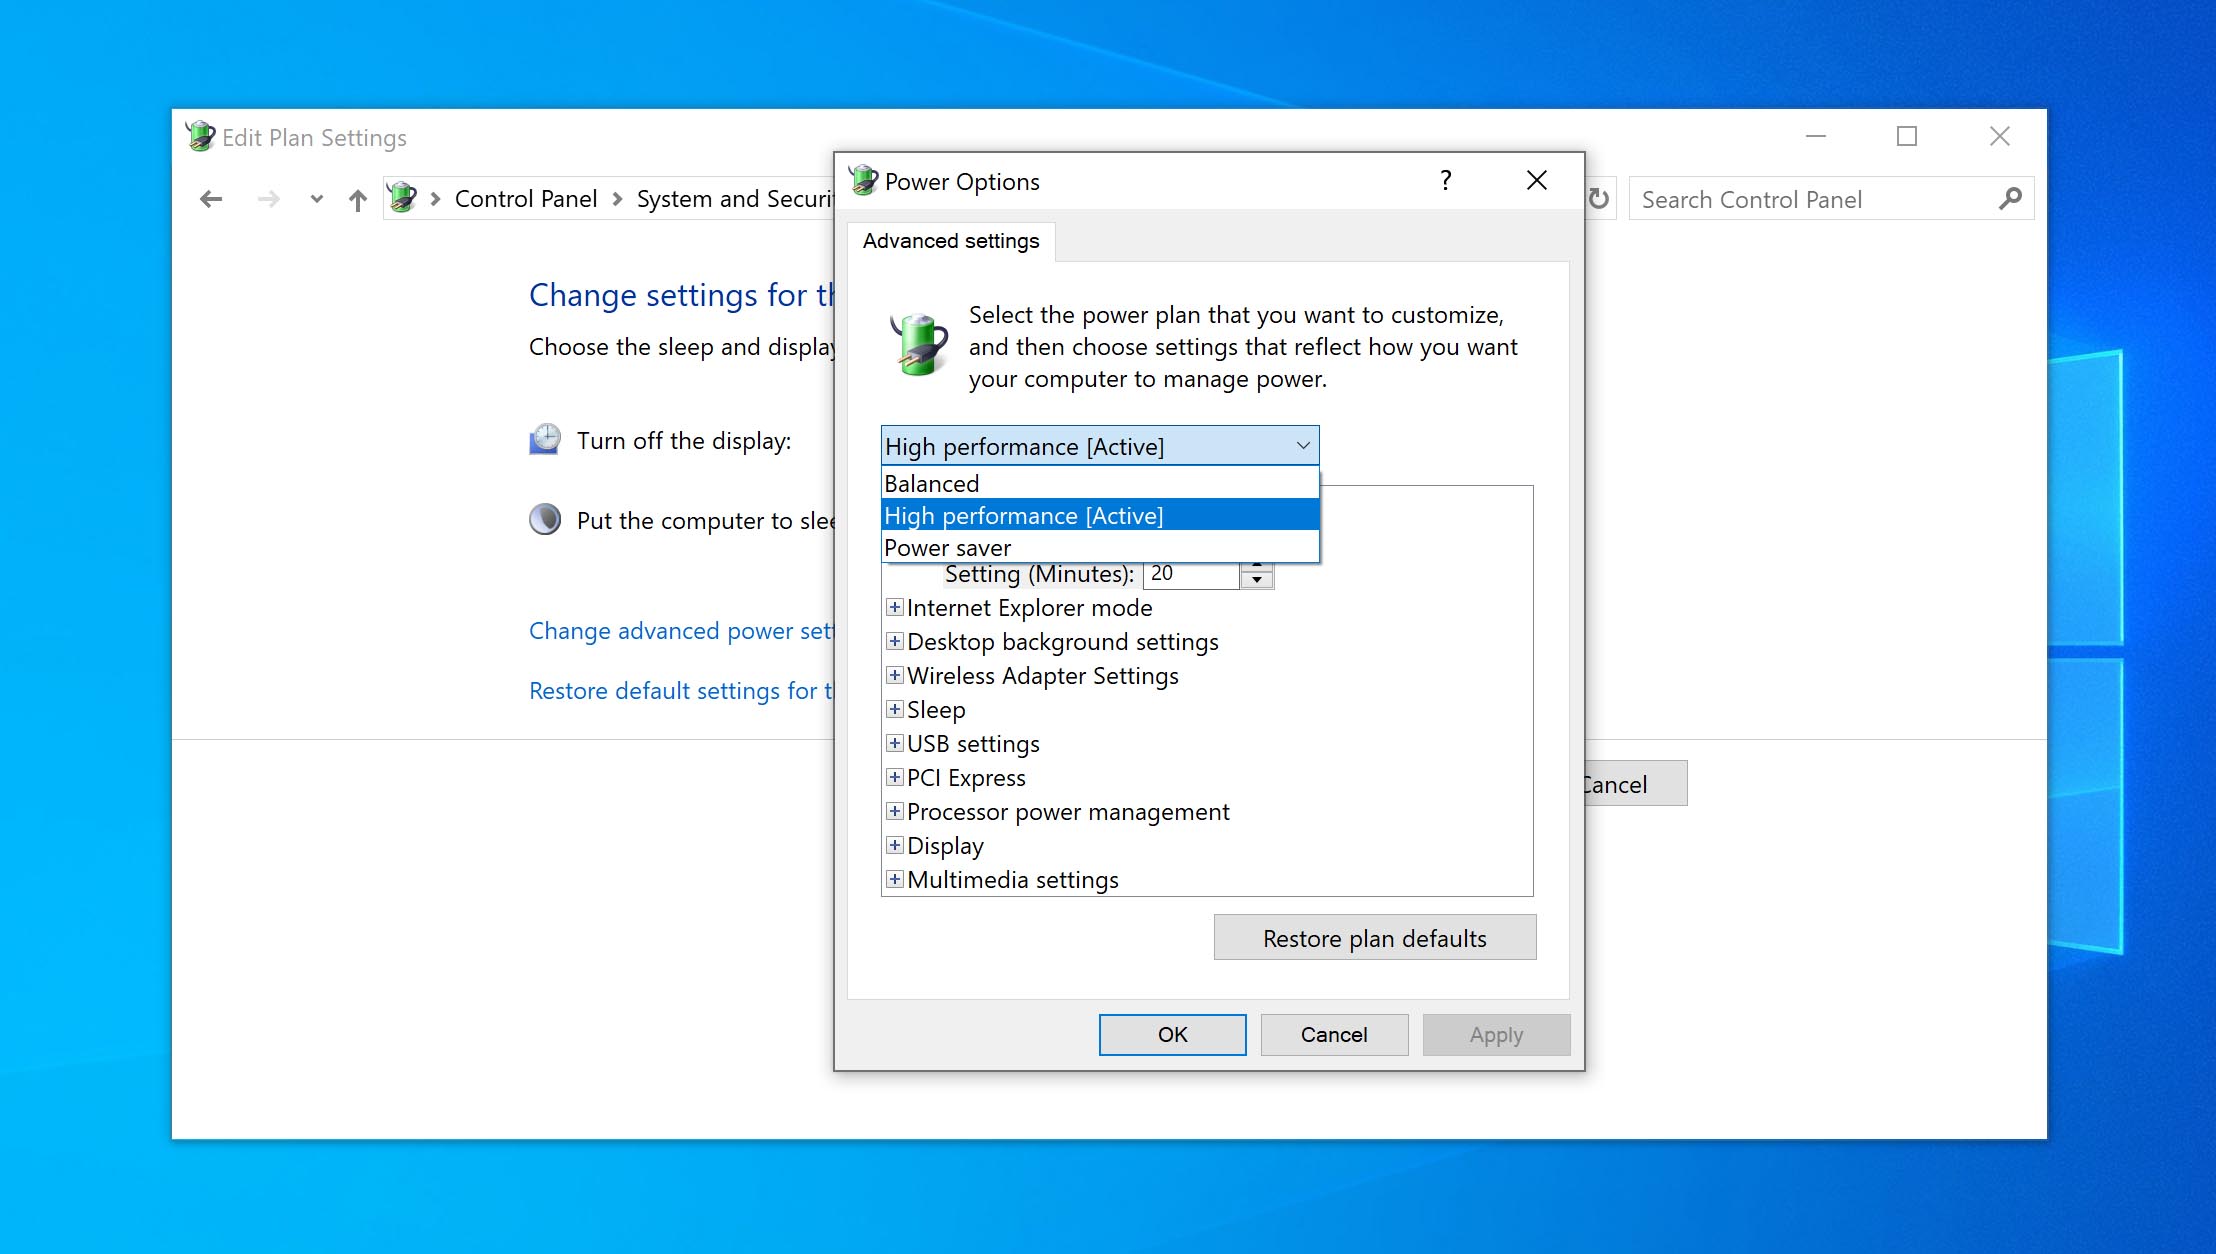
Way 6: Change Energy Options from Balanced to High Performance
This change of energy settings seems to have worked for a number of users who have experienced 100% disk usage on Windows 10. Laptop users will have a more noticeable impact rather than desktop users. Use this procedure:
- Go to Power Options > Change plan settings > Change advanced power settings.
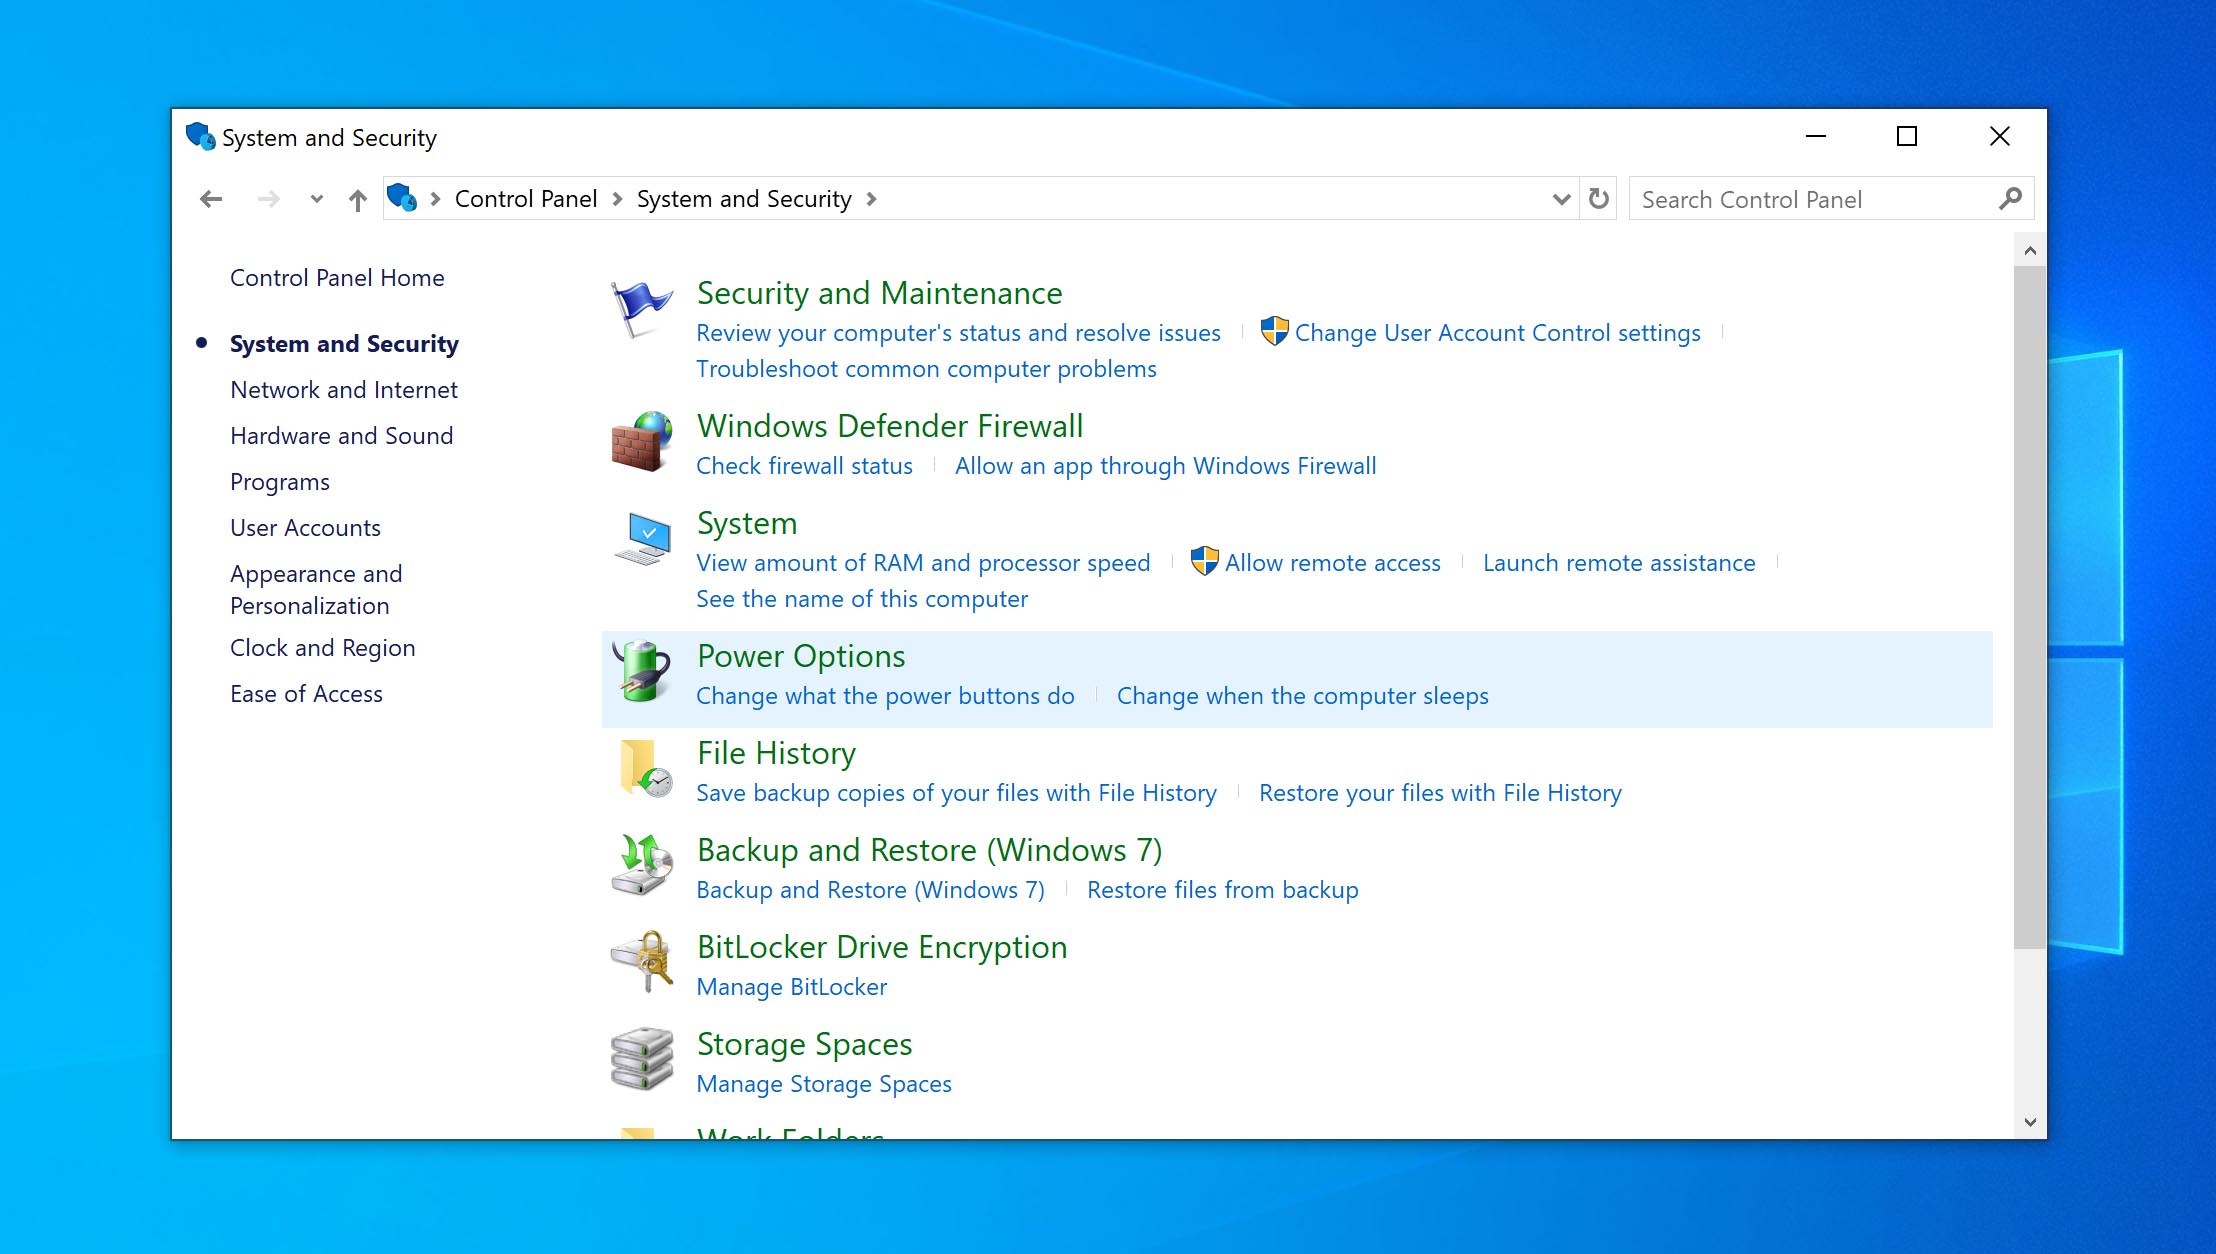
- Select the High-performance option from the drop-down box and make sure all plan settings are set to their defaults.
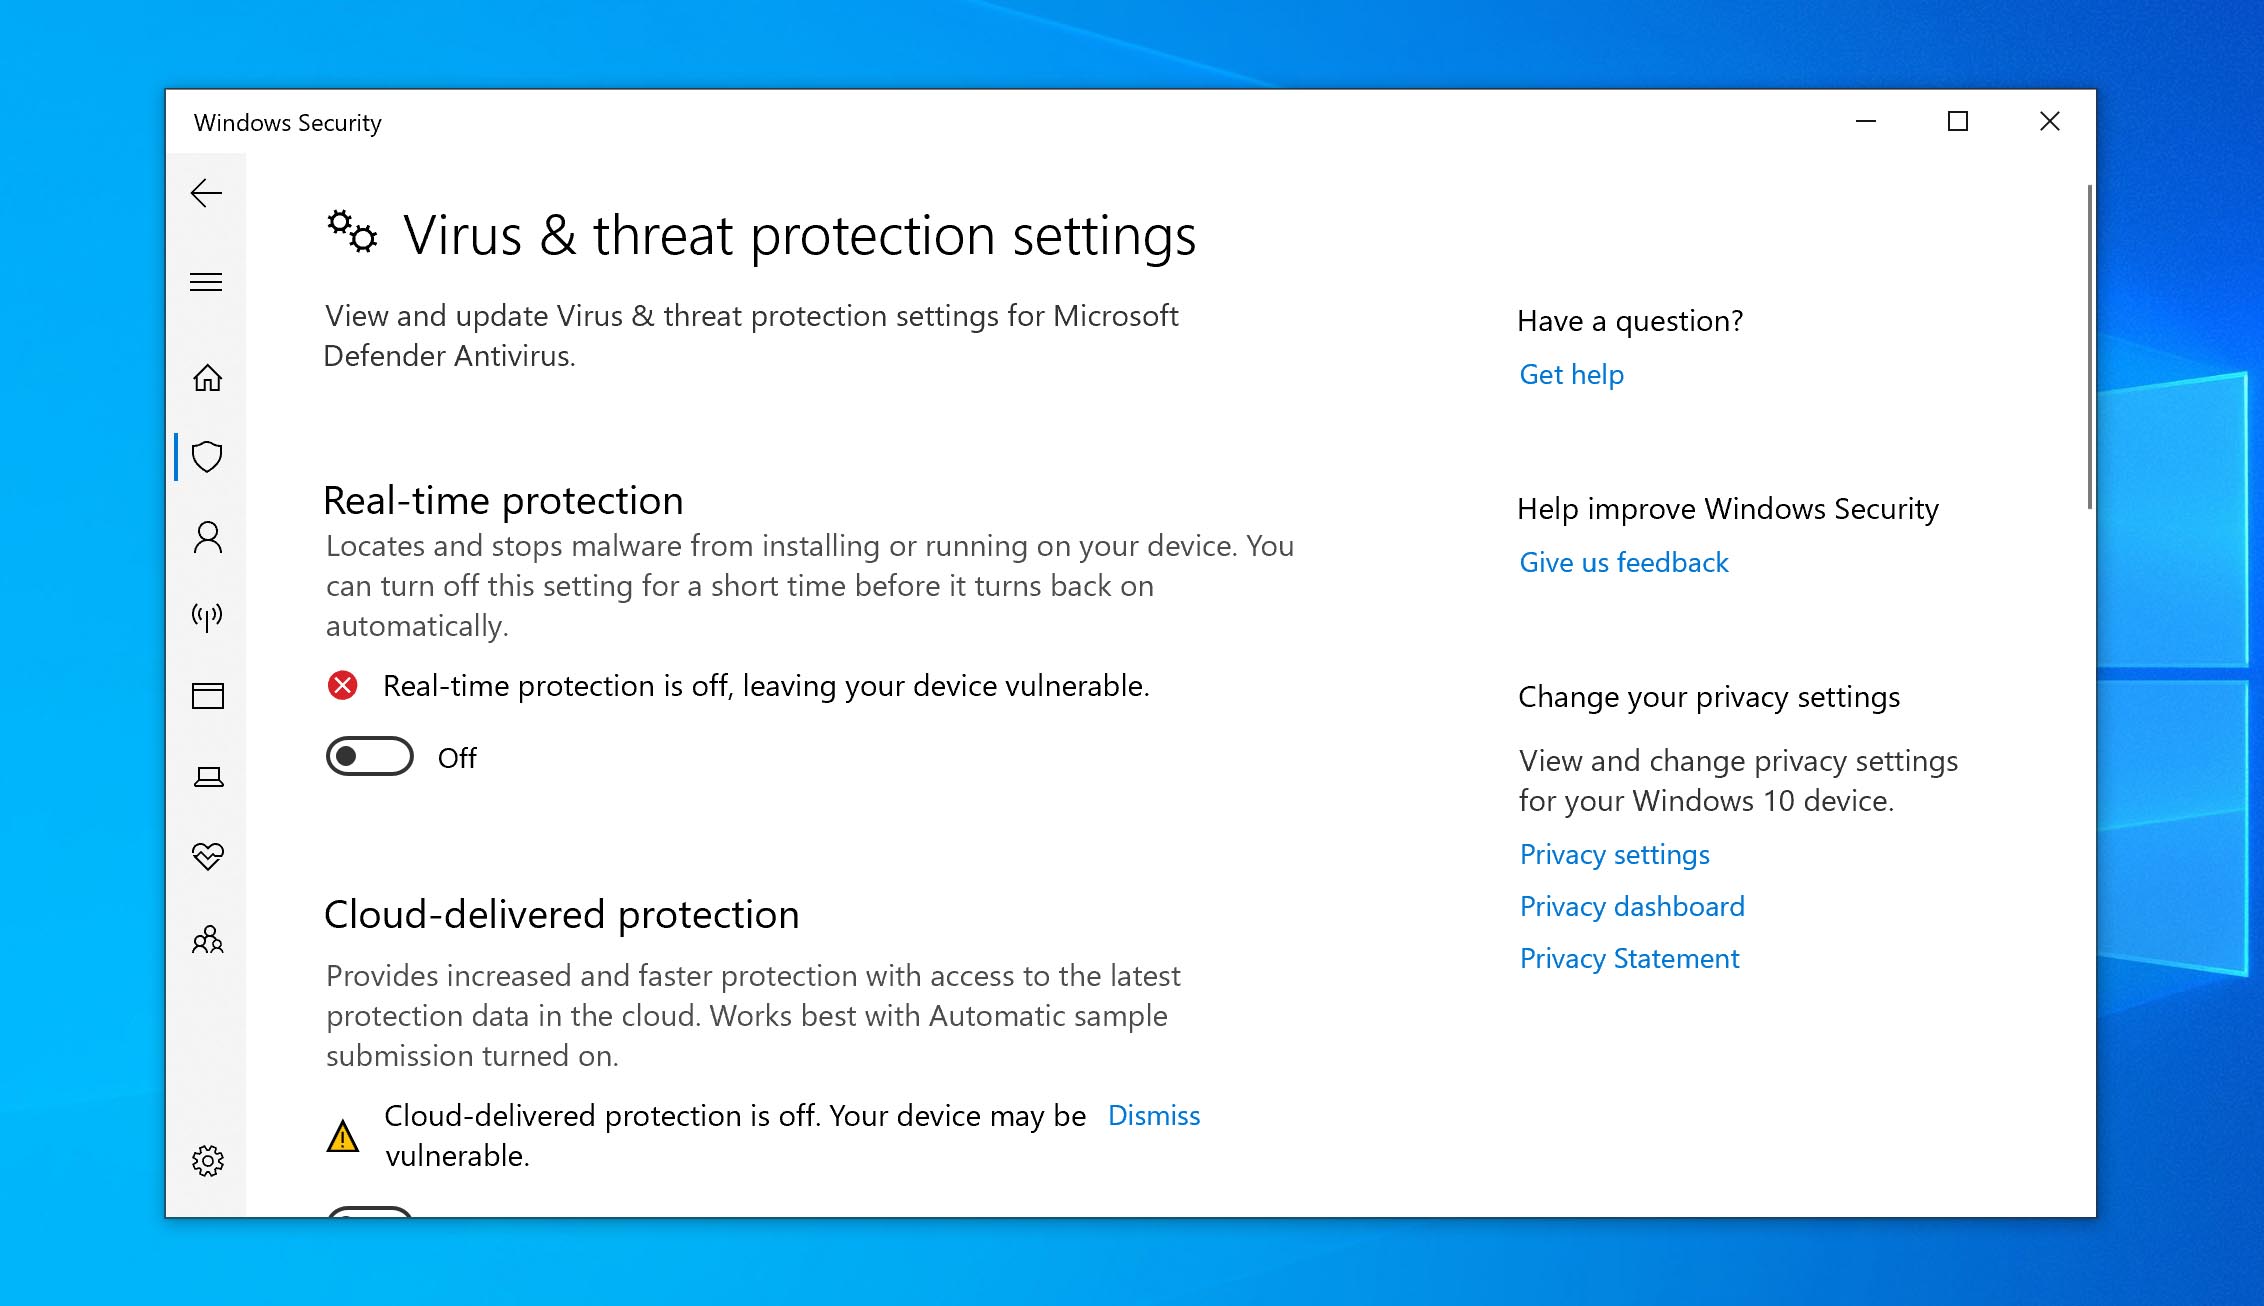
Way 7: Temporarily Turn Off Your Antivirus Software
Another step to take when investigating the cause behind your Windows 10 100% disk usage problem is to turn off your antivirus software temporarily. See if this improves your disk usage. If so, you may want to consider changing antivirus packages. Even Windows Defender can cause problems by increasing I/O and network usage which might lead to high disk usage.
Way 8: Reset Virtual Memory in Windows 10
Virtual memory treats your disk as if it is RAM and uses it to swap out temporary files when it runs out of actual RAM. Errors in the pagefile.sys can cause 100% disk usage on your Windows 10 machine. The remedy to this problem is to reset your virtual memory settings.
Follow these steps to reset your virtual memory:
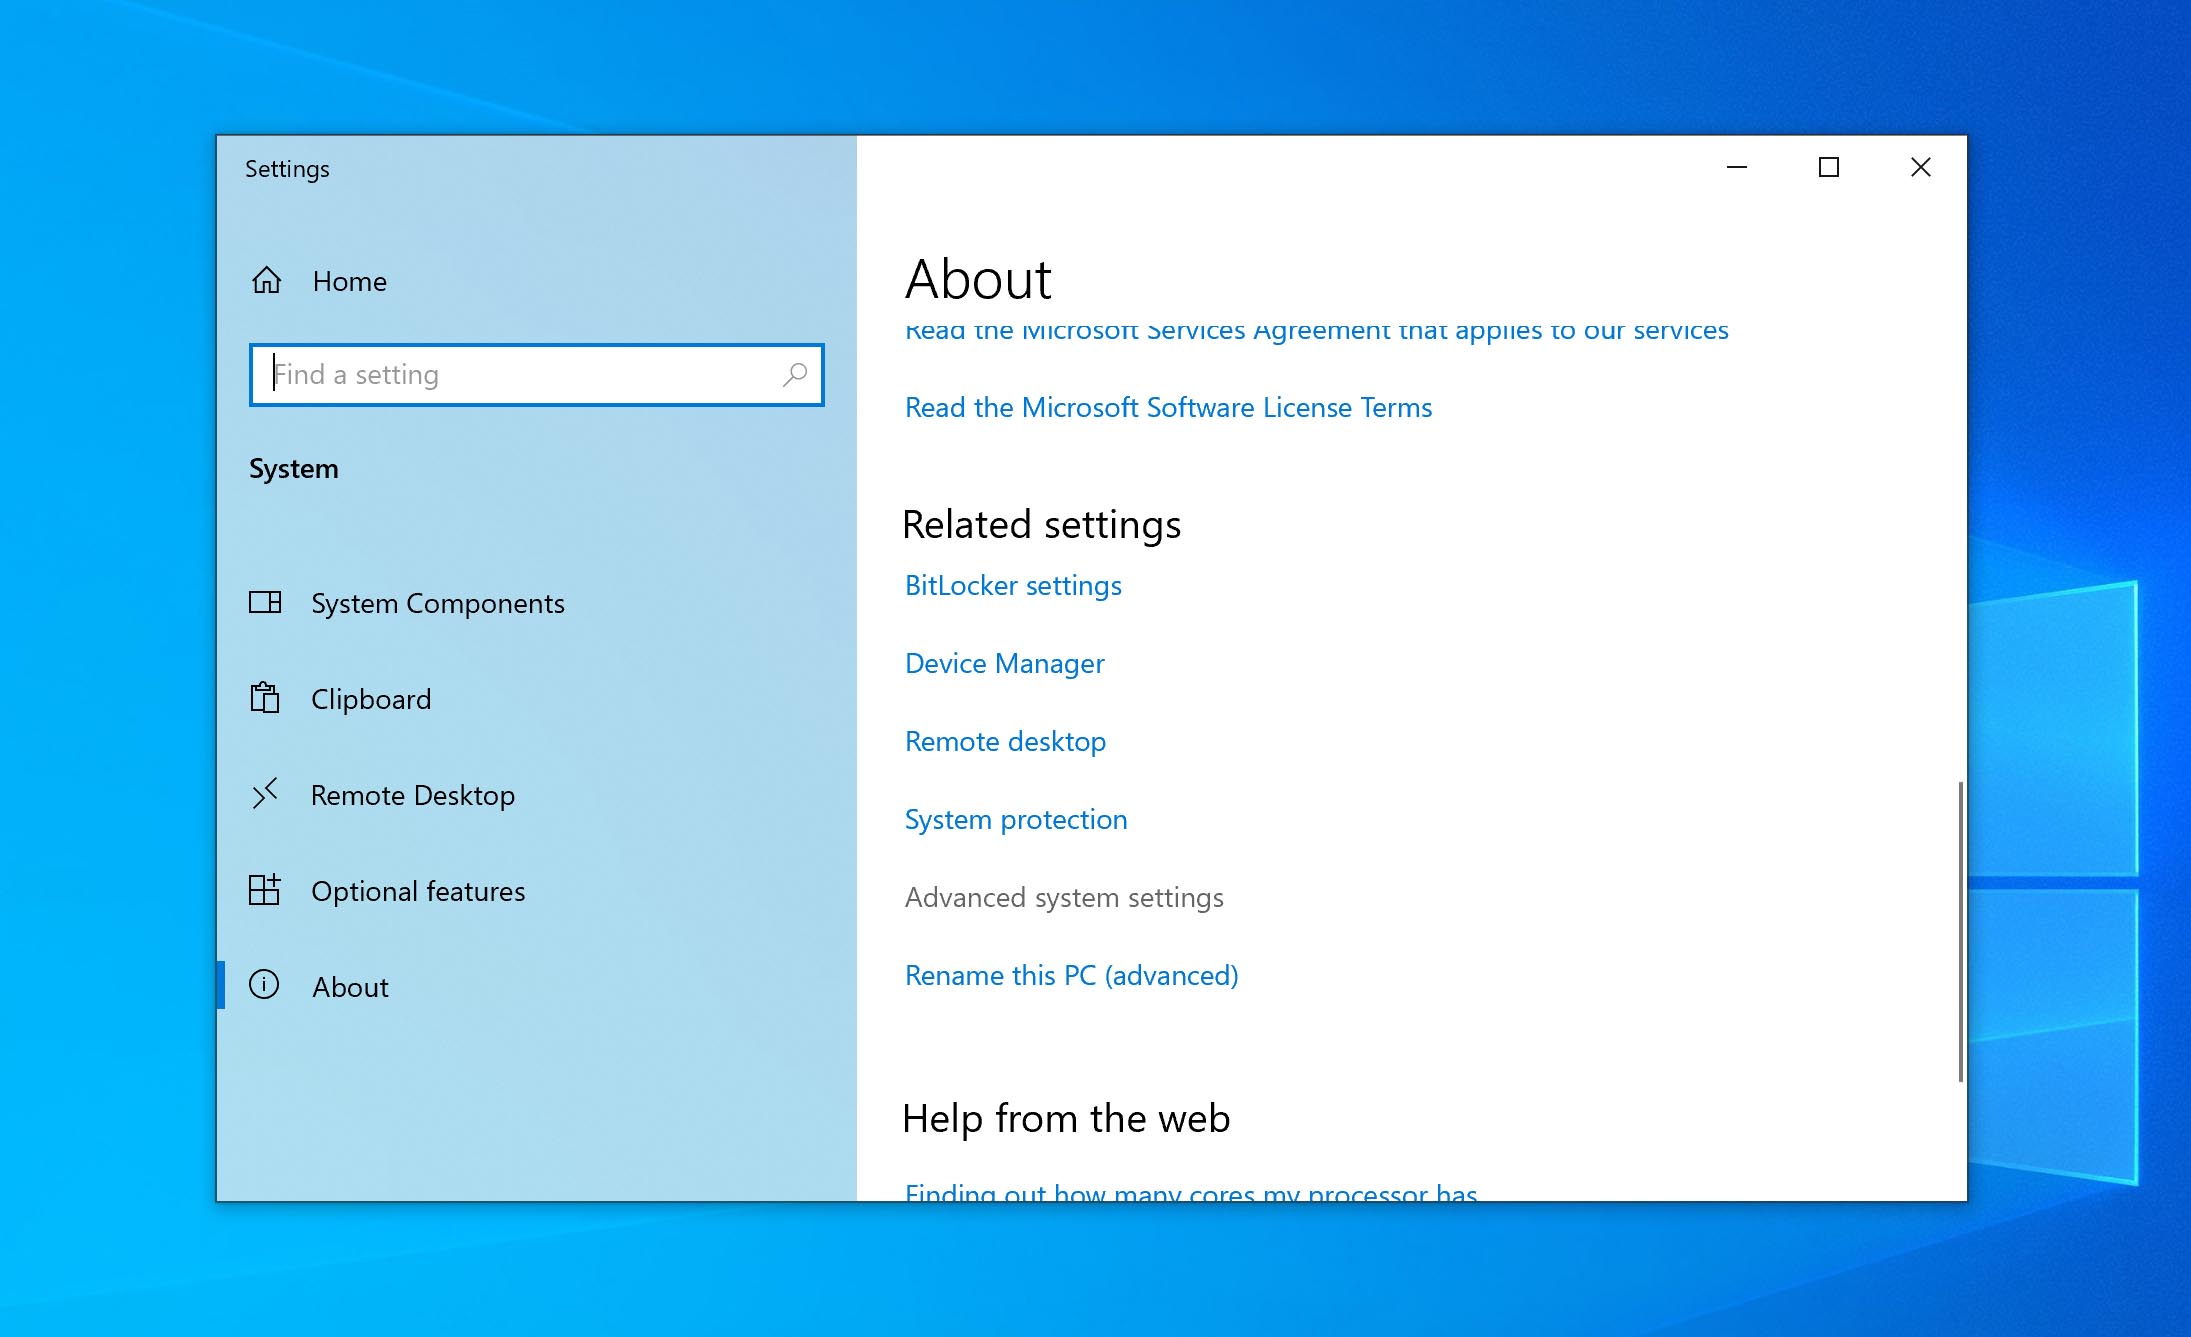
- In your computer’s “System Properties” you need to click on “Advanced system settings”.
- Click “Settings” in the Performance section.
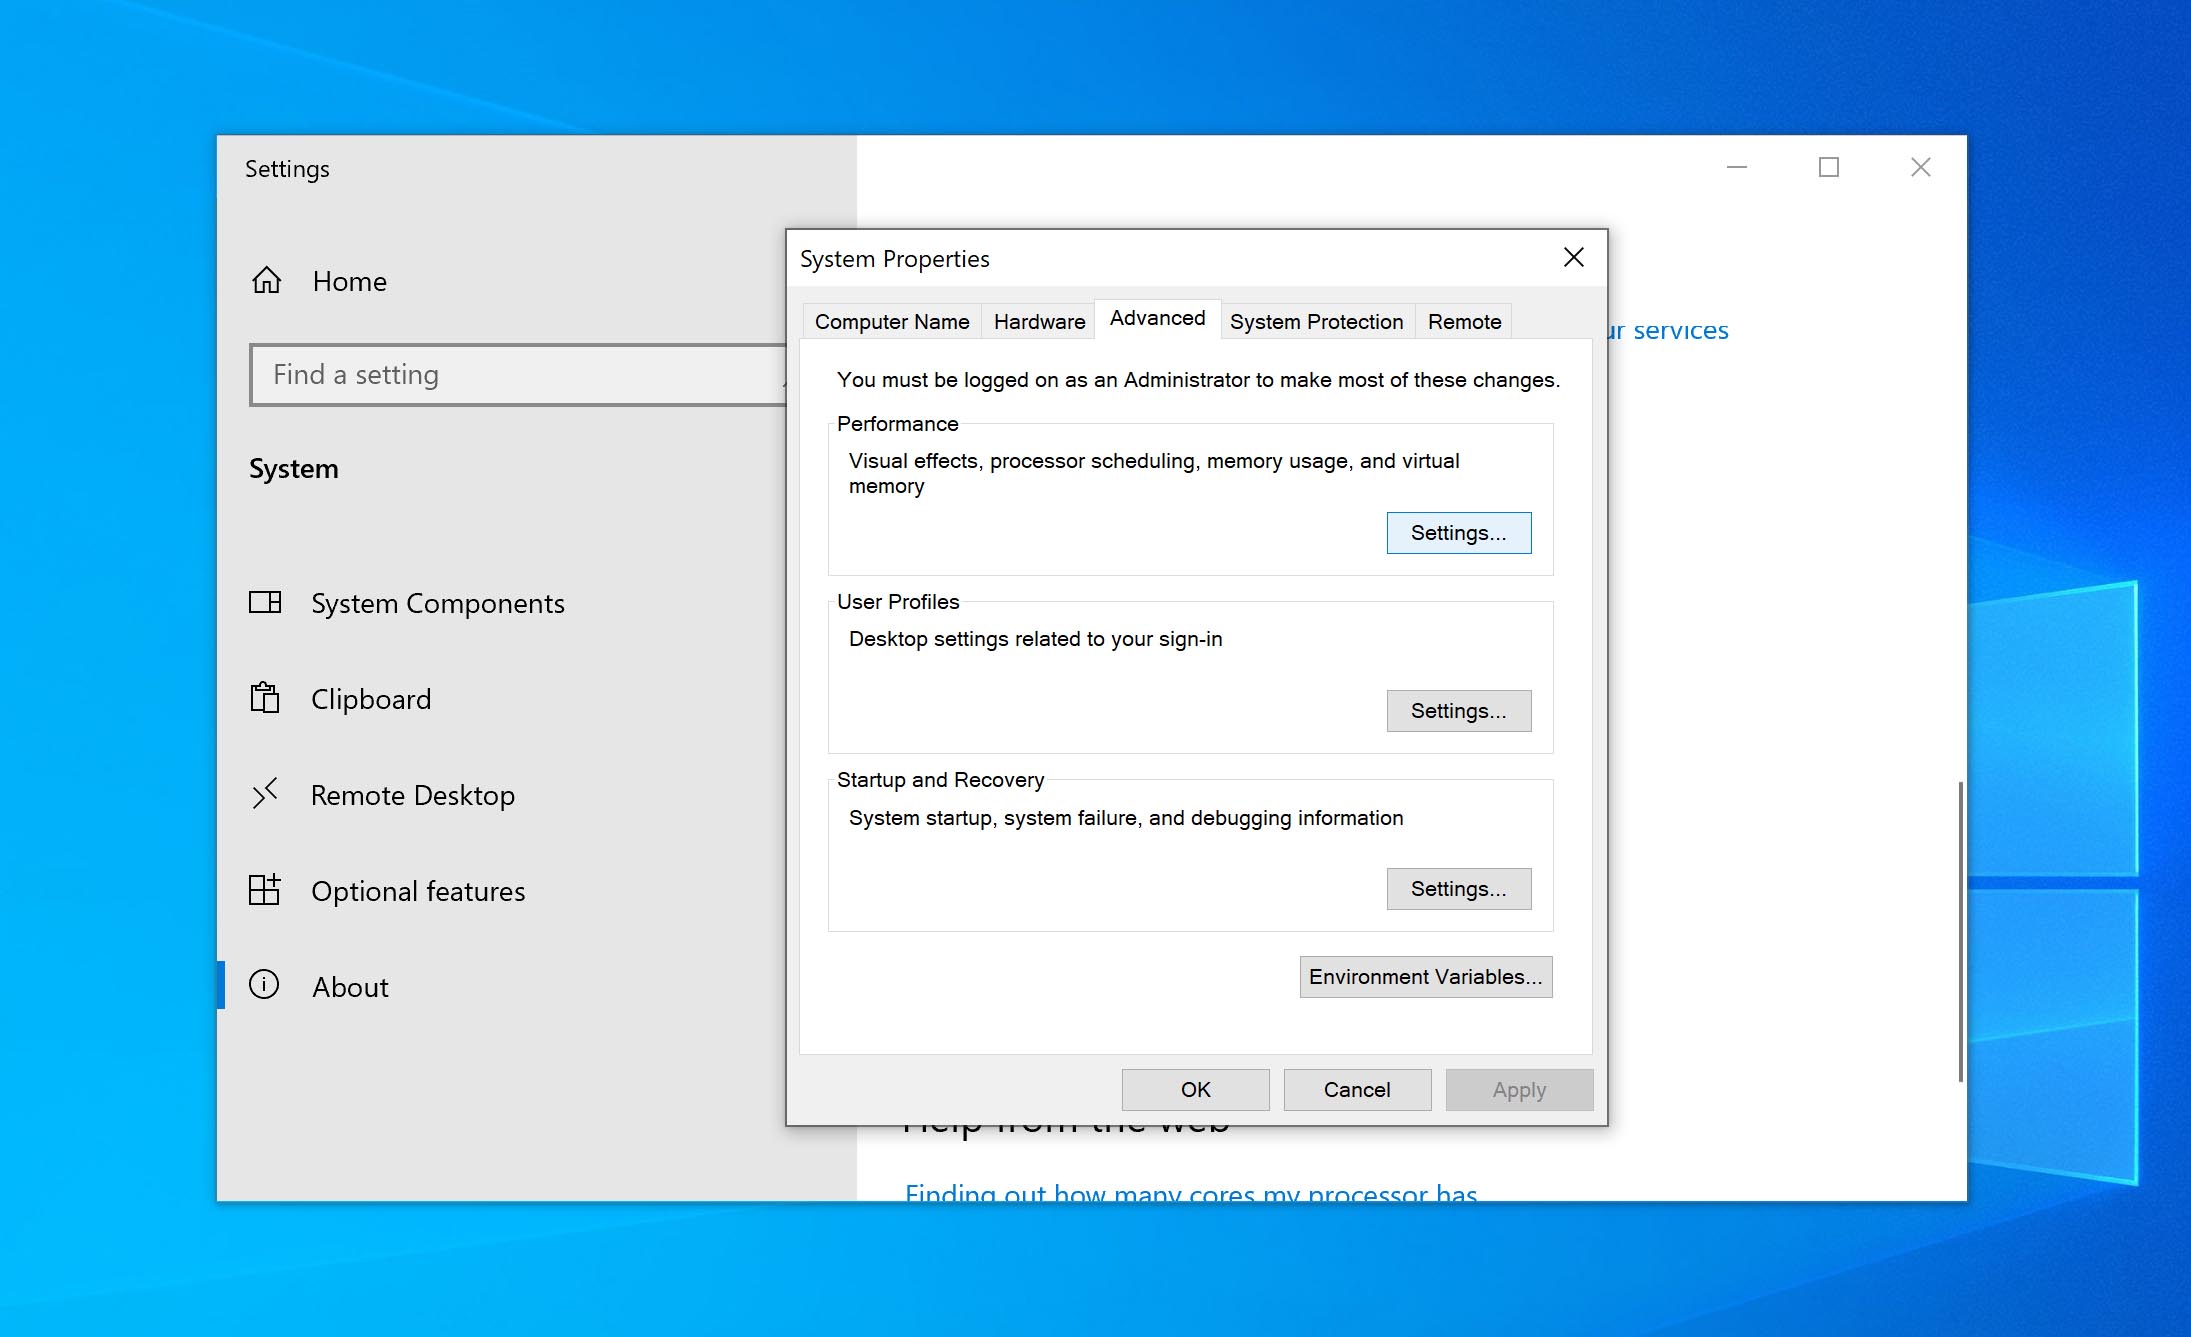
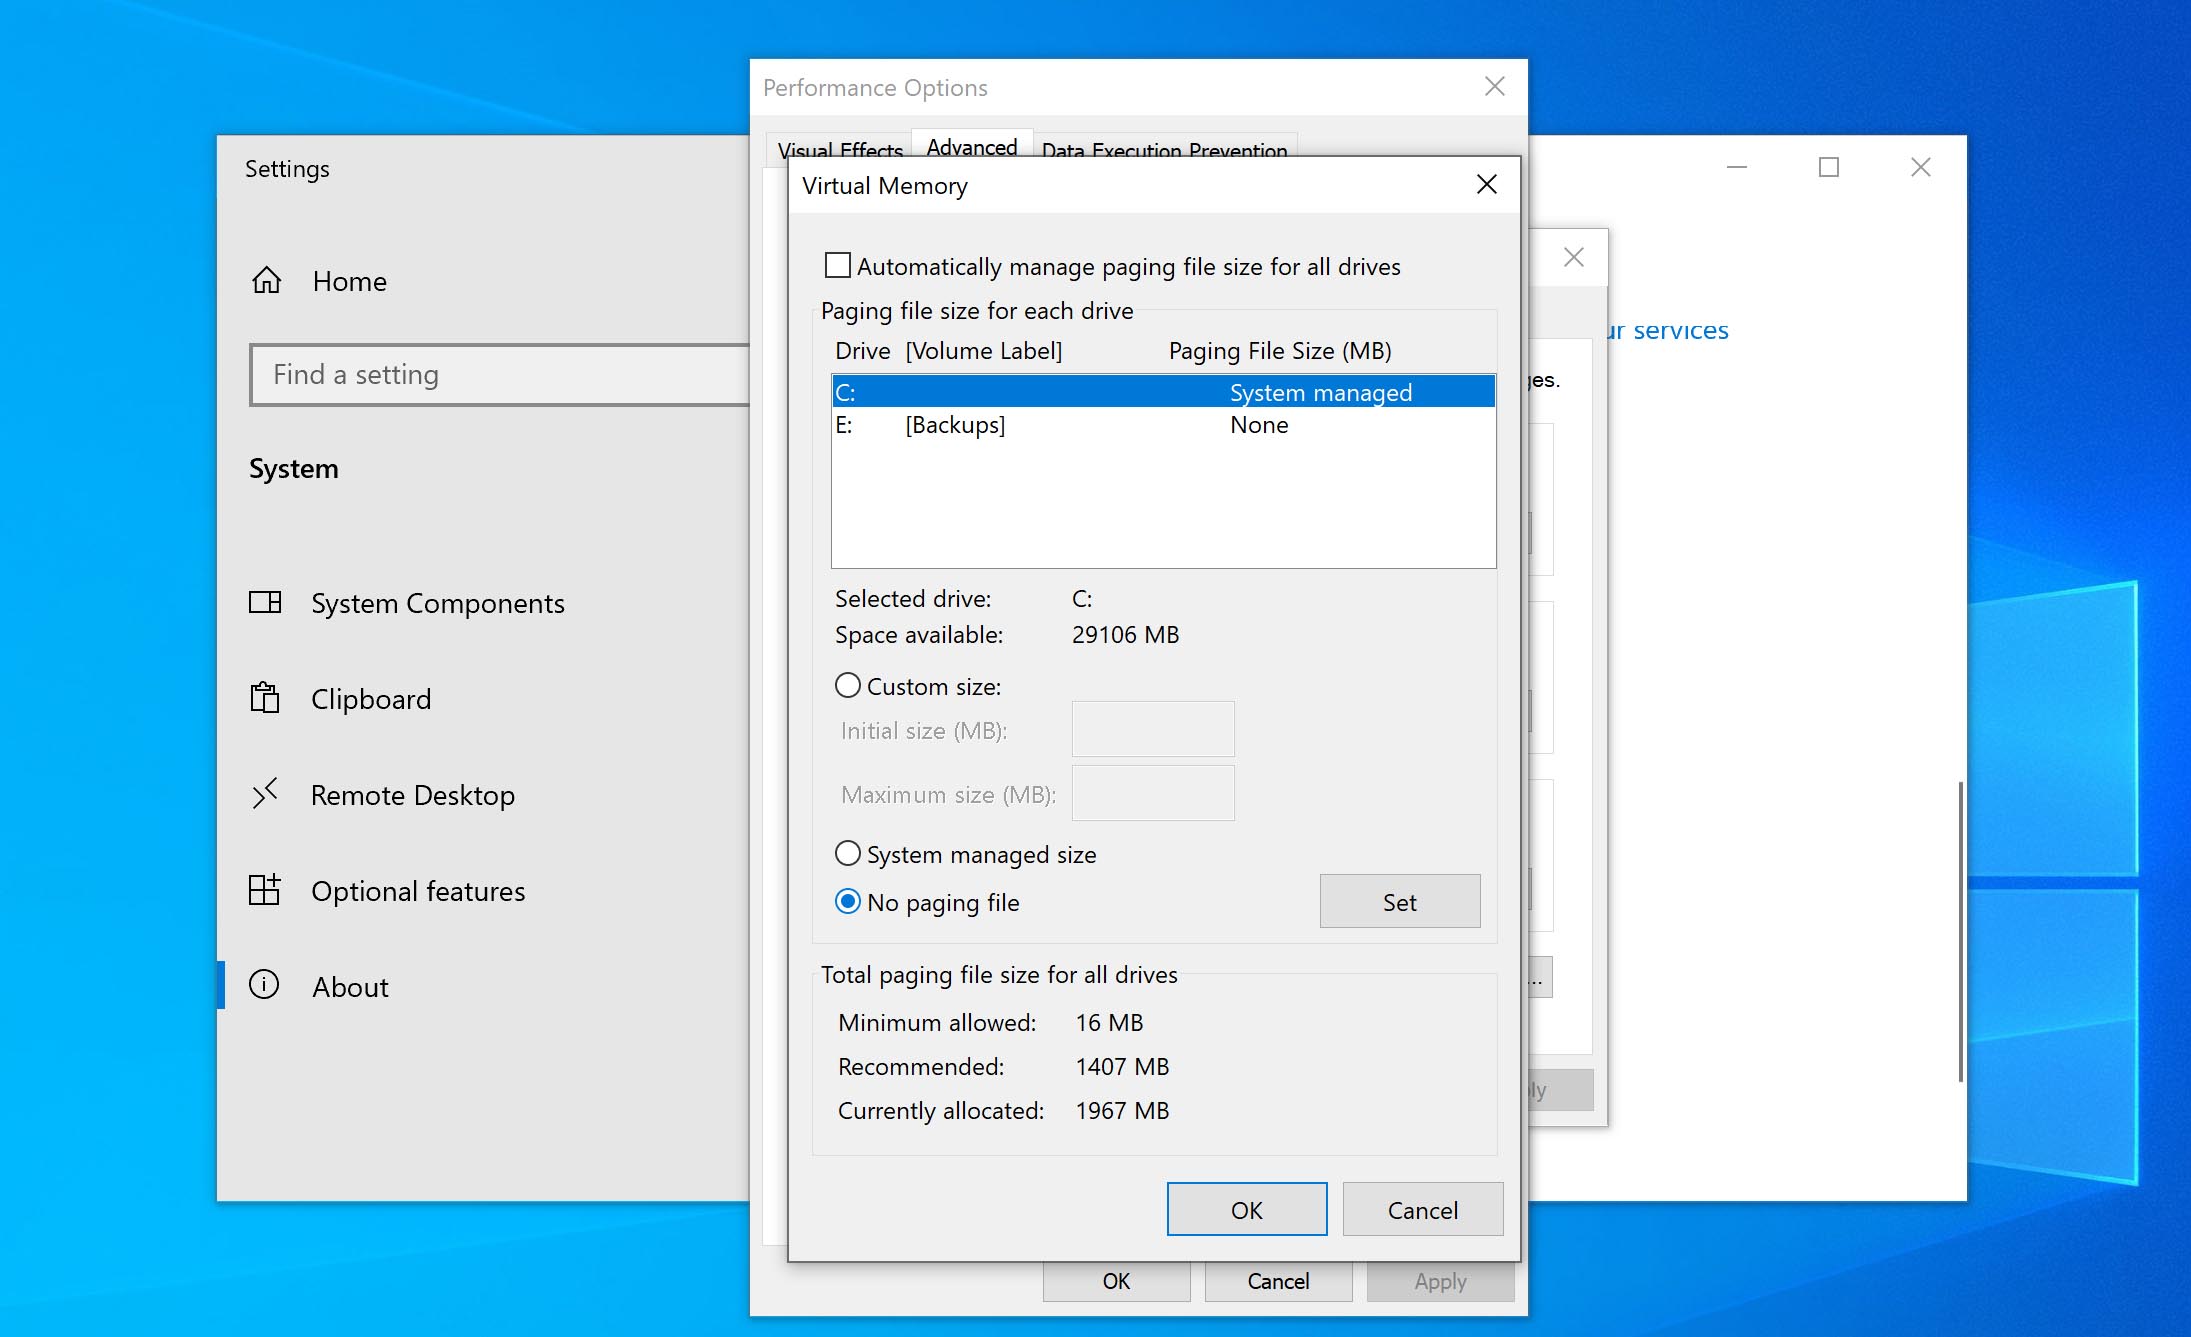
- Select the “Advanced” tab and click the “Change” button.
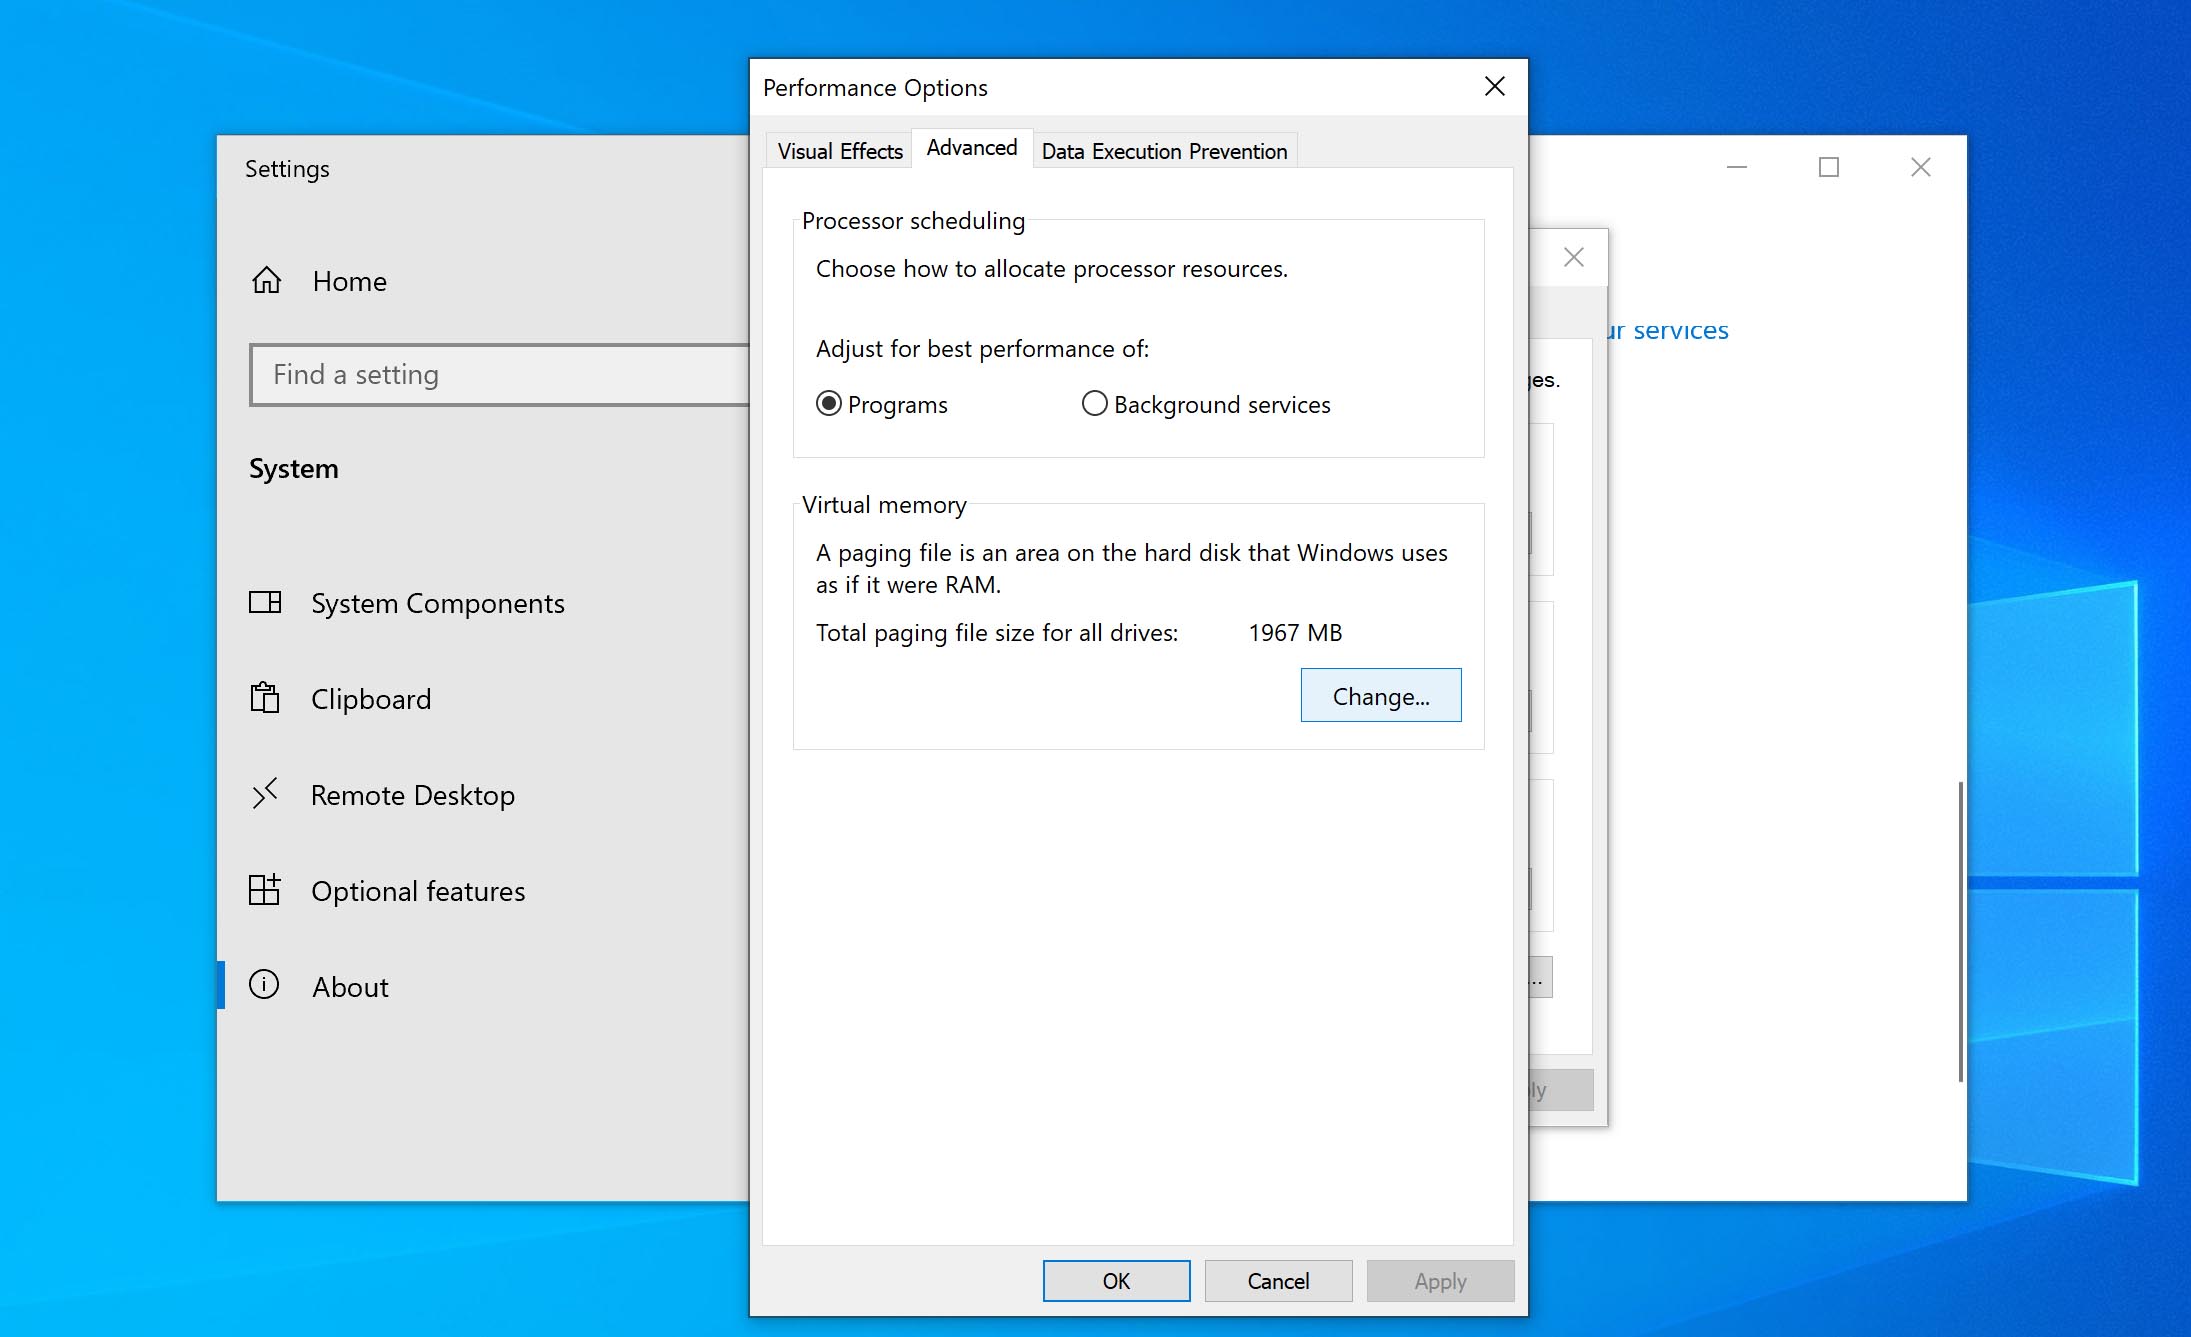
- Make sure the box titled “Automatically manage paging file size” is checked.
- You can also choose “No paging file”, Press OK and then reboot. This will inhibit the use of virtual memory and may improve your system’s disk performance.
Way 9: Run CHKDSK (CheckDisk)
CHKDSK is a command-line tool that scans your file system for logical and physical errors, including bad sectors. Bad sectors can result in the high disk usage issue you’re facing now. If any bad sectors are found, CHKDSK will address them. Soft/logical bad sectors can be repaired, but hard/physical bad sectors cannot be repaired, and will instead be marked as unusable so Windows avoids using them.
The command we’ll be using is:
chkdsk *: /r
By default, CHKDSK only scans for problems and reports back. The /r flag instructs CHKDSK to attempt to repair any issue it finds.
This is how you run CHKDSK:
- Right-click Start and click Windows PowerShell (Admin).
- Type the
chkdsk *: /rcommand. Replace the * with your drive letter. Press Enter.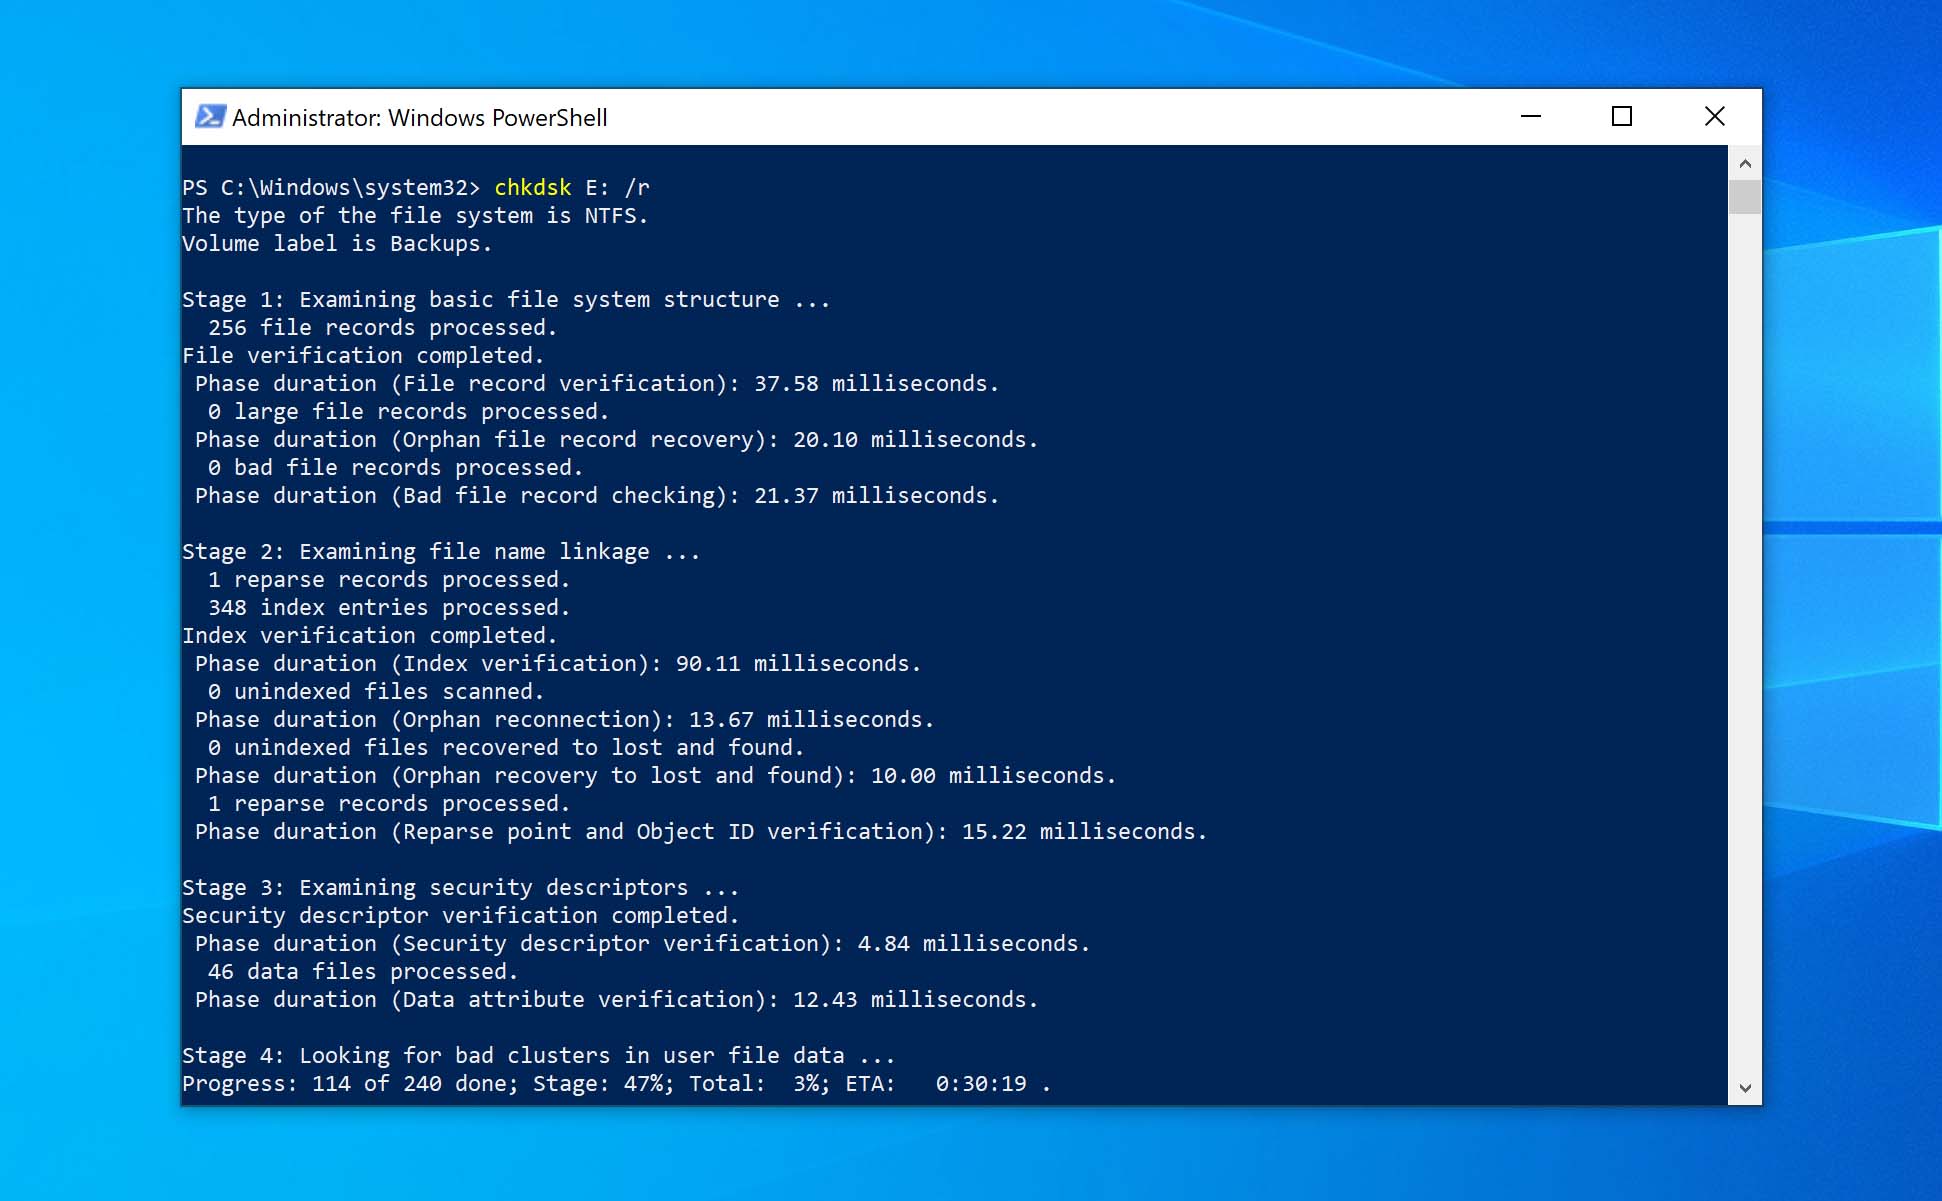
Way 10: Run Disk Defragmentation
Disk defragmentation is good for keeping your data organized. Data isn’t always written sequentially to the disk. Rather, it often gets stored in non-contiguous sectors. When data is fragmented in this manner, it takes longer for the read/write head to access all parts of a file. While it’s searching for pieces of the file, in addition to performing other functions, it can cause 100% disk usage.
Windows handles disk defragmentation automatically, typically running once a week. However, if this schedule is disputed for one reason or another, you can run it manually. Follow these instructions to defrag your disk on Windows 10:
- Open File Explorer.
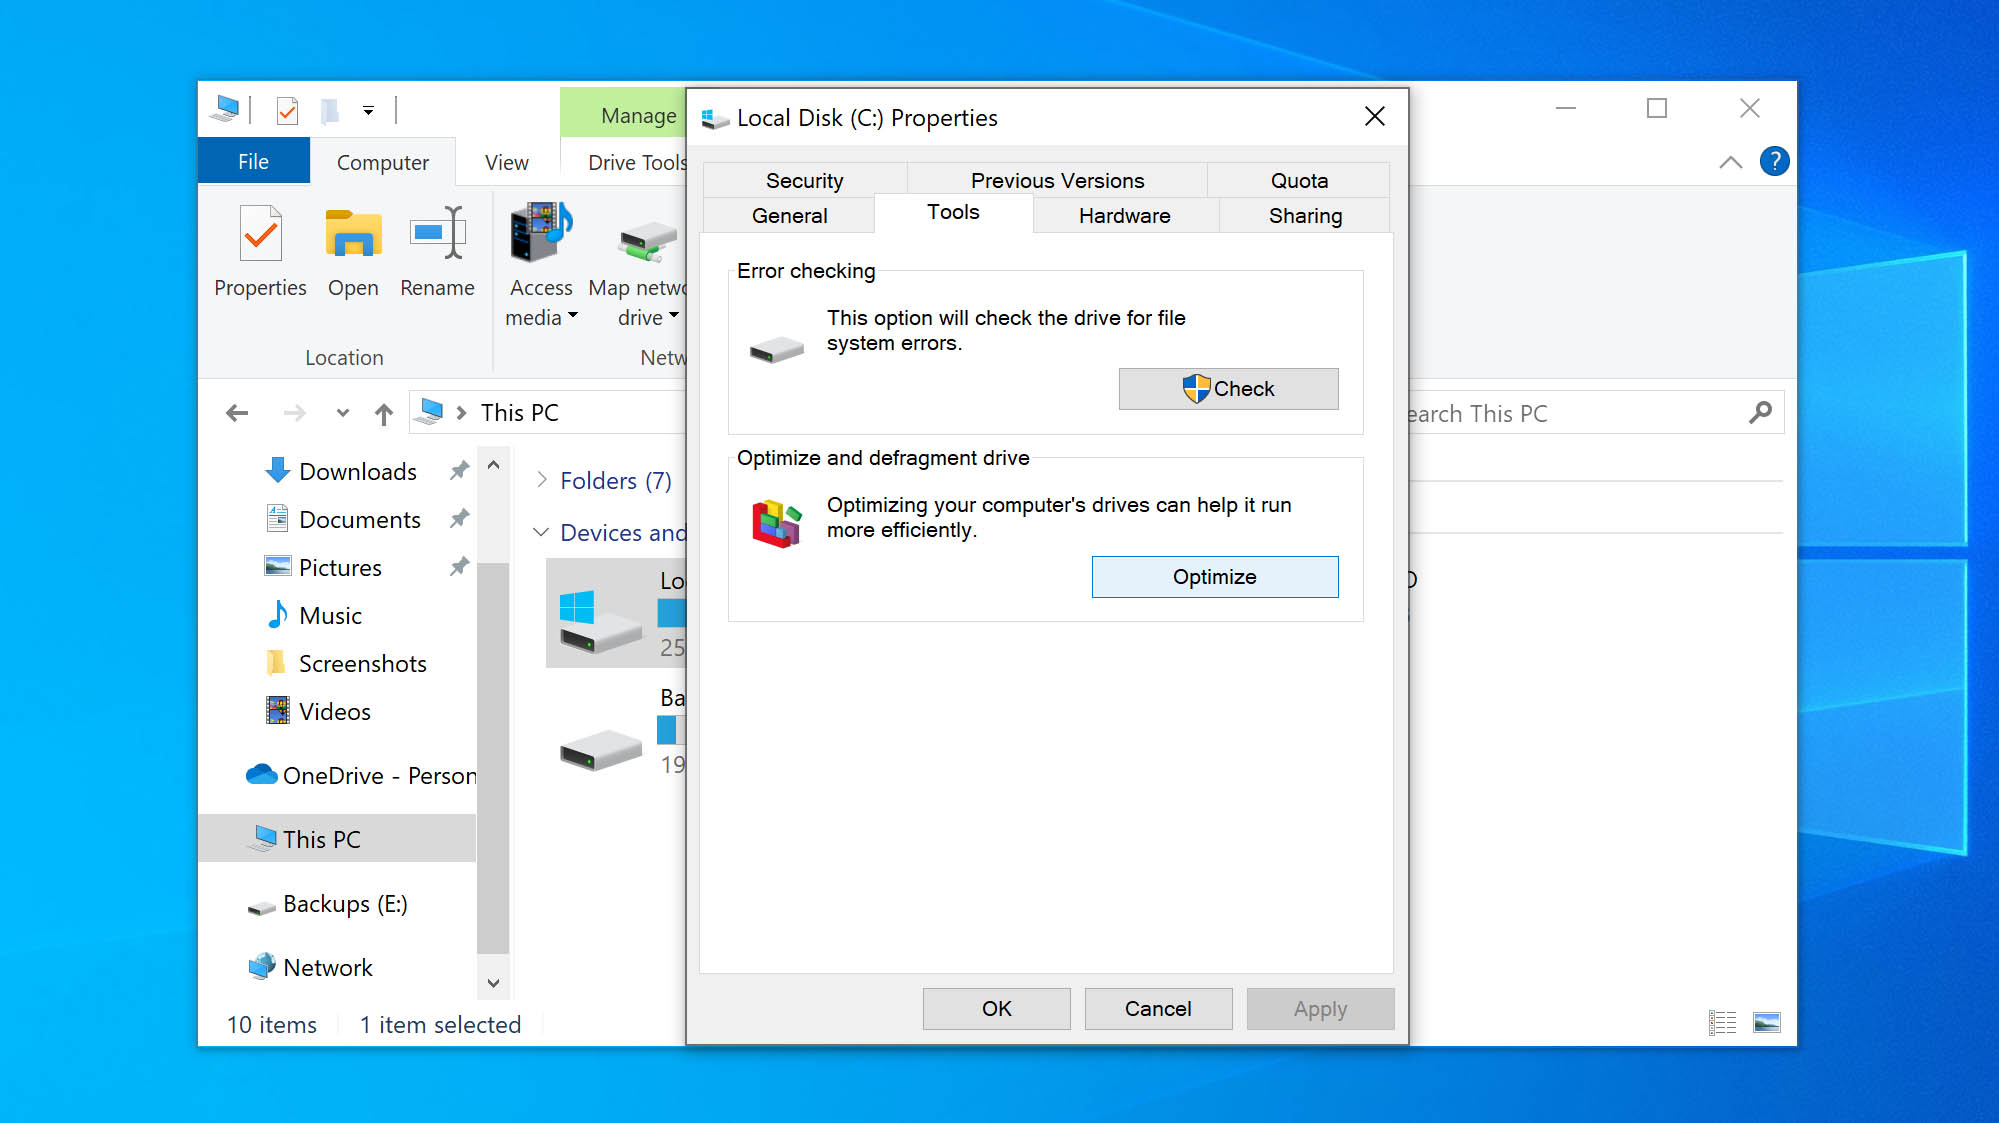
- Right-click the drive with 100% disk usage, then click Properties.
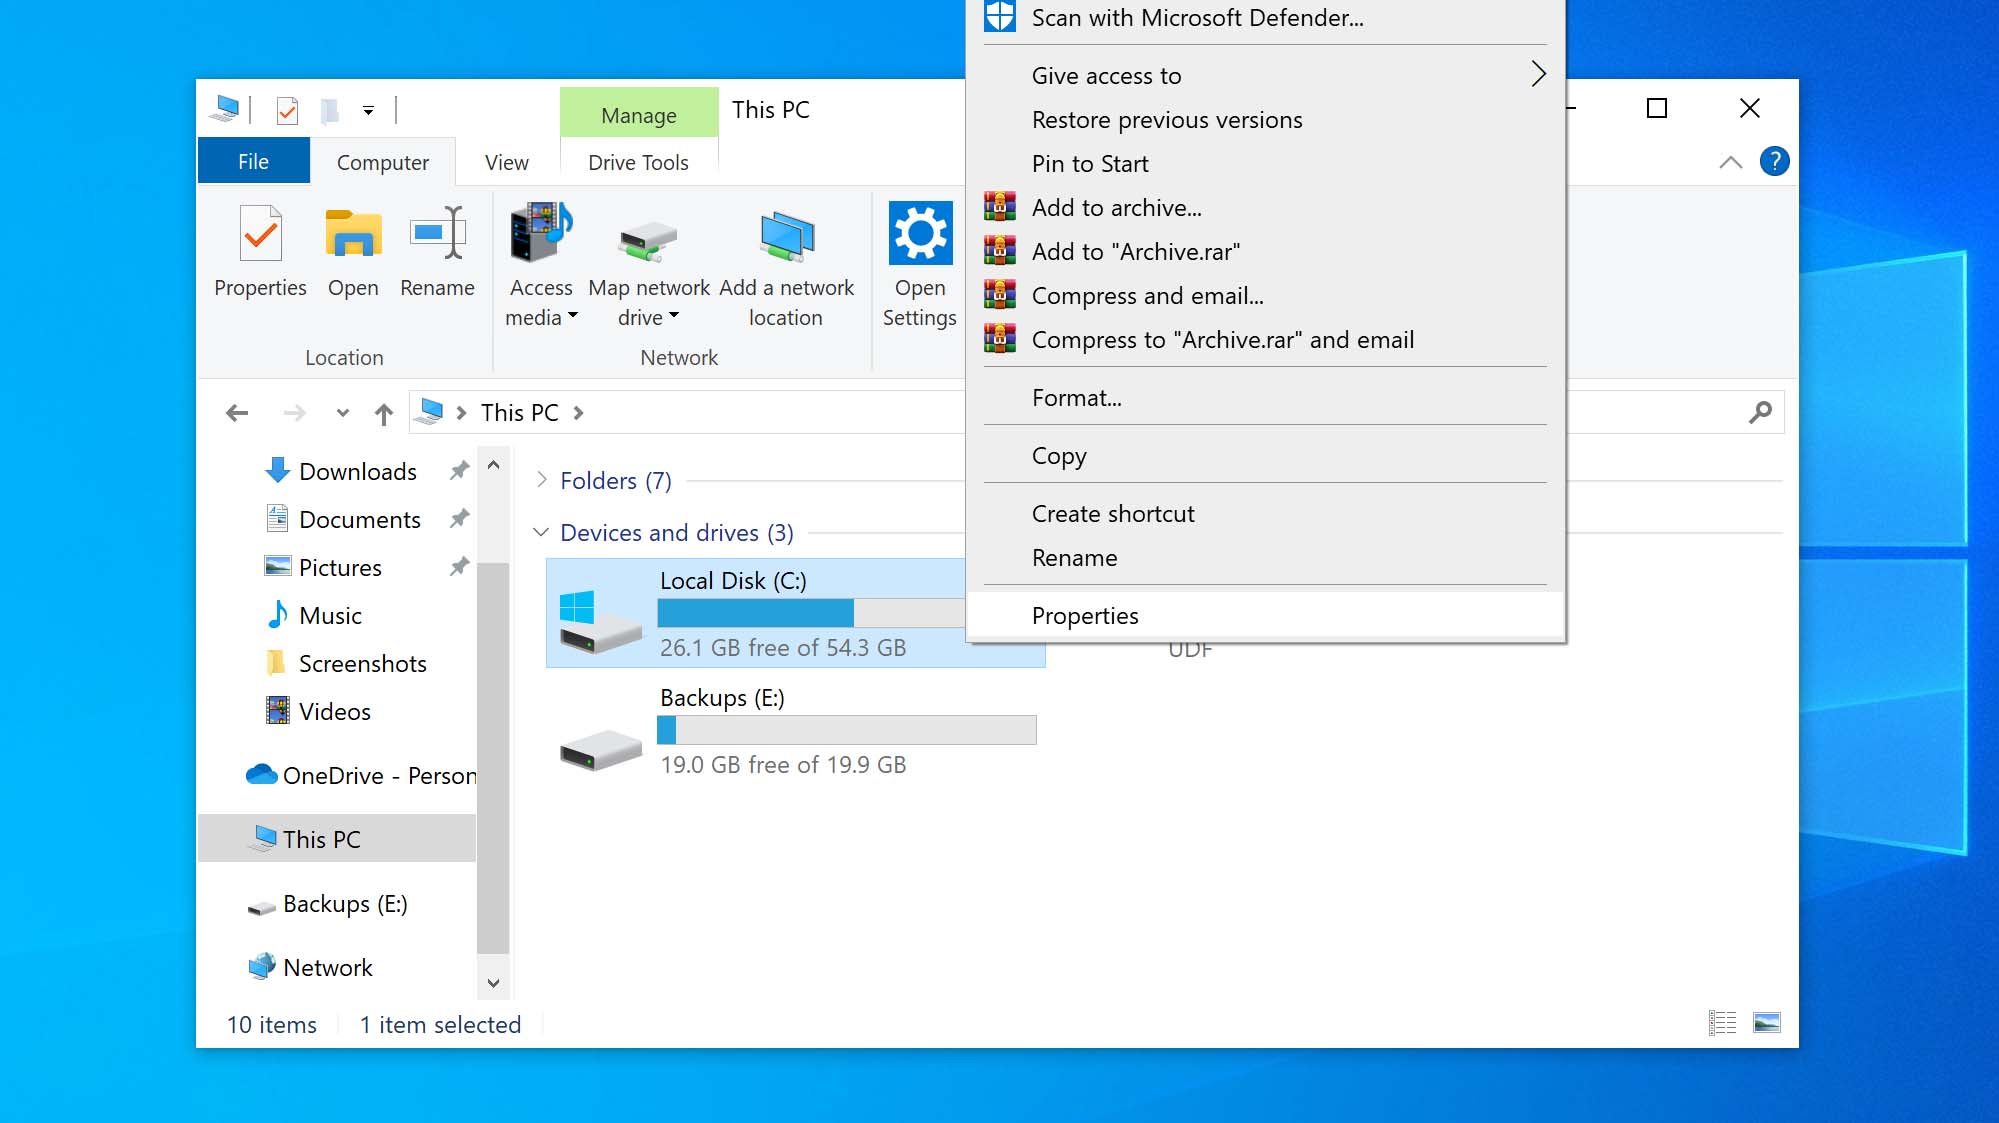
- Go to the Tools tab.
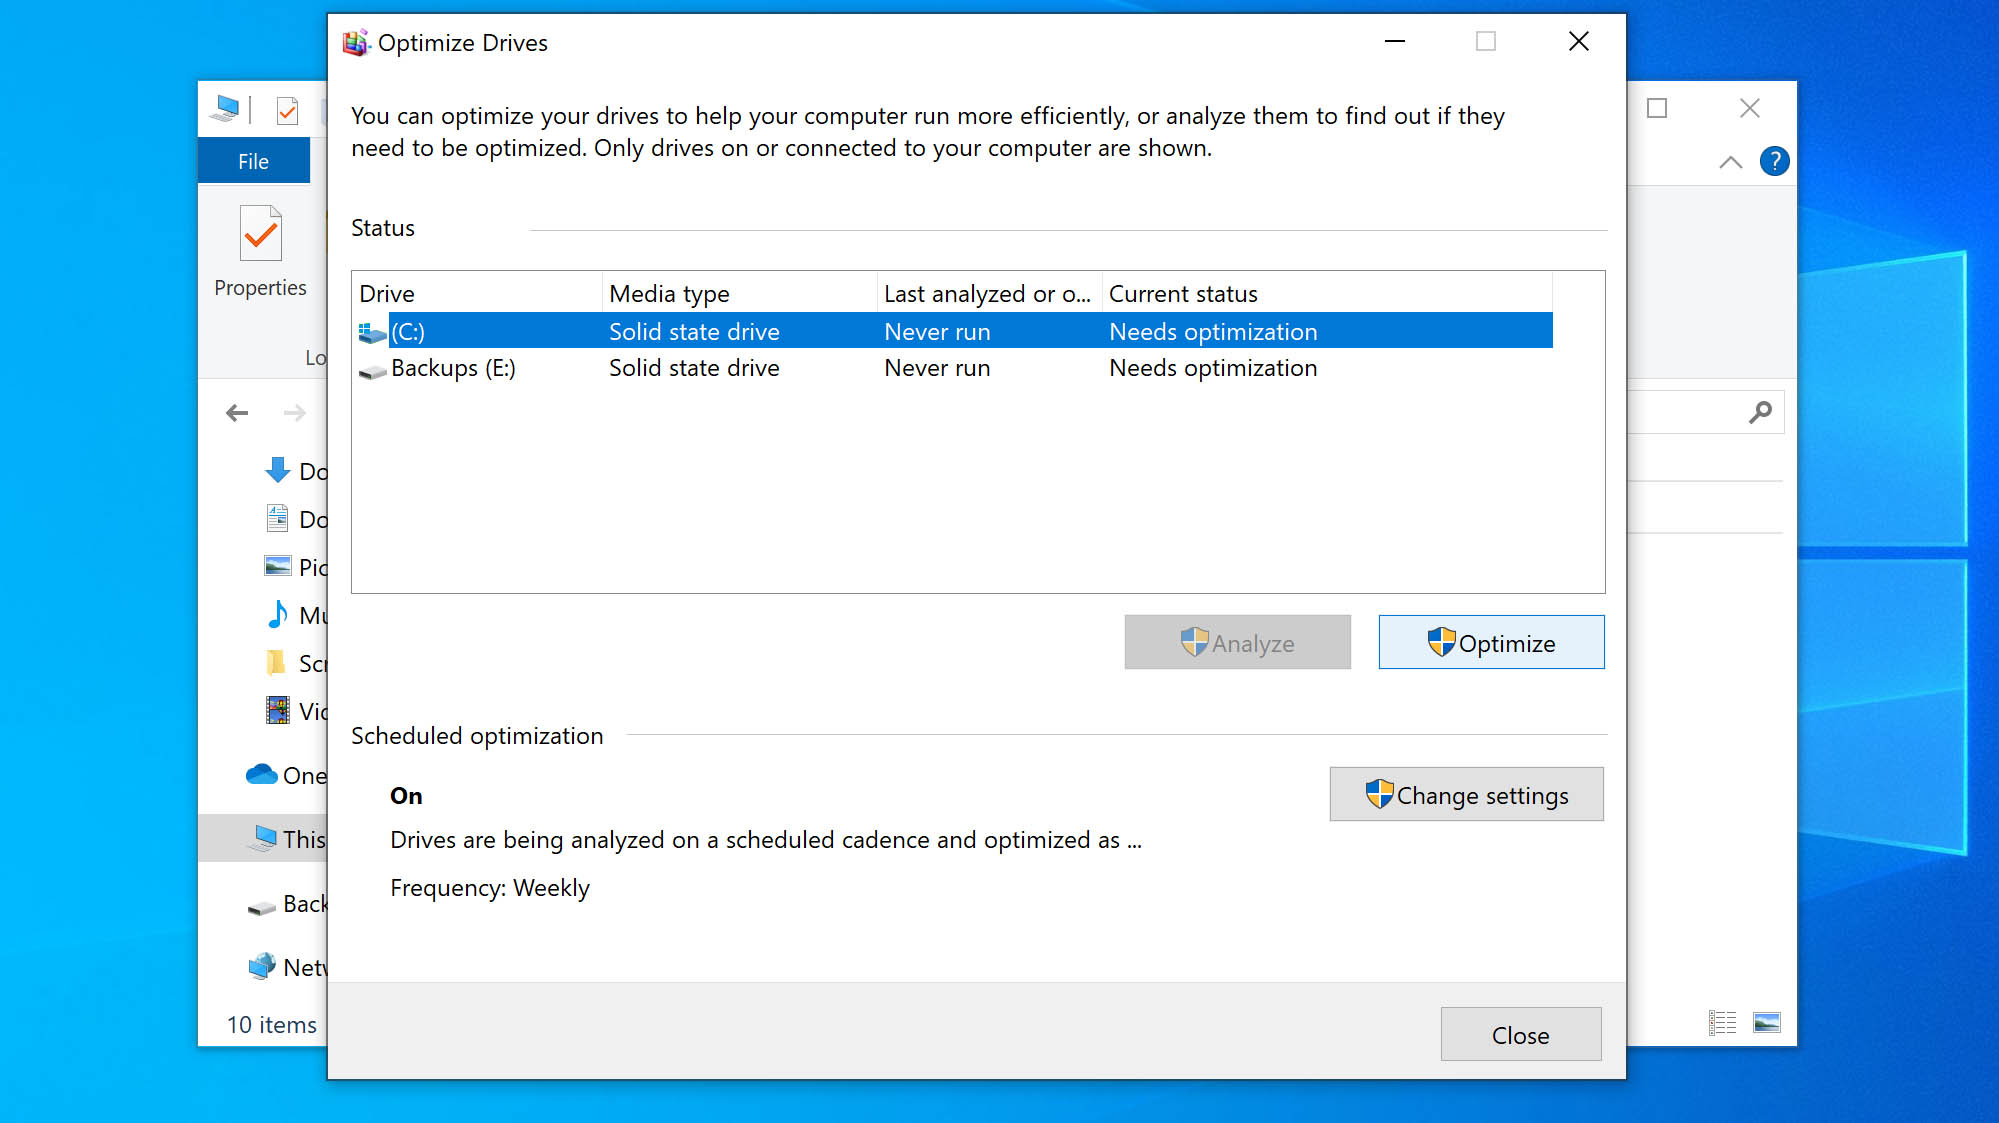
- Click Optimize.
- Click Optimize.
Consider Other Ways to Solve the 100% Disk Usage Problem
In general, your hard drive should never be at 100% usage. If you’ve found that none of the methods outlined so far have been useful, it’s time to look at what options you have going forward.
Upgrade Your Drive
It may not be that your drive is broken. Instead, it could simply be that your drive is too old or low-spec to keep up with your usage. As hard disk drives are mechanical, their speed will gradually decline over time with wear.
Consider upgrading to an HDD with a higher revolutions per minute (RPM) rating. A higher RPM directly correlates to better speeds. Alternatively, you can opt for an SSD. With an SSD, data is stored on flash memory and is much faster to access.
Run Additional Diagnostics
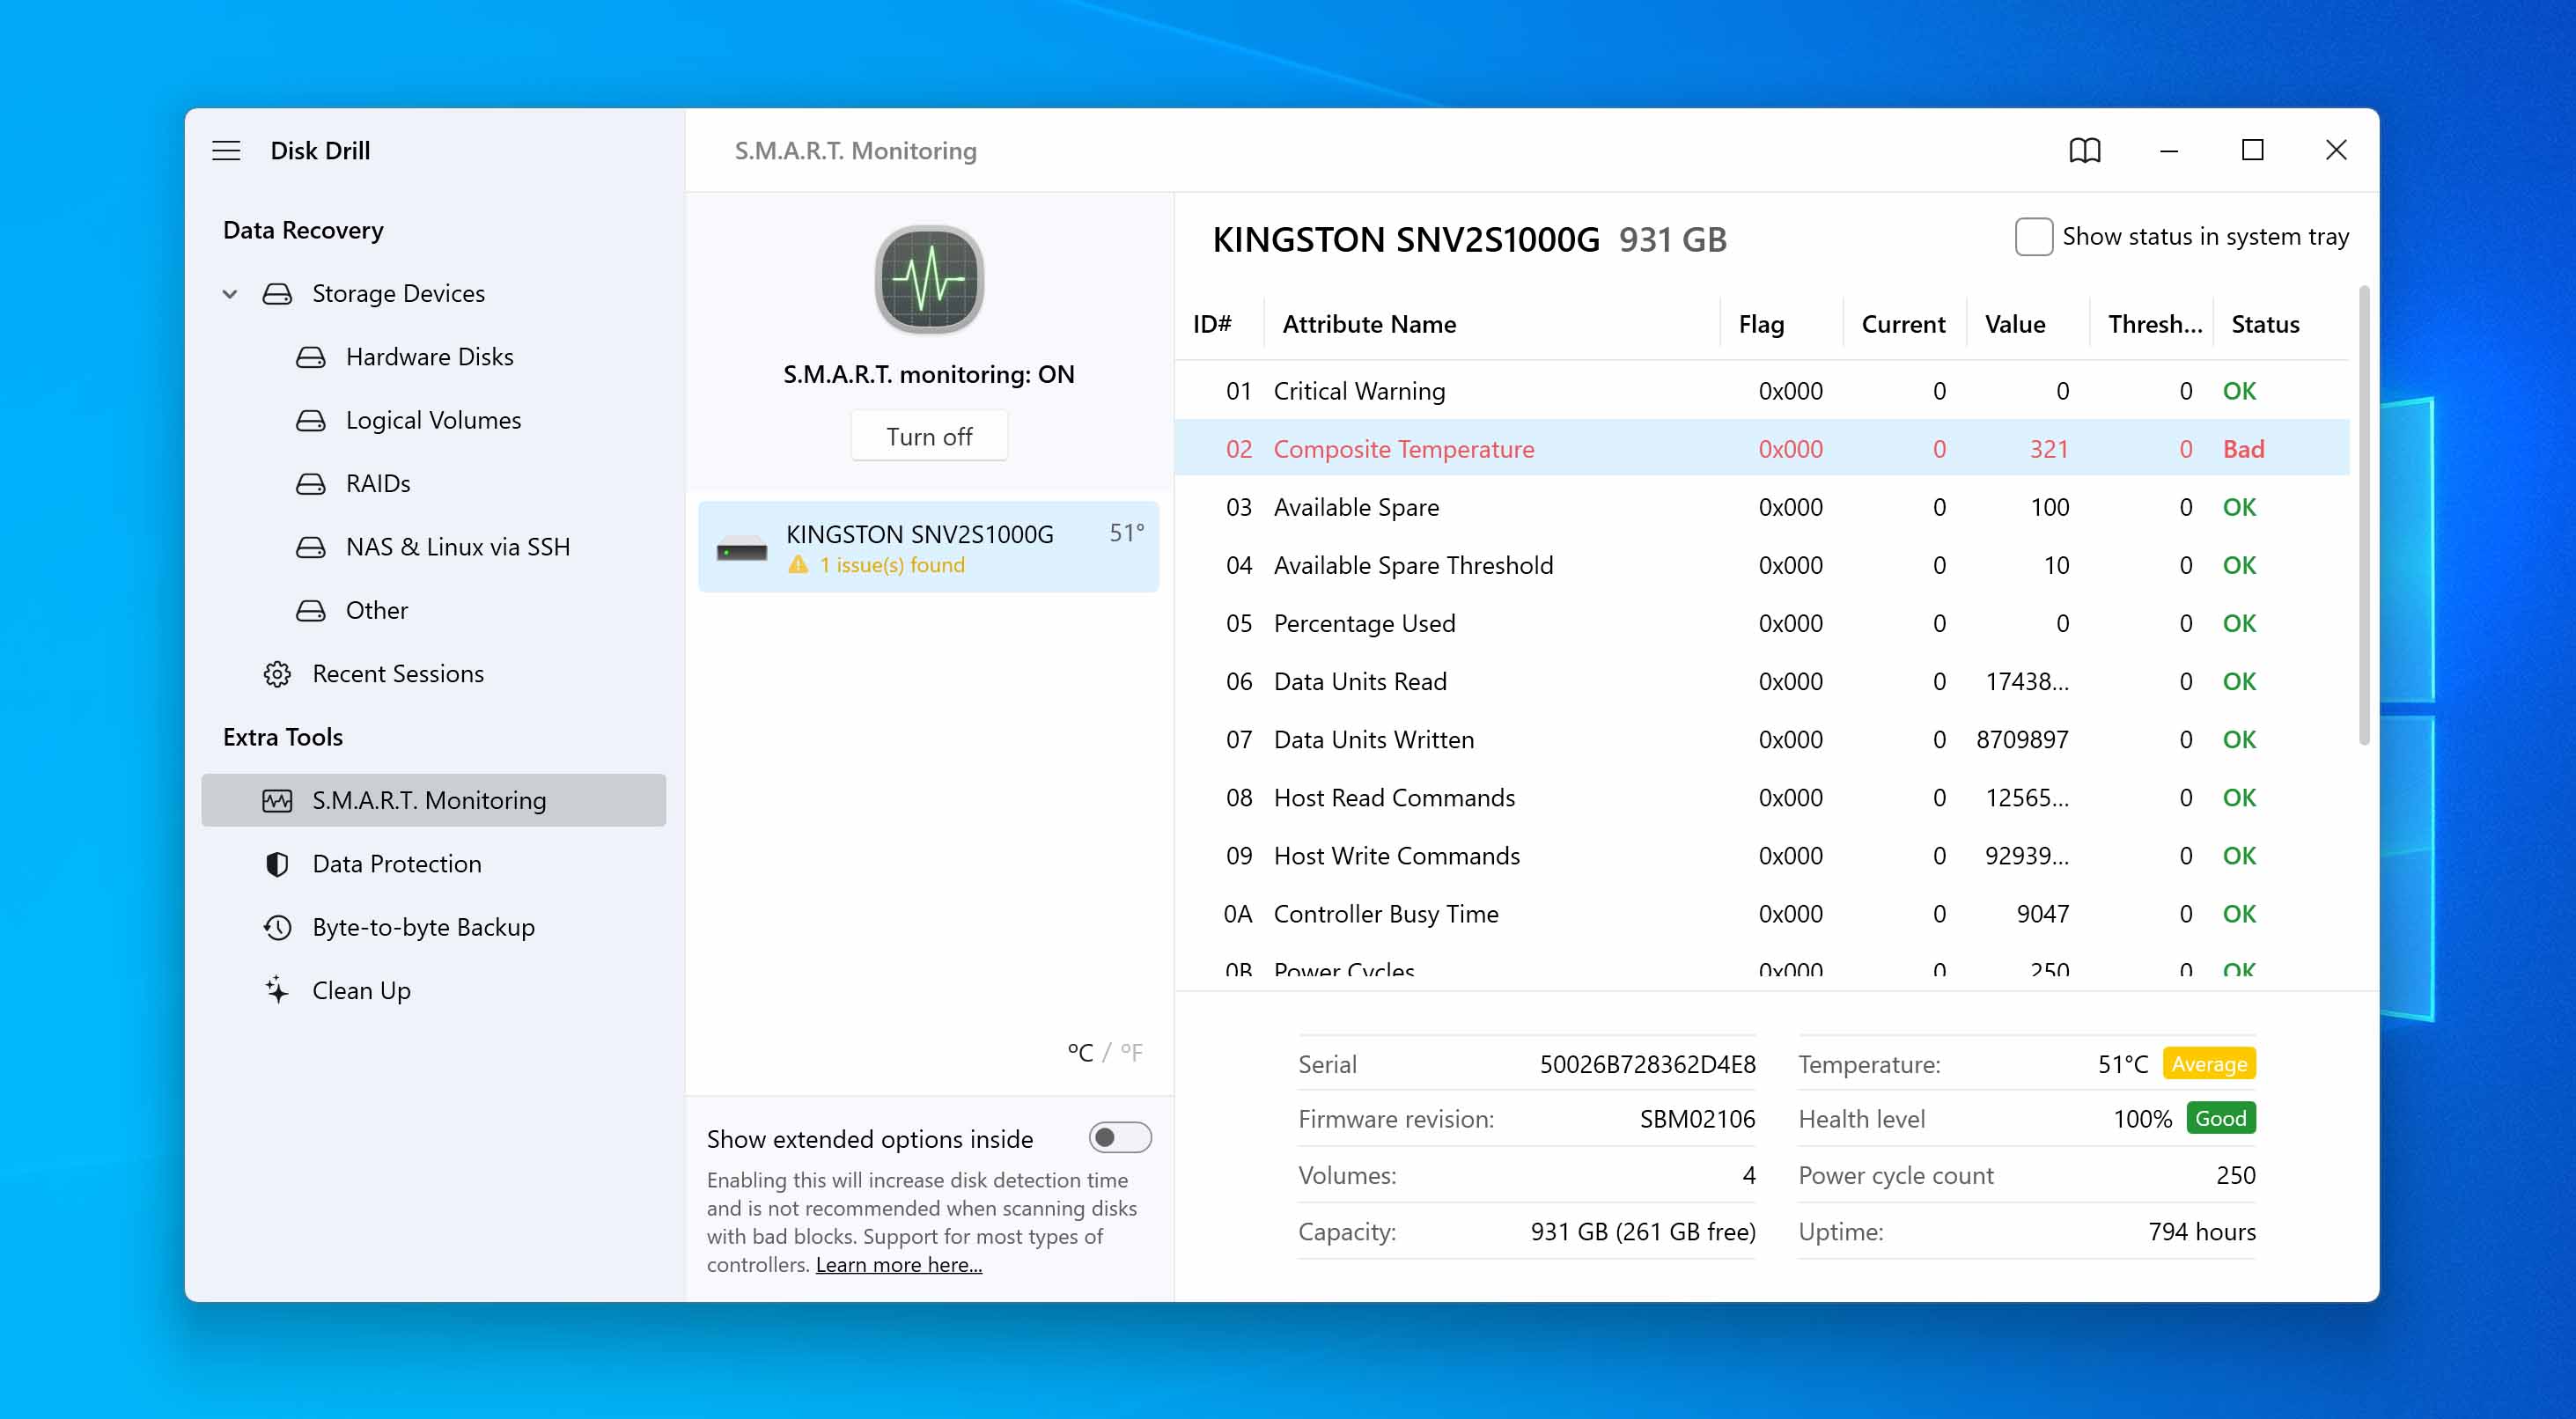
If upgrading your drive isn’t an option at the moment, you may be able to get a better understanding of what the issue is by monitoring your S.M.A.R.T. data. S.M.A.R.T. is a monitoring system that allows you to see valuable information about your drive and its status.
You can get the S.M.A.R.T. status of your drive by running wmic diskdrive get status in PowerShell, but this doesn’t break down each factor that’s measured. Instead, you’ll need to use another tool for that. Disk Drill comes with the ability to monitor your S.M.A.R.T. status in the background. Or, Hard Disk Sentinel is a good option that comes community-recommended.
Use Lightweight Software Alternatives
Sometimes you just have to make do with the drive you have. Where possible, look at using lightweight software alternatives. Let’s look at web browsers, for example. Chrome is a fairly resource-intensive web browser. Edge, on the other hand, has made significant strides in optimization, making it one of the more reliable options nowadays in terms of performance.
Knowing your drive’s limitations and working with what you have can go a long way in keeping your disk usage maintainable.
Sort Processes by Disk Usage
In Task Manager, you can sort the active processes running on your computer by disk usage. In doing so, you will be able to see what processes are causing high disk usage. If you find unfamiliar processes, search for them on Google to understand what they are and whether you need them.
Scan for Malware
Viruses can infect your disk and cause high disk usage through shadow interactions with your PC. Scan your computer for malware with Windows Security or a third-party antivirus solution like Trend Micro.