When a RAID array fails, it can feel like a complete disaster. Whether you’re running a home NAS, a small business server, or a professional storage system, RAID data loss can disrupt everything. Fortunately, Disk Drill, a leading data recovery tool by CleverFiles, offers advanced features for RAID recovery. But how does it work, and which RAID configurations does it support? Let’s dive deep into RAID technology, failure scenarios, and how Disk Drill can help you restore your data.
What Is RAID?
RAID (Redundant Array of Independent Disks) is a storage technology that combines multiple physical drives into one logical unit to improve performance, provide redundancy, or both. Depending on the RAID level, your drives can be set up to:
- 🏎️💨 Increase speed (striping)
- 🪞 Provide redundancy (mirroring or parity)
- 🛢️ Combine storage without redundancy (JBOD)
Here’s a quick overview of the most common RAID levels:
- RAID 0 (Striping) – Splits data across multiple drives for maximum speed but offers zero redundancy.
- RAID 1 (Mirroring) – Duplicates data on two or more drives, providing full redundancy but half usable space.
- RAID 5 – Uses striping with parity, allowing one drive failure without data loss.
- RAID 6 – Similar to RAID 5 but with dual parity, tolerating two drive failures.
- RAID 10 / RAID 1E – Combines mirroring and striping, offering both speed and redundancy.
- JBOD (Just a Bunch Of Disks) – Concatenates multiple drives into a single volume with no redundancy.
Additionally, modern storage solutions like Windows Storage Spaces and Linux BTRFS introduce flexible virtual RAID-like structures with parity, mirroring, and advanced resiliency features.
Why RAID Fails
Even though RAID was designed to increase storage reliability, it’s not immune to failures. Common causes of RAID data loss include:
- 📀 Multiple disk failures in parity-based RAID (RAID 5/6)
- 📟 Controller or motherboard failure
- 📅 Corrupted RAID metadata or partition table
- 🔌 Power surges or accidental disconnection
- 🙍🏻♂️ User errors (formatting, deletion, or improper rebuild)
Once a RAID fails, the system may no longer recognize the array. In these cases, your best chance at recovery is to avoid writing new data to the drives and use RAID recovery software like Disk Drill.
Can Disk Drill Recover RAID Arrays?
Yes, Disk Drill can recover many types of RAID configurations, as long as the drives are individually accessible to your computer. The software automatically detects, reconstructs, and scans RAID volumes, allowing you to recover lost files even if the array is no longer operational.
Here’s what Disk Drill supports across different platforms:
1. 🐧 Linux RAID Recovery
Disk Drill can work with Linux-native RAID setups when the disks are connected to a system running macOS or Windows. Supported Linux RAID levels include:
- RAID 0
- RAID 1
- RAID 5
- RAID 6
- RAID 10 / RAID 1E
- JBOD
Additionally, BTRFS RAID volumes are supported, including:
- RAID 0
- RAID 1
- RAID 5
- RAID 6
- RAID 10
- Single
2. 🪟 Windows RAID Recovery
Disk Drill supports recovery from traditional Windows RAID arrays and Storage Spaces, including:
Windows RAID types:
- RAID 0
- RAID 1
- RAID 5
- JBOD
Windows Storage Spaces types:
- Simple (similar to RAID 0)
- Two-way mirror
- Three-way mirror
- Parity
- Dual parity
3. 🍎 macOS RAID Recovery
Apple’s Disk Utility can create software RAID arrays, which Disk Drill can recover from:
- RAID 0 (Striped)
- RAID 1 (Mirrored)
- JBOD (Concatenated Disks)
In addition, the macOS version of Disk Drill fully supports Apple Fusion Drive configurations, allowing recovery even when the SSD or HDD portion of the hybrid setup fails. You can learn more in our dedicated Fusion Drive recovery guide for step‑by‑step instructions.
4. 🗄️ Synology Hybrid RAID (SHR)
Synology Hybrid RAID (SHR) is Synology’s flexible RAID option commonly used in Synology NAS systems. Instead of forcing you to choose a classic RAID level and match drive sizes, SHR is designed to maximize usable capacity while still providing redundancy, even when drives are different sizes.
Under the hood, SHR uses standard Linux storage technologies—often described as a combination of Linux software RAID (mdraid) and LVM (Logical Volume Manager)—wrapped in an automated setup designed to be easier than traditional RAID planning. Disk Drill supports the following SHR configurations:
- SHR-1
- SHR-2
How Disk Drill Recovers RAID Arrays
Recovering data from a failed RAID setup with Disk Drill is a straightforward process. The software automatically detects and reconstructs RAID volumes, letting you focus on saving your files instead of dealing with complex manual configurations.
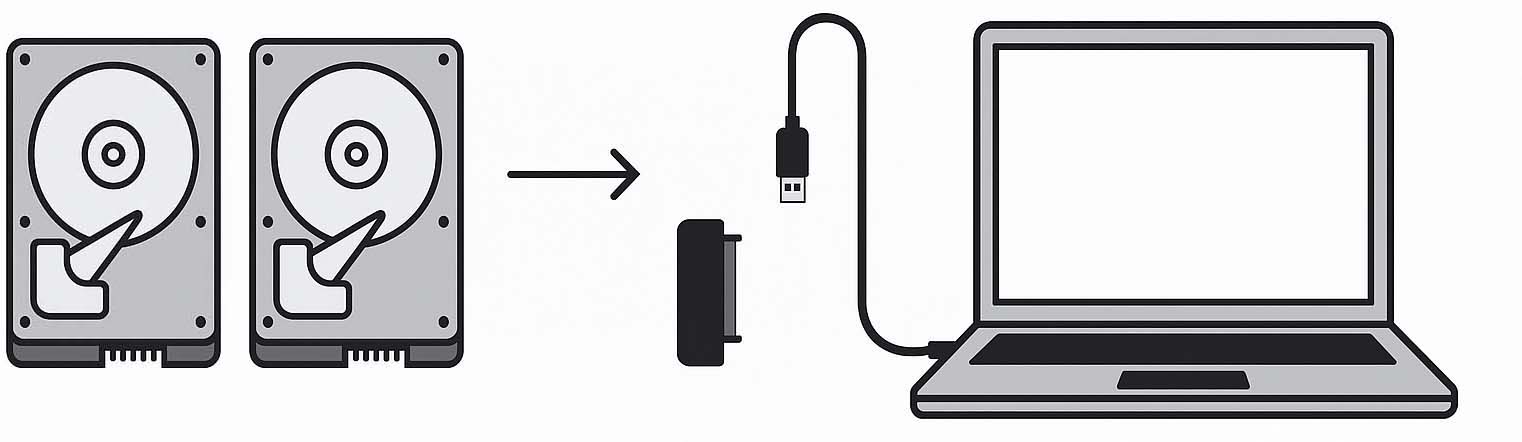
Step 1: Connect the Drives
Remove all drives (both failed and healthy) from your RAID enclosure and connect them individually to your computer using SATA ports or USB-to-SATA adapters/docking stations.
Step 2: Automatic Array Detection
Disk Drill scans the connected drives for RAID metadata and virtually reconstructs the array. This process is fully automated and does not require manual configuration.
- Disk Drill analyzes all connected disks to detect RAID members.
- The software virtually rebuilds the RAID volume into a single logical partition.
- A multi-step recovery engine works under the hood to maximize data restoration.


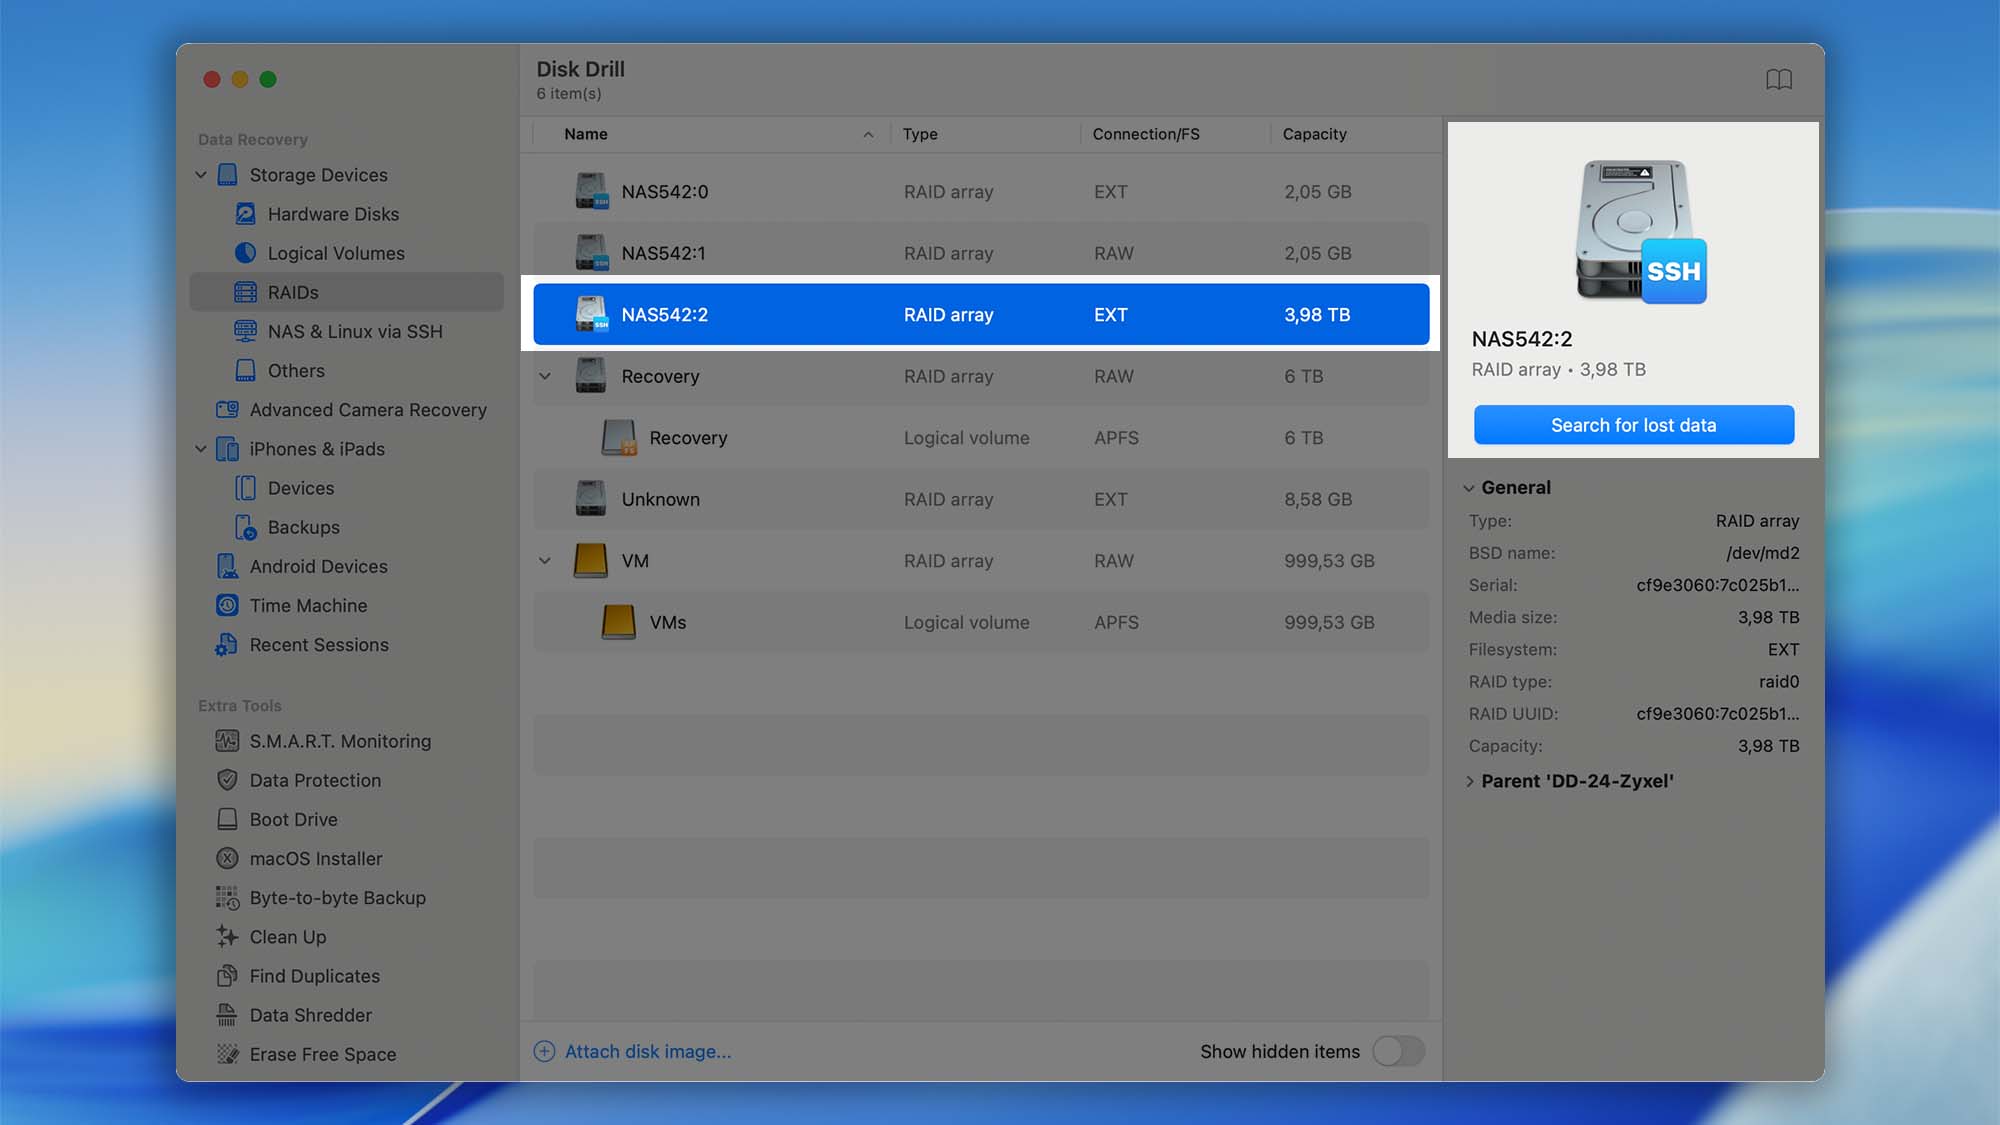
Once the reconstruction process is complete, Disk Drill will display the RAID status. You can check it by selecting the “RAIDs” section in the left panel of the main Disk Drill window:
- 🟢 Valid – The array is healthy and can be fully recovered.
- 🟡 Recovered – Some drives were damaged, but most data was successfully rebuilt.
- 🔴 Corrupted – Severe damage; only partial data recovery is possible.
Step 3: File System Detection
After the RAID volume is rebuilt, Disk Drill checks the file system of the virtual array. Supported file systems include:
- Windows RAID & Storage Spaces: NTFS, FAT32, exFAT, ReFS
- macOS Software RAID: HFS+, APFS
- Linux & NAS RAID: EXT2, EXT3, EXT4, BTRFS


Step 4: Scan, Preview, and Recover
- Run a scan on the rebuilt virtual RAID volume.


- Preview recoverable files to ensure data integrity before restoration.
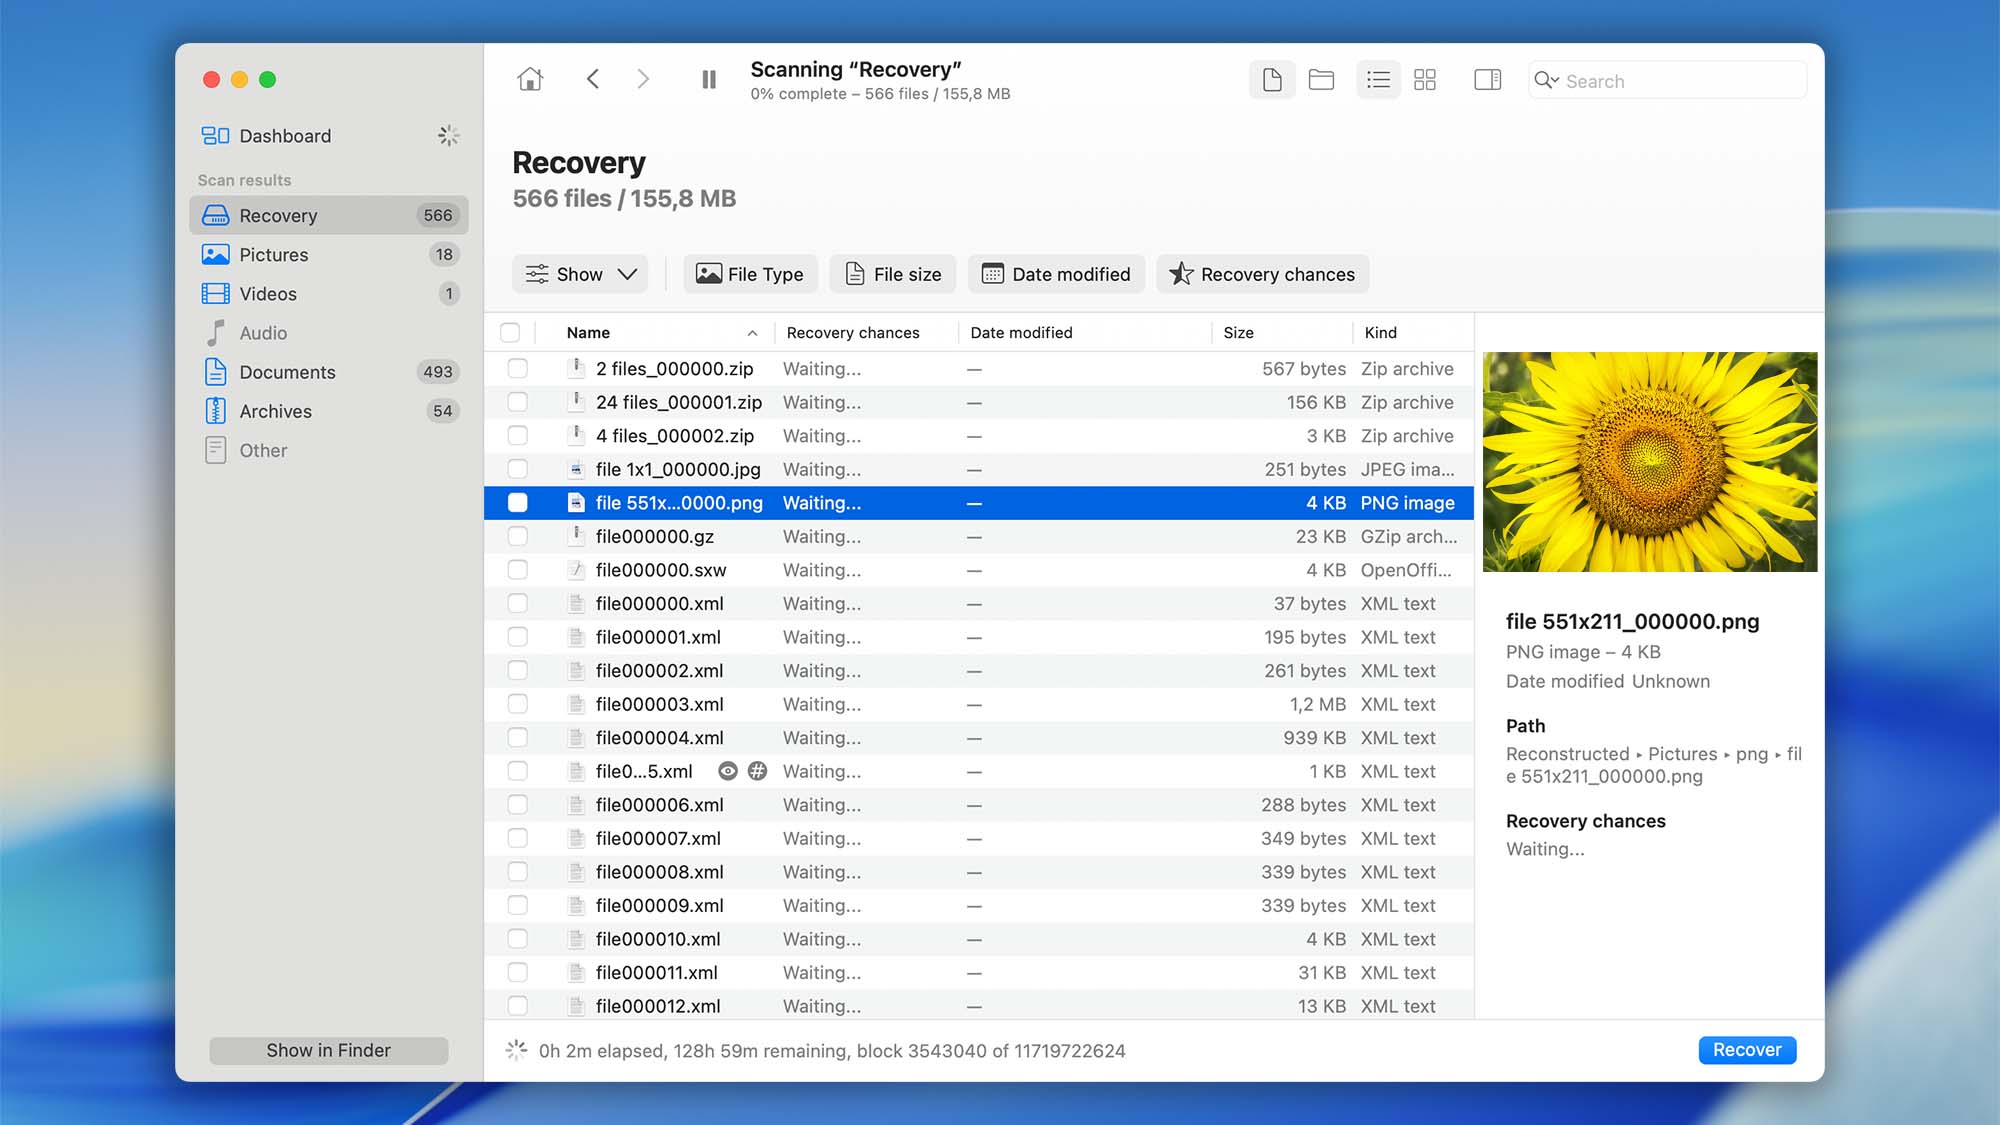
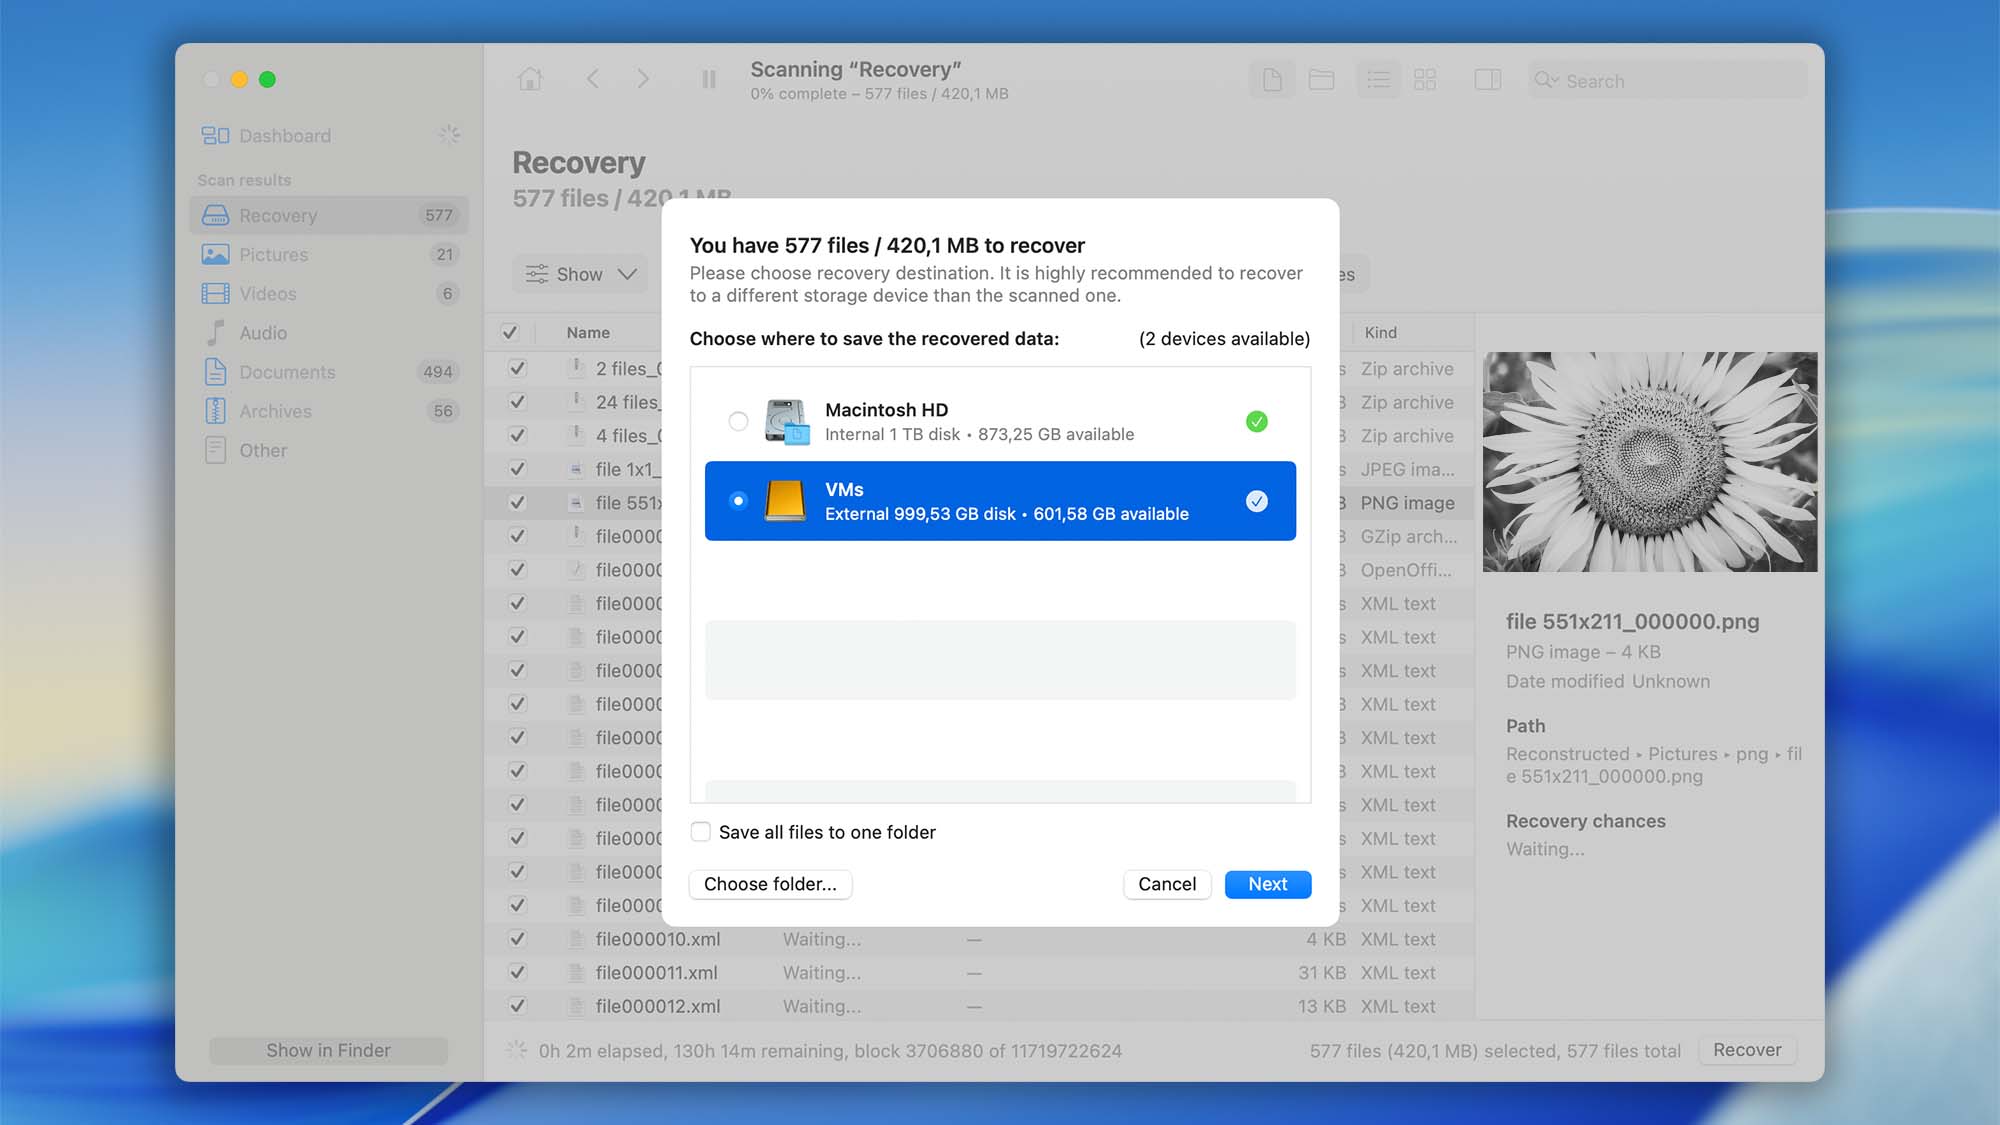
- Recover files to a safe storage location that is not part of the original RAID array to avoid overwriting data.


Best Practices for RAID Recovery with Disk Drill
- Stop using the RAID immediately to prevent overwriting data.
- Label drives in order before removing them to simplify reconstruction.
- Use a reliable power source during recovery to avoid interruptions.
- Recover data to a separate disk to prevent overwriting lost files.
- Consider professional help if your RAID has severe hardware damage.